Applies to: Invoices API | Orders API | Customers API | Cards API
Learn how to send an invoice to a customer or automatically charge a card on file.
In this walkthrough, you use the Invoices API to create and publish invoices and then simulate the customer experience of paying an invoice. You also use the Orders API to create orders and the Customers API and Cards API to create a customer and add a card on file. These resources are created in the Square Sandbox test environment, which provides test credit cards and tokens used to simulate payments from the buyer.
Before you begin the walkthrough, do the following:
Review Sandbox testing considerations to understand how you use the Square Sandbox for testing.
Gather account information to use for your API requests. You need your Sandbox access token to authorize API requests and your location ID to create orders.
Create a customer and a card on file in the seller's Customer Directory. The customer profile includes an email address where Square sends invoices and receipts. The card on file associated with the customer profile enables automatic payments.
The procedures in this walkthrough show you how to configure two invoices. The first procedure directs Square to email the invoice to request payment from the customer. The second procedure directs Square to automatically charge a card on file.
Note
It's also possible for customers to remit a payment directly to a seller using a credit card, check, cash, or other accepted form of payment. The seller can then record the payment using the Square Dashboard, Point of Sale (POS) application, or Square Invoices application.
In this walkthrough, you create your customer, order, and invoice resources in the Sandbox. The Sandbox is an isolated server environment provisioned for each Sandbox test account. You should use the Sandbox for testing. For more information, see Square Sandbox.
Invoices define a payment schedule that specifies payment amounts, due dates, and whether Square should send the customer an invoice requesting payment or automatically charge a card on file. You use Sandbox test payment values to test both payment flows:
- Test credit card - For example 1 of this walkthrough, you use a Sandbox credit card to pay an invoice on the Square-hosted invoice payment page.
- Test payment token - To prepare for this walkthrough, you use the Sandbox payment token to add a card on file for a customer. Then, for example 2, you specify the ID of the card on file so Square can charge the card automatically.
Sandbox payment methods are never charged.
You can also use the Sandbox Square Dashboard to view your Sandbox resources and verify the changes that you make with the Square API.
Follow these steps to get the access token and location ID used in this walkthrough.
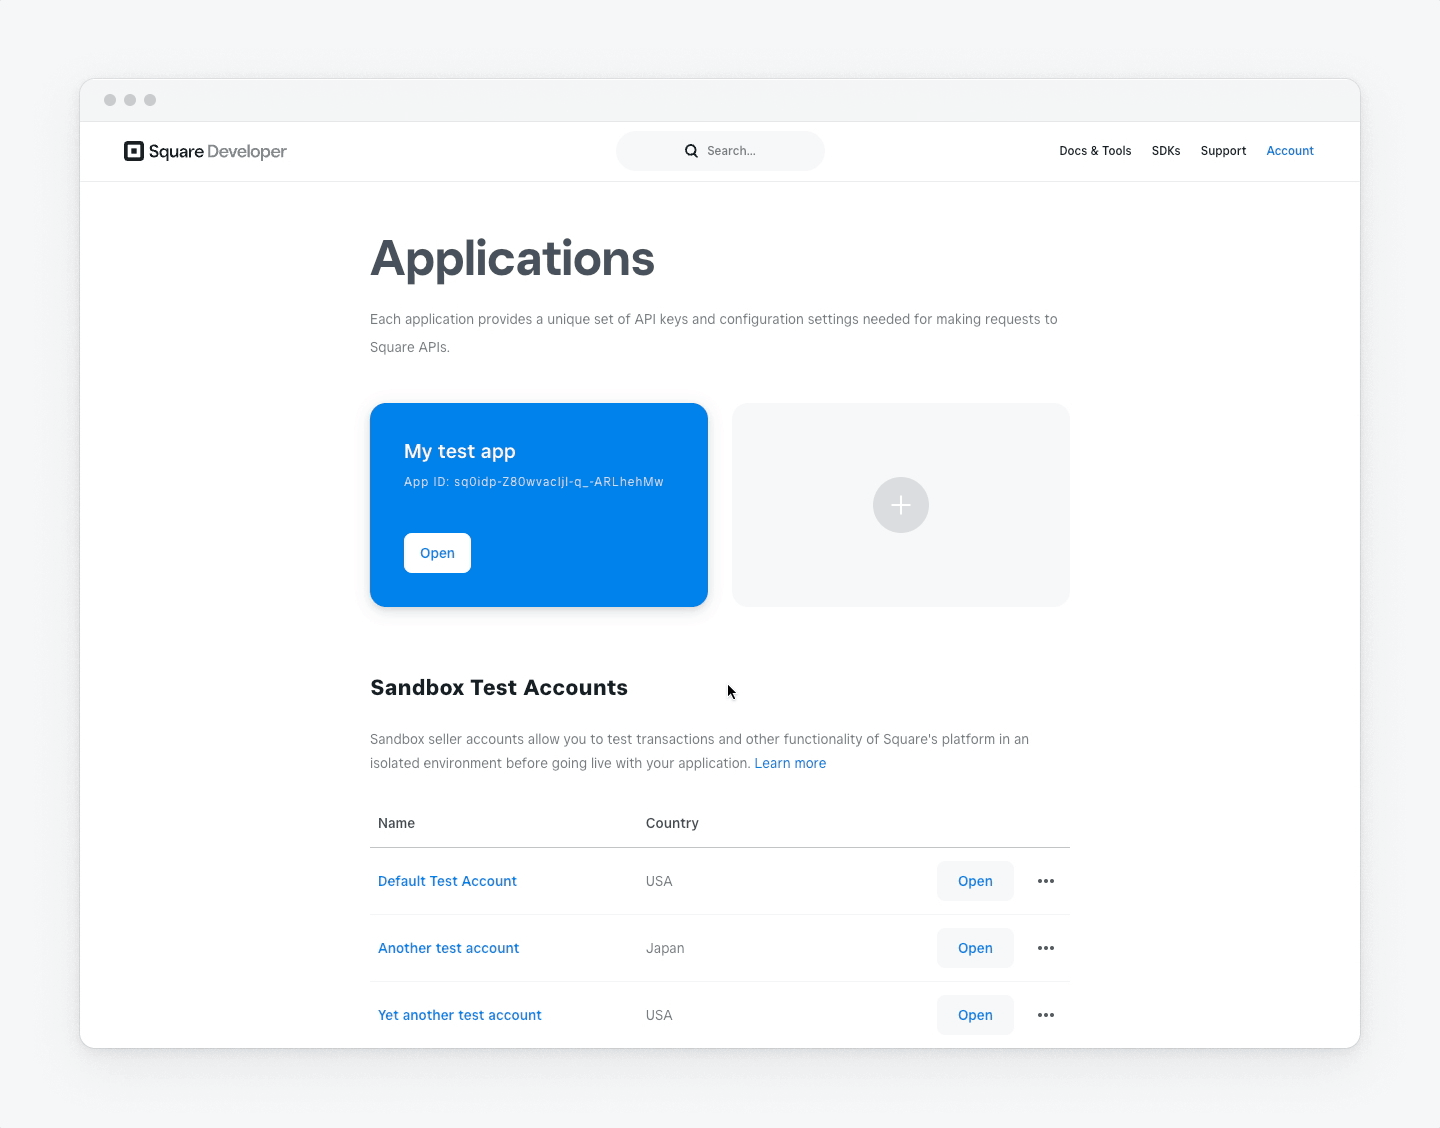
Sign in to the Developer Console and open your application. If you don't have a Square account, see Get Started to learn how to create an account and an application.
Get your Sandbox access token:
- At the top of the page, in the Sandbox and Production toggle, choose Sandbox.
- On the Credentials page, under Sandbox Access Token, choose Show and then copy the token. All Square API requests require an access token for authorization. This personal access token grants full access to the Sandbox resources in your account.
Important
The Sandbox access token is a secure secret. Don't share it with anyone.
Get your location ID:
- In the left pane, choose Locations.
- On the Locations page, keep Default Test Account selected and copy a location ID.
Note
To retrieve location IDs programmatically, call ListLocations.
To prepare for this walkthrough, you create a customer profile in your Customer Directory and then add a card on file.
Call CreateCustomer to create a customer profile with an email address. Square sends invoices and receipts to this email address.
Replace
{ACCESS_TOKEN}with your Sandbox access token and{UNIQUE_KEY}with a unique string. A unique idempotency key guarantees that Square processes a request only once.Create customer
The following is an example response:
{
  "customer":{
    "id": "DJREAYPRBMSSFAB4TGAexample",
    "created_at": "2021-05-30T18:38:16.973Z",
    "updated_at": "2021-05-30T18:38:17Z",
    "given_name": "John",
    "family_name": "Doe",
    "email_address": "[email protected]",
    "preferences": {
      "email_unsubscribed": false
    },
    "creation_source": "THIRD_PARTY",
    "version": 0
  }
}
Copy the customer ID from the response. You use it to save a card on file in the next step and also when you create orders and invoices.
Call CreateCard to associate a card on file with the customer profile.
- Replace
{ACCESS_TOKEN}with your Sandbox access token. - Replace the example value for
customer_idwith the customer ID you copied.
Create card
Note
For simplicity, this walkthrough uses the Sandbox payment token for
source_id. It skips the process of generating a payment token using the Web Payments SDK or In-App Payments SDK. Note that when using thecnon:card-nonce-okpayment token to create a card in the Sandbox, you must specify94103as the postal code.- Replace
Copy the card ID from the response. You use it to define invoice payment requests that automatically charge the card on file.
To retrieve an existing card ID, you can call ListCards and include the
customer_idquery parameter.
In this example, you create an order, create an invoice for the order, and then publish the invoice. The invoice settings direct Square to send an invoice to the customer requesting one payment for the full order amount. Then, you pay the invoice on the invoice payment page and retrieve the invoice to verify the payment status.
Note
If you want to share the URL of the invoice payment page with the customer directly, set the delivery_method field to SHARE_MANUALLY in your CreateInvoice request. This setting tells Square not to send the invoice to the customer. The URL is returned in the public_url field of the PublishInvoice response.
In this step, you create an order to associate with your invoice. To create the invoice in the next step, you must provide the ID of an order that was created using the Orders API.
Call CreateOrder to create a sample order for a $1.00 item.
- Replace
{ACCESS_TOKEN}with your Sandbox access token and{UNIQUE_KEY}with a unique string. - Replace the example values for
location_idandcustomer_idwith your actual values.
Create order
The following is an excerpt of the example response:
{
  "order": {
    "id": "AdSjVqPCzOAQqvTnzy46VLexample",
    "location_id": "S8GWD5example",
    "line_items": [
      {
         ...
      }
    ],
    ...
    "total_money": {
      "amount": 100,
      "currency": "USD"
    },
    ...
    "customer_id": "DJREAYPRBMSSFAB4TGAexample"
  }
}
When you create an invoice, the Invoices API uses the
total_moneyof the associated order to calculate percentage-based payments and ensure that the sum of all invoice payment requests equals the total order amount.- Replace
Copy the order ID from the response. You use it in the next step to create an invoice.
In this step, you create a draft invoice and then publish it. Square takes no action on an invoice until it's published.
Call CreateInvoice to create a draft invoice. The invoice in this example specifies one payment request for the full order amount, due by the specified date. It also enables the credit or debit card payment option on the invoice payment page and directs Square to use email to send invoice-related communication to the customer.
- Replace
{ACCESS_TOKEN}with your Sandbox access token and{UNIQUE_KEY}with a unique string. - Replace the example values for
order_idandcustomer_idwith your actual values. - Replace the example due date with a date in YYYY-MM-DD format.
Create invoice
The following example response contains the draft invoice:
{
  "invoice": {
    "id": "inv:0-ChC9tyZuZGGkQ1op9mVTSDexample",
    "version": 0,
    "location_id": "S8GWD5example",
    "order_id": "AdSjVqPCzOAQqvTnzy46VLexample",
    "payment_requests": [
      {
        "uid": "ccc0fc9b-c2a5-42a9-836d-92d01example",
        "request_type": "BALANCE",
        "due_date": "2021-06-30",
        "computed_amount_money": {
          "amount": 100,
          "currency": "USD"
        },
        "total_completed_amount_money": {
          "amount": 0,
          "currency": "USD"
        },
        "automatic_payment_source": "NONE"
      }
    ],
    "invoice_number": "000006",
    "status": "DRAFT",
    "timezone": "America/Los_Angeles",
    "created_at": "2021-05-30T19:01:32Z",
    "updated_at": "2021-05-30T19:01:32Z",
    "primary_recipient": {
      "customer_id": "DJREAYPRBMSSFAB4TGAexample",
      "given_name": "John",
      "family_name": "Doe",
      "email_address": "[email protected]"
    },
    "accepted_payment_methods": {
      "card": true,
      "square_gift_card": false,
      "bank_account": false,
      "buy_now_pay_later": false,
      "cash_app_pay": false
    },
    "delivery_method": "EMAIL",
    "store_payment_method_enabled": false
  }
}
Note the following invoice fields:
versionis 0 because this is the first version of the invoice.statusisDRAFTbecause the invoice hasn't been published.computed_amount_moneyis the amount due for the payment request.total_completed_amount_moneyis the amount the customer has paid for the payment request, in this case 0.primary_recipientincludes additional customer profile information retrieved by the Invoices API.accepted_payment_methodsare the payment methods customers can use to pay the invoice on the invoice payment page.
- Replace
Copy the invoice ID from the response. You use it to publish and retrieve the invoice.
Optionally, review the draft invoice in the Sandbox Square Dashboard as follows:
- Sign in to the Developer Console.
- On the Sandbox test accounts page, choose Square Dashboard for the Default Test Account. This opens the Sandbox Square Dashboard associated with the default test account.
- In the left pane, choose Payments, and then choose Invoices.
- Verify that the unpaid invoice is created and that the status is
DRAFT.
Call PublishInvoice to publish the draft invoice.
- Replace
{ACCESS_TOKEN}with your Sandbox access token and{UNIQUE_KEY}with a unique string. - Replace the example invoice ID in the path with your actual invoice ID.
Publish invoice
Square generates the invoice page and processes the invoice based on the payment requests, scheduled date, delivery method, and other invoice settings. For more information, see Configuring how Square processes an invoice.
The following is an example response:
{
  "invoice": {
    "id": "inv:0-ChC9tyZuZGGkQ1op9mVTSDexample",
    "version": 1,
    "location_id": "S8GWD5example",
    "order_id": "AdSjVqPCzOAQqvTnzy46VLexample",
    "payment_requests": [
      {
        "uid": "ccc0fc9b-c2a5-42a9-836d-92d01example",
        "request_type": "BALANCE",
        "due_date": "2021-06-30",
        "computed_amount_money": {
          "amount": 100,
          "currency": "USD"
        },
        "total_completed_amount_money": {
          "amount": 0,
          "currency": "USD"
        },
        "automatic_payment_source": "NONE"
      }
    ],
    "invoice_number": "000006",
    "public_url": "https://squareupsandbox.com/pay-invoice/invtmp:5e22a2c2-47c1-46d6-b061-808764dfe2b9",
    "status": "UNPAID",
    "timezone": "America/Los_Angeles",
    "created_at": "2021-05-30T19:01:32Z",
    "updated_at": "2021-05-30T19:05:01Z",
    "primary_recipient": {
      "customer_id": "DJREAYPRBMSSFAB4TGAexample",
      "given_name": "John",
      "family_name": "Doe",
      "email_address": "[email protected]"
    },
    "accepted_payment_methods": {
      "card": true,
      "square_gift_card": false,
      "bank_account": false,
      "buy_now_pay_later": false,
      "cash_app_pay": false
    },
    "next_payment_amount_money": {
      "amount": 100,
      "currency": "USD"
    },
    "delivery_method": "EMAIL",
    "store_payment_method_enabled": false
  }
}
The published invoice has the following changes:
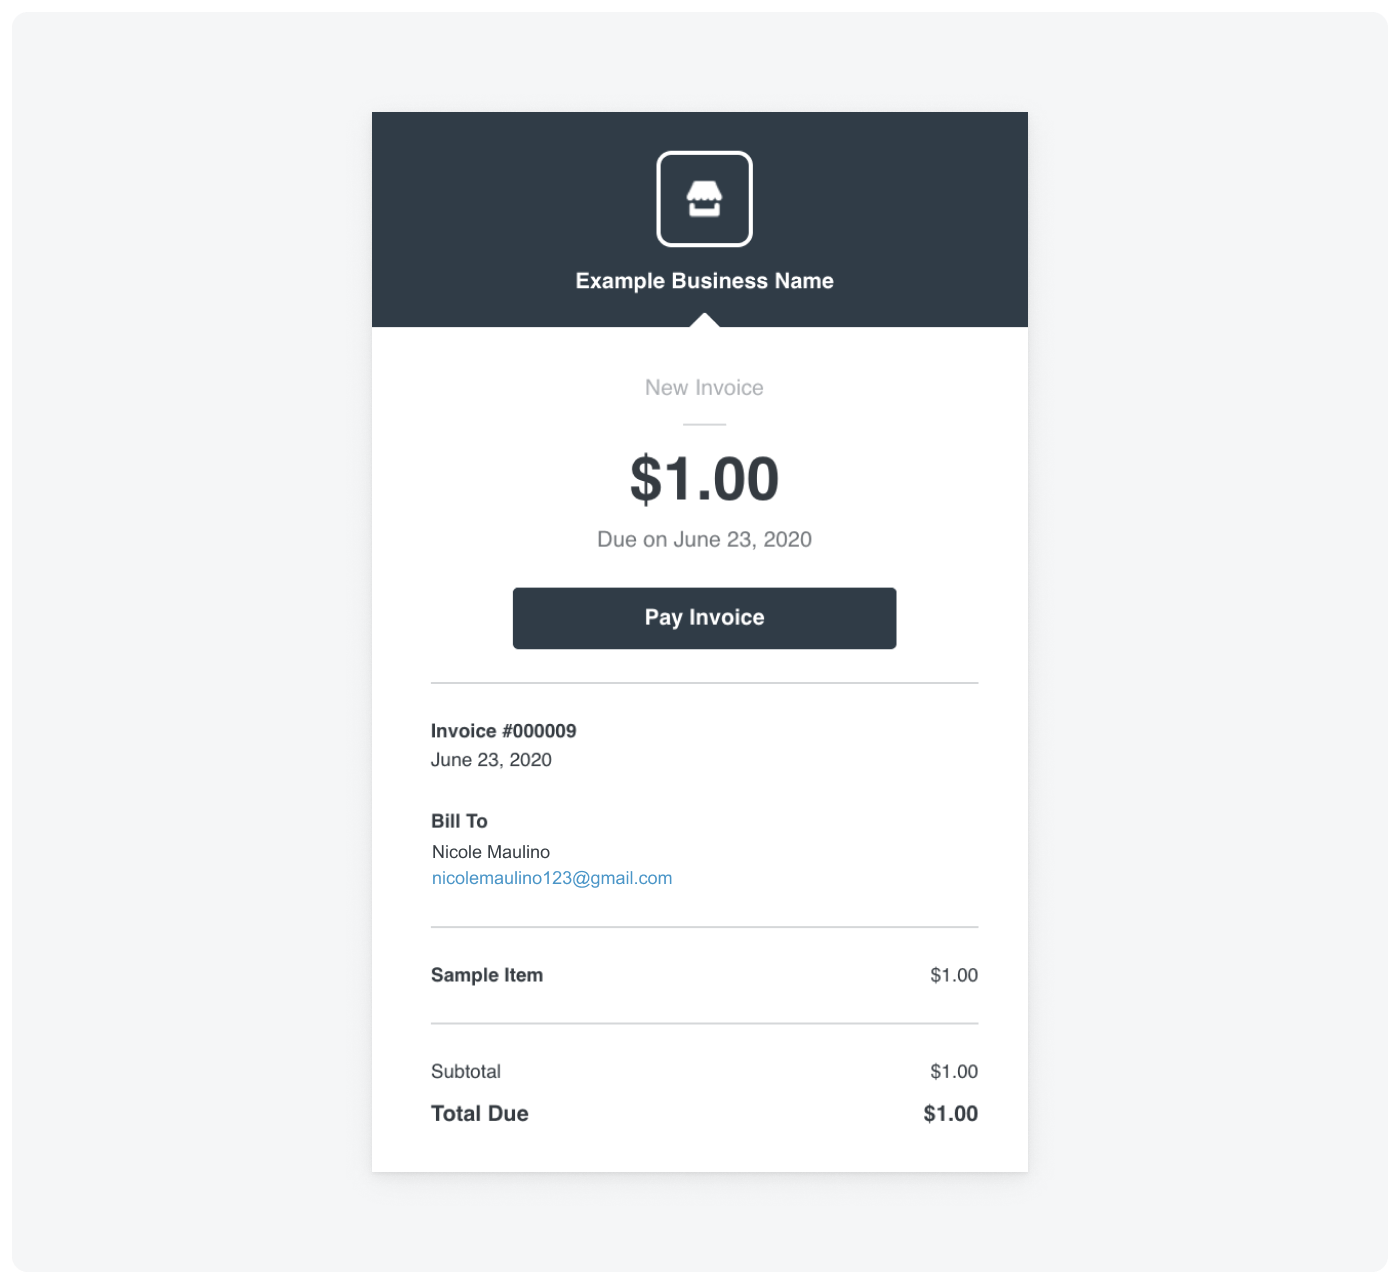
versionchanged to 1.statuschanged fromDRAFTtoUNPAID.public_urlis added to the invoice. This is a temporary link to the Square-hosted invoice payment page where the customer can pay the invoice. If the link expires before the invoice is paid, the customer can request a new link from the expired payment page.next_payment_amount_moneyis added to the invoice. This example requests one payment in full, so the amount equals the total order amount. If you request multiple payments, the field shows the amount that is due next based on the payment schedule. If one or more payments are overdue, the field includes the overdue amount. For example, consider an invoice for $2 that requires a deposit of $1 and the balance of $1 at a later date. If the deposit is overdue, this field indicates $2 as the next payment amount.The following is an example email sent to the customer. The customer can choose Pay Invoice to open the invoice payment page and make a payment.
Although not supported in the Sandbox environment, Square also emails the invoice to the seller. For more information about invoice-related communication from Square, see Automatic communication from Square.
- Replace
The customer has the following options to pay the invoice:
- Choose Pay Invoice in the emailed invoice to open the invoice payment page and pay the invoice.
- Contact the seller and pay by credit card, cash, or other accepted payment method. Sellers can record the payment in the Square Dashboard, POS application, or Square Invoices application.
In this step, you pay the invoice on the invoice payment page.
Open the invoice payment page. You can find the payment link in the
public_urlfield in thePublishInvoiceresponse.Use the Sandbox test credit card information to pay the invoice.
Call GetInvoice to retrieve the invoice and verify status.
- Replace
{ACCESS_TOKEN}with your Sandbox access token. - Replace the example invoice ID in the path with your actual invoice ID.
Get invoice
If you paid in full, the invoice in the response has the following changes:
statusis PAID.total_completed_amount_moneyspecifies 100 for the amount paid.next_payment_amount_moneyis removed from the invoice.
You can also verify the changes in the Sandbox Square Dashboard.
- Replace
In this example, you create an order, create an invoice for the order, and then publish the invoice. The invoice settings direct Square to automatically charge a card on file for a deposit when the invoice is published and a balance at a later date. Then, you retrieve the invoice to verify the payment status.
In this step, you create an order to associate with your invoice. To create the invoice in the next step, you must provide the ID of an order that was created using the Orders API.
Call CreateOrder to create a sample order for $4.00.
- Replace
{ACCESS_TOKEN}with your Sandbox access token and{UNIQUE_KEY}with a unique string. - Replace the example values for
location_idandcustomer_idwith your actual values.
Create order
- Replace
Copy the order ID from the response. You use it in the next step to create an invoice.
In this step, you create a draft invoice and then publish it. Square takes no action on an invoice until it's published.
Call CreateInvoice to create a draft invoice. The invoice in this example specifies a deposit payment request for 25% of the order amount and a balance payment request. Both payment requests direct Square to charge a card on file and provide the card ID. The invoice sets the delivery method that Square uses for invoice-related communication with the customer to
EMAIL, which is required for automatic payments. It also enables the credit or debit card and Square gift card payment options on the invoice payment page.- Replace
{ACCESS_TOKEN}with your Sandbox access token and{UNIQUE_KEY}with a unique string. - Replace the example values for
order_id,customer_id, andcard_idwith your actual values. - Replace the example values for
due_datewith dates in YYYY-MM-DD format. Use the current date for the deposit (so Square charges the card immediately and you can verify the charge) and a future date for the balance.
Create invoice
Note
Instead of specifying percentage-based payment amounts, you can specify exact amounts. The sum of the exact amounts must match the
total_moneyof the order. For more information, see Configuring payment requests.The following is an example response:
{
  "invoice": {
    "id": "inv:0-ChB1vUizal7VFGWas0H1Bexample",
    "version": 0,
    "location_id": "S8GWD5example",
    "order_id": "8NW3YYM7Ho58Ur7k9vkLexample",
    "payment_requests": [
      {
        "uid": "968d4546-3d4b-4be7-8411-cddcbexample",
        "request_type": "DEPOSIT",
        "due_date": "2021-05-30",
        "percentage_requested": "25",
        "card_id": "ccof:aC1D4q9aUXTkexample",
        "computed_amount_money": {
          "amount": 100,
          "currency": "USD"
        },
        "total_completed_amount_money": {
          "amount": 0,
          "currency": "USD"
        },
        "automatic_payment_source": "CARD_ON_FILE"
      },
      {
        "uid": "8e1e2012-c9fc-491b-9545-6380fexample",
        "request_type": "BALANCE",
        "due_date": "2021-06-15",
        "card_id": "ccof:aC1D4q9aUXTkexample",
        "computed_amount_money": {
          "amount": 300,
          "currency": "USD"
        },
        "total_completed_amount_money": {
          "amount": 0,
          "currency": "USD"
        },
        "automatic_payment_source": "CARD_ON_FILE"
      }
    ],
    "invoice_number": "000007",
    "status": "DRAFT",
    "timezone": "America/Los_Angeles",
    "created_at": "2021-05-30T03:09:48Z",
    "updated_at": "2021-05-30T03:09:48Z",
    "primary_recipient": {
      "customer_id": "DJREAYPRBMSSFAB4TGAexample",
      "given_name": "John",
      "family_name": "Doe",
      "email_address": "[email protected]"
    },
    "accepted_payment_methods": {
      "card": true,
      "square_gift_card": true,
      "bank_account": false,
      "buy_now_pay_later": false,
      "cash_app_pay": false
    },
    "delivery_method": "EMAIL",
    "store_payment_method_enabled": false
  }
}
Note the following invoice fields:
versionis 0 because this is the first version of the invoice.statusisDRAFTbecause the invoice hasn't been published.computed_amount_moneyis the amount due for each payment request.total_completed_amount_moneyis the amount the customer has paid for the payment request.accepted_payment_methodsare the payment methods customers can use to pay the invoice on the invoice payment page. At least one payment method must be set totrue. This setting is independent of any automatic payment requests for the invoice.
You can review the draft invoice in the Sandbox Square Dashboard as described in the first walkthrough example.
- Replace
Call PublishInvoice to publish the invoice.
- Replace
{ACCESS_TOKEN}with your Sandbox access token and{UNIQUE_KEY}with a unique string. - Replace the example invoice ID in the path with your actual invoice ID.
Publish invoice
Square generates the invoice page and processes the invoice based on the payment requests, scheduled date, delivery method, and other invoice settings. For more information, see Configuring how Square processes an invoice.
The following is an example response:
{
  "invoice": {
    "id": "inv:0-ChB1vUizal7VFGWas0H1Bexample",
    "version": 1,
    "location_id": "S8GWD5example",
    "order_id": "8NW3YYM7Ho58Ur7k9vkLexample",
    "payment_requests": [
      {
        "uid": "968d4546-3d4b-4be7-8411-cddcbexample",
        "request_type": "DEPOSIT",
        "due_date": "2021-05-30",
        "percentage_requested": "25",
        "card_id": "ccof:aC1D4q9aUXTkexample",
        "computed_amount_money": {
          "amount": 100,
          "currency": "USD"
        },
        "total_completed_amount_money": {
          "amount": 0,
          "currency": "USD"
        },
        "automatic_payment_source": "CARD_ON_FILE"
      },
      {
        "uid": "8e1e2012-c9fc-491b-9545-6380fexample",
        "request_type": "BALANCE",
        "due_date": "2021-05-30",
        "card_id": "ccof:aC1D4q9aUXTkexample",
        "computed_amount_money": {
          "amount": 300,
          "currency": "USD"
        },
        "total_completed_amount_money": {
          "amount": 0,
          "currency": "USD"
        },
        "automatic_payment_source": "CARD_ON_FILE"
      }
    ],
    "invoice_number": "000007",
    "public_url": "https://squareupsandbox.com/pay-invoice/invtmp:5e22a2c2-47c1-46d6-b061-808764dfe2b9",
    "status": "UNPAID",
    "timezone": "America/Los_Angeles",
    "created_at": "2021-05-30T03:09:48Z",
    "updated_at": "2021-05-30T03:12:33Z",
    "primary_recipient": {
      "customer_id": "DJREAYPRBMSSFAB4TGAexample",
      "given_name": "John",
      "family_name": "Doe",
      "email_address": "[email protected]"
    },
    "accepted_payment_methods": {
      "card": true,
      "square_gift_card": true,
      "bank_account": false,
      "buy_now_pay_later": false,
      "cash_app_pay": false
    },
    "next_payment_amount_money": {
      "amount": 100,
      "currency": "USD"
    },
    "delivery_method": "EMAIL",
    "store_payment_method_enabled": false
  }
}
The published invoice has the following changes:
versionis incremented. The value depends on whether Square started processing the payment before returning the response.statuschanged fromDRAFTtoUNPAIDorPAYMENT_PENDING. The value depends on whether Square started processing the payment before returning the response.public_urlis added to the invoice. This is a temporary link to the Square-hosted invoice payment page where the customer can pay the invoice. If the link expires before the invoice is paid, the customer can request a new link from the expired payment page.next_payment_amount_moneyis added to the invoice.Soon after the invoice is published, Square charges the customer's card on file if you specified the current date for the deposit. Square sends an invoice receipt to both the seller and customer (in the Production environment only). If the due date is in the future, the customer can optionally choose Make Early Payment to pay the invoice sooner.
- Replace
In this step, you verify that Square automatically charged the card on file for the deposit amount.
Call GetInvoice to retrieve the invoice and verify status.
- Replace
{ACCESS_TOKEN}with your Sandbox access token. - Replace the example invoice ID in the path with your actual invoice ID.
Get invoice
After Square charges the card for the deposit, the invoice in the response has the following changes:
statuschanged toPARTIALLY_PAID.total_completed_amount_moneyfor the deposit is 100, which equals thecomputed_amount_moneyand indicates that the deposit was paid.next_payment_amount_moneyis 300, which is the amount of the balance payment request.
You can also verify the changes in the Sandbox Square Dashboard or on the invoice payment page.
- Replace