Applies to: Mobile Payments SDK - Android | Payments API | OAuth API
Learn how to build a secure in-person payment solution for Android devices with the Mobile Payments SDK.
Applies to: Mobile Payments SDK - Android | Payments API | OAuth API
Learn how to build a secure in-person payment solution for Android devices with the Mobile Payments SDK.
The Mobile Payments SDK offers developers a secure way to integrate the Square checkout flow into their mobile applications and accept in-person payments with Square Readers.
There are four steps required to take your first payment using the Mobile Payments SDK:
For an example implementation, download the Mobile Payments SDK sample application, written in Kotlin using Compose.
minSdkVersion is API 28 (Android 9) or later.targetSdkVersion is API 35 (Android 15) or a minimum of API 28 (Android 9).compileSdkVersion is 35.gradle.properties.The Mobile Payments SDK doesn't support Proguard for code optimization, as it might remove some critical bytecode from the library.
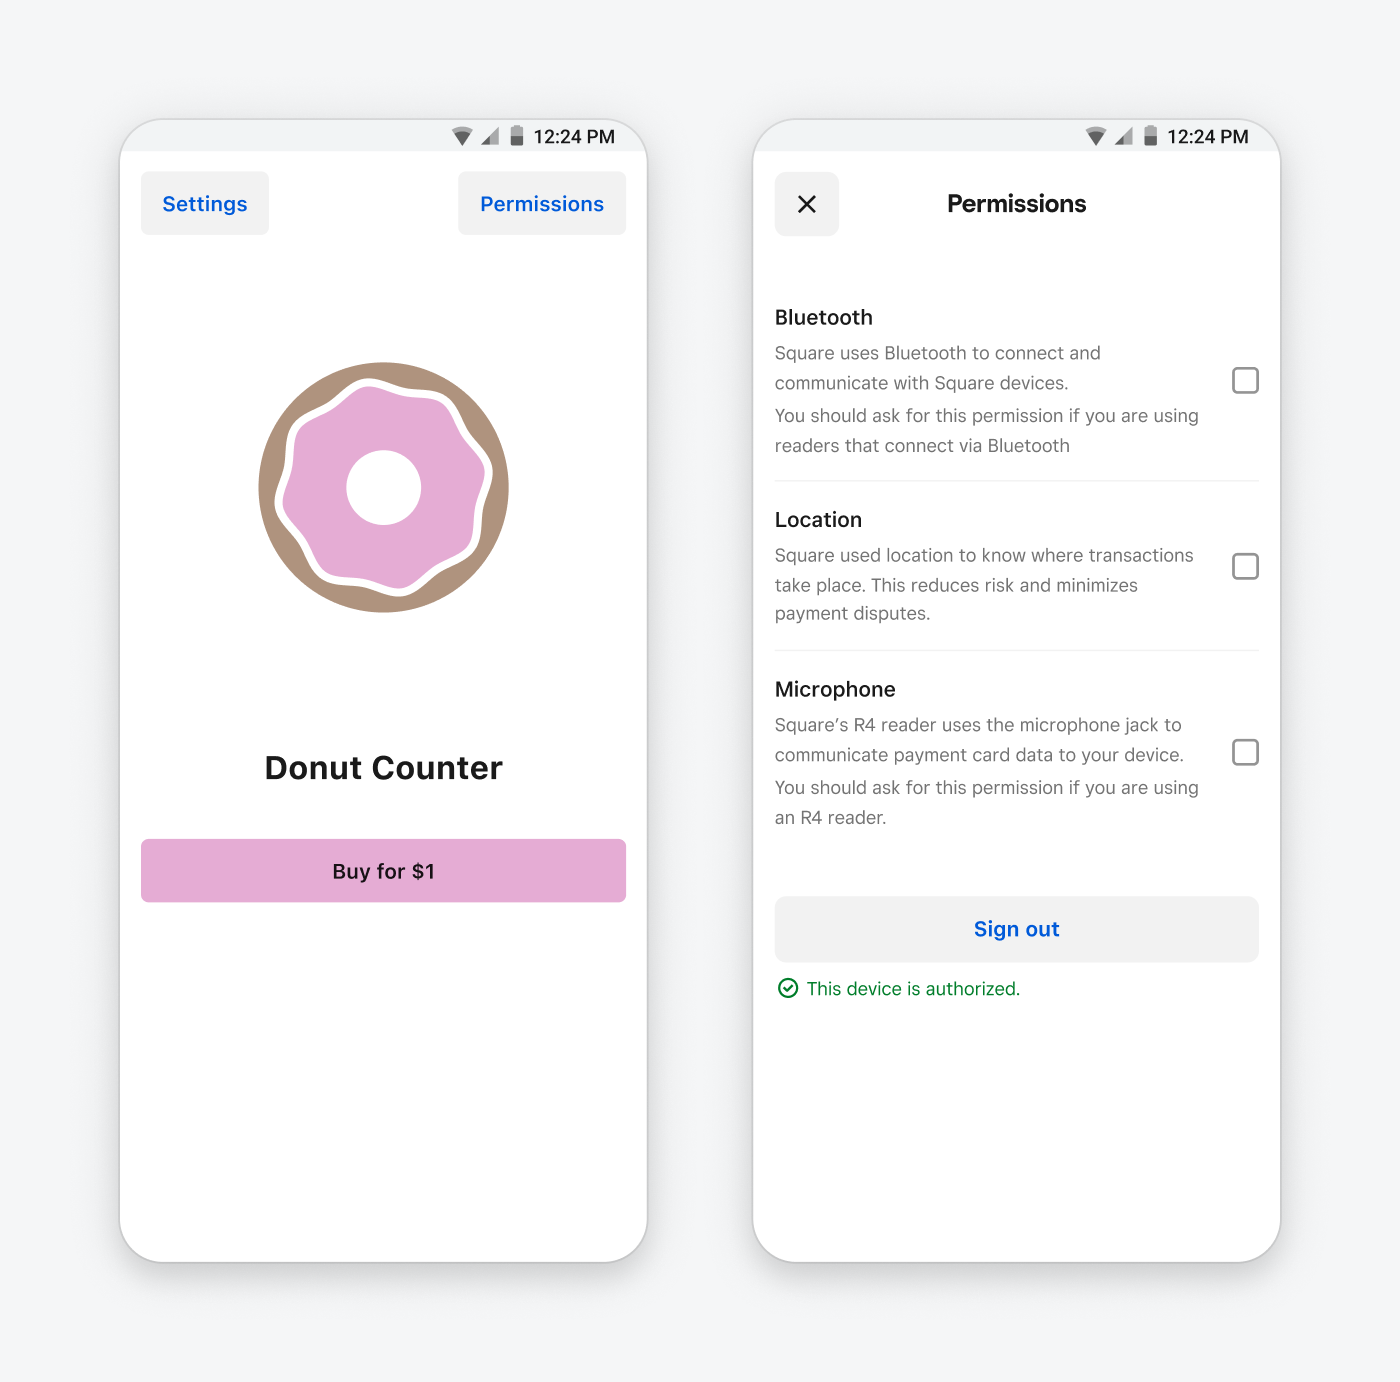
The Mobile Payments SDK requires that the user grant access to their device’s current location while using your app. To use a Contactless and Chip reader to take card payments, Bluetooth must be enabled, and to use a magstripe reader, your application must be granted permission to access the device's microphone.
Ensure your application requests the following runtime permissions:
| Android device permission | Purpose |
|---|---|
ACCESS_FINE_LOCATION | To confirm that payments are occurring in a supported Square location. |
RECORD_AUDIO | To receive data from magstripe readers. |
BLUETOOTH_CONNECT | To receive data from contactless and chip readers. |
BLUETOOTH_SCAN | To store information during checkout. |
READ_PHONE_STATE | To identify the device sending information to Square servers. |
The Mobile Payments SDK isn't compatible with custom devices from original equipment manufacturers that violate Square's security rules or devices that grant root access to the mobile device operating system code and kernel. These devices cannot connect to a contactless and chip reader and don't comply with Square's security requirements.
The following additional considerations apply when trying to run the SDK on custom devices:
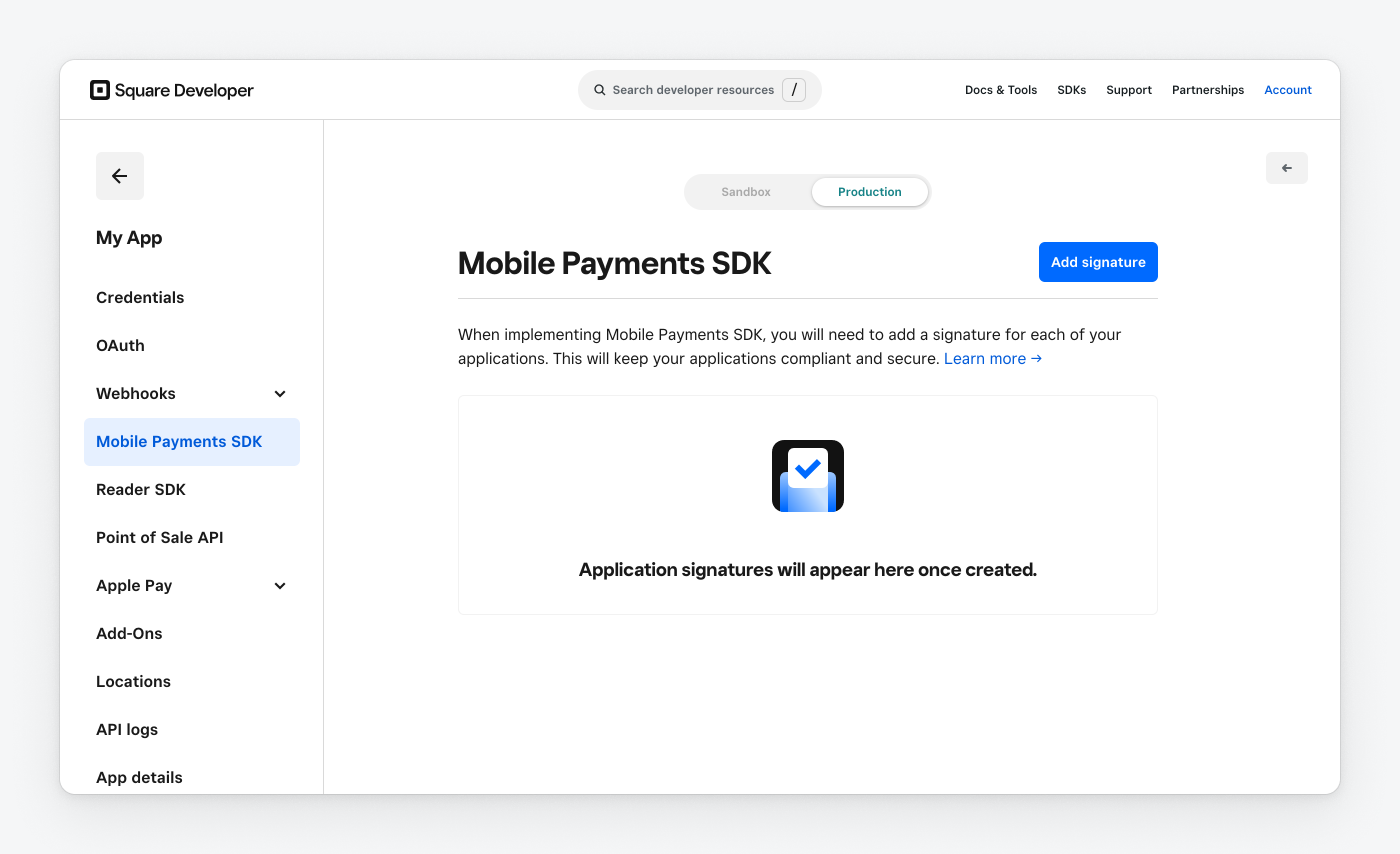
Developers using the Mobile Payments SDK version 2.1 or later are required to submit an application signature to Square prior to taking payments in production. This signature is an extra layer of security that ensures that your application hasn't been tampered with or otherwise modified by a user.
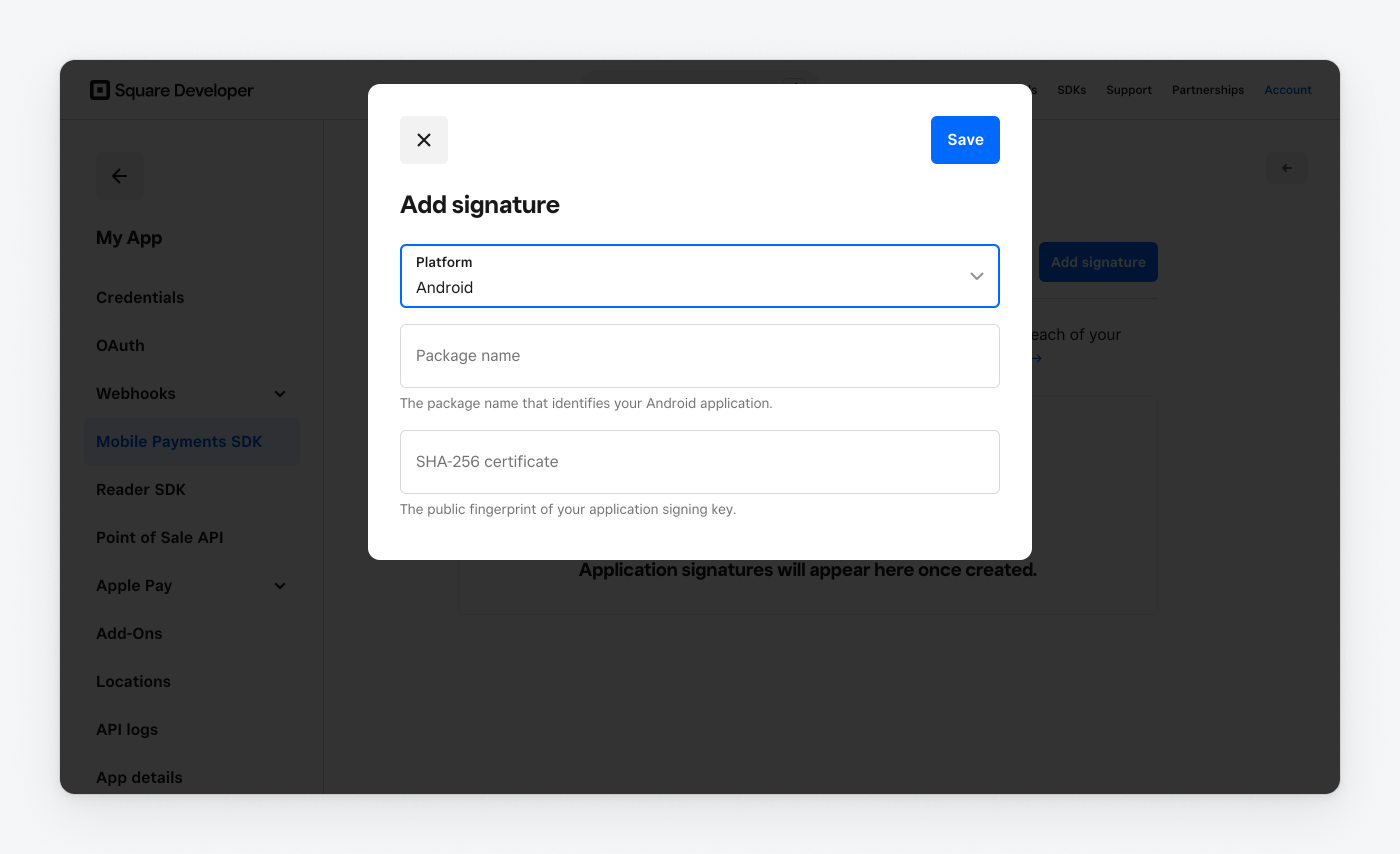
To submit an application signature, log in to the Developer Console and choose your application. In the left pane, choose Mobile Payments SDK, and then choose Add Signature.
You must provide your Package Name and Signing Key (SHA-256) to Square. For more information, see Android developer documentation on signing your app.
If you publish a single mobile application used by multiple Square sellers using the same Square application id, you only need to submit one signature per platform for that application. Any debug builds you create that take payments in production also require their own application signature, since the signing key differs from your published application.
The Mobile Payments SDK page in the Developer Console lists each signature that you've submitted. If an application signature is deleted, the application is no longer able to take payments, but you can submit a new signature for your application at any time.
If you're developing with the Mobile Payments SDK's Flutter or React Native plugins and publishing both an Android and iOS application, you must submit a signature for each application.
To comply with data privacy laws, the Mobile Payments SDK requires merchants in Canada, the United Kingdom, and the European Union to grant or deny consent for performance and analytics tracking. Your application should prompt merchants in these regions for consent and log whether consent was granted or denied using settingsManager.updateTrackingConsent(granted: Boolean).
Before processing payments, check the current state of consent for the authorized merchant.
val trackingConsentState = settingsManager.trackingConsentState
The possible states are:
PENDING - Consent has not yet been providedGRANTED - Merchant has granted consent for trackingDENIED - Merchant has denied consent for trackingNOT_REQUIRED - Merchant is in a region where consent is not required for trackingIf you don't implement consent handling via the API, the SDK automatically displays a consent dialog modal to users in regions where consent is required. This modal:
If you use a custom UI for your payment prompt screen and have not provided your user's consent status with the API, the SDK returns an error from startPaymentActivity. You must handle consent before initiating any payment when using a custom payment UI.
Get started with the Mobile Payments SDK by configuring your Android application and taking a test payment in the Square Sandbox.
Use the following steps to set up and test the Mobile Payments SDK in your own application. You can also download the Mobile SDK sample application (written in Kotlin) to see an example of initialization, authorization, and taking payments in production or the Square Sandbox.
Add Square's Maven repo to your project's settings.gradle file and the following dependencies to your project's build.gradle file. The Mock Reader UI is used to simulate virtual reader devices.
settings.gradle.kts:
...
dependencyResolutionManagement {
 repositoriesMode.set(RepositoriesMode.FAIL_ON_PROJECT_REPOS)
 repositories {
   ...
   maven ("https://sdk.squareup.com/public/android/")
 }
}
...
build.gradle.kts:
...
dependencies {
 // Your dependencies
 ...
 val squareSdkVersion = "2.4.0"
 // Mobile Payments SDK dependency
 implementation("com.squareup.sdk:mobile-payments-sdk:$squareSdkVersion")

 // MockReader UI dependency
 implementation("com.squareup.sdk:mockreader-ui:$squareSdkVersion")
}
Before taking a payment or attempting any other operation with the Mobile Payments SDK, you must initialize it using the initialize method and your Square developer application ID. To get your application ID, sign in to the Developer Console and choose your application. If you don't have an application, see Get Started for steps to create a Square application.
Your application opens in the Developer Console to the Credentials page. This page contains your Square application ID used to initialize the Mobile Payments SDK.
To test the Mobile Payments SDK in the Square Sandbox with mock readers and mock payments, switch the toggle at the top of the Developer Console to Sandbox to show your Sandbox credentials and initialize the SDK with your Sandbox application ID. To start taking production payments, you must initialize the Mobile Payments SDK again with your production application ID.
A good place to initialize the SDK is inside the onCreate() method of an extended Application class, because it's executed early in the application lifecycle.
class DemoApplication : Application() {
    override fun onCreate() {
      super.onCreate()
      MobilePaymentsSdk.initialize(getId(), this)
    }
}
If using the previous example, you should write your own implementation for getId() to return your application ID value from the Developer Console. Depending on your use case, this can be your production or Sandbox application ID, which might be stored as hardcoded strings, as Android resources, or fetched from your server.
The AuthorizationManager handles authorization for the Mobile Payments SDK. Call the authorize() method with an OAuth access token and location ID. If you're testing your application in the Square Sandbox, you can use your Sandbox personal access token and location ID.
Don't deploy an application that contains your personal access token into production. For secure authorization in production, you should implement OAuth instead of using a personal access token.
In your call to authorize(), configure a callback to be notified of authorization errors and display those to the user.
override fun onResume() {
    super.onResume()
    val authorizationManager = MobilePaymentsSdk.authorizationManager()
    // Authorize and handle authorization successes or failures
    callbackReference = authorizationManager.authorize(accessToken, locationId) { result ->
      when (result) {
        is Success -> {
          finishWithAuthorizedSuccess(result.value)
        }
        is Failure -> {
          when (result.errorCode) {
            NO_NETWORK -> showRetryDialog(result)
            USAGE_ERROR -> showUsageErrorDialog(result)
          }
        }
      }
    }
}

override fun onPause() {
    super.onPause()
    // Remove the callback reference to prevent memory leaks
    callbackReference?.clear()
}
Physical card readers aren't supported in the Square Sandbox. To take test payments, you must simulate a virtual reader with the Mock Reader UI.
The Mock Reader UI automatically attaches a floating button to the currently displayed Activity as you navigate between screens in your application after you've called MockReaderUI.show(). The icon can be dragged anywhere on the screen and persists throughout your application lifecycle.
override fun onCreate() {
    super.onCreate()
    // If in Sandbox - display Mock Reader floating icon
    if (MobilePaymentsSdk.isSandboxEnvironment()) {
        MockReaderUI.show()
    }
}

// MockReader must hide once deauthorized as it should only be used within the Sandbox environment.
private fun deauthorize() {
    MockReaderUI.hide()
}
Click the following button to simulate connecting a magstripe reader or a contactless and chip reader to your device. You can use the ReaderManager to programmatically access information about these simulated readers, such as their model and available card entry methods.

When mock readers have been connected and you begin a payment, click the button again to test your application's payment flow and simulate swiping, inserting, removing, or tapping a card with the mock reader. Choose Payment details to select different card brands and payment behaviors (approved or declined) for testing purposes. To hide the button in your application, call MockReaderUI.hide().
When testing card payment flows, any inserted cards must be removed through the mock reader UI before beginning a new payment.
To pair physical readers for production payments, see Pair and Manage Card Readers.
The PaymentManager handles payments in the Mobile Payments SDK. Prior to starting a payment, you create PaymentParameters to represent details of an individual payment and PromptParameters to indicate how the payment prompts are presented to the buyer.
Before beginning a payment, create a PaymentParameters object. At a minimum, you must include the payment amount, a payment attempt ID, and the processing mode, which determines whether payments can be taken offline. For the complete list of payment parameter values and details, see Android technical reference.
Each payment also requires PromptParameters, consisting of a mode and additionalPaymentMethods available to buyers. The current options are KEYED (a manually entered credit card payment) or CASH.
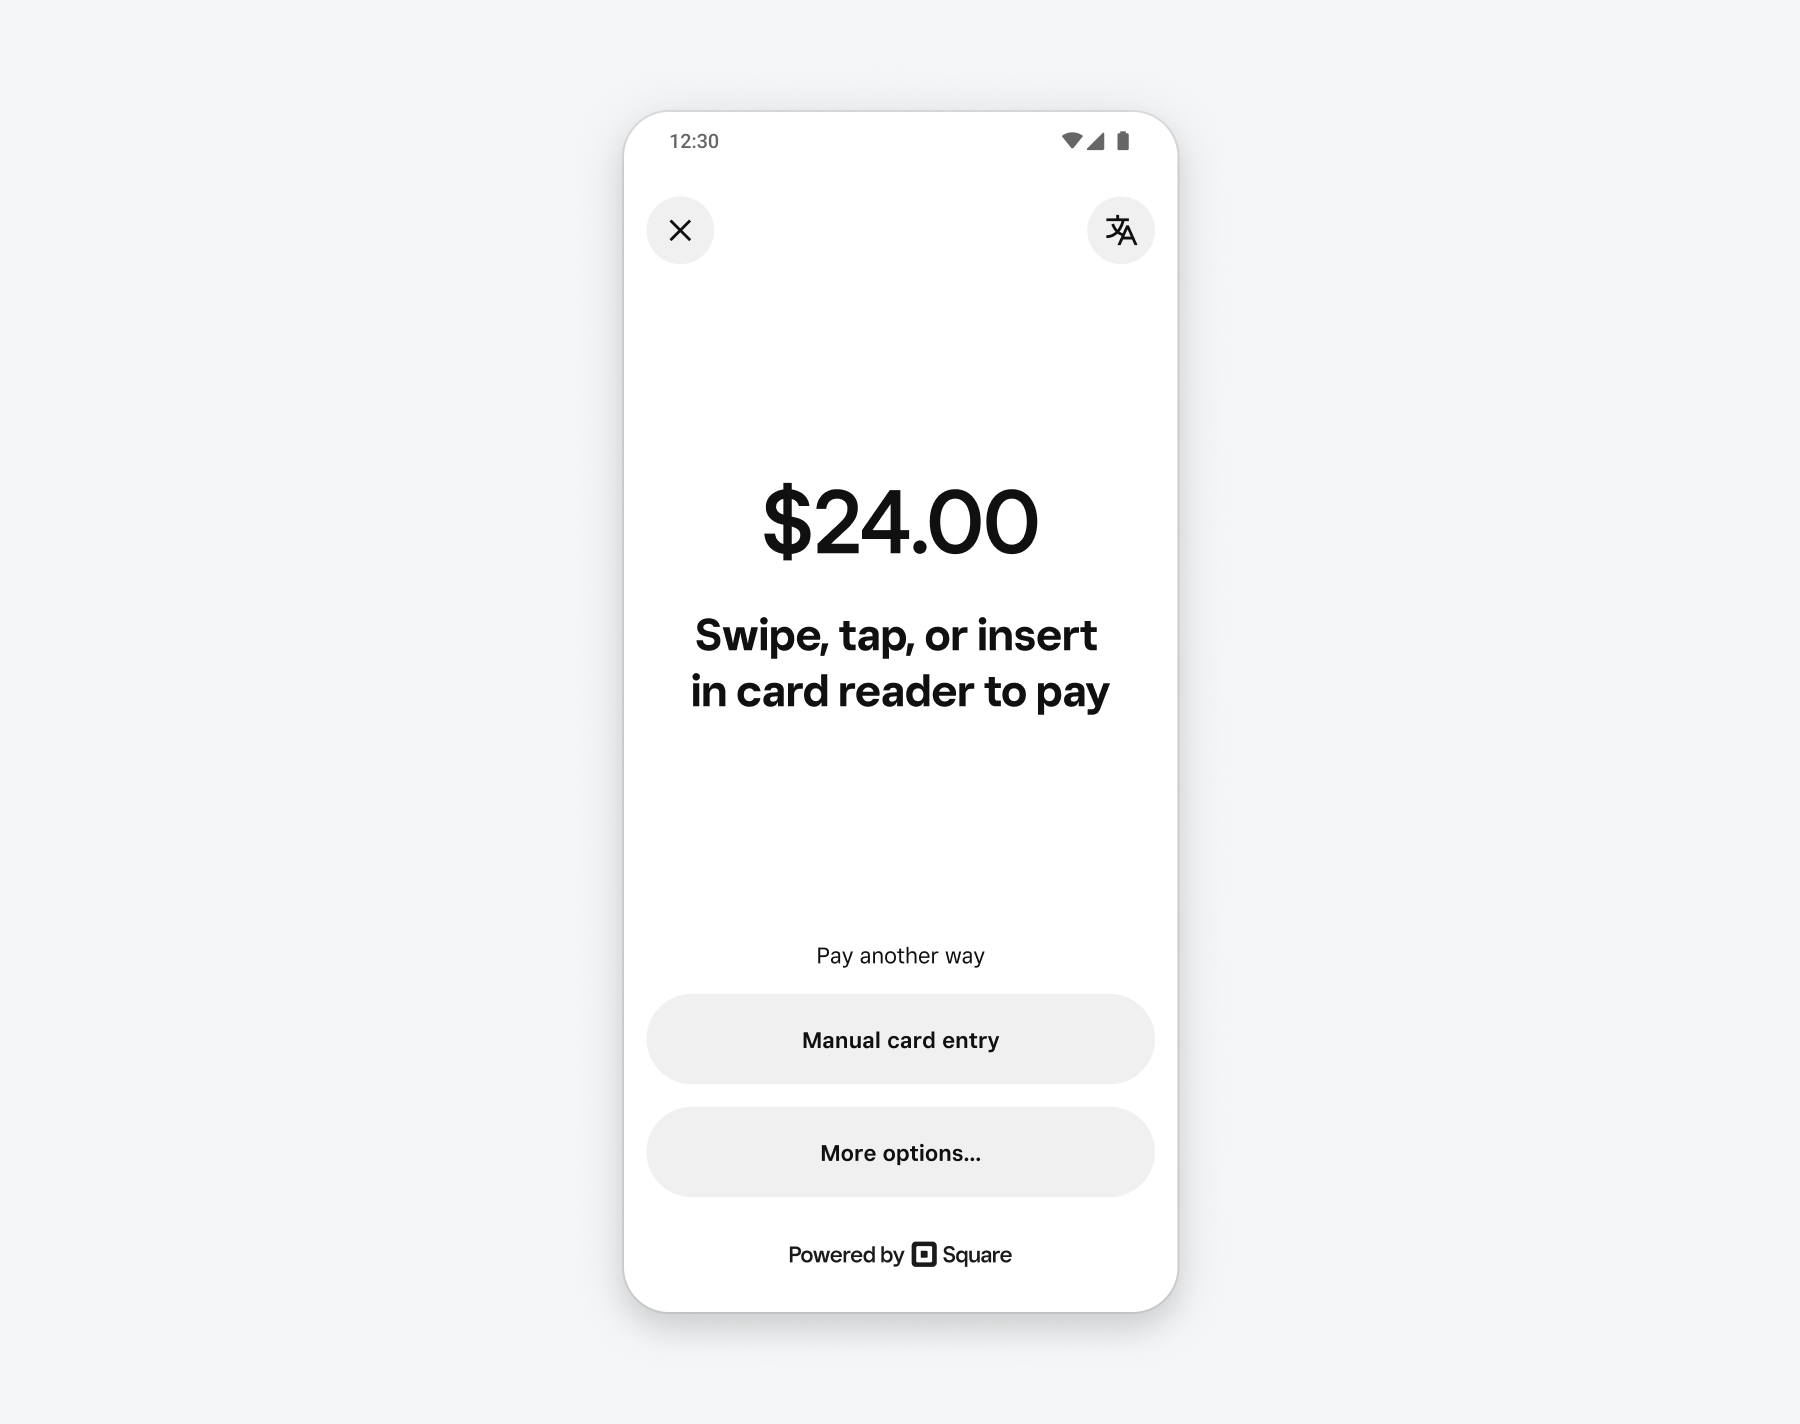
Square provides a payment prompt screen that displays a UI prompting buyers to swipe, tap, or insert their card, depending on the payment options available. To use this screen, set PromptParameters.mode to DEFAULT. If you want to create your own custom payment prompt screen instead of using the default, set PromptParameters.mode to CUSTOM.
If you create your own custom payment prompt UI, use the setAvailableCardEntryMethodChangedCallback to update your UI if the available card entry methods change (for example, if a magstripe reader is inserted or removed from the mobile device). You should set this callback in either a ViewModel or an Activity’s onCreate() or onResume() method.
When you're ready to begin a payment, call paymentManager.startPaymentActivity() with the PaymentParameters and PromptParameters you created for this payment, along with a callback to notify you of the payment's success or failure.
fun startPaymentActivity() {
    val paymentManager = MobilePaymentsSdk.paymentManager()
    // Configure the payment parameters
    val paymentParams = PaymentParameters.Builder(
        amount = Money(100, CurrencyCode.USD),
        paymentAttemptId = UUID.randomUUID().toString(),
        processingMode = processingMode(ProcessingMode.ONLINE_ONLY)
    )
        .referenceId("1234")
        .note("Chocolate Cookies and Lemonade")
        .autocomplete(true)
        .build()
    // Configure the prompt parameters
    val promptParams = PromptParameters(
        mode = PromptMode.DEFAULT,
        additionalPaymentMethods = listOf(Type.KEYED)
    )
    // Start the payment activity
    handle = paymentManager.startPaymentActivity(paymentParams, promptParams) { result ->
        // Callback to handle the payment result
        when (result) {
            is Success -> // show payment details
            is Failure -> // show error message
        }
    }
}

override fun onDestroy() {
    handle?.cancel()
    ...
}
During a payment, Square takes control of the screen display as another Android Activity to ensure that buyer information is handled securely and that the final confirmation of the payment is correctly shown to the buyer.
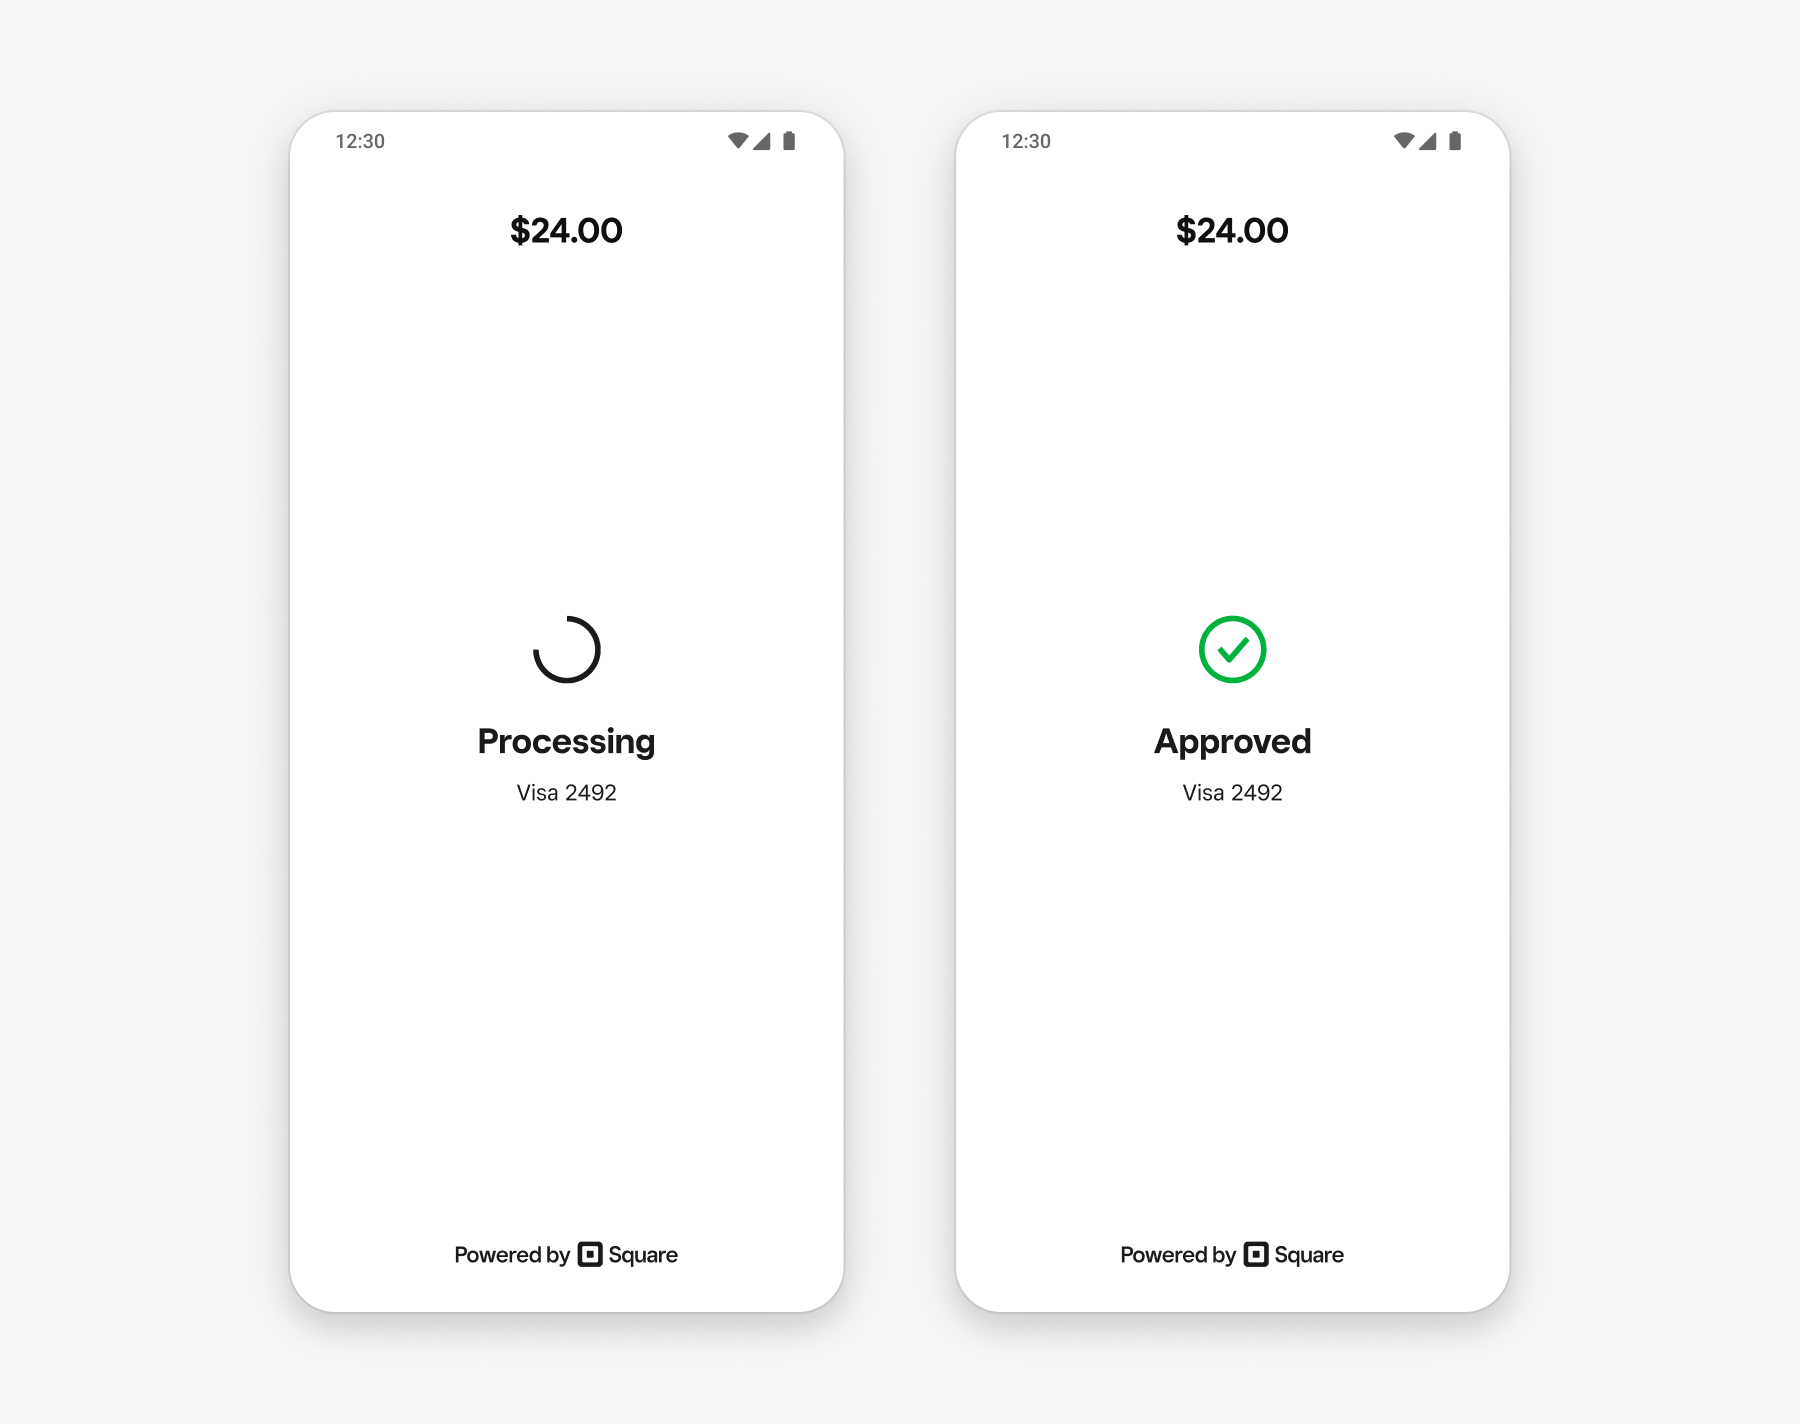
If the payment completes successfully, a Payment object is returned to your payment callback. This payment can be accessed on the Square Dashboard or with the Payments API. If the payment fails, the response contains a PaymentError.
After installing the Mobile Payments SDK and testing your application with test payments in the Square Sandbox, learn more about configuring your application to take production payments.