Applies to: Reader SDK - Android | Mobile Authorization API
Learn how to build a secure in-person payment solution for Android devices.
Requirements and limitations
You have a Square account enabled for payment processing. If you haven't enabled payment processing on your account (or you're not sure), visit squareup.com/activation.
Your application minSdkVersion is API 24 (Android 7) or later.
Your application targetSdkVersion is API 33 (Android 13) or earlier.
Your application compileSdkVersion is 32.
Your application uses AndroidX or enables Jetifier in gradle.properties.
You're using the Android Gradle Plugin version 3.0.0 or later. The Reader SDK might work with 2.3.0 or later, but stability isn't guaranteed.
Your application uses Google Play Services version 16.0.1. Square cannot guarantee that the SDK works with different versions of these libraries.
You're not using Proguard for code optimization. Compressing the Reader SDK binary removes critical bytecode elements and results in runtime errors.
Your version of the Reader SDK adheres to the Square update policy. To limit risk to developers and their users, Square enforces a Reader SDK update policy requiring developers keep their version of the Reader SDK current.
You're generally familiar with developing applications on Android. If you're new to Android development, you should read the Getting Started Guide on the Android Developers site before continuing.
Important
The Reader SDK isn't supported on Android versions earlier than API 19 (Android 4.4).
To complete the following steps, you need:
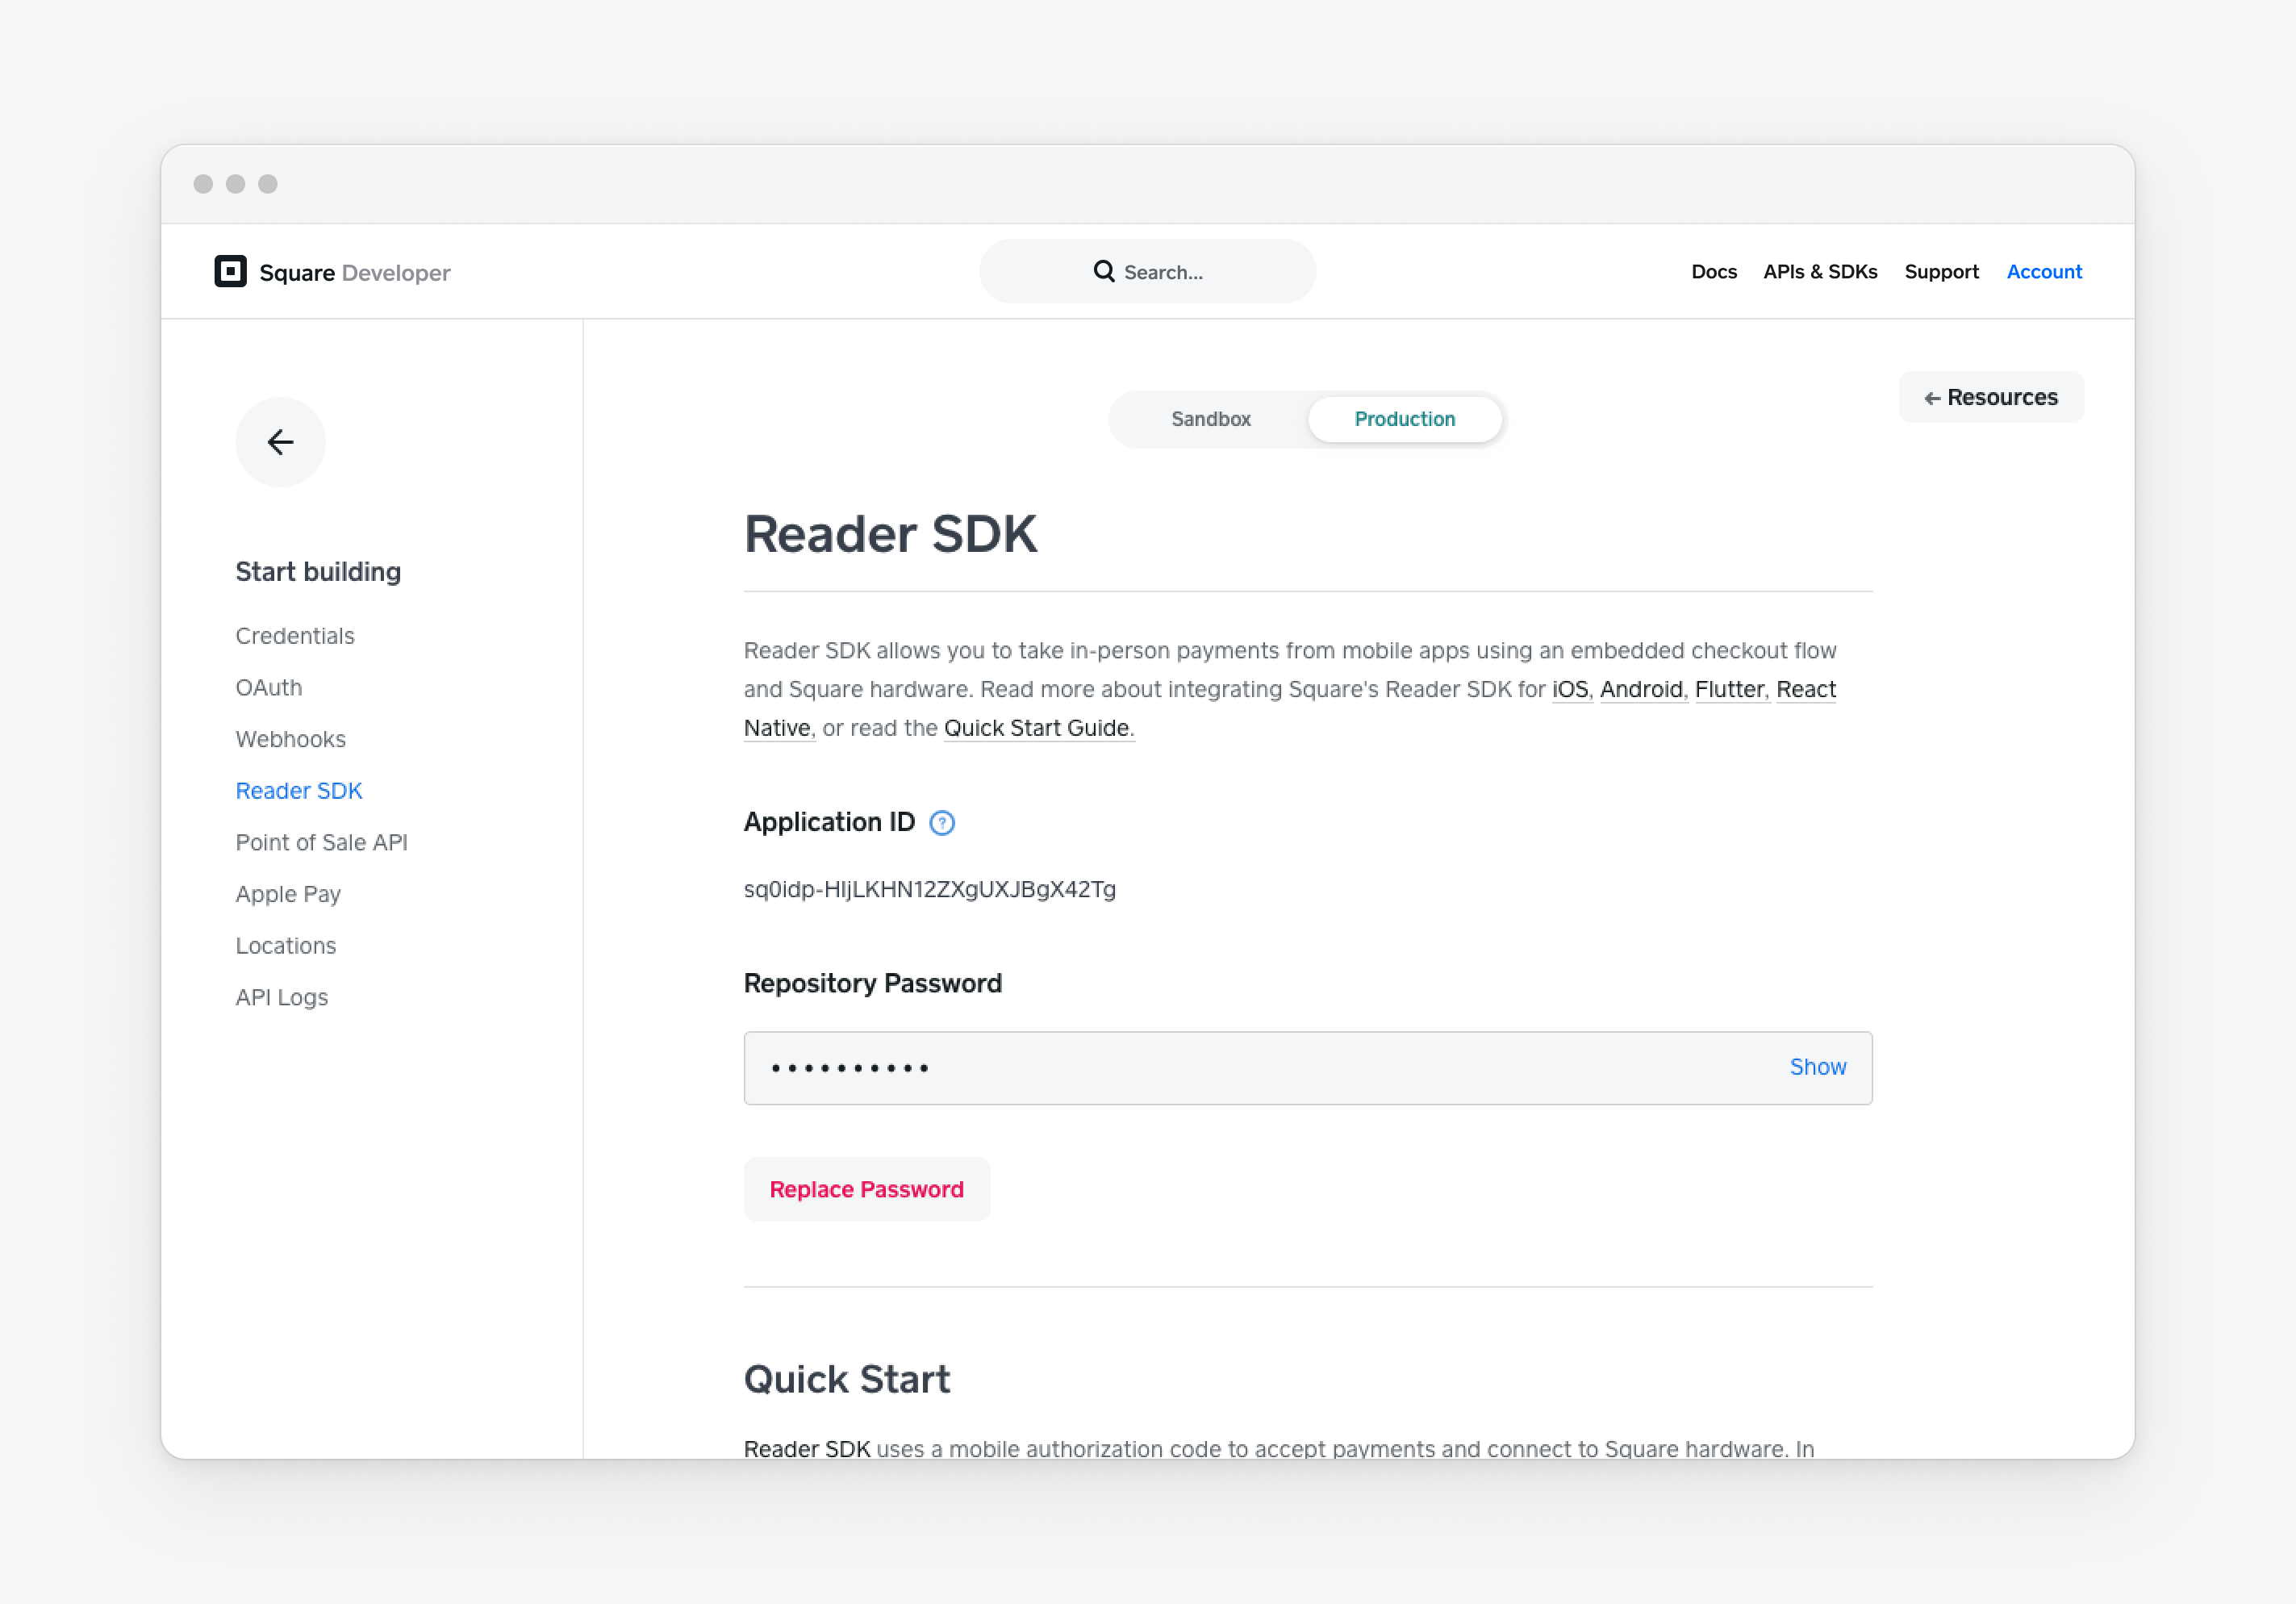
- Your application ID - Find your application ID on the Credentials page of your Square application in the Developer Console.
- Your Reader SDK repository password - Find your Reader SDK repository password on the Reader SDK page of your Square application in the Developer Console.
To work with Square Readers, applications must have the following device permissions. If the required device permissions aren't granted when the checkout flow initiates, the Reader SDK prompts the user to grant the necessary permissions.
| Android device permission | Purpose |
|---|
| Location | To confirm that payments are occurring in a supported country. |
| Audio | To connect Magstripe Readers. |
| Bluetooth | To connect Contactless Readers. |
| Device Storage | To store information during checkout. |
| Phone Access | To identify the device sending information to Square servers. |
The Reader SDK isn't compatible to run on custom devices from OEMs that violate Square's security rules or on devices that grant root access to the mobile device operating system code and kernel. As a result, these devices cannot connect to a Contactless and Chip Reader.
The following additional considerations apply when trying to run the SDK on custom devices:
- The Reader SDK cannot run on custom operating systems.
- The Reader SDK isn't supported to run on rooted or jailbroken devices.
- Square prohibits using any software that provides the ability to record or capture screen data or that results in elevated privileges.
- Square recommends running the Reader SDK on devices from large mobile device manufacturers such as Google, Samsung, or HTC.
- Avoid running on devices from smaller OEMs because there's no guarantee that they comply with Square's required security standards.
- Verify that your device is supported (see Devices Compatible with the Square Magstripe and Chip Card Readers).
- Supported OS versions should be the latest or as close to the latest as possible.
- Review Square's support window for the OS version and confirm support for the compilation target version and the runtime version: The compilation target currently supports versions 21 to 30. For runtime, the supported versions are 21 to 31.
If the mobile application runs on an uncommon device manufacturer, be sure to test connecting to the Square Reader over Bluetooth before investing in the device.
The following steps are recommended to verify your device:
- Test the device with any expected software requirements before committing to using it for the Reader SDK.
- Review Square's version support window.
- Ensure that you can pair the device with the Reader SDK using Bluetooth.
The Reader SDK and its dependencies contain more than 65,000 methods, so your build script must enable multidex. If your minSdkVersion is earlier than API 21, you need to include the multidex dependency.
Connect the Reader SDK to a Square Contactless Reader to accept chip and tap payments.
android {
defaultConfig {
minSdkVersion 21
targetSdkVersion 31
multiDexEnabled true
}
}
dependencies {
implementation 'androidx.multidex:multidex:2.0.0'
}
5. Add code to request and use a mobile authorization code
To authorize the SDK, you must build an authorization service to retrieve a mobile authorization code with the Mobile Authorization API and return it to your application.
Mobile authorization codes are short lived and should be used immediately to authorize the Reader SDK. Authorization is valid until it's explicitly revoked by calling deauthorize or your application fails to take a payment within 90 days. Mobile authorization codes don't need to be manually refreshed under normal operations.
Create a new AuthorizeActivity with two skeleton functions (retrieveAuthorizationCode() and onAuthorizationCodeRetrieved()), and then customize them to call your authorization service.
public class AuthorizeActivity extends Activity {
@Override protected void onCreate(Bundle savedInstanceState) {
super.onCreate(savedInstanceState);
setContentView(R.layout.authorize_activity);
View authorizeButton = findViewById(R.id.authorize_button);
authorizeButton.setOnClickListener(view -> retrieveAuthorizationCode());
}
private void retrieveAuthorizationCode() {
}
private void onAuthorizationCodeRetrieved(String authorizationCode) {
showAuthorizationInProgress(true);
ReaderSdk.authorizationManager().authorize(authorizationCode);
}
private void showAuthorizationInProgress(boolean inProgress) {
}
}
7. Create a CheckoutActivity
Create a new activity, CheckoutActivity, with a button that calls startCheckout() to begin the checkout flow.
Did you know?
The Checkout activity is a good place to add a button that starts the contactless reader connect flow. A Square contactless reader cannot be connected until the Reader SDK is authorized. Authorization is completed in step 6, which means you can now connect a reader. For information about connecting a reader, see Connect a Contactless Reader.
import com.squareup.sdk.reader.checkout.AdditionalPaymentType;
import com.squareup.sdk.reader.checkout.CheckoutErrorCode;
import com.squareup.sdk.reader.checkout.CheckoutManager;
import com.squareup.sdk.reader.checkout.CheckoutParameters;
import com.squareup.sdk.reader.checkout.CheckoutResult;
import com.squareup.sdk.reader.checkout.CurrencyCode;
import com.squareup.sdk.reader.checkout.Money;
import com.squareup.sdk.reader.core.CallbackReference;
import com.squareup.sdk.reader.core.Result;
import com.squareup.sdk.reader.core.ResultError;
public class CheckoutActivity extends Activity {
@Override protected void onCreate(Bundle savedInstanceState) {
super.onCreate(savedInstanceState);
if (!ReaderSdk.authorizationManager().getAuthorizationState().isAuthorized()) {
goToAuthorizeActivity();
}
setContentView(R.layout.checkout_activity);
View startCheckoutButton = findViewById(R.id.start_checkout_button);
startCheckoutButton.setOnClickListener(view -> startCheckout());
}
private void goToAuthorizeActivity() {
}
}
9. Add code to handle checkout results
Implement the onCheckoutResult callback to parse the checkout response. CheckoutActivityCallback.onResult() is invoked asynchronously on the main thread with a Result object. The result includes the CheckoutResult (in case of success) or a ResultError (in case of error).
public class CheckoutActivity extends Activity {
private void onCheckoutResult(Result<CheckoutResult, ResultError<CheckoutErrorCode>> result) {
if (result.isSuccess()) {
CheckoutResult checkoutResult = result.getSuccessValue();
showCheckoutResult(checkoutResult);
} else {
ResultError<CheckoutErrorCode> error = result.getError();
switch (error.getCode()) {
case SDK_NOT_AUTHORIZED:
goToAuthorizeActivity();
break;
case CANCELED:
Toast.makeText(this, "Checkout canceled", Toast.LENGTH_SHORT).show();
break;
case USAGE_ERROR:
showErrorDialog(error);
break;
}
}
}
private void showCheckoutResult(CheckoutResult checkoutResult) {
}
private void showErrorDialog(ResultError<?> error) {
String dialogMessage = error.getMessage();
if (BuildConfig.DEBUG) {
dialogMessage += "\n\nDebug Message: " + error.getDebugMessage();
Log.d("Checkout", error.getDebugCode() + ", " + error.getDebugMessage());
}
showDialog(getString(R.string.error_dialog_title), dialogMessage);
}
private void showDialog(CharSequence title, CharSequence message) {
}
}