Use the Sandbox test environment to simulate transactions and experiment with Square APIs while building an application.
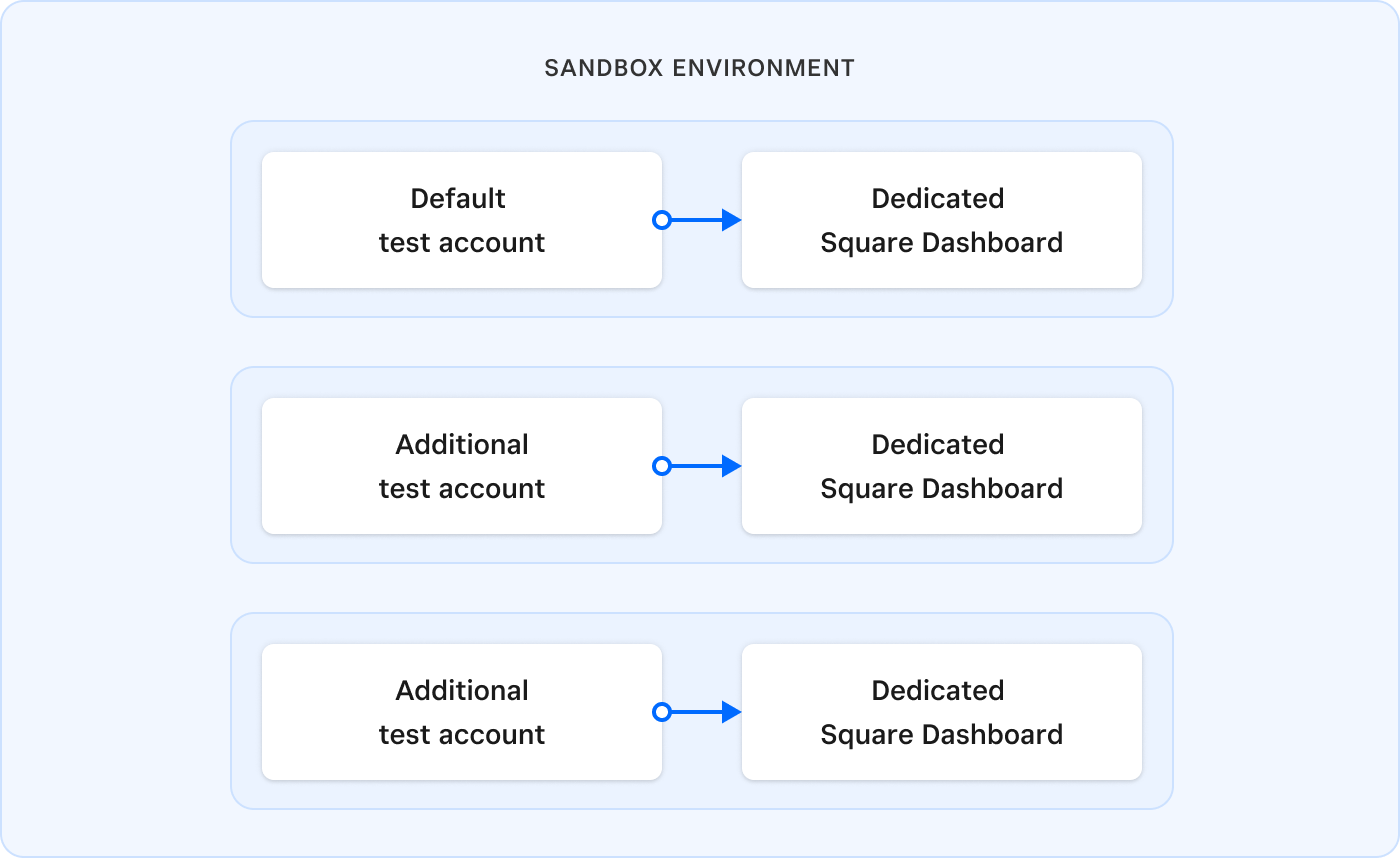
The Square Sandbox is a free, isolated server environment that allows developers to safely test Square APIs without affecting real data. It lets you simulate payment processing and other business activities using test seller accounts and test payment methods. Square provisions a Sandbox environment for each application you register in the Developer Console and a Sandbox Square Dashboard for each test account.
The Sandbox base URL is https://connect.squareupsandbox.com. The base URL is used for Square API calls in the Sandbox, for example:
CreatePayment-https://connect.squareupsandbox.com/v2/paymentsObtainToken-https://connect.squareupsandbox.com/oauth2/token
For Square GraphQL queries in the Sandbox, the base URL is:
https://connect.squareupsandbox.com/public/graphql
Important
The production base URL is https://connect.squareup.com.
Account credentials and resources from one environment cannot be used with or accessed from the other. For example, Sandbox OAuth access tokens cannot be used in production. For more information, see Move OAuth from the Sandbox to Production.
You can choose the Sandbox environment when using Square developer tools:
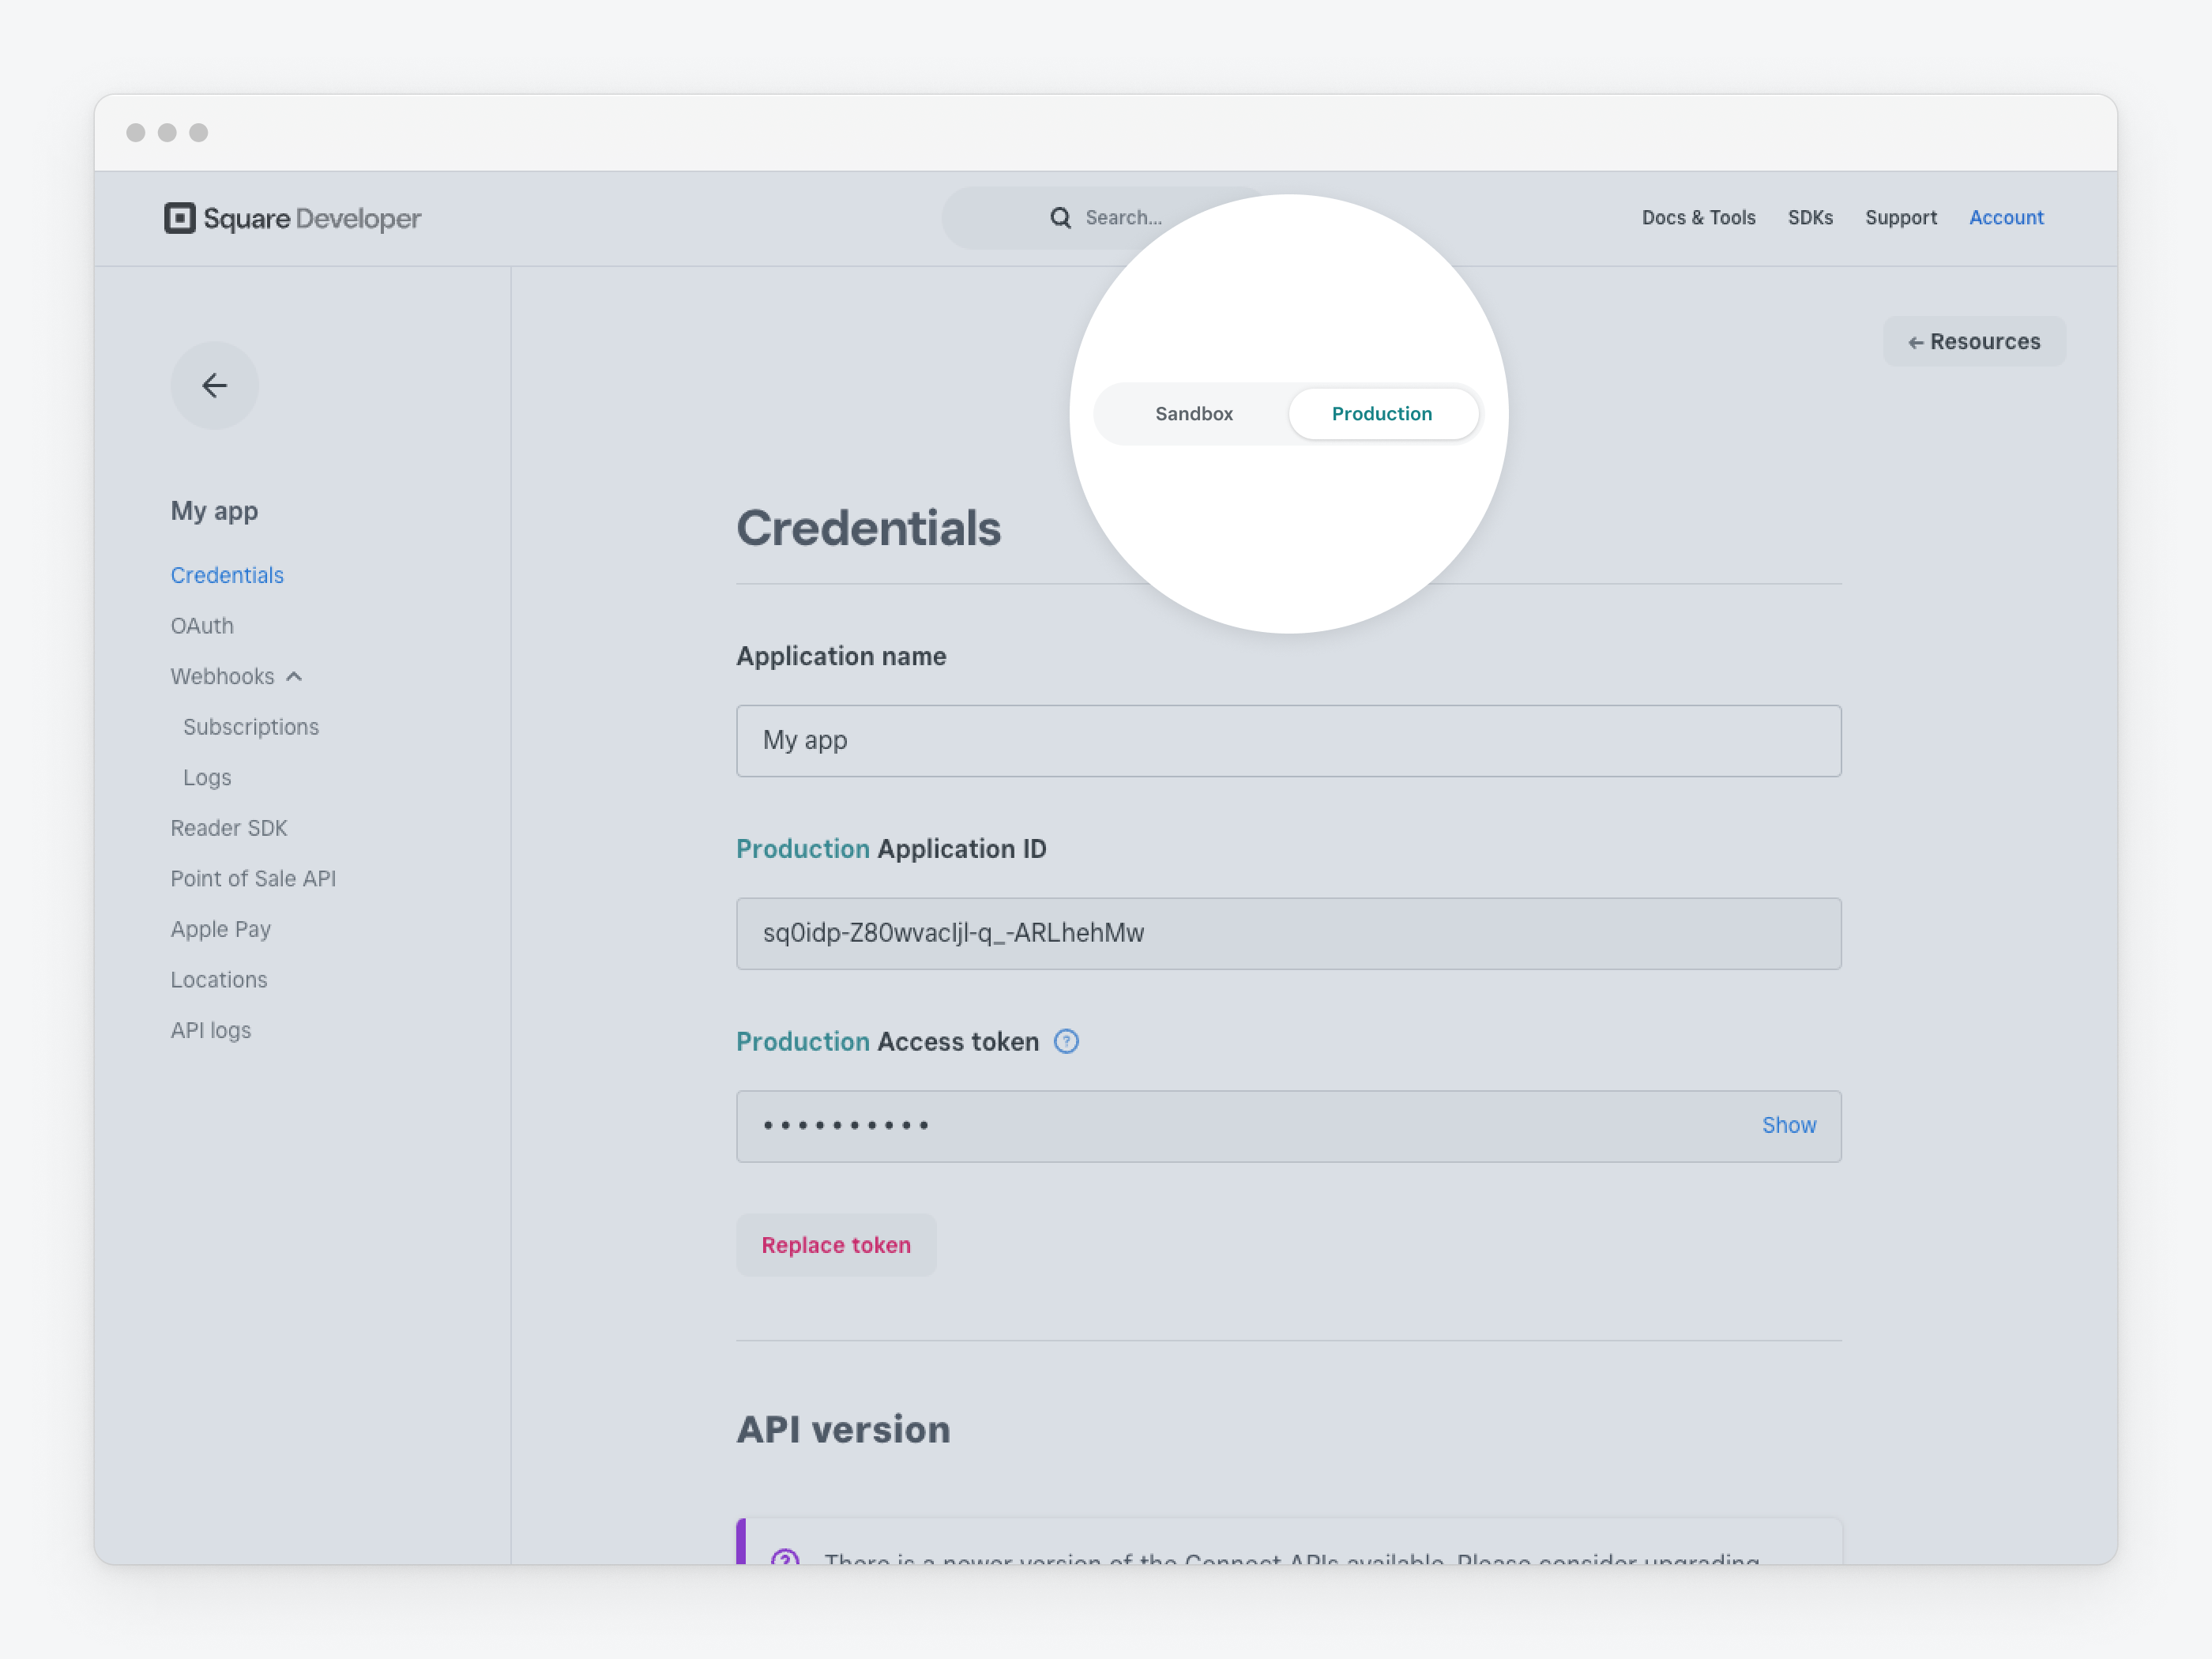
In the Developer Console, when you open an application, choose Sandbox in the toggle at the top of the page.
In API Explorer, choose Sandbox in the toggle in the Access token box.
In GraphQL Explorer, choose Sandbox in the toggle at the top of the page.
With Square SDKs, configure the Sandbox environment when the Square client is initialized.
Use the Sandbox to:
- Test different payment scenarios using Sandbox credit card numbers, payment tokens, and other test values. These Sandbox payment values are never charged.
- Test end-to-end flows using API Explorer or your own code. For example, you can create an inventory and subscriptions, create orders, and take payments using Sandbox payment values. You can also subscribe for Sandbox webhook notifications.
- Test new versions of Square APIs before using them in production. You can specify the
Square-Versionin your API requests or change the default Sandbox API version for your application on the Credentials page in the Developer Console. - Generate OAuth access tokens for Sandbox test accounts to test permission scopes without implementing an OAuth flow.
- Make sure you gracefully handle API calls in unsupported regions.
Important
The Sandbox Square Dashboard provides only a limited subset of the features available in the production Square Dashboard used by sellers, and some functionality available in production may be missing or behave differently in the sandbox. Square recommends using the Sandbox Square Dashboard for basic API testing only. For comprehensive testing and validation, rely on the API Explorer in Sandbox mode, which matches the behavior of our production APIs and provide reliable test coverage.
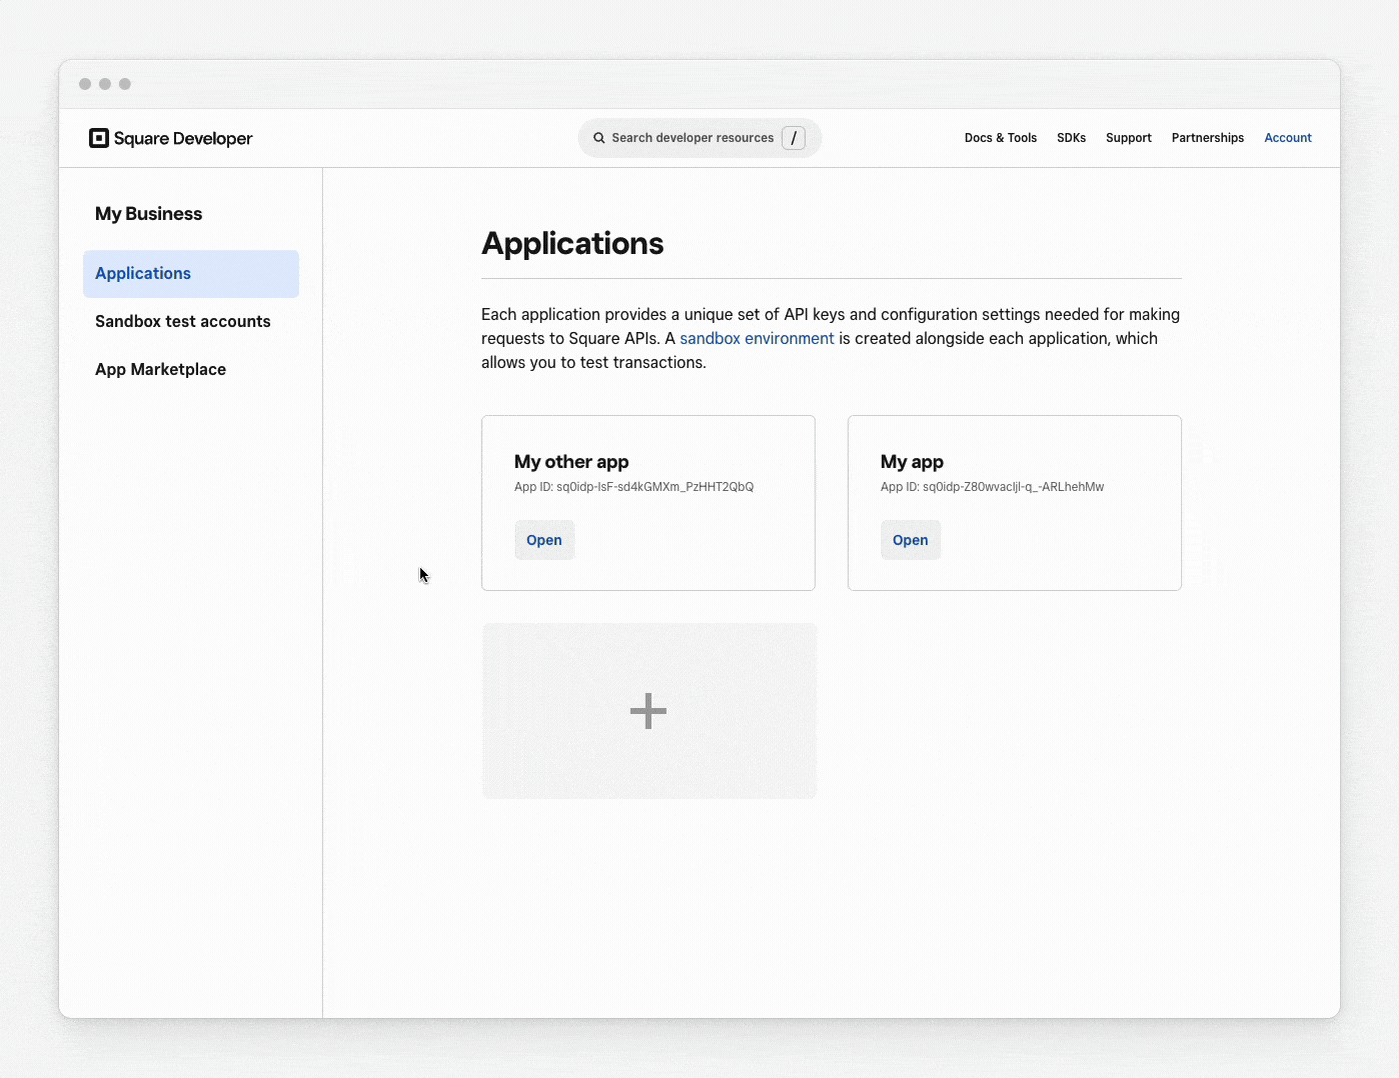
You need a Square account and an application. Note that some Square developer tools require that you sign in to access features.
The access token in your Square API requests and Square GraphQL queries must be valid for the Sandbox environment. This can be your personal Sandbox access token or a Sandbox OAuth access token. If you're signed in to API Explorer, the access tokens associated with your account are available in the Access token dropdown.
When switching to production, make sure to use an access token that's valid for the production environment. Otherwise, you receive an
UNAUTHORIZEDerror for Square API calls or "Failed to fetch" for GraphQL queries.You must use Sandbox test values to make payments in the Sandbox. The Sandbox doesn't accept real credit cards or payment methods. Sandbox test values cannot be used in production.
Not all Square products and features support testing in the Sandbox.
The following are some example limitations:
- Square hardware, such as a POS terminal, cannot be used in the Sandbox. Testing the Terminal API in the Sandbox is supported, but testing on the device itself isn't.
- Square products and applications, including Square for Restaurants, Square Point of Sale, and Square Invoices, aren't supported.
- The Point of Sale API, Snippets API, Sites API, and Reader SDK aren't supported.
- Customer settings aren't supported.
- Gift cards generated with the Gift Cards API cannot be used with Virtual Terminal in the Sandbox Square Dashboard. In addition, physical gift cards cannot be created or managed.
The Sandbox Square Dashboard used with Sandbox test accounts also has limitations.
The following are some example limitations:
- Receipts aren't generated.
- Refunds can be viewed but not issued.
- Viewing or editing subscriptions isn't supported.
- Sending emails isn't supported.
- Viewing the booking URL isn't supported.
- The Banking tab isn't supported. As a result, Balance and application fee reporting are also not supported.
Important
Don't keep any PII (personal identifiable information) in a Sandbox environment, such as names, email addresses, phone numbers, or birthdays. Personal data in a Sandbox doesn't comply with GDPR. For more information, see Square GDPR FAQs. If you need to add personal data for any reason (such as migration testing), make sure to promptly delete it after completing your task.
Use of the Sandbox environment is free of charge. You can make an unlimited number of free Sandbox API calls. There are no payment processing fees for Sandbox payments because cards aren't actually charged and payments are never actually processed by a live bank.
In the production environment, some API calls require that your application user has a subscription to the related Square software-as-a-service. All production payment processing through Square APIs have a processing fee. For more information, see Payments Pricing with Square APIs and SDKs.
When you sign up for a Square developer account, Square creates the default test account, which grants unrestricted access to all of your applications. Each time an application is registered in the Developer Console, Square generates an access token for this account that can be used to authorize any Square API request in the Sandbox. This access token is the same value as the application's Sandbox Access token on the Credentials page.
You can create additional Sandbox test accounts to simulate sellers operating in supported countries and to test with specific permission scopes.
Each Sandbox test account has access to a Sandbox Square Dashboard that lets you see the results of your API calls from the seller's perspective.
- Sign in to the Developer Console.
- In the left pane, choose Sandbox test accounts, and then choose Square Dashboard next to the account name.
You can create up to 10 Sandbox test accounts in addition to the default test account in the Developer Console. A test account simulates a Square seller account.
Sign in to the Developer Console.
In the left pane, choose Sandbox test accounts, and then choose New sandbox test account.
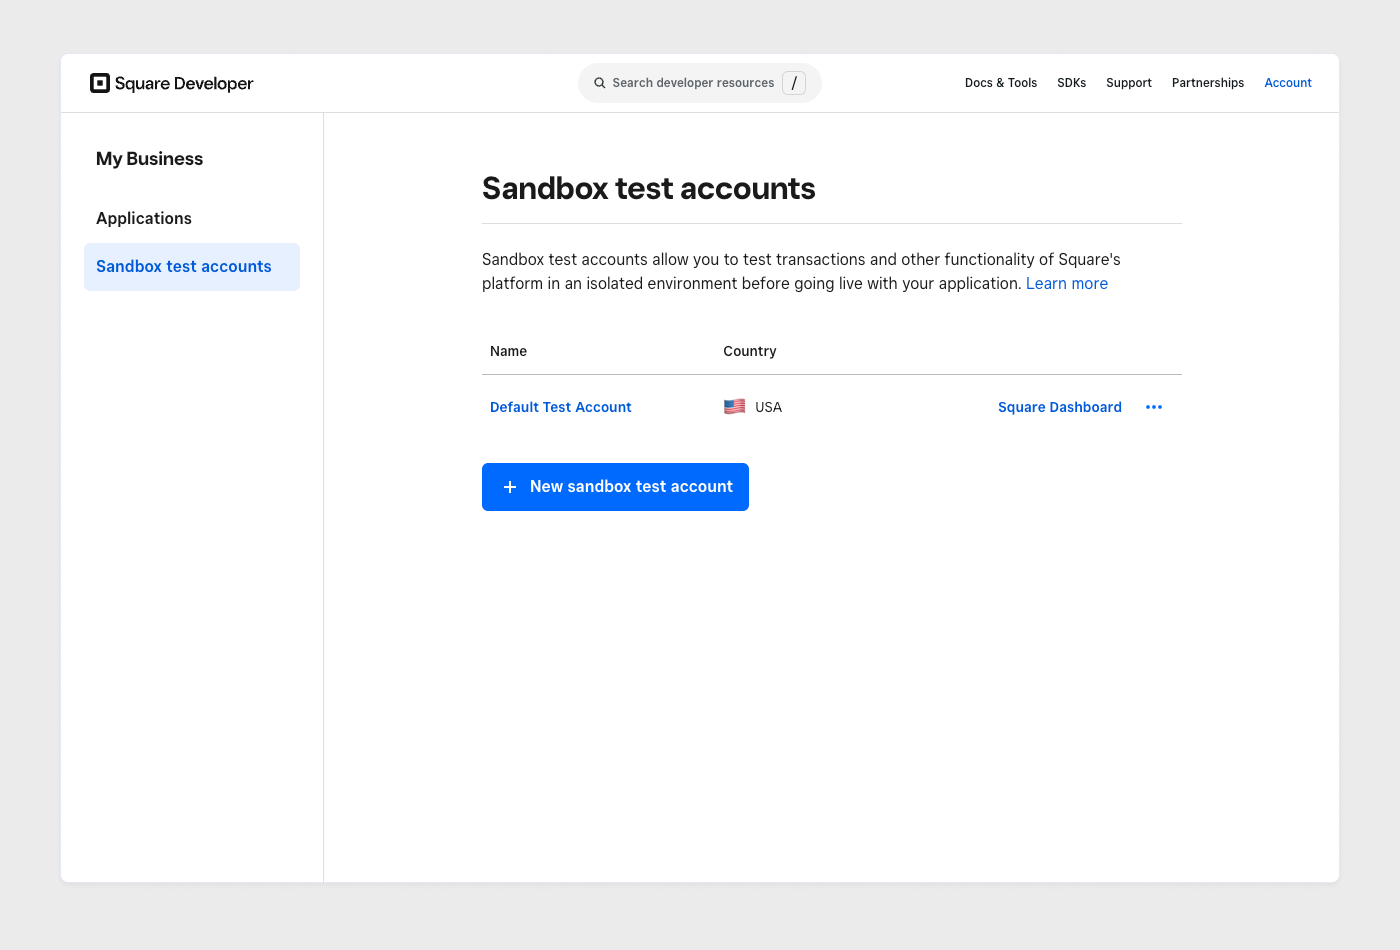
Enter the account name and choose the country of operation.
You can create the test account in any country where Square processes payments. Simulated payments follow the banking rules of the account's country. For example, a Sandbox account for France processes payments according to French regulations.
To generate access tokens that grant all available permissions for all your applications, select the Automatically create authorizations for all my current apps checkbox.
Choose Create.
For each test account that you create, you can generate an OAuth access token that grants a specific set of permissions for each of your applications. This feature lets you quickly test with a permission scope without implementing an OAuth flow.
Sign in to the Developer Console and open the application that you want to test with.
At the top of the page, choose Sandbox in the environment toggle.
In the left pane, choose OAuth. The Test account authorizations section displays test accounts that currently have access tokens.
- Choose the account name from the table. This opens the Authorization details modal where you can view the current tokens and permissions, renew the access token with the existing permissions, or revoke the access token.
- To change the permission scope, choose Revoke token, and then choose Revoke.
- Choose Authorize test account.
- From the Test account dropdown, choose the account name.
- Select the permissions you want to allow.
- Choose Save.
- Choose Authorize test account.
- From the Test account dropdown, choose the account name.
- Select the permissions you want to allow.
- Choose Save.
To use the access token, provide it as a bearer token in the Authorization header, as shown in the following ListLocations example:
curl https://connect.squareupsandbox.com/v2/locations \
  -H 'Square-Version: 2025-01-23' \
  -H 'Authorization: Bearer {SANDBOX_ACCESS_TOKEN}' \
  -H 'Content-Type: application/json'