Learn about the datasets that Square seeds into a new Sandbox seller test account.
Creating a developer account provides one Sandbox test account by default. More Sandbox test accounts can be added for the US or other supported countries. Square can add seeded test data to each US test account, saving time from creating data manually.
Important
Sandbox seeding data can only be created for Sandbox test accounts based in the US.
Beginning with a dataset that reflects the production volume of a typical Square seller's first week saves you the effort of generating test data from scratch. The seed data created for your account includes simulated names, items, orders, team members, and customers that closely mirror real-world entities. This dataset provides enough variations to allow you to test the majority of code paths in your application effectively.
The seeded data represents a small Florida retail business—a flower shop with three locations. The seeded catalog is an assortment of flower-related items. The dataset includes:
- Catalog - ~30 items including categories, discounts, modifiers, and items such as flowers, vases, cards, and supplies. Some of the items are in stock, and some are out of stock.
- Customers - ~100 customers with Naples Florida addresses, telephone numbers with the 239 area code, and email addresses. All telephone numbers are fictitious 555 numbers.
- Inventory - Physical counts and adjustments for each item in the catalog and for each store location. These adjustments are the basis for the stock levels shown in the item library.
- Location - These are three additional locations added to the Sandbox test account you create, in addition to the default location. All orders, payments, and refunds have been made at the three flower shop locations.
- Orders - A large set of completed orders that reference seeded catalog items, payments, refunds, team members, and customers.
- Payments - The completed card, bank transfer, cash and external payments for the orders.
- Refunds - The refunded payments.
- Team members - The employees that work at the three locations. None of the seeded team members are assigned to jobs or have specific permissions. You can use the Sandbox Square Dashboard or the Team API
Team API to assign these items.
Seeded data usage has no restrictions. You can update or delete any of the seeded data in your Sandbox test account. You can use seeded data such as customers and catalog items in new orders and payments that you create. A given seeded item variation might not have inventory tracking set by default. If you want to test inventory stock level updating for one of the seeded locations, you need to turn on the track_inventory
Payments and refunds increase and decrease the balance of your Sandbox test account. The Sandbox Square Dashboard doesn't have a banking application, so you cannot see the balance there. Because your Sandbox test account cannot connect to an external bank, you cannot transfer a seeded balance to a bank. If you're testing the Payouts API
The seeding script uses public Square API endpoints and doesn't retry if it gets a 500 error. The script is successful if less than 5% of attempts fail. This means the number of items added might vary between your Sandbox test accounts. You can check the script status by signing in to your Square account and opening the Sandbox merchants endpoint
Note
The page shows the status of all your test accounts. The seed_data_status property shows "DONE" when the script is finished. While the script is running, the status shows "IN_PROGRESS".
There is no equivalent production merchant endpoint. Use the Merchants API
The default Sandbox test account cannot be seeded, which means that while the accounts object on the page shows your default test account, it doesn't show a seeding status for that account. Any Sandbox test account that you created before February 3, 2025, doesn't have seeded data or a seeding status.
The following example shows that the developer has two Sandbox test accounts. The first is the default test account that they received when they created their Square account. The second test account was created by the developer and has seeded test data from a completed run of the Sandbox seeding script.
{
  "accounts": [
    {
      "token": "{MERCHANT_TOKEN_1}",
      "is_primary": true,
      "nickname": "Default Test Account",
      "country": "US"
    },
    {
      "token": "{MERCHANT_TOKEN_2}",
      "is_primary": false,
      "nickname": "A Florida flower shop",
      "country": "US",
      "seed_data_status": "DONE"
    }
  ]
}
Did you know?
You can get fresh seeded data by creating another Sandbox test account. Seeded data cannot be reset in an existing Sandbox test account.
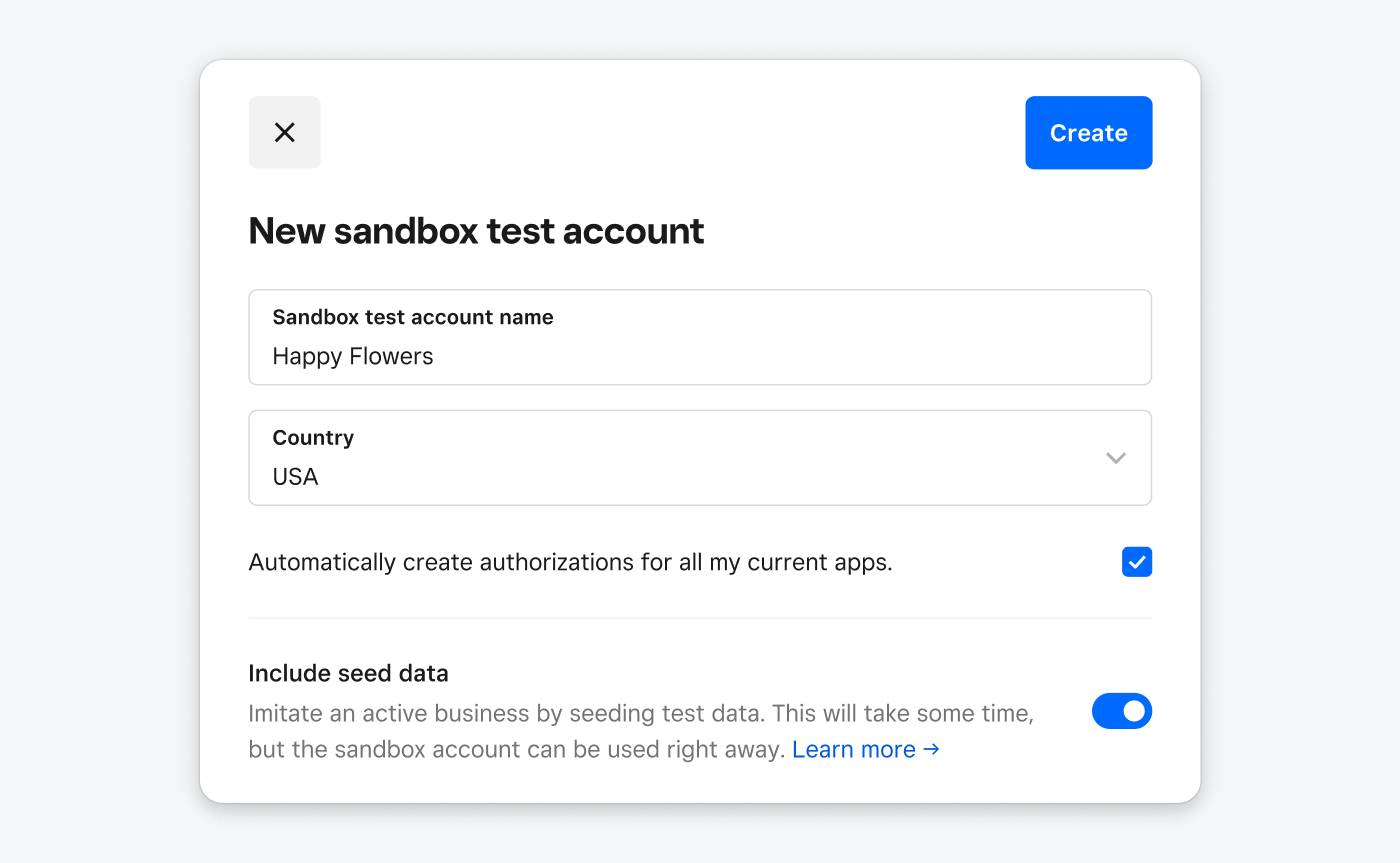
To add seeded test data to a new Sandbox test account, complete these steps:
- In the Developer Console, choose Sandbox test accounts.
- Choose the + New sandbox test account button to start creating a new test account.
- In the Sandbox test account name box, enter a name. The seeded test data is for a flower shop so you might want to give your account a related name.
- In the Country box, choose USA.
- Leave the authorizations checkbox selected.
- Enable the Include seed data option.
- Choose Create.
When the test account is created, Square starts a process to seed the data into the account. You can open the Square Dashboard immediately after the account is created. Over the next minute, the data is seeded into your account. You can work in the Square Dashboard and make API calls on the account while the data is being seeded.
When you create a new Sandbox test account, you need to choose the country USA if you want to have seed data added to your new Sandbox test account as shown:
Warning
If you deselect the Automatically create authorizations for all my current apps checkbox, you cannot access seeded data using an API until you individually authorize the application using the Developer Console.
If you chose not to grant access to all your applications or you created an application after the data was seeded, you need to authorize your application so you can work with the seeded data. To grant authorization, follow these steps:
- In Developer Console, select the application that you want to give access to seeded data.
- In the left pane, choose OAuth.
- Choose Authorize an app.
- Choose the Sandbox test account that you want to give your application access to.
- Leave all individual permissions selected.
- Choose Save.
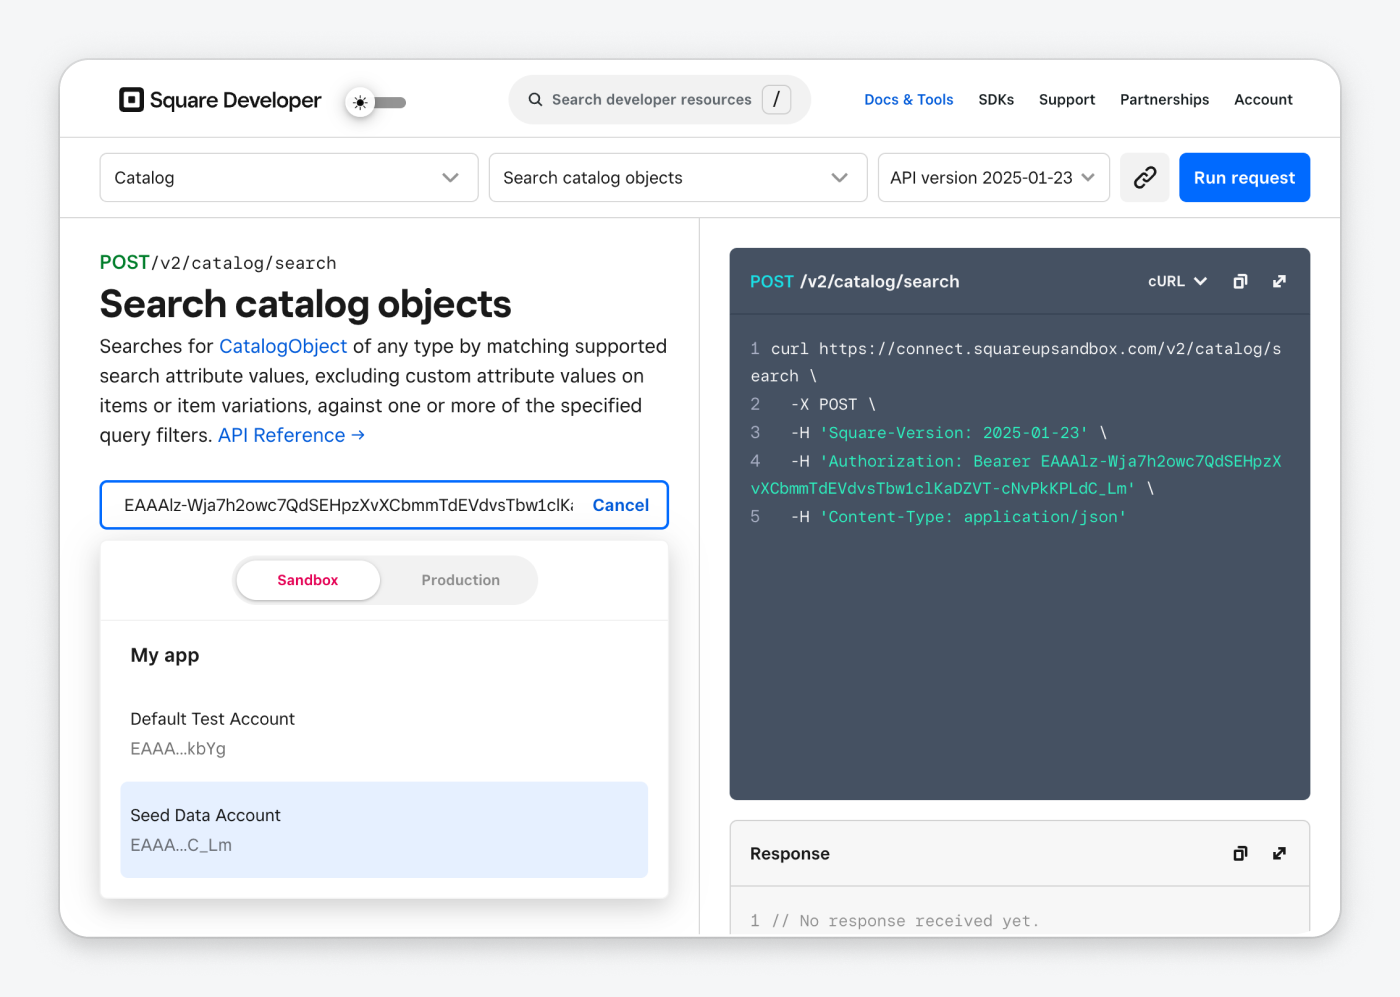
After you've granted access, you can use the generated authorization token in API Explorer
- Choose an API for seeded data, such as the Catalog API.
- Select the Get Token button. If you've used API Explorer recently, there might be a token in the input field and the button shows Change instead of Get Token.
- Scroll through your applications until you find the application you authorized for access to seeded data.
- Select the token for the Sandbox test account whose seeded data you want to use.
The following screenshot shows the API Explorer authorization token selector and two token choices. The developer chose the Catalog API and selected the token for the Sandbox test account Seed Data Account so that their My app application can get seeded data.
The seeded dataset can be used to test your read, update, and delete API calls. If you create a new Square API entity, such as an order, you can reference the seeded data by ID. For example, if you create a new order, you can set the Order.customer_id to the ID of one of the seeded customers.
The following examples reference seeded objects by ID. These IDs are unique to the Sandbox test account Square created for this topic.
Your Sandbox test account has dozens of customers, many with completed orders. Each seeded customer has an email address ending in the "example" domain and was created by a "third party", which is Square's seeding script. You might have added more customers using the Square Dashboard or the Customers API
Using these two properties, you can create a SearchCustomers
Search customers
Every order created by the seeding script is associated with a customer created by the script. If you want to find all seeded orders by customer ID, call SearchOrders
Search orders
Each completed order has an Order.tenders[].id property that references a corresponding PaymentHHmE9EaCXIsjyrP70pnOLDa7dNUZY:
Get payment
Square seeds payments as card, bank transfer, cash, or external payments.
Several completed orders have an Order.refunds[] property that references a corresponding RefundrXl0ds80xd36H9OGMBocJKvkEHHZY_S9YINlYtkrBmpotCDUEZOcl60sOXKxw0mHlFOStRvDc:
Get payment refund
Important
The refund_id path parameter is a composed value. Its components are Order.refunds[].tender_id and Order.refunds[].id.