Applies to: Web Payments SDK
Learn how to take Apple Pay payments in a web client with the Web Payments SDK.
You can add Apple Pay to the application you built in Web Payments SDK Quickstart using the Quickstart project sample. Digital wallet payments with Apple Pay are available in all regions in which Square operates.
The following steps add code to the quickstart project sample. If you haven't created an application using the quickstart, you need to do so before completing these steps.
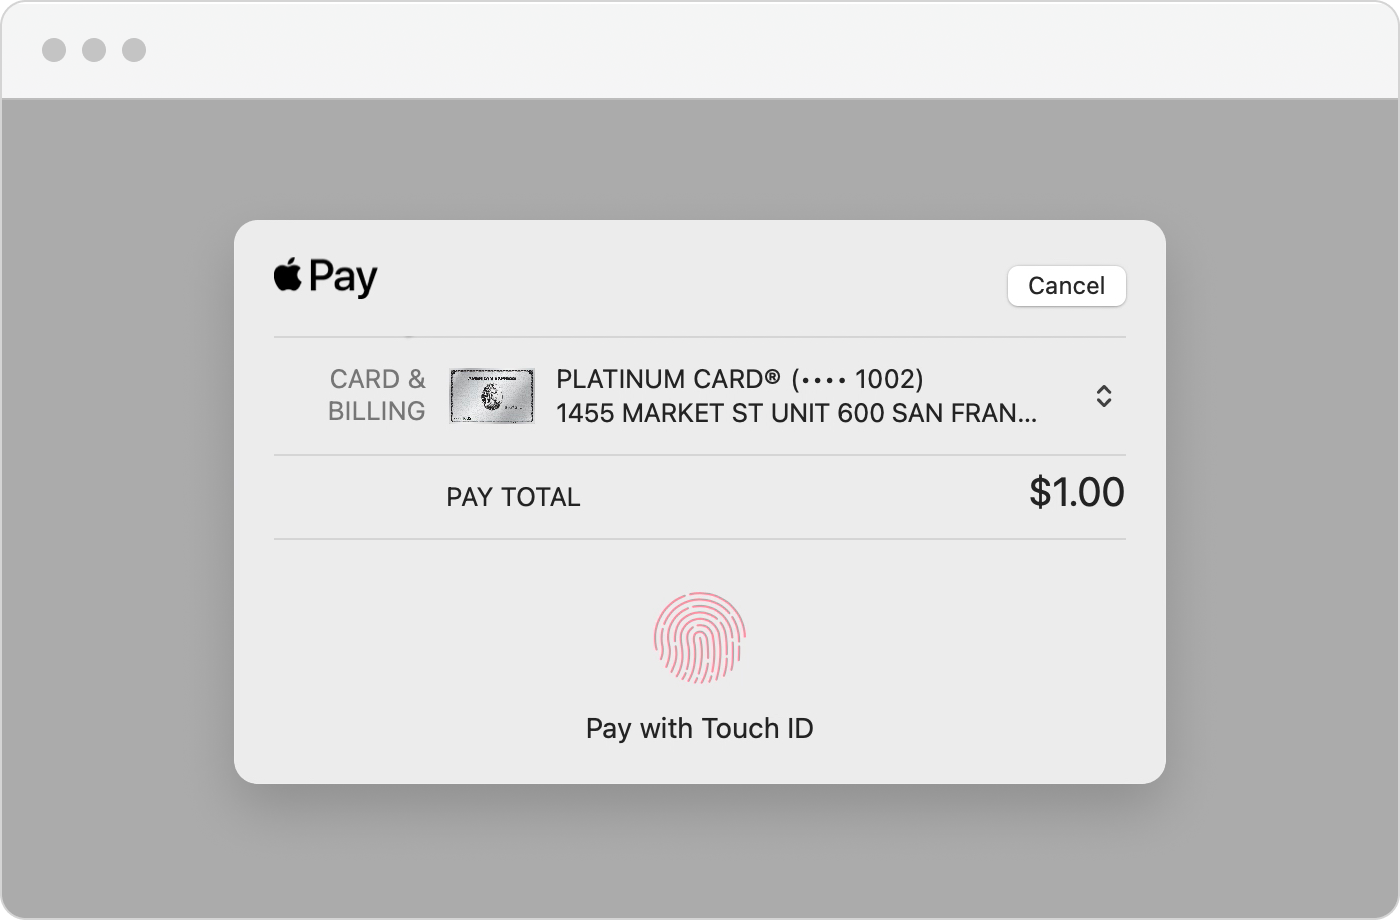
The following shows the Apple Pay sheet rendered by the Web Payments SDK:
You can find a complete example of the Apple Pay code on GitHub.
The Web Payments SDK adheres to Apple's development requirements for Apple Pay on the Web. To take an Apple Pay payment, the following must be true:
- Apple Pay is supported on Apple Safari browsers.
- You're using HTTPS and have a Square account. Apple Pay payments cannot be tested with HTTP or from localhost.
- You use the payment form in a Safari browser that is:
iOS 10 or later - Apple Pay JavaScript is supported on all iOS devices with a Secure Element. It's supported in both Safari and SFSafariViewController objects.
macOS 10.12 or later - Apple Pay JavaScript is supported in Safari. The user must have an iPhone or Apple Watch to authorize the payment or have a MacBook Pro with Touch ID.
Important
If you're developing on a MacBook Pro, it might be necessary to activate Apple Pay and Touch ID, and then restart Safari.
By registering your domain to use Apple Pay and the Apple Pay Platform, you agree to the Apple Pay Platform Web Merchant Terms and Conditions.
Important
You must configure the Terms and Conditions certificate to download when the buyer visits the URL. Otherwise, your application won't be able to validate the agreement. Also, if the certificate gets a file extension added to it by your server, the validation won't work.
To register a Sandbox domain for Apple Pay in the Square Sandbox:
Open the Developer Console.
Choose the application associated with your Web Payments SDK implementation.
Set the Developer Console to Sandbox mode.
In the left pane, choose Apple Pay for the selected application.
Choose the Add Sandbox Domain link and follow the instructions.
Apple Merchant ID - Because Square generates domain validation with Apple Pay when the payment page loads, you don't need to create an Apple merchant ID or call the Apple APIs to enable the functionality.
Domain association folder - If you're using the server provided by the quickstart application, put the
.well-known/apple-developer-merchantid-domain-associationfolder and file under thepublicdirectory. The domain verification file works only with Square as the domain.
Warning
For Sandbox testing or production, the domain where you use Apple Pay must be an HTTPS domain. You cannot use a localhost or an HTTP URL with Apple Pay.
The Apple Pay payment method needs information about the buyer and the payment amount before it can open the Apple Pay sheet. Your application creates a PaymentRequest object to provide that information and then gets a new ApplePay object initialized with it.
The following code creates the payment request and attaches the ApplePay method to the page:
Add an HTML element to the prerequisite walkthrough form with an ID of
apple-pay-button. The HTML for the body of index.html should look like the following:<form id="payment-form"> <!-- Add the following element --> <button id="apple-pay-button"></button> <div id="card-container"></div> <button id="card-button" type="button">Pay $1.00</button> </form> <div id="payment-status-container"></div>Add a style element and button style properties in the
<head>tag. For a reference of Apple Pay button styles, see Styling the Apple Pay Button Using CSS.Add the following functions to the script tag:
 function buildPaymentRequest(payments) {
   return payments.paymentRequest({
     countryCode: 'US',
     currencyCode: 'USD',
     total: {
       amount: '1.00',
       label: 'Total',
     },
   });
 }

 async function initializeApplePay(payments) {
   const paymentRequest = buildPaymentRequest(payments)
   const applePay = await payments.applePay(paymentRequest);
   // Note: You don't need to `attach` applePay.
   return applePay;
 }
In the
DOMContentLoadedevent listener, add the following code after you initialize theApplePaymethod:let applePay; try { applePay = await initializeApplePay(payments); } catch (e) { console.error('Initializing Apple Pay failed', e); // There are a number of reason why Apple Pay might not be supported. // (such as Browser Support, Device Support, Account). Therefore you should // handle // initialization failures, while still loading other applicable payment // methods. }
Test the application
Navigate to your registered HTTPS sandbox domain for Apple Pay in your browser.
Success
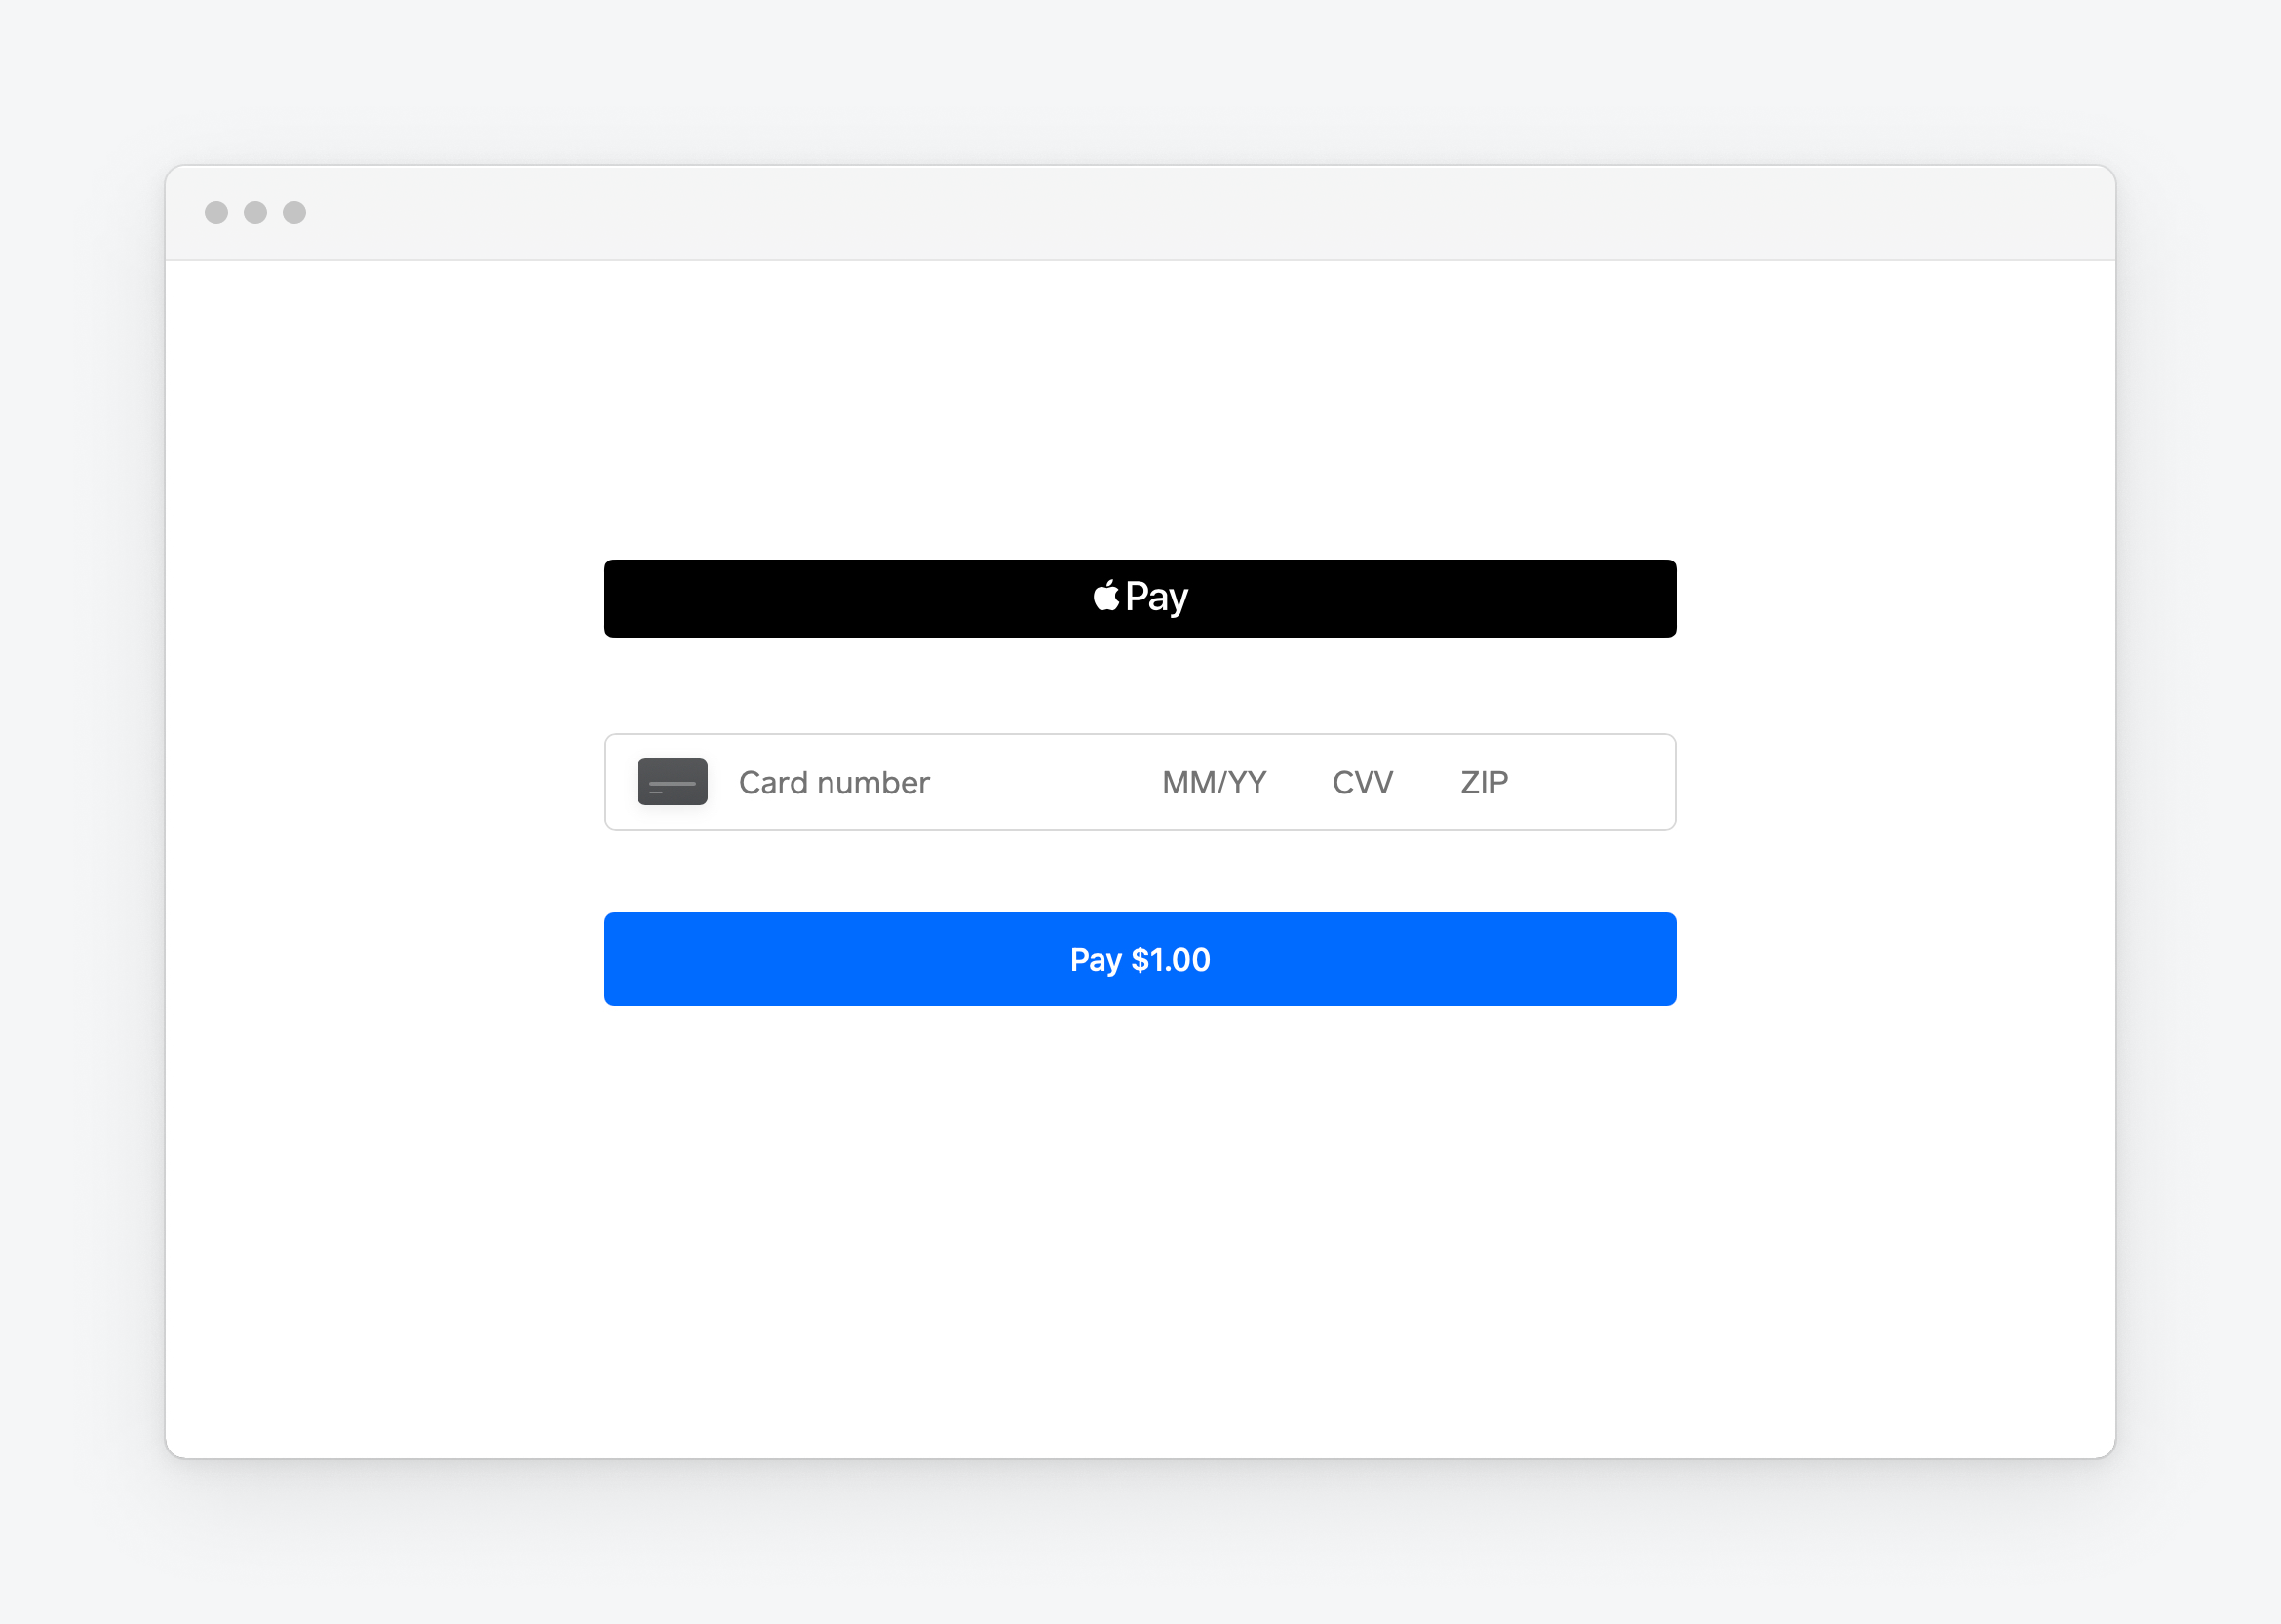
You should see the Apple Pay button rendered on your page.
At this point, return to your code and find the
handlePaymentMethodSubmissionfunction call to continue.
Important
To comply with Apple Pay's requirements, you need to call tokenize() immediately within the button's click handler. Avoid any async operations (such as API calls, await statements, or database queries) between the click and tokenize() call.
Add the following code after
// Checkpoint 2in theDOMContentLoaded eventListenerfunction:if (applePay !== undefined) { const applePayButton = document.getElementById('apple-pay-button'); applePayButton.addEventListener('click', async function (event) { event.preventDefault() await handlePaymentMethodSubmission(event, applePay); }); }
Note
For a code listing of the example helper method handlePaymentMethodSubmission(event, applePay) see the GitHub QuickStart sample.
Test the application
Navigate to your registered HTTPS sandbox domain for Apple Pay in your browser.
Choose the Apple Pay button.
Use your own personal card. This card isn't charged or stored in the Sandbox environment.
Success
You should be able to load the Apple Pay form and create a payment.
Before your application can request a digital wallet payment, it must provide payment request details that the digital wallet page shows to the buyer. The previous examples showed a payment request with a specified country, currency, and payment amount. In production use, your application might need to declare payment requests that include more detail and with added event listeners. To learn more about advanced payment requests, see Payment Requests.
To test your Apple Pay integration, you must register a valid credit card in your Apple Pay Wallet.
Important
Apple doesn't allow Sandbox test credit card values. You must use a valid credit card from your Apple Pay Wallet. The card isn't charged for test payments as long as you're testing in the Square Sandbox.
When your application is ready for production, do the following:
Register a domain for Apple Pay in production:
- Open the Developer Console.
- Choose the application associated with your Web Payments SDK implementation.
- Set the Developer Console to Production mode.
- In the left pane, choose Apple Pay for the selected application.
- Choose the Add Domain link and follow the instructions.
Change your payment page script tag that references the Web Payments SDK to the following:
https://web.squarecdn.com/v1/square.jsReplace the Sandbox application ID and location ID in your payment page JavaScript with your production application ID and location ID. You can also get a production location ID from the Developer Console Locations page for a Square account.
Important
To enhance payment security, use the verifyBuyer function to apply Strong Customer Authentication (SCA) and verify the cardholder's identity. SCA should be used for all customer-initiated transactions, including digital wallet payments. If SCA isn't initiated for digital wallet payments, the transactions might be declined due to a lack of authentication.