
Android In-App Payments SDK Tutorial
Easily and securely take payments on Android
I’ll be walking you through our Android In-App Payments SDK so you can implement a secure, customizable payment form in your mobile app. We also have plugins for this SDK that support Flutter and React Native, which you can learn about by watching our other videos or visiting our documentation.
Pre-requisites
- Install Android Studio locally.
- Sign up for:
- Clone this sample app locally.
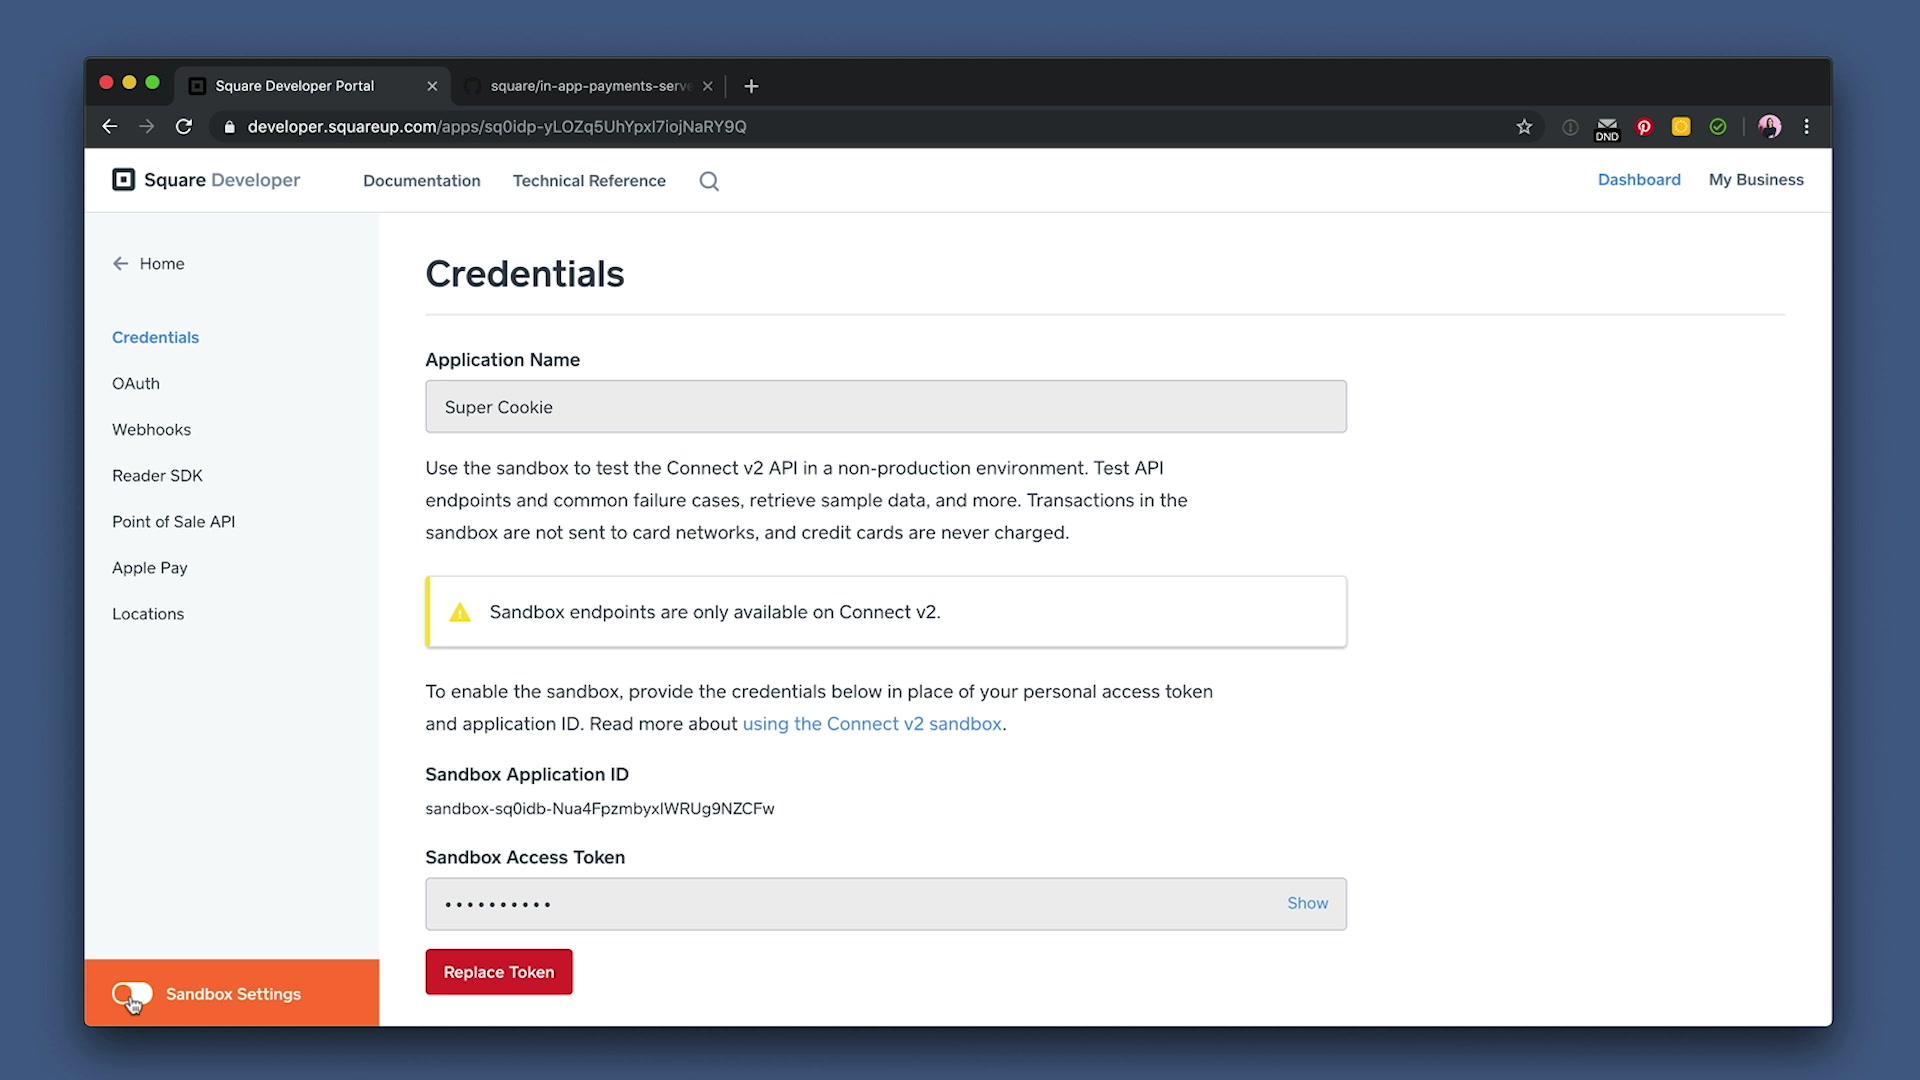
First, you’ll want to log in to your new Square Developer account. You will want to create a new application by hitting the “Create Application” or “Create Your First Application” button.
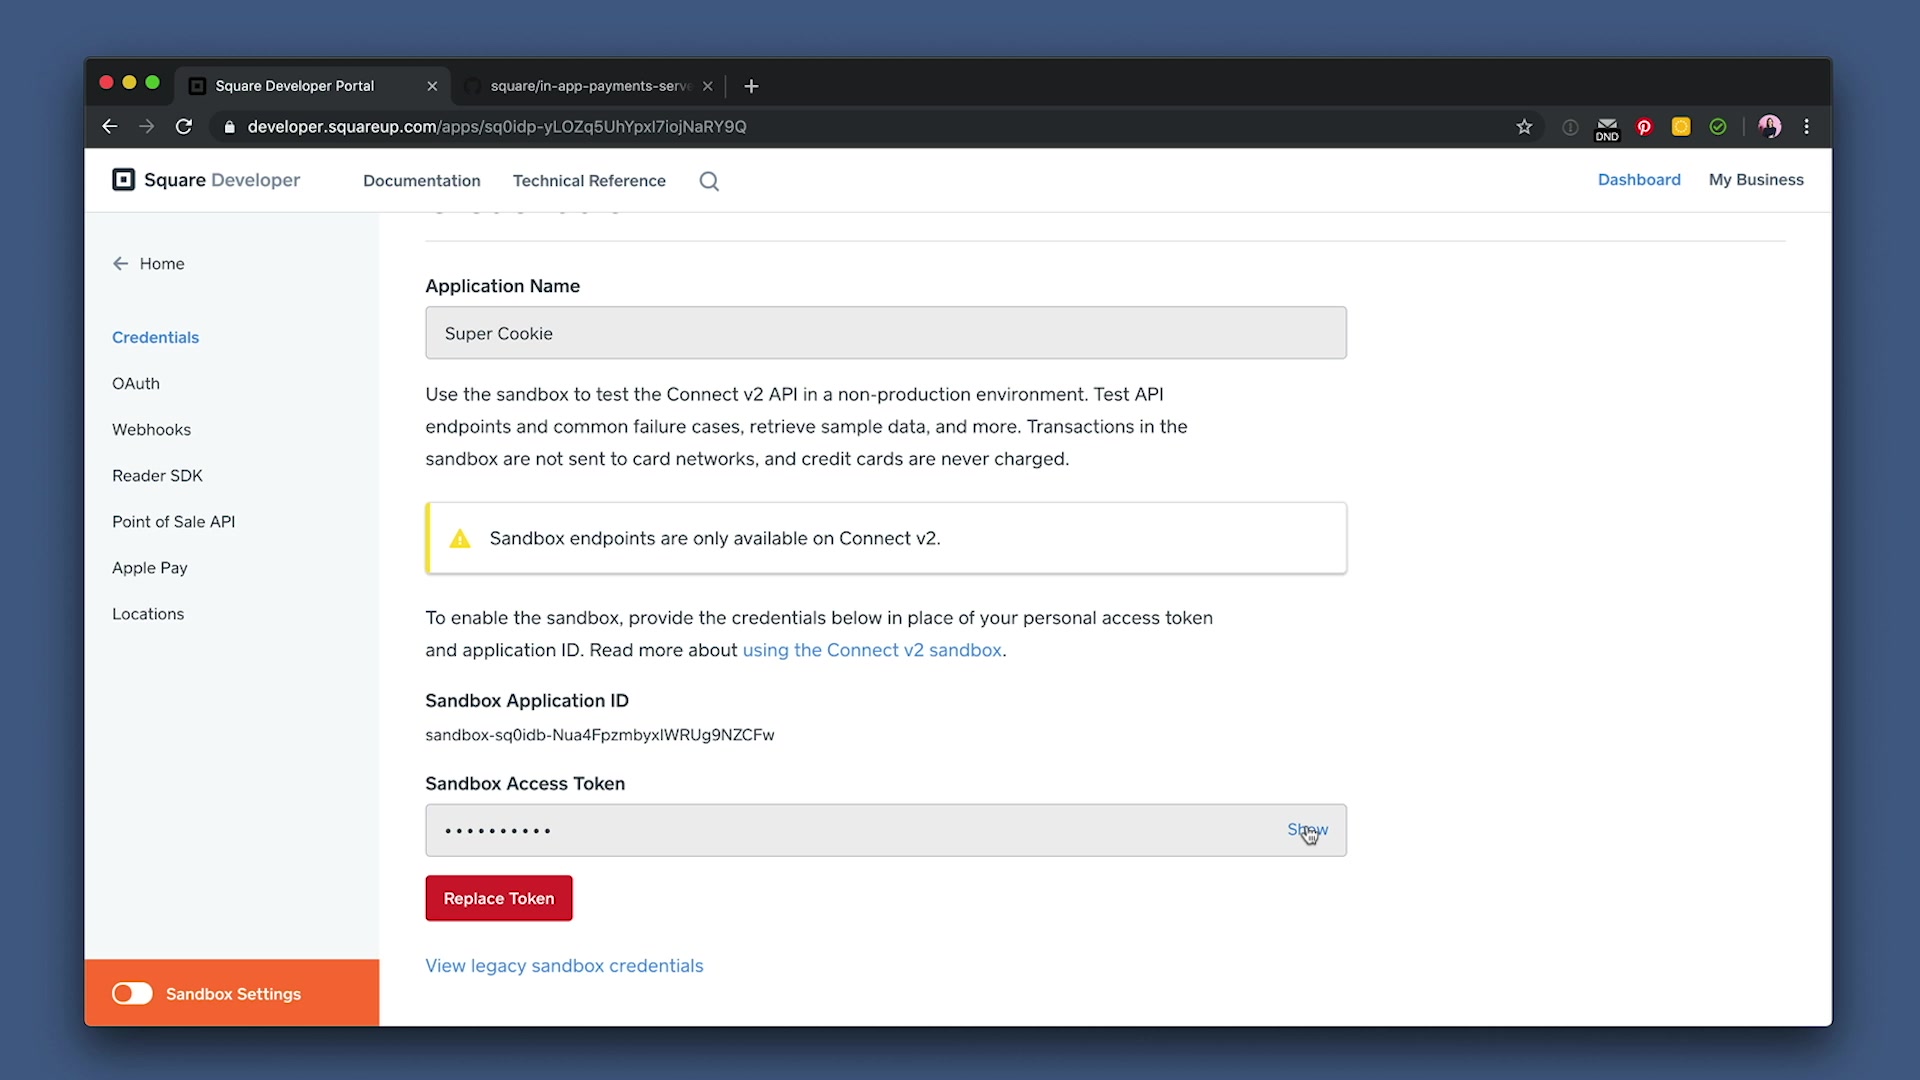
Then, copy your new apps Sandbox Application ID (see below). Something to note, you can toggle between Sandbox and Production credentials at the bottom left corner of the page. I’m using Sandbox for this tutorial because we’re just testing things out, but after you’re done testing, make sure to toggle this back to Production.
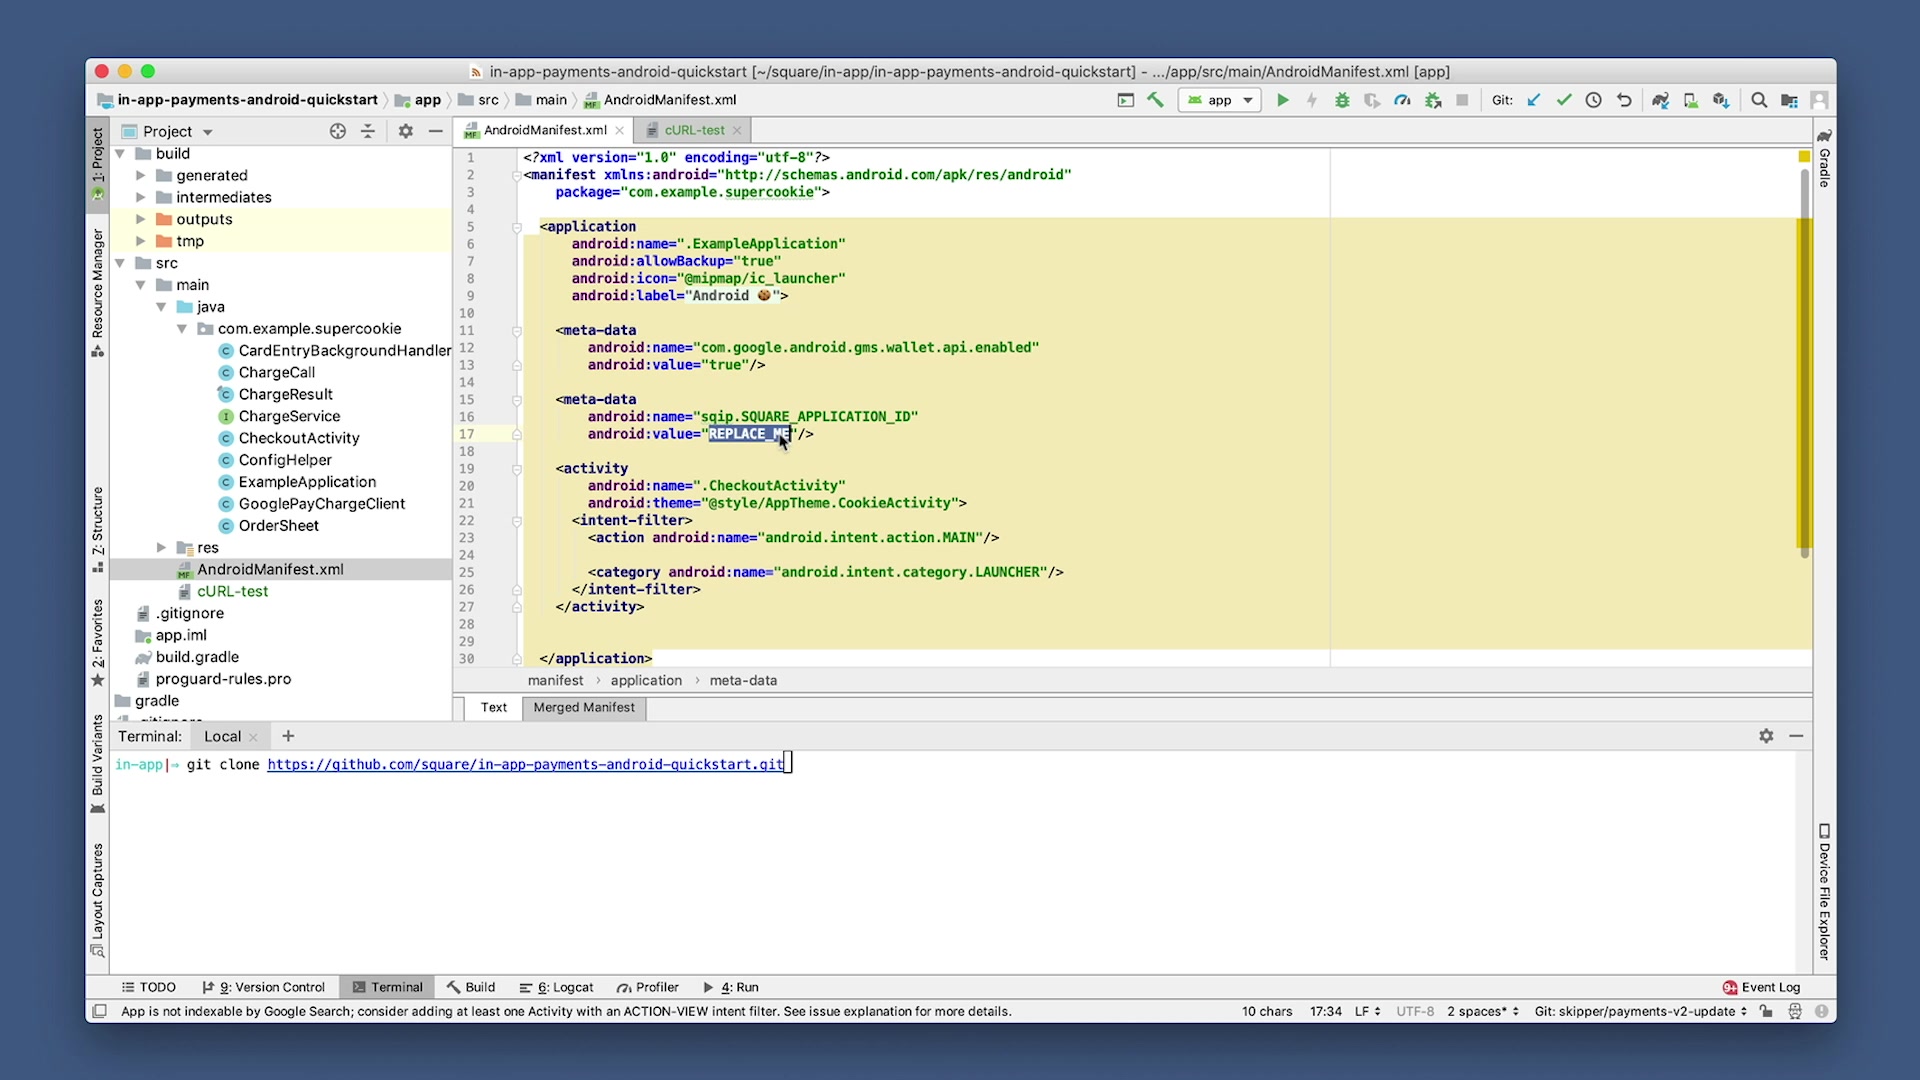
Next, you should go into Android Studio and open the AndroidManifest.xml file. Look for where it says “REPLACE ME” and paste the Application ID you just copied and paste it in its place.
You can now save this file and hit “Play” to rebuild the project to see the app running. Select Pixel 2 as the simulator. Next, make sure your build version is a minimum of 21. Once it’s reloaded, you’ll see the sample app running, Super Cookie!
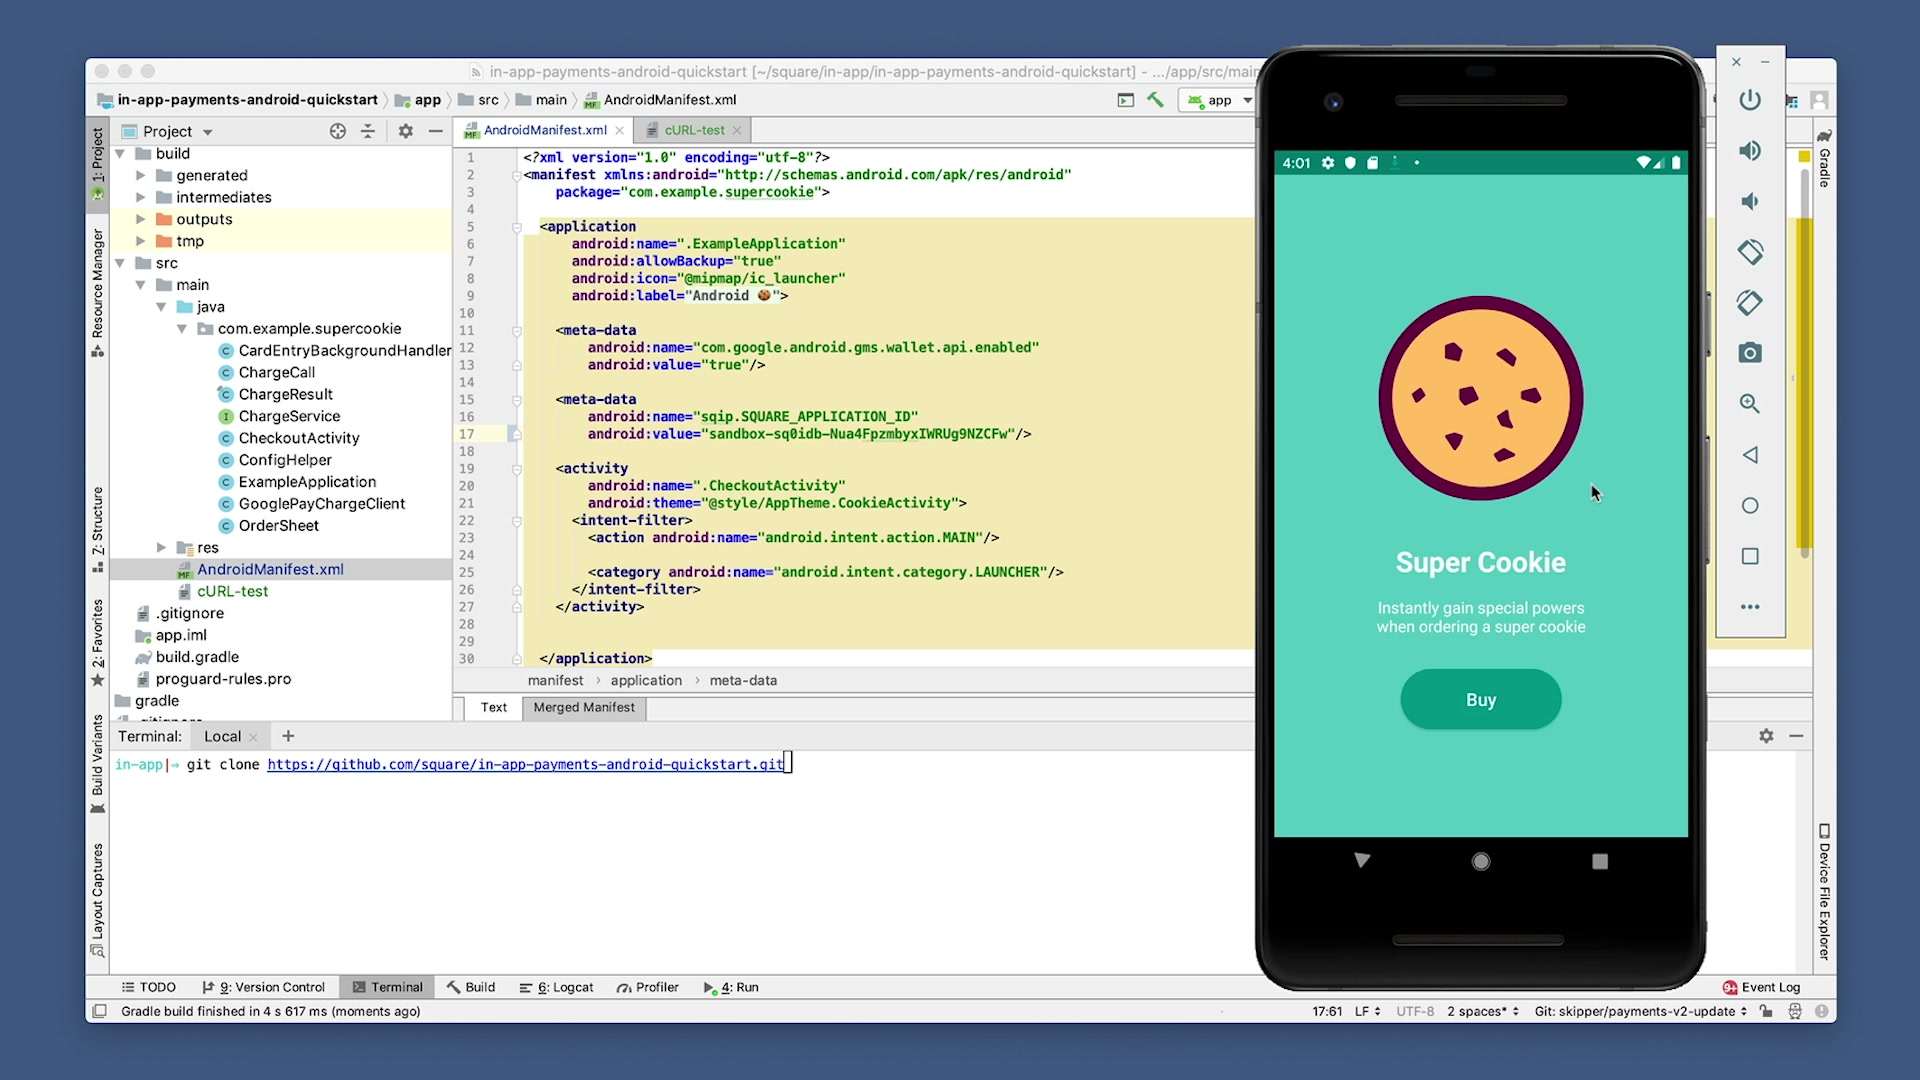
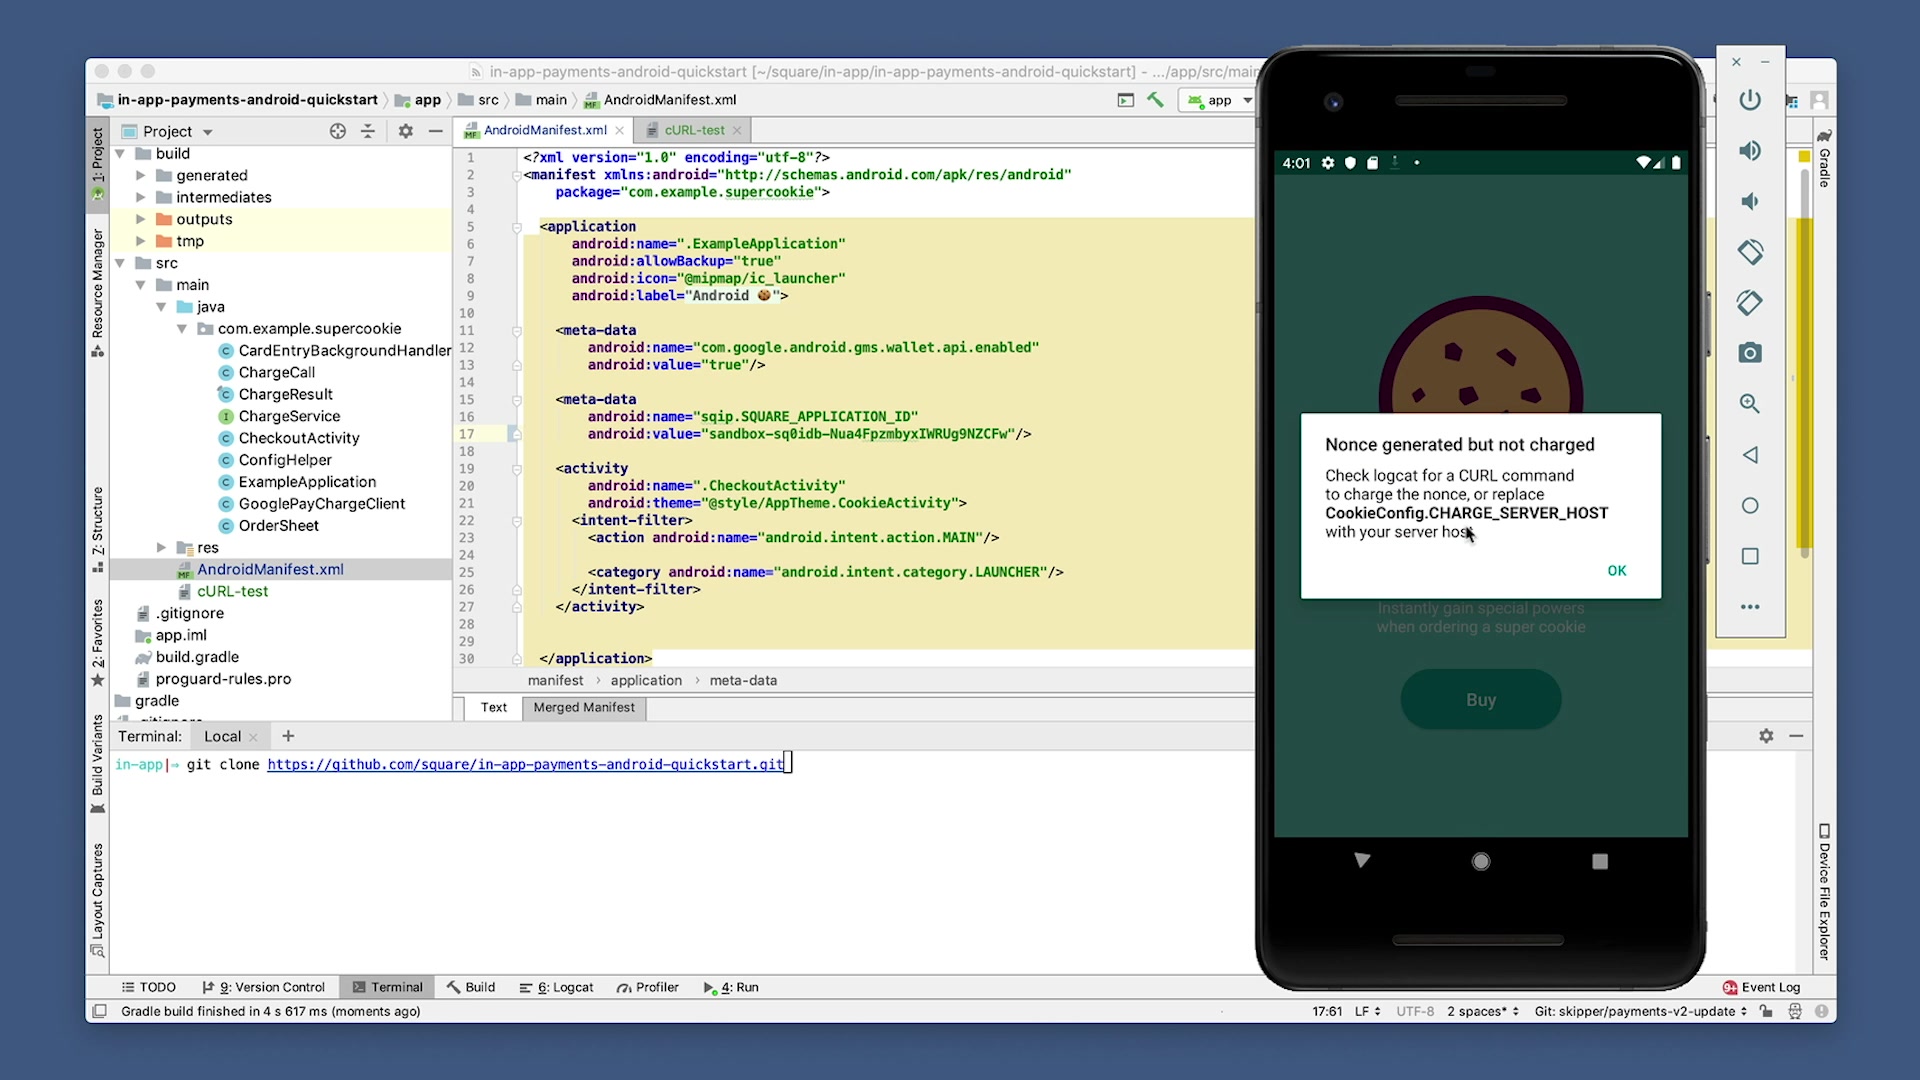
To test things out, click on the “Buy” button. Then click “Pay with card." We’re going to enter some fake card details, which you’ll find examples of here. Something to note, there are other countries with different fake card information so make sure to test accordingly.
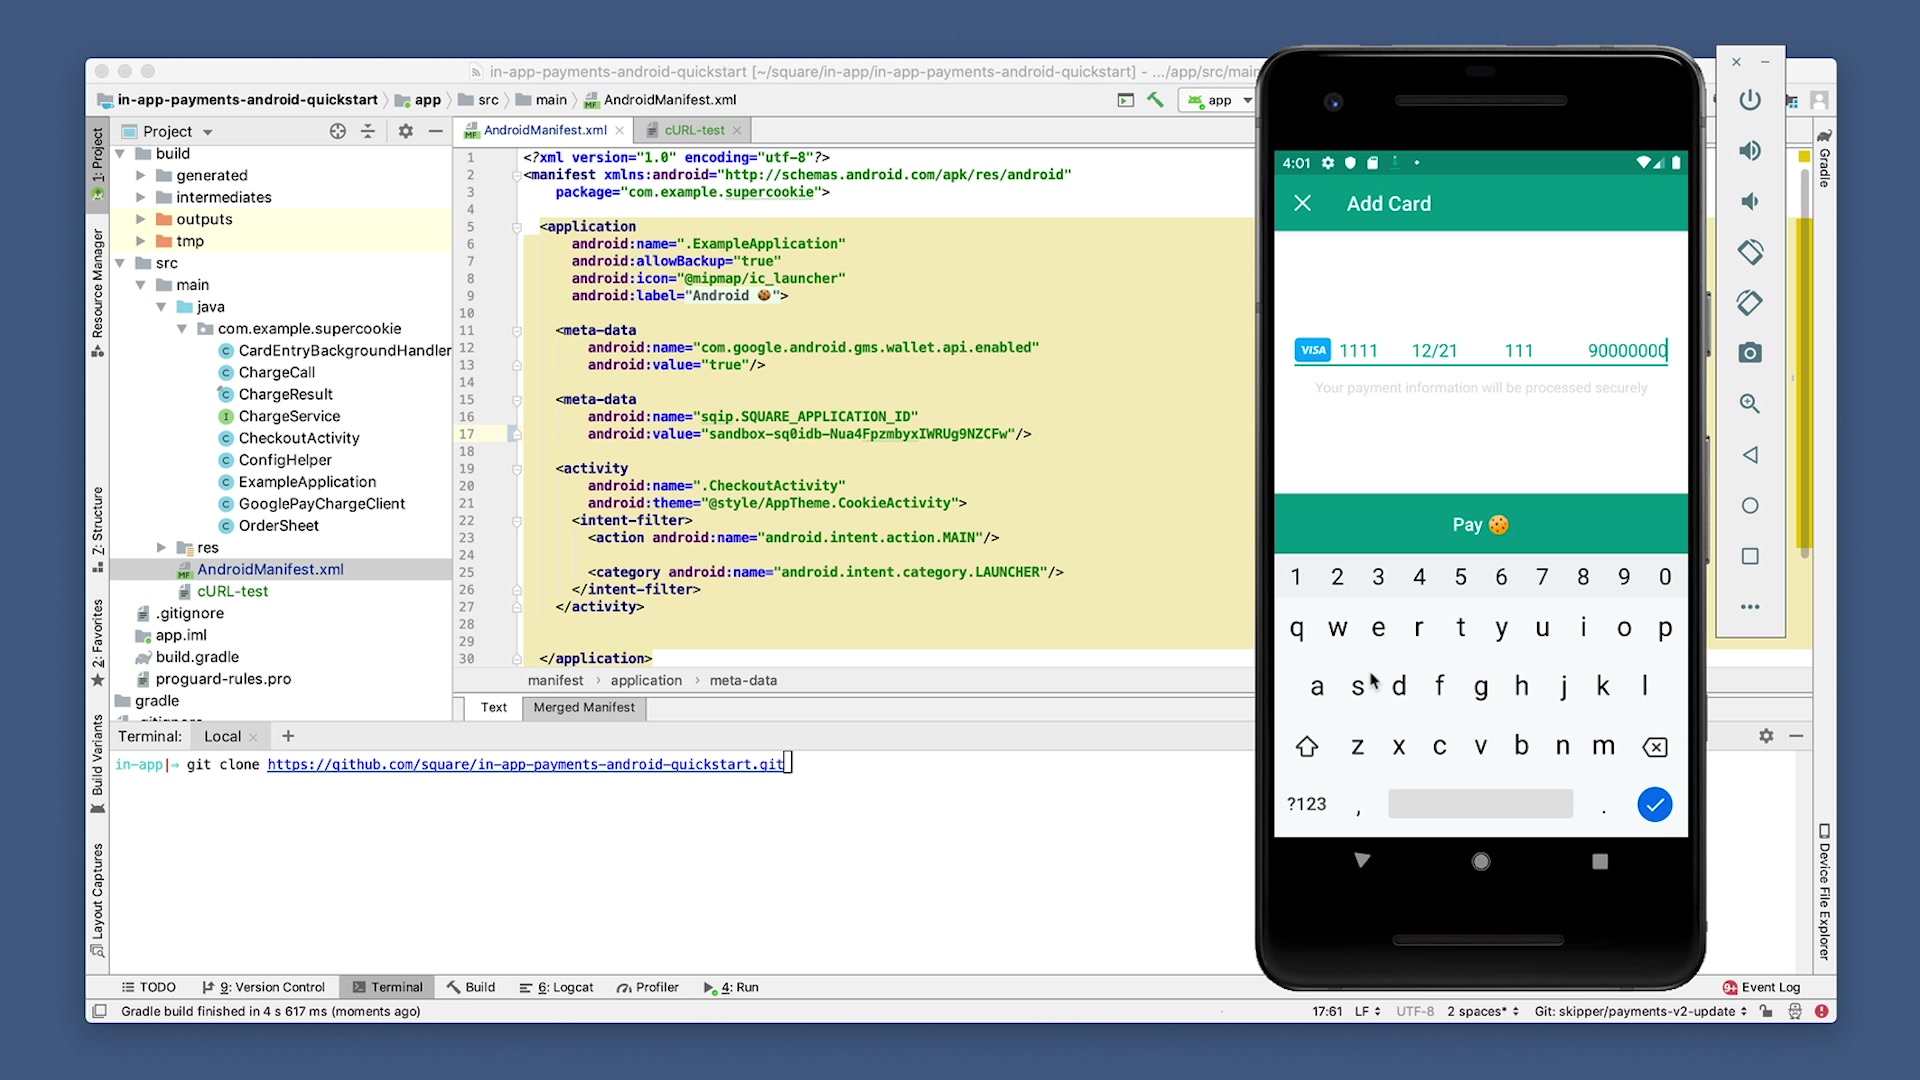
Click “Pay.” This will generate a nonce, but it doesn’t actually charge the card. Instead, it simply outputs a cURL command in logcat that lets you make a test charge.
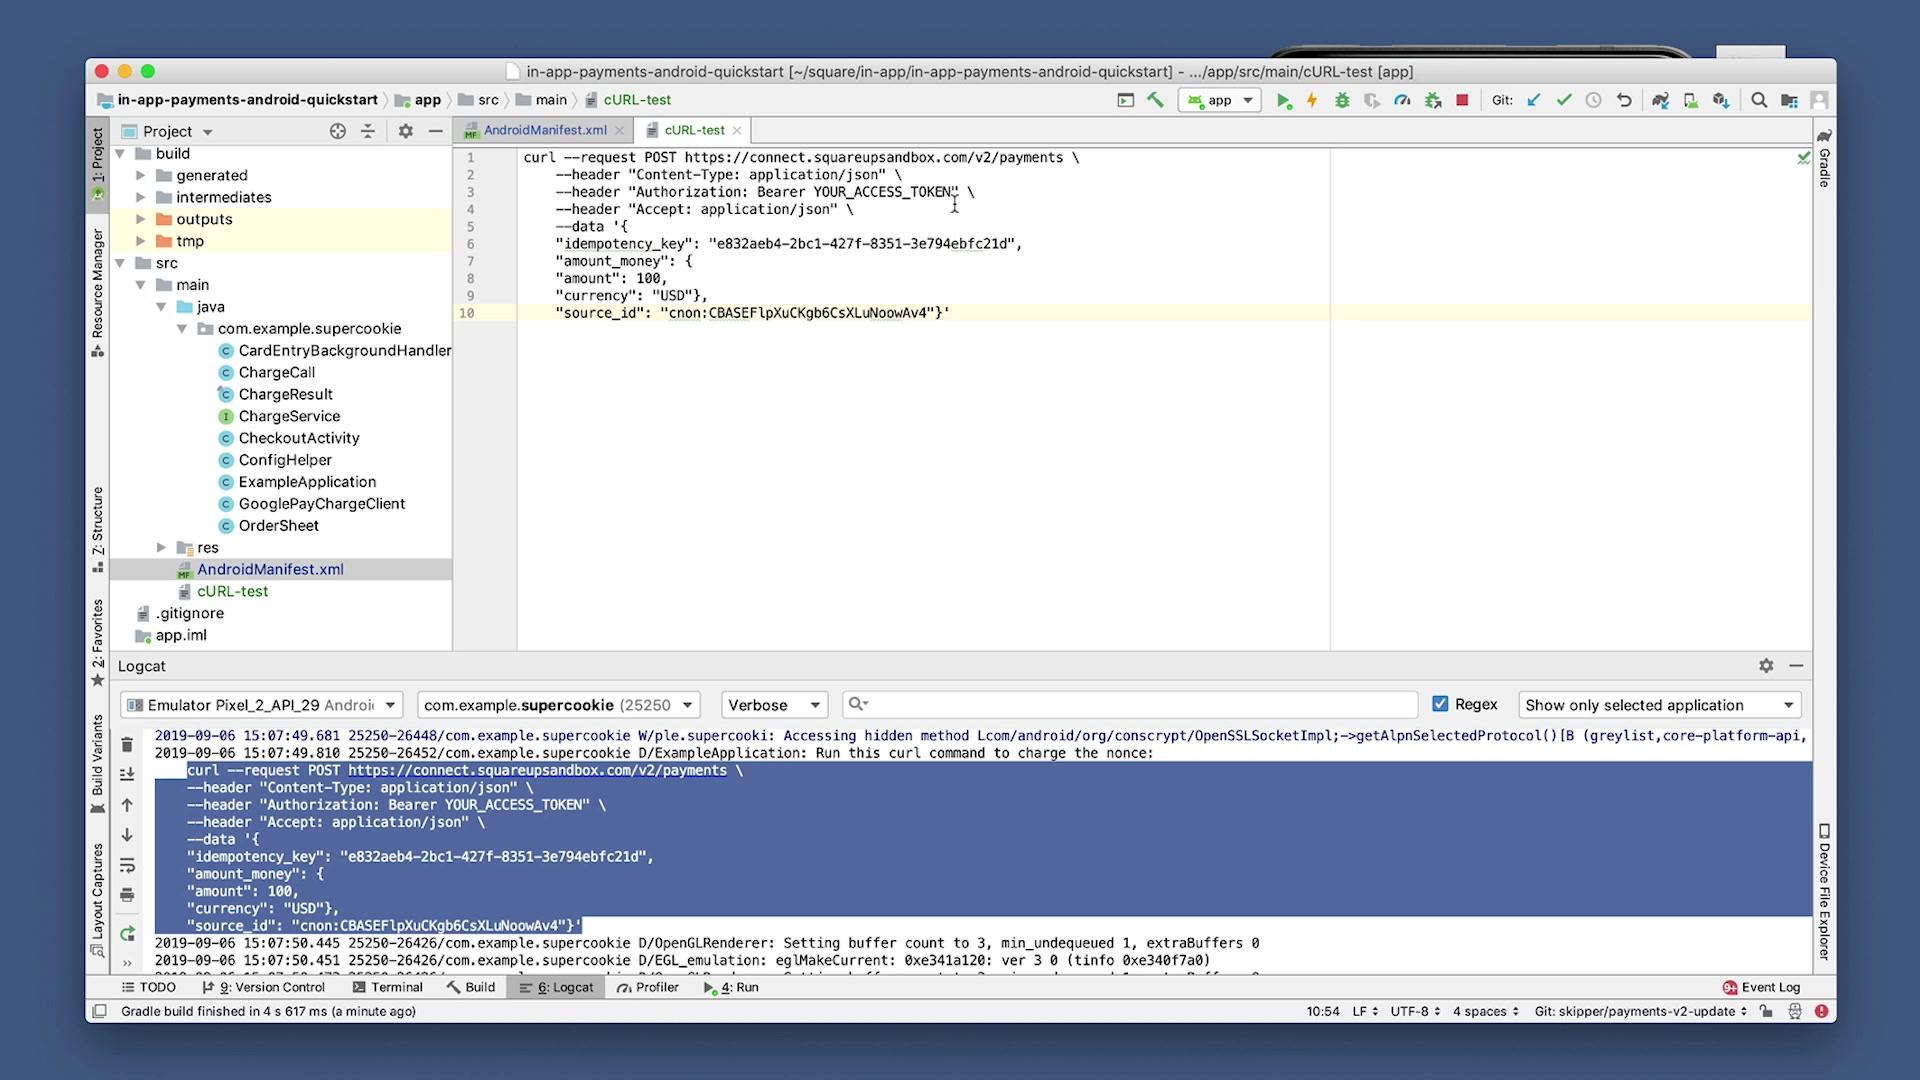
To complete the charge, open up Logcat, scroll up and you’ll find the cURL command. Copy this and paste it in a blank file.
It’s looking for your Access Token, so go back to the Square Developer Dashboard to grab it.
Click “show” and copy the credentials and then hide it again. It’s always best practice to keep this token top secret. Don’t share it with anyone or commit it to a public repo to keep your app secure.
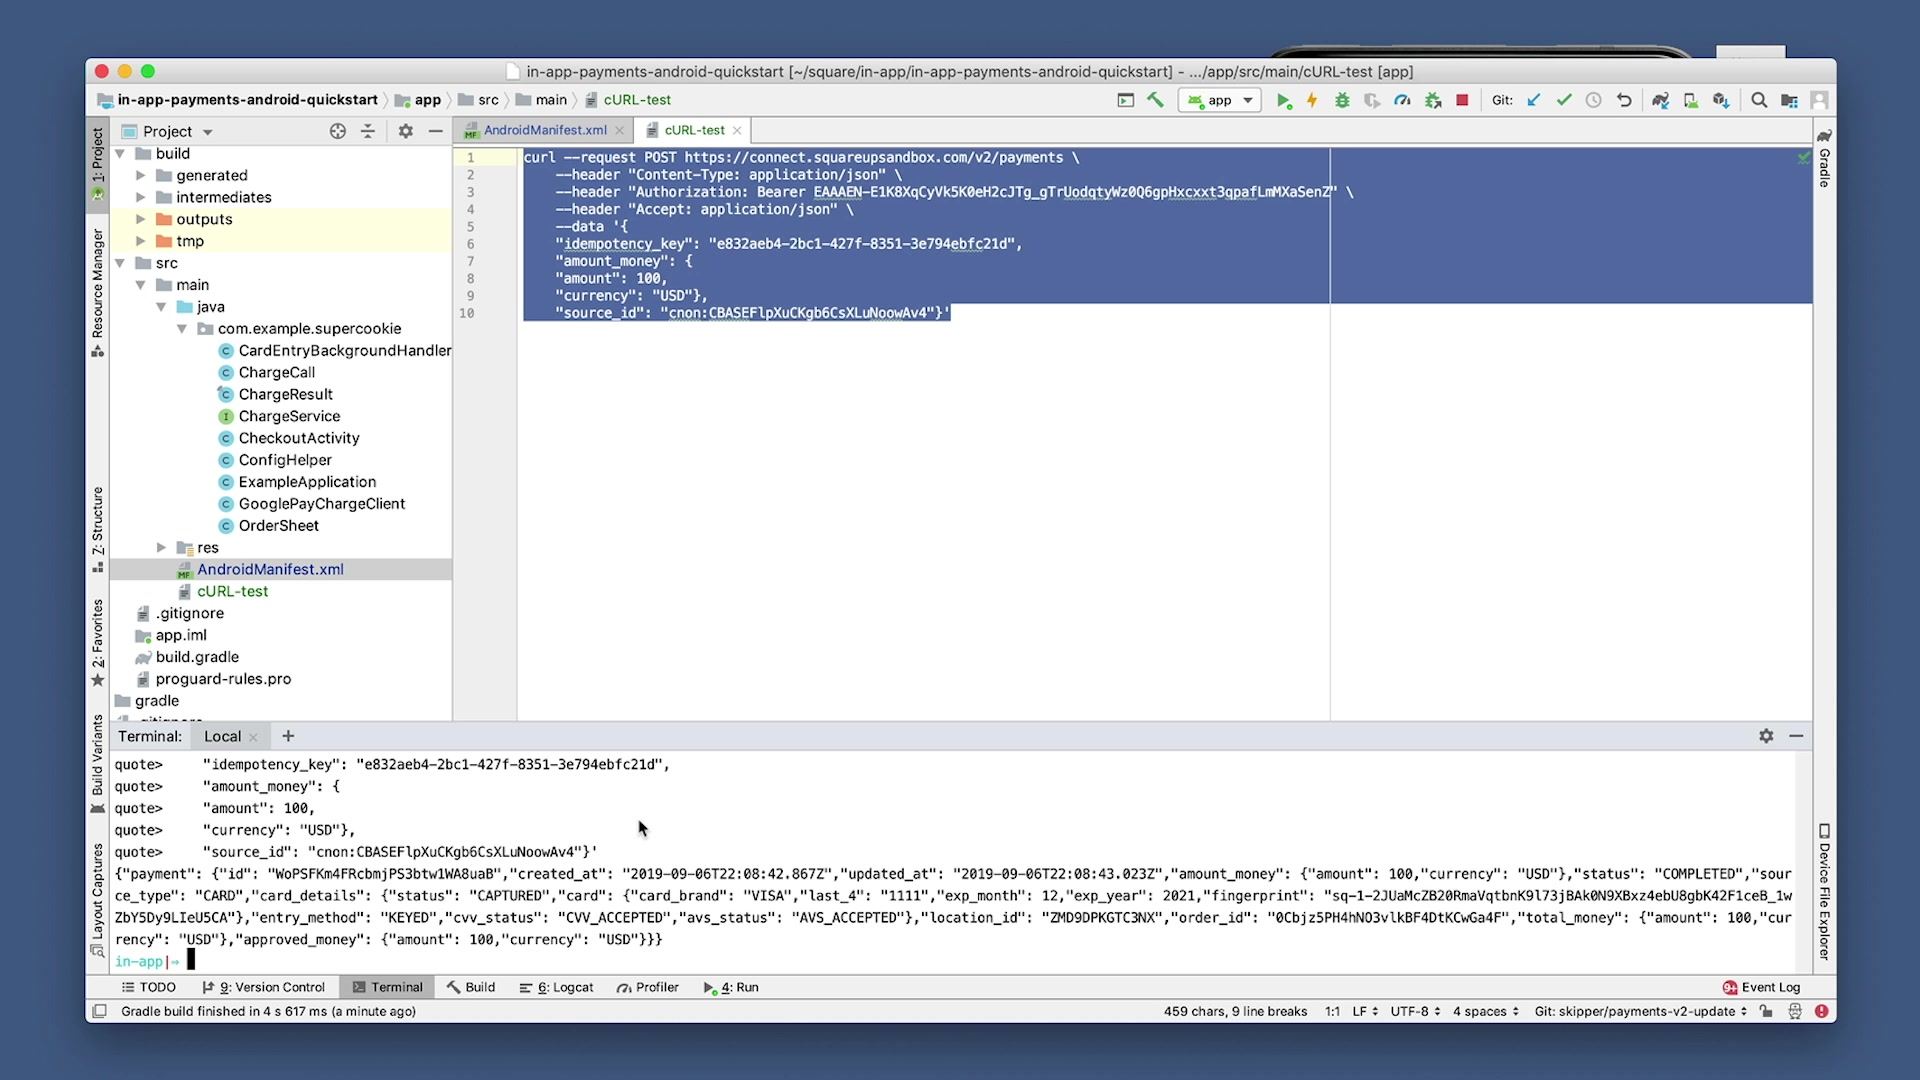
Head back to Android Studio and paste the token where it says: YOUR_ACCESS_TOKEN. Then copy and paste this whole command into Terminal. You should see a response like this...Success!
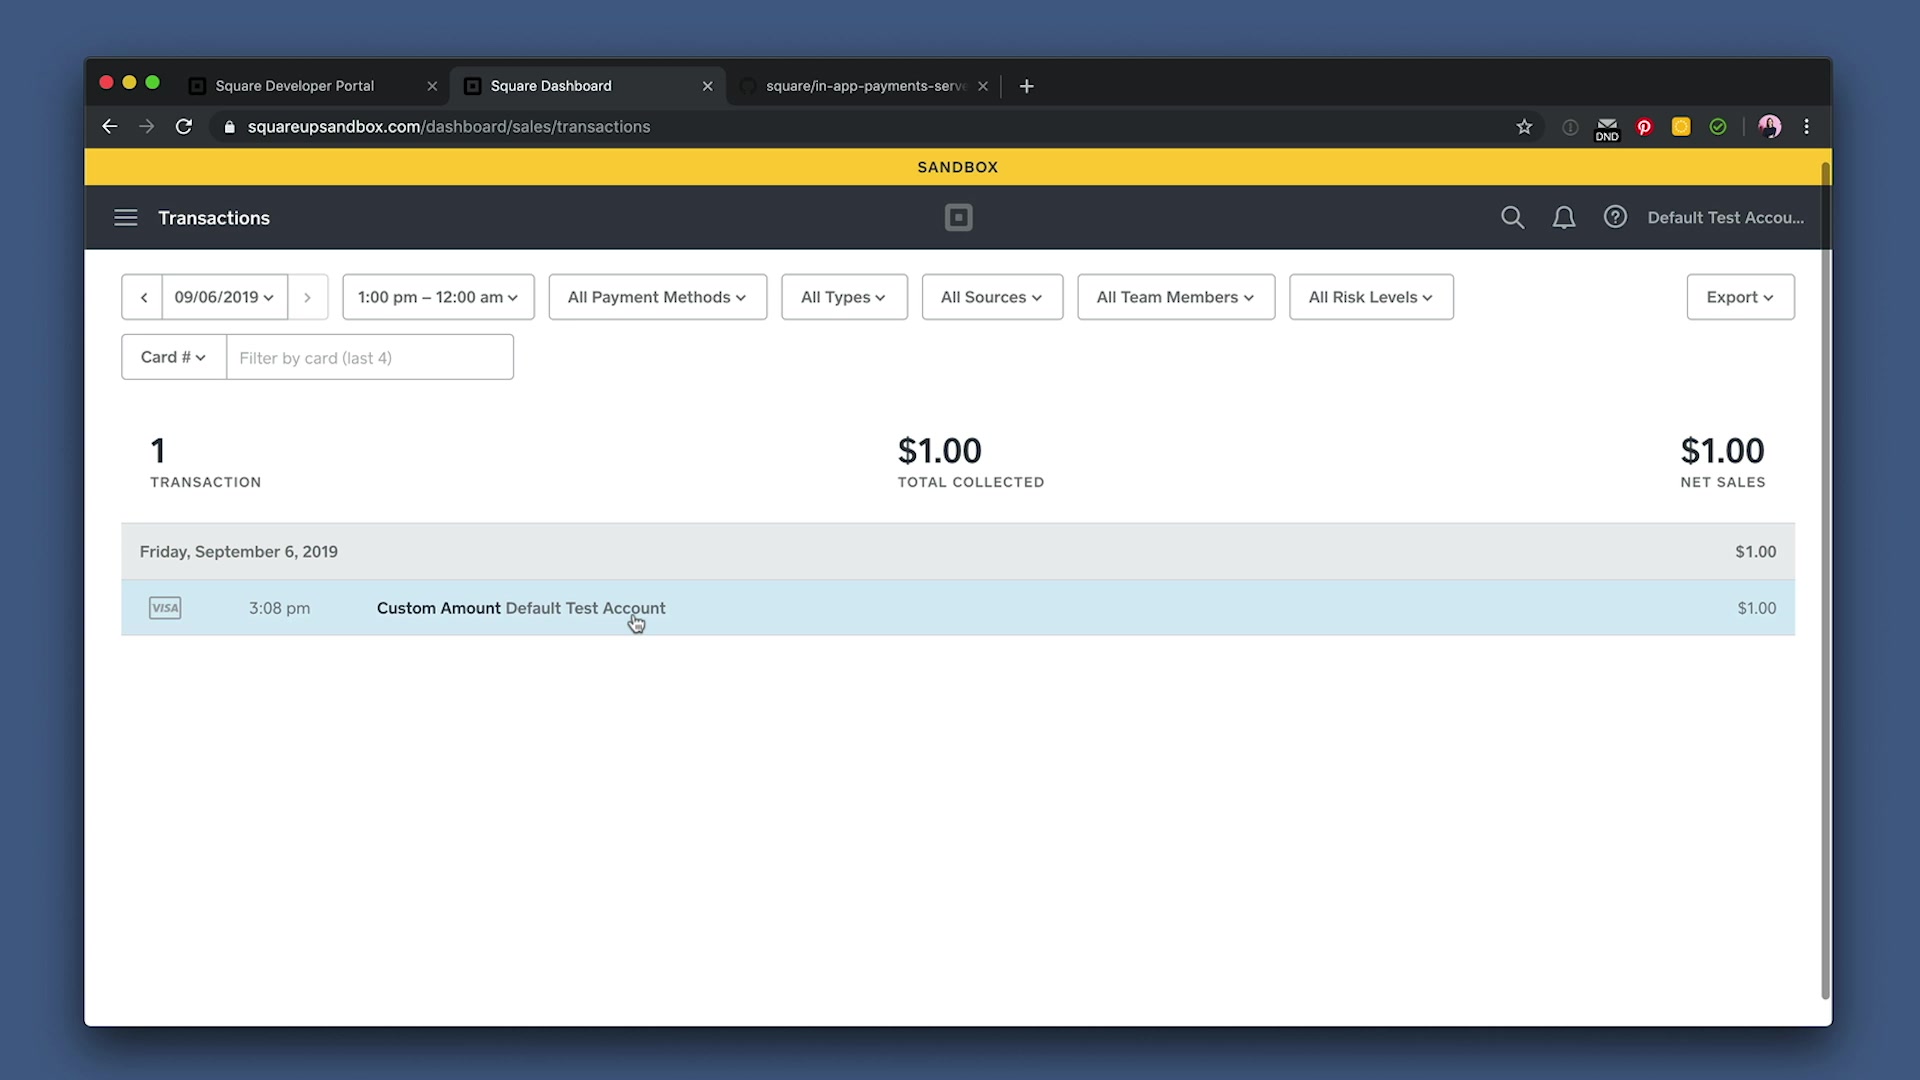
Open your Square Developer Dashboard home page. Scroll down until you see a “Launch” button for the app you created. In the new dashboard that launches, click “Transactions,” and you should see the charge listed!
Deploy to Heroku
Now let’s deploy this to Heroku so we can see it live and run it on production!
Open up this sample server repo. Scroll down and click on the “Deploy to Heroku” button.
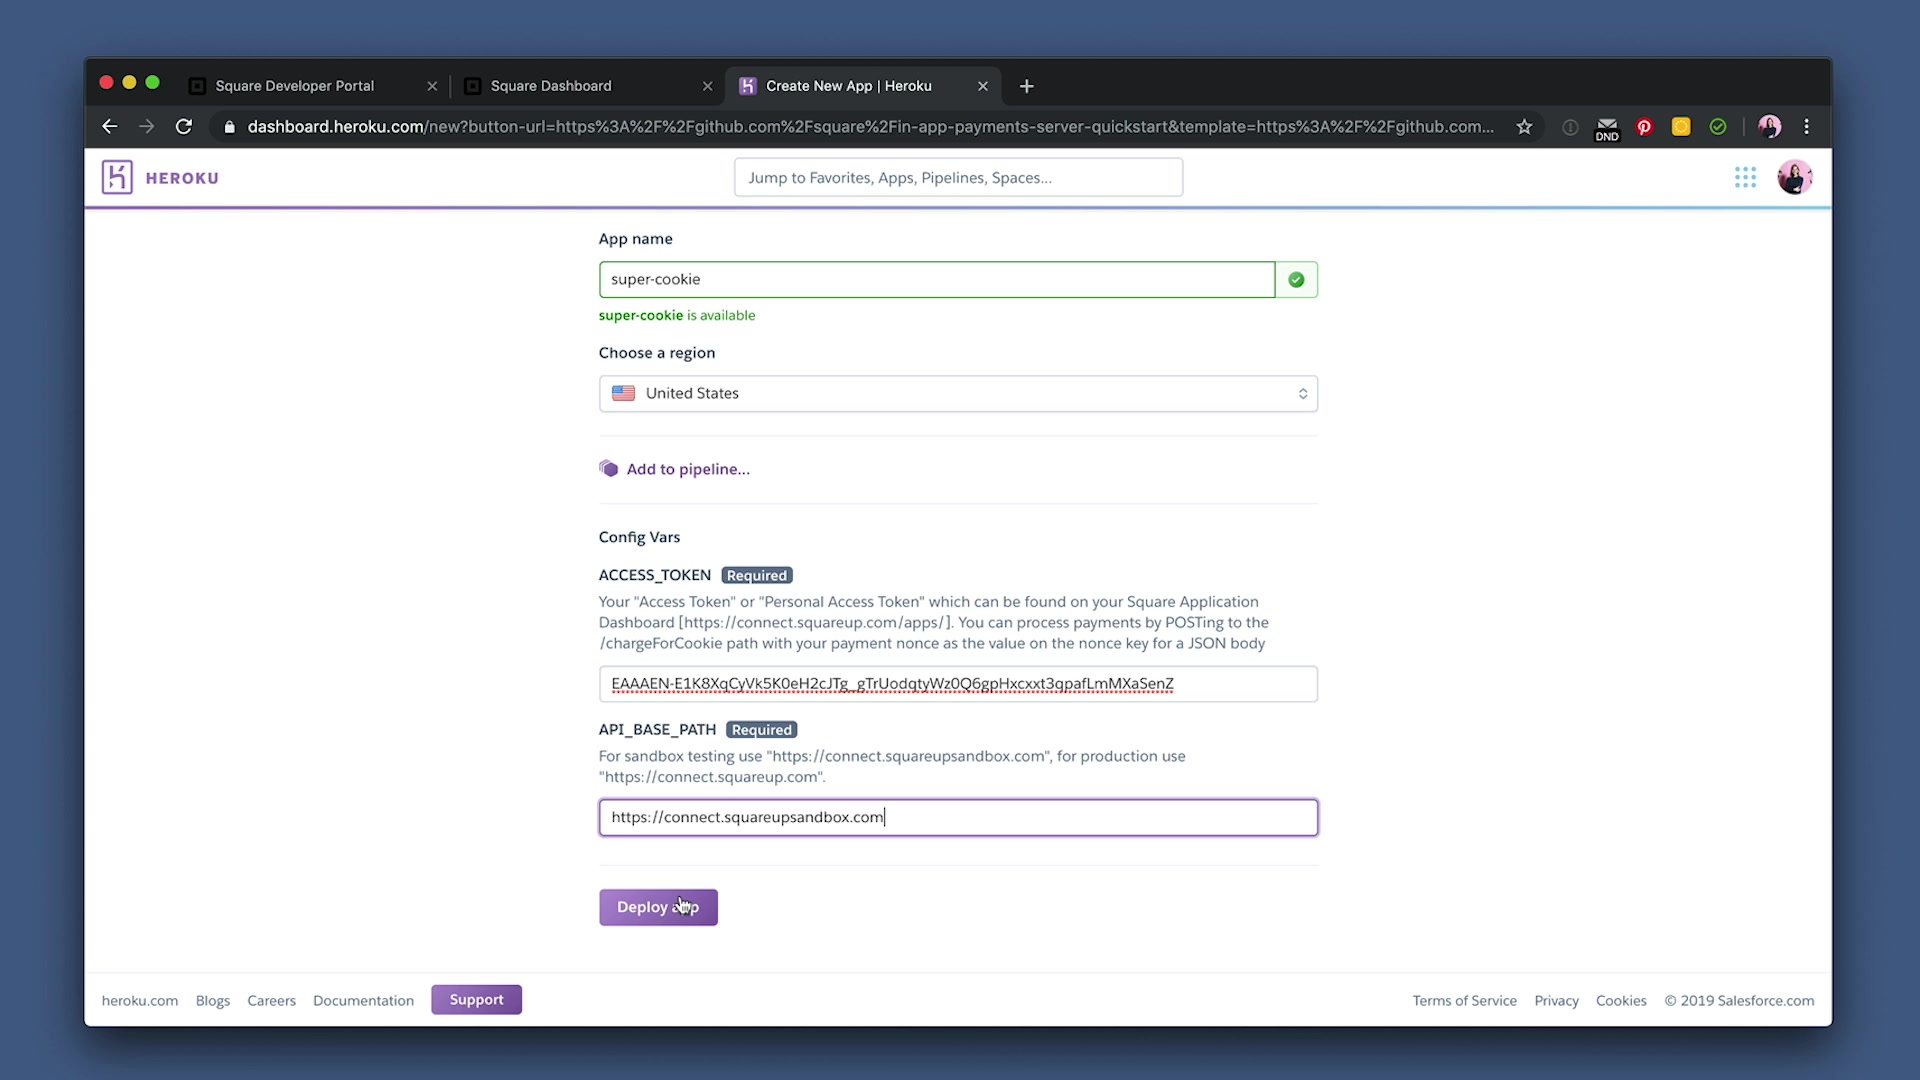
Now start filling out all the details. Starting with your App Name, then your Access Token, which you can find back in your Square Developer Dashboard, and lastly your API base path. Since we’re using Sandbox, paste in the path provided, then click “Deploy.” This will take a minute to run.
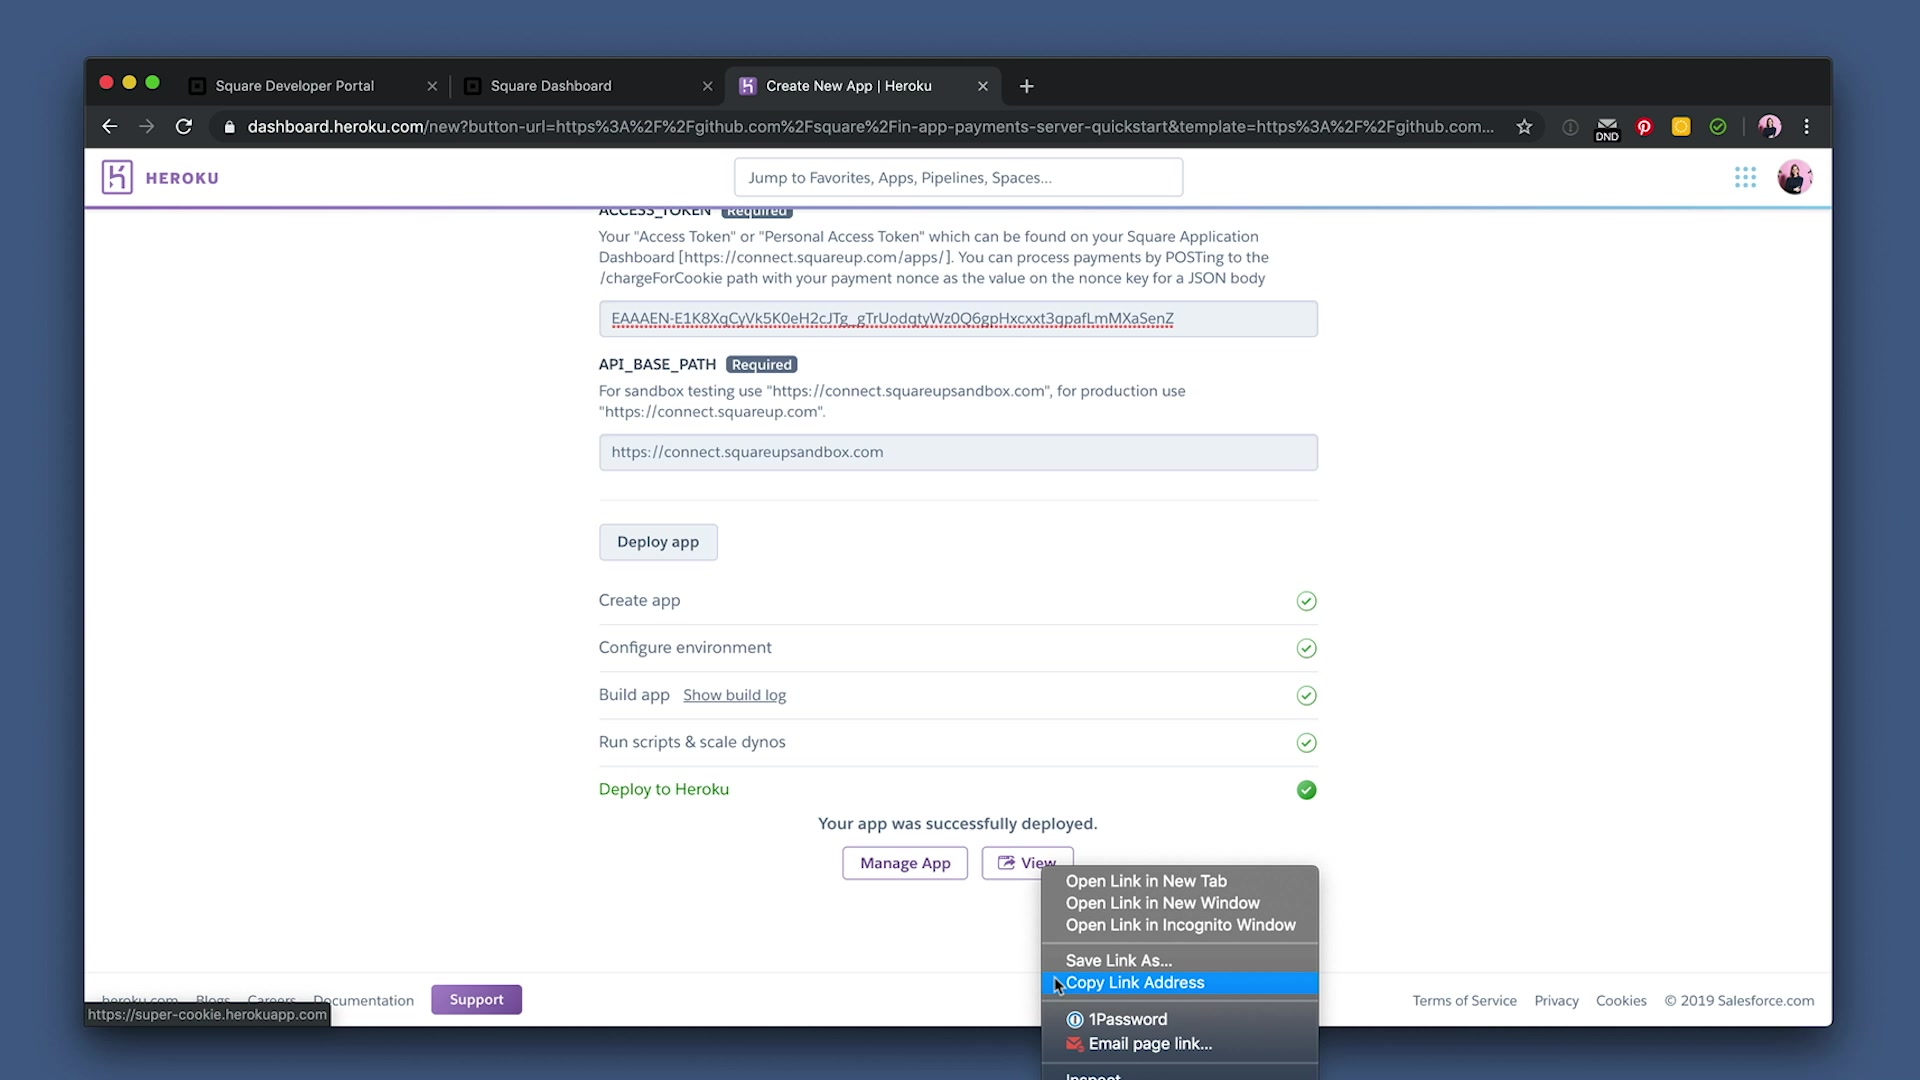
Once it’s deployed, it’ll show a “View” button. Right click on that and copy its URL, no need to open that page up!
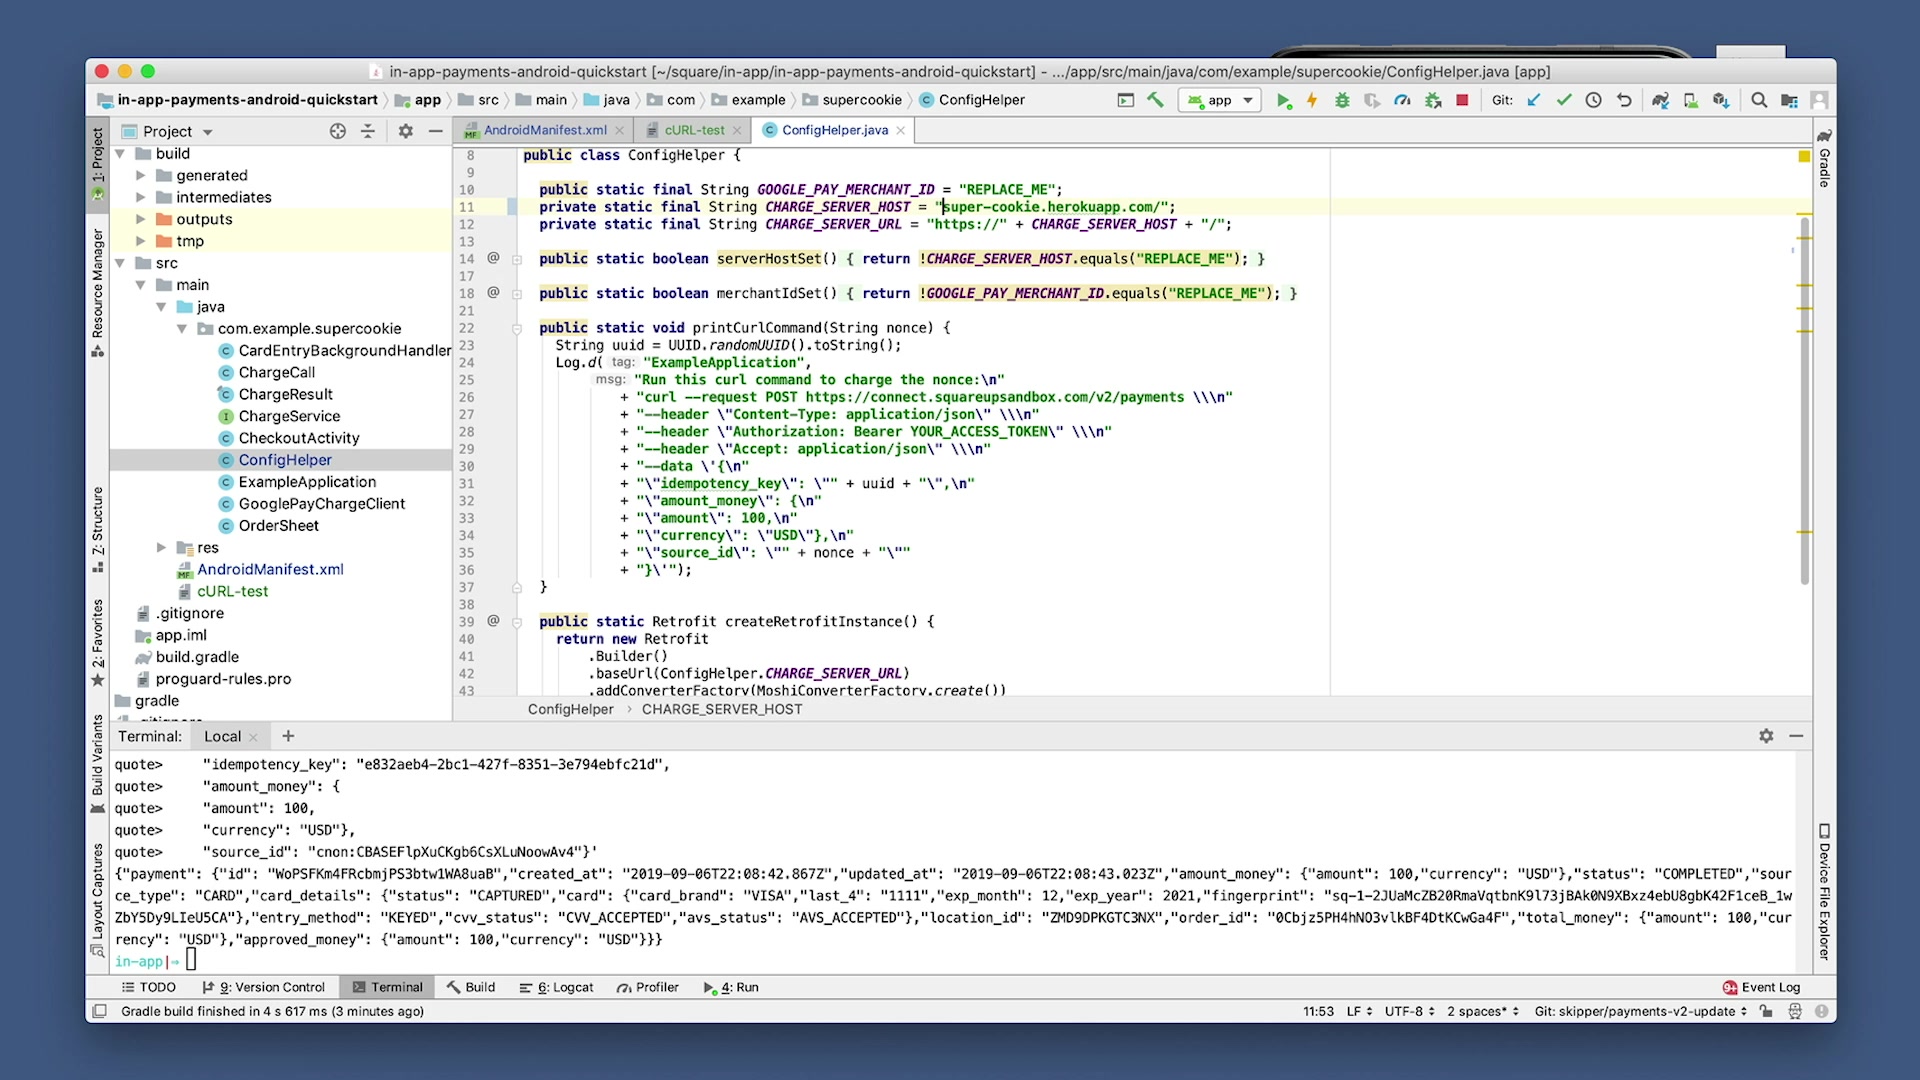
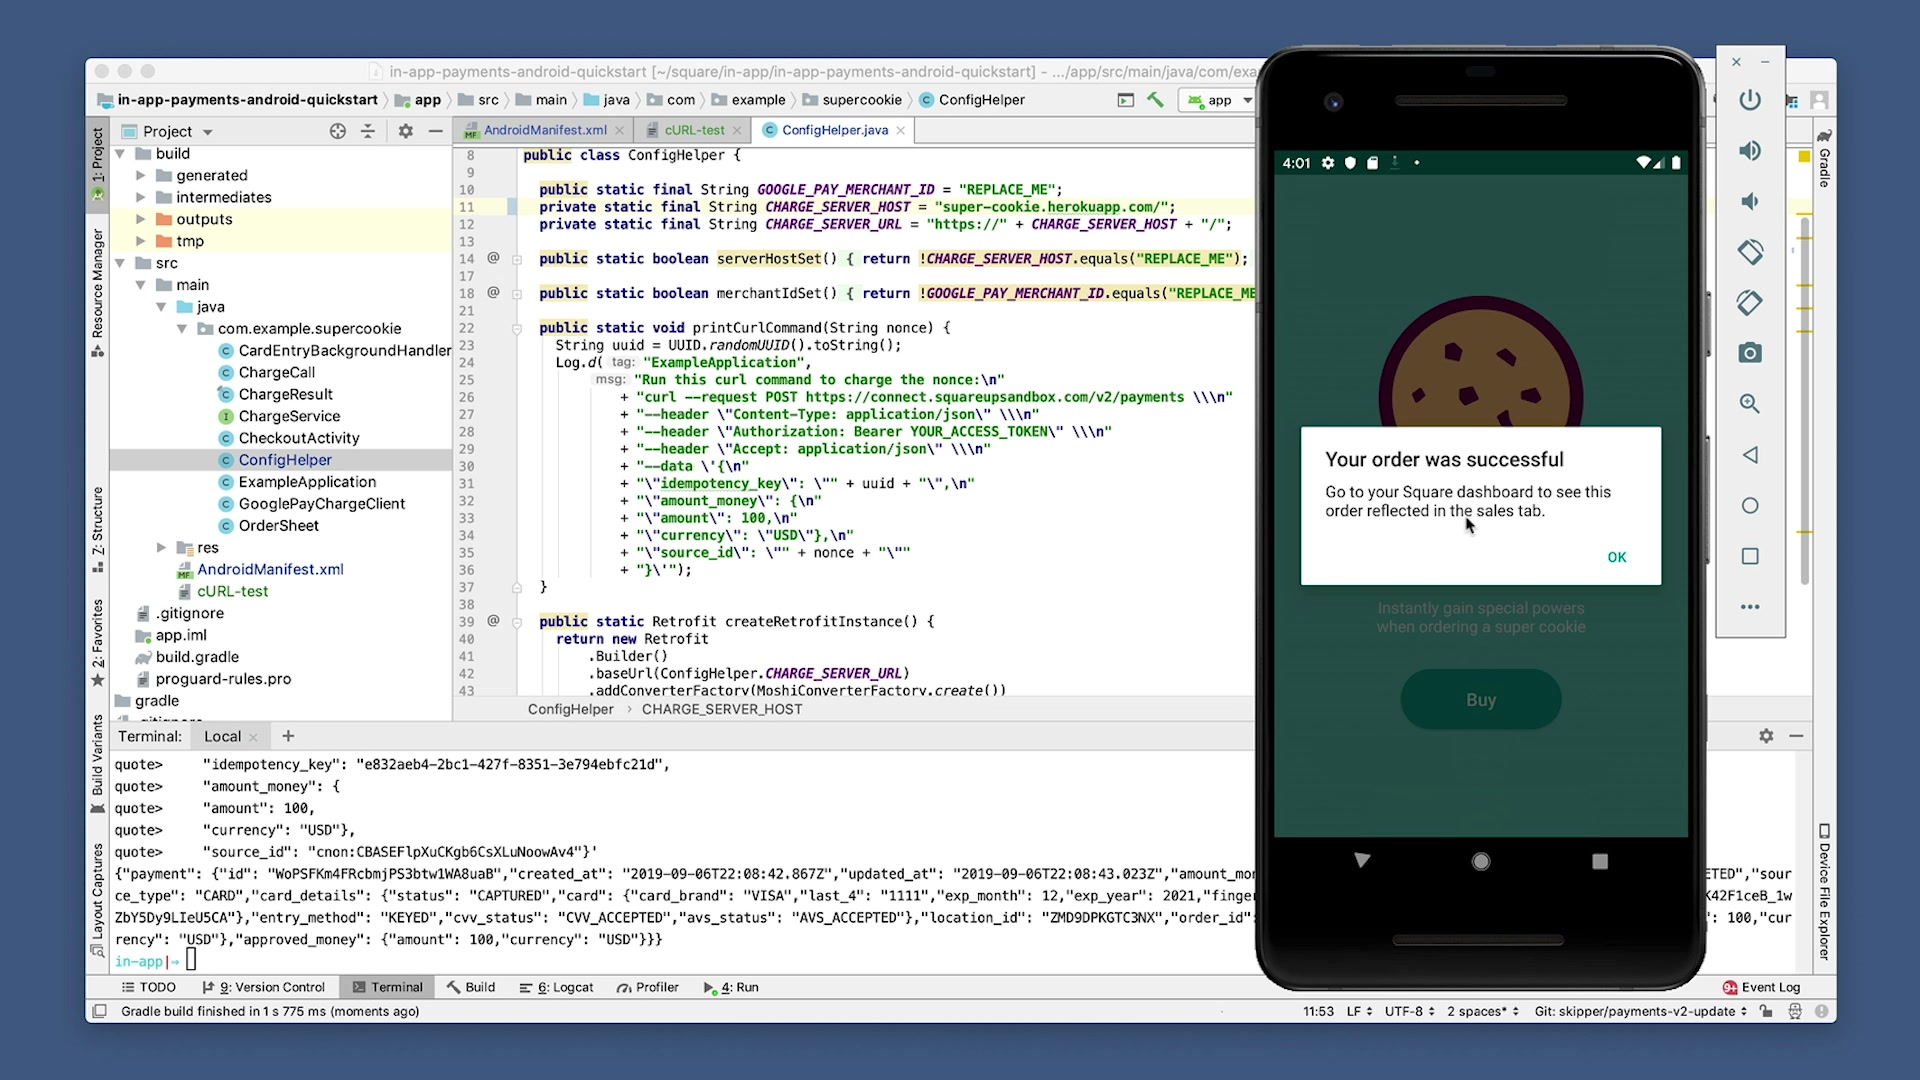
Open ConfigHelper.java file. Set CHARGE_SERVER_HOST to that Heroku link, then remove the https and save it.
Let’s rebuild the project and open up the simulator again. Tap the “Buy” button and then “Pay with card.” Enter the test card information once again, hit “submit,” and wait for it to say success.
Tab back to the transactions page on your Seller Sandbox Dashboard. Refresh the page and then you should see your production charge!
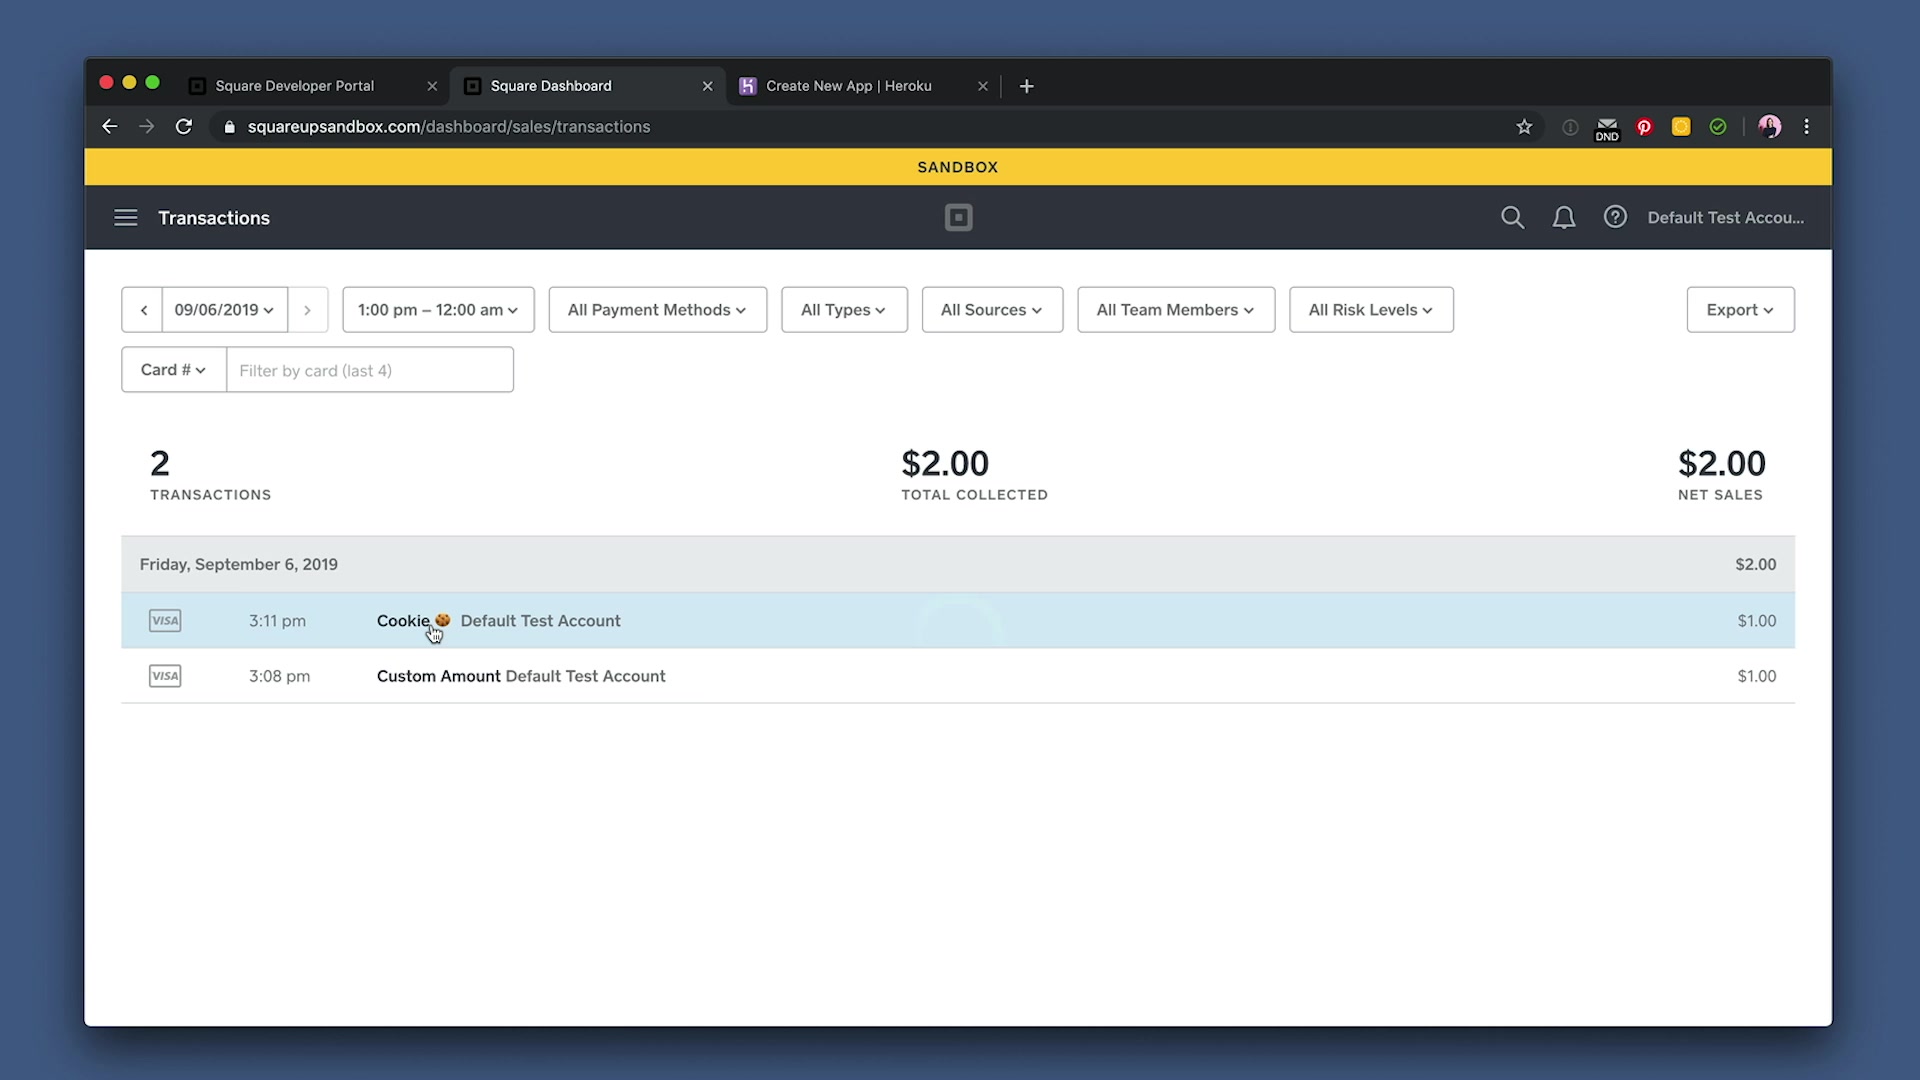
Congrats, we just completed a manual cURL and production-style credit card transaction with In-App Payments SDK. Now you can start building custom solutions!


