Useful tools: Headless Chrome & puppeteer for browser automation & testing.
Learn about some of the new tools that can make end-to-end testing easier & more accurate, as well as automate anything you can do in a web browser!
Websites have become more complicated than ever. Instead of a single html page, modern sites are often composed of multiple component files that are packaged together and then optimized. When a site loads these files, it makes dozens of different asynchronous requests to complete the page with more information, in addition to all of the ads and analytics scripts that are loaded and running as well. We want all of these different moving parts to turn into a seamless and delightful fresh-out-of-the-oven experience for our users, but that isn’t always the case. Sometimes you don’t know one ingredient has spoiled until you’ve finished baking. End-to-end (E2E) testing tools are designed to make sure you catch any of those mistakes before setting the plates. If you have already bought into the need for testing things from start to finish, then you need to know about Headless Chrome.
Headless Chrome
One of the latest and greatest tools for end-to-end testing is Headless Chrome. Before you starting thinking about spooky horse riders, know that Headless Chrome is the same web browser you know, except that you can turn off all of the UI, run it from the command line, and do some spooOOOooooky programmatic control.
The first thing you’ll need to know about Headless Chrome is that you aren’t launching it from your desktop or dock. You’ll instead be doing everything from the command line.
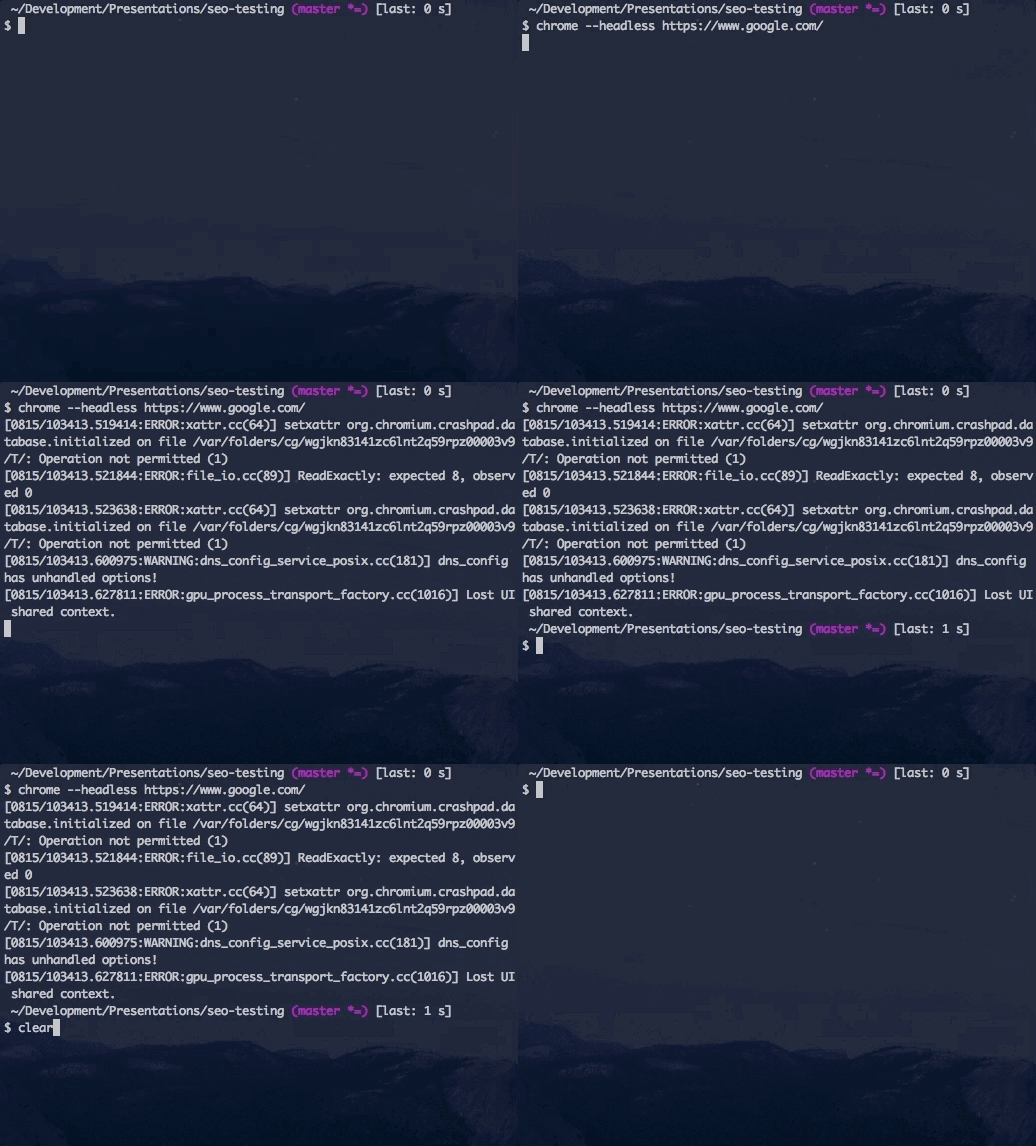
 Running Headless Chrome from the command line.
You’ll want to start by making an alias for the Chrome executable so you can run it from the command line more easily. For me (on a Mac), that looks something like digging deep into the Google Chrome app to find the executable underneath:
$ alias chrome="/Applications/Goo...Chrome"
I’ve added that to my bash_profile so that the alias is there whenever I open up a new terminal window. Running Chrome in headless mode is then as easy as a single command line flag --headless. The only other argument you’ll need to provide is the URL of the website you want to go to. With just these two flags, Headless Chrome will make the request and get the response, and then exit with a job well done. At first glance, this might seem more like a worse cURL request, but there are some command line flags that can make this a little bit more useful.
Remote Debugging
Requesting a page and exiting isn’t super exciting, but one of the neat command line flags you can combine with --headless is --remote-debugging-port. This flag opens up a port for controlling and interacting with the Chrome instance via the DevTools Protocol. You’ll need to specify a port number (like --remote-debugging-port=9222) and you can even try out the remote debugging from within Chrome. Just open up a new (non-headless) tab and head on over to localhost:9222. You’ll be able to see all of the Chrome instances running, view rendered websites, use their javascript consoles, and even click, type or otherwise interact with the page (though if you wanted to browse the web, using DevTools to control a Headless Chrome instance from another Chrome browser probably isn’t the best way to do it 😄). This flag will be very useful when you start running complex operations totally headless and then need a way to peek in and see what is going on.
Screenshots & PDFs
One of the really useful and easily accessible features of command line Headless Chrome is taking screenshots or creating pdfs of a website. The two flags work similarly, but can produce very different results. The flag --print-to-pdf=site.pdf will have the same effect as going through the print dialog and saving to a pdf name site.pdf. Because it is using the print dialog, it creates a pdf of the print media css, which, depending on how much your site expects to be printed, can be kind of wonky. Oftentimes you’d prefer a screenshot to a pdf, and there is a flag for that as well! --screenshot=file.png will take the rendered pixels and save them to an image file named file.png. Combining that with other flags like--window-size=1200,1600 will let you create a multitude of screenshots of your site in different sizes for seeing how your page could look on any device you want.
Using Headless Chrome just from the command line has tons of value: easy to take a screenshot of your website built from your branch code to automatically include into a pull request, or take screenshots of your local environment and compare them to live images of the production site using an image-diffing tool like [pixelmatch](https://github.com/mapbox/pixelmatch).
However, these command line flags won’t help you if you are trying to do some more complex testing or interactions with a webpage. For that, we will need something a little more powerful.
Puppeteer
 Puppeteer is ©Google and licensed under Apache 2.0
Puppeteer is a NodeJS based library that uses the same Headless Chrome and DevTools protocol to interact with Headless Chrome, but with a much more powerful and extensible interface in JavaScript. After installing puppeteer from NPM, it typically looks like this:
(async () => {
    const browser = await puppeteer.launch();
    const page = await browser.newPage();

    await page.goto('https://example.com');
    await page.screenshot({path: 'example.png'});
    await browser.close();
})();
You might notice that we’re liberally using async and await. If you aren’t familiar with async/await, definitely take a second to read the documentation for async & await. With the above code, we are creating a new Chrome browser, loading up a new page, and then running through a few asynchronous functions as the page goes to a website, performs an action, and finally closing the browser. Nearly everything in Puppeteer that interacts with a website is asynchronous, which isn’t that great when you want to use a website in a predictable, linear fashion. Instead of endlessly thening or using callbacks, we’ll use await for most every command to keep the execution flow more synchronous. Let’s take a deeper look at some of the ways you can interact with Chrome with NodeJS with Puppeteer:
Browser
browser = await puppeteer.launch({
    headless: //Whether to run browser in headless mode
    executablePath: //path to a specified version of chrome to run
    slowMo: //slows down all actions
    defaultViewport: {
        width:
        height:
        deviceScaleFactor:
        isMobile:
        hasTouch:
    }
    args: //custom flags to run chrome with
    userDataDir:
    env: //environment variables, defaulting for process.env
})

browser.newPage();
browser.pages()
browser.close()
browser.createIncognitoBrowserContext();
browser.userAgent()
browser.version()
Browsers are one of the first objects you’ll create, and you have lots of options when starting up the browser. One of the most common configuration options I use is headless , which is a boolean that lets you run Chrome with the UI so you can see what your puppeteer scripts are doing. slowMo is also super helpful because it will add an artificial delay for the supplied number of milliseconds to pretty much everything. This can make events that wouldn’t be visible to a human much more noticeable, and can help grease the wheels when interacting with a webpage with many asynchronously added event handlers.
In terms of what you can do with the browser, the most common thing you’ll be doing is creating a newPage, but you can also create new incognito tabs, as well as have basic control over closing pages, checking the browser version and user agent. You can read more about the browser object on the puppeteer GitHub documentation.
Page
A page object for Headless Chrome is analogous to a tab in the version of Chrome that you’re probably use to. The page object has lots of functionality and functions to control how web sites are requested, loaded, and used.
const page = await browser.newPage();

page.reload();

page.setExtraHTTPHeaders({});
page.setRequestInterception(value)

page.setJavaScriptEnabled(enabled)
page.setOfflineMode(enabled)

page.setViewport(viewport)
page.setUserAgent(userAgent)
page.emulate(options)

page.close();
You’ll usually just be creating new pages and interacting with the contents, but the page object is also where you can change some useful settings. With setViewport, setUserAgent, & emulate you can load webpages the same way that a mobile device or tablet might see them, letting you know (and test) how your site responds to responsive environments.
There are also a wealth of event handlers that you can use with a page.
page.on('console', msg => {});
page.on('dialog', msg => {});
page.on('error', msg => {});
page.on('frameattached', msg => {});
page.on('framenavigated', msg => {});
page.on('load', msg => {}); //javascript load events
page.on('request', msg => {});
page.on('response', msg => {});
page.on('workercreated', msg => {});
You can create functions that run when a page outputs to its javascript console, or when it creates additional requests for images and other assets, and when the responses for those requests come back.
Mouse
Loading a website isn’t all that useful compared to interacting with the contents, and the mouse is a big way to do that. Puppeteer gives you a helpful function, page.click() that allows you to create a click on a designated selector, with the option to specify which kind of click and how long you hold the button down.
page.click('#checkout',{
    button: 'left', //left, right, middle,
    clickCount: 1,
    delay: 200 //how long to hold down the mouse button
})
You can also have more fine-tuned control of the mouse with page.mouse() , an object that gives you control over moving the mouse, and opens up more complex sequences like dragging.
let mouse = page.mouse();
// same as page.click(), but uses a page x,y coordinate
mouse.click(300, 287,{
    button: 'middle',//left, right, middle
    clickCount: 2,
    delay: 20 //how long to hold down the mouse button
})
mouse.down();
mouse.up();
mouse.move(x,y);
Keyboard
The keyboard is another great source of interaction, and just like the mouse, puppeteer gives you a helper function that lets you choose a selector and what you want typed, as well as lower-level commands for precise keystroke control, selecting individual keys, and deciding how long they are held down.
page.type('#name','Sammy',{
    delay: 50//how long to wait between keystrokes
})
page.keyboard.type('Hello World!');
page.keyboard.press('ArrowLeft');

await page.keyboard.down('Shift');
await page.keyboard.up('Shift');
Headless Chrome in practice
All of the different tools that Headless Chrome and Puppeteer expose can come together to create a symphony of testing and website automation. One of the simplest use cases could be creating a test that looks for visual differences between your local branch of your site and the production version.
$ chrome --headless --screenshot=local.png \
--window-size=1280,1000 localhost:8080

$ chrome --headless --screenshot=production.png \
--window-size=1280,1000 https://example.com/

$ pixelmatch local.png production.png output.png 0.1
This script uses the command line flags for Headless Chrome to create a screenshot of your local code(localhost:8080) and compare that to a screenshot of your production site (example.com) using pixelmatch, a image diff-ing tool.
We can also do that same example with some more complex interactions using Puppeteer.
await page.goto('https://www.wikihow.com/Tie-Your-Shoes');
await page.waitForSelector('#article_shell');
await page.screenshot({
    path: './production.png',
    fullPage: false,
})
await page.goto('https://www.wikihow.com/Tie-Your-Shoes');
await page.waitForSelector('#article_shell');
await page.screenshot({
    path: './local.png',
    fullPage: false,
})

let img1 = fs.createReadStream('./production.png')
.pipe(new PNG()).on('parsed', doneReading)
.on('error', function () { reject() });

let img2 = fs.createReadStream('./local.png')
.pipe(new PNG()).on('parsed', doneReading)
.on('error', function () { reject() });

let filesRead = 0
function doneReading() {
    if (++filesRead < 2) return;
    var diff = new PNG({ width: img1.width, height: img1.height });

    pixelmatch(img1.data, img2.data, diff.data, img1.width, img1.height, { threshold: 0.1 });

    diff.pack().pipe(fs.createWriteStream('diff.png'));
    resolve()
}
With this code, we can load a page, wait for a specific selector to show up on the page, and then use the full ecosystem of NodeJS libraries to handle and manipulate the resulting images.
It’s also possible to run very complex website interactions that span multiple pages and interactions. Here is an example of a end-to-end test you might have for a registration page:
const puppeteer = require('puppeteer');

browser = await puppeteer.launch({
    headless: true,
    slowMo: 80,
});
page = await browser.newPage();

await page.goto('http://example.com');

await page.waitForSelector('#tickets');

await page.hover('#tickets > div.container > div > div > div > h2:nth-child(5) > button > i')

await page.waitFor(2000); //make sure I really want to buy

await Promise.all([
    page.waitForNavigation({}),
    page.click('#tickets > div.container > div > div > div > h2:nth-child(5) > button > i', {
        button: 'left',
        delay: 200
    })
]);

await page.click('#tito-tickets-form > div.tito-submit-wrapper > button')

await page.waitForSelector('#tito-iframe');

const frame = await page.frames().find(f => f.name() === 'tito-iframe');
await (await frame.$('#registration_name')).type('Taylor', { delay: 100 });
await (await frame.$('#registration_name')).type(' Swift', {});
await (await frame.$('#registration_email')).type('[email protected]')

browser.close();
After going to the page, the mouse events are used to click on a button, navigate to a new page, and then type into an iframe on the page to fill out registration details. One point to note is this section:
await Promise.all([
    page.waitForNavigation({}),
    page.click('#tickets > div.container > div > div > div > h2:nth-child(5) > button > i', {
        button: 'left',
        delay: 200
    })
]);
This is actually a best practice when using click events to navigate between pages. page.click() returns a promise, but that promise resolves when the click event is complete. That isn’t really enough time to see the next page lead, and if you just do the usual await on that, your next line of code that is meant for the new page will probably be disappointed. Luckily, there’s page.waitForNavigation() which returns a promise that won’t resolve until the browser has navigated to a new page. By wrapping them both in a Promise.all() you can make sure that you don’t continue execution until the link is clicked and the next page has been navigated to.
This kind of complex page interaction is the superpower of Headless Chrome when it comes to end-to-end testing and website automation. This post only shows you the tip of the iceberg when it comes to what you can do with Headless Chrome to improve your testing workflows. If you want to get deeper with the tools, definitely check out some of the following resources:
-
Getting Started with Headless Chrome & Automated Testing with Headless Chrome both by Eric Bidelman on the Google web developers site
-
GoogleChrome/puppeteer and the Puppeteer API documentation on GitHub — great resources for reading about what all the methods are.
-
Chrome/Lighthouse — available as a chrome extension, NodeJS package and CLI tool, this can be a great way to quickly get tests for important areas of websites including accessibility, speed & SEO.
Hope you enjoyed this look into some of the neat things you can do with Headless Chrome. If you want to keep up to date with the rest of our content, be sure to follow this blog & our Twitter account, and sign up for our developer newsletter!


