
Accept payments with Square using Next.js App Router
Build an end-to-end payment flow with Next.js Server Actions
In this how-to guide, we’re going to walk through the steps of accepting payments in your Next.js app using the new App Router so you can build an end-to-end payment flow.
This tutorial requires a general understanding of the Next.js App Router. If you are not yet familiar with the major API changes of the Next.js App Router, you can check out Next.js Learn.
All of the code for this payment flow how-to guide can be found in the Square Next Online Payments Example repo.
Getting Started
Before we start writing any code for our payment flow, you’ll need to add the react-square-web-payments-sdk package to your project. This package provides us with a series of React components that drastically simplify the process of setting up a payment form.
npm install react-square-web-payments-sdk
With that installed, you can now start using the package components in your app. Let’s take a look at how you can use the PaymentForm and CreditCard components to create a payment form.
"use client";import { CreditCard, PaymentForm } from "react-square-web-payments-sdk";export default function Home() { const appId = "YOUR_APP_ID"; const locationId = "YOUR_LOCATION_ID"; return ( <PaymentForm applicationId={appId} locationId={locationId} cardTokenizeResponseReceived={async (token) => { // we’ll come back to this soon console.log(token); }} > <CreditCard /> </PaymentForm> );}
The PaymentForm component is a provider component that handles all of the configurations for accepting payments at the beginning of the payment flow. It has three required props:
applicationId: This is the ID of your Square application. You can find this value in your Square Developer Dashboard.locationId: This is the ID for your specific business location. The best way to find this ID is by running a “list locations” request via the Square API Explorer. You can look through the response data to see the IDs of all your locations.cardTokenizeResponseReceived: This is a callback function that will run after a token is generated for the payment method. The function we call here will take that generated token and use it to process the payment on the server side. In the next step, we’ll learn how to create that function using a Server Action, but we haven’t written that function yet so for now we’ll just log the token to the console.
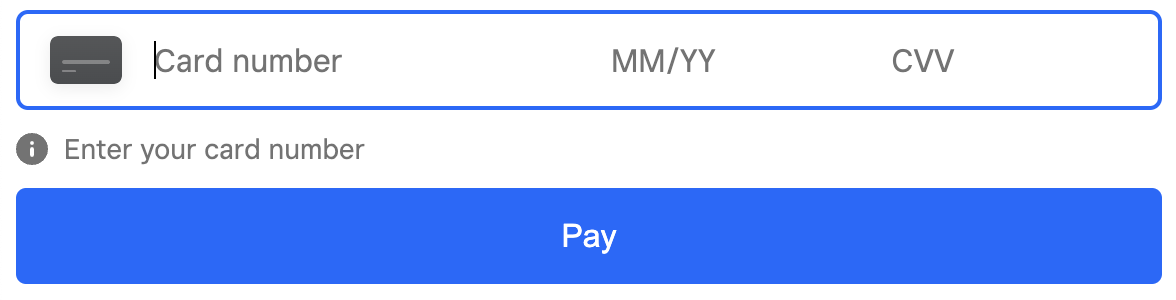
With those props defined, we then add the CreditCard component as a child to render a credit card input field. And this is the result that we get:
NextJS 14 Server Actions
At this point, we’re ready to process our payment token on the server side. Traditionally, we might do this by creating an API Route and then calling that endpoint via fetch on the client side. While that is a viable solution, Next 14 comes with a new feature called Server Actions which allows us to create server side functions that we can call directly from our React components. These Server Actions eliminate the need to define API endpoints that only your application uses and thereby drastically simplify our code. In this step, we’re going to walk through exactly how to define a Server Action to process our payment.
Before we define our Server Action, we first need to install the Square Node.js SDK:
npm install square
Now to create our Server Action. First create a new folder under the app directory called actions. Within that actions folder, create a file called actions.js. Now the first thing we need to do in this file is import the Square Client object and use that to initialize the paymentsApi:
"use server";import { Client } from "square";const { paymentsApi } = new Client({ accessToken: process.env.SQUARE_ACCESS_TOKEN, environment: "sandbox",});
One thing you’ll notice is that this file includes a ”use server” directive at the top. This directive indicates that our function is a Server Action.
Note that the Client requires you to provide your Square access token. The value of your access token can be found in your Square Developer Dashboard, under your specific application. This access token should be secure, so it is best to store this value in an environment variable.
Now we can define our actual Server Action function.
"use server";import { Client } from "square";import { randomUUID } from "crypto";const { paymentsApi } = new Client({ accessToken: process.env.SQUARE_ACCESS_TOKEN, environment: "sandbox",});export async function submitPayment(sourceId) { try { const { result } = await paymentsApi.createPayment({ idempotencyKey: randomUUID(), sourceId, amountMoney: { currency: "USD", amount: 100, }, }); return result; } catch (error) { console.log(error); }}
What we’ve done is defined a function that takes in a sourceId and uses that sourceId along with the Square paymentsApi to make a request to create a payment. That sourceId, in our case, is going to be the token that we generated on the frontend. So we’re passing that token to this function in order to safely process the payment on the backend. Once that request is made, we return the result back to our frontend.
While our code may look good at this point, if we try to submit a payment now, we’ll encounter this error on the server: TypeError: Do not know how to serialize a BigInt. This error occurs because BigInt values aren’t serialized in JSON by default. To fix this, we need to define our own toJSON method to return a string.
BigInt.prototype.toJSON = function () { return this.toString();};
All in all now, our actions.js file should look like this:
"use server";import { Client } from "square";import { randomUUID } from "crypto";BigInt.prototype.toJSON = function () { return this.toString();};const { paymentsApi } = new Client({ accessToken: process.env.SQUARE_ACCESS_TOKEN, environment: "sandbox",});export async function submitPayment(sourceId) { try { const { result } = await paymentsApi.createPayment({ idempotencyKey: randomUUID(), sourceId, amountMoney: { currency: "USD", amount: 100, }, }); return result; } catch (error) { console.log(error); }}
We can now call this Server Action from our PaymentForm component like so:
"use client";import { CreditCard, PaymentForm } from "react-square-web-payments-sdk";import { submitPayment } from "./actions/actions";export default function Home() { const appId = "YOUR_APP_ID"; const locationId = "YOUR_LOCATION_ID"; return ( <PaymentForm applicationId={appId} locationId={locationId} cardTokenizeResponseReceived={async (token) => { const result = await submitPayment(token.token); console.log(result); }} > <CreditCard /> </PaymentForm> );}
That’s all there is to it. We now have a fully functioning end-to-end payment flow. If you enter a credit card number and click pay, you’ll see the payment response logged in the developer console. Give it a try with one of the Sandbox credit card numbers.
Conclusion
With this setup, you can now begin to customize this payment flow for your application. The react-square-web-payments-sdk offers all kinds of options for doing things like styling your credit card form or adding additional payment methods like Apple Pay and Google Pay. So give this a try and incorporate this payment flow into your Next.js app today. Don’t forget that all of the code from this guide can be found in the Square Next Online Payments Example repo. We can’t wait to see what you build!
Authored By

