
Square implementation with Laravel
A guest contribution written for Square by our friend Nikola Gavrić
Background and introduction
Hello! I’m Nikola Gavrić, a Software Engineer in Niš, Serbia. I was using Square for several projects and after searching to find a library for the Laravel framework (there were basically no Square integrations with Laravel), I decided to create my own. After receiving emails from developers requesting various features, I decided to make Laravel Square developer-friendly and easy-to-use with low-effort required to setup.
What is Laravel Square?
Laravel Square is a package for Laravel/Lumen that adds basic payment functionality, as well as support for adding a customer and itemization to orders on a transaction with discounts and taxes. The package depends on Laravel or Lumen ≥ 5.5.
How do I setup Laravel Square in my application?
This tutorial doesn’t include setting up your payment form — you can check that out in Square’s official documentation here.
laravel new square-test

// or

composer create-porject laravel/laravel square-test
After you have your project set, install your library and configure it to your needs.
composer require nikolag/laravel-square
Right now, the current version is 2.1.2.
Now that we’ve installed the library, we need to configure it to work with our application. The first thing to do is to generate a basic configuration file using the following command:
php artisan vendor:publish --tag=nikolag_config
There are a couple key concepts that will help you with next steps once you publish the configuration file: default and connections. The default** option **represents the default payment implementation, which will be used when utilizing contracts instead of a Facade approach. The connections option describes all possible connections and their settings, designed with the idea that the core package can be used to create other payment implementations, thus requiring an array of connections and their configurations.
After library installation and configuration, we need to set up a few environment variables for our project.
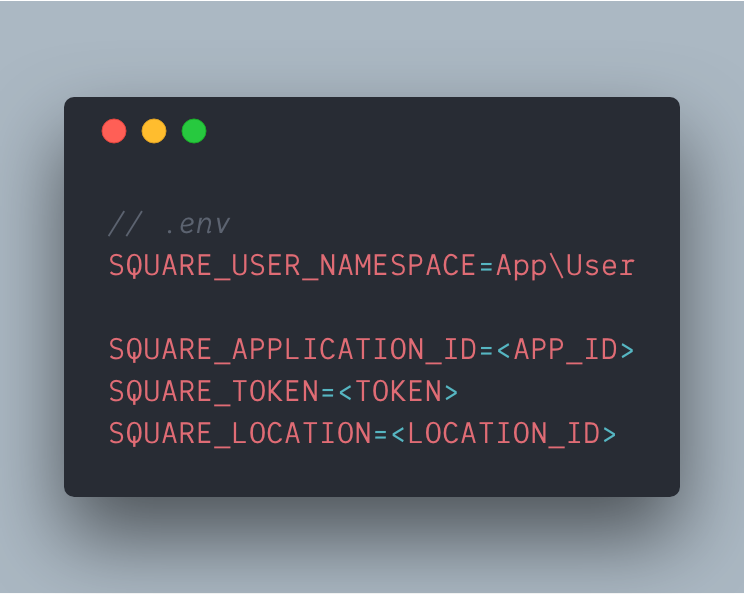 Environment configuration
What is the Laravel Square library used for?
Use cases include:
-
One-time payments (single transactions)
-
Payments with customers
-
Payments with orders
-
Payments with orders and customers
How do I use the Laravel Square library?
In order to charge customers, we need to add a trait to our User class (merchant) and then run php artisan migrate to generate the tables required for the library to work.
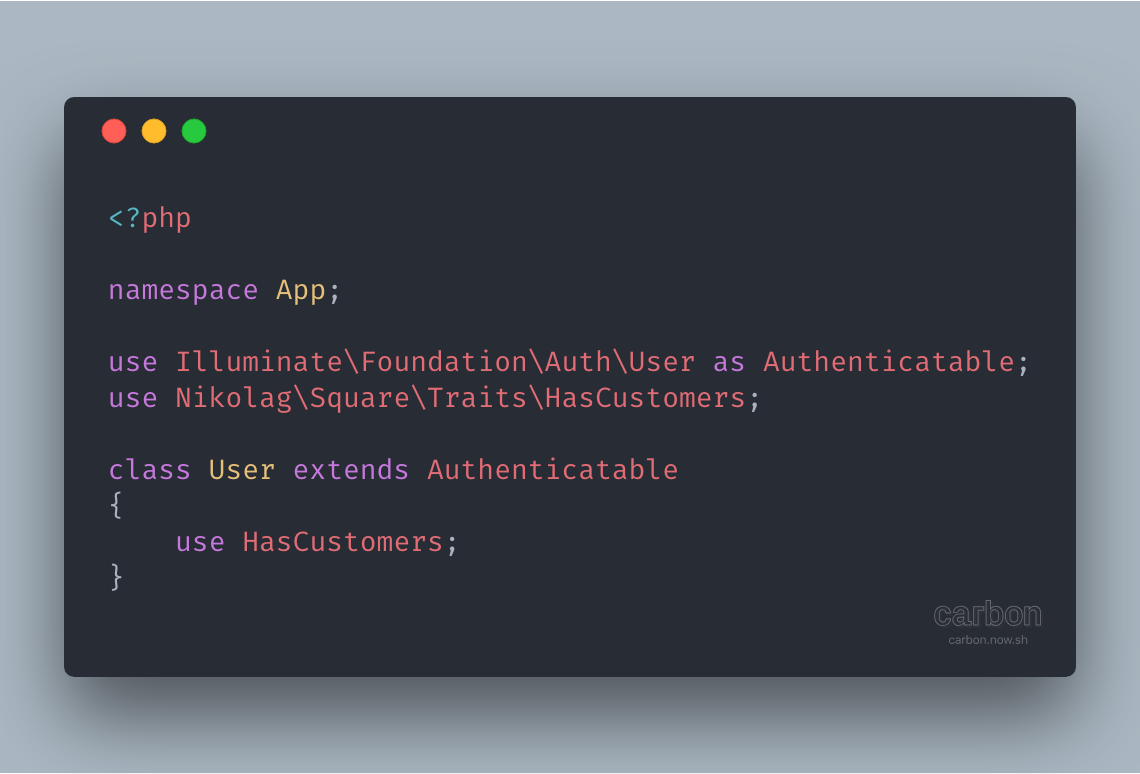 User class (merchant) with a trait
Now that you have everything set up, you can start using one-time charges and charging your customers. The next step is to create routes which will trigger our charges. Let’s register these new routes within web routes inside routes/web.php:
 Web routes
With routes set up, let’s create a controller to handle our calls using the following command:
php artisan make:controller ChargeController
Then we need to create and implement our charging methods, as seen below:
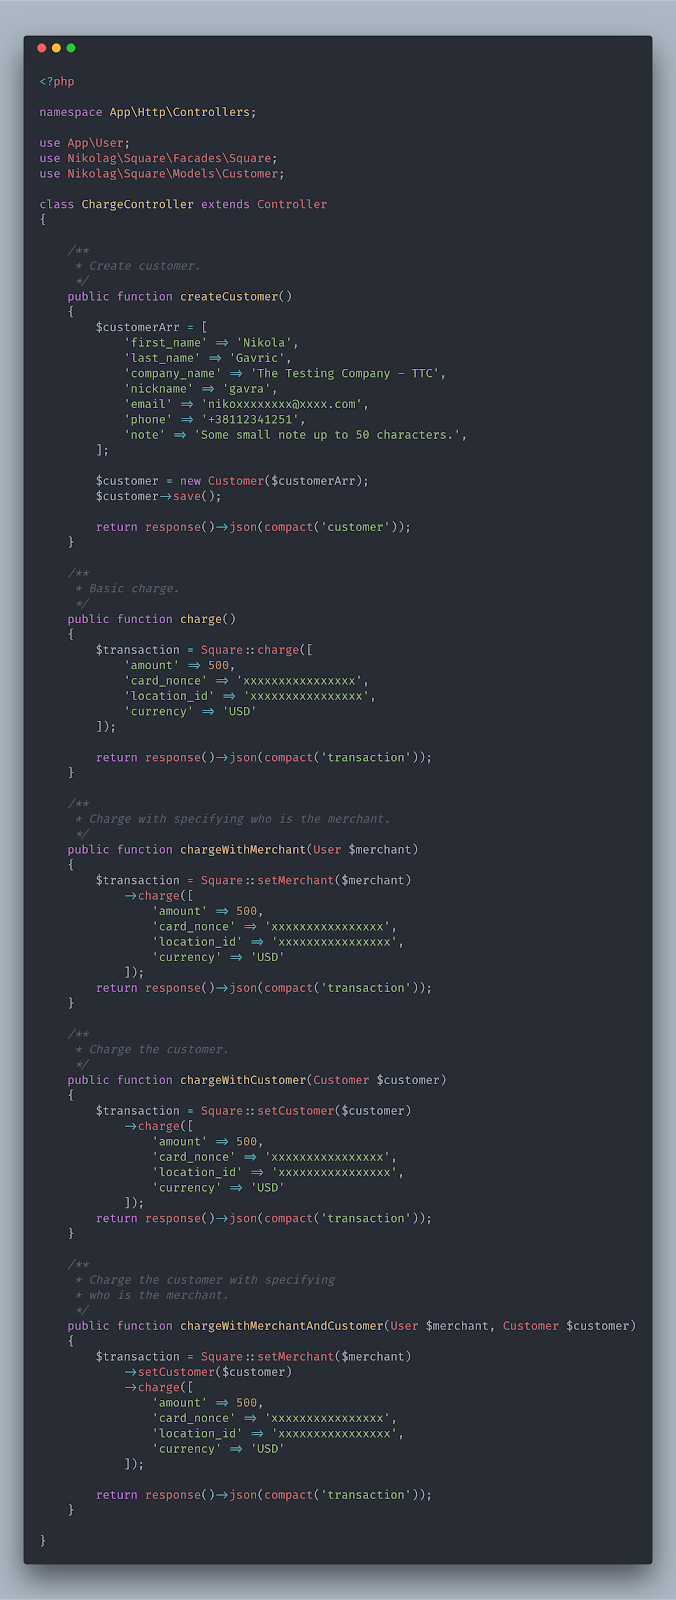 Charge controller and its methods
You’ll notice a familiar pattern in how you can chain methods and build your charge. If you’re looking for more info on our methods, check the wiki pages for a clear description. Now that we have our controller configured and our methods implemented, we can test our calls by actually triggering these routes that were defined and see what responses we get. I strongly recommend that you use your sandbox credentials when testing.
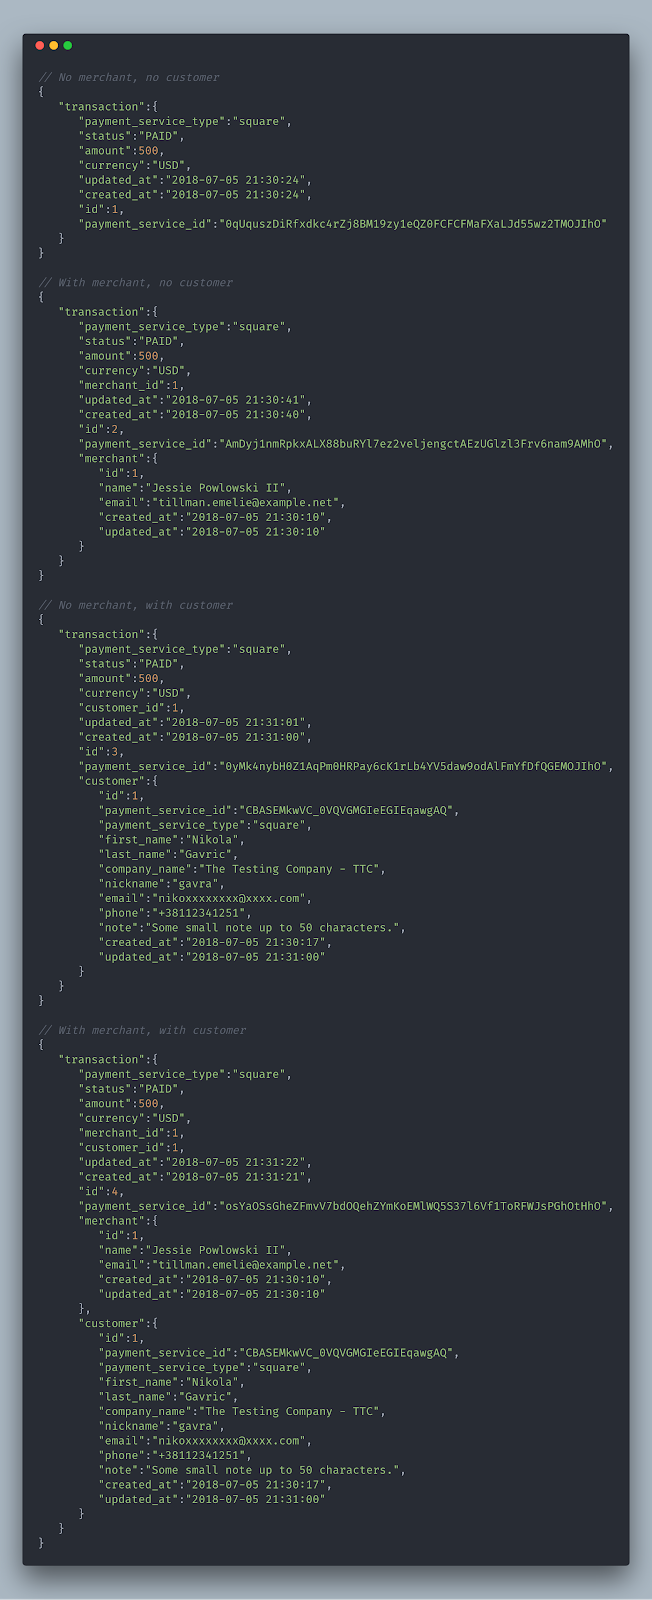 Endpoint responses
We can see in the above example how our transaction builds up as we feed it more information. We can also see that both our transaction and our customer have payment_service_type and payment_service_id. This is because we are actually saving these entities/models/objects in the payment Vault (in this case, Square Vault).
Okay, but what if my customers are placing orders, using one-time discounts, and then I have to apply tax?
This is where our charging process with ordering systems comes in handy.
Charging your customers through Orders is simple. All you have to do is define your Order model, use theHasProducts trait that we offer, and update your environment file.
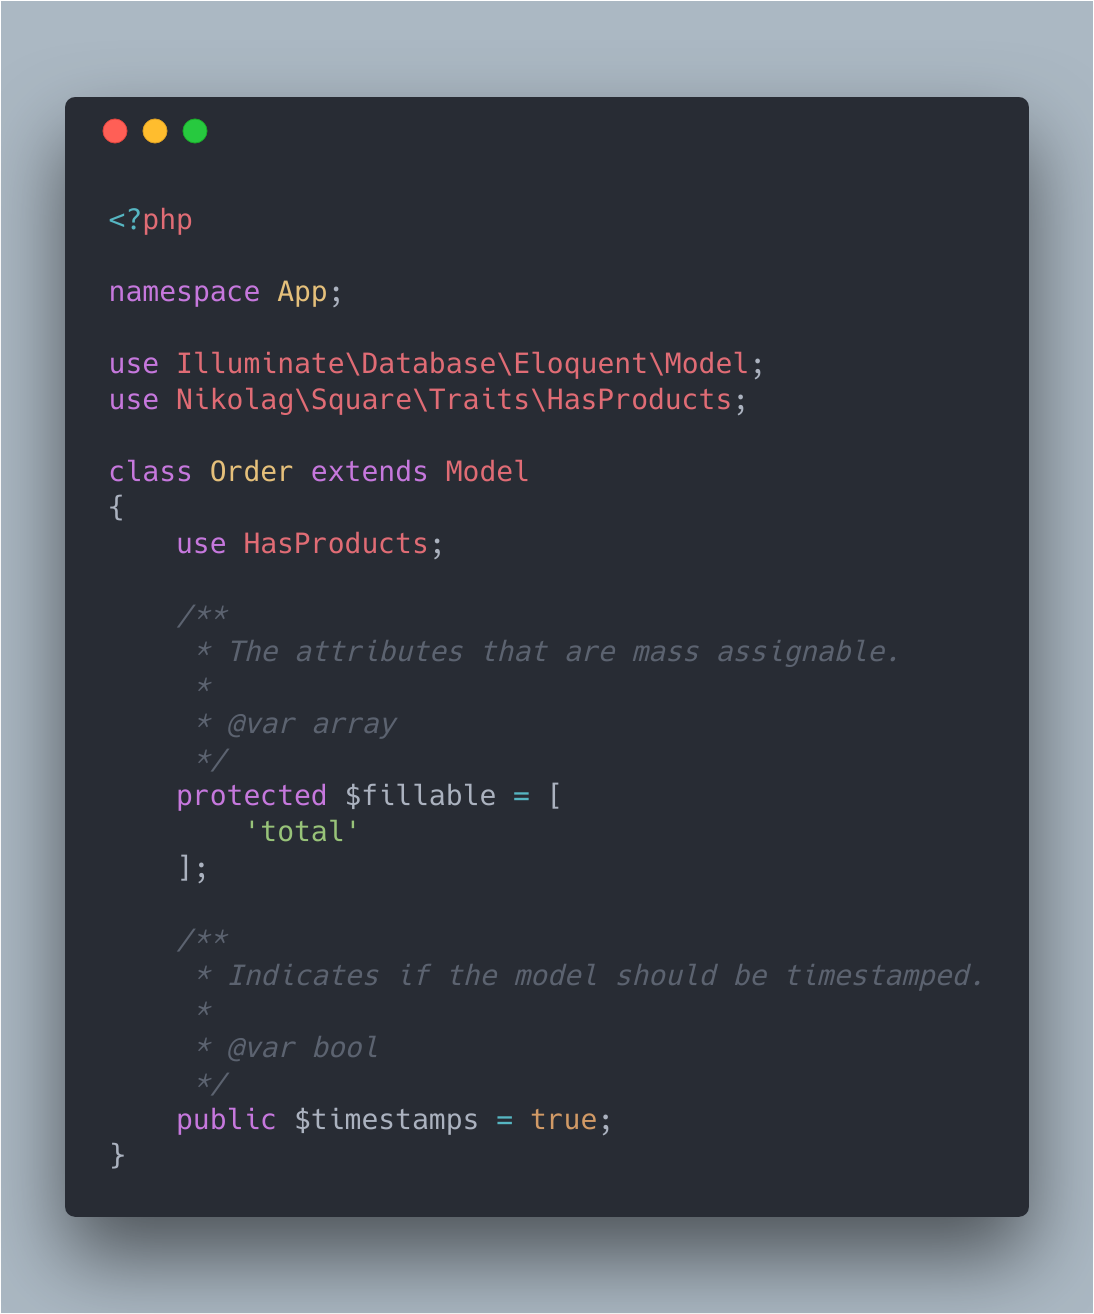 Order class and HasProducts trait
After defining the Order class, you can add as many additional fields to it as you want. You can create your own migration file, customize your own Order in any way that you want, and you can update your environment file accordingly, as long as you use our trait HasProducts.
Next we should look at migrations:
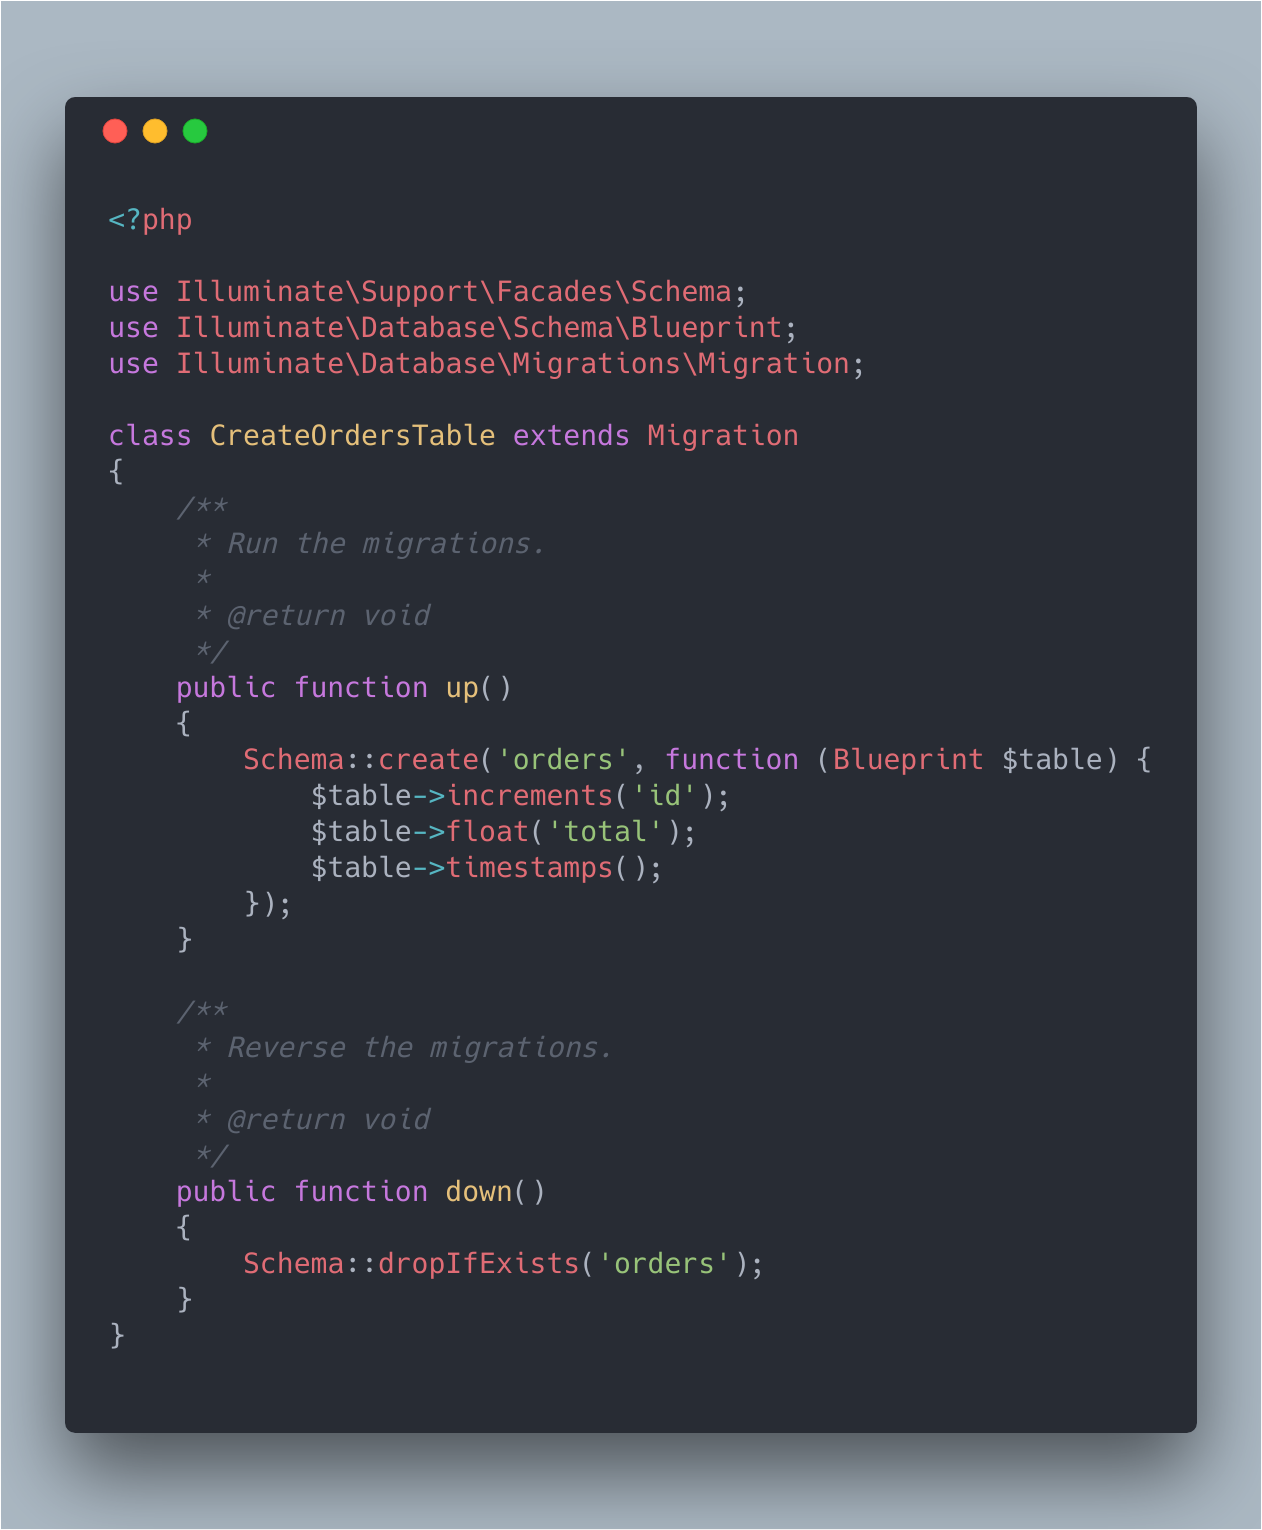 Order migration file
We have added a new column called “Total” to store orders’ total value, so we don’t have to re-calculate every time. Again: you can add as many columns/attributes to your Order class as you want, but for the purpose of this tutorial, we will be adding Total.
After finishing both migrations and the model itself, it’s time to update our environment and tell our application which model we will be using for Orders system.
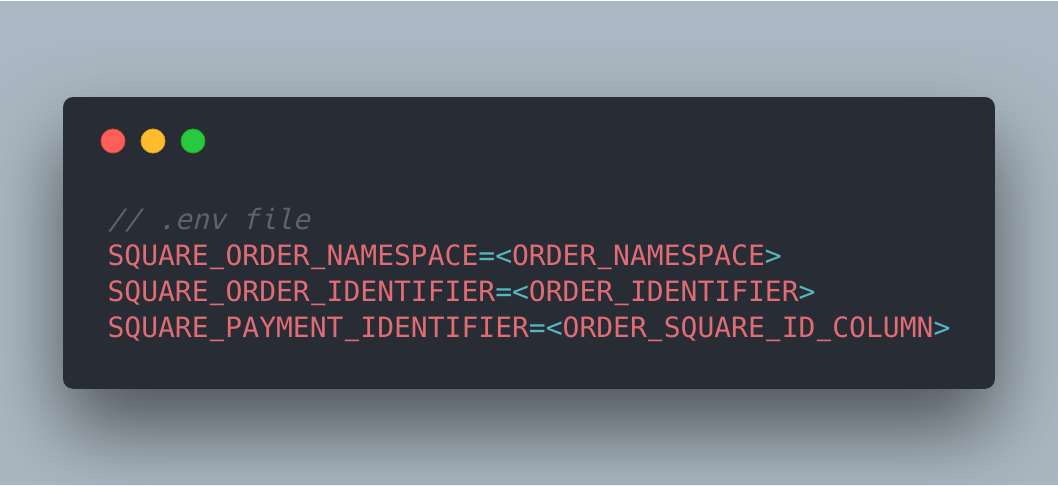 Environment configuration for Order system
The first two environment variables are clear: first is the fully qualified class name (namespace) and second is the primary key of our Order model. These two variables are by default set to App\Order and id. If you don’t have any composite key as your primary key or string and your namespace is grouped under App, you can just skip this step. The third variable SQUARE_PAYMENT_IDENTIFIER represents the name of the column in which we will store the ID of the order saved inside Square service. The SQUARE_PAYMENT_IDENTIFIER variable also has a default value, but if for some reason it is already taken, you can define your own name. To view all the variables we are using, you can take a look at config/nikolag.php.
Our next step is to implement our endpoints we created earlier inside our web routes by simply creating a new controller. So let’s run this command:
php artisan make:controller OrderController
Now it is time to implement our methods (seen below):
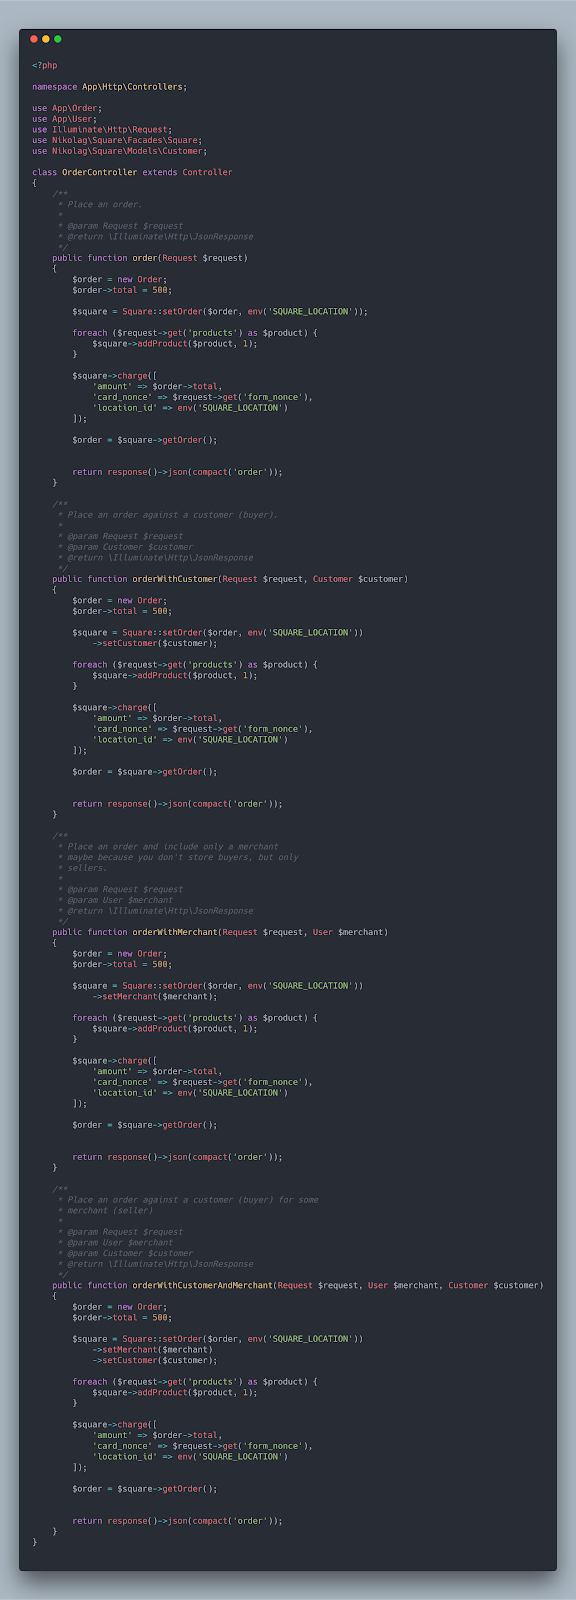 Order controller with implemented methods
Looks like a big chunk of code to analyze! Nope, not really — if you just look at the method names it’s pretty clear what we are trying to do. It’s even easier if you see our chained methods on theSquare facade and we can chain these methods in any order that we want.
We won’t cover taxes and discounts in this how-to guide — you can refer to our wiki pages and check out the concrete examples for each scenario there.
You must be asking yourself now, what are these products he is getting from a request itself?
What are Products?
Products can be an associative array or a collection of eloquent models. Why? Because we don’t want to always re-create our existing products, we want to store and remember them somewhere and just reuse them when we need them. In that case, we will be using Eloquent models; on the other hand, if we are just creating a new item or a customized version of a product, we can always create that as a unique product itself.
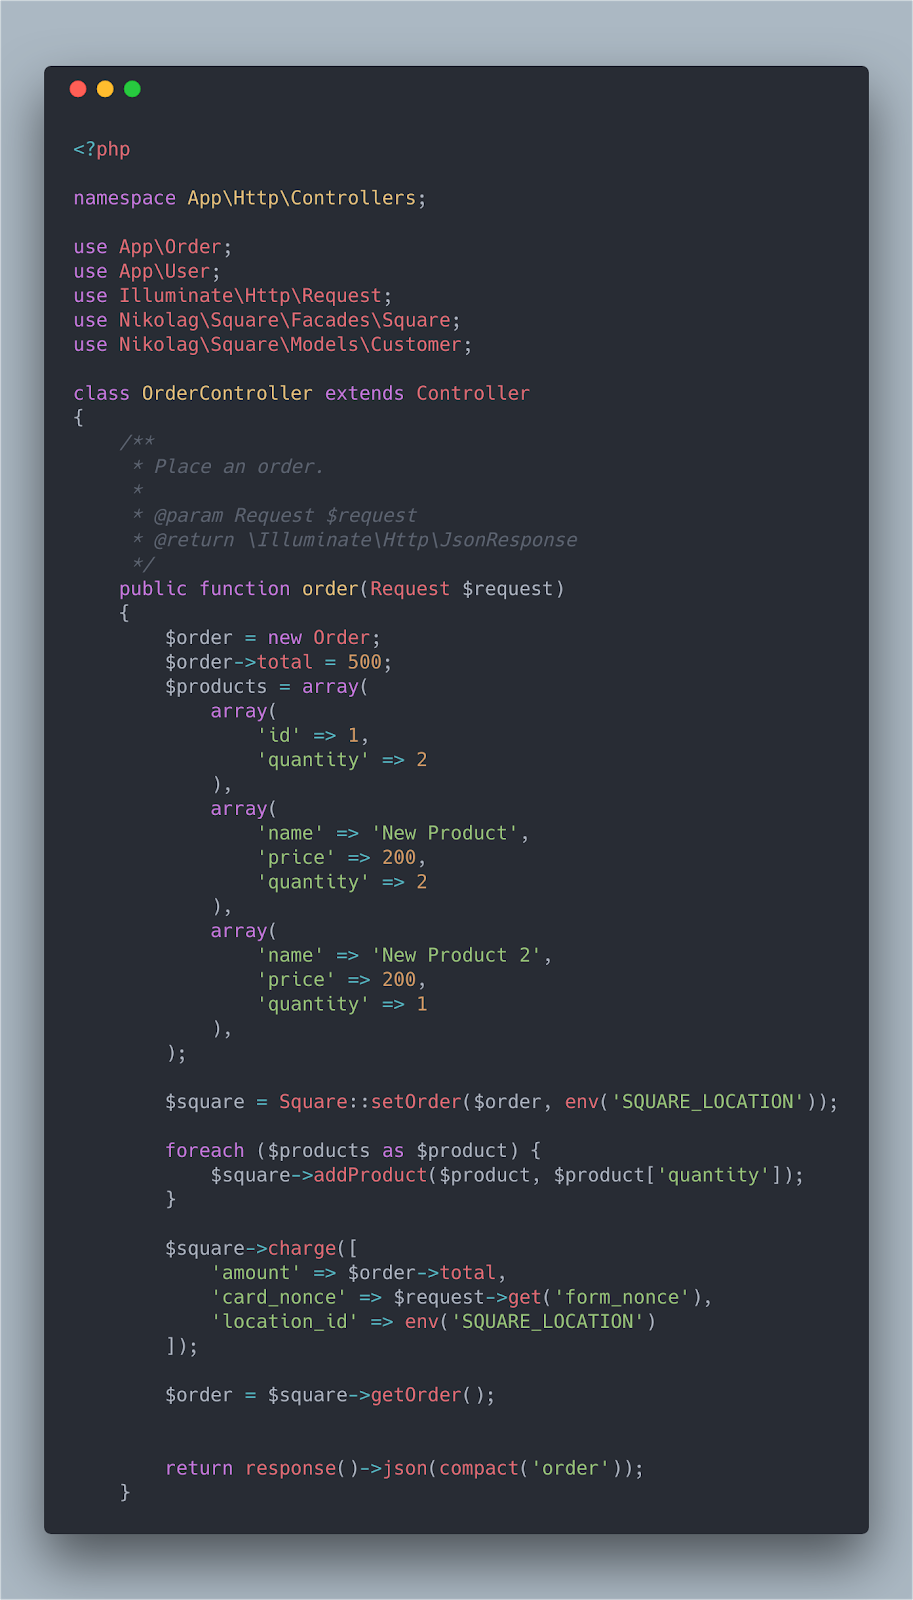 Products as an associative array
Above we can see a minimalist example of products as an associative array. All these products will be created and stored for us and used in a transaction. We could retrieve these same products later and reuse them if we wanted to.
Now we will retrieve and reuse the products we already saved.
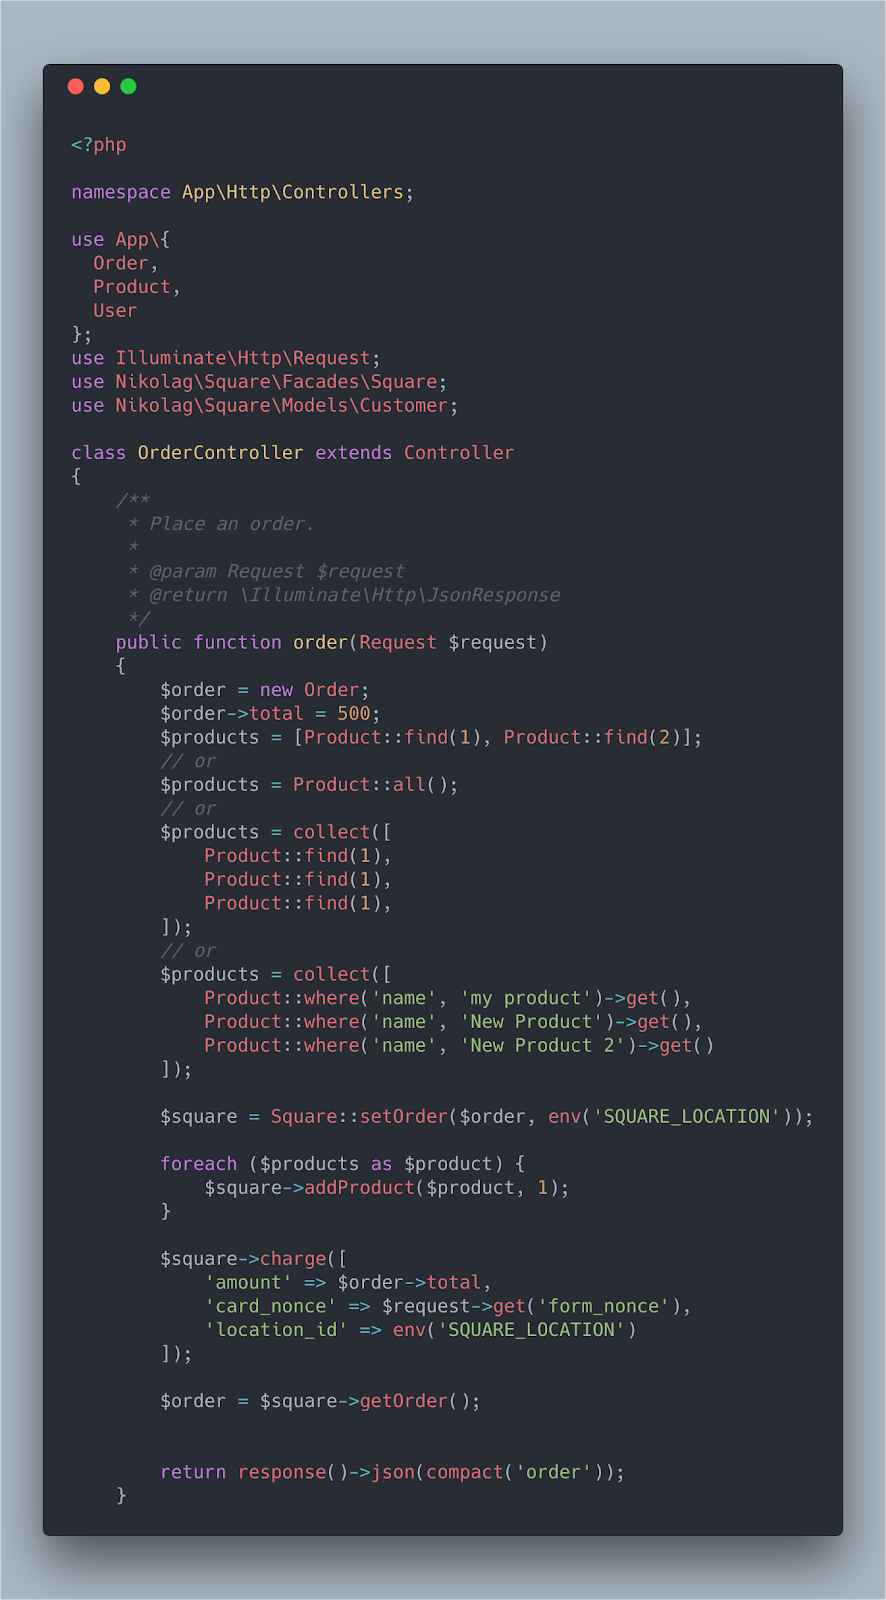 Products as Eloquent models
As you can see, we are retrieving them as a normal Eloquent model, and querying them accordingly.
Bottom line: this library can give you as much flexibility as you need as a developer. It gives you back time and resources that you can invest in your own implementation. With less worrying about compliance, integration, exception handling, and the like.
Conclusion
Finally! A lot of time, knowledge and effort went into building this seemingly small library to make it flexible, rewarding, fast, reliable, and developer friendly. My goal was to create a reliable package that’s payment gateway agnostic.
If you wish to clone this project, you can go to this github link and download it in zip format or clone and start coding. You can also reach me on github at NikolaGavric94 .
Thank you for reading through this tutorial on how to use laravel-square library to charge your customers with ease. Just implement the library and enjoy.
Have your own story about something that you’ve built on or for Square, let us know! Tweet us @SquareDev, join our Slack community, and/or subscribe to our newsletter to let us know!
Authored By


