
Introducing Radiography
Text-ray goggles for your Android views
![]()
As Android developers, a large part of our job is ultimately to show pixels on people’s devices. The rest of our job is making those pixels do something when you touch them. Despite this simple goal, getting the right pixels to show up can sometimes be a challenge. When something goes wrong and your views don’t look like they should, it’s helpful to be able to peek behind the curtain to see what the views are actually doing. When you can connect a debugger to your app, Android Studio’s Layout Inspector is probably the best tool for the job. However, mobile apps are just that – mobile. Most crashes happen in the wild, where you can’t debug them. If you upload crashes to a service like Bugsnag, you might want to see what your user was looking at but not upload actual screenshot images.
Today, we’re introducing Radiography, a small library for looking at your view hierarchies with text-ray vision.
DecorView { 1080×2160px }
├─LinearLayout { id:main, 1080×1962px }
│ ├─EditText { id:username, 580×124px, focused, text-length:0 }
│ ├─EditText { id:password, 580×124px, text-length:0 }
│ ╰─LinearLayout { 635×154px }
│   ├─Button { id:signin, 205×132px, text-length:7 }
│   ╰─Button { id:forgot_password, 430×132px, text-length:15 }
├─View { id:navigationBarBackground, 1080×132px }
╰─View { id:statusBarBackground, 1080×66px }
At Square, we have been using this library to provide context in automated crash reports and help debug development apps since 2015. We recently converted the code to Kotlin and modernized the API, and are excited to finally open source it.
The initial public release of Radiography starts at version 2.0.0. What happened to version 1.0? We’ve been using version 1.x internally for five years, and we feel that publicly releasing the library as version 2 accurately represents its maturity.
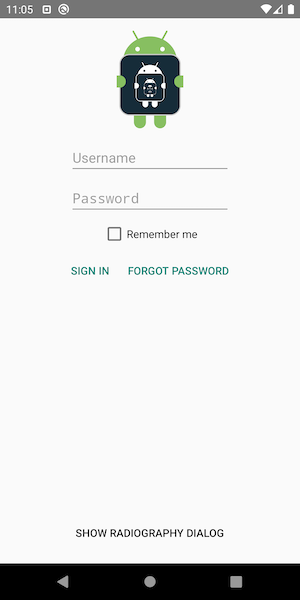
Using Radiography to dump your view hierarchy couldn’t be easier. From anywhere in your app, and on any thread, simply call Radiography.scan(). You’ll get a description of all the views in all the windows your app is currently showing. For example, here’s a simple login screen and the output Radiography generates for it:
com.squareup.radiography.sample.MainActivity:
window-focus:false
 DecorView { 1080×2160px }
 ├─LinearLayout { 1080×2028px }
 │ ├─ViewStub { id:action_mode_bar_stub, GONE, 0×0px }
 │ ╰─FrameLayout { id:content, 1080×1962px }
 │   ╰─LinearLayout { id:main, 1080×1962px }
 │     ├─ImageView { id:logo, 1080×352px }
 │     ├─EditText { id:username, 580×124px, text-length:0 }
 │     ├─EditText { id:password, 580×124px, text-length:0 }
 │     ├─CheckBox { id:remember_me, 343×88px, text-length:11 }
 │     ├─LinearLayout { 635×154px }
 │     │ ├─Button { id:signin, 205×132px, text-length:7 }
 │     │ ╰─Button { id:forgot_password, 430×132px, text-length:15 }
 │     ├─View { 1080×812px }
 │     ╰─Button { id:show_dialog, 601×132px, text-length:23 }
 ├─View { id:navigationBarBackground, 1080×132px }
 ╰─View { id:statusBarBackground, 1080×66px }
The source is on GitHub. This screen is pretty simple, but scanning a real app can generate a lot of output, so you can specify a scope to only include the focused window or a particular view, and you can pass filters to exclude certain subtrees.
// Render only the view hierarchy from the focused window, if any.
val prettyHierarchy = Radiography.scan(
    scanScope = FocusedWindowScope)

// Filter out views with specific ids.
val prettyHierarchy = Radiography.scan(
     viewFilter = skipIdsViewFilter(R.id.debug_drawer))
If your app uses custom views that you’d like to get more detail about, you can provide your own custom renderers as well.
One more thing…
Radiography is great for dumping your view hierarchy from the wild. But what if your app isn’t rendered using views? Google has been working on a brand new UI toolkit called Jetpack Compose. While Compose is compatible with Android views, it does not use them internally – it has its own way of managing structure and state. Tools that only work with Android Views won’t help you debug Compose-based apps. Android Studio’s Layout Inspector only works with Android views right now, although it will eventually support Compose.
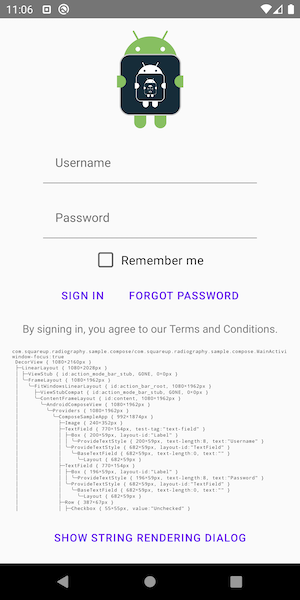
Radiography supports Compose today. We rewrote the sample screen above in Compose to compare (source is also on GitHub).
com.squareup.radiography.sample.compose.MainActivity:
window-focus:false
 DecorView { 1080×2160px }
 ├─LinearLayout { 1080×2028px }
 │ ├─ViewStub { id:action_mode_bar_stub, GONE, 0×0px }
 │ ╰─FrameLayout { 1080×1962px }
 │   ╰─FitWindowsLinearLayout { id:action_bar_root, 1080×1962px }
 │     ├─ViewStubCompat { id:action_mode_bar_stub, GONE, 0×0px }
 │     ╰─ContentFrameLayout { id:content, 1080×1962px }
 │       ╰─AndroidComposeView { 1080×1962px, focused }
 │         ╰─Providers { 1080×1962px }
 │           ╰─ComposeSampleApp { 992×1874px }
 │             ├─Image { 240×352px }
 │             ├─TextField { 770×154px, test-tag:"text-field" }
 │             │ ├─Box { 200×59px, layout-id:"Label" }
 │             │ │ ╰─ProvideTextStyle { 200×59px, text-length:8 }
 │             │ ╰─ProvideTextStyle { 682×59px, layout-id:"TextField" }
 │             │   ╰─BaseTextField { 682×59px, text-length:0 }
 │             │     ╰─Layout { 682×59px }
 │             ├─TextField { 770×154px }
 │             │ ├─Box { 196×59px, layout-id:"Label" }
 │             │ │ ╰─ProvideTextStyle { 196×59px, text-length:8 }
 │             │ ╰─ProvideTextStyle { 682×59px, layout-id:"TextField" }
 │             │   ╰─BaseTextField { 682×59px, text-length:0 }
 │             │     ╰─Layout { 682×59px }
 │             ├─Row { 387×67px }
 │             │ ├─Checkbox { 55×55px, value:"Unchecked" }
 │             │ ├─Spacer { 22×0px }
 │             │ ╰─Text { 298×59px, text-length:11 }
 │             ├─Row { 685×99px }
 │             │ ├─TextButton { 199×99px }
 │             │ │ ╰─Providers { 155×55px }
 │             │ │   ╰─Text { 155×52px, text-length:7 }
 │             │ ╰─TextButton { 442×99px }
 │             │   ╰─Providers { 398×55px }
 │             │     ╰─Text { 398×52px, text-length:15 }
 │             ├─AndroidView {  }
 │             │ ╰─ViewBlockHolder { 919×53px }
 │             │   ╰─TextView { 919×53px, text-length:53 }
 │             ├─ScrollableRow { 1324×588px }
 │             │ ╰─ScrollableColumn { 1324×1026px }
 │             │   ╰─Text { 1324×1026px, test-tag:"live-hierarchy", text-length:2525 }
 │             ╰─TextButton { 737×99px }
 │               ╰─Providers { 693×55px }
 │                 ╰─Text { 693×52px, text-length:28 }
 ├─View { id:navigationBarBackground, 1080×132px }
 ╰─View { id:statusBarBackground, 1080×66px }
To get started using Radiography, checkout the README on GitHub for Gradle instructions and more information on how to customize your scans. Bug reports and feature requests are welcome as well!
Happy scanning!


