
Fly Vim, First-Class
A Vim starter kit for OS X. Batteries included.
Written by Riley Strong.
Engineers at Square use a wide variety of code editors: Sublime, IntelliJ, Xcode, and Vim are among the most popular. Over time, the Square Vim enthusiasts have compiled settings, shortcuts, and plugins into a single repo we lovingly call Maximum Awesome, which we are open-sourcing today! We want anyone running OS X to be able to get up and running with Vim in minutes.
Why?
We pair program often (but not always) at Square. It’s a great way to tackle complex problems, onboard new teammates, and try out new ideas. By using the same base config files, there’s no need to relearn shortcuts when using someone else’s computer — it’s all standardized! This reduces a lot of friction and allows us to focus on the code.
Highlights
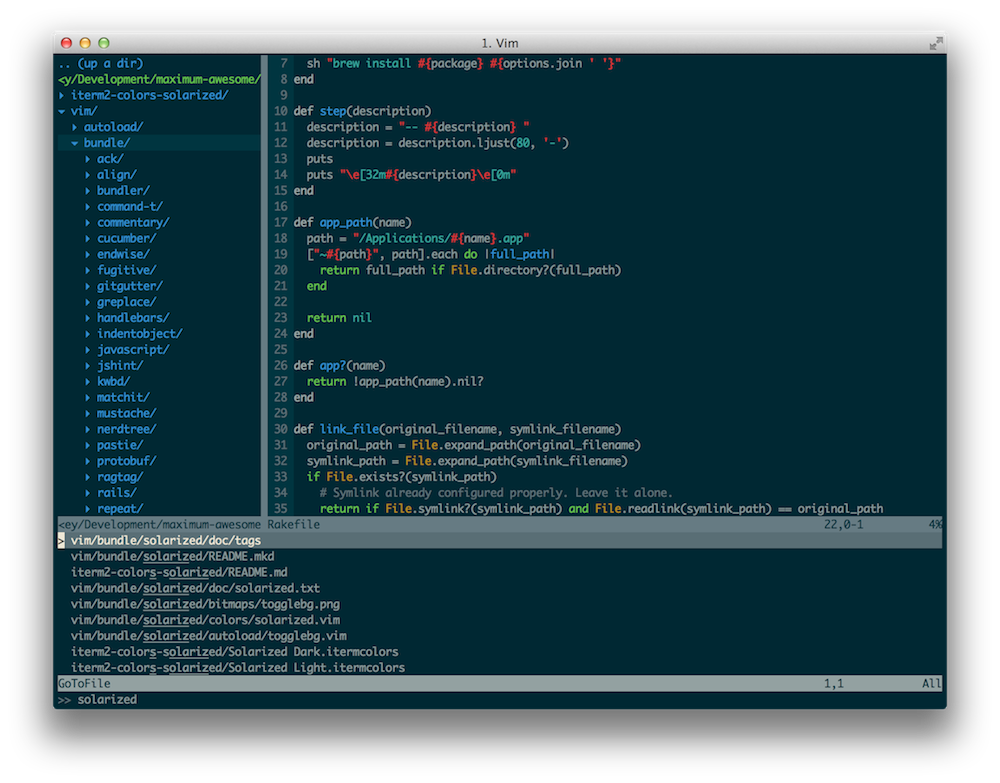
Maximum Awesome comes with many of the features you expect from a full IDE: syntax highlighting, code completion, error highlighting, etc. But it doesn’t stop there! To get things started, here are just a few of my favorite plugins and shortcuts:
-
Shared Clipboard: The Vim register and OS X clipboard are kept in sync, so I can move code around just like any native application.
-
Command-T Plugin: For those who use Sublime or TextMate, this superpower will already be familiar. While in Vim, use the shortcut ,t and type just a few letters to open the file you want.
-
NERDTree Plugin: Browse a project’s file structure, move files, or create new ones, all without ever leaving the comfort of Vim. Use ,d to toggle the drawer, or use ,f to open NERDTree to the current file.
-
Git Integration: The fugitive plugin has most git commands covered, but the Vim-specific ones I love are :Gblame and :Gdiff. I can easily understand who wrote different parts of a file with :Gblame or get a side-by-side comparison of what I’ve just written using :Gdiff.
-
Quickly Comment Code: Use \\ to quickly comment out a line or \ on a visual selection.
There are also some components included beyond Vim. Maximum Awesome comes with iTerm 2, a replacement for Terminal, a tmux config, and the Solarized color scheme. This just scratches the surface, though. Hop over to the README for a more exhaustive list.
Installing
On your Mac, Maximum Awesome will set everything up automatically for you. Just run the command below in your terminal:
git clone [https://github.com/square/maximum-awesome.git](https://github.com/square/maximum-awesome.git) && cd maximum-awesome && rake
Symlinks are created in your home directory that point to the repo so updating is as easy as git pull && rake. If you already had Vim or tmux config files, they’ve been backed up. For example, your old .vim directory is now .vim.bak. Keep reading about “Customizing” if you want to incorporate your existing settings.
Having problems installing? Open an issue on GitHub and we’ll take a look right away.
Customizing
In your home directory, Maximum Awesome creates a .vimrc.local file where you can customize Vim to your heart’s content. However, we’d love to incorporate your changes and improve Vim for everyone, so feel free to fork Maximum Awesome and open some pull requests!
Happy Vimming
Whether you’re the type of person with an hjkl shirt, or just trying out Vim for the first time, we hope Maximum Awesome makes writing code easier. Enjoy! Riley Strong - Profile *Follow the latest activity of Riley Strong - Profile on Medium. 93 people are following Riley Strong - Profile to see…*medium.com
Authored By
