
Building a photo booth for Droidcon NYC
A month ago, my team at Square released the Reader SDK. We had the opportunity to show a demo at Droidcon NYC. How could we make payments…
A month ago, my team at Square released the Reader SDK. We had the opportunity to show a demo at Droidcon NYC. How could we make payments cool?
We set up to build SquickPic, a fun Android photo booth: pay a dollar 💳, choose a filter, smile, Snap! 📸 The photo booth prints the picture and tweets it 🐦 (@SquickPic).
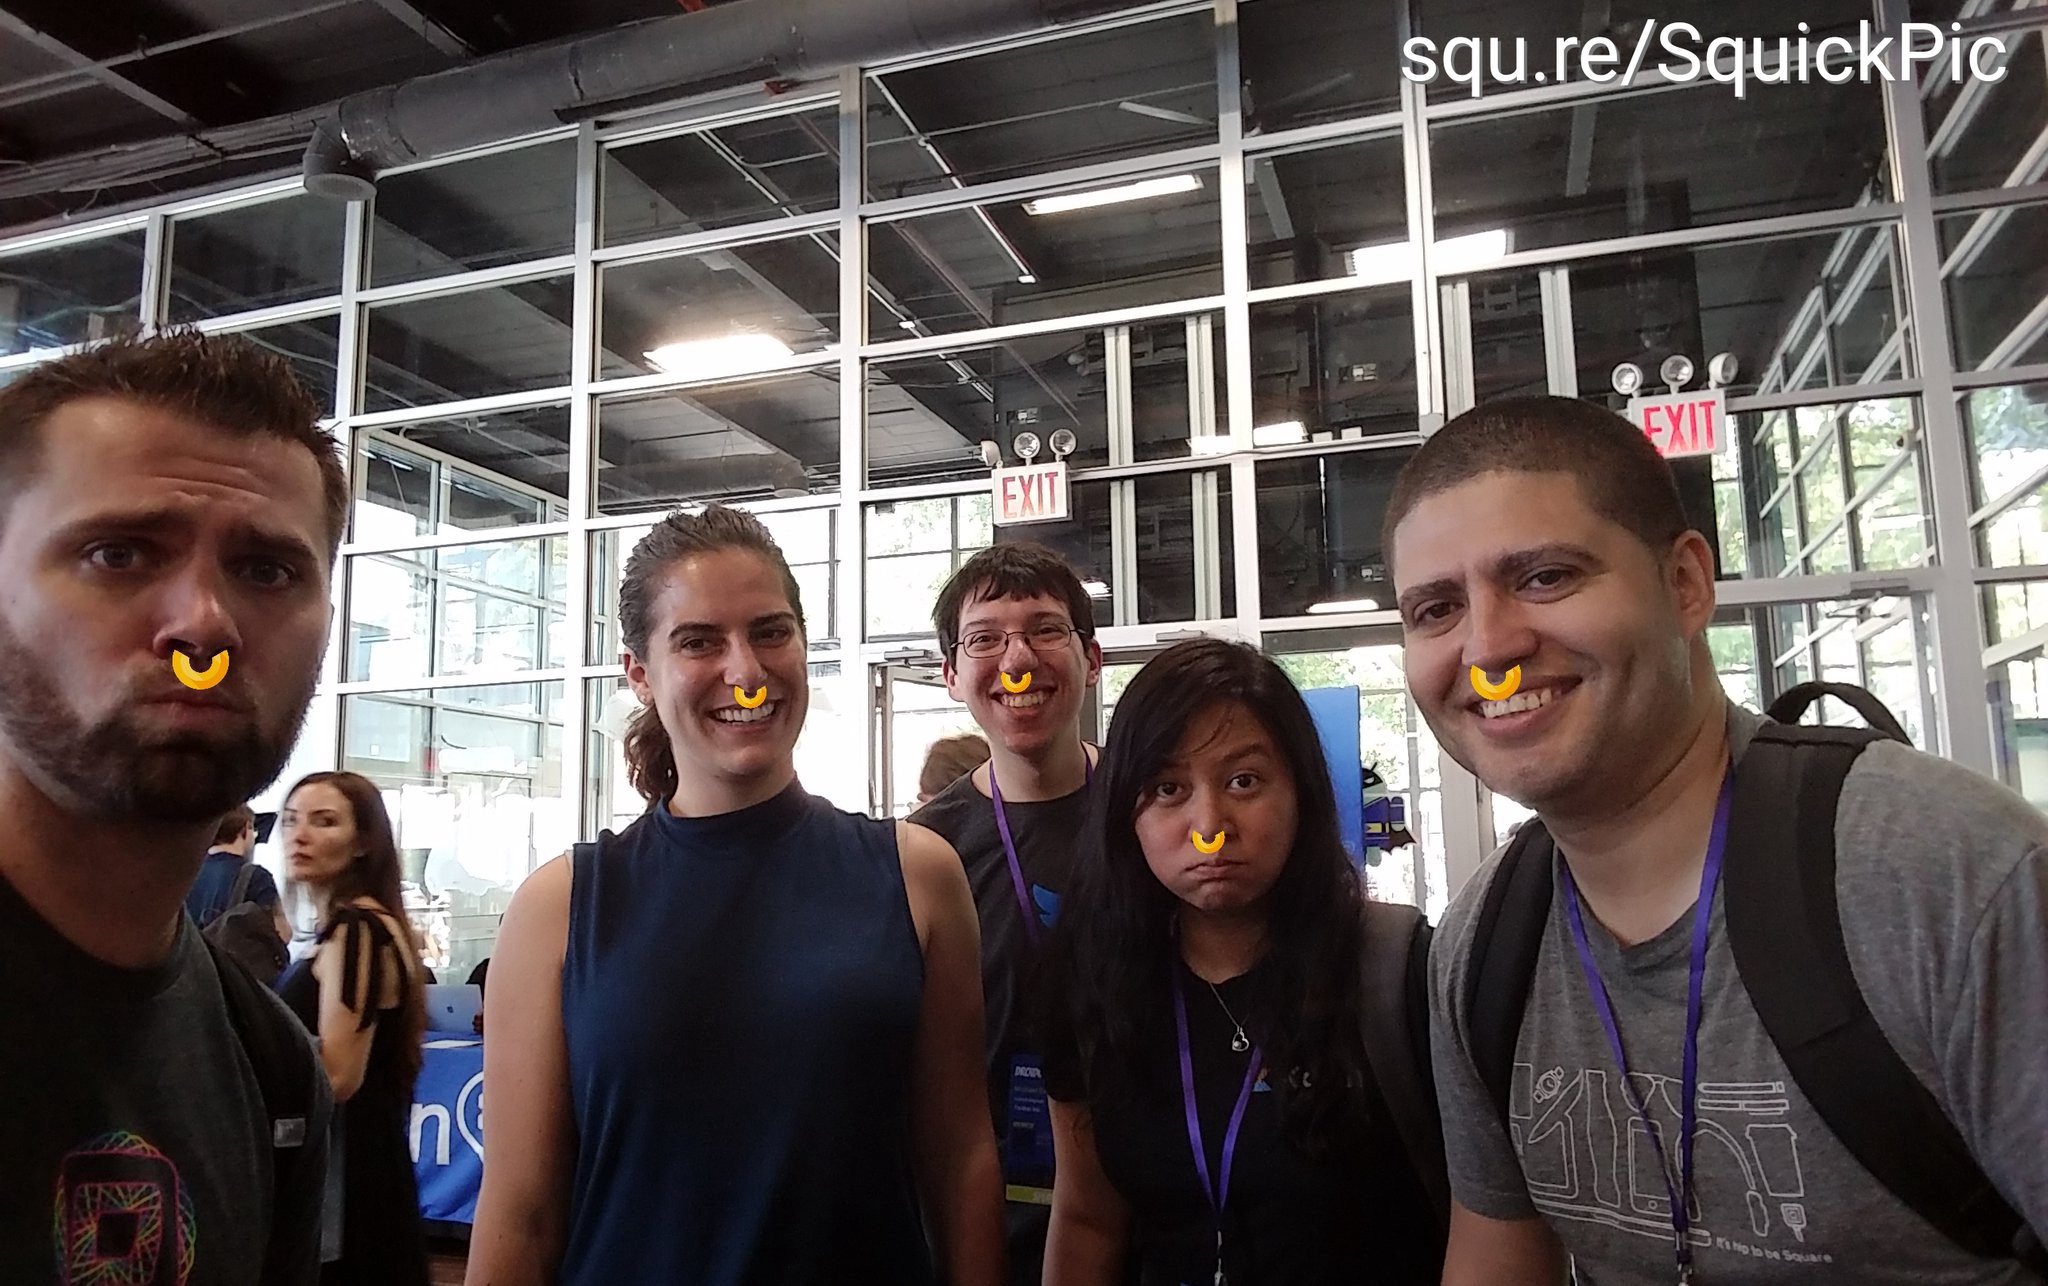 Android engineers Christina, Mike, Zarah and John joined me in sporting an Oreo Nose Ring
We decided to open source SquickPic (sources on GitHub). In this blog, we’ll go over the most interesting parts of the code:
-
Face detection
-
Kiosk experience
-
Taking payments
-
Printing with Google Cloud Print
-
Tweeting 🐦
App flow
 Idle screen, waiting for a new customer
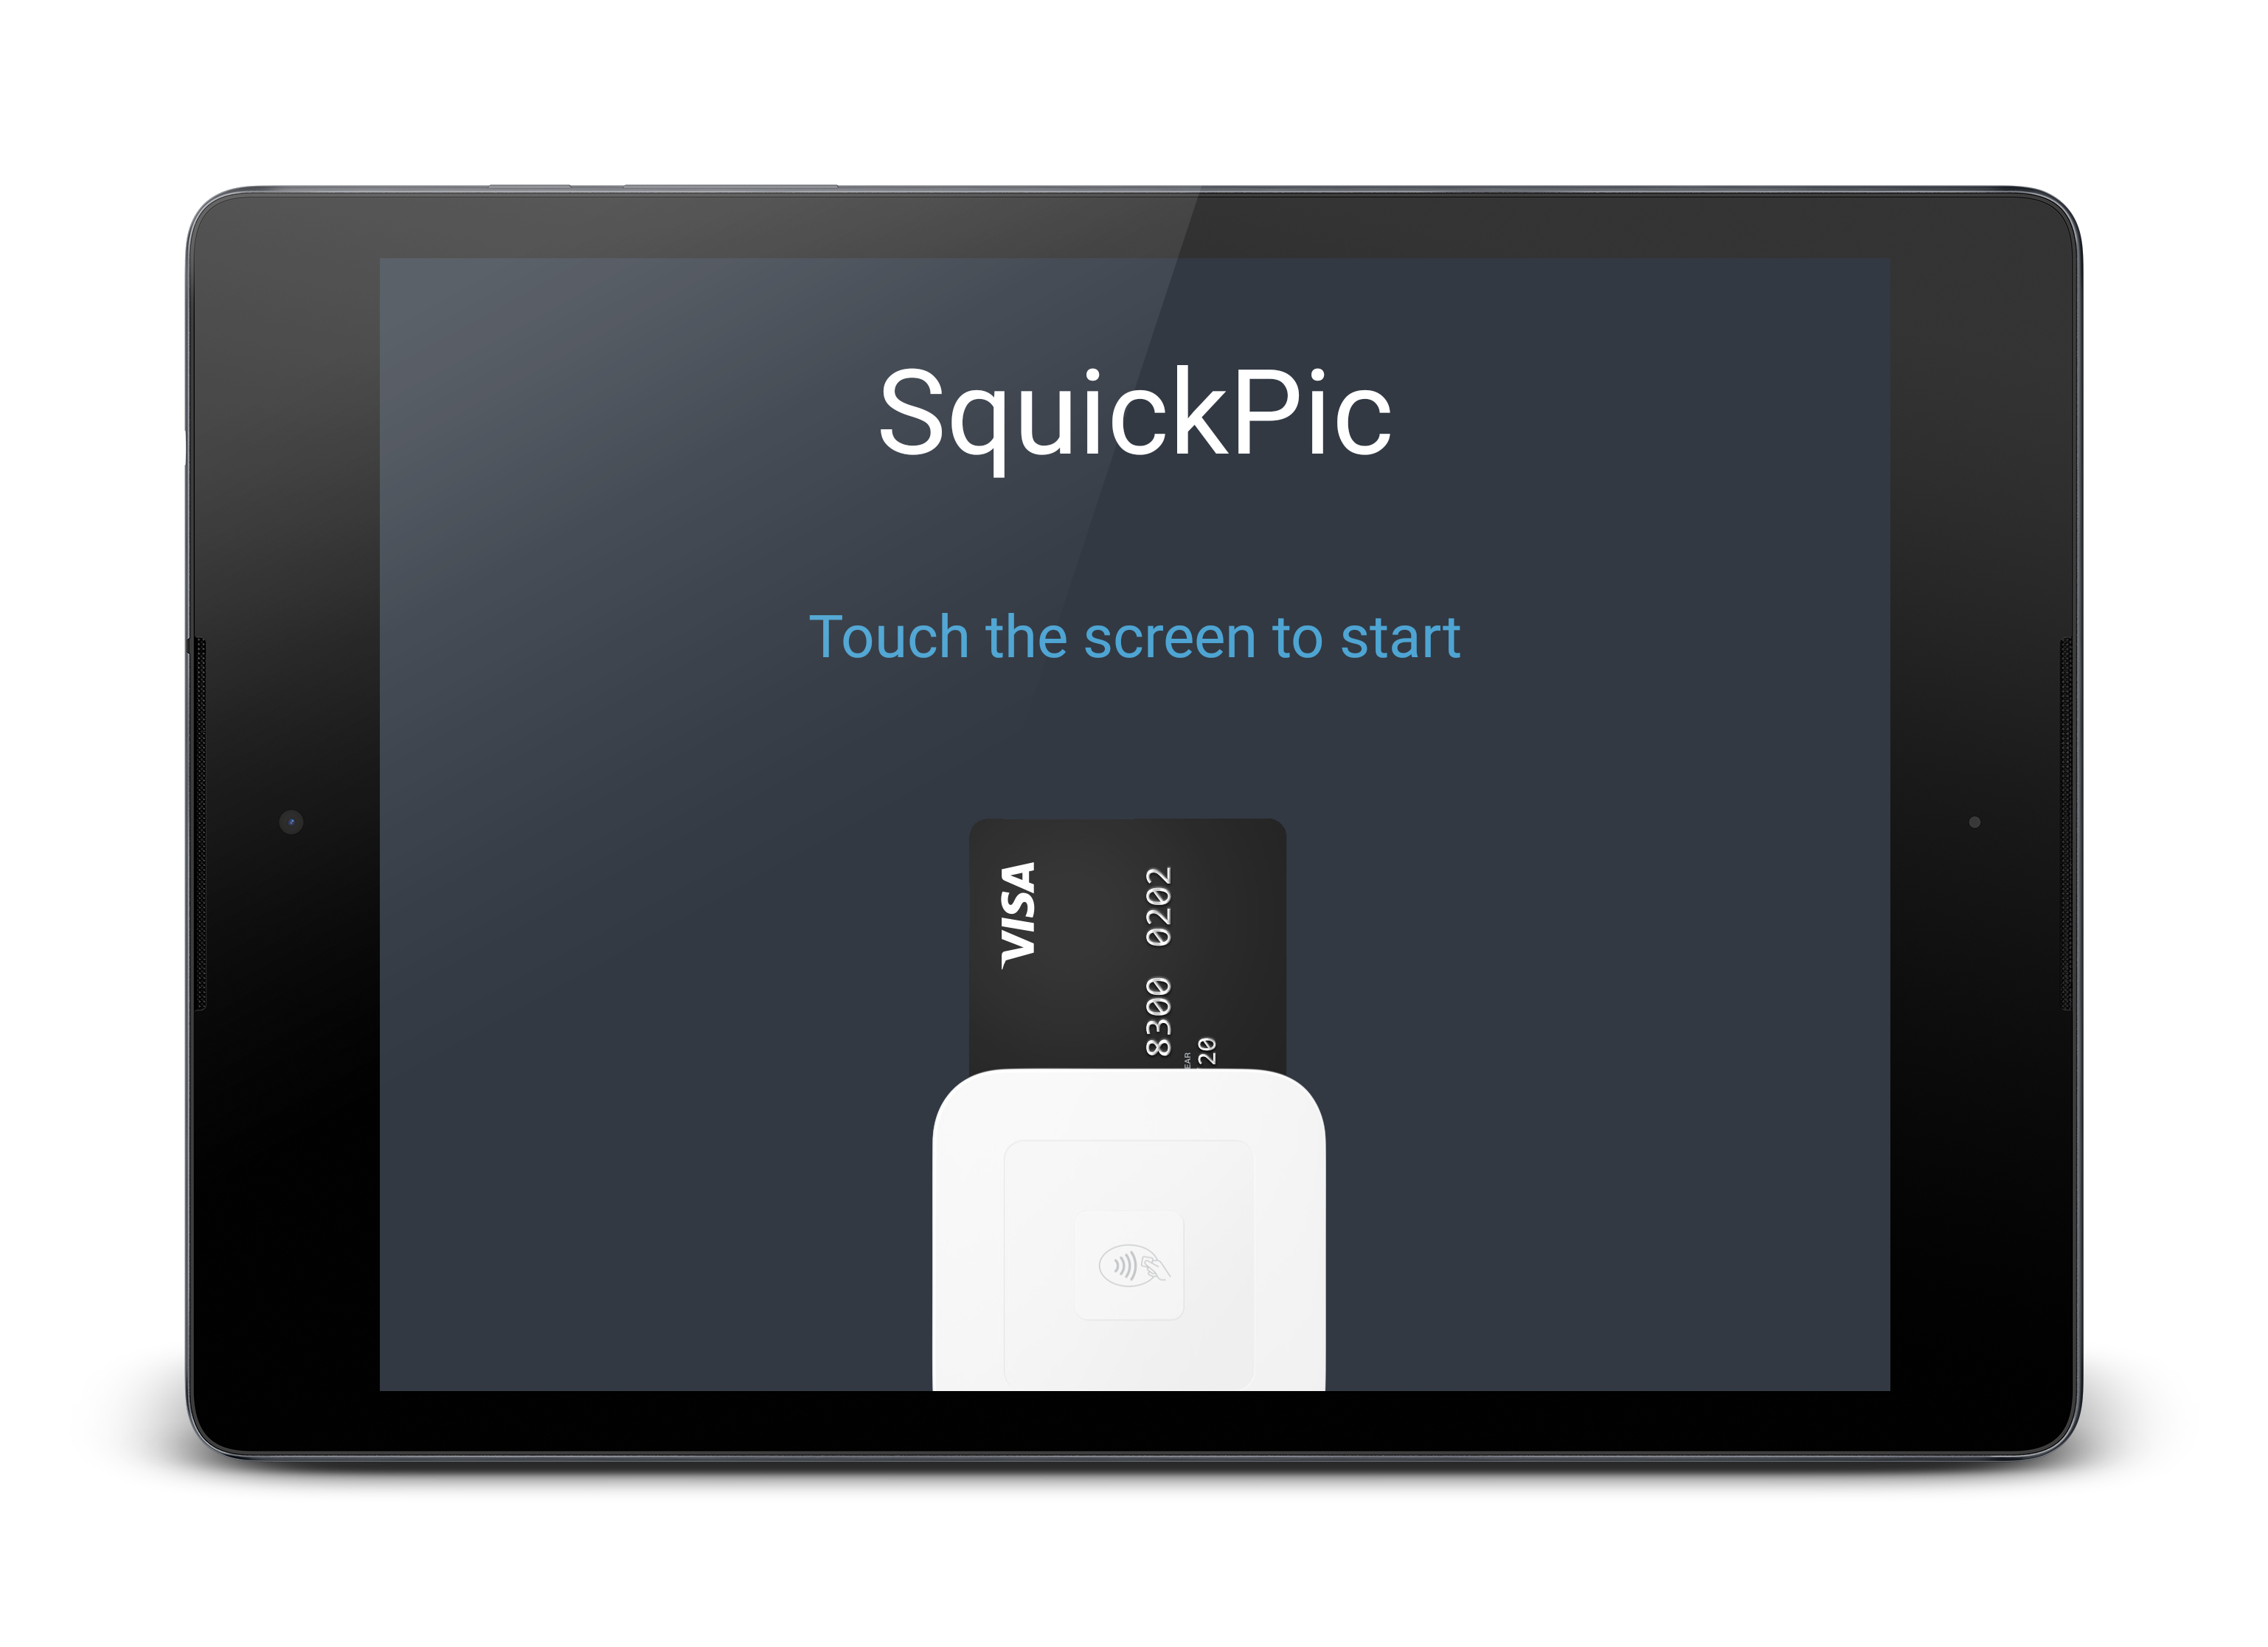
 💳Ready to take a card payment!
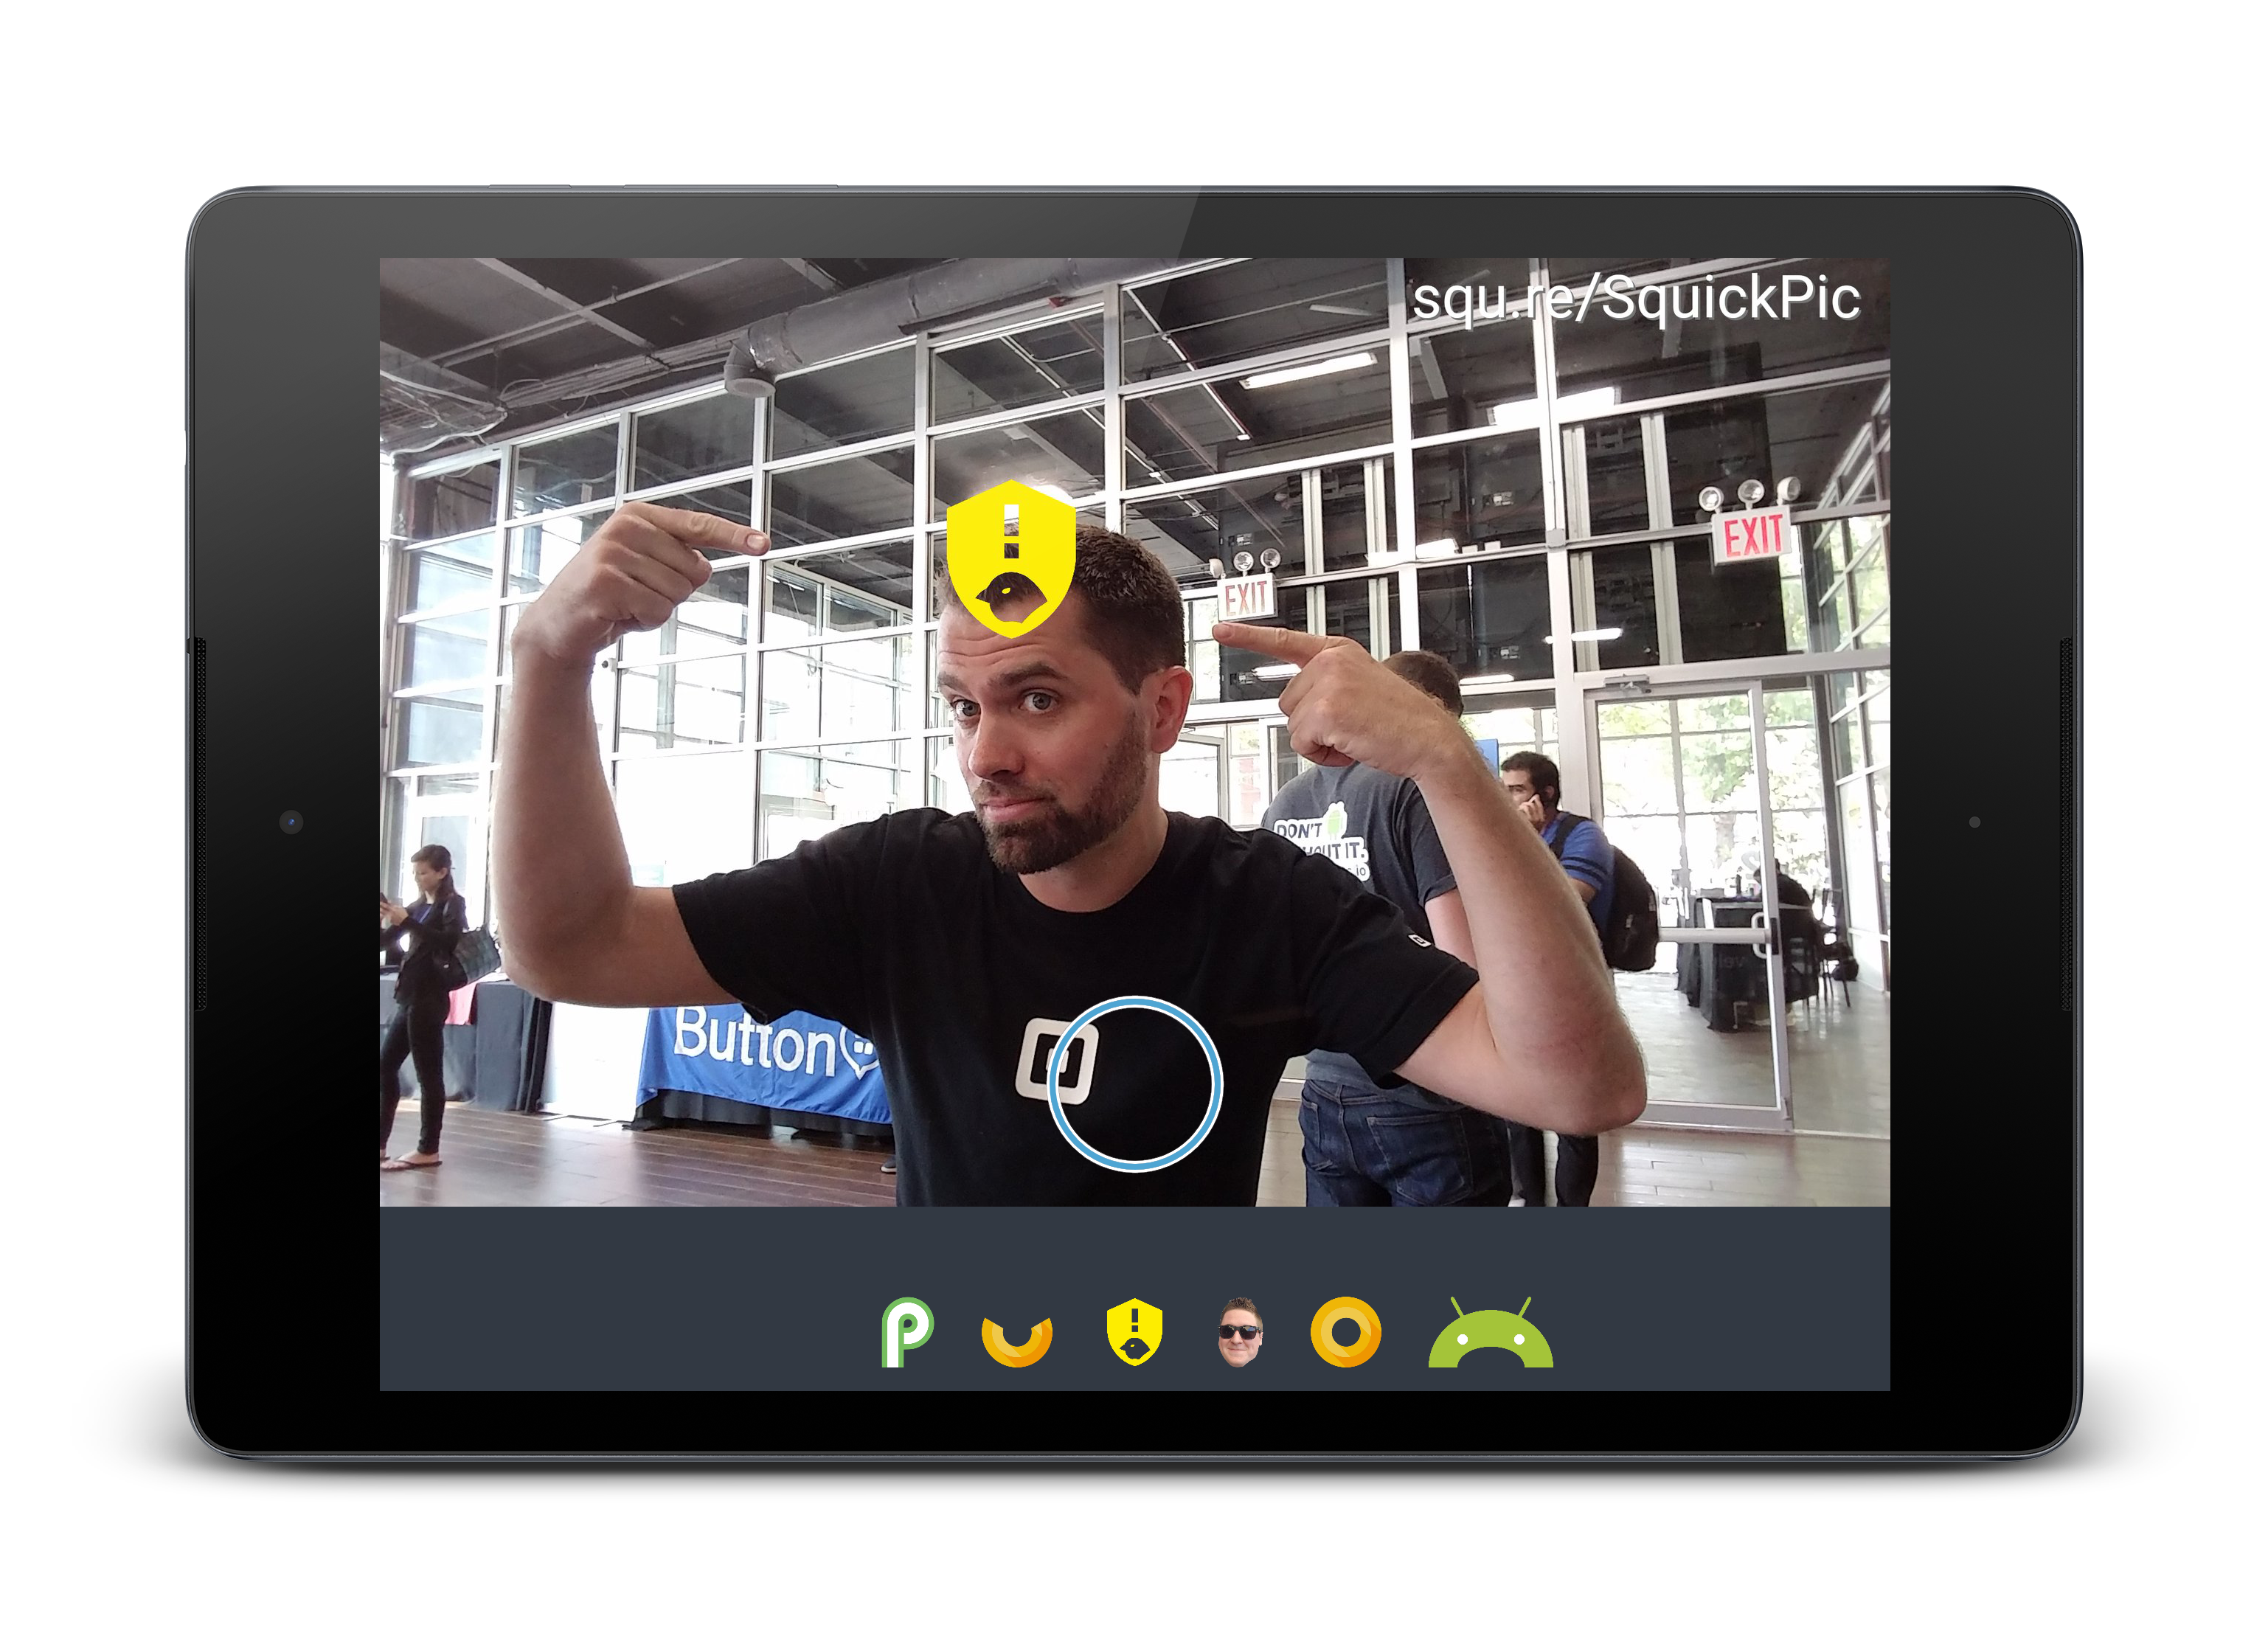 Filter selection. Best filter is obviously LeakCanary 😅
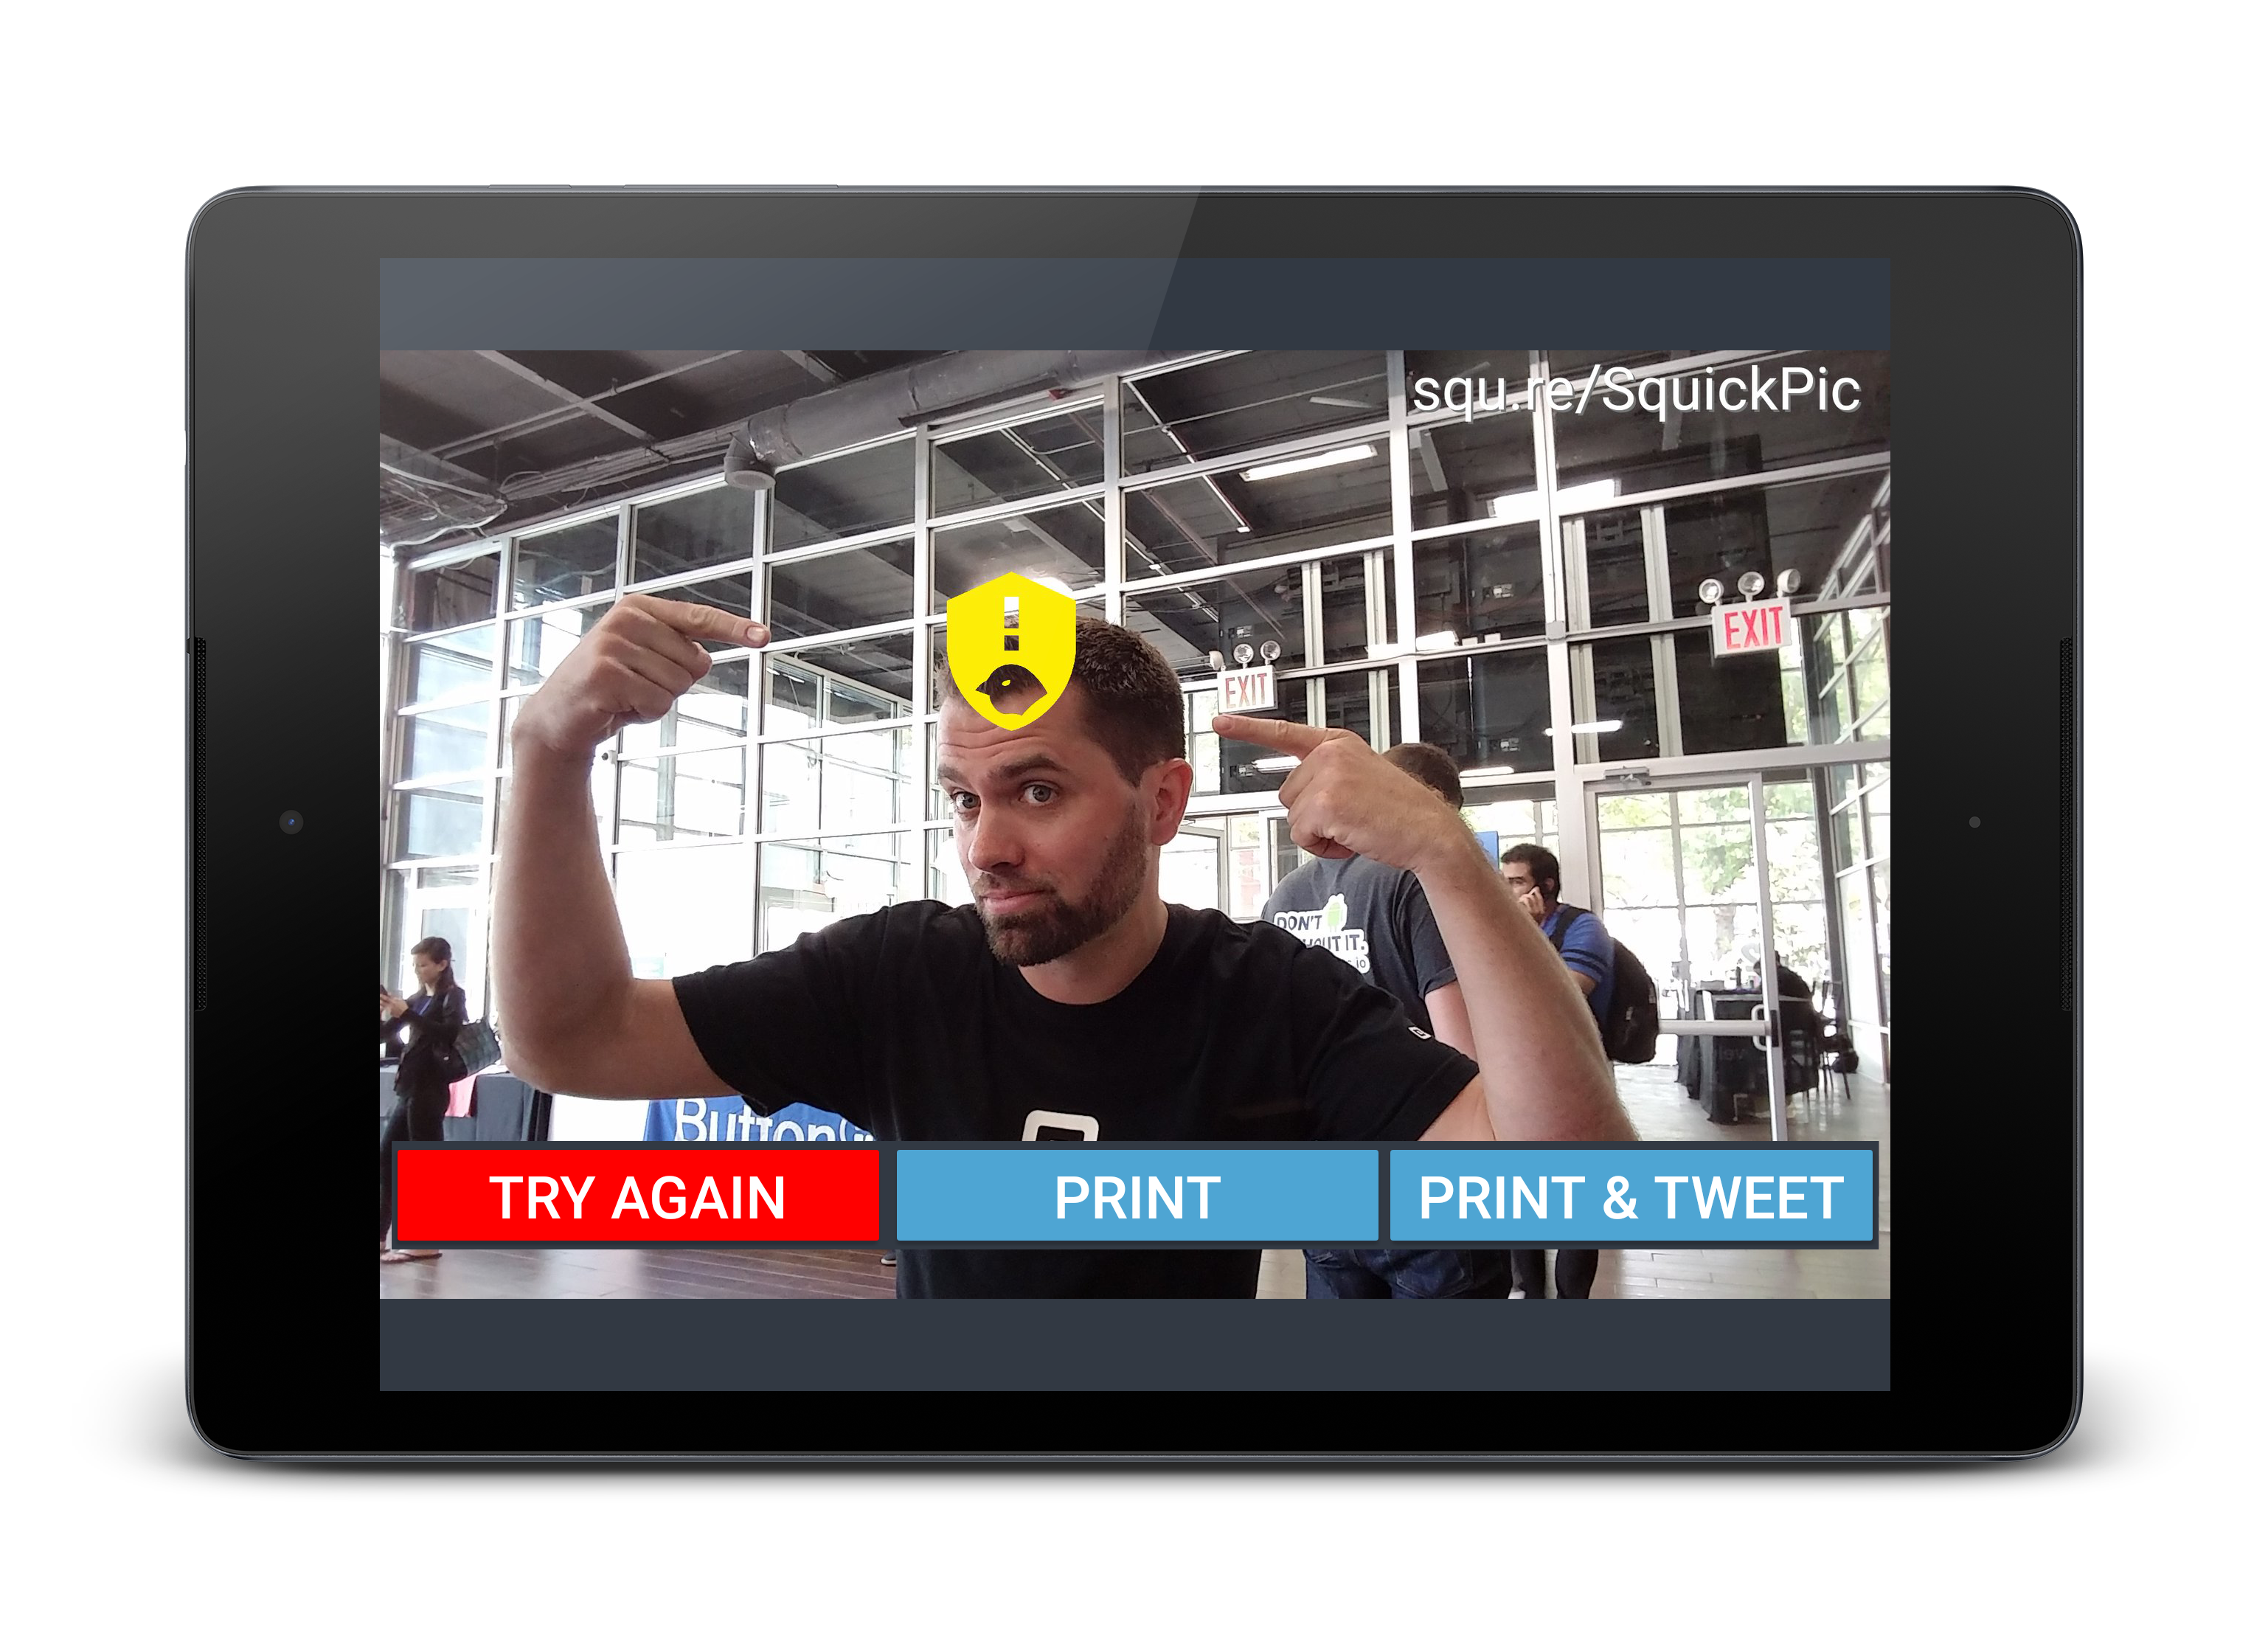 🖨Ready to print!
Face detection
The first step was building out face detection. We used Google Mobile Vision API and checked out the FaceTracker sample app. Nothing like copy pasting and removing what you don’t need to get to working code quickly!
The most tricky part was figuring out scaling and reversing: face detection runs on the camera bitmap and provides coordinates in that referential. The camera bitmap gets scaled up to the display, so we have to scale up our filters:
private void drawEye(Canvas canvas, Scaler scaler, Face face, Landmark eye) {
  PointF eyePosition = eye.getPosition();
  float faceWidth = scaler.scaleHorizontal(face.getWidth());
  float eyeSize = faceWidth / 5f;
  float centerX = scaler.translateX(eyePosition.x);
  float centerY = scaler.translateY(eyePosition.y);
  float halfEyeSize = eyeSize / 2;
  float eyeHeight = eyeSize * ratio;

  eyeRect.left = centerX - halfEyeSize;
  eyeRect.top = centerY - halfEyeSize;
  eyeRect.right = eyeRect.left + eyeSize;
  eyeRect.bottom = eyeRect.top + eyeHeight;

  if (scaler.isFrontFacing()) {
    canvas.drawBitmap(reversedBitmap, null, eyeRect, null);
  } else {
    canvas.drawBitmap(bitmap, null, eyeRect, null);
  }
}
Kiosk experience
The photobooth was set up in a public space, so we locked the tablet on the photobooth app with startLockTask():
@Override protected void onResume() {
  super.onResume();
  if (SDK_INT >= LOLLIPOP) {
    if (!isAppInLockTaskMode()) {
      startLockTask();
    }
  }
}

public boolean isAppInLockTaskMode() {
  ActivityManager activityManager =
      (ActivityManager) getSystemService(Context.ACTIVITY_SERVICE);

  if (SDK_INT >= M) {
    return activityManager.getLockTaskModeState() != ActivityManager.LOCK_TASK_MODE_NONE;
  }
  if (SDK_INT >= LOLLIPOP) {
    return activityManager.isInLockTaskMode();
  }
  return false;
}
We also set the relevant activities to fullscreen:
public abstract class FullscreenActivity extends AppCompatActivity {

  @Override public void onWindowFocusChanged(boolean hasFocus) {
    super.onWindowFocusChanged(hasFocus);
    if (hasFocus) {
      setFullscreen();
    }
  }

  @Override protected void onResume() {
    super.onResume();
    setFullscreen();
  }

  private void setFullscreen() {
    getWindow().getDecorView()
        .setSystemUiVisibility(View.SYSTEM_UI_FLAG_LAYOUT_STABLE
            | View.SYSTEM_UI_FLAG_LAYOUT_HIDE_NAVIGATION
            | View.SYSTEM_UI_FLAG_LAYOUT_FULLSCREEN
            | View.SYSTEM_UI_FLAG_HIDE_NAVIGATION
            | View.SYSTEM_UI_FLAG_FULLSCREEN
            | View.SYSTEM_UI_FLAG_IMMERSIVE_STICKY);
  }
}
Taking payments
This was the most important part for us! Also the simplest, just a few lines of code 💪.
Money checkoutAmount = new Money(amount, CurrencyCode.current());
CheckoutParameters.Builder params = CheckoutParameters.newBuilder(checkoutAmount)
    .skipReceipt(true)
    .alwaysRequireSignature(false)
    .note("Smile! 📸");
CheckoutManager checkoutManager = ReaderSdk.checkoutManager();
checkoutManager.startCheckoutActivity(this, params.build());
Printing with Google Cloud Print
PrinterHelper makes it easy to print bitmaps by showing a system UI to select a printer, configure attributes, and then send the print job. This is great for consumer devices but not so much for a photo booth where we expect pictures to print automatically.
We bought a Selphy CP1300 and connected it to Google Cloud Print. Unfortunately, the Cloud Print Android API also shows a UI, and the HTTP API documentation left out details that we had to figure out.
Our first step was to obtain an OAuth token. We used AccountManager to request an OAuth token:
accountManager.getAuthToken(userAccount,
    "oauth2:https://www.googleapis.com/auth/cloudprint",
    null,
	activity,
	future -> {
      Bundle bundle = future.getResult();
      Intent credentialsIntent = (Intent) bundle.get(AccountManager.KEY_INTENT);
      if (credentialsIntent != null) {
        startActivityForResult(credentialsIntent, CREDENTIALS_CODE);
      } else {
        String token = bundle.getString(AccountManager.KEY_AUTHTOKEN);
        onTokenRetrieved(token);
      }
    }, null);
Next, we defined a Retrofit interface to list printers and send a print job:
public interface CloudPrintService {

  @FormUrlEncoded
  @POST("search")
  Call<SearchResponse> search(@Field("connection_status") String connectionStatus,
      @Field("q") String q, @Field("use_cdd") boolean useCdd);

  @Multipart
  @POST("submit")
  Call<SubmitResponse> submit(@Part("printerid") RequestBody printerId,
      @Part("title") RequestBody title, @Part("ticket") RequestBody ticket,
      @Part MultipartBody.Part content, @Part("contentType") RequestBody contentType);
}
Retrofit is backed by OkHttp, so we set up an OkHttp interceptor to add the Cloud Print OAuth token to our requests:
@Override public Response intercept(Chain chain) throws IOException {
  String oauthToken = oAuthStore.getOAuthToken();
  Request request;
  if (oauthToken != null) {
    request = chain.request()
        .newBuilder()
        .addHeader("Authorization", "OAuth " + oauthToken)
        .build();
  } else {
    request = chain.request();
  }
  return chain.proceed(request);
}
We converted the bitmap into a JPEG byte array and sent it as a multipart message:
ByteArrayOutputStream stream = new ByteArrayOutputStream();
bitmap.compress(Bitmap.CompressFormat.JPEG, 100, stream);
byte[] jpegBytes = stream.toByteArray();
RequestBody requestFile = RequestBody.create(MediaType.parse("image/jpeg"), jpegBytes);
MultipartBody.Part content =
    MultipartBody.Part.createFormData("content", "squickpic.jpeg", requestFile);
Tweeting 🐦
We set up Twitter Core and used a TwitterLoginButton to authenticate via the Twitter app. Tweeting a picture requires uploading it first, and then attaching it as a media to a status update:
public class Tweeter {

  public String uploadPicture(byte[] jpegBytes) throws IOException {
    TwitterApiClient twitterApiClient = TwitterCore.getInstance().getApiClient();
    MediaService mediaService = twitterApiClient.getMediaService();

    RequestBody media = RequestBody.create(MediaType.parse("image/jpeg"), jpegBytes);
    Response<Media> uploadResponse = mediaService.upload(media, null, null).execute();

    if (!uploadResponse.isSuccessful()) {
      throw new IOException("Upload not successful");
    }
    return uploadResponse.body().mediaIdString;
  }

  public void tweet(String message, String mediaId) throws IOException {
    TwitterApiClient twitterApiClient = TwitterCore.getInstance().getApiClient();
    StatusesService statusesService = twitterApiClient.getStatusesService();
    Response<Tweet> tweetResponse =
        statusesService.update(message, null, false, null, null, null, null, false, mediaId)
            .execute();
    if (!tweetResponse.isSuccessful()) {
      throw new IOException("Tweet not successful");
    }
  }
}
That’s it! We had a ton of fun building this and taking goofy selfies with Droidcon NYC attendees. Don’t hesitate to check out the sources on GitHub!
 SquickPic at Droidcon NYC
Authored By


