
Online Payments with Square and React
Build an end-to-end payment flow with Square and Next.js.
If the thought of implementing online payments terrifies you, you’re not alone. Scary as it may be, ensuring that you get paid is the most important part of building an online business. Fortunately, we have taken a lot of the guesswork out of building an online payment flow.
The Square Web Payments SDK has made processing payments online easier than ever before. The SDK allows you to create your own payment flow and process payments securely. Better yet, if you’re building a React application, the react-square-web-payments-sdk provides a React wrapper that simplifies the process down to a handful of components.
In this tutorial, we’re going to show how you can build your own custom payment flow with the react-square-web-payments-sdk. We’ll use Next.js to build out a payment form on the front end, as well as process the payment on the back end with the Square Payments API. By the end of this tutorial, you’ll have a fully functional payment flow that accepts credit cards, Google Pay, and Apple Pay. It’s time to get paid.
NOTE: This tutorial makes use of the Next.js Pages Router. If you are looking for a payments implementation that leverages the App Router and Server Actions, check out this blog post.

Feel free to explre the videos that we have on this topic as well.
Getting Started
NOTE: Since payments require both front end and back end code, we’re using Next.js as it provides a full stack framework. This tutorial will require a basic understanding of React and Next.js. All of the code for this tutorial can be found in the square-online-payments-react Github repo.
To get started, either open up your current Next.js project or create a brand new Next.js app by running
npx create-next-app@latest
NOTE: The latest major version of Next.js is Next.js 14. This tutorial makes use of the Next.js Pages Router. While the Pages Router is still supported in Next.js 14, a more modern implementation that leverages the App Router and Server Actions, can be found here.
With our project created, the first thing we’ll need to do is install the react-square-web-payments-sdk package by running
npm install react-square-web-payments-sdk
The most important component of this package is the PaymentForm provider, which provides us access to the web payments SDK. We can wrap our entire app with this provider to make the SDK available everywhere, or we can wrap a smaller area of our app with the provider to limit its scope. For demonstration’s sake, I’m going to put the provider in our Home component.
import styles from '../styles/Home.module.css'
import { PaymentForm } from 'react-square-web-payments-sdk';

export default function Home() {
  return (
    <div className={styles.container}>
      <PaymentForm
        applicationId="sandbox-XXXXXX"
        cardTokenizeResponseReceived={(token, verifiedBuyer) => {
          console.log('token:', token);
          console.log('verifiedBuyer:', verifiedBuyer);
        }}
        locationId='XXXXXXXXXX'
      >
      </PaymentForm>
    </div>
  )
}
I’ll also add some styles to our container div in Home.module.css to center the form on the page.
.container {
  display: grid;
  justify-content: center;
  align-content: center;
  height: 100vh;
}
You’ll notice that the PaymentForm provider requires three props. Let’s take a look at each of them.
applicationId: This is the ID of your Square application. You can find this value in your Square Developer Dashboard.locationId: This is the ID for your specific business location. The best way to find this ID is by running a “list locations” request via the Square API Explorer. You can look through the response data to see the IDs of all your locations.cardTokenizeResponseReceived: I promise this one isn’t as complicated as it seems. This is a callback function that will run after a token is generated for the payment method. If that sounds like a bunch of gibberish, don’t worry. Let’s take a quick break to talk about tokenization.
Payment Tokenization
Payment tokenization is the process of taking sensitive payment information and replacing it with a nonsensitive generated number called a token. We do this to protect your users’ payment information and add a level of security. If you’re worried about how to implement tokenization, don’t sweat it. Square takes care of this for you. All you need to do is provide a function that uses the token once it’s generated. That’s where cardTokenizeResponseReceived comes in. Eventually, we’ll define this function to process our payment with the token, but for now let’s keep it simple and log the token and buyer to the console.
If you’d like to learn more about payment tokenization, check out this payment tokenization article that takes a deeper look at how tokenization works.
Accept Credit Card Payment
With our PaymentForm configured, we can now add a payment method to our form. Any good payment form has to be able to accept a credit card, so that’ll be the first payment method we add. To do that, let’s import the CreditCard component from our react-square-web-payments-sdk and then add the component as a child of our PaymentForm.
<PaymentForm
  applicationId="sandbox-XXXXXX"
  cardTokenizeResponseReceived={async (token, verifiedBuyer) => {
    console.log('token:', token);
    console.log('verifiedBuyer:', verifiedBuyer);
  }}
  locationId='XXXXXXXXXX'
>
  <CreditCard />
</PaymentForm>
And our form should now look like this:
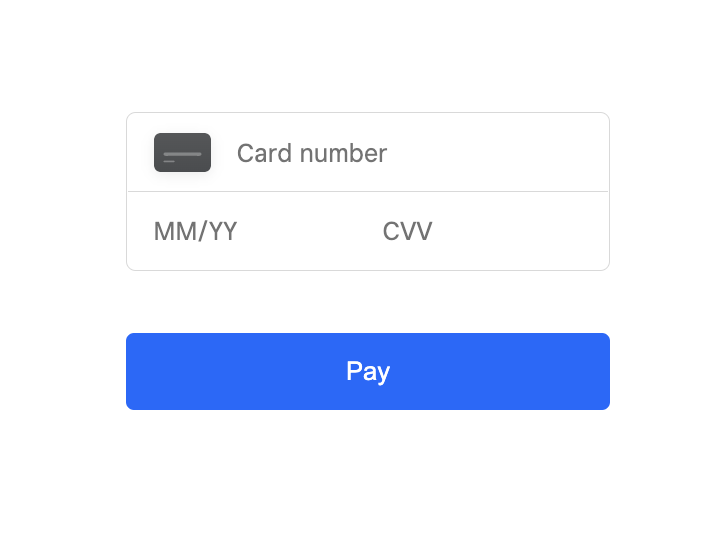
Amazing. This one component has instantly added a safe and secure way to accept a credit card payment. Right now, if you try to input a credit card number and click ‘Pay’, our cardTokenizeResponseReceived will run and log the payment token to the console. You can reference the Sandbox Payment docs for Sandbox credit card numbers you can use for testing.
This is a great step toward functionality, but chances are this default form doesn’t quite fit with your app’s aesthetic. Fortunately, the CreditCard component allows us to apply styles to match our app’s theme a bit better.
<CreditCard
  buttonProps={{
    css: {
      backgroundColor: "#771520",
      fontSize: "14px",
      color: "#fff",
      "&:hover": {
        backgroundColor: "#530f16",
      },
    },
  }}
/>

Chances are this still doesn’t fit your app’s aesthetic, but I wanted to show that our form’s appearance is completely customizable. Feel free to check out the react-square-web-payments-sdk docs to see all the different props and styles you can apply to change the look and feel of your form.
Payment Processing
Our payment form can now accept a credit card, but we’re still not getting paid yet. Now we need to process the payment with the Square Payments API. This payment processing will need to be done on the server, so we’ll leverage Next.js’s API routes to accomplish this.
Set up the Server
First, let’s create a new folder in our pages directory called api. Within the api folder, create a new file called pay.js. This is where we’ll write our custom endpoint to process the payment.
Since we’re going to use the Square Payments API, we need to install the Square Node.js SDK.
npm install square
With the SDK installed we can import the Client from Square at the top of our file.
import { Client } from 'square';
Now we can initialize the paymentsApi by providing an access token and environment type to the Client.
const { paymentsApi } = new Client({
  accessToken: process.env.SQUARE_ACCESS_TOKEN,
  environment: 'sandbox'
});
The value of your access token can be found in your Square Developer Dashboard, under your specific application.
NOTE: We need to keep our access token hidden, so we’re storing it in an environment variable. For more information on how to create environment variables in a Next.js project, check out the Next.js documentation.
Handle the Request
Awesome. We’ve got all our setup in place, so let’s go ahead and write our request handler function that will be responsible for processing the payment. This handler is meant to handle a POST request, so we’ll first want to check the method on our req object. If it is a POST request, we can then run the createPayment method from the paymentsApi.
import { Client } from 'square';
import { randomUUID } from 'crypto';

const { paymentsApi } = new Client({
  accessToken: process.env.SQUARE_ACCESS_TOKEN,
  environment: 'sandbox'
});

export default async function handler(req, res) {
  if ( req.method === 'POST' ) {
    const { result } = await paymentsApi.createPayment({
      idempotencyKey: randomUUID(),
      sourceId: req.body.sourceId,
      amountMoney: {
        currency: 'USD',
        amount: 100
      }
    })
    console.log(result);
    res.status(200).json(result);
  } else {
    res.status(500).send();
  }
}
Let’s take a look at the request body that we pass to the createPayment method.
idempotencyKey: A unique string that identifies this request. To generate a unique string, we use therandomUUIDfunction from the Node.js crypto module. Don’t forget to import this at the top.sourceId: The ID for the source of funds for the payment. In our case, this will be the payment token that is generated by the Square payment form. We’ll provide this token in the body of the POST request.amountMoney: An object that defines the amount of money to be paid. In our case we specify the currency to be U.S. dollars, and the amount is in the smallest denomination of the currency type. So a value of 100 represents 100 cents, or $1.00.
NOTE: You can see all the options that you can pass to this method in the API reference.
Finally, after we await the result of creating the payment, we send the result back to the client with a 200 status code.
Sending the POST Request
Our custom payment processing endpoint is created. Now we need to make use of it by sending a POST request to the endpoint from our payment form. To do this we’re going to revisit the cardTokenizeResponseReceived prop that we saw earlier on our PaymentForm provider. Again, this prop is a callback function that is executed once our payment is tokenized.
To send our POST request, we’ll use the Fetch API and include our token in the body of our request.
cardTokenizeResponseReceived={async (token, verifiedBuyer) => {
  const response = await fetch("/api/pay", {
    method: "POST",
    headers: {
      "Content-type": "application/json",
    },
    body: JSON.stringify({
      sourceId: token.token,
    }),
  });
  console.log(await response.json());
}}
Remember that our token will be used as the sourceId for our createPayment method.
Almost There
While our code may look good at this point, if we try to create a payment now, we’ll encounter this error on the server: TypeError: Do not know how to serialize a BigInt. This error occurs because BigInt values aren’t serialized in JSON by default. To fix this we need to jump back into our pay.js file and define our own toJSON method to return a string.
BigInt.prototype.toJSON = function() { return this.toString(); }
Now our API route is ready to go.
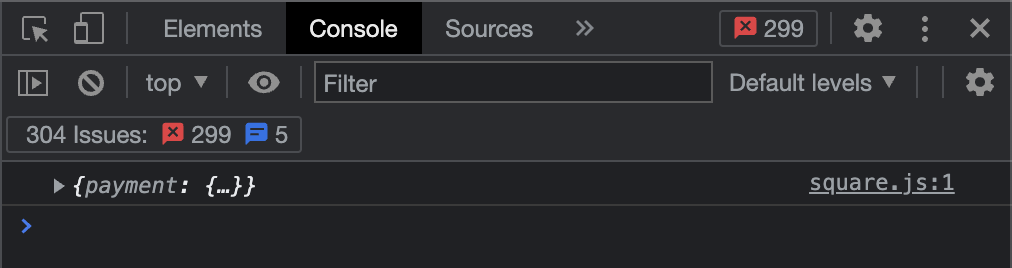
To ensure everything is working properly, we’re going to log the response to the console. At this point we can try to submit a payment with our form. If everything is successful, we should see a payment object logged in the console.
To confirm the payment was processed, we should also be able to see it in the transactions tab of our sandbox seller dashboard.
And there we have it. We have successfully implemented end-to-end payment processing.
Digital Wallets - Apple and Google Pay
The more ways we allow our customers to pay us, the better. For this reason the web payments SDK can handle a lot more than just credit card payments. We can also integrate digital wallets such as Apple and Google Pay into our payment form. With the setup we currently have in place, it only takes a few more lines of code to add these payment methods. Let’s see how we can set these up.
If you recall, earlier I said that our PaymentFrom provider requires three props. Actually, it’s four. To add digital wallets, our PaymentForm provider requires one additional prop called createPaymentRequest. This prop is used to capture the details of a digital wallet payment. For our purposes, we’ll provide the most basic details.
createPaymentRequest={() => ({
  countryCode: "US",
  currencyCode: "USD",
  total: {
    amount: "1.00",
    label: "Total",
  },
})}
You can see all of the different options you can provide for this prop in the react-square-web-payments-sdk docs.
Now we can import the ApplePay and GooglePay components and add them as children alongside our CreditCard component.
import {
  ApplePay,
  GooglePay,
  CreditCard,
  PaymentForm,
} from "react-square-web-payments-sdk";

//…

<ApplePay />
<GooglePay />
<CreditCard
  //credit card props
/>
NOTE: You won’t see the Apple Pay button appear. In order to support Apple Pay, first you’ll need to Register your Sandbox domain with Apple. Keep in mind that this payment method will only be available on Safari browsers that support Apple Pay.
What’s really nice about this implementation is that, even though these are different payment methods, they all still generate a token. That means all of our logic for processing payment tokens still applies, which makes adding payment methods seamless.
Conclusion
And there we have it. We’ve built out an end-to-end payment processing flow that accepts credit cards and digital wallets. As you can see, the react-square-web-payments-sdk drastically simplifies the implementation of accepting and processing payments. What was once intimidating and scary is now accessible and manageable. So go ahead and integrate this flow into your application and start making money. We can’t wait to see what you build.
Authored By

