# Square Developer Platform — Full Documentation > Concatenated developer documentation for AI agent ingestion, per the llmstxt.org spec. > Count: 481 pages > Generated: 2026-07-22T16:54:16.882Z > Index: https://developer.squareup.com/llms.txt --- # Inventory Adjustment Reasons > Source: https://developer.squareup.com/docs/inventory-api/adjustment-reasons > Status: BETA > Languages: All > Platforms: All Learn how to categorize inventory adjustments with standard and custom adjustment reasons and filter inventory change history by reason. **Applies to:** [Inventory API](inventory-api/what-it-does) ## Overview Adjustment reasons let applications record *why* an inventory quantity changed, using the same set of reasons that sellers see in the Square Dashboard and Square Point of Sale. Every [InventoryAdjustment](https://developer.squareup.com/reference/square/objects/InventoryAdjustment) can carry a `reason_id` that identifies a standard reason provided by Square (such as `DAMAGED` or `RECEIVED`) or a custom reason defined by the seller (such as "Donated to charity"). With adjustment reasons, your application can: * Write adjustments with a reason, so they're categorized consistently with first-party Square products. * Manage the seller's custom adjustment reasons (create, update, delete, and restore). * Filter the inventory change history by one or more reasons. ## Reason identifiers A reason is identified by an `InventoryAdjustmentReasonId` object rather than a single ID string, in order to support predefined reason codes alongside the seller's custom reasons: * Standard and system-generated reasons are identified by `type` alone - for example, `{ "type": "DAMAGED" }`. * Custom reasons use `type` `CUSTOM` plus the seller-specific `custom_reason_id` - for example, `{ "type": "CUSTOM", "custom_reason_id": "R5BX3PDCZ6EXAMPLE" }`. The full `InventoryAdjustmentReason` resource adds a `name` (custom reasons only), a `direction` (`INCREASE` or `DECREASE`), timestamps, and an `is_deleted` flag. ### Standard reasons Standard reasons are predefined by Square, available to every seller, and can be written on adjustments by your application. Each standard reason implies a direction: | Reason type | Direction | |-------------|-----------| | `RECEIVED` | `INCREASE` | | `RETURNED` | `INCREASE` | | `DAMAGED` | `DECREASE` | | `THEFT` | `DECREASE` | | `LOST` | `DECREASE` | | `SPOILAGE_WASTE` | `DECREASE` | | `SAMPLES_PROMOTIONAL` | `DECREASE` | | `INTERNAL_USE` | `DECREASE` | | `VENDOR_RETURN` | `DECREASE` | | `PRODUCTION_WASTE` | `DECREASE` | ### System-generated reasons Some reasons are only ever attached to adjustments generated by Square products and cannot be written by your application: `SALE`, `RECOUNT`, `TRANSFER`, `IN_TRANSIT`, and `CANCELED_SALE`. You might encounter them when reading the change history. By default, they're omitted from [ListInventoryAdjustmentReasons](https://developer.squareup.com/reference/square/inventory-api/list-inventory-adjustment-reasons) results; pass `include_system_codes=true` to include them. ### Custom reasons Sellers (and your application, on their behalf) can define custom reasons with a name of up to 50 characters and a direction. Deleting a custom reason is a soft delete: historical adjustments keep referencing it, deleted reasons can still be retrieved by ID, and a deleted reason can be brought back with [RestoreInventoryAdjustmentReason](https://developer.squareup.com/reference/square/inventory-api/restore-inventory-adjustment-reason). ## Endpoints | Endpoint | Route | Permission | |----------|-------|------------| | ListInventoryAdjustmentReasons | `GET /v2/inventory/adjustment-reasons` | `INVENTORY_READ` | | RetrieveInventoryAdjustmentReason | `POST /v2/inventory/adjustment-reasons/retrieve` | `INVENTORY_READ` | | CreateInventoryAdjustmentReason | `POST /v2/inventory/adjustment-reasons/create` | `INVENTORY_WRITE` | | UpdateInventoryAdjustmentReason | `PUT /v2/inventory/adjustment-reasons/update` | `INVENTORY_WRITE` | | DeleteInventoryAdjustmentReason | `POST /v2/inventory/adjustment-reasons/delete` | `INVENTORY_WRITE` | | RestoreInventoryAdjustmentReason | `POST /v2/inventory/adjustment-reasons/restore` | `INVENTORY_WRITE` | ## List the available reasons The following example lists the reasons available to the seller. The response contains the standard reasons and the seller's custom reasons. Include deleted custom reasons with `include_deleted=true`, and system-generated reasons with `include_system_codes=true`. {% tabset %} {% tab id="Request" %} ```bash curl https://connect.squareup.com/v2/inventory/adjustment-reasons \ -H 'Square-Version: 2026-07-15' \ -H 'Authorization: Bearer {ACCESS_TOKEN}' \ -H 'Content-Type: application/json' ``` {% /tab %} {% tab id="Response" %} ```json { "adjustment_reasons": [ { "id": { "type": "RECEIVED" }, "direction": "INCREASE" }, { "id": { "type": "DAMAGED" }, "direction": "DECREASE" }, { "id": { "type": "CUSTOM", "custom_reason_id": "R5BX3PDCZ6EXAMPLE" }, "name": "Donated to charity", "direction": "DECREASE", "created_at": "2026-07-16T18:24:31.000Z", "updated_at": "2026-07-16T18:24:31.000Z", "is_deleted": false } ] } ``` {% /tab %} {% /tabset %} ## Create a custom reason Provide an idempotency key and the reason's `id`, `name`, and `direction`. The `id` must have type `CUSTOM` and omit `custom_reason_id` - Square assigns the ID and returns it in the response. {% tabset %} {% tab id="Request" %} ```bash curl https://connect.squareup.com/v2/inventory/adjustment-reasons/create \ -X POST \ -H 'Square-Version: 2026-07-15' \ -H 'Authorization: Bearer {ACCESS_TOKEN}' \ -H 'Content-Type: application/json' \ -d '{ "idempotency_key": "0e485885-fabc-43cc-ae63-2d3666dc0f27", "adjustment_reason": { "id": { "type": "CUSTOM" }, "name": "Donated to charity", "direction": "DECREASE" } }' ``` {% /tab %} {% tab id="Response" %} ```json { "adjustment_reason": { "id": { "type": "CUSTOM", "custom_reason_id": "R5BX3PDCZ6EXAMPLE" }, "name": "Donated to charity", "direction": "DECREASE", "created_at": "2026-07-16T18:24:31.000Z", "updated_at": "2026-07-16T18:24:31.000Z", "is_deleted": false } } ``` {% /tab %} {% /tabset %} Only the `name` of an existing custom reason can be changed later (with UpdateInventoryAdjustmentReason, passing the reason's full `id` in `adjustment_reason` alongside the new `name`). The `direction` is fixed at creation because historical adjustments already recorded with the reason rely on it. Standard and system-generated reasons cannot be modified. ## Write an adjustment with a reason Set `reason_id` on the adjustment in a [BatchChangeInventory](https://developer.squareup.com/reference/square/inventory-api/batch-change-inventory) request. The reason's direction must match the state transition - for example, a `DECREASE` reason like `DAMAGED` pairs with a transition out of `IN_STOCK`, such as `IN_STOCK` to `WASTE`. ```bash curl https://connect.squareup.com/v2/inventory/changes/batch-create \ -X POST \ -H 'Square-Version: 2026-07-15' \ -H 'Authorization: Bearer {ACCESS_TOKEN}' \ -H 'Content-Type: application/json' \ -d '{ "idempotency_key": "8fc6a5b0-9fe8-4b46-b46b-2ef95dc8a103", "changes": [ { "type": "ADJUSTMENT", "adjustment": { "catalog_object_id": "6F4K33KPNUVDWKZ43KUIFH6K", "from_state": "IN_STOCK", "to_state": "WASTE", "from_location_id": "EF6D9SACKWBKZ", "to_location_id": "EF6D9SACKWBKZ", "quantity": "3", "occurred_at": "2026-07-16T14:20:00.000Z", "reason_id": { "type": "DAMAGED" } } } ] }' ``` To use a custom reason instead, pass its full identifier. Custom reasons apply to plain stock increases and decreases: an `INCREASE` custom reason pairs with a `NONE` to `IN_STOCK` transition, and a `DECREASE` custom reason pairs with `IN_STOCK` to `NONE`. For example, the following change removes 3 units using a seller-defined reason: ```json { "type": "ADJUSTMENT", "adjustment": { "catalog_object_id": "6F4K33KPNUVDWKZ43KUIFH6K", "from_state": "IN_STOCK", "to_state": "NONE", "from_location_id": "EF6D9SACKWBKZ", "to_location_id": "EF6D9SACKWBKZ", "quantity": "3", "occurred_at": "2026-07-16T14:25:00.000Z", "reason_id": { "type": "CUSTOM", "custom_reason_id": "R5BX3PDCZ6EXAMPLE" } } } ``` You can also change the reason on a past adjustment with [UpdateInventoryAdjustment](https://developer.squareup.com/reference/square/inventory-api/update-inventory-adjustment) - see [Update a past adjustment](inventory-api/track-costs-and-vendors#update-a-past-adjustment). The same validity rules apply, and the reason of a system-generated adjustment can't be changed. ## Filter the change history by reason [BatchRetrieveInventoryChanges](https://developer.squareup.com/reference/square/inventory-api/batch-retrieve-inventory-changes) accepts a `reason_ids` filter that returns only adjustments recorded with one of the given reasons. ```bash curl https://connect.squareup.com/v2/inventory/changes/batch-retrieve \ -X POST \ -H 'Square-Version: 2026-07-15' \ -H 'Authorization: Bearer {ACCESS_TOKEN}' \ -H 'Content-Type: application/json' \ -d '{ "catalog_object_ids": ["6F4K33KPNUVDWKZ43KUIFH6K"], "types": ["ADJUSTMENT"], "reason_ids": [ { "type": "DAMAGED" }, { "type": "CUSTOM", "custom_reason_id": "R5BX3PDCZ6EXAMPLE" } ] }' ``` {% aside type="important" %} The `reason_ids` filter cannot be combined with the `states` filter in the same request. {% /aside %} ## Delete and restore custom reasons Deleting a custom reason hides it from sellers and from default `ListInventoryAdjustmentReasons` results, but doesn't remove it from adjustments that already reference it. ```bash curl https://connect.squareup.com/v2/inventory/adjustment-reasons/delete \ -X POST \ -H 'Square-Version: 2026-07-15' \ -H 'Authorization: Bearer {ACCESS_TOKEN}' \ -H 'Content-Type: application/json' \ -d '{ "reason_id": { "type": "CUSTOM", "custom_reason_id": "R5BX3PDCZ6EXAMPLE" } }' ``` Restore a deleted reason with the same request body sent to `POST /v2/inventory/adjustment-reasons/restore`. A deleted reason cannot be updated until it's restored. --- # Track Inventory Costs and Vendors > Source: https://developer.squareup.com/docs/inventory-api/track-costs-and-vendors > Status: BETA > Languages: All > Platforms: All Learn how to record unit costs and vendors on stock-receiving inventory adjustments and update past adjustments with the Inventory API. **Applies to:** [Inventory API](inventory-api/what-it-does) | [Catalog API](catalog-api/what-it-does) | [Vendors API](vendors-api/create-vendors) ## Overview Sellers that track what they pay for their stock can answer questions like "What is my inventory worth?" and "What did I pay this vendor last quarter?" The Inventory API lets your application record that information the same way first-party Square products do: * Record the amount paid (`cost_money`) and the vendor (`vendor_id`) when receiving stock. * Update the quantity, cost, vendor, or reason of a past adjustment with [UpdateInventoryAdjustment](https://developer.squareup.com/reference/square/inventory-api/update-inventory-adjustment). Default costs and vendors for an item variation come from the variation's `vendor_information` in the catalog. See [Manage Vendor Information](catalog-api/manage-vendor-information). {% aside type="info" %} Reading cost fields works for any seller; *writing* cost and vendor data requires the seller to have an active Square for Retail Plus, Square for Restaurants Plus, or Square for Restaurants Premium subscription. {% /aside %} ## Record cost and vendor when receiving stock `cost_money` and `vendor_id` can be written only on stock-receiving adjustments - adjustments whose `from_state` is `NONE` or `UNLINKED_RETURN`. `cost_money` is the total amount paid to the vendor for the units in the adjustment, and `vendor_id` references a vendor managed with the [Vendors API](https://developer.squareup.com/reference/square/vendors-api). The following [BatchChangeInventory](https://developer.squareup.com/reference/square/inventory-api/batch-change-inventory) request receives 100 units purchased for $250.00 from a known vendor: ```bash curl https://connect.squareup.com/v2/inventory/changes/batch-create \ -X POST \ -H 'Square-Version: 2026-07-15' \ -H 'Authorization: Bearer {ACCESS_TOKEN}' \ -H 'Content-Type: application/json' \ -d '{ "idempotency_key": "42c1a557-2b31-4b8b-8ecb-6dcf10ffb2b2", "changes": [ { "type": "ADJUSTMENT", "adjustment": { "catalog_object_id": "6F4K33KPNUVDWKZ43KUIFH6K", "from_state": "NONE", "to_state": "IN_STOCK", "from_location_id": "EF6D9SACKWBKZ", "to_location_id": "EF6D9SACKWBKZ", "quantity": "100", "occurred_at": "2026-07-16T14:20:00.000Z", "cost_money": { "amount": 25000, "currency": "USD" }, "vendor_id": "5ZW5RVANNKV3B3RB", "reason_id": { "type": "RECEIVED" } } } ] }' ``` Cost and vendor values then appear on the adjustment in change-history responses. Reading these fields doesn't require a subscription; adjustments written without cost information simply omit the fields. ## Update a past adjustment Sellers sometimes need to correct a received quantity, a cost, or a vendor after the fact. `UpdateInventoryAdjustment` (`PUT /v2/inventory/adjustments/update`, `INVENTORY_WRITE`) supports sparse updates of a past adjustment, with the same restrictions that apply in the Square Dashboard: * `quantity` must always be provided, but it can be identical to the current quantity if only cost, vendor, or reason changes are desired. * `cost_money` and `vendor_id` can be changed only on adjustments that add stock (`from_state` of `NONE` or `UNLINKED_RETURN`) and on untracked sale adjustments. * `reason_id` can be changed to any reason that's valid for the adjustment's state transition. The reason of a system-generated adjustment (such as `SALE` or `RECOUNT`) can't be changed. See [Inventory Adjustment Reasons](inventory-api/adjustment-reasons). * Adjustments that Square generates from other records can't be updated: inferred adjustments from physical counts, transfer-like cross-location adjustments, and component adjustments. * Adjustments linked to purchase orders can't be updated. Adjustments linked to sales can only have cost and vendor updated, and only for untracked sales. * Restock adjustments linked to an itemized return can have their quantity updated, up to the quantity remaining on the return. * Adjustments older than 1 year cannot be updated. ```bash curl https://connect.squareup.com/v2/inventory/adjustments/update \ -X PUT \ -H 'Square-Version: 2026-07-15' \ -H 'Authorization: Bearer {ACCESS_TOKEN}' \ -H 'Content-Type: application/json' \ -d '{ "idempotency_key": "d6f1cf4e-6d90-4a2b-9df7-2f0ab9a78ee1", "adjustment": { "id": "HA4STFR47RAEORFWXHOYPRG5", "quantity": "100", "cost_money": { "amount": 27500, "currency": "USD" }, "vendor_id": "5ZW5RVANNKV3B3RB" } }' ``` The endpoint is available only to sellers with an active Square for Retail Plus, Square for Restaurants Plus, or Square for Restaurants Premium subscription. --- # Manage Vendor Information on Item Variations > Source: https://developer.squareup.com/docs/catalog-api/manage-vendor-information > Status: BETA > Languages: All > Platforms: All Learn how to set default unit costs, vendors, and vendor codes on catalog item variations with the Catalog API. **Applies to:** [Catalog API](catalog-api/what-it-does) | [Inventory API](inventory-api/what-it-does) | [Vendors API](vendors-api/create-vendors) ## Overview An item variation's `vendor_information` describes how the seller purchases that product: which vendors supply it, the usual cost per unit, and the product's identifier in each vendor's system. Square uses this information to prefill purchase orders and as the default cost when inventory movements need one - for example, when a physical count increases the in-stock quantity or when an untracked variation with a default cost is sold. {% aside type="info" %} Reading `vendor_information` works for any seller; *writing* it requires the seller to have an active Square for Retail Plus, Square for Restaurants Plus, or Square for Restaurants Premium subscription. {% /aside %} ## The vendor_information field [CatalogItemVariation](https://developer.squareup.com/reference/square/objects/CatalogItemVariation) has a repeated `vendor_information` field. Each entry contains: | Field | Description | |-------|-------------| | `unit_cost_money` | The usual amount the seller pays per unit when purchasing from this vendor. | | `vendor_id` | Optional. The ID of a vendor managed with the [Vendors API](https://developer.squareup.com/reference/square/vendors-api). Each entry must reference a different vendor. | | `vendor_code` | Optional. The product's unique identifier (such as a SKU) in the vendor's own system. Used to prefill purchase orders. | Two rules give the list its meaning: * **The first entry is the default.** When Square needs a default cost or vendor for the variation (physical count increases, untracked sales with cost tracking, purchase order prefill), it uses the first entry in the list. * **An entry can omit `vendor_id`.** A single cost-only entry supports sellers who track what they pay for a product without tracking a vendor. Use this when the seller isn't tracking vendors for the variation - don't combine a vendorless cost entry with vendor-specific entries. ## Set vendor information on a variation Write `vendor_information` as part of the variation in an [UpsertCatalogObject](https://developer.squareup.com/reference/square/catalog-api/upsert-catalog-object) (or batch upsert) request: ```bash curl https://connect.squareup.com/v2/catalog/object \ -X POST \ -H 'Square-Version: 2026-07-15' \ -H 'Authorization: Bearer {ACCESS_TOKEN}' \ -H 'Content-Type: application/json' \ -d '{ "idempotency_key": "0a3d5bfb-8325-4a7b-8dcc-2f0a4b3b9c66", "object": { "type": "ITEM_VARIATION", "id": "#small-leather-collar", "item_variation_data": { "item_id": "W62UWFY35CWMTGPTTVGXAMPL", "name": "Small", "pricing_type": "FIXED_PRICING", "price_money": { "amount": 2500, "currency": "USD" }, "vendor_information": [ { "vendor_id": "5ZW5RVANNKV3B3RB", "vendor_code": "LC-SM-0042", "unit_cost_money": { "amount": 1050, "currency": "USD" } }, { "vendor_id": "V6C8QK4M2WX9YB7R", "vendor_code": "8890-SM", "unit_cost_money": { "amount": 1200, "currency": "USD" } } ] } } }' ``` In this example, the variation can be purchased from two vendors. The first entry is the default: Square uses vendor `5ZW5RVANNKV3B3RB` and its $10.50 unit cost when it needs a single default cost or vendor for the variation. The second entry (vendor `V6C8QK4M2WX9YB7R` at $12.00 per unit) appears on the variation in the Square Dashboard and prefills the unit cost when the seller creates a purchase order for that vendor. As with other variation fields, the entire `vendor_information` list is replaced on write. To add or remove an entry, read the variation, modify the list, and upsert it back with the variation's current `version`. ## How vendor information connects to inventory Vendor information supplies *defaults*; the actual cost of received stock is recorded on inventory adjustments: * When your application receives stock with the Inventory API, it can record the actual `cost_money` and `vendor_id` on the receiving adjustment. See [Track Inventory Costs and Vendors](inventory-api/track-costs-and-vendors). * When Square generates stock-increasing adjustments itself (for example, from a physical count), it uses the variation's default cost. --- # Getting Started > Source: https://developer.squareup.com/docs/reporting-api/getting-started > Status: BETA > Languages: All > Platforms: All Learn how to set up and configure the Square Reporting API for querying transaction and business data. ## Prerequisites Before you begin, ensure you have: 1. A Square Developer account 2. A [Square application](https://developer.squareup.com/docs/get-started/create-account-and-application) created in the Developer Console 3. An [access token](https://developer.squareup.com/docs/build-basics/access-tokens) (personal access token or OAuth token with `REPORTING_READ` scope) 4. Basic familiarity with REST APIs and JSON 5. A tool for making HTTP requests (cURL, Postman, or your preferred HTTP client) {% aside type="tip" %} **New to Cube?** The Reporting API is built on Cube's semantic layer. We explain all the key concepts (cubes, measures, dimensions) in this guide, but if you want to dive deeper, see the [Cube documentation](https://cube.dev/docs). {% /aside %} {% aside type="info" %} - **OAuth Support**: The Reporting API supports OAuth tokens with the `REPORTING_READ` permission. Personal access tokens are also supported for testing and development. - **Security Best Practice**: Never commit access tokens to source control. Use environment variables or secure secret management systems. {% /aside %} ## Step 1: Set Up Your Environment Store your access token as an environment variable: ```bash # macOS/Linux export SQUARE_ACCESS_TOKEN="your_access_token_here" export SQUARE_API_BASE="https://connect.squareup.com/reporting" # Windows (PowerShell) $env:SQUARE_ACCESS_TOKEN="your_access_token_here" $env:SQUARE_API_BASE="https://connect.squareup.com/reporting" ``` ## Step 2: Verify connectivity Test your authentication by calling the metadata endpoint: ```bash curl -X GET "${SQUARE_API_BASE}/v1/meta" \ -H "Authorization: Bearer ${SQUARE_ACCESS_TOKEN}" \ -H "Content-Type: application/json" ``` **Expected response**: A JSON object containing cubes, measures, dimensions, and segments. If you receive a `403 Forbidden` error, verify: - Your access token is correct - You're using a personal access token (not OAuth) - Your token has not expired ## Step 3: Explore available data The `/v1/meta` response shows all available data, including **views** and **cubes**. Views are the recommended starting point — they combine data from multiple cubes into a simplified, curated interface. Let's look at the `Sales` view: ```bash curl -X GET "${SQUARE_API_BASE}/v1/meta" \ -H "Authorization: Bearer ${SQUARE_ACCESS_TOKEN}" | jq '.cubes[] | select(.name == "Sales") | {name, type, title, measures: [.measures[].name]}' ``` This command: 1. Fetches metadata 2. Filters to the `Sales` view 3. Shows the view name and available measures **Sample output**: ```json { "name": "Sales", "type": "view", "title": "Sales", "measures": [ "Sales.top_line_product_sales", "Sales.net_sales", "Sales.total_collected_amount", "Sales.order_count", "Sales.avg_net_sales", "Sales.discounts_amount", "Sales.itemized_returns", "Sales.refunds_by_amount_amount", "Sales.tips_amount", "Sales.sales_tax_amount" ] } ``` {% aside type="info" %} **Views vs Cubes**: Views (like `Sales`) pre-join data from multiple cubes and pre-filter for common use cases. Cubes (like `Orders`) provide raw, granular access. For most reporting, start with views. See [Metadata Discovery](/docs/reporting-api/metadata-discovery) for details. {% /aside %} ## Step 4: Run your first query Let's query daily net sales for the last 30 days using the `Sales` view: ```bash curl -X POST "${SQUARE_API_BASE}/v1/load" \ -H "Authorization: Bearer ${SQUARE_ACCESS_TOKEN}" \ -H "Content-Type: application/json" \ -d '{ "query": { "measures": ["Sales.net_sales"], "timeDimensions": [{ "dimension": "Sales.local_reporting_timestamp", "dateRange": "last 30 days", "granularity": "day" }] } }' ``` **What this query does**: - **Measures**: Calculates `net_sales` (gross sales minus discounts/returns) - **Time Dimensions**: Groups by day for the last 30 days - **No segment needed**: The `Sales` view automatically filters to closed (completed) orders ### Understanding the Response **Success response** (HTTP 200): ```json { "data": [ { "Sales.local_reporting_timestamp.day": "2024-02-01T00:00:00.000", "Sales.net_sales": "1250.50" }, { "Sales.local_reporting_timestamp.day": "2024-02-02T00:00:00.000", "Sales.net_sales": "980.25" } ], "annotation": { "measures": {}, "dimensions": {}, "timeDimensions": {} }, "slowQuery": false } ``` {% aside type="info" %} **Note**: Access your data via `response.data`. {% /aside %} **Long-running query response** (HTTP 200): ```json { "error": "Continue wait" } ``` If you receive `"Continue wait"`, the query is still processing. **Retry the same request** until you get results. This is expected behavior for complex queries. ## Step 5: Add dimensions for detailed breakdown Let's break down sales by location name: ```bash curl -X POST "${SQUARE_API_BASE}/v1/load" \ -H "Authorization: Bearer ${SQUARE_ACCESS_TOKEN}" \ -H "Content-Type: application/json" \ -d '{ "query": { "measures": [ "Sales.net_sales", "Sales.tips_amount", "Sales.order_count" ], "dimensions": ["Sales.location_name"], "timeDimensions": [{ "dimension": "Sales.local_reporting_timestamp", "dateRange": "last 30 days", "granularity": "day" }] } }' ``` **Response structure**: ```json { "data": [ { "Sales.location_name": "Downtown Store", "Sales.local_reporting_timestamp.day": "2024-02-01T00:00:00.000", "Sales.net_sales": "850.50", "Sales.tips_amount": "125.00", "Sales.order_count": "42" }, { "Sales.location_name": "Uptown Store", "Sales.local_reporting_timestamp.day": "2024-02-01T00:00:00.000", "Sales.net_sales": "400.00", "Sales.tips_amount": "50.00", "Sales.order_count": "28" } ], "slowQuery": false } ``` Notice how the `Sales` view gives you `location_name` directly — no need to look up location IDs separately. ## Step 6: Handle long-running queries For queries that take time to process, implement retry logic: ### Using cURL with a retry loop ```bash #!/bin/bash QUERY='{ "measures": ["Sales.net_sales"], "timeDimensions": [{ "dimension": "Sales.local_reporting_timestamp", "dateRange": ["2024-01-01", "2024-12-31"], "granularity": "month" }] }' MAX_RETRIES=10 RETRY_DELAY=2 for i in $(seq 1 $MAX_RETRIES); do echo "Attempt $i of $MAX_RETRIES..." RESPONSE=$(curl -s -X POST "${SQUARE_API_BASE}/v1/load" \ -H "Authorization: Bearer ${SQUARE_ACCESS_TOKEN}" \ -H "Content-Type: application/json" \ -d "{\"query\": $QUERY}") if echo "$RESPONSE" | grep -q "Continue wait"; then echo "Query still processing, waiting ${RETRY_DELAY}s..." sleep $RETRY_DELAY else echo "Results received!" echo "$RESPONSE" | jq '.' exit 0 fi done echo "Query timed out after $MAX_RETRIES attempts" exit 1 ``` ### Using Python ```python import os import time import requests SQUARE_ACCESS_TOKEN = os.environ['SQUARE_ACCESS_TOKEN'] SQUARE_API_BASE = os.environ['SQUARE_API_BASE'] def execute_query_with_retry(query, max_retries=10, retry_delay=2): """Execute a Reporting API query with automatic retry for long-running queries.""" headers = { 'Authorization': f'Bearer {SQUARE_ACCESS_TOKEN}', 'Content-Type': 'application/json' } for attempt in range(1, max_retries + 1): print(f"Attempt {attempt} of {max_retries}...") response = requests.post( f'{SQUARE_API_BASE}/v1/load', headers=headers, json={"query": query} ) if response.status_code != 200: raise Exception(f"API error: {response.status_code} - {response.text}") data = response.json() if 'error' in data and data['error'] == 'Continue wait': print(f"Query still processing, waiting {retry_delay}s...") time.sleep(retry_delay) else: print("Results received!") return data raise TimeoutError(f"Query timed out after {max_retries} attempts") # Example usage query = { "measures": ["Sales.net_sales"], "timeDimensions": [{ "dimension": "Sales.local_reporting_timestamp", "dateRange": ["2024-02-01", "2024-02-29"], "granularity": "day" }] } results = execute_query_with_retry(query) print(results) ``` ### Using JavaScript/Node.js ```javascript const axios = require('axios'); const SQUARE_ACCESS_TOKEN = process.env.SQUARE_ACCESS_TOKEN; const SQUARE_API_BASE = process.env.SQUARE_API_BASE; async function executeQueryWithRetry(query, maxRetries = 10, retryDelay = 2000) { const headers = { 'Authorization': `Bearer ${SQUARE_ACCESS_TOKEN}`, 'Content-Type': 'application/json' }; for (let attempt = 1; attempt <= maxRetries; attempt++) { console.log(`Attempt ${attempt} of ${maxRetries}...`); try { const response = await axios.post( `${SQUARE_API_BASE}/v1/load`, { query }, { headers } ); if (response.data.error === 'Continue wait') { console.log(`Query still processing, waiting ${retryDelay / 1000}s...`); await new Promise(resolve => setTimeout(resolve, retryDelay)); } else { console.log('Results received!'); return response.data; } } catch (error) { throw new Error(`API error: ${error.response?.status} - ${error.message}`); } } throw new Error(`Query timed out after ${maxRetries} attempts`); } // Example usage const query = { measures: ['Sales.net_sales'], timeDimensions: [{ dimension: 'Sales.local_reporting_timestamp', dateRange: ['2024-02-01', '2024-02-29'], granularity: 'day' }] }; executeQueryWithRetry(query) .then(results => console.log(JSON.stringify(results, null, 2))) .catch(error => console.error(error)); ``` ## Data freshness and propagation delay {% aside type="info" %} There is a delay between when a transaction occurs and when it appears in the Reporting API. Most cubes have approximately a 15-minute delay. Some cubes may offer faster freshness but might not be joinable with other cubes. Check the metadata endpoint (`/v1/meta`) for per-cube freshness details. {% /aside %} For real-time order data, use the [Orders API](https://developer.squareup.com/reference/square/orders-api) instead. --- # Views > Source: https://developer.squareup.com/docs/reporting-api/views > Status: BETA > Languages: All > Platforms: All Understand how views organize and structure data in the Square Reporting API for flexible querying. ## Overview **Views are the recommended way to query the Reporting API.** They pre-join data from multiple cubes, pre-filter to relevant records, and expose human-readable dimensions like `location_name` instead of raw IDs. {% aside type="info" %} For most reporting tasks, start with a view. Use [cubes](/docs/reporting-api/cubes/core) directly only when you need raw, unfiltered data or fields not exposed through any view. {% /aside %} ## Available views | View | Measures | Dimensions | Segments | Primary Use Case | |------|----------|------------|----------|-----------------| | **Sales** | 23 | 23 | 7 | Order-level sales, revenue, tips, discounts | | **ItemSales** | 37 | 42 | 5 | Item-level sales with discounts, modifiers, combos | | **ModifierSales** | 10 | 18 | 2 | Modifier-level sales analysis | | **KDS** | 22 | 42 | 4 | Kitchen ticket and item prep times | | **SpeedOfService** | 25 | 21 | 8 | Order entry/service time + sales + KDS metrics | | **PeerBenchmarkHourlySales** | 4 | 9 | 0 | Hourly sales distribution vs peers | | **PeerBenchmarkOrderValue** | 4 | 7 | 0 | Average order value benchmarking vs peers | | **PeerBenchmarkSalesTrend** | 10 | 7 | 0 | Year-over-year sales growth vs peers | ## Sales view The **Sales** view is the recommended starting point for most sales reporting. It reports only on closed (fully settled) orders and includes dimensions for location, channel, customer, and employee analysis. {% aside type="info" %} **No segment needed.** The Sales view automatically filters to closed orders — you don't need to add `segments: ["Orders.closed_checks"]` like you would when querying the Orders cube directly. {% /aside %} ### Measures | Measure | Type | Description | |---------|------|-------------| | `top_line_product_sales` | sum | Gross sales (default "sales" measure — use this unless you need a specific qualifier) | | `net_sales` | sum | Top-line sales minus discounts and itemized returns | | `total_collected_amount` | sum | Total collected from customer (includes tips, tax, gift cards, returns) | | `total_sales_amount` | sum | Total sales amount for the order | | `order_count` | count | Number of orders | | `avg_net_sales` | avg | Average net sales per order | | `avg_top_line_product_sales` | avg | Average gross sales per order | | `avg_total_collected` | avg | Average total collected per order | | `avg_total_sales` | avg | Average total sales per order | | `discounts_amount` | sum | Total discounts applied | | `comps_amount` | sum | Total comps applied | | `itemized_returns` | sum | Itemized returns (excludes refunds, discounts, comps) | | `refunds_by_amount_amount` | sum | Non-itemized refunds (money given back) | | `tips_amount` | sum | Total tips (excludes cash tips and auto-gratuity) | | `sales_tax_amount` | sum | Sales tax collected | | `gift_card_sales_amount` | sum | Revenue from Square Gift Card sales (not purchases made with gift cards) | | `top_line_product_sales_count` | sum | Orders contributing to gross sales | | `net_sales_count` | sum | Orders contributing to net sales | | `total_sales_count` | sum | Orders contributing to total sales | | `location_count` | count | Unique locations | | `unique_customers` | countDistinct | Unique customers | | `customer_visit_count` | count | Customer visits (purchases) | | `employee_count` | count | Unique team members | ### Key dimensions | Dimension | Type | Description | |-----------|------|-------------| | `location_name` | string | Location display name | | `location_id` | string | Location identifier | | `local_reporting_timestamp` | time | Timestamp in location's local timezone | | `local_date` | string | Date in YYYY-MM-dd format, local timezone | | `local_day_of_week` | string | Day of week name, local timezone | | `local_hour` | number | Hour of day (0-23), local timezone | | `channel_name` | string | Sales channel display name | | `channel_category` | string | High-level channel category | | `customer_type` | string | NEW or RETURNING | | `customer_id` | string | Customer identifier | | `employee_full_name` | string | Team member full name | | `order_id` | string | Order identifier | | `merchant_id` | string | Merchant identifier | | `distinct_item_names` | string | Comma-separated item names on order | | `item_quantities` | string | Items with quantities (e.g., "Beer x 2, Burger x 1") | | `distinct_item_count` | number | Number of distinct line items | | `had_loyalty_at_purchase` | boolean | Whether customer had active loyalty | ### Segments | Segment | Description | |---------|-------------| | `in_store` | In-store sales channels | | `online` | Online sales channels | | `has_tip` | Orders with tips | | `no_tip` | Orders without tips | | `has_customer` | Orders linked to a customer | | `new_customers` | First-time customers only | | `returning_customers` | Returning customers only | ### Example: Daily sales by location ```json { "measures": ["Sales.net_sales", "Sales.order_count"], "dimensions": ["Sales.location_name"], "timeDimensions": [{ "dimension": "Sales.local_reporting_timestamp", "dateRange": "last 30 days", "granularity": "day" }] } ``` ### Example: Online vs in-store sales ```json { "measures": ["Sales.net_sales", "Sales.order_count"], "timeDimensions": [{ "dimension": "Sales.local_reporting_timestamp", "dateRange": "last 7 days" }], "segments": ["Sales.online"] } ``` ## ItemSales view The **ItemSales** view provides item-level sales data with related discounts, modifiers, and order-level metrics. Like the Sales view, it reports only on closed orders. ### Key measures | Measure | Type | Description | |---------|------|-------------| | `count` | count | Item transaction count | | `items_sold_count` | sum | Items sold (handles fractional quantities) | | `items_returned_count` | sum | Items returned | | `net_quantity` | sum | Net quantity (sales minus returns) | | `item_net_sales` | sum | Net item sales | | `item_net_sales_with_tax` | sum | Net item sales including tax | | `sales_gross_amount` | sum | Gross sales for sold items | | `returns_gross_amount` | sum | Gross return amount (negative) | | `avg_item_gross_sales` | avg | Average gross sales per item | | `avg_item_net_sales` | avg | Average net sales per item | | `discount_amount` | sum | Net discount amount | | `unique_customers` | countDistinct | Unique customers | ### Key dimensions | Dimension | Type | Description | |-----------|------|-------------| | `item_name` | string | Item name | | `category_name` | string | Item category | | `item_variation_name` | string | Item variation name | | `item_sku` | string | SKU | | `location_name` | string | Location display name | | `local_reporting_timestamp` | time | Local timestamp | | `local_date` | string | Local date (YYYY-MM-dd) | | `modifier_name` | string | Modifier name | | `modifier_list_name` | string | Modifier list/group name | | `discount_name` | string | Discount or comp name | | `channel_name` | string | Sales channel | | `customer_type` | string | NEW or RETURNING | | `transaction_type` | string | SALE or RETURN | | `payment_method` | string | Payment method | ### Segments | Segment | Description | |---------|-------------| | `sales` | Sales transactions only | | `returns` | Return transactions only | | `has_customer` | Orders with a linked customer | | `new_customers` | First-time customers | | `returning_customers` | Returning customers | ### Example: Top-selling items ```json { "measures": ["ItemSales.items_sold_count", "ItemSales.item_net_sales"], "dimensions": ["ItemSales.item_name", "ItemSales.category_name"], "timeDimensions": [{ "dimension": "ItemSales.local_reporting_timestamp", "dateRange": "last 30 days" }], "order": { "ItemSales.item_net_sales": "desc" }, "limit": 20 } ``` ## ModifierSales view The **ModifierSales** view provides modifier-level sales data for closed orders. {% aside type="info" %} **Important:** `modifier_name` is not unique across modifier lists. Always group by both `modifier_list_name` and `modifier_name` when analyzing individual modifiers. For example, "Large" could exist in both a "Size" list and a "Drink Size" list. {% /aside %} ### Measures | Measure | Type | Description | |---------|------|-------------| | `orders_count` | countDistinct | Unique orders with modifiers | | `quantity_sold` | sum | Modifiers sold | | `quantity_returned` | sum | Modifiers returned | | `net_quantity` | sum | Net quantity (sales minus returns) | | `gross_sales` | sum | Gross modifier sales | | `net_sales` | sum | Net modifier sales | | `returns_amount` | sum | Returns amount | | `avg_gross_sales` | avg | Average gross sales per modifier | | `avg_net_sales` | avg | Average net sales per modifier | | `avg_modifier_price` | avg | Average modifier price | ### Key dimensions | Dimension | Type | Description | |-----------|------|-------------| | `modifier_name` | string | Modifier name (not unique — always pair with `modifier_list_name`) | | `modifier_list_name` | string | Modifier list/group name (e.g., "Size", "Toppings") | | `item_name` | string | Item the modifier was applied to | | `location_name` | string | Location display name | | `local_reporting_timestamp` | time | Local timestamp | | `channel_name` | string | Sales channel | ### Example: Top modifier combinations ```json { "measures": ["ModifierSales.quantity_sold", "ModifierSales.net_sales"], "dimensions": [ "ModifierSales.modifier_list_name", "ModifierSales.modifier_name", "ModifierSales.item_name" ], "timeDimensions": [{ "dimension": "ModifierSales.local_reporting_timestamp", "dateRange": "last 30 days" }], "order": { "ModifierSales.quantity_sold": "desc" }, "limit": 20 } ``` ## Other views ### KDS (Kitchen Display System) Kitchen ticket and item performance metrics. Measures include ticket counts, prep/completion times, on-time vs late percentages, and item-level timing. {% aside type="warning" %} Kitchen tickets are not the same as sales orders. Use the Sales view for sales reporting and KDS for kitchen operations analysis. {% /aside %} ### SpeedOfService Combines speed-of-service metrics (order entry time, service time) with sales measures and optional KDS ticket metrics. Useful for analyzing operational efficiency alongside revenue. ### PeerBenchmark views Three views for benchmarking your sales against similar businesses in the same city and category: - **PeerBenchmarkHourlySales** — Sales distribution by hour of day vs peers - **PeerBenchmarkOrderValue** — Average order value vs peers - **PeerBenchmarkSalesTrend** — Year-over-year sales growth vs peers {% aside type="info" %} Not all merchants have a matching peer cohort. These views use `my_` prefix for your metrics and `peer_` prefix for peer-group metrics. Filter `cadence` to exactly one value (`weekly`, `monthly`, or `yearly`). {% /aside %} ## Views vs cubes | | Views | Cubes | |--|-------|-------| | **Pre-filtered** | Yes (e.g., Sales only includes closed orders) | No — you add segments yourself | | **Human-readable** | Yes (`location_name`, `channel_name`) | IDs only (`location_id`) | | **Pre-joined** | Yes (combines data from multiple cubes) | Single data domain | | **Recommended for** | Standard reporting | Advanced/raw data access | | **Segment needed?** | Optional (for further filtering) | Usually required (e.g., `closed_checks`) | --- # Understanding Dynamic Schemas > Source: https://developer.squareup.com/docs/reporting-api/understanding-dynamic-schemas > Status: BETA > Languages: All > Platforms: All Learn how the Reporting API dynamically generates schemas based on your available data and permissions. ## What is a dynamic schema? A **dynamic schema** means the API's queryable data model is discovered at runtime rather than hard-coded into your application. Instead of knowing at development time what fields are available, your application queries the `/v1/meta` endpoint to learn the current structure, then builds queries accordingly. This is fundamentally different from traditional REST APIs where you write code against a fixed set of known fields. ### Why dynamic schemas? The Reporting API schema is **backwards compatible** — Square does not remove or rename fields in breaking ways. However, the schema does **grow over time** as new measures, dimensions, and cubes are added. Dynamic discovery lets your application automatically pick up these additions without redeployment. ## Architecture pattern: Discovery Layer Implement a discovery layer that sits between your application logic and the API: ![reporting-api-dynamic-schemas-discovery-layer](//images.ctfassets.net/1nw4q0oohfju/3nK44SkLo8mS3dZxCrU4Sv/9f3e635650cdaf7f8264a0136fe4d88b/reporting-api-dynamic-schemas-discovery-layer.png) **Layer Responsibilities**: - **Application Layer**: UI, business logic, and reporting components - **Discovery Layer**: Metadata caching, query validation, and error handling - **API Layer**: Schema discovery and query execution ## Key principles 1. **Discover on startup**: Fetch metadata on application startup or periodically to surface new fields 2. **Cache metadata appropriately**: Balance freshness with API load (1-24 hour TTL) 3. **Build dynamic UIs**: Populate options from metadata, not hard-coded lists 4. **Validate before executing**: Check queries against cached metadata to catch errors early 5. **Refresh after errors**: If a query fails with "not found", invalidate cache and retry For implementation details — caching code, validation patterns, and parsing examples — see [Metadata Discovery](/docs/reporting-api/metadata-discovery). ## Schema change scenarios | Change | Client Impact | Action | |--------|---------------|--------| | Measure added | None | Discover automatically | | Dimension added | None | Discover automatically | | Measure removed | Queries using it fail | Validate queries against metadata before execution | | Dimension removed | Queries using it fail | Validate queries against metadata before execution | | Cube/view added | None | Discover automatically | | Cube/view removed | All queries to it fail | Validate cube names against metadata | | Member renamed | Queries using old name fail | Always discover member names from `/v1/meta` | | Type changed | May affect parsing/display | Check `type` field in metadata | --- # Metadata Discovery > Source: https://developer.squareup.com/docs/reporting-api/metadata-discovery > Status: BETA > Languages: All > Platforms: All Discover available metadata, fields, and data structures in the Reporting API to build effective queries. ## Overview The `/v1/meta` endpoint is the foundation of working with the Reporting API. It returns a complete description of the available data model, including: - **Cubes**: Logical groupings of related metrics - **Measures**: Numeric aggregations you can calculate - **Dimensions**: Attributes for grouping and filtering - **Segments**: Predefined filters for common business logic Understanding the metadata structure is essential for building dynamic, resilient clients. ## Views vs cubes The `/v1/meta` endpoint returns two types of queryable entities: **views** and **cubes**. Each entry has a `type` field (`"view"` or `"cube"`) that tells you which it is. ### Views — the recommended starting point **Views** are curated, pre-joined interfaces designed for specific reporting use cases. They combine data from multiple cubes, pre-filter where appropriate, and expose human-readable dimensions. For example, the `Sales` view: - Pre-filters to closed (fully settled) orders — no need to add `segments: ["Orders.closed_checks"]` - Includes `location_name` instead of just `location_id` - Has intuitive segments like `Sales.online` and `Sales.in_store` - Combines order, location, channel, and customer data in one queryable entity **Use views for most reporting tasks.** They're simpler to query and less error-prone. ### Cubes — raw data for advanced use **Cubes** are the underlying data building blocks. Each cube maps to a specific data domain (orders, items, payments, locations) and exposes its raw measures and dimensions. Cubes are useful when: - You need a field that isn't exposed in any view - You need raw, unfiltered data (e.g., including open or voided orders) - You're doing advanced analysis that doesn't fit a view's pre-defined shape {% aside type="warning" %} Some internal cubes are not intended for direct use. For example, `ClosedOrders` is an internal cube that backs the `Sales` view — its description says "Do not use directly — use Sales view instead." Always check a cube's description before querying it directly. {% /aside %} ### How to tell them apart ```bash # List all views curl -s -H "Authorization: Bearer $TOKEN" \ https://connect.squareup.com/reporting/v1/meta | \ jq '.cubes[] | select(.type == "view") | {name, description}' # List all cubes curl -s -H "Authorization: Bearer $TOKEN" \ https://connect.squareup.com/reporting/v1/meta | \ jq '.cubes[] | select(.type == "cube") | {name, description}' ``` ## Fetching metadata ### Basic Request ```bash curl -X GET "https://connect.squareup.com/reporting/v1/meta" \ -H "Authorization: Bearer YOUR_ACCESS_TOKEN" \ -H "Content-Type: application/json" ``` ### Response Structure The metadata response is a JSON object with the following top-level structure: ```json { "cubes": [ { "name": "Orders", "title": "Orders", "measures": [...], "dimensions": [...], "segments": [...] } ] } ``` ## Understanding cubes A **cube** represents a logical data model containing related measures and dimensions. Each cube corresponds to a business domain (e.g., Orders, Payments, Customers). ### Cube Structure ```json { "name": "Orders", "title": "Orders", "description": "Sales order data including payments, items, and fulfillment", "measures": [...], "dimensions": [...], "segments": [...] } ``` | Property_Name | Description | |---------------|-------------| | `name` | Unique identifier for the cube (used in queries) | | `title` | Human-readable display name | | `description` | Explanation of what data the cube contains | | `measures` | Array of available numeric aggregations | | `dimensions` | Array of available grouping/filtering attributes | | `segments` | Array of predefined filters | ### Common Views (Recommended) | View | Purpose | Data Freshness | |------|---------|----------------| | `Sales` | Order-level sales, revenue, tips, refunds — pre-filtered to closed orders | ~15 minutes | | `ItemSales` | Item-level sales with discounts, modifiers, and category data | ~15 minutes | | `ModifierSales` | Modifier-level sales with modifier list metadata | ~15 minutes | | `SpeedOfService` | Speed of service metrics and sales data | ~15 minutes | | `KDS` | Kitchen Display System ticket and item performance | ~15 minutes | ### Common Cubes (Advanced) | Cube | Purpose | Data Freshness | |------|---------|----------------| | `Orders` | Raw order data including open/voided orders | ~15 minutes | | `ItemTransactions` | Raw item transaction data | ~15 minutes | | `PaymentAndRefunds` | Payment and refund transaction details | ~15 minutes | | `Location` | Location reference data (name, timezone, status) | N/A (reference) | {% aside type="info" %} Use the `/v1/meta` endpoint or the [Schema Explorer](https://reporting-schema-explorer-production-f.squarecdn.com/schema-explorer.html) for the complete, up-to-date list of available views and cubes. {% /aside %} ## Understanding measures **Measures** are numeric values that can be aggregated (summed, averaged, counted, etc.). They represent the "what you're measuring" in your query. ### Measure Structure ```json { "name": "Orders.net_sales", "title": "Net Sales", "description": "Total sales after discounts and returns, excluding tax", "type": "number", "aggType": "sum", "drillMembers": ["Orders.order_id", "Orders.sale_timestamp"], "format": "currency" } ``` | Property_Name | Description | |---------------|-------------| | `name` | Fully qualified measure name (Cube.measure) | | `title` | Human-readable display name | | `description` | Detailed explanation of what the measure calculates | | `type` | Data type (number, string, time) | | `aggType` | Aggregation type (sum, count, avg, min, max) | | `drillMembers` | Suggested dimensions for drill-down analysis | | `format` | Display format hint (currency, percent, number) | ### Common Sales Measures From the `Orders` cube: | Measure | Description | Use Case | |---------|-------------|----------| | `Orders.net_sales` | Gross sales minus discounts/returns | Primary revenue metric | | `Orders.net_sales_with_tax` | Net sales plus sales tax | Gross revenue in tax-inclusive regions | | `Orders.top_line_product_sales` | Gross product sales before adjustments | Starting point for sales funnel | | `Orders.discounts_amount` | Total discounts applied | Promotional effectiveness | | `Orders.itemized_returns` | Value of returned items | Return rate analysis | | `Orders.sales_tax_amount` | Sales tax collected | Tax reporting | | `Orders.tips_amount` | Tips received (non-cash) | Service performance | | `Orders.comps_amount` | Complimentary items value | Comp tracking | ### Measure Types and Aggregations #### Sum Measures Most monetary measures use `sum` aggregation: ```json { "name": "Orders.net_sales", "aggType": "sum" } ``` #### Count Measures For counting distinct entities: ```json { "name": "Orders.count", "aggType": "count" } ``` #### Average Measures For calculating averages: ```json { "name": "Orders.avg_net_sales", "aggType": "avg" } ``` ## Understanding dimensions **Dimensions** are attributes used to group, filter, or slice your data. They represent the "how you're slicing" your measures. ### Dimension Structure ```json { "name": "Orders.location_id", "title": "Location ID", "description": "Unique identifier for the location where the order was placed", "type": "string", "suggestFilterValues": true } ``` | Property_Name | Description | |---------------|-------------| | `name` | Fully qualified dimension name (Cube.dimension) | | `title` | Human-readable display name | | `description` | Explanation of what the dimension represents | | `type` | Data type (string, number, time) | | `suggestFilterValues` | Whether the API can suggest filter values | ### Dimension Types #### Categorical Dimensions String-based attributes for grouping: ```json { "name": "Orders.location_id", "type": "string" } ``` Common categorical dimensions: - `Orders.location_id` — Group by location - `Orders.merchant_id` — Group by merchant - `Orders.sales_channel_id` — Group by sales channel (online, in-person, etc.) - `Orders.device_id` — Group by device #### Time Dimensions Special dimensions for time-series analysis: ```json { "name": "Orders.sale_timestamp", "type": "time" } ``` Time dimensions support granularity: - `day` — Daily aggregation - `week` — Weekly aggregation - `month` — Monthly aggregation - `quarter` — Quarterly aggregation - `year` — Yearly aggregation #### Local Time Dimensions For business-day alignment: ```json { "name": "Orders.local_date", "type": "time" } ``` Use local time dimensions when you need results aligned to the location's timezone rather than UTC. ### Common Dimensions | Dimension | Type | Description | |-----------|------|-------------| | `Orders.sale_timestamp` | time | UTC timestamp of sale | | `Orders.local_date` | time | Local date in location timezone | | `Orders.location_id` | string | Location identifier | | `Orders.merchant_id` | string | Merchant identifier | | `Orders.sales_channel_id` | string | Sales channel (e.g., online, in-person) | | `Orders.device_id` | string | Device used for transaction | | `Orders.customer_id` | string | Customer identifier | ## Understanding segments **Segments** are predefined filters that encapsulate common business logic. They ensure consistency across queries and simplify complex filtering. ### Segment Structure ```json { "name": "Orders.closed_checks", "title": "Closed Checks", "description": "Filters to fully paid and settled orders, matching Sales Summary behavior" } ``` | Property_Name | Description | |---------------|-------------| | `name` | Fully qualified segment name (Cube.segment) | | `title` | Human-readable display name | | `description` | Explanation of the filter logic | ### Common Segments | Segment | Purpose | |---------|--------| | `Orders.closed_checks` | Fully paid/settled orders (recommended for Sales Summary parity) | | `Orders.open_checks` | Orders awaiting payment | | `Orders.awaiting_capture` | Orders awaiting payment capture | | `Orders.fully_paid` | Fully paid orders | | `Orders.has_tip` | Orders that include a tip | | `Orders.no_tip` | Orders without a tip | ### Why Use Segments? Segments provide several benefits: 1. **Consistency**: Ensures everyone uses the same filter logic 2. **Simplicity**: Encapsulates complex conditions in a single reference 3. **Maintainability**: Filter logic can be updated centrally 4. **Report Parity**: Matches Square dashboard behavior **Example**: Instead of manually filtering by order state: ```json { "filters": [{ "member": "Orders.state", "operator": "equals", "values": ["COMPLETED"] }, { "member": "Orders.check_state", "operator": "equals", "values": ["CLOSED"] }] } ``` Simply use the segment: ```json { "segments": ["Orders.closed_checks"] } ``` ## Understanding meta tags Cubes, measures, dimensions, and segments can include a `meta` field with additional metadata tags. These tags provide UI hints, stability information, and semantic context beyond the basic properties. ### Quick Reference | Tag | Applies To | Purpose | |-----|------------|--------| | `label` | Dimensions, Measures, Segments | Human-readable display label (e.g., "Net sales") | | `tooltip` | Dimensions, Measures, Segments | Short tooltip text for UI hover states | | `context` | Dimensions, Measures, Segments | Extended context for LLMs and advanced UIs | | `stability` | Cubes (required), Dimensions, Measures | Data quality and API stability level | | `deprecated_at` | Cubes, Dimensions, Measures | Deprecation date (ISO 8601, when stability is `deprecated`) | | `values` | Dimensions, Segments | Allowed values for enum-like fields | | `translation_types` | Dimensions | Values requiring localization | | `examples` | Cubes | Example queries demonstrating cube usage | ### Stability levels The `stability` tag communicates the maturity and reliability of a cube or field: | Value | Data Quality | Breaking Changes | Description | |-------|--------------|------------------|-------------| | `preview` | Uncertain (may have missing data) | Highly likely | Early access, under active development | | `beta` | Uncertain (often missing historical data) | Unlikely but possible | Approaching general availability | | `ga` | Verified | None | General Availability — production-ready | | `deprecated` | N/A | N/A | Supported for 12+ months, then removed | Stability is set at the cube level and can be overridden at the field level. For example, a `ga` cube might have an individual measure marked as `preview`. ### Example: Meta tags in metadata response ```json { "name": "Orders.net_sales", "title": "Net Sales", "type": "number", "aggType": "sum", "format": "currency", "meta": { "label": "Net sales", "tooltip": "Amount of gross sales minus discounts, comps, returns, refunds, tips, taxes, fees, or gift card sales.", "stability": "beta" } } ``` ### Example: Dimension with allowed values ```json { "name": "Orders.check_state", "title": "Check State", "type": "string", "meta": { "label": "Check state", "tooltip": "The payment status of the order.", "values": ["AWAITING_CAPTURE_CHECK", "CLOSED_CHECK", "OPEN_CHECK"] } } ``` For the complete meta tags reference with detailed examples and best practices, see the [Meta Tags Reference](https://reporting-schema-explorer-production-f.squarecdn.com/meta-tags.html). ## Parsing metadata programmatically ### Example: Extract All Measures from a Cube ```python import requests import os def get_cube_measures(cube_name): """Fetch and parse measures from a specific cube.""" response = requests.get( 'https://connect.squareup.com/reporting/v1/meta', headers={'Authorization': f'Bearer {os.environ["SQUARE_ACCESS_TOKEN"]}'} ) metadata = response.json() # Find the cube cube = next((c for c in metadata['cubes'] if c['name'] == cube_name), None) if not cube: raise ValueError(f"Cube {cube_name} not found") # Extract measure information measures = [] for measure in cube['measures']: measures.append({ 'name': measure['name'], 'title': measure['title'], 'description': measure.get('description', ''), 'type': measure['type'], 'aggType': measure.get('aggType', 'unknown') }) return measures # Usage measures = get_cube_measures('Orders') for measure in measures: print(f"{measure['name']}: {measure['title']}") ``` ### Example: Build a Dimension Selector ```javascript async function buildDimensionSelector(cubeName) { const response = await fetch('https://connect.squareup.com/reporting/v1/meta', { headers: { 'Authorization': `Bearer ${process.env.SQUARE_ACCESS_TOKEN}` } }); const metadata = await response.json(); const cube = metadata.cubes.find(c => c.name === cubeName); if (!cube) { throw new Error(`Cube ${cubeName} not found`); } // Build selector options return cube.dimensions.map(dimension => ({ value: dimension.name, label: dimension.title, description: dimension.description, type: dimension.type })); } // Usage const dimensions = await buildDimensionSelector('Orders'); console.log(dimensions); ``` ### Example: Validate Query Against Metadata ```python def validate_query(query, metadata): """Validate that a query uses valid measures, dimensions, and segments.""" cube_name = query.get('cube', 'Orders') cube = next((c for c in metadata['cubes'] if c['name'] == cube_name), None) if not cube: return False, f"Cube {cube_name} not found" # Validate measures valid_measures = {m['name'] for m in cube['measures']} for measure in query.get('measures', []): if measure not in valid_measures: return False, f"Invalid measure: {measure}" # Validate dimensions valid_dimensions = {d['name'] for d in cube['dimensions']} for dimension in query.get('dimensions', []): if dimension not in valid_dimensions: return False, f"Invalid dimension: {dimension}" # Validate segments valid_segments = {s['name'] for s in cube['segments']} for segment in query.get('segments', []): if segment not in valid_segments: return False, f"Invalid segment: {segment}" return True, "Query is valid" # Usage query = { "measures": ["Orders.net_sales"], "dimensions": ["Orders.location_id"], "segments": ["Orders.closed_checks"] } is_valid, message = validate_query(query, metadata) print(f"Valid: {is_valid}, Message: {message}") ``` ## Caching metadata Metadata changes infrequently, so caching is recommended: ### Simple Time-Based Cache ```python import time class MetadataCache: def __init__(self, ttl_seconds=3600): self.cache = None self.last_fetch = 0 self.ttl = ttl_seconds def get(self): now = time.time() if self.cache is None or (now - self.last_fetch) > self.ttl: self.cache = self._fetch_metadata() self.last_fetch = now return self.cache def _fetch_metadata(self): response = requests.get( 'https://connect.squareup.com/reporting/v1/meta', headers={'Authorization': f'Bearer {os.environ["SQUARE_ACCESS_TOKEN"]}'} ) return response.json() def invalidate(self): self.cache = None # Usage cache = MetadataCache(ttl_seconds=3600) # 1 hour TTL metadata = cache.get() ``` ## Best practices ### 1. Cache Metadata Appropriately - **Recommended TTL**: 1-24 hours depending on your needs - **Invalidation**: Clear cache after query errors related to schema - **Startup**: Always fetch fresh metadata on application boot ### 2. Build Dynamic UIs Don't hard-code measure/dimension lists. Build them from metadata: ```javascript // Good: Dynamic const measures = metadata.cubes.Orders.measures.map(m => ({ label: m.title, value: m.name })); // Bad: Hard-coded const measures = [ { label: 'Net Sales', value: 'Orders.net_sales' }, { label: 'Tips', value: 'Orders.tips_amount' } ]; ``` ### 3. Validate Before Querying Check that your query components exist before sending to `/v1/load`: ```python # Validate first is_valid, error = validate_query(query, metadata) if not is_valid: raise ValueError(error) # Then execute results = execute_query(query) ``` ### 4. Use Segments for Report Parity Always use `Orders.closed_checks` when building sales reports that should match the Square dashboard: ```json { "measures": ["Orders.net_sales"], "segments": ["Orders.closed_checks"] } ``` ### 5. Document Your Dependencies Track which measures and dimensions your application requires: ```yaml # app-requirements.yml required_measures: - Orders.net_sales - Orders.tips_amount required_dimensions: - Orders.location_id - Orders.sale_timestamp required_segments: - Orders.closed_checks ``` ## Exploring metadata with jq Use `jq` to explore metadata from the command line: ### List all views (recommended) ```bash curl -s -H "Authorization: Bearer $TOKEN" \ https://connect.squareup.com/reporting/v1/meta | \ jq '.cubes[] | select(.type == "view") | .name' ``` ### List all cubes ```bash curl -s -H "Authorization: Bearer $TOKEN" \ https://connect.squareup.com/reporting/v1/meta | \ jq '.cubes[].name' ``` ### Get all measures from Orders cube ```bash curl -s -H "Authorization: Bearer $TOKEN" \ https://connect.squareup.com/reporting/v1/meta | \ jq '.cubes[] | select(.name == "Orders") | .measures[] | {name, title, description}' ``` ### Find dimensions by type ```bash curl -s -H "Authorization: Bearer $TOKEN" \ https://connect.squareup.com/reporting/v1/meta | \ jq '.cubes[] | select(.name == "Orders") | .dimensions[] | select(.type == "time") | .name' ``` ### List all segments ```bash curl -s -H "Authorization: Bearer $TOKEN" \ https://connect.squareup.com/reporting/v1/meta | \ jq '.cubes[] | select(.name == "Orders") | .segments[] | {name, title}' ``` --- # Measures > Source: https://developer.squareup.com/docs/reporting-api/query-construction/measures > Status: BETA > Languages: All > Platforms: All Learn how to define and use measures for aggregating numerical data in Reporting API queries. ## Overview {% aside type="info" %} * The measure names and examples below reflect the current schema. For the most up-to-date list of available measures, use the [Schema Explorer](https://reporting-schema-explorer-production-f.squarecdn.com/schema-explorer.html) or the `/v1/meta` endpoint. * For most sales reporting, use the `Sales` view instead of the `Orders` cube. The `Sales` view pre-filters to closed orders and includes human-readable dimensions. The examples below use `Orders.*` to teach measure concepts, but the same patterns apply to any view or cube. {% /aside %} Measures define **what you want to calculate**. They are numeric aggregations like sums, counts, or averages. ### Understanding Measure Types {% aside type="warning" %} Measure aggregation types (sum, count, average) are **pre-defined in the schema**. When you build a query, you simply select measures by name—the API automatically applies the correct aggregation logic. You **cannot** change a measure's aggregation type in your query. For example, `Orders.net_sales` is always a sum, and `Orders.count` is always a count. {% /aside %} #### How to Discover Measure Types There are two ways to find out what aggregation type a measure uses: 1. **Schema Explorer** (recommended for browsing): - Visit the [Schema Explorer](https://reporting-schema-explorer-production-f.squarecdn.com/schema-explorer.html) - Search for the measure you're interested in - View its `aggType` property 2. **Metadata API** (for programmatic discovery): - Call `/reporting/v1/meta` to get the full schema - Each measure includes an `aggType` field - See [Metadata Discovery](/docs/reporting-api/metadata-discovery) for details #### Common Measure Types | Measure Type | Description | Example Measures | |--------------|-------------|------------------| | `sum` | Adds up all values | `Orders.net_sales`, `Orders.tips_amount`, `Orders.discounts_amount` | | `count` | Counts number of records | `Orders.count`, `PaymentAndRefunds.count` | | `avg` | Calculates average value | `Orders.avg_net_sales`, `Orders.avg_total_sales` | ## Single measure ```json { "measures": ["Orders.net_sales"] } ``` This returns the **sum** of all order net sales (because `Orders.net_sales` has `aggType: "sum"`). ## Multiple measures ```json { "measures": [ "Orders.net_sales", "Orders.net_sales_with_tax", "Orders.tips_amount", "Orders.sales_tax_amount" ] } ``` All of these are sum measures, so you get the total for each. ## Examples by measure type ### Sum Measures (Most Common) Sum measures add up monetary amounts or quantities: ```json { "measures": [ "Orders.net_sales", // Sum of all net sales "Orders.tips_amount", // Sum of all tips "Orders.discounts_amount" // Sum of all discounts ], "timeDimensions": [{ "dimension": "Orders.sale_timestamp", "dateRange": ["2024-01-01", "2024-01-31"] }], "segments": ["Orders.closed_checks"] } ``` **Result**: Total amounts for the entire period. ### Count Measures Count measures tell you how many records exist: ```json { "measures": [ "Orders.count", // Number of orders "PaymentAndRefunds.count" // Number of payments ], "timeDimensions": [{ "dimension": "Orders.sale_timestamp", "dateRange": ["2024-01-01", "2024-01-31"], "granularity": "day" }], "segments": ["Orders.closed_checks"] } ``` **Result**: Daily count of orders and payments. ### Average Measures Average measures calculate mean values: ```json { "measures": [ "Orders.avg_net_sales", // Average net sales per order "Orders.count" // For context ], "dimensions": ["Orders.location_id"], "timeDimensions": [{ "dimension": "Orders.sale_timestamp", "dateRange": "last 30 days" }], "segments": ["Orders.closed_checks"] } ``` **Result**: Average order size per location (with order count for context). ### Combining Different Measure Types You can mix measure types in a single query: ```json { "measures": [ "Orders.net_sales", // SUM: Total revenue "Orders.count", // COUNT: Number of orders "Orders.avg_net_sales" // AVG: Average net sales per order ], "dimensions": ["Orders.location_id"], "timeDimensions": [{ "dimension": "Orders.sale_timestamp", "dateRange": "this month" }], "segments": ["Orders.closed_checks"], "order": { "Orders.net_sales": "desc" } } ``` **Result**: Complete performance metrics by location. ## Common measure combinations ### Sales Summary Metrics ```json { "measures": [ "Orders.top_line_product_sales", // SUM "Orders.discounts_amount", // SUM "Orders.itemized_returns", // SUM "Orders.net_sales", // SUM "Orders.sales_tax_amount", // SUM "Orders.tips_amount" // SUM ] } ``` ### Payment Analysis ```json { "measures": [ "Orders.net_sales", // SUM "Orders.count", // COUNT "Orders.avg_net_sales" // AVG ] } ``` ## Metadata example When you query `/reporting/v1/meta`, each measure includes its aggregation type: ```json { "name": "Orders.net_sales", "title": "Net Sales", "description": "Total sales after discounts and returns, excluding tax", "type": "number", "aggType": "sum", "format": "currency" } ``` ```json { "name": "Orders.count", "title": "Order Count", "description": "Number of orders", "type": "number", "aggType": "count" } ``` ```json { "name": "Orders.avg_net_sales", "title": "Average Net Sales", "description": "Average net sales per order", "type": "number", "aggType": "avg", "format": "currency" } ``` ## Key takeaways ✅ **Measure types are fixed** — You select measures by name; the API applies the aggregation ✅ **Use Schema Explorer** — Browse all measures and their types interactively ✅ **Use Metadata API** — Programmatically discover measure types for validation ✅ **Mix measure types** — Combine sum, count, and average measures in one query ❌ **Cannot override** — You cannot change a measure's aggregation type in your query --- # Dimensions > Source: https://developer.squareup.com/docs/reporting-api/query-construction/dimensions > Status: BETA > Languages: All > Platforms: All Understand how dimensions categorize and group data in your Reporting API query results. ## Overview Dimensions define **how you want to slice your measures**. They are categorical or time-based attributes that group your data. {% aside type="info" %} **Tip**: For most reporting, use views like `Sales` which provide human-readable dimensions (e.g., `Sales.location_name` instead of `Orders.location_id`). The examples below use `Orders.*` to teach dimension concepts, but the same patterns apply to any view or cube. {% /aside %} ## Single dimension ```json { "measures": ["Orders.net_sales"], "dimensions": ["Orders.location_id"] } ``` This returns net sales grouped by location. ## Multiple dimensions ```json { "measures": ["Orders.net_sales"], "dimensions": [ "Orders.location_id", "Orders.sales_channel_id" ] } ``` This returns net sales grouped by location AND sales channel (creating a cross-tab). {% aside type="info" %} **Dimensions use AND logic**: Multiple dimensions create a cross-tabulation with one row per unique combination. For OR logic (e.g., "location A OR location B"), use filters with the `equals` operator and multiple values instead. {% /aside %} {% aside type="warning" %} **Avoid double counting with multi-cube joins.** When querying across joined cubes (e.g., `Orders` and `ItemTransactions`), make a separate query for each level of aggregation. Summing measures from different cubes in a single query can cause double counting because of the join relationship (e.g., one order with 3 line items would count the order-level measure 3 times). For example, to get both order-level net sales and item-level gross sales: - **Query 1** (order level): `measures: ["Orders.net_sales"]` - **Query 2** (item level): `measures: ["ItemTransactions.sales_gross_amount"]` Do **not** combine them in a single query with item-level dimensions, as this would inflate the order-level totals. {% /aside %} ## Common dimension patterns ### By Location ```json { "measures": ["Orders.net_sales"], "dimensions": ["Orders.location_id"] } ``` ### By Sales Channel ```json { "measures": ["Orders.net_sales"], "dimensions": ["Orders.sales_channel_id"] } ``` ### By Customer ```json { "measures": ["Orders.net_sales", "Orders.count"], "dimensions": ["Orders.customer_id"] } ``` ### Multi-dimensional Analysis ```json { "measures": ["Orders.net_sales"], "dimensions": [ "Orders.location_id", "Orders.sales_channel_id", "Orders.device_id" ] } ``` This returns net sales for every unique combination of location, sales channel, and device. For example: one row for "Location A, Online, iPad", another for "Location A, Online, Terminal", another for "Location A, In-Person, Terminal", and so on. {% aside type="warning" %} **Performance Consideration**: More dimensions = more result rows. A query with 3 dimensions might return thousands of rows. Use `limit` to control result size. {% /aside %} ## Combining with time dimensions ```json { "measures": ["Orders.net_sales"], "dimensions": ["Orders.location_id"], "timeDimensions": [{ "dimension": "Orders.sale_timestamp", "dateRange": ["2024-01-01", "2024-01-31"], "granularity": "day" }] } ``` This returns daily sales by location (one row per day per location). --- # Time Dimensions > Source: https://developer.squareup.com/docs/reporting-api/query-construction/time-dimensions > Status: BETA > Languages: All > Platforms: All Configure time-based dimensions to analyze trends and patterns over specific date ranges in the Reporting API. ## Overview Time dimensions enable **[time-series analysis](https://en.wikipedia.org/wiki/Time_series)** with automatic date grouping. {% aside type="info" %} **Tip**: Views like `Sales` and `ItemSales` support the same time dimension patterns shown below. For most reporting, use `Sales.local_reporting_timestamp` for time-series analysis on the `Sales` view. {% /aside %} ## Basic time dimension ```json { "measures": ["Orders.net_sales"], "timeDimensions": [{ "dimension": "Orders.sale_timestamp", "dateRange": ["2024-01-01", "2024-01-31"], "granularity": "day" }] } ``` ## Time dimension structure ```json { "dimension": "Cube.time_dimension", // Required: which time field "dateRange": ["start", "end"], // Required: date range "granularity": "day" // Optional: grouping level } ``` ## Granularity options | Granularity | Description | Example Use Case | |-------------|-------------|------------------| | `hour` | Hourly buckets | Intra-day analysis | | `day` | Daily buckets | Daily sales reports | | `week` | Weekly buckets | Weekly trends | | `month` | Monthly buckets | Monthly performance | | `quarter` | Quarterly buckets | Quarterly reports | | `year` | Yearly buckets | Year-over-year analysis | ## Date range formats ### Absolute Dates ```json { "dateRange": ["2024-01-01", "2024-01-31"] } ``` ### Relative Dates ```json { "dateRange": "today" } ``` ```json { "dateRange": "yesterday" } ``` ```json { "dateRange": "this week" } ``` ```json { "dateRange": "last 7 days" } ``` ```json { "dateRange": "last 30 days" } ``` ```json { "dateRange": "this month" } ``` ```json { "dateRange": "last month" } ``` {% aside type="info" %} **All relative date formats tested**: We've verified that all the relative date formats shown above work with the Square Reporting API, including `today`, `yesterday`, `this week`, `last 7 days`, `last 30 days`, `this month`, `last month`, `this year`, `last year`, `last week`, `this quarter`, and `last quarter`. {% /aside %} ## Time dimension examples ### Daily Sales for January ```json { "measures": ["Orders.net_sales"], "timeDimensions": [{ "dimension": "Orders.sale_timestamp", "dateRange": ["2024-01-01", "2024-01-31"], "granularity": "day" }] } ``` Returns net sales for each day in January—one row per day with the date and sales total. ### Hourly Sales Today ```json { "measures": ["Orders.net_sales"], "timeDimensions": [{ "dimension": "Orders.sale_timestamp", "dateRange": "today", "granularity": "hour" }] } ``` Returns net sales for each hour of today—useful for intra-day monitoring and real-time dashboards. ### Monthly Sales Year-to-Date ```json { "measures": ["Orders.net_sales"], "timeDimensions": [{ "dimension": "Orders.sale_timestamp", "dateRange": ["2024-01-01", "2024-12-31"], "granularity": "month" }] } ``` Returns net sales for each month in 2024—one row per month showing monthly totals. ### No Granularity (Total Only) ```json { "measures": ["Orders.net_sales"], "timeDimensions": [{ "dimension": "Orders.sale_timestamp", "dateRange": ["2024-01-01", "2024-01-31"] // No granularity = single total for the range }] } ``` Returns a single total for all of January—no time breakdown, just one aggregated value for the entire period. ## Combining time dimensions with regular dimensions ```json { "measures": ["Orders.net_sales"], "dimensions": ["Orders.location_id"], "timeDimensions": [{ "dimension": "Orders.sale_timestamp", "dateRange": ["2024-01-01", "2024-01-31"], "granularity": "day" }] } ``` This returns daily sales by location (one row per day per location). ## Local timestamps vs UTC timestamps The Reporting API offers two approaches to time-based queries, and choosing the right one is important for matching merchant expectations. ### Approach 1: UTC timestamps (`sale_timestamp`) `Orders.sale_timestamp` stores the sale time in UTC. When you use this with `timeDimensions`, the API groups data by UTC time boundaries. ```json { "measures": ["Orders.net_sales"], "timeDimensions": [{ "dimension": "Orders.sale_timestamp", "dateRange": ["2024-01-01", "2024-01-31"], "granularity": "day" }], "segments": ["Orders.closed_checks"] } ``` **When to use**: Backend analytics, cross-timezone aggregation, or when UTC alignment is acceptable. **Caveat**: For merchants in non-UTC timezones, UTC-based daily grouping won't match what they consider a "business day." A sale at 11pm local time might fall into the next day in UTC. This can cause discrepancies of ~7% or more compared to the Square Dashboard for multi-timezone merchants. ### Approach 2: Local time dimensions (`local_date`, `local_reporting_timestamp`) The `Orders.local_date` dimension (type: `string`) represents the date in the **location's local timezone**. This aligns with what merchants see in the Square Dashboard. ```json { "measures": ["Orders.net_sales"], "dimensions": ["Orders.local_date"], "timeDimensions": [{ "dimension": "Orders.sale_timestamp", "dateRange": ["2024-01-01", "2024-01-31"] }], "segments": ["Orders.closed_checks"] } ``` **When to use**: Building reports that should match the Square Dashboard, or any merchant-facing reporting where "today's sales" should align with the merchant's local day. Additional local time dimensions are available for finer-grained local time analysis: - `Orders.local_day_of_week` — Day of the week in local timezone - `Orders.local_hour` — Hour of the day in local timezone - `Orders.local_month` — Month in local timezone - `Orders.local_year` — Year in local timezone ### Which approach should I use? | Scenario | Recommended Approach | Dimension | |----------|---------------------|-----------| | Match Square Dashboard | Local time | `Orders.local_date` | | Merchant-facing daily reports | Local time | `Orders.local_date` | | Hourly analysis (local business hours) | Local time | `Orders.local_hour` | | Cross-timezone backend analytics | UTC | `Orders.sale_timestamp` | | Time-series with granularity grouping | UTC | `Orders.sale_timestamp` | {% aside type="info" %} **Tip**: If your reports need to match the Square Dashboard closely, use `Orders.local_date` for daily grouping rather than `Orders.sale_timestamp` with `day` granularity. {% /aside %} --- # Segments > Source: https://developer.squareup.com/docs/reporting-api/query-construction/segments > Status: BETA > Languages: All > Platforms: All Use segments to filter and isolate specific subsets of data in your Reporting API queries. ## Overview Segments are **predefined filters** that encapsulate business logic. They provide consistent, reusable filtering that matches Square dashboard behavior. {% aside type="info" %} **Tip**: Views like `Sales` include curated segments such as `Sales.online`, `Sales.in_store`, `Sales.new_customers`, and `Sales.returning_customers`. These are often simpler than building equivalent filters on raw cubes. {% /aside %} ## Using a segment ```json { "measures": ["Orders.net_sales"], "segments": ["Orders.closed_checks"] } ``` Returns net sales for only fully paid orders—excludes open checks and unpaid orders. ## Multiple segments ```json { "measures": ["Sales.net_sales"], "segments": [ "Sales.in_store", "Sales.has_tip" ] } ``` Returns net sales for orders that are both in-store AND have a tip. Multiple segments are combined with AND logic. {% aside type="info" %} **Segments vs Filters for AND/OR Logic**: Segments are always combined with AND logic (all conditions must be true). For OR logic within a single condition (e.g., "location A OR location B"), use a filter with the `equals` operator and multiple values. You can combine both—use segments for business logic AND filters for specific OR conditions. {% /aside %} ## Common segments | Segment | Purpose | |---------|---------| | `Orders.closed_checks` | Fully paid/settled orders (recommended for sales reports) | | `Orders.open_checks` | Orders awaiting payment | | `Orders.awaiting_capture` | Orders awaiting payment capture | | `Orders.fully_paid` | Fully paid orders | | `Orders.has_tip` | Orders with a tip | | `Orders.no_tip` | Orders without a tip | | `Orders.has_customer` | Orders linked to a customer | ## View segments Views provide additional curated segments that simplify common filtering patterns. ### Sales view segments | Segment | Description | |---------|-------------| | `Sales.online` | Online sales channels | | `Sales.in_store` | In-store sales channels | | `Sales.has_tip` | Orders with a non-zero tip | | `Sales.no_tip` | Orders with no tip | | `Sales.has_customer` | Orders linked to an identified customer | | `Sales.new_customers` | Only new customers | | `Sales.returning_customers` | Only returning customers | ### ItemSales view segments | Segment | Description | |---------|-------------| | `ItemSales.sales` | Only sales transactions (excludes returns) | | `ItemSales.returns` | Only return transactions | | `ItemSales.has_customer` | Orders linked to an identified customer | | `ItemSales.new_customers` | Only new customers | | `ItemSales.returning_customers` | Only returning customers | {% aside type="info" %} **Tip**: View segments like `Sales.online` and `Sales.in_store` replace the need to filter by sales channel ID manually. Use views for the simplest querying experience. {% /aside %} ## Why use segments? ### Without segment (manual filtering): ```json { "measures": ["Orders.net_sales"], "filters": [{ "member": "Orders.state", "operator": "equals", "values": ["COMPLETED"] }, { "member": "Orders.check_state", "operator": "equals", "values": ["CLOSED"] }] } ``` ### With segment (recommended): ```json { "measures": ["Orders.net_sales"], "segments": ["Orders.closed_checks"] } ``` ### Benefits: - **Simpler queries** - One segment replaces multiple filter conditions - **Consistent logic** - Same business rules across all queries - **Dashboard parity** - Matches Square dashboard behavior - **Centrally maintained** - Filter definitions managed by Square ## Best practices ### 1. Always Use `Orders.closed_checks` for Sales Reports ```json { "measures": ["Orders.net_sales"], "segments": ["Orders.closed_checks"] } ``` This ensures you're only counting fully paid orders, matching dashboard totals. ### 2. Combine Segments with Filters ```json { "measures": ["Orders.net_sales"], "segments": ["Orders.closed_checks"], "filters": [{ "member": "Orders.location_id", "operator": "equals", "values": ["LOC_123"] }] } ``` Use segments for business logic, filters for specific criteria. ### 3. Check Available Segments in Metadata Not all cubes have the same segments. Use the metadata endpoint or Schema Explorer to see what's available for each cube. --- # Filters > Source: https://developer.squareup.com/docs/reporting-api/query-construction/filters > Status: BETA > Languages: All > Platforms: All Apply filters to narrow query results and retrieve precisely the data you need from the Reporting API. ## Overview Filters provide **custom filtering** beyond segments. Use filters for specific IDs, numeric thresholds, or OR logic. {% aside type="info" %} **Understanding Filter Logic**: Multiple filters in an array are combined with AND logic. However, the `equals` operator with multiple values uses OR logic (e.g., "location A OR location B"). This allows you to combine AND logic between different filter conditions while using OR logic within a single condition. {% /aside %} ## Filter structure ```json { "member": "Cube.dimension", "operator": "equals", "values": ["value1", "value2"] } ``` ## Filter operators | Operator | Description | Example | |----------|-------------|---------| | `equals` | Exact match (OR with multiple values) | `"values": ["L123"]` | | `notEquals` | Not equal | `"values": ["L123"]` | | `contains` | String contains | `"values": ["cafe"]` | | `notContains` | String doesn't contain | `"values": ["test"]` | | `startsWith` | String starts with | `"values": ["L"]` | | `endsWith` | String ends with | `"values": ["ABC"]` | | `gt` | Greater than | `"values": ["100"]` | | `gte` | Greater than or equal | `"values": ["100"]` | | `lt` | Less than | `"values": ["100"]` | | `lte` | Less than or equal | `"values": ["100"]` | | `inDateRange` | Date in range | `"values": ["2024-01-01", "2024-01-31"]` | | `notInDateRange` | Date not in range | `"values": ["2024-01-01", "2024-01-31"]` | | `set` | Value is not null | No values needed | | `notSet` | Value is null | No values needed | ## Filter examples ### Filter by Specific Location ```json { "measures": ["Orders.net_sales"], "filters": [{ "member": "Orders.location_id", "operator": "equals", "values": ["L1234567890ABC"] }] } ``` ### Filter by Multiple Locations (OR Logic) ```json { "measures": ["Orders.net_sales"], "filters": [{ "member": "Orders.location_id", "operator": "equals", "values": ["L1234567890ABC", "L9876543210XYZ"] }] } ``` Returns net sales from location A OR location B—the `equals` operator with multiple values uses OR logic. ### Exclude Test Locations ```json { "measures": ["Orders.net_sales"], "filters": [{ "member": "Orders.location_id", "operator": "notContains", "values": ["test"] }] } ``` ### Filter by Sales Threshold ```json { "measures": ["Orders.net_sales"], "dimensions": ["Orders.location_id"], "filters": [{ "member": "Orders.net_sales", "operator": "gte", "values": ["1000"] }] } ``` ### Multiple Filters (AND Logic) ```json { "measures": ["Orders.net_sales"], "filters": [ { "member": "Orders.location_id", "operator": "equals", "values": ["L1234567890ABC"] }, { "member": "Orders.sales_channel_id", "operator": "equals", "values": ["online"] } ] } ``` All filters are combined with AND logic. ## Filters vs segments | Use Filters When | Use Segments When | |------------------|-------------------| | Filtering by specific IDs | Applying common business logic | | Dynamic user-selected filters | Ensuring report consistency | | One-off analysis | Matching dashboard behavior | | Numeric thresholds | Predefined filter combinations | | OR logic needed | AND logic sufficient | --- # Ordering & Pagination > Source: https://developer.squareup.com/docs/reporting-api/query-construction/ordering-and-pagination > Status: BETA > Languages: All > Platforms: All Control the sort order of results and paginate through large datasets in Reporting API responses. {% aside type="info" %} **Tip**: The ordering and pagination patterns below work the same way with views (like `Sales`) and cubes (like `Orders`). {% /aside %} ## Ordering results Control the sort order of your results. ### Order Structure ```json { "order": { "Cube.measure_or_dimension": "asc" // or "desc" } } ``` ### Order Examples #### Sort by Measure (Descending) ```json { "measures": ["Orders.net_sales"], "dimensions": ["Orders.location_id"], "order": { "Orders.net_sales": "desc" } } ``` Returns locations sorted by net sales (highest first). #### Sort by Dimension (Ascending) ```json { "measures": ["Orders.net_sales"], "dimensions": ["Orders.location_id"], "order": { "Orders.location_id": "asc" } } ``` Returns locations sorted alphabetically. #### Sort by Time (Ascending) ```json { "measures": ["Orders.net_sales"], "timeDimensions": [{ "dimension": "Orders.sale_timestamp", "dateRange": ["2024-01-01", "2024-01-31"], "granularity": "day" }], "order": { "Orders.sale_timestamp": "asc" } } ``` Returns days in chronological order. #### Multiple Sort Keys ```json { "measures": ["Orders.net_sales"], "dimensions": ["Orders.location_id", "Orders.sales_channel_id"], "order": [ ["Orders.location_id", "asc"], ["Orders.net_sales", "desc"] ] } ``` Sorts by location first, then by net sales within each location. ## Limiting and pagination Control the number of results returned. ### Limit ```json { "measures": ["Orders.net_sales"], "dimensions": ["Orders.location_id"], "limit": 10 } ``` Returns top 10 results. ### Offset ```json { "measures": ["Orders.net_sales"], "dimensions": ["Orders.location_id"], "limit": 10, "offset": 10 } ``` Returns results 11-20 (skips first 10). ### Pagination Pattern ```javascript async function fetchAllResults(baseQuery, pageSize = 100) { let allResults = []; let offset = 0; let hasMore = true; while (hasMore) { const query = { ...baseQuery, limit: pageSize, offset: offset }; const response = await executeQuery(query); allResults.push(...response.data); hasMore = response.data.length === pageSize; offset += pageSize; } return allResults; } ``` {% aside type="warning" %} **Use a stable sort key when paginating.** If results are not sorted by a deterministic key, rows can shift between pages — causing duplicates or missed rows. Always include an `order` clause with a stable key (such as a unique dimension or a combination like timestamp + ID) when using `limit`/`offset` pagination. {% /aside %} {% aside type="warning" %} **Performance Consideration**: Large result sets (>10,000 rows) may be slow. Consider: - Adding filters to reduce scope - Using fewer dimensions - Increasing aggregation granularity (e.g., month instead of day) {% /aside %} ## Best practices ### 1. Order Time Series Chronologically ```json { "order": { "Orders.sale_timestamp": "asc" } } ``` For time-series data, ascending order shows progression over time. ### 2. Order Rankings by Measure ```json { "order": { "Orders.net_sales": "desc" } } ``` For rankings (top locations, top customers), descending order shows highest first. ### 3. Always Set Limits with Multiple Dimensions ```json { "dimensions": ["Orders.location_id", "Orders.sales_channel_id"], "limit": 1000 } ``` Multiple dimensions can create thousands of rows—always limit results. ### 4. Use Reasonable Page Sizes ```json { "limit": 100 // Good for UI display } ``` or ```json { "limit": 1000 // Good for exports } ``` Avoid fetching unlimited results. ### 5. Use Stable Sort Keys for Pagination When paginating through results, always sort by a deterministic key: ```json { "measures": ["Orders.net_sales"], "dimensions": ["Orders.order_id"], "order": { "Orders.order_id": "asc" }, "limit": 100, "offset": 0 } ``` Without a stable sort key, the database may return rows in a different order between pages, leading to duplicates or gaps. --- # Real-World Scenarios > Source: https://developer.squareup.com/docs/reporting-api/real-world-scenarios > Status: BETA > Languages: All > Platforms: All Explore practical examples and common use cases for building Reporting API queries in production applications. ## Overview These examples show how to combine measures, dimensions, segments, and filters to answer complex business questions for restaurant operations. {% aside type="info" %} These examples use **views** (`Sales`, `ItemSales`) which are the recommended way to query the Reporting API. Views pre-join data from multiple cubes and pre-filter for common use cases. For the most up-to-date field names, check the [Schema Explorer](https://reporting-schema-explorer-production-f.squarecdn.com/schema-explorer.html) or the `/v1/meta` endpoint. {% /aside %} ## Scenario 1: Daily sales by location **Business Question**: "How are my locations performing day by day?" ```json { "measures": [ "Sales.net_sales", "Sales.order_count", "Sales.avg_net_sales" ], "dimensions": ["Sales.location_name"], "timeDimensions": [{ "dimension": "Sales.local_reporting_timestamp", "dateRange": "last 30 days", "granularity": "day" }] } ``` **What this returns**: Daily net sales, order count, and average order value for each location over the last 30 days. Notice there's no `segments` needed — the `Sales` view automatically filters to closed orders, and gives you `location_name` directly instead of a raw ID. ## Scenario 2: Online vs in-store sales **Business Question**: "How do my online sales compare to in-store?" **Online sales:** ```json { "measures": [ "Sales.net_sales", "Sales.order_count", "Sales.tips_amount" ], "dimensions": ["Sales.channel_name"], "timeDimensions": [{ "dimension": "Sales.local_reporting_timestamp", "dateRange": "this month", "granularity": "day" }], "segments": ["Sales.online"] } ``` **In-store sales:** ```json { "measures": [ "Sales.net_sales", "Sales.order_count", "Sales.tips_amount" ], "dimensions": ["Sales.channel_name"], "timeDimensions": [{ "dimension": "Sales.local_reporting_timestamp", "dateRange": "this month", "granularity": "day" }], "segments": ["Sales.in_store"] } ``` **What this returns**: Daily sales by channel for the current month. Use the `Sales.online` or `Sales.in_store` segments to filter by sales channel type, or omit the segment and group by `Sales.channel_name` to see all channels. ## Scenario 3: Top-selling items **Business Question**: "What are my best-selling items by revenue?" ```json { "measures": [ "ItemSales.item_net_sales", "ItemSales.items_sold_count" ], "dimensions": [ "ItemSales.item_name", "ItemSales.category_name" ], "timeDimensions": [{ "dimension": "ItemSales.transacted_at", "dateRange": "last 30 days" }], "segments": ["ItemSales.sales"], "order": { "ItemSales.item_net_sales": "desc" }, "limit": 20 } ``` **What this returns**: Top 20 items ranked by net sales, with category and quantity for context. The `ItemSales` view pre-joins item data with order and location information. Use the `ItemSales.sales` segment to exclude returns. ## Scenario 4: Refund analysis by location **Business Question**: "How much was refunded last month, and which locations had the most refunds?" ```json { "measures": [ "Sales.refunds_by_amount_amount", "Sales.net_sales", "Sales.order_count" ], "dimensions": ["Sales.location_name"], "timeDimensions": [{ "dimension": "Sales.local_reporting_timestamp", "dateRange": "last month" }], "filters": [{ "member": "Sales.refunds_by_amount_amount", "operator": "gt", "values": ["0"] }], "order": { "Sales.refunds_by_amount_amount": "desc" } } ``` **What this returns**: Refund totals by location name for orders that had refunds, sorted by highest refund amount. Compare against net sales to understand refund rates per location. ## Scenario 5: Team member performance **Business Question**: "Which team members are collecting the most in sales and tips?" ```json { "measures": [ "Sales.net_sales", "Sales.order_count", "Sales.tips_amount" ], "dimensions": ["Sales.employee_full_name"], "timeDimensions": [{ "dimension": "Sales.local_reporting_timestamp", "dateRange": "this month" }], "segments": ["Sales.has_tip"], "order": { "Sales.net_sales": "desc" } } ``` **What this returns**: Sales and tip totals by team member name for the current month, filtered to orders with tips. The `Sales` view gives you `employee_full_name` directly — no need to look up team member IDs. ## Key patterns in these scenarios | Pattern | Use Case | Components Used | |---------|----------|-----------------| | **Location comparison** | Compare performance across locations | `Sales` view + `location_name` dimension | | **Channel analysis** | Online vs in-store | `Sales` view + `Sales.online` / `Sales.in_store` segments | | **Item-level analysis** | Track menu item performance | `ItemSales` view + `item_name` dimension + `sales` segment | | **Refund filtering** | Find orders with refunds | `Sales` view + filter on `refunds_by_amount_amount > 0` | | **Team performance** | Identify top performers | `Sales` view + `employee_full_name` dimension + `has_tip` segment | ## Tips for building complex queries 1. **Start with a view** — Use `Sales` for order-level reporting, `ItemSales` for item-level analysis 2. **Add time dimensions** — Always scope to a specific date range 3. **Layer in dimensions** — Add location, channel, or team member dimensions for grouping 4. **Apply filters** — Use filters for thresholds or exclusions 5. **Use view segments** — `Sales.online`, `Sales.in_store`, `Sales.has_tip`, `ItemSales.sales`, etc. 6. **Set reasonable limits** — Especially important with multiple dimensions 7. **Order meaningfully** — Sort by the metric that matters most for your analysis 8. **Use the right view** — `Sales` for orders, `ItemSales` for items, `ModifierSales` for modifiers ## Common query templates ### Sales Summary ```json { "measures": [ "Sales.top_line_product_sales", "Sales.discounts_amount", "Sales.itemized_returns", "Sales.net_sales", "Sales.sales_tax_amount", "Sales.tips_amount", "Sales.total_collected_amount" ], "timeDimensions": [{ "dimension": "Sales.local_reporting_timestamp", "dateRange": "last 30 days", "granularity": "day" }] } ``` ### Location Performance ```json { "measures": ["Sales.net_sales", "Sales.order_count"], "dimensions": ["Sales.location_name"], "timeDimensions": [{ "dimension": "Sales.local_reporting_timestamp", "dateRange": "this month" }], "order": {"Sales.net_sales": "desc"} } ``` --- # Error Handling > Source: https://developer.squareup.com/docs/reporting-api/error-handling > Status: BETA > Languages: All > Platforms: All Handle errors, rate limits, and edge cases when integrating with the Square Reporting API endpoints. ## Overview The Reporting API uses standard HTTP status codes and returns structured error responses. Understanding error patterns and implementing proper retry logic is essential for building resilient applications. ## Common first-time issues If you're just getting started and hitting errors, here are the most frequent issues and quick fixes: **403 Forbidden** — Your access token is invalid or missing. 1. Verify your token is correct and hasn't expired 2. Check the header format: `Authorization: Bearer YOUR_TOKEN` 3. Ensure you're using a personal access token or an OAuth token with `REPORTING_READ` scope **400 Bad Request — "Cube not found"** — The cube or view name in your query doesn't exist. 1. Fetch available names via `GET /v1/meta` 2. Names are case-sensitive — use them exactly as shown in metadata 3. Views (like `Sales`) are often easier to start with than cubes **Empty results (`"data": []`)** — Your query succeeded but matched no data. 1. Verify your date range includes actual transaction data 2. Try a broader date range to confirm data exists 3. Make sure you're using the right view/cube for your use case **"Continue wait" never resolves** — Your query is too complex or the date range is too large. 1. Reduce the date range 2. Remove unnecessary dimensions 3. Simplify to fewer measures 4. See [Continue wait pattern](#continue-wait-pattern) below for proper retry logic For detailed explanations, see the specific sections below. ## HTTP status codes | Status Code | Meaning | Common Causes | |-------------|---------|---------------| | 200 | Success | Query executed successfully or "Continue wait" | | 400 | Bad Request | Invalid query structure, unknown measures/dimensions | | 401 | Unauthorized | Missing authentication token | | 403 | Forbidden | Invalid or expired token, insufficient permissions | | 404 | Not Found | Invalid endpoint path | | 429 | Too Many Requests | Rate limit exceeded | | 500 | Internal Server Error | Server-side error, database timeout | | 503 | Service Unavailable | Service temporarily unavailable | ## Error response structure All errors return a JSON object with an `error` field: ```json { "error": "Error message" } ``` ### Example Error Responses #### Invalid Measure ```json { "error": "Measure 'Orders.invalid_measure' not found" } ``` #### Invalid Authentication ```json { "error": "Unauthorized" } ``` #### Database Timeout ```json { "error": "Query execution timeout" } ``` ## Continue wait pattern The most common "error" you'll encounter isn't actually an error—it's the **Continue wait** response. ### What is Continue Wait? When a query takes time to process, the API returns: ```json { "error": "Continue wait" } ``` **HTTP Status**: 200 (Success) This is **not an error**. It means: - Your query is valid - Processing is underway - You should retry the same request ### Why Continue Wait Exists Complex queries may need to: - Scan large amounts of data - Perform multiple aggregations - Wait for pre-aggregation builds Rather than holding the connection open, the API returns quickly and asks you to poll. ### Continue Wait Flow ![reporting-api-error-handling-continue-wait](//images.ctfassets.net/1nw4q0oohfju/2qf8qVtpukoaGIMOdULIyq/45226f3db16bb025aebcb6fd98a91cac/reporting-api-error-handling-continue-wait.png) ### Implementing Continue Wait Retry #### Python Example ```python import time import requests def execute_with_retry(query, max_attempts=10, delay_seconds=2): """Execute query with automatic Continue wait retry.""" url = "https://connect.squareup.com/reporting/v1/load" headers = { "Authorization": f"Bearer {SQUARE_ACCESS_TOKEN}", "Content-Type": "application/json" } for attempt in range(1, max_attempts + 1): response = requests.post(url, headers=headers, json=query) # Check for HTTP errors if response.status_code != 200: raise Exception(f"HTTP {response.status_code}: {response.text}") data = response.json() # Check for Continue wait if data.get("error") == "Continue wait": print(f"Attempt {attempt}/{max_attempts}: Query processing...") time.sleep(delay_seconds) continue # Success! return data raise TimeoutError(f"Query did not complete after {max_attempts} attempts") # Usage try: results = execute_with_retry(my_query) print(f"Received {len(results['data'])} rows") except TimeoutError as e: print(f"Query timed out: {e}") except Exception as e: print(f"Query failed: {e}") ``` #### JavaScript Example ```javascript async function executeWithRetry(query, maxAttempts = 10, delayMs = 2000) { const url = "https://connect.squareup.com/reporting/v1/load"; const headers = { "Authorization": `Bearer ${SQUARE_ACCESS_TOKEN}`, "Content-Type": "application/json" }; for (let attempt = 1; attempt <= maxAttempts; attempt++) { const response = await fetch(url, { method: "POST", headers: headers, body: JSON.stringify(query) }); if (!response.ok) { throw new Error(`HTTP ${response.status}: ${await response.text()}`); } const data = await response.json(); if (data.error === "Continue wait") { console.log(`Attempt ${attempt}/${maxAttempts}: Query processing...`); await new Promise(resolve => setTimeout(resolve, delayMs)); continue; } // Success! return data; } throw new Error(`Query did not complete after ${maxAttempts} attempts`); } // Usage try { const results = await executeWithRetry(myQuery); console.log(`Received ${results.data.length} rows`); } catch (error) { console.error(`Query failed: ${error.message}`); } ``` ### Continue Wait Best Practices 1. **Use exponential backoff**: Start with 2s, increase to 5s, then 10s 2. **Set reasonable max attempts**: 10-20 attempts is typical 3. **Log retry attempts**: Help with debugging 4. **Don't retry forever**: Fail gracefully after max attempts 5. **Keep the same query**: Don't modify the query between retries #### Exponential Backoff Example ```python def execute_with_exponential_backoff(query, max_attempts=10): """Execute with exponential backoff.""" delays = [2, 2, 5, 5, 10, 10, 15, 15, 20, 20] # seconds for attempt in range(max_attempts): response = requests.post(url, headers=headers, json=query) if response.status_code != 200: raise Exception(f"HTTP {response.status_code}: {response.text}") data = response.json() if data.get("error") == "Continue wait": delay = delays[attempt] if attempt < len(delays) else 20 print(f"Attempt {attempt + 1}: Waiting {delay}s...") time.sleep(delay) continue return data raise TimeoutError("Query timed out") ``` ## Validation errors Validation errors occur when your query references invalid entities or has structural issues. ### Common Validation Errors #### Unknown Measure **Error**: ```json { "error": "Measure 'Orders.unknown_measure' not found" } ``` **Cause**: The measure doesn't exist in the current schema. **Solution**: 1. Fetch fresh metadata: `GET /v1/meta` 2. Verify the measure name (case-sensitive) 3. Check if the measure was deprecated **Prevention**: ```python def validate_measures(query, metadata): """Validate measures before querying.""" valid_measures = set() for cube in metadata['cubes']: valid_measures.update(m['name'] for m in cube['measures']) for measure in query.get('measures', []): if measure not in valid_measures: raise ValueError(f"Invalid measure: {measure}") ``` #### Unknown Dimension **Error**: ```json { "error": "Dimension 'Orders.unknown_dimension' not found" } ``` **Solution**: Same as unknown measure—validate against metadata. #### Unknown Segment **Error**: ```json { "error": "Segment 'Orders.unknown_segment' not found" } ``` **Solution**: Check available segments in metadata. #### Invalid Date Range **Error**: ```json { "error": "Invalid date range format" } ``` **Cause**: Date format is incorrect. **Solution**: Use `YYYY-MM-DD` format: ```json { "dateRange": ["2024-01-01", "2024-01-31"] } ``` #### Missing Required Fields **Error**: ```json { "error": "Time dimension must include 'dimension' and 'dateRange'" } ``` **Solution**: Ensure time dimensions are complete: ```json { "timeDimensions": [{ "dimension": "Orders.sale_timestamp", "dateRange": ["2024-01-01", "2024-01-31"] }] } ``` ## Authentication errors ### 401 Unauthorized **Error**: ```json { "error": "Unauthorized" } ``` **Causes**: - Missing `Authorization` header - Malformed header (not `Bearer TOKEN`) - Empty token **Solution**: ```bash # Correct format Authorization: Bearer YOUR_ACCESS_TOKEN # Wrong formats Authorization: YOUR_ACCESS_TOKEN # Missing "Bearer" Authorization: Bearer # Missing token ``` ### 403 Forbidden **Error**: ```json { "error": "Forbidden" } ``` **Causes**: - Invalid access token - Expired token - Token lacks required permissions - Using OAuth token without REPORTING_READ scope **Solution**: 1. Verify token in Developer Console 2. Generate a new personal access token 3. Check token hasn't expired 4. Ensure you're using a personal access token (not OAuth) ## Rate limiting ### 429 Too Many Requests **Error**: ```json { "error": "Rate limit exceeded" } ``` **Solution**: Implement exponential backoff with `Retry-After` header: ```python def execute_with_rate_limit_retry(query, max_retries=3): """Execute with rate limit retry.""" for attempt in range(max_retries): response = requests.post(url, headers=headers, json=query) if response.status_code == 429: retry_after = int(response.headers.get('Retry-After', 60)) print(f"Rate limited. Retrying after {retry_after}s...") time.sleep(retry_after) continue if response.status_code != 200: raise Exception(f"HTTP {response.status_code}") return response.json() raise Exception("Rate limit exceeded after retries") ``` ### Rate Limit Best Practices 1. **Cache results**: Don't re-query for the same data 2. **Batch queries**: Combine multiple measures in one query 3. **Use appropriate cache strategies**: Leverage server-side caching 4. **Respect Retry-After**: Don't retry immediately 5. **Monitor usage**: Track query volume ## Server errors ### 500 Internal Server Error **Error**: ```json { "error": "Internal server error" } ``` **Causes**: - Database timeout - Server-side bug - Resource exhaustion **Solution**: 1. Retry with exponential backoff (may be transient) 2. Simplify the query (reduce date range, dimensions) 3. Contact support if persistent ```python def execute_with_server_error_retry(query, max_retries=3): """Retry on server errors with backoff.""" for attempt in range(max_retries): try: response = requests.post(url, headers=headers, json=query) if response.status_code == 500: delay = 2 ** attempt # Exponential: 1s, 2s, 4s print(f"Server error. Retrying in {delay}s...") time.sleep(delay) continue return response.json() except requests.exceptions.RequestException as e: if attempt == max_retries - 1: raise time.sleep(2 ** attempt) raise Exception("Server error after retries") ``` ### 503 Service Unavailable **Error**: ```json { "error": "Service temporarily unavailable" } ``` **Cause**: Service is down for maintenance or experiencing issues. **Solution**: 1. Retry with exponential backoff 2. Check Square status page 3. Implement circuit breaker pattern ## Query timeout errors ### Database Timeout **Error**: ```json { "error": "Query execution timeout" } ``` **Causes**: - Query is too complex - Date range is too large - Too many dimensions - No pre-aggregations available **Solutions**: #### 1. Reduce Date Range ```json // Instead of {"dateRange": ["2020-01-01", "2024-12-31"]} // Try {"dateRange": ["2024-01-01", "2024-01-31"]} ``` #### 2. Reduce Dimensions ```json // Instead of {"dimensions": ["Orders.location_id", "Orders.customer_id", "Orders.device_id"]} // Try {"dimensions": ["Orders.location_id"]} ``` #### 3. Increase Granularity ```json // Instead of {"granularity": "day"} // Try {"granularity": "month"} ``` #### 4. Add Filters ```json { "filters": [{ "member": "Orders.location_id", "operator": "equals", "values": ["L1234567890ABC"] }] } ``` ## Empty result errors ### No Data Returned **Response**: ```json { "data": [] } ``` **This is not an error**, but you should handle it: ```python results = execute_query(query) if not results.get('data'): print("No data found for the specified criteria") # Handle empty case else: print(f"Found {len(results['data'])} rows") ``` **Common causes**: - Date range has no transactions - Filters are too restrictive - Segment excludes all data - Wrong cube for your use case ## Schema evolution errors ### Deprecated Measure **Error**: ```json { "error": "Measure 'Orders.legacy_measure' is deprecated. Use 'Orders.new_measure' instead." } ``` **Solution**: 1. Update your query to use the new measure 2. Invalidate your metadata cache 3. Re-fetch metadata to discover new measures ```python def handle_deprecated_measure(query, metadata): """Replace deprecated measures with current ones.""" # Map of deprecated -> current measures replacements = { 'Orders.legacy_tax': 'Orders.sales_tax_amount', 'Orders.old_sales': 'Orders.net_sales' } updated_measures = [] for measure in query.get('measures', []): if measure in replacements: print(f"Replacing deprecated {measure} with {replacements[measure]}") updated_measures.append(replacements[measure]) else: updated_measures.append(measure) query['measures'] = updated_measures return query ``` ## Complete error handling example Here's a production-ready error handling implementation: ```python import time import requests from typing import Dict, Any, Optional class ReportingAPIClient: def __init__(self, access_token: str): self.base_url = "https://connect.squareup.com/reporting" self.headers = { "Authorization": f"Bearer {access_token}", "Content-Type": "application/json" } def execute_query( self, query: Dict[str, Any], max_attempts: int = 10, max_retries: int = 3 ) -> Dict[str, Any]: """ Execute a query with comprehensive error handling. Args: query: The query object max_attempts: Max attempts for Continue wait max_retries: Max retries for server errors Returns: Query results Raises: ValueError: Invalid query TimeoutError: Query timed out Exception: Other errors """ # Validate query first self._validate_query(query) # Execute with retries for retry in range(max_retries): try: return self._execute_with_continue_wait(query, max_attempts) except requests.exceptions.HTTPError as e: status_code = e.response.status_code if status_code == 400: # Validation error - don't retry raise ValueError(f"Invalid query: {e.response.text}") elif status_code == 401 or status_code == 403: # Auth error - don't retry raise Exception(f"Authentication failed: {e.response.text}") elif status_code == 429: # Rate limit - respect Retry-After retry_after = int(e.response.headers.get('Retry-After', 60)) print(f"Rate limited. Waiting {retry_after}s...") time.sleep(retry_after) continue elif status_code >= 500: # Server error - retry with backoff if retry < max_retries - 1: delay = 2 ** retry print(f"Server error. Retrying in {delay}s...") time.sleep(delay) continue raise else: raise except requests.exceptions.RequestException as e: # Network error - retry with backoff if retry < max_retries - 1: delay = 2 ** retry print(f"Network error. Retrying in {delay}s...") time.sleep(delay) continue raise raise Exception(f"Query failed after {max_retries} retries") def _execute_with_continue_wait( self, query: Dict[str, Any], max_attempts: int ) -> Dict[str, Any]: """Execute query with Continue wait retry.""" delays = [2, 2, 5, 5, 10, 10, 15, 15, 20, 20] for attempt in range(max_attempts): response = requests.post( f"{self.base_url}/v1/load", headers=self.headers, json=query ) response.raise_for_status() data = response.json() if data.get("error") == "Continue wait": delay = delays[attempt] if attempt < len(delays) else 20 print(f"Attempt {attempt + 1}/{max_attempts}: Waiting {delay}s...") time.sleep(delay) continue return data raise TimeoutError(f"Query did not complete after {max_attempts} attempts") def _validate_query(self, query: Dict[str, Any]): """Basic query validation.""" if not query.get('measures') and not query.get('dimensions'): raise ValueError("Query must include at least one measure or dimension") if 'timeDimensions' in query: for td in query['timeDimensions']: if 'dimension' not in td or 'dateRange' not in td: raise ValueError("Time dimension must include 'dimension' and 'dateRange'") # Usage client = ReportingAPIClient(access_token=SQUARE_ACCESS_TOKEN) try: results = client.execute_query({ "measures": ["Orders.net_sales"], "timeDimensions": [{ "dimension": "Orders.sale_timestamp", "dateRange": ["2024-01-01", "2024-01-31"], "granularity": "day" }], "segments": ["Orders.closed_checks"] }) print(f"Success! Received {len(results['data'])} rows") except ValueError as e: print(f"Invalid query: {e}") except TimeoutError as e: print(f"Query timed out: {e}") except Exception as e: print(f"Query failed: {e}") ``` ## Monitoring and logging ### What to Log ```python import logging logger = logging.getLogger(__name__) def execute_with_logging(query): """Execute query with comprehensive logging.""" logger.info(f"Executing query: {json.dumps(query)}") start_time = time.time() try: results = execute_query(query) duration = time.time() - start_time logger.info(f"Query succeeded in {duration:.2f}s, {len(results['data'])} rows") return results except TimeoutError as e: duration = time.time() - start_time logger.error(f"Query timed out after {duration:.2f}s: {e}") raise except Exception as e: duration = time.time() - start_time logger.error(f"Query failed after {duration:.2f}s: {e}") raise ``` ### Metrics to Track - Query success rate - Average query duration - Continue wait frequency - Timeout frequency - Rate limit hits - Error types and frequency ## Troubleshooting checklist When a query fails: 1. **Check HTTP status code** - 401/403: Authentication issue - 400: Invalid query - 429: Rate limit - 500/503: Server issue 2. **Verify authentication** - Token is valid - Header format is correct - Using personal access token (not OAuth) 3. **Validate query structure** - All measures exist in metadata - All dimensions exist in metadata - Date ranges are valid - Required fields are present 4. **Simplify the query** - Reduce date range - Remove dimensions - Increase granularity - Add filters 5. **Check for Continue wait** - Implement retry logic - Use exponential backoff - Set reasonable max attempts 6. **Review metadata** - Refresh metadata cache - Check for deprecated measures - Verify cube names --- # Best Practices > Source: https://developer.squareup.com/docs/reporting-api/best-practices > Status: BETA > Languages: All > Platforms: All Optimize your Reporting API integration with best practices for performance, caching, and query design. ## Overview This guide covers best practices for building reliable applications with the Reporting API. These recommendations focus on patterns specific to the Reporting API's architecture — schema discovery, query construction, the Continue Wait pattern, and data freshness. ## Schema discovery and validation {% aside type="info" %} **Golden Rule**: Never hard-code measures, dimensions, or segments. Always discover them from `/v1/meta`. {% /aside %} **Bad — hard-coded measures:** ```javascript const MEASURES = ['Orders.net_sales', 'Orders.tips_amount']; ``` **Good — discovered at runtime:** ```javascript const metadata = await fetchMetadata(); const measures = metadata.cubes.Orders.measures.map(m => m.name); ``` Schema can evolve as new measures and dimensions are added. Hard-coded values will break silently when they no longer match the API. ### Cache metadata appropriately **Recommended TTL**: 1–24 hours depending on your use case. - Refresh at application startup - Refresh periodically (every 1–24 hours) - Refresh after "measure not found" or similar schema errors If a requested measure or dimension is missing from metadata, fall back to an alternative rather than failing outright. This makes your integration resilient to schema changes. ### Validate queries before execution Before sending a query to `/v1/load`, check that every measure, dimension, and segment in the request exists in the current metadata. This catches typos and stale references early and produces clearer error messages than a failed API call. ## Query construction ### Always use segments for report parity **Bad — manual filtering:** ```json { "measures": ["Orders.net_sales"], "filters": [{ "member": "Orders.state", "operator": "equals", "values": ["COMPLETED"] }] } ``` **Good — use the segment:** ```json { "measures": ["Orders.net_sales"], "segments": ["Orders.closed_checks"] } ``` Segments encapsulate business logic maintained by Square. Using them ensures your results match Square dashboard reports. ### Specify explicit date ranges Always include a `dateRange` in your `timeDimensions`. Open-ended queries can attempt to return years of data and time out. ```json { "timeDimensions": [{ "dimension": "Orders.sale_timestamp", "dateRange": ["2024-01-01", "2024-01-31"] }] } ``` ### Use appropriate granularity | Use Case | Granularity | |----------|-------------| | Intra-day monitoring | `hour` | | Daily reports | `day` | | Weekly trends | `week` | | Monthly analysis | `month` | | Quarterly reports | `quarter` | | Year-over-year | `year` | Avoid using `day` granularity for a full year of data — use `month` or `quarter` to keep result sets manageable. ### Limit and order results Always set a `limit` to avoid unexpectedly large result sets, especially when using high-cardinality dimensions like `customer_id`. **Recommended limits**: - UI display: 10–100 - Export/analysis: 1,000–10,000 - Pagination: 100–500 per page Use `order` to sort results meaningfully — chronological for time series, descending by measure for rankings. ### Batch multiple measures **Bad — three separate queries:** ```javascript const netSales = await query({ measures: ['Orders.net_sales'] }); const tips = await query({ measures: ['Orders.tips_amount'] }); const tax = await query({ measures: ['Orders.sales_tax_amount'] }); ``` **Good — single query:** ```javascript const data = await query({ measures: [ 'Orders.net_sales', 'Orders.tips_amount', 'Orders.sales_tax_amount' ] }); ``` One query is faster and uses fewer API calls. ### Minimize dimensions Each additional dimension multiplies the result set size. Only include dimensions you actually need for your analysis. ## Data freshness and caching The `Orders` cube has a data freshness of approximately 15 minutes. - **Historical data** (yesterday and earlier) won't change — cache it aggressively (24 hours or longer) - **Today's data** — cache for 15 minutes to match the cube's refresh cycle - **Metadata** (`/v1/meta`) — cache for 1–24 hours This simple tiered caching strategy significantly reduces API calls without sacrificing data accuracy. ## Error handling ### Implement Continue Wait retry The Reporting API uses a "Continue wait" pattern for queries that take time to compute. Your client **must** handle this: ```javascript async function executeWithRetry(query, maxAttempts = 10) { const delays = [2, 2, 5, 5, 10, 10, 15, 15, 20, 20]; for (let attempt = 0; attempt < maxAttempts; attempt++) { const response = await fetch(url, { method: 'POST', headers, body: JSON.stringify(query) }); const data = await response.json(); if (data.error === 'Continue wait') { const delay = delays[attempt] || 20; await new Promise(r => setTimeout(r, delay * 1000)); continue; } return data; } throw new Error('Query timed out after max retries'); } ``` {% aside type="warning" %} Without Continue Wait handling, complex queries will appear to fail on the first attempt. This is the most common integration issue. {% /aside %} ### Handle schema evolution gracefully When a preferred measure or dimension is unavailable in the current metadata, fall back to an alternative rather than crashing. This is especially important during schema transitions when measures may be temporarily renamed or replaced. ## Security Store your Square access token in environment variables — never hard-code tokens in source code. Use separate tokens for sandbox and production environments, and rotate them periodically. Validate any user-supplied input (date ranges, location IDs) before incorporating it into queries. Enforce reasonable limits on date range spans to prevent abuse. ## Summary checklist - [ ] Metadata is discovered at runtime from `/v1/meta`, not hard-coded - [ ] Metadata cache has appropriate TTL (1–24 hours) - [ ] Queries are validated against current metadata before execution - [ ] Continue Wait retry logic is implemented - [ ] Explicit date ranges are specified in all queries - [ ] `Orders.closed_checks` segment is used for sales reports - [ ] Historical data is cached aggressively (24+ hours) - [ ] Result sets are limited to reasonable sizes - [ ] Access tokens are stored securely in environment variables --- # Reporting API Overview > Source: https://developer.squareup.com/docs/reporting-api/overview > Status: BETA > Languages: All > Platforms: All Query sales, payments, customer, and catalog metrics using the Square Reporting API's dynamic REST interface. The **Reporting API** is a Cube-based REST API that enables developers to query sales, payments, customer, and catalog metrics for embedding analytics, operational automations, and back-office workflows. Unlike traditional REST APIs with dozens of fixed endpoints, the Reporting API exposes **only two universal endpoints**: - **`/v1/meta`** — Describes what data is available (schema discovery) - **`/v1/load`** — Queries the actual data based on discovered metadata This design enables a powerful, flexible API surface that can evolve without breaking client applications that properly implement schema discovery. ### Benefits of Dynamic Schemas - **Expansive data catalog**: Access hundreds of measures and dimensions without endpoint proliferation - **Automatic joins**: Combine measures from multiple cubes in a single query—the API handles joins automatically - **Future-proof clients**: Applications that discover schema at runtime adapt automatically to new fields - **Consistent API**: One query pattern works for all reporting needs ### Trade-offs to Consider - **More complex client logic**: You must implement schema discovery and dynamic query building - **Runtime validation required**: Invalid query combinations are caught at query time, not compile time - **Learning curve**: Developers must understand Cube concepts (cubes, measures, dimensions, segments) ## How it differs from traditional REST APIs | Traditional REST API | Reporting API (Dynamic Schema) | |---------------------|--------------------------------| | Fixed endpoints per resource | Two universal endpoints for all queries | | Fields are predetermined | Fields discovered via metadata | | Schema changes require API versioning | Schema evolves; clients adapt via discovery | | Simple to use, limited flexibility | Complex setup, maximum flexibility | | Client knows structure at build time | Client learns structure at runtime | ## Key concepts ### Views A **view** is a curated, pre-joined interface built on top of one or more cubes. For example, the `Sales` view combines data from multiple cubes and pre-filters for common sales reporting. **Views are the recommended starting point** — they provide a simpler query surface with sensible defaults. Use cubes directly when you need cross-cube joins or access to raw data not exposed through a view. ### Cubes A **cube** is a logical grouping of related measures and dimensions (e.g., `Orders`, `PaymentAndRefunds`). Think of a cube as a "data table" optimized for analytics. You can query cubes directly for advanced use cases, but prefer views for standard reporting. ### Measures **Measures** are numeric aggregations you want to calculate (e.g., `Orders.net_sales`, `Orders.tips_amount`). These are the "what you're measuring" in your query. ### Dimensions **Dimensions** are attributes you use to group or filter data (e.g., `Orders.location_id`, `Orders.sale_timestamp`). These are the "how you're slicing" your measures. ### Segments **Segments** are predefined filters that represent common business logic (e.g., `Orders.closed_checks` filters to fully paid orders). Use segments to ensure report parity with Square's dashboard. ### Time Dimensions **Time dimensions** are special dimensions for time-series queries. They support granularity (day, week, month) and date ranges. ## Core workflow Every interaction with the Reporting API follows this pattern: ![reporting-api-overview-core-workflow](//images.ctfassets.net/1nw4q0oohfju/65myKb4YK8VEvkKG6qaRDL/c4eaf66e46989ed416cad472cb3df162/reporting-api-overview-core-workflow.png) **Workflow Steps**: 1. **Discover**: Call `/v1/meta` to learn available cubes, measures, dimensions, and segments 2. **Cache**: Store metadata with appropriate TTL (1-24 hours) 3. **Validate**: Check that your desired measures and dimensions are compatible 4. **Execute**: Send a query to `/v1/load` with your selected entities 5. **Handle Long-Running Queries**: Retry if you receive a "Continue wait" response 6. **Process**: Parse and use the returned data ## Automatic multi-cube joins One of the most powerful features of the Reporting API is the ability to combine data from multiple cubes in a single query. Simply include measures from different cubes in your `measures` array, and the API automatically handles the join. **Example: Combine Orders, Payments, and Items data** ```json { "measures": [ "Orders.net_sales", "Orders.count", "PaymentAndRefunds.total_amount", "ItemTransactions.net_quantity" ], "dimensions": ["Orders.location_id"], "timeDimensions": [{ "dimension": "Orders.sale_timestamp", "dateRange": "last 30 days" }], "segments": ["Orders.closed_checks"] } ``` This single query returns sales, payment totals, and items sold—all grouped by location. No need to specify join conditions; the API handles it automatically. See [Multi-Cube Joins](/docs/reporting-api/cubes/joins) for more multi-cube join examples. ## Quick example Here's a minimal example showing the complete workflow: ### Step 1: Discover Available Data ```bash curl -X GET "https://connect.squareup.com/reporting/v1/meta" \ -H "Authorization: Bearer YOUR_ACCESS_TOKEN" ``` This returns metadata describing all available cubes, measures, and dimensions. ### Step 2: Query Daily Sales ```bash curl -X POST "https://connect.squareup.com/reporting/v1/load" \ -H "Authorization: Bearer YOUR_ACCESS_TOKEN" \ -H "Content-Type: application/json" \ -d '{ "query": { "measures": ["Orders.net_sales", "Orders.net_sales_with_tax"], "timeDimensions": [{ "dimension": "Orders.sale_timestamp", "dateRange": ["2024-01-01", "2024-01-31"], "granularity": "day" }], "segments": ["Orders.closed_checks"] } }' ``` This returns daily net sales for January 2024, filtered to closed (completed) orders. ## When to use the Reporting API The Reporting API is ideal for: - **Custom dashboards and analytics**: Build seller-facing or internal reporting tools - **Operational automations**: Trigger workflows based on sales thresholds or patterns - **Back-office integrations**: Sync sales data to accounting, inventory, or ERP systems - **Ad-hoc analysis**: Query arbitrary combinations of metrics and dimensions **Not recommended for**: - Real-time transaction processing (use the Orders or Payments APIs instead) - Operational CRUD operations (use domain-specific APIs) - High-frequency polling (data freshness is ~15 minutes for most cubes) ## Authentication The Reporting API supports both personal access tokens and OAuth tokens. **For OAuth applications**, request the `REPORTING_READ` permission scope when obtaining authorization from sellers. **For testing and development**, you can use personal access tokens from the Developer Console. Include your access token in the `Authorization` header on every request: ``` Authorization: Bearer YOUR_ACCESS_TOKEN ``` See [Getting Started](/docs/reporting-api/getting-started) for detailed authentication setup and [OAuth API documentation](/docs/oauth-api/overview) for implementing OAuth flows. ## Data freshness - **Standard cubes** (e.g., `Orders`): ~15 minute refresh interval ## Base URL All Reporting API endpoints are under: ``` https://connect.squareup.com/reporting ``` Core endpoints: - `GET /v1/meta` — Schema discovery - `GET/POST /v1/load` — Execute queries ## Additional Resources * [Schema Explorer](https://reporting-schema-explorer-production-f.squarecdn.com/schema-explorer.html) — Browse all cubes, measures, and dimensions interactively * [Meta tag reference](https://reporting-schema-explorer-production-f.squarecdn.com/meta-tags.html) — Browse all fields returned from the metadata response * [Cube Query Format](https://cube.dev/docs/product/apis-integrations/core-data-apis/rest-api/query-format#query-properties) — Complete query property reference * [Error Handling](reporting-api/error-handling) — Handle errors and edge cases * [Best Practices](reporting-api/best-practices) — Production-ready patterns --- # Query Construction Overview > Source: https://developer.squareup.com/docs/reporting-api/query-construction > Status: BETA > Languages: All > Platforms: All Learn how to build and execute queries against the Square Reporting API using the /v1/load endpoint. ## Overview The `/v1/load` endpoint executes queries against your discovered schema. Unlike traditional REST APIs where you call different endpoints for different resources, you construct a JSON query object that specifies: - **What to measure** (measures) - **How to slice it** (dimensions) - **What to filter** (segments and filters) - **When to analyze** (time dimensions) - **How to format results** (order, limit, offset) {% aside type="info" %} * For most reporting, query **views** like `Sales` and `ItemSales` rather than raw cubes. Views pre-join data from multiple cubes and pre-filter for common use cases. See [Views vs Cubes](/docs/reporting-api/metadata-discovery#views-vs-cubes) for details. * **Complete Query Reference**: For detailed information about all query properties and advanced options, see the [Cube Query Format documentation](https://cube.dev/docs/product/apis-integrations/core-data-apis/rest-api/query-format#query-properties). {% /aside %} ## Basic query structure Every query follows this structure: ```json { "measures": ["Cube.measure1", "Cube.measure2"], "dimensions": ["Cube.dimension1"], "timeDimensions": [{ "dimension": "Cube.time_dimension", "dateRange": ["start-date", "end-date"], "granularity": "day" }], "segments": ["Cube.segment1"], "filters": [{ "member": "Cube.dimension", "operator": "equals", "values": ["value"] }], "order": { "Cube.measure1": "desc" }, "limit": 1000, "offset": 0 } ``` {% aside type="info" %} **All fields are optional** except that you must include at least one measure or dimension. However, most useful queries include measures, time dimensions, and segments. {% /aside %} ## Query components Each component serves a specific purpose in your query: | Component | Purpose | Learn More | |-----------|---------|------------| | **Measures** | Define what to calculate (sums, counts, averages) | [Measures Guide](/docs/reporting-api/query-construction/measures) | | **Dimensions** | Define how to group results (location, channel, customer) | [Dimensions Guide](/docs/reporting-api/query-construction/dimensions) | | **Time Dimensions** | Enable time-series analysis with date grouping | [Time Dimensions Guide](/docs/reporting-api/query-construction/time-dimensions) | | **Segments** | Apply predefined business logic filters | [Segments Guide](/docs/reporting-api/query-construction/segments) | | **Filters** | Add custom filtering conditions | [Filters Guide](/docs/reporting-api/query-construction/filters) | | **Order, Limit, Offset** | Control result sorting and pagination | [Ordering & Pagination](/docs/reporting-api/query-construction/ordering-pagination) | ## Quick start examples These examples use the `Sales` view, which is the recommended starting point for most reporting queries. The `Sales` view pre-filters to closed orders, so no `closed_checks` segment is needed. ### Simple Query: Total Sales Today ```json { "measures": ["Sales.net_sales"], "timeDimensions": [{ "dimension": "Sales.local_reporting_timestamp", "dateRange": "today" }] } ``` Returns a single total of all closed sales for today—the simplest query for checking current day revenue. ### Grouped Query: Sales by Location ```json { "measures": ["Sales.net_sales", "Sales.order_count"], "dimensions": ["Sales.location_name"], "timeDimensions": [{ "dimension": "Sales.local_reporting_timestamp", "dateRange": "last 30 days" }] } ``` Returns total sales and order count for each location over the last 30 days—one row per location showing performance comparison. The `Sales` view gives you `location_name` directly. ### Time-Series Query: Daily Sales Trend ```json { "measures": ["Sales.net_sales"], "timeDimensions": [{ "dimension": "Sales.local_reporting_timestamp", "dateRange": ["2024-01-01", "2024-01-31"], "granularity": "day" }], "order": { "Sales.local_reporting_timestamp": "asc" } } ``` Returns daily sales for each day in January—31 rows showing the sales trend over time in chronological order. ### Filtered Query: Online Sales Only ```json { "measures": ["Sales.net_sales", "Sales.tips_amount"], "dimensions": ["Sales.channel_name"], "timeDimensions": [{ "dimension": "Sales.local_reporting_timestamp", "dateRange": "this month", "granularity": "day" }], "segments": ["Sales.online"] } ``` Returns daily online sales and tips by channel this month—uses the `Sales.online` segment to filter to online orders only. ## Executing queries ### Using POST (Recommended) ```bash curl -X POST "https://connect.squareup.com/reporting/v1/load" \ -H "Authorization: Bearer ${SQUARE_ACCESS_TOKEN}" \ -H "Content-Type: application/json" \ -d '{ "query": { "measures": ["Sales.net_sales"], "timeDimensions": [{ "dimension": "Sales.local_reporting_timestamp", "dateRange": "today" }] } }' ``` {% aside type="warning" %} **POST Body Format**: The query must be wrapped in a `"query"` field. Without this wrapper, you'll receive an error: `{"error": "Query param is required"}`. {% /aside %} ### Using GET For simple queries, you can use GET with URL-encoded JSON: ```bash QUERY='{"measures":["Sales.net_sales"],"timeDimensions":[{"dimension":"Sales.local_reporting_timestamp","dateRange":"today"}]}' ENCODED=$(echo $QUERY | jq -sRr @uri) curl -X GET "https://connect.squareup.com/reporting/v1/load?query=${ENCODED}" \ -H "Authorization: Bearer ${SQUARE_ACCESS_TOKEN}" ``` ### Response Format **Success response with data**: ```json { "data": [ { "Sales.local_reporting_timestamp.day": "2024-02-05T00:00:00.000", "Sales.net_sales": "1250.50" } ] } ``` **Success response with no data**: ```json { "data": [] } ``` {% aside type="info" %} **Empty Results Are Not Errors**: An empty `data` array means the query executed successfully but found no matching records. This is normal when: - The date range has no sales activity - Filters are too restrictive - The location/channel combination doesn't exist - Segments exclude all records **To troubleshoot empty results:** - Expand the date range (try `"last 30 days"` instead of `"today"`) - Remove or relax filters - Verify the location/customer/device IDs exist - Check if segments are too restrictive (try without segments first) - Use the metadata endpoint to confirm the entities exist {% /aside %} **Long-running query**: ```json { "error": "Continue wait" } ``` Retry the same request until you get results. ## Query building best practices ### 1. Use Views for Sales Reports ```json { "measures": ["Sales.net_sales"] } ``` The `Sales` view pre-filters to closed orders — no segment needed. If querying the `Orders` cube directly, always add `"segments": ["Orders.closed_checks"]`. ### 2. Specify Explicit Date Ranges ```json { "timeDimensions": [{ "dateRange": ["2024-01-01", "2024-01-31"] }] } ``` Avoid open-ended ranges that might return too much data. ### 3. Set Reasonable Limits ```json { "limit": 1000 } ``` Especially important when using multiple dimensions. ### 4. Validate Before Executing Check that all measures, dimensions, and segments exist in your metadata before querying. ## Common mistakes ### ❌ Querying Orders Cube Without Segment ```json { "measures": ["Orders.net_sales"] // Missing: "segments": ["Orders.closed_checks"] } ``` This includes open/unpaid orders, which doesn't match dashboard reports. Use the `Sales` view instead, which pre-filters to closed orders. ### ❌ No Date Range ```json { "timeDimensions": [{ "dimension": "Sales.local_reporting_timestamp" // Missing: "dateRange" }] } ``` This might return all historical data. ### ❌ Too Many Dimensions Without Limit ```json { "dimensions": ["Sales.location_name", "Sales.channel_name", "Sales.employee_full_name"] // Missing: "limit": 1000 } ``` This could return millions of rows. --- # Working with Cubes Overview > Source: https://developer.squareup.com/docs/reporting-api/cubes > Status: BETA > Languages: All > Platforms: All Understand cubes, the building blocks of the Reporting API data model for structured business analytics. ## Overview The Reporting API data model is organized into **cubes**—logical groupings of related metrics and dimensions. Each cube contains: - **Measures** - What to calculate (e.g., `net_sales`, `count`, `tips_amount`) - **Dimensions** - How to slice and group (e.g., `location_id`, `sale_timestamp`, `customer_id`) - **Segments** - Predefined filters for common scenarios (e.g., `closed_checks`, `online_orders`) {% aside type="info" %} **New to the Reporting API?** Start with **views** like `Sales` and `ItemSales` — they're curated interfaces that pre-join data from multiple cubes and pre-filter for common use cases. This section covers the underlying cube architecture for developers who need advanced access. See [Views vs Cubes](/docs/reporting-api/metadata-discovery#views-vs-cubes) for guidance on when to use each. {% /aside %} {% aside type="info" %} **Interactive Schema Explorer**: Browse the complete, up-to-date schema with examples at the [Reporting API Schema Explorer](https://reporting-schema-explorer-production-f.squarecdn.com/schema-explorer.html). The schema explorer provides: - Complete list of all cubes with descriptions - All measures, dimensions, and segments for each cube - Data freshness information - Example queries for each cube - Interactive search and filtering {% /aside %} ## What is a cube? Think of a cube as a **pre-built data mart** optimized for specific analytical questions: - **Orders cube** - Answers questions about sales, revenue, and order patterns - **PaymentAndRefunds cube** - Answers questions about payment methods, tender types, and refunds - **CustomerSnapshots cube** - Answers questions about customer behavior and lifetime value - **ItemTransactions cube** - Answers questions about product performance and inventory Each cube is designed around a specific business entity and includes all the measures and dimensions relevant to analyzing that entity. ## Cube components explained ### Measures (What to Calculate) Measures are pre-aggregated metrics with defined calculation logic: ```json { "name": "Orders.net_sales", "aggType": "sum", "description": "Total sales after discounts and returns, excluding tax" } ``` You select measures by name; the API applies the correct aggregation automatically. ### Dimensions (How to Slice) Dimensions are attributes you can group by or filter on: ```json { "name": "Orders.location_id", "type": "string", "description": "Location where the order was placed" } ``` Use dimensions to break down your measures (e.g., sales by location, by channel, by customer). ### Segments (Predefined Filters) Segments encapsulate common business logic: ```json { "name": "Orders.closed_checks", "description": "Only fully paid and settled orders" } ``` Use segments to ensure consistent filtering across all queries. ## Available cubes The Reporting API currently provides 43 cubes and 8 views for different analytical needs. For complete details, interactive exploration, and the most up-to-date list, visit the [Schema Explorer](https://reporting-schema-explorer-production-f.squarecdn.com/schema-explorer.html). ### Core Cubes (Most Commonly Used) | Cube | Purpose | Key Use Cases | |------|---------|---------------| | **Orders** | Sales analytics | Revenue reporting, order trends, location performance | | **PaymentAndRefunds** | Payment analysis | Payment methods, tender types, refund tracking | | **CustomerSnapshots** | Customer analytics | Customer lifetime value, purchase frequency | | **ItemTransactions** | Product performance | Item-level sales, inventory analysis | ## Quick example Here's a simple query using the Orders cube: ```json { "measures": ["Orders.net_sales", "Orders.count"], "dimensions": ["Orders.location_id"], "timeDimensions": [{ "dimension": "Orders.sale_timestamp", "dateRange": "last 30 days" }], "segments": ["Orders.closed_checks"] } ``` This returns total sales and order count for each location over the last 30 days. ## Key Concepts ### 1. Schema Discovery The schema is dynamic and evolves over time. Always use the `/v1/meta` endpoint or Schema Explorer to discover: - Available cubes - Measures and their aggregation types - Dimensions and their data types - Available segments See [Schema Discovery](/docs/reporting-api/cubes/schema-discovery) for details. ### 2. Cube Relationships Cubes can be combined in queries through automatic joins. The API handles join logic based on common dimensions like `order_id`, `location_id`, or `customer_id`. See [Multi-Cube Joins](/docs/reporting-api/cubes/joins) for details. ### 3. Time Handling Cubes provide both UTC and local time dimensions for different reporting needs: - **UTC** - Consistent global time - **Local** - Business day alignment See [Time Handling](/docs/reporting-api/cubes/time) for details. --- # Schema Discovery > Source: https://developer.squareup.com/docs/reporting-api/cubes/schema-discovery > Status: BETA > Languages: All > Platforms: All Programmatically discover cube schemas, available fields, and relationships in the Reporting API. ## Overview The definitive source for the current schema is the `/v1/meta` endpoint. Always use schema discovery to: - **Get the latest schema** - New measures and dimensions are added over time - **Validate your queries** - Ensure measures and dimensions exist before querying - **Discover data freshness** - Check refresh intervals for each cube - **Find available segments** - Use predefined filters for common scenarios For a complete guide to metadata structure, parsing, and caching strategies, see [Metadata Discovery](/docs/reporting-api/metadata-discovery). ## Quick schema discovery ### Get All Available Cubes and Views ```bash curl -X GET "https://connect.squareup.com/reporting/v1/meta" \ -H "Authorization: Bearer YOUR_ACCESS_TOKEN" | jq '.cubes[] | {name, type}' ``` ### Get Details for a Specific Cube ```bash curl -X GET "https://connect.squareup.com/reporting/v1/meta" \ -H "Authorization: Bearer YOUR_ACCESS_TOKEN" | \ jq '.cubes[] | select(.name == "Orders")' ``` ### List All Measures for a Cube ```bash curl -X GET "https://connect.squareup.com/reporting/v1/meta" \ -H "Authorization: Bearer YOUR_ACCESS_TOKEN" | \ jq '.cubes[] | select(.name == "Orders") | .measures[] | {name, title, aggType, description}' ``` ### List All Segments for a Cube ```bash curl -X GET "https://connect.squareup.com/reporting/v1/meta" \ -H "Authorization: Bearer YOUR_ACCESS_TOKEN" | \ jq '.cubes[] | select(.name == "Orders") | .segments[] | {name, title, description}' ``` ## Interactive schema explorer For interactive browsing and exploration, use the [Schema Explorer](https://reporting-schema-explorer-production-f.squarecdn.com/schema-explorer.html). --- # Core Cubes > Source: https://developer.squareup.com/docs/reporting-api/cubes/core-cubes > Status: BETA > Languages: All > Platforms: All Understand the core data cubes available in the Reporting API and how they model your business data. {% aside type="warning" %} **Start with views, not cubes.** For most reporting use cases, we recommend using **views** like `Sales`, `ItemSales`, and `ModifierSales` instead of querying cubes directly. Views pre-join data from multiple cubes, pre-filter to closed orders, and provide human-readable dimensions. See [Metadata Discovery](/docs/reporting-api/metadata-discovery#views-vs-cubes) for details. Use cubes directly only when you need raw, unfiltered data or fields not available in any view. {% /aside %} ## Overview The two most commonly used cubes are **Orders** and **PaymentAndRefunds**. Understanding these cubes is essential for most reporting scenarios. ## Orders cube The **Orders** cube is the primary source for sales analytics, containing measures and dimensions for completed transactions. ### Key Characteristics - **Data Freshness**: ~15 minutes - **Use For**: Historical analysis (yesterday and earlier), daily/weekly/monthly reports - **Critical Segment**: `closed_checks` (always use for sales reports) ### Key Measures | Measure | Type | Description | |---------|------|-------------| | `net_sales` | sum | Primary revenue metric (after discounts/returns, before tax) | | `net_sales_with_tax` | sum | Revenue including sales tax | | `tips_amount` | sum | Tips received (non-cash) | | `sales_tax_amount` | sum | Sales tax collected | | `count` | count | Number of orders | | `avg_net_sales` | avg | Average net sales per order | | `discounts_amount` | sum | Total discounts applied | | `itemized_returns` | sum | Returns and refunds | ### Key Dimensions | Dimension | Type | Description | |-----------|------|-------------| | `location_id` | string | Location where order was placed | | `sale_timestamp` | time | UTC sale time | | `local_date` | string | Local business date (YYYY-MM-dd format) | | `sales_channel_id` | string | Sales channel (online, in-person) | | `customer_id` | string | Customer identifier | | `device_id` | string | Device that processed the order | | `order_id` | string | Unique order identifier | ### Key Segments | Segment | Description | |---------|-------------| | `closed_checks` | Fully paid orders (recommended for sales reports) | | `open_checks` | Orders awaiting payment | | `awaiting_capture` | Orders awaiting capture | | `fully_paid` | Fully paid orders | | `has_tip` | Orders with tips | | `no_tip` | Orders without tips | | `has_customer` | Orders with a linked customer | ### Example Query ```json { "measures": [ "Orders.net_sales", "Orders.count", "Orders.avg_net_sales" ], "dimensions": ["Orders.location_id"], "timeDimensions": [{ "dimension": "Orders.sale_timestamp", "dateRange": "last 30 days" }], "segments": ["Orders.closed_checks"], "order": { "Orders.net_sales": "desc" } } ``` Returns sales performance by location for the last 30 days. ## PaymentAndRefunds cube The **PaymentAndRefunds** cube provides detailed payment transaction data, including payment methods and refund information. ### Key Characteristics - **Data Freshness**: ~15 minutes - **Use For**: Payment method analysis, refund tracking - **Relationship to Orders**: One order can have multiple payments (split payments, partial payments) ### Key Measures | Measure | Type | Description | |---------|------|-------------| | `total_amount` | sum | Total payment amount including tips and tax | | `tip_amount` | sum | Tips on this payment | | `count` | count | Number of payment transactions | | `refund_total_amount` | sum | Total refunds | ### Key Dimensions | Dimension | Type | Description | |-----------|------|-------------| | `payment_id` | string | Unique payment identifier | | `order_id` | string | Associated order identifier | | `type` | string | Payment type (CARD, CASH, etc.) | | `reporting_timestamp` | time | UTC payment time | | `location_id` | string | Location where payment was made | | `payment_method` | string | Payment method (CARD, CASH, etc.) | ### Example Query ```json { "measures": [ "PaymentAndRefunds.total_amount", "PaymentAndRefunds.count" ], "dimensions": ["PaymentAndRefunds.type"], "timeDimensions": [{ "dimension": "PaymentAndRefunds.reporting_timestamp", "dateRange": "last 30 days" }], "order": { "PaymentAndRefunds.total_amount": "desc" } } ``` Returns payment totals by payment type (CARD, CASH, etc.) for the last 30 days. ## Comparing the core cubes | Feature | Orders | PaymentAndRefunds | |---------|--------|-------------------| | **Freshness** | ~15 min | ~15 min | | **Best For** | Sales analysis | Payment method analysis | | **Granularity** | Order level | Payment level | | **Key Metric** | Net sales | Payment amounts | | **Relationship** | One order | Multiple payments per order | ## When to use each cube ### Use Orders When: - Building daily/weekly/monthly reports - Analyzing sales trends and revenue - You need order-level metrics ### Use PaymentAndRefunds When: - Analyzing payment methods - Monitoring refunds - Understanding split payment patterns - Comparing payment amounts to order amounts ## Example queries for each cube ### Orders: Monthly Sales by Location ```json { "measures": ["Orders.net_sales", "Orders.count"], "dimensions": ["Orders.location_id"], "timeDimensions": [{ "dimension": "Orders.sale_timestamp", "dateRange": ["2024-01-01", "2024-12-31"], "granularity": "month" }], "segments": ["Orders.closed_checks"] } ``` ### PaymentAndRefunds: Payment Methods This Month ```json { "measures": [ "PaymentAndRefunds.total_amount", "PaymentAndRefunds.count" ], "dimensions": ["PaymentAndRefunds.type"], "timeDimensions": [{ "dimension": "PaymentAndRefunds.reporting_timestamp", "dateRange": "this month" }] } ``` --- # Time Handling > Source: https://developer.squareup.com/docs/reporting-api/cubes/time > Status: BETA > Languages: All > Platforms: All Configure time zones, date ranges, and temporal granularity when working with cube-based queries. ## Overview The Reporting API provides both UTC and local time dimensions to support different reporting needs. Understanding when to use each is crucial for accurate time-based analysis. ## UTC time dimensions UTC time dimensions store timestamps in Coordinated Universal Time (UTC), providing a consistent global reference. ### Available UTC Dimensions - `Orders.sale_timestamp` - UTC time when order was placed - `PaymentAndRefunds.reporting_timestamp` - UTC time when payment was processed - `Orders.created_at` - UTC time when order was created ### When to Use UTC Use UTC time dimensions when you need: - **Consistent global time** across all locations - **Cross-timezone aggregation** (e.g., total sales across all locations globally) - **Precise timestamp ordering** without timezone ambiguity - **API integration** where systems expect UTC ### Example: UTC Query ```json { "measures": ["Orders.net_sales"], "timeDimensions": [{ "dimension": "Orders.sale_timestamp", "dateRange": ["2024-01-01T00:00:00Z", "2024-01-01T23:59:59Z"], "granularity": "hour" }], "segments": ["Orders.closed_checks"] } ``` Returns hourly sales for January 1st in UTC time—may span multiple business days for locations in different timezones. ## Local time dimensions Local time dimensions adjust timestamps to the location's timezone, providing business-day alignment. ### Available Local Dimensions - `Orders.local_date` - Business date in location's timezone - `Orders.local_reporting_timestamp` - Reporting timestamp in location's timezone ### When to Use Local Time Use local time dimensions when you need: - **Business day alignment** (e.g., "What were sales on January 1st at this location?") - **Location-specific reporting** that matches what staff see in the dashboard - **Day-of-week analysis** (e.g., "Which day of the week is busiest?") - **Service period tracking** (e.g., lunch vs dinner at local time) ### Example: Local Date Query ```json { "measures": ["Orders.net_sales"], "dimensions": ["Orders.local_date"], "filters": [{ "member": "Orders.local_date", "operator": "inDateRange", "values": ["2024-01-01", "2024-01-31"] }], "segments": ["Orders.closed_checks"] } ``` Returns sales for each business day in January, aligned to each location's local timezone. ## Comparing UTC vs local time ### Example Scenario: Multi-Location Restaurant Chain You have locations in New York (EST), Los Angeles (PST), and London (GMT). **UTC Query**: ```json { "measures": ["Orders.net_sales"], "timeDimensions": [{ "dimension": "Orders.sale_timestamp", "dateRange": ["2024-01-01T00:00:00Z", "2024-01-01T23:59:59Z"], "granularity": "hour" }] } ``` **Result**: Sales from 12am-11:59pm UTC, which includes: - New York: 7pm Jan 1 - 6:59pm Jan 2 - Los Angeles: 4pm Jan 1 - 3:59pm Jan 2 - London: 12am Jan 1 - 11:59pm Jan 1 **Local Date Query**: ```json { "measures": ["Orders.net_sales"], "dimensions": ["Orders.location_id", "Orders.local_date"], "filters": [{ "member": "Orders.local_date", "operator": "equals", "values": ["2024-01-01"] }] } ``` **Result**: Sales for January 1st business day at each location: - New York: 12am-11:59pm EST on Jan 1 - Los Angeles: 12am-11:59pm PST on Jan 1 - London: 12am-11:59pm GMT on Jan 1 ## Decision guide: which time dimension to use? | Reporting Need | Use | Reason | |----------------|-----|--------| | Global totals | UTC | Consistent across all timezones | | Business day reports | Local | Matches location's business day | | Cross-timezone trends | UTC | Consistent time reference | | Location-specific reports | Local | Matches staff experience | | API integrations | UTC | Standard for APIs | | Day-of-week analysis | Local | Business day semantics | | Hourly patterns | Local | Service period alignment | ## Common patterns ### Pattern 1: Global Daily Totals (UTC) ```json { "measures": ["Orders.net_sales", "Orders.count"], "timeDimensions": [{ "dimension": "Orders.sale_timestamp", "dateRange": ["2024-01-01", "2024-01-31"], "granularity": "day" }], "segments": ["Orders.closed_checks"] } ``` Returns daily totals in UTC—consistent global view. ### Pattern 2: Location Business Day Totals (Local) ```json { "measures": ["Orders.net_sales", "Orders.count"], "dimensions": ["Orders.location_id", "Orders.local_date"], "filters": [{ "member": "Orders.local_date", "operator": "inDateRange", "values": ["2024-01-01", "2024-01-31"] }], "segments": ["Orders.closed_checks"] } ``` Returns sales by location and business day—matches location dashboards. ### Pattern 3: Hourly Patterns by Location (Local) ```json { "measures": ["Orders.net_sales"], "dimensions": ["Orders.location_id"], "timeDimensions": [{ "dimension": "Orders.sale_timestamp", "dateRange": "last 7 days", "granularity": "hour" }], "segments": ["Orders.closed_checks"] } ``` Returns hourly sales patterns—use local time dimensions if you want to analyze service periods (lunch, dinner) at local time. ## Best practices ### 1. Use Local Time for Business Day Reports ```json { "dimensions": ["Orders.local_date"], "filters": [{ "member": "Orders.local_date", "operator": "inDateRange", "values": ["2024-01-01", "2024-01-31"] }] } ``` This ensures January 1st means "January 1st business day" at each location. ### 2. Use UTC for Cross-Timezone Aggregation ```json { "timeDimensions": [{ "dimension": "Orders.sale_timestamp", "dateRange": ["2024-01-01", "2024-01-31"], "granularity": "day" }] } ``` This provides consistent global time buckets. ### 3. Be Consistent Within a Query Don't mix UTC and local time dimensions in the same query—choose one approach and stick with it. ### 4. Document Your Choice When building reports, document whether you're using UTC or local time so future developers understand the semantics. --- # Multi-Cube Joins > Source: https://developer.squareup.com/docs/reporting-api/cubes/joins > Status: BETA > Languages: All > Platforms: All Learn how to join data across multiple cubes to create comprehensive cross-domain analytical reports. ## Overview The Reporting API supports querying multiple cubes in a single request by including measures from different cubes in the `measures` array. The API automatically handles the join server-side. ## How multi-cube queries work When you include measures from multiple cubes (e.g., `Orders.net_sales` and `PaymentAndRefunds.total_amount`), the API: 1. **Identifies the cubes** involved in your query 2. **Determines the join relationships** based on common dimensions between cubes 3. **Executes the join** server-side and returns combined results 4. **Aggregates the measures** according to your specified dimensions and time granularity {% aside type="info" %} **Key benefit**: You don't need to specify join conditions—the API handles this automatically based on the cube schema relationships. {% /aside %} ## Understanding cube relationships Before querying multiple cubes, it's important to understand how they relate: ### Orders ↔ PaymentAndRefunds Relationship - **One order can have multiple payments** (split payments, partial payments, etc.) - Each payment has an `order_id` linking it to an order - Each order has `tenders[].payment_id` references to its payments When you join Orders and PaymentAndRefunds on `order_id`, payment measures are **aggregated** (summed) for all payments belonging to that order. ### Common Join Dimensions | Dimension | Links | Use For | |-----------|-------|---------| | `order_id` | Orders ↔ Payments | Order-level analysis | | `location_id` | All cubes ↔ Locations | Location performance | | `merchant_id` | All cubes ↔ Merchant | Merchant-level aggregation | | `customer_id` | Orders ↔ Customers | Customer analysis | {% aside type="warning" %} **Join Validation**: Not all cubes can be joined together. If you try to query measures from cubes that don't have a join path, the API will return an error: ```json {"error": "Can't find join path to join 'Orders', 'CatalogModifierList'"} ``` The API automatically determines if cubes can be joined based on their schema relationships. Always test your multi-cube queries to ensure the cubes have a valid join path. {% /aside %} ## Two types of multi-cube joins The behavior depends on whether you include a common dimension that links the cubes: ### 1. Aggregated Joins (No Common Dimension) When you query multiple cubes without specifying a linking dimension, the API aggregates both cubes at the same level: ```json { "measures": ["Orders.count", "PaymentAndRefunds.count"], "timeDimensions": [{ "dimension": "Orders.sale_timestamp", "dateRange": ["2024-01-01", "2024-01-31"], "granularity": "day" }] } ``` **Response**: Each row shows aggregated totals for both cubes at the same time granularity: ```json { "data": [ { "Orders.sale_timestamp.day": "2024-01-01T00:00:00.000", "Orders.count": 42, "PaymentAndRefunds.count": 45 } ] } ``` **Use case**: Compare overall metrics (e.g., "Did we have more payments than orders today?") ### 2. Row-Level Joins (With Common Dimension) When you include a dimension that exists in both cubes (like `order_id` or `location_id`), the API joins row-by-row: ```json { "measures": ["Orders.net_sales", "PaymentAndRefunds.total_amount"], "dimensions": ["Orders.order_id"], "timeDimensions": [{ "dimension": "Orders.sale_timestamp", "dateRange": ["2024-01-01", "2024-01-31"] }], "limit": 10 } ``` **Response**: Each row shows an order with its associated payment data: ```json { "data": [ { "Orders.order_id": "ORDER123", "Orders.net_sales": "125.50", "PaymentAndRefunds.total_amount": "135.50" }, { "Orders.order_id": "ORDER456", "Orders.net_sales": "89.25", "PaymentAndRefunds.total_amount": "96.30" } ] } ``` **Use case**: Analyze individual orders and their payment details (e.g., "Which orders have payment amounts that differ from net sales?") ## Example 1: Aggregated join - daily orders vs payments **Type**: Aggregated join (no common dimension) Compare order counts with payment counts by day to identify discrepancies: ```json { "measures": [ "Orders.count", "Orders.net_sales", "PaymentAndRefunds.count", "PaymentAndRefunds.total_amount" ], "timeDimensions": [{ "dimension": "Orders.sale_timestamp", "dateRange": ["2024-01-01", "2024-01-31"], "granularity": "day" }], "segments": ["Orders.closed_checks"] } ``` **Response**: ```json { "data": [ { "Orders.sale_timestamp.day": "2024-01-01T00:00:00.000", "Orders.count": 42, "Orders.net_sales": "4250.50", "PaymentAndRefunds.count": 45, "PaymentAndRefunds.total_amount": "4590.04" }, { "Orders.sale_timestamp.day": "2024-01-02T00:00:00.000", "Orders.count": 38, "Orders.net_sales": "3980.25", "PaymentAndRefunds.count": 40, "PaymentAndRefunds.total_amount": "4298.67" } ] } ``` **Why this is useful**: Payment count may be higher than order count when orders have multiple payments (e.g., split payments, partial payments). This aggregated view helps identify such patterns over time. ## Example 2: Row-level join - orders by location **Type**: Row-level join (common dimension: `location_id`) Build a comprehensive location performance report combining sales, items, and customer data: ```json { "measures": [ "Orders.net_sales", "Orders.count", "ItemTransactions.net_quantity", "CustomerSnapshots.count" ], "dimensions": ["Orders.location_id"], "timeDimensions": [{ "dimension": "Orders.sale_timestamp", "dateRange": "last 30 days" }], "segments": ["Orders.closed_checks"] } ``` **Response**: ```json { "data": [ { "Orders.location_id": "L1234567890ABC", "Orders.net_sales": "125000.50", "Orders.count": 1250, "ItemTransactions.net_quantity": 3500, "CustomerSnapshots.count": 450 }, { "Orders.location_id": "L9876543210XYZ", "Orders.net_sales": "98000.25", "Orders.count": 980, "ItemTransactions.net_quantity": 2800, "CustomerSnapshots.count": 380 } ] } ``` **Why this is useful**: The cubes are joined on `location_id`, so each row shows all metrics for a specific location. This enables location-level KPI calculations: - **Average items per order**: `ItemTransactions.net_quantity / Orders.count` (e.g., 3500 / 1250 = 2.8 items per order) - **Average orders per customer**: `Orders.count / CustomerSnapshots.count` (e.g., 1250 / 450 = 2.78 orders per customer) ## Example 3: Row-level join - orders with aggregated payments **Type**: Row-level join (common dimension: `order_id`) Analyze individual orders with their total payment amounts: ```json { "measures": ["Orders.net_sales", "PaymentAndRefunds.total_amount"], "dimensions": ["Orders.order_id"], "timeDimensions": [{ "dimension": "Orders.sale_timestamp", "dateRange": "last 7 days" }], "segments": ["Orders.closed_checks"], "limit": 10 } ``` **Response**: ```json { "data": [ { "Orders.order_id": "ORDER123", "Orders.net_sales": "125.50", "PaymentAndRefunds.total_amount": "135.50" }, { "Orders.order_id": "ORDER456", "Orders.net_sales": "89.25", "PaymentAndRefunds.total_amount": "96.30" } ] } ``` {% aside type="info" %} **Important**: Since one order can have multiple payments, `PaymentAndRefunds.total_amount` is the **sum of all payments** for that order. If an order has 2 payments of \$50 each, the total_amount will be \$100. {% /aside %} **Why this is useful**: Each row represents a specific order with its aggregated payment data. This helps identify: - Orders where payment amount differs from net sales (due to tax, tips, rounding) - Orders with missing payment records (payment amount = 0) - Total payment amounts for orders with split/partial payments ## Example 4: Viewing individual payments **Type**: Row-level join (common dimension: `payment_id`) To see individual payments (not aggregated by order), use `payment_id` as the dimension: ```json { "measures": [ "PaymentAndRefunds.total_amount", "PaymentAndRefunds.tip_amount" ], "dimensions": [ "PaymentAndRefunds.payment_id", "PaymentAndRefunds.order_id", "PaymentAndRefunds.type" ], "timeDimensions": [{ "dimension": "PaymentAndRefunds.reporting_timestamp", "dateRange": "last 7 days" }], "limit": 10 } ``` **Response**: ```json { "data": [ { "PaymentAndRefunds.payment_id": "PAYMENT001", "PaymentAndRefunds.order_id": "ORDER123", "PaymentAndRefunds.type": "CARD", "PaymentAndRefunds.total_amount": "75.50", "PaymentAndRefunds.tip_amount": "10.00" }, { "PaymentAndRefunds.payment_id": "PAYMENT002", "PaymentAndRefunds.order_id": "ORDER123", "PaymentAndRefunds.type": "CASH", "PaymentAndRefunds.total_amount": "60.00", "PaymentAndRefunds.tip_amount": "0.00" } ] } ``` **Why this is useful**: This shows individual payments, including multiple payments for the same order (note both payments have `order_id: "ORDER123"`). Use this when you need to: - Analyze payment method mix at the payment level - Identify split payment patterns - Track individual payment amounts and tips ## Client-side joins (alternative approach) For more complex analysis, you can also query cubes separately and join in your application: ### Step 1: Query Orders ```json { "measures": ["Orders.net_sales"], "dimensions": ["Orders.order_id"], "timeDimensions": [{ "dimension": "Orders.sale_timestamp", "dateRange": "last 7 days" }] } ``` ### Step 2: Query Payments ```json { "measures": ["PaymentAndRefunds.total_amount"], "dimensions": ["PaymentAndRefunds.order_id", "PaymentAndRefunds.type"], "timeDimensions": [{ "dimension": "PaymentAndRefunds.reporting_timestamp", "dateRange": "last 7 days" }] } ``` ### Step 3: Join in Your Application Join the results using `order_id` as the key. {% aside type="info" %} **When to use client-side joins**: Use this approach when you need fine-grained control over the join logic or when querying at different granularities. {% /aside %} ## Common join patterns ### Orders + Payments by Location ```json { "measures": ["Orders.net_sales", "PaymentAndRefunds.total_amount"], "dimensions": ["Orders.location_id"], "timeDimensions": [{ "dimension": "Orders.sale_timestamp", "dateRange": "last 30 days" }], "segments": ["Orders.closed_checks"] } ``` ### Orders + Items by Location ```json { "measures": ["Orders.net_sales", "ItemTransactions.net_quantity"], "dimensions": ["Orders.location_id"], "timeDimensions": [{ "dimension": "Orders.sale_timestamp", "dateRange": "last 30 days" }], "segments": ["Orders.closed_checks"] } ``` ### Orders + Customers by Location ```json { "measures": ["Orders.count", "CustomerSnapshots.count"], "dimensions": ["Orders.location_id"], "timeDimensions": [{ "dimension": "Orders.sale_timestamp", "dateRange": "last 30 days" }], "segments": ["Orders.closed_checks"] } ``` ## Troubleshooting join errors ### Error: Can't Find Join Path ```json {"error": "Can't find join path to join 'Orders', 'CatalogModifierList'"} ``` **What this means**: The cubes don't have a direct or indirect join relationship in the schema. **Solutions**: 1. **Query cubes separately** and join in your application 2. **Use a different cube combination** that has a join path 3. **Check the Schema Explorer** to understand cube relationships 4. **Test joins** before deploying to production ### Common Joinable Cube Combinations {% aside type="info" %} Join paths are defined in the server-side Cube.js schema and may change over time. Test multi-cube queries in development before relying on them in production. If a join path doesn't exist, the API returns an error like `"Can't find join path to join 'Cube1', 'Cube2'"`. {% /aside %} | Cube 1 | Cube 2 | Join Key | Works? | |--------|--------|----------|--------| | Orders | PaymentAndRefunds | `order_id`, `location_id` | ✅ Yes | | Orders | ItemTransactions | `order_id`, `location_id` | ✅ Yes | | Orders | CustomerSnapshots | `customer_id`, `location_id` | ✅ Yes | | PaymentAndRefunds | ItemTransactions | `order_id`, `location_id` | ✅ Yes | | Orders | Location | `location_id` | ✅ Yes | | Orders | CatalogModifierList | None | ❌ No | ## Best practices ### 1. Test Multi-Cube Queries Always test multi-cube combinations to ensure a join path exists: ```json { "measures": ["Cube1.measure", "Cube2.measure"], "limit": 1 } ``` If you get a "Can't find join path" error, use client-side joins instead. ### 2. Understand Cardinality Know the relationship between cubes: - **One-to-many**: Orders → Payments (one order, multiple payments) - **Many-to-one**: Orders → Customers (multiple orders, one customer) This affects how measures are aggregated. ### 3. Use Common Dimensions for Row-Level Joins Include dimensions like `order_id` or `location_id` to get row-level detail: ```json { "measures": ["Orders.net_sales", "PaymentAndRefunds.total_amount"], "dimensions": ["Orders.order_id"] } ``` ### 4. Always Set Limits with Multi-Cube Queries Multi-cube queries can return many rows: ```json { "measures": ["Orders.net_sales", "PaymentAndRefunds.count"], "dimensions": ["Orders.location_id"], "limit": 1000 } ``` --- # Measure & Dimension Types > Source: https://developer.squareup.com/docs/reporting-api/cubes/types > Status: BETA > Languages: All > Platforms: All Reference guide for the different measure and dimension types supported across Reporting API cubes. ## Overview Understanding measure and dimension types is crucial for building correct queries and interpreting results. ## Measure types and aggregations ### Sum Measures Most monetary measures use `sum` aggregation: ```json { "name": "Orders.net_sales", "aggType": "sum", "type": "number", "format": "currency" } ``` **Examples**: - `Orders.net_sales` - Total sales after discounts and returns - `Orders.tips_amount` - Total tips received - `Orders.sales_tax_amount` - Total sales tax collected - `Orders.discounts_amount` - Total discounts applied **Behavior**: Values are summed across the selected dimensions and time range. **Example query**: ```json { "measures": ["Orders.net_sales", "Orders.tips_amount"], "timeDimensions": [{ "dimension": "Orders.sale_timestamp", "dateRange": "last 30 days" }], "segments": ["Orders.closed_checks"] } ``` Returns the sum of all net sales and tips for the last 30 days. ### Count Measures Count measures use `count` aggregation: ```json { "name": "Orders.count", "aggType": "count", "type": "number" } ``` **Examples**: - `Orders.count` - Number of orders - `Sales.order_count` - Number of orders (via Sales view) - `PaymentAndRefunds.count` - Number of payment/refund transactions **Behavior**: Counts distinct entities (orders, payments, etc.). **Example query**: ```json { "measures": ["Orders.count", "PaymentAndRefunds.count"], "timeDimensions": [{ "dimension": "Orders.sale_timestamp", "dateRange": "last 30 days", "granularity": "day" }], "segments": ["Orders.closed_checks"] } ``` Returns daily order and payment counts for the last 30 days. ### Average Measures Average measures use `avg` aggregation: ```json { "name": "Orders.avg_net_sales", "aggType": "avg", "type": "number", "format": "currency" } ``` **Examples**: - `Orders.avg_net_sales` - Average net sales per order - `Orders.avg_total_sales` - Average customer order value **Behavior**: Calculates the mean value across the selected scope. **Example query**: ```json { "measures": [ "Orders.avg_net_sales", "Orders.count" ], "dimensions": ["Orders.location_id"], "timeDimensions": [{ "dimension": "Orders.sale_timestamp", "dateRange": "last 30 days" }], "segments": ["Orders.closed_checks"] } ``` Returns average ticket size per location (with order count for context). ### Calculated Measures Some measures are derived from other measures: **Examples**: - `Orders.net_sales` = `top_line_product_sales - discounts_amount - itemized_returns` - `Orders.net_sales_with_tax` = `net_sales + sales_tax_amount` **Behavior**: Calculated on the fly during query execution using the underlying measures. {% aside type="info" %} **Why use calculated measures?** They ensure consistent business logic. For example, `net_sales` is always calculated the same way, ensuring all reports use the same definition. {% /aside %} ## Dimension types ### Categorical Dimensions String-based attributes for grouping and filtering: **Examples**: - `Orders.location_id` - Location identifier - `Orders.sales_channel_id` - Sales channel - `PaymentAndRefunds.payment_method` - Payment method **Usage**: Group by these to break down metrics. **Example query**: ```json { "measures": ["Orders.net_sales"], "dimensions": ["Orders.sales_channel_id"], "timeDimensions": [{ "dimension": "Orders.sale_timestamp", "dateRange": "last 30 days" }], "segments": ["Orders.closed_checks"] } ``` Returns sales by channel (online vs in-person). ### Time Dimensions Special dimensions for time-series analysis: **Examples**: - `Orders.sale_timestamp` - UTC sale time - `Orders.local_date` - Local business date - `Orders.local_reporting_timestamp` - Reporting day in local time **Usage**: Use with `timeDimensions` array and `granularity` for time-series aggregation. **Example query**: ```json { "measures": ["Orders.net_sales"], "timeDimensions": [{ "dimension": "Orders.sale_timestamp", "dateRange": ["2024-01-01", "2024-01-31"], "granularity": "day" }], "segments": ["Orders.closed_checks"] } ``` Returns daily sales for January. ### Identifier Dimensions Unique identifiers for drill-down analysis: **Examples**: - `Orders.order_id` - Unique order identifier - `Orders.customer_id` - Customer identifier - `PaymentAndRefunds.payment_id` - Payment identifier - `Orders.device_id` - Device identifier **Usage**: Drill down to individual entities or join cubes. **Example query**: ```json { "measures": ["Orders.net_sales"], "dimensions": ["Orders.order_id"], "timeDimensions": [{ "dimension": "Orders.sale_timestamp", "dateRange": "last 7 days" }], "segments": ["Orders.closed_checks"], "limit": 100 } ``` Returns individual order details for the last 7 days. ## How aggregations work ### Sum Aggregation Example If you have 3 orders with net_sales of \$10, \$20, and \$30: ```json { "measures": ["Orders.net_sales"], "timeDimensions": [{ "dimension": "Orders.sale_timestamp", "dateRange": "today" }] } ``` **Result**: `{"Orders.net_sales": "60.00"}` (10 + 20 + 30) ### Count Aggregation Example Same 3 orders: ```json { "measures": ["Orders.count"], "timeDimensions": [{ "dimension": "Orders.sale_timestamp", "dateRange": "today" }] } ``` **Result**: `{"Orders.count": 3}` ### Average Aggregation Example Same 3 orders: ```json { "measures": ["Orders.avg_net_sales"], "timeDimensions": [{ "dimension": "Orders.sale_timestamp", "dateRange": "today" }] } ``` **Result**: `{"Orders.avg_net_sales": "20.00"}` ((10 + 20 + 30) / 3) ## Discovering types in metadata When you query `/reporting/v1/meta`, each measure and dimension includes its type: **Measure example**: ```json { "name": "Orders.net_sales", "title": "Net Sales", "description": "Total sales after discounts and returns, excluding tax", "type": "number", "aggType": "sum", "format": "currency" } ``` **Dimension example**: ```json { "name": "Orders.location_id", "title": "Location ID", "type": "string" } ``` **Time dimension example**: ```json { "name": "Orders.sale_timestamp", "title": "Sale Timestamp", "type": "time" } ``` --- # Reporting API Overview > Source: https://developer.squareup.com/docs/reporting-api > Status: BETA > Languages: All > Platforms: All Query sales, payments, customer, and catalog metrics using the Square Reporting API's dynamic REST interface. The **Reporting API** is a Cube-based REST API that enables developers to query sales, payments, customer, and catalog metrics for embedding analytics, operational automations, and back-office workflows. Unlike traditional REST APIs with dozens of fixed endpoints, the Reporting API exposes **only two universal endpoints**: - **`/v1/meta`** — Describes what data is available (schema discovery) - **`/v1/load`** — Queries the actual data based on discovered metadata This design enables a powerful, flexible API surface that can evolve without breaking client applications that properly implement schema discovery. ### Benefits of Dynamic Schemas - **Expansive data catalog**: Access hundreds of measures and dimensions without endpoint proliferation - **Automatic joins**: Combine measures from multiple cubes in a single query—the API handles joins automatically - **Future-proof clients**: Applications that discover schema at runtime adapt automatically to new fields - **Consistent API**: One query pattern works for all reporting needs ### Trade-offs to Consider - **More complex client logic**: You must implement schema discovery and dynamic query building - **Runtime validation required**: Invalid query combinations are caught at query time, not compile time - **Learning curve**: Developers must understand Cube concepts (cubes, measures, dimensions, segments) ## How it differs from traditional REST APIs | Traditional REST API | Reporting API (Dynamic Schema) | |---------------------|--------------------------------| | Fixed endpoints per resource | Two universal endpoints for all queries | | Fields are predetermined | Fields discovered via metadata | | Schema changes require API versioning | Schema evolves; clients adapt via discovery | | Simple to use, limited flexibility | Complex setup, maximum flexibility | | Client knows structure at build time | Client learns structure at runtime | ## Key concepts ### Views A **view** is a curated, pre-joined interface built on top of one or more cubes. For example, the `Sales` view combines data from multiple cubes and pre-filters for common sales reporting. **Views are the recommended starting point** — they provide a simpler query surface with sensible defaults. Use cubes directly when you need cross-cube joins or access to raw data not exposed through a view. ### Cubes A **cube** is a logical grouping of related measures and dimensions (e.g., `Orders`, `PaymentAndRefunds`). Think of a cube as a "data table" optimized for analytics. You can query cubes directly for advanced use cases, but prefer views for standard reporting. ### Measures **Measures** are numeric aggregations you want to calculate (e.g., `Orders.net_sales`, `Orders.tips_amount`). These are the "what you're measuring" in your query. ### Dimensions **Dimensions** are attributes you use to group or filter data (e.g., `Orders.location_id`, `Orders.sale_timestamp`). These are the "how you're slicing" your measures. ### Segments **Segments** are predefined filters that represent common business logic (e.g., `Orders.closed_checks` filters to fully paid orders). Use segments to ensure report parity with Square's dashboard. ### Time Dimensions **Time dimensions** are special dimensions for time-series queries. They support granularity (day, week, month) and date ranges. ## Core workflow Every interaction with the Reporting API follows this pattern: ![reporting-api-overview-core-workflow](//images.ctfassets.net/1nw4q0oohfju/65myKb4YK8VEvkKG6qaRDL/c4eaf66e46989ed416cad472cb3df162/reporting-api-overview-core-workflow.png) **Workflow Steps**: 1. **Discover**: Call `/v1/meta` to learn available cubes, measures, dimensions, and segments 2. **Cache**: Store metadata with appropriate TTL (1-24 hours) 3. **Validate**: Check that your desired measures and dimensions are compatible 4. **Execute**: Send a query to `/v1/load` with your selected entities 5. **Handle Long-Running Queries**: Retry if you receive a "Continue wait" response 6. **Process**: Parse and use the returned data ## Automatic multi-cube joins One of the most powerful features of the Reporting API is the ability to combine data from multiple cubes in a single query. Simply include measures from different cubes in your `measures` array, and the API automatically handles the join. **Example: Combine Orders, Payments, and Items data** ```json { "measures": [ "Orders.net_sales", "Orders.count", "PaymentAndRefunds.total_amount", "ItemTransactions.net_quantity" ], "dimensions": ["Orders.location_id"], "timeDimensions": [{ "dimension": "Orders.sale_timestamp", "dateRange": "last 30 days" }], "segments": ["Orders.closed_checks"] } ``` This single query returns sales, payment totals, and items sold—all grouped by location. No need to specify join conditions; the API handles it automatically. See [Multi-Cube Joins](/docs/reporting-api/cubes/joins) for more multi-cube join examples. ## Quick example Here's a minimal example showing the complete workflow: ### Step 1: Discover Available Data ```bash curl -X GET "https://connect.squareup.com/reporting/v1/meta" \ -H "Authorization: Bearer YOUR_ACCESS_TOKEN" ``` This returns metadata describing all available cubes, measures, and dimensions. ### Step 2: Query Daily Sales ```bash curl -X POST "https://connect.squareup.com/reporting/v1/load" \ -H "Authorization: Bearer YOUR_ACCESS_TOKEN" \ -H "Content-Type: application/json" \ -d '{ "query": { "measures": ["Orders.net_sales", "Orders.net_sales_with_tax"], "timeDimensions": [{ "dimension": "Orders.sale_timestamp", "dateRange": ["2024-01-01", "2024-01-31"], "granularity": "day" }], "segments": ["Orders.closed_checks"] } }' ``` This returns daily net sales for January 2024, filtered to closed (completed) orders. ## When to use the Reporting API The Reporting API is ideal for: - **Custom dashboards and analytics**: Build seller-facing or internal reporting tools - **Operational automations**: Trigger workflows based on sales thresholds or patterns - **Back-office integrations**: Sync sales data to accounting, inventory, or ERP systems - **Ad-hoc analysis**: Query arbitrary combinations of metrics and dimensions **Not recommended for**: - Real-time transaction processing (use the Orders or Payments APIs instead) - Operational CRUD operations (use domain-specific APIs) - High-frequency polling (data freshness is ~15 minutes for most cubes) ## Authentication The Reporting API supports both personal access tokens and OAuth tokens. **For OAuth applications**, request the `REPORTING_READ` permission scope when obtaining authorization from sellers. **For testing and development**, you can use personal access tokens from the Developer Console. Include your access token in the `Authorization` header on every request: ``` Authorization: Bearer YOUR_ACCESS_TOKEN ``` See [Getting Started](/docs/reporting-api/getting-started) for detailed authentication setup and [OAuth API documentation](/docs/oauth-api/overview) for implementing OAuth flows. ## Data freshness - **Standard cubes** (e.g., `Orders`): ~15 minute refresh interval ## Base URL All Reporting API endpoints are under: ``` https://connect.squareup.com/reporting ``` Core endpoints: - `GET /v1/meta` — Schema discovery - `GET/POST /v1/load` — Execute queries ## Additional Resources * [Schema Explorer](https://reporting-schema-explorer-production-f.squarecdn.com/schema-explorer.html) — Browse all cubes, measures, and dimensions interactively * [Meta tag reference](https://reporting-schema-explorer-production-f.squarecdn.com/meta-tags.html) — Browse all fields returned from the metadata response * [Cube Query Format](https://cube.dev/docs/product/apis-integrations/core-data-apis/rest-api/query-format#query-properties) — Complete query property reference * [Error Handling](reporting-api/error-handling) — Handle errors and edge cases * [Best Practices](reporting-api/best-practices) — Production-ready patterns --- # Brand Guidelines > Source: https://developer.squareup.com/docs/brand-guidelines > Status: PUBLIC > Languages: All > Platforms: All Learn about brand guidelines for building with Square APIs Thank you for choosing to develop with Square! We know integrating is only your first step. Advertising your integration with Square to your customer base is very important. In this section you’ll find marketing assets you can post on your site and style guidelines on how to use them. ## Logos Please download and choose which logo to host on your website when mentioning integration with Square. {% table %} --- * ![Built with Square brand logo - white](//images.ctfassets.net/1nw4q0oohfju/6eaji5oYvuLMpwUOTkPyRj/e2a672153be4083c9ad7153f14ff06f9/brand_white-edcf1cc8a10da45f6d0e67215261bcd24f83a48336be84307d3ca62314963adf.png) * [White](https://images.ctfassets.net/1nw4q0oohfju/6eaji5oYvuLMpwUOTkPyRj/e2a672153be4083c9ad7153f14ff06f9/brand_white-edcf1cc8a10da45f6d0e67215261bcd24f83a48336be84307d3ca62314963adf.png) 1125x320, PNG --- * ![Built with Square brand logo - black](//images.ctfassets.net/1nw4q0oohfju/7ntgEwkWoRRGdTu91jr9yd/62d9d5b8a06107447c15cbbfffd2abb7/brand_black-f67a0600187e707deb22521e86452dd6746851870f815e9e454423b9e5b8a6d3.png) * [Black](https://images.ctfassets.net/1nw4q0oohfju/7ntgEwkWoRRGdTu91jr9yd/62d9d5b8a06107447c15cbbfffd2abb7/brand_black-f67a0600187e707deb22521e86452dd6746851870f815e9e454423b9e5b8a6d3.png) 1125x320, PNG {% /table %} ## Style Guidelines When using our logo please make sure to follow the below set of guidelines: * Do not alter the button or badge * Do not change the proposition * Do not change the color * Give a good amount of clear space around the logo: at least 40 pixels --- # Card Surcharges > Source: https://developer.squareup.com/docs/payments-api/take-payments/card-payments/card-surcharges > Status: BETA > Languages: All > Platforms: All Learn how to retrieve and understand card surcharge details on payment records. **Applies to:** [Payments API](payments-refunds) | [Terminal API](terminal-api/overview) | [Mobile Payments SDK](/docs/mobile-payments-sdk) ## Overview Card surcharges allow merchants to pass on the cost of card processing to customers who choose to pay with a credit card instead of cash or other payment methods. When a payment includes a surcharge, Square provides detailed information about the surcharge amounts in the payment record through the `applied_card_surcharge_details` ([CardSurchargeDetails](https://developer.squareup.com/reference/square/objects/CardSurchargeDetails)) property. This guide explains how to retrieve and interpret surcharge information when fetching payments that were processed with card surcharges through the Terminal API or Mobile Payments SDK. {% aside type="info" %} Card surcharge details are read-only fields that appear on payment records. These surcharges must be configured and applied through the Terminal API or Mobile Payments SDK when creating the payment. {% /aside %} ## Understanding card surcharge details When you retrieve a payment that includes a card surcharge using [GetPayment](https://developer.squareup.com/reference/square/payments-api/get-payment) or [ListPayments](https://developer.squareup.com/reference/square/payments-api/list-payments), the response includes surcharge information in the `card_details.applied_card_surcharge_details` field. ### Surcharge field structure The [applied_card_surcharge_details](https://developer.squareup.com/reference/square/objects/CardPaymentDetails#definition__property-applied_card_surcharge_details) property contains one money sub-property: - **`card_surcharge_money`** - The base surcharge amount levied by the merchant for using a card payment instead of cash or another payment type. This amount only includes the surcharge itself, not any additional fees or taxes on the surcharge. This amount is specified in the smallest denomination of the applicable currency (for example, US dollar amounts are specified in cents). ## Retrieving payments with surcharges The [applied_card_surcharge_details](https://developer.squareup.com/reference/square/objects/CardPaymentDetails#definition__property-applied_card_surcharge_details) field only appears on payments that have a surcharge applied. For payments without surcharges, this field is not present in the response. ### Example: Get a payment with surcharge details The following example shows how to retrieve a payment and access its surcharge information: ```` ### Example response with surcharge details When a payment includes a surcharge, the response includes the `applied_card_surcharge_details` field: ```json { "payment": { "id": "PAYMENT_ID", "created_at": "2024-12-15T10:30:00.000Z", "updated_at": "2024-12-15T10:30:05.000Z", "amount_money": { "amount": 10300, "currency": "USD" }, "status": "COMPLETED", "source_type": "CARD", "card_details": { "status": "CAPTURED", "card": { "card_brand": "VISA", "last_4": "1234", "exp_month": 12, "exp_year": 2025 }, "applied_card_surcharge_details": { "card_surcharge_money": { "amount": 300, "currency": "USD" } }, "entry_method": "KEYED", "cvv_status": "CVV_ACCEPTED", "avs_status": "AVS_ACCEPTED" }, "location_id": "LOCATION_ID", "total_money": { "amount": 10300, "currency": "USD" } } } ``` In this example: - The base payment amount is $100.00 (10000 cents) - The card surcharge is $3.00 (300 cents) - The total payment amount is $103.00 (10300 cents) ## Working with surcharge data When processing payments with surcharges in your application, consider the following: ### Calculating the base amount To determine the original purchase amount before surcharges: ```javascript // Example in JavaScript const payment = // ... retrieved payment object const cardDetails = payment.card_details; if (cardDetails.applied_card_surcharge_details) { const totalAmount = payment.amount_money.amount; const surchargeAmount = cardDetails.applied_card_surcharge_details.card_surcharge_money.amount; const baseAmount = totalAmount - surchargeAmount; console.log(`Base amount: ${baseAmount}`); console.log(`Surcharge: ${surchargeAmount}`); console.log(`Total charged: ${totalAmount}`); } ``` ### Displaying surcharge information When displaying payment details to customers or in reports, clearly separate: - The base purchase amount - The card processing surcharge - The total amount charged ## Best practices When working with card surcharges: 1. **Check for surcharge presence** - Always verify if `applied_card_surcharge_details` exists before attempting to access its fields, as it's only present on payments with surcharges. 2. **Handle currency properly** - Remember that all money amounts are in the smallest currency unit. Convert appropriately for display purposes. 3. **Maintain transparency** - Clearly communicate surcharge amounts to customers in receipts and payment confirmations. 4. **Consider regional regulations** - Be aware that surcharge regulations vary by region. Some jurisdictions have specific rules about card surcharges. 5. **Reconciliation** - When reconciling payments, account for both the base surcharge and any additional amounts separately for accurate financial reporting. ## Integration considerations ### Terminal API and Mobile Payments SDK Card surcharges are configured and applied when creating payments through: - [Terminal API](terminal-api/overview) - For in-person payments using Square Terminal - [Mobile Payments SDK](mobile-payments-sdk) - For mobile payment applications The surcharge configuration happens at payment creation time through these APIs. The Payments API only provides read access to surcharge details after the payment is created. ### Webhooks When using [payment webhooks](payments-api/webhooks), the `payment.created` and `payment.updated` webhook events include the `applied_card_surcharge_details` field for payments with surcharges. ## Related resources - [Retrieve Payments](payments-api/retrieve-payments) - Learn more about fetching payment details - [Card Payments](payments-api/take-payments/card-payments) - Overview of card payment processing - [Terminal API Documentation](terminal-api/overview) - Configure surcharges for in-person payments - [Mobile Payments SDK](mobile-payments-sdk) - Implement surcharges in mobile applications - [Working with Monetary Amounts](build-basics/common-data-types/working-with-monetary-amounts) - Understanding currency handling in Square APIs --- # Bank Account API Operations > Source: https://developer.squareup.com/docs/bank-accounts-api/retrieve-bank-accounts > Status: PUBLIC > Languages: All > Platforms: All Learn how to retrieve information about a linked bank account. **Applies to:** [Bank Accounts API](https://developer.squareup.com/reference/square/bank-accounts-api) {% subheading %}Use the Bank Accounts API to retrieve seller bank accounts and manage customer bank accounts for ACH payment processing.{% /subheading %} {% toc hide=true /%} ## Overview This guide covers the operational aspects of using the Bank Accounts API to: * Retrieve seller bank account information * Create and manage customer bank accounts for ACH payments * List and filter bank accounts * Handle bank account verification and status changes ## API Operations ### Available Endpoints **For All Bank Accounts:** * [ListBankAccounts](https://developer.squareup.com/reference/square/bank-accounts-api/list-bank-accounts) - Retrieve bank accounts * [GetBankAccount](https://developer.squareup.com/reference/square/bank-accounts-api/get-bank-account) - Retrieve a specific bank account by ID **For Customer Bank Accounts Only:** * [CreateBankAccount](https://developer.squareup.com/reference/square/bank-accounts-api/create-bank-account) - Store a new customer bank account * [DisableBankAccount](https://developer.squareup.com/reference/square/bank-accounts-api/disable-bank-account) - Disable a customer bank account ## Working with Seller Bank Accounts ### Retrieve Seller Bank Accounts List all bank accounts for a specific location: ```bash curl https://connect.squareup.com/v2/bank-accounts?location_id=LOCATION_ID \ -H 'Square-Version: 2025-12-17' \ -H 'Authorization: Bearer ACCESS_TOKEN' \ -H 'Content-Type: application/json' ``` ### Example Seller Bank Account Response ```json { "bank_account": { "id": "w3yRgCGYQnwmdl0R3GB", "account_number_suffix": "971", "country": "US", "currency": "USD", "account_type": "CHECKING", "holder_name": "Jane Doe", "primary_bank_identification_number": "112200303", "location_id": "MER9ST0SUIQ9W", "status": "VERIFIED", "creditable": true, "debitable": true, "version": 3, "bank_name": "Checking and Savings Bank" } } ``` ## Working with Customer Bank Accounts ### Create a Customer Bank Account To create a customer bank account, you'll need a `source_id` (a bank account token) obtained from your payment form or bank account verification flow: ```bash curl https://connect.squareup.com/v2/bank-accounts \ -X POST \ -H 'Square-Version: 2025-12-17' \ -H 'Authorization: Bearer ACCESS_TOKEN' \ -H 'Content-Type: application/json' \ -d '{ "idempotency_key": "4e43559a-f0fd-47d3-9da2-7ea1f97d94be", "source_id": "bnon:CA4SEHsQwr0rx6DbWLD5BQaqMnoYAQ", "customer_id": "HM3B2D5JKGZ69359BTEHXM2V8M" }' ``` {% aside type="info" %} The `source_id` is a bank account token (prefixed with "bnon:") that represents the tokenized bank account details. This token is typically obtained from the Web Payments SDK or other Square payment form implementations. {% /aside %} ### Example Customer Bank Account Response ```json { "bank_account": { "id": "bact:OxfBTiXgByaXds1K4GB", "account_number_suffix": "000", "country": "US", "currency": "USD", "account_type": "CHECKING", "holder_name": "Nicola Snow", "primary_bank_identification_number": "011401533", "status": "VERIFICATION_IN_PROGRESS", "creditable": true, "debitable": true, "fingerprint": "sq-1-mO3XNctJpTLL8uYowOWpioS8nQyTc838gcBo90254XonoEJ_c7Uw6yqL6qihFNY8fA", "version": 1, "bank_name": "Citizens Bank", "customer_id": "HM3B2D5JKGZ69359BTEHXM2V8M" } } ``` {% aside type="info" %} Note the `fingerprint` field in customer bank accounts - this unique identifier helps prevent duplicate bank accounts from being created for the same customer and underlying bank account combination. {% /aside %} ### List Customer Bank Accounts {% aside type="warning" %} Always include the `customer_id` parameter when retrieving customer bank accounts. Omitting this parameter will return the seller's bank accounts instead, potentially exposing sensitive financial information to unauthorized users (such as displaying the business owner's bank account to store employees). {% /aside %} The same `ListBankAccounts` endpoint is used for both seller and customer bank accounts. The `customer_id` parameter determines which accounts are returned: **For customer bank accounts** (include customer_id): ```bash curl https://connect.squareup.com/v2/bank-accounts?customer_id=HM3B2D5JKGZ69359BTEHXM2V8M \ -H 'Square-Version: 2025-12-17' \ -H 'Authorization: Bearer ACCESS_TOKEN' \ -H 'Content-Type: application/json' ``` **For seller bank accounts** (omit customer_id or use location_id): ```bash # Returns seller accounts - DO NOT use this in customer-facing interfaces curl https://connect.squareup.com/v2/bank-accounts \ -H 'Square-Version: 2025-12-17' \ -H 'Authorization: Bearer ACCESS_TOKEN' \ -H 'Content-Type: application/json' ``` Always validate that you're passing the correct customer ID, especially in point-of-sale or customer-facing applications where exposing seller bank accounts would be a serious security breach. ### Disable a Customer Bank Account Bank accounts cannot be deleted once created, but they can be disabled to prevent further use. Disabling a bank account is the recommended approach when: * A customer wants to remove a bank account from their payment methods * A bank account has been compromised or flagged for security reasons * You need to prevent accidental charges to an outdated account Once disabled, the bank account: * Cannot be used for new payments * Remains in the system for historical records and compliance * Will still appear in list operations but with a `DISABLED` status * Cannot be re-enabled (a new bank account must be created if needed) ```bash curl https://connect.squareup.com/v2/bank-accounts/bact:OxfBTiXgByaXds1K4GB/disable \ -X POST \ -H 'Square-Version: 2025-12-17' \ -H 'Authorization: Bearer ACCESS_TOKEN' \ -H 'Content-Type: application/json' ``` ## Processing ACH Payments Once a customer bank account is verified, you can use it to process ACH payments: ```bash curl https://connect.squareup.com/v2/payments \ -X POST \ -H 'Square-Version: 2025-12-17' \ -H 'Authorization: Bearer ACCESS_TOKEN' \ -H 'Content-Type: application/json' \ -d '{ "source_id": "bact:OxfBTiXgByaXds1K4GB", "amount_money": { "amount": 5000, "currency": "USD" }, "customer_id": "HM3B2D5JKGZ69359BTEHXM2V8M", "idempotency_key": "payment-key-456" }' ``` {% aside type="info" %} The Payments API will reject attempts to charge a seller's bank account. If you accidentally pass a seller bank account ID (which has a different format than customer bank account IDs), the API returns a `NOT_FOUND` error. Only customer bank accounts (prefixed with "bact:") can be used as payment sources. {% /aside %} ## Filtering and Pagination ### Filter by Account Type When using `ListBankAccounts`, the response will include both seller and customer bank accounts. You can identify the type by checking for either `location_id` (seller accounts) or `customer_id` (customer accounts). ### Pagination Use cursor-based pagination for large result sets: ```bash curl https://connect.squareup.com/v2/bank-accounts?cursor=CURSOR_VALUE \ -H 'Square-Version: 2025-12-17' \ -H 'Authorization: Bearer ACCESS_TOKEN' \ -H 'Content-Type: application/json' ``` ## Handling Webhooks ### Subscribe to Bank Account Events Configure webhook subscriptions to receive notifications for: * `bank_account.created` - New bank account linked * `bank_account.verified` - Account verification completed * `bank_account.disabled` - Account disabled ### Example Webhook Payload ```json { "merchant_id": "MERCHANT_ID", "location_id": "LOCATION_ID", "type": "bank_account.verified", "event_id": "EVENT_ID", "created_at": "2026-01-14T09:30:00Z", "data": { "type": "bank_account", "id": "bact:OxfBTiXgByaXds1K4GB", "object": { "bank_account": { "id": "bact:OxfBTiXgByaXds1K4GB", "status": "VERIFIED", "customer_id": "HM3B2D5JKGZ69359BTEHXM2V8M", "version": 2 // ... additional fields } } } } ``` ## Error Handling ### Common Error Codes | Error Code | Description | Resolution | | ---------- | ----------- | ---------- | | `INVALID_CUSTOMER_ID` | Customer ID doesn't exist | Verify customer exists before creating bank account | | `DUPLICATE_BANK_ACCOUNT` | Bank account already exists for customer | Check fingerprint to avoid duplicates | | `VERIFICATION_REQUIRED` | Account not verified for payments | Complete verification process | | `BANK_ACCOUNT_DISABLED` | Account has been disabled | Use a different bank account | ### Verification States Monitor the `status` field for verification progress: * `VERIFICATION_IN_PROGRESS` - Awaiting verification * `VERIFIED` - Ready for payments * `DISABLED` - Cannot be used ## Implementation Checklist ### For Customer Bank Accounts * **Implement tokenization** - Set up the Web Payments SDK to securely tokenize bank account details before sending them to your server. * **Create customer profile** - Ensure a customer profile exists in Square before attempting to store their bank account information. * **Handle duplicates** - Use the fingerprint field to detect and prevent creating duplicate bank accounts for the same customer. * **Complete verification** - Implement the verification flow using either micro-deposits or instant verification to activate the account. * **Configure webhooks** - Set up webhook handlers to receive notifications when bank account status changes occur. * **Secure storage** - Store the returned bank account ID securely in your database for processing future ACH payments. * **Enable account management** - Provide functionality for customers to disable bank accounts they no longer wish to use. ### For Seller Bank Accounts * **Request permissions** - Ensure your OAuth application has `BANK_ACCOUNTS_READ` permission to access seller bank accounts. * **Display account info** - Retrieve and display bank account information in your application's seller dashboard. * **Support multiple locations** - Handle scenarios where sellers have different bank accounts linked to different locations. * **Monitor status changes** - Implement webhook handlers to track when seller bank accounts are verified or disabled. ## Related APIs * [Payments API](https://developer.squareup.com/reference/square/payments-api) - Process ACH payments using stored bank accounts * [Customers API](https://developer.squareup.com/reference/square/customers-api) - Manage customer profiles linked to bank accounts * [Webhooks API](https://developer.squareup.com/reference/square/webhooks) - Subscribe to bank account events * [Web Payments SDK](https://developer.squareup.com/reference/sdks/web/payments) - Tokenize bank account details --- # Store and Charge Bank Accounts on File > Source: https://developer.squareup.com/docs/web-payments/bank-on-file > Status: BETA > Languages: All > Platforms: All learn how to store and then charge a bank account on file with the Web Payments SDK, Bank Accounts API, and Payments API Applies to: [Web Payments SDK](web-payments/overview) | [Payments API](payments-refunds) | [Bank Accounts API](bank-accounts-api) {% subheading %}Learn how to store and charge a bank account on file with the Web Payments SDK.{% /subheading %} {% toc hide=true /%} ## Overview The Web Payments SDK and Square APIs enable you to securely store customer bank accounts for one-time or recurring ACH charges, eliminating the need for customers to re-link their accounts on each visit. Common use cases include gyms processing monthly membership fees, utility companies streamlining recurring billing, or any business that needs to collect regular ACH payments. By integrating the Bank Accounts API with the Web Payments SDK, you can implement these payment features efficiently while maintaining security and compliance. This guide covers storing bank accounts and processing both one-time and recurring ACH payments. For ACH payments without storing accounts, see [Take ACH Bank Transfer Payments](web-payments/add-ach). {% aside type="tip" %} Bank accounts cannot be deleted once created due to compliance and record-keeping requirements. Instead, use the [DisableBankAccount](https://developer.squareup.com/reference/square/bank-accounts-api/disable-bank-account) endpoint to prevent future charges while maintaining historical records. {% /aside %} ## Prerequisites Before implementing bank account storage, ensure your application meets these requirements: - **Location**: ACH bank transfers via Web Payments SDK are only supported in the United States. For international bank account storage and payment processing, see [International Development](international-development) - **Permissions**: Your application needs: - `BANK_ACCOUNTS_WRITE` and `BANK_ACCOUNTS_READ` - `CUSTOMERS_WRITE` - `PAYMENTS_WRITE` and `PAYMENTS_READ` - **Setup**: Complete the [ACH Bank Transfer Payments setup](web-payments/add-ach#1-attach-ach-to-the-page) - **Bank Support**: Customer banks must be supported by Plaid (Square's banking partner) ## Store a Bank Account This section walks through linking and storing a customer's bank account to their profile for future use. ![A diagram showing the store bank account flow](//images.ctfassets.net/1nw4q0oohfju/N789WkQ8S0lCEM4F4UZ3G/c93661223553a8108d6c7e72ae928cec/store-bank-account-flow.png) Charging a buyer on their linked and stored bank account involves the generation and use of these token types: {% table %} * Token {% width="110px" %} * Definition --- * `BNON` * A token returned by Web Payments SDK for a Plaid-authorized bank account. --- * `BACT` * A token returned by Square for a Plaid-authorized bank account stored with Square. --- * `BAUTH` * A token returned by the Web Payments SDK for a buyer-authorized charge on a linked bank account. Use this token with the [CreatePayment](https://developer.squareup.com/reference/square/payments-api/create-payment) method. {% /table %} ### Step 1: Create a Customer First, create a Square Customer object to associate with the bank account: {% tabset %} {% tab id="Request" %} ```` {% /tab %} {% tab id="Response" %} On success, Square returns the new Customer object: ```json { "customer": { "id": "WC1GYWRIT7STE3GU4ZLQ3X76EF", "created_at": "2024-12-19T00:48:34.398Z", "updated_at": "2024-12-19T00:48:34Z", "given_name": "Lauren", "family_name": "Noble", "preferences": { "email_unsubscribed": false }, "creation_source": "THIRD_PARTY", "version": 0 } } ``` Store the `id` returned in the response. You'll need this customer ID for Step 3. {% /tab %} {% /tabset %} ### Step 2: Tokenize the Bank Account The [ach.tokenize](https://developer.squareup.com/reference/sdks/web/payments/objects/ACH#ACH.tokenize) with [AchStoreOptions.intent](https://developer.squareup.com/reference/sdks/web/payments/objects/AchStoreOptions) set to `'STORE'` presents the customer with Plaid's secure authentication interface. Set up an event listener to capture the BNON token after completion of the `tokenize` call: Use the Web Payments SDK to [initialize ACH](https://developer.squareup.com/reference/sdks/web/payments/objects/ACH) and launch the Plaid authentication flow: ```javascript // Initialize ACH payment method const ach = await payments.ach({ transactionId: '415111211611', // Your unique transaction ID }); ach.addEventListener('ontokenization', async function(event) { const { tokenResult, error } = event.detail; if (error) { throw new Error(`Tokenization failed: ${error}`); } if (tokenResult.status === 'OK') { // Send token to your server await fetch('/create-bank-on-file', { method: 'POST', headers: { 'Content-Type': 'application/json' }, body: JSON.stringify({ token: tokenResult.token }) }); } }); // Launch Plaid authentication flow try { await ach.tokenize({ accountHolderName: 'Lauren Noble', intent: 'STORE', // Always use STORE for saving accounts }); } catch (e) { console.error(e); } ``` ### Step 3: Store with Square From your server, create the bank account record using the BNON token and the following parameters: * **source_id** - The BNON token sent to your server after the call to [ach.tokenize](https://developer.squareup.com/reference/sdks/web/payments/objects/ACH#ACH.tokenize). * **customer_id** - The unique ID for the customer generated during customer creation. {% aside type="info" %} **Testing with Real Tokens Required** The `source_id` parameter must be a valid token generated by the Web Payments SDK's `ach.tokenize()` method. You cannot use placeholder values, example tokens from documentation, or manually created strings for testing. If you attempt to use an invalid or made-up `source_id`, you'll receive this error: ```json { "errors": [ { "code": "NOT_FOUND", "detail": "Bank nonce not found", "category": "INVALID_REQUEST_ERROR" } ] } ``` To test the `CreateBankAccount` endpoint, you must first: 1. Implement the Web Payments SDK on your frontend 1. Complete the Plaid bank linking flow 1. Call `ach.tokenize()` to generate a valid token 1. Use that token immediately in your `CreateBankAccount` request Bank tokens are single-use and expire quickly, so you'll need to generate a fresh token for each test. {% /aside %} {% tabset %} {% tab id="Request" %} ```bash curl https://connect.squareupsandbox.com/v2/bank-accounts \ -X POST \ -H 'Authorization: Bearer {ACCESS_TOKEN}' \ -H 'Content-Type: application/json' \ -d '{ "idempotency_key": "{UNIQUE_KEY}", "source_id": "bnon:Ja85BvcwFYPiDZJV4H", "customer_id": "WC1GYWRIT7STE3GU4ZLQ3X76EF" }' ``` {% /tab %} {% tab id="Response" %} A `BACT` token is returned in the `bank_account` object. Use that token with the Web Payments SDK to `tokenize()` a charge on that bank account. ```json { "bank_account": { "id": "bact:J71CYCQ789KnZnXi5HC", "account_number_suffix": "000", "country": "US", "currency": "USD", "account_type": "CHECKING", "holder_name": "Lauren Noble", "status": "VERIFIED", "debitable": true, "customer_id": "WC1GYWRIT7STE3GU4ZLQ3X76EF" } } ``` The response can include: - `debitable: true` - Indicates the account can be charged (send funds) - `creditable: true` - Indicates the account can receive refunds - `status: "VERIFIED"` - Account is ready for payment processing {% /tab %} {% /tabset %} ## One-Time Payments Process a single charge to a customer's stored bank account with these steps. These steps assume a bank account has already been linked and stored to the customer's account. {% aside type="tip" %} The Payments API automatically rejects attempts to charge seller bank accounts (those without the "bact:" prefix). This prevents accidentally charging business accounts instead of customer accounts. {% /aside %} ### Step 1: Retrieve Bank Accounts Retrieve the customer's stored bank accounts using the [ListBankAccounts](https://developer.squareup.com/reference/square/bank-accounts-api/list-bank-accounts) endpoint. **Important:** You must include the `customer_id` as a query parameter to filter results to only that customer's accounts. Without this parameter, the endpoint returns all bank accounts associated with the seller's Square account, including the seller's own bank accounts. {% tabset %} {% tab id="Request" %} ```` {% /tab %} {% tab id="Response" %} ```json { "bank_accounts": [{ "id": "bact:J71CYCQ789KnZnXi5HC", "account_number_suffix": "000", "account_type": "CHECKING", "holder_name": "Lauren Noble", "bank_name": "Citizens Bank", "status": "VERIFIED", "debitable": true, "customer_id": "WC1GYWRIT7STE3GU4ZLQ3X76EF" }] } ``` {% /tab %} {% /tabset %} ### Step 2: Display Options Present the available bank accounts in your UI to let the customer select which account to charge. Display enough information for the customer to identify their account while maintaining security: **Recommended display fields:** - `holder_name` - Account holder's name - `bank_name` - Financial institution name - `account_type` - CHECKING or SAVINGS - `account_number_suffix` - Last 3-4 digits (e.g., "...000") **Important:** Never display full account or routing numbers. The `account_number_suffix` provides enough information for identification. **Example UI pattern:** ```javascript bankAccounts.forEach(account => { // Display: "Citizens Bank - Checking (...000) - Lauren Noble" const displayText = `${account.bank_name} - ${account.account_type} (...${account.account_number_suffix}) - ${account.holder_name}`; // Verify account is ready for payments if (account.status === 'VERIFIED' && account.debitable) { // Add to payment method selection UI addPaymentOption(displayText, account.id); } }); ``` Capture the selected account's `id` to use in the next step for payment authorization. ### Step 3: Authorize Payment Use the [ach.tokenize](https://developer.squareup.com/reference/sdks/web/payments/objects/ACH#ACH.tokenize) method to generate a BAUTH token for the one-time charge authorization with the following parameters: * **bankAccountId** - The stored bank account token (`BACT`) that was returned when your application stored the bank account with Square. * **intent** - The purpose of the authorization. In this case, to `CHARGE` the bank account. * **amount** - The full price of the purchase, including any taxes and fees. * **currency** - The currency of the bank account to authorize. ```javascript // Initialize ACH const ach = await payments.ach({ transactionId: '415111211611', }); // Authorize one-time charge try { await ach.tokenize({ intent: 'CHARGE', // Use CHARGE for one-time payments amount: '5.00', // Amount as string with dollars and cents currency: 'USD', bankAccountId: "bact:J71CYCQ789KnZnXi5HC", }); } catch (e) { console.error(e); } ``` Capture the BAUTH token using the same event listener pattern shown earlier. ### Step 4: Process Payment On your application server, create the payment with the Payments API [CreatePayment](https://developer.squareup.com/reference/square/payments-api/create-payment) endpoint using the BAUTH token: {% tabset %} {% tab id="Request" %} ```` {% /tab %} {% tab id="Response" %} ```json { "payment": { "id": "grLqqvOQQiXYI2wi9ph5BzP5x5CAS", "created_at": "2024-12-20T00:01:24.106Z", "updated_at": "2024-12-20T00:01:24.434Z", "amount_money": { "amount": 500, "currency": "USD" }, "status": "PENDING", "source_type": "BANK_ACCOUNT", "customer_id": "WC1GYWRIT7STE3GU4ZLQ3X76EF", "total_money": { "amount": 500, "currency": "USD" }, "receipt_number": "nrKp", "bank_account_details": { "bank_name": "Citizens Bank", "transfer_type": "ACH", "account_ownership_type": "INDIVIDUAL", "fingerprint": "sq-2-EYJJ2O13bT1CDmvlkYACunmnyjEtBBwt8HDLLrYDFjR", "country": "US", "ach_details": { "routing_number": "054000017", "account_number_suffix": "000", "account_type": "CHECKING" } }, "application_details": { "square_product": "ECOMMERCE_API", "application_id": "sq0ids-IifESTgTFwVVT8F8yEEARR" }, "version_token": "M3nP7wD8fWzkijFI7USxvUugfqWkNuC0sO6HSi6BuHF6o" } } ``` {% /tab %} {% /tabset %} ## Fixed Recurring Payments Set up automated recurring charges for the same amount at regular intervals. ![A diagram showing the process recurring payment flow in the Web Payments SDK](//images.ctfassets.net/1nw4q0oohfju/6BdjfAHfDWn4lRzdeUlQvB/e25fdacf8d7b65616d4cc5454248e62a/recurring-payment-flow.png) ### Understanding Recurring Charge Authorization When you use intent: `RECURRING_CHARGE` with the Web Payments SDK, Square does not automatically charge the customer’s bank account on the specified frequency. The `RECURRING_CHARGE` operation only creates a reusable BAUTH token that’s authorized for recurring payments according to the schedule you defined. Your application is fully responsible for implementing the scheduling logic and calling the Payments API `CreatePayment` endpoint with this token whenever a payment is due. Think of it as getting permission to charge on a schedule, not setting up automatic charges. You’ll need to build your own scheduling system (using cron jobs, scheduled tasks, or a third-party scheduling service) to trigger payments at the appropriate times. The frequency parameters you provide during tokenization are for authorization purposes only—they tell the customer what schedule they’re agreeing to, but don’t create any automatic payment processing on Square’s side. {% aside type="info" %} These steps assume a bank account has already been linked and stored to the customer's account. {% /aside %} ### Step 1: Retrieve and Display Accounts Follow the same process as one-time payments to retrieve and display the customer's bank accounts. Consider adding UI elements to capture subscription preferences like frequency and start date. ### Step 2: Authorize Recurring Charges Configure the recurring payment schedule when generating the BAUTH token: {% tabset %} {% tab id="Daily" %} ```javascript // Helper function to create daily recurring frequency configuration function createDailyRecurringFrequency(days) { return { days: days // Charge every [x] days }; } // Example: Charge every 3 days const dailyFrequency = createDailyRecurringFrequency(3); // Use with ach.tokenize() await ach.tokenize({ intent: 'RECURRING_CHARGE', bankAccountId: 'bact:J71CYCQ789KnZnXi5HC', amount: '9.99', currency: 'USD', frequency: dailyFrequency, startDate: '2024-12-21' }); ``` {% /tab %} {% tab id="Weekly" %} ```javascript // Valid day values for weekly recurring payments const DAYS_OF_WEEK = [ 'SUNDAY', 'MONDAY', 'TUESDAY', 'WEDNESDAY', 'THURSDAY', 'FRIDAY', 'SATURDAY' ]; // Helper function to create weekly recurring frequency configuration function createWeeklyRecurringFrequency(daysOfWeek, occurrence = 1) { return { weekly: { daysOfWeek: daysOfWeek, // Array of days, e.g., ['MONDAY', 'FRIDAY'] occurrence: occurrence // Repeat every [x] weeks (default: 1) } }; } // Example: Charge every Monday and Friday const weeklyFrequency = createWeeklyRecurringFrequency( ['MONDAY', 'FRIDAY'], 1 ); // Use with ach.tokenize() await ach.tokenize({ intent: 'RECURRING_CHARGE', bankAccountId: 'bact:J71CYCQ789KnZnXi5HC', amount: '29.99', currency: 'USD', frequency: weeklyFrequency, startDate: '2024-12-21' }); ``` {% /tab %} {% tab id="Monthly" %} ```javascript // Helper function to create monthly recurring frequency configuration function createMonthlyRecurringFrequency(daysOfMonth, endOfMonth = false, occurrence = 1) { return { monthly: { occurrence: occurrence, // Repeat every [x] months (default: 1) days: { daysOfMonth: daysOfMonth, // Array of days, e.g., [1, 15] endOfMonth: endOfMonth // true to include last day of month } } }; } // Example 1: Charge on the 1st and 15th of every month const monthlyFrequency = createMonthlyRecurringFrequency( [1, 15], false, 1 ); // Example 2: Charge on the last day of every month only const endOfMonthFrequency = createMonthlyRecurringFrequency( [], // Empty array when charging only on last day true, // Charge on last day 1 ); // Example 3: Charge on the 15th AND last day of every month const midAndEndMonthFrequency = createMonthlyRecurringFrequency( [15], // Charge on the 15th true, // ALSO charge on last day 1 ); // Use with ach.tokenize() await ach.tokenize({ intent: 'RECURRING_CHARGE', bankAccountId: 'bact:J71CYCQ789KnZnXi5HC', amount: '49.99', currency: 'USD', frequency: midAndEndMonthFrequency, // Charges on 15th and last day startDate: '2024-12-21' }); ``` {% /tab %} {% tab id="Yearly" %} ```javascript // Valid month values for recurring payments const MONTHS = [ 'JANUARY', 'FEBRUARY', 'MARCH', 'APRIL', 'MAY', 'JUNE', 'JULY', 'AUGUST', 'SEPTEMBER', 'OCTOBER', 'NOVEMBER', 'DECEMBER' ]; // Helper function to create yearly recurring frequency configuration function createYearlyRecurringFrequency(months, daysOfMonth, endOfMonth = false, occurrence = 1) { return { yearly: { occurrence: occurrence, // Repeat every [x] years (default: 1) months: months, // Array of months, e.g., ['JANUARY', 'JULY'] days: { daysOfMonth: daysOfMonth, // Array of days, e.g., [1, 15] endOfMonth: endOfMonth // true for last day of month } } }; } // Example: Charge on the 15th of January and July every year const yearlyFrequency = createYearlyRecurringFrequency( ['JANUARY', 'JULY'], [15], false, 1 ); // Use with ach.tokenize() await ach.tokenize({ intent: 'RECURRING_CHARGE', bankAccountId: 'bact:J71CYCQ789KnZnXi5HC', amount: '99.99', currency: 'USD', frequency: yearlyFrequency, startDate: '2024-12-21' }); ``` {% /tab %} {% /tabset %} ### Step 3: Process Recurring Charges Use the BAUTH token to charge the account according to the authorized schedule. The payment process is identical to one-time payments, but you can reuse the BAUTH token for each scheduled charge without re-authorization. {% aside type="info" %} You don't need to charge immediately after obtaining the BAUTH token. Store it securely and use it when each scheduled payment is due. {% /aside %} ## Disable Bank Accounts While you cannot delete stored bank accounts, you can disable them to prevent future charges: {% aside type="important" %} Disabling is permanent for that specific bank account record. To charge the account again, the customer must complete the full onboarding flow as if linking a new account. {% /aside %} {% tabset %} {% tab id="Request" %} ```bash curl https://connect.squareupsandbox.com/v2/bank-accounts/bact:J71CYCQ789KnZnXi5HC/disable \ -X POST \ -H 'Authorization: Bearer {ACCESS-TOKEN}' \ -H 'Content-Type: application/json' ``` {% /tab %} {% tab id="Response" %} ```json { "bank_account": { "id": "bact:J71CYCQ789KnZnXi5HC", "status": "DISABLED", "debitable": false, "customer_id": "WC1GYWRIT7STE3GU4ZLQ3X76EF" } } ``` {% /tab %} {% /tabset %} ## Monitoring Bank Account Status Subscribe to these webhook events to track bank account lifecycle changes: - `bank_account.created` - Triggered when a customer links a new bank account - `bank_account.verified` - Triggered when account verification completes (account ready for payments) - `bank_account.disabled` - Triggered when an account is disabled These events help you update your UI, notify customers, and handle account status changes automatically. See [Webhooks API](https://developer.squareup.com/reference/square/webhooks) for setup instructions. ## Troubleshooting ### Payment Declined - Verify account status is `VERIFIED` before attempting charges - Ensure sufficient funds in customer's account - Check that BAUTH token hasn't expired (tokens have limited validity) ### Duplicate Bank Account Error - Check the `fingerprint` field of existing accounts before creating new ones - Use `ListBankAccounts` to find existing accounts for the customer ### Account Not Found - Verify you're using the correct `customer_id` when listing accounts - Ensure the bank account ID starts with "bact:" prefix - Check that the account hasn't been disabled ## Next Steps - Implement [webhook notifications](payments-api/webhooks) for payment status updates - Set up [error handling](payments-api/error-codes) for failed payments - Configure [testing scenarios](devtools/sandbox/payments) in the Sandbox environment --- # Common Pitfalls and Solutions > Source: https://developer.squareup.com/docs/checkout-api/common-pitfalls > Status: PUBLIC > Languages: All > Platforms: All Learn about some of the common pitfalls encountered when integrating your application with the Checkout API **Applies to:** [Checkout API](checkout-api) | [Orders API](orders-api/what-it-does) | [Payments API](payments-refunds) ## Overview This guide addresses the most common issues developers encounter when implementing the Checkout API, particularly around payment link behavior, Dashboard visibility, and order management. ## Critical Distinction: Dashboard vs API Payment Links {% aside type="important" %} Payment links created through the Square Dashboard and those created via the Checkout API behave very differently. Mixing up these two types is a common source of confusion. {% /aside %} ### Quick identification guide | Creation Method | URL Pattern | Reusability | Dashboard Visible | |----------------|-------------|-------------|-------------------| | **Square Dashboard** | `/checkout/{CHECKOUT_ID}` | Multiple uses | ✅ Yes | | **Checkout API** | `/order/{ORDER_ID}` | Single use only | ❌ No | ### Why this matters - **Customer confusion**: Expecting API links to work multiple times leads to failed payments - **Seller confusion**: Sellers looking for API-generated links in Dashboard won't find them - **Integration issues**: Treating these as interchangeable breaks payment flows ## Common pitfall #1: Expecting reusable payment links ### The problem API-generated payment links (`CreatePaymentLink`) are **single-use only**. After successful payment, the link shows a thank you page and cannot process another payment. ### The solution - Create a new payment link for each transaction - Never share the same API-generated link with multiple customers - If you need reusable links, direct sellers to create them via Square Dashboard ## Common pitfall #2: Looking for API links in dashboard ### The problem Sellers expect to see all payment links in their Square Dashboard, but API-generated links are **never visible there** by design. ### The solution Build your own management interface if sellers need to: - View active payment links - Track payment link usage - Cancel unused links ### Why Square does this - API links are meant for programmatic, one-time transactions - Showing thousands of single-use links would clutter the Dashboard - Dashboard links serve a different purpose (reusable, seller-managed) ## Common pitfall #3: Orders stuck in `OPEN` status ### The problem Orders with fulfillments created via payment links remain in `OPEN` status even after successful payment. They never automatically transition to `COMPLETED`. ### What happens 1. Customer pays successfully → Payment status: `COMPLETED` ✅ 2. Order status remains: `OPEN` ⚠️ 3. Fulfillment cannot be updated programmatically ❌ ### The solution **Current Limitation**: Orders must be manually completed in Square Dashboard's Orders Manager. **Workaround options**: 1. **Educate sellers**: Train them to manually complete orders in Orders Manager 1. **Track separately**: Maintain order completion status in your own system {% aside type="info" %} This is a known limitation. Square currently doesn't support programmatic fulfillment updates for `DIGITAL` type fulfillments created through payment links. {% /aside %} ## Common pitfall #4: Incorrect payment link deletion ### The problem Deleting payment links has different effects depending on timing, which can lead to unintended data loss or orphaned orders. ### Payment link deletion behavior matrix | When Deleted | Payment Link | Order Status | Payment | Use Case | |--------------|--------------|--------------|---------|----------| | **Before payment** | Deleted | `CANCELED` | None exists | Abandon cart cleanup | | **After payment** | Deleted | `OPEN` | `COMPLETED` | Clean up used links | ## Common pitfall #5: Missing order references ### The problem When orders created from payment links don't include `customer_id`, it's hard to associate orders with customers. ### The solution 1. Check for customer ID on order 1. If not on order, retrieve associated payment 1. Read customer ID on payment ## Quick decision tree ### "Should I use Dashboard or API payment links?" | Feature | Square Dashboard | Checkout API | |---------|-----------------|--------------| | **Link Reusability** | ✅ Multiple uses | ❌ Single use only | | **Creation Method** | Manual via UI | Programmatic via API | | **Dashboard Visibility** | ✅ Fully visible | ❌ Never visible | | **Best For** | Reusable products, donations | Dynamic orders, sessions | | **Fulfillment Updates** | ✅ Supported | ⚠️ Manual only | ### "My integration isn't working as expected" If your integration isn't working as expected, follow these debugging steps to find the most likely cause: 1. **Check the URL pattern** - Is it `/checkout` (Dashboard) or `/order` (API)? 2. **Verify single use** - Has this payment link already been used? 3. **Check Dashboard expectations** - Are you looking for API links in Dashboard? 4. **Review order status** - Are you expecting automatic completion with fulfillments? 5. **Examine deletion timing** - Are you deleting before or after payment? ## Best Practices Checklist ✅ **DO:** - Create new payment links for each transaction - Build your own tracking system for API-generated links - Handle order completion manually or track separately - Delete payment links after successful payment (if desired) - Retrieve customer info from payments, not orders ❌ **DON'T:** - Expect API payment links to be reusable - Look for API links in Square Dashboard - Expect orders with fulfillments to auto-complete - Assume Dashboard and API links work the same way {% aside type="warning" %} If you delete a payment link while a buyer is actively completing checkout, they will receive an error message and cannot complete their payment. The underlying order is automatically canceled. {% /aside %} ## See Also - [Checkout API Overview](checkout-api) - Complete API introduction - [Manage Checkout](checkout-api/manage-checkout) - CRUD operations for payment links - [Square Order Checkout](checkout-api/square-order-checkout) - Working with orders - [Guidelines and Limitations](checkout-api/guidelines-and-limitations) - Complete limitations reference --- # Exception Handling > Source: https://developer.squareup.com/docs/web-payments/exception-handling > Status: PUBLIC > Languages: All > Platforms: All Learn about how to handle common Web Payments SDK exceptions. **Applies to:** [Web Payments SDK](https://developer.squareup.com/reference/sdks/web/payments) {% subheading %}Learn about how to handle common Web Payments SDK exceptions.{% /subheading %} ## Overview Each of the [Web Payments SDK](https://developer.squareup.com/reference/sdks/web/payments) methods may throw JavaScript errors for certain exceptional circumstances. While most errors should be used to assist in diagnosing problems with initial SDK setup, there are a few key errors that benefit from a deeper understanding. This topic helps you learn more about these errors. The full list of Web Payments SDK errors can be found in the [SDK reference documentation](https://developer.squareup.com/reference/sdks/web/payments/errors). ## PaymentMethodUnsupportedError **Cause:** The `PaymentMethodUnsupportedError` error is thrown whenever a specific payment method is unusable. The `message` property of this error describes the reason in more detail. Common reasons the Web Payments SDK might throw this error include: - Your application is not set up to support this payment method. **Example:** - Most payment methods require registering them for your application in the developer console. - The payment method is not supported on the buyer's browser. **Example:** - Apple Pay is only supported on Safari browsers. - The payment method is temporarily disabled or otherwise inaccessible. **Example:** - Due to a third-party vendor outage, Square disables the payment method that requires it. This error is normally thrown when the individual payment method is initialized. **Solution:** - Any payment method that can safely be turned off should have logic to handle the `PaymentMethodUnsupportedError` error. **Example:** - ```javascript try { googlePay = await payments.googlePay(); } catch (e) { if (e.name === 'PaymentMethodUnsupportedError') { // disable the Google Pay method } else { // general exception handling for other error types } } ``` ## BrowserNotSupportedError **Cause:** The `BrowserNotSupportedError` is thrown when a buyer's browser cannot use the Web Payments SDK at all. This differs from `PaymentMethodUnsupportedError`, which indicates that specific payment methods aren't supported while the SDK itself remains functional. When `BrowserNotSupportedError` occurs, the buyer must switch to a different browser to complete their transaction. This error is normally thrown when the `payments()` method is called. **Solution:** This browser does not support the Web Payments SDK product. Any error messaging should direct the end-user to use another browser. **Example:** - ```javascript try { payments = await square.payments(); } catch (e) { if (e.name === 'BrowserNotSupportedError') { // provide error message directing the end-user to use another browser } else { // general exception handling } } ``` ## WebSdkEmbedError **Cause:** The Web Payments SDK must be run from a [fully secure HTTPS context](https://developer.mozilla.org/en-US/docs/Web/Security/Secure_Contexts). This is a standard security measure to protect end-users from MITM (man-in-the-middle) attackers. **Solution:** In order for a context to be considered secure, it must: - be hosted using HTTPS/TLS - use non-deprecated network security settings - if contained within another page, that page must also be HTTPS/TLS You can test your context using the JavaScript expression `window.isSecureContext`. --- # Transfer Orders API > Source: https://developer.squareup.com/docs/transfer-orders-api > Status: BETA > Languages: All > Platforms: All Learn about ordering and receiving items from another seller location by using the Transfer Orders API. **Applies to:** [Transfer Orders API](https://developer.squareup.com/reference/square/transfer-order-api) | [Inventory API](inventory-api/what-it-does) | [Catalog API](catalog-api/what-it-does) | [Locations API](locations-api) | [Team API](team/overview) {% subheading %}Learn about ordering and receiving items from another seller location by using the Transfer Orders API.{% /subheading %} ## Overview The [Transfer Orders API](https://developer.squareup.com/reference/square/transfer-order-api) lets you build applications that manage and track inventory movements between a seller's Square locations. When implementing inventory management features, you can use this API to programmatically handle stock transfers while maintaining consistency with the seller's catalog and inventory data. Building on the foundations of Square's Catalog API and Inventory API, the Transfer Orders API lets you add stock transfer capabilities to your inventory management applications. Your application can create transfer orders using the seller's existing catalog item variations, and Square automatically handles the corresponding inventory adjustments. This means you can implement transfer order functionality without building custom inventory tracking logic or maintaining separate item mappings. Square sellers who subscribe to [Square Plus](https://squareup.com/point-of-sale/retail/pricing) can create and update stock transfer orders from the [Square Stand](https://squareup.com/hardware/stand) or [Square Dashboard](https://app.squareup.com/dashboard). These transfer orders can be retrieved and updated with the Transfer Orders API. You can also create and update transfer orders from your application using the API. ## Prerequisites To implement the Transfer Orders API in your application, you need: - A Square account for testing. - OAuth 2.0 implementation with the following permissions: - `INVENTORY_READ` - `INVENTORY_WRITE` - Catalog items that are: - Active in the seller's catalog. - Enabled for inventory tracking. - Stocked at the source location. ## What is a transfer order? A transfer order is an object that tracks the movement of inventory items between a seller's locations. When creating a transfer order in your application, you specify: - The source location sending the items. - The destination location receiving the items. - An array of catalog item variations and their quantities. - Optional metadata such as expected delivery dates and tracking information. Square maintains the transfer order's status and automatically handles inventory adjustments when your application updates the transfer order through its lifecycle. ## Core features The Transfer Orders API provides endpoints that let you implement inventory transfer functionality in your applications, with automatic inventory adjustments handled by Square at each stage of the transfer lifecycle. You can: - Create transfer orders using existing catalog item variations. - Track the transfer status through a well-defined state machine. - Record item receipts with support for damaged or missing items. - Search and retrieve the transfer order history. - Let Square handle all inventory adjustments automatically. ## How transfer orders work ### Status lifecycle Your application interacts with transfer orders through a defined state machine. ![A chart showing the lifecycle of a transfer order from draft through completed.](//images.ctfassets.net/1nw4q0oohfju/729TmKCLrefXaggRUp9Jvf/55ceeb811d222037a1c89269d160110a/transfer_order_statuses.png) At several points in the transfer order lifecycle, Square creates Inventory API `InventoryChange` or `InventoryCount` records to document the movement of transferred items. 1. **DRAFT** - The initial state after creation. - You can modify or delete the order. - No inventory adjustments occur. - This is useful for staged order creation. 2. **STARTED** - The transfer is initiated. - Square decrements inventory from the source location. - An [InventoryAdjustment](https://developer.squareup.com/reference/square/objects/InventoryAdjustment) is created for each item to document its in-transit status. - Deletion is no longer allowed. - Call when the physical transfer begins. 3. **PARTIALLY_RECEIVED** - A partial receipt is recorded. - Your application has recorded some received quantities. - Remaining quantities stay in transit. - Additional receipt calls are allowed. - Use for multi-part deliveries. 4. **COMPLETED** - The transfer is finished. - All quantities are received or canceled. - No pending quantities remain. - Only metadata updates are allowed. - The final state for successful transfers. 5. **CANCELED** - The transfer is canceled. - Square returns pending quantities to their source. - Only metadata updates are allowed. - Use when a transfer won't complete. ### Inventory state transitions Square automatically handles these inventory state changes when your application updates a transfer order: 1. When you start a transfer: - Source location - `IN_STOCK` → `IN_TRANSIT` 2. When you record receipt: - Good condition - `IN_TRANSIT` → `IN_STOCK` (at its destination) - Damaged items - `IN_TRANSIT` → `WASTE` (at its destination) - Canceled items - `IN_TRANSIT` → `IN_STOCK` (returned to its source) ## Implementation use cases The Transfer Orders API supports various inventory management features you might need to implement: ### Inventory rebalancing - Automate stock redistribution between locations - Implement min/max inventory-level maintenance - Build demand-based transfer workflows ### Location management - Automate new location stocking - Handle location closure inventory redistribution - Support seasonal location transfers ### Event support - Manage temporary location transfers - Implement return workflows - Track event-specific inventory ### Distribution management - Build warehouse management features - Implement distribution center workflows - Support bulk transfer operations ## API integration points When implementing the Transfer Orders API, you interact with these related APIs: - **Catalog API** - Transfer order line items refer to the catalog item variations that are being transferred. - **Inventory API** - Check stock levels, adjustments, and transfers. - **Locations API** - Search for transfer orders by location ID. - **Team API** - Associate team members with transfer operations. ## Implementation steps To integrate the Transfer Orders API into your application: 1. Review the [Manage Transfer Orders](transfer-orders-api/transfer-orders-guide) for implementation basics. 2. Study the [Inventory Management Reporting](transfer-orders-api/inventory-management-reporting) for reporting on inventory transfer activity. 3. Follow the [Transfer Order Webhooks](transfer-orders-api/webhooks) guide to learn how to respond to inventory transfer events. ## Version and support The Transfer Orders API is in Beta. While developing your integration: - Monitor the release notes for updates. - Test extensively in the Square Sandbox environment. - Implement robust error handling. - Follow Square's versioning guidelines. - Consider future Beta phase changes. --- # Transfer Order Webhooks > Source: https://developer.squareup.com/docs/transfer-orders-api/webhooks > Status: BETA > Languages: All > Platforms: All Learn how to handle webhooks emitted by the Transfer Orders API on an inventory transfer event. **Applies to:** [Transfer Orders API](https://developer.squareup.com/reference/square/transfer-order-api) | [Webhook Subscriptions API](webhooks/webhook-subscriptions-api) {% subheading %}Learn how to handle webhooks emitted by the Transfer Orders API on an inventory transfer event.{% /subheading %} ## Overview The Transfer Orders API provides three webhook events that fire when transfer orders change: - **`transfer_order.created`** - Triggered when a new transfer order is created. - **`transfer_order.updated`** - Triggered when a transfer order is modified (items are added or removed, quantities are changed, statuses are updated, or items are received). - **`transfer_order.deleted`** - Triggered when a draft transfer order is deleted. For the Fleet Foot Running Co. multi-location inventory management system, these webhooks enable: - Immediate notifications to source location managers when another store requests their inventory. - Real-time updates when transfer quantities or items change. - Alerts when transfers are canceled or completed. - Automatic synchronization across all store management systems. For more information about how to implement Square API webhooks, see [Square Webhooks](webhooks/overview). ## Transfer order webhooks for multi-location notifications Fleet Foot Running Co. operates multiple store locations and managers need real-time visibility when other stores request inventory transfers from their location. By implementing transfer order webhooks, your application can automatically notify managers when transfer orders affecting their inventory are created, modified, or canceled—ensuring that they stay informed about stock movements across the entire retail network. ## Setting up webhook subscriptions To receive transfer order notifications across all Fleet Foot Running Co. locations, create a webhook subscription that monitors all three transfer order events: {% tabset %} {% tab id="Request" %} ```` {% /tab %} {% tab id="Response" %} ```json { "subscription": { "id": "wbhk_a7c08f3d-0b2e-4f91-b4f2-1234567890ab", "name": "Fleet Foot Transfer Order Notifications", "enabled": true, "event_types": [ "transfer_order.created", "transfer_order.updated", "transfer_order.deleted" ], "notification_url": "https://fleetfoot.example.com/webhooks/transfer-orders", "api_version": "2025-09-24", "signature_key": "1k3n4p5q6r7s8t9u0v1w2x3y4z5a6b7c", "created_at": "2025-10-09T10:00:00.000Z", "updated_at": "2025-10-09T10:00:00.000Z" } } ``` {% /tab %} {% /tabset %} {% aside type="important" %} Store the `signature_key` securely. You need it to verify that webhook notifications are genuinely from Square. {% /aside %} ## Webhook event payloads ### transfer_order.created event When the Olympia store creates a transfer order requesting New Balance FuelCell shoes from Tacoma, the webhook fires immediately. ```json { "merchant_id": "FLEET_FOOT_MERCHANT_ID", "type": "transfer_order.created", "event_id": "evt_123e4567-e89b-12d3-a456-426614174000", "created_at": "2025-10-09T10:15:00.000Z", "data": { "type": "transfer_order", "id": "ZXOLSDDQKOCBMTWY", "object": { "transfer_order": { "id": "ZXOLSDDQKOCBMTWY", "source_location_id": "EWVV7AYQC45SS", "destination_location_id": "90A9W5RRYD2GQ", "status": "DRAFT", "created_at": "2025-10-09T10:15:00.000Z", "updated_at": "2025-10-09T10:15:00.000Z", "expected_at": "2025-10-10T09:00:00Z", "created_by_team_member_id": "tm_olympia_manager", "line_items": [ { "transfer_order_line_uid": "HVU4OIW64ZMKPGTA", "item_variation_id": "XPBDUOG3VQBRASADVRSOYS67", "quantity_ordered": "5" }, { "transfer_order_line_uid": "JKL5OIW64ZMKPGTB", "item_variation_id": "R6C5CP6JXBZMA22FSXYVUC5W", "quantity_ordered": "3" } ], "version": 1 } } } } ``` ### transfer_order.updated event The webhook fires for various update scenarios: **Scenario 1: Adding items to a draft** ```json { "merchant_id": "FLEET_FOOT_MERCHANT_ID", "type": "transfer_order.updated", "event_id": "evt_223e4567-e89b-12d3-a456-426614174001", "created_at": "2025-10-09T10:30:00.000Z", "data": { "type": "transfer_order", "id": "ZXOLSDDQKOCBMTWY", "object": { "transfer_order": { "id": "ZXOLSDDQKOCBMTWY", "source_location_id": "EWVV7AYQC45SS", "destination_location_id": "90A9W5RRYD2GQ", "status": "DRAFT", "created_at": "2025-10-09T10:15:00.000Z", "updated_at": "2025-10-09T10:30:00.000Z", "expected_at": "2025-10-10T09:00:00Z", "created_by_team_member_id": "tm_olympia_manager", "line_items": [ { "transfer_order_line_uid": "HVU4OIW64ZMKPGTA", "item_variation_id": "XPBDUOG3VQBRASADVRSOYS67", "quantity_ordered": "5" }, { "transfer_order_line_uid": "JKL5OIW64ZMKPGTB", "item_variation_id": "R6C5CP6JXBZMA22FSXYVUC5W", "quantity_ordered": "3" }, { "transfer_order_line_uid": "MNO6OIW64ZMKPGTC", "item_variation_id": "J4H4PL3UGRAWCUDW3JS73LT6", "quantity_ordered": "4" } ], "version": 2 } } } } ``` **Scenario 2: Starting the transfer** ```json { "merchant_id": "FLEET_FOOT_MERCHANT_ID", "type": "transfer_order.updated", "event_id": "evt_323e4567-e89b-12d3-a456-426614174002", "created_at": "2025-10-09T11:00:00.000Z", "data": { "type": "transfer_order", "id": "ZXOLSDDQKOCBMTWY", "object": { "transfer_order": { "id": "ZXOLSDDQKOCBMTWY", "source_location_id": "EWVV7AYQC45SS", "destination_location_id": "90A9W5RRYD2GQ", "status": "STARTED", "created_at": "2025-10-09T10:15:00.000Z", "updated_at": "2025-10-09T11:00:00.000Z", "started_at": "2025-10-09T11:00:00.000Z", "expected_at": "2025-10-10T09:00:00Z", "tracking_number": "FLEET-042", "created_by_team_member_id": "tm_olympia_manager", "started_by_team_member_id": "tm_tacoma_staff", "line_items": [ { "transfer_order_line_uid": "HVU4OIW64ZMKPGTA", "item_variation_id": "XPBDUOG3VQBRASADVRSOYS67", "quantity_ordered": "5", "quantity_pending": "5", "quantity_received": "0", "quantity_damaged": "0", "quantity_canceled": "0" }, { "transfer_order_line_uid": "JKL5OIW64ZMKPGTB", "item_variation_id": "R6C5CP6JXBZMA22FSXYVUC5W", "quantity_ordered": "3", "quantity_pending": "3", "quantity_received": "0", "quantity_damaged": "0", "quantity_canceled": "0" }, { "transfer_order_line_uid": "MNO6OIW64ZMKPGTC", "item_variation_id": "J4H4PL3UGRAWCUDW3JS73LT6", "quantity_ordered": "4", "quantity_pending": "4", "quantity_received": "0", "quantity_damaged": "0", "quantity_canceled": "0" } ], "version": 3 } } } } ``` **Scenario 3: Receiving items (partial receipt)** ```json { "merchant_id": "FLEET_FOOT_MERCHANT_ID", "type": "transfer_order.updated", "event_id": "evt_423e4567-e89b-12d3-a456-426614174003", "created_at": "2025-10-10T09:30:00.000Z", "data": { "type": "transfer_order", "id": "ZXOLSDDQKOCBMTWY", "object": { "transfer_order": { "id": "ZXOLSDDQKOCBMTWY", "source_location_id": "EWVV7AYQC45SS", "destination_location_id": "90A9W5RRYD2GQ", "status": "PARTIALLY_RECEIVED", "created_at": "2025-10-09T10:15:00.000Z", "updated_at": "2025-10-10T09:30:00.000Z", "started_at": "2025-10-09T11:00:00.000Z", "expected_at": "2025-10-10T09:00:00Z", "tracking_number": "FLEET-042", "created_by_team_member_id": "tm_olympia_manager", "started_by_team_member_id": "tm_tacoma_staff", "received_by_team_member_id": "tm_olympia_receiver", "line_items": [ { "transfer_order_line_uid": "HVU4OIW64ZMKPGTA", "item_variation_id": "XPBDUOG3VQBRASADVRSOYS67", "quantity_ordered": "5", "quantity_pending": "0", "quantity_received": "4", "quantity_damaged": "1", "quantity_canceled": "0" }, { "transfer_order_line_uid": "JKL5OIW64ZMKPGTB", "item_variation_id": "R6C5CP6JXBZMA22FSXYVUC5W", "quantity_ordered": "3", "quantity_pending": "0", "quantity_received": "3", "quantity_damaged": "0", "quantity_canceled": "0" }, { "transfer_order_line_uid": "MNO6OIW64ZMKPGTC", "item_variation_id": "J4H4PL3UGRAWCUDW3JS73LT6", "quantity_ordered": "4", "quantity_pending": "2", "quantity_received": "2", "quantity_damaged": "0", "quantity_canceled": "0" } ], "version": 4 } } } } ``` ### transfer_order.deleted event When a draft transfer order is deleted. ```json { "merchant_id": "FLEET_FOOT_MERCHANT_ID", "type": "transfer_order.deleted", "event_id": "evt_523e4567-e89b-12d3-a456-426614174004", "created_at": "2025-10-09T10:45:00.000Z", "data": { "type": "transfer_order", "id": "ABC123DELETEEXAMPLE", "deleted": true } } ``` ## Processing webhook notifications Your webhook endpoint should process notifications and alert the appropriate store managers. ```javascript // Example webhook handler for Fleet Foot Running Co. app.post('/webhooks/transfer-orders', async (req, res) => { // Verify the webhook signature if (!verifyWebhookSignature(req)) { return res.status(401).send('Unauthorized'); } const event = req.body; const transferOrder = event.data.object?.transfer_order; try { switch(event.type) { case 'transfer_order.created': // Notify source location manager about new transfer request await notifySourceLocation(transferOrder); break; case 'transfer_order.updated': // Determine what changed and notify relevant parties await processTransferUpdate(transferOrder); break; case 'transfer_order.deleted': // Notify that transfer was canceled await notifyCancellation(event.data.id); break; } // Acknowledge receipt res.status(200).send('OK'); } catch (error) { console.error('Webhook processing error:', error); res.status(500).send('Internal Server Error'); } }); async function notifySourceLocation(transferOrder) { const sourceLocationId = transferOrder.source_location_id; const destinationLocationId = transferOrder.destination_location_id; // Look up location details const sourceLocation = await getLocationDetails(sourceLocationId); const destinationLocation = await getLocationDetails(destinationLocationId); // Get item details for the notification const itemDetails = await getItemDetails(transferOrder.line_items); // Send notification to source location manager const notification = { type: 'TRANSFER_REQUEST', priority: transferOrder.status === 'STARTED' ? 'HIGH' : 'MEDIUM', message: `${destinationLocation.name} has requested a transfer of ${itemDetails.totalItems} items`, details: { transferOrderId: transferOrder.id, requestingStore: destinationLocation.name, status: transferOrder.status, expectedDate: transferOrder.expected_at, items: itemDetails.breakdown } }; await sendManagerNotification(sourceLocation.manager_email, notification); } async function processTransferUpdate(transferOrder) { // Check what changed by examining the status if (transferOrder.status === 'STARTED') { // Transfer has been started - notify destination await notifyDestinationLocation(transferOrder, 'TRANSFER_STARTED'); } else if (transferOrder.status === 'PARTIALLY_RECEIVED') { // Some items received - notify source about discrepancies await checkForDiscrepancies(transferOrder); } else if (transferOrder.status === 'COMPLETED') { // Transfer complete - notify both locations await notifyTransferComplete(transferOrder); } else if (transferOrder.status === 'CANCELED') { // Transfer canceled - notify both locations await notifyTransferCanceled(transferOrder); } } ``` ## Best practices for webhook implementation ### Idempotent processing Transfer order webhooks might be delivered multiple times. Use the `event_id` to ensure that you process each event only once. ```javascript async function processWebhook(event) { // Check if we've already processed this event if (await hasProcessedEvent(event.event_id)) { return { status: 'already_processed' }; } // Process the event await handleTransferOrderEvent(event); // Mark as processed await markEventProcessed(event.event_id); } ``` ### Quick response times Respond to webhook notifications within one minute to avoid receiving a retry request from Square. ```javascript app.post('/webhooks/transfer-orders', async (req, res) => { // Immediately acknowledge receipt res.status(200).send('OK'); // Process asynchronously processWebhookAsync(req.body); }); ``` ### Signature verification Always verify webhook signatures to ensure that notifications are from Square. ```javascript function verifyWebhookSignature(request) { const signature = request.headers['x-square-hmacsha256-signature']; const body = JSON.stringify(request.body); const hash = crypto .createHmac('sha256', webhookSignatureKey) .update(request.headers['x-square-request-timestamp'] + body) .digest('base64'); return signature === hash; } ``` ### Location-specific routing Route notifications to the appropriate store managers based on their role. ```javascript async function routeNotification(transferOrder) { const notifications = []; // Always notify source location when items are requested if (transferOrder.source_location_id) { notifications.push({ locationId: transferOrder.source_location_id, type: 'OUTBOUND_TRANSFER', priority: 'HIGH' }); } // Notify destination for status updates if (transferOrder.status !== 'DRAFT') { notifications.push({ locationId: transferOrder.destination_location_id, type: 'INBOUND_TRANSFER', priority: 'MEDIUM' }); } return notifications; } ``` ## Testing webhook notifications Square provides a webhook tester in the Developer Console. To test your Fleet Foot Running Co. notification system: 1. Navigate to the **Webhooks** section in the Square Developer Console. 2. Select your transfer order webhook subscription. 3. Choose **Send test event** and choose the event type. 4. Verify that your endpoint receives the notification and that managers get alerts. You can also trigger real webhook events in the Square Sandbox environment by creating, updating, and deleting test transfer orders between your test locations. ## Webhook event flow example The following shows a typical sequence of webhook events for a complete transfer between Fleet Foot Running Co. stores: 1. **10:15 AM** - Olympia creates a draft transfer → `transfer_order.created` (the Tacoma manager is notified). 2. **10:30 AM** - Olympia adds more items → `transfer_order.updated` (the Tacoma manager is notified of the changes). 3. **11:00 AM** - Tacoma starts the transfer → `transfer_order.updated` (the Olympia manager is notified of the shipment). 4. **Next day 9:30 AM** - Olympia receives items → `transfer_order.updated` (both managers are notified of the completion). This webhook-driven notification system ensures that all Fleet Foot Running Co. locations stay synchronized and that managers have real-time visibility into inventory movements affecting their stores. --- # Channels API > Source: https://developer.squareup.com/docs/channels-api > Status: BETA > Languages: All > Platforms: All Learn how to retrieve a seller's sales, marketing, and fulfillment channels with the Channels API. **Applies to:** [Channels API](https://developer.squareup.com/reference/square/channels-api) {% subheading %}Learn how to use a Square API to retrieve channel information for a Square seller.{% /subheading %} {% toc hide=true /%} ## Overview The Square Channels API allows you to manage and retrieve information about channels associated with a seller's account. A channel represents the link between a seller and the platforms or services where they conduct business — the medium through which buyers and sellers interact. Conceptually, a channel serves as an abstraction or interface that can be implemented by various objects or entities within the Square ecosystem. A channel can be one of the following classes: * **Sales channel** - The mechanism that created an [Order](https://developer.squareup.com/reference/square/objects/order), order line items, or both. * **Marketing channel** - The mechanism that sourced the traffic that resulted in an order. This is generally limited to channels (internal or external) that directly pull product or service listings from the Square platform. * **Fulfillment channel** - The mechanism that fulfilled the Order. A [Channel](https://developer.squareup.com/reference/square/objects/Channel) object can be associated with various platform concepts through its `reference` field. The [Reference](https://developer.squareup.com/reference/square/objects/Reference) object includes: - `type` - The type of platform concept (required). - `id` - The ID of the referenced entity (required). {% aside type="info" %} The Channels API is not supported in the Sandbox. {% /aside %} ## Available endpoints The Channels API provides the following endpoints for retrieving channel information: - [BulkRetrieveChannels](https://developer.squareup.com/reference/square/channels-api/bulk-retrieve-channels) - Looks up multiple channels in a single request. - [ListChannels](https://developer.squareup.com/reference/square/channels-api/list-channels) - Retrieves a list of all channels with optional filtering. - [RetrieveChannel](https://developer.squareup.com/reference/square/channels-api/retrieve-channel) - Retrieves detailed information about a specific channel. ## Working with channels The Channels API gives your application the ability to report on the marketing, sales, and fulfillment channels available to a seller and which products and services are available through each channel. ## Use cases Integrating the Channels API with the Catalog and Location APIs allows for many use cases that a seller limit the visibility of catalog objects to channels such as a seller's locations or the point of sale used to make a sale. ### Item visibility The Channels API is essential for understanding how catalog items are distributed across a seller’s sales channels. When used alongside a catalog item variation’s `channels_integrations` properties, it enables applications to determine exactly where specific products can be sold or services can be offered. For example, consider a coffee shop that sells ceramic mugs. The Channels API lists all available sales channels (from physical store locations to online shops), while the catalog data identifies which mugs are available through each channel. Together, they allow applications to accurately display product availability, whether an item is limited to certain store locations, available at all POS systems, or listed online. Beyond catalog management, the API also helps applications discover enabled Square services (like gift cards or invoicing) and identify authorized third-party integrations. This allows applications to dynamically adapt their features to match the seller's capabilities and channel configuration. ### Menu visibility Unlike other Catalog objects, `CatalogCategory` objects cannot be directly assigned to locations. Instead, they use a **channel-based visibility system** to determine where menus appear across a seller's locations. #### Key Concepts - **Menu Categories**: `CatalogCategory` objects with `category_type` set to `MENU_CATEGORY` form the structure of menus created in the Square Dashboard - **Channels**: Represent different distribution points for catalog content, including physical locations - **Channel References**: Link channels to specific entities like locations ### How Menu Visibility Works When a seller creates and manages menus in the Square Dashboard: 1. They define menu categories (`CatalogCategory` objects) 2. They assign these categories to specific locations through the Dashboard interface 3. Behind the scenes, Square uses **channels** to manage this visibility ### Retrieving Location-Specific Menus via API To find which menu categories are visible at a specific location using the Catalog API: #### Step 1: Get the Seller's Channels First, retrieve all channels for the seller. Look for channels where `reference.type` equals `LOCATION` - these represent the seller's physical locations. **Example Response:** ```json { "channels": [ { "id": "CH_IT55vdjtd81xkZvF68NXQqPO54qnOXkyQRkiBQlQuYC", "merchant_id": "25PR2SBM8PV5D", "name": "FlamingRed", "version": 1, "reference": { "type": "LOCATION", "id": "E78VDDVFW1EYX" // This is the Location ID }, "status": "ACTIVE", "created_at": "2023-04-26T13:10:24.808Z", "updated_at": "2023-04-26T13:10:24.808Z" }, { "id": "CH_4s6dFPG7nd0Axgdcu8NXQqPO54qnOXkyQRkiBQlQuYC", "merchant_id": "25PR2SBM8PV5D", "name": "Seed Data test", "reference": { "type": "LOCATION", "id": "LFF3HK0DN6A61" }, "status": "ACTIVE" }, { "id": "CH_leic5ZC8kuuyAVAIQUlxuEG72EYFNBoxFCz5574e9945o", "merchant_id": "25PR2SBM8PV5D", "name": "Online store", "reference": { "type": "LOCATION", "id": "LRAXEJYQZ0JED" }, "status": "ACTIVE" } ] } ``` #### Step 2: Map Channels to Locations From the channels response, create a mapping: | Channel ID | Channel Name | Location ID | |------------|--------------|-------------| | `CH_IT55vdjtd81xkZvF68NXQqPO54qnOXkyQRkiBQlQuYC` | FlamingRed | `E78VDDVFW1EYX` | | `CH_4s6dFPG7nd0Axgdcu8NXQqPO54qnOXkyQRkiBQlQuYC` | Seed Data test | `LFF3HK0DN6A61` | | `CH_leic5ZC8kuuyAVAIQUlxuEG72EYFNBoxFCz5574e9945o` | Online store | `LRAXEJYQZ0JED` | #### Step 3: Check Menu Category Visibility When you retrieve a menu category, check its `channels` array to see which locations can display it. **Example: Breakfast Menu Category** ```json { "object": { "type": "CATEGORY", "id": "3H3ADZMYJU6U27JYO2PZFANQ", "updated_at": "2025-08-06T07:21:55.923Z", "created_at": "2025-06-02T18:24:46.958Z", "version": 1754464915923, "is_deleted": false, "present_at_all_locations": true, "category_data": { "name": "Breakfast menu", "category_type": "MENU_CATEGORY", "parent_category": { "ordinal": 137439154960 }, "is_top_level": true, "channels": [ "CH_IT55vdjtd81xkZvF68NXQqPO54qnOXkyQRkiBQlQuYC" // FlamingRed channel ], "online_visibility": false } } } ``` This breakfast menu category includes the channel ID `CH_IT55vdjtd81xkZvF68NXQqPO54qnOXkyQRkiBQlQuYC`, which corresponds to the "FlamingRed" location (`E78VDDVFW1EYX`). ## How to list channels To retrieve a list of all channels, use the `ListChannels` endpoint. This endpoint supports filtering and pagination. Filters are useful when a seller has many channels of various types. You can filter the channels list by: - `reference_type` - Filter by the type of reference associated with the channel. - `status` - Filter by channel status. The two filter types can be combined into an `AND` query but you cannot request multiple values for a given filter. For example, you can request channels of `reference_type` == `LOCATION` and `status` == `ACTIVE` but you cannot request channels of (`reference_type` == `LOCATION` OR `reference_type` == `KIOSK`) and `status` == `ACTIVE`. {% tabset %} {% tab id="Request" %} This example asks for a list of all active channel locations: ```` {% /tab %} {% tab id="Response" %} The response shows that this seller has two active locations. ```json { "channels": [ { "id": "CH_cjVl8mqAdQmv0hCdaF16agtdnoQ9JrkS4gEd5PlQuYC", "merchant_id": "0DCJPNSXMA29K", "name": "My Business", "version": 1, "reference": { "type": "LOCATION", "id": "90A9W5RRYD2GQ" }, "status": "ACTIVE", "created_at": "2023-04-07T09:55:48.777Z", "updated_at": "2023-04-07T09:55:48.777Z", "processed_gdpr_forget": false }, { "id": "CH_PxXxNVd4hBTcIBPErF16agtdnoQ9JrkS4gEd5PlQuYC", "merchant_id": "0DCJPNSXMA29K", "name": "My 2nd location", "version": 1, "reference": { "type": "LOCATION", "id": "EWVV7AYQC45SS" }, "status": "ACTIVE", "created_at": "2023-04-07T08:33:34.708Z", "updated_at": "2023-04-07T08:33:34.708Z", "processed_gdpr_forget": false } ] } ``` {% /tab %} {% /tabset %} ## How to bulk retrieve channels Use the `BulkRetrieveChannels` endpoint when you need to retrieve information about multiple specific channels at once. This is more efficient than making individual requests for each channel. The source for the channel ID list might be the results of a [SearchCatalogObjects](catalog-api/search-catalog-objects) query that returns a long list of catalog objects. Each object that has channel ID information can be parsed to get the referenced ID and then added to the `BulkRetrieveChannels` query. An application might also cache the most frequently referenced channel IDs and then run the `BulkRetrieveChannels` request to get the current state of these channels. {% tabset %} {% tab id="Request" %} In this example, the application caches the channel IDs for a seller's locations and the third-party applications that they're using. With one request, the application gets the channel information for these locations and applications. ```` {% /tab %} {% tab id="Response" %} ```json { "responses": { "CH_cjVl8mqAdQmv0hCdaF16agtdnoQ9JrkS4gEd5PlQuYC": { "channel": { "id": "CH_cjVl8mqAdQmv0hCdaF16agtdnoQ9JrkS4gEd5PlQuYC", "merchant_id": "0DCJPNSXMA29K", "name": "My Business", "version": 1, "reference": { "type": "LOCATION", "id": "90A9W5RRYD2GQ" }, "status": "ACTIVE", "created_at": "2023-04-07T09:55:48.777Z", "updated_at": "2023-04-07T09:55:48.777Z", "processed_gdpr_forget": false } }, "CH_PxXxNVd4hBTcIBPErF16agtdnoQ9JrkS4gEd5PlQuYC": { "channel": { "id": "CH_PxXxNVd4hBTcIBPErF16agtdnoQ9JrkS4gEd5PlQuYC", "merchant_id": "0DCJPNSXMA29K", "name": "My 2nd location", "version": 1, "reference": { "type": "LOCATION", "id": "EWVV7AYQC45SS" }, "status": "ACTIVE", "created_at": "2023-04-07T08:33:34.708Z", "updated_at": "2023-04-07T08:33:34.708Z", "processed_gdpr_forget": false } }, "CH_jL8ic7qvKWTHgpJOEKJghCeMP62C4VVP4pXfvJPd9945o": { "channel": { "id": "CH_jL8ic7qvKWTHgpJOEKJghCeMP62C4VVP4pXfvJPd9945o", "merchant_id": "0DCJPNSXMA29K", "name": "Point of Sale", "version": 1, "reference": { "type": "POINT_OF_SALE" }, "status": "ACTIVE", "created_at": "2025-06-12T01:11:46.200Z", "updated_at": "2025-06-12T01:11:46.200Z", "processed_gdpr_forget": false } }, "CH_KH0VQTd9HzLmOWRGrF16agtdnoQ9JrkS4gEd5PlQuYC": { "channel": { "id": "CH_KH0VQTd9HzLmOWRGrF16agtdnoQ9JrkS4gEd5PlQuYC", "merchant_id": "0DCJPNSXMA29K", "name": "paymentform_test", "version": 1, "reference": { "type": "OAUTH_APPLICATION", "id": "sq0ids-DjHCld9txNH4ekueiPQwyg" }, "status": "ACTIVE", "created_at": "2023-11-08T01:13:29.705Z", "updated_at": "2023-11-08T01:13:29.705Z", "processed_gdpr_forget": false } } } } ``` {% /tab %} {% /tabset %} Important notes: - You can request up to 100 channels in a single request. - The response includes a map of channel IDs to their corresponding channel information. - If any channels cannot be retrieved, the response includes error details for those specific channels. ## How to retrieve a single channel When you need information about a specific channel, use the `RetrieveChannel` endpoint. {% tabset %} {% tab id="Request" %} This example requests a channel whose ID is `CH_KH0VQTd9HzLmOWRGrF16agtdnoQ9JrkS4gEd5PlQuYC`. ```` {% /tab %} {% tab id="Response" %} The response shows that this seller is currently using a third-party application called "Kiosk Manager". ```json { "channel": { "id": "CH_KH0VQTd9HzLmOWRGrF16agtdnoQ9JrkS4gEd5PlQuYC", "merchant_id": "0DCJPNSXMA29K", "name": "Kiosk Manager, "version": 1, "reference": { "type": "OAUTH_APPLICATION", "id": "sq0ids-DjHCld9txNH4ekueiPQwyg" }, "status": "ACTIVE", "created_at": "2023-11-08T01:13:29.705Z", "updated_at": "2023-11-08T01:13:29.705Z", "processed_gdpr_forget": false } } ``` {% /tab %} {% /tabset %} ## Authentication requirements All Channels API endpoints: - Support OAuth 2.0 access tokens. - Require `CHANNELS_READ` permission for OAuth 2.0 authentication. ## Error handling Common error codes across all endpoints include: - `UNAUTHORIZED` - Invalid authentication credentials. - `FORBIDDEN` - Insufficient permissions. - `MISSING_REQUIRED_PARAMETER` - Required parameters are missing from the request. The `RetrieveChannel` endpoint might also return: - `NOT_FOUND` - The requested channel ID doesn't exist. ## API versions All endpoints are currently in Beta status except where noted. The current API version for these endpoints is `2025-10-16`. --- # Manage Transfer Orders > Source: https://developer.squareup.com/docs/transfer-orders-api/transfer-orders-guide > Status: BETA > Languages: All > Platforms: All Learn how to use the Transfer Orders API to manage inventory transfers between a seller's locations. **Applies to:** [Transfer Orders API](https://developer.squareup.com/reference/square/transfer-order-api) | [Inventory API](inventory-api/what-it-does) | [Catalog API](catalog-api/what-it-does) | [Locations API](locations-api) {% subheading %}Learn how to use the Transfer Orders API to manage inventory transfers between a seller's locations.{% /subheading %} ## Overview This guide walks you through a complete transfer order workflow using the Transfer Orders API. The example uses a fictional running shoe retailer with stores in Tacoma, WA and Olympia, WA, as they transfer inventory between locations. The example shows how to: * Create a draft transfer order. * Add or remove shoe variations from the draft. * Delete a draft if plans change. * Start the transfer when shoes leave Tacoma for Olympia. * Cancel an in-progress transfer if needed. * Receive the shipment at the Olympia store to complete the transfer. Each step includes real API requests and responses, demonstrating how the Transfer Orders API works with the Inventory API to track item movement, update stock states (from `IN_STOCK` to `IN_TRANSIT` to `IN_STOCK`), and maintain accurate inventory counts at both locations throughout the transfer lifecycle. For more details about the transfer order lifecycle, see [How transfer orders work](transfer-orders-api#how-transfer-orders-work). ## Create a draft order The Olympia store manager at Fleet Foot Running Co. needs to restock the popular New Balance FuelCell racing flat in multiple sizes. After checking the Square Dashboard, they find that the Tacoma store has sufficient stock to transfer half their inventory without creating shortages. The Olympia store manager asks the Tacoma store manager to create a draft transfer order. Keeping it in draft status allows time to review other inventory needs and potentially add more items to optimize the shipment. ### Get shoe catalog IDs Before creating the transfer order, the Tacoma store manager runs a [SearchCatalogItems](https://developer.squareup.com/reference/square/catalog-api/search-catalog-items) query to get the variation IDs for the New Balance FuelCell shoe variations in all sizes. {% tabset %} {% tab id="Request" %} ```` {% /tab %} {% tab id="Response" %} All sizes of the FuelCell shoe are returned in the response with an item variation per size. ```json { "items": [ { "type": "ITEM", "id": "M2GW24SH2CI65FSRAN3RX4YP", "updated_at": "2025-06-12T01:11:46.24Z", "created_at": "2020-02-05T18:42:15.88Z", "version": 1749690706240, "is_deleted": false, "present_at_all_locations": false, "present_at_location_ids": [ "90A9W5RRYD2GQ", "EWVV7AYQC45SS" ], "item_data": { "name": "New Balance FuelCell", "description": "Lightweight racing flat designed for speed. Features FuelCell foam technology for maximum energy return and a carbon fiber plate for propulsion. Perfect for race day and fast training runs.", "is_taxable": true, "tax_ids": [ "MD66EEZEZPG7JJTB7IXUT2DO" ], "variations": [ { "type": "ITEM_VARIATION", "id": "C4N5RAZPHMHUMW72DB5K73O5", "updated_at": "2025-06-12T01:11:46.24Z", "created_at": "2020-02-05T18:42:15.88Z", "version": 1749690706240, "is_deleted": false, "present_at_all_locations": false, "present_at_location_ids": [ "90A9W5RRYD2GQ", "EWVV7AYQC45SS" ], "item_variation_data": { "item_id": "M2GW24SH2CI65FSRAN3RX4YP", "name": "Size 7", "sku": "NBFC-7", "ordinal": 0, "pricing_type": "FIXED_PRICING", "price_money": { "amount": 18000, "currency": "USD" }, "location_overrides": [ { "location_id": "90A9W5RRYD2GQ", "track_inventory": true, "inventory_alert_type": "LOW_QUANTITY", "inventory_alert_threshold": 2 }, { "location_id": "EWVV7AYQC45SS", "track_inventory": true, "inventory_alert_type": "LOW_QUANTITY", "inventory_alert_threshold": 2 } ], "sellable": true, "stockable": true, "default_unit_cost": { "amount": 9000, "currency": "USD" }, "channels": [ "CH_YaVkJT09dd6NHfrvsF16agtdnoQ9JrkS4gEd5PlQuYC", "CH_jL8ic7qvKWTHgpJOEKJghCeMP62C4VVP4pXfvJPd9945o" ] } }, { "type": "ITEM_VARIATION", "id": "PLACNBU425UEWUYSCZ6DGK2N", "updated_at": "2025-06-12T01:11:46.24Z", "created_at": "2020-02-05T18:42:15.88Z", "version": 1749690706240, "is_deleted": false, "present_at_all_locations": false, "present_at_location_ids": [ "90A9W5RRYD2GQ", "EWVV7AYQC45SS" ], "item_variation_data": { "item_id": "M2GW24SH2CI65FSRAN3RX4YP", "name": "Size 7.5", "sku": "NBFC-7.5", "ordinal": 1, "pricing_type": "FIXED_PRICING", "price_money": { "amount": 18000, "currency": "USD" }, "location_overrides": [ { "location_id": "90A9W5RRYD2GQ", "track_inventory": true, "inventory_alert_type": "LOW_QUANTITY", "inventory_alert_threshold": 2 }, { "location_id": "EWVV7AYQC45SS", "track_inventory": true, "inventory_alert_type": "LOW_QUANTITY", "inventory_alert_threshold": 2 } ], "sellable": true, "stockable": true, "default_unit_cost": { "amount": 9000, "currency": "USD" }, "channels": [ "CH_YaVkJT09dd6NHfrvsF16agtdnoQ9JrkS4gEd5PlQuYC", "CH_jL8ic7qvKWTHgpJOEKJghCeMP62C4VVP4pXfvJPd9945o" ] } }, { "type": "ITEM_VARIATION", "id": "CGWLR42RT7WDRI52CZO6SQO3", "updated_at": "2025-06-12T01:11:46.24Z", "created_at": "2020-02-05T18:42:15.88Z", "version": 1749690706240, "is_deleted": false, "present_at_all_locations": false, "present_at_location_ids": [ "90A9W5RRYD2GQ", "EWVV7AYQC45SS" ], "item_variation_data": { "item_id": "M2GW24SH2CI65FSRAN3RX4YP", "name": "Size 8", "sku": "NBFC-8", "ordinal": 2, "pricing_type": "FIXED_PRICING", "price_money": { "amount": 18000, "currency": "USD" }, "location_overrides": [ { "location_id": "90A9W5RRYD2GQ", "track_inventory": true, "inventory_alert_type": "LOW_QUANTITY", "inventory_alert_threshold": 3 }, { "location_id": "EWVV7AYQC45SS", "track_inventory": true, "inventory_alert_type": "LOW_QUANTITY", "inventory_alert_threshold": 3 } ], "sellable": true, "stockable": true, "default_unit_cost": { "amount": 9000, "currency": "USD" }, "channels": [ "CH_YaVkJT09dd6NHfrvsF16agtdnoQ9JrkS4gEd5PlQuYC", "CH_jL8ic7qvKWTHgpJOEKJghCeMP62C4VVP4pXfvJPd9945o" ] } }, { "type": "ITEM_VARIATION", "id": "VWHK2HSJJKFM6RE2ETWZYUMD", "updated_at": "2025-06-12T01:11:46.24Z", "created_at": "2020-02-05T18:42:15.88Z", "version": 1749690706240, "is_deleted": false, "present_at_all_locations": false, "present_at_location_ids": [ "90A9W5RRYD2GQ", "EWVV7AYQC45SS" ], "item_variation_data": { "item_id": "M2GW24SH2CI65FSRAN3RX4YP", "name": "Size 8.5", "sku": "NBFC-8.5", "ordinal": 3, "pricing_type": "FIXED_PRICING", "price_money": { "amount": 18000, "currency": "USD" }, "location_overrides": [ { "location_id": "90A9W5RRYD2GQ", "track_inventory": true, "inventory_alert_type": "LOW_QUANTITY", "inventory_alert_threshold": 3 }, { "location_id": "EWVV7AYQC45SS", "track_inventory": true, "inventory_alert_type": "LOW_QUANTITY", "inventory_alert_threshold": 3 } ], "sellable": true, "stockable": true, "default_unit_cost": { "amount": 9000, "currency": "USD" }, "channels": [ "CH_YaVkJT09dd6NHfrvsF16agtdnoQ9JrkS4gEd5PlQuYC", "CH_jL8ic7qvKWTHgpJOEKJghCeMP62C4VVP4pXfvJPd9945o" ] } }, { "type": "ITEM_VARIATION", "id": "XPBDUOG3VQBRASADVRSOYS67", "updated_at": "2025-06-12T01:11:46.24Z", "created_at": "2020-02-05T18:42:15.88Z", "version": 1749690706240, "is_deleted": false, "present_at_all_locations": false, "present_at_location_ids": [ "90A9W5RRYD2GQ", "EWVV7AYQC45SS" ], "item_variation_data": { "item_id": "M2GW24SH2CI65FSRAN3RX4YP", "name": "Size 9", "sku": "NBFC-9", "ordinal": 4, "pricing_type": "FIXED_PRICING", "price_money": { "amount": 18000, "currency": "USD" }, "location_overrides": [ { "location_id": "90A9W5RRYD2GQ", "track_inventory": true, "inventory_alert_type": "LOW_QUANTITY", "inventory_alert_threshold": 4 }, { "location_id": "EWVV7AYQC45SS", "track_inventory": true, "inventory_alert_type": "LOW_QUANTITY", "inventory_alert_threshold": 4 } ], "sellable": true, "stockable": true, "default_unit_cost": { "amount": 9000, "currency": "USD" }, "channels": [ "CH_YaVkJT09dd6NHfrvsF16agtdnoQ9JrkS4gEd5PlQuYC", "CH_jL8ic7qvKWTHgpJOEKJghCeMP62C4VVP4pXfvJPd9945o" ] } }, { "type": "ITEM_VARIATION", "id": "R6C5CP6JXBZMA22FSXYVUC5W", "updated_at": "2025-06-12T01:11:46.24Z", "created_at": "2020-02-05T18:42:15.88Z", "version": 1749690706240, "is_deleted": false, "present_at_all_locations": false, "present_at_location_ids": [ "90A9W5RRYD2GQ", "EWVV7AYQC45SS" ], "item_variation_data": { "item_id": "M2GW24SH2CI65FSRAN3RX4YP", "name": "Size 9.5", "sku": "NBFC-9.5", "ordinal": 5, "pricing_type": "FIXED_PRICING", "price_money": { "amount": 18000, "currency": "USD" }, "location_overrides": [ { "location_id": "90A9W5RRYD2GQ", "track_inventory": true, "inventory_alert_type": "LOW_QUANTITY", "inventory_alert_threshold": 4 }, { "location_id": "EWVV7AYQC45SS", "track_inventory": true, "inventory_alert_type": "LOW_QUANTITY", "inventory_alert_threshold": 4 } ], "sellable": true, "stockable": true, "default_unit_cost": { "amount": 9000, "currency": "USD" }, "channels": [ "CH_YaVkJT09dd6NHfrvsF16agtdnoQ9JrkS4gEd5PlQuYC", "CH_jL8ic7qvKWTHgpJOEKJghCeMP62C4VVP4pXfvJPd9945o" ] } }, { "type": "ITEM_VARIATION", "id": "J4H4PL3UGRAWCUDW3JS73LT6", "updated_at": "2025-06-12T01:11:46.24Z", "created_at": "2020-02-05T18:42:15.88Z", "version": 1749690706240, "is_deleted": false, "present_at_all_locations": false, "present_at_location_ids": [ "90A9W5RRYD2GQ", "EWVV7AYQC45SS" ], "item_variation_data": { "item_id": "M2GW24SH2CI65FSRAN3RX4YP", "name": "Size 10", "sku": "NBFC-10", "ordinal": 6, "pricing_type": "FIXED_PRICING", "price_money": { "amount": 18000, "currency": "USD" }, "location_overrides": [ { "location_id": "90A9W5RRYD2GQ", "track_inventory": true, "inventory_alert_type": "LOW_QUANTITY", "inventory_alert_threshold": 5 }, { "location_id": "EWVV7AYQC45SS", "track_inventory": true, "inventory_alert_type": "LOW_QUANTITY", "inventory_alert_threshold": 5 } ], "sellable": true, "stockable": true, "default_unit_cost": { "amount": 9000, "currency": "USD" }, "channels": [ "CH_YaVkJT09dd6NHfrvsF16agtdnoQ9JrkS4gEd5PlQuYC", "CH_jL8ic7qvKWTHgpJOEKJghCeMP62C4VVP4pXfvJPd9945o" ] } }, { "type": "ITEM_VARIATION", "id": "GTPCF6YEFC6PJ2XCU2SVIAFY", "updated_at": "2025-06-12T01:11:46.24Z", "created_at": "2020-02-05T18:42:15.88Z", "version": 1749690706240, "is_deleted": false, "present_at_all_locations": false, "present_at_location_ids": [ "90A9W5RRYD2GQ", "EWVV7AYQC45SS" ], "item_variation_data": { "item_id": "M2GW24SH2CI65FSRAN3RX4YP", "name": "Size 10.5", "sku": "NBFC-10.5", "ordinal": 7, "pricing_type": "FIXED_PRICING", "price_money": { "amount": 18000, "currency": "USD" }, "location_overrides": [ { "location_id": "90A9W5RRYD2GQ", "track_inventory": true, "inventory_alert_type": "LOW_QUANTITY", "inventory_alert_threshold": 3 }, { "location_id": "EWVV7AYQC45SS", "track_inventory": true, "inventory_alert_type": "LOW_QUANTITY", "inventory_alert_threshold": 3 } ], "sellable": true, "stockable": true, "default_unit_cost": { "amount": 9000, "currency": "USD" }, "channels": [ "CH_YaVkJT09dd6NHfrvsF16agtdnoQ9JrkS4gEd5PlQuYC", "CH_jL8ic7qvKWTHgpJOEKJghCeMP62C4VVP4pXfvJPd9945o" ] } }, { "type": "ITEM_VARIATION", "id": "XVM5FR3JS4RFBXNCX6MHC76B", "updated_at": "2025-06-12T01:11:46.24Z", "created_at": "2020-02-05T18:42:15.88Z", "version": 1749690706240, "is_deleted": false, "present_at_all_locations": false, "present_at_location_ids": [ "90A9W5RRYD2GQ", "EWVV7AYQC45SS" ], "item_variation_data": { "item_id": "M2GW24SH2CI65FSRAN3RX4YP", "name": "Size 11", "sku": "NBFC-11", "ordinal": 8, "pricing_type": "FIXED_PRICING", "price_money": { "amount": 18000, "currency": "USD" }, "location_overrides": [ { "location_id": "90A9W5RRYD2GQ", "track_inventory": true, "inventory_alert_type": "LOW_QUANTITY", "inventory_alert_threshold": 3 }, { "location_id": "EWVV7AYQC45SS", "track_inventory": true, "inventory_alert_type": "LOW_QUANTITY", "inventory_alert_threshold": 3 } ], "sellable": true, "stockable": true, "default_unit_cost": { "amount": 9000, "currency": "USD" }, "channels": [ "CH_YaVkJT09dd6NHfrvsF16agtdnoQ9JrkS4gEd5PlQuYC", "CH_jL8ic7qvKWTHgpJOEKJghCeMP62C4VVP4pXfvJPd9945o" ] } }, { "type": "ITEM_VARIATION", "id": "TSIV2RS64IS26LUZA3HIL6TX", "updated_at": "2025-06-12T01:11:46.24Z", "created_at": "2020-02-05T18:42:15.88Z", "version": 1749690706240, "is_deleted": false, "present_at_all_locations": false, "present_at_location_ids": [ "90A9W5RRYD2GQ", "EWVV7AYQC45SS" ], "item_variation_data": { "item_id": "M2GW24SH2CI65FSRAN3RX4YP", "name": "Size 11.5", "sku": "NBFC-11.5", "ordinal": 9, "pricing_type": "FIXED_PRICING", "price_money": { "amount": 18000, "currency": "USD" }, "location_overrides": [ { "location_id": "90A9W5RRYD2GQ", "track_inventory": true, "inventory_alert_type": "LOW_QUANTITY", "inventory_alert_threshold": 2 }, { "location_id": "EWVV7AYQC45SS", "track_inventory": true, "inventory_alert_type": "LOW_QUANTITY", "inventory_alert_threshold": 2 } ], "sellable": true, "stockable": true, "default_unit_cost": { "amount": 9000, "currency": "USD" }, "channels": [ "CH_YaVkJT09dd6NHfrvsF16agtdnoQ9JrkS4gEd5PlQuYC", "CH_jL8ic7qvKWTHgpJOEKJghCeMP62C4VVP4pXfvJPd9945o" ] } }, { "type": "ITEM_VARIATION", "id": "ILBMJ7XFSMBAOVDU5FZIDBKO", "updated_at": "2025-06-12T01:11:46.24Z", "created_at": "2020-02-05T18:42:15.88Z", "version": 1749690706240, "is_deleted": false, "present_at_all_locations": false, "present_at_location_ids": [ "90A9W5RRYD2GQ", "EWVV7AYQC45SS" ], "item_variation_data": { "item_id": "M2GW24SH2CI65FSRAN3RX4YP", "name": "Size 12", "sku": "NBFC-12", "ordinal": 10, "pricing_type": "FIXED_PRICING", "price_money": { "amount": 18000, "currency": "USD" }, "location_overrides": [ { "location_id": "90A9W5RRYD2GQ", "track_inventory": true, "inventory_alert_type": "LOW_QUANTITY", "inventory_alert_threshold": 2 }, { "location_id": "EWVV7AYQC45SS", "track_inventory": true, "inventory_alert_type": "LOW_QUANTITY", "inventory_alert_threshold": 2 } ], "sellable": true, "stockable": true, "default_unit_cost": { "amount": 9000, "currency": "USD" }, "channels": [ "CH_YaVkJT09dd6NHfrvsF16agtdnoQ9JrkS4gEd5PlQuYC", "CH_jL8ic7qvKWTHgpJOEKJghCeMP62C4VVP4pXfvJPd9945o" ] } }, { "type": "ITEM_VARIATION", "id": "KWTYJITTTYSE56DMH4ZXPGDF", "updated_at": "2025-06-12T01:11:46.24Z", "created_at": "2020-02-05T18:42:15.88Z", "version": 1749690706240, "is_deleted": false, "present_at_all_locations": false, "present_at_location_ids": [ "90A9W5RRYD2GQ", "EWVV7AYQC45SS" ], "item_variation_data": { "item_id": "M2GW24SH2CI65FSRAN3RX4YP", "name": "Size 13", "sku": "NBFC-13", "ordinal": 11, "pricing_type": "FIXED_PRICING", "price_money": { "amount": 18000, "currency": "USD" }, "location_overrides": [ { "location_id": "90A9W5RRYD2GQ", "track_inventory": true, "inventory_alert_type": "LOW_QUANTITY", "inventory_alert_threshold": 1 }, { "location_id": "EWVV7AYQC45SS", "track_inventory": true, "inventory_alert_type": "LOW_QUANTITY", "inventory_alert_threshold": 1 } ], "sellable": true, "stockable": true, "default_unit_cost": { "amount": 9000, "currency": "USD" }, "channels": [ "CH_YaVkJT09dd6NHfrvsF16agtdnoQ9JrkS4gEd5PlQuYC", "CH_jL8ic7qvKWTHgpJOEKJghCeMP62C4VVP4pXfvJPd9945o" ] } } ], "product_type": "REGULAR", "skip_modifier_screen": false, "ecom_uri": "https://fleetfoot.square.site/product/new-balance-fuelcell", "ecom_available": true, "ecom_visibility": "VISIBLE", "categories": [ { "id": "RFECWJWLWUGARTRQ6ZXY4DG7", "ordinal": -2251799813685248 } ], "description_html": "

Lightweight racing flat designed for speed. Features FuelCell foam technology for maximum energy return and a carbon fiber plate for propulsion. Perfect for race day and fast training runs.

", "description_plaintext": "Lightweight racing flat designed for speed. Features FuelCell foam technology for maximum energy return and a carbon fiber plate for propulsion. Perfect for race day and fast training runs.", "channels": [ "CH_YaVkJT09dd6NHfrvsF16agtdnoQ9JrkS4gEd5PlQuYC", "CH_jL8ic7qvKWTHgpJOEKJghCeMP62C4VVP4pXfvJPd9945o" ], "is_archived": false, "requires_subscription_to_sell": false, "reporting_category": { "id": "RFECWJWLWUGARTRQ6ZXY4DG7", "ordinal": -2251799813685248 }, "is_alcoholic": false } } ], "cursor": "", "matched_variation_ids": [ "C4N5RAZPHMHUMW72DB5K73O5", "PLACNBU425UEWUYSCZ6DGK2N", "CGWLR42RT7WDRI52CZO6SQO3", "VWHK2HSJJKFM6RE2ETWZYUMD", "XPBDUOG3VQBRASADVRSOYS67", "R6C5CP6JXBZMA22FSXYVUC5W", "J4H4PL3UGRAWCUDW3JS73LT6", "GTPCF6YEFC6PJ2XCU2SVIAFY", "XVM5FR3JS4RFBXNCX6MHC76B", "TSIV2RS64IS26LUZA3HIL6TX", "ILBMJ7XFSMBAOVDU5FZIDBKO", "KWTYJITTTYSE56DMH4ZXPGDF" ] } ``` {% /tab %} {% /tabset %} ### Create the draft transfer order The Tacoma store manager uses your application to call [CreateTransferOrder](https://developer.squareup.com/reference/square/transfer-order-api/create-transfer-order) to create a draft transfer order for pairs of FuelCell shoes in sizes 8, 8.5, 9, and 9.5. {% tabset %} {% tab id="Request" %} ```` {% /tab %} {% tab id="Response" %} ```json { "transfer_order": { "id": "EXAMPLE_TRANSFER_ORDER_ID_123", "source_location_id": "TACOMA_STORE_LOCATION_ID", "destination_location_id": "OLYMPIA_STORE_LOCATION_ID", "status": "DRAFT", "created_at": "2025-01-15T10:30:00Z", "updated_at": "2025-01-15T10:30:00Z", "expected_at": "2025-11-09T05:00:00Z", "notes": "Example transfer order for men's New Balance FuelCells to Olympia", "tracking_number": "TRACK123456789", "created_by_team_member_id": "EXAMPLE_TEAM_MEMBER_ID_789", "line_items": [ { "transfer_order_line_uid": "1", "item_variation_id": "CGWLR42RT7WDRI52CZO6SQO3", "quantity_ordered": "1", "quantity_pending": "1", "quantity_received": "0", "quantity_damaged": "0", "quantity_canceled": "0" }, { "transfer_order_line_uid": "2", "item_variation_id": "VWHK2HSJJKFM6RE2ETWZYUMD", "quantity_ordered": "1", "quantity_pending": "1", "quantity_received": "0", "quantity_damaged": "0", "quantity_canceled": "0" }, { "transfer_order_line_uid": "3", "item_variation_id": "XPBDUOG3VQBRASADVRSOYS67", "quantity_ordered": "1", "quantity_pending": "1", "quantity_received": "0", "quantity_damaged": "0", "quantity_canceled": "0" }, { "transfer_order_line_uid": "4", "item_variation_id": "R6C5CP6JXBZMA22FSXYVUC5W", "quantity_ordered": "1", "quantity_pending": "1", "quantity_received": "0", "quantity_damaged": "0", "quantity_canceled": "0" } ], "version": 1753109537351 } } ``` {% /tab %} {% /tabset %} ## Update a draft transfer order The Olympia store manager gets a call from the local high school track coach asking for women's racing flats for their 5,000 meter runners. There isn't enough stock in the needed sizes so the manager adds the women's FuelCell shoes to the draft transfer order. Your application calls the [UpdateTransferOrder](https://developer.squareup.com/reference/square/transfer-order-api/update-transfer-order) endpoint. The following example makes the request with the ID of the transfer order to update, its current version number, and the new line item to add: {% tabset %} {% tab id="Request" %} ```` {% /tab %} {% tab id="Response" %} The updated transfer order has a new line item for the women's shoe in size 9 and an incremented version number. ```json { "transfer_order": { "id": "EXAMPLE_TRANSFER_ORDER_ID_123", "source_location_id": "TACOMA_STORE_LOCATION_ID", "destination_location_id": "OLYMPIA_STORE_LOCATION_ID", "status": "DRAFT", "created_at": "2025-01-15T10:30:00Z", "updated_at": "2025-01-15T10:30:00Z", "expected_at": "2025-11-09T05:00:00Z", "notes": "Example transfer order for men's New Balance FuelCells to Olympia", "tracking_number": "TRACK123456789", "created_by_team_member_id": "EXAMPLE_TEAM_MEMBER_ID_789", "line_items": [ { "transfer_order_line_uid": "1", "item_variation_id": "CGWLR42RT7WDRI52CZO6SQO3", "quantity_ordered": "1", "quantity_pending": "1", "quantity_received": "0", "quantity_damaged": "0", "quantity_canceled": "0" }, { "transfer_order_line_uid": "2", "item_variation_id": "VWHK2HSJJKFM6RE2ETWZYUMD", "quantity_ordered": "1", "quantity_pending": "1", "quantity_received": "0", "quantity_damaged": "0", "quantity_canceled": "0" }, { "transfer_order_line_uid": "3", "item_variation_id": "XPBDUOG3VQBRASADVRSOYS67", "quantity_ordered": "1", "quantity_pending": "1", "quantity_received": "0", "quantity_damaged": "0", "quantity_canceled": "0" }, { "transfer_order_line_uid": "4", "item_variation_id": "R6C5CP6JXBZMA22FSXYVUC5W", "quantity_ordered": "1", "quantity_pending": "1", "quantity_received": "0", "quantity_damaged": "0", "quantity_canceled": "0" }, { "transfer_order_line_uid": "5", "item_variation_id": "M2GW24SH2CI65FSRAN3RX4YP", "quantity_ordered": "2", "quantity_pending": "2", "quantity_received": "0", "quantity_damaged": "0", "quantity_canceled": "0" } ], "version": 17531095353343 } } ``` {% /tab %} {% /tabset %} ## Delete a draft transfer order If the Olympia store manager decides to cancel their request for the shoe transfer, your application uses the following [DeleteTransferOrder](https://developer.squareup.com/reference/square/transfer-order-api/delete-transfer-order) endpoint call to delete the transfer order: {% tabset %} {% tab id="Request" %} ```` {% /tab %} {% tab id="Response" %} When the order is deleted, the response shows an empty object. The transfer order is deleted as well. ```json {} ``` {% /tab %} {% /tabset %} ## Start a transfer Now that the Olympia store manager is satisfied with the list of shoes to be transferred, they let the Tacoma store know that there are no additional shoes to be transferred. The Tacoma store manager starts the transfer order using the [StartTransferOrder](https://developer.squareup.com/reference/square/transfer-order-api/start-transfer-order) endpoint, prints a physical copy of the transfer using your application, and asks their shipping department to send the shoes to Olympia. {% tabset %} {% tab id="Request" %} ```` {% /tab %} {% tab id="Response" %} The response contains the newly started order. The `status` is now `STARTED` and the version number is incremented. ```json { "transfer_order": { "id": "EXAMPLE_TRANSFER_ORDER_ID_123", "source_location_id": "TACOMA_STORE_LOCATION_ID", "destination_location_id": "OLYMPIA_STORE_LOCATION_ID", "status": "STARTED", "created_at": "2025-01-15T10:30:00Z", "updated_at": "2025-01-15T10:30:00Z", "expected_at": "2025-11-09T05:00:00Z", "notes": "Example transfer order for men's New Balance FuelCells to Olympia", "tracking_number": "TRACK123456789", "created_by_team_member_id": "EXAMPLE_TEAM_MEMBER_ID_789", "line_items": [ { "transfer_order_line_uid": "1", "item_variation_id": "CGWLR42RT7WDRI52CZO6SQO3", "quantity_ordered": "1", "quantity_pending": "1", "quantity_received": "0", "quantity_damaged": "0", "quantity_canceled": "0" }, { "transfer_order_line_uid": "2", "item_variation_id": "VWHK2HSJJKFM6RE2ETWZYUMD", "quantity_ordered": "1", "quantity_pending": "1", "quantity_received": "0", "quantity_damaged": "0", "quantity_canceled": "0" }, { "transfer_order_line_uid": "3", "item_variation_id": "XPBDUOG3VQBRASADVRSOYS67", "quantity_ordered": "1", "quantity_pending": "1", "quantity_received": "0", "quantity_damaged": "0", "quantity_canceled": "0" }, { "transfer_order_line_uid": "4", "item_variation_id": "R6C5CP6JXBZMA22FSXYVUC5W", "quantity_ordered": "1", "quantity_pending": "1", "quantity_received": "0", "quantity_damaged": "0", "quantity_canceled": "0" }, { "transfer_order_line_uid": "5", "item_variation_id": "M2GW24SH2CI65FSRAN3RX4YP", "quantity_ordered": "2", "quantity_pending": "2", "quantity_received": "0", "quantity_damaged": "0", "quantity_canceled": "0" } ], "version": 19331095353343 } } ``` {% /tab %} {% /tabset %} Now that the transfer order has started, it can no longer be deleted. Instead, the order can be canceled and any shoes that haven't been received by the Olympia store are returned to inventory in Tacoma. ## Cancel a transfer order Unlike a draft transfer order, which can be deleted, a transfer order that is started and potentially even partially received can be only be canceled or completed. When canceled, any non-received items are returned to the source location's inventory. Any already received items remain at the receiving location. Call the [CancelTransferOrder](https://developer.squareup.com/reference/square/transfer-order-api/cancel-transfer-order) endpoint to cancel the transfer order. {% tabset %} {% tab id="Request" %} ```` {% /tab %} {% tab id="Response" %} The canceled order is returned with the `status` of `CANCELED` and an incremented version number. ```json { "transfer_order": { "id": "EXAMPLE_TRANSFER_ORDER_ID_123", "source_location_id": "TACOMA_STORE_LOCATION_ID", "destination_location_id": "OLYMPIA_STORE_LOCATION_ID", "status": "CANCELED", "created_at": "2025-01-15T10:30:00Z", "updated_at": "2025-01-15T10:30:00Z", "expected_at": "2025-11-09T05:00:00Z", "notes": "Example transfer order for men's New Balance FuelCells to Olympia", "tracking_number": "TRACK123456789", "created_by_team_member_id": "EXAMPLE_TEAM_MEMBER_ID_789", "line_items": [ { "transfer_order_line_uid": "1", "item_variation_id": "CGWLR42RT7WDRI52CZO6SQO3", "quantity_ordered": "1", "quantity_pending": "0", "quantity_received": "0", "quantity_damaged": "0", "quantity_canceled": "1" }, { "transfer_order_line_uid": "2", "item_variation_id": "VWHK2HSJJKFM6RE2ETWZYUMD", "quantity_ordered": "1", "quantity_pending": "0", "quantity_received": "0", "quantity_damaged": "0", "quantity_canceled": "1" }, { "transfer_order_line_uid": "3", "item_variation_id": "XPBDUOG3VQBRASADVRSOYS67", "quantity_ordered": "1", "quantity_pending": "0", "quantity_received": "0", "quantity_damaged": "0", "quantity_canceled": "1" }, { "transfer_order_line_uid": "4", "item_variation_id": "R6C5CP6JXBZMA22FSXYVUC5W", "quantity_ordered": "1", "quantity_pending": "0", "quantity_received": "0", "quantity_damaged": "0", "quantity_canceled": "1" }, { "transfer_order_line_uid": "5", "item_variation_id": "M2GW24SH2CI65FSRAN3RX4YP", "quantity_ordered": "2", "quantity_pending": "0", "quantity_received": "0", "quantity_damaged": "0", "quantity_canceled": "2" } ], "version": 19331095353343 } } ``` {% /tab %} {% /tabset %} ## Receive goods At the Olympia store, the manager opens your application to acknowledge the receipt of all pairs of shoes except for the women's shoes that Tacoma didn't send. The Olympia store manager decided to cancel the transfer of the two pairs of women's shoes. The call to the [ReceiveTransferOrder](https://developer.squareup.com/reference/square/transfer-order-api/receive-transfer-order) endpoint includes a list of [TransferOrderGoodsReceiptLineItem](https://developer.squareup.com/reference/square/objects/TransferOrderGoodsReceiptLineItem) objects, one for each item variation in the transfer order. You put the actual count of items received, damaged in transit, or canceled in these objects. {% tabset %} {% tab id="Request" %} This receipt request references the `uid` values from the transfer order line items to be received. ```` {% /tab %} {% tab id="Response" %} The completed transfer order is returned. The new `status` is `COMPLETED`, the version is incremented, and the quantity status for each line item is updated to show that no line items are pending, four line items are received, and one line item is canceled. ```json { "transfer_order": { "id": "EXAMPLE_TRANSFER_ORDER_ID_123", "source_location_id": "TACOMA_STORE_LOCATION_ID", "destination_location_id": "OLYMPIA_STORE_LOCATION_ID", "status": "COMPLETED", "created_at": "2025-01-15T10:30:00Z", "updated_at": "2025-01-15T10:30:00Z", "expected_at": "2025-11-09T05:00:00Z", "notes": "Example transfer order for men's New Balance FuelCells to Olympia", "tracking_number": "TRACK123456789", "created_by_team_member_id": "EXAMPLE_TEAM_MEMBER_ID_789", "line_items": [ { "transfer_order_line_uid": "1", "item_variation_id": "CGWLR42RT7WDRI52CZO6SQO3", "quantity_ordered": "1", "quantity_pending": "0", "quantity_received": "1", "quantity_damaged": "0", "quantity_canceled": "0" }, { "transfer_order_line_uid": "2", "item_variation_id": "VWHK2HSJJKFM6RE2ETWZYUMD", "quantity_ordered": "1", "quantity_pending": "0", "quantity_received": "1", "quantity_damaged": "0", "quantity_canceled": "0" }, { "transfer_order_line_uid": "3", "item_variation_id": "XPBDUOG3VQBRASADVRSOYS67", "quantity_ordered": "1", "quantity_pending": "0", "quantity_received": "1", "quantity_damaged": "0", "quantity_canceled": "0" }, { "transfer_order_line_uid": "4", "item_variation_id": "R6C5CP6JXBZMA22FSXYVUC5W", "quantity_ordered": "1", "quantity_pending": "0", "quantity_received": "1", "quantity_damaged": "0", "quantity_canceled": "0" }, { "transfer_order_line_uid": "5", "item_variation_id": "M2GW24SH2CI65FSRAN3RX4YP", "quantity_ordered": "2", "quantity_pending": "0", "quantity_received": "0", "quantity_damaged": "0", "quantity_canceled": "2" } ], "version": 21331095353343 } } ``` {% /tab %} {% /tabset %} ## Get the transfer order status {% tabset %} {% tab id="Request" %} ```` {% /tab %} {% tab id="Response" %} ```json { "transfer_order": { "id": "EXAMPLE_TRANSFER_ORDER_ID_123", "source_location_id": "TACOMA_STORE_LOCATION_ID", "destination_location_id": "OLYMPIA_STORE_LOCATION_ID", "status": "STARTED", "created_at": "2025-01-15T10:30:00Z", "updated_at": "2025-01-15T10:30:00Z", "expected_at": "2025-11-09T05:00:00Z", "notes": "Example transfer order for men's New Balance FuelCells to Olympia", "tracking_number": "TRACK123456789", "created_by_team_member_id": "EXAMPLE_TEAM_MEMBER_ID_789", "line_items": [ { "transfer_order_line_uid": "1", "item_variation_id": "CGWLR42RT7WDRI52CZO6SQO3", "quantity_ordered": "1", "quantity_pending": "1", "quantity_received": "0", "quantity_damaged": "0", "quantity_canceled": "0" }, { "transfer_order_line_uid": "2", "item_variation_id": "VWHK2HSJJKFM6RE2ETWZYUMD", "quantity_ordered": "1", "quantity_pending": "1", "quantity_received": "0", "quantity_damaged": "0", "quantity_canceled": "0" }, { "transfer_order_line_uid": "3", "item_variation_id": "XPBDUOG3VQBRASADVRSOYS67", "quantity_ordered": "1", "quantity_pending": "1", "quantity_received": "0", "quantity_damaged": "0", "quantity_canceled": "0" }, { "transfer_order_line_uid": "4", "item_variation_id": "R6C5CP6JXBZMA22FSXYVUC5W", "quantity_ordered": "1", "quantity_pending": "1", "quantity_received": "0", "quantity_damaged": "0", "quantity_canceled": "0" }, { "transfer_order_line_uid": "5", "item_variation_id": "M2GW24SH2CI65FSRAN3RX4YP", "quantity_ordered": "2", "quantity_pending": "2", "quantity_received": "0", "quantity_damaged": "0", "quantity_canceled": "0" } ], "version": 19331095353343 } } ``` {% /tab %} {% /tabset %} ## Confirm the current stock levels at each location The managers of the Tacoma and Olympia stores might want to review the current stock levels of all FuelCell sizes after the transfer is complete. The Transfer Orders API only reports on the quantity of items being transferred and not the new stock levels at either location after the transfer. To learn about reporting on inventory stock levels after a transfer, see [Inventory Management Reporting](transfer-orders-api/inventory-management-reporting). ## See also * [Transfer Orders API](transfer-orders-api) * [Inventory Management Reporting](transfer-orders-api/inventory-management-reporting) * [Transfer Orders Webhooks](transfer-orders-api/webhooks) --- # Inventory Management Reporting > Source: https://developer.squareup.com/docs/transfer-orders-api/inventory-management-reporting > Status: BETA > Languages: All > Platforms: All Learn how to manage inventory transferred between a Square seller's locations. **Applies to:** [Transfer Orders API](https://developer.squareup.com/reference/square/transfer-order-api) | [Inventory API](inventory-api/what-it-does) | [Catalog API](catalog-api/what-it-does) | [Locations API](locations-api) | [Team API](team/overview) {% subheading %}Learn how to manage inventory transferred between a Square seller's locations.{% /subheading %} ## Overview As you build inventory management features for multi-location retailers like Fleet Foot Running Co., it's important to provide detailed reporting for transfer orders that extends beyond basic status tracking. Your application should account for real-world scenarios where the quantities received differ from the quantities ordered—such as when shoe boxes are damaged in transit, pairs go missing, or size counts are incorrect at either store. Square provides two complementary APIs to help you build robust transfer reporting: - The [Transfer Orders API](transfer-orders-api) gives you detailed transfer lifecycle data (what was ordered, received, damaged, or lost). For more information, see [Get the transfer order status](#get-the-transfer-order-status). - The [Inventory API](inventory-api/what-it-does) provides real-time stock positions at each location. This guide shows you how to leverage both APIs to build reports that answer your sellers' critical questions: - What's the status of each shoe size in my transfer? - How many pairs do I have at each store after the transfer completes? - Are there any size discrepancies I need to investigate? For more information, see [Get inventory adjustments, transfers, and counts](#get-inventory-adjustments-transfers-and-counts). ## Inventory management report strategies When Fleet Foot Running Co. completes a transfer order between their Tacoma and Olympia stores, the application needs visibility into two critical aspects: * **Transfer status details** - The size-by-size quantities by state (ordered, received, damaged, and lost). * **Location inventory balances** - The current stock levels at both the Tacoma and Olympia stores. ### Transfer Orders API (transfer status details) Use the Transfer Orders API when you need comprehensive transfer details: **What it provides:** - Quantities ordered, pending, received, damaged, or lost for each shoe size. - Transfer order summaries (dates, store locations, and status). - Line-item level granularity for each size variation. **Best for:** Audit trails, transfer reconciliation, and exception reporting ### Inventory API (current stock levels) Use the Inventory API to determine post-transfer inventory positions: **What it provides:** - Current available quantities at each store location. - Real-time stock levels after all adjustments. - Consolidated view across all inventory movements. **Best for:** Stock availability, replenishment decisions, and store balancing ### Recommended reporting strategy For complete transfer visibility at Fleet Foot Running Co., combine both approaches: 1. **During transfer** - Use the Transfer Orders API to track in-transit shoes and monitor transfer progress between stores. 2. **Post-transfer** - Use the Inventory API to confirm final stock positions at both Tacoma and Olympia locations. 3. **Reconciliation** - Compare transfer order quantities with inventory changes to identify any missing or damaged pairs. This dual-API approach ensures that you can answer both "What happened during the transfer?" and "What's our current inventory position?". These are critical questions for effective retail inventory management. ## Get the transfer order status You can call the [SearchTransferOrders](https://developer.squareup.com/reference/square/transfer-order-api/search-transfer-orders) endpoint, which returns an array of transfer order summaries (lightweight objects containing essential transfer metadata without line-item details). To retrieve the complete transfer order including line items for each shoe size, pass the summary's ID to the [RetrieveTransferOrder](https://developer.squareup.com/reference/square/transfer-order-api/retrieve-transfer-order) endpoint. {% tabset %} {% tab id="Request" %} The following query example returns any transfer order between Fleet Foot Running Co. stores that isn't in a draft state and is sorted by the date the order is created: ```` {% /tab %} {% tab id="Response" %} The returned objects don't include transferred line items (shoe sizes and quantities), so you need to call the [RetrieveTransferOrder](https://developer.squareup.com/reference/square/transfer-order-api/retrieve-transfer-order) endpoint for each transfer order as shown in this example: ```json { "transfer_orders": [ { "id": "VOE53GHMAKZSRJH4", "source_location_id": "EWVV7AYQC45SS", "destination_location_id": "90A9W5RRYD2GQ", "status": "COMPLETED", "created_at": "2025-10-07T21:53:35.528Z", "updated_at": "2025-10-07T21:54:08.278Z", "expected_at": "2025-10-07T21:52:00Z", "completed_at": "2025-10-07T21:54:08.278Z", "tracking_number": "FLEET-001", "created_by_team_member_id": "bxrMsKrMAMzWgYGGo8BL", "version": 1759874048278 }, { "id": "4TZGTNKKNB2VJPP7", "source_location_id": "90A9W5RRYD2GQ", "destination_location_id": "EWVV7AYQC45SS", "status": "COMPLETED", "created_at": "2025-10-08T18:04:48.673Z", "updated_at": "2025-10-08T18:07:43.655Z", "expected_at": "2025-10-08T18:04:00Z", "completed_at": "2025-10-08T18:07:43.655Z", "notes": "Return overstock sizes to Tacoma", "tracking_number": "FLEET-003", "created_by_team_member_id": "bxrMsKrMAMzWgYGGo8BL", "version": 1759946863655 }, { "id": "ZXOLSDDQKOCBMTWY", "source_location_id": "EWVV7AYQC45SS", "destination_location_id": "90A9W5RRYD2GQ", "status": "STARTED", "created_at": "2025-10-08T22:02:22.531Z", "updated_at": "2025-10-08T22:02:23.499Z", "expected_at": "2025-10-08T22:01:00Z", "created_by_team_member_id": "bxrMsKrMAMzWgYGGo8BL", "version": 1759960943499 } ] } ``` {% /tab %} {% /tabset %} With each transfer order returned by the previous query, you need to call `RetrieveTransferOrder`. {% tabset %} {% tab id="Request" %} ```bash curl https://connect.squareupsandbox.com/v2/transfer-orders/ZXOLSDDQKOCBMTWY \ -H 'Square-Version: 2025-09-24' \ -H 'Authorization: Bearer EAAAlkuWf9PJ7EEeV7PSMza45IqJuvI6iuPexW-yLoSx6-a6J5xOOwnNDOniKhUD' \ -H 'Content-Type: application/json' ``` {% /tab %} {% tab id="Response" %} The response shows the full transfer order with its line items for New Balance FuelCell racing flats: ```json { "transfer_order": { "id": "ZXOLSDDQKOCBMTWY", "source_location_id": "EWVV7AYQC45SS", "destination_location_id": "90A9W5RRYD2GQ", "status": "STARTED", "created_at": "2025-10-08T22:02:22.531Z", "updated_at": "2025-10-08T22:02:23.499Z", "expected_at": "2025-10-08T22:01:00Z", "created_by_team_member_id": "bxrMsKrMAMzWgYGGo8BL", "line_items": [ { "transfer_order_line_uid": "HVU4OIW64ZMKPGTA", "item_variation_id": "XPBDUOG3VQBRASADVRSOYS67", "quantity_ordered": "5", "quantity_pending": "5", "quantity_received": "0", "quantity_damaged": "0", "quantity_canceled": "0" } ], "version": 1759960943499 } } ``` In this example, you can see that five pairs of size 9 New Balance FuelCell shoes are in the transfer order and all five are still in transit from Tacoma to Olympia. {% /tab %} {% /tabset %} ## Get inventory adjustments, transfers, and counts When a transfer order is started and the inventory is received by Fleet Foot Running Co.'s Olympia store, inventory adjustments are created. To get those adjustments, call the [BatchRetrieveInventoryChanges](https://developer.squareup.com/reference/square/inventory-api/batch-retrieve-inventory-changes) endpoint to track the movement of shoes between stores: - 20 pairs of New Balance FuelCell (size 9) are received from the vendor at Tacoma (`InventoryAdjustment`) - 10 pairs are transferred from Tacoma to Olympia (`InventoryTransfer`) - 10 pairs are moved from `IN_STOCK` to `IN_TRANSIT` at the Tacoma store (`InventoryAdjustment`) After the 10 pairs are received at the Olympia store: - 10 pairs are moved from `IN_TRANSIT` to `IN_STOCK` at Olympia (`InventoryAdjustment`) ### Get transfers and adjustments {% tabset %} {% tab id="Request" %} This `BatchRetrieveInventoryChanges` request specifies both Fleet Foot Running Co. locations (Tacoma and Olympia) that are involved in the shoe transfer. The query filters for states of `IN_TRANSIT` or `IN_STOCK` and the adjustment type of `ADJUSTMENT`. The date range is set to October 7 to October 8 to capture the transfer activity. ```` {% /tab %} {% tab id="Response" %} The response shows the complete inventory movement for New Balance FuelCell shoes: 1. The initial receipt of 20 pairs from the vendor at the Tacoma store. 2. The transfer of 10 pairs from Tacoma to Olympia. 3. The state change from in-stock to in-transit for those 10 pairs at Tacoma. 4. The state change from in-transit to in-stock for those 10 pairs at Olympia. ```json { "changes": [ { "type": "ADJUSTMENT", "adjustment": { "id": "YYJ3H4F2UTCPVRIGOJU3TGII", "from_state": "ORDERED_FROM_VENDOR", "to_state": "IN_STOCK", "location_id": "EWVV7AYQC45SS", "catalog_object_id": "XPBDUOG3VQBRASADVRSOYS67", "catalog_object_type": "ITEM_VARIATION", "quantity": "20", "occurred_at": "2025-10-07T21:52:41.824Z", "created_at": "2025-10-07T21:52:41.912Z", "team_member_id": "bxrMsKrMAMzWgYGGo8BL", "purchase_order_id": "IBLBJ4UKV4E7XCNA" } }, { "type": "TRANSFER", "transfer": { "id": "IF3VZIJS4NP7N7ONWFO7JGQB_0", "state": "IN_TRANSIT", "from_location_id": "EWVV7AYQC45SS", "to_location_id": "90A9W5RRYD2GQ", "catalog_object_id": "XPBDUOG3VQBRASADVRSOYS67", "catalog_object_type": "ITEM_VARIATION", "quantity": "10", "occurred_at": "2025-10-07T21:53:36.246Z", "created_at": "2025-10-07T21:53:36.349Z" } }, { "type": "ADJUSTMENT", "adjustment": { "id": "IF3VZIJS4NP7N7ONWFO7JGQB_1", "from_state": "IN_STOCK", "to_state": "IN_TRANSIT", "location_id": "EWVV7AYQC45SS", "catalog_object_id": "XPBDUOG3VQBRASADVRSOYS67", "catalog_object_type": "ITEM_VARIATION", "quantity": "10", "occurred_at": "2025-10-07T21:53:36.246Z", "created_at": "2025-10-07T21:53:36.349Z" } }, { "type": "ADJUSTMENT", "adjustment": { "id": "4K5T6BICCZ3ZSPNSZDQC4E2R", "from_state": "IN_TRANSIT", "to_state": "IN_STOCK", "location_id": "90A9W5RRYD2GQ", "catalog_object_id": "XPBDUOG3VQBRASADVRSOYS67", "catalog_object_type": "ITEM_VARIATION", "quantity": "10", "occurred_at": "2025-10-07T21:54:08.14Z", "created_at": "2025-10-07T21:54:08.204Z" } }, { "type": "TRANSFER", "transfer": { "id": "3L4XQA4LNODN5EMXMCA6QCMS_0", "state": "IN_TRANSIT", "from_location_id": "90A9W5RRYD2GQ", "to_location_id": "EWVV7AYQC45SS", "catalog_object_id": "XPBDUOG3VQBRASADVRSOYS67", "catalog_object_type": "ITEM_VARIATION", "quantity": "10", "occurred_at": "2025-10-08T18:04:49.605Z", "created_at": "2025-10-08T18:04:49.742Z" } }, { "type": "ADJUSTMENT", "adjustment": { "id": "3L4XQA4LNODN5EMXMCA6QCMS_1", "from_state": "IN_STOCK", "to_state": "IN_TRANSIT", "location_id": "90A9W5RRYD2GQ", "catalog_object_id": "XPBDUOG3VQBRASADVRSOYS67", "catalog_object_type": "ITEM_VARIATION", "quantity": "10", "occurred_at": "2025-10-08T18:04:49.605Z", "created_at": "2025-10-08T18:04:49.742Z" } }, { "type": "ADJUSTMENT", "adjustment": { "id": "Z3TWWWYJGEJBINFW2QOP5Q7I", "from_state": "IN_TRANSIT", "to_state": "IN_STOCK", "location_id": "EWVV7AYQC45SS", "catalog_object_id": "XPBDUOG3VQBRASADVRSOYS67", "catalog_object_type": "ITEM_VARIATION", "quantity": "10", "occurred_at": "2025-10-08T18:07:43.436Z", "created_at": "2025-10-08T18:07:43.541Z" } } ] } ``` {% /tab %} {% /tabset %} ### Get inventory counts For each shoe size that Fleet Foot Running Co. wants to report on, call the [BatchRetrieveInventoryCounts](https://developer.squareup.com/reference/square/inventory-api/batch-retrieve-inventory-counts) endpoint. The response includes the current stock count at the specified store location for the inventory states requested. This example asks for the in-stock and in-transit counts at the Olympia store (`90A9W5RRYD2GQ`) for size 9 New Balance FuelCell shoes (`XPBDUOG3VQBRASADVRSOYS67`). {% aside type="tip" %} If you provide the New Balance FuelCell item ID instead of a specific size variation ID, the endpoint returns the counts for all available sizes of that shoe model. {% /aside %} {% tabset %} {% tab id="Request" %} ```` {% /tab %} {% tab id="Response" %} ```json { "counts": [ { "catalog_object_id": "XPBDUOG3VQBRASADVRSOYS67", "catalog_object_type": "ITEM_VARIATION", "state": "IN_STOCK", "location_id": "90A9W5RRYD2GQ", "quantity": "0", "calculated_at": "2025-10-08T18:04:49.762Z" }, { "catalog_object_id": "XPBDUOG3VQBRASADVRSOYS67", "catalog_object_type": "ITEM_VARIATION", "state": "IN_TRANSIT", "location_id": "90A9W5RRYD2GQ", "quantity": "5", "calculated_at": "2025-10-08T22:02:23.411Z" } ] } ``` This response shows that the Olympia store currently has 0 pairs in stock and 5 pairs in transit for size 9 New Balance FuelCell shoes. {% /tab %} {% /tabset %} ## Get the transferred catalog item variations To report on the actual shoe models and sizes being transferred between Fleet Foot Running Co. stores, you need to call [RetrieveCatalogObject](https://developer.squareup.com/reference/square/catalog-api/retrieve-catalog-object) as shown in the following example, which retrieves a catalog object by the transfer order line item `item_variation_id`: {% tabset %} {% tab id="Request" %} ```` {% /tab %} {% tab id="Response" %} The response returns the New Balance FuelCell size 9 shoe variation that's in transit: ```json { "object": { "type": "ITEM_VARIATION", "id": "XPBDUOG3VQBRASADVRSOYS67", "updated_at": "2025-10-08T18:04:52.448Z", "created_at": "2024-10-08T18:58:29.345Z", "version": 1759946692448, "is_deleted": false, "present_at_all_locations": false, "present_at_location_ids": [ "90A9W5RRYD2GQ", "EWVV7AYQC45SS" ], "item_variation_data": { "item_id": "M2GW24SH2CI65FSRAN3RX4YP", "name": "Size 9", "sku": "NBFC-9", "ordinal": 4, "pricing_type": "FIXED_PRICING", "price_money": { "amount": 18000, "currency": "USD" }, "location_overrides": [ { "location_id": "90A9W5RRYD2GQ", "track_inventory": true, "sold_out": true }, { "location_id": "EWVV7AYQC45SS", "track_inventory": true } ], "inventory_alert_type": "LOW_QUANTITY", "inventory_alert_threshold": 4, "sellable": true, "stockable": true, "default_unit_cost": { "amount": 9000, "currency": "USD" }, "channels": [ "CH_YaVkJT09dd6NHfrvsF16agtdnoQ9JrkS4gEd5PlQuYC", "CH_jL8ic7qvKWTHgpJOEKJghCeMP62C4VVP4pXfvJPd9945o" ], "item_variation_vendor_info_ids": [ "5NS65PAR7J47DNRYPEWYBLHS" ], "item_variation_vendor_infos": [ { "type": "ITEM_VARIATION_VENDOR_INFO", "id": "5NS65PAR7J47DNRYPEWYBLHS", "updated_at": "2025-10-07T21:51:48.731Z", "created_at": "2025-10-07T21:51:48.903Z", "version": 1759873908731, "is_deleted": false, "present_at_all_locations": false, "present_at_location_ids": [ "90A9W5RRYD2GQ", "EWVV7AYQC45SS" ], "item_variation_vendor_info_data": { "ordinal": 1, "price_money": { "amount": 9000, "currency": "USD" }, "item_variation_id": "XPBDUOG3VQBRASADVRSOYS67", "vendor_id": "N6ET64R24BFQ3YOT" } } ] } } } ``` Note that the Olympia location shows `"sold_out": true` because all inventory is currently in transit from Tacoma. {% /tab %} {% /tabset %} --- # Customer API Best Practices > Source: https://developer.squareup.com/docs/customers-api/best-practices > Status: PUBLIC > Languages: All > Platforms: All Learn about the best practices for creating an application that manages a seller's customer roster using the Customers API. **Applies to:** [Customers API](customers-api/what-it-does) | [Cards API](cards-api/overview) | [Web Payments SDK](web-payments/overview) | [In-App Payments SDK](in-app-payments-sdk/what-it-does) | [Payments API](payments-refunds) {% subheading %}Learn about the best practices for creating an application that manages a seller's customer roster using the Customers API.{% /subheading %} {% toc hide=true /%} ## Overview To be listed in the Square App Marketplace, applications must meet specific requirements aligned with the best practices outlined in this guide. While optional for apps not intended for the App Marketplace, following these practices will help you build more reliable and valuable solutions for Square sellers. {% aside type="info" %} These best practices complement, but don't replace, the comprehensive documentation available in the [Customers API](https://developer.squareup.com/docs/customers) documentation. {% /aside %} ## Core requirements The following requirements outline the essential implementations for managing customer data, processing payments, and storing card information. They're designed to prevent data inconsistencies, ensure accurate payment attribution, and uphold PCI compliance. Each requirement includes links to the relevant API documentation for further guidance. ### Customer data management #### Unique customer records Duplicate customers in the seller's roster can present challenges to their business and must be addressed manually by the seller or with the help of Square technical support. To avoid creating duplicate customers, you should: - Use unique identifiers (an email or phone number is recommended) when creating customers. - Implement logic to detect and prevent duplicate entries for the same customer. For more information, see [Create customer profiles](customers-api/use-the-api/keep-records#create-a-customer-profile). ### Payment integration Linking a payment to the customer who made it improves the accuracy of sales reporting and ensures that refunds are issued to the correct individual when needed. #### Customer ID integration - Always supply the correct `customer_id` when making payment-related API calls. - This applies to: - The Reader SDK. - The Point of Sale API. - Payment-related APIs. For more information, see [CreatePayment](${SQUARE_TECH_REF}/payments-api/create-payment#request__property-customer_id). ### Card-on-file requirements #### Terms of service requirements - Provide explicit Terms of Service/Privacy Policy stating the storage of credit card information. For more information, see [Cards API](cards-api/overview). #### Customer consent - Implement a checkbox mechanism to acquire customer consent for storing credit card details. - Ensure that consent is clearly documented and stored. For more information, see [Cards API](cards-api/overview). ## Implementation guidelines The following code examples and patterns demonstrate the correct implementation of customer creation and payment processing. Each section includes sample JSON payloads, required fields, and validation steps. Follow these patterns to ensure reliable customer data management and payment attribution. ### Creating customers Before creating a new customer, check to see whether a customer already exists with that email address or phone number. For more information see, [Create customer profiles](customers-api/use-the-api/keep-records#create-customer-profiles). #### Unique key implementation ```json { "customer": { "email_address": "customer@example.com", "phone_number": "+1-555-555-0123", "given_name": "John", "family_name": "Doe" }, "idempotency_key": "unique_idempotency_key" } ``` - Use an email address or phone number as a unique identifier. - Always include idempotency keys in create requests. - Validate contact information before submission. ### Payment integration When processing payments, include the `customer_id` in your `CreatePayment` request. This is required for card-on-file payments and recommended for all other payment types. Without a `customer_id`, Square attempts to match the customer using an email or phone number or creates a new customer record if no match is found. #### Customer ID usage ```json { "source_id": "card_nonce_or_token", "customer_id": "CUSTOMER_ID", "amount_money": { "amount": 1000, "currency": "USD" } } ``` - Include [customer_id](${SQUARE_TECH_REF}/objects/Payment#definition__property-customer_id) in all payment requests when available. - Validate that `customer_id` exists before making payment calls. - Handle cases where `customer_id` might be invalid. ## Best practices by feature This section details specific implementation patterns for key API features. Each feature includes code-level considerations and common pitfalls to avoid. These practices are based on real integration scenarios and help prevent issues like duplicate customer records or incomplete card storage compliance. ### Card on file Implementing card-on-file storage requires specific consent mechanisms and privacy policy components to maintain PCI compliance and protect customer data. #### Consent implementation - Display a clear consent checkbox. - Store consent records. - Include a consent timestamp. - Link to the Terms of Service. #### Privacy policy requirements - Clearly state your card storage policy. - Describe how customer data will be used. - Outline your data retention policies. - Explain customers’ rights and control over their data. ### Customer data management Poor customer data management leads to duplicate records, which breaks customer-based reporting, complicates Point of Sale lookups, and causes redundant customer notifications. #### Duplicate prevention - Check for existing customers before creating new records. - Use reference keys to link customers with external systems. - Implement strategies to merge duplicate customer records. - Perform regular data cleanup to maintain accuracy and consistency. ## Troubleshooting guide This guide addresses common integration issues related to customer data integrity and payment processing. Each issue includes identifiable symptoms, step-by-step resolution instructions, and code examples that illustrate effective error handling and recovery strategies. ### Common issues #### Duplicate customer records - Symptom: Multiple records for same customer. - Resolution: 1. Search for existing customers using email and phone number before creating a new record. 2. Use idempotency keys to prevent accidental duplicates. 3. Implement functionality to merge duplicate records when identified. #### Invalid customer IDs - Symptom: Payment failures due to `customer_id` issues. - Resolution: 1. Validate the `customer_id` before using it in requests. 2. If validation fails, implement a retry mechanism that includes a customer lookup. 3. Gracefully handle cases where the `customer_id` is expired or invalid, with appropriate error messaging and fallback logic. ## Monitoring recommendations Monitor key metrics and error patterns to ensure reliable customer operations and quickly detect integration issues. Each metric offers valuable insights into system health and API performance. Set up alerts for anomalies—particularly those related to customer creation and payment processing—to enable fast response and resolution. ### Key metrics #### Customer creation - Success rate - Duplicate detection rate - Error rates by type #### Payment integration - Customer ID validation success - Card-on-file usage rates - Consent-tracking metrics ### Error tracking #### Priority errors - Customer creation failures - Payment integration issues - Consent-recording failures #### Response time - API latency monitoring - Error resolution time - Customer lookup performance --- # Quickstart: Create and Manage Gift Cards with Customer Integration > Source: https://developer.squareup.com/docs/customers-api/quick-start > Status: PUBLIC > Languages: All > Platforms: All Learn how to create a new customer and process a payment for that customer using the Customers and Payments APIs. **Applies to:** [Customers API](customers-api/what-it-does) | [Gift Cards API](gift-cards/using-gift-cards-api) {% subheading %}Learn how to integrate the Customers API with the Gift Cards API to create or find customers and manage their gift cards.{% /subheading %} {% toc hide=true /%} ## Prerequisites Before you begin, you need the following: * A Square account (sign up for a free [developer account](https://squareup.com/signup) if you don't have one). * An access token for the Square API. For more information, see [Get Started](get-started). The following language-specific requirements are needed to run the code samples: {% tabset %} {% tab id="java" %} * Java 8 or later * Square Java SDK 35.0.0 or later * Gradle or Maven Add this dependency to your `build.gradle` file: ```groovy implementation 'com.squareup:square:35.0.0' ``` Or to your `pom.xml` file: ```xml com.squareup square 35.0.0 ``` {% /tab %} {% tab id="c#" %} * .NET 6.0 or later * Square .NET SDK 35.0.0 or later * NuGet package manager Install via NuGet: ```bash dotnet add package Square ``` {% /tab %} {% tab id="nodejs" %} * Node.js 14 or later * Square Node.js SDK 35.0.0 or later * npm or yarn Install via npm: ```bash npm install square ``` Or via yarn: ```bash yarn add square ``` {% /tab %} {% tab id="python" %} * Python 3.7 or later * Square Python SDK 35.0.0 or later * pip Install via pip: ```bash pip install squareup ``` {% /tab %} {% /tabset %} ## 1. Initialize the Square client Set up the Square client with your credentials. {% tabset %} {% tab id="java" %} ```java import com.squareup.square.SquareClient; import com.squareup.square.Environment; public class GiftCardService { private final SquareClient client; public GiftCardService(String accessToken) { client = new SquareClient.Builder() .environment(Environment.SANDBOX) .accessToken(accessToken) .build(); } } ``` {% /tab %} {% tab id="c#" %} ```csharp using Square; using Square.Models; public class GiftCardService { private readonly ISquareClient _client; public GiftCardService(string accessToken) { _client = new SquareClient.Builder() .Environment(Square.Environment.Sandbox) .AccessToken(accessToken) .Build(); } } ``` {% /tab %} {% tab id="nodejs" %} ```javascript const { Client, Environment } = require('square'); class GiftCardService { constructor(accessToken) { this.client = new Client({ accessToken: accessToken, environment: Environment.Sandbox }); } } ``` {% /tab %} {% tab id="python" %} ```python from square.client import Client from square.environment import Environment class GiftCardService: def __init__(self, access_token): self.client = Client( access_token=access_token, environment=Environment.SANDBOX ) ``` {% /tab %} {% /tabset %} ## 2. Search for an existing customer Search for a customer using their email address. {% tabset %} {% tab id="java" %} ```java public Customer findOrCreateCustomer(String firstName, String lastName, String emailAddress, String streetAddress) throws ApiException { SearchCustomersRequest searchRequest = new SearchCustomersRequest.Builder() .query(new CustomerQuery.Builder() .filter(new CustomerFilter.Builder() .emailAddress(new CustomerTextFilter.Builder() .exact(emailAddress) .build()) .build()) .build()) .build(); SearchCustomersResponse searchResponse = client.getCustomersApi() .searchCustomers(searchRequest); if (searchResponse.getCustomers() != null && !searchResponse.getCustomers().isEmpty()) { return searchResponse.getCustomers().get(0); } // Customer not found, create new one Address address = new Address.Builder() .addressLine1(streetAddress) .build(); CreateCustomerRequest createRequest = new CreateCustomerRequest.Builder() .idempotencyKey(UUID.randomUUID().toString()) .givenName(firstName) .familyName(lastName) .emailAddress(emailAddress) .address(address) .build(); CreateCustomerResponse createResponse = client.getCustomersApi() .createCustomer(createRequest); return createResponse.getCustomer(); } ``` {% /tab %} {% tab id="c#" %} ```csharp public async Task FindOrCreateCustomerAsync(string firstName, string lastName, string emailAddress, string streetAddress) { var searchRequest = new SearchCustomersRequest { Query = new CustomerQuery { Filter = new CustomerFilter { EmailAddress = new CustomerTextFilter { Exact = emailAddress } } } }; var searchResponse = await _client.CustomersApi.SearchCustomersAsync(searchRequest); if (searchResponse.Customers?.Any() == true) { return searchResponse.Customers[0]; } // Customer not found, create new one var address = new Address { AddressLine1 = streetAddress }; var createRequest = new CreateCustomerRequest { IdempotencyKey = Guid.NewGuid().ToString(), GivenName = firstName, FamilyName = lastName, EmailAddress = emailAddress, Address = address }; var createResponse = await _client.CustomersApi.CreateCustomerAsync(createRequest); return createResponse.Customer; } ``` {% /tab %} {% tab id="nodejs" %} ```javascript async findOrCreateCustomer(firstName, lastName, emailAddress, streetAddress) { const searchRequest = { query: { filter: { emailAddress: { exact: emailAddress } } } }; try { const searchResponse = await this.client.customersApi.searchCustomers(searchRequest); if (searchResponse.result.customers?.length > 0) { return searchResponse.result.customers[0]; } // Customer not found, create new one const createRequest = { idempotencyKey: crypto.randomUUID(), givenName: firstName, familyName: lastName, emailAddress: emailAddress, address: { addressLine1: streetAddress } }; const createResponse = await this.client.customersApi.createCustomer(createRequest); return createResponse.result.customer; } catch (error) { console.error('Error finding or creating customer:', error); throw error; } } ``` {% /tab %} {% tab id="python" %} ```python async def find_or_create_customer(self, first_name, last_name, email_address, street_address): search_request = { "query": { "filter": { "email_address": { "exact": email_address } } } } search_response = await self.client.customers.search_customers(search_request) if search_response.is_success() and search_response.body.get("customers"): return search_response.body["customers"][0] # Customer not found, create new one create_request = { "idempotency_key": str(uuid.uuid4()), "given_name": first_name, "family_name": last_name, "email_address": email_address, "address": { "address_line_1": street_address } } create_response = await self.client.customers.create_customer(create_request) return create_response.body["customer"] ``` {% /tab %} {% /tabset %} ## 3. Manage gift cards Create a new gift card or retrieve existing ones for the customer. {% tabset %} {% tab id="java" %} ```java public GiftCard createOrGetGiftCard(Customer customer, Money amount) throws ApiException { // First check for existing gift cards SearchGiftCardsRequest searchRequest = new SearchGiftCardsRequest.Builder() .query(new GiftCardQuery.Builder() .filter(new GiftCardFilter.Builder() .customerId(customer.getId()) .build()) .build()) .build(); SearchGiftCardsResponse searchResponse = client.getGiftCardsApi() .searchGiftCards(searchRequest); if (searchResponse.getGiftCards() != null && !searchResponse.getGiftCards().isEmpty()) { GiftCard existingCard = searchResponse.getGiftCards().get(0); // Load additional funds to existing card GiftCardActivity activity = new GiftCardActivity.Builder() .type("LOAD") .locationId("YOUR_LOCATION_ID") .giftCardId(existingCard.getId()) .loadActivityDetails( new GiftCardActivityLoad.Builder() .amountMoney(amount) .build()) .build(); CreateGiftCardActivityRequest activityRequest = new CreateGiftCardActivityRequest.Builder() .idempotencyKey(UUID.randomUUID().toString()) .giftCardActivity(activity) .build(); client.getGiftCardActivitiesApi().createGiftCardActivity(activityRequest); return existingCard; } // Create new gift card CreateGiftCardRequest createRequest = new CreateGiftCardRequest.Builder() .idempotencyKey(UUID.randomUUID().toString()) .locationId("YOUR_LOCATION_ID") .giftCard(new GiftCard.Builder() .type("DIGITAL") .customerId(customer.getId()) .build()) .build(); CreateGiftCardResponse createResponse = client.getGiftCardsApi() .createGiftCard(createRequest); GiftCard newCard = createResponse.getGiftCard(); // Activate the new card with initial balance GiftCardActivity activity = new GiftCardActivity.Builder() .type("ACTIVATE") .locationId("YOUR_LOCATION_ID") .giftCardId(newCard.getId()) .activateActivityDetails( new GiftCardActivityActivate.Builder() .amountMoney(amount) .build()) .build(); CreateGiftCardActivityRequest activityRequest = new CreateGiftCardActivityRequest.Builder() .idempotencyKey(UUID.randomUUID().toString()) .giftCardActivity(activity) .build(); client.getGiftCardActivitiesApi().createGiftCardActivity(activityRequest); return newCard; } ``` {% /tab %} {% tab id="c#" %} ```csharp public async Task CreateOrGetGiftCardAsync(Customer customer, Money amount) { // First check for existing gift cards var searchRequest = new SearchGiftCardsRequest { Query = new GiftCardQuery { Filter = new GiftCardFilter { CustomerId = customer.Id } } }; var searchResponse = await _client.GiftCardsApi.SearchGiftCardsAsync(searchRequest); if (searchResponse.GiftCards?.Any() == true) { var existingCard = searchResponse.GiftCards[0]; // Load additional funds to existing card var activity = new GiftCardActivity { Type = "LOAD", LocationId = "YOUR_LOCATION_ID", GiftCardId = existingCard.Id, LoadActivityDetails = new GiftCardActivityLoad { AmountMoney = amount } }; var activityRequest = new CreateGiftCardActivityRequest { IdempotencyKey = Guid.NewGuid().ToString(), GiftCardActivity = activity }; await _client.GiftCardActivitiesApi.CreateGiftCardActivityAsync(activityRequest); return existingCard; } // Create new gift card var createRequest = new CreateGiftCardRequest { IdempotencyKey = Guid.NewGuid().ToString(), LocationId = "YOUR_LOCATION_ID", GiftCard = new GiftCard { Type = "DIGITAL", CustomerId = customer.Id } }; var createResponse = await _client.GiftCardsApi.CreateGiftCardAsync(createRequest); var newCard = createResponse.GiftCard; // Activate the new card with initial balance var activateActivity = new GiftCardActivity { Type = "ACTIVATE", LocationId = "YOUR_LOCATION_ID", GiftCardId = newCard.Id, ActivateActivityDetails = new GiftCardActivityActivate { AmountMoney = amount } }; var activateRequest = new CreateGiftCardActivityRequest { IdempotencyKey = Guid.NewGuid().ToString(), GiftCardActivity = activateActivity }; await _client.GiftCardActivitiesApi.CreateGiftCardActivityAsync(activateRequest); return newCard; } ``` {% /tab %} {% tab id="nodejs" %} ```javascript async createOrGetGiftCard(customer, amount) { // First check for existing gift cards const searchRequest = { query: { filter: { customerId: customer.id } } }; try { const searchResponse = await this.client.giftCardsApi.searchGiftCards(searchRequest); if (searchResponse.result.giftCards?.length > 0) { const existingCard = searchResponse.result.giftCards[0]; // Load additional funds to existing card const activity = { type: 'LOAD', locationId: 'YOUR_LOCATION_ID', giftCardId: existingCard.id, loadActivityDetails: { amountMoney: amount } }; const activityRequest = { idempotencyKey: crypto.randomUUID(), giftCardActivity: activity }; await this.client.giftCardActivitiesApi.createGiftCardActivity(activityRequest); return existingCard; } // Create new gift card const createRequest = { idempotencyKey: crypto.randomUUID(), locationId: 'YOUR_LOCATION_ID', giftCard: { type: 'DIGITAL', customerId: customer.id } }; const createResponse = await this.client.giftCardsApi.createGiftCard(createRequest); const newCard = createResponse.result.giftCard; // Activate the new card with initial balance const activateActivity = { type: 'ACTIVATE', locationId: 'YOUR_LOCATION_ID', giftCardId: newCard.id, activateActivityDetails: { amountMoney: amount } }; const activateRequest = { idempotencyKey: crypto.randomUUID(), giftCardActivity: activateActivity }; await this.client.giftCardActivitiesApi.createGiftCardActivity(activateRequest); return newCard; } catch (error) { console.error('Error managing gift card:', error); throw error; } } ``` {% /tab %} {% tab id="python" %} ```python async def create_or_get_gift_card(self, customer, amount): # First check for existing gift cards search_request = { "query": { "filter": { "customer_id": customer["id"] } } } search_response = await self.client.gift_cards.search_gift_cards(search_request) if search_response.is_success() and search_response.body.get("gift_cards"): existing_card = search_response.body["gift_cards"][0] # Load additional funds to existing card activity = { "type": "LOAD", "location_id": "YOUR_LOCATION_ID", "gift_card_id": existing_card["id"], "load_activity_details": { "amount_money": amount } } activity_request = { "idempotency_key": str(uuid.uuid4()), "gift_card_activity": activity } await self.client.gift_card_activities.create_gift_card_activity(activity_request) return existing_card # Create new gift card create_request = { "idempotency_key": str(uuid.uuid4()), "location_id": "YOUR_LOCATION_ID", "gift_card": { "type": "DIGITAL", "customer_id": customer["id"] } } create_response = await self.client.gift_cards.create_gift_card(create_request) new_card = create_response.body["gift_card"] # Activate the new card with initial balance activate_activity = { "type": "ACTIVATE", "location_id": "YOUR_LOCATION_ID", "gift_card_id": new_card["id"], "activate_activity_details": { "amount_money": amount } } activate_request = { "idempotency_key": str(uuid.uuid4()), "gift_card_activity": activate_activity } await self.client.gift_card_activities.create_gift_card_activity(activate_request) return new_card ``` {% /tab %} {% /tabset %} ## Complete example The following is a complete example showing how to use the service: {% tabset %} {% tab id="java" %} ```java import com.squareup.square.SquareClient; import com.squareup.square.Environment; import com.squareup.square.exceptions.ApiException; import com.squareup.square.models.*; import java.util.UUID; public class GiftCardService { private final SquareClient client; public GiftCardService(String accessToken) { client = new SquareClient.Builder() .environment(Environment.SANDBOX) .accessToken(accessToken) .build(); } public void processCustomerGiftCard(String firstName, String lastName, String emailAddress, String streetAddress, Money amount) throws ApiException { // Find or create customer Customer customer = findOrCreateCustomer(firstName, lastName, emailAddress, streetAddress); // Create or load gift card GiftCard giftCard = createOrGetGiftCard(customer, amount); System.out.println("Gift card processed successfully for customer: " + customer.getGivenName() + " " + customer.getFamilyName()); System.out.println("Gift card ID: " + giftCard.getId()); } // ... (include findOrCreateCustomer and createOrGetGiftCard methods from above) public static void main(String[] args) { try { GiftCardService service = new GiftCardService("YOUR_ACCESS_TOKEN"); Money amount = new Money.Builder() .amount(10000L) // $100.00 .currency("USD") .build(); service.processCustomerGiftCard( "John", "Doe", "john.doe@example.com", "123 Main St", amount ); } catch (ApiException e) { System.err.println("Error: " + e.getMessage()); } } } ``` {% /tab %} {% tab id="c#" %} ```csharp using Square; using Square.Models; using System; using System.Threading.Tasks; public class GiftCardService { private readonly ISquareClient _client; public GiftCardService(string accessToken) { _client = new SquareClient.Builder() .Environment(Square.Environment.Sandbox) .AccessToken(accessToken) .Build(); } public async Task ProcessCustomerGiftCardAsync(string firstName, string lastName, string emailAddress, string streetAddress, Money amount) { // Find or create customer var customer = await FindOrCreateCustomerAsync(firstName, lastName, emailAddress, streetAddress); // Create or load gift card var giftCard = await CreateOrGetGiftCardAsync(customer, amount); Console.WriteLine($"Gift card processed successfully for customer: {customer.GivenName} {customer.FamilyName}"); Console.WriteLine($"Gift card ID: {giftCard.Id}"); } // ... (include FindOrCreateCustomerAsync and CreateOrGetGiftCardAsync methods from above) public static async Task Main(string[] args) { try { var service = new GiftCardService("YOUR_ACCESS_TOKEN"); var amount = new Money { Amount = 10000, // $100.00 Currency = "USD" }; await service.ProcessCustomerGiftCardAsync( "John", "Doe", "john.doe@example.com", "123 Main St", amount ); } catch (ApiException e) { Console.Error.WriteLine($"Error: {e.Message}"); } } } ``` {% /tab %} {% tab id="nodejs" %} ```javascript const { Client, Environment } = require('square'); const crypto = require('crypto'); class GiftCardService { constructor(accessToken) { this.client = new Client({ accessToken: accessToken, environment: Environment.Sandbox }); } async processCustomerGiftCard(firstName, lastName, emailAddress, streetAddress, amount) { try { // Find or create customer const customer = await this.findOrCreateCustomer( firstName, lastName, emailAddress, streetAddress); // Create or load gift card const giftCard = await this.createOrGetGiftCard(customer, amount); console.log(`Gift card processed successfully for customer: ${customer.givenName} ${customer.familyName}`); console.log(`Gift card ID: ${giftCard.id}`); } catch (error) { console.error('Error processing gift card:', error); throw error; } } // ... (include findOrCreateCustomer and createOrGetGiftCard methods from above) } // Usage example async function main() { try { const service = new GiftCardService('YOUR_ACCESS_TOKEN'); const amount = { amount: 10000, // $100.00 currency: 'USD' }; await service.processCustomerGiftCard( 'John', 'Doe', 'john.doe@example.com', '123 Main St', amount ); } catch (error) { console.error('Error:', error); } } main(); ``` {% /tab %} {% tab id="python" %} ```python from square.client import Client from square.environment import Environment import uuid import asyncio class GiftCardService: def __init__(self, access_token): self.client = Client( access_token=access_token, environment=Environment.SANDBOX ) async def process_customer_gift_card(self, first_name, last_name, email_address, street_address, amount): try: # Find or create customer customer = await self.find_or_create_customer( first_name, last_name, email_address, street_address) # Create or load gift card gift_card = await self.create_or_get_gift_card(customer, amount) print(f"Gift card processed successfully for customer: {customer['given_name']} {customer['family_name']}") print(f"Gift card ID: {gift_card['id']}") except Exception as e: print(f"Error processing gift card: {str(e)}") raise # ... (include find_or_create_customer and create_or_get_gift_card methods from above) # Usage example async def main(): try: service = GiftCardService('YOUR_ACCESS_TOKEN') amount = { "amount": 10000, # $100.00 "currency": "USD" } await service.process_customer_gift_card( "John", "Doe", "john.doe@example.com", "123 Main St", amount ) except Exception as e: print(f"Error: {str(e)}") if __name__ == "__main__": asyncio.run(main()) ``` {% /tab %} {% /tabset %} ## Next steps * Learn more about [managing customer profiles](customers-api/what-it-does). * Explore how to [manage gift cards on file](gift-cards/manage-gift-cards-on-file). * Learn about [reloading gift cards](gift-cards/reload-gift-cards). --- # Managing Duplicate Customers in Square API Integration > Source: https://developer.squareup.com/docs/customers-api/duplicated-customers > Status: PUBLIC > Languages: All > Platforms: All Learn how Square handles duplicated customers and how your application should handle merged duplicate customers using the Customers API **Applies to:** [Customers API](customers-api/what-it-does) | [Cards API](cards-api/overview) | [Loyalty API](loyalty-api/overview) Customer records in Square's system may contain duplicates that accumulate over time. These duplicates can originate from various sources, including Square API integrations and Square's own products. Your application needs to implement a robust strategy for handling duplicates. ## Key Challenges When developing your application, you need to account for several customer data scenarios. Your system must handle search requests that return multiple records for the same customer, recognizing that these duplicates can arise from various, sometimes untraceable sources. Additionally, since duplicate customer records may be merged over time, your application should implement special handling procedures to manage these consolidated profiles effectively. ## Avoid duplicating customers To prevent customer duplication, carefully search for existing customers before creating new ones. This search should use unique identifiers such as email addresses and phone numbers to identify potential matches. Furthermore, when processing payments, include the `customer_id` in your requests whenever it's available, as this makes Square use your customer instead of searching for a match and then creating a new customer if the search doesn't turn up a customer. ## Duplicate Detection Your application might encounter customer duplication even after you've implemented best practices to avoid duplicating customers. To catch potential duplication before adding a new customer, implement these practices: - Check for similar customer records using available identifiers - Compare key fields like name, email, and phone number - Consider fuzzy matching for slight variations in contact details ## Customer Merge Operations and Data Integrity Guidelines Proper handling of customer record merges is crucial for maintaining data integrity across Square's ecosystem, as these operations affect multiple interconnected services and resources. ### Supported Merge Methods Square handles duplicate customer profiles through two methods: sellers can manually merge duplicates through the Square Dashboard, or Square can perform automatic merges. In both cases, when a merged customer's ID is requested via the Customer API, Square maintains the original records but returns the new merged customer ID, ensuring all references remain valid. {% aside type="important" %} Customer profiles that have been merged into a new profile are never returned by the Customers API. To get objects related to the merged customer profiles, you need to detect customer merges and store the merged IDs. {% /aside %} ### Important: Preserving Customer Relationships While it may seem possible to use the Customers API to merge customers by: 1. Creating a new customer 2. Copying profile data 3. [Deleting the old customer](customers-api/use-the-api/keep-records#delete-customer-profiles) This approach will **break** existing relationships because: - Customer IDs are used as foreign keys in many Square resources: - Payments - Orders - Loyalty Programs - Gift Cards - Subscriptions - Invoices - Custom attributes {% aside type="important" %} When you delete a customer, these relationships become orphaned and **cannot** be redirected to a new customer ID. {% /aside %} . ## Detect merged customer profiles When Square merges duplicate customer profiles, your application needs to maintain mappings to access resources associated with merged customers. Here's how to implement this: ### Detection Methods 1. **Webhook Events** - Listen for [customer.created](https://developer.squareup.com/reference/square/customers-api/webhooks/customer.created) events - Check [CustomerCreatedEventObject](https://developer.squareup.com/reference/square/objects/CustomerCreatedEventObject).event_context - If created by merge, the context will indicate this 2. **API Response Analysis** - When calling [RetrieveCustomer](https://developer.squareup.com/reference/square/customers-api/retrieve-customer) - Compare the returned customer ID with your request ID - If IDs differ but email/phone match, a merge occurred ### Maintain a merge mapping In the following implementation examples, a seller had two sets of duplicated customers. Their IDs are represented by the following lists: * `["previous_id_A", "previous_id_B"]` * `["previous_id_C", "previous_id_D", "previous_id_E"]`. Two new customer profiles created from the merge operations: * `"new_customer_id_1"` * `"new_customer_id_2"` Any Customer API responses for these customers after the merge return only these new profile IDs. The seller used the Square Dashboard to merge these customers into new customer profiles which generated a [customer.created](https://developer.squareup.com/reference/square/customers-api/webhooks/customer.created) webhook event for each merge. The application's webhook handler updated a dictionary by adding the ID of the profile the duplicates were merged into and the IDs of the duplicates. In the following example dictionary, the results of the two merges are recorded. ### Store Customer ID Mappings Maintaining a dictionary of merged customer profiles: ```json { "new_customer_id_1": ["previous_id_A", "previous_id_B"], "new_customer_id_2": ["previous_id_C", "previous_id_D", "previous_id_E"] } ``` ### Resource Lookup Logic When searching for customer-associated resources (e.g., orders), the application needs to find all resources that reference the current customer profile and those that reference the old merged customer profiles. The following [Square Python SDK](sdks/python) example uses the merged customer profile dictionary to find all orders for current ID and any ID merged into the new profile: 1. **Get all customer IDs** - Look the current customer ID up in the dictionary and return all related customer IDs (both current and previous) 1. **Get all orders** - Search for all orders associated with a customer, including orders linked to their previous profiles ```python from square import Square import os from typing import List, Dict, Any def get_all_related_customer_ids(current_id: str, id_mapping: Dict[str, List[str]]) -> List[str]: """ Given a current (post-merge) customer ID, return all related customer IDs (both current and previous) Args: current_id: The current customer profile ID id_mapping: Dictionary mapping new IDs to lists of previous IDs Returns: List of all related customer IDs (current ID + all previous IDs) """ # Start with the current ID all_ids = [current_id] # Add any previous IDs associated with this current ID if current_id in id_mapping: all_ids.extend(id_mapping[current_id]) return all_ids def search_customer_orders( current_id: str, id_mapping: Dict[str, List[str]], location_ids: List[str], client: Square ) -> List[Dict[str, Any]]: """ Search for all orders associated with a customer, including orders linked to their previous profiles Args: current_id: The current (post-merge) customer profile ID id_mapping: Dictionary mapping new IDs to lists of previous IDs location_ids: List of Square location IDs to search client: Initialized Square client Returns: List of all orders found across all related customer profiles """ # Get all customer IDs (current and previous) customer_ids = get_all_related_customer_ids(current_id, id_mapping) # Create the search query with customer filter search_query = { "filter": { "customer_filter": { "customer_ids": customer_ids } }, "sort": { "sort_field": "CLOSED_AT", "sort_order": "DESC" } } try: # Search orders using the Square SDK result = client.orders.search( body={ "location_ids": location_ids, "query": search_query } ) if result.is_success(): return result.body.get('orders', []) else: print(f"Error searching orders: {result.errors}") return [] except Exception as e: print(f"Exception when searching orders: {str(e)}") return [] # Example usage: def main(): # Initialize the Square client client = Square( access_token=os.environ.get("SQUARE_TOKEN"), environment='sandbox' # Use 'production' for production environment ) # Example mapping of new IDs to previous IDs id_mapping = { "NEW_ID_1": ["OLD_ID_A", "OLD_ID_B"], "NEW_ID_2": ["OLD_ID_C", "OLD_ID_D"] } # Example location IDs - replace with actual location IDs location_ids = ["057P5VYJ4A5X1", "18YC4JDH91E1H"] # Search for all orders, including those from previous profiles orders = search_customer_orders( current_id="NEW_ID_1", id_mapping=id_mapping, location_ids=location_ids, client=client ) # Process the orders for order in orders: print(f"Order ID: {order.get('id')}") # Process other order fields as needed ``` {% aside type="tip" %} You should update your ID mappings immediately when detecting merges to maintain data consistency. {% /aside %} ## Loyalty reward programs The process for handling loyalty reward programs associated with duplicate customers is a little complex and needs to be explained. ### Loyalty Account Merging Rules The way loyalty accounts are handled depends on how a customer profile merge happened. A seller can use the Square Dashboard to manually merge customers or ask Square to automatically merge duplicated customers. The rules are as follows: - **Manual merges** - When a seller merges two customer profiles that both have loyalty accounts: - Seller selects which phone number to retain - Activity from both loyalty accounts combines into the selected account. The `loyalty_account.mapping.phone_number` remains the same. - **Automatic Merges** - Automatic merging can occur only when: - One profile has a loyalty account - The other profile has no loyalty account - Existing loyalty account gets the new `loyalty_account.customer_id` {% aside type="important" %} Square will never automatically merge two profiles that both have loyalty accounts. This prevents accidental combination of active loyalty programs. {% /aside %} --- # Ruby SDK Migration Guide > Source: https://developer.squareup.com/docs/sdks/ruby/migration > Status: PUBLIC > Languages: All > Platforms: All Upgrade from the legacy version of the Square Ruby SDK to version 43.0.0 or later. Version `44.0.0.20250820` of the Ruby SDK represents a full rewrite of the SDK, with a number of breaking changes, outlined in the following sections. When upgrading to this version or later versions, take note of the changes in the SDK, including client construction and parameter names. If necessary, you can use the legacy version of the SDK along with the latest version. SDK versions `43.0.1.20250716` and earlier continue to function as expected, but you should plan to update your integration as soon as possible to ensure continued support. ## Client construction The new version of the Ruby SDK introduces breaking changes in the client class. {% table %} * Legacy {% width="165px" %} * New {% width="180px" %} * Additional information --- * * * --- * `access_token` * `token` * The access token used for authentication. --- * `custom_url` * `base_url` * The base URL for API requests. --- * `square_version` * `version` * The Square API version to use. --- * `additional_headers` * `additional_headers` * Additional headers can be set at individual methods. --- * `timeout` * `timeout` * The default HTTP timeout when invoking an endpoint. --- * `environment` * `environment` * This option has been removed. Set the environment in `base_url` instead. --- * `retry_interval` * Removed * This option has been removed. --- * `backoff_factor` * Removed * This option has been removed. --- * `retry_statuses` * Removed * This option has been removed. --- * `retry_methods` * Removed * This option has been removed. --- * `http_call_back` * Removed * This option has been removed. --- * `bearer_auth_credentials` * Removed * This option has been removed. --- * `user_agent_detail` * Removed * This option has been removed. --- * `config` * Removed * This option has been removed. {% /table %} ```ruby // LEGACY require 'square_legacy' client = Square::LegacyClient.new( bearer_auth_credentials: BearerAuthCredentials.new( access_token: ENV['SQUARE_ACCESS_TOKEN'] ), environment: 'sandbox' ) // NEW require 'square' client = Square::Client.new( base_url: Square::Environment::PRODUCTION, token: 'YOUR_API_KEY' ) ``` ## Use the legacy and new SDK side by side While the new SDK has many improvements, it takes time to upgrade when there are breaking changes. To make the migration easier, the old SDK is published as `square_legacy` so that the two SDKs can be used side by side in the same project. The following example shows how to use the new and legacy SDKs inside a single file: ```ruby require 'square' require 'square_legacy' client = Square::Client.new(token: 'YOUR_API_KEY') legacy_client = Square::LegacyClient.new( bearer_auth_credentials: BearerAuthCredentials.new( access_token: ENV['SQUARE_ACCESS_TOKEN'] ), ) # List all payments with the new client. new_response = client.payments.list() # List all payments with the legacy client. legacy_response = legacy_client.payments.list_payments() ``` You should migrate to the new SDK using the following steps: 1. Upgrade the gem to `^44.0.0`. 2. Run `gem install square.rb`. 3. Search and replace all requires from `square` to `square_legacy`. 4. Gradually move over to use the new SDK by importing it from the `square` module. ## Strongly-typed requests and responses The previous version of the SDK had no strong typing, so users had to craft payloads without any help from autocomplete. The newly generated SDK comes with YARD documentation and RBS types so that developers can let their IDE guide them. ```ruby // LEGACY result = client.customers.create_customer(body: { "given_name": "John", "family_name": "Smith", "address": { "address_line_1": "500 Electric Ave", "address_line_2": "Suite 600", "locality": "New York", "administrative_district_level_1": "NY", "postal_code": "98100", "country": "US" } }) // NEW result = client.customers.create(body: { "given_name": "John", "family_name": "Smith", "address": { "address_line_1": "500 Electric Ave", "address_line_2": "Suite 600", "locality": "New York", "administrative_district_level_1": "NY", "postal_code": "98100", "country": "US" } }) ``` While the before and after code snippets remain similar, the experience of writing in an editor is quite different. ## Exceptions The legacy SDK represents successful calls and errors with the same `ApiResponse` type. Users could distinguish between successes and errors as shown: ```ruby // LEGACY result = customers_api.create_customer(body: body) if result.success? puts result.data elsif result.error? warn result.errors end ``` The new SDK represents errors as `Exceptions`, all of which inherit from the `SquareError` class. ```ruby begin result = customers_api.create_customer(body: body) rescue Square::SquareError => e puts("The server could not be reached") puts(e.cause) end ``` ## Auto-pagination Square's paginated endpoints now support auto-pagination with an iterator. Callers don't need to manually fetch the next page. You can now iterate over the entire list and the client automatically fetches the next page behind the scenes. The following example shows the same code, with the legacy and new SDKs: ```ruby page = client.customers.list( body: { limit: 10, sort_field: 'DEFAULT', sort_order: 'DESC' } ) page.auto_paging_each do |customer| puts(customer.id) ``` --- # Manage Menus > Source: https://developer.squareup.com/docs/catalog-api/manage-menus > Status: PUBLIC > Languages: All > Platforms: All Learn how to manage menus with the Catalog API and catalog categories. **Applies to:** [Catalog API](catalog-api/what-it-does) {% subheading %}Learn how to manage menus with the Catalog API and catalog categories.{% /subheading %} {% toc hide=true /%} ## Overview This guide walks you through syncing menus using the Square Catalog API, for example, to display a seller's offerings in your kiosk, mobile application, or online ordering site. You'll also learn how to create root menu categories and organize menus for different services, such as breakfast and lunch. When a seller [creates a menu](https://squareup.com/help/us/en/article/6424-create-menus-with-square-for-restaurants) through the Square Dashboard, the system automatically creates [catalog categories](https://developer.squareup.com/reference/square/objects/CatalogCategory) with a `CategoryType` of `MENU_CATEGORY`. These categories are used to organize items in the seller's menu and are distinct from regular catalog categories. Key points about menu categories: - Automatically created when sellers build menus in the Square Dashboard. - Have a `category_type` of `MENU_CATEGORY`. - Used specifically for menu organization. - Like regular categories, can have parent-child relationships. - Can be used across different sales [channels](channels-api). {% aside type="info" %} When working with catalog categories, your application needs to handle two distinct types: `REGULAR_CATEGORY` and `MENU_CATEGORY`. If your application already has logic that processes `REGULAR_CATEGORY` objects, maintain this logic separately from any new code that handles `MENU_CATEGORY` objects. `REGULAR_CATEGORY` objects continue to be essential for critical business operations, including: - Generating sales reports for menu items. - Routing orders to kitchen printers. Even if you implement support for `MENU_CATEGORY`, don't remove or modify your existing `REGULAR_CATEGORY` handling. Both category types serve different purposes and should coexist in your application. {% /aside %} ## Requirements - A Square account with Square Free, Plus, and Premium subscribers with advanced restaurant capabilities added. - A Square account with full service, quick service, or bar mode enabled in the Square Point of Sale application. - Your Square application credentials. - Authorization to use the [Square Catalog API](catalog-api/what-it-does). ## Syncing menus with your application When integrating with your application or other external systems, you need an efficient way to sync menu data. This section covers both the initial sync and incremental updates. ### Get menu channels `CatalogCategory` objects handle location visibility differently than other `Catalog` objects. Instead of direct location assignment, they use channels as an abstraction layer: - [Channel](https://developer.squareup.com/reference/square/objects/Channel) objects act as the bridge between menu categories and locations. - Each [Location](https://developer.squareup.com/reference/square/objects/Location) has a corresponding channel (identified by `reference.type = "LOCATION"`). - Menu categories declare visibility by listing channel IDs in their `channels` array. **To synchronize menus for a specific location:** 1. Get the channel ID for your target location. 2. Filter menu categories to include only those referencing that channel. 3. Sync only these filtered categories to ensure location-specific accuracy. for more information about mapping channels to locations, see [Channels API - Menu visibility](channels-api#menu-visibility). ### Initial sync In the following examples, a restaurant creates a breakfast menu and lunch menu. Each menu has a root category and child categories. The breakfast beverages menu has a submenu for coffee drinks. To perform a complete menu sync with an external service (such as a delivery platform), you need three specific API calls to get all menu-related catalog objects in the correct hierarchy. #### Get the root menu categories {% tabset %} {% tab id="Request" %} First, use [SearchCatalogObjects](https://developer.squareup.com/reference/square/catalog-api/search-catalog-objects) to get all top-level menu categories for the channel you want to sync. The query uses three filters: * `exact_query` is set to the category type of menu. * `set_query` is set to the channels you want to return. * `range_query` limits the returned menu to root menus. ```` This returns `CatalogCategory` objects that are both top-level categories and menu categories. These objects form your root menu structure. {% aside type="info" %} The `present_at_all_locations` property might be set to `true` or `false` but because menu visibility is controlled by the `channels` property, this property has no effect. {% /aside %} {% /tab %} {% tab id="Response" %} The `SearchCatalogObjects` endpoint returns any root menus that are visible in the specified channel. {% aside type="info" %} The `set_query` doesn't exclude catalog categories whose channel list includes other channels too. For this reason, your query might return catalog categories that are visible in the desired channel and also in other channels. {% /aside %} ```json { "objects": [ { "type": "CATEGORY", "id": "3H3ADZMYJU6U27JYO2PZFANQ", "updated_at": "2025-08-06T07:21:55.923Z", "created_at": "2025-06-02T18:24:46.958Z", "version": 1754464915923, "is_deleted": false, "present_at_all_locations": true, "category_data": { "name": "Breakfast menu", "category_type": "MENU_CATEGORY", "parent_category": { "ordinal": 137439154960 }, "is_top_level": true, "channels": [ "CH_IT55vdjtd81xkZvF68NXQqPO54qnOXkyQRkiBQlQuYC", "CH_leic5ZC8kuuyAVAIQUlxuEG72EYFNBoxFCz5574e9945o", "CH_94EExem5ysllXKniR9W0uEG72EYFNBoxFCz5574e9945o" ], "online_visibility": false, "ecom_seo_data": { "page_title": "", "page_description": "", "permalink": "" } } }, { "type": "CATEGORY", "id": "H462U4DGLLEGU34OS4LLLNJQ", "updated_at": "2025-08-06T07:21:56.451Z", "created_at": "2025-06-10T22:43:22.259Z", "version": 1754464916451, "is_deleted": false, "present_at_all_locations": true, "category_data": { "name": "Lunch Menu", "category_type": "MENU_CATEGORY", "parent_category": { "ordinal": 343597585168 }, "is_top_level": true, "channels": [ "CH_IT55vdjtd81xkZvF68NXQqPO54qnOXkyQRkiBQlQuYC", "CH_94EExem5ysllXKniR9W0uEG72EYFNBoxFCz5574e9945o" ], "online_visibility": false } } ], "latest_time": "2025-10-16T20:01:53.649Z" } ``` {% /tab %} {% /tabset %} #### Get the child menu categories Get all of the descendants of the root categories. {% tabset %} {% tab id="Request" %} Next, use [SearchCatalogObjects](https://developer.squareup.com/reference/square/catalog-api/search-catalog-objects) to get all child categories under these root categories: ```` This returns all categories that are both menu categories (`category_type = "MENU_CATEGORY"`) and have their `root_category_id` set to one of the IDs from the first call. {% /tab %} {% tab id="Response" %} The response in the following example shows all breakfast and lunch menu categories. ```json { "objects": [ { "type": "CATEGORY", "id": "SBT57VC6BCTZ523HYBQ5DSPH", "updated_at": "2025-06-02T22:03:50.87Z", "created_at": "2025-06-02T18:24:46.958Z", "version": 1748901830870, "is_deleted": false, "present_at_all_locations": true, "category_data": { "name": "Pastries", "category_type": "MENU_CATEGORY", "parent_category": { "id": "3H3ADZMYJU6U27JYO2PZFANQ", "ordinal": 0 }, "is_top_level": false, "channels": [ "CH_IT55vdjtd81xkZvF68NXQqPO54qnOXkyQRkiBQlQuYC", "CH_leic5ZC8kuuyAVAIQUlxuEG72EYFNBoxFCz5574e9945o" ], "online_visibility": false, "root_category": "3H3ADZMYJU6U27JYO2PZFANQ" } }, { "type": "CATEGORY", "id": "JLIE5PQIE7LEFVN5DZUL72RX", "updated_at": "2025-06-02T22:03:50.87Z", "created_at": "2025-06-02T18:24:46.958Z", "version": 1748901830870, "is_deleted": false, "present_at_all_locations": true, "category_data": { "name": "Breakfast Sandwiches", "category_type": "MENU_CATEGORY", "parent_category": { "id": "3H3ADZMYJU6U27JYO2PZFANQ", "ordinal": -68719476736 }, "is_top_level": false, "channels": [ "CH_IT55vdjtd81xkZvF68NXQqPO54qnOXkyQRkiBQlQuYC", "CH_leic5ZC8kuuyAVAIQUlxuEG72EYFNBoxFCz5574e9945o" ], "online_visibility": false, "root_category": "3H3ADZMYJU6U27JYO2PZFANQ" } }, { "type": "CATEGORY", "id": "H5P6BRQKWKL6BDZKIS4FGPSM", "updated_at": "2025-06-02T22:03:50.87Z", "created_at": "2025-06-02T21:46:40.409Z", "version": 1748901830870, "is_deleted": false, "present_at_all_locations": true, "category_data": { "name": "Beverages", "image_ids": [ "ABHX2WBOQMGTSQ5QOVIYWGPQ" ], "category_type": "MENU_CATEGORY", "parent_category": { "id": "3H3ADZMYJU6U27JYO2PZFANQ", "ordinal": 68719476736 }, "is_top_level": false, "channels": [ "CH_IT55vdjtd81xkZvF68NXQqPO54qnOXkyQRkiBQlQuYC", "CH_leic5ZC8kuuyAVAIQUlxuEG72EYFNBoxFCz5574e9945o" ], "online_visibility": false, "root_category": "3H3ADZMYJU6U27JYO2PZFANQ", "ecom_seo_data": { "page_title": "", "page_description": "", "permalink": "" } } }, { "type": "CATEGORY", "id": "ZTVXYFS633S6GSLMHVP5O5IG", "updated_at": "2025-06-02T22:04:56.684Z", "created_at": "2025-06-02T22:04:56.898Z", "version": 1748901896684, "is_deleted": false, "present_at_all_locations": true, "category_data": { "name": "Coffee-drinks", "image_ids": [ "BAXRGSINXCHS7RW4ZMQSHGGL" ], "category_type": "MENU_CATEGORY", "parent_category": { "id": "H5P6BRQKWKL6BDZKIS4FGPSM", "ordinal": -2251731094208512 }, "is_top_level": false, "channels": [ "CH_IT55vdjtd81xkZvF68NXQqPO54qnOXkyQRkiBQlQuYC", "CH_leic5ZC8kuuyAVAIQUlxuEG72EYFNBoxFCz5574e9945o" ], "online_visibility": false, "root_category": "3H3ADZMYJU6U27JYO2PZFANQ" } }, { "type": "CATEGORY", "id": "4D5MK3D5LB2ZPXPMD6IRQ5RB", "updated_at": "2025-06-10T18:04:54.674Z", "created_at": "2025-06-10T18:04:54.806Z", "version": 1749578694674, "is_deleted": false, "present_at_all_locations": true, "category_data": { "name": "Special sandwich subgroup", "category_type": "MENU_CATEGORY", "parent_category": { "id": "JLIE5PQIE7LEFVN5DZUL72RX", "ordinal": -2251731094208512 }, "is_top_level": false, "channels": [ "CH_IT55vdjtd81xkZvF68NXQqPO54qnOXkyQRkiBQlQuYC", "CH_leic5ZC8kuuyAVAIQUlxuEG72EYFNBoxFCz5574e9945o" ], "online_visibility": false, "root_category": "3H3ADZMYJU6U27JYO2PZFANQ" } }, { "type": "CATEGORY", "id": "7EN7VWSPUI25PJPS6XEEUV5G", "updated_at": "2025-06-10T22:43:22.122Z", "created_at": "2025-06-10T22:43:22.259Z", "version": 1749595402122, "is_deleted": false, "present_at_all_locations": true, "category_data": { "name": "Starters", "category_type": "MENU_CATEGORY", "parent_category": { "id": "H462U4DGLLEGU34OS4LLLNJQ", "ordinal": 0 }, "is_top_level": false, "channels": [ "CH_IT55vdjtd81xkZvF68NXQqPO54qnOXkyQRkiBQlQuYC" ], "online_visibility": false, "root_category": "H462U4DGLLEGU34OS4LLLNJQ" } }, { "type": "CATEGORY", "id": "JNC2O2TJ534GSLDLSIE35NMH", "updated_at": "2025-06-10T22:43:22.122Z", "created_at": "2025-06-10T22:43:22.259Z", "version": 1749595402122, "is_deleted": false, "present_at_all_locations": true, "category_data": { "name": "Sandwiches", "category_type": "MENU_CATEGORY", "parent_category": { "id": "H462U4DGLLEGU34OS4LLLNJQ", "ordinal": 1 }, "is_top_level": false, "channels": [ "CH_IT55vdjtd81xkZvF68NXQqPO54qnOXkyQRkiBQlQuYC" ], "online_visibility": false, "root_category": "H462U4DGLLEGU34OS4LLLNJQ" } } ], "latest_time": "2025-06-10T22:44:08.232Z" } ``` {% /tab %} {% /tabset %} {% accordion expanded=false %} {% slot "heading" %} #### Understanding menu category relationships {% /slot %} When working with menu categories, it's important to understand the distinction between `parent_category_id` and `root_category_id`: **Direct parent vs. root category** - `parent_category_id` indicates the immediate parent of a category. - `root_category_id` indicates the top-level ancestor of a category. These IDs are different if a category is nested multiple levels deep. When you make this API call, it shows all categories under a main menu item. For example, in a coffee shop menu: - Root category: "Breakfast Menu" (ID: `3H3ADZMYJU6U27JYO2PZFANQ`) - Parent category: "Beverages" (ID: `H5P6BRQKWKL6BDZKIS4FGPSM`) - Category: "Coffee-drinks" (ID: `ZTVXYFS633S6GSLMHVP5O5IG`) ```json { "object": { "type": "CATEGORY", "id": "ZTVXYFS633S6GSLMHVP5O5IG", "updated_at": "2025-06-02T22:04:56.684Z", "created_at": "2025-06-02T22:04:56.898Z", "version": 1748901896684, "is_deleted": false, "present_at_all_locations": true, "category_data": { "name": "Coffee-drinks", "image_ids": [ "BAXRGSINXCHS7RW4ZMQSHGGL" ], "category_type": "MENU_CATEGORY", "parent_category": { "id": "H5P6BRQKWKL6BDZKIS4FGPSM", "ordinal": -2251731094208512 }, "is_top_level": false, "channels": [ "CH_IT55vdjtd81xkZvF68NXQqPO54qnOXkyQRkiBQlQuYC", "CH_leic5ZC8kuuyAVAIQUlxuEG72EYFNBoxFCz5574e9945o" ], "online_visibility": false, "root_category": "3H3ADZMYJU6U27JYO2PZFANQ" } } } ``` To properly reconstruct the menu hierarchy, always check the `parent_category_id` to determine where each category belongs in the structure. {% /accordion %} #### Get menu items To complete the menu, your application needs to get the [items](https://developer.squareup.com/reference/square/objects/CatalogItem), [variations](https://developer.squareup.com/reference/square/objects/CatalogItemVariation), any [modifier lists](https://developer.squareup.com/reference/square/objects/CatalogModifierList), [images](https://developer.squareup.com/reference/square/objects/CatalogImage), and other resources related to the items shown on the menus. You can get all this information with a single API call. Note that you need to include the `"include_related_objects": true` query parameter. {% tabset %} {% tab id="Request" %} Finally, use [SearchCatalogObjects](https://developer.squareup.com/reference/square/catalog-api/search-catalog-objects) to get all items in the categories returned by the previous API call. ```` {% /tab %} {% tab id="Response" %} This returns all menu-related `CatalogItem` objects, their variations, and related objects such as modifier lists, taxes, and product images. Items are associated with owning categories by setting the IDs of these categories in the [CatalogItem.categories](https://developer.squareup.com/reference/square/objects/CatalogItem#definition__property-categories) property. {% aside type="info" %} The example response is truncated for brevity. {% /aside %} ```json { "objects": [ { "type": "ITEM", "id": "UX7IHR55Q7OXE4OIM6XC5HED", "updated_at": "2025-06-10T18:04:55.345Z", "created_at": "2021-12-05T00:12:08.245Z", "version": 1749578695345, "is_deleted": false, "present_at_all_locations": true, "item_data": { "name": "Cannon Beach, sunset", "description": "Sunset on a spring evening, Cannon Beach, OR", "is_taxable": true, "tax_ids": [ "UCQQDWUYMYIZD3NZZBG7GLQK" ], "variations": [ { "type": "ITEM_VARIATION", "id": "2LGBIYQR277UJLCBV4HDD5XX", "updated_at": "2025-06-10T18:04:54.674Z", "created_at": "2021-12-05T00:12:08.245Z", "version": 1749578694674, "is_deleted": false, "custom_attribute_values": { "Square:90b0a94b-67f7-427c-add2-14e705ed5139": { "name": "Media", "custom_attribute_definition_id": "4MFYBLAD7GH4UQE6ZYUMFLDY", "type": "SELECTION", "selection_uid_values": [ "G4QBD2RTWOESM2YSHVOW5CDR" ], "key": "Square:90b0a94b-67f7-427c-add2-14e705ed5139" } }, "present_at_all_locations": true, "item_variation_data": { "item_id": "UX7IHR55Q7OXE4OIM6XC5HED", "name": "Regular", "sku": "IMGP2427", "ordinal": 1, "pricing_type": "FIXED_PRICING", "price_money": { "amount": 16000, "currency": "USD" }, "location_overrides": [ { "location_id": "E78VDDVFW1EYX", "track_inventory": true, "sold_out": true }, { "location_id": "LFF3HK0DN6A61", "track_inventory": true }, { "location_id": "LRAXEJYQZ0JED", "track_inventory": true, "sold_out": true } ], "track_inventory": true, "inventory_alert_type": "NONE", "sellable": true, "stockable": true, "channels": [ "CH_IT55vdjtd81xkZvF68NXQqPO54qnOXkyQRkiBQlQuYC", "CH_QsN9pXIZiVwCMWjFr8NXQqPO54qnOXkyQRkiBQlQuYC", "CH_leic5ZC8kuuyAVAIQUlxuEG72EYFNBoxFCz5574e9945o" ] } } ], "product_type": "REGULAR", "skip_modifier_screen": false, "ecom_uri": "https://flamingredphoto.square.site/product/cannon-beach-sunset/15", "ecom_image_uris": [ "https://flamingredphoto.square.site/uploads/1/3/1/8/131848966/s381317022439460574_p15_i3_w460.jpeg" ], "ecom_available": true, "ecom_visibility": "VISIBLE", "image_ids": [ "DZUOK5RZ37YCFM6WOWX564XG" ], "categories": [ { "id": "5YKGXW7RGOVVWL5U57VRGR3A", "ordinal": 412316860416 }, { "id": "YOJ5XWPLU232WTTG4JKBGEC3", "ordinal": 2251662374731761 }, { "id": "4D5MK3D5LB2ZPXPMD6IRQ5RB", "ordinal": -2251799813685248 } ], "description_html": "\u003cp\u003eSunset on a spring evening, Cannon Beach, OR\u003c/p\u003e", "description_plaintext": "Sunset on a spring evening, Cannon Beach, OR", "channels": [ "CH_QsN9pXIZiVwCMWjFr8NXQqPO54qnOXkyQRkiBQlQuYC", "CH_leic5ZC8kuuyAVAIQUlxuEG72EYFNBoxFCz5574e9945o", "CH_IT55vdjtd81xkZvF68NXQqPO54qnOXkyQRkiBQlQuYC" ], "is_archived": false, "reporting_category": { "id": "5YKGXW7RGOVVWL5U57VRGR3A", "ordinal": 412316860416 } } }, { "type": "ITEM", "id": "GDAYYASFCCF6QUGM4URTS7BN", "updated_at": "2025-06-10T22:44:08.232Z", "created_at": "2025-06-10T22:43:22.259Z", "version": 1749595448232, "is_deleted": false, "present_at_all_locations": false, "present_at_location_ids": [ "E78VDDVFW1EYX" ], "item_data": { "name": "Classic Burger", "description": "Juicy beef patty with lettuce, tomato, onions, and pickles on a sesame seed bun.", "is_taxable": true, "modifier_list_info": [ { "modifier_list_id": "UBG5GMFXG4GABAHNIY4DNHWQ", "min_selected_modifiers": -1, "max_selected_modifiers": -1, "enabled": true, "hidden_from_customer": false, "ordinal": 2, "allow_quantities": "NOT_SET", "is_conversational": "NOT_SET", "hidden_from_customer_override": "NOT_SET" } ], "variations": [ { "type": "ITEM_VARIATION", "id": "B5IDPADMOT7MQ2NK26FKNJQU", "updated_at": "2025-06-10T22:43:22.122Z", "created_at": "2025-06-10T22:43:22.259Z", "version": 1749595402122, "is_deleted": false, "present_at_all_locations": false, "present_at_location_ids": [ "E78VDDVFW1EYX" ], "item_variation_data": { "item_id": "GDAYYASFCCF6QUGM4URTS7BN", "name": "Regular", "ordinal": 0, "pricing_type": "FIXED_PRICING", "price_money": { "amount": 1500, "currency": "USD" }, "sellable": true, "stockable": true, "channels": [ "CH_QsN9pXIZiVwCMWjFr8NXQqPO54qnOXkyQRkiBQlQuYC" ] } } ], "product_type": "FOOD_AND_BEV", "ecom_uri": "https://flamingredphoto.square.site/product/classic-burger/36", "ecom_available": true, "ecom_visibility": "VISIBLE", "categories": [ { "id": "U3G2UZ75UWIVG3JWQL5BCLH4", "ordinal": 0 }, { "id": "JNC2O2TJ534GSLDLSIE35NMH", "ordinal": 0 } ], "description_html": "\u003cp\u003eJuicy beef patty with lettuce, tomato, onions, and pickles on a sesame seed bun.\u003c/p\u003e", "description_plaintext": "Juicy beef patty with lettuce, tomato, onions, and pickles on a sesame seed bun.", "channels": [ "CH_QsN9pXIZiVwCMWjFr8NXQqPO54qnOXkyQRkiBQlQuYC" ], "is_archived": false, "reporting_category": { "id": "U3G2UZ75UWIVG3JWQL5BCLH4", "ordinal": 0 }, "is_alcoholic": false } } ], "related_objects": [ { "type": "IMAGE", "id": "DZUOK5RZ37YCFM6WOWX564XG", "updated_at": "2022-04-11T23:43:48.436Z", "created_at": "2021-12-15T00:25:01.383Z", "version": 1649720628436, "is_deleted": false, "present_at_all_locations": true, "image_data": { "name": "IMGP2427.jpg", "url": "https://items-images-production.s3.us-west-2.amazonaws.com/files/c9525e3ae73b06a349b7a6c195c0ce76eb38cf96/original.jpeg" } }, { "type": "CATEGORY", "id": "5YKGXW7RGOVVWL5U57VRGR3A", "updated_at": "2025-01-22T19:57:21.1Z", "created_at": "2018-07-26T21:53:14.953Z", "version": 1737575841100, "is_deleted": false, "custom_attribute_values": { "helmet_brand": { "name": "Helmet Brand", "string_value": "Kratoni", "custom_attribute_definition_id": "WO43QWQ4QYOOPCQZJMG6JIBF", "type": "STRING", "key": "helmet_brand" } }, "present_at_all_locations": true, "category_data": { "name": "Photographs", "category_type": "REGULAR_CATEGORY", "parent_category": { "ordinal": -2251662374731776 }, "is_top_level": true, "online_visibility": true } }, { "type": "TAX", "id": "UCQQDWUYMYIZD3NZZBG7GLQK", "updated_at": "2025-06-05T07:33:20.607Z", "created_at": "2022-04-11T23:43:45.765Z", "version": 1749108800607, "is_deleted": false, "present_at_all_locations": true, "tax_data": { "name": "Washington", "calculation_phase": "TAX_SUBTOTAL_PHASE", "inclusion_type": "ADDITIVE", "percentage": "8.9", "applies_to_custom_amounts": true, "enabled": true, "tax_type_id": "us_sales_tax", "tax_type_name": "Sales Tax", "is_secondary_tax": false } }, { "type": "CATEGORY", "id": "5GFEUEK7R4DKFSXP54WUOUJM", "updated_at": "2025-06-02T18:24:46.792Z", "created_at": "2025-06-02T18:24:46.958Z", "version": 1748888686792, "is_deleted": false, "present_at_all_locations": true, "category_data": { "name": "Breakfast Sandwiches", "category_type": "REGULAR_CATEGORY", "parent_category": { "ordinal": 206158631696 }, "is_top_level": true, "online_visibility": true } }, { "type": "CATEGORY", "id": "QFN5Y5AUUK2XK2NT3AFPV4AL", "updated_at": "2025-06-02T18:24:46.792Z", "created_at": "2025-06-02T18:24:46.958Z", "version": 1748888686792, "is_deleted": false, "present_at_all_locations": true, "category_data": { "name": "Pastries", "category_type": "REGULAR_CATEGORY", "parent_category": { "ordinal": 274878108432 }, "is_top_level": true, "online_visibility": true } }, { "type": "IMAGE", "id": "GC2BM3L5G7YU5ACM6J5NIB24", "updated_at": "2025-06-02T21:47:48.166Z", "created_at": "2025-06-02T21:47:48.199Z", "version": 1748900868166, "is_deleted": false, "present_at_all_locations": true, "image_data": { "url": "https://items-images-production.s3.us-west-2.amazonaws.com/files/fbb6a5bb738eca54b3a6accd06e79fc893141221/original.png" } }, { "type": "IMAGE", "id": "FEOGCZJTM3K2MUNQ5LZUSQ4M", "updated_at": "2025-06-02T21:48:14.755Z", "created_at": "2025-06-02T21:48:14.791Z", "version": 1748900894755, "is_deleted": false, "present_at_all_locations": true, "image_data": { "url": "https://items-images-production.s3.us-west-2.amazonaws.com/files/d221308875a8e89dcfc58418ddc7854b3ae62df1/original.png" } }, { "type": "MODIFIER_LIST", "id": "CQZ6SECYCB5E2JM2OJU6WO2M", "updated_at": "2025-06-10T22:43:22.122Z", "created_at": "2025-06-10T22:43:22.259Z", "version": 1749595402122, "is_deleted": false, "present_at_all_locations": false, "present_at_location_ids": [ "E78VDDVFW1EYX" ], "modifier_list_data": { "name": "Sauce Choice", "ordinal": 100000000, "selection_type": "SINGLE", "modifiers": [ { "type": "MODIFIER", "id": "FDZD6MPY6CIL4RDDDCYOJ442", "updated_at": "2025-06-10T22:43:22.122Z", "created_at": "2025-06-10T22:43:22.259Z", "version": 1749595402122, "is_deleted": false, "present_at_all_locations": false, "present_at_location_ids": [ "E78VDDVFW1EYX" ], "modifier_data": { "name": "BBQ", "price_money": { "amount": 0, "currency": "USD" }, "on_by_default": true, "ordinal": 0, "modifier_list_id": "CQZ6SECYCB5E2JM2OJU6WO2M" } }, { "type": "MODIFIER", "id": "MA3TSC4BXGTORHF36EBK35K3", "updated_at": "2025-06-10T22:43:22.122Z", "created_at": "2025-06-10T22:43:22.259Z", "version": 1749595402122, "is_deleted": false, "present_at_all_locations": false, "present_at_location_ids": [ "E78VDDVFW1EYX" ], "modifier_data": { "name": "Spicy", "price_money": { "amount": 0, "currency": "USD" }, "on_by_default": false, "ordinal": 1, "modifier_list_id": "CQZ6SECYCB5E2JM2OJU6WO2M" } }, { "type": "MODIFIER", "id": "XACXEM7NKRQOQETHRJG2ITZZ", "updated_at": "2025-06-10T22:43:22.122Z", "created_at": "2025-06-10T22:43:22.259Z", "version": 1749595402122, "is_deleted": false, "present_at_all_locations": false, "present_at_location_ids": [ "E78VDDVFW1EYX" ], "modifier_data": { "name": "Mild", "price_money": { "amount": 0, "currency": "USD" }, "on_by_default": false, "ordinal": 2, "modifier_list_id": "CQZ6SECYCB5E2JM2OJU6WO2M" } } ], "is_conversational": false, "modifier_type": "LIST", "min_selected_modifiers": 1, "max_selected_modifiers": 1 } }, { "type": "MODIFIER_LIST", "id": "UBG5GMFXG4GABAHNIY4DNHWQ", "updated_at": "2025-06-10T22:43:22.122Z", "created_at": "2025-06-10T22:43:22.259Z", "version": 1749595402122, "is_deleted": false, "present_at_all_locations": false, "present_at_location_ids": [ "E78VDDVFW1EYX" ], "modifier_list_data": { "name": "Cooking Preference", "ordinal": 100000001, "selection_type": "SINGLE", "modifiers": [ { "type": "MODIFIER", "id": "IZ4ZJIH3RBP7AXNTVDHMAGVD", "updated_at": "2025-06-10T22:43:22.122Z", "created_at": "2025-06-10T22:43:22.259Z", "version": 1749595402122, "is_deleted": false, "present_at_all_locations": false, "present_at_location_ids": [ "E78VDDVFW1EYX" ], "modifier_data": { "name": "Medium", "price_money": { "amount": 0, "currency": "USD" }, "on_by_default": true, "ordinal": 0, "modifier_list_id": "UBG5GMFXG4GABAHNIY4DNHWQ" } }, { "type": "MODIFIER", "id": "JMP4KPGWKM4R7LA7HK6VZSET", "updated_at": "2025-06-10T22:43:22.122Z", "created_at": "2025-06-10T22:43:22.259Z", "version": 1749595402122, "is_deleted": false, "present_at_all_locations": false, "present_at_location_ids": [ "E78VDDVFW1EYX" ], "modifier_data": { "name": "Well Done", "price_money": { "amount": 0, "currency": "USD" }, "on_by_default": false, "ordinal": 1, "modifier_list_id": "UBG5GMFXG4GABAHNIY4DNHWQ" } } ], "is_conversational": false, "modifier_type": "LIST", "min_selected_modifiers": 1, "max_selected_modifiers": 1 } }, { "type": "CATEGORY", "id": "U3G2UZ75UWIVG3JWQL5BCLH4", "updated_at": "2025-06-10T22:43:22.122Z", "created_at": "2025-06-10T22:43:22.259Z", "version": 1749595402122, "is_deleted": false, "present_at_all_locations": true, "category_data": { "name": "Sandwiches", "category_type": "REGULAR_CATEGORY", "parent_category": { "ordinal": 412317061904 }, "is_top_level": true, "online_visibility": true } }, { "type": "CATEGORY", "id": "Z6O6YJFE37DLY37G4OULXDHY", "updated_at": "2025-06-10T22:43:22.122Z", "created_at": "2025-06-10T22:43:22.259Z", "version": 1749595402122, "is_deleted": false, "present_at_all_locations": true, "category_data": { "name": "Starters", "category_type": "REGULAR_CATEGORY", "parent_category": { "ordinal": 481036538640 }, "is_top_level": true, "online_visibility": true } } ], "latest_time": "2025-06-10T22:44:08.232Z" } ``` {% /tab %} {% /tabset %} {% accordion expanded=false %} {% slot "heading" %} ### Processing the initial sync {% /slot %} When processing these results, follow this specific order: 1. **Root categories** (from the first call): - Store the root category IDs. - Note which are top-level menu categories. - These form the base of your menu structure. 2. **Child categories** (from the second call): - Link each child category to its parent and root categories. - Maintain the `MENU_CATEGORY` hierarchy. - Store these category IDs for the next step. 3. **Items and variations** (from the third call): - Link items to their appropriate categories. - Process all variations for each item. - Include any related objects (such as modifiers and images). {% /accordion %} ## Get menu updates To keep your application's menu data current with the seller's Square catalog, implement a periodic sync strategy to capture various types of menu changes. ### Types of menu updates - Item modifications (price, description, or images) - Menu structure changes (new categories or item reorganization) - Item availability updates - New item additions or removals To learn about tracking availability updates, see [Monitor Sold-out Item Variations or Modifiers](inventory-api/monitor-sold-out-status-on-item-variation). You can efficiently track these changes using the `updated_at` timestamp in the [SearchCatalogObjects](https://developer.squareup.com/reference/square/catalog-api/search-catalog-objects) endpoint: ### Return menu category changes {% tabset %} {% tab id="Request" %} This example returns all menu categories modified after June 11, 2025, at 7:00 AM: ```` {% /tab %} {% tab id="Response" %} Only menu cateogories are returned. ```json { "objects": [ { "type": "CATEGORY", "id": "XFOOIQWNGT25OGNOALD4DP4V", "updated_at": "2025-06-11T20:15:38.512Z", "created_at": "2025-06-10T23:36:14.87Z", "version": 1749672938512, "is_deleted": false, "present_at_all_locations": true, "category_data": { "name": "Appetizers", "category_type": "MENU_CATEGORY", "parent_category": { "ordinal": 549756015376 }, "is_top_level": true, "channels": [ "CH_leic5ZC8kuuyAVAIQUlxuEG72EYFNBoxFCz5574e9945o" ], "online_visibility": true, "ecom_seo_data": { "page_title": "", "page_description": "", "permalink": "" } } }, { "type": "CATEGORY", "id": "ILBEI56EXWHBBHC7LH7HP7CZ", "updated_at": "2025-06-11T20:26:05.431Z", "created_at": "2025-06-10T23:39:46.038Z", "version": 1749673565431, "is_deleted": false, "present_at_all_locations": true, "category_data": { "name": "Delivery Menu", "category_type": "MENU_CATEGORY", "parent_category": { "ordinal": 618475492112 }, "is_top_level": true, "channels": [ "CH_4s6dFPG7nd0Axgdcu8NXQqPO54qnOXkyQRkiBQlQuYC" ], "online_visibility": false, "ecom_seo_data": { "page_title": "", "page_description": "", "permalink": "" } } }, { "type": "CATEGORY", "id": "YUJLJGPTN5OSDE5ZJOTNBK47", "updated_at": "2025-06-11T20:26:05.431Z", "created_at": "2025-06-10T23:52:08.642Z", "version": 1749673565431, "is_deleted": false, "present_at_all_locations": true, "category_data": { "name": "Appetizers", "category_type": "MENU_CATEGORY", "parent_category": { "id": "ILBEI56EXWHBBHC7LH7HP7CZ", "ordinal": -2251731094208512 }, "is_top_level": false, "channels": [ "CH_4s6dFPG7nd0Axgdcu8NXQqPO54qnOXkyQRkiBQlQuYC" ], "online_visibility": false, "root_category": "ILBEI56EXWHBBHC7LH7HP7CZ" } }, { "type": "CATEGORY", "id": "24ZP2P5IMO4QE4VFGFNXRGOM", "updated_at": "2025-06-11T21:39:58.991Z", "created_at": "2025-06-11T21:39:59.052Z", "version": 1749677998991, "is_deleted": false, "present_at_all_locations": true, "category_data": { "name": "Appetizers - menu II", "category_type": "MENU_CATEGORY", "parent_category": { "ordinal": 687194968848 }, "is_top_level": true, "online_visibility": true } } ], "latest_time": "2025-06-11T21:39:58.991Z" } ``` {% /tab %} {% /tabset %} ### Return item changes After retrieving any changes to the menu structure, you want to get any changes to menu items and related types. {% tabset %} {% tab id="Request" %} This example retrieves items, variations, images, taxes, discounts, modifiers, and modifier lists. These types are usually defined for menu items and might change frequently. The list of types that you sync might be different. This example asks for all changes (including deletions) in these types made after June 10, 2025, at 7:00 PM: ```` {% aside type="info" %} If you include related objects, your result set might include other related objects even if they haven't changed. {% /aside %} {% /tab %} {% tab id="Response" %} ```json { "objects": [ { "type": "ITEM_VARIATION", "id": "I573TS32QL4CESCFYG5T3Y7A", "updated_at": "2025-06-10T22:43:22.122Z", "created_at": "2025-06-10T22:43:22.259Z", "version": 1749595402122, "is_deleted": false, "present_at_all_locations": false, "present_at_location_ids": [ "E78VDDVFW1EYX" ], "item_variation_data": { "item_id": "WMESBNU3X25KAZ7MOSEBKNHC", "name": "Regular", "ordinal": 0, "pricing_type": "FIXED_PRICING", "price_money": { "amount": 1000, "currency": "USD" }, "sellable": true, "stockable": true, "channels": [ "CH_QsN9pXIZiVwCMWjFr8NXQqPO54qnOXkyQRkiBQlQuYC" ] } }, { "type": "ITEM_VARIATION", "id": "57M2377J6RKASJH5JHY5NCZ2", "updated_at": "2025-06-10T22:43:22.122Z", "created_at": "2025-06-10T22:43:22.259Z", "version": 1749595402122, "is_deleted": false, "present_at_all_locations": false, "present_at_location_ids": [ "E78VDDVFW1EYX" ], "item_variation_data": { "item_id": "TDQ4GS3ATSYUEWH5YEBHQETC", "name": "Regular", "ordinal": 0, "pricing_type": "FIXED_PRICING", "price_money": { "amount": 1200, "currency": "USD" }, "sellable": true, "stockable": true, "channels": [ "CH_QsN9pXIZiVwCMWjFr8NXQqPO54qnOXkyQRkiBQlQuYC" ] } }, { "type": "ITEM_VARIATION", "id": "B5IDPADMOT7MQ2NK26FKNJQU", "updated_at": "2025-06-10T22:43:22.122Z", "created_at": "2025-06-10T22:43:22.259Z", "version": 1749595402122, "is_deleted": false, "present_at_all_locations": false, "present_at_location_ids": [ "E78VDDVFW1EYX" ], "item_variation_data": { "item_id": "GDAYYASFCCF6QUGM4URTS7BN", "name": "Regular", "ordinal": 0, "pricing_type": "FIXED_PRICING", "price_money": { "amount": 1500, "currency": "USD" }, "sellable": true, "stockable": true, "channels": [ "CH_QsN9pXIZiVwCMWjFr8NXQqPO54qnOXkyQRkiBQlQuYC" ] } }, { "type": "MODIFIER_LIST", "id": "CQZ6SECYCB5E2JM2OJU6WO2M", "updated_at": "2025-06-10T22:43:22.122Z", "created_at": "2025-06-10T22:43:22.259Z", "version": 1749595402122, "is_deleted": false, "present_at_all_locations": false, "present_at_location_ids": [ "E78VDDVFW1EYX" ], "modifier_list_data": { "name": "Sauce Choice", "ordinal": 100000000, "selection_type": "SINGLE", "modifiers": [ { "type": "MODIFIER", "id": "FDZD6MPY6CIL4RDDDCYOJ442", "updated_at": "2025-06-10T22:43:22.122Z", "created_at": "2025-06-10T22:43:22.259Z", "version": 1749595402122, "is_deleted": false, "present_at_all_locations": false, "present_at_location_ids": [ "E78VDDVFW1EYX" ], "modifier_data": { "name": "BBQ", "price_money": { "amount": 0, "currency": "USD" }, "on_by_default": true, "ordinal": 0, "modifier_list_id": "CQZ6SECYCB5E2JM2OJU6WO2M" } }, { "type": "MODIFIER", "id": "MA3TSC4BXGTORHF36EBK35K3", "updated_at": "2025-06-10T22:43:22.122Z", "created_at": "2025-06-10T22:43:22.259Z", "version": 1749595402122, "is_deleted": false, "present_at_all_locations": false, "present_at_location_ids": [ "E78VDDVFW1EYX" ], "modifier_data": { "name": "Spicy", "price_money": { "amount": 0, "currency": "USD" }, "on_by_default": false, "ordinal": 1, "modifier_list_id": "CQZ6SECYCB5E2JM2OJU6WO2M" } }, { "type": "MODIFIER", "id": "XACXEM7NKRQOQETHRJG2ITZZ", "updated_at": "2025-06-10T22:43:22.122Z", "created_at": "2025-06-10T22:43:22.259Z", "version": 1749595402122, "is_deleted": false, "present_at_all_locations": false, "present_at_location_ids": [ "E78VDDVFW1EYX" ], "modifier_data": { "name": "Mild", "price_money": { "amount": 0, "currency": "USD" }, "on_by_default": false, "ordinal": 2, "modifier_list_id": "CQZ6SECYCB5E2JM2OJU6WO2M" } } ], "is_conversational": false, "modifier_type": "LIST", "min_selected_modifiers": 1, "max_selected_modifiers": 1 } }, { "type": "MODIFIER_LIST", "id": "UBG5GMFXG4GABAHNIY4DNHWQ", "updated_at": "2025-06-10T22:43:22.122Z", "created_at": "2025-06-10T22:43:22.259Z", "version": 1749595402122, "is_deleted": false, "present_at_all_locations": false, "present_at_location_ids": [ "E78VDDVFW1EYX" ], "modifier_list_data": { "name": "Cooking Preference", "ordinal": 100000001, "selection_type": "SINGLE", "modifiers": [ { "type": "MODIFIER", "id": "IZ4ZJIH3RBP7AXNTVDHMAGVD", "updated_at": "2025-06-10T22:43:22.122Z", "created_at": "2025-06-10T22:43:22.259Z", "version": 1749595402122, "is_deleted": false, "present_at_all_locations": false, "present_at_location_ids": [ "E78VDDVFW1EYX" ], "modifier_data": { "name": "Medium", "price_money": { "amount": 0, "currency": "USD" }, "on_by_default": true, "ordinal": 0, "modifier_list_id": "UBG5GMFXG4GABAHNIY4DNHWQ" } }, { "type": "MODIFIER", "id": "JMP4KPGWKM4R7LA7HK6VZSET", "updated_at": "2025-06-10T22:43:22.122Z", "created_at": "2025-06-10T22:43:22.259Z", "version": 1749595402122, "is_deleted": false, "present_at_all_locations": false, "present_at_location_ids": [ "E78VDDVFW1EYX" ], "modifier_data": { "name": "Well Done", "price_money": { "amount": 0, "currency": "USD" }, "on_by_default": false, "ordinal": 1, "modifier_list_id": "UBG5GMFXG4GABAHNIY4DNHWQ" } } ], "is_conversational": false, "modifier_type": "LIST", "min_selected_modifiers": 1, "max_selected_modifiers": 1 } }, { "type": "MODIFIER", "id": "FDZD6MPY6CIL4RDDDCYOJ442", "updated_at": "2025-06-10T22:43:22.122Z", "created_at": "2025-06-10T22:43:22.259Z", "version": 1749595402122, "is_deleted": false, "present_at_all_locations": false, "present_at_location_ids": [ "E78VDDVFW1EYX" ], "modifier_data": { "name": "BBQ", "price_money": { "amount": 0, "currency": "USD" }, "on_by_default": true, "ordinal": 0, "modifier_list_id": "CQZ6SECYCB5E2JM2OJU6WO2M" } }, { "type": "MODIFIER", "id": "MA3TSC4BXGTORHF36EBK35K3", "updated_at": "2025-06-10T22:43:22.122Z", "created_at": "2025-06-10T22:43:22.259Z", "version": 1749595402122, "is_deleted": false, "present_at_all_locations": false, "present_at_location_ids": [ "E78VDDVFW1EYX" ], "modifier_data": { "name": "Spicy", "price_money": { "amount": 0, "currency": "USD" }, "on_by_default": false, "ordinal": 1, "modifier_list_id": "CQZ6SECYCB5E2JM2OJU6WO2M" } }, { "type": "MODIFIER", "id": "XACXEM7NKRQOQETHRJG2ITZZ", "updated_at": "2025-06-10T22:43:22.122Z", "created_at": "2025-06-10T22:43:22.259Z", "version": 1749595402122, "is_deleted": false, "present_at_all_locations": false, "present_at_location_ids": [ "E78VDDVFW1EYX" ], "modifier_data": { "name": "Mild", "price_money": { "amount": 0, "currency": "USD" }, "on_by_default": false, "ordinal": 2, "modifier_list_id": "CQZ6SECYCB5E2JM2OJU6WO2M" } }, { "type": "MODIFIER", "id": "IZ4ZJIH3RBP7AXNTVDHMAGVD", "updated_at": "2025-06-10T22:43:22.122Z", "created_at": "2025-06-10T22:43:22.259Z", "version": 1749595402122, "is_deleted": false, "present_at_all_locations": false, "present_at_location_ids": [ "E78VDDVFW1EYX" ], "modifier_data": { "name": "Medium", "price_money": { "amount": 0, "currency": "USD" }, "on_by_default": true, "ordinal": 0, "modifier_list_id": "UBG5GMFXG4GABAHNIY4DNHWQ" } }, { "type": "MODIFIER", "id": "JMP4KPGWKM4R7LA7HK6VZSET", "updated_at": "2025-06-10T22:43:22.122Z", "created_at": "2025-06-10T22:43:22.259Z", "version": 1749595402122, "is_deleted": false, "present_at_all_locations": false, "present_at_location_ids": [ "E78VDDVFW1EYX" ], "modifier_data": { "name": "Well Done", "price_money": { "amount": 0, "currency": "USD" }, "on_by_default": false, "ordinal": 1, "modifier_list_id": "UBG5GMFXG4GABAHNIY4DNHWQ" } }, { "type": "ITEM", "id": "TDQ4GS3ATSYUEWH5YEBHQETC", "updated_at": "2025-06-10T22:44:07.766Z", "created_at": "2025-06-10T22:43:22.259Z", "version": 1749595447766, "is_deleted": false, "present_at_all_locations": false, "present_at_location_ids": [ "E78VDDVFW1EYX" ], "item_data": { "name": "Loaded Nachos", "description": "Crispy tortilla chips topped with melted cheese, jalapenos, sour cream, and salsa.", "is_taxable": true, "variations": [ { "type": "ITEM_VARIATION", "id": "57M2377J6RKASJH5JHY5NCZ2", "updated_at": "2025-06-10T22:43:22.122Z", "created_at": "2025-06-10T22:43:22.259Z", "version": 1749595402122, "is_deleted": false, "present_at_all_locations": false, "present_at_location_ids": [ "E78VDDVFW1EYX" ], "item_variation_data": { "item_id": "TDQ4GS3ATSYUEWH5YEBHQETC", "name": "Regular", "ordinal": 0, "pricing_type": "FIXED_PRICING", "price_money": { "amount": 1200, "currency": "USD" }, "sellable": true, "stockable": true, "channels": [ "CH_QsN9pXIZiVwCMWjFr8NXQqPO54qnOXkyQRkiBQlQuYC" ] } } ], "product_type": "FOOD_AND_BEV", "ecom_uri": "https://flamingredphoto.square.site/product/loaded-nachos/34", "ecom_available": true, "ecom_visibility": "VISIBLE", "categories": [ { "id": "Z6O6YJFE37DLY37G4OULXDHY", "ordinal": 1 }, { "id": "7EN7VWSPUI25PJPS6XEEUV5G", "ordinal": 1 } ], "description_html": "

Crispy tortilla chips topped with melted cheese, jalapenos, sour cream, and salsa.

", "description_plaintext": "Crispy tortilla chips topped with melted cheese, jalapenos, sour cream, and salsa.", "channels": [ "CH_QsN9pXIZiVwCMWjFr8NXQqPO54qnOXkyQRkiBQlQuYC" ], "is_archived": false, "reporting_category": { "id": "Z6O6YJFE37DLY37G4OULXDHY", "ordinal": 1 }, "is_alcoholic": false } }, { "type": "ITEM", "id": "WMESBNU3X25KAZ7MOSEBKNHC", "updated_at": "2025-06-10T22:44:08.012Z", "created_at": "2025-06-10T22:43:22.259Z", "version": 1749595448012, "is_deleted": false, "present_at_all_locations": false, "present_at_location_ids": [ "E78VDDVFW1EYX" ], "item_data": { "name": "Buffalo Wings", "description": "Spicy chicken wings served with blue cheese dressing and celery sticks.", "is_taxable": true, "modifier_list_info": [ { "modifier_list_id": "CQZ6SECYCB5E2JM2OJU6WO2M", "min_selected_modifiers": -1, "max_selected_modifiers": -1, "enabled": true, "hidden_from_customer": false, "ordinal": 1, "allow_quantities": "NOT_SET", "is_conversational": "NOT_SET", "hidden_from_customer_override": "NOT_SET" } ], "variations": [ { "type": "ITEM_VARIATION", "id": "I573TS32QL4CESCFYG5T3Y7A", "updated_at": "2025-06-10T22:43:22.122Z", "created_at": "2025-06-10T22:43:22.259Z", "version": 1749595402122, "is_deleted": false, "present_at_all_locations": false, "present_at_location_ids": [ "E78VDDVFW1EYX" ], "item_variation_data": { "item_id": "WMESBNU3X25KAZ7MOSEBKNHC", "name": "Regular", "ordinal": 0, "pricing_type": "FIXED_PRICING", "price_money": { "amount": 1000, "currency": "USD" }, "sellable": true, "stockable": true, "channels": [ "CH_QsN9pXIZiVwCMWjFr8NXQqPO54qnOXkyQRkiBQlQuYC" ] } } ], "product_type": "FOOD_AND_BEV", "ecom_uri": "https://flamingredphoto.square.site/product/buffalo-wings/35", "ecom_available": true, "ecom_visibility": "VISIBLE", "categories": [ { "id": "Z6O6YJFE37DLY37G4OULXDHY", "ordinal": 0 }, { "id": "7EN7VWSPUI25PJPS6XEEUV5G", "ordinal": 0 } ], "description_html": "

Spicy chicken wings served with blue cheese dressing and celery sticks.

", "description_plaintext": "Spicy chicken wings served with blue cheese dressing and celery sticks.", "channels": [ "CH_QsN9pXIZiVwCMWjFr8NXQqPO54qnOXkyQRkiBQlQuYC" ], "is_archived": false, "reporting_category": { "id": "Z6O6YJFE37DLY37G4OULXDHY", "ordinal": 0 }, "is_alcoholic": false } }, { "type": "ITEM", "id": "GDAYYASFCCF6QUGM4URTS7BN", "updated_at": "2025-06-10T22:44:08.232Z", "created_at": "2025-06-10T22:43:22.259Z", "version": 1749595448232, "is_deleted": false, "present_at_all_locations": false, "present_at_location_ids": [ "E78VDDVFW1EYX" ], "item_data": { "name": "Classic Burger", "description": "Juicy beef patty with lettuce, tomato, onions, and pickles on a sesame seed bun.", "is_taxable": true, "modifier_list_info": [ { "modifier_list_id": "UBG5GMFXG4GABAHNIY4DNHWQ", "min_selected_modifiers": -1, "max_selected_modifiers": -1, "enabled": true, "hidden_from_customer": false, "ordinal": 2, "allow_quantities": "NOT_SET", "is_conversational": "NOT_SET", "hidden_from_customer_override": "NOT_SET" } ], "variations": [ { "type": "ITEM_VARIATION", "id": "B5IDPADMOT7MQ2NK26FKNJQU", "updated_at": "2025-06-10T22:43:22.122Z", "created_at": "2025-06-10T22:43:22.259Z", "version": 1749595402122, "is_deleted": false, "present_at_all_locations": false, "present_at_location_ids": [ "E78VDDVFW1EYX" ], "item_variation_data": { "item_id": "GDAYYASFCCF6QUGM4URTS7BN", "name": "Regular", "ordinal": 0, "pricing_type": "FIXED_PRICING", "price_money": { "amount": 1500, "currency": "USD" }, "sellable": true, "stockable": true, "channels": [ "CH_QsN9pXIZiVwCMWjFr8NXQqPO54qnOXkyQRkiBQlQuYC" ] } } ], "product_type": "FOOD_AND_BEV", "ecom_uri": "https://flamingredphoto.square.site/product/classic-burger/36", "ecom_available": true, "ecom_visibility": "VISIBLE", "categories": [ { "id": "U3G2UZ75UWIVG3JWQL5BCLH4", "ordinal": 0 }, { "id": "JNC2O2TJ534GSLDLSIE35NMH", "ordinal": 0 } ], "description_html": "

Juicy beef patty with lettuce, tomato, onions, and pickles on a sesame seed bun.

", "description_plaintext": "Juicy beef patty with lettuce, tomato, onions, and pickles on a sesame seed bun.", "channels": [ "CH_QsN9pXIZiVwCMWjFr8NXQqPO54qnOXkyQRkiBQlQuYC" ], "is_archived": false, "reporting_category": { "id": "U3G2UZ75UWIVG3JWQL5BCLH4", "ordinal": 0 }, "is_alcoholic": false } } ], "related_objects": [ { "type": "CATEGORY", "id": "U3G2UZ75UWIVG3JWQL5BCLH4", "updated_at": "2025-06-10T22:43:22.122Z", "created_at": "2025-06-10T22:43:22.259Z", "version": 1749595402122, "is_deleted": false, "present_at_all_locations": true, "category_data": { "name": "Sandwiches", "category_type": "REGULAR_CATEGORY", "parent_category": { "ordinal": 412317061904 }, "is_top_level": true, "online_visibility": true } }, { "type": "CATEGORY", "id": "Z6O6YJFE37DLY37G4OULXDHY", "updated_at": "2025-06-10T22:43:22.122Z", "created_at": "2025-06-10T22:43:22.259Z", "version": 1749595402122, "is_deleted": false, "present_at_all_locations": true, "category_data": { "name": "Starters", "category_type": "REGULAR_CATEGORY", "parent_category": { "ordinal": 481036538640 }, "is_top_level": true, "online_visibility": true } } ], "latest_time": "2025-06-11T21:39:58.991Z" } ``` {% /tab %} {% /tabset %} {% accordion expanded=false %} {% slot "heading" %} ### Best practices for menu syncing {% /slot %} 1. **Initial load** - Perform the initial sync during off-peak hours. - Process objects in the correct order (categories → items → modifiers). - Validate relationships as you build the menu structure. 2. **Incremental updates** - Store the last sync timestamp. - Include related objects in update queries. - Handle deleted objects appropriately. 3. **Error handling** - Implement retry logic for failed requests. - Log sync errors for troubleshooting. - Maintain a sync status dashboard. 4. **Data validation** - Verify category relationships. - Validate price points. - Check for required attributes. {% /accordion %} ## Understanding menu categories vs. regular categories When working with the Catalog API, it's important to understand the distinction between menu categories and regular categories: * **Menu categories** - Created through the Square Dashboard's menu builder. - Have `category_type = "MENU_CATEGORY"`. - Used specifically for menu organization. - Like regular categories, support parent-child relationships. - Can be synchronized across channels. * **Regular categories** - Created through the Catalog API. - Have `category_type = "REGULAR_CATEGORY"`. - Used for general item organization. - Might appear as duplicates of menu categories. {% aside type="important" %} When retrieving categories through the Catalog API, you might see what appears to be duplicate categories. This happens because the menu builder creates separate menu categories (`MENU_CATEGORY`) from regular categories (`REGULAR_CATEGORY`). To work specifically with menu structures, always filter for categories where `category_type = "2" (`MENU_CATEGORY`). {% /aside %} ## Kitchen display names For Food & Beverage operations, Square supports separate kitchen display names to streamline back-of-house operations. These properties allow restaurants to use different names for kitchen staff versus customer-facing displays, improving order accuracy and kitchen efficiency. **Available properties:** - [CatalogItem.kitchen_name](https://developer.squareup.com/reference/square/objects/CatalogItem#definition__property-kitchen_name) - A kitchen-friendly name for the menu item. - [CatalogItem.buyer_facing_name](https://developer.squareup.com/reference/square/objects/CatalogItem#definition__property-buyer_facing_name) - The customer-facing name displayed to buyers. - [CatalogItemVariation.kitchen_name](https://developer.squareup.com/reference/square/objects/CatalogItemVariation#definition__property-kitchen_name) - Kitchen name for specific item variations (sizes and options). - [CatalogModifier.kitchen_name](https://developer.squareup.com/reference/square/objects/CatalogModifier#definition__property-kitchen_name) - Kitchen name for modifiers (such as add-ons and customizations). **Benefits for restaurant operations:** These properties help restaurants: - Use abbreviated or coded names on kitchen display systems (KDSs). - Maintain appetizing, descriptive names for customer receipts and online ordering. - Reduce confusion during food preparation with standardized kitchen terminology. - Speed up order fulfillment by using familiar kitchen shorthand. - Support multi-language operations (kitchen names in one language, buyer names in another). **Example: Creating items with kitchen names** ```` **Example: Adding kitchen names to modifiers** ```` **Best practices for kitchen names:** 1. **Keep it concise** - Kitchen names should be short and easy to read on kitchen display screens. 2. **Use standard abbreviations** - Develop consistent abbreviations your kitchen staff understands. 3. **Consider screen space** - Kitchen display systems often have limited character width. 4. **Test with staff** - Ensure kitchen names are clear and unambiguous to your team. 5. **Update consistently** - When adding new items, maintain your naming conventions. **Common kitchen name patterns:** | Customer Name | Kitchen Name | Purpose | |--------------|--------------|---------| | Grilled Chicken Caesar Salad | GRL CKN CAESAR | Abbreviated ingredients | | Mediterranean Veggie Wrap | MED VEG WRAP | Shortened descriptors | | Extra Virgin Olive Oil | EVOO | Industry standard abbreviations | | Add Avocado (+$2.00) | +AVO | Modifier shorthand | | No Onions | NO ONION / -ONION | Exclusion indicators | | Gluten-Free Bun | GF BUN | Dietary abbreviations | ## Create a menu ### 1. Retrieving menu categories Use the Catalog API to retrieve existing menu categories. ```` ### 2. Creating location-specific menu categories When creating categories for different locations, ensure that you: * Set the correct `category_type`. * Establish proper parent-child relationships. * Use consistent naming across locations. The following shows an example for a delivery service menu category: {% tabset %} {% tab id="Request" %} ```` {% aside type="info" %} Menu objects are automatically enabled across all locations by default. When creating or updating menu objects using the API: - Set `present_at_all_locations` to `true` or omit it entirely. - Don't set `present_at_location_ids` or `absent_at_location_ids` (leave these fields empty). Location-specific menu configuration can only be managed through the Square Dashboard. This includes: - Enabling or disabling menus for specific locations. - Setting location-specific menu availability. - Managing location-based menu variations. {% /aside %} {% /tab %} {% tab id="Response" %} ```json { "catalog_object": { "type": "CATEGORY", "id": "ILBEI56EXWHBBHC7LH7HP7CZ", "updated_at": "2025-06-10T23:39:45.984Z", "created_at": "2025-06-10T23:39:45.984Z", "version": 1749598785984, "is_deleted": false, "present_at_all_locations": true, "category_data": { "name": "Delivery Menu", "category_type": "MENU_CATEGORY", "parent_category": { "ordinal": 618475492112 }, "is_top_level": true, "online_visibility": true } }, "id_mappings": [ { "client_object_id": "#delivery_menu", "object_id": "ILBEI56EXWHBBHC7LH7HP7CZ" } ] } ``` {% /tab %} {% /tabset %} ### 3. Creating subcategories When creating subcategories, always reference the parent menu category. {% tabset %} {% tab id="Request" %} ```` {% /tab %} {% tab id="Response" %} ```json { "catalog_object": { "type": "CATEGORY", "id": "YUJLJGPTN5OSDE5ZJOTNBK47", "updated_at": "2025-06-10T23:52:08.586Z", "created_at": "2025-06-10T23:52:08.586Z", "version": 1749599528586, "is_deleted": false, "present_at_all_locations": true, "category_data": { "name": "Appetizers", "category_type": "MENU_CATEGORY", "parent_category": { "id": "ILBEI56EXWHBBHC7LH7HP7CZ", "ordinal": -2251731094208512 }, "is_top_level": false, "online_visibility": true, "root_category": "ILBEI56EXWHBBHC7LH7HP7CZ" } }, "id_mappings": [ { "client_object_id": "#delivery_appetizers_2", "object_id": "YUJLJGPTN5OSDE5ZJOTNBK47" } ] } ``` {% /tab %} {% /tabset %} ### 4. Menu structures When working with menu categories, it's important to understand that the structure you see in the Square Dashboard is represented by `MENU_CATEGORY` types in the Catalog API. The following example shows how different menu structures might look: #### Dashboard menu structure ``` Restaurant Menu (MENU_CATEGORY) ├── Beverages │ ├── Non-Alcoholic │ │ ├── Iced Tea (Small/Large) │ │ ├── Soft Drinks (Regular/Large) │ │ └── Coffee (Small/Large) │ ├── Beer │ │ ├── Draft (Domestic/Craft) │ │ └── Bottled (Domestic/Imported) │ └── Wine │ ├── Red (Glass/Bottle) │ └── White (Glass/Bottle) ├── Appetizers │ ├── Mozzarella Sticks │ ├── Wings (6pc/12pc) │ └── Nachos └── Entrees ├── Sandwiches │ ├── Club │ └── BLT └── Salads ├── Caesar └── Garden ``` #### Delivery service menu structure ``` Delivery Menu (MENU_CATEGORY) ├── Beverages │ ├── Iced Tea (Small/Large) │ ├── Soft Drinks (Regular/Large) │ └── Coffee (Small/Large) ├── Appetizers │ ├── Mozzarella Sticks │ ├── Wings (6pc/12pc) │ └── Nachos └── Entrees ├── Sandwiches │ ├── Club │ └── BLT └── Salads ├── Caesar └── Garden ``` ## Common issues and solutions ### Issue: Duplicate categories - **Cause**: Items appearing in both menu and regular categories. - **Solution**: Filter specifically for `MENU_CATEGORY` types. - **Prevention**: Use proper category type filtering in API calls. ### Issue: Missing menu items - **Cause**: Looking at the wrong category type. - **Solution**: Check both menu and regular category associations. - **Prevention**: Implement proper category type checking. ### Issue: Incorrect menu structure - **Cause**: Mixing menu and regular categories. - **Solution**: Maintain proper parent-child relationships. - **Prevention**: Validate category types and relationships. ## Implementation tips 1. **Category filtering** ```` 2. **Relationship maintenance** - Track both menu and regular category IDs. - Update all relevant category associations. - Maintain a proper hierarchy. 3. **Data validation** - Verify category types before updates. - Check parent-child relationships. - Validate item associations. ### Next steps after syncing 1. **Verify data** - Compare item counts. - Validate category structures. - Check modifier associations. 2. **Monitor performance** - Track sync times. - Monitor API usage. - Optimize query patterns. 3. **Setup alerts** - Configure sync failure notifications. - Monitor for pricing discrepancies. - Alert when structure changes occur. --- # Manage Scheduled Shifts > Source: https://developer.squareup.com/docs/labor-api/manage-scheduled-shifts > Status: BETA > Languages: All > Platforms: All Learn how to create and manage future scheduled shifts for team members using scheduling endpoints in the Labor API. **Applies to:** [Labor API](labor-api/what-it-does) | [Team API](team/overview) | [Locations API](locations-api) | [Webhooks](webhooks/overview) {% subheading %}Use the [Labor API](https://developer.squareup.com/reference/square/labor-api) to create and manage future scheduled shifts for team members.{% /subheading %} {% toc hide=true /%} ## Overview Applications can use the Labor API to manage team schedules. The basic process includes creating draft scheduled shifts, publishing the scheduled shifts to make them visible to team members, and optionally updating or deleting scheduled shifts. The following diagram shows the API call flow for managing a scheduled shift and the webhook events triggered by each request: ![A diagram showing the process flow of Labor API requests that you use to manage a scheduled shift and the webhook events triggered by each request.](//images.ctfassets.net/1nw4q0oohfju/6LJK8zyRPT2Hib8wVUpg7y/fe7e27f67c1b9c585f71f5304cff6fa8/manage-scheduled-shift-flow.png) All updates to a scheduled shift are made to the `draft_shift_details` field. When a scheduled shift is published, Square copies `draft_shift_details` to `published_shift_details`. *If the shift was never published, setting `draft_shift_details.is_deleted` to `true` in an `UpdateScheduledShift` request deletes the shift. Otherwise, the shift is just marked for deletion and you must publish the change to delete it. {% aside type="info" %} The Labor API defines two types of objects; be careful not to confuse them: - A [ScheduledShift](https://developer.squareup.com/reference/square/objects/ScheduledShift) is used to manage team schedules. - A [Timecard](https://developer.squareup.com/reference/square/objects/Timecard) represents a single work shift for a team member. Each `Timecard` captures: - The actual time worked during one shift - Information needed for payroll processing For example, if an employee works five different shifts in a week, they will have five separate Timecard records - one for each shift. **Note:** The older `Shift` object type is deprecated. Use Timecards instead. For information about migration, see [Migration notes](labor-api/what-it-does#migration-notes). {% /aside %} ## Requirements and limitations The following requirements and limitations apply when managing scheduled shifts using the Labor API: * **Square API version** - Square API version 2025-05-21 or later is required to access or manage scheduled shifts. * **Valid access token** - Square API requests require an `Authorization` header with a bearer access token. The examples in this topic use the {% tooltip text="Square Sandbox" %}An isolated server environment used for testing. API calls in the Sandbox use the "connect.squareupsandbox.com" domain and require an access token that's valid for Sandbox.{% /tooltip %}, so you can test using your [Sandbox access token](build-basics/access-tokens#get-a-personal-access-token). {% accordion expanded=false %} {% slot "heading" %} #### More details {% /slot %} Applications using [OAuth](oauth-api/overview) access tokens to authorize requests typically require the following permissions when working with team schedules: - `MERCHANT_PROFILE_READ` to retrieve location information. - `EMPLOYEES_READ` to retrieve team member and job information. - `TIMECARDS_READ` to retrieve scheduled shifts. - `TIMECARDS_WRITE` to create, update, and publish scheduled shifts. To call Square APIs in the production environment, change the base URL to `https://connect.squareup.com` and use your production (personal) access token. {% /accordion %} * **Two-week window for bulk publishing** - The minimum `start_at` and maximum `end_at` timestamps of all shifts in a `BulkPublishScheduledShifts` request must fall within a two-week period. {% anchor id="time-zone-offset" /%} * **Time zone + offset for start and end times** - The `start_at` and `end_at` timestamps are provided in RFC 3339 format and represent the local time for the shift location specified in `location_id`. Precision up to the minute is respected; seconds are truncated. {% accordion expanded=false %} {% slot "heading" %} #### More details {% /slot %} For example, 9:00 AM local PST time can be specified as `2025-04-13T09:00:00-08:00` or `2025-04-13T17:00:00Z`. Square stores the location's time zone (for example, "America/Los_Angeles") in the read-only `timezone` field of the scheduled shift. Square uses the time zone to calculate the correct local time for shifts and display times appropriately to team members. When providing Daylight Saving Time (DST) timestamps, be aware that: - Times during the DST start transition (typically 2:00-2:59 AM) don't exist. - Times during the DST end transition (typically 1:00-1:59 AM) occur twice. {% /accordion %} For scheduling capabilities, see general [Requirements and limitations](labor-api/scheduling#requirements-and-limitations). {% anchor id="create-scheduled-shifts" /%} ## Create scheduled shifts To create a scheduled shift, call [CreateScheduledShift](https://developer.squareup.com/reference/square/labor-api/create-scheduled-shift) and provide `draft_shift_details`. You can then review and update the shift and publish it when you're ready to make it visible to all team members. When a scheduled shift is published, Square keeps `draft_shift_details` as is and copies it to the `published_shift_details` field. Be ready to provide `draft_shift_details` with the following required fields: - `location_id` - The ID of the location where the shift occurs. Call [ListLocations](https://developer.squareup.com/reference/square/locations-api/list-locations) to get location IDs. - `job_id` - The ID of the job for the shift. Call [ListJobs](https://developer.squareup.com/reference/square/team-api/list-jobs) to get job IDs. - `start_at` and `end_at` - Start and end times for the shift in the [time zone + offset](#time-zone-offset) of the location. You can also provide the following optional `draft_shift_details` fields: - `team_member_id` - The ID of the [team member to assign to the shift](#manage-team-member-assignments). - `notes` - Notes for the shift. {% line-break /%} {% tabset %} {% tab id="Request" %} The following example request includes all draft shift details ```` {% /tab %} {% tab id="Response" %} The response returns the new scheduled shift with draft shift details. ```json { "scheduled_shift": { "id": "kxR8FWJE8DT3x7", "draft_shift_details": { "location_id": "KACM8A41GR60X", "job_id": "jxR8EWJE8DT2x7", "team_member_id": "-3oZQKPKVk6gUXU_V5Qa", "start_at": "2025-04-15T09:00:00-07:00", "end_at": "2025-04-15T17:00:00-07:00", "notes": "Opening shift", "is_deleted": false, "timezone": "America/Los_Angeles" }, "version": 1, "created_at": "2025-04-02T14:58:49-07:00", "updated_at": "2025-04-02T14:58:49-07:00" } } ``` {% /tab %} {% /tabset %} ### Webhooks Creating a scheduled shift triggers the following [webhook event](webhooks/overview): - [labor.scheduled_shift.created](https://developer.squareup.com/reference/square/labor-api/webhooks/labor.scheduled_shift.created) ### Next steps - [Update the scheduled shift](#update-scheduled-shifts) as needed. Updates might include [managing the team member assignment](#manage-team-member-assignments) or [deleting the shift](#delete-scheduled-shifts). - [Publish the scheduled shift](#publish-scheduled-shifts) to make it public. ## Update scheduled shifts To make changes to a scheduled shift, call [UpdateScheduledShift](https://developer.squareup.com/reference/square/labor-api/update-scheduled-shift) and provide `draft_shift_details` with any new, changed, or cleared fields. When you're ready to make the changes visible to all team members, publish the shift. Be ready to provide the following information: - `id` - The shift ID as a path parameter. Get the shift ID from the [CreateScheduledShift](https://developer.squareup.com/reference/square/labor-api/create-scheduled-shift) response or call [SearchScheduledShifts](https://developer.squareup.com/reference/square/labor-api/search-scheduled-shifts). - `draft_shift_details` - Any new, changed, or cleared fields. You can make the following changes: - Change the value of required fields. - `location_id` - The ID of the location where the shift occurs. Call [ListLocations](https://developer.squareup.com/reference/square/locations-api/list-locations) to get location IDs. - `job_id` - The ID of the job for the shift. Call [ListJobs](https://developer.squareup.com/reference/square/team-api/list-jobs) to get job IDs. - `start_at` and `end_at` - Start and end times for the shift in [time zone + offset format](#time-zone-offset). - Add, change, or clear optional fields. To clear these fields, set the value to `null`. - `team_member_id` - The ID of the [team member to assign to the shift](#manage-team-member-assignments). - `notes` - Notes for the shift. - Use the `is_deleted` field to [delete the shift](#delete-scheduled-shifts). - `version` (optional) - The current version of the shift, used to enable [optimistic concurrency control](build-basics/common-api-patterns/optimistic-concurrency) for the request. Get the current version when you get the shift ID. {% aside type="info" %} `UpdateScheduledShift` supports [sparse updates](build-basics/clearing-fields#sparse-updates), so the request only needs to include your changes. Any updates to the `published_shift_details` field are ignored. {% /aside %} {% tabset %} {% tab id="Request" %} The following example request changes the `team_member_id`, `start_at`, and `end_at` fields and clears the `notes` field: ```` {% /tab %} {% tab id="Response" %} The response returns the scheduled shift with updated draft shift details and incremented `version`. In this example, the presence of the `published_shift_details` field indicates that the shift was previously published. Note that `draft_shift_details` differs from `published_shift_details` because the change isn't published yet. ```json { "scheduled_shift": { "id": "kxR8FWJE8DT3x7", "draft_shift_details": { "location_id": "KACM8A41GR60X", "job_id": "jxR8EWJE8DT2x7", "team_member_id": "-3oZQKPKVk6gUXU_V5Qa", "start_at": "2025-04-15T11:00:00-07:00", "end_at": "2025-04-15T18:00:00-07:00", "is_deleted": false, "timezone": "America/Los_Angeles" }, "published_shift_details": { "location_id": "KACM8A41GR60X", "job_id": "jxR8EWJE8DT2x7", "team_member_id": "1AVJj0DjkzbmbJw5r4KK", "start_at": "2025-04-15T09:00:00-07:00", "end_at": "2025-04-15T17:00:00-07:00", "notes": "Opening shift", "is_deleted": false, "timezone": "America/Los_Angeles" }, "version": 2, "created_at": "2025-04-02T14:58:49-07:00", "updated_at": "2025-04-02T15:00:00-07:00" } } ``` {% /tab %} {% /tabset %} ### Webhooks Updating a scheduled shift triggers the following [webhook events](webhooks/overview): - [labor.scheduled_shift.updated](https://developer.squareup.com/reference/square/labor-api/webhooks/labor.scheduled_shift.updated) - [labor.scheduled_shift.deleted](https://developer.squareup.com/reference/square/labor-api/webhooks/labor.scheduled_shift.deleted) - Only if `draft_shift_details.is_deleted` is set to `true` when [deleting a draft-only shift](#delete-scheduled-shifts). ### Next steps - Update the scheduled shift with more changes as needed. This might include [managing the team member assignment](#manage-team-member-assignments) or [deleting the shift](#delete-scheduled-shifts). - [Publish the scheduled shift](#publish-scheduled-shifts) to make your changes public. ## Publish scheduled shifts After creating or updating a scheduled shift, you must call [PublishScheduledShift](https://developer.squareup.com/reference/square/labor-api/publish-scheduled-shift) or [BulkPublishScheduledShifts](https://developer.squareup.com/reference/square/labor-api/bulk-publish-scheduled-shifts) to make the new shift or latest draft details visible to all team members. When a scheduled shift is published, Square keeps `draft_shift_details` as is and copies it to the `published_shift_details` field. Be ready to provide the following information: - `id` - The shift ID. Get the shift ID from the [CreateScheduledShift](https://developer.squareup.com/reference/square/labor-api/create-scheduled-shift) response or call [SearchScheduledShifts](https://developer.squareup.com/reference/square/labor-api/search-scheduled-shifts). - `idempotency_key` - A unique string used to ensure the [idempotency](build-basics/common-api-patterns/idempotency) of the operation. Required for `PublishScheduledShift`; not used for `BulkPublishScheduledShifts`. - `scheduled_shift_notification_audience` - Indicates whether Square should send an email notification to team members. Valid values: * `ALL` - Send a notification to all active team members. * `AFFECTED` (default) - Send a notification to the team member assigned to the shift. When changing the team member assignment, both team members are notified. * `NONE` - Don't send notifications. Note that republishing an unchanged shift doesn't resend the notification if set to `AFFECTED` or `NONE`. - `version` (optional) - The current version of the shift, used to enable [optimistic concurrency control](build-basics/common-api-patterns/optimistic-concurrency) for the request. Get the current version when you get the shift ID. {% line-break /%} {% accordion expanded=true %} {% slot "heading" %} ### Publish a single scheduled shift {% /slot %} To publish a single scheduled shift, call [PublishScheduledShift](https://developer.squareup.com/reference/square/labor-api/publish-scheduled-shift) and provide the ID of the scheduled shift you want to publish (as a path parameter) and `idempotency_key`. Optionally provide `version` and `scheduled_shift_notification_audience`. {% tabset %} {% tab id="Request" %} ```` {% /tab %} {% tab id="Response" %} The response returns the published scheduled shift. ```json { "scheduled_shift": { "id": "kxR8FWJE8DT3x7", "draft_shift_details": { "location_id": "KACM8A41GR60X", "job_id": "jxR8EWJE8DT2x7", "team_member_id": "-3oZQKPKVk6gUXU_V5Qa", "start_at": "2025-04-15T09:00:00-07:00", "end_at": "2025-04-15T17:00:00-07:00", "notes": "Opening shift", "is_deleted": false, "timezone": "America/Los_Angeles" }, "published_shift_details": { "location_id": "KACM8A41GR60X", "job_id": "jxR8EWJE8DT2x7", "team_member_id": "-3oZQKPKVk6gUXU_V5Qa", "start_at": "2025-04-15T09:00:00-07:00", "end_at": "2025-04-15T17:00:00-07:00", "notes": "Opening shift", "is_deleted": false, "timezone": "America/Los_Angeles" }, "version": 2, "created_at": "2025-04-02T14:58:49-07:00", "updated_at": "2025-04-02T15:00:00-07:00" } } ``` {% /tab %} {% /tabset %} {% /accordion %} {% accordion expanded=true %} {% slot "heading" %} ### Publish multiple scheduled shifts {% /slot %} To publish 1 – 100 scheduled shifts, provide `scheduled_shifts` as a map of key-value pairs that represent individual publish requests. The minimum `start_at` and maximum `end_at` timestamps of all shifts in a `BulkPublishScheduledShifts` request must fall within a two-week period. - Each key is the ID of a scheduled shift you want to publish. - Each value is a `BulkPublishScheduledShiftsData` object that contains the optional `version` field or is empty. The optional `scheduled_shift_notification_audience` setting applies to the bulk operation. {% tabset %} {% tab id="Request" %} ```` {% /tab %} {% tab id="Response" %} The response returns a map of responses for the published scheduled shifts. Responses might not be returned in the same order as the individual publish requests sent to `BulkPublishScheduledShifts`. ```json { "responses": { "kxR8FWJE8DT3x7": { "scheduled_shift": { "id": "kxR8FWJE8DT3x7", "draft_shift_details": { "location_id": "KACM8A41GR60X", "job_id": "jxR8EWJE8DT2x7", "team_member_id": "-3oZQKPKVk6gUXU_V5Qa", "start_at": "2025-04-15T09:00:00-07:00", "end_at": "2025-04-15T17:00:00-07:00", "notes": "Opening shift", "is_deleted": false, "timezone": "America/Los_Angeles" }, "published_shift_details": { "location_id": "KACM8A41GR60X", "job_id": "jxR8EWJE8DT2x7", "team_member_id": "-3oZQKPKVk6gUXU_V5Qa", "start_at": "2025-04-15T09:00:00-07:00", "end_at": "2025-04-15T17:00:00-07:00", "notes": "Opening shift", "is_deleted": false, "timezone": "America/Los_Angeles" }, "version": 2, "created_at": "2025-04-02T14:58:49-07:00", "updated_at": "2025-04-02T15:00:00-07:00" } }, "kxR8FWJE8DT4x8": { "scheduled_shift": { "id": "kxR8FWJE8DT4x8", "draft_shift_details": { "location_id": "KACM8A41GR60X", "job_id": "jxR8EWJE8DT2x7", "team_member_id": "-4pZQKPKVk6gUXU_V5Qb", "start_at": "2025-04-15T17:00:00-07:00", "end_at": "2025-04-16T01:00:00-07:00", "notes": "Closing shift", "is_deleted": false, "timezone": "America/Los_Angeles" }, "published_shift_details": { "location_id": "KACM8A41GR60X", "job_id": "jxR8EWJE8DT2x7", "team_member_id": "-4pZQKPKVk6gUXU_V5Qb", "start_at": "2025-04-15T17:00:00-07:00", "end_at": "2025-04-16T01:00:00-07:00", "notes": "Closing shift", "is_deleted": false, "timezone": "America/Los_Angeles" }, "version": 2, "created_at": "2025-04-02T14:58:49-07:00", "updated_at": "2025-04-02T15:00:00-07:00" } }, "kxR8FWJE8DT5x9": { "scheduled_shift": { "id": "kxR8FWJE8DT5x9", "draft_shift_details": { "location_id": "KACM8A41GR60X", "job_id": "jxR8EWJE8DT2x7", "team_member_id": "-5qZQKPKVk6gUXU_V5Qc", "start_at": "2025-04-16T09:00:00-07:00", "end_at": "2025-04-16T17:00:00-07:00", "notes": "Opening shift", "is_deleted": false, "timezone": "America/Los_Angeles" }, "published_shift_details": { "location_id": "KACM8A41GR60X", "job_id": "jxR8EWJE8DT2x7", "team_member_id": "-5qZQKPKVk6gUXU_V5Qc", "start_at": "2025-04-16T09:00:00-07:00", "end_at": "2025-04-16T17:00:00-07:00", "notes": "Opening shift", "is_deleted": false, "timezone": "America/Los_Angeles" }, "version": 1, "created_at": "2025-04-02T14:58:49-07:00", "updated_at": "2025-04-02T15:00:00-07:00" } } } } ``` {% /tab %} {% /tabset %} {% /accordion %} ### Webhooks Publishing a scheduled shift triggers the following [webhook events](webhooks/overview): - [labor.scheduled_shift.updated](https://developer.squareup.com/reference/square/labor-api/webhooks/labor.scheduled_shift.updated) - [labor.scheduled_shift.published](https://developer.squareup.com/reference/square/labor-api/webhooks/labor.scheduled_shift.published) - [labor.scheduled_shift.deleted](https://developer.squareup.com/reference/square/labor-api/webhooks/labor.scheduled_shift.deleted) - Only if publishing a shift that has `draft_shift_details.is_deleted` set to `true` when [deleting the published shift](#delete-scheduled-shifts). Each individual publish request in a bulk operation triggers these events. ### Next steps - [Update the scheduled shift](#update-scheduled-shifts) with more changes as needed. This might include [managing the team member assignment](#manage-team-member-assignments) or [deleting the shift](#delete-scheduled-shifts). {% anchor id="manage-team-member-assignments" /%} ## Managing team member assignments In a scheduled shift, the optional `team_member_id` field references the ID of the [team member](https://developer.squareup.com/reference/square/objects/TeamMember) assigned to the shift. >`"team_member_id": "K6JiNAakLUf5lUYmfjn"` You can assign a team member when you first [create the shift](#create-scheduled-shifts) or add, change, or clear the assignment when you [update the shift](#update-scheduled-shifts). To clear the team member assignment, set the value to `null`. >`"team_member_id": null` You must [publish the shift](#publish-scheduled-shifts) to make the latest draft details public. When published, Square notifies team members according to the `scheduled_shift_notification_audience` setting. ### Team members and job assignments Sellers can optionally record the jobs that team members are qualified to do. These jobs are stored in the `wage_setting.job_assignments` field, as shown in the following example: ```json { "team_member": { "id": "1yJlHapkseYnNPETIU1B", ... "wage_setting": { "team_member_id": "-3oZQKPKVk6gUXU_V5Qa", "job_assignments": [ { "job_title": "Server", "job_id": "FjS8x95cqHiMenw4f1NAUH4P", "pay_type": "HOURLY", "hourly_rate": { "amount": 1700, "currency": "USD" } }, { "job_title": "Cashier", "job_id": "VDNpRv8da51NU8qZFC5zDWpF", "pay_type": "HOURLY", "hourly_rate": { "amount": 2000, "currency": "USD" } } ], ... } } } ``` ### Find available team members To find team members that can work a particular job: 1. Call [ListJobs](https://developer.squareup.com/reference/square/team-api/list-jobs) to get the ID of the job to schedule (if needed). 2. Call [SearchTeamMembers](https://developer.squareup.com/reference/square/team-api/search-team-members) and filter by location ID and `ACTIVE` status. 3. Iterate through the results to build a job pool of team members who can do the job: 1. If `wage_setting` is present, iterate through `job_assignments`. 2. Compare the `job_id` field to the ID of the job to schedule. 3. Copy the ID of team members who can do the job. 4. Call [SearchScheduledShifts](https://developer.squareup.com/reference/square/labor-api/search-scheduled-shifts) to find the team members who are already working during the scheduled shift so that you can remove them from the job pool. ```` This query finds all published and assigned shifts that overlap with the specified time period at the specified location. The overlap is detected by finding shifts that start before the period ends (`start.end_at`) and end after the period begins (`end.start_at`). To find team members working on a specific calendar day, you can alternatively use the [workday filter](labor-api/retrieve-scheduled-shifts#workday-start-at), which is designed for date-based queries. {% anchor id="delete-scheduled-shifts" /%} ## Deleting scheduled shifts The `draft_shift_details.is_deleted` field is used to delete scheduled shifts. The deletion process differs based on whether the shift was previously published. ### Draft-only shifts For shifts that were never published, you need to [update the shift](#update-scheduled-shifts). 1. Call `UpdateScheduledShift` and set `draft_shift_details.is_deleted` to `true`. This operation performs a hard delete — the shift is permanently deleted and is no longer accessible through API endpoints. This operation triggers these [webhook events](webhooks/overview): - [labor.scheduled_shift.updated](https://developer.squareup.com/reference/square/labor-api/webhooks/labor.scheduled_shift.updated) - [labor.scheduled_shift.deleted](https://developer.squareup.com/reference/square/labor-api/webhooks/labor.scheduled_shift.deleted) ### Published shifts For shifts that were previously published, you need to [update the shift](#update-scheduled-shifts) and then [publish the shift](#publish-scheduled-shifts). 1. Call `UpdateScheduledShift` and set `draft_shift_details.is_deleted` to `true`. This operation marks the shift for deletion and triggers this [webhook event](webhooks/overview): - [labor.scheduled_shift.updated](https://developer.squareup.com/reference/square/labor-api/webhooks/labor.scheduled_shift.updated) In this state, the shift remains accessible and `draft_shift_details.is_deleted` can be set back to `false` to cancel the deletion. 2. Call `PublishScheduledShift` to make the change public. This operation performs a hard delete — the shift is permanently deleted and is no longer accessible through API endpoints. This operation triggers these webhook events: - [labor.scheduled_shift.updated](https://developer.squareup.com/reference/square/labor-api/webhooks/labor.scheduled_shift.updated) - [labor.scheduled_shift.deleted](https://developer.squareup.com/reference/square/labor-api/webhooks/labor.scheduled_shift.deleted) - [labor.scheduled_shift.published](https://developer.squareup.com/reference/square/labor-api/webhooks/labor.scheduled_shift.published) Square notifies team members according to the `scheduled_shift_notification_audience` setting. Note that the `ScheduledShift` object in the event data has different `is_deleted` settings: - For `labor.scheduled_shift.updated`: - `draft_shift_details.is_deleted` is `true` - `published_shift_details.is_deleted` is `false` - For `labor.scheduled_shift.published`: - `draft_shift_details.is_deleted` is `true` - `published_shift_details.is_deleted` is `true` ## See also * [Scheduling with the Labor API](labor-api/scheduling) * [Labor API](labor-api/what-it-does) * [Team API](team/overview) --- # Scheduling with the Labor API > Source: https://developer.squareup.com/docs/labor-api/scheduling > Status: BETA > Languages: All > Platforms: All Use the Square Labor API to create and manage team schedules. **Applies to:** [Labor API](labor-api/what-it-does) | [Team API](team/overview) | [Locations API](locations-api) | [Webhooks](webhooks/overview) | [GraphQL](devtools/graphql) {% subheading %}Learn how to manage team schedules using the Labor API.{% /subheading %} {% toc hide=true /%} ## Overview The Labor API provides scheduling capabilities that let third-party scheduling applications integrate with Square. You can manage team member schedules, synchronize schedule data between external systems and Square, and access data for labor forecasting, labor cost reporting, and optimizing staffing levels. The API supports: - Creating draft and published schedules. - Managing shift assignments and changes. - Searching scheduled hours by status, team member, and other parameters. - Notifying team members about schedule updates. Whether you're creating a standalone scheduling application or integrating with the Square Dashboard and Square Team application, you can use the Labor API to manage scheduled shifts. {% aside type="info" %} The Labor API defines two types of objects; be careful not to confuse them: - A [ScheduledShift](https://developer.squareup.com/reference/square/objects/ScheduledShift) is used to manage team schedules. - A [Timecard](https://developer.squareup.com/reference/square/objects/Timecard) represents a single work shift for a team member. Each `Timecard` captures: - The actual time worked during one shift - Information needed for payroll processing For example, if an employee works five different shifts in a week, they will have five separate Timecard records - one for each shift. **Note:** The older `Shift` object type is deprecated. Use Timecards instead. For information about migration, see [Migration notes](labor-api/what-it-does#migration-notes). {% /aside %} ## Requirements and limitations The following requirements and limitations apply when managing scheduled shifts using the Labor API. - Square API version 2025-05-21 or later is required to access or manage scheduled shifts. - The ability to schedule repeated shifts using templates isn't supported. - Scheduled shifts created by the API are visible in the **Staff** section of the Square Dashboard under **Scheduling** and in the Square Team application. Note the following: - Sellers must use [team permissions](https://squareup.com/help/article/5822-employee-permissions) in the **Shifts** category to allow other team members to access draft shifts. Published shifts are accessible by all team members. - Some scheduling features require that the seller has an active [Shifts Plus](https://squareup.com/staff/shifts/pricing) subscription. For example, shifts that are scheduled more than 10 days in advance using the Labor API are visible in the Square Dashboard to sellers without a subscription but these shifts cannot be updated. {% aside info="info" %} The Labor API provides unrestricted access to schedule management, so these requirements don't apply to third-party scheduling applications. {% /aside %} - The color scheme for a scheduled shift cannot be changed. This property isn't exposed on the `ScheduledShift` object. See additional [requirements and limitations](labor-api/manage-scheduled-shifts#requirements-and-limitations) for managing scheduled shifts. ## How scheduling works Team schedules are made up of individual scheduled shifts spanning a given time period. To create a scheduled shift, first provide draft shift details such as the job ID, location ID, team member assignment, and start and end times. You can update draft shift details as needed and then publish the shift to make your changes public. The following diagram shows the API call flow for managing a scheduled shift and the [webhook events](labor-api/webhooks) triggered by each request: ![A diagram showing the process flow of Labor API requests that you use to manage a scheduled shift and the webhook events triggered by each request.](//images.ctfassets.net/1nw4q0oohfju/6LJK8zyRPT2Hib8wVUpg7y/fe7e27f67c1b9c585f71f5304cff6fa8/manage-scheduled-shift-flow.png) The simplest flow is from create to publish, but you can iteratively update and publish or republish. For more information about these flows, see [Manage Scheduled Shifts](labor-api/manage-scheduled-shifts). *If the shift was never published, setting `draft_shift_details.is_deleted` to `true` in an `UpdateScheduledShift` request deletes the shift. Otherwise, the shift is just marked for deletion and you must publish the change to delete it. {% aside type="info" %} The diagram doesn't include calls used to obtain the `location_id`, `team_member_id`, and `job_id` from other Square APIs or calls to `RetrieveScheduledShift` and `SearchScheduledShifts` for retrieving information about a scheduled shift. {% /aside %} The following key concepts apply to scheduling with the Labor API: {% accordion expanded=false %} {% slot "heading" %} ### Scheduled shifts contain draft and published shift details {% /slot %} You work with two primary objects for shift management: - [ScheduledShift](https://developer.squareup.com/reference/square/objects/ScheduledShift) - A specific time slot in a work schedule. This object is used to manage the draft and published versions of a shift: - `draft_shift_details` - Stores the latest draft shift details. - `published_shift_details` - Stores the current published shift details. This field is initially added when the scheduled shift is first published and then updated with every subsequent published version. After the initial publish, you can determine whether there are unpublished changes by comparing `draft_shift_details` to `published_shift_details`. - [ScheduledShiftDetails](https://developer.squareup.com/reference/square/objects/ScheduledShiftDetails) - The data type for the `draft_shift_details` and `published_shift_details` fields of a `ScheduledShift`. The following fields are required: `location_id`, `job_id`, `start_at`, and `end_at`. Only the latest draft shift details and current published shift details are accessible for a scheduled shift. {% /accordion %} {% accordion expanded=false %} {% slot "heading" %} ### Draft shift details are writable, published shift details are read only {% /slot %} Draft shift details are writable using the `CreateScheduledShift` and `UpdateScheduledShift` endpoints. To change the details for a published shift: 1. Call `UpdateScheduledShift` and provide the updated `draft_shift_details`. 2. Call `PublishScheduledShift` or `BulkPublishScheduledShifts` to make the changes public. When a scheduled shift is published, Square copies `draft_shift_details` to `published_shift_details`. {% /accordion %} {% accordion expanded=false %} {% slot "heading" %} ### Team member notifications are optionally sent on publish {% /slot %} The `PublishScheduledShift` and `BulkPublishScheduledShifts` endpoints provide a `scheduled_shift_notification_audience` parameter that lets you control whether Square notifies team members about new, changed, or deleted shifts. Notifications can be sent to affected team members only (default) or all active team members, or you can choose not to send notifications. Notifications are sent to the email address on record for [team members](https://developer.squareup.com/reference/square/objects/TeamMember). {% /accordion %} ## Scheduling endpoints The Labor API provides a set of endpoints used for managing team schedules. Applications using [OAuth](oauth-api/overview) to authorize API requests require the `TIMECARDS_WRITE` or `TIMECARDS_READ` permission to call scheduling endpoints. ### Managing scheduled shifts Use the following endpoints to [create and manage](labor-api/manage-scheduled-shifts) scheduled shifts. {% table %} * Endpoint * Permission {% width="145px" %} * Description ----- * [CreateScheduledShift](https://developer.squareup.com/reference/square/labor-api/create-scheduled-shift) * `TIMECARDS_WRITE` * Creates a scheduled shift by providing draft shift details such as job ID, team member assignment, and start and end times. ----- * [UpdateScheduledShift](https://developer.squareup.com/reference/square/labor-api/update-scheduled-shift) * `TIMECARDS_WRITE` * Updates the draft shift details for a scheduled shift. ----- * [PublishScheduledShift](https://developer.squareup.com/reference/square/labor-api/publish-scheduled-shift) * `TIMECARDS_WRITE` * Publishes a scheduled shift to make the current draft details visible to all team members. ----- * [BulkPublishScheduledShifts](https://developer.squareup.com/reference/square/labor-api/bulk-publish-scheduled-shifts) * `TIMECARDS_WRITE` * Publishes 1 – 100 scheduled shifts to make the current draft details visible to all team members. {% /table %} ### Retrieving scheduled shifts Use the following endpoints to [retrieve and search](labor-api/retrieve-scheduled-shifts) scheduled shifts. {% table %} * Endpoint * Permission {% width="135px" %} * Description ----- * [RetrieveScheduledShift](https://developer.squareup.com/reference/square/labor-api/retrieve-scheduled-shift) * `TIMECARDS_READ` * Retrieves a scheduled shift by ID. ----- * [SearchScheduledShifts](https://developer.squareup.com/reference/square/labor-api/search-scheduled-shifts) * `TIMECARDS_READ` * Retrieves a paginated list of scheduled shifts, with optional filter and sort settings. {% /table %} {% aside type="info" %} You can use the `scheduledShifts` entry point in [Square GraphQL](devtools/graphql) queries to access scheduling data through read-only operations. GraphQL queries can improve performance and reduce development time by letting you request exactly the data you need in fewer, more compact data transfers. {% /aside %} ## See also - [Manage Scheduled Shifts](labor-api/manage-scheduled-shifts) - [Retrieve Scheduled Shifts](labor-api/retrieve-scheduled-shifts) --- # Retrieve Scheduled Shifts > Source: https://developer.squareup.com/docs/labor-api/retrieve-scheduled-shifts > Status: BETA > Languages: All > Platforms: All Use the Square Labor API to retrieve scheduled shifts and search for shifts by location, team member, date range, and assignment status. **Applies to:** [Labor API](labor-api/what-it-does) | [Team API](team/overview) | [Locations API](locations-api) {% subheading %}Use the [Labor API](https://developer.squareup.com/reference/square/labor-api) to search and retrieve scheduled shifts with flexible filtering options.{% /subheading %} {% toc hide=true /%} ## Overview Applications can use the Labor API to search and retrieve scheduled shifts. You can search shifts using various filters, including date ranges, locations, team members, assignment status, and published status. {% aside type="info" %} The Labor API defines two types of objects; be careful not to confuse them: - A [ScheduledShift](https://developer.squareup.com/reference/square/objects/ScheduledShift) is used to manage team schedules. - A [Timecard](https://developer.squareup.com/reference/square/objects/Timecard) represents a single work shift for a team member. Each `Timecard` captures: - The actual time worked during one shift - Information needed for payroll processing For example, if an employee works five different shifts in a week, they will have five separate Timecard records - one for each shift. **Note:** The older `Shift` object type is deprecated. Use Timecards instead. For information about migration, see [Migration notes](labor-api/what-it-does#migration-notes). {% /aside %} ## Requirements and limitations The following requirements and limitations apply when retrieving scheduled shifts using the Labor API. * **Square API version** - Square API version 2025-05-21 or later is required to access or manage scheduled shifts. * **Valid access token** - Square API requests require an `Authorization` header with a bearer access token. The examples in this topic use the {% tooltip text="Square Sandbox" %}An isolated server environment used for testing. API calls in the Sandbox use the "connect.squareupsandbox.com" domain and require an access token that's valid for Sandbox.{% /tooltip %}, so you can test using your [Sandbox access token](build-basics/access-tokens#get-a-personal-access-token). {% accordion expanded=false %} {% slot "heading" %} #### More details {% /slot %} Applications using [OAuth](oauth-api/overview) access tokens to authorize requests typically require the following permissions when working with team schedules: - `MERCHANT_PROFILE_READ` to retrieve location information. - `EMPLOYEES_READ` to retrieve team member and job information. - `TIMECARDS_READ` to retrieve scheduled shifts. - `TIMECARDS_WRITE` to create, update, and publish scheduled shifts. To call Square APIs in the production environment, change the base URL to `https://connect.squareup.com` and use your production (personal) access token. {% /accordion %} ## Retrieve a specific shift To retrieve a specific scheduled shift, call [RetrieveScheduledShift](https://developer.squareup.com/reference/square/labor-api/retrieve-scheduled-shift) and provide the shift ID. {% tabset %} {% tab id="Request" %} ```` {% /tab %} {% tab id="Response" %} The response returns the requested scheduled shift. ```json { "scheduled_shift": { "id": "kxR8FWJE8DT3x7", "draft_shift_details": { "location_id": "KACM8A41GR60X", "job_id": "jxR8EWJE8DT2x7", "team_member_id": "-3oZQKPKVk6gUXU_V5Qa", "start_at": "2025-04-15T09:00:00-07:00", "end_at": "2025-04-15T17:00:00-07:00", "notes": "Opening shift", "is_deleted": false, "timezone": "America/Los_Angeles" }, "published_shift_details": { "location_id": "KACM8A41GR60X", "job_id": "jxR8EWJE8DT2x7", "team_member_id": "-3oZQKPKVk6gUXU_V5Qa", "start_at": "2025-04-15T09:00:00-07:00", "end_at": "2025-04-15T17:00:00-07:00", "notes": "Opening shift", "is_deleted": false, "timezone": "America/Los_Angeles" }, "version": 2, "created_at": "2025-04-02T14:58:49-07:00", "updated_at": "2025-04-02T15:00:00-07:00" } } ``` {% /tab %} {% /tabset %} ## Search scheduled shifts To search for scheduled shifts, call [SearchScheduledShifts](https://developer.squareup.com/reference/square/labor-api/search-scheduled-shifts) with optional filter and sort settings. By default, results are sorted by `start_at` in ascending order. To list all scheduled shifts, call `SearchScheduledShifts` without any filters: {% tabset %} {% tab id="Request" %} ```` {% /tab %} {% tab id="Response" %} ```json { "scheduled_shifts": [ { "id": "kxR8FWJE8DT3x7", "draft_shift_details": { "location_id": "KACM8A41GR60X", "job_id": "jxR8EWJE8DT2x7", "team_member_id": "-3oZQKPKVk6gUXU_V5Qa", "start_at": "2025-04-15T09:00:00-07:00", "end_at": "2025-04-15T17:00:00-07:00", "notes": "Opening shift", "is_deleted": false, "timezone": "America/Los_Angeles" }, "published_shift_details": { "location_id": "KACM8A41GR60X", "job_id": "jxR8EWJE8DT2x7", "team_member_id": "-3oZQKPKVk6gUXU_V5Qa", "start_at": "2025-04-15T09:00:00-07:00", "end_at": "2025-04-15T17:00:00-07:00", "notes": "Opening shift", "is_deleted": false, "timezone": "America/Los_Angeles" }, "version": 2, "created_at": "2025-04-02T14:58:49-07:00", "updated_at": "2025-04-02T15:00:00-07:00" }, { "id": "kxR8FWJE8DT4x8", "draft_shift_details": { "location_id": "KACM8A41GR60X", "job_id": "jxR8EWJE8DT2x7", "team_member_id": "-4pZQKPKVk6gUXU_V5Qb", "start_at": "2025-04-15T17:00:00-07:00", "end_at": "2025-04-16T01:00:00-07:00", "notes": "Closing shift", "is_deleted": false, "timezone": "America/Los_Angeles" }, "published_shift_details": { "location_id": "KACM8A41GR60X", "job_id": "jxR8EWJE8DT2x7", "team_member_id": "-4pZQKPKVk6gUXU_V5Qb", "start_at": "2025-04-15T17:00:00-07:00", "end_at": "2025-04-16T01:00:00-07:00", "notes": "Closing shift", "is_deleted": false, "timezone": "America/Los_Angeles" }, "version": 1, "created_at": "2025-04-02T14:58:49-07:00", "updated_at": "2025-04-02T14:58:49-07:00" } ] } ``` {% /tab %} {% /tabset %} Use the optional `limit` field to control the {% tooltip text="page size" %}The maximum number of results to return in a single paged response.{% /tooltip %} (default 50, maximum 50) and the `cursor` field to page through the results. For more information, see [Pagination](build-basics/common-api-patterns/pagination). ### Filter and sort options The following filter options can be used in a search query. Multiple filters in a query are combined as an `AND` operation, which means shifts must match all specified filters to be included in the results. For information about how some filters interact, see [Filter combinations](#filter-combinations). {% table %} * Field {% width="220px" %} * Description --- * `assignment_status` * Returns shifts based on whether the `team_member_id` field is populated in the draft or published shift details. Valid values are `ASSIGNED` or `UNASSIGNED`. When omitted, it returns shifts with both statuses. --- * `location_ids` * Returns shifts for the specified locations. When omitted, it returns shifts for all locations. If needed, call [ListLocations](https://developer.squareup.com/reference/square/locations-api/list-locations) to get location IDs. --- * `scheduled_shift_statuses` * Returns shifts based on the draft or published status of the shift. A published shift has `published_shift_details`. Draft shifts either don't have that field or it differs from the draft details. Valid values are `DRAFT` or `PUBLISHED`. When omitted, it returns shifts with both statuses. --- * `start` * Returns shifts whose `start_at` time is within the specified time range (inclusive). --- * `end` * Returns shifts whose `end_at` time is within the specified time range (inclusive). --- * `team_member_ids` * Returns shifts assigned to the specified team members. When omitted, it returns all assigned and unassigned shifts. If needed, call [SearchTeamMembers](https://developer.squareup.com/reference/square/team-api/search-team-members) to get team member IDs. --- * `workday` * Returns shifts based on a workday date range. For more information, see [Workday filter](#workday-filter). {% /table %} Use the following fields to sort the query. By default, results are sorted by `START_AT` and `ASC`. {% table %} * Field {% width="120px" %} * Description --- * `field` * The field to sort by. Valid values are `START_AT` (default), `END_AT`, `CREATED_AT`, or `UPDATED_AT`. --- * `order` * The sort order. Valid values are `DESC` (default) or `ASC`. {% /table %} #### Workday filter The `workday` filter provides a way to search scheduled shifts using `YYYY-MM-DD` calendar dates. You define whether to match shifts based on their start time, their end time, or either their start time or end time. ```json "query": { "filter": { "workday": { "match_shifts_by": "START_AT", "date_range": { "start_date": "2024-10-14", "end_date": "2024-10-27" } } } } ``` This filter has three components: {% table %} * Component * Description --- * `date_range` * Specifies the `start_date` and `end_date` of the date range to match against. --- * `match_shifts_by` * Controls how shifts are matched against the date range. Valid values: - `START_AT` - Match shifts that start within the date range. - `END_AT` - Match shifts that end within the date range. - `INTERSECTION` - Match shifts that start or end within the date range. --- * `default_timezone` * The time zone to use for date matching, in IANA format (for example, "America/Los_Angeles"). Required if the shift location doesn't define a time zone. {% /table %} {% anchor id="filter-combinations" /%} #### Filter combinations When combined in a query, certain filters might interact in ways that aren't immediately apparent. Understanding the interactions between the following combinations can help you create more effective queries: * **Team member and assignment status**: - Using `team_member_ids` alone returns shifts for the specified team members plus all unassigned shifts. - Add `assignment_status: "ASSIGNED"` to only get shifts assigned to the specified team members. * **Shift status and assignment status**: - The `scheduled_shift_statuses` filter affects which shift details are checked: - `DRAFT` - Evaluates `draft_shift_details` (includes unpublished shifts and shifts with modified drafts). - `PUBLISHED` - Evaluates `published_shift_details`. - `DRAFT` and `PUBLISHED` (default) - Evaluates both sets of details. - The assignment status is evaluated against the specified shift details. - Shifts marked for deletion (`is_deleted: true`) are ignored with the `DRAFT` status filter. * **Date range filters**: - The `start` and `end` filters use exact timestamps. - The `workday` filter uses calendar dates and can match shifts based on different criteria. - When both are specified, shifts must match both conditions. ### Example: Published shifts at a specified location and date range The following example finds all published shifts that start during a specific time window at the specified location: {% tabset %} {% tab id="Request" %} ```` {% /tab %} {% tab id="Response" %} ```json { "scheduled_shifts": [ { "id": "K0YH4CV5462JB", "draft_shift_details": { "team_member_id": "TMDHAOU2N4I8RWi2", "location_id": "PAA1RJZZKXBFG", "job_id": "gad1UVkdSodJ1F4PCzoA8y6d", "start_at": "2025-01-25T03:00:00-05:00", "end_at": "2025-01-25T09:00:00-05:00", "notes": "Don't forget to prep the vegetables and pull the dough", "is_deleted": false, "timezone": "America/New_York" }, "published_shift_details": { "team_member_id": "TMDHAOU2N4I8RWi2", "location_id": "PAA1RJZZKXBFG", "job_id": "gad1UVkdSodJ1F4PCzoA8y6d", "start_at": "2025-01-25T03:00:00-05:00", "end_at": "2025-01-25T09:00:00-05:00", "notes": "Don't forget to prep the vegetables and pull the dough", "is_deleted": false, "timezone": "America/New_York" }, "version": 4, "created_at": "2024-12-31T03:11:24Z", "updated_at": "2024-12-31T06:52:01Z" } ] } ``` {% /tab %} {% /tabset %} {% anchor id="workday-start-at" /%} ### Example: Workday matching START_AT The following example gets all published and assigned shifts on the specified date at the specified location, matching shifts based on their start time: {% tabset %} {% tab id="Request" %} ```` {% /tab %} {% tab id="Response" %} ```json { "scheduled_shifts": [ { "id": "K0YH4CV5462JB", "draft_shift_details": { "team_member_id": "TMDHAOU2N4I8RWi2", "location_id": "PAA1RJZZKXBFG", "job_id": "gad1UVkdSodJ1F4PCzoA8y6d", "start_at": "2025-01-25T03:00:00-05:00", "end_at": "2025-01-25T09:00:00-05:00", "notes": "Don't forget to prep the vegetables and pull the dough", "is_deleted": false, "timezone": "America/New_York" }, "published_shift_details": { "team_member_id": "TMDHAOU2N4I8RWi2", "location_id": "PAA1RJZZKXBFG", "job_id": "gad1UVkdSodJ1F4PCzoA8y6d", "start_at": "2025-01-25T03:00:00-05:00", "end_at": "2025-01-25T09:00:00-05:00", "notes": "Don't forget to prep the vegetables and pull the dough", "is_deleted": false, "timezone": "America/New_York" }, "version": 4, "created_at": "2024-12-31T03:11:24Z", "updated_at": "2024-12-31T06:52:01Z" } ] } ``` {% /tab %} {% /tabset %} ## See also * [Scheduling with the Labor API](labor-api/scheduling) * [Manage Scheduled Shifts](labor-api/manage-scheduled-shifts) * [Labor API](labor-api/what-it-does) * [Team API](team/overview) --- # Square Model Context Protocol Server > Source: https://developer.squareup.com/docs/mcp > Status: BETA > Languages: All > Platforms: All Learn about the Square MCP server, which implements the MCP standard and provides a bridge between AI assistants and the Square REST API platform. {% subheading %}The Square Model Context Protocol (MCP) server implements the [Model Context Protocol](https://modelcontextprotocol.io) standard, providing a bridge between AI assistants and the Square REST API platform.{% /subheading %} ## Overview {% aside type="info" %} The Square MCP server is currently in Beta. To provide feedback or report bugs, open [GitHub issues](https://github.com/square/square-mcp-server/issues). {% /aside %} To view the MCP server source or contribute to the project, see [GitHub - square/square-mcp-server](https://github.com/square/square-mcp-server/). You can configure your AI agent to use the Square MCP server hosted by Block as a remote server or you can set up and run the server locally for your AI agent's use. For information about running the Square MCP server locally, see [Local Square MCP server quickstart](#local-server-quickstart). ## Square MCP server The Square remote MCP server is hosted at: ``` https://mcp.squareup.com/sse ``` ### MCP server tools The Square MCP server connects your AI tools directly to the full Square API platform, giving you programmatic access to everything the APIs offer—customers, orders, items, and more. Use it to power natural language queries, generate code, and accelerate development with AI assistance. Square recommends using the remote MCP server, which supports OAuth login with more control and granular permissions. This lets you securely sign in with your Square account and authorize only the scopes your application needs, with no manual token management required. For testing, you can run a local instance configured to access a seller's Sandbox environment. Remote instances only access production resources. {% aside type="important" %} Square recommends that you become familiar with the server and test your prompts against a Square account Sandbox environment before using it in production. {% /aside %} ## Integration with AI assistants The Square MCP server works with many different AI assistants including: * [Claude.ai](https://claude.ai) * [Claude Desktop](https://claude.ai/download) * [Goose](https://block.github.io/goose/) * [Cursor](https://www.cursor.com/) * [Windsurf](https://codeium.com/windsurf) ## Integrate with Claude.ai Add the Square MCP server to Claude. ### For Claude Enterprise & Teams (owners and primary owners) 1. Navigate to **Settings > Integrations** (for Teams) or **Settings > Data management** (for Enterprise). 1. In the **Integrations** section, choose **Add more**. 1. Add the Square MCP server URL: `https://mcp.squareup.com/sse`. 1. To finish configuring your integration, choose **Add**. ### For Claude Max 1. Navigate to **Settings > Profile**. 1. In the **Integrations** section, choose **Add more**. 1. Add the Square MCP server URL: `https://mcp.squareup.com/sse`. 1. To finish configuring your integration, choose **Add**. ### Enable the Square integration 1. Open a chat with Claude. 2. In the chat interface, access the **Search and tools** menu. 3. Choose **Connect** to authenticate with your Square account. 4. After connecting, use the same menu to enable specific Square tools. ## Integrate with Claude Desktop ### Remote MCP Add an entry to `claude_desktop_config.json` as shown in the following example: ```json { "mcpServers": { "mcp_square_api": { "command": "npx", "args": ["mcp-remote", "https://mcp.squareup.com/sse"] } } } ``` This approach allows you to authenticate directly with your Square account credentials without needing to manage access tokens. ### Local MCP Add an entry to `claude_desktop_config.json` as shown in the following example: ```json { "mcpServers": { "mcp_square_api": { "command": "npx", "args": ["square-mcp-server", "start"], "env": { "ACCESS_TOKEN": "YOUR_SQUARE_ACCESS_TOKEN", "SANDBOX": "true" } } } } ``` ## Integrate with Goose [Install Goose](https://block.github.io/goose/docs/getting-started/installation) and then configure the Square MCP server as an extension for the Goose Desktop and Goose CLI. The Goose Desktop and CLI share the same configuration file so you only need to configure the MCP server once. ### Remote MCP server To install the Square remote MCP server in Goose, click the [Open Goose](goose://extension?cmd=npx&arg=mcp-remote&arg=https%3A%2F%2Fmcp.squareup.com%2Fsse&id=square_mcp_production_remote&name=Square%20MCP%20Remote&description=Square%20Production%20MCP%20Remote) link on any computer with Goose installed, choose **Open Goose**, and then choose **OK** to confirm the extension installation. You can also copy and paste the URL into your browser's address bar. ### Local MCP server To install the Square remote MCP server in Goose, run the following command: ```bash npx square-mcp-server install # Auto-install local MCP for Goose npx square-mcp-server get-goose-url # Output a manual config URL ``` To learn more about using the Square MCP server with Goose, see [Square MCP Extension](https://block.github.io/goose/docs/tutorials/square-mcp). ## Integrate with Cursor To connect [Cursor](https://www.cursor.com/) with the Square MCP server, following the instructions for a remote or local MCP server. ### Remote MCP server Choose `Type`: "Command" and in the `Command` field, enter the following (recommended for OAuth authentication): ``` npx mcp-remote https://mcp.squareup.com/sse ``` This allows you to log in with your Square account directly instead of managing access tokens. ### Local MCP server Choose `Type`: "Command" and in the `Command` field, enter the following: ``` npx square-mcp-server start ``` ## Integrate with Windsurf Connect the Square MCP server to [Windsurf](https://codeium.com/windsurf) by editing the [`mcp_config.json` file](https://docs.codeium.com/windsurf/mcp): ### Remote MCP server ```json { "mcpServers": { "square_api": { "command": "npx", "args": ["mcp-remote", "https://mcp.squareup.com/sse"] } } } ``` Using the remote MCP server enables OAuth authentication, allowing you to connect with your Square account credentials without managing access tokens. {% aside type="info" %} Square maintains an allowlist of MCP clients in order to protect against malicious client registration attempts. If you want your client added to the allowlist, please request an addition in the [Square developer forum](https://developer.squareup.com/forums/c/mcp/14). {% /aside %} ### Local MCP server ```json { "mcpServers": { "square_api": { "command": "npx", "args": ["square-mcp-server", "start"], "env": { "ACCESS_TOKEN": "YOUR_SQUARE_ACCESS_TOKEN", "SANDBOX": "true" } } } } ``` --- {% anchor id="local-server-quickstart" /%} ## Local Square MCP server quickstart To run a local instance, you need to have [Node.js](https://nodejs.org/en/download) installed. You can then set up and run the Square MCP server with a single command: ```bash npx square-mcp-server start ``` To configure environment variables inline: ```bash ACCESS_TOKEN=YOUR_SQUARE_ACCESS_TOKEN SANDBOX=true npx square-mcp-server start ``` To configure environment variables for local development: ```bash npx /path/to/project/square-mcp-server ``` {% aside type="info" %} You need your Square access token. For more information, see [Access Tokens and Other Square Credentials](https://developer.squareup.com/docs/build-basics/access-tokens). {% /aside %} ### Local configuration Set the following environment variables as needed: | Variable | Purpose | Example | |----------------------|--------------------------------------|--------------------------------| | `ACCESS_TOKEN` | Your Square API access token | `ACCESS_TOKEN=sq0atp-...` | | `SANDBOX` | Use the Square sandbox environment | `SANDBOX=true` | | `PRODUCTION` | Use the Square production environment | `PRODUCTION=true` | | `DISALLOW_WRITES` | Restrict to read-only operations | `DISALLOW_WRITES=true` | | `SQUARE_VERSION` | Specify the Square API version | `SQUARE_VERSION=2025-04-16` | --- # Python SDK Migration Guide > Source: https://developer.squareup.com/docs/sdks/python/migration > Status: PUBLIC > Languages: Python > Platforms: All Upgrade from the legacy version of the Square Python SDK to version 42.0.0 or later. Version `42.0.0.20250416` of the Python SDK represents a full rewrite of the SDK with a number of breaking changes, outlined in the following sections. When upgrading to this version or later versions, take note of the changes in the SDK, including client construction and parameter names. If necessary, you can use the legacy version of the SDK along with the latest version. SDK versions `41.0.0.20250319` and earlier continue to function as expected, but you should plan to update your integration as soon as possible to ensure continued support. ## Client construction The new version of the Python SDK introduces breaking changes in the client class. ```python // LEGACY import os from square_legacy.client import Client as LegacySquare client = LegacySquare( environment="sandbox", access_token=os.environ.get("SQUARE_TOKEN") ) // NEW import os from square import Square from square.environment import SquareEnvironment client = Square( environment=SquareEnvironment.SANDBOX, token=os.environ.get("SQUARE_TOKEN") ) ``` {% table %} * Legacy {% width="165px" %} * New {% width="180px" %} * Additional information --- * `environment` * `environment` * An enumeration for specifying the environment (`SANDBOX` or `PRODUCTION`). --- * `access_token` * `token` * The access token used for authentication. --- * `custom_url` * `base_url` * The base URL for API requests. --- * `square_version` * `version` * The Square API version to use. --- * `additional_headers` * `additional_headers` * Additional headers can be set at individual methods. --- * `http_call_back` * Removed * This option has been removed. --- * `user_agent_detail` * Removed * This option has been removed. {% /table %} ## Use the legacy and new SDK side by side While the new SDK has many improvements, it takes time to upgrade when there are breaking changes. To make the migration easier, the old SDK is published as `squareup_legacy` so that the two SDKs can be used side by side in the same project. The following example shows how to use the new and legacy SDKs inside a single file: ```python from square_legacy.client import Client as LegacySquare from square import Square def main(): client = Square(token=os.environ.get("SQUARE_TOKEN")) legacy_client = LegacySquare(access_token=os.environ.get("SQUARE_TOKEN")) # List all payments with the new client. new_response = client.payments.list() # List all payments with the legacy client. legacy_response = legacy_client.payments.list_payments() ``` You should migrate to the new SDK using the following steps: 1. Upgrade the PyPi package to `^42.0.0`. 2. Run `pip install squareup_legacy`. 3. Search and replace all requires and imports from `square` to `square_legacy`. 4. Gradually introduce methods from the new SDK by importing them from the Square import. ## TypedDict requests The previous version of the SDK relied on simple Python dictionaries to represent request body properties. For example, consider the following method call required to create a customer: ```python // LEGACY response = client.customers.create_customer( { "idempotency_key": str(uuid.uuid4()), "given_name": 'given-vs1', "family_name": 'family-vs1', "address": { "address_line_1": '1955 Broadway', "address_line_2": 'Oakland, CA 94612' } ) ``` In the new SDK, requests are now defined with [`TypedDict`](https://typing.python.org/en/latest/spec/typeddict.html#typeddict) types. The UX is similar, but you're now presented with `**kwargs` for each parameter to better guide you through the expected set of parameters. ```python // NEW response = client.customers.create( idempotency_key=str(uuid.uuid4()), given_name="given-vs1", family_name="family-vs1", address={ "address_line_1": "1955 Broadway", "address_line_2": "Oakland, CA 94612" } ) ``` ## Pydantic responses The new SDK uses [Pydantic](https://docs.pydantic.dev), a popular Python validation library, to define response models. With this, response types now have a better autocompletion experience and properties can be accessed with dot-notation rather than free-form dictionary access. ```python // LEGACY response = client.locations.list_locations() location = response.body['locations'][0] name = location['name'] // NEW response = client.locations.list() location_name = response.locations[0] name = location.name ``` ## Exceptions The legacy SDK represents successful calls and errors with the same `ApiResponse` type. Users could distinguish between successes and errors as shown: ```python // LEGACY response = client.locations.list_locations() if response.is_success(): for location in response.body['locations']: print(f"{location['id']}: ", end="") print(f"{location['name']}, ", end="") print(f"{location['address']['address_line_1']}, ", end="") print(f"{location['address']['locality']}") elif response.is_error(): for error in response.errors: print(error['category']) print(error['code']) print(error['detail']) ``` The new SDK represents errors as `Exceptions`, all of which inherit from the `ApiError` class. The `ApiError` class includes the Square `Error` type. ```python from square.core.api_error import ApiError try: response = client.locations.list() for location in response.items: print(f"{location.id}: ", end="") print(f"{location.name}, ", end="") print(f"{location.address.address_line_1}, ", end="") print(f"{location.address.locality}") except ApiError as e: for error in e.errors: print(error.category) print(error.code) print(error.detail) ``` ## Auto-pagination Square's paginated endpoints now support auto-pagination with an iterator. Callers don't need to manually fetch the next page. You can now iterate over the entire list and the client automatically fetches the next page behind the scenes. The following example shows the same code, with the legacy and new SDKs: ```python // LEGACY result = client.customers.list_customers( limit=10, sort_field='DEFAULT', sort_order='DESC' ) if result.is_success(): while (result.body != {}): for cust in result.body['customers']: print(f"customer: ID: {cust['id']}, ", end="") print(f"Version: {cust['version']}, ", end="") print(f"Given name: {cust['given_name']}, ", end="") print(f"Family name: {cust['family_name']}") if (result.cursor): result = client.customers.list_customers( limit=limit, sort_field='DEFAULT', sort_order='DESC', cursor=result.cursor ) else: break elif result.is_error(): for error in result.errors: print(error['category']) print(error['code']) print(error['detail']) // NEW try: response = client.customers.list( limit=10, sort_field='DEFAULT', sort_order='DESC' ) for customer in response: print(f"customer: ID: {customer.id}, ", end="") print(f"Version: {cutomer.version}, ", end="") print(f"Given name: {customer.given_name}, ", end="") print(f"Family name: {customer.family_name}") except ApiError as e: for error in e.errors: print(error.category) print(error.code) print(error.detail) ``` --- # Develop for Japan > Source: https://developer.squareup.com/docs/international-development/japan > Status: PUBLIC > Languages: All > Platforms: All Learn about regional differences and requirements related to building integrations for Japanese sellers. ## Overview You can use Square APIs and SDKs to build applications that support and process in-person or online payments for sellers in Japan. Before you begin development, be sure to familiarize yourself with which [payment methods](payment-card-support-by-country) are available in Japan and the [pricing models](payments-pricing) for payments made with Square APIs and Square hardware. ## In-Person Payment Solutions ### Integration Options for Your POS System If you have an existing POS system and want to connect to Square in-person payment solutions in Japan, you have two integration options: * The [Terminal API](terminal-api/overview) is compatible with Square Terminal devices. It connects directly to Square servers, making it available for almost any system, including Windows-based systems, web applications, or other platforms, because it connects directly to Square servers. * The [Point-of-Sale API](pos-api/what-it-does) works with Square Reader devices and operates via mobile devices only. It uses the Square mobile app for checkout, utilizing deep link functionality to switch between your app and Square. #### Key considerations when choosing an API: * If your goal is to process itemized orders, the Terminal API is your only option. * The Point-of-Sale API supports only custom amount-based transactions. * If your external POS system manages itemized orders, syncing itemized sales with Square can allow you to: * Print itemized receipts. * Keep itemized transactions synchronized between systems. When implementing in-person payment applications, you should process payments in-store with the [Square Terminal](https://squareup.com/jp/ja/hardware/terminal) or [Square Reader](https://squareup.com/jp/ja/hardware/reader) devices. Staff must be present in the store or close enough to attend at any time when payment processing is required. ### Itemized vs. Non-Itemized Approaches When integrating with Square in-person payment APIs, you'll need to choose between two integration approaches based on your business needs: {% tabset %} {% tab id="Itemized" %} This approach is best for merchants who want to log itemized transactions in Square and want the Square Terminal or Square's compatible printers to print itemized receipts. **How it works**: * Use the [Orders API](orders-api/what-it-does) to create orders with line items. * Pass the Square order ID to the [Terminal API](terminal-api/overview) to process payments and print itemized receipts. * Use the [Catalog API](catalog-api/what-it-does) to sync products between your system and Square. * Optionally, use [Terminal Actions](terminal-api/advanced-features) to programmatically print receipts as a separate operation. **Limitations**: * Formal receipts are not currently supported - only normal receipts can be printed. This approach is ideal when you want Square Terminal to handle receipt printing, want to leverage Square's reporting and analytics capabilities, or need product-level sales tracking for your business. {% /tab %} {% tab id="Non-Itemized (Custom Amount)" %} This approach is best suited for merchants with a custom POS system and existing printer integration for order management. **How it works**: You send only the total payment amount to Square. Square processes the payment but does not store details of the individual items. Only the custom payment amount is recorded. **Limitations**: * Square cannot track or print itemized receipts for these transactions. * If you need detailed transaction records, you must print receipts using your own receipt printing system. {% /tab %} {% /tabset %} ### Supported Payment Methods for In-Person Payments Japanese merchants can accept several payment methods for in-person transactions, including credit cards, digital wallet payments (Apple Pay and Google Pay), gift cards, e-money, prepaid IC cards (such as SUICA and PASMO), and QR code payments (such as PayPay, Alipay, Rakuten Pay, and au PAY). {% aside type="important" %} To support e-money or PayPay payments, Japanese sellers must submit an application form to activate those payment methods. For more information, see: - [Apply for Electronic Money](https://squareup.com/help/jp/ja/article/6711-jp-only-e-money-application) - [Apply for QR Code](https://squareup.com/help/jp/ja/article/8370-apply-for-qr-code-payments) {% /aside %} ### API Comparison for In-Person Payments {% table %} * Feature * Terminal API * Point-of-Sale API * Mobile Payments SDK --- * Device Type * Square Terminal * Square Reader * Square Reader --- * Connection Method * Connection to Square server * Link to Square Point of Sale app * Direct SDK integration --- * Itemized Orders Support * ✅ Supported (with Orders API) * ❌ Not supported * - --- * Custom Amount Support * ✅ Supported * ✅ Supported * - --- * Accepted Payment Methods * credit card, e-money, QR, gift card * credit card, e-money, QR, gift card * - --- * SDK/API Status in Japan * ✅ Available * ✅ Available * ❌ Not yet available --- * Documentation * [Terminal API Overview](terminal-api/overview) * [Point of Sale API Overview](pos-api/what-it-does) * [Mobile Payments SDK Overview](mobile-payments-sdk) {% /table %} ### Testing In-Person Payment Integrations Square provides a Sandbox environment where you can test your in-person payment integrations before going live. However, there are important differences between Sandbox and production testing for physical devices. #### Sandbox Testing (Without Physical Devices): You can test Terminal API integrations in the Sandbox without connecting to a physical Square Terminal. Square provides special test device IDs that simulate different checkout scenarios, including successful payments, canceled payments, and timeout scenarios. This allows you to develop and test your integration logic without needing physical hardware. The Sandbox environment supports testing various payment methods specific to Japan, including: * **E-money (FELICA) payments** - Test e-money/FeLiCa transactions using dedicated test device IDs * **QR code payments (PayPay)** - Test PayPay QR code payments (note: the Sandbox location must be based in Japan) **Example Test Device IDs:** {% table %} * Payment Method * Test Device ID * Notes --- * Credit Card (Successful) * `9fa747a2-25ff-48ee-b078-04381f7c828f` * Checkout successfully completed with credit card. --- * E-money (FELICA) * `19a01fbd-3dcd-4d9f-a499-a641684af745` * eMoney/FeLiCa payment for the full amount is approved. --- * QR Code (PayPay) * `cae0ee02-f83b-11ec-b939-0242ac120002` * PayPay QR code payment for the full amount is approved. Sandbox location must be based in Japan {% line-break /%} __Note:__ In the sandbox environment, PayPay is the only QR code brand name that appears. {% /table %} For a complete list of test device IDs and their behaviors, see [Terminal API Sandbox Testing](devtools/sandbox/testing#terminal-api-checkouts). #### Production Testing (With Physical Devices): Testing with an actual Square Terminal device is only supported in the production environment. The Sandbox environment does not support connections to physical Square Terminal devices. When testing with a physical device in production, you can use the minimum payment amount of 1 yen to minimize testing costs. Use the following workflow for testing: 1. Conduct initial development and testing in Sandbox using test device IDs. 2. Perform final testing in production using a Square Terminal and small payment amounts (minimum 1 yen). For more information, see [Test Square APIs in the Sandbox](devtools/sandbox/testing). ## Online Payment Solutions ### Payments Made on a Buyer's Screen For online payments in Japan, merchants can accept credit cards, debit cards, gift cards, and digital wallet payments (Apple Pay and Google Pay) when customers purchase through a web browser or mobile app. You can build custom checkout forms using either the [Web Payments SDK](web-payments/overview) or [In-App Payments SDK](in-app-payments-sdk/what-it-does), and you can [localize these forms](in-app-payments/localize-ios) from English to Japanese to provide a better customer experience. * Use the **Web Payments SDK** for web applications or browser-based checkouts (desktop and mobile). * Use the **In-App Payments SDK** for native mobile applications on iOS and Android. ### 3D Secure (3DS) Requirement for Online Payments {% aside type="important" %} This is a critical requirement for all merchants operating in Japan. [3D Secure (3DS) authentication](sca-overview) is **mandatory** for all online card payments in Japan. All merchants and integrations must comply with this regulation. {% /aside %} **What does this mean for your integration?** * Depending on the card issuer, 3DS authentication may be required during card transactions. * Use the [Web Payments SDK](web-payments/take-card-payment) or [In-App SDK](sca-overview-iap) to implement the 3DS flow. * Merchants cannot disable or opt out of 3DS in Japan. ## Sales Reporting ### FELICA Payments In a [Payment](https://developer.squareup.com/reference/square/objects/Payment) object, gift cards, credit cards, debit cards, and e-money (FELICA) payments are all recorded with a `source_type` of `CARD`. Detailed information is available through the `card_details` field. [Terminal checkout objects](https://developer.squareup.com/reference/square/objects/TerminalCheckout) also use the `CheckoutOptionsPaymentType` enum to denote whether the payment was made with a card, e-money, or QR. To retrieve payment information, you can use the [GetTerminalCheckout]((https://developer.squareup.com/reference/square/square/terminal-api/get-terminal-checkout)), [RetrieveOrder](https://developer.squareup.com/reference/square/square/orders-api/retrieve-order), or [GetPayment](https://developer.squareup.com/reference/square/square/payments-api/get-payment) endpoints depending on your needs. The `card_details` object includes a `card_brand` enum that helps you distinguish between different payment methods. * Credit cards show the international brand name (such as `VISA` or `Mastercard`). * E-money payments show `FELICA`. The `electronic_money_details.felica_details` field shows details specific to FeliCa payments, including `felica_brand` (either `FELICA_QP`, `FELICA_TRANSPORTATION`, `FELICA_ID`, or `UNKNOWN`). {% accordion expanded=false%} {% slot "heading" %} ### Example Payment object {% /slot %} ```json { "payment": { "id": "{PAYMENT_ID}", "created_at": "2023-10-13T21:14:29.577Z", "updated_at": "2023-10-13T21:14:30.504Z", "amount_money": { "amount": 5000, "currency": "JPY" }, "source_type": "CARD", "card_details": { "status": "CAPTURED", "card": { "card_brand": "FELICA" } } } } ``` {% /accordion %} {% accordion expanded=false%} {% slot "heading" %} ### Example Order object {% /slot %} ```json { "order": { "id": "{ORDER_ID}", "created_at": "2023-10-13T21:15:54.577Z", "updated_at": "2023-10-13T21:15:55.504Z", "tenders": [ { "id": "{PAYMENT_ID}", "location_id": "{LOCATION_ID}", "transaction_id": "{TRANSACTION_ID}", "created_at": "2023-10-13T21:15:54.577Z", "amount_money": { "amount": 5000, "currency": "JPY" }, "type": "CARD", "card_details": { "status": "CAPTURED", "card": { "card_brand": "FELICA", "last_4": "{LAST_FOUR}" }, "entry_method": "CONTACTLESS" } } ] } } ``` {% /accordion %} #### Point of Sale API workflow for E-Money payments 1. Get a transaction ID from a completed checkout. 2. Retrieve the corresponding Order object using the Orders API. 3. Use the `tenders.id` value to get a Payment object with [GetPayment](https://developer.squareup.com/reference/square/square/payments-api/get-payment). The Payment object will return `CardPaymentDetails.Card.CardBrand` with the value `FELICA`. **Terminal checkouts** use `payment_ids` for payments, so you can use `GetPayment` directly to get payment information without needing to go through the Order object first. For non-itemized sales, the `item_type` for orders created with e-money payments, are `CUSTOM`, because there's a custom amount for the payment. Itemized sales use the `ITEM` item type instead. For more information, see [Take E-Money Payments in Japan](pos-api/cookbook/electronic-payments). ### QR Code Payments The [wallet_details](https://developer.squareup.com/reference/square/objects/Payment#definition__property-wallet_details) property in a `Payments` object supports several QR code brands, including: * `PAYPAY` * `ALIPAY` * `RAKUTEN_PAY` * `AU_PAY` * `D_BARAI` * `MERPAY` * `WECHAT_PAY`. If a different brand is used that doesn't match these values, it is recorded as `UNKNOWN`. **Example Order object with a QR code payment:** ```json { "order": { "id": "{ORDER_ID}", "created_at": "2023-10-13T21:15:54.577Z", "updated_at": "2023-10-13T21:15:55.504Z", "tenders": [ { "id": "{PAYMENT_ID}", "location_id": "{LOCATION_ID}", "transaction_id": "{ORDER_ID}", "created_at": "2023-10-13T21:15:55.504Z", "note": "a custom note description", "amount_money": { "amount": 100, "currency": "JPY" }, "processing_fee_money": { "amount": 3, "currency": "JPY" }, "type": "WALLET" } ] } } ``` Note that the `tenders` object array in an order object doesn't have a value defined for `wallet_details`. For implementation guides on accepting QR code payments, see * [Accept PayPay Payments in Japan for the Point of Sale API](pos-api/qr-code-payments-paypay) * [PayPay QR Code Payments for the Terminal API](terminal-api/international-payment-methods/paypay-qr-code-payments) * [Take E-Money Payments in Japan](pos-api/cookbook/electronic-payments). {% aside type="info" %} **Data retention** The Square Developer Console shows data for 1 year, but [API logs](devtools/api-logs) are retained for only 28 days. You can view API logs in the Developer Console or API Explorer. Use the Square API Explorer and API Logs to capture historical data about payments and purchases. {% /aside %} ## Error Handling for Failed Requests When a request fails, Square API endpoints return a response with an `errors` field containing one or more `Errors`. ### Key considerations for Japan * **Error messages are always returned in English**. You need to retrieve the error object as a JSON object and translate the error details for Japanese users. Your application should take appropriate action based on the `error.category`, `error.code`, and `error.field` (which indicates where the error occurred). * **Specific refund limitations for transportation cards**. If a buyer uses a PASMO or SUICA transportation card for a payment, you encounter a `REFUND_DECLINED` error. The seller cannot issue a refund for those payment cards. **Example refund decline error response:** ```json { "errors": [ { "code": "REFUND_DECLINED", "detail": "Payment could not be refunded", "category": "REFUND_ERROR" } ] } ``` ### Errors with Canceling an E-Money Payment Using [CancelTerminalCheckout](https://developer.squareup.com/reference/square/terminal-api/cancel-terminal-checkout) to cancel an e-money payment after getting an error on the Square Terminal is not supported. If an error occurs on Square Terminal during an e-money payment, the checkout request has the `IN_PROGRESS` or `PENDING` state. In this situation, the buyer must manually cancel the checkout. To do so: * Close the error message window * Tap the navigation button back to the checkout screen * Cancel the checkout manually. --- # Add a Content Security Policy > Source: https://developer.squareup.com/docs/web-payments/content-security-policy > Status: PUBLIC > Languages: All > Platforms: All Learn how to add a content security policy to your application that takes payments with Web Payments SDK. {% subheading %} Learn how to implement a Content Security Policy with vendor scripts in your Web Payments SDK integration. {% /subheading %} ## Overview A [Content Security Policy](https://developer.mozilla.org/en-US/docs/Web/HTTP/Guides/CSP) (CSP) is a critical security feature that helps protect your Web Payments SDK integration from various attacks, specifically cross-site scripting (XSS) attacks. To comply with the latest PCI DDS security requirements, your application must provide a CSP vendor script for a supported payment method, so that the Web Payments SDK can securely process payments through the payment method, and enable the CSP to protect your application from external scripting attacks. ## What CSP provides CSP provides several key security benefits: - Controls which resources (scripts, styles, images) can load - Specifies allowed origins for content - Prevents malicious script injection - Manages secure communication with payment endpoints ## Requirements and limitations - Web Payments SDK installed and integrate with an application - Access to modify your application's headers - An HTTPS-enabled environment for development ## Set up CSP If your application deploys a Content Security Policy (CSP) with the Web Payments SDK, you must enable the following CSP directives to add an additional security layer. 1. Modify the headers. In `index.html`, add the CSP meta tag or header to your application: For Sandbox Environment: ```html ``` For Production: ```html ``` 2. Add the vendor scripts. Include the necessary payment scripts in your HTML: {% tabset %} {% tab id="Square" %} ```html ``` {% /tab %} {% tab id="Cash App Pay" %} ```html ``` {% /tab %} {% tab id="Afterpay" %} ```html ``` {% /tab %} {% tab id="ACH" %} ```html ``` {% /tab %} {% tab id="Google Pay" %} ```html ``` {% /tab %} {% /tabset %} 3. Implement error handling in the application. Add error handling for the following script loading failures in the application: ```javascript // Monitor script loading window.addEventListener('error', function(e) { if (e.target.src && e.target.src.includes('square.js')) { console.error('Square script failed to load:', e); handleScriptLoadError(); } }); function handleScriptLoadError() { // Implement your fallback logic const paymentForm = document.getElementById('payment-form'); if (paymentForm) { paymentForm.innerHTML = 'Payment temporarily unavailable. Please try again later.'; } // Notify your error monitoring service notifyErrorService('Square script load failure'); } ``` 4. Verify the CSP implementation. 1. Check the console with a web browser: - Look for CSP violation messages. - Verify script loading success. 2. Test a payment flow: ```javascript async function testPaymentFlow() { try { const payments = Square.payments(appId, locationId); const card = await payments.card(); await card.attach('#card-container'); console.log('Payment flow initialized successfully'); } catch (e) { console.error('Payment flow test failed:', e); } } ``` 3. Validate in different environments: - Test in sandbox environment first. - Verify in staging (if applicable). - Confirm in production. ## Common issues and solutions Script loading failures: - Verify CSP directives match script sources. - Check for network connectivity. - Confirm that the script URLs are correct. CSP violations: - Review browser console for specific violation messages. - Update CSP to include missing sources. - Verify all resource domains are included. Integration conflicts: - Check for conflicts with other security headers. - Verify compatibility with other third-party scripts. - Test with all payment methods. ## Best practices Security: - Use specific source URLs rather than wildcards - Minimize use of 'unsafe-inline' and 'unsafe-eval' - Regularly review and update CSP rules Performance: - Load scripts asynchronously when possible - Implement proper error handling - Monitor script loading performance Maintenance: - Document all CSP modifications - Keep track of vendor script versions - Regular testing of all payment flows ## Additional resources - [Mozilla - Content Security Policy](https://developer.mozilla.org/en-US/docs/Web/HTTP/CSP) - [CSP Evaluator tool](https://csp-evaluator.withgoogle.com/) --- # Set Up the Web Client Application > Source: https://developer.squareup.com/docs/web-payments/quickstart/set-up-web-client-app > Status: PUBLIC > Languages: All > Platforms: All Learn how to set up a web client application with the Web Payments SDK quickstart sample project. **Applies to:** [Web Payments SDK](web-payments/overview) | [Payments API](payments-refunds) {% subheading %}Learn how to set up a web client app with the [Web Payments SDK quickstart](https://github.com/square/web-payments-quickstart) sample project.{% /subheading %} {% toc hide=true /%} ## Overview If you don't already have a web client set up that you're working in, the [Web Payments SDK quickstart](https://github.com/square/web-payments-quickstart) includes a template front-end and backend. ### Set up the application 1. Clone the [Web Payments SDK quickstart](https://github.com/square/web-payments-quickstart) GitHub repo. 2. Run `npm install` and then `npm run dev`. 3. Navigate to `http://localhost:3000` to verify that the server is running. The server displays the following web page: ![A graphic showing the default Quickstart web page that confirms that the sample is running.](https://images.ctfassets.net/1nw4q0oohfju/6VzcqQ3LPYXZgMBDHDBlqF/8a65191cbdc097dbb2c0e7421842c7ce/welcome-quickstart-page.png) {% aside type="success" %} If your web page renders as shown in the previous image, you're ready to write the code that adds the [Card](https://developer.squareup.com/reference/sdks/web/payments/card-payments) payment method to the page. {% /aside %} The following files are key to the quickstart: * The `public/index.html` file lists specific payment method sub-examples. If you continue this quickstart, you replace this list with the default credit card payment acceptance logic. * The top-level `server.js` file contains the server call to the [CreatePayment](https://developer.squareup.com/reference/square/payments-api/create-payment) endpoint for charging the payment source. The quickstart application must include server.js to make the server call; otherwise, the application cannot create a payment. {% aside type="important" %} * The value in `server.js` [line 45](https://github.com/square/web-payments-quickstart/blob/main/server.js#L45) sets the currency for the quickstart to US dollars. If your default test account is based in another country, be sure to update `server.js` with the currency code for your country before you run the quickstart. * If you're using a non-US account, you must change the currency to match the country in which you're accepting the payment. {% /aside %} ## Next step * [Add the Web Payments SDK to the Web Client](web-payments/quickstart/add-sdk-to-web-client) --- # Charge and Store Cards for Online Payments > Source: https://developer.squareup.com/docs/web-payments/charge-and-store-cards > Status: PUBLIC > Languages: All > Platforms: All Learn how to use the Web Payments SDK to charge a card and store card details for future online payments with a card on file. **Applies to:** [Web Payments SDK](web-payments/overview) | [Payments API](payments-refunds) | [Cards API](cards-api/overview) | [Customers API](customers-api/what-it-does) {% subheading %} Learn how to use the Web Payments SDK to charge a card and store card details for future online payments with a card on file.{% /subheading %} ## Overview After configuring your application with the Web Payments SDK to accept card-not-present payments, you can use the Web Payments SDK to store card details with Square as a card on file and charge the card on file for future online payments. ## How the card-on-file workflows work During payment tokenization, Square checks the tokenize request to determine whether [buyer verification](sca-overview) is needed based on the buyer's information. After receiving the payment token and verifying the buyer, the application performs one of the following card-on-file workflows: * **Store card details** - The application includes the payment token in a Cards API call to store card details as a card on file with [CreateCard](https://developer.squareup.com/reference/square/cards-api/create-card). * **Charge a card on file** - The application includes the payment token in a Payments API call to process a payment with [CreatePayment](https://developer.squareup.com/reference/square/payments-api/create-payment). * **Charge a card and store card details** - The application charges the card and stores the card details as a card on file with a single request call. The application includes the payment token in a Payments API call to process a payment and then creates a card on file and stores the card details as a `Card` object with a new customer profile. When you call `CreateCard`, the `source_id` is the `payment_id` from the Payments API payment response object. This workflow is ideal for scenarios where buyers want to save their card details while making a payment. To explore example implementations of the card-on-file workflows, see [Web Payments SDK Quickstart](web-payments/quickstart) or set up the [quickstart repository](https://github.com/square/web-payments-quickstart) and choose from the available examples. The following are additional code examples of each card-on-file workflow setup: - [Store card details](https://github.com/square/web-payments-quickstart/blob/273eb48c41ce189683e12d8628c7e81c8509854f/public/examples/card-store.html) - [Charge a card on file](https://github.com/square/web-payments-quickstart/blob/273eb48c41ce189683e12d8628c7e81c8509854f/public/examples/card-charge-card-on-file.html) - [Charge a card and store its details](https://github.com/square/web-payments-quickstart/blob/273eb48c41ce189683e12d8628c7e81c8509854f/public/examples/card-charge-and-store.html) ## Set up a card-on-file workflow ### Requirements and limitations Update your application to support the Web Payments SDK card payment flow by following the instructions in [Take a Card Payment](web-payments/take-card-payment) or [Add the Web Payments SDK to the Web Client](web-payments/quickstart/add-sdk-to-web-client). Choose a workflow when you set up the application. Follow the example code by setting up the [quickstart repository](https://github.com/square/web-payments-quickstart). The "store card details" workflow involves a `storeCard` method to store card details, while the "charge a card on file" workflow modifies a `CreatePayment` method to take the payment token and the customer ID. If your application needs to charge a card for a payment and store the card details from that same payment, use the "charge a card and store its details" workflow where the application combines both tasks in a single request call. {% accordion expanded=false %} {% slot "heading" %} ### Store card details {% /slot %} 1. Add a helper `storeCard` method, as shown in the following example, that passes the `token` and `customerId` objects as arguments to your server. The server can then make the call to the Square [CreateCard](https://developer.squareup.com/reference/square/cards-api/create-card) endpoint. ```javascript async function storeCard(token, customerId) { const body = JSON.stringify({ locationId, sourceId: token, customerId, idempotencyKey: window.crypto.randomUUID(), }); const paymentResponse = await fetch('/card', { method: 'POST', headers: { 'Content-Type': 'application/json', }, body, }); if (paymentResponse.ok) { return paymentResponse.json(); } const errorBody = await paymentResponse.text(); throw new Error(errorBody); } ``` 2. Modify the `tokenize` method with the following updates to `verificationDetails`. Set `intent` to `STORE`, `customerInitiated` to `true`, and `sellerKeyedIn` to `false`. ```javascript async function tokenize(paymentMethod) { const verificationDetails = { billingContact: { givenName: 'John', familyName: 'Doe', email: 'john.doe@square.example', phone: '3214563987', addressLines: ['123 Main Street', 'Apartment 1'], city: 'London', state: 'LND', countryCode: 'GB', }, intent: 'STORE', customerInitiated: true, sellerKeyedIn: false, }; const tokenResult = await paymentMethod.tokenize(verificationDetails); if (tokenResult.status === 'OK') { return tokenResult.token; } else { throw new Error( `Tokenization errors: ${JSON.stringify(tokenResult.errors)}`, ); } } ``` 3. Replace the `handlePaymentMethodSubmission` method with a new method called `handleStoreCardSubmission`, pass the `event`, `card`, and `customerId` arguments to the method, and modify the following `try` statement declaration from the code example: ```javascript async function handleStoreCardSubmission(event, card, customerId) { event.preventDefault(); try { // disable the submit button as we await tokenization and make a payment request. cardButton.disabled = true; const token = await tokenize(card); const storeCardResults = await storeCard( token, customerId, ); displayResults('SUCCESS'); console.debug('Store Card Success', storeCardResults); } catch (e) { cardButton.disabled = false; displayResults('FAILURE'); console.error('Store Card Failure', e); } } ``` 4. In the `cardButton.addEventListener` event listener, declare a new `customerId` object and call the `handleStoreCardSubmission` method as indicated in the following code example: ```javascript const cardButton = document.getElementById('card-button'); cardButton.addEventListener('click', async function (event) { const textInput = document.getElementById('customer-input'); if (!textInput.reportValidity()) { return; } const customerId = textInput.value; handleStoreCardSubmission(event, card, customerId); }); ``` {% /accordion %} {% accordion expanded=false %} {% slot "heading" %} ### Charge a card on file {% /slot %} 1. In your application, initialize a [Card](https://developer.squareup.com/reference/sdks/web/payments/objects/Card) object. 2. Call [Card.tokenize()](https://developer.squareup.com/reference/sdks/web/payments/objects/Card#Card.tokenize) with the `verificationDetails` and `cardId` of the stored card. The `Card.tokenize()` method passes the following properties in a `verificationDetails` object: * `amount` - The amount of the card payment to be charged. * `billingContact` - The buyer's contact information for billing. * `intent` - The transactional intent of the payment. * `sellerKeyedIn` - Indicates that the seller keyed in payment details on behalf of the customer. This is used to flag a payment as Mail Order / Telephone Order (MOTO). * `customerInitiated` - Indicates whether the customer initiated the payment. * `currencyCode` - The three-letter ISO 4217 currency code. {% aside type="important" %} Provide as much buyer information as possible for `billingContact` so that you get more accurate decline rate performance from 3DS authentication. {% /aside %} 3. Modify the [CreatePayment](https://developer.squareup.com/reference/square/payments-api/create-payment) endpoint by renaming the `createPaymentWithCardOnFile` function and passing in the `token` and `customerId`. The following code example demonstrates the charge card-on-file setup. ```javascript async function createPaymentWithCardOnFile( token, customerId, ) { const body = JSON.stringify({ locationId, sourceId: token, customerId, idempotencyKey: window.crypto.randomUUID(), }); const paymentResponse = await fetch('/payment', { method: 'POST', headers: { 'Content-Type': 'application/json', }, body, }); if (paymentResponse.ok) { return paymentResponse.json(); } const errorBody = await paymentResponse.text(); throw new Error(errorBody); } // status is either SUCCESS or FAILURE; function displayPaymentResults(status) { const statusContainer = document.getElementById( 'payment-status-container', ); if (status === 'SUCCESS') { statusContainer.classList.remove('is-failure'); statusContainer.classList.add('is-success'); } else { statusContainer.classList.remove('is-success'); statusContainer.classList.add('is-failure'); } statusContainer.style.visibility = 'visible'; } async function tokenize(paymentMethod, sourceId) { const verificationDetails = { amount: '1.00', billingContact: { givenName: 'John', familyName: 'Doe', email: 'john.doe@square.example', phone: '3214563987', addressLines: ['123 Main Street', 'Apartment 1'], city: 'London', state: 'LND', countryCode: 'GB', }, currencyCode: 'GBP', intent: 'CHARGE', customerInitiated: true, sellerKeyedIn: false, }; const tokenResult = await paymentMethod.tokenize(verificationDetails, sourceId); if (tokenResult.status === 'OK') { return tokenResult.token; } else { let errorMessage = `Tokenization failed with status: ${tokenResult.status}`; if (tokenResult.errors) { errorMessage += ` and errors: ${JSON.stringify( tokenResult.errors, )}`; } throw new Error(errorMessage); } } document.addEventListener('DOMContentLoaded', async function () { if (!window.Square) { throw new Error('Square.js failed to load properly'); } let payments; try { payments = window.Square.payments(appId, locationId); } catch { const statusContainer = document.getElementById( 'payment-status-container', ); statusContainer.className = 'missing-credentials'; statusContainer.style.visibility = 'visible'; return; } let card; try { card = await payments.card(); } catch (e) { console.error('Initializing Card failed', e); return; } async function handleChargeCardOnFileSubmission( event, card, cardId, customerId, ) { event.preventDefault(); try { // disable the submit button as we await tokenization and make a payment request. cardButton.disabled = true; const token = await tokenize(card, cardId); const paymentResults = await createPaymentWithCardOnFile( token, customerId ); displayPaymentResults('SUCCESS'); console.debug('Payment Success', paymentResults); } catch (e) { cardButton.disabled = false; displayPaymentResults('FAILURE'); console.error(e.message); } } const cardButton = document.getElementById('card-button'); cardButton.addEventListener('click', async function (event) { const customerTextInput = document.getElementById('customer-input'); const cardTextInput = document.getElementById('card-input'); if ( !customerTextInput.reportValidity() || !cardTextInput.reportValidity() ) { return; } const cardId = cardTextInput.value; const customerId = customerTextInput.value; handleChargeCardOnFileSubmission(event, card, cardId, customerId); }); }); ``` {% /accordion %} {% accordion expanded=false %} {% slot "heading" %} ### Charge a card and store its details {% /slot %} 1. After the `CreatePayment` method in your application, create a new method called `storeCard`, pass the `paymentId` and `customerId` objects as arguments, and add the requisite properties and the `storeCardResponse` as shown in the following example: ```javascript async function storeCard(paymentId, customerId) { const body = JSON.stringify({ locationId, sourceId: paymentId, customerId, idempotencyKey: window.crypto.randomUUID(), }); const storeCardResponse = await fetch('/card', { method: 'POST', headers: { 'Content-Type': 'application/json', }, body, }); if (storeCardResponse.ok) { return storeCardResponse.json(); } const errorBody = await storeCardResponse.text(); throw new Error(errorBody); } ``` 2. In the `tokenize` method, update the `verificationDetails` object by setting `intent` to `CHARGE_AND_STORE`. ```javascript async function tokenize(paymentMethod) { const verificationDetails = { amount: '1.00', billingContact: { givenName: 'John', familyName: 'Doe', email: 'john.doe@square.example', phone: '3214563987', addressLines: ['123 Main Street', 'Apartment 1'], city: 'London', state: 'LND', countryCode: 'GB', }, currencyCode: 'GBP', intent: 'CHARGE_AND_STORE', customerInitiated: true, sellerKeyedIn: false, }; ``` 3. In the `document.addEventListener` event listener method, change the `handlePaymentMethodSubmission` method to `handleChargeAndStoreCardSubmission`, pass the `event`, `card`, and `customerId` objects as arguments, and modify the rest of the code as shown in the following example: ```javascript async function handleChargeAndStoreCardSubmission(event, card, customerId) { event.preventDefault(); try { // disable the submit button as we await tokenization and make a payment request. cardButton.disabled = true; const token = await tokenize(card); const paymentResults = await createPayment(token); console.debug('Payment Success', paymentResults); const storeCardResults = await storeCard( paymentResults.payment.id, customerId, ); console.debug('Store Card Success', storeCardResults); displayPaymentResults('SUCCESS'); } catch (e) { cardButton.disabled = false; displayPaymentResults('FAILURE'); console.error(e.message); } } const cardButton = document.getElementById('card-button'); cardButton.addEventListener('click', async function (event) { const textInput = document.getElementById('customer-input'); if (!textInput.reportValidity()) { return; } const customerId = textInput.value; await handleChargeAndStoreCardSubmission(event, card, customerId); }); ``` {% /accordion %} ## Recommended next step If your application doesn't yet have a Content Security Policy configured, see [Add a Content Security Policy](web-payments/content-security-policy). --- # Charge and Store Cards for Online Payments > Source: https://developer.squareup.com/docs/web-payments/sca-charge-and-store-card-on-file > Status: PUBLIC > Languages: All > Platforms: All Learn how to use the Web Payments SDK to charge a card and store card details for future online payments with a card on file. **Applies to:** [Web Payments SDK](web-payments/overview) | [Payments API](payments-refunds) | [Cards API](cards-api/overview) | [Customers API](customers-api/what-it-does) {% subheading %} Learn how to use the Web Payments SDK to charge a card and store card details for future online payments with a card on file.{% /subheading %} ## Overview After configuring your application with the Web Payments SDK to accept card-not-present payments, you can use the Web Payments SDK to store card details with Square as a card on file and charge the card on file for future online payments. ## How the card-on-file workflows work During payment tokenization, Square checks the tokenize request to determine whether [buyer verification](sca-overview) is needed based on the buyer's information. After receiving the payment token and verifying the buyer, the application performs one of the following card-on-file workflows: * **Store card details** - The application includes the payment token in a Cards API call to store card details as a card on file with [CreateCard](https://developer.squareup.com/reference/square/cards-api/create-card). * **Charge a card on file** - The application includes the payment token in a Payments API call to process a payment with [CreatePayment](https://developer.squareup.com/reference/square/payments-api/create-payment). * **Charge a card and store card details** - The application charges the card and stores the card details as a card on file with a single request call. The application includes the payment token in a Payments API call to process a payment and then creates a card on file and stores the card details as a `Card` object with a new customer profile. When you call `CreateCard`, the `source_id` is the `payment_id` from the Payments API payment response object. This workflow is ideal for scenarios where buyers want to save their card details while making a payment. To explore example implementations of the card-on-file workflows, see [Web Payments SDK Quickstart](web-payments/quickstart) or set up the [quickstart repository](https://github.com/square/web-payments-quickstart) and choose from the available examples. The following are additional code examples of each card-on-file workflow setup: - [Store card details](https://github.com/square/web-payments-quickstart/blob/273eb48c41ce189683e12d8628c7e81c8509854f/public/examples/card-store.html) - [Charge a card on file](https://github.com/square/web-payments-quickstart/blob/273eb48c41ce189683e12d8628c7e81c8509854f/public/examples/card-charge-card-on-file.html) - [Charge a card and store its details](https://github.com/square/web-payments-quickstart/blob/273eb48c41ce189683e12d8628c7e81c8509854f/public/examples/card-charge-and-store.html) ## Set up a card-on-file workflow ### Requirements and limitations Update your application to support the Web Payments SDK card payment flow by following the instructions in [Take a Card Payment](web-payments/take-card-payment) or [Add the Web Payments SDK to the Web Client](web-payments/quickstart/add-sdk-to-web-client). Choose a workflow when you set up the application. Follow the example code by setting up the [quickstart repository](https://github.com/square/web-payments-quickstart). The "store card details" workflow involves a `storeCard` method to store card details, while the "charge a card on file" workflow modifies a `CreatePayment` method to take the payment token and the customer ID. If your application needs to charge a card for a payment and store the card details from that same payment, use the "charge a card and store its details" workflow where the application combines both tasks in a single request call. {% accordion expanded=false %} {% slot "heading" %} ### Store card details {% /slot %} 1. Add a helper `storeCard` method, as shown in the following example, that passes the `token` and `customerId` objects as arguments to your server. The server can then make the call to the Square [CreateCard](https://developer.squareup.com/reference/square/cards-api/create-card) endpoint. ```javascript async function storeCard(token, customerId) { const body = JSON.stringify({ locationId, sourceId: token, customerId, idempotencyKey: window.crypto.randomUUID(), }); const paymentResponse = await fetch('/card', { method: 'POST', headers: { 'Content-Type': 'application/json', }, body, }); if (paymentResponse.ok) { return paymentResponse.json(); } const errorBody = await paymentResponse.text(); throw new Error(errorBody); } ``` 2. Modify the `tokenize` method with the following updates to `verificationDetails`. Set `intent` to `STORE`, `customerInitiated` to `true`, and `sellerKeyedIn` to `false`. ```javascript async function tokenize(paymentMethod) { const verificationDetails = { billingContact: { givenName: 'John', familyName: 'Doe', email: 'john.doe@square.example', phone: '3214563987', addressLines: ['123 Main Street', 'Apartment 1'], city: 'London', state: 'LND', countryCode: 'GB', }, intent: 'STORE', customerInitiated: true, sellerKeyedIn: false, }; const tokenResult = await paymentMethod.tokenize(verificationDetails); if (tokenResult.status === 'OK') { return tokenResult.token; } else { throw new Error( `Tokenization errors: ${JSON.stringify(tokenResult.errors)}`, ); } } ``` 3. Replace the `handlePaymentMethodSubmission` method with a new method called `handleStoreCardSubmission`, pass the `event`, `card`, and `customerId` arguments to the method, and modify the following `try` statement declaration from the code example: ```javascript async function handleStoreCardSubmission(event, card, customerId) { event.preventDefault(); try { // disable the submit button as we await tokenization and make a payment request. cardButton.disabled = true; const token = await tokenize(card); const storeCardResults = await storeCard( token, customerId, ); displayResults('SUCCESS'); console.debug('Store Card Success', storeCardResults); } catch (e) { cardButton.disabled = false; displayResults('FAILURE'); console.error('Store Card Failure', e); } } ``` 4. In the `cardButton.addEventListener` event listener, declare a new `customerId` object and call the `handleStoreCardSubmission` method as indicated in the following code example: ```javascript const cardButton = document.getElementById('card-button'); cardButton.addEventListener('click', async function (event) { const textInput = document.getElementById('customer-input'); if (!textInput.reportValidity()) { return; } const customerId = textInput.value; handleStoreCardSubmission(event, card, customerId); }); ``` {% /accordion %} {% accordion expanded=false %} {% slot "heading" %} ### Charge a card on file {% /slot %} 1. In your application, initialize a [Card](https://developer.squareup.com/reference/sdks/web/payments/objects/Card) object. 2. Call [Card.tokenize()](https://developer.squareup.com/reference/sdks/web/payments/objects/Card#Card.tokenize) with the `verificationDetails` and `cardId` of the stored card. The `Card.tokenize()` method passes the following properties in a `verificationDetails` object: * `amount` - The amount of the card payment to be charged. * `billingContact` - The buyer's contact information for billing. * `intent` - The transactional intent of the payment. * `sellerKeyedIn` - Indicates that the seller keyed in payment details on behalf of the customer. This is used to flag a payment as Mail Order / Telephone Order (MOTO). * `customerInitiated` - Indicates whether the customer initiated the payment. * `currencyCode` - The three-letter ISO 4217 currency code. {% aside type="important" %} Provide as much buyer information as possible for `billingContact` so that you get more accurate decline rate performance from 3DS authentication. {% /aside %} 3. Modify the [CreatePayment](https://developer.squareup.com/reference/square/payments-api/create-payment) endpoint by renaming the `createPaymentWithCardOnFile` function and passing in the `token` and `customerId`. The following code example demonstrates the charge card-on-file setup. ```javascript async function createPaymentWithCardOnFile( token, customerId, ) { const body = JSON.stringify({ locationId, sourceId: token, customerId, idempotencyKey: window.crypto.randomUUID(), }); const paymentResponse = await fetch('/payment', { method: 'POST', headers: { 'Content-Type': 'application/json', }, body, }); if (paymentResponse.ok) { return paymentResponse.json(); } const errorBody = await paymentResponse.text(); throw new Error(errorBody); } // status is either SUCCESS or FAILURE; function displayPaymentResults(status) { const statusContainer = document.getElementById( 'payment-status-container', ); if (status === 'SUCCESS') { statusContainer.classList.remove('is-failure'); statusContainer.classList.add('is-success'); } else { statusContainer.classList.remove('is-success'); statusContainer.classList.add('is-failure'); } statusContainer.style.visibility = 'visible'; } async function tokenize(paymentMethod, sourceId) { const verificationDetails = { amount: '1.00', billingContact: { givenName: 'John', familyName: 'Doe', email: 'john.doe@square.example', phone: '3214563987', addressLines: ['123 Main Street', 'Apartment 1'], city: 'London', state: 'LND', countryCode: 'GB', }, currencyCode: 'GBP', intent: 'CHARGE', customerInitiated: true, sellerKeyedIn: false, }; const tokenResult = await paymentMethod.tokenize(verificationDetails, sourceId); if (tokenResult.status === 'OK') { return tokenResult.token; } else { let errorMessage = `Tokenization failed with status: ${tokenResult.status}`; if (tokenResult.errors) { errorMessage += ` and errors: ${JSON.stringify( tokenResult.errors, )}`; } throw new Error(errorMessage); } } document.addEventListener('DOMContentLoaded', async function () { if (!window.Square) { throw new Error('Square.js failed to load properly'); } let payments; try { payments = window.Square.payments(appId, locationId); } catch { const statusContainer = document.getElementById( 'payment-status-container', ); statusContainer.className = 'missing-credentials'; statusContainer.style.visibility = 'visible'; return; } let card; try { card = await payments.card(); } catch (e) { console.error('Initializing Card failed', e); return; } async function handleChargeCardOnFileSubmission( event, card, cardId, customerId, ) { event.preventDefault(); try { // disable the submit button as we await tokenization and make a payment request. cardButton.disabled = true; const token = await tokenize(card, cardId); const paymentResults = await createPaymentWithCardOnFile( token, customerId ); displayPaymentResults('SUCCESS'); console.debug('Payment Success', paymentResults); } catch (e) { cardButton.disabled = false; displayPaymentResults('FAILURE'); console.error(e.message); } } const cardButton = document.getElementById('card-button'); cardButton.addEventListener('click', async function (event) { const customerTextInput = document.getElementById('customer-input'); const cardTextInput = document.getElementById('card-input'); if ( !customerTextInput.reportValidity() || !cardTextInput.reportValidity() ) { return; } const cardId = cardTextInput.value; const customerId = customerTextInput.value; handleChargeCardOnFileSubmission(event, card, cardId, customerId); }); }); ``` {% /accordion %} {% accordion expanded=false %} {% slot "heading" %} ### Charge a card and store its details {% /slot %} 1. After the `CreatePayment` method in your application, create a new method called `storeCard`, pass the `paymentId` and `customerId` objects as arguments, and add the requisite properties and the `storeCardResponse` as shown in the following example: ```javascript async function storeCard(paymentId, customerId) { const body = JSON.stringify({ locationId, sourceId: paymentId, customerId, idempotencyKey: window.crypto.randomUUID(), }); const storeCardResponse = await fetch('/card', { method: 'POST', headers: { 'Content-Type': 'application/json', }, body, }); if (storeCardResponse.ok) { return storeCardResponse.json(); } const errorBody = await storeCardResponse.text(); throw new Error(errorBody); } ``` 2. In the `tokenize` method, update the `verificationDetails` object by setting `intent` to `CHARGE_AND_STORE`. ```javascript async function tokenize(paymentMethod) { const verificationDetails = { amount: '1.00', billingContact: { givenName: 'John', familyName: 'Doe', email: 'john.doe@square.example', phone: '3214563987', addressLines: ['123 Main Street', 'Apartment 1'], city: 'London', state: 'LND', countryCode: 'GB', }, currencyCode: 'GBP', intent: 'CHARGE_AND_STORE', customerInitiated: true, sellerKeyedIn: false, }; ``` 3. In the `document.addEventListener` event listener method, change the `handlePaymentMethodSubmission` method to `handleChargeAndStoreCardSubmission`, pass the `event`, `card`, and `customerId` objects as arguments, and modify the rest of the code as shown in the following example: ```javascript async function handleChargeAndStoreCardSubmission(event, card, customerId) { event.preventDefault(); try { // disable the submit button as we await tokenization and make a payment request. cardButton.disabled = true; const token = await tokenize(card); const paymentResults = await createPayment(token); console.debug('Payment Success', paymentResults); const storeCardResults = await storeCard( paymentResults.payment.id, customerId, ); console.debug('Store Card Success', storeCardResults); displayPaymentResults('SUCCESS'); } catch (e) { cardButton.disabled = false; displayPaymentResults('FAILURE'); console.error(e.message); } } const cardButton = document.getElementById('card-button'); cardButton.addEventListener('click', async function (event) { const textInput = document.getElementById('customer-input'); if (!textInput.reportValidity()) { return; } const customerId = textInput.value; await handleChargeAndStoreCardSubmission(event, card, customerId); }); ``` {% /accordion %} ## Recommended next step If your application doesn't yet have a Content Security Policy configured, see [Add a Content Security Policy](web-payments/content-security-policy). --- # Manage Card-on-File Declines > Source: https://developer.squareup.com/docs/cards-api/manage-card-on-file-declines > Status: PUBLIC > Languages: All > Platforms: All Learn about Square features and guidance that can help reduce and manage card-on-file declines. **Applies to:** [Cards API](cards-api/overview) | [Webhooks](webhooks/overview) {% subheading %}Use Square features and guidance to help manage or reduce declines for [card-on-file payments](cards-api/overview#card-on-file-payments) and increase customer retention.{% /subheading %} {% toc hide=true /%} {% anchor id="card-automatically-updated-event-notifications" /%} ## card.automatically_updated event notifications To proactively manage potential declines due to expired card data or closed accounts, subscribe to receive [card.automatically_updated](https://developer.squareup.com/reference/square/cards-api/webhooks/card.automatically_updated) event notifications when Square automatically updates cards on file. You can subscribe [manually](webhooks/step2subscribe) in the Developer Console or [programmatically](webhooks/webhook-subscriptions-api) using the Webhook Subscriptions API. When you receive a `card.automatically_updated` notification, inspect the `card` object in the notification payload and take appropriate action: * **Expiration updates** - When allowed by the issuing bank, Square automatically updates the expiration date and last 4 digits of expiring cards on file. By listening for these updates, you can help ensure that card information remains current if the expiration date or card number changes. To use this feature: 1. In the notification payload, check the `exp_month`, `exp_year`, and `last_4` fields. 2. If you store this card information, update your records. {% line-break /%} * **Issuer alerts about closed accounts (Beta, select Mastercard cards only)** - For some Mastercard cards on file, the issuing bank alerts Square when the underlying account is closed. Square then marks the card as `ISSUER_ALERT_CARD_CLOSED`. Issuer alerts aren't guaranteed to be accurate, but they're a strong signal that future charges to the card are likely to fail. In testing, 80% of cards with issuer alerts were declined at the time of payment. By proactively contacting customers to set up a new payment method on file, you can reduce the likelihood that recurring subscriptions become delinquent. {% aside type="info" %} To access issuer alerts, Square API version 2024-12-18 or later is required for your webhook subscription or when calling the Cards API. {% /aside %} To use this feature: 1. In the notification payload, check whether the `issuer_alert` field is present. If present and set to `ISSUER_ALERT_CARD_CLOSED`, check the `issuer_alert_at` field to determine whether this is a new alert. 2. If the account is newly marked as closed, request a new payment method from the customer. {% accordion expanded=false %} {% slot "heading" %} #### More details {% /slot %} If notified by the issuing bank that the underlying account for the card on file is closed, Square sets the `issuer_alert` field to `ISSUER_ALERT_CARD_CLOSED`, updates the `issuer_alert_at` timestamp, and invokes a `card.automatically_updated` event. The `issuer_alert` and `issuer_alert_at` fields are present only when the card has an active issuer alert. If notified by the issuing bank that the account is reopened, Square clears both fields and invokes a `card.automatically_updated` event. The following example payload contains the `issuer_alert` and `issuer_alert_at` fields, which indicates that there's an active issuer alert: ```json { "merchant_id": "6SSW7HV8K2ST5", "type": "card.automatically_updated", "event_id": "d214f854-adb1-4f56-b078-4b8697a3187a", "created_at": "2025-02-15T04:38:13Z", "data": { "type": "card", "id": "ccof:uIbfJXhXETSP197M3GB", "object": { "card": { "id": "ccof:uIbfJXhXETSP197M3GB", "billing_address": { "address_line_1": "500 Electric Ave", "address_line_2": "Suite 600", "locality": "New York", "administrative_district_level_1": "NY", "postal_code": "10003", "country": "US" }, "fingerprint": "ex-p-cs80EK9Flz7LsCMv-szbptQ_ssAGrhemzSTsPFgt9nzyE6t7okiLIQc-qw_quqKX4Q", "bin": "411111", "card_brand": "VISA", "card_type": "CREDIT", "cardholder_name": "Amelia Earhart", "customer_id": "VDKXEEKPJN48QDG3BGGFAK05P8", "enabled": true, "exp_month": 11, "exp_year": 2027, "last_4": "1111", "issuer_alert": "ISSUER_ALERT_CARD_CLOSED", "issuer_alert_at": "2025-02-16T04:38:13Z", "merchant_id": "6SSW7HV8K2ST5", "prepaid_type": "NOT_PREPAID", "reference_id": "user-id-2", "version": 2 } } } } ``` {% /accordion %} Square also supports `card.created`, `card.updated`, `card.disabled`, and `card.forgotten` [webhook events](webhooks/v2webhook-events-tech-ref#cards-api) for the Cards API. {% aside type="tip" %} The [Events API](events-api/overview) can be used with webhook subscriptions for recovery and reconciliation of missed webhook events. {% /aside %} ## SCA verification [Strong Customer Authentication](sca-overview) (SCA) provides an additional layer of fraud protection in regions where SCA is required or for sellers that subscribe to Square Risk Manager to enforce 3-D Secure (3DS). SCA applies both when saving cards on file and making card-on-file payments. To help reduce the likelihood of declines for card-on-file payments, provide as much buyer information as possible to the Web Payments SDK or In-App Payments SDK. For more information, see [Charge and Store Cards for Online Payments](web-payments/charge-and-store-cards) for Web Payments SDK integrations or [Verify a Buyer](in-app-payments-sdk/verify-buyer) for In-App Payments SDK integrations. {% anchor id="health-account-cards-beta" /%} {% anchor id="health-account-cards" /%} ## Health account cards (Beta) Square uses the Bank Identification Number (BIN) to determine whether a card on file is for a Health Savings Account (HSA) or a Flexible Spending Account (FSA), which can be used for authorized medical expenses. For these cards, Square sets the `Card.hsa_fsa` field to `true`. You can use the `hsa_fsa` field to identify HSA and FSA cards, which tend to have higher decline rates as the year progresses because they might run out of funds. Sellers accepting card-on-file payments should ask customers to provide a secondary payment method on file when saving an HSA or FSA card on file. {% aside type="info" %} Square API version 2024-12-18 or later is required to access the `hsa_fsa` field. {% /aside %} ## Prepaid cards A prepaid card is a type of payment card that can hold a certain amount of value. For these cards, Square sets the `Card.prepaid_type` field to `PREPAID`. You can use the `prepaid_type` field to identify prepaid cards, which tend to have higher decline rates because they run out of funds. Sellers accepting card-on-file payments should ask customers to also provide a secondary payment method on file when saving a prepaid card on file. ## Additional best practices ### Logging and audits Keep detailed logs of transaction attempts and declined payments to identify and address recurring issues. Conduct regular audits of transaction flows to ensure compliance with regulations and identify any potential issues. ### Retry strategy Consider the following factors when designing your retry strategy: - Check the decline reason to determine the appropriate action: - `INSUFFICIENT_FUNDS` - Retrying after a few days might be effective. - `GENERIC_DECLINE` error - Don't retry. Instead, inform the buyer that the specific reason for the decline isn't available and advise them to contact their issuer for further details and assistance. Sometimes the specific reason for a card decline is unavailable because of limitations in the information provided by the issuing bank. - Wait at least 24 hours before retrying. Immediate retries can trigger fraud alerts or cause additional declines. - Limit retries to 2 to 3 attempts over several days to avoid triggering fraud alerts. Excessive retries can be flagged as suspicious activity. ### Customer communication When possible, inform buyers when a decline occurs and suggest they contact their issuing bank for further details and assistance, especially when the exact reason for the decline isn't available. If a charge continues to fail, request a new payment method from the customer. ### Test decline scenarios Test in production and Sandbox environments to ensure your application gracefully handles card-on-file declines. Square provides [card-on-file IDs](devtools/sandbox/payments#card-on-file-id-values) you can use for testing some common card-on-file decline scenarios in the {% tooltip text="Square Sandbox" %}An isolated server environment used for testing. API calls in the Sandbox use the "connect.squareupsandbox.com" domain and require an access token that's valid for Sandbox.{% /tooltip %}. ## See also * [Cards API](cards-api) * [Manage Customer Cards on File](cards-api/manage-cards) * [Create a Card on File from a Payment ID](cards-api/walkthrough/card-from-payment-id) * [Create a Card on File and a Payment](cards-api/walkthrough-seller-card) * [Create a Shared Card on File and Make a Payment](cards-api/walkthrough-shared-card) --- # .NET SDK Migration Guide > Source: https://developer.squareup.com/docs/sdks/dotnet/migration > Status: PUBLIC > Languages: All > Platforms: All Upgrade from the legacy version of the Square .NET SDK to version 42.0.0 or later. Version `41.0.0` of the .NET SDK represents a full rewrite of the SDK with a number of breaking changes, outlined in the following sections. When upgrading to this version or later versions, take note of the changes in the SDK, including client construction and parameter names. If necessary, you can use the legacy version of the SDK along with the latest version. SDK versions `40.1.0` and earlier continue to function as expected, but you should plan to update your integration as soon as possible to ensure continued support. ## Client construction To create a new client, you construct it using `new` and passing in parameters, as opposed to the legacy client that uses a Java-esque builder pattern. ```csharp using Square; // new var client = new SquareClient( token, // optional if you configure SQUARE_TOKEN environment variable new ClientOptions { BaseUrl = SquareEnvironment.Production // default, so you can omit ClientOptions parameter } ); // legacy var legacyClient = new Square.Legacy.SquareClient.Builder() .BearerAuthCredentials(new BearerAuthModel.Builder(token).Build()) .Environment(Square.Legacy.Environment.Production) .Build(); ``` {% table %} * Legacy * New {% width="200px" %} * Additional information --- * `AccessToken` * `Token` * The access token used for authentication. --- * `BearerAuthCredentials` * Removed * Set using the `Token` or `SQUARE_TOKEN` environment variable. --- * `CustomUrl` * `ClientOptions.BaseUrl` * Sets the base URL for API requests and defaults to `https://connect.squareup.com`. --- * `SquareVersion` * `ClientOptions.Version` * The Square API version to use. --- * `AdditionalHeaders` * `ClientOptions.AdditionalHeaders` * Available through `ClientOptions.AdditionalHeaders`. --- * `UserAgentDetail` * Removed * Set the user agent header on `ClientOptions.DefaultHeaders`. --- * `Timeout` * `Timeout` * Accepts a `TimeSpan` and the default is 30 seconds. --- * `HttpCallback` * Removed * Configure the HTTP client and options on the `ClientOptions`. --- * `HttpClientConfig` * Removed * Configure the HTTP client and options on the `ClientOptions`. {% /table %} ## Use the legacy and new SDK side by side While the new SDK has many improvements, it takes time to upgrade when there are breaking changes. To make the migration easier, the old SDK is available in the `Square.Legacy` NuGet package. The following example shows how to use the new and legacy SDKs inside a single file: ```csharp using Square; using Square.Legacy.Authentication; using Square.Locations; public class Program { public static async Task Main(string[] args) { var token = Environment.GetEnvironmentVariable("SQUARE_TOKEN") ?? throw new Exception("Missing SQUARE_TOKEN environment variable"); // LEGACY var legacyClient = new Square.Legacy.SquareClient.Builder() .BearerAuthCredentials(new BearerAuthModel.Builder(token).Build()) .Environment(Square.Legacy.Environment.Sandbox) .Build(); // NEW var client = new SquareClient( token, new ClientOptions { BaseUrl = SquareEnvironment.Sandbox } ); // use new client var location = await GetLocationAsync(client); // use legacy client await CreateOrderAsync(legacyClient, location); } private static async Task GetLocationAsync(SquareClient client) { var response = await client.Locations.GetAsync( new GetLocationsRequest { LocationId = "YOUR_LOCATION_ID" } ); return response.Location ?? throw new Exception("response.Location is null"); } private static async Task CreateOrderAsync( Square.Legacy.SquareClient legacyClient, Location location ) { await legacyClient .OrdersApi .CreateOrderAsync(new Square.Legacy.Models.CreateOrderRequest.Builder() .IdempotencyKey(Guid.NewGuid().ToString()) .Order(new Square.Legacy.Models.Order.Builder(location.Id).Build()) .Build()); } } ``` You should migrate to the new SDK using the following steps: 1. Install the `Square.Legacy` NuGet package alongside the existing Square SDK. 2. Search and replace all `using` statements from `Square` to `Square.Legacy`. 3. Gradually introduce the new SDK by importing it from the `Square` namespace. ## Request construction The legacy SDK allows you to instantiate a request either using a constructor and positional parameters or using a builder pattern. With the new SDK, you simply create a new instance of the request and use the property initializer to set the properties. ```csharp // Legacy with builder pattern var request = new Square.Legacy.Models.CreatePaymentRequest.Builder("SOURCE_ID", "IDEMPOTENCY_KEY") .AmountMoney(new Square.Legacy.Models.Money.Builder().Amount(20L).Currency("USD").Build()) .TipMoney(new Square.Legacy.Models.Money.Builder().Amount(3L).Currency("USD").Build()) .Build(); // Legacy with positional constructor parameters request = new Square.Legacy.Models.CreatePaymentRequest( "SOURCE_ID", Guid.NewGuid().ToString(), new Square.Legacy.Models.Money(20L, "USD"), new Square.Legacy.Models.Money(3L, "USD") ); // New with property initializers var request = new CreatePaymentRequest { SourceId = "SOURCE_ID", IdempotencyKey = Guid.NewGuid().ToString(), AmountMoney = new Money { Amount = 20L, Currency = Currency.Usd }, TipMoney = new Money { Amount = 3L, Currency = Currency.Usd } }; ``` ## API classes and method name changes Previously, API classes were named after the resource you're interacting with and suffixed with `Api`. To interact with customer resources, you use the `client.CustomersApi` property. Methods were named based on the action you want to perform and the same resource name specified earlier. To list customers, you call `client.CustomersApi.ListCustomersAsync()`. ```csharp // Legacy client.CustomersApi.ListCustomersAsync() ``` The new API classes are named by the resource without the `Api` suffix, and the methods now name the action without mentioning the resource a second time. ```csharp // New client.Customers.ListAsync() ``` When interacting with a nested resource, you can chain the resources using dot-notation. ```java // New client.Customers.Groups.ListAsync(); ``` Some other class and method names might have changed. The differences are easiest to discover by exploring the new method signatures. ## Auto-pagination Square's paginated endpoints now support auto-pagination with an iterator. Callers don’t need to manually fetch the next page. You can now iterate over the entire list and the client automatically fetches the next page behind the scenes. The following example shows the same code, with the legacy and new SDKs: ```csharp // Legacy using Square.Legacy; using Square.Legacy.Authentication; var legacyClient = new SquareClient.Builder() .BearerAuthCredentials(new BearerAuthModel.Builder("YOUR_TOKEN").Build()) .Build(); string? cursor = null; do { var response = await legacyClient.PaymentsApi.ListPaymentsAsync(total: 100, cursor: cursor); if (response.Payments is null) break; var payments = response.Payments; foreach (var payment in payments) { Console.WriteLine( "payment: ID: {0}, Created at: {1}, Updated at: {2}", payment.Id, payment.CreatedAt, payment.UpdatedAt ); } cursor = response.Cursor; } while (!string.IsNullOrEmpty(cursor)); // New using Square; using Square.Payments; var client = new SquareClient("YOUR_TOKEN"); var payments = await client.Payments.ListAsync(new ListPaymentsRequest{ Limit = 100 }); await foreach (var payment in payments) { Console.WriteLine( "payment: ID: {0}, Created at: {1}, Updated at: {2}", payment.Id, payment.CreatedAt, payment.UpdatedAt ); } ``` If you need to paginate page by page, you can still do so. ```csharp await foreach (var page in payments.AsPagesAsync()) { foreach (var payment in page.Items) { Console.WriteLine( "payment: ID: {0}, Created at: {1}, Updated at: {2}", payment.Id, payment.CreatedAt, payment.UpdatedAt ); } } ``` ## Synchronous calls In the legacy SDK, you can make synchronous calls. Following modern .NET standards, synchronous API calls are no longer supported. ## Explicit null values In the legacy SDK, explicit null values can be sent using `null` values. The new SDK uses `RequestOptions.AdditionalBodyProperties`. ```csharp // Legacy await legacyClient.LocationsApi.UpdateLocationAsync( locationId, new Square.Legacy.Models.UpdateLocationRequest.Builder() .Location(new Square.Legacy.Models.Location.Builder() .WebsiteUrl("https://developer.squareup.com") .TwitterUsername(null) .Build() ).Build() ); // New await client.Locations.UpdateAsync( new UpdateLocationRequest { LocationId = locationId, Location = new Location { WebsiteUrl = "https://developer.squareup.com" } }, new RequestOptions { AdditionalBodyProperties = new { location = new Dictionary { ["twitter_username"] = null } } } ); ``` {% aside type="info" %} You can pass anything into `AdditionalBodyProperties` that translates to a JSON object, but you need to use a dictionary to ensure `null` values aren't omitted. {% /aside %} --- # Java SDK Migration Guide > Source: https://developer.squareup.com/docs/sdks/java/migration > Status: PUBLIC > Languages: All > Platforms: All Upgrade from the legacy version of the Square Java SDK to version 42.0.0 or later. Version `44.0.0.20250319` of the Java SDK represents a full rewrite of the SDK with a number of breaking changes, outlined in the following sections. When upgrading to this version or later versions, take note of the changes in the SDK, including client construction and parameter names. If necessary, you can use the legacy version of the SDK along with the latest version. SDK versions `43.1.0.20250220` and earlier continue to function as expected, but you should plan to update your integration as soon as possible to ensure continued support. ## Client construction The new `Client` class has some breaking changes and is constructed in a slightly different way than the legacy version of the SDK. {% table %} * Legacy * New {% width="100px" %} * Additional information --- * `accessToken` * `token` * The access token used for authentication. --- * `bearerAuthCredentials` * Removed * Set using the `token` or `SQUARE_TOKEN` environment variable. --- * `customUrl` * `url` * Sets the base URL for API requests and defaults to `https://connect.squareup.com`. --- * `squareVersion` * `version` * The Square API version to use. --- * `additionalHeaders` * Removed * Available through `ClientOptions` and `RequestOptions` objects. --- * `userAgentDetail` * Removed * Configurable by setting the OkHttp client directly. --- * `timeout` * `timeout` * Now takes an `int` rather than a `long`. --- * `httpCallback` * Removed * Configurable by setting the OkHttp client directly. --- * `httpClientConfig` * Removed * Configurable by setting the OkHttp client directly. --- * `new Builder` * `builder` * See the following example. {% /table %} ```java // LEGACY import com.squareup.square.legacy.Environment; import com.squareup.square.legacy.SquareClient; SquareClient client = new SquareClient.Builder() .environment() // defaults to Environment.PRODUCTION .accessToken("YOUR_TOKEN") // defaults to using "SQUARE_ACCESS_TOKEN" environment variable .build(); // NEW import com.squareup.square.Environment; import com.squareup.square.SquareClient; SquareClient client = SquareClient.builder() .environment() // defaults to Environment.PRODUCTION .token("YOUR_TOKEN"); // defaults to using "SQUARE_TOKEN" environment variable .build(); ``` ## Use the legacy and new SDK side by side While the new SDK has many improvements, it takes time to upgrade when there are breaking changes. To make the migration easier, the new SDK exports the legacy SDK as `com.squareup.square.legacy`. The following example shows how to use the new and legacy SDKs inside a single file: ```java package com.square.examples; import com.squareup.square.SquareClient; import com.squareup.square.core.Environment; import com.squareup.square.legacy.exceptions.ApiException; import com.squareup.square.legacy.models.CreateOrderRequest; import com.squareup.square.legacy.models.CreateOrderResponse; import com.squareup.square.legacy.models.Order; import com.squareup.square.types.GetLocationResponse; import com.squareup.square.types.GetLocationsRequest; import com.squareup.square.types.Location; import java.io.IOException; import java.util.Optional; import java.util.UUID; public class SideBySide { public static void main(String[] args) { com.squareup.square.legacy.SquareClient legacyClient = new com.squareup.square.legacy.SquareClient.Builder() .accessToken(System.getenv("SQUARE_TOKEN")) .environment(com.squareup.square.legacy.Environment.SANDBOX) .build(); SquareClient client = SquareClient.builder() .token(System.getenv("SQUARE_TOKEN")) .environment(Environment.SANDBOX) .build(); Location location = getLocation(client).get(); CreateOrderResponse result = createOrder(legacyClient, location); } private static Optional getLocation(SquareClient client) { GetLocationResponse response = client.locations() .get(GetLocationsRequest.builder() .locationId("YOUR_LOCATION_ID") .build()); return response.getLocation(); } private static CreateOrderResponse createOrder( com.squareup.square.legacy.SquareClient legacyClient, Location location) { try { return legacyClient .getOrdersApi() .createOrder(new CreateOrderRequest.Builder() .idempotencyKey(UUID.randomUUID().toString()) .order(new Order.Builder(location.getId().get()).build()) .build()); } catch (ApiException | IOException e) { throw new RuntimeException(e); } } } ``` You should migrate to the new SDK using the following steps: 1. Include the following dependencies in your project: {% tabset %} {% tab id="Maven" %} ```xml com.squareup square 47.0.1.20260715 com.squareup square-legacy 47.0.1.20260715 ``` {% /tab %} {% tab id="Gradle" %} ```groovy dependencies { implementation 'com.squareup:square:47.0.1.20260715' implementation 'com.squareup:square-legacy:47.0.1.20260715' } ``` {% /tab %} {% /tabset %} 2. Search and replace all imports from `com.squareup.square` to `com.squareup.square.legacy`. 3. Gradually introduce the new SDK by importing it from the `com.squareup.square` import. ## Request builder constructors There are two main differences between the request builders in the legacy SDK and the new SDK: * **Instantiation** - The legacy SDK builders are instantiated through their internal class constructors, whereas the new SDK builders are instantiated through static `builder()` methods. * **Required fields** - In the legacy SDK, required fields are passed in as parameters to the builder constructor, while the new SDK has staged builders that won't expose the `.build()` method until all required fields are set. ```java // LEGACY CreatePaymentRequest request = new CreatePaymentRequest.Builder("SOURCE_ID", "IDEMPOTENCY_KEY") .amountMoney(new Money.Builder().amount(20L).currency("USD").build()) .tipMoney(new Money.Builder().amount(3L).currency("USD").build()) .build(); // NEW CreatePaymentRequest request = CreatePaymentRequest.builder() .sourceId("SOURCE_ID") .idempotencyKey(UUID.randomUUID().toString()) .amountMoney(Money.builder().amount(20L).currency(Currency.USD).build()) .tipMoney(Money.builder().amount(3L).currency(Currency.USD).build()) .build(); ``` ## API classes and method name changes Previously, API classes were named after the resource you're interacting with and suffixed with `Api`. To interact with customer resources, you use the `client.getCustomersApi()` method. The method was named based on the action you want to perform and the same resource name specified earlier. To list customers, you call `client.getCustomersApi().listCustomers();`. ```java // LEGACY client.getCustomersApi().listCustomers(); ``` The new API classes are named by the resource without the `Api` suffix, and the methods now name the action without mentioning the resource a second time. ```java // NEW client.customers().list(); ``` When interacting with a nested resource, you can chain the resources using dot-notation. ```java // NEW client.customers().groups().list(); ``` Some other class and method names might have changed. The differences are easiest to discover by exploring the new method signatures. ## Auto-pagination Square's paginated endpoints now support auto-pagination with an iterator. Callers don’t need to manually fetch the next page. You can now iterate over the entire list and the client automatically fetches the next page behind the scenes. The following example shows the same code, with the legacy and new SDKs: ```java // LEGACY import com.squareup.square.legacy.SquareClient; import com.squareup.square.legacy.models.ListPaymentsResponse; import com.squareup.square.legacy.models.Payment; import java.util.List; SquareClient legacyClient = new SquareClient.Builder() .accessToken("YOUR_TOKEN") .build(); ListPaymentsResponse response = legacyClient.getPaymentsApi().listPayments(...); List payments = response.getPayments(); String cursor = response.getCursor(); for (Payment payment : payments) { System.out.printf("payment: ID: %s Created at: %s, Updated at: %s\n", payment.getId(), payment.getCreatedAt(), payment.getUpdatedAt()); } while (!response.getCursor().isEmpty()) { response = legacyClient.getPaymentsApi().listPayments(..., cursor, ...); payments = response.getPayments(); cursor = response.getCursor(); for (Payment payment : payments) { System.out.printf("payment: ID: %s Created at: %s, Updated at: %s\n", payment.getId(), payment.getCreatedAt(), payment.getUpdatedAt()); } } // NEW import com.squareup.square.SquareClient; import com.squareup.square.core.SyncPagingIterable; import com.squareup.square.types.Payment; import com.squareup.square.types.PaymentsListRequest; SquareClient square = SquareClient.builder().token("YOUR_TOKEN").build(); SyncPagingIterable payments = square.payments().list(PaymentsListRequest.builder().total(100L).build()); for (Payment payment : payments) { System.out.printf( "payment: ID: %s Created at: %s, Updated at: %s\n", payment.getId(), payment.getCreatedAt(), payment.getUpdatedAt()); } ``` If you need to paginate page by page, you can still do so. ```java // First page List pagePayments = payments.getItems(); for (Payment payment : pagePayments) { // ... } // Remaining pages while (payments.hasNext()) { pagePayments = payments.nextPage().getItems(); for (Payment payment : pagePayments) { // ... } } ``` ## Async calls In the legacy SDK, asynchronous calls can be made on the same client as synchronous calls by appending `Async` to the method name. In the new SDK, async calls must be made to a class with the same name as the synchronous client with `Async` prepended: ```java // LEGACY SquareClient legacyClient = new SquareClient.Builder().accessToken("YOUR_TOKEN").build(); ListLocationsResponse syncResponse = legacyClient.getLocationsApi().listLocations(); CompletableFuture asyncResponse = legacyClient.getLocationsApi().listLocationsAsync(); // NEW SquareClient client = SquareClient.builder().token("YOUR_TOKEN").build(); AsyncSquareClient asyncClient = AsyncSquareClient.builder().token("YOUR_TOKEN").build(); ListLocationsResponse syncResponse = client.locations().list(); CompletableFuture asyncResponse = asyncClient.locations().list(); ``` ## Explicit null values In the legacy SDK, explicit null values can be sent using null values in the builder methods. In the new SDK, they can be set using `Nullable.ofNull()`. ```java // LEGACY new Transaction.Builder().clientId(null).build(); // NEW Transaction.builder().clientId(Nullable.ofNull()).build(); Transaction.builder().clientId(Nullable.of(null)).build(); // also valid ``` --- # Take Payments for Orders > Source: https://developer.squareup.com/docs/terminal-api/take-payments-for-orders > Status: PUBLIC > Languages: All > Platforms: All Learn how to take payments for orders with the Terminal API and Square Terminal. **Applies to:** [Terminal API](terminal-api/overview) | [Orders API](orders-api/what-it-does) {% subheading %}Learn how to use the Terminal API to process payments for orders created through the Orders API. {% /subheading %} ## Overview The Terminal API supports the lifecycle of an order by integrating the Square Terminal and the [Orders API](https://developer.squareup.com/reference/square/orders-api). The Orders API enables the purchase of line items, calculates totals, confirms payments, tracks an order's progress through fulfillment, itemizes purchases, and generates receipts all within a [CreateTerminalCheckout](https://developer.squareup.com/reference/square/terminal-api/create-terminal-checkout) request. With support for orders interoperability, you can build complex payment workflows using the Terminal API with an order. The Terminal API's integration with orders and itemization lets you build workflows that process complex payments on the Square Terminal, such as splitting payments for a restaurant order that itemizes several menu line items. With this integration, you can use Square products like Square Order Manager to manage orders that have been paid and processed by the Square Terminal. ### Requirements * Square Terminal version 6.62 or later. * Support for orders and itemization with the Square Terminal. For more information about regional support, see [Take Payments on Hardware](in-person-payment-options#checkout-flow-and-key-capabilities). ### Limitations * The Terminal API doesn't support updates made to orders after the Terminal checkout with the `order_id` moves to the `IN_PROGRESS` state, which indicates that the Square Terminal is currently processing the checkout. * Any updates made to the order while the Terminal checkout is in the `IN_PROGRESS` state might lead to errors on the Square Terminal during checkout, and problems with resolving the order. * To correctly update an order after a Terminal checkout has already been created, send a cancel request using [CancelTerminalCheckout](https://developer.squareup.com/reference/square/terminal-api/cancel-terminal-checkout). * If you successfully canceled the Terminal checkout and the order is still `OPEN`, update the order and create a new Terminal checkout with the same order. You can also create a new order and use its `order_id` to create a new Terminal checkout. * Order must be `OPEN`. * Square deletes completed checkouts after 30 days. If you need to store the Terminal checkouts for future reference, retain the checkout's payment IDs. ## About orders and the Terminal API An `Order` object is a top-level container representing an order. The order can have line items attached to it to indicate that the order consists of the items attached. A Terminal checkout can link to an open order and allow a buyer to complete a payment on that order. The Square Terminal displays the itemized list of purchased items during checkout and on the printed and digital receipts. ## Process payments for orders The following procedure shows how to use the Terminal API to process payments with an order. ### 1. Create an order Using the Terminal API with orders and itemization support, create an `Order` object using the Orders API [CreateOrder](https://developer.squareup.com/reference/square/orders-api/create-order) endpoint, representing an order for a total amount of $5.00 USD, with two $1.00 items and a single $3.00 item. {% tabset %} {% tab id="Request" %} ```` {% /tab %} {% tab id="Response" %} Note that when created, the order is in an `OPEN` state. The `OPEN` state allows you to update the order. ```json { "order": { "id": "Cc2NJAhkrOd3aaHm2NQK9RM0kADZY", "location_id": "W3Q7PHA6CMDH8", "line_items": [ { "uid": "kLgfgH63Jip5nIuyIB1Ir", "quantity": "2", "name": "One Dollar Item", "base_price_money": { "amount": 100, "currency": "USD" }, "gross_sales_money": { "amount": 200, "currency": "USD" }, "total_tax_money": { "amount": 0, "currency": "USD" }, "total_discount_money": { "amount": 0, "currency": "USD" }, "total_money": { "amount": 200, "currency": "USD" }, "variation_total_price_money": { "amount": 200, "currency": "USD" }, "item_type": "ITEM", "total_service_charge_money": { "amount": 0, "currency": "USD" } }, { "uid": "tzVkst1R2mBXlxU4Qx5mc", "quantity": "1", "name": "Three Dollar Item", "base_price_money": { "amount": 300, "currency": "USD" }, "gross_sales_money": { "amount": 300, "currency": "USD" }, "total_tax_money": { "amount": 0, "currency": "USD" }, "total_discount_money": { "amount": 0, "currency": "USD" }, "total_money": { "amount": 300, "currency": "USD" }, "variation_total_price_money": { "amount": 300, "currency": "USD" }, "item_type": "ITEM", "total_service_charge_money": { "amount": 0, "currency": "USD" } } ], "created_at": "2025-03-10T23:34:19.971Z", "updated_at": "2025-03-10T23:34:19.971Z", "state": "OPEN", "version": 1, "total_tax_money": { "amount": 0, "currency": "USD" }, "total_discount_money": { "amount": 0, "currency": "USD" }, "total_tip_money": { "amount": 0, "currency": "USD" }, "total_money": { "amount": 500, "currency": "USD" }, "total_service_charge_money": { "amount": 0, "currency": "USD" }, "net_amounts": { "total_money": { "amount": 500, "currency": "USD" }, "tax_money": { "amount": 0, "currency": "USD" }, "discount_money": { "amount": 0, "currency": "USD" }, "tip_money": { "amount": 0, "currency": "USD" }, "service_charge_money": { "amount": 0, "currency": "USD" } }, "source": { "name": "Terminal API" }, "net_amount_due_money": { "amount": 500, "currency": "USD" } } } ``` The order is created after the checkout request passes the following validation rules: * The order must belong to the location to which the Square Terminal is currently logged in. * The order must be in an `OPEN` state. * The order and checkout currency must match. * The order and checkout amount must be equal to each other if `payment_options.autocomplete` is set to `true`. This moves the order to a `COMPLETED` state. After the checkout request is sent to the Square Terminal, the buyer can complete or cancel the checkout. {% /tab %} {% /tabset %} ### 2. Link an order to a Terminal checkout - Pass the order's `order_id` to a new Terminal checkout request to collect any payments associated with the order. - Set the `show_itemized_cart` value to `true` in the Terminal checkout's [DeviceCheckoutOptions](https://developer.squareup.com/reference/square/objects/DeviceCheckoutOptions#definition__property-show_itemized_cart) property. This property shows the itemization screen on the Square Terminal prior to taking a payment. This field is active only if the Terminal checkout includes the `order_id`. - Pass the rest of the details in the `checkout` property fields of the request. {% tabset %} {% tab id="Request" %} ```` {% /tab %} {% tab id="Response" %} ```json { "checkout": { "id": "WJ5393OCcdkqO", "amount_money": { "amount": 500, "currency": "USD" }, "device_options": { "device_id": "147CS149A7003873", "collect_signature": false, "tip_settings": { "allow_tipping": false }, "skip_receipt_screen": false, "show_itemized_cart": true }, "status": "PENDING", "created_at": "2025-03-11T18:02:32.005Z", "updated_at": "2025-03-11T18:02:32.005Z", "app_id": "sq0idp-dcqnATUXGLZMGmES5uuG0Q", "order_id": "Cc2NJAhkrOd3aaHm2NQK9RM0kADZY", "location_id": "W3Q7PHA6CMDH8", "payment_type": "CARD_PRESENT", "payment_options": { "autocomplete": true } } } ``` {% /tab %} {% /tabset %} The `CreateOrder` response returns an `order_id` value, which you can pass into the `order_id` field in the `CreateTerminalCheckout` request. If the Terminal checkout request is successful, the `amount_money` value from the Terminal checkout is applied to the order. The following image demonstrates how the Square Terminal shows a checkout order for coffee and a croissant, with discounts and service charges applied prior to the buyer confirming and paying for the order. ![An image of the Square Terminal showing an itemized order from a checkout.](//images.ctfassets.net/1nw4q0oohfju/4fEMzUdk0Q7oG7NSYvXtDf/0c90af94061da9c195aede1c5b5f1e13/terminal-itemized-cart.png) {% accordion expanded=false %} {% slot "heading" %} ### (Optional) Take a split tender payment {% /slot %} By default, Terminal checkouts are designed to pay the full order total. In this case: * The Terminal checkout sets `autocomplete` to `true`. * The Terminal checkout amount must equal the order total. * The order automatically transitions to a `COMPLETED` state when the checkout completes. If `autocomplete` is set to `false` in the Terminal checkout, you can submit partial payments against the order, such as for splitting a restaurant bill between two cards. In this partial payment flow, the order does not move to a `COMPLETED` state automatically. To process all partial payments, you need to call [PayOrder](https://developer.squareup.com/reference/square/orders-api/pay-order) and include all payment IDs. For more information, see [Pay for Orders](orders-api/pay-for-orders). 1. Create an order with the Orders API. 2. Create one or more Terminal checkouts for part of the order total. Assign the `order_id` and verify `autocomplete=false` when calling Terminal API. 3. Collect the [`payment_id`](https://developer.squareup.com/reference/square/objects/TerminalCheckout#definition__property-payment_ids) from each Terminal checkout and any other payments created such as for cash payments. 4. Call the [PayOrder](https://developer.squareup.com/reference/square/orders/pay-order) endpoint with all of the payment IDs. After calling `PayOrder`, the order's status changes to `COMPLETED`. The associated partial payments' statuses are also changed to `COMPLETED`. Split tenders are available in regions that support order IDs for checkouts. {% /accordion %} ### 3. Provide an itemized receipt when a Terminal checkout is completed Including the `order_id` in the Terminal checkout request allows the Square Terminal to print a paper and digital receipt with itemization. By default, the buyer sees the receipt options screen on the Terminal checkout and chooses a method to receive the receipt. The Square Terminal provides an itemized receipt using its built-in printer or a link to view the digital link from the buyer's email or a text message sent to the buyer's phone number. ![A digital screenshot of an itemized receipt listing coffee and croissant purchases, along with discounts and service charges.](//images.ctfassets.net/1nw4q0oohfju/47F5Hco1lz28Jl2QuY3eIj/379fab3aa87f48c3e52d63d36aaf3c9f/terminal-itemized-receipt-order.png) The following animation shows the Square Terminal accepting a card payment and displaying the receipt options. ![An animation of the Square Terminal accepting a card and showing the receipt options screen.](//images.ctfassets.net/1nw4q0oohfju/ktlzFdBR5mcyFkBPkmkoG/a5554d93402d69b47ab0bc16ce51329b/terminal-receipt-options.gif) You can set the following additional receipt options: {% accordion expanded=false %} {% slot "heading" %} #### Skip receipt options at checkout {% /slot %} By default, the `skip_receipt_screen` property is set to `false`. If this property is set to `true`, the Square Terminal skips the receipt options screen during checkout. ```` {% /accordion %} {% accordion expanded=false %} {% slot "heading" %} #### Set default to always print a receipt {% /slot %} You can set the Square Terminal to automatically print a receipt. This setting overrides the `skip_receipt_screen` value from the Terminal checkout request and doesn't display the receipt options screen. To set the option to automatically print receipts on the Square Terminal, tap **Hardware**, **Printer**, **Receipts**, **Print Receipts**, and **Automatically**. The following animation demonstrates how to set this option. ![An animation demonstrating how to change the receipt option on the Square Terminal.](//images.ctfassets.net/1nw4q0oohfju/4bN4yco8FLjLZ0dwdyK9BI/47459c512269d5b1c2872271b6ddb239/terminal-printer-settings.gif) {% /accordion %} {% accordion expanded=false %} {% slot "heading" %} #### Print formal receipts (Japan only) {% /slot %} For Square accounts in Japan, the Square Terminal prints both a standard receipt and a formal receipt called ryoshusho (領収書). The Square Terminal provides the formal receipt option on the **Receipt Options** screen. You can reissue formal receipts after checkout by using the `RECEIPT` Terminal action and include the `payment_id` that's returned from the completed Terminal checkout. For more information, see [Display the receipt options screen](terminal-api/advanced-features/issue-receipts#display-the-receipt-options-screen). {% /accordion %} ### Take other types of payments and checkout features Square Terminal supports processing other types of payments and additional checkout features. For more information, see [Additional Payment and Checkout Features](terminal-api/additional-payment-checkout-features). --- # Additional Payment and Checkout Features > Source: https://developer.squareup.com/docs/terminal-api/additional-payment-checkout-features > Status: PUBLIC > Languages: All > Platforms: All Learn how to modify a Terminal checkout to accept other types of payments and enable additional checkout features. **Applies to:** [Terminal API](terminal-api/overview) | [Orders API](orders-api/what-it-does) | [Payments API](payments-api/take-payments) {% subheading %} Learn how to modify a Terminal checkout to accept other types of payments and enable additional checkout features.{% /subheading %} ## Overview The Square Terminal supports processing additional types of payments for a given order that's [linked to a Terminal checkout](terminal-api/take-payments-for-orders) or for an [one-off payment](terminal-api/square-terminal-payments). Use a [CreateTerminalCheckout](https://developer.squareup.com/reference/square/terminal-api/creater-terminal-checkout) request to enable these features and a [PayForOrder](https://developer.squareup.com/reference/square/orders-api/pay-order) request to process the payment type for an order. ## Review payment types and checkout features Each of the following sections demonstrate how to modify a `CreateTerminalCheckout` request to support a payment type or to enable a checkout feature. ## Take a delayed capture payment The Square Terminal supports the delayed capture of payments made with the Square Point of Sale application. To learn how delayed capture works with card payments, see [Delayed Capture of a Card Payment](payments-api/take-payments/card-payments/delayed-capture). The delayed capture flow with the Terminal API works as follows: 1. Create a [CreateTerminalCheckout](https://developer.squareup.com/reference/square/terminal-api/create-terminal-checkout) request and set `autocomplete` to `false` to authorize the payment but not capture it. * The `autocomplete` attribute is a Boolean type that indicates whether `Payment` objects are automatically completed or left in an `APPROVED` state for later changes. The default value is `true`. * The `delay_duration` attribute is a modifiable string type that indicates the length of time, in RFC 3339 format. By default, `delay_action` is set to `CANCEL`. If `delay_action` is set to `COMPLETE`, then payments will be automatically captured at the end of the delay window. 36 hours is the default, but more importantly 36 hours is the maximum duration for all Terminal checkouts. This property applies only when autocomplete is `false`. ```` 2. When the buyer completes the checkout flow on the Square Terminal, the Terminal checkout transitions to `COMPLETED` and includes the resulting `payment_id`. The `Payment` object now has a status of `APPROVED`. 3. Call `UpdatePayment` using the `payment_id` to change the payment amount and tip amount after the payment is authorized. 4. Call `CompletePayment` to capture the payment or call `CancelPayment` to void the payment. To learn more about updating payments, see [Update Payment and Tip Amounts](payments-api/update-payments). ## Take a partial authorized payment The Square Terminal supports accepting partial payments with a Square gift card. The following information uses a Square gift card as an example. A buyer swipes or manually enters a Square gift card on the Square Terminal. In the Terminal checkout request under `payment_options`, set `accept_partial_authorization` to `true` and `autocomplete` to `false`, which allows sellers to authorize a payment for less than the total amount when the Square gift card doesn't have sufficient funds. The seller can then initiate a follow-up checkout request to authorize the remaining amount. {% tabset %} {% tab id="Request" %} The Square Terminal displays the following warning message for the insufficient balance: ![A Square Terminal image displaying an insufficient funds warning during a partial authorization checkout.](//images.ctfassets.net/1nw4q0oohfju/5jLjMmT92qfyuF3pWAhTIU/cd8ae9d9e0197faed6b60517ec9edcd1/Partial-Auth_Warning.png) The following checkout request incorporates a partial payment authorization and a $20 order. The checkout request is for $20 USD and charging a Square gift card with a balance of $5.00. ```` {% /tab %} {% tab id="Response" %} After the buyer uses their gift card, the Terminal checkout is set to `COMPLETED` and the payment status is set to `APPROVED`. ```json { "checkout": { "id": "WJ5393OCcdkqO", "amount_money": { "amount": 2000, "currency": "USD" }, "device_options": { "device_id": "147CS149A7003873", }, "status": "COMPLETED", "created_at": "2025-03-11T18:02:32.005Z", "updated_at": "2025-03-11T18:02:32.005Z", "app_id": "sq0idp-dcqnATUXGLZMGmES5uuG0Q", "order_id": "Cc2NJAhkrOd3aaHm2NQK9RM0kADZY", "location_id": "W3Q7PHA6CMDH8", "payment_type": "CARD_PRESENT", "payment_options": { "autocomplete": true } } } ``` The Square Terminal displays the following receipt options screen for the $5.00 completed payment and indicates the remaining $15 due. ![A Square Terminal image displaying the receipt options screen during a partial authorization checkout and the remaining balance due.](//images.ctfassets.net/1nw4q0oohfju/3YUEmKyyBCMbPVf5zfNHHh/bc117e245434d5f80ae218a1be17a569/Partial-Auth_Receipt-Screen.png) {% /tab %} {% tab id="Pay remaining amount" %} #### Pay the remaining amount of the order To pay the remaining amount, which is $15 in this example, create another checkout with `autocomplete` set to `false` and `accept_partial_authorization` set to `true`. If you used an `order_id` for the first checkout, make sure to use the same `order_id` here. ```` After the buyer completes the Terminal checkout with a credit card, the seller must complete the order by using the [PayOrder](https://developer.squareup.com/reference/square/orders/pay-order) endpoint. For more information about partial payments and how to pay for orders, see [Partial Payment Authorizations](payments-api/take-payments/card-payments/partial-payments-with-gift-cards) and [Pay for Orders](orders-api/pay-for-orders), respectively. {% /tab %} {% /tabset %} ## Take a payment with a manually entered card The Square Terminal supports manual payment card entry by providing the [payment_type](https://developer.squareup.com/reference/square/objects/TerminalCheckout#definition__property-payment_type) field in the `TerminalCheckout` object and in the [CheckoutOptionsPaymentType](https://developer.squareup.com/reference/square/enums/CheckoutOptionsPaymentType) enumeration. When a `payment_type` with the value of `MANUAL_CARD_ENTRY` is specified in the checkout request, the Square Terminal displays the Manual Credit Card Entry form and a virtual keyboard for the input of card information. The following command configures the Square Terminal checkout to accept manual payment card input: {% tabset %} {% tab id="Request" %} ```` {% /tab %} {% tab id="Response" %} The following response carries a checkout object with the `payment_type` requested: ```json { "checkout": { "id": "Dobuud5jsMbqO", "amount_money": { "amount": 100, "currency": "USD" }, "reference_id": "232323", "note": "hamburger", "payment_type": "MANUAL_CARD_ENTRY", "device_id": "R5WNWB5BKNG9R", "status": "PENDING", "created_at": "2020-03-20T21:23:05.051Z", "updated_at": "2020-03-20T21:23:05.051Z", "app_id": "sq0ids-o38CJ3JfIrKJ_xn10mRhFg" } } ``` {% /tab %} {% /tabset %} ## Take a payment with a signature The Square Terminal supports the ability to require or skip collecting a signature for a payment by providing the `collect_signature` field for the [DeviceCheckoutOptions](https://developer.squareup.com/reference/square/objects/DeviceCheckoutOptions) object. If `collect_signature` is set to `true` in the checkout request, the Square Terminal displays the signature collection screen during checkout. The buyer is then required to provide a signature before proceeding to the next screen. If `collect_signature` is set to `false`, the checkout skips the signature capture screen. The default value for `collect_signature` is `false`. {% aside type="important" %} * The Square API version must be 2022-04-20 or later to use the `collect_signature` field. If the `Square-Version` in the request header isn't set, the request defaults to using the API version from the Developer Console. For more information, see [How Square API versioning works](build-basics/versioning-overview#how-square-api-versioning-works). * The `collect_signature` field is applicable only in the United States and Canada. In other regions, the Square Terminal determines whether it needs to collect signatures from buyers. {% /aside %} {% tabset %} {% tab id="Request" %} The following example demonstrates how to set up the Square Terminal checkout request to require signature collection: ```` {% /tab %} {% tab id="Response" %} The following response carries a checkout object with `collect_signature` requested: ```json { "checkout": { "id": "jnaokd5jsMbqO", "amount_money": { "amount": 100, "currency": "USD" }, "reference_id": "232323", "note": "hamburger", “device_options”: { “device_id”: "R5WNWB5BKNG9R", “collect_signature”: true }, "payment_type": "CARD_PRESENT", "device_id": "R5WNWB5BKNG9R", "status": "PENDING", "created_at": "2020-04-20T21:23:05.051Z", "updated_at": "2020-04-20T21:23:05.051Z", "app_id": "sq0ids-o38CJ3JfIrKJ_xn10mRhFg" } } ``` {% /tab %} {% /tabset %} ## Take a fee from a payment The Square Terminal supports collecting an application fee from a payment. The [app_fee_money](https://developer.squareup.com/reference/square/objects/TerminalCheckout#definition__property-app_fee_money) property has a value amount limit. {% tabset %} {% tab id="Request" %} Create a [CreateTerminalCheckout](https://developer.squareup.com/reference/square/terminal-api/create-terminal-checkout) request and add `app_fee_money` with 100 ($1.00 USD) and USD as the amount and currency, respectively. ```` {% /tab %} {% tab id="Response" %} When the buyer completes the checkout flow on the Square Terminal, the Terminal checkout transitions to a `COMPLETED` state. A `payment_id` is attached to the Terminal checkout. ```json { "checkout": { "id": "jnaokd5jsMbqO", "amount_money": { "amount": 500, "currency": "USD" }, "reference_id": "232323", "note": "hamburger", “device_options”: { “device_id”: "R5WNWB5BKNG9R", “collect_signature”: true }, "payment_type": "CARD_PRESENT", "device_id": "R5WNWB5BKNG9R", "status": "COMPLETED", "created_at": "2022-05-12T21:23:05.051Z", "updated_at": "2022-05-12T21:23:05.051Z", "app_id": "sq0ids-o38CJ3JfIrKJ_xn10mRhFg" } } ``` {% /tab %} {% /tabset %} Call the [GetPayment](https://developer.squareup.com/reference/square/payments/get-payment) endpoint using the `payment_id` from the Terminal checkout to verify that the application fee amount is properly attached to the payment and attributed to the application ID. Sign in to the Square Dashboard as the seller associated with your application and navigate to the **Balances** section to verify that the expected amount has been added to your Square balance. After you've linked a bank account, the collected fees are transferred nightly to your linked bank account. For more information about how to collect fees from payments, see [Collect Application Fees](payments-api/take-payments-and-collect-fees). ## Prompt the buyer for a tip at checkout The following `device_options` settings configure the Square Terminal checkout to: * Prompt for a tip on the Square Terminal. * Show the receipt screen. The `device_options` object sets the following behaviors: {% tabset %} {% tab id="Request" %} ```` {% /tab %} {% tab id="Response" %} The response is returned with a `PENDING` status. Note that the `PENDING` status changes to `IN_PROGRESS` when the Square Terminal acknowledges the request and shows the checkout display screen to the buyer while awaiting input. When the checkout is complete and Square has accepted the payment card, the status is `COMPLETED`. ```json { "checkout": { "id": "Dobuud5jsMbqO", "amount_money": { "amount": 100, "currency": "USD" }, "reference_id": "232323", "note": "hamburger", "device_options": { "device_id": "R5WNWB5BKNG9R", "tip_settings": { "separate_tip_screen": true, "custom_tip_field": false, "allow_tipping": true }, "skip_receipt_screen": false }, "device_id": "R5WNWB5BKNG9R", "status": "PENDING", "created_at": "2020-03-20T21:23:05.051Z", "updated_at": "2020-03-20T21:23:05.051Z", "app_id": "sq0ids-o38CJ3JfIrKJ_xn10mRhFg" } } ``` {% /tab %} {% /tabset %} ## Collect tip money prior to checkout If the buyer uses the POS application to enter a tip amount before the checkout is sent to the Square Terminal, the seller doesn't need to use the Square Terminal to collect a tip. You already know the tip amount before calling the Terminal API, for which you use the `tip_money` parameter and the `amount_money` parameter in the checkout request. A common scenario for this tip collection flow involves the seller using a kiosk POS application that calculates the tip and you don't want the buyer to enter the tip on the Square Terminal. The buyer-facing flow on the kiosk includes adding a tip and the kiosk then sends the total amount (including tip) to the Square Terminal as a checkout request. The `tip_money` parameter can only be set and included in the request if the checkout request has tip settings disabled. The default value for the [allow_tipping](https://developer.squareup.com/reference/square/objects/TipSettings#definition__property-allow_tipping) field in the `TipSettings` object is `false`. For more information about how to process payments with tip money, see [Take Cash Payments](payments-api/take-payments/cash-payments) and [Update Payment and Tip Amounts](payments-api/update-payments). {% tabset %} {% tab id="Request" %} ```` {% /tab %} {% tab id="Response" %} ```json { "checkout": { "id": "Dobuud5jsMbqO", "amount_money": { "amount": 100, "currency": "USD" }, "reference_id": "232323", "note": "hamburger", "device_options": { "device_id": "R5WNWB5BKNG9R", "tip_settings": { "separate_tip_screen": true, "custom_tip_field": false, "allow_tipping": true }, "skip_receipt_screen": false }, "device_id": "R5WNWB5BKNG9R", "tip_money": { "amount": 100, "currency": "USD", }, "status": "PENDING", "created_at": "2020-03-20T21:23:05.051Z", "updated_at": "2020-03-20T21:23:05.051Z", "app_id": "sq0ids-o38CJ3JfIrKJ_xn10mRhFg" } } ``` {% /tab %} {% /tabset %} ## Assign a team member ID to the checkout The team member ID is associated with an individual [TeamMember](https://developer.squareup.com/reference/square/objects/TeamMember) record and who is associated with creating the Terminal checkout. The `team_member_id` is also passed to the final payment that was created during checkout. {% tabset %} {% tab id="Request" %} ```` {% /tab %} {% tab id="Response" %} ```json { "checkout": { "id": "Dobuud5jsMbqO", "amount_money": { "amount": 100, "currency": "USD" }, "reference_id": "232323", "team_member_id": "7yJlHapkseXnNPETIU1B", "note": "hamburger", "device_options": { "device_id": "R5WNWB5BKNG9R", "tip_settings": { "separate_tip_screen": true, "custom_tip_field": false, "allow_tipping": true }, "skip_receipt_screen": false }, "device_id": "R5WNWB5BKNG9R", "tip_money": { "amount": 100, "currency": "USD", }, "status": "PENDING", "created_at": "2020-03-20T21:23:05.051Z", "updated_at": "2020-03-20T21:23:05.051Z", "app_id": "sq0ids-o38CJ3JfIrKJ_xn10mRhFg" } } ``` {% /tab %} {% /tabset %} For more information about setting up team members, see [Team API Integration Guide](team/integration). ## Add a statement description identifier to the checkout Setting the `statement_description_identifier` field adds a custom identifier to the transaction description which appears on the buyer's bank statement. For more information about statement descriptions, see [Card Payment and Statement Description](payments-api/take-payments/card-payments/statement-descriptions). {% tabset %} {% tab id="Request" %} ```` {% /tab %} {% tab id="Response" %} ```json { "checkout": { "id": "Dobuud5jsMbqO", "amount_money": { "amount": 100, "currency": "USD" }, "statement_description_identifier": "SQ *MYFASTFOOD*#05421", "reference_id": "232323", "team_member_id": "7yJlHapkseXnNPETIU1B", "note": "hamburger", "device_options": { "device_id": "R5WNWB5BKNG9R", "tip_settings": { "separate_tip_screen": true, "custom_tip_field": false, "allow_tipping": true }, "skip_receipt_screen": false }, "device_id": "R5WNWB5BKNG9R", "tip_money": { "amount": 100, "currency": "USD", }, "status": "PENDING", "created_at": "2020-03-20T21:23:05.051Z", "updated_at": "2020-03-20T21:23:05.051Z", "app_id": "sq0ids-o38CJ3JfIrKJ_xn10mRhFg" } } ``` {% /tab %} {% /tabset %} ## Add a card surcharge Auto Card Surcharging (ACS) automatically adds a surcharge to eligible card‑present transactions processed on Square Terminal via the Terminal API. The system completes the following tasks: * **Applies a surcharge rate** - within network and jurisdictional rules. This setting is configured for each seller within the Square dashboard. * **Provides developer API for transaction level control** - to allow an auto card surcharge on the payment. * **Displays a UI element** - on the Square Terminal detailing surcharge amount. * **Detects card type automatically** - (e.g. debit vs credit) to determine surcharge eligibility. * **Itemizes the surcharge** - on Terminal screens and receipts. * **Returns surcharge details** - in the Payment object for reporting and reconciliation. {% aside type="important" %} In order to create a payment with a card surcharge in the seller's Square Terminal, the following requirements need to be met: * Square Terminal must be running OS version 5.57.0000 and App version 6.79 or higher to support Auto Card Surcharging * To ensure the Terminal is running the latest version, swipe the screen from the left to open the menu screen, navigate to `Settings > Hardware > General > About Terminal`, and apply any software updates if available. * Square seller must go through [surcharge onboarding](https://squareup.com/help/us/en/article/8596-set-up-and-manage-card-surcharges) in Square dashboard. * Card surcharges are only supported in the US * Only supported for `CARD_PRESENT` and `MANUAL_CARD_ENTRY` payment types {% /aside %} ### Implementation A new field is available within the [DeviceCheckoutOptions](https://developer.squareup.com/reference/square/objects/DeviceCheckoutOptions) to include in the [Create terminal checkout](https://developer.squareup.com/reference/square/terminal-api/create-terminal-checkout) request that allows an auto card surcharge if all Seller eligibility and payment instrument requirements are met. When a card surcharge is added to a checkout request, the buyer-facing checkout UI shows details of the surcharge as shown in the following figure: ![An image of two Square Terminal checkout confirmation screens, first with surcharge detail, second without](//images.ctfassets.net/1nw4q0oohfju/2x9RXNoVBWP2EhI8DXvPLy/adcca9ab0f93513e447d26f2b54a4a51/terminal-surcharging.png) ### Request and response examples {% tabset %} {% tab id="Request" %} ```` {% /tab %} {% tab id="Response" %} ```json { "checkout": { "id": "Dobuud5jsMbqO", "amount_money": { "amount": 100, "currency": "USD" }, "reference_id": "232323", "team_member_id": "7yJlHapkseXnNPETIU1B", "device_options": { "device_id": "R5WNWB5BKNG9R", "tip_settings": { "separate_tip_screen": true, "custom_tip_field": false, "allow_tipping": true }, "skip_receipt_screen": false, "allow_auto_card_surcharge": true }, "device_id": "R5WNWB5BKNG9R", "tip_money": { "amount": 100, "currency": "USD", }, "status": "PENDING", "created_at": "2020-03-20T21:23:05.051Z", "updated_at": "2020-03-20T21:23:05.051Z", "app_id": "sq0ids-o38CJ3JfIrKJ_xn10mRhFg" } } ``` {% /tab %} {% /tabset %} --- # Flutter Plugin > Source: https://developer.squareup.com/docs/mobile-payments-sdk/flutter > Status: PUBLIC > Languages: All > Platforms: All The Flutter plugin for the Square Mobile Payments SDK is an open source Dart interface for calling native Mobile Payments SDK implementations. **Applies to:** [Mobile Payments SDK - Android](https://developer.squareup.com/docs/sdk/mobile-payments/android) | [Mobile Payments SDK - iOS](https://developer.squareup.com/docs/sdk/mobile-payments/ios) {% subheading %}Use Flutter to create applications that take payments on iOS and Android.{% /subheading %} {% toc disabled=true /%} ## Overview The Flutter plugin for the Mobile Payments SDK is an open source project that provides a Dart interface for calling the native Mobile Payments SDK implementations. For more information and to start using the plugin, see the API Reference and sample application in the [Mobile Payments SDK Flutter repo on GitHub](https://github.com/square/mobile-payments-sdk-flutter). ## See also * [React Native Plugin](mobile-payments-sdk/react-native) --- # Tap to Pay on Android > Source: https://developer.squareup.com/docs/mobile-payments-sdk/android/tap-to-pay > Status: BETA > Languages: All > Platforms: All Use Tap to Pay on Android to accept payments with your own device, without the need for Square hardware. Accept contactless payments with your Android phone and the Mobile Payments SDK without additional hardware. ## Requirements and limitations * Tap to Pay requires a [compatible Android phone](https://squareup.com/us/en/compatibility?platform=Android) running Android 9 or later. Tap to Pay isn't available on Android tablets. * Tap to Pay isn't available for [offline payments](mobile-payments-sdk/android/offline-payments#take-a-payment-offline). ## Device management A compatible Android phone pairs automatically, unlike a Square Reader, which requires manual pairing. When the Mobile Payments SDK is operating on a compatible device, the device is enabled to accept payments. However, to take a payment with Tap to Pay, there cannot be any other Square Readers paired with the device. Before attempting a Tap to Pay payment, forget or disconnect any paired Square Readers. Use the `ReaderInfo` class to learn details about connected readers and Tap to Pay devices available in the list of `readers`. For Tap to Pay devices, the `ReaderInfo.model` is always `TAP_TO_PAY`. For more information, see [Pair and Manage Card Readers](mobile-payments-sdk/android/pair-manage-readers). ## Accept payments with Tap to Pay To begin the payment flow in your application, you can use the `DEFAULT` `PromptParameters`, which displays a UI created by Square and lists the available payment methods from all connected readers. {% aside type="important" %} If you have a Square Reader paired with your device, only the payment options offered by that reader are displayed. To show the Tap to Pay on Android prompt, you must forget or disconnect any Square Readers paired to the device before starting the payment. {% /aside %} ![android-mpsdk-ttp](//images.ctfassets.net/1nw4q0oohfju/3K2CgxdBz88JEPQyAGTj1T/5dd6962f127e5e3f23f627729aa551c9/android-mpsdk-ttp.png) If you don't want to use the payment prompt built by Square, you can set your `PromptParameters.mode` to `CUSTOM` and create your own UI to prompt buyers to make their payment. If `paymentManager.getAvailableCardEntryMethods() = { CONTACTLESS }`, that means there are no hardware readers connected and you can display a Tap to Pay prompt in your UI. If `EMV` or `SWIPE` is listed as available card entry methods, there are other readers connected to your device and you shouldn't display a Tap to Pay prompt. For any payment method, you should check whether the [reader status](mobile-payments-sdk/android/pair-manage-readers#reader-status) is `READY` (by setting up a callback with `ReaderManager.setReaderChangedCallback`) before displaying it as a payment option in your UI. The rest of the [Mobile Payments SDK payment flow](mobile-payments-sdk/android/take-payments) is identical for Tap to Pay payments and other payment methods. --- # Tap to Pay on iPhone > Source: https://developer.squareup.com/docs/mobile-payments-sdk/ios/tap-to-pay > Status: BETA > Languages: All > Platforms: All Use Tap to Pay on iPhone to accept payments with your own device, without the need for Square hardware. Accept contactless payments with your iPhone and the Mobile Payments SDK without additional hardware. ## Requirements and limitations * Tap to Pay requires an iPhone XS or newer, running iOS 16.7 or later. Tap to Pay isn't available on iPads. * Tap to Pay entitlement - You must [request the Tap to Pay entitlement for your Apple developer account](https://developer.apple.com/documentation/proximityreader/setting-up-the-entitlement-for-tap-to-pay-on-iphone). To do so, you must have an organization-level developer account and be logged in as the account holder. * When writing your integration, you should familiarize yourself with [Apple’s documentation for Tap to Pay on iPhone](https://developer.apple.com/tap-to-pay/). * Tap to Pay isn't available for [offline payments](mobile-payments-sdk/ios/offline-payments). ## Link a Square seller account Sellers using their iOS device to take payments must link their Square seller account with an Apple ID prior to taking payments with Tap to Pay. To present this option in your application, use the `ReaderManager.TapToPaySettings` to link an Apple account. The `linkAppleAccount()` function presents an Apple sheet to the user (the Square seller) prompting them to accept the Tap to Pay on iPhone terms and conditions. As the application developer, you determine where in your application to launch this linking flow. You should ensure that this option is only available to admin users of your application or those with certain permissions. The seller doesn't need to be logged in to their Apple account on the device itself, they only need to log in to link their account when presented with the sheet. The Mobile Payments SDK's `ReaderManager` also includes `relinkAppleAccount`, a method to relink (change) the associated Apple ID by presenting the Tap to Pay terms and conditions again, and `isAppleAccountLinked`, a method to check whether the device's Apple ID is already linked to a Square seller ID. ## Device management The `ReaderManager` is used to pair and monitor changes in Square Readers and Tap to Pay devices linked to the authorized seller account. You can check `ReaderManager.TapToPaySettings.isDeviceCapable()` to determine whether the current device supports Tap to Pay. A compatible iOS phone pairs automatically, unlike a Square Reader, which requires manual pairing. When the seller's Apple ID is linked to their Square account and the Mobile Payments SDK is operating on a compatible device, the device is enabled to accept payments. Use the `ReaderInfo` class to learn details about connected readers and Tap to Pay devices available in the list of `readers`. For Tap to Pay devices, the `ReaderInfo.model` is always `tapToPay`. For more information, see [Pair and Manage Card Readers](mobile-payments-sdk/ios/pair-manage-readers). ## Accept payments with Tap to Pay To begin the payment flow in your application, you can use the `.default` `PromptParameters`, which displays a UI created by Square and lists the available payment methods from all connected readers, including Tap to Pay if the device is supported. ![ios-mpsdk-ttp](//images.ctfassets.net/1nw4q0oohfju/53RCYXn57m2uvvXPSsqv99/ca93e49cc662b76e56cf4bed89b4f80e/ios-mpsdk-ttp.png) If you don’t want to use the payment prompt built by Square, you can set your `PromptParameters.mode` to `custom` and create your own UI to prompt buyers to make their payment based on the `readerInfo.supportedInputMethods` for each reader in `ReaderManager.readers`. You should check whether the [reader status](mobile-payments-sdk/ios/pair-manage-readers#reader-status) is `ready` (by setting up an observer) before displaying it as a payment option in your UI. The rest of the [Mobile Payments SDK payment flow](mobile-payments-sdk/ios/take-payments) is identical for Tap to Pay payments and other payment methods. --- # PHP SDK Migration Guide > Source: https://developer.squareup.com/docs/sdks/php/migration > Status: PUBLIC > Languages: All > Platforms: All Upgrade from the legacy version of the Square PHP SDK to version 41.0.0.20250220 or later. Version `41.0.0.20250220` of the PHP SDK represents a full rewrite of the SDK with a number of breaking changes, outlined in the following sections. When upgrading to this version or later versions, take note of the changes in the SDK, including client construction and parameter names. If necessary, you can use the legacy version of the SDK along with the latest version. SDK versions `40.0.0.20250123` and earlier continue to function as expected, but you should plan to update your integration as soon as possible to ensure continued support. ## Client construction The new `Client` class has some breaking changes and is constructed in a slightly different way than the legacy version of the SDK. {% table %} * Legacy * New * Additional information --- * `Environment` * `baseUrl` * An enum for specifying the environment (Sandbox or Production). --- * `accessToken` * `token` * The access token used for authentication. --- * `customUrl` * `baseUrl` * The base URL for API requests. --- * `numberOfRetries` * `maxRetries` * The configuration used to control the number of retries. --- * `additionalHeaders` * `headers` * Additional headers can be set at individual methods. --- * `httpCallback` * Removed * This option has been removed. --- * `userAgentDetail` * Removed * This option has been removed. * {% /table %} ```php // LEGACY use Square\Legacy\SquareClient as LegacySquareClient; $client = new LegacySquareClient( config: [ 'accessToken' => getenv('SQUARE_ACCESS_TOKEN') ?? '', 'environment' => 'sandbox', ], ); // NEW use Square\Environments; use Square\SquareClient; $client = new SquareClient( token: getenv('SQUARE_ACCESS_TOKEN') ?? '', options: [ 'baseUrl' => Environments::Sandbox->value, ], ); ``` ## Use the legacy and new SDK side by side While the new SDK has many improvements, we understand that it takes time to upgrade when there are breaking changes. To make the migration easier, the new SDK exports the legacy SDK as `Square/Legacy`. The following example shows how to use the new and legacy SDKs inside a single file: ```php getenv('SQUARE_ACCESS_TOKEN') ?? '', 'environment' => 'sandbox', ]); $client = new SquareClient( token: getenv('SQUARE_ACCESS_TOKEN') ?? '', options: [ 'baseUrl' => Environments::Sandbox->value, ], ); function getLocation($client) { $response = $client->locations->get( new GetLocationsRequest([ 'locationId' => 'YOUR_LOCATION_ID', ]), ); return $response->getLocation(); } function createOrder($legacyClient, $location) { $order = new Order($location['id']); $request = new CreateOrderRequest; $request->setIdempotencyKey(uniqid()); $request->setOrder($order); return $legacyClient->getOrdersApi()->createOrder($request); } $location = getLocation($client); $result = createOrder($legacyClient, $location); ``` You should migrate to the new SDK using the following steps: 1. Upgrade the square/square package to `^41.0.0.20250220`. 2. Search and replace all requires and imports from `Square` to `Square\Legacy`. 3. Gradually introduce methods from the new SDK by importing them from the `Square` import. ## Array constructors The previous version of the SDK relied on using a mix of builders and setter methods, which created verbose integrations. For example, consider the following `createOrder` method call: ```php // LEGACY $order = new Order($location['id']); $request = new CreateOrderRequest; $request->setIdempotencyKey(uniqid()); $request->setOrder($order); $legacyClient->getOrdersApi()->createOrder($request); ``` In the new SDK, you can consolidate all the parameters in a single statement. All the parameters are still specified by their name, which makes their meaning instantly clear. ```php // NEW $client->orders->create( new CreateOrderRequest([ 'idempotencyKey' => uniquid(), 'order' => new Order([ 'locationId' => $location['id'], ]), ]), ) ``` ## Enums This SDK leverages the PHP 8.1 first-class enums to improve type safety and usability. To maintain forward compatibility with the API (where new enum values might be introduced in the future), enum properties are defined as `string` and use `value-of` annotations to specify the corresponding enum type. The best example of this is when the client's base URL or environment is configured. ```php // LEGACY use Square\Legacy\SquareClient as LegacySquareClient; $client = new LegacySquareClient( config: [ 'environment' => 'sandbox', ], ); // NEW use Square\Environments; use Square\SquareClient; $client = new SquareClient( options: [ 'baseUrl' => Environments::Sandbox->value, // Enums can be accessed with '->value'. ], ); ``` ## API classes and method name changes Previously, API classes were named after the resource you're interacting with and suffixed with `Api`. To interact with customer resources, you used the `client->getCustomersApi()` method. The method was named based on the action you want to perform and the same resource name specified earlier. To list customers, you call `client->getCustomersApi()->listCustomers`. ```php // LEGACY $client->getCustomersApi()->listCustomers(); ``` The new API classes are named after the resource without the `Api` suffix and their methods are named after the action without repeating the resource name. ```php // NEW $client->customers->list(); ``` When interacting with a nested resource, you can chain the resources using the arrow-notation. ```php // NEW $client->customers->groups->list(); ``` Other class and method names might have changed. The differences are easiest to discover by exploring the new method signatures. ## Auto-pagination The Square paginated endpoints now support auto-pagination with an iterator. Callers don’t need to manually fetch the next page. You can now iterate over the entire list and the client automatically fetches the next page behind the scenes. The following example shows the same code, with the legacy and new SDK: ```php // LEGACY $limit = 10; $listCustomersResponse = $legacyClient->getCustomersApi()->listCustomers( limit: $limit, sortField: 'DEFAULT', sortOrder: 'DESC' ); while (!empty($listCustomersResponse->getCustomers())) { $customers = $listCustomersResponse->getCustomers(); foreach ($customers as $customer) { echo sprintf( "customer: ID: %s Version: %s, Given name: %s, Family name: %s\n", $customer->getId(), $customer->getVersion(), $customer->getGivenName(), $customer->getFamilyName() ); } $cursor = $listCustomersResponse->getCursor(); if ($cursor) { $listCustomersResponse = $legacyClient->getCustomersApi()->listCustomers( cursor: $cursor, limit: $limit, sortField: 'DEFAULT', sortOrder: 'DESC' ); } else { break; } } // NEW $customers = $client->customers->list( new ListCustomersRequest([ 'limit' => 10, 'sortField' => 'DEFAULT', 'sortOrder' => 'DESC' ]), ]); foreach ($customers as $customer) { echo sprintf( "customer: ID: %s Version: %s, Given name: %s, Family name: %s\n", $customer->getId(), $customer->getVersion(), $customer->getGivenName(), $customer->getFamilyName() ); } ``` If you need to paginate page by page, you can still do so with a lot less code: - Use `$customers->getPages()` to iterate over each page individually. - Use `$customers->getItems()` to get the customers of the current page. ```php $customers = $client->customers->list( new ListCustomersRequest([ 'limit' => 10, 'sortField' => 'DEFAULT', 'sortOrder' => 'DESC' ]), ]); foreach ($customers->getPages() as $page) { foreach($customer as $page->getItems()) { echo sprintf( "customer: ID: %s Version: %s, Given name: %s, Family name: %s\n", $customer->getId(), $customer->getVersion(), $customer->getGivenName(), $customer->getFamilyName() ); } } ``` If you need to paginate page by page, you can still do so with a lot less code: - Use `$customers.getPages()` to iterate over each page individually. - Use `$customers.getItems()` to get the customers of the current page. ```php $customers = $client->customers->list( new ListCustomersRequest([ 'limit' => 10, 'sortField' => 'DEFAULT', 'sortOrder' => 'DESC' ]), ]); foreach ($customers->getPages() as $page) { foreach($customer as $page->getItems()) { echo sprintf( "customer: ID: %s Version: %s, Given name: %s, Family name: %s\n", $customer->getId(), $customer->getVersion(), $customer->getGivenName(), $customer->getFamilyName() ); } } ``` --- # Build a Developer Team > Source: https://developer.squareup.com/docs/devtools/developer-permissions > Status: PUBLIC > Languages: All > Platforms: All Learn how to add a developer to your Square development team and give them the right set of permissions. {% subheading %}Learn how to add a developer to your Square development team and give them the correct set of permissions.{% /subheading %} {% toc hide=true /%} ## Overview When you create team member profiles in the [Square Dashboard](https://app.squareup.com/dashboard/team/team-members), new team members are invited to your developer organization. You define jobs and permissions for team members in this process flow. It's the same flow that a seller uses to invite a new team member except that a new developer is assigned permissions for the Developer Console and optionally assigned permissions to your Square account. ![A graphic image that shows a conceptual relationship between team members and the resources that they can access.](//images.ctfassets.net/1nw4q0oohfju/5KYOgHvZ83OImlHlyyzeS5/e073ad64309643ec5fb09e84550f36f2/dev-permissions.png) ## Pricing When you create a new Square account, you get a default team permissions set and one custom permission set. For more than two levels of access, you need an [Advanced Access](https://squareup.com/staff/advanced-access) subscription, which includes customized access, team insights, and enhanced security. In order to get the Advanced Access subscription, your Square account needs to be based in one of the following countries: * Australia * Canada * France * Ireland * Japan * Spain * United Kingdom * United States ## Team roles The default team permissions set can be customized to include developers permissions for Developer Console access. This is useful if all team members are developers. If your team includes non-developers, such as coffee shop staff using Square Point of Sale, you shouldn't add developer permissions to the default set. Instead, create a new permission set specifically for developers. Your development team might include roles for: * **Developers** - People who write code, create or manage application registrations, set application credentials, manage OAuth parameters, or work with other configurations. * **Technical support** - People on your team who set up your application in production at a seller's site. * **Product marketing** - Team members who manage communication and marketing. {% aside type="info" %} If you need to provide a permission set for each of these developer roles, you must have an Advanced Access subscription. {% /aside %} All of these roles need access to different parts of the Developer Console. It's a good practice to scope team member access to only the functions in the Developer Console that a team member needs to do their job. For example, settings on the **OAuth** tab shouldn't be accessible to a team member in the product marketing role. ## Developer Console permissions The following image shows the developer permission selection dialog in the Team application. ![An image that shows the developer permission selection dialog in the Team application.](//images.ctfassets.net/1nw4q0oohfju/15fwGNEsHBi4CdGHitcD6c/d3bdd04515426520a708a4875edcfd43/developer-permission-selection.svg) To support building a team of developers for your organization, the Square Dashboard is used to manage developer team members as you might manage other team members. Use the Square Dashboard to [create team members](https://squareup.com/help/us/en/article/8356-add-and-manage-team-members). You can create and assign developer jobs and permission sets that contain developer permissions. If your team is building an application in the Developer Console, it's a good practice to set appropriate levels of access to console features. To create a team for your organization, complete these steps: 1. **Add a team member** - Each new team member is assigned a permission set and a job title. 1. **Assign a job title** - Assign a new or existing job title. {% aside type="important" %} Job titles are case-sensitive. You can create both a 'Developer' and a 'developer' job. When adding a team member with the title 'Developer,' ensure you select the correct 'Developer' job title again for consistency. {% /aside %} 2. **Customize or create a permission set** - Add developer permissions to an existing permission set or create a new permission set enabled for developers. 3. **Assign the permission set** - Assign the developer-enabled permission set to the team member. {% aside type="tip" %} After you've got a developer permission set, you can assign it to the next developer team members you create. {% /aside %} ## Create a permission set Create permission sets in the Square Dashboard to control access to the Developer Console. If you've given the default team permissions to non-developers, don't customize it for developers. Instead, make new permission sets for your developer team. For more information, see [Create Permission Sets](https://squareup.com/help/article/5822-employee-permissions). If you often use the Developer Console, choose **Account** and then **Settings**. On the **Settings** menu, choose **Manage team** to reach the Team page in the Square Dashboard. The jobs and permission sets usually created include **Product Marketing**, **IT Support**, and **Developer** - This job needs access to tools such as [API Explorer](devtools/api-explorer), [API Logs](devtools/api-logs), [webhook configurations](webhooks/overview), the [Sandbox](devtools/sandbox/overview) for testing, and limited seller account permissions to verify that the application integration code is working correctly. If all roles use the same permissions, then customize the default team permissions set instead of creating a new permission set for each role. ### Recommended permissions and roles When you add a new member to your development team, you can give them access to Square Point of Sale apps like Checkout, Orders, Invoices, and Appointments. They might need these apps to test the integration code they write. Besides these apps, the new team member needs access to features in the Developer Console to do their job. You assign developer-specific permissions in the **Team** app on the Square Dashboard. There are three developer permissions, and two of them have an extra permission, as shown in the [Developer Console permissions](#developer-console-permissions) section. {% accordion expanded=false %} {% slot "heading" %} ### Developer permissions {% /slot %} {% line-break /%} {% line-break /%} These development-specific permissions provide access to Developer Console functions as shown in the following table: {% table %} * Permission {% width="170px" %} * View basic application information {% width="100px" %} * Access all developer tools{% width="100px" %} * Create and view personal access tokens{% width="110px" %} * View App Marketplace submissions{% width="110px" %} * Manage App Marketplace listings{% width="110px" %} --- * View an account owner's email address * ✅ * ⛔ * ⛔ * ⛔ * ⛔ --- * Add, change, and delete an account owner's email address * ⛔ * ✅ * ⛔ * ⛔ * ⛔ --- * View and open applications * ✅ * ⛔ * ⛔ * ⛔ * ⛔ --- * Add new applications * ⛔ * ✅ * ⛔ * ⛔ * ⛔ --- * Open Sandbox test accounts and read Sandbox credentials * ⛔ * ✅ * ⛔ * ⛔ * ⛔ --- * Create new Sandbox test accounts, replace Sandbox credentials * ⛔ * ✅ * ⛔ * ⛔ * ⛔ --- * Read production application credentials and locations * ⛔ * ⛔ * ✅ * ⛔ * ⛔ --- * Replace production application credentials and application version * ⛔ * ⛔ * ✅ * ⛔ * ⛔ --- * Read production OAuth credentials * ⛔ * ✅ * ⛔ * ⛔ * ⛔ --- * Update production OAuth credentials * ⛔ * ✅ * ⛔ * ⛔ * ⛔ --- * View application webhook subscriptions and webhook logs * ⛔ * ✅ * ⛔ * ⛔ * ⛔ --- * Add application webhook subscriptions * ⛔ * ✅ * ⛔ * ⛔ * ⛔ --- * View a Reader SDK application repository password * ⛔ * ✅ * ⛔ * ⛔ * ⛔ --- * Replace a Reader SDK application repository password * ⛔ * ✅ * ⛔ * ⛔ * ⛔ --- * Read a Point of Sale API configuration - iOS * ⛔ * ✅ * ⛔ * ⛔ * ⛔ --- * Add an Android Point of Sale package * ⛔ * ✅ * ⛔ * ⛔ * ⛔ --- * View the Apple Pay domain URL * ⛔ * ✅ * ⛔ * ⛔ * ⛔ --- * Add and verify the Apple Pay domain URL * ⛔ * ✅ * ⛔ * ⛔ * ⛔ --- * View API logs for an application * ✅ * ⛔ * ⛔ * ⛔ * ⛔ --- * Respond to App Marketplace reviews * ⛔ * ⛔ * ⛔ * ⛔ * ✅ --- * View App Marketplace listings and submissions * ⛔ * ⛔ * ⛔ * ✅ * ⛔ --- * Edit and submit an App Marketplace listings or submission * ⛔ * ⛔ * ⛔ * ⛔ * ✅ {% /table %} {% /accordion %} ## Manage ownership of a Square account As your team of developers evolves and your business grows, you might find it necessary to update information about your Square account. For information about editing your account, see [Manage Your Account and Business Settings](https://squareup.com/help/article/3861-edit-your-account-and-business-settings) to secure your account, change language preferences, and keep your business information up to date. You can transfer your Square account to a new owner or accept a transfer to become the new owner of an existing Square account. For information, see [Transfer Ownership of Your Square Account](https://squareup.com/help/article/7675-transfer-ownership-of-your-square-account). ## Additional resources * [Team API](team/overview) - Your team of developers along with their job details can be retrieved and managed using the Team API. * [Labor API](labor-api/what-it-does) - If you need to track the hours that a team member works on a project, you can use the Labor API to create a time clock that lets a member of your team record their hours. These same APIs let you build labor reports for costing purposes. --- # React Native Plugin > Source: https://developer.squareup.com/docs/mobile-payments-sdk/react-native > Status: PUBLIC > Languages: All > Platforms: All The React Native plugin for the Square Mobile Payments SDK is an open source JavaScript interface for calling native Mobile Payments SDK implementations. **Applies to:** [Mobile Payments SDK - Android](https://developer.squareup.com/docs/sdk/mobile-payments/android) | [Mobile Payments SDK - iOS](https://developer.squareup.com/docs/sdk/mobile-payments/ios) {% subheading %}Use React Native to create applications that take payments on iOS and Android.{% /subheading %} {% toc disabled=true /%} ## Overview The React Native plugin for the Mobile Payments SDK is an open source project that provides a JavaScript interface for calling native Mobile Payments SDK implementations. For more information and to start using the plugin, see the API Reference and sample application in the [Mobile Payments SDK React Native repo on GitHub](https://github.com/square/mobile-payments-sdk-react-native/tree/main). ## See also * [Flutter Plugin](mobile-payments-sdk/flutter) --- # Node.js SDK Migration Guide > Source: https://developer.squareup.com/docs/sdks/nodejs/migration > Status: PUBLIC > Languages: All > Platforms: All Upgrade from the legacy version of the Square Node.js SDK to version 40.0.0 or later. Version `40.0.0` of the Node.js SDK represents a full rewrite of the SDK with a number of breaking changes, outlined in the following sections. When upgrading to this version or later versions, take note of the changes in the SDK, including client construction and parameter names. If necessary, you can use the legacy version of the SDK along with the latest version. SDK versions `39.1.0` and earlier continue to function as expected, but you should plan to update your integration as soon as possible to ensure continued support. ## Client construction The new `Client` class has some breaking changes and is constructed in a slightly different way than the legacy version of the SDK. {% table %} * Legacy * New * Additional information --- * `Client` * `SquareClient` * The main client class for interacting with Square APIs. --- * `Environment` * `SquareEnvironment` * An enum for specifying the environment (Sandbox or Production). --- * `bearerAuthCredentials.accessToken` * `token` * The access token used for authentication. --- * `customUrl` * `baseUrl` * The base URL for API requests. --- * `squareVersion` * `version` * The Square API version to use. --- * N/A * `fetcher` * Provide your own fetch function for making HTTP requests. --- * `timeout` * Removed * Timeout can be set at individual methods. --- * `additionalHeaders` * Removed * Additional headers can be set at individual methods. --- * `httpClientOptions` * Removed * HTTP options can be set at individual methods. --- * `unstable_httpClientOptions` * Removed * This option has been removed. --- * `userAgentDetail` * Removed * This option has been removed. * {% /table %} ```javascript // LEGACY import { Client, Environment } from "square/legacy"; const client = new Client({ bearerAuthCredentials: { accessToken: process.env.SQUARE_ACCESS_TOKEN, }, environment: Environment.Sandbox, }); // NEW import { SquareClient, SquareEnvironment } from "square"; const client = new SquareClient({ token: process.env.SQUARE_ACCESS_TOKEN, environment: SquareEnvironment.Sandbox, }); ``` ## Use the legacy and new SDK side by side While the new SDK has many improvements, we understand that it takes time to upgrade when there are breaking changes. To make the migration easier, the new SDK exports the legacy SDK as `square/legacy`. The following example shows how to use the new and legacy SDKs inside a single file: ```javascript import { randomUUID } from "crypto"; import { Square, SquareClient } from "square"; import { Client } from "square/legacy"; const client = new SquareClient({ token: process.env.SQUARE_ACCESS_TOKEN, }); const legacyClient = new Client({ bearerAuthCredentials: { accessToken: process.env.SQUARE_ACCESS_TOKEN!, }, }); async function getLocation(): Promise { return ( await client.locations.get({ locationId: "YOUR_LOCATION_ID", }) ).location!; } async function createOrder() { const location = await getLocation(); await legacyClient.ordersApi.createOrder({ idempotencyKey: randomUUID(), order: { locationId: location.id!, lineItems: [ { name: "New Item", quantity: "1", basePriceMoney: { amount: BigInt(100), currency: "USD", }, }, ], }, }); } createOrder(); ``` You should migrate to the new SDK using the following steps: 1. Upgrade the NPM module to `^40.0.0`. 2. Search and replace all requires and imports from `"square"` to `"square/legacy"`. * For required, replace `require("square")` with `require("square/legacy")`. * For imports, replace `from "square"` with `from "square/legacy"`. * For dynamic imports, replace `import("square")` with `import("square/legacy")`. 3. Gradually introduce methods from the new SDK by importing them from `"square"`. {% aside type="info" %} If you're using TypeScript, make sure that the `moduleResolution` setting in your `tsconfig.json` is equal to `node16`, `nodenext`, or `bundler` to consume the legacy SDK. {% /aside %} ## Named parameters The previous version of the SDK relied on many positional parameters, which made it difficult for readers to understand the meaning of the parameter. For example: ```javascript // LEGACY await client.customersApi.listCustomers(undefined, 10, undefined, "DESC"); ``` It's not immediately clear what `undefined`, `10`, `undefined`, and `DESC` mean. In the new version of the SDK, you specify the parameters by their name and you're not required to pass `undefined` parameters. The same `ListCustomers` request looks like the following: ```javascript // NEW await client.customers.list({ limit: 10, sortOrder: "DESC", }); ``` ## API classes and method name changes Previously, API classes were named after the resource you're interacting with and suffixed with `Api`. To interact with customer resources, you used the `client.customersApi` class. The method was named based on the action you want to perform and the same resource name specified earlier. To list customers, you call `client.customersApi.listCustomers`. ```javascript // LEGACY await client.customersApi.listCustomers(); ``` The new API classes are named by the resource without the `Api` suffix, and the methods now name the action without mentioning the resource a second time. ```javascript // NEW await client.customers.list(); ``` When interacting with a nested resource, you can chain the resources using dot-notation. ```javascript // NEW await client.customers.groups.list(); ``` To find all classes and method names that might have changed, see [reference.md](https://github.com/square/square-nodejs-sdk/blob/master/reference.md). ## Auto-pagination Paginated endpoints now support auto-pagination with an async iterator. Callers don’t need to manually fetch the next page at all. You can now iterate over the entire list and the client automatically fetches the next page behind the scenes. The following example shows the same code, with the legacy and new SDK: ```javascript // LEGACY const limit = 10; let listCustomersResponse = await customersApi.listCustomers( undefined, limit, "DEFAULT", "DESC" ); while (!isEmpty(listCustomersResponse.result)) { let customers = listCustomersResponse.result.customers; customers.forEach(function (cust) { console.log( "customer: ID: " + cust.id, "Version: " + cust.version + ",", "Given name: " + cust.givenName + ",", "Family name:" + cust.familyName ); }); let cursor = listCustomersResponse.result.cursor; if (cursor) { listCustomersResponse = await customersApi.listCustomers( cursor, limit, "DEFAULT", "DESC" ); } else { break; } } // NEW let customerPager = await client.customers.list({ limit: 10, sortField: "DEFAULT", sortOrder: "DESC", }); for await (const customer of customerPager) { console.log( "customer: ID: " + customer.id, "Version: " + customer.version + ",", "Given name: " + customer.givenName + ",", "Family name: " + customer.familyName ); } ``` If you need to paginate page by page, you can still do so with a lot less code: - Use `customerPager.data` to get the customers of the current page. - Use `customerPage.hasNextPage()` to check whether there's another page after the current one. - Use `customerPage.getNextPage()` to retrieve the next page of customers. ```javascript let customerPager = await client.customers.list({ limit: 10, sortField: "DEFAULT", sortOrder: "DESC", }); const printCustomers = (customers: Square.Customer[]) => { for (const customer of customers) { console.log( "customer: ID: " + customer.id, "Version: " + customer.version + ",", "Given name: " + customer.givenName + ",", "Family name: " + customer.familyName ); } }; printCustomers(customerPager.data); while (customerPager.hasNextPage()) { customerPager = await customerPager.getNextPage(); printCustomers(customerPager.data); } ``` ## Big integers The SDK requires you to pass in a `BigInt` to any field that is typed as a long or a big integer in Square's API. The SDK also guarantees that longs and big integers are returned as `BigInt` from the API. Here's an example of passing in a `BigInt`: ```javascript await client.orders.create({ idempotencyKey: idempotencyKey, order: { locationId: locationId, lineItems: [ { name: "New Item", quantity: "1", basePriceMoney: { amount: BigInt(100), currency: "USD", }, }, ], }, }); ``` Make sure to remove the `BigInt.prototype.toJSON` workaround from your code if you were previously using it. The prototyping workaround causes issues with the SDK, which already handles big integers correctly. ## Next steps For more sample code and examples of using the new Node.js SDK, see [Common Square API Patterns](sdks/nodejs/common-square-api-patterns). --- # Go SDK > Source: https://developer.squareup.com/docs/sdks/go > Status: PUBLIC > Languages: All > Platforms: All Use the Square Go library to build with Square APIs in a language-idiomatic way that reduces complexity without sacrificing API functionality. {% subheading %}The Square Go library supports Square APIs in a language-idiomatic way that reduces complexity without sacrificing API functionality.{% /subheading %} {% toc hide=true /%} {% card-layout%} {% card iconPath="//images.ctfassets.net/1nw4q0oohfju/14OXUvUMscxqnOrElYjHi1/d29fb3702f93d44836c463d3657e51f6/go-bw.svg" href="https://pkg.go.dev/github.com/square/square-go-sdk" %} {% card-link-out %}SDK package{% /card-link-out %} {% /card %} {% card iconPath="//images.ctfassets.net/1nw4q0oohfju/6foMeNHsmKw27jkpa7lPHk/6d5da15335dcf70d1fd1c28ca3bb540e/Github.svg" href="https://github.com/square/square-go-sdk/tree/master" %} {% card-link-out %}Reference library docs{% /card-link-out %} {% /card %} {% /card-layout %} {% line-break /%} **Latest SDK Version:** v4.0.1 Each SDK version is tied to a specific [Square API version](build-basics/versioning-overview). As features are added, Square releases a new Square API version and a new SDK version. To use new features, you must update the SDK version in your application. Review the [release notes](changelog/connect) to learn about changes in each API version. An increase in the SDK major version number indicates a breaking change. You should always test your application before deploying a change to production. ## Quickstart * Follow along with the [Quickstart guide](sdks/go/quick-start) to set up and test the Square Go SDK in your own project. * Download the [Square Go SDK sample app](https://github.com/Square-Developers/go-getting-started/tree/main) and follow the instructions in the README. --- # Square Go SDK Quickstart > Source: https://developer.squareup.com/docs/sdks/go/quick-start > Status: BETA > Languages: All > Platforms: All Learn how to quickly set up and test the Square Go SDK. {% subheading %}Learn how to quickly set up and test the Square Go SDK.{% /subheading %} {% toc hide=true /%} ## Prepare for the Quickstart Before you begin, you need a Square account and account credentials. You use the Square Sandbox for the Quickstart exercise. 1. Create a Square account and an application. For more information, see [Create an Account and Application](get-started/create-account-and-application). 2. Get a Sandbox access token from the Developer Console. For more information, see [Get a personal access token](build-basics/access-tokens#get-a-personal-access-token). 3. Install the following: * [Go](https://go.dev/) - Square supports Go version 1.18 or later. {% aside type="info" %} If you prefer to skip the following setup steps, download the [Square Go SDK Quickstart](https://github.com/Square-Developers/go-getting-started) sample and follow the instructions in the README. {% /aside %} ## Create a project 1. Open a new terminal window. 2. Create a new directory for your project, navigate to that directory, and initialize a new Go module. ``` mkdir quickstart cd quickstart go mod init quickstart ``` 3. Run the following command to use the Square Go library in your module: ``` go get github.com/square/square-go-sdk ``` ## Write code 1. In your project directory, create a new file named quickstart.go with the following content: ```go import ( "context" "fmt" "os" square "github.com/square/square-go-sdk" client "github.com/square/square-go-sdk/client" option "github.com/square/square-go-sdk/option" ) func main() { client := client.NewClient( option.WithToken( os.Getenv("SQUARE_ACCESS_TOKEN"), ), option.WithBaseURL(square.Environments.Sandbox), ) // Get the list of locations response, err := client.Locations.List(context.TODO()) if err != nil { fmt.Println(err) } else { for l := range response.Locations { fmt.Printf("ID: %s \n", *response.Locations[l].ID) fmt.Printf("Name: %s \n", *response.Locations[l].Name) fmt.Printf("Address: %s \n", *response.Locations[l].Address.AddressLine1) fmt.Printf("%s \n", *response.Locations[l].Address.Locality) } fmt.Println(response) } } ``` This code does the following: 1. Creates a new `client` object with your Square access token. For more information, see [Set your Square credentials](#set-credentials). 2. Calls the `Locations.List` method. 3. If the request is successful, your Square location details are printed in the terminal window. ## Set your Square credentials The Go code in this Quickstart reads your Square Sandbox access token from the `SQUARE_ACCESS_TOKEN` environment variable. This helps avoid the use of hardcoded credentials in the code. For the following commands, replace `yourSandboxAccessToken` with your Square Sandbox access token: ### Linux or macOS ```bash export SQUARE_ACCESS_TOKEN=yourSandboxAccessToken ``` ### Windows: PowerShell ```bash Set-item -Path Env:SQUARE_ACCESS_TOKEN -Value yourSandboxAccessToken ``` ### Windows: Command shell ```bash set SQUARE_ACCESS_TOKEN=yourSandboxAccessToken ``` ## Run the application 1. In your quickstart directory, run the `go build` command to compile the code. 2. Run your program with `./quickstart`. 2. Verify the result. You should see at least one location, even if you just created your Square account. --- # Take QR Code Payments for Digital Wallets > Source: https://developer.squareup.com/docs/terminal-api/international-payment-methods/paypay-qr-code-payments > Status: PUBLIC > Languages: All > Platforms: All Learn how to set up QR code payments for multiple digital wallet brands in Japan with the Terminal API. **Applies to:** [Terminal API](terminal-api/overview) {% subheading %}Use the Terminal API to take QR code payments for multiple digital wallets in Japan.{% /subheading %} {% toc hide=true /%} ## Requirements and limitations * The Terminal API supports multiple digital wallet brands for a QR code payment. * Square Terminal must be running version 6.58 or later to accept a QR code payment. * Square Terminal must be activated and located in Japan. * The seller must be approved to accept QR code payments in Japan. For more information, see [Apply for QR code payment](https://squareup.com/help/jp/ja/article/8370-apply-for-qr-code-payments), which can be viewed in English or Japanese. ## Request a Terminal checkout for a QR code payment The [Terminal API](https://developer.squareup.com/reference/square/terminal-api) supports multi-brand QR code payments by providing the [payment_type](https://developer.squareup.com/reference/square/objects/TerminalCheckout#definition__property-payment_type) field in the `TerminalCheckout` object and the [CheckoutOptionsPaymentType](https://developer.squareup.com/reference/square/enums/CheckoutOptionsPaymentType) enumeration. When a `payment_type` has the `QR_CODE` enumerator value specified in the checkout request, the Terminal displays a multi-brand QR code for the buyer to scan. For example, if the seller supports the PayPay digital wallet brand, the buyer can make a PayPay payment by scanning the QR code. The QR code supports digital wallets that are connected to a specific seller location and each seller account can have multiple locations. The following example shows a Terminal checkout request with the QR code `payment_type`. This checkout request launches the QR code screen on the Square Terminal: ```` --- # Define Item Variations Using Options > Source: https://developer.squareup.com/docs/catalog-api/item-options > Status: PUBLIC > Languages: All > Platforms: All Learn how to use item options to simplify the process of creating standard variants for catalog items. **Applies to:** [Catalog API](catalog-api/what-it-does) {% subheading %}Learn how to use item options to simplify the process of creating standard variants for catalog items.{% /subheading %} {% toc hide=true /%} ## Overview Leveraging item options offers a more efficient strategy for application developers, especially when addressing inconsistencies in how sellers name product variations. By standardizing attributes like size and color, item options simplify the search process, allowing users to quickly find specific variations (such as a large red polo shirt) without navigating through poorly labeled or inconsistent entries (such as like Large red polo shirt, Red Polo shirt - LG, or Polo shirt: red large). This approach enhances usability and ensures a more seamless shopping experience. ## Item options and variations The [Catalog API](https://developer.squareup.com/reference/square/catalog-api) includes several objects that enable efficient and standardized definitions of item variations in the seller's inventory. These objects include: * [Items](https://developer.squareup.com/reference/square/objects/CatalogItem) - Generalized items, such as "Shirt". * [Item variation](https://developer.squareup.com/reference/square/objects/CatalogItemVariation) - Specific items for sale, such as "Polo shirt: Lg, red". * [Item options](https://developer.squareup.com/reference/square/objects/CatalogItemOption) - Standardized attributes such as color, size, and style. When creating item variations in the Square Dashboard, sellers have two options: using item options or the variation name model. In both cases, the `item_variation_data.name` property is assigned a descriptive name. If item options are used, Square sets the variation name by combining the chosen option values into a comma-separated string and the `item_variation_data.item_option_values` property references the selected options and values. {% aside type="important" %} When using item options, the `CatalogItemVariation.name` includes only the option values, not the item's name (for example, "Large, Red" instead of "Polo shirt: Large, Red"). The item name should be set in the parent catalog item, such as "Polo shirt". {% /aside %} ### Defining variations There are two strategies for defining shirt variations: * [Item variation name strategy](#variation-strategy) - Add variation attributes to its name (such as "small red polo shirt"). * [Item option strategy](#option-strategy) - Use item options to set variation attributes (such as "small", "red", and "polo"). When the variation name strategy is used, a seller might give variations inconsistent names, such as: * "LG Red Camp Shirt". * "Blue Polo shirt - small". * "Yellow T-shirt: XL". This can complicate searches within your application. For example, finding a blue polo shirt involves a text query like "blue polo shirt" to locate the relevant catalog objects. For more information, see [Search for item variations by searchable attribute](#text-query). ### Benefits of using item options Item options streamline the creation of item variations by linking them to standardized attributes, such as these examples: * **Color** - Options include "Red", "Green", and "Blue". * **Size** - Options range from "Extra Large" to "Small". * **Style** - Varieties such as "Polo", "Dress", and "Camp". After your application creates a [CatalogItemOption](https://developer.squareup.com/reference/square/objects/CatalogItemOption)—such as "color" with predefined values—that option can be applied to define the color attribute for any new catalog items. Your application can also use catalog item options created by the seller in the Square Dashboard. Using item options, a variation is automatically generated for every combination of option values. Each variation is linked to options and values (such as Red, Small, and Polo), eliminating the need for sellers to manually format individual descriptions. These examples (color, size, and style) are just that—examples. Your application can create any type of option with various values. For information about querying by item option value, see [Search for item variations using item options](#option-query). {% anchor id="variation-strategy" /%} ## Item variation name strategy Item variations can be straightforward, defined by a single characteristic, or more complex, combining multiple characteristics to represent a composite variation. In the following example, $35 polo shirts in three sizes and two colors are sold by a clothing retailer. To add these shirts to the catalog, six item variations are created. All the shirts have the same variation properties except for the variation name, which is unique to each variation. * "Polo shirt, Red, Large" * "Polo shirt, Red, Medium" * "Polo shirt, Red, Small" * "Polo shirt, Blue, Large" * "Polo shirt, Blue, Medium" * "Polo shirt, Blue, Small" In the seller's item library and at the point of sale, items are organized alphabetically by name. If the naming of variations is inconsistent, the sorting order might appear illogical and confusing. ### Create item size and color variations using a variation name To add item variations to a catalog, create a `CatalogItem` instance with a list of `CatalogItemVariation` instances nested within the item through the `variations` attribute on the `CatalogItem` object. A variation is created for each combination of color and size. {% tabset %} {% tab id="Request" %} ```` {% /tab %} {% tab id="Response" %} The request results in a `CatalogItem` instance with nine `CatalogItemVariation` instances nested within. ```json { "catalog_object": { "type": "ITEM", "id": "3RJ4KVW64QXHXYDJ5CS6J4LE", "updated_at": "2020-10-17T00:08:15.13Z", "version": 1602893295130, "is_deleted": false, "present_at_all_locations": true, "item_data": { "name": "Shirt", "description": "Shirt", "variations": [ { "type": "ITEM_VARIATION", "id": "F3P54C436KUEUGMRCUFYBEIZ", "updated_at": "2020-10-17T00:08:15.13Z", "version": 1602893295130, "is_deleted": false, "present_at_all_locations": true, "item_variation_data": { "item_id": "3RJ4KVW64QXHXYDJ5CS6J4LE", "name": "Polo shirt, Red, Large", "ordinal": 0, "pricing_type": "FIXED_PRICING", "price_money": { "amount": 2500, "currency": "USD" } } }, { "type": "ITEM_VARIATION", "id": "IJBAQDICELYUAUTHM352X3AI", "updated_at": "2020-10-17T00:08:15.13Z", "version": 1602893295130, "is_deleted": false, "present_at_all_locations": true, "item_variation_data": { "item_id": "3RJ4KVW64QXHXYDJ5CS6J4LE", "name": "Polo shirt, Red, Medium", "ordinal": 1, "pricing_type": "FIXED_PRICING", "price_money": { "amount": 3000, "currency": "USD" } } }, { "type": "ITEM_VARIATION", "id": "5JMHD2SBPVG3A7ZFN5HDXSY6", "updated_at": "2020-10-17T00:08:15.13Z", "version": 1602893295130, "is_deleted": false, "present_at_all_locations": true, "item_variation_data": { "item_id": "3RJ4KVW64QXHXYDJ5CS6J4LE", "name": "Polo shirt, Red, Small", "ordinal": 2, "pricing_type": "FIXED_PRICING", "price_money": { "amount": 3500, "currency": "USD" } } }, { "type": "ITEM_VARIATION", "id": "FQZGFI5ZQZY4RYK3H5X3QG2X", "updated_at": "2020-10-17T00:08:15.13Z", "version": 1602893295130, "is_deleted": false, "present_at_all_locations": true, "item_variation_data": { "item_id": "3RJ4KVW64QXHXYDJ5CS6J4LE", "name": "Polo shirt, Blue, Large", "ordinal": 3, "pricing_type": "FIXED_PRICING", "price_money": { "amount": 2500, "currency": "USD" } } }, { "type": "ITEM_VARIATION", "id": "6F4K33KPNUVDWKZ43KUIFH6K", "updated_at": "2020-10-17T00:08:15.13Z", "version": 1602893295130, "is_deleted": false, "present_at_all_locations": true, "item_variation_data": { "item_id": "3RJ4KVW64QXHXYDJ5CS6J4LE", "name": "Polo shirt, Blue, Medium", "ordinal": 4, "pricing_type": "FIXED_PRICING", "price_money": { "amount": 3000, "currency": "USD" } } }, { "type": "ITEM_VARIATION", "id": "H6QGZ6Q3XBEIL672DZYQW5SH", "updated_at": "2020-10-17T00:08:15.13Z", "version": 1602893295130, "is_deleted": false, "present_at_all_locations": true, "item_variation_data": { "item_id": "3RJ4KVW64QXHXYDJ5CS6J4LE", "name": "Polo shirt, Blue, Small", "ordinal": 5, "pricing_type": "FIXED_PRICING", "price_money": { "amount": 3500, "currency": "USD" } } }, { "type": "ITEM_VARIATION", "id": "FQZGFI5ZQZY4RYK3H5X3QG2X", "updated_at": "2020-10-17T00:08:15.13Z", "version": 1602893295130, "is_deleted": false, "present_at_all_locations": true, "item_variation_data": { "item_id": "3RJ4KVW64QXHXYDJ5CS6J4LE", "name": "Polo shirt, Green, Large", "ordinal": 3, "pricing_type": "FIXED_PRICING", "price_money": { "amount": 2500, "currency": "USD" } } }, { "type": "ITEM_VARIATION", "id": "6F4K33KPNUVDWKZ43KUIFH6K", "updated_at": "2020-10-17T00:08:15.13Z", "version": 1602893295130, "is_deleted": false, "present_at_all_locations": true, "item_variation_data": { "item_id": "3RJ4KVW64QXHXYDJ5CS6J4LE", "name": "Polo shirt, Green, Medium", "ordinal": 4, "pricing_type": "FIXED_PRICING", "price_money": { "amount": 3000, "currency": "USD" } } }, { "type": "ITEM_VARIATION", "id": "H6QGZ6Q3XBEIL672DZYQW5SH", "updated_at": "2020-10-17T00:08:15.13Z", "version": 1602893295130, "is_deleted": false, "present_at_all_locations": true, "item_variation_data": { "item_id": "3RJ4KVW64QXHXYDJ5CS6J4LE", "name": "Polo shirt, Green, Small", "ordinal": 5, "pricing_type": "FIXED_PRICING", "price_money": { "amount": 3500, "currency": "USD" } } } ], "product_type": "REGULAR" } }, "id_mappings": [ { "client_object_id": "#shirt", "object_id": "3RJ4KVW64QXHXYDJ5CS6J4LE" }, { "client_object_id": "#shirt_small_red", "object_id": "F3P54C436KUEUGMRCUFYBEIZ" }, { "client_object_id": "#shirt_medium_red", "object_id": "IJBAQDICELYUAUTHM352X3AI" }, { "client_object_id": "#shirt_large_red", "object_id": "5JMHD2SBPVG3A7ZFN5HDXSY6" }, { "client_object_id": "#shirt_small_blue", "object_id": "FQZGFI5ZQZY4RYK3H5X3QG2X" }, { "client_object_id": "#shirt_medium_blue", "object_id": "6F4K33KPNUVDWKZ43KUIFH6K" }, { "client_object_id": "#shirt_large_blue", "object_id": "H6QGZ6Q3XBEIL672DZYQW5SH" }, { "client_object_id": "#shirt_small_greeen", "object_id": "FQZGFI5ZQZY4RYK3H5X3QG2X" }, { "client_object_id": "#shirt_medium_green", "object_id": "6F4K33KPNUVDWKZ43KUIFH6K" }, { "client_object_id": "#shirt_large_green", "object_id": "H6QGZ6Q3XBEIL672DZYQW5SH" } ] } ``` {% /tab %} {% /tabset %} {% anchor id="option-strategy" /%} ## Item option strategy Continuing with the polo shirt example, a "Polo shirt" variation must have a color and size because the parent "Shirt" item was defined with these options. The possible values for these variation options are taken from the "Shirt" item definition. ![A diagram showing the way you define catalog item options.](//images.ctfassets.net/1nw4q0oohfju/47K9EUWpS0OBHDhwoLMvB1/4425eb78a951fa4160cd9cdec97f8aec/catalog-item-shirt.png) Keep in mind that because "Polo shirt" and "Club shirt" are variations of "Shirt", they're restricted to the same option values. If the seller later receives teal polo shirts, they must add "Teal" to the color option set. Prices can be set for each variation, allowing for different styles to have distinct prices. For example, a "Shirt" item with "Polo shirt" and "Club shirt" variations can have the "Polo shirt" priced at $35 and the "Club shirt" at $45. ### Get existing item options A seller might have already created a set of standard item options in the Square Dashboard. Before creating new options, you should see whether the option you need is already available. {% tabset %} {% tab id="Request" %} The following request looks for an existing color item option by querying for item options whose name includes "Color": ```` {% /tab %} {% tab id="Response" %} The following response shows that a seller has already created a standard set of colors: ```json { "objects": [ { "type": "ITEM_OPTION", "id": "6J4XYMEIZR5KKTE6SRF7KBLJ", "updated_at": "2024-11-18T23:55:09.446Z", "created_at": "2021-10-19T22:40:12.165Z", "version": 1731974109446, "is_deleted": false, "present_at_all_locations": true, "item_option_data": { "name": "Color", "display_name": "Color", "show_colors": false, "values": [ { "type": "ITEM_OPTION_VAL", "id": "YXJJJB2AKABUSBTSXYJJ7ZYN", "version": 1731623376831, "item_option_value_data": { "item_option_id": "6J4XYMEIZR5KKTE6SRF7KBLJ", "name": "Red", "ordinal": 6 } }, { "type": "ITEM_OPTION_VAL", "id": "6GGHS6YHE6VXPLNYWTLVLICD", "version": 1731623376831, "item_option_value_data": { "item_option_id": "6J4XYMEIZR5KKTE6SRF7KBLJ", "name": "Blue", "ordinal": 7 } }, { "type": "ITEM_OPTION_VAL", "id": "KAHGO4JHH2UUVKZOE4BIPL4M", "version": 1731623376831, "item_option_value_data": { "item_option_id": "6J4XYMEIZR5KKTE6SRF7KBLJ", "name": "Yellow", "ordinal": 8 } }, { "type": "ITEM_OPTION_VAL", "id": "CI3RA2SRJB2YEDSP7MOXHTLV", "version": 1731974109446, "item_option_value_data": { "item_option_id": "6J4XYMEIZR5KKTE6SRF7KBLJ", "name": "Purple", "ordinal": 9 } } ] } } ], "latest_time": "2024-11-18T23:55:47.187Z" } ``` Your application might need to modify item options to update the set of values within each option set. There are no restrictions to updating item options. To make an update, call [UpsertCatalogObject](https://developer.squareup.com/reference/square/catalog-api/upsert-catalog-object) and provide the complete set of new and updated values. {% /tab %} {% /tabset %} ### Generated item variations Your application can create the `CatalogItem`, `CatalogItemOption` objects, and `CatalogVariations` objects with a single `BatchCatalogUpsert` call. ![A diagram showing a set of catalog item variations for polo shirts with a variation for each combination of color and size.](//images.ctfassets.net/1nw4q0oohfju/5Chov7mLvkow6pz8Viub3s/71e96095b167ee90200d5bde6fee9ebb/catalog-item-polo.png) To simplify the following examples, the options are limited to "color" and "size", while the `CatalogItemOption` for "Style" is omitted. Additionally, the `CatalogItem` name is updated to "Polo Shirt" for clarity and specificity, replacing the more generic "Shirt". ### Create item size and color variations using item options The following example shows how to create item options similar to the previous example. The process starts by using `BatchUpsertCatalogObject` to create two `CatalogItemOption` objects. A `CatalogItem` is then created with nine `CatalogItemVariation` objects nested within it. Each `CatalogItemVariation` has two item option values attached, which specify the colors (red, blue, and yellow) and sizes (small, medium, and large). {% tabset %} {% tab id="Request" %} ```` Item option values are linked to an item variation by referencing the corresponding `item_option_ids` and `item_option_value_ids` in the `item_option_values` attribute of the item variation. This ensures that each variation is accurately associated with its specific options and values. {% /tab %} {% tab id="Response" %} The request results in the creation of: * Two item options (of `CatalogItemOption`): one for size and one for color. * One item (of `CatalogItem`). * Nine item variations (of `CatalogItemVariation`) nested within the item. Each item variation references the size and color options by the corresponding item option value IDs defined in the two item option objects, respectively. ```json { "objects": [ { "type": "ITEM_OPTION", "id": "GYWZZUMPQGBNMBANC32WWSWC", "updated_at": "2020-10-17T04:44:20.494Z", "version": 1602909860494, "is_deleted": false, "present_at_all_locations": true, "item_option_data": { "name": "COLOR_OPTIONS", "values": [ { "type": "ITEM_OPTION_VAL", "id": "O7XQMPXSMFSGUSATAGARGX3E", "updated_at": "2020-10-17T04:44:20.494Z", "version": 1602909860494, "is_deleted": false, "present_at_all_locations": true, "item_option_value_data": { "item_option_id": "GYWZZUMPQGBNMBANC32WWSWC", "name": "RED", "ordinal": 0 } }, { "type": "ITEM_OPTION_VAL", "id": "W55IT3LUEQI62LTLXOPLXYEL", "updated_at": "2020-10-17T04:44:20.494Z", "version": 1602909860494, "is_deleted": false, "present_at_all_locations": true, "item_option_value_data": { "item_option_id": "GYWZZUMPQGBNMBANC32WWSWC", "name": "Blue", "ordinal": 1 } }, { "type": "ITEM_OPTION_VAL", "id": "ZZ5IT3LUEQI62LTLXOPLXYEL", "updated_at": "2020-10-17T04:44:20.494Z", "version": 1602909860494, "is_deleted": false, "present_at_all_locations": true, "item_option_value_data": { "item_option_id": "ZZWZZUMPQGBNMBANC32WWSWC", "name": "Yellow", "ordinal": 2 } } ] } }, { "type": "ITEM_OPTION", "id": "WUHPNVNVCW2KBXZ36GT2BNZH", "updated_at": "2020-10-17T04:44:20.494Z", "version": 1602909860494, "is_deleted": false, "present_at_all_locations": true, "item_option_data": { "name": "SIZE_OPTIONS", "values": [ { "type": "ITEM_OPTION_VAL", "id": "O55AQ6U4HFWDAIPHFHURPMEA", "updated_at": "2020-10-17T04:44:20.494Z", "version": 1602909860494, "is_deleted": false, "present_at_all_locations": true, "item_option_value_data": { "item_option_id": "WUHPNVNVCW2KBXZ36GT2BNZH", "name": "Small", "ordinal": 0 } }, { "type": "ITEM_OPTION_VAL", "id": "RJI7UGDMDVOHBEQJSASTWOOJ", "updated_at": "2020-10-17T04:44:20.494Z", "version": 1602909860494, "is_deleted": false, "present_at_all_locations": true, "item_option_value_data": { "item_option_id": "WUHPNVNVCW2KBXZ36GT2BNZH", "name": "Medium", "ordinal": 1 } }, { "type": "ITEM_OPTION_VAL", "id": "56QF4FR2BC2D67K4QJ2U2KYC", "updated_at": "2020-10-17T04:44:20.494Z", "version": 1602909860494, "is_deleted": false, "present_at_all_locations": true, "item_option_value_data": { "item_option_id": "WUHPNVNVCW2KBXZ36GT2BNZH", "name": "Large", "ordinal": 2 } } ] } }, { "type": "ITEM", "id": "EQVBSUZZ65RO2WWPFU6PLYWU", "updated_at": "2020-10-17T04:44:20.494Z", "version": 1602909860494, "is_deleted": false, "present_at_all_locations": true, "item_data": { "name": "Polo Shirt", "variations": [ { "type": "ITEM_VARIATION", "id": "6PRFCYBKD7QNDERVZP5FBDL7", "updated_at": "2020-10-17T04:44:20.494Z", "version": 1602909860494, "is_deleted": false, "present_at_all_locations": true, "item_variation_data": { "item_id": "EQVBSUZZ65RO2WWPFU6PLYWU", "name": "Small, RED", "ordinal": 0, "pricing_type": "FIXED_PRICING", "price_money": { "amount": 2500, "currency": "USD" }, "item_option_values": [ { "item_option_id": "WUHPNVNVCW2KBXZ36GT2BNZH", "item_option_value_id": "O55AQ6U4HFWDAIPHFHURPMEA" }, { "item_option_id": "GYWZZUMPQGBNMBANC32WWSWC", "item_option_value_id": "O7XQMPXSMFSGUSATAGARGX3E" } ] } }, { "type": "ITEM_VARIATION", "id": "SOQTNT7336QXGHI3YK7ZZQ6O", "updated_at": "2020-10-17T04:44:20.494Z", "version": 1602909860494, "is_deleted": false, "present_at_all_locations": true, "item_variation_data": { "item_id": "EQVBSUZZ65RO2WWPFU6PLYWU", "name": "Small, Blue", "ordinal": 1, "pricing_type": "FIXED_PRICING", "price_money": { "amount": 2500, "currency": "USD" }, "item_option_values": [ { "item_option_id": "WUHPNVNVCW2KBXZ36GT2BNZH", "item_option_value_id": "O55AQ6U4HFWDAIPHFHURPMEA" }, { "item_option_id": "GYWZZUMPQGBNMBANC32WWSWC", "item_option_value_id": "W55IT3LUEQI62LTLXOPLXYEL" } ] } }, { "type": "ITEM_VARIATION", "id": "SOQTNT7336QXGHI3YK7ZZQ6O", "updated_at": "2020-10-17T04:44:20.494Z", "version": 1602909860494, "is_deleted": false, "present_at_all_locations": true, "item_variation_data": { "item_id": "EQVBSUZZ65RO2WWPFU6PLYWU", "name": "Small, Yellow", "ordinal": 2, "pricing_type": "FIXED_PRICING", "price_money": { "amount": 2500, "currency": "USD" }, "item_option_values": [ { "item_option_id": "WUHPNVNVCW2KBXZ36GT2BNZH", "item_option_value_id": "O55AQ6U4HFWDAIPHFHURPMEA" }, { "item_option_id": "ZZWZZUMPQGBNMBANC32WWSWC", "item_option_value_id": "ZZ5IT3LUEQI62LTLXOPLXYEL" } ] } }, { "type": "ITEM_VARIATION", "id": "KI66FNZXAEGEPE42J2PPX6AJ", "updated_at": "2020-10-17T04:44:20.494Z", "version": 1602909860494, "is_deleted": false, "present_at_all_locations": true, "item_variation_data": { "item_id": "EQVBSUZZ65RO2WWPFU6PLYWU", "name": "Medium, RED", "ordinal": 3, "pricing_type": "FIXED_PRICING", "price_money": { "amount": 3000, "currency": "USD" }, "item_option_values": [ { "item_option_id": "WUHPNVNVCW2KBXZ36GT2BNZH", "item_option_value_id": "RJI7UGDMDVOHBEQJSASTWOOJ" }, { "item_option_id": "GYWZZUMPQGBNMBANC32WWSWC", "item_option_value_id": "O7XQMPXSMFSGUSATAGARGX3E" } ] } }, { "type": "ITEM_VARIATION", "id": "RHSUAWEXGNTQNQA55KNEYXOO", "updated_at": "2020-10-17T04:44:20.494Z", "version": 1602909860494, "is_deleted": false, "present_at_all_locations": true, "item_variation_data": { "item_id": "EQVBSUZZ65RO2WWPFU6PLYWU", "name": "Medium, Blue", "ordinal": 4, "pricing_type": "FIXED_PRICING", "price_money": { "amount": 3000, "currency": "USD" }, "item_option_values": [ { "item_option_id": "WUHPNVNVCW2KBXZ36GT2BNZH", "item_option_value_id": "RJI7UGDMDVOHBEQJSASTWOOJ" }, { "item_option_id": "GYWZZUMPQGBNMBANC32WWSWC", "item_option_value_id": "W55IT3LUEQI62LTLXOPLXYEL" } ] } }, { "type": "ITEM_VARIATION", "id": "RHSUAWEXGNTQNQA55KNEYXOO", "updated_at": "2020-10-17T04:44:20.494Z", "version": 1602909860494, "is_deleted": false, "present_at_all_locations": true, "item_variation_data": { "item_id": "EQVBSUZZ65RO2WWPFU6PLYWU", "name": "Medium, Yellow", "ordinal": 5, "pricing_type": "FIXED_PRICING", "price_money": { "amount": 3000, "currency": "USD" }, "item_option_values": [ { "item_option_id": "WUHPNVNVCW2KBXZ36GT2BNZH", "item_option_value_id": "RJI7UGDMDVOHBEQJSASTWOOJ" }, { "item_option_id": "ZZWZZUMPQGBNMBANC32WWSWC", "item_option_value_id": "ZZ5IT3LUEQI62LTLXOPLXYEL" } ] } }, { "type": "ITEM_VARIATION", "id": "AY6GSOG4ZZTYJ6RJPU2F4O6I", "updated_at": "2020-10-17T04:44:20.494Z", "version": 1602909860494, "is_deleted": false, "present_at_all_locations": true, "item_variation_data": { "item_id": "EQVBSUZZ65RO2WWPFU6PLYWU", "name": "Large, RED", "ordinal": 6, "pricing_type": "FIXED_PRICING", "price_money": { "amount": 3500, "currency": "USD" }, "item_option_values": [ { "item_option_id": "WUHPNVNVCW2KBXZ36GT2BNZH", "item_option_value_id": "56QF4FR2BC2D67K4QJ2U2KYC" }, { "item_option_id": "GYWZZUMPQGBNMBANC32WWSWC", "item_option_value_id": "O7XQMPXSMFSGUSATAGARGX3E" } ] } }, { "type": "ITEM_VARIATION", "id": "GBUW47ZH7I7PZI6E5XCWPLGD", "updated_at": "2020-10-17T04:44:20.494Z", "version": 1602909860494, "is_deleted": false, "present_at_all_locations": true, "item_variation_data": { "item_id": "EQVBSUZZ65RO2WWPFU6PLYWU", "name": "Large, Blue", "ordinal": 7, "pricing_type": "FIXED_PRICING", "price_money": { "amount": 3500, "currency": "USD" }, "item_option_values": [ { "item_option_id": "WUHPNVNVCW2KBXZ36GT2BNZH", "item_option_value_id": "56QF4FR2BC2D67K4QJ2U2KYC" }, { "item_option_id": "GYWZZUMPQGBNMBANC32WWSWC", "item_option_value_id": "W55IT3LUEQI62LTLXOPLXYEL" } ] } }, { "type": "ITEM_VARIATION", "id": "GBUW47ZH7I7PZI6E5XCWPLGD", "updated_at": "2020-10-17T04:44:20.494Z", "version": 1602909860494, "is_deleted": false, "present_at_all_locations": true, "item_variation_data": { "item_id": "EQVBSUZZ65RO2WWPFU6PLYWU", "name": "Large, Yellow", "ordinal": 8, "pricing_type": "FIXED_PRICING", "price_money": { "amount": 3500, "currency": "USD" }, "item_option_values": [ { "item_option_id": "WUHPNVNVCW2KBXZ36GT2BNZH", "item_option_value_id": "56QF4FR2BC2D67K4QJ2U2KYC" }, { "item_option_id": "ZZWZZUMPQGBNMBANC32WWSWC", "item_option_value_id": "ZZ5IT3LUEQI62LTLXOPLXYEL" } ] } } ], "product_type": "REGULAR", "item_options": [ { "item_option_id": "WUHPNVNVCW2KBXZ36GT2BNZH" }, { "item_option_id": "GYWZZUMPQGBNMBANC32WWSWC" } ] } } ], "id_mappings": [ { "client_object_id": "#item_option_color", "object_id": "GYWZZUMPQGBNMBANC32WWSWC" }, { "client_object_id": "#item_option_size", "object_id": "WUHPNVNVCW2KBXZ36GT2BNZH" }, { "client_object_id": "#item", "object_id": "EQVBSUZZ65RO2WWPFU6PLYWU" }, { "client_object_id": "#item_option_value_color_red", "object_id": "O7XQMPXSMFSGUSATAGARGX3E" }, { "client_object_id": "#item_option_value_color_blue", "object_id": "W55IT3LUEQI62LTLXOPLXYEL" }, { "client_object_id": "#item_option_value_color_yellow", "object_id": "ZZ5IT3LUEQI62LTLXOPLXYEL" }, { "client_object_id": "#item_option_value_size_small", "object_id": "O55AQ6U4HFWDAIPHFHURPMEA" }, { "client_object_id": "#item_option_value_size_medium", "object_id": "RJI7UGDMDVOHBEQJSASTWOOJ" }, { "client_object_id": "#item_option_value_size_large", "object_id": "56QF4FR2BC2D67K4QJ2U2KYC" }, { "client_object_id": "#item_variation_small_red", "object_id": "6PRFCYBKD7QNDERVZP5FBDL7" }, { "client_object_id": "#item_variation_medium_red", "object_id": "KI66FNZXAEGEPE42J2PPX6AJ" }, { "client_object_id": "#item_variation_large_red", "object_id": "AY6GSOG4ZZTYJ6RJPU2F4O6I" }, { "client_object_id": "#item_variation_small_blue", "object_id": "SOQTNT7336QXGHI3YK7ZZQ6O" }, { "client_object_id": "#item_variation_medium_blue", "object_id": "RHSUAWEXGNTQNQA55KNEYXOO" }, { "client_object_id": "#item_variation_large_blue", "object_id": "GBUW47ZH7I7PZI6E5XCWPLGD" }, { "client_object_id": "#item_variation_small_yellow", "object_id": "SOQTNT7336QXGHI3YK7ZZQ6O" }, { "client_object_id": "#item_variation_medium_yellow", "object_id": "RHSUAWEXGNTQNQA55KNEYXOO" }, { "client_object_id": "#item_variation_large_yellow", "object_id": "GBUW47ZH7I7PZI6E5XCWPLGD" } ] } ``` Notice that the `name` and `ordinal` attributes of an item variation are no longer set in the request. They're set on the item options. Don't set the `name` and `ordinal` attributes on the item variation when using an item option value. The `ordinal` number shown in the response is computed as the matrix element position. {% /tab %} {% /tabset %} ## Search for item variations with or without item options When an item option is used in an item variation, the display order is determined by the sequence of the associated item option values. The display name for an item variation is created by combining the names of these option values. You must manage the name and order of an item variation through the item option. If you're not using item options, you can still manage the name and order directly on the item variations. Other attributes, such inventory counts and SKU, are maintained at the item variation level, regardless of whether item options are used. {% anchor id="option-query" /%} ### Search for item variations using item options The following example searches for the small and red item variation with item options defining the size and color. Notice that the item option values (`Small` and `RED`) are referred to by the respective item option value IDs (`item_option_value_ids`). {% tabset %} {% tab id="Request" %} ```` {% /tab %} {% tab id="Response" %} The request returns a successful response similar to the following. Because the request used the `item_variations_for_item_option_values_query` filter, only the matched item variations are returned. ```json { "objects": [ { "type": "ITEM_VARIATION", "id": "6PRFCYBKD7QNDERVZP5FBDL7", "updated_at": "2020-10-17T04:44:20.494Z", "version": 1602909860494, "is_deleted": false, "present_at_all_locations": true, "item_variation_data": { "item_id": "EQVBSUZZ65RO2WWPFU6PLYWU", "name": "Small, RED", "ordinal": 0, "pricing_type": "FIXED_PRICING", "price_money": { "amount": 2500, "currency": "USD" }, "item_option_values": [ { "item_option_id": "WUHPNVNVCW2KBXZ36GT2BNZH", "item_option_value_id": "O55AQ6U4HFWDAIPHFHURPMEA" }, { "item_option_id": "GYWZZUMPQGBNMBANC32WWSWC", "item_option_value_id": "O7XQMPXSMFSGUSATAGARGX3E" } ] } } ], "latest_time": "2020-10-17T04:44:20.494Z" } ``` {% /tab %} {% /tabset %} {% tabset %} {% tab id="Request" %} To specify the `RED` option value in the search query, set the `RED` item option value ID (`O7XQMPXSMFSGUSATAGARGX3E`) on the `item_variation_for_item_option_values_query` filter. ```` {% /tab %} {% tab id="Response" %} The successful response includes three item variations including the `RED` item options: `Small, RED`, `Medium, RED`, and `Large, RED` item variations. ```json { "objects": [ { "type": "ITEM_VARIATION", "id": "6PRFCYBKD7QNDERVZP5FBDL7", "updated_at": "2020-10-17T04:44:20.494Z", "version": 1602909860494, "is_deleted": false, "present_at_all_locations": true, "item_variation_data": { "item_id": "EQVBSUZZ65RO2WWPFU6PLYWU", "name": "Small, RED", "ordinal": 0, "pricing_type": "FIXED_PRICING", "price_money": { "amount": 2500, "currency": "USD" }, "item_option_values": [ { "item_option_id": "WUHPNVNVCW2KBXZ36GT2BNZH", "item_option_value_id": "O55AQ6U4HFWDAIPHFHURPMEA" }, { "item_option_id": "GYWZZUMPQGBNMBANC32WWSWC", "item_option_value_id": "O7XQMPXSMFSGUSATAGARGX3E" } ] } }, { "type": "ITEM_VARIATION", "id": "KI66FNZXAEGEPE42J2PPX6AJ", "updated_at": "2020-10-17T04:44:20.494Z", "version": 1602909860494, "is_deleted": false, "present_at_all_locations": true, "item_variation_data": { "item_id": "EQVBSUZZ65RO2WWPFU6PLYWU", "name": "Medium, RED", "ordinal": 2, "pricing_type": "FIXED_PRICING", "price_money": { "amount": 3000, "currency": "USD" }, "item_option_values": [ { "item_option_id": "WUHPNVNVCW2KBXZ36GT2BNZH", "item_option_value_id": "RJI7UGDMDVOHBEQJSASTWOOJ" }, { "item_option_id": "GYWZZUMPQGBNMBANC32WWSWC", "item_option_value_id": "O7XQMPXSMFSGUSATAGARGX3E" } ] } }, { "type": "ITEM_VARIATION", "id": "AY6GSOG4ZZTYJ6RJPU2F4O6I", "updated_at": "2020-10-17T04:44:20.494Z", "version": 1602909860494, "is_deleted": false, "present_at_all_locations": true, "item_variation_data": { "item_id": "EQVBSUZZ65RO2WWPFU6PLYWU", "name": "Large, RED", "ordinal": 4, "pricing_type": "FIXED_PRICING", "price_money": { "amount": 3500, "currency": "USD" }, "item_option_values": [ { "item_option_id": "WUHPNVNVCW2KBXZ36GT2BNZH", "item_option_value_id": "56QF4FR2BC2D67K4QJ2U2KYC" }, { "item_option_id": "GYWZZUMPQGBNMBANC32WWSWC", "item_option_value_id": "O7XQMPXSMFSGUSATAGARGX3E" } ] } } ], "latest_time": "2020-10-17T04:44:20.494Z" } ``` {% /tab %} {% /tabset %} {% anchor id="text-query" /%} ### Search for item variations by attribute name The Catalog API supports various query filters to search for catalog objects. The `name` attribute is one of the searchable attributes. The following cURL example illustrates how to search for item variations with `"small red shirt"` or `"small red"` set on their names: {% tabset %} {% tab id="Request" %} ```` Instead of using the `"Small red shirt"` phrase as a single element of the `keywords` list, you can specify a three-element list in the `text_query` expression as shown. The result is the same. ```` {% /tab %} {% tab id="Response" %} In the example catalog, there's only one item variation with the `name` of `"Small red shirt"`. The successful response returns this object for the match. ```json { "objects": [ { "type": "ITEM_VARIATION", "id": "F3P54C436KUEUGMRCUFYBEIZ", "updated_at": "2020-10-17T00:08:15.13Z", "version": 1602893295130, "is_deleted": false, "present_at_all_locations": true, "item_variation_data": { "item_id": "3RJ4KVW64QXHXYDJ5CS6J4LE", "name": "Small red shirt", "ordinal": 0, "pricing_type": "FIXED_PRICING", "price_money": { "amount": 2500, "currency": "USD" } } } ], "latest_time": "2020-10-17T04:44:20.494Z" } ``` {% /tab %} {% /tabset %} #### Less specific text query This query example uses only keywords that are common to multiple item variations, regardless of whether the variations were defined with item options. In the example catalog, there's an item variation (named `Small red shirt`) without item options and another item variation (named `Small, RED`) with item option values defining the size and color. As a result, this request returns both for the match. {% tabset %} {% tab id="Request" %} ```` The order of the query expression list doesn't matter and punctuations are ignored. {% /tab %} {% tab id="Response" %} ```json { "objects": [ { "type": "ITEM_VARIATION", "id": "F3P54C436KUEUGMRCUFYBEIZ", "updated_at": "2020-10-17T00:08:15.13Z", "version": 1602893295130, "is_deleted": false, "present_at_all_locations": true, "item_variation_data": { "item_id": "3RJ4KVW64QXHXYDJ5CS6J4LE", "name": "Small red shirt", "ordinal": 0, "pricing_type": "FIXED_PRICING", "price_money": { "amount": 2500, "currency": "USD" } } }, { "type": "ITEM_VARIATION", "id": "6PRFCYBKD7QNDERVZP5FBDL7", "updated_at": "2020-10-17T04:44:20.494Z", "version": 1602909860494, "is_deleted": false, "present_at_all_locations": true, "item_variation_data": { "item_id": "EQVBSUZZ65RO2WWPFU6PLYWU", "name": "Small, RED", "ordinal": 0, "pricing_type": "FIXED_PRICING", "price_money": { "amount": 2500, "currency": "USD" }, "item_option_values": [ { "item_option_id": "WUHPNVNVCW2KBXZ36GT2BNZH", "item_option_value_id": "O55AQ6U4HFWDAIPHFHURPMEA" }, { "item_option_id": "GYWZZUMPQGBNMBANC32WWSWC", "item_option_value_id": "O7XQMPXSMFSGUSATAGARGX3E" } ] } } ], "latest_time": "2020-10-17T04:44:20.494Z" } ``` {% /tab %} {% /tabset %} --- # Synchronize a Catalog with an External Platform > Source: https://developer.squareup.com/docs/catalog-api/sync-with-external-system > Status: PUBLIC > Languages: All > Platforms: All Learn about using the Square API to synchronize an external platform with a Square catalog. **Applies to:** [Catalog API](catalog-api/what-it-does) | [Subscriptions API](subscriptions/overview) {% subheading %}Learn about using the Square API to synchronize an external platform with a Square catalog.{% /subheading %} {% toc hide=true /%} ## Overview When a seller's catalog exists in the Square Developer platform under their Square account and a duplicate catalog exists in an external platform, the two catalogs should be periodically synchronized to maintain parity. For example, a seller uses an enterprise resource planning (ERP) system to keep a catalog for functions such as cost accounting, inventory, or sales through another channel. The seller uses the catalog in Square Point of Sale to complete item purchases and process payments in a physical retail location. {% aside type="tip" %} A seller's catalog is the source of the Square Dashboard item library and for items shown in Square Point of Sale. {% /aside %} You need to know which platform hosts the master ("source of truth") catalog. Changes should be synchronized from the master catalog to the catalog in the other platform. ### Use reference IDs Regardless of whether the Square platform hosts the seller's master catalog or the external system does, you should store the ID of the external item with the Square `CatalogObject` and the `ID` of the Square `CatalogObject` in its equivalent object in the external catalog. A good place to store the external ID is as a `custom_attribute_values` ([CatalogCustomAttributeValue](https://developer.squareup.com/reference/square/objects/CatalogCustomAttributeValue)) property value. For information about using catalog custom attributes, see [Add Custom Attributes](catalog-api/add-custom-attributes). ### Source of catalog updates Catalog objects can be inserted, changed, or deleted by sellers in the Square Dashboard item library or from Square Point of Sale. These updates can also be made from any other catalog integration that a seller is using. Your sync logic needs to catch any updates made to the catalog, regardless of the source of the update. ## Sync from Square to an external platform To sync to an external platform, your application periodically gets changes to the catalog in a Square account and writes them to the external platform. There are a couple of useful strategies to drive the periodic catalog reads: * **On notification of a change** - Use [catalog.version.updated](https://developer.squareup.com/reference/square/catalog-api/webhooks/catalog.version.updated) to trigger a sync. The event provides the timestamp of a catalog update. Make a [SearchCatalogObjects](https://developer.squareup.com/reference/square/catalog-api/search-catalog-objects) request with the [begin_time](https://developer.squareup.com/reference/square/catalog-api/search-catalog-objects#request__property-begin_time) request property set to the previous event timestamp. * **Regular interval polling** - On a set time interval, make a [SearchCatalogObjects](https://developer.squareup.com/reference/square/catalog-api/search-catalog-objects) request with the [begin_time](https://developer.squareup.com/reference/square/catalog-api/search-catalog-objects#request__property-begin_time) request property set to the previous interval timestamp. Both strategies use the `begin_time` property of `SearchCatalogObjects` to return only `Catalog` objects that have been updated after the time you set in the search request. The results of the search request include only the objects that you're interested in. For `Catalog` objects returned in the result, you need to push the new objects or updates to the external platform. {% aside type="warning" %} Whichever strategy you use, don't call [ListCatalog](https://developer.squareup.com/reference/square/catalog-api/list-catalog) on interval or event unless you're listing for the current catalog version number and limiting the scope of object types. Otherwise, your result set can be very large and subject your application to rate limiting. {% /aside %} ## Sync on notification of a change Synchronize when this webhook event is fired. It's fired once for every [UpsertCatalogObject](https://developer.squareup.com/reference/square/catalog-api/upsert-catalog-object), [DeleteCatalogObject](https://developer.squareup.com/reference/square/catalog-api/delete-catalog-object), [BatchUpsertCatalogObjects](https://developer.squareup.com/reference/square/catalog-api/batch-upsert-catalog-objects), or [BatchDeleteCatalogObjects](https://developer.squareup.com/reference/square/catalog-api/batch-delete-catalog-objects) API call. {% aside type="info" %} Deleted `Catalog` objects are returned in future `SearchCatalogObjects` responses. Such an object has an `is_deleted` property whose value is `true`. For more information about deleting `Catalog` objects, see [Delete Catalog Objects and Query Deleted Objects](catalog-api/delete-catalog-objects). {% /aside %} Insert, update, and delete operations trigger the generation of a new catalog version number, which is then assigned to every inserted, updated, or deleted object. In a given `catalog.version.updated` webhook event, `object.catalog_version.updated_at` gives the timestamp for the creation of that new version. If you call `SearchCatalogOjbects` with that timestamp, you get all updates completed after the version increment event. To get the object updates that triggered the webhook, you should use the `updated_at` timestamp for the previous webhook event. ### BatchUpsertCatalogObjects benefits A positive side-effect of using `BatchUpsertCatalogObjects` instead of making a single object update with `UpsertCatalogObject` is that you receive a single webhook notification for all batches in the batch request. Because `BatchUpsertCatalogObjects` accepts up to 10,000 objects to be added or updated, it results in one webhook event rather than thousands. Batch delete operations have the same benefit. ### Webhook usage example To get all `Catalog` object changes since the last time you synced, you need two things: 1. **The timestamp of your previous sync** - This timestamp should be the moment the previous catalog version was set. The timestamp is provided in the previous webhook event (`object.catalog_version.updated_at`). 2. **A new webhook notification** - This webhook tells you that the catalog has changed and that there's a new version. The timestamp marks the start of a time range in which new catalog changes were made. The `SearchCatalogObjects` request takes that date (the date of your last sync) as the `begin_time` property of the request. When you make the search request, you're asking Square to return all catalog changes since the last sync. The response carries all changes from then to the moment you make the search request. You can further scope the `SearchCatalogObjects` request to only those catalog types that you're syncing. For example, the external platform might only store items and variations. It might not store discounts, pricing rules, taxes, or other catalog types. In this case, add a search clause like the following example: ```json "object_types": [ "ITEM", "ITEM_VARIATION" ] ``` ### Trigger sync with a webhook Complete the following steps to start syncing a catalog from Square to an external system by using Square webhook notifications: 1. [Subscribe](webhooks/step2subscribe) to [catalog.version.updated](https://developer.squareup.com/reference/square/catalog-api/webhooks/catalog.version.updated) using the Developer Console or [subscribe](webhooks/webhook-subscriptions-api) programmatically with the Subscriptions API. 1. Make a full copy of the master catalog in the target platform. 3. Cache an arbitrary start date. Usually this is the date the target catalog is created. 4. Handle the next `catalog.version.updated` webhook event. 1. Call `SearchCatalogObjects` with the cached date. 1. Replace the cached date with the value of `object.catalog_version.updated_at`. 1. Parse the response to `SearchCatalogObjects`, which has all Square catalog changes since the last sync (or initial copy). 2. Sync updates to the external platform. The following object is the body of a `catalog.version.updated` webhook event payload. Note the `object.catalog_version.updated_at` property. ```json { "merchant_id": "S1JEG5YR89KNM", "type": "catalog.version.updated", "event_id": "ce50c3de-7f60-36e6-af1f-21b9867f6f4d", "created_at": "2024-10-02T21:36:39.343216712Z", "data": { "type": "catalog_version", "id": "", "object": { "catalog_version": { "updated_at": "2024-10-02T21:36:36.932Z" } } } } ``` The following example shows the use of a webhook timestamp to get all catalog updates after the catalog version was incremented: {% tabset %} {% tab id="Request" %} To request all `Catalog` objects that have changed after the previous webhook event (`2024-10-02T21:31:36.932Z`) , make a `SearchCatalogOjbects` request like the following example: ```` {% /tab %} {% tab id="Response" %} The response shows that the only catalog update was a `CatalogItem` that was updated because its `CatalogItemVariation` with ID `UD3CZNICTRKB35IWY36ARVHT` was deleted after `2024-10-02T21:31:36.932Z`. You should also delete that object in the external platform. ```json { "objects": [ { "type": "ITEM", "id": "BD4FDFQQOMVOIIVW67F3AUYN", "updated_at": "2024-10-02T21:36:36.932Z", "created_at": "2024-04-09T20:59:24.983Z", "version": 1727904996932, "is_deleted": false, "present_at_all_locations": true, "item_data": { "name": "Muffin", "description": "Plump homemade muffins", "abbreviation": "MUFF", "is_taxable": true, "variations": [ { "type": "ITEM_VARIATION", "id": "6U4CAIYCXVZO6NZYTBGKPXYN", "updated_at": "2024-10-02T21:36:36.932Z", "created_at": "2024-10-02T21:36:37.081Z", "version": 1727904996932, "is_deleted": false, "present_at_all_locations": true, "item_variation_data": { "item_id": "BD4FDFQQOMVOIIVW67F3AUYN", "name": "Regular", "ordinal": 0, "pricing_type": "VARIABLE_PRICING", "sellable": true, "stockable": true } } ], "product_type": "REGULAR", "description_html": "
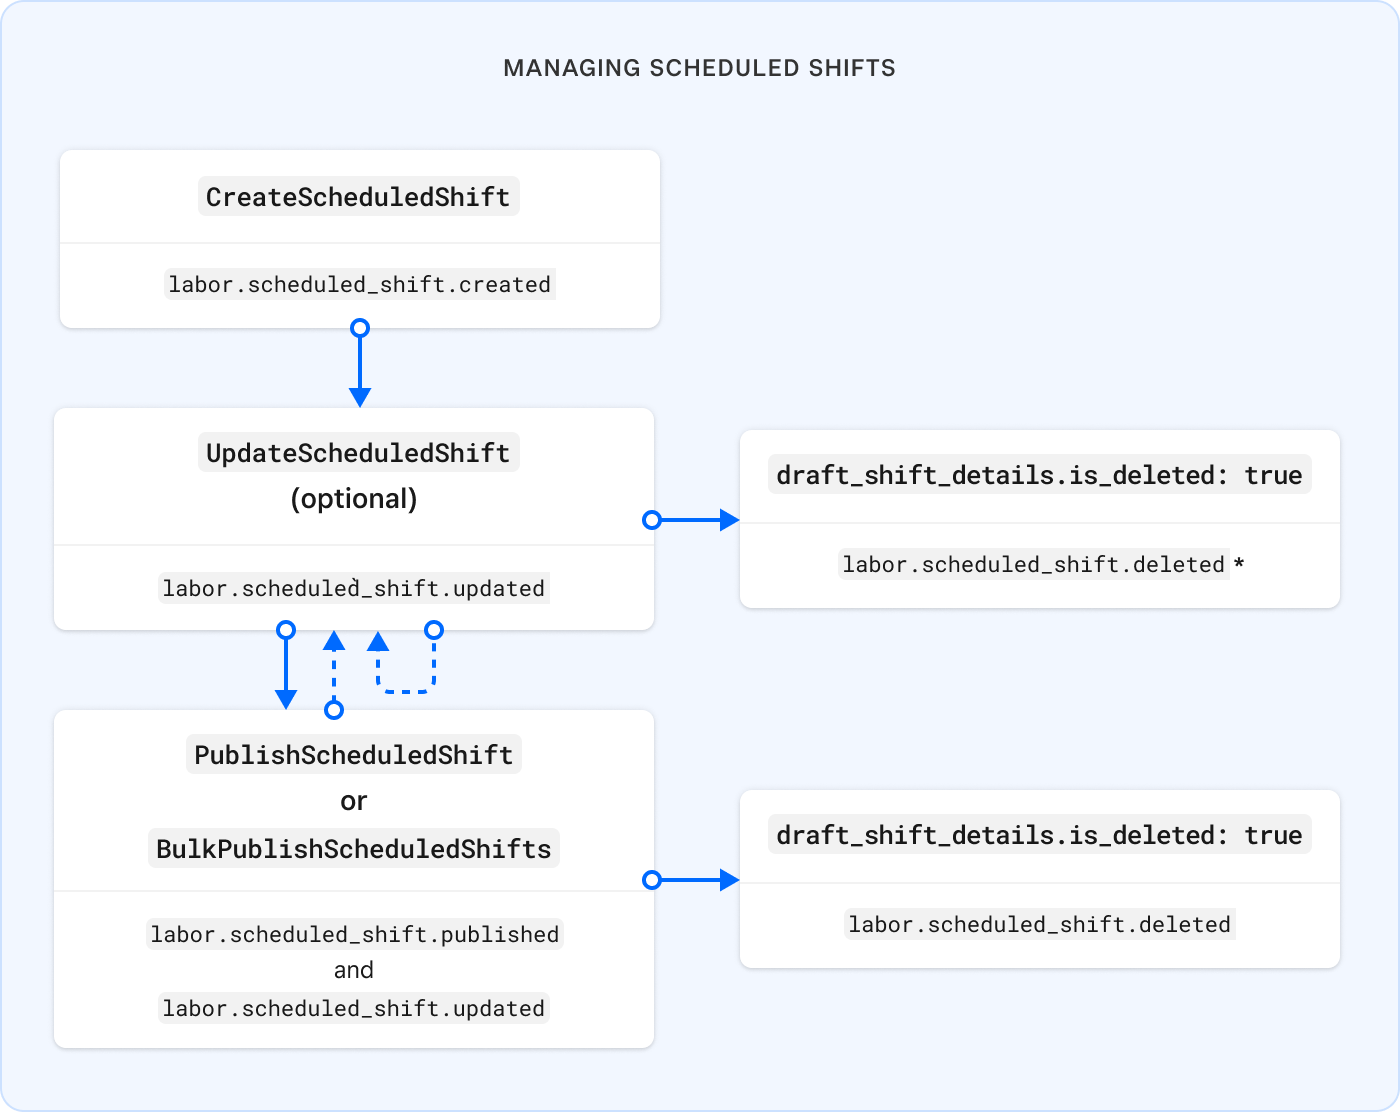

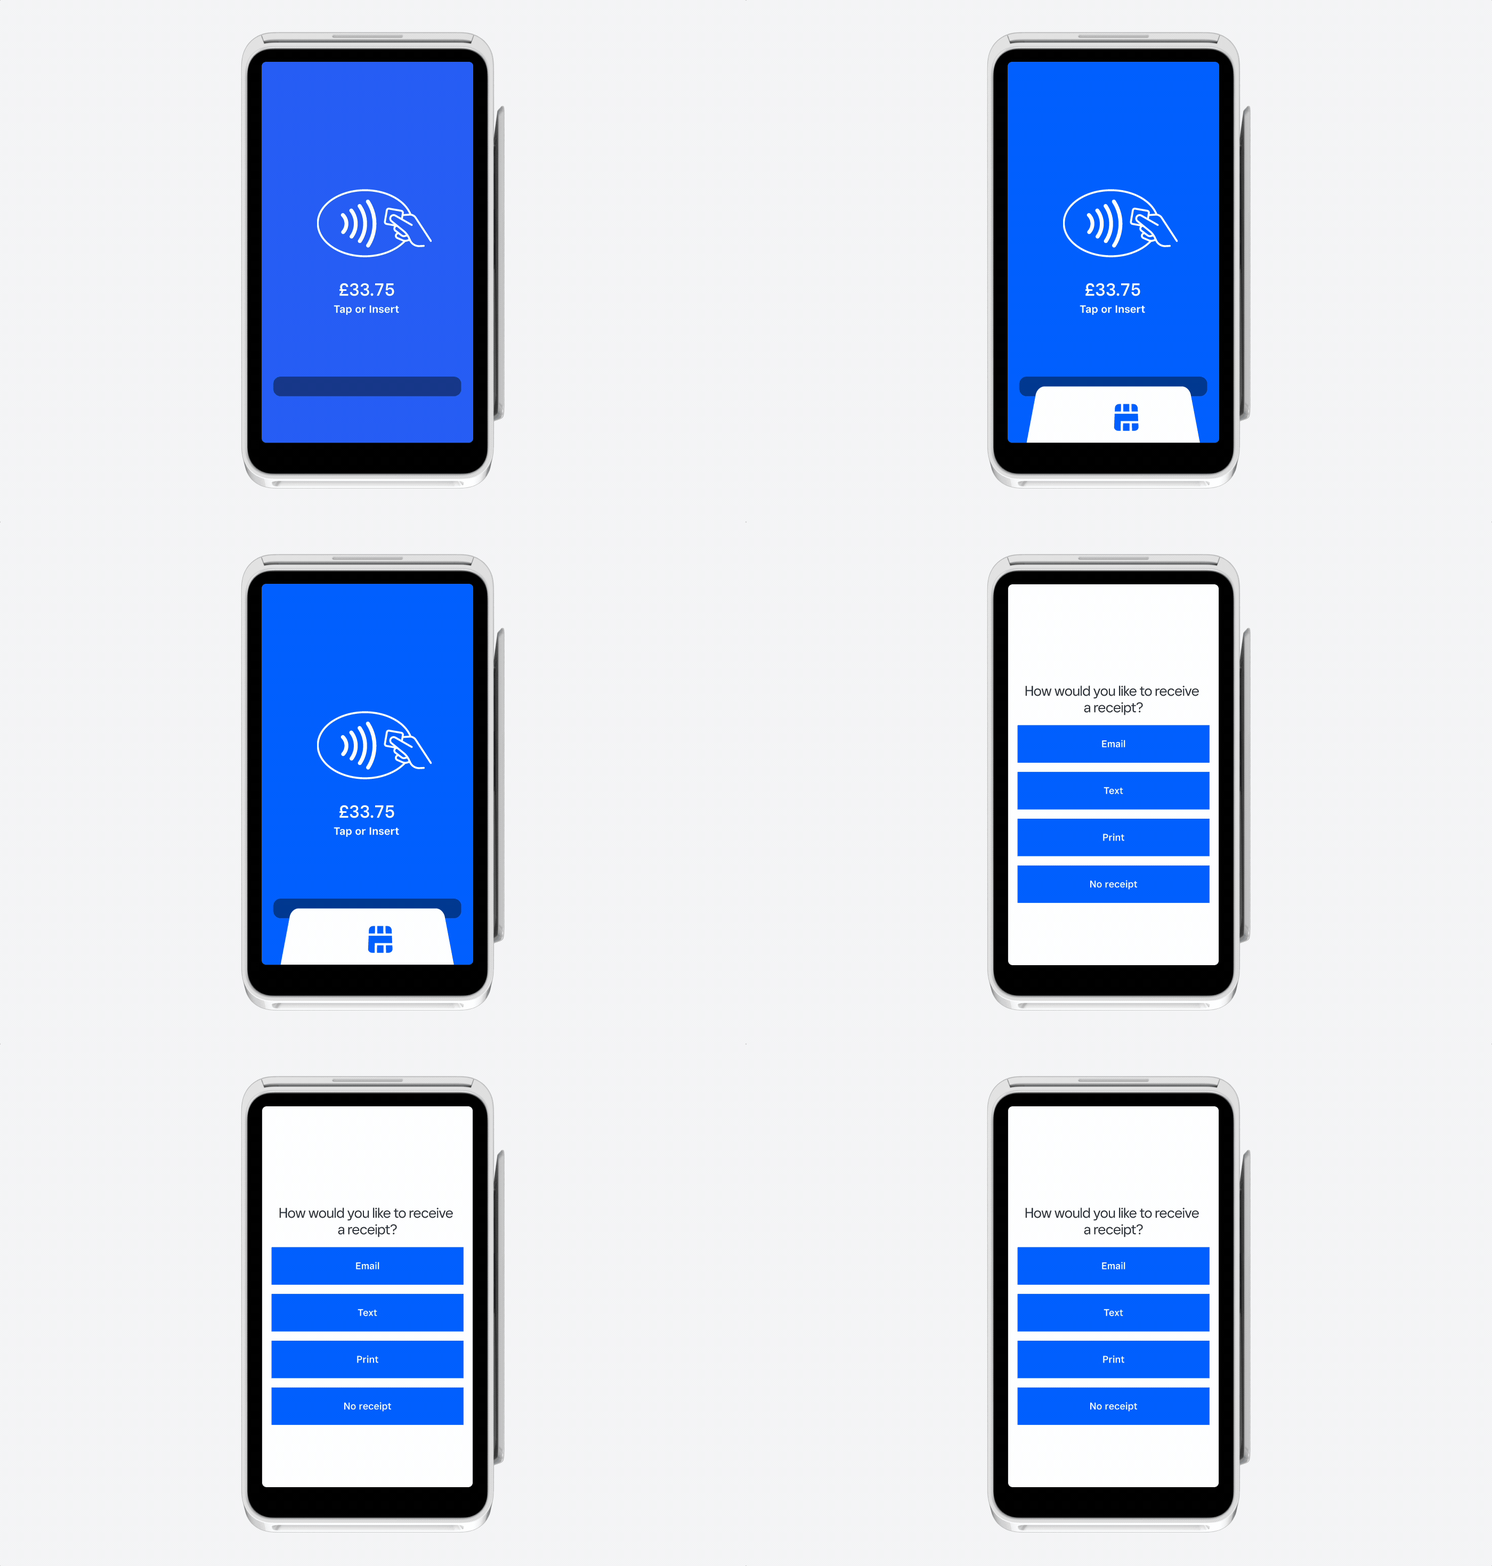
Plump homemade muffins

", "description_plaintext": "Plump homemade muffins", "is_archived": false } }, { "type": "ITEM_VARIATION", "id": "UD3CZNICTRKB35IWY36ARVHT", "updated_at": "2024-10-02T21:36:36.932Z", "created_at": "2024-04-09T20:59:24.983Z", "version": 1727904996932, "is_deleted": true, "present_at_all_locations": true, "item_variation_data": { "item_id": "BD4FDFQQOMVOIIVW67F3AUYN", "name": "Regular", "ordinal": 0, "pricing_type": "VARIABLE_PRICING", "sellable": true, "stockable": true } }, { "type": "ITEM_VARIATION", "id": "6U4CAIYCXVZO6NZYTBGKPXYN", "updated_at": "2024-10-02T21:36:36.932Z", "created_at": "2024-10-02T21:36:37.081Z", "version": 1727904996932, "is_deleted": false, "present_at_all_locations": true, "item_variation_data": { "item_id": "BD4FDFQQOMVOIIVW67F3AUYN", "name": "Regular", "ordinal": 0, "pricing_type": "VARIABLE_PRICING", "sellable": true, "stockable": true } } ], "latest_time": "2024-10-02T21:36:36.932Z" } ``` {% /tab %} {% /tabset %} ## Sync on regular interval polling Polling replaces the non-deterministic webhook event trigger with a regular cadence that you establish in your application. For example, you can set a chron job to fire an event every 15 minutes to get all catalog updates made since the last time a chron event fired. ### Trigger sync from your chron job Complete following steps to start syncing a catalog from Square to an external system by using a timer that you add to your application backend: 1. Make a full copy of the master catalog in the target platform. 3. Cache an arbitrary start date. Usually this is the date the target catalog is created. 4. Start your chron job. 5. When a chron event fires: 1. Call `SearchCatalogObjects` with the cached date, 1. Replace the cached date with the timestamp of the chron event. 1. Parse the response to `SearchCatalogObjects`, which has all Square catalog changes since the initial copy. The following example shows the use of a chron event timestamp to get all catalog updates after the catalog version was incremented: {% tabset %} {% tab id="Request" %} To request all `Catalog` objects that have changed after the previous chron event (`2024-10-02T21:31:36.932Z`) , make a `SearchCatalogOjbects` request like this request. ```` {% /tab %} {% tab id="Response" %} The response shows that the only catalog update was a `CatalogItem` that was updated because its `CatalogItemVariation` with ID `UD3CZNICTRKB35IWY36ARVHT` was deleted after `2024-10-02T21:31:36.932Z`. ```json { "objects": [ { "type": "ITEM", "id": "BD4FDFQQOMVOIIVW67F3AUYN", "updated_at": "2024-10-02T21:36:36.932Z", "created_at": "2024-04-09T20:59:24.983Z", "version": 1727904996932, "is_deleted": false, "present_at_all_locations": true, "item_data": { "name": "Muffin", "description": "Plump homemade muffins", "abbreviation": "MUFF", "is_taxable": true, "variations": [ { "type": "ITEM_VARIATION", "id": "6U4CAIYCXVZO6NZYTBGKPXYN", "updated_at": "2024-10-02T21:36:36.932Z", "created_at": "2024-10-02T21:36:37.081Z", "version": 1727904996932, "is_deleted": false, "present_at_all_locations": true, "item_variation_data": { "item_id": "BD4FDFQQOMVOIIVW67F3AUYN", "name": "Regular", "ordinal": 0, "pricing_type": "VARIABLE_PRICING", "sellable": true, "stockable": true } } ], "product_type": "REGULAR", "description_html": "

Plump homemade muffins

", "description_plaintext": "Plump homemade muffins", "is_archived": false } }, { "type": "ITEM_VARIATION", "id": "UD3CZNICTRKB35IWY36ARVHT", "updated_at": "2024-10-02T21:36:36.932Z", "created_at": "2024-04-09T20:59:24.983Z", "version": 1727904996932, "is_deleted": true, "present_at_all_locations": true, "item_variation_data": { "item_id": "BD4FDFQQOMVOIIVW67F3AUYN", "name": "Regular", "ordinal": 0, "pricing_type": "VARIABLE_PRICING", "sellable": true, "stockable": true } }, { "type": "ITEM_VARIATION", "id": "6U4CAIYCXVZO6NZYTBGKPXYN", "updated_at": "2024-10-02T21:36:36.932Z", "created_at": "2024-10-02T21:36:37.081Z", "version": 1727904996932, "is_deleted": false, "present_at_all_locations": true, "item_variation_data": { "item_id": "BD4FDFQQOMVOIIVW67F3AUYN", "name": "Regular", "ordinal": 0, "pricing_type": "VARIABLE_PRICING", "sellable": true, "stockable": true } } ], "latest_time": "2024-10-02T21:36:36.932Z" } ``` {% /tab %} {% /tabset %} ## Sync from an external platform to Square Syncing from an external platform to Square applies where the external platform hosts the master catalog. Using whatever mechanism is appropriate for the external platform that your application supports, you parse any external updates and push them into the catalog in the seller's Square account by using [UpsertCatalogObject](https://developer.squareup.com/reference/square/catalog-api/upsert-catalog-object), [DeleteCatalogObject](https://developer.squareup.com/reference/square/catalog-api/delete-catalog-object), [BatchUpsertCatalogObjects](https://developer.squareup.com/reference/square/catalog-api/batch-upsert-catalog-objects), or [BatchDeleteCatalogObjects](https://developer.squareup.com/reference/square/catalog-api/batch-delete-catalog-objects) API calls. It's a good idea to group like operations so you can call the Catalog API batch endpoints and reduce the number of API calls you make. For example, you can pull all the delete operations into a single [BatchDeleteCatalogObjects](https://developer.squareup.com/reference/square/catalog-api/batch-delete-catalog-objects) API call. For each `Catalog` object that exists in both platforms, apply the external update by first retrieving the Square `Catalog` object by the `CatalogObject` ID that you stored in the external platform. For information about retrieving a `Catalog` object by ID, see [Retrieve a catalog object with a specified ID and catalog version](catalog-api/retrieve-catalog-objects#retrieve-a-catalog-object-with-a-specified-id-and-catalog-version). To learn about updating existing Square `Catalog` objects with changes to the same object in an external platform, see [Update Catalog Objects](catalog-api/update-catalog-objects). If an external catalog item is deleted, call [DeleteCatalogObject](https://developer.squareup.com/reference/square/catalog-api/delete-catalog-object). ### Verify updates You can verify updates synchronously by catching the response to upsert or delete requests. If you get a `200` response, that means the catalog change succeeded. You can parse the call response to verify if necessary. If you want to run verification in a webhook listener process, you can use the webhook events generated by the Catalog API operations. You need to provide a timestamp representing your first Catalog API call to that verify process. To process verifications triggered by webhook events, first [subscribe](webhooks/step2subscribe) to [catalog.version.updated](https://developer.squareup.com/reference/square/catalog-api/webhooks/catalog.version.updated) using the Developer Console or [subscribe](webhooks/webhook-subscriptions-api) programmatically with the Subscriptions API. The webhook listener you use needs to be running before you make your first Catalog API call to push updates. ## Bi-directional syncing Bi-directional catalog synchronization can be difficult to implement because of the large number of endpoints involved in both systems. `Catalog` object updates in either system result in risky operations such as: * **CRUD operations** - Risks arise from concurrency, merging, duplication, and deletion issues if both systems have CRUD operations around the same time. * **Price changes** - An accounting integrity risk can arise from a user on either system inadvertently updating the other system. For example, a Square user updates the POS price, which then updates the online price in the other system with that new price. A seller might intend for item prices to be different across sales channels. If your application must address a bi-directional use case, you need to account for these side-effects, which are beyond the scope of this topic. However, you can use the preceding sections to understand the mechanisms you can use to build either direction of your use case. --- # Process an Unlinked Refund > Source: https://developer.squareup.com/docs/refunds-api/unlinked-refunds > Status: PUBLIC > Languages: All > Platforms: All Learn how to process unlinked refunds with Refunds API. **Applies to:** [Refunds API](refunds-api/overview) | [Web Payments SDK](web-payments/overview) {% subheading %} Learn how to process unlinked refunds with the Refunds API.{% /subheading %} {% toc hide=true /%} ## Overview An unlinked refund isn't linked to a Square payment and has no associated payment ID. Use an unlinked refund when there's no Square payment to link to (such as when the original payment was processed by another payment processor). ## Requirements and limitations The ability to process an unlinked refund has the following limitations: * Unlinked refunds aren't supported in Japan. * Refunds cannot be processed by a Square account that hasn't been enabled for payment processing. * The unlinked refund feature is only available for sellers who've been authorized to use it. A seller using your application needs to contact their Square account manager for authorization. When authorized, all of the seller's locations can take unlinked refunds. The following example is the `400` response that your application receives if used by a seller who isn't authorized to make unlinked refunds: ```json { "errors": [ { "code": "BAD_REQUEST", "detail": "Unlinked refund processing is not enabled for this merchant.", "category": "INVALID_REQUEST_ERROR" } ] } ``` ### Refund a non-Square payment Non-Square payments exist when a seller is transitioning their payment processing from another service to Square. During the transition period, the seller might want to issue a refund through Square for a payment taken before they started with Square. The refund request is unlinked because there's no Square `Payment` object to represent the original payment. This unlinked refund is processed the same way as a standard refund. The seller's Square account is the source of the funds for the refund. If there are insufficient funds in the seller's Square account, the seller's linked bank account is the refund's source. ## Create an unlinked refund Use the `RefundPayment` endpoint to process an unlinked refund to a card. In the request, don't provide a payment ID. Instead, provide values for the following unlinked refund types before processing the refund. ### Create an unlinked refund to a card Add the following values to the `RefundPayment` request for the card refund: * `destination_id` - Identifies the refund destination by setting the value to a payment card (or Square gift card) token or card-on-file ID. Specify one of the following: * A payment token. * A Square gift card or card-on-file ID. * `location_id` - Where the refund occurred. * `customer_id` - Required for card-on-file destinations. * `unlinked` - Must be `true`. A payment token is generated by your application using the [Web Payments SDK](web-payments/overview). When testing, use a [Sandbox test](devtools/sandbox/payments#payment-tokens-for-testing-payments-api) token such as `cnon:card-nonce-ok`. The following `RefundPayment` request specifies a test payment card on file that Square provides for [Sandbox testing](devtools/sandbox/payments#payment-tokens-for-testing-payments-api). You can test the same request with any of the card test values that Square provides. ```` After receiving the request, Square processes the refund and returns money to the buyer. In response, Square returns a `Refund` object, as shown in the following example: ```json { "refund": { "id": "9YBgvKvpjwsfM4lT1FjpXBdI...fAGf0A9ueKAqWCHxmQotH8TWjor9ZYfI", "status": "PENDING", "amount_money": { "amount": 1000, "currency": "USD" }, "order_id": "6MnVDc5q4xpivpp6LED7FWYNGdZZY", "created_at": "2022-09-24T21:08:06.847Z", "updated_at": "2022-09-24T21:08:06.856Z", "location_id": "S8GWD5R9QB376", "reason": "Buyer returned goods", "unlinked": true, "destination_type": "CARD", "destination_details": { "card_details": { "card": { "card_brand": "MASTERCARD", "last_4": "6952", "exp_month": 12, "exp_year": 2028, "fingerprint": "sq-1-HVUCWbGnS2LZ...E8Gkh_EtOTe0A", "card_type": "CREDIT", "bin": "512081" }, "entry_method": "ON_FILE" } } } } ``` The `order_id` in this example is the unlinked return order ID. Square creates a refund order while processing the refund request and returns the new order ID in this response. The `destination_details` field contains the details of the refund destination. Card refunds have a `card_details` field, which contains the refund destination's payment card details that you can use to confirm with the buyer that the funds were refunded to the intended card. ### Create a cash unlinked refund Add the following values to the `RefundPayment` request for the cash refund: * `destination_id` - Must be `CASH`. * `location_id` - Where the refund occurred. * `unlinked` - Must be `true`. * `cash_details` - Must include the amount of cash the seller provided as `seller_supplied_money`. The following is an example `RefundPayment` request: ```` After receiving the request, Square makes a record of the refund and returns a `Refund` object, as shown in the following example: ```json { "refund": { "id": "9YBgvKvpjwsfM4lT1FjpXBdI...fAGf0A9ueKAqWCHxmQotH8TWjor9ZYfI", "status": "PENDING", "amount_money": { "amount": 1000, "currency": "USD" }, "order_id": "6MnVDc5q4xpivpp6LED7FWYNGdZZY", "created_at": "2024-10-17T21:08:06.847Z", "updated_at": "2024-10-17T21:08:06.856Z", "location_id": "{LOCATION_ID}", "reason": "Buyer returned goods", "unlinked": true, "destination_type": "CASH", "destination_details": { "cash_details": { "seller_supplied_money": { "amount": 1000, "currency": "USD" }, "change_back_money": { "amount": 0, "currency": "USD" } } } } } ``` ### Create an unlinked refund to an external source Add the following values to the `RefundPayment` request for the external refund: * `destination_id` - Must be `EXTERNAL`. * `location_id` - Where the refund occurred. * `unlinked` - Must be `true`. * `external_details` - Must include: * source - A description of the external refund source. * type - See [accepted options](https://developer.squareup.com/reference/square/refunds-api/refund-payment#request__property-external_details). The following is an example `RefundPayment` request: ```` After receiving the request, Square makes a record of the refund and returns a `Refund` object, as shown in the following example: ```json { "refund": { "id": "9YBgvKvpjwsfM4lT1FjpXBdI...fAGf0A9ueKAqWCHxmQotH8TWjor9ZYfI", "status": "PENDING", "amount_money": { "amount": 1000, "currency": "USD" }, "order_id": "6MnVDc5q4xpivpp6LED7FWYNGdZZY", "created_at": "2024-10-17T21:08:06.847Z", "updated_at": "2024-10-17T21:08:06.856Z", "location_id": "{LOCATION_ID}", "reason": "Buyer returned goods", "unlinked": true, "destination_type": "EXTERNAL", "destination_details": { "external_details": { "type": “OTHER”, "source": "Food Delivery Service" } } } } ``` --- # Order Service Charges > Source: https://developer.squareup.com/docs/orders-api/service-charges > Status: PUBLIC > Languages: All > Platforms: All Learn how to add service charges to an order using the Orders API. **Applies to:** [Orders API](orders-api/what-it-does) {% subheading %}Learn how to apply service charges to an order using the Orders API.{% /subheading %} {% toc hide=true /%} ## Overview Building on the example order created in [Order Price Adjustments](orders-api/price-adjustments), learn how the calculation phases you set on an order affect service charges applied to an order. Square calculates and applies any discounts on the order before service charges are applied. After discounted prices are applied to the order, service charges are applied. Service charges are scoped as follows: * **Based on the total amount of the order** - If the service charge will be taxed, it's applied before taxes are calculated. * **Apportioned based on the individual items in the order** - The apportioned charge is based on a percentage or a fixed amount. ## Calculation phases The time that the service charge calculation happens is a calculation phase. The Orders API supports any of four calculation phases for a service charge: * **Subtotal phase** - The service charge is calculated before taxes. * **Total phase** - The service charge is calculated after taxes. * **Apportioned amount phase** - The service charge is calculated after any percentage-based apportioned service charges and before taxes. * **Apportioned percentage phase** - The service charge is calculated before any amount-based apportioned service charges and taxes. ### Phase limitations Each calculation phase is intended to work with only certain types of service charges. When a given phase is used in the wrong type of charge, your application receives a `400 BAD_REQUEST` response. **Subtotal phase service charge** - Cannot be used on an order in the following condition: * The service charge is applied at the order line-item level. **Total phase service charge** - Cannot be used on an order in the following conditions: * The service charge is taxable. * The service charge is applied at the order line-item level. **Apportioned amount phase service charge** - Cannot be used on an order in the following conditions: * The [treatment_type](https://developer.squareup.com/reference/square/objects/OrderServiceCharge#definition__property-treatment_type) of the service charge is `LINE_ITEM_TREATMENT`. * The service charge has a percentage amount instead of an amount. **Apportioned percentage phase service charge** - Cannot be used on an order in the following conditions: * The [treatment_type](https://developer.squareup.com/reference/square/objects/OrderServiceCharge#definition__property-treatment_type) of the service charge is `LINE_ITEM_TREATMENT`. * The service charge has a dollar amount instead of a percentage. {% aside type="important" %} Apportioned service charges aren't accounted for in the `line_item.gross_sales_money` attribute. If your sales report includes service charges in line-item totals, report on the `total_money` attribute instead of `gross_sales_money`. {% /aside %} ## Apportioned amount service charge An apportioned amount service charge adds a portion of the total service charge to line items in the order. If the `service_charges[].scope` is set to `ORDER`, a portion of the service charge is applied to every line. If the scope is set to `LINE_ITEM`, only those line items where the service charge is applied get a portion of the service charge. Suppose the total service charge on an order is $10 and the order subtotal is $116 for the three line items. $10 needs to be apportioned across all line items using the following calculation: * `Dog Biscuits - Chicken Flavor`: ((2 @ $15 per box = $30) / $116) * 10 = $2.59 * `Handmade Sweater - Blue`: (($50) / $116) * 10 = $4.31 * `Chewy Rawhide - Beef Flavor`: ((3 @ $12 per box = $30) / $116) * 10 = $3.10 {% line-break /%} {% tabset %} {% tab id="Request" %} The following example request specifies the $10 apportioned amount service charge and the three line items: ```` {% /tab %} {% tab id="Response" %} The following response shows that the three apportioned line-item service charges total the $10 total service charge: ```json { "order": { "location_id": "VJN4XSBFTVPK9", "line_items": [ { "uid": "uFptr9GfXbBTuKMJRQJdGB", "quantity": "2", "name": "Dog Biscuits - Chicken Flavor", "base_price_money": { "amount": 1500, "currency": "USD" }, "gross_sales_money": { "amount": 3000, "currency": "USD" }, "total_tax_money": { "amount": 0, "currency": "USD" }, "total_discount_money": { "amount": 0, "currency": "USD" }, "total_money": { "amount": 3259, "currency": "USD" }, "variation_total_price_money": { "amount": 3000, "currency": "USD" }, "item_type": "ITEM", "applied_service_charges": [ { "uid": "PlbvFDyMySGH4FXicgOEyD", "service_charge_uid": "SVS_CHARGE1", "applied_money": { "amount": 259, "currency": "USD" } } ], "total_service_charge_money": { "amount": 259, "currency": "USD" } }, { "uid": "PCi6xxwOBo8Y1fzGEOBl8", "quantity": "1", "name": "Handmade Sweater - Blue", "base_price_money": { "amount": 5000, "currency": "USD" }, "gross_sales_money": { "amount": 5000, "currency": "USD" }, "total_tax_money": { "amount": 0, "currency": "USD" }, "total_discount_money": { "amount": 0, "currency": "USD" }, "total_money": { "amount": 5431, "currency": "USD" }, "variation_total_price_money": { "amount": 5000, "currency": "USD" }, "item_type": "ITEM", "applied_service_charges": [ { "uid": "tB2mgXVVhtIaINB9gFutuB", "service_charge_uid": "SVS_CHARGE1", "applied_money": { "amount": 431, "currency": "USD" } } ], "total_service_charge_money": { "amount": 431, "currency": "USD" } }, { "uid": "ozixhXglLJ9k6O4o5Pkfo", "quantity": "3", "name": "Chewy Rawhide - Beef Flavor", "base_price_money": { "amount": 1200, "currency": "USD" }, "gross_sales_money": { "amount": 3600, "currency": "USD" }, "total_tax_money": { "amount": 0, "currency": "USD" }, "total_discount_money": { "amount": 0, "currency": "USD" }, "total_money": { "amount": 3910, "currency": "USD" }, "variation_total_price_money": { "amount": 3600, "currency": "USD" }, "item_type": "ITEM", "applied_service_charges": [ { "uid": "z24JMoRuw1y8vmRFHK1UE", "service_charge_uid": "SVS_CHARGE1", "applied_money": { "amount": 310, "currency": "USD" } } ], "total_service_charge_money": { "amount": 310, "currency": "USD" } } ], "created_at": "2024-06-18T20:47:37.048Z", "updated_at": "2024-06-18T20:47:37.048Z", "state": "OPEN", "version": 1, "total_tax_money": { "amount": 0, "currency": "USD" }, "total_discount_money": { "amount": 0, "currency": "USD" }, "total_tip_money": { "amount": 0, "currency": "USD" }, "total_money": { "amount": 12600, "currency": "USD" }, "service_charges": [ { "uid": "SVS_CHARGE1", "name": "service charge", "amount_money": { "amount": 1000, "currency": "USD" }, "applied_money": { "amount": 1000, "currency": "USD" }, "calculation_phase": "APPORTIONED_AMOUNT_PHASE", "taxable": true, "total_money": { "amount": 1000, "currency": "USD" }, "total_tax_money": { "amount": 0, "currency": "USD" }, "type": "CUSTOM", "treatment_type": "APPORTIONED_TREATMENT", "scope": "ORDER" } ], "total_service_charge_money": { "amount": 1000, "currency": "USD" }, "net_amounts": { "total_money": { "amount": 12600, "currency": "USD" }, "tax_money": { "amount": 0, "currency": "USD" }, "discount_money": { "amount": 0, "currency": "USD" }, "tip_money": { "amount": 0, "currency": "USD" }, "service_charge_money": { "amount": 1000, "currency": "USD" } }, "customer_id": "0V2VTQ2XQZJRNA8WXVSF81EWH0", "net_amount_due_money": { "amount": 12600, "currency": "USD" } } } ``` {% /tab %} {% /tabset %} ## Apportioned percentage service charge Suppose the total service charge on the order is 10% of the order subtotal (before tax). The order subtotal is $116, which means that the service charge is $11.60. That amount needs to be apportioned across all line items using the following calculation: * `Dog Biscuits - Chicken Flavor`: ((2 @ $15 per box = $30) / $116) * 11.60 = $3.00 * `Handmade Sweater - Blue`: (($50) / $116) * 11.60 = $5.00 * `Chewy Rawhide - Beef Flavor`: ((3 @ $12 per box = $30) / $116) * 11.60 = $3.60 The three apportioned line-item service charges ($3.00 + $5.00 + $3.60) equal the $11.60 total service charge. ## Apportioned service charge taxes Apportioned service charges cannot have their own tax rate or amount. Instead, `applied_service_charges` inherit the tax of the line item it's applied to. If you add an applied tax to an apportioned service charge, it's ignored. ### Ignored service charge taxes In the following example, an apportioned service charge is declared with a tax applied directly to the service charge: {% tabset %} {% tab id="Request" %} ```json { "service_charges": [ { "calculation_phase": "APPORTIONED_AMOUNT_PHASE", "name": "Fixed amount service charge", "treatment_type": "APPORTIONED_TREATMENT", "uid": "APPORTIONED_AMOUNT_SERVICE_CHARGE", "scope": "LINE_ITEM", "amount_money": { "amount": 1000, "currency": "USD" }, "taxable": true, "applied_taxes": [ { "tax_uid": "SERVICE_CHARGE_TAX", "uid": "2" } ] } ], "taxes": [ { "name": "Service charge tax", "percentage": "8", "scope": "LINE_ITEM", "type": "ADDITIVE", "uid": "SERVICE_CHARGE_TAX" } ] } ``` {% /tab %} {% tab id="Response" %} The following response shows that the service charge is applied to the line item but not the service charge tax: ```json { "line_items": [ { "uid": "H5j9clSbv0cAQoUWGzv7QD", "quantity": "2", "name": "Dog Biscuits - Chicken Flavor", "base_price_money": { "amount": 1500, "currency": "USD" }, "gross_sales_money": { "amount": 3000, "currency": "USD" }, "total_tax_money": { "amount": 0, "currency": "USD" }, "total_discount_money": { "amount": 0, "currency": "USD" }, "total_money": { "amount": 5000, "currency": "USD" }, "variation_total_price_money": { "amount": 3000, "currency": "USD" }, "item_type": "ITEM", "applied_service_charges": [ { "uid": "1", "service_charge_uid": "APPORTIONED_AMOUNT_SERVICE_CHARGE", "applied_money": { "amount": 2000, "currency": "USD" } } ], "total_service_charge_money": { "amount": 2000, "currency": "USD" } }, } ``` {% /tab %} {% /tabset %} A non-apportioned line-item service charge must have its own tax information configured with its own rate, which can be different from the line-item tax rate. If a seller wants to ensure that a service charge is taxed at the same rate as its associated line item, an apportioned service charge should be used. ## Percentage service charges When you specify a percentage service charge to an order, Square calculates the service charge as a percentage of the whole order. If you want to apply service charges to individual line items, you need to use apportioned service charges. Raphael's Puppy-Care Emporium has established a fund to help encourage pet adoption and is adding a service charge for this. The service charge is applied after discounts, but before taxes (subtotal phase). {% aside type="important" %} When processing tips for external vendors (such as third-party delivery couriers), do not use the Payment object's tip fields. Adding tips through the Payment object would incorrectly include these amounts in the seller's internal team members' tip pool. Instead, use the [Order.service_charge](https://developer.squareup.com/reference/square/objects/order#definition__property-service_charges) property on the Order object to record tips for external vendors who help fulfill orders. This ensures: - External vendor tips are properly segregated from internal team member tips - Tips are correctly attributed to the external vendor - Tip amounts don't impact the seller's internal tip pool calculations {% /aside %} {% tabset %} {% tab id="Request" %} The following `CalculateOrder` request defines this service charge (`PET-ADOPT-1.5-PCT`) and applies it to the order: ```` {% /tab %} {% tab id="Response" %} In the following response, the 1.5% `service_charge_money` ($1.74) is added to the $116.00 total, so the `net_amount_due_money` is $117.74: ```json { "order": { "line_items": [ { "quantity": "2", "name": "Dog Biscuits - Chicken Flavor", "base_price_money": { "amount": 1500, "currency": "USD" }, "gross_sales_money": { "amount": 3000, "currency": "USD" }, "total_money": { "amount": 3000, "currency": "USD" } }, { "quantity": "1", "name": "Handmade Sweater - Blue", "base_price_money": { "amount": 5000, "currency": "USD" }, "gross_sales_money": { "amount": 5000, "currency": "USD" }, "total_money": { "amount": 5000, "currency": "USD" } }, { "quantity": "3", "name": "Chewy Rawhide - Beef Flavor", "base_price_money": { "amount": 1200, "currency": "USD" }, "gross_sales_money": { "amount": 3600, "currency": "USD" }, "total_money": { "amount": 3600, "currency": "USD" } } ], "total_money": { "amount": 11774, "currency": "USD" }, "service_charges": [ { "name": "PET-ADOPT-1.5-PCT", "percentage": "1.5", "applied_money": { "amount": 174, "currency": "USD" }, "calculation_phase": "SUBTOTAL_PHASE", "total_money": { "amount": 174, "currency": "USD" }, } ], "total_service_charge_money": { "amount": 174, "currency": "USD" }, "net_amounts": { "total_money": { "amount": 11774, "currency": "USD" }, "service_charge_money": { "amount": 174, "currency": "USD" } }, "net_amount_due_money": { "amount": 11774, "currency": "USD" } } } ``` {% /tab %} {% /tabset %} ## Service charge taxes You can apply a tax to an order-level service charge in the same way you can apply a tax to a line item. In the following example, an order-level service charge of $10 is added to an order. The service charge applies a special service charge line-item tax of 8%. The order-scoped service charge is treated as a single line item, which is why the tax needs to be a `LINE_ITEM` tax. {% tabset %} {% tab id="Request" %} ```` {% aside type="info" %} Setting `service_charges.taxable` has no bearing on whether a tax is charged on the service charge. As long as you set `service_charges.applied_taxes`, a tax will be applied. {% /aside %} {% /tab %} {% tab id="Response" %} The response shows that a service charge tax of $.80 is added to the order and applied to the service charge. In the order total amounts, `total_service_charge_money` doesn't reflect the tax. However, you can see the tax in `net_amounts.tax_money`. ```json { "order": { "location_id": "VJN4XSBFTVPK9", "line_items": [ { "uid": "hc8R2Ky8qG4X7s7z95JYBC", "quantity": "2", "name": "Dog Biscuits - Chicken Flavor", "base_price_money": { "amount": 1500, "currency": "USD" }, "gross_sales_money": { "amount": 3000, "currency": "USD" }, "total_tax_money": { "amount": 0, "currency": "USD" }, "total_discount_money": { "amount": 0, "currency": "USD" }, "total_money": { "amount": 3000, "currency": "USD" }, "variation_total_price_money": { "amount": 3000, "currency": "USD" }, "item_type": "ITEM", "total_service_charge_money": { "amount": 0, "currency": "USD" } }, { "uid": "KuoP2Nl0eZHiXqwn52OMwC", "quantity": "1", "name": "Handmade Sweater - Blue", "base_price_money": { "amount": 5000, "currency": "USD" }, "gross_sales_money": { "amount": 5000, "currency": "USD" }, "total_tax_money": { "amount": 0, "currency": "USD" }, "total_discount_money": { "amount": 0, "currency": "USD" }, "total_money": { "amount": 5000, "currency": "USD" }, "variation_total_price_money": { "amount": 5000, "currency": "USD" }, "item_type": "ITEM", "total_service_charge_money": { "amount": 0, "currency": "USD" } }, { "uid": "gyqXxxDcDbSlSmEoiNFyzC", "quantity": "3", "name": "Chewy Rawhide - Beef Flavor", "base_price_money": { "amount": 1200, "currency": "USD" }, "gross_sales_money": { "amount": 3600, "currency": "USD" }, "total_tax_money": { "amount": 0, "currency": "USD" }, "total_discount_money": { "amount": 0, "currency": "USD" }, "total_money": { "amount": 3600, "currency": "USD" }, "variation_total_price_money": { "amount": 3600, "currency": "USD" }, "item_type": "ITEM", "total_service_charge_money": { "amount": 0, "currency": "USD" } } ], "taxes": [ { "uid": "SERVICE_CHARGE_TAX", "name": "Service charge tax", "percentage": "8", "type": "ADDITIVE", "applied_money": { "amount": 80, "currency": "USD" }, "scope": "LINE_ITEM" } ], "created_at": "2024-06-28T20:47:28.825Z", "updated_at": "2024-06-28T20:47:28.825Z", "state": "OPEN", "version": 1, "total_tax_money": { "amount": 80, "currency": "USD" }, "total_discount_money": { "amount": 0, "currency": "USD" }, "total_tip_money": { "amount": 0, "currency": "USD" }, "total_money": { "amount": 12680, "currency": "USD" }, "service_charges": [ { "uid": "APPORTIONED_AMOUNT_SERVICE_CHARGE", "name": "twelve percent service charge", "amount_money": { "amount": 1000, "currency": "USD" }, "applied_money": { "amount": 1000, "currency": "USD" }, "calculation_phase": "SUBTOTAL_PHASE", "taxable": true, "total_money": { "amount": 1080, "currency": "USD" }, "total_tax_money": { "amount": 80, "currency": "USD" }, "applied_taxes": [ { "uid": "2", "tax_uid": "SERVICE_CHARGE_TAX", "applied_money": { "amount": 80, "currency": "USD" } } ], "type": "CUSTOM", "treatment_type": "LINE_ITEM_TREATMENT", "scope": "ORDER" } ], "total_service_charge_money": { "amount": 1000, "currency": "USD" }, "net_amounts": { "total_money": { "amount": 12680, "currency": "USD" }, "tax_money": { "amount": 80, "currency": "USD" }, "discount_money": { "amount": 0, "currency": "USD" }, "tip_money": { "amount": 0, "currency": "USD" }, "service_charge_money": { "amount": 1000, "currency": "USD" } }, "customer_id": "0V2VTQ2XQZJRNA8WXVSF81EWH0", "net_amount_due_money": { "amount": 12680, "currency": "USD" } } } ``` {% /tab %} {% /tabset %} ## 3rd-Party delivery tip with a service charge Use an order-scoped, non-taxable service charge to represent a tip intended for a 3rd-party courier such as DoorDash rather than the seller’s staff. This keeps the amount out of payment‐level gratuity reporting and avoids affecting item-level taxes. ### Why a service charge? `payment.tip_money` is designed for staff gratuities associated with the seller’s team that should be paid out through payroll. An `order.service_charge` is considered the best place to pass non-line-item order adjustments, including those that are pass-through to the merchants like courier tips and delivery platform fees. ### Recommended settings * `scope`- `ORDER` (applies to the whole order). * `amount_money` - Pass in an explicit tip amount, don't calculate the service charge using a percentage. * `calculation_phase` - `TOTAL_PHASE` or `SUBTOTAL_PHASE`. While this field is required in API requests, it only affects percentage-based calculations. When providing an explicit amount, the phase value is accepted but not used in calculations. Avoid using apportioned phases (like `APPORTIONED_PERCENTAGE_PHASE`), as these follow different rules for distributing amounts across line items. * `taxable` - `false` * `name` - A clear label like "Courier Tip" for downstream reporting. ### Example This example shows a $1.50 tip for the courier who delivered the order: ```json "service_charges": [ { "scope": "ORDER", "calculation_phase": "TOTAL_PHASE", "taxable": false, "amount_money": { "amount": 150, "currency": "USD" }, "name": "Courier Tip" } ] ``` ## See also * [Order Price Adjustments](orders-api/price-adjustments) * [Order Taxes](orders-api/taxes) * [Order Discounts](orders-api/discounts) --- # Order Taxes > Source: https://developer.squareup.com/docs/orders-api/taxes > Status: PUBLIC > Languages: All > Platforms: All Learn how to apply taxes to an order using the Orders API. **Applies to:** [Orders API](orders-api/what-it-does) {% subheading %}Learn how to apply taxes to an order using the Orders API.{% /subheading %} {% toc hide=true /%} ## Overview Building on the example order created in [Order Price Adjustments](orders-api/price-adjustments), learn how to apply taxes to the example order. The final calculations for the order involve taxes. There are two types of taxes and they're processed by the Orders API in this order: 1. **Item-level taxes** - Calculated and applied to one or more individual items. 2. **Order-level taxes** - Calculated for the entire order and then distributed proportionally to each item as apportioned taxes. ## Example In the following example, the state of California has approved the following taxes, which must now be collected: * A 5% fair trade tax, applicable to any handmade goods. * An 8.5% sales tax on every order. {% line-break /%} {% tabset %} {% tab id="Request" %} The following `CalculateOrder` request defines these two taxes (`FAIR-TRADE-5-PCT` and `STATE-SALES-8.5-PCT`) and applies each one appropriately: ```` {% /tab %} {% tab id="Response" %} In the response, the fair trade tax is applied only to the handmade sweater. The state sales tax is calculated for the order total and distributed proportionally across all the items. ```json { "order": { "line_items": [ { "quantity": "2", "name": "Dog Biscuits - Chicken Flavor", "base_price_money": { "amount": 1500, "currency": "USD" }, "gross_sales_money": { "amount": 3000, "currency": "USD" }, "total_tax_money": { "amount": 255, "currency": "USD" }, "total_money": { "amount": 3255, "currency": "USD" }, "applied_taxes": [ { "tax_uid": "STATE-SALES-8.5-PCT", "applied_money": { "amount": 255, "currency": "USD" } } ], }, { "quantity": "1", "name": "Handmade Sweater - Blue", "base_price_money": { "amount": 5000, "currency": "USD" }, "gross_sales_money": { "amount": 5000, "currency": "USD" }, "total_tax_money": { "amount": 675, "currency": "USD" }, "total_money": { "amount": 5675, "currency": "USD" }, "applied_taxes": [ { "tax_uid": "FAIR-TRADE-5-PCT", "applied_money": { "amount": 250, "currency": "USD" } }, { "tax_uid": "STATE-SALES-8.5-PCT", "applied_money": { "amount": 425, "currency": "USD" } } ] }, { "quantity": "3", "name": "Chewy Rawhide - Beef Flavor", "base_price_money": { "amount": 1200, "currency": "USD" }, "gross_sales_money": { "amount": 3600, "currency": "USD" }, "total_tax_money": { "amount": 306, "currency": "USD" }, "total_money": { "amount": 3906, "currency": "USD" }, "applied_taxes": [ { "tax_uid": "STATE-SALES-8.5-PCT", "applied_money": { "amount": 306, "currency": "USD" } } ] } ], "taxes": [ { "uid": "STATE-SALES-8.5-PCT", "name": "State sales tax - 8.5%", "percentage": "8.5", "type": "ADDITIVE", "applied_money": { "amount": 986, "currency": "USD" }, "scope": "ORDER" }, { "uid": "FAIR-TRADE-5-PCT", "name": "Fair Trade Tax - 5%", "percentage": "5", "type": "ADDITIVE", "applied_money": { "amount": 250, "currency": "USD" }, "scope": "LINE_ITEM" } ], "total_tax_money": { "amount": 1236, "currency": "USD" }, "total_money": { "amount": 12836, "currency": "USD" }, "net_amounts": { "total_money": { "amount": 12836, "currency": "USD" }, "tax_money": { "amount": 1236, "currency": "USD" } }, "net_amount_due_money": { "amount": 12836, "currency": "USD" } } } ``` {% /tab %} {% /tabset %} If your application supports service charges, see [Order Service Charges](orders-api/service-charges) to learn how to apply service charges to this example order. To learn how discounts are applied to this example order, see [Order Discounts](orders-api/discounts). ## See also * [Order Price Adjustments](orders-api/price-adjustments) * [Order Service Charges](orders-api/service-charges) * [Order Discounts](orders-api/discounts) --- # Order Price Adjustments > Source: https://developer.squareup.com/docs/orders-api/price-adjustments > Status: PUBLIC > Languages: All > Platforms: All Learn how to adjust prices on an order with taxes, discounts, and service charges by using the Orders API. **Applies to:** [Orders API](orders-api/what-it-does) | [Catalog API](catalog-api/what-it-does) {% subheading %}Learn how to adjust prices on an order with taxes, discounts, and service charges using the Orders API.{% /subheading %} {% toc hide=true /%} ## Overview You can set parameters in a [CreateOrder](https://developer.squareup.com/reference/square/orders-api/create-order) request that tells Square to adjust the line item price for any item in an order. The API calculates these adjustments and applies them as [discounts](orders-api/discounts), [service charges](orders-api/service-charges), or [taxes](orders-api/taxes). Price adjustments are scoped as follows: * **Item level** - The price adjustment is applied specifically to an applicable line item. * **Order level** - The price adjustment is distributed across all the line item subtotals. ## Preview order price adjustments If your application shows the buyer what they will pay for an order when placed, you need to calculate the order before you actually create it. The Orders API provides the [CalculateOrder](https://developer.squareup.com/reference/square/orders-api/CalculateOrder) endpoint that takes the same request body as `CreateOrder`. To preview Square's calculation before you actually create an order, provide the same request body that you will use for `CreateOrder`. In the `CalculateOrder` response, you can see that line item prices now show any discounts, taxes, or service charges that Square applied. You can set these adjustment parameters directly in an order request or, in some cases, you can refer to catalog [taxes](catalog-api/design-a-catalog#taxes) or [discounts](catalog-api/design-a-catalog#discounts) configured by a seller. When you call `CreateOrder` with the same request body, an order is actually created with those calculated values. ## Rounding rules The Orders API performs its adjustment calculations using Bankers' Rounding, also known as Rounding Half to Even. Under Common Rounding rules (Round Half Up), half-values round up to the next closest integer. However, under Bankers' Rounding, half-values round to the closest even integer. This has the effect of rounding even numbers down, while leaving odd numbers unchanged. The following table shows examples of values rounded to two decimal places using Common Rounding and Bankers' Rounding: {% table %} * Value {% width="80px" %} * Common Rounding{% width="100px" %} * Bankers' Rounding --- * 0.505 * 0.51 * 0.50 (0 is the closest even and 1 is odd. Round down to .50) --- * 0.715 * 0.72 * (2 is the closest even and 1 is odd. Round up two 2) --- * 0.085 * 0.09 * 0.08 (8 is the closest even and 9 is odd. Round down to 8) {% /table %} ### Bankers' Rounding Bankers' Rounding is a rounding mode in which non-tie decimals (> 0 and ≠ 5) are rounded up or down to the nearest integer and ties (= 5) are rounded to the nearest even integer. For example, non-ties to two decimal places: 3.222 -> 3.22 and –3.228 -> –3.23. Ties to two decimal places: 3.225 -> 3.22 and –3.235 -> –3.24. ## Example use case To illustrate how the Orders API calculates totals, consider an online order from Raphael's Puppy-Care Emporium. The order consists of the following items: * Two boxes of chicken-flavored dog biscuits, at $15.00 per box. * A handmade sweater for dogs (blue color), at $50.00. * Three packages of beef-flavored chewy rawhide, at $12.00 per package. The following examples use the [CalculateOrder](https://developer.squareup.com/reference/square/orders-api/CalculateOrder) endpoint to demonstrate each step in the process. ## Initial item totals The first step is to calculate the initial total for each item, which is the base price of the item multiplied by the quantity. {% table %} * Quantity * Description * Base price * Item total --- * 2 * Dog Biscuits - Chicken Flavor * $15.00 * $30.00 --- * 1 * Handmade Sweater - Blue * $50.00 * $50.00 --- * 3 * Chewy Rawhide - Beef Flavor * $12.00 * $36.00 {% /table %} The subtotal for the order is the sum of all the item totals: $30.00 + $50.00 + $36.00 = $116.00. {% tabset %} {% tab id="Request" %} The following `CalculateOrder` request shows the items in the order and the totals calculated by the Orders API: ```` {% /tab %} {% tab id="Response" %} In this partial response example, the `gross_sales_money` attributes reflect the item totals, while `net_amount_due_money` reflects the subtotal for the order ($116.00). ```json { "order": { "line_items": [ { "quantity": "2", "name": "Dog Biscuits - Chicken Flavor", "base_price_money": { "amount": 1500, "currency": "USD" }, "gross_sales_money": { "amount": 3000, "currency": "USD" }, }, { "quantity": "1", "name": "Handmade Sweater - Blue", "base_price_money": { "amount": 5000, "currency": "USD" }, "gross_sales_money": { "amount": 5000, "currency": "USD" }, }, { "quantity": "3", "name": "Chewy Rawhide - Beef Flavor", "base_price_money": { "amount": 1200, "currency": "USD" }, "gross_sales_money": { "amount": 3600, "currency": "USD" }, } ], "total_money": { "amount": 11600, "currency": "USD" }, "net_amount_due_money": { "amount": 11600, "currency": "USD" } } } ``` {% /tab %} {% /tabset %} To learn about how discounts are applied to this example order, see [Order Discounts](orders-api/discounts). If your application will support service charges, see [Order Service Charges](orders-api/service-charges) to walk through applying service charges to this example order. To learn about applying taxes to the example order, see [Order Taxes](orders-api/taxes). ## See also * [Order Discounts](orders-api/discounts) * [Order Service Charges](orders-api/service-charges) * [Order Taxes](orders-api/taxes) --- # Order Discounts > Source: https://developer.squareup.com/docs/orders-api/discounts > Status: PUBLIC > Languages: All > Platforms: All Learn how to apply discounts to an order using the Orders API. **Applies to:** [Orders API](orders-api/what-it-does) | [Catalog API](catalog-api/what-it-does) {% subheading %}Learn how to apply discounts to an order using the Orders API.{% /subheading %} {% toc hide=true /%} ## Overview Building on the example order created in [Order Price Adjustments](orders-api/price-adjustments), learn how to apply discounts to the example order. If your application uses catalog pricing rules to calculate discount amounts, see [Automatically Apply Discounts](catalog-api/cookbook/auto-apply-discounts) for information about setting up discount pricing rules. After the Orders API calculates item totals, it considers any available discounts of these types: * **Discount on order total** - A discount can be defined in the order and based on a percentage (for example, 10% off) or based on a fixed amount and then applied to the order total. * **Discount on line item** - A discount can be defined in the order and applied to an individual item or the entire order. * **Pricing rule discount on line item** - A catalog pricing rule for [Square-applied order discounts](orders-api/apply-taxes-and-discounts/auto-apply-discounts) and applied to line items in the order. If an order has multiple discounts of different scopes and types, they're calculated and applied in this sequence: 1. Item-level percentage 2. Order-level percentage 3. Order-level fixed amount 4. Item-level fixed amount {% aside type="important" %} Because order-level fixed-amount discounts are applied before item-level fixed-amount discounts, the order-level discount can reduce an item's price before the item-level discount is calculated. If the item-level discount is close to the item's base price, it might not fully apply. To avoid this, convert the item-level fixed-amount discount to an equivalent percentage discount. {% /aside %} {% accordion %} {% slot "heading" %} ## Percentage discounts {% /slot %} ### On items Chicken-flavored dog biscuits have been discontinued, so this item receives a 7% discount. The `applied_discounts` attribute tells Square that this line item gets a specific discount and the `discounts` attribute defines what the discount is. `applied_discounts` can be set on any line item and reference any `discount` defined in the order. Note that `applied_discounts` is a list, which means that multiple discounts can be applied to a single line item. {% tabset %} {% tab id="Request" %} The following `CalculateOrder` request defines the discount (`DISCONTINUED-7-PCT`) and applies it to `Dog Biscuits - Chicken Flavor`: ```` {% /tab %} {% tab id="Response" %} In the response, `total_discount_money` for the item is $2.10, which is 7% of the `gross_sales_money` for the item. The item total is adjusted from $30.00 to $27.90, which lowers the order total from $116.00 to $113.90. ``` { "order": { ... "line_items": [ { ... "quantity": "2", "name": "Dog Biscuits - Chicken Flavor", "base_price_money": { "amount": 1500, "currency": "USD" }, "gross_sales_money": { "amount": 3000, "currency": "USD" }, ... "total_discount_money": { "amount": 210, "currency": "USD" }, "total_money": { "amount": 2790, "currency": "USD" }, ... "applied_discounts": [ { ... "discount_uid": "DISCONTINUED-7-PCT", "applied_money": { "amount": 210, "currency": "USD" } } ], ... }, ... ], "discounts": [ { "uid": "DISCONTINUED-7-PCT", "name": "Discontinued - 7% off", "percentage": "7", "applied_money": { "amount": 210, "currency": "USD" }, "type": "FIXED_PERCENTAGE", "scope": "LINE_ITEM" } ], ... "total_discount_money": { "amount": 210, "currency": "USD" }, ... "total_money": { "amount": 11390, "currency": "USD" }, ... "net_amounts": { "total_money": { "amount": 11390, "currency": "USD" }, ... "discount_money": { "amount": 210, "currency": "USD" }, ... }, "net_amount_due_money": { "amount": 11390, "currency": "USD" } } } ``` {% /tab %} {% /tabset %} ### On orders To celebrate National Puppy Day, the entire order receives a 12% discount. The Orders API calculates and applies order-level discounts as line-item price adjustments, so it apportions the discount across all the line-item subtotals. In this case, the `applied_discounts` attribute isn't used. The `discounts` attribute uses a `scope` parameter to tell Square to apply the discount to all line items. {% tabset %} {% tab id="Request" %} The following `CalculateOrder` request defines the discount (`NATL-PUPPY-12-PCT`) to be applied to all the items: ```` {% /tab %} {% tab id="Response" %} In the response, the 12% order discount is shown as `total_discount_money`. The amount is deducted from `gross_sales_money`, resulting in `total_money` for the item. The total `discount_money` for the order is $13.92. When subtracted from the $116.00 item total, the resulting `net_amount_due_money` is $102.08. ``` { "order": { ... "line_items": [ { ... "quantity": "2", "name": "Dog Biscuits - Chicken Flavor", "base_price_money": { "amount": 1500, "currency": "USD" }, "gross_sales_money": { "amount": 3000, "currency": "USD" }, ... "total_discount_money": { "amount": 360, "currency": "USD" }, "total_money": { "amount": 2640, "currency": "USD" }, ... "applied_discounts": [ { ... "discount_uid": "NATIONAL PUPPY DAY - 12 PERCENT OFF", "applied_money": { "amount": 360, "currency": "USD" } } ], ... }, { ... "quantity": "1", "name": "Handmade Sweater - Blue", "base_price_money": { "amount": 5000, "currency": "USD" }, "gross_sales_money": { "amount": 5000, "currency": "USD" }, ... "total_discount_money": { "amount": 600, "currency": "USD" }, "total_money": { "amount": 4400, "currency": "USD" }, ... "applied_discounts": [ { ... "discount_uid": "NATIONAL PUPPY DAY - 12 PERCENT OFF", "applied_money": { "amount": 600, "currency": "USD" } } ], ... }, { ... "quantity": "3", "name": "Chewy Rawhide - Beef Flavor", "base_price_money": { "amount": 1200, "currency": "USD" }, "gross_sales_money": { "amount": 3600, "currency": "USD" }, ... "total_discount_money": { "amount": 432, "currency": "USD" }, "total_money": { "amount": 3168, "currency": "USD" }, ... "applied_discounts": [ { ... "discount_uid": "NATIONAL PUPPY DAY - 12 PERCENT OFF", "applied_money": { "amount": 432, "currency": "USD" } } ], ... } ], "discounts": [ { "uid": "NATIONAL PUPPY DAY - 12 PERCENT OFF", "name": "National Puppy Day - 12% off", "percentage": "12", "applied_money": { "amount": 1392, "currency": "USD" }, "type": "FIXED_PERCENTAGE", "scope": "ORDER" } ], ... "total_discount_money": { "amount": 1392, "currency": "USD" }, ... "total_money": { "amount": 10208, "currency": "USD" }, ... "net_amounts": { "total_money": { "amount": 10208, "currency": "USD" }, ... "discount_money": { "amount": 1392, "currency": "USD" }, ... }, "net_amount_due_money": { "amount": 10208, "currency": "USD" } } } ``` In this example, you can see the discount of $13.92 shown in three places: * **Individual discount total** - The total for the single discount defined. If there were multiple discounts on the order, each discount would be totaled in `discounts[].applied_money`. * **Total order discounts** - The sum total of all discounts applied to the order in `total_discount_money`. * **Amount subtracted from order total** - The amount discounted from the total amount of the order in `net_amounts.discount_money`. The latter two attributes are always the same amount. When coding a report, such as a sales activity report, you can use the `net_amounts` attribute instead of `total_money` and `total_discount_money` to populate report line items. {% /tab %} {% /tabset %} {% /accordion %} {% accordion %} {% slot "heading" %} ## Fixed amount discounts {% /slot %} ### On items To thank customers for their business, a Puppy Appreciation Discount is applied to dog treats. Customers save $3.00 on chicken-flavor dog biscuits and $11.00 on beef-flavor chewy rawhide. {% tabset %} {% tab id="Request" %} The following `CalculateOrder` request defines two discounts (APPREC-3-USD and APPREC-11-USD) and applies them to the appropriate items: ```` {% /tab %} {% tab id="Response" %} In the response, $3.00 is deducted from the dog biscuits and $11.00 is deducted from the rawhide. The total `discount_money` for the order is $14.00. When subtracted from the $116.00 item total, the resulting `net_amount_due_money` is $102.00. {% aside type="info" %} An item-level fixed discount is applied to the extended price of the line item. In the example, two dog biscuits were ordered for a gross amount of $30. The fixed $3 discount is applied, leaving a net total of $27 for the line item. {% /aside %} ``` { "order": { ... "line_items": [ { ... "quantity": "2", "name": "Dog Biscuits - Chicken Flavor", "base_price_money": { "amount": 1500, "currency": "USD" }, "gross_sales_money": { "amount": 3000, "currency": "USD" }, ... "total_discount_money": { "amount": 300, "currency": "USD" }, "total_money": { "amount": 2700, "currency": "USD" }, ... "applied_discounts": [ { ... "discount_uid": "APPREC-3-USD", "applied_money": { "amount": 300, "currency": "USD" } } ], ... }, { ... "quantity": "1", "name": "Handmade Sweater - Blue", "base_price_money": { "amount": 5000, "currency": "USD" }, "gross_sales_money": { "amount": 5000, "currency": "USD" }, ... "total_discount_money": { "amount": 0, "currency": "USD" }, "total_money": { "amount": 5000, "currency": "USD" }, ... }, { ... "quantity": "3", "name": "Chewy Rawhide - Beef Flavor", "base_price_money": { "amount": 1200, "currency": "USD" }, "gross_sales_money": { "amount": 3600, "currency": "USD" }, ... "total_discount_money": { "amount": 1100, "currency": "USD" }, "total_money": { "amount": 2500, "currency": "USD" }, ... "applied_discounts": [ { ... "discount_uid": "APPREC-11-USD", "applied_money": { "amount": 1100, "currency": "USD" } } ], ... } ], "discounts": [ { "uid": "APPREC-3-USD", "name": "Customer Appreciation Discount - $3 off", "amount_money": { "amount": 300, "currency": "USD" }, "applied_money": { "amount": 300, "currency": "USD" }, "type": "FIXED_AMOUNT", "scope": "LINE_ITEM" }, { "uid": "APPREC-11-USD", "name": "Customer Appreciation Discount - $11 off", "amount_money": { "amount": 1100, "currency": "USD" }, "applied_money": { "amount": 1100, "currency": "USD" }, "type": "FIXED_AMOUNT", "scope": "LINE_ITEM" } ], ... "total_discount_money": { "amount": 1400, "currency": "USD" }, ... "total_money": { "amount": 10200, "currency": "USD" }, ... "net_amounts": { "total_money": { "amount": 10200, "currency": "USD" }, ... "discount_money": { "amount": 1400, "currency": "USD" }, ... }, "net_amount_due_money": { "amount": 10200, "currency": "USD" } } } ``` {% /tab %} {% /tabset %} ### On orders To celebrate the storewide Anniversary Sale, a discount of $5.00 is applied to the entire order. The Orders API calculates and applies order-level discounts as line-item price adjustments, so it evenly distributes the discount across all the line-item subtotals. {% tabset %} {% tab id="Request" %} The following `CalculateOrder` request defines the discount `(ANNI-SALE-5-USD)` to be applied to all the items: ```` {% /tab %} {% tab id="Response" %} In the response, the $5.00 discount is distributed across the item totals, in proportion to the $116.00 subtotal for the order. {% table %} * Item * Item total * % of $116.00 * Contribution to discount --- * Biscuits * $30.00 * 25.86% * $1.29 --- * Sweater * $50.00 * 43.10% * $2.16 --- * Rawhide * $36.00 * 31.03% * $1.55 {% /table %} The total `discount_money` for the order is $5.00. When subtracted from the $116.00 item total, the resulting `net_amount_due_money` is $111.00. ``` { "order": { ... "line_items": [ { ... "quantity": "2", "name": "Dog Biscuits - Chicken Flavor", "base_price_money": { "amount": 1500, "currency": "USD" }, "gross_sales_money": { "amount": 3000, "currency": "USD" }, ... "total_discount_money": { "amount": 129, "currency": "USD" }, "total_money": { "amount": 2871, "currency": "USD" }, ... "applied_discounts": [ { ... "discount_uid": "GLOBAL-SALES-5-DOLLARS-OFF", "applied_money": { "amount": 129, "currency": "USD" } } ], ... }, { ... "quantity": "1", "name": "Handmade Sweater - Blue", "base_price_money": { "amount": 5000, "currency": "USD" }, "gross_sales_money": { "amount": 5000, "currency": "USD" }, ... "total_discount_money": { "amount": 216, "currency": "USD" }, "total_money": { "amount": 4784, "currency": "USD" }, ... "applied_discounts": [ { ... "discount_uid": "GLOBAL-SALES-5-DOLLARS-OFF", "applied_money": { "amount": 216, "currency": "USD" } } ], ... }, { ... "quantity": "3", "name": "Chewy Rawhide - Beef Flavor", "base_price_money": { "amount": 1200, "currency": "USD" }, "gross_sales_money": { "amount": 3600, "currency": "USD" }, ... "total_discount_money": { "amount": 155, "currency": "USD" }, "total_money": { "amount": 3445, "currency": "USD" }, ... "applied_discounts": [ { ... "discount_uid": "GLOBAL-SALES-5-DOLLARS-OFF", "applied_money": { "amount": 155, "currency": "USD" } } ], "item_type": "ITEM" } ], "discounts": [ { "uid": "GLOBAL-SALES-5-DOLLARS-OFF", "name": "Global Sales - $5 off", "amount_money": { "amount": 500, "currency": "USD" }, "applied_money": { "amount": 500, "currency": "USD" }, "type": "FIXED_AMOUNT", "scope": "ORDER" } ], ... "total_discount_money": { "amount": 500, "currency": "USD" }, ... "total_money": { "amount": 11100, "currency": "USD" }, ... "net_amounts": { "total_money": { "amount": 11100, "currency": "USD" }, ... "discount_money": { "amount": 500, "currency": "USD" }, ... }, "net_amount_due_money": { "amount": 11100, "currency": "USD" } } } ``` {% /tab %} {% /tabset %} {% /accordion %} {% accordion %} {% slot "heading" %} ## Item catalog pricing rule discount {% /slot %} The owners of Raphael's Puppy-Care Emporium have decided to offer a Buy One, Get One Free discount to motivate customers to buy combinations of dog biscuit items. To expedite the checkout process, they set up a pricing rule in their catalog to [automatically apply discounts](catalog-api/cookbook/auto-apply-discounts). On every order, they add the [pricing_options](https://developer.squareup.com/reference/square/objects/Order#definition__property-pricing_options) attribute and set `auto_apply_discounts`. That's all they need to do. When set, any order that contains a catalog item that matches a price rule is automatically discounted. {% tabset %} {% tab id="Request" %} The following example shows an order for two cases of dog biscuits. The details of the line item are taken from the [CatalogItemVariation](https://developer.squareup.com/reference/square/objects/CatalogItemVariation) referenced by `catalog_object_id`. ```` {% /tab %} {% tab id="Response" %} Because Raphael's Puppy-Care Emporium is giving away a package of chewy rawhide for every two cases of biscuits purchased, the Order is automatically updated with the Buy One, Get One Free discount defined by the catalog as shown in this response: ``` { "order":{ "id":"5FLV8dgGYHgRdrE4XOR9W8RMxh4F", "location_id":"7WQ0KXC8ZSD90", "line_items":[ { "uid":"PpAcZ9GNazqgGpy99BHbUC", "catalog_object_id":"K5NRPU4HXO6O5RFFHLEW3TI2", "quantity":"1", "name":""Chewy Rawhide", "variation_name":"Chewy Rawhide - Beef Flavor", "base_price_money":{ "amount":500, "currency":"USD" }, "total_discount_money":{ "amount":500, "currency":"USD" }, "applied_discounts":[ { "uid":"ApDUTXKYyDukeiA98cG6mD", "discount_uid":"a5nircWuDBWzPBh797O5SD", "applied_money":{ "amount":500, "currency":"USD" } } ], "item_type":"ITEM" }, { "uid":"PpAcZ9GNazqgGpy99BHbUC", "catalog_object_id":"RZNRPU4HXO6O5ROGHLEW3TI2", "quantity":"2", "name":""Dog Biscuits", "variation_name":"Dog Biscuits - Beef Flavor", "base_price_money":{ "amount":1500, "currency":"USD" }, "item_type":"ITEM" } ], "discounts":[ { "uid":"a5nircWuDBWzPBh797O5SD", "catalog_object_id":"FJYAGNWCJSX42774FCLQZ25Z", "name":"BOGO", "percentage":"100.0", "applied_money":{ "amount":"500, "currency":"USD" }, "type":"FIXED_PERCENTAGE", "scope":"LINE_ITEM", "pricing_rule_id":"TL3AYTOI4DB4HYTL2WK3QJ6J" } ], "total_money":{ "amount":3000, "currency":"USD" }, "pricing_options":{ "auto_apply_discounts":true } } } ``` In this example, the chewy rawhide line item has an `applied_discount` attribute to indicate that it's the free item, while the two cases of biscuits are sold at the regular price. The `discounts` attribute on the order details the discount given on the order and references the pricing rule applied from the catalog. {% /tab %} {% /tabset %} {% /accordion %} ## See also * [Order Price Adjustments](orders-api/price-adjustments) * [Order Service Charges](orders-api/service-charges) * [Order Taxes](orders-api/taxes) * [Redeem Loyalty Points for a Discount](loyalty-api/walkthrough1/redeem-points) --- # Configure the Mobile Payments SDK for Square Stand or Square Kiosk > Source: https://developer.squareup.com/docs/mobile-payments-sdk/ios/square-stand > Status: PUBLIC > Languages: All > Platforms: iOS Configure the Mobile Payments SDK on iOS to use Square Stand or Square Kiosk to take card payments. **Applies to:** [Mobile Payments SDK - iOS](https://developer.squareup.com/docs/sdk/mobile-payments/ios) {% subheading %}Learn how to configure your Mobile Payments SDK iOS application to work with Square Stand and Square Kiosk.{% /subheading %} {% toc hide=true /%} ## Requirements and limitations You need to [install the Mobile Payments SDK](mobile-payments-sdk/ios#1-install-the-sdk-and-dependencies) and [authorize your application](mobile-payments-sdk/ios/configure-authorize) to take payments. {% aside type="info" %} Other than Square Readers, the Mobile Payments SDK cannot talk to any printers, cash drawers, barcode scanners, or other peripherals connected through Square Stand or Square Kiosk. {% /aside %} ## Update your Info.plist file for Square Stand To use [Square Stand](https://squareup.com/stand) or [Square Kiosk](https://squareup.com/us/en/hardware/kiosk) with your Mobile Payments SDK application, add the following key-value pairs to your `Info.plist` file. The SDK automatically detects whether a Square Stand or Square Kiosk is connected and uses it to accept card payments. Key | Values ----| ------ [UISupportedExternalAccessoryProtocols](https://developer.apple.com/library/content/documentation/General/Reference/InfoPlistKeyReference/Articles/iPhoneOSKeys.html#//apple_ref/doc/uid/TP40009252-SW4) | `com.squareup.s020`{% line-break /%}`com.squareup.s025`{% line-break /%}`com.squareup.s089`{% line-break /%}`com.squareup.protocol.stand` {% aside type="warning" %} Before you can submit an application using Square Stand or Square Kiosk to the Apple App Store, Square must notify Apple that your application is authorized to work with Square Stand or Square Kiosk. This process might take several weeks to complete. [Contact us](https://docs.google.com/forms/d/e/1FAIpQLSe5X3KEGZcwH_79t7jcywK9Q_sI7cw9ZHTzpuURjZQKIwvr0g/viewform) for assistance. {% /aside %} ## See also * [Build on iOS](mobile-payments-sdk/ios) --- # Migrate from the Reader SDK > Source: https://developer.squareup.com/docs/mobile-payments-sdk/migrate > Status: PUBLIC > Languages: All > Platforms: iOS, Android Learn how to migrate applications from the Reader SDK to use the Mobile Payments SDK. **Applies to:** [Mobile Payments SDK - Android](https://developer.squareup.com/docs/sdk/mobile-payments/android) | [Mobile Payments SDK - iOS](https://developer.squareup.com/docs/sdk/mobile-payments/ios) | [Mobile Authorization API](mobile-authz/what-it-does) | [OAuth API](oauth-api/overview) | [Payments API](payments-refunds) | [Orders API](orders-api/what-it-does) {% subheading %}Learn how to migrate applications from the Reader SDK to use the Mobile Payments SDK.{% /subheading %} {% toc hide=true /%} ## Overview The Mobile Payments SDK is the successor of the Reader SDK, providing a simple and PCI-compliant payment flow for iOS and Android applications. Developers should migrate their Reader SDK applications to the Mobile Payments SDK to benefit from new features and ensure continued support **before the retirement of the Reader SDK on December 31, 2025**. The following sections cover the major differences between the Reader SDK and the Mobile Payments SDK. When migrating your application, you can also reference the Mobile Payments SDK sample applications for [iOS](https://github.com/square/mobile-payments-sdk-ios) and [Android](https://github.com/square/mobile-payments-sdk-android). {% aside type="info" %} When migrating or upgrading to the Mobile Payments SDK **version 2.1 or above**, you are required to submit an application signature to Square prior to taking production payments. See the instructions for [iOS](mobile-payments-sdk/ios#application-signature) and [Android](mobile-payments-sdk/android#application-signature). {% /aside %} ## OAuth authentication The Reader SDK requires a mobile authorization code generated with the Mobile Authorization API to authorize the SDK, in addition to the standard OAuth flow. In contrast, the Mobile Payments SDK doesn't require a mobile authorization code, only the standard [PKCE OAuth flow](oauth-api/overview#pkce-flow). The Mobile Authorization API isn't required to use the Mobile Payments SDK. When a seller signs in to Square using your [authorization URL](oauth-api/create-urls-for-square-authorization) and approves your authorization request, your redirect URL receives the authorization response containing an authorization code. This code is used to call the `ObtainToken` endpoint, which returns the Square seller's `access_token` in the response. Use this access token with the Mobile Payments SDK `AuthorizationManager.authorize` method and when calling other Square APIs. To learn more about the OAuth workflow, see [OAuth API](oauth-api/overview). ## Payments, not transactions The Mobile Payments SDK is built on the [Payments API](payments-refunds), enabling a comprehensive integration with the rest of the Square Developer platform. In contrast, the Reader SDK is built on the now deprecated Transactions API, which shouldn't be used moving forward. Working with payments instead of transactions allows you to benefit from all the capabilities offered by this and other APIs, including: * Collecting developer [application fees](payments-api/take-payments-and-collect-fees) (a portion of each payment your application processes using the Mobile Payments SDK). * The [delayed capture of payments](payments-api/take-payments/card-payments/delayed-capture) and a configurable delay duration before completing or voiding a payment. * Adding tips, discounts, and taxes using the [Orders API](orders-api/what-it-does). * Associating a payment with a `reference_id` or `team_member_id`. For more information about modifying your application to use payments instead of transactions, see [Migrate from the Transactions API](payments-api/migrate-from-transactions-api). ## Reader management and settings screen Another change from the Reader SDK is the addition of programmatic reader management in the Mobile Payments SDK. You can use the `ReaderManager` to pair readers and get a list of readers connected to the mobile device running your application. The `ReaderInfo` class provides details about connected readers such as model, battery percentage, serial number, and card entry methods. You can use this class to create custom screens to display information about the status of readers to application users or use a Square-provided settings screen for quick integration. ## Store a card on file The Reader SDK includes a built-in workflow for saving a card on file. The Mobile Payments SDK relies on the [Cards API](https://developer.squareup.com/reference/square/cards-api) to save a card to a customer's profile. To store a card on file with the Mobile Payments SDK: 1. Authorize a payment with a credit card. This payment can be [delayed and canceled later](mobile-payments-sdk/ios/take-payments#delay-the-capture-of-payments) if you don’t want to charge the customer. 2. Note the `payment_id` value. 3. Use the `CreateCard` endpoint to save the card on file. For more information, see [Create a Card on File from a Payment ID](cards-api/walkthrough/card-from-payment-id#step-3-create-a-card-on-file-using-the-payment-id-as-the-source). ## Split tender payments To take multiple payments or accept different forms of payment on a single order, your application must take each payment separately with the Mobile Payments SDK. You should build your own checkout flow UI to give buyers the option of split tender payments, create separate `PaymentParameters` for each payment, and then make individual calls to `PaymentManager.startPayment()` (iOS) or `PaymentManager.startPaymentActivity()` (Android). If you're using the [Orders API](https://developer.squareup.com/reference/square/orders-api) and want to split a payment for an order, each payment made with the Mobile Payments SDK must include the `orderID` in the `PaymentParameters` and `autocomplete` must be set to `false`. To complete the payments, call the [PayOrder](https://developer.squareup.com/reference/square/orders-api/pay-order) endpoint, specifying each of the payment IDs. For more information, see [Pay for Orders](orders-api/pay-for-orders). ## Tipping Tips can be added to a payment before or after authorization by including an optional `tipMoney` value in the payment parameters or by calling the [UpdatePayment](https://developer.squareup.com/reference/square/payments-api/update-payment) endpoint and setting `tip_money` prior to completing a delayed payment. The Mobile Payments SDK doesn't include a built-in tipping UI, so you should build your own tipping UI for your application. ## Signature collection Signatures aren't required for inserted, tapped, or swiped card payments. The Mobile Payments SDK doesn't include a signature collection workflow. ## Receipts Your application must provide buyers the option to receive a digital or printed receipt. Receipts aren't sent directly by Square. [You can generate receipts for customers](mobile-payments-sdk/ios/take-payments#receipts) using `cardDetails` from the SDK's payment response or send customers a link to the Square-generated `receipt_url`, found in the Square `Payment` object. This URL is only present on `COMPLETED` payments. --- # Mobile Payments SDK > Source: https://developer.squareup.com/docs/mobile-payments-sdk > Status: PUBLIC > Languages: All > Platforms: All Use the Mobile Payments SDK to accept in-person payments using an embedded Square payment flow in iOS and Android applications. **Applies to:** [Mobile Payments SDK - Android](https://developer.squareup.com/docs/sdk/mobile-payments/android) | [Mobile Payments SDK - iOS](https://developer.squareup.com/docs/sdk/mobile-payments/ios) | [Reader SDK](reader-sdk/what-it-does) | [Payments API](payments-refunds) | [Orders API](orders-api/what-it-does) | [OAuth API](oauth-api/overview) {% subheading %}Use the Mobile Payments SDK to accept in-person payments in iOS and Android applications.{% /subheading %} {% toc hide=true /%} ![mpsdk-splash](//images.ctfassets.net/1nw4q0oohfju/3sGJ10fdEwfpOQhinJyBuD/47519cd29463975c21124262c5c5f3cd/mpsdk-splash.png) ## Overview The Mobile Payments SDK lets developers accept in-person payments using an embedded Square payment flow in iOS and Android applications. Sellers can take mobile payments using a Square Reader or Square Stand. The Mobile Payments SDK is the successor of the Reader SDK and offers the following benefits: * **Offline payments** - Take and store payments locally on a mobile device. Offline payments allows you to build reliability into your application experience so sellers can keep taking payments even if devices lose their network connection. For more information, see [Offline Payments for Android](mobile-payments-sdk/android/offline-payments) or [Offline Payments for iOS](mobile-payments-sdk/ios/offline-payments). * **Mobile payment integration with the [Payments API](payments-refunds)** - Payments taken with the Mobile Payments SDK are linked to Square `Payment` objects to enable: * The delayed capture of payments. * Partial authorization, which is used to split payments across multiple credit cards. * A configurable delay duration before voiding an authorization. * Collecting application fees. * Associating a payment with reference ID, team member ID, or location ID. * Accepting cash payments. * **Mobile payment integration with the [Orders API](orders-api/what-it-does)** - Payments taken with the Mobile Payments SDK can be linked to Square `Order` objects to enable: * Itemization, where a payment is separated into different line items representing `Catalog` objects. * Applying price modifications such as taxes, discounts, or service charges on items. * Order-ahead functionality and sending SDK payments to Square Point of Sale for fulfillment. * **Sandbox support** - Authorize the Mobile Payments SDK with a Square Sandbox account to test your mobile payment integration with fake payments. You can simulate a virtual reader device to take test payments in the Square Sandbox without a physical card reader. * **Programmatic reader management** - Programmatically pair card readers and monitor their battery level, state, and available payment methods using the SDK `ReaderManager`. * **Sample applications** – Square provides Mobile Payments SDK sample applications for [iOS](https://github.com/square/mobile-payments-sdk-ios) (written in Swift using SwiftUI) and [Android](https://github.com/square/mobile-payments-sdk-android) (written in Kotlin using Compose) to demonstrate a basic implementation of initialization, authorization, requesting permissions, and taking payments in the Sandbox and in production. ## Requirements and limitations * The Mobile Payments SDK is currently available for accounts based in the United States, Canada, the United Kingdom, and Australia. * Using the Mobile Payments SDK to implement payment solutions in unattended terminals or unattended kiosks is strictly prohibited. For example, an outdoor vending machine is unattended because it can be accessed by users outside of normal business hours and might not be in the line of sight of a seller or worker. * The Mobile Payments SDK can only be used to implement payment solutions in attended terminals or attended kiosks. A terminal or kiosk is considered attended if all the following conditions are met: * It cannot be physically accessed by buyers outside the seller's normal business hours. * It's in the line of sight of the seller or one of the seller's workers. * The onsite seller and workers are trained to use the payment solution and are available to assist and support customers with completing transactions. * Card issuers impose transaction limits that might trigger a cardholder verification method (CVM) when a transaction or cumulative limit is reached. These limits vary by payment method and by country and region. Verification is handled in the Mobile Payments SDK by entering a personal identification number (PIN) during the payment flow when required by the card issuer. * When using Mobile Payments SDK version 2.1 or later, you must provide an application signature to Square before taking payments in production. Learn how to do so for [Android](mobile-payments-sdk/android#application-signature) and [iOS](mobile-payments-sdk/ios#application-signature). ## Mobile Payments SDK components The Mobile Payments SDK is divided into four managers that provide specific areas of functionality: * **Authorization** - The `AuthorizationManager` handles authorizing and deauthorizing your application to process payments on behalf of a Square seller using an [OAuth access token](oauth-api/what-it-does) and a [location ID](locations-api). OAuth access tokens are used to get authenticated and scoped access to any Square account. These tokens should be used even if you only plan to use the Mobile Payments SDK with your own Square account. For more information, see [OAuth sample applications](sample-apps#oauth-samples). * **Reader pairing and management** - The `ReaderManager` allows you to pair card readers, listen for reader status updates, and perform actions on reader devices. * **Payments** - The `PaymentManager` handles the payment flow for your application, which includes determining the available payment methods, taking payments, and accessing payments taken offline. * **Settings** – The `SettingsManager` provides an optional device management UI that you can use in your application and provides details about the current SDK version. ## OAuth permissions At minimum, your application must have the following permissions to use the Mobile Payments SDK: * `MERCHANT_PROFILE_READ` * `PAYMENTS_WRITE` * `PAYMENTS_WRITE_IN_PERSON` * To collect application fees, you must also have `PAYMENTS_WRITE_ADDITIONAL_RECIPIENTS` permission. * To add credit card surcharges, you must also have `ITEMS_READ` permission. Depending on its functionality and the other Square APIs used by your application, you might need to request other OAuth permissions for mobile payment integration from sellers. To learn which permissions are required for each API, see [Square OAuth Permissions Reference](oauth-api/square-permissions). {% aside type="important" %} Square OAuth access tokens expire after 30 days. Before expiration, applications must generate a new OAuth access token using the refresh token received when the authorization was first granted. {% /aside %} ## Hardware devices and capabilities The Mobile Payments SDK can be used to take payments with any version of Square Reader or Square Stand. Offline payment support is limited to the two most recent versions of Square Reader for contactless and chip, Square Reader for magstripe, and Square Stand second generation. ### Identify your Square Reader version All Square Readers have a 16-digit serial number. Each Square Reader lists its version number in the 5th to 8th digits of the serial number like this XXXX**MMMM**XXXXXXXX. When you locate the serial number, refer to the **MMMM sequence** in the serial number. {% table %} * Product name * Version * MMMM sequence * Charging port * Offline payments support --- * Square Reader for contactless and chip (2nd generation) * Version 1 (v1) * S171, S172 * USB-C * ✅ --- * Square Reader for contactless and chip (1st generation) * Version 3 (v3) * S109, S130, S146, S148, S192, S193 * Micro USB * ✅ --- * Square Reader for contactless and chip (1st generation) * Version 2 (v2) * S084, S095, S098, S103, S127 * Micro USB * ⛔️ --- * Square Reader for contactless and chip (1st generation) * Version 1 (v1) * S070, S092 * Micro USB * ⛔️ --- * Square Reader for magstripe * Version 1 (v1) * N/A * N/A * ✅ {% /table %} ### Identify your Square Stand version Each Square Stand lists its model number in the 5th to 8th digits of the serial number like this XXXX**MMMM**XXXXXXXX. When you locate the serial number, refer to the **MMMM sequence** in the serial number. {% table %} * Product name * Serial number * MMMM sequence * Color * Hardware * Offline payments support --- * Square Stand (2nd generation) * 16-digit serial number * S176, S155 * Black & White * Built-in contactless and chip reader * ✅ --- * Square Stand (1st generation) * 16-digit or 14-digit serial number * S142, S015, S020, S021, S067, S025, S068, S089, S089 * White * Built-in magstripe reader * ✅ {% /table %} The `ReaderManager` can be used to access the device serial number programmatically to determine the device version. A payment attempted with an offline flow on unsupported hardware results in an error. ### Update policy Developers should make their best efforts to update their working version of the Mobile Payments SDK as soon as new versions are available. Square supports a given version of the Mobile Payments SDK for 2 years following its GA (General Availability) release, unless an update is required to address critical security updates or vulnerabilities or as otherwise deemed necessary by Square. If it becomes necessary to discontinue support for an SDK version before the 2-year life expectancy, Square contacts you in advance using the email address associated with your Square account. ## See also * [Build on Android](mobile-payments-sdk/android) * [Build on iOS](mobile-payments-sdk/ios) --- # Build on iOS > Source: https://developer.squareup.com/docs/mobile-payments-sdk/ios > Status: PUBLIC > Languages: Swift, Objective C > Platforms: iOS **Applies to:** [Mobile Payments SDK - iOS](https://developer.squareup.com/docs/sdk/mobile-payments/ios) | [Payments API](payments-refunds) | [OAuth API](oauth-api/overview) {% subheading %}Learn how to build a secure in-person payment solution for iOS devices with the Mobile Payments SDK.{% /subheading %} {% line-break /%} {% toc hide=true /%} ## Overview The Mobile Payments SDK offers developers a secure way to integrate the Square checkout flow into their mobile applications, and accept in-person payments with a Square Reader or Square Stand. There are four steps required to take your first payment using the Mobile Payments SDK: 1. [Install and configure the Mobile Payments SDK in your Xcode application](#install-sdk) 2. [Authorize the Mobile Payments SDK](mobile-payments-sdk/ios/configure-authorize#authorize) 3. [Pair a card reader](mobile-payments-sdk/ios/pair-manage-readers) 4. [Take a payment](mobile-payments-sdk/ios/take-payments) For an example implementation, download the [Mobile Payments SDK sample application](https://github.com/square/mobile-payments-sdk-ios), written in Swift using SwiftUI. ## Requirements and limitations To build with the Mobile Payments SDK for iOS, the following must be true: * You have a Square account enabled for payment processing. If you haven't enabled payment processing on your account (or you're not sure), visit [squareup.com/activation](https://squareup.com/activation). * Your Square account is based in the United States, Canada, the United Kingdom, or Australia. If you're developing from outside these areas, you can take test payments in the Square Sandbox, but cannot take production payments. * You're using Xcode 15.1+. * You've set your Xcode iOS deployment target to iOS 16+. * You have a Square application ID. You can find your application ID on the [Developer Console](https://developer.squareup.com/apps). * Your application must [request an OAuth access token](build-basics/access-tokens#get-an-oauth-access-token) to authorize Square sellers using your application to take payments. * Your version of the Mobile Payments SDK adheres to the Square update policy. To limit risk to developers and their users, Square enforces an [update policy](mobile-payments-sdk#update-policy) requiring developers keep their version of the Mobile Payments SDK current. * When using the Mobile Payments SDK version 2.1 or later, you must provide an [application signature](#application-signature) to Square before taking payments in production. * You're generally familiar with developing applications on iOS. If you're new to iOS development, you should visit the [Apple Training Center](https://training.apple.com/us/en) before continuing. ## Privacy permissions The Mobile Payments SDK requires that each user grant access to their device's current location while using your application. This ensures that payments are taken in a Square-supported country and that each payment is associated with a specific seller location. At this time, the Mobile Payments SDK can only be used to take production payments in the United States, Canada, the United Kingdom, or Australia. Bluetooth must be enabled to take payments with a contactless and chip reader and microphone access must be granted to take payments with a magstripe reader. Include the following privacy key/value pairs in your application's `Info.plist` file: {% table %} * Key {% width="300px" %} * Description --- * [NSBluetoothAlwaysUsageDescription](https://developer.apple.com/documentation/bundleresources/information_property_list/nsbluetoothalwaysusagedescription) * Square uses Bluetooth to connect and communicate with Square readers and compatible accessories. --- * [NSLocationWhenInUseUsageDescription](https://developer.apple.com/documentation/bundleresources/information_property_list/nslocationwheninuseusagedescription) * Square needs to know where transactions take place to reduce risk and minimize payment disputes. --- * [NSMicrophoneUsageDescription](https://developer.apple.com/documentation/bundleresources/information_property_list/nsmicrophoneusagedescription) * Some Square readers use the microphone to communicate payment card data to your device. {% /table %} {% aside type="info" %} Some additional settings are required to [use the Mobile Payments SDK with Square Stand](mobile-payments-sdk/ios/square-stand). {% /aside %} ## Device compatibility The Mobile Payments SDK isn't compatible with custom devices from OEMs that violate Square's security rules or on devices that grant root access to the mobile device operating system code and kernel. These devices cannot connect to a contactless and chip reader. The following additional considerations apply when trying to run the SDK on custom devices: * The Mobile Payments SDK isn't supported for rooted or jailbroken devices. * The Mobile Payments SDK cannot run on custom operating systems. * Square prohibits using any software that provides the ability to record or capture screen data or that results in elevated privileges. * [Verify that your device is supported](https://squareup.com/us/en/compatibility?platform=iOS&brand=Apple) for Square readers. * Supported OS versions should be the latest or as close to the latest as possible. * Review Square's support window for the OS version and confirm support for the compilation target version and the runtime version: The compilation target currently supports iOS versions 15 and later. ## Application signature Developers using the Mobile Payments SDK version 2.1 or later are required to submit an application signature to Square prior to taking payments in production. This signature is an extra layer of security that ensures that your application hasn't been tampered with or otherwise modified by a user. To submit an application signature, log in to the Developer Console and choose your application. In the left pane, choose **Mobile Payments SDK**, and then choose **Add Signature**. You must provide your [bundle ID](https://developer.apple.com/documentation/appstoreconnectapi/bundle-ids) and [team ID](https://developer.apple.com/help/account/manage-your-team/locate-your-team-id/) to Square. ![The Mobile Payments SDK page on the Developer Console, which prompts users to create application signatures.](//images.ctfassets.net/1nw4q0oohfju/zwlje3EYsbdgTannaGkGJ/fa1087e3218e738fc4ae95ce829608c0/signatures-empty.png) ![The Developer Console flow for adding an iOS application signature for a Mobile Payments SDK application. The user is asked for a Bundle ID and Team ID.](//images.ctfassets.net/1nw4q0oohfju/75xMMTSNStcXuKHqx4fix6/314bef321e478590f60b4eb89175d964/signatures-ios.png) If you publish a single mobile application used by multiple Square sellers using the same Square application id, you only need to submit one signature per platform for that application. Any debug builds you create that take payments in production also require their own application signature. The **Mobile Payments SDK** page in the Developer Console lists each signature that you've submitted. If an application signature is deleted, the application is no longer able to take payments, but you can submit a new signature for your application at any time. {% aside type="info" %} If you're developing with the Mobile Payments SDK's [Flutter](mobile-payments-sdk/flutter) or [React Native](mobile-payments-sdk/react-native) plugins and publishing both an Android and iOS application, you must submit a signature for each application. {% /aside %} ## Data privacy consent To comply with data privacy laws, the Mobile Payments SDK requires merchants in Canada, the United Kingdom, and the European Union to grant or deny consent for performance and analytics tracking. Your application must handle consent appropriately for merchants in these regions using the `TrackingConsentManager` protocol. Before processing payments, check the current state of consent for the authorized merchant. {% tabset %} {% tab id="Swift" %} ```swift let consentState = trackingConsentManager.getTrackingConsentState() ``` {% /tab %} {% tab id="ObjectiveC" %} ```objectivec ConsentState consentState = [self.trackingConsentManager getTrackingConsentState]; ``` {% /tab %} {% /tabset %} The possible states are: * `pending` - Consent has not yet been provided * `granted` - Merchant has granted consent for tracking * `denied` - Merchant has denied consent for tracking * `notRequired` - Merchant is in a region where consent is not required for tracking When your application prompts merchants for consent, log their response using `setTrackingConsentStateIsGranted(_ isGranted: Bool)`. {% tabset %} {% tab id="Swift" %} ```swift trackingConsentManager.setTrackingConsentStateIsGranted(true) // or false ``` {% /tab %} {% tab id="ObjectiveC" %} ```objectivec [self.trackingConsentManager setTrackingConsentStateIsGranted:YES]; // or NO ``` {% /tab %} {% /tabset %} If you don't implement consent handling via the API, the SDK automatically displays a consent dialog modal to users in regions where consent is required. This modal: * appears on the first payment attempt or when the user first opens the [settings screen](mobile-payments-sdk/ios/pair-manage-readers#settings-manager). * is shown only once per application per device. * is not displayed to users outside required regions. Listen for changes to `trackingConsentState` by conforming to the `TrackingConsentStateObserver` protocol. {% aside type="important" %} If you use a custom UI for your payment prompt screen and have not provided your user's consent status with the API, the SDK returns an error from `startPayment`. You must handle consent before initiating any payment when using a custom payment UI. {% /aside %} ## Quickstart Get started with the Mobile Payments SDK by configuring your iOS application and taking a test payment in the Square Sandbox. Use the following steps to set up and test the Mobile Payments SDK in your own application. You can also download the [Mobile SDK sample application](https://github.com/square/mobile-payments-sdk-ios) (written in Swift) to see an example of initialization, authorization, requesting permissions, and taking payments in production or the Square Sandbox. ![Screenshots of the Mobile Payments SDK iOS sample application, showing the purchase screen and permission selection screen.](//images.ctfassets.net/1nw4q0oohfju/5SHkoLQTaniLscxdpKFGec/6f7dc45e8620b2e18b2edf1514e3a3ca/mobile-payments-sdk-ios.png) {% anchor id="install-sdk" /%} ## 1. Install the SDK and dependencies ### Option A: Install with Swift Package Manager Install the Mobile Payments SDK with Swift Package Manager by following these steps in your Xcode project: 1. Choose **File**, and then choose **Add Package Dependencies**. 2. Enter the repository URL: **https://github.com/square/mobile-payments-sdk-ios**. 3. Choose the **Exact Version** dependency rule and specify the version as `2.4.0`. 4. Ensure the **SquareMobilePaymentsSDK** product is added to your target. 5. Optionally, you can add the **MockReaderUI** product to your target to simulate a physical reader when one isn't present in a Sandbox environment. ![An Xcode screenshot showing the Mobile Payments SDK and the Mock Reader UI added to the application target.](//images.ctfassets.net/1nw4q0oohfju/4dgYKXxerNgPnwwXF7ln5a/49c46f668c28950b41e92c3b7e149059/xcode.png) ### Option B: Install with Cocoapods Install the Mobile Payments SDK with [Cocoapods](https://guides.cocoapods.org/using/getting-started.html) by adding the following to your Podfile: ``` use_frameworks! pod "SquareMobilePaymentsSDK", "~> 2.4.0" # To use a simulated reader device to take sandbox payments, add the optional MockReaderUI: pod "MockReaderUI", "~> 2.4.0", configurations: ['Debug'] ``` ## 2. Add a run script in the build phases for your target 1. On the **Build Phases** tab for your application target, choose the **+** button (at the top left of the pane). 2. Choose **New Run Script Phase**. The new run script phase should be the last build phase. 3. Paste the following into the editor panel of the new run script: ```shell FRAMEWORKS="${BUILT_PRODUCTS_DIR}/${FRAMEWORKS_FOLDER_PATH}" "${FRAMEWORKS}/SquareMobilePaymentsSDK.framework/setup" ``` {% aside type="important" %} Ensure that the new run script phase is the last build phase. Otherwise, the build fails. {% /aside %} For the run script to execute correctly, your application must disable user script sandboxing. 1. On the **Build Settings** tab for your application target, find the **Build Options** section. 2. Update the **User Script Sandboxing** setting to **No** for all build configurations. ![An Xcode screenshot showing the Build Options for a mobile application: the "User Script Sandboxing" option is set to "No".](//images.ctfassets.net/1nw4q0oohfju/fZZttntcmUvGDDAlkQCwI/152dec81698ec8e8e3f2ee715cafd51b/xcode_build_options.png) [Context: Swift, iOS] ## 3. Initialize the Mobile Payments SDK Before taking a payment or attempting any other operation with the Mobile Payments SDK, you must initialize it using the `initialize()` method and your Square application ID in your `AppDelegate`'s `didFinishLaunchingWithOptions` method. To get your application ID, sign in to the [Developer Console](https://developer.squareup.com/apps) and choose your application. If you don't have an application yet, see [Get Started](square-get-started) for steps to create a Square application. Your application opens to the **Credentials** page. This page contains the Square application ID used to initialize the Mobile Payments SDK. {% aside type="info" %} To test the Mobile Payments SDK in the Square Sandbox with mock readers and mock payments, switch the toggle at the top of the Developer Console to **Sandbox** to show your Sandbox credentials and initialize the SDK with your Sandbox application ID. To start taking production payments, you must initialize the Mobile Payments SDK again with your production application ID. {% /aside %} ```swift import UIKit import SquareMobilePaymentsSDK @UIApplicationMain class AppDelegate: UIResponder, UIApplicationDelegate { func application(_ application: UIApplication, didFinishLaunchingWithOptions launchOptions: [UIApplication.LaunchOptionsKey: Any]? = nil) -> Bool { MobilePaymentsSDK.initialize( applicationLaunchOptions: launchOptions, squareApplicationID: "<#your_square_application_id#>" ) return true } } ``` ## 4. Authorize the Mobile Payments SDK The `AuthorizationManager` handles authorization for the Mobile Payments SDK. Call the `authorize()` method with an [OAuth access token](oauth-api/overview) and location ID. If you're testing your application in the [Square Sandbox](devtools/sandbox/overview), you can use your personal access token and location ID from the **Sandbox** tab in the Developer Console. {% aside type="important" %} Don't deploy an application into production that contains your personal access token. For a secure authorization implementation in production, you should implement OAuth instead of using a personal access token. {% /aside %} When authorization completes, the `AuthorizeCompletionHandler` provides the result of the authorization, including any [errors](mobile-payments-sdk/ios/handling-errors). ```swift import SquareMobilePaymentsSDK class <#YourViewController#>: UIViewController { func authorizeMobilePaymentsSDK(accessToken: String, locationID: String) { guard MobilePaymentsSDK.shared.authorizationManager.state == .notAuthorized else { return } MobilePaymentsSDK.shared.authorizationManager.authorize( accessToken: accessToken, locationID: locationID) { error in if let authError = error { // Handle auth error print("error: \(authError.localizedDescription)") return } print("Square Mobile Payments SDK successfully authorized.") } } } ``` {% anchor id="request-location-bluetooth" /%} ## 5. Request location and Bluetooth permissions The Mobile Payments SDK requires the user to grant access to the device's current location while using your application. This permission is required for payment, so you should only start a payment if you've determined that location access has been granted. ```swift import CoreLocation class <#YourViewController#>: UIViewController { private lazy var locationManager = CLLocationManager() // Call this in your app's lifecycle func requestLocationPermission() { switch CLLocationManager.authorizationStatus() { case .notDetermined: locationManager.requestWhenInUseAuthorization() case .restricted, .denied: print("Show UI directing the user to the iOS Settings app") case .authorizedAlways, .authorizedWhenInUse: print("Location services have already been authorized.") @unknown default: fatalError() } } } ``` To use contactless readers (Square Reader for contactless and chip or Square Stand) with the SDK, you must request Bluetooth permission from users of your application. Use a method similar to the following `requestBluetoothPermissions()` method: ```swift import CoreBluetooth final class <#YourViewController#>: ViewController { private var centralManager: CBCentralManager? // Call this in your app's lifecycle func requestBluetoothPermissions() { guard CBManager.authorization == .notDetermined else { return } centralManager = CBCentralManager( delegate: self, queue: .main, options: nil ) } } extension <#YourViewController#>: CBCentralManagerDelegate { func centralManagerDidUpdateState(_ central: CBCentralManager) { // Check state and prompt for permission if necessary } } ``` {% anchor id="mock-readers" /%} ## 6. Test with mock readers in the Square Sandbox Physical card readers aren't supported in the Square Sandbox. To take test payments, you must simulate a virtual reader with the Mock Reader UI. The Mock Reader UI consists of a floating button that can be dragged anywhere on the screen and persists as you navigate between screens in your application. Instantiate the Mock Reader UI and show the button with `try? self.mockReaderUI?.present()`. ```swift import MockReaderUI private lazy var mockReaderUI: MockReaderUI? = { do { return try MockReaderUI(for: MobilePaymentsSDK.shared) } catch { assertionFailure("Could not instantiate a mock reader UI: \(error.localizedDescription)") } return nil }() try? mockReaderUI?.present() ``` Click the following button to simulate connecting a magstripe reader or a contactless and chip reader to your device. ![The floating button that appears when using the Mobile Payments SDK Mock Reader UI.](//images.ctfassets.net/1nw4q0oohfju/4Fzum30bXvQr6HUnD9TWdc/0cb3606cf3996b1e945f32beff1e9814/floater.png) When mock readers have been connected and you [begin a payment](#begin-payment), click the button again to test your application's payment flow and simulate a swiped, inserted, or tapped card with the mock reader. Choose **Payment details** to select different card brands and payment behaviors (approved or declined) for testing purposes. To hide the mock reader UI in your application, call `self.mockReaderUI?.dismiss()`. {% aside type="info" %} When testing card payment flows, any inserted cards must be removed through the mock reader UI before beginning a new payment. {% /aside %} To pair physical readers for production payments, see [Pair and Manage Card Readers](mobile-payments-sdk/ios/pair-manage-readers). ## 7. Set up a payment The `PaymentManager` handles payments in the Mobile Payments SDK. Prior to starting a payment, you create `PaymentParameters` to represent details of an individual payment and `PromptParameters` to indicate how the payment prompts are presented to the buyer. When setting up a payment, you must conform to the `PaymentManagerDelegate` to [handle results and errors](mobile-payments-sdk/ios/handling-errors) from a payment. If the payment completes successfully, a `Payment` object is returned, which can be accessed on the [Sandbox Square Dashboard](testing/sandbox) or with the [Payments API](https://developer.squareup.com/reference/square/payments-api). If the payment fails, the response contains a `PaymentError`. ### Payment parameters Before beginning a payment, create a `PaymentParameters` object. At a minimum, you must include the payment amount, a [payment attempt ID](mobile-payments-sdk/ios/take-payments#idempotency-and-payment-attempts), and the processing mode, which [determines whether payments can be taken offline](mobile-payments-sdk/ios/offline-payments). For the complete list of payment parameter values and details, see [iOS technical reference](https://developer.squareup.com/docs/sdk/mobile-payments/ios). ### Prompt parameters Each payment must also have `PromptParameters` configured, consisting of a `mode` and `additionalMethods` available to buyers. Square provides a payment prompt screen that displays a UI to buyers prompting them to swipe, insert, or tap their card, depending on the payment options available. To use this screen for your quickstart application, set the `PromptParameters.mode` to `default`. ![ios-mpsdk-prompt](//images.ctfassets.net/1nw4q0oohfju/s32OClWXm5bANH79nZTjm/16de405cfa6f9d1b6cfa514d090b1571/ios-mpsdk-prompt.png) If you create your own custom payment prompt UI by passing `custom` in the `PromptParameters.mode`, use the `availableCardInputMethodsObserver` to update your UI if the available card entry methods change (for example, if a magstripe reader is inserted or removed from the mobile device). {% anchor id="begin-payment" /%} ## 8. Take a payment When you're ready to begin a payment, call `PaymentManager.startPayment()` with the `PaymentParameters` and `PromptParameters` you created for this payment. ```swift import SquareMobilePaymentsSDK class <#YourViewController#>: UIViewController { private var paymentHandle: PaymentHandle? func startPayment() { paymentHandle = MobilePaymentsSDK.shared.paymentManager.startPayment( makePaymentParameters(), promptParameters: PromptParameters( mode: .default, additionalMethods: .all ), from: self, delegate: self ) } func makePaymentParameters() -> PaymentParameters { PaymentParameters( paymentAttemptID: UUID().uuidString, amountMoney: Money(amount: 100, currency: .USD), processingMode: processingMode.onlineOnly ) } } extension <#YourViewController#>: PaymentManagerDelegate { public func paymentManager( _ paymentManager: PaymentManager, didFinish payment: Payment ) { print("Payment Did Finish: \(payment)") } public func paymentManager( _ paymentManager: PaymentManager, didFail payment: Payment, withError error: Error ) { // Handle Payment Failed print("error: \(error.localizedDescription)") } public func paymentManager( _ paymentManager: PaymentManager, didCancel payment: Payment ) { // Handle Payment Canceled } } ``` During each payment, Square takes control of the screen display to ensure that buyer information is handled securely and that the final confirmation of the payment is correctly shown to the buyer. While a payment is in progress, the `UIViewController` passed to `startPayment` must remain presented or pushed until your `PaymentManagerDelegate` receives a callback indicating the payment has completed, failed, or was canceled. After the payment starts, it cannot be canceled by the developer. ![ios-mpsdk-states](//images.ctfassets.net/1nw4q0oohfju/1XNyCdfhj7ZOkwaGYaAyDW/865bae3e45ef905dcb40a5b4ee801840/ios-mpsdk-states.png) If the payment completes successfully, a `Payment` object is returned to your payment callback. This payment can be accessed on the Square Dashboard or with the [Payments API](https://developer.squareup.com/reference/square/payments-api). If the payment fails, the response contains an [error](mobile-payments-sdk/ios/handling-errors). ## Next steps After installing the Mobile Payments SDK and testing your application with test payments in the Square Sandbox, learn more about configuring your application to take production payments: * [Authorize the Mobile Payments SDK](mobile-payments-sdk/ios/configure-authorize#authorize) * [Pair and Manage Card Readers](mobile-payments-sdk/ios/pair-manage-readers) * [Take a Payment](mobile-payments-sdk/ios/take-payments) [Context: Objective C, iOS] ## 3. Initialize the Mobile Payments SDK Before taking a payment or attempting any other operation with the Mobile Payments SDK, you must initialize it using the `initialize()` method and your Square application ID in your `AppDelegate`'s `didFinishLaunchingWithOptions` method. To get your application ID, sign in to the [Developer Console](https://developer.squareup.com/apps) and choose your application. If you don't have an application yet, see [Get Started](square-get-started) for steps to create a Square application. Your application opens to the **Credentials** page. This page contains the Square application ID used to initialize the Mobile Payments SDK. {% aside type="info" %} To test the Mobile Payments SDK in the Square Sandbox with mock readers and mock payments, switch the toggle at the top of the Developer Console to **Sandbox** to show your Sandbox credentials and initialize the SDK with your Sandbox application ID. To start taking production payments, you must initialize the Mobile Payments SDK again with your production application ID. {% /aside %} ```objectivec #import "AppDelegate.h" @import SquareMobilePaymentsSDK; @interface AppDelegate () // … @end @implementation AppDelegate - (BOOL)application:(UIApplication *)application didFinishLaunchingWithOptions:(NSDictionary *)launchOptions { [SQMPMobilePaymentsSDK initializeWithApplicationLaunchOptions:launchOptions squareApplicationID:@"<#your_square_application_id#>"]; return YES; } } ``` ## 4. Authorize the Mobile Payments SDK The `SQMPAuthorizationManager` handles authorization for the Mobile Payments SDK. Call the `authorize()` method with an [OAuth access token](oauth-api/overview) and location ID. If you're testing your application in the [Square Sandbox](devtools/sandbox/overview), you can use your personal access token and location ID from the **Sandbox** tab in the Developer Console. {% aside type="important" %} Don't deploy an application into production that contains your personal access token. For a secure authorization implementation in production, you should implement OAuth instead of using a personal access token. {% /aside %} When authorization completes, the `AuthorizeCompletionHandler` provides the result of the authorization, including any [errors](mobile-payments-sdk/ios/handling-errors). ```objectivec #import @import SquareMobilePaymentsSDK; @interface <#YourViewController#> : UIViewController // … @end @implementation <#YourViewController#> - (void)authorizeMobilePaymentsSDKWithAccessToken:(NSString *)accessToken locationID:(NSString *)locationID { if (SQMPMobilePaymentsSDK.shared.authorizationManager.state != SQMPAuthorizationStateNotAuthorized) { return; } [SQMPMobilePaymentsSDK.shared.authorizationManager authorizeWithAccessToken:accessToken locationID:locationID completion:^(NSError * _Nullable error) { if (error == nil) { NSLog(@"Square Mobile Payments SDK successfully authorized."); } else { // Handle auth error NSLog(@"error: %@", error.localizedDescription); } }]; } @end ``` {% anchor id="request-location-bluetooth" /%} ## 5. Request location and Bluetooth permissions The Mobile Payments SDK requires the user to grant access to the device's current location while using your application. This permission is required for payment, so you should only start a payment if you've determined that location access has been granted. ```objectivec #import #import @interface <#YourViewController#> : UIViewController @property (nonatomic, strong) CLLocationManager *locationManager; - (void)requestLocationPermission; @end @implementation <#YourViewController#> - (instancetype)init { self = [super init]; if (self) { _locationManager = [[CLLocationManager alloc] init]; _locationManager.delegate = self; } return self; } // Call this in your app's lifecycle - (void)requestLocationPermission { CLAuthorizationStatus status = [CLLocationManager authorizationStatus]; switch (status) { case kCLAuthorizationStatusNotDetermined: [self.locationManager requestWhenInUseAuthorization]; break; case kCLAuthorizationStatusRestricted: case kCLAuthorizationStatusDenied: NSLog(@"Show UI directing the user to the iOS Settings app"); break; case kCLAuthorizationStatusAuthorizedAlways: case kCLAuthorizationStatusAuthorizedWhenInUse: NSLog(@"Location services have already been authorized."); break; default: @throw [NSException exceptionWithName:NSInternalInconsistencyException reason:@"Unknown authorization status" userInfo:nil]; } } @end ``` To use contactless readers (Square Reader for contactless and chip or Square Stand) with the SDK, you must request Bluetooth permission from users of your application. Use a method similar to the following `requestBluetoothPermissions` method: ```objectivec #import #import @interface <#YourViewController#> : UIViewController @property (nonatomic, strong) CBCentralManager *centralManager; - (void)requestBluetoothPermissions; @end @implementation <#YourViewController#> // Call this in your app's lifecycle - (void)requestBluetoothPermissions { if (CBManager.authorization == CBManagerAuthorizationNotDetermined) { self.centralManager = [[CBCentralManager alloc] initWithDelegate:self queue:dispatch_get_main_queue() options:nil]; } } - (void)centralManagerDidUpdateState:(CBCentralManager *)central { // Check state and prompt for permission if necessary } @end ``` {% anchor id="mock-readers" /%} ## 6. Test with mock readers in the Square Sandbox Physical card readers aren't supported in the Square Sandbox. To take test payments, you must simulate a virtual reader with the Mock Reader UI. The Mock Reader UI consists of a floating button that can be dragged anywhere on the screen and persists as you navigate between screens in your application. See the following example for how to instantiate and present the Mock Reader UI: ```objectivec @import MockReaderUI; @interface ViewController () @property (strong, nonatomic) SQRDMockReaderUI *mockReaderUI; @end @implementation ViewController - (void)testMockReaderUI { NSError *error = nil; if (self.mockReaderUI == nil) { self.mockReaderUI = [[SQRDMockReaderUI alloc] initFor:SQMPMobilePaymentsSDK.shared error:&error]; if (error != nil) { NSLog(@"Mock Reader init Failed with error: %@", error); } } if (self.mockReaderUI.isPresented == false) { NSLog(@"Mock reader not presented. Calling present"); [self.mockReaderUI presentAndReturnError:&error]; if (error != nil) { NSLog(@"Present Failed with error: %@", error); } } else { NSLog(@"Mock reader already being presented"); } } @end ``` Click the following button to simulate connecting a magstripe reader or a contactless and chip reader to your device. ![The floating button that appears when using the Mobile Payments SDK Mock Reader UI.](//images.ctfassets.net/1nw4q0oohfju/4Fzum30bXvQr6HUnD9TWdc/0cb3606cf3996b1e945f32beff1e9814/floater.png) When mock readers have been connected and you [begin a payment](#begin-payment), click the button again to test your application's payment flow and simulate a swiped, inserted, or tapped card with the mock reader. Choose **Payment details** to select different card brands and payment behaviors (approved or declined) for testing purposes. To hide the mock reader UI in your application, call `[self.mockReaderUI dismiss]`. {% aside type="info" %} When testing card payment flows, any inserted cards must be removed through the mock reader UI before beginning a new payment. {% /aside %} To pair physical readers for production payments, see [Pair and Manage Card Readers](mobile-payments-sdk/ios/pair-manage-readers). ## 7. Set up a payment The `SQMPPaymentManager` handles payments in the Mobile Payments SDK. Prior to starting a payment, you create `SQMPPaymentParameters` to represent details of an individual payment and `SQMPPromptParameters` to indicate how the payment prompts are presented to the buyer. When setting up a payment, you must conform to the `SQMPPaymentManagerDelegate` to [handle results and errors](mobile-payments-sdk/ios/handling-errors) from a payment. If the payment completes successfully, a `Payment` object is returned, which can be accessed on the [Sandbox Square Dashboard](testing/sandbox) or with the [Payments API](https://developer.squareup.com/reference/square/payments-api). If the payment fails, the response contains a `PaymentError`. ### Payment parameters Before beginning a payment, create a `SQMPPaymentParameters` object. At a minimum, you must include the payment amount, a [payment attempt ID](mobile-payments-sdk/ios/take-payments#idempotency-and-payment-attempts), and the processing mode, which [determines whether payments can be taken offline](mobile-payments-sdk/ios/offline-payments). For the complete list of payment parameter values and details, see [iOS technical reference](https://developer.squareup.com/docs/sdk/mobile-payments/ios). ### Prompt parameters Each payment must also have `SQMPPromptParameters` configured, consisting of a `mode` and `additionalMethods` available to buyers. Square provides a payment prompt screen that displays a UI to buyers prompting them to swipe, insert, or tap their card, depending on the payment options available. To use this screen for your quickstart application, set the `SQMPPromptParameters.mode` to `default`. ![ios-mpsdk-prompt](//images.ctfassets.net/1nw4q0oohfju/s32OClWXm5bANH79nZTjm/16de405cfa6f9d1b6cfa514d090b1571/ios-mpsdk-prompt.png) If you create your own custom payment prompt UI by passing `custom` in the `PromptParameters.mode`, use the `availableCardInputMethodsObserver` to update your UI if the available card entry methods change (for example, if a magstripe reader is inserted or removed from the mobile device). {% anchor id="begin-payment" /%} ## 8. Take a payment When you're ready to begin a payment, call `PaymentManager.startPayment()` with the `SQMPPaymentParameters` and `SQMPPromptParameters` you created in the previous step. ```objectivec #import @import SquareMobilePaymentsSDK; @interface ViewController () // ... @end @implementation <#YourViewController#> - (void)startPayment { id paymentHandle = [SQMPMobilePaymentsSDK.shared.paymentManager startPayment:[self makePaymentParameters] promptParameters:[[SQMPPromptParameters alloc] initWithMode:SQMPPromptModeDefault additionalMethods:SQMPAdditionalPaymentMethods.all] from:self delegate:self]; } - (SQMPPaymentParameters *)makePaymentParameters { SQMPMoney *amountMoney = [[SQMPMoney alloc] initWithAmount:100 currency:SQMPCurrencyUSD]; NSString *paymentAttemptID = [[NSUUID UUID] UUIDString]; SQMPProcessingMode processingMode = SQMPProcessingModeOnlineOnly; return [[SQMPPaymentParameters alloc] initWithPaymentAttemptID:paymentAttemptID amountMoney:amountMoney processingMode:processingMode]; } - (void)paymentManager:(id)paymentManager didFinish:(id)payment { NSLog(@"Payment did finish: %@", payment); } - (void)paymentManager:(nonnull id)paymentManager didFail:(nonnull id)payment withError:(nonnull NSError *)error { NSLog(@"Payment did fail with error: %@", error.localizedDescription); } - (void)paymentManager:(id)paymentManager didCancel:(id)payment { NSLog(@"Payment did cancel"); } @end ``` During each payment, Square takes control of the screen display to ensure that buyer information is handled securely and that the final confirmation of the payment is correctly shown to the buyer. While a payment is in progress, the `UIViewController` passed to `startPayment` must remain presented or pushed until your `PaymentManagerDelegate` receives a callback indicating the payment has completed, failed, or was canceled. After the payment starts, it cannot be canceled by the developer. ![ios-mpsdk-states](//images.ctfassets.net/1nw4q0oohfju/1XNyCdfhj7ZOkwaGYaAyDW/865bae3e45ef905dcb40a5b4ee801840/ios-mpsdk-states.png) If the payment completes successfully, a `SQMPPayment` object is returned to your payment callback. This payment can be accessed on the Square Dashboard or with the [Payments API](https://developer.squareup.com/reference/square/payments-api). If the payment fails, the response contains an [error](mobile-payments-sdk/ios/handling-errors). ## Next steps After installing the Mobile Payments SDK and testing your application with test payments in the Square Sandbox, learn more about configuring your application to take production payments: * [Authorize the Mobile Payments SDK](mobile-payments-sdk/ios/configure-authorize#authorize) * [Pair and Manage Card Readers](mobile-payments-sdk/ios/pair-manage-readers) * [Take a Payment](mobile-payments-sdk/ios/take-payments) --- # Build on Android > Source: https://developer.squareup.com/docs/mobile-payments-sdk/android > Status: PUBLIC > Languages: All > Platforms: Android **Applies to:** [Mobile Payments SDK - Android](https://developer.squareup.com/docs/sdk/mobile-payments/android) | [Payments API](payments-refunds) | [OAuth API](oauth-api/overview) {% subheading %}Learn how to build a secure in-person payment solution for Android devices with the Mobile Payments SDK.{% /subheading %} {% toc hide=true /%} ## Overview The Mobile Payments SDK offers developers a secure way to integrate the Square checkout flow into their mobile applications and accept in-person payments with Square Readers. There are four steps required to take your first payment using the Mobile Payments SDK: 1. [Install and configure the Mobile Payments SDK in your Android application](#install-sdk) 2. [Authorize the Mobile Payments SDK](mobile-payments-sdk/android/configure-authorize#authorize) 3. [Pair a card Reader](mobile-payments-sdk/android/pair-manage-readers) 4. [Take a payment](mobile-payments-sdk/android/take-payments) For an example implementation, download the [Mobile Payments SDK sample application](https://github.com/square/mobile-payments-sdk-android), written in Kotlin using Compose. ## Requirements and limitations * Your Square account is enabled for payment processing. If you haven't enabled payment processing on your account (or you're not sure), visit [squareup.com/activation](https://squareup.com/activation). * Your Square account is based in the United States, Canada, or Australia. If you're developing from outside these areas, you can take test payments in the Square Sandbox, but cannot take production payments. * Your application's `minSdkVersion` is API 28 (Android 9) or later. * Your application's `targetSdkVersion` is API 35 (Android 15) or a minimum of API 28 (Android 9). * Your application's `compileSdkVersion` is 35. * Your application uses AndroidX or enables [Jetifier](https://developer.android.com/jetpack/androidx#using_androidx) in `gradle.properties`. * You're using the [Android Gradle Plugin](https://developer.android.com/build/releases/gradle-plugin) version 8.4.2 or later. * Your version of the Mobile Payments SDK adheres to the Square update policy. To limit risk to developers and their users, Square enforces an [update policy](mobile-payments-sdk#update-policy) requiring developers keep their version of the Mobile Payments SDK current. * When using Mobile Payments SDK version 2.1 or later, you must provide an [application signature](#application-signature) to Square before taking payments in production. * You're generally familiar with developing applications on Android. If you're new to Android development, you should read the [Documentation on the Android Developers site](https://developer.android.com/guide) before continuing. {% aside type="info" %} The Mobile Payments SDK doesn't support Proguard for code optimization, as it might remove some critical bytecode from the library. {% /aside %} ## Device permissions The Mobile Payments SDK requires that the user grant access to their device’s current location while using your app. To use a Contactless and Chip reader to take card payments, Bluetooth must be enabled, and to use a magstripe reader, your application must be granted permission to access the device's microphone. Ensure your application [requests](https://developer.android.com/training/permissions/requesting#request-permission) the following runtime permissions: {% table %} * Android device permission * Purpose --- * `ACCESS_FINE_LOCATION` * To confirm that payments are occurring in a supported Square location. --- * `RECORD_AUDIO` * To receive data from magstripe readers. --- * `BLUETOOTH_CONNECT` * To receive data from contactless and chip readers. --- * `BLUETOOTH_SCAN` * To store information during checkout. --- * `READ_PHONE_STATE` * To identify the device sending information to Square servers. {% /table %} ## Device compatibility The Mobile Payments SDK isn't compatible with custom devices from original equipment manufacturers that violate Square's security rules or devices that grant root access to the mobile device operating system code and kernel. These devices cannot connect to a contactless and chip reader and don't comply with Square's security requirements. The following additional considerations apply when trying to run the SDK on custom devices: * The Mobile Payments SDK isn't supported for rooted devices or devices with custom ROMs. * Square prohibits using any software that provides the ability to record or capture screen data or that results in elevated privileges. * Square recommends running the Mobile Payments SDK on devices from large mobile device manufacturers such as Google or Samsung. * If your mobile application runs on an uncommon device manufacturer, be sure to test the device with any expected software requirements, including Bluetooth connectivity, before investing in the device. * Supported OS versions should be the latest or as close to the latest as possible. * Review the Square support window for the OS version and confirm support for the compilation target version and the runtime version. The compilation target currently supports version 34. For runtime, the supported versions are 24 to 34. ## Application signature Developers using the Mobile Payments SDK version 2.1 or later are required to submit an application signature to Square prior to taking payments in production. This signature is an extra layer of security that ensures that your application hasn't been tampered with or otherwise modified by a user. To submit an application signature, log in to the Developer Console and choose your application. In the left pane, choose **Mobile Payments SDK**, and then choose **Add Signature**. You must provide your **Package Name** and **Signing Key (SHA-256)** to Square. For more information, see [Android developer documentation on signing your app](https://developer.android.com/studio/publish/app-signing#api-providers). ![The Mobile Payments SDK page on the Developer Console, which prompts users to create application signatures.](//images.ctfassets.net/1nw4q0oohfju/zwlje3EYsbdgTannaGkGJ/fa1087e3218e738fc4ae95ce829608c0/signatures-empty.png) ![The Developer Console flow for adding an Android application signature for a Mobile Payments SDK application. The user is asked for a Package name and SHA-256 certificate.](//images.ctfassets.net/1nw4q0oohfju/5iV2rcSW30YrurYQvecf1a/ee073e0a0bf3d169f51a58c5a241bde7/signatures-android.png) If you publish a single mobile application used by multiple Square sellers using the same Square application id, you only need to submit one signature per platform for that application. Any debug builds you create that take payments in production also require their own application signature, since the signing key differs from your published application. The **Mobile Payments SDK** page in the Developer Console lists each signature that you've submitted. If an application signature is deleted, the application is no longer able to take payments, but you can submit a new signature for your application at any time. {% aside type="info" %} If you're developing with the Mobile Payments SDK's [Flutter](mobile-payments-sdk/flutter) or [React Native](mobile-payments-sdk/react-native) plugins and publishing both an Android and iOS application, you must submit a signature for each application. {% /aside %} ## Data privacy consent To comply with data privacy laws, the Mobile Payments SDK requires merchants in Canada, the United Kingdom, and the European Union to grant or deny consent for performance and analytics tracking. Your application should prompt merchants in these regions for consent and log whether consent was granted or denied using `settingsManager.updateTrackingConsent(granted: Boolean)`. Before processing payments, check the current state of consent for the authorized merchant. {% tabset %} {% tab id="Kotlin" %} ```kotlin val trackingConsentState = settingsManager.trackingConsentState ``` {% /tab %} {% tab id="Java" %} ```java ConsentState TrackingConsentState = settingsManager.getTrackingConsentState(); ``` {% /tab %} {% /tabset %} The possible states are: * `PENDING` - Consent has not yet been provided * `GRANTED` - Merchant has granted consent for tracking * `DENIED` - Merchant has denied consent for tracking * `NOT_REQUIRED` - Merchant is in a region where consent is not required for tracking If you don't implement consent handling via the API, the SDK automatically displays a consent dialog modal to users in regions where consent is required. This modal: * appears on the first payment attempt or when the user first opens the [settings screen](mobile-payments-sdk/android/pair-manage-readers#settings-manager). * is shown only once per application per device. * is not displayed to users outside required regions. {% aside type="important" %} If you use a custom UI for your payment prompt screen and have not provided your user's consent status with the API, the SDK returns an error from `startPaymentActivity`. You must handle consent before initiating any payment when using a custom payment UI. {% /aside %} ## Quickstart Get started with the Mobile Payments SDK by configuring your Android application and taking a test payment in the Square Sandbox. Use the following steps to set up and test the Mobile Payments SDK in your own application. You can also download the [Mobile SDK sample application](https://github.com/square/mobile-payments-sdk-android) (written in Kotlin) to see an example of initialization, authorization, and taking payments in production or the Square Sandbox. ![Screenshots of the Square Mobile Payments SDK Android sample app, showing the purchase screen and permission selection screen](//images.ctfassets.net/1nw4q0oohfju/7Ft8ZYiR6xGIJRbMFUXhCo/91ffa2ccaaad8badaebfe9339a387651/mobile-payments-sdk-android.png) {% anchor id="install-sdk" /%} ## 1. Install the SDK and dependencies Add Square's Maven repo to your project's `settings.gradle` file and the following dependencies to your project's `build.gradle` file. The Mock Reader UI is used to [simulate virtual reader devices](#mockreader). {% tabset %} {% tab id="Kotlin" %} `settings.gradle.kts`: ```gradle ... dependencyResolutionManagement { repositoriesMode.set(RepositoriesMode.FAIL_ON_PROJECT_REPOS) repositories { ... maven ("https://sdk.squareup.com/public/android/") } } ... ``` `build.gradle.kts`: ```gradle ... dependencies { // Your dependencies ... val squareSdkVersion = "2.4.0" // Mobile Payments SDK dependency implementation("com.squareup.sdk:mobile-payments-sdk:$squareSdkVersion") // MockReader UI dependency implementation("com.squareup.sdk:mockreader-ui:$squareSdkVersion") } ``` {% /tab %} {% tab id="Java" %} `settings.gradle`: ```groovy ... dependencyResolutionManagement { repositoriesMode.set(RepositoriesMode.FAIL_ON_PROJECT_REPOS) repositories { ... maven { url "https://sdk.squareup.com/public/android/" } } } ``` `build.gradle`: ```groovy ... dependencies { // Your dependencies ... def squareSdkVersion = "2.4.0" // Mobile Payments SDK dependency implementation "com.squareup.sdk:mobile-payments-sdk:$squareSdkVersion" // MockReader UI dependency implementation "com.squareup.sdk:mockreader-ui:$squareSdkVersion" } ``` {% /tab %} {% /tabset %} ## 2. Initialize the Mobile Payments SDK Before taking a payment or attempting any other operation with the Mobile Payments SDK, you must initialize it using the `initialize` method and your Square developer application ID. To get your application ID, sign in to the [Developer Console](https://developer.squareup.com/apps) and choose your application. If you don't have an application, see [Get Started](square-get-started) for steps to create a Square application. Your application opens in the Developer Console to the **Credentials** page. This page contains your Square application ID used to initialize the Mobile Payments SDK. {% aside type="info" %} To test the Mobile Payments SDK in the Square Sandbox with mock readers and mock payments, switch the toggle at the top of the Developer Console to **Sandbox** to show your Sandbox credentials and initialize the SDK with your Sandbox application ID. To start taking production payments, you must initialize the Mobile Payments SDK again with your production application ID. {% /aside %} A good place to initialize the SDK is inside the `onCreate()` method of an [extended Application class](https://guides.codepath.com/android/Understanding-the-Android-Application-Class), because it's executed early in the application lifecycle. {% tabset %} {% tab id="Kotlin" %} ```kotlin class DemoApplication : Application() { override fun onCreate() { super.onCreate() MobilePaymentsSdk.initialize(getId(), this) } } ``` {% /tab %} {% tab id="Java" %} ```java public class DemoApplication extends Application { @Override public void onCreate() { super.onCreate(); MobilePaymentsSdk.initialize(getId(), this); } } ``` {% /tab %} {% /tabset %} If using the previous example, you should write your own implementation for `getId()` to return your application ID value from the Developer Console. Depending on your use case, this can be your production or Sandbox application ID, which might be stored as hardcoded strings, as Android resources, or fetched from your server. ## 3. Authorize the Mobile Payments SDK The `AuthorizationManager` handles authorization for the Mobile Payments SDK. Call the `authorize()` method with an [OAuth access token](oauth-api/overview) and location ID. If you're testing your application in the [Square Sandbox](devtools/sandbox/overview), you can use your Sandbox personal access token and location ID. {% aside type="important" %} Don't deploy an application that contains your personal access token into production. For secure authorization in production, you should implement OAuth instead of using a personal access token. {% /aside %} In your call to `authorize()`, configure a callback to be notified of [authorization errors](mobile-payments-sdk/android/handling-errors) and display those to the user. {% tabset %} {% tab id="Kotlin" %} ```kotlin override fun onResume() { super.onResume() val authorizationManager = MobilePaymentsSdk.authorizationManager() // Authorize and handle authorization successes or failures callbackReference = authorizationManager.authorize(accessToken, locationId) { result -> when (result) { is Success -> { finishWithAuthorizedSuccess(result.value) } is Failure -> { when (result.errorCode) { NO_NETWORK -> showRetryDialog(result) USAGE_ERROR -> showUsageErrorDialog(result) } } } } } override fun onPause() { super.onPause() // Remove the callback reference to prevent memory leaks callbackReference?.clear() } ``` {% /tab %} {% tab id="Java" %} ```java @Override protected void onResume() { super.onResume(); AuthorizationManager authorizationManager = MobilePaymentsSdk.authorizationManager(); // Authorize and handle authorization successes or failures callbackReference = authorizationManager.authorize(accessToken, locationId, result -> { if (result.isSuccess()) { finishWithAuthorizedSuccess(result.value()); } else { AuthorizeErrorCode authorizeErrorCode = result.errorCode(); switch (authorizeErrorCode) { case NO_NETWORK: showRetryDialog(result); break; case USAGE_ERROR: showUsageErrorDialog(result); break; } } }); } @Override protected void onPause() { super.onPause(); // Remove the callback reference to prevent memory leaks callbackReference.clear(); } ``` {% /tab %} {% /tabset %} {% anchor id="mock-readers" /%} ## 4. Test with mock readers in the Square Sandbox Physical card readers aren't supported in the Square Sandbox. To take test payments, you must simulate a virtual reader with the Mock Reader UI. The Mock Reader UI automatically attaches a floating button to the currently displayed Activity as you navigate between screens in your application after you've called `MockReaderUI.show()`. The icon can be dragged anywhere on the screen and persists throughout your application lifecycle. {% tabset %} {% tab id="Kotlin" %} ```kotlin override fun onCreate() { super.onCreate() // If in Sandbox - display Mock Reader floating icon if (MobilePaymentsSdk.isSandboxEnvironment()) { MockReaderUI.show() } } // MockReader must hide once deauthorized as it should only be used within the Sandbox environment. private fun deauthorize() { MockReaderUI.hide() } ``` {% /tab %} {% tab id="Java" %} ```java @Override protected void onCreate() { super.onCreate(); // If in Sandbox - display Mock Reader floating icon if (MobilePaymentsSdk.isSandboxEnvironment()) { MockReaderUI.show(); } } // MockReader must hide once deauthorized as it should only be used within the Sandbox environment. @Override private void deauthorize() { MockReaderUI.hide(); } ``` {% /tab %} {% /tabset %} Click the following button to simulate connecting a magstripe reader or a contactless and chip reader to your device. You can use the `ReaderManager` to [programmatically access information](mobile-payments-sdk/android/pair-manage-readers#settings-manager) about these simulated readers, such as their model and available card entry methods. ![The floating button that appears when using the Mobile Payments SDK Mock Reader UI.](//images.ctfassets.net/1nw4q0oohfju/4Fzum30bXvQr6HUnD9TWdc/0cb3606cf3996b1e945f32beff1e9814/floater.png) When mock readers have been connected and you [begin a payment](#take-payment), click the button again to test your application's payment flow and simulate swiping, inserting, removing, or tapping a card with the mock reader. Choose **Payment details** to select different card brands and payment behaviors (approved or declined) for testing purposes. To hide the button in your application, call `MockReaderUI.hide()`. {% aside type="info" %} When testing card payment flows, any inserted cards must be removed through the mock reader UI before beginning a new payment. {% /aside %} To pair physical readers for production payments, see [Pair and Manage Card Readers](mobile-payments-sdk/android/pair-manage-readers). ## 5. Set up a payment The `PaymentManager` handles payments in the Mobile Payments SDK. Prior to starting a payment, you create `PaymentParameters` to represent details of an individual payment and `PromptParameters` to indicate how the payment prompts are presented to the buyer. ### Payment parameters Before beginning a payment, create a `PaymentParameters` object. At a minimum, you must include the payment amount, a [payment attempt ID](mobile-payments-sdk/android/take-payments#idempotency-and-payment-attempts), and the processing mode, which [determines whether payments can be taken offline](mobile-payments-sdk/android/offline-payments#take-a-payment-offline). For the complete list of payment parameter values and details, see [Android technical reference](https://developer.squareup.com/docs/sdk/mobile-payments/android). ### Prompt parameters Each payment also requires `PromptParameters`, consisting of a `mode` and `additionalPaymentMethods` available to buyers. The current options are `KEYED` (a manually entered credit card payment) or `CASH`. Square provides a payment prompt screen that displays a UI prompting buyers to swipe, tap, or insert their card, depending on the payment options available. To use this screen, set `PromptParameters.mode` to `DEFAULT`. If you want to create your own custom payment prompt screen instead of using the default, set `PromptParameters.mode` to `CUSTOM`. ![android-mpsdk-prompt](//images.ctfassets.net/1nw4q0oohfju/1iEfBHjH6uA5AUx1ahLO7j/e09d0c5891710a9cc0eb2948ceec1b19/android-mpsdk-prompt.png) If you create your own custom payment prompt UI, use the `setAvailableCardEntryMethodChangedCallback` to update your UI if the available card entry methods change (for example, if a magstripe reader is inserted or removed from the mobile device). You should set this callback in either a `ViewModel` or an Activity’s `onCreate()` or `onResume()` method. {% anchor id="take-payment" /%} ## 6. Take a payment When you're ready to begin a payment, call `paymentManager.startPaymentActivity()` with the `PaymentParameters` and `PromptParameters` you created for this payment, along with a `callback` to notify you of the payment's success or failure. {% tabset %} {% tab id="Kotlin" %} ```kotlin fun startPaymentActivity() { val paymentManager = MobilePaymentsSdk.paymentManager() // Configure the payment parameters val paymentParams = PaymentParameters.Builder( amount = Money(100, CurrencyCode.USD), paymentAttemptId = UUID.randomUUID().toString(), processingMode = processingMode(ProcessingMode.ONLINE_ONLY) ) .referenceId("1234") .note("Chocolate Cookies and Lemonade") .autocomplete(true) .build() // Configure the prompt parameters val promptParams = PromptParameters( mode = PromptMode.DEFAULT, additionalPaymentMethods = listOf(Type.KEYED) ) // Start the payment activity handle = paymentManager.startPaymentActivity(paymentParams, promptParams) { result -> // Callback to handle the payment result when (result) { is Success -> // show payment details is Failure -> // show error message } } } override fun onDestroy() { handle?.cancel() ... } ``` {% /tab %} {% tab id="Java" %} ```java public void startPaymentActivity() { PaymentManager paymentManager = MobilePaymentsSdk.paymentManager(); // Configure the payment parameters PaymentParameters paymentParams = new PaymentParameters.Builder( new Money(100, CurrencyCode.USD), UUID.randomUUID().toString(), ProcessingMode.ONLINE_ONLY ) .referenceId("1234") .note("Chocolate Cookies and Lemonade") .autocomplete(true) .build(); // Configure the prompt parameters PromptParameters promptParams = new PromptParameters( PromptMode.DEFAULT, Collections.singletonList(AdditionalPaymentMethod.Type.KEYED) ); // Start the payment activity paymentHandle = paymentManager.startPaymentActivity(paymentParams, promptParams, result -> { // Handle the payment result if (result.isSuccess()) { // show payment details ... } else { // show error message ... } }); } @Override public void onDestroy() { if (paymentHandle != null) { paymentHandle.cancel(); } ... } ``` {% /tab %} {% /tabset %} During a payment, Square takes control of the screen display as another Android Activity to ensure that buyer information is handled securely and that the final confirmation of the payment is correctly shown to the buyer. ![android-mpsdk-states](//images.ctfassets.net/1nw4q0oohfju/54og9mE6zYlsAyovV4kCPN/19d501124850fe91b0b1e9f5db6d0289/android-mpsdk-states.png) If the payment completes successfully, a `Payment` object is returned to your payment callback. This payment can be accessed on the Square Dashboard or with the [Payments API](https://developer.squareup.com/reference/square/payments-api). If the payment fails, the response contains a `PaymentError`. ## Next steps After installing the Mobile Payments SDK and testing your application with test payments in the Square Sandbox, learn more about configuring your application to take production payments. * [Authorize your Android Application](mobile-payments-sdk/android/configure-authorize) * [Pair and Manage Card Readers](mobile-payments-sdk/android/pair-manage-readers) * [Take a Payment](mobile-payments-sdk/android/take-payments) --- # Authorize the Mobile Payments SDK > Source: https://developer.squareup.com/docs/mobile-payments-sdk/ios/configure-authorize > Status: PUBLIC > Languages: Swift, Objective C > Platforms: iOS **Applies to:** [Mobile Payments SDK - iOS](https://developer.squareup.com/docs/sdk/mobile-payments/ios) | [OAuth API](oauth-api/overview) | [Locations API](locations-api) {% subheading %}Learn how to configure and authorize your Mobile Payments SDK iOS application.{% /subheading %} {% line-break /%} [Context: Swift, iOS] {% toc hide=true /%} ## Overview To enable your application to securely connect to a Square seller account, the Mobile Payments SDK must be authorized using an [OAuth access token](oauth-api/what-it-does) and a [location ID](locations-api). Each Square seller who uses your application must be authorized with an OAuth access token The same process should be used even if you only plan to use the Mobile Payments SDK with your own Square account. To get started, see [OAuth documentation](oauth-api/overview) and the [Mobile Payments SDK sample application](https://github.com/square/mobile-payments-sdk-ios) for an example of how to authorize the SDK. When requesting an OAuth access token from a seller, your application must request the following permissions: * `MERCHANT_PROFILE_READ` is required to get a list of all a seller's locations. * `PAYMENTS_WRITE` and `PAYMENTS_WRITE_IN_PERSON` are required to take payments with the Mobile Payments SDK. * `PAYMENTS_WRITE_ADDITIONAL_RECIPIENTS` is required only if you want to collect [application fees](payments-api/take-payments-and-collect-fees). * `EMPLOYEES_READ` is required if you want to associate a payment with a particular `teamMemberId`. When displaying the Square authorization page, it’s recommended to use [SFSafariViewController](https://developer.apple.com/documentation/safariservices/sfsafariviewcontroller) instead of [WKWebView](https://developer.apple.com/documentation/webkit/wkwebview). `WKWebView` can be used if it's required for the look and feel of your application, but using `SFSafariViewController` is a better supported and stable experience. For information about when to use `SFSafariViewController` rather than `WKWebView`, see [Apple's guidance](https://developer.apple.com/news/?id=trjs0tcd). The Mobile Payments SDK is divided into [four managers](mobile-payments-sdk#mobile-payments-sdk-components) to provide specific areas of functionality. Authorization is handled by the `AuthorizationManager`. In your application's authorization or bootstrapping logic, use the `AuthorizationManager`'s `authorize()` function to authorize the Mobile Payments SDK with the OAuth access token and location ID for the Square seller connecting to your application. When authorization completes, the `AuthorizeCompletionHandler` provides the result of the authorization, including any errors. ```swift import SquareMobilePaymentsSDK class <#YourViewController#>: UIViewController { func authorizeMobilePaymentsSDK(accessToken: String, locationID: String) { guard MobilePaymentsSDK.shared.authorizationManager.state == .notAuthorized else { return } MobilePaymentsSDK.shared.authorizationManager.authorize( withAccessToken: accessToken, locationID: locationID) { error in guard let authError = error else { print("Square Mobile Payments SDK successfully authorized.") return } // Handle auth error print("error: \(authError.localizedDescription)") } } } ``` ## Authorization state You can check whether a user of your application is `authorized`, `notAuthorized`, or (in the process of) `authorizing` by checking `AuthorizationManager.state` prior to beginning authorization. To track changes in the authorization state, add an `AuthorizationStateObserver` to your `viewController` to receive updates to the authorization `state` whenever the Mobile Payments SDK is authorized or deauthorized. ### Session expiration Square OAuth access tokens expire after 30 days. After expiration, applications must generate a new OAuth access token using the refresh token received [when the authorization was first granted](oauth-api/how-oauth-works). The response looks like the following: ```json { "access_token": "EAAAEL_EXAMPLE_l5ncx260W8yWz2gGO0GtJeFBJqIdHIXZjpQZ_XW-yxh-Tl7MlF8vIE__n", "token_type": "bearer", "expires_at": "2024-05-15T19:36:00Z", "merchant_id": "ML61OXvVbScCI", "refresh_token": "EXAMPLEzRUFx8bgauwrDjXYIioyCDEB7vyOG0cScx-qfczgTpNtUjAGLResAKOe9" } ``` Square recommends tracking the `expires_at` value on your server and refreshing the authorization token before it expires. You can store expiration time on the device and check it during application initialization. If the SDK detects an expired token, it deauthorizes the Square seller account (in the same manner as calling `AuthorizationManager.deauthorize()`) and your `AuthorizationStateObserver` is notified of the change in state. ### Deauthorize the Mobile Payments SDK To deauthorize the Mobile Payments SDK and sign out of a seller's Square account, use the Authorization Manager's `deauthorize()` method. This method provides a `DeauthorizeCompletionHandler`, called when the SDK finishes deauthorizing. It's a good idea to call this method when a user logs out of your application or hasn't had any activity within a period of time. This prevents your application from having to track a large number of dangling authorizations. ```swift func deauthorizeMobilePaymentsSDK() { MobilePaymentsSDK.shared.authorizationManager.deauthorize { // Check authorization status print(MobilePaymentsSDK.shared.authorizationManager.state) } } ``` ## Next steps After the Mobile Payments SDK is installed and initialized in your mobile application and authorized with a Square account, you're ready to [pair and manage card readers](mobile-payments-sdk/ios/pair-manage-readers). [Context: Objective C, iOS] {% toc hide=true /%} ## Overview To enable your application to securely connect to a Square seller account, the Mobile Payments SDK must be authorized using an [OAuth access token](oauth-api/what-it-does) and a [location ID](locations-api). Each Square seller who uses your application must be authorized with an OAuth access token The same process should be used even if you only plan to use the Mobile Payments SDK with your own Square account. To get started, see [OAuth documentation](oauth-api/overview) and the [Mobile Payments SDK sample application](https://github.com/square/mobile-payments-sdk-ios) for an example of how to authorize the SDK. When requesting an OAuth access token from a seller, your application must request the following permissions: * `MERCHANT_PROFILE_READ` is required to get a list of all a seller's locations. * `PAYMENTS_WRITE` and `PAYMENTS_WRITE_IN_PERSON` are required to take payments with the Mobile Payments SDK. * `PAYMENTS_WRITE_ADDITIONAL_RECIPIENTS` is required only if you want to collect [application fees](payments-api/take-payments-and-collect-fees). * `EMPLOYEES_READ` is required if you want to associate a payment with a particular `teamMemberId`. When displaying the Square authorization page, it’s recommended to use [SFSafariViewController](https://developer.apple.com/documentation/safariservices/sfsafariviewcontroller) instead of [WKWebView](https://developer.apple.com/documentation/webkit/wkwebview). `WKWebView` can be used if it's required for the look and feel of your application, but using `SFSafariViewController` is a better supported and stable experience. For information about when to use `SFSafariViewController` rather than `WKWebView`, see [Apple's guidance](https://developer.apple.com/news/?id=trjs0tcd). The Mobile Payments SDK is divided into [four managers](mobile-payments-sdk#mobile-payments-sdk-components) to provide specific areas of functionality. Authorization is handled by the `SQMPAuthorizationManager`. In your application's authorization or bootstrapping logic, use the `AuthorizationManager`'s `authorize()` function to authorize the Mobile Payments SDK with the OAuth access token and location ID for the Square seller connecting to your application. When authorization completes, the `AuthorizeCompletionHandler` provides the result of the authorization, including any errors. ```objectivec #import @import SquareMobilePaymentsSDK; @interface <#YourViewController#> : UIViewController // … @end @implementation <#YourViewController#> - (void)authorizeMobilePaymentsSDKWithAccessToken:(NSString *)accessToken locationID:(NSString *)locationID { if (SQMPMobilePaymentsSDK.shared.authorizationManager.state != SQMPAuthorizationStateNotAuthorized) { return; } [SQMPMobilePaymentsSDK.shared.authorizationManager authorizeWithAccessToken:accessToken locationID:locationID completion:^(NSError * _Nullable error) { if (error == nil) { NSLog(@"Square Mobile Payments SDK successfully authorized."); } else { // Handle auth error NSLog(@"error: %@", error.localizedDescription); } }]; } @end ``` ## Authorization state You can check whether a user of your application is `authorized`, `notAuthorized`, or (in the process of) `authorizing` by checking `SQMPAuthorizationManager.state` prior to beginning authorization. To track changes in the authorization state, add an `SQMPAuthorizationStatusObserver` to your `viewController` to receive updates to the authorization `state` whenever the Mobile Payments SDK is authorized or deauthorized. ### Session expiration Square OAuth access tokens expire after 30 days. After expiration, applications must generate a new OAuth access token using the refresh token received [when the authorization was first granted](oauth-api/how-oauth-works). The response looks like the following: ```json { "access_token": "EAAAEL_EXAMPLE_l5ncx260W8yWz2gGO0GtJeFBJqIdHIXZjpQZ_XW-yxh-Tl7MlF8vIE__n", "token_type": "bearer", "expires_at": "2024-05-15T19:36:00Z", "merchant_id": "ML61OXvVbScCI", "refresh_token": "EXAMPLEzRUFx8bgauwrDjXYIioyCDEB7vyOG0cScx-qfczgTpNtUjAGLResAKOe9" } ``` Square recommends tracking the `expires_at` value on your server and refreshing the authorization token before it expires. You can store expiration time on the device and check it during application initialization. If the SDK detects an expired token, it deauthorizes the Square seller account (in the same manner as calling `AuthorizationManager.deauthorize()`) and your `AuthorizationStateObserver` is notified of the change in state. ### Deauthorize the Mobile Payments SDK To deauthorize the Mobile Payments SDK and sign out of a seller's Square account, use the Authorization Manager's `deauthorize()` method. This method provides a `DeauthorizeCompletionHandler`, called when the SDK finishes deauthorizing. It's a good idea to call this method when a user logs out of your application or hasn't had any activity within a period of time. This prevents your application from having to track a large number of dangling authorizations. ```objectivec - (void)deauthorizeMobilePaymentsSDK { [SQMPMobilePaymentsSDK.shared.authorizationManager deauthorizeWithCompletion:^{ // Check authorization status SQMPAuthorizationState state = SQMPMobilePaymentsSDK.shared.authorizationManager.state; NSLog(@"%ld", (long)state); }]; } ``` ## Next steps After the Mobile Payments SDK is installed and initialized in your mobile application and authorized with a Square account, you're ready to [pair and manage card readers](mobile-payments-sdk/ios/pair-manage-readers). --- # Pair and Manage Card Readers > Source: https://developer.squareup.com/docs/mobile-payments-sdk/ios/pair-manage-readers > Status: PUBLIC > Languages: All > Platforms: iOS **Applies to:** [Mobile Payments SDK - iOS](https://developer.squareup.com/docs/sdk/mobile-payments/ios) | [OAuth API](oauth-api/overview) | [Locations API](locations-api) {% subheading %}Learn how to pair and manage card readers with the Mobile Payments SDK for iOS.{% /subheading %} {% line-break /%} [Context: Swift, iOS] {% toc hide=true /%} ## Overview The Mobile Payments SDK's `ReaderManager` lets you pair and monitor changes in Square readers. ## Requirements and limitations * To successfully pair a contactless reader and take payments, your application must [request location and Bluetooth permissions](mobile-payments-sdk/ios#request-location-bluetooth) from the user. * Physical reader devices cannot be used in the Square Sandbox. For testing purposes, you can use the [Mock Reader UI](mobile-payments-sdk/ios#mock-readers) to pair simulated readers and process mock payments with your application in the Square Sandbox. ## Settings Manager The Mobile Payments SDK offers a pre-made reader settings screen you can use in your application by calling `MobilePaymentsSDK.shared.settingsManager.presentSettings(viewController: self) { _ in }`. This screen includes two tabs. The **Devices** tab displays the model and connection status for readers paired to the seller's phone or tablet and includes a button for pairing a new reader. The **About** tab displays information about the Mobile Payments SDK, authorized location, and environment used to take payments. Users can also enable or disable consent for [performance and analytics tracking](mobile-payments-sdk/ios#data-privacy-consent) from this screen, if they are in a region where consent is required. Use the `settingsManager.sdkSettings` to programmatically retrieve information about the current `environment` (either `production` or `sandbox`) and the current `version`. You can check whether the settings screen is currently displayed with `settingsManager.isSettingsPresented` and programmatically dismiss it with `settingsManager.dismissSettings()`. This is useful for kiosks, or when your application needs to respond to external events while settings are open. With the `SettingsManager`, you can also view `PaymentSettings` for the Square seller authenticated to your application, such as whether they have the ability to [take payments offline](/mobile-payments-sdk/ios/offline-payments). ![ios-mpsdk-settings](//images.ctfassets.net/1nw4q0oohfju/6ccWFsfhlpc64odlsjBMpR/eec7c1934ed415b8068b65da4bef530b/ios-mpsdk-settings.png) ## Reader Manager If you want more control over your reader pairing and management screens, you can create your own using information from the Mobile Payments SDK's `ReaderManager`. This manager provides methods for pairing and forgetting readers, accessing information about a particular reader, and listening for reader status updates. ### Pairing a reader Square Readers for magstripe are automatically detected by the Mobile Payments SDK as they are inserted or removed from a device's connection port and don't need to be paired. Likewise, the [Square Stand](mobile-payments-sdk/ios/square-stand) includes a built-in reader device and doesn't need an external reader paired to take payments. Square readers for contactless and chip must be paired with the Mobile Payments SDK using the `ReaderManager`. To start searching for nearby Bluetooth readers, call `readerManager.startPairing(with:)`, passing in a `ReaderPairingDelegate`, which is notified when reader pairing begins and whether the pairing succeeded or failed. During pairing, a `PairingHandle` is returned and can be used to stop the pairing in progress. You should call `PairingHandle.stop()` any time a user leaves the screen from which they're attempting to pair a reader. When pairing is successful, the paired reader is added to the array of available readers accessed with `readerManager.readers`. If the pairing fails, the delegate's `readerPairingDidFail` method returns an [error](mobile-payments-sdk/ios/handling-errors) you can use to troubleshoot and attempt pairing again. Only one reader pairing can be in progress at one time, so before calling `startPairing`, check the Boolean value `readerManager.isPairingInProgress` and only begin pairing if it's `false`. ```swift import SquareMobilePaymentsSDK class <#YourViewController#>: UIViewController { private var pairingHandle: PairingHandle? func startPairing() { // `self` must conform to ReaderPairingDelegate pairingHandle = MobilePaymentsSDK.shared.readerManager.startPairing(with: self) } func stopPairing() { // Manually stop searching for nearby readers. pairingHandle?.stop() } } extension <#YourViewController#>: ReaderPairingDelegate { func readerPairingDidBegin() { print("Reader pairing did begin!") } func readerPairingDidSucceed() { print("Reader Paired!") } func readerPairingDidFail(with error: Error) { // Handle pairing error print("Error: \(error.localizedDescription)") } } ``` ## Reader information The `ReaderInfo` class provides information about Square readers and stands paired with your application. These properties include: * The battery level and charging status. * The model (`contactlessAndChip`, `magstripe`, or `stand`). * The serial number. * The firmware including version and update status (see [Firmware info](#firmware-info)). * The card entry methods supported by the reader (`TAP`, `DIP`, or `SWIPE`). * The [Reader status](#reader-status). You can use this information to send notifications to users of your application when a reader is unpaired or its battery is low. In case of a [pairing error](mobile-payments-sdk/ios/handling-errors), you can use `connectionInfo.failureReason` to provide more details and suggestions to your application users about how to retry their pairing attempt. ### Getting reader updates The Mobile Payments SDK reports changes to connected readers to any subscribed observers. An observer must conform to the `ReaderObserver` protocol and receives notifications when: * A reader starts or stops charging. * A reader's battery level changes. * [Reader status](#reader-status) changes (for example, starts connecting or becomes ready to take payments). * Firmware update status or firmware update time changes. ```swift import SquareMobilePaymentsSDK class <#YourViewController#>: UIViewController { override func viewDidAppear(_ animated: Bool) { super.viewDidAppear(animated) // Add this class as an observer to receive reader updates. MobilePaymentsSDK.shared.readerManager.add(self) } override func viewDidDisappear(_ animated: Bool) { super.viewDidDisappear(animated) MobilePaymentsSDK.shared.readerManager.remove(self) } } extension <#YourViewController#>: ReaderObserver { func readerWasAdded(_ readerInfo: ReaderInfo) { print("Reader Added!") } func readerWasRemoved(_ readerInfo: ReaderInfo) { print("Reader Removed!") } func readerDidChange(_ readerInfo: ReaderInfo, change: ReaderChange) { switch change { case .batteryDidBeginCharging: print("Reader is charging.") case .batteryDidEndCharging: print("Reader not charging") case .batteryLevelDidChange: print("Reader battery changed to: \(readerInfo.batteryStatus!.level)") case .statusDidChange: print("Reader status changed to:\(readerInfo.statusInfo.status)") @unknown default: // Handle other `ReaderChange` events here. print(change) } } } ``` ### Card input methods Different reader devices offer different card entry methods. Square Reader for magstripe can only accept swiped cards, while Square Reader for contactless and chip can accept tapped or dipped cards. The card entry methods supported are available within the `ReaderInfo` `supportedInputMethods`. However, this list isn't updated if the available entry methods change (for example, if the NFC connection to a contactless reader times out). Your application should add an `AvailableCardInputMethodsObserver` to be notified when the available input methods change. Before taking a payment, your application should display the available payment methods to customers as a prompt to swipe, insert, or tap their card to pay. The SDK provides a prebuilt [payment prompt screen](mobile-payments-sdk/ios/take-payments#create-prompt-parameters) you can use instead of creating a custom prompt. If you want to create your own payment prompt screen, your application should query the `PaymentManager` `availableCardInputMethods` method and display the available payment methods to buyers. ```swift import SquareMobilePaymentsSDK import UIKit class <#YourViewController#>: AvailableCardInputMethodsObserver { var availableCardInputMethods = MobilePaymentsSDK.shared.paymentManager.availableCardInputMethods func viewDidLoad() { // Add this class as an observer to receive updates to // available card input methods. MobilePaymentsSDK.shared.paymentManager.add(self) } public func availableCardInputMethodsDidChange(_ cardInputMethods: CardInputMethods) { availableCardInputMethods = cardInputMethods if availableCardInputMethods.isEmpty { print("No card readers connected.") } else { print("Available card input methods: \(cardInputMethods)") } } } ``` ### Reader status Your application can check the current status of connected readers with `ReaderInfo.statusInfo` to display updates and messages to users. The `statusInfo` property returns a `ReaderStatusInfo` object that contains the reader's current status and additional context. The `statusInfo.status` property indicates the reader's current state. The possible values are: * `ready`: The reader is paired, connected, and able to accept card payments. * Magstripe readers connect automatically and are always `ready` until physically disconnected from the mobile device. * `connectingToSquare`: The reader is establishing a connection to Square's servers. * `connectingToDevice`: The reader is establishing a connection to the mobile device. * `faulty`: The reader has encountered a hardware or connection error and is in an unrecoverable state. * `readerUnavailable`: The reader is connected but not able to take payments. If a reader is unavailable, check `statusInfo.unavailableReasonInfo` for specific details, which may include bluetooth failure, a blocking firmware update, or issues with the merchant’s Square account. Depending on the reason, you can prompt the user to take action, or retry the connection with Square's servers with `readerManager.retryConnection()`. {% aside type="info" %} `readerInfo.status` is available in iOS Mobile Payments SDK version `2.3.0` and above. If your integration uses an earlier version of the SDK, monitor the status of connected readers with `readerInfo.state`. The available states are `connecting`, `updatingFirmware`, `disconnected`, or `failedToConnect`. {% /aside %} ```swift import SquareMobilePaymentsSDK extension <#YourViewController#> { func readyReaderCount() -> Int { // You can access all connected readers via // `MobilePaymentsSDK.shared.readerManager.readers` MobilePaymentsSDK.shared.readerManager.readers.filter { $0.statusInfo.status == .ready }.count } func hasReadyReader() -> Bool { MobilePaymentsSDK.shared.readerManager.readers.contains { $0.statusInfo.status == .ready } } } ``` ### Firmware info The `ReaderInfo.firmwareInfo` property provides structured firmware data through the `ReaderFirmwareInfo` class, which includes: * `updateStatus: FirmwareUpdateStatus` — The current firmware update status, represented as an enum with the following cases: - `.none` — No firmware update is available or in progress. - `.pending` — A firmware update is scheduled. - `.inProgress` — A firmware update is currently being installed. - `.failed` — A firmware update failed. * `updateTime: Date?` — The scheduled time for the next firmware update, if one is pending. ```swift import SquareMobilePaymentsSDK extension <#YourViewController#> { func checkFirmwareStatus() { for reader in MobilePaymentsSDK.shared.readerManager.readers { let firmwareInfo = reader.firmwareInfo print("Firmware version: \(firmwareInfo.version ?? "unknown")") switch firmwareInfo.updateStatus { case .none: print("Firmware is up to date") case .pending: if let updateTime = firmwareInfo.updateTime { print("Update scheduled for: \(updateTime)") } case .inProgress: print("Firmware update in progress") case .failed: print("Firmware update failed") @unknown default: break } } } } ``` ### Preferred firmware update time You can schedule firmware updates to occur at a preferred time of day using `readerSettings.preferredFirmwareUpdateTime`. This property accepts a `TimeOfDay` value with `hour` (0–23) and `minute` (0–59) properties. Setting this value allows sellers to schedule reader firmware updates during off-hours to avoid interruptions during business operations. ```swift import SquareMobilePaymentsSDK class <#YourViewController#>: UIViewController, ReaderSettingsObserver { override func viewDidAppear(_ animated: Bool) { super.viewDidAppear(animated) MobilePaymentsSDK.shared.readerManager.readerSettings.add(self) } override func viewDidDisappear(_ animated: Bool) { super.viewDidDisappear(animated) MobilePaymentsSDK.shared.readerManager.readerSettings.remove(self) } func setFirmwareUpdateTime() { // Schedule firmware updates for 2:00 AM if let time = TimeOfDay(hour: 2, minute: 0) { MobilePaymentsSDK.shared.readerManager.readerSettings.preferredFirmwareUpdateTime = time } } // MARK: - ReaderSettingsObserver func readerSettingsDidChange() { print("Reader settings changed") } } ``` ### Unpairing a reader Paired contactless and chip readers are remembered by the Mobile Payments SDK. When a new card reader is paired to the application, it remains paired until forgotten with the `ReaderManager`'s `forget(reader)` method. ## Next steps To test your application in the Square Sandbox without a physical Square Reader device, use the Mobile Payments SDK [Mock Reader UI](mobile-payments-sdk/ios#mock-readers) to simulate a reader and accept test payments. Otherwise, after you've paired a physical Square Reader device, you're ready to [take payments](mobile-payments-sdk/ios/take-payments) in a production environment. [Context: Objective C, iOS] {% toc hide=true /%} ## Overview The Mobile Payments SDK's `ReaderManager` lets you pair and monitor changes in Square readers. ## Requirements and limitations * To successfully pair a contactless reader and take payments, your application must [request location and Bluetooth permissions](mobile-payments-sdk/ios#request-location-bluetooth) from the user. * Physical reader devices cannot be used in the Square Sandbox. For testing purposes, you can use the [Mock Reader UI](mobile-payments-sdk/ios#mock-readers) to pair simulated readers and process mock payments with your application in the Square Sandbox. ## Settings Manager The Mobile Payments SDK offers a pre-made reader settings screen you can use in your application by calling `SQMPSettingsManager.presentSettings()`. This screen includes two tabs. The **Devices** tab displays the model and connection status for readers paired to the sellers's phone or tablet and includes a button for pairing a new reader. The **About** tab displays information about the Mobile Payments SDK, authorized location, and environment used to take payments. Users can also enable or disable consent for [performance and analytics tracking](mobile-payments-sdk/ios#data-privacy-consent) from this screen, if they are in a region where consent is required. Use the `SQMPSettingsManager.sdkSettings` to programmatically retrieve information about the current `environment` (either `production` or `sandbox`) and the current `version`. With the `SettingsManager`, you can also view `PaymentSettings` for the Square seller authenticated to your application, such as whether they have the ability to [take payments offline](/mobile-payments-sdk/ios/offline-payments). You can check whether the settings screen is currently displayed with `settingsManager.isSettingsPresented` and programmatically dismiss it with `settingsManager.dismissSettings()`. This is useful for kiosk mode or when your application needs to respond to external events while settings are open. ![ios-mpsdk-settings](//images.ctfassets.net/1nw4q0oohfju/6ccWFsfhlpc64odlsjBMpR/eec7c1934ed415b8068b65da4bef530b/ios-mpsdk-settings.png) ## Reader Manager If you want more control over your reader pairing and management screens, you can create your own using information from the Mobile Payments SDK `SQMPReaderManager`. This manager provides methods for pairing and forgetting readers, accessing information about a particular reader, and listening for reader status updates. ### Pairing a reader Square Readers for magstripe are automatically detected by the Mobile Payments SDK as they are inserted or removed from a device's connection port and don't need to be paired. Likewise, the [Square Stand](mobile-payments-sdk/ios/square-stand) includes a built-in reader device and doesn't need an external reader paired to take payments. Square readers for contactless and chip must be paired with the Mobile Payments SDK using the `ReaderManager`. To start searching for nearby Bluetooth readers, call `readerManager.startPairing(with:)`, passing in a `ReaderPairingDelegate`, which is notified when reader pairing begins and whether the pairing succeeded or failed. During pairing, a `PairingHandle` is returned and can be used to stop the pairing in progress. You should call `PairingHandle.stop()` any time a user leaves the screen from which they're attempting to pair a reader. When pairing is successful, the paired reader is added to the array of available readers accessed with `readerManager.readers`. If the pairing fails, the delegate's `readerPairingDidFail` method returns an [error](mobile-payments-sdk/ios/handling-errors) you can use to troubleshoot and attempt pairing again. Only one reader pairing can be in progress at one time, so before calling `startPairing`, check the Boolean value `readerManager.isPairingInProgress` and only begin pairing if it's `false`. ```objectivec #import @import SquareMobilePaymentsSDK; @interface <#YourViewController#> : UIViewController @property (nonatomic, strong) id pairingHandle; - (void)startPairing; - (void)stopPairing; @end @implementation <#YourViewController#> - (void)startPairing { // `self` must conform to SQMPReaderPairingDelegate self.pairingHandle = [SQMPMobilePaymentsSDK.shared.readerManager startPairingWith:self]; } - (void)stopPairing { // Manually stop searching for nearby readers. [self.pairingHandle stop]; } #pragma mark - SQMPReaderPairingDelegate - (void)readerPairingDidBegin { NSLog(@"Reader pairing did begin!"); } - (void)readerPairingDidSucceed { NSLog(@"Reader Paired!"); } - (void)readerPairingDidFailWith:(NSError * _Nonnull)error { // Handle pairing error NSLog(@"Error: %@", error.localizedDescription); } @end ``` ## Reader information The `SQMPReaderInfo` class provides information about Square readers and stands paired with your application. These properties include: * The battery level and charging status. * The model (`contactlessAndChip`, `magstripe`, or `stand`). * The serial number. * The firmware info, including version and update status. * The connection type (`unknown`, `usb`, `bluetooth`, `embedded`, or `audio`). * The card entry methods supported by the reader (`TAP`, `DIP`, or `SWIPE`). You can use this information to send notifications to users of your application when a reader is unpaired or its battery is low. In case of a [pairing error](mobile-payments-sdk/ios/handling-errors), you can use `connectionInfo.failureReason` to provide more details and suggestions to your application users about how to retry their pairing attempt. ### Getting reader updates The Mobile Payments SDK reports changes to connected readers to any subscribed observers. An observer must conform to the `SQMPReaderObserver` protocol and receives notifications when: * A reader starts or stops charging. * A reader's battery level changes. * [Reader status](#reader-status) changes (for example, starts connecting or becomes ready to take payments). ```objectivec #import @import SquareMobilePaymentsSDK; @interface <#YourViewController#> : UIViewController @end @implementation <#YourViewController#> - (void)viewDidAppear:(BOOL)animated { [super viewDidAppear:animated]; // Add this class as an observer to receive reader updates. [SQMPMobilePaymentsSDK.shared.readerManager add:self]; } - (void)viewDidDisappear:(BOOL)animated { [super viewDidDisappear:animated]; [SQMPMobilePaymentsSDK.shared.readerManager remove:self]; } #pragma mark - SQMPReaderObserver - (void)readerWasAdded:(id _Nonnull)readerInfo { NSLog(@"Reader Added!"); } - (void)readerWasRemoved:(id _Nonnull)readerInfo { NSLog(@"Reader Removed!"); } - (void)readerDidChange:(id _Nonnull)readerInfo change:(enum SQMPReaderChange)change { switch (change) { case SQMPReaderChangeBatteryDidBeginCharging: NSLog(@"Reader is charging."); break; case SQMPReaderChangeBatteryDidEndCharging: NSLog(@"Reader not charging"); break; case SQMPReaderChangeBatteryLevelDidChange: NSLog(@"Reader battery changed to: %ld", (long)readerInfo.batteryStatus.level); break; case SQMPReaderChangeStatusDidChange: NSLog(@"Reader status changed to: %ld", (long)readerInfo.status); break; default: // Handle other `SQMPReaderChange` events here. NSLog(@"Unknown change: %ld", (long)change); break; } } @end ``` ### Card input methods Different reader devices offer different card entry methods. Square Reader for magstripe can only accept swiped cards, while Square Reader for contactless and chip can accept tapped or dipped cards. The card entry methods supported are available within the `ReaderInfo` `supportedInputMethods`. However, this list isn't updated if the available entry methods change (for example, if the NFC connection to a contactless reader times out). Your application should add an `SQMPAvailableCardInputMethodsObserver` to be notified when the available input methods change. Before taking a payment, your application should display the available payment methods to customers as a prompt to swipe, insert, or tap their card to pay. The SDK provides a prebuilt [payment prompt screen](mobile-payments-sdk/ios/take-payments#create-prompt-parameters) you can use instead of creating a custom prompt. If you want to create your own payment prompt screen, your application should query the `PaymentManager` `availableCardInputMethods` method and display the available payment methods to buyers. ```objectivec #import @import SquareMobilePaymentsSDK; @interface <#YourViewController#> : UIViewController @property (nonatomic, strong) SQMPCardInputMethods *availableCardInputMethods; @end @implementation <#YourViewController#> - (void)viewDidLoad { [super viewDidLoad]; // Initialize availableCardInputMethods self.availableCardInputMethods = SQMPMobilePaymentsSDK.shared.paymentManager.availableCardInputMethods; // Add this class as an observer to receive updates to available card input methods. [SQMPMobilePaymentsSDK.shared.paymentManager add:self]; } #pragma mark - SQMPAvailableCardInputMethodsObserver - (void)availableCardInputMethodsDidChange:(SQMPCardInputMethods *)cardInputMethods { self.availableCardInputMethods = cardInputMethods; if (self.availableCardInputMethods.isEmpty) { NSLog(@"No card readers connected."); } else { NSLog(@"Available card input methods: %@", cardInputMethods); } } @end ``` ### Reader status Your application can check the current status of connected readers with `SQMPReaderInfo.statusInfo` to display updates and messages to users. The `statusInfo` property returns a `SQMPReaderStatusInfo` object that contains the reader's current status and additional context. The statusInfo.status property indicates the reader's current status. The possible values are: * `ready`: The reader is paired, connected, and able to accept card payments. * Magstripe readers connect automatically and are always `ready` until physically disconnected from the mobile device. * `connectingToSquare`: The reader is establishing a connection to Square's servers. * `connectingToDevice`: The reader is establishing a connection to the mobile device. * `faulty`: The reader has encountered a hardware or connection error and is in an unrecoverable state. * `readerUnavailable`: The reader is connected but not able to take payments. If a reader is unavailable, check `statusInfo.unavailableReasonInfo.reason` for specific details, which may include bluetooth failure, a blocking firmware update, or issues with the merchant’s Square account. Depending on the reason, you can prompt the user to take action, or retry the connection with Square's servers with `SQMPreaderManager.retryConnection()`. {% aside type="info" %} `SQMPreaderInfo.status` is available in iOS Mobile Payments SDK version `2.3.0` and above. If your integration uses an earlier version of the SDK, monitor the status of connected readers with `readerInfo.state`. The available states are `connecting`, `updatingFirmware`, `disconnected`, or `failedToConnect`. {% /aside %} ```objectivec #import @import SquareMobilePaymentsSDK; @interface <#YourViewController#> : UIViewController // … @end @implementation <#YourViewController#> - (NSInteger)readyReaderCount { // You can access all connected readers via // `SQMPMobilePaymentsSDK.shared.readerManager.readers` NSArray> *readers = SQMPMobilePaymentsSDK.shared.readerManager.readers; NSInteger readyReaderCount = 0; for (id reader in readers) { if (reader.status == SQMPReaderStatusReady) { readyReaderCount++; } } return readyReaderCount; } @end ``` ### Unpairing a reader Paired contactless and chip readers are remembered by the Mobile Payments SDK. When a new card reader is paired to the application, it remains paired until forgotten with the `ReaderManager`'s `forget(reader)` method. ## Next steps To test your application in the Square Sandbox without a physical Square Reader device, use the Mobile Payments SDK [Mock Reader UI](mobile-payments-sdk/ios#mock-readers) to simulate a reader and accept test payments. Otherwise, after you've paired a physical Square Reader device, you're ready to [take payments](mobile-payments-sdk/ios/take-payments) in a production environment. --- # Take a Payment > Source: https://developer.squareup.com/docs/mobile-payments-sdk/ios/take-payments > Status: PUBLIC > Languages: All > Platforms: iOS **Applies to:** [Mobile Payments SDK - iOS](https://developer.squareup.com/docs/sdk/mobile-payments/ios) | [Payments API](payments-refunds) | [Orders API](orders-api/what-it-does) {% subheading %}Learn how to use the Mobile Payments SDK for iOS to take a payment with a Square Reader or Square Stand.{% /subheading %} {% line-break /%} [Context: Swift, iOS] {% toc hide=true /%} ## Overview Payments in the Mobile Payments SDK are handled by the `PaymentManager` and must conform to the `PaymentManagerDelegate` protocol. The `PaymentManagerDelegate` is called when a payment starts and finishes successfully, fails, or is canceled. Your application should include logic to handle each of these scenarios. To learn about error messages produced by the Mobile Payments SDK and ways to resolve them, see [Handling Errors](mobile-payments-sdk/ios/handling-errors). If the payment completes successfully, a `Payment` object is returned, describing details of the payment. This can be either an `OnlinePayment` or an `OfflinePayment`. ```swift extension <#YourViewController#>: PaymentManagerDelegate { func paymentManager(_ paymentManager: PaymentManager, didFinish payment: Payment) { // You can further inspect each payment once cast if let onlinePayment = payment as? OnlinePayment { print("Online Payment - ID: \(onlinePayment.id!), status: \(onlinePayment.status.description)") } else if let offlinePayment = payment as? OfflinePayment { print("Offline Payment - ID: \(offlinePayment.localID), status: \(offlinePayment.status.description)") } } func paymentManager(_ paymentManager: PaymentManager, didFail payment: Payment, withError error: Error) { // Handle this the same way as `didFinish` } func paymentManager(_ paymentManager: PaymentManager, didCancel payment: Payment) { // Handle this the same way as `didFinish` } } ``` ## Requirements and limitations Before taking a payment with the SDK in a production environment, ensure that you've done the following: * [Requested the permissions](mobile-payments-sdk/ios#privacy-permissions) necessary for the type of reader you're using. * [Installed and initialized](mobile-payments-sdk/ios#quickstart) the Mobile Payments SDK in your iOS application. * [Authorized the Mobile Payments SDK](mobile-payments-sdk/ios/configure-authorize) with a Square account. Additionally, before taking a payment in production, you can test your application using [mock readers](mobile-payments-sdk/ios#mock-readers) and the Square Sandbox or download the [Mobile Payments SDK sample application](https://github.com/square/mobile-payments-sdk-ios) to see an example payment implementation. ## Create payment parameters To begin a payment with the Mobile Payments SDK, you create a `PaymentParameters` object, which includes attributes describing the payment you want to take. For example, there are parameters for the payment amount, payment attempt ID, optional tip, application fee (if applicable), and the processing mode, which [determines whether payments can be taken offline](mobile-payments-sdk/ios/offline-payments). `autoDetect` is the recommended `processingMode`, as this directs the payment online or offline based on the highest chance of success. For this reason, the resulting Payment object might be an `OnlinePayment` or `OfflinePayment`, and your application should account for both if you're using the `autoDetect` processing mode. Merchants can optionally add [card surcharges](#card-surcharging) to payments, and your application can allow or override that setting with the `allowCardSurcharge` parameter. For the complete list of payment parameter values and details, see the [iOS technical reference](https://developer.squareup.com/docs/sdk/mobile-payments/ios). ### Idempotency and payment attempts {% aside type="important" %} In the Mobile Payments SDK version `2.2.2` and earlier, you generated and added your own idempotency key in your `paymentParameters`. In version `2.3.0` and later, the `idempotencyKey` parameter is deprecated and you instead provide a `paymentAttemptID`. This is the recommended way to handle idempotent payment requests in the Mobile Payments SDK, and offers both idempotency protection and support for Strong Customer Authentication (SCA) requirements. {% /aside %} [Square payment requests](https://developer.squareup.com/reference/square/payments-api/create-payment) contain an idempotency key, a unique string identifier that accompanies an API operation, allowing Square to recognize potential duplicate calls. Using an idempotency key for each payment request ensures that a payment can only occur once, protecting against unintended outcomes like charging a customer twice for the same transaction. When you provide a `paymentAttemptID` in your `paymentParameters` for each call to `startPayment`, the Mobile Payments SDK generates a unique idempotency key for the payment request, and stores it along with your payment attempt ID. If multiple requests are made for the same payment attempt (for example, during SCA flows), the SDK generates a new idempotency key for each request and updates the stored idempotency key for the given payment attempt ID. You can't include both an `idempotencyKey` and a `paymentAttemptID` in your `paymentParameters`, only one. Along with a `paymentAttemptID`, you should include a unique `referenceID` value in your `paymentParameters` for each payment. This persists with the payment and can be used to identify the payment within your own system if you need to reference it later. Your attempt ID and reference ID are not interchangeable. You shouldn't use the same value for both parameters because sometimes a payment requires multiple attempts (for example, if the first payment attempt is declined for expiration or insufficient funds, you can retry the payment with the same `referenceID` and a new `paymentAttemptID`). Typically, the `referenceID` is used to match Square payments to an external system, but it can also be used to identify payments within Square. If you don't receive a server response from a payment made with the Mobile Payments SDK, you should check its status to determine whether to attempt the payment again. Use the [ListPayments](https://developer.squareup.com/reference/square/payments-api/list-payments) endpoint and query by location ID, total payment amount, or other fields to filter the list. You can use your unique `referenceID` to identify the correct payment and check its status. You might need to make a new payment attempt if the prior payment exists, but can't be completed. In this situation, retrieve the final idempotency key used for the payment attempt with `PaymentManager.getIdempotencyKey`, and cancel the incomplete payment by using [CancelPaymentByIdempotencyKey](https://developer.squareup.com/reference/square/payments-api/cancel-payment-by-idempotency-key). The following is an example of payment parameters created for a payment of $1 USD. The parameters include a `paymentAttemptID`, unique `referenceID`, and an optional `orderID` that allows you to associate a payment with an itemized [Square order](orders-api/what-it-does). ```swift import UIKit import SquareMobilePaymentsSDK extension <#YourViewController#> { func makePaymentParameters() -> PaymentParameters { let amount = Money(amount: 100, currency: .USD) // This is the ID used to reference the payment in your own system. let referenceID = "MY_REFERENCE_ID_1234" // This is the ID of the payment attempt for idempotent payment requests. let paymentAttemptID = "paymentAttemptID" // allow the payment to be taken online or offline let processingMode = processingMode.autoDetect // allow credit card surcharging for online payments if configured by the merchant let allowCardSurcharge = true // Create the payment parameters let paymentParams = PaymentParameters( paymentAttemptID: paymentAttemptID, amountMoney: amount, processingMode: processingMode, allowCardSurcharge: allowCardSurcharge ) // An optional note to add to the payment. paymentParams.note = "My Note" // Optional parameter to associate this payment with a previously created Square order. paymentParams.orderID = "CAISENgvlJ6jLWAzERDzjyHVybY" // A user-defined ID to associate with the payment. You can use this field // to associate the payment to an entity in an external system. paymentParams.referenceID = referenceID return paymentParams } } ``` ## Create prompt parameters Each payment must also have `PromptParameters` configured. The `PromptParameters` contain a `PromptMode` and `AdditionalPaymentMethods`. `PromptParameters.mode` determines whether your application uses the `default` Square-provided payment prompt UI or a custom payment prompt where you build your own UI. The default UI provided by Square is presented on top of the `viewController` passed to `PaymentManager.startPayment` and presents buyers with the payment options available from `PaymentManager.availableCardInputMethods`. ![ios-mpsdk-prompt](//images.ctfassets.net/1nw4q0oohfju/s32OClWXm5bANH79nZTjm/16de405cfa6f9d1b6cfa514d090b1571/ios-mpsdk-prompt.png) {% line-break /%} `PromptParameters.additionalPaymentMethods` specifies a list of additional payment methods available to use for this payment. The current options are `keyed` (a manually entered credit card payment) or `cash`. If you're using the default `PromptMode`, you can make `AdditionalPaymentMethods` an empty list to remove the manual card entry button from the payment prompt. If you create your own `custom` `PromptMode`, you should use the `additionalPaymentMethods` available from the `PaymentHandle` to render these options for buyers in your own payment prompt UI. ## Start the payment To begin processing a payment, call `PaymentManager.startPayment()` with the `PaymentParameters` and `PromptParameters` you previously created. During the payment, Square takes control of the screen display to ensure that buyer information is handled securely and that the final confirmation of the payment is correctly shown to the buyer. You must conform to the `PaymentManagerDelegate` to handle results and [errors](mobile-payments-sdk/ios/handling-errors) from the payment flow. When the payment begins, the Payment Manager provides a `PaymentHandle` as a way for you to interact with the ongoing payment (for example, if you need to [cancel the payment](#canceling-payments)). When the payment completes, regardless of whether it completed successfully, control is returned to the user interface and your application is notified of the result using `PaymentManagerDelegate`. Your application can display [receipt](#receipts) or [error](mobile-payments-sdk/ios/handling-errors) information to the user and continue other processing. {% aside type="info" %} Only one payment can be in process at a given moment. If you make a second call to `startPayment` before the first has completed, triggering the `PaymentManagerDelegate`, the second call fails immediately with a `paymentAlreadyInProgress` error. The first payment call continues. {% /aside %} ```swift import SquareMobilePaymentsSDK class <#YourViewController#>: UIViewController { private var paymentHandle: PaymentHandle? func startPayment() { paymentHandle = MobilePaymentsSDK.shared.paymentManager.startPayment( makePaymentParameters(), promptParameters: PromptParameters( mode: .default, additionalMethods: .all ), from: self, delegate: self ) } func makePaymentParameters() -> PaymentParameters { PaymentParameters( paymentAttemptID: UUID().uuidString, amountMoney: Money(amount: 100, currency: .USD) ) } } ``` ## Delay the capture of payments As part of your application's workflow, you might want to authorize a customer's transaction but delay the capture of the payment (the transfer of funds from customer to seller) for a period of time. For example, in a restaurant with a kiosk ordering system, you might want to authorize a customer's credit card when they order, but not complete the payment until they receive their food. While creating `PaymentParameters`, set the `autocomplete` value to `false` if you want to delay the capture of the payment. While the payment is delayed, use the Payments API to [complete](https://developer.squareup.com/reference/square/payments-api/complete-payment) or [cancel the payment](https://developer.squareup.com/reference/square/payments-api/cancel-payment). You can also [update the payment](https://developer.squareup.com/reference/square/payments-api/update-payment) to add a tip using the `tip_money` parameter. When `autocomplete` is `false`, there are two more `PaymentParameter` values which handle the delayed payment: * `delayDuration`: The number of seconds to wait before canceling the payment or taking another `delayAction`, specified as a `TimeInterval`, with a minimum value of 60 seconds. Use a value of “0” to fallback to the default 36 hours for card present payments, or 7 days for manually entered payments. * `delayAction`: The action to take once the `delayDuration` has passed with no other action on the payment. The possible options are `cancel` (default) or `complete`. {% aside %} Only one of `autocomplete` and `acceptPartialAuthorization` can be `true`. If you are accepting multiple payment methods for a single purchase (such as a gift card and credit card), you must set `autocomplete` to `false` and manage the delayed capture of the payment. {% /aside %} For more information about delayed payment capture using the Payments API, see [Delayed Capture of a Card Payment](payments-api/take-payments/card-payments/delayed-capture). ## Card Surcharging A surcharge is an additional amount or percentage that sellers can set to pass on credit card processing fees to buyers. Sellers optionally set a surcharge percentage in their Square Dashboard. As a Mobile Payments SDK developer, you can include this surcharge or choose to override the dashboard settings and disallow surcharges on card payments in your application. {% aside type="important" %} * Surcharges with the Mobile Payments SDK are only available for credit card payments made in the US. * Surcharges are not available for offline payments, debit card payments, or pre-existing orders. {% /aside %} To add surcharges to credit card payments, your application must have `ITEMS_READ` permission in addition to the [standard payment permissions](mobile-payments-sdk#oauth-permissions). Use the `allowCardSurcharge` parameter in your `PaymentParameters` to control whether surcharges can be applied to individual payments: ```swift // Enable surcharging for this payment paymentParams.allowCardSurcharge = true // Or disable surcharging for this specific payment paymentParams.allowCardSurcharge = false ``` If you're using a custom payment prompt, use the use the `PaymentHandle.totalMoneyWithProposedCardSurcharge` to display surcharge amounts to customers before payment completion. This ensures transparency and compliance with surcharging regulations. After an Online payment completes, access surcharge information from its `CardPaymentDetails` for receipt generation and record keeping: ```swift extension YourViewController: PaymentManagerDelegate { func paymentManager(_ paymentManager: PaymentManager, didFinish payment: Payment) { // Cast to OnlinePayment to access cardDetails if let onlinePayment = payment as? OnlinePayment, let cardDetails = onlinePayment.cardDetails, let surchargeDetails = cardDetails.appliedCardSurchargeDetails { print("Base surcharge amount: \(surchargeDetails.cardSurchargeMoney)") if let taxOnSurcharge = surchargeDetails.taxOnCardSurchargeMoney { print("Tax on surcharge: \(taxOnSurcharge)") } ``` ## Canceling payments The `PaymentHandle` provided by the Mobile Payments SDK during a payment can be used to cancel that payment. Note that only a payment where `autocomplete` is set to `false` can be canceled during processing. You can first check the value of `PaymentHandle.isPaymentCancelable`. If it's set to `true`, the payment can be canceled by calling `paymentHandle.cancelPayment()`. For example, if your code dismisses the view controller passed to `PaymentManager.startPayment` and the payment was not successful, you must call `cancelPayment`. During any payment flow, if the application is backgrounded or the application activity is interrupted, the payment in progress is canceled. ## Receipts Your application must provide buyers with the option to receive a digital or printed receipt. These receipts aren't sent directly by Square. Therefore, to remain compliant with EMV-certification requirements, you must generate receipts including the following fields from the payment response `cardDetails` object, when available: * `cardholderName` (example: James Smith) * `cardBrand` and `last4` (example: Visa 0094) * `applicationName` (example: AMERICAN EXPRESS) * `applicationIdentifier` (example: AID: A0 00 00 00 25 01 09 01) * `entryMethod` (example: Contactless) [Context: Objective C, iOS] {% toc hide=true /%} ## Overview Payments in the Mobile Payments SDK are handled by the `SQMPPaymentManager` and must conform to the `SQMPPaymentManagerDelegate` protocol. The `SQMPPaymentManagerDelegate` is called when a payment starts and finishes successfully, fails, or is canceled. Your application should include logic to handle each of these scenarios. To learn about error messages produced by the Mobile Payments SDK and ways to resolve them, see [Handling Errors](mobile-payments-sdk/ios/handling-errors). If the payment completes successfully, a `Payment` object is returned, describing details of the payment. This can be either an `OnlinePayment` or an `OfflinePayment`. ```objectivec #import @import SquareMobilePaymentsSDK; @interface <#YourViewController#> () // … @end @implementation <#YourViewController#> - (void)paymentManager:(id)paymentManager didFinish:(id)payment { // You can further inspect each payment once cast if ([payment conformsToProtocol:@protocol(SQMPOnlinePayment)]) { id onlinePayment = (id)payment; NSLog(@"Online Payment - ID: %@, status: %lu", onlinePayment.id, onlinePayment.status); } else if ([payment conformsToProtocol:@protocol(SQMPOfflinePayment)]) { id offlinePayment = (id)payment; NSLog(@"Offline Payment - ID: %@, status: %lu", offlinePayment.localID, offlinePayment.status); } } @end ``` ## Requirements and limitations Before taking a payment with the SDK in a production environment, ensure that you've done the following: * [Requested the permissions](mobile-payments-sdk/ios#privacy-permissions) necessary for the type of reader you're using. * [Installed and initialized](mobile-payments-sdk/ios#quickstart) the Mobile Payments SDK in your iOS application. * [Authorized the Mobile Payments SDK](mobile-payments-sdk/ios/configure-authorize) with a Square account. Additionally, before taking a payment in production, you can test your application using [mock readers](mobile-payments-sdk/ios#mock-readers) and the Square Sandbox or download the [Mobile Payments SDK sample application](https://github.com/square/mobile-payments-sdk-ios) (written in Swift) to see an example payment implementation. ## Create payment parameters To begin a payment with the Mobile Payments SDK, you create a `SQMPPaymentParameters` object, which includes attributes describing the payment you want to take. For example, there are parameters for the payment amount, payment attempt ID, optional tip, application fee (if applicable), and the processing mode, which determines whether [payments can be taken offline](mobile-payments-sdk/ios/offline-payments). `autoDetect` is the recommended `processingMode`, as this directs the payment online or offline based on the highest chance of success. For this reason, the resulting Payment object might be an `OnlinePayment` or `OfflinePayment`, and your application should account for both if you're using the `autoDetect` processing mode. Merchants can optionally add [card surcharges](#card-surcharging) to payments, and your application can allow or override that setting with the `allowCardSurcharge` parameter. For the complete list of payment parameter values and details, see the [iOS technical reference](https://developer.squareup.com/docs/sdk/mobile-payments/ios). ### Idempotency and payment attempts {% aside type="important" %} In the Mobile Payments SDK version `2.2.2` and earlier, you generated and added your own idempotency key in your `SQMPpaymentParameters`. In version `2.3.0` and later, the `idempotencyKey` parameter is deprecated and you instead provide a `paymentAttemptID`. This is the recommended way to handle idempotent payment requests in the Mobile Payments SDK, and offers both idempotency protection and support for Strong Customer Authentication (SCA) requirements. {% /aside %} [Square payment requests](https://developer.squareup.com/reference/square/payments-api/create-payment) contain an idempotency key, a unique string identifier that accompanies an API operation, allowing Square to recognize potential duplicate calls. Using an idempotency key for each payment request ensures that a payment can only occur once, protecting against unintended outcomes like charging a customer twice for the same transaction. When you provide a `paymentAttemptID` in your `SQMPPaymentParameters` for each call to `startPayment`, the Mobile Payments SDK generates a unique idempotency key for the payment request, and stores it along with your payment attempt ID. If multiple requests are made for the same payment attempt (for example, during SCA flows), the SDK generates a new idempotency key for each request and updates the stored idempotency key for the given payment attempt ID. You can't include both an `idempotencyKey` and a `paymentAttemptID` in your `SQMPPaymentParameters`, only one. Along with a `paymentAttemptID`, you should include a unique `referenceID` value in your `SQMPPaymentParameters` for each payment. This persists with the payment and can be used to identify the payment within your own system if you need to reference it later. Your attempt ID and reference ID are not interchangeable. You shouldn't use the same value for both parameters because sometimes a payment requires multiple attempts (for example, if the first payment attempt is declined for expiration or insufficient funds, you can retry the payment with the same `referenceID` and a new `paymentAttemptID`). Typically, the `referenceID` is used to match Square payments to an external system, but it can also be used to identify payments within Square. If you don't receive a server response from a payment made with the Mobile Payments SDK, you should check its status to determine whether to attempt the payment again. Use the [ListPayments](https://developer.squareup.com/reference/square/payments-api/list-payments) endpoint and query by location ID, total payment amount, or other fields to filter the list. You can use your unique `referenceID` to identify the correct payment and check its status. You might need to make a new payment attempt if the prior payment exists, but can't be completed. In this situation, retrieve the final idempotency key used for the payment attempt with `PaymentManager.getIdempotencyKey`, and cancel the incomplete payment by using [CancelPaymentByIdempotencyKey](https://developer.squareup.com/reference/square/payments-api/cancel-payment-by-idempotency-key). The following is an example of payment parameters created for a payment of $1 USD. The parameters include a `paymentAttemptID`, unique `referenceID`, and an optional `orderID` that allows you to associate a payment with an itemized [Square order](orders-api/what-it-does). ```objectivec #import @import SquareMobilePaymentsSDK; @implementation <#YourViewController#> - (SQMPPaymentParameters *)makePaymentParameters { SQMPMoney *amount = [[SQMPMoney alloc] initWithAmount:100 currency:SQMPCurrencyUSD]; // allow the payment to be taken online or offline SQMPProcessingMode processingMode = SQMPProcessingModeAutoDetect; // This is the ID used to reference the payment in your own system. NSString *referenceID = @"MY_REFERENCE_ID_1234"; // This is the ID of the payment attempt for idempotent payment requests. NSString *paymentAttemptID = [NSUUID UUID].UUIDString; // Create the payment parameters SQMPPaymentParameters *paymentParams = [[SQMPPaymentParameters alloc] initWithPaymentAttemptID:paymentAttemptID amountMoney:amount processingMode:processingMode]; // An optional note to add to the payment. paymentParams.note = @"My Note"; // Optional parameter to associate this payment with a previously created Square order. paymentParams.orderID = @"CAISENgvlJ6jLWAzERDzjyHVybY"; // A user-defined ID to associate with the payment. You can use this field // to associate the payment to an entity in an external system. paymentParams.referenceID = referenceID; return paymentParams; } @end ``` ## Create prompt parameters Each payment must also have `SQMPPromptParameters` configured. The `SQMPPromptParameters` contain a `PromptMode` and `AdditionalPaymentMethods`. `PromptParameters.mode` determines whether your application uses the `default` Square-provided payment prompt UI or a custom payment prompt where you build your own UI. The default UI provided by Square is presented on top of the `viewController` passed to `PaymentManager.startPayment` and presents buyers with the payment options available from `PaymentManager.availableCardInputMethods`. ![ios-mpsdk-prompt](//images.ctfassets.net/1nw4q0oohfju/s32OClWXm5bANH79nZTjm/16de405cfa6f9d1b6cfa514d090b1571/ios-mpsdk-prompt.png) {% line-break /%} `PromptParameters.additionalPaymentMethods` specifies a list of additional payment methods available to use for this payment. The current options are `keyed` (a manually entered credit card payment) and `cash`. If you're using the default `PromptMode`, you can make `AdditionalPaymentMethods` an empty list to remove the manual card entry button from the payment prompt. If you create your own `custom` `PromptMode`, you should use the `additionalPaymentMethods` available from the `SQMPPaymentHandle` to render these options for buyers in your own payment prompt UI. ## Start the payment To begin processing a payment, call `PaymentManager.startPayment()` with the `SQMPPaymentParameters` and `SQMPPromptParameters` you previously created. During the payment, Square takes control of the screen display to ensure that buyer information is handled securely and that the final confirmation of the payment is correctly shown to the buyer. You must conform to the `SQMPPaymentManagerDelegate` to handle results and [errors](mobile-payments-sdk/ios/handling-errors) from the payment flow. When the payment begins, the Payment Manager provides a `SQMPPaymentHandle` as a way for you to interact with the ongoing payment (for example, if you need to [cancel the payment](#canceling-payments)). When the payment completes, regardless of whether it completed successfully, control is returned to the user interface and your application is notified of the result using `SQMPPaymentManagerDelegate`. Your application can display [receipt](#receipts) or [error](mobile-payments-sdk/ios/handling-errors) information to the user and continue other processing. {% aside type="info" %} Only one payment can be in process at a given moment. If you make a second call to `startPayment` before the first has completed, triggering the `SQMPPaymentManagerDelegate`, the second call fails immediately with a `paymentAlreadyInProgress` error. The first payment call continues. {% /aside %} ```objectivec #import @import SquareMobilePaymentsSDK; @interface <#YourViewController#> : UIViewController // … @end @implementation <#YourViewController#> - (void)startPayment { id paymentHandle = [SQMPMobilePaymentsSDK.shared.paymentManager startPayment:[self makePaymentParameters] promptParameters:[[SQMPPromptParameters alloc] initWithMode:SQMPPromptModeDefault additionalMethods:SQMPAdditionalPaymentMethods.all] from:self delegate:self]; } - (SQMPPaymentParameters *)makePaymentParameters { SQMPMoney *amountMoney = [[SQMPMoney alloc] initWithAmount:100 currency:SQMPCurrencyUSD]; NSString *paymentAttemptID = [[NSUUID UUID] UUIDString]; return [[SQMPPaymentParameters alloc] initWithpaymentAttemptID:paymentAttemptID amountMoney:amountMoney]; } @end ``` ## Delay the capture of payments As part of your application's workflow, you might want to authorize a customer's transaction but delay the capture of the payment (the transfer of funds from customer to seller) for a period of time. For example, in a restaurant with a kiosk ordering system, you might want to authorize a customer's credit card when they order, but not complete the payment until they receive their food. While creating `SQMPPaymentParameters`, set the `autocomplete` value to `false` if you want to delay the capture of a payment. While the payment is delayed, use the Payments API to [complete](https://developer.squareup.com/reference/square/payments-api/complete-payment) or [cancel the payment](https://developer.squareup.com/reference/square/payments-api/cancel-payment). You can also [update the payment](https://developer.squareup.com/reference/square/payments-api/update-payment) to add a tip using the `tip_money` parameter. When `autocomplete` is `false`, there are two more `SQMPPaymentParameter` values which handle the delayed payment: * `delayDuration`: The number of seconds to wait before canceling the payment or taking another `delayAction`, specified as a `TimeInterval`, with a minimum value of 60 seconds. Use a value of “0” to fallback to the default 36 hours for card present payments, or 7 days for manually entered payments. * `delayAction`: The action to take once the `delayDuration` has passed with no other action on the payment. The possible options are `cancel` (default) or `complete`. {% aside %} Only one of `autocomplete` and `acceptPartialAuthorization` can be `true`. If you are accepting multiple payment methods for a single purchase (such as a gift card and credit card), you must set `autocomplete` to `false` and manage the delayed capture of the payment. {% /aside %} For more information about delayed payment capture using the Payments API, see [Delayed Capture of a Card Payment](payments-api/take-payments/card-payments/delayed-capture). ## Card Surcharging A surcharge is an additional amount or percentage that sellers can set to pass on credit card processing fees to buyers. Sellers optionally set a surcharge percentage in their Square Dashboard. As a Mobile Payments SDK developer, you can include this surcharge or choose to override the dashboard settings and disallow surcharges on card payments in your application. {% aside type="important" %} * Surcharges with the Mobile Payments SDK are only available for credit card payments made in the US. * Surcharges are not available for offline payments, debit card payments, or pre-existing orders. {% /aside %} To add surcharges to credit card payments, your application must have `ITEMS_READ` permission in addition to the [standard payment permissions](mobile-payments-sdk#oauth-permissions). Use the `allowCardSurcharge` parameter in your `SQMPPaymentParameters` to control whether surcharges can be applied to individual payments: ```objectivec // Enable surcharging for this payment paymentParams.allowCardSurcharge = YES // Or disable surcharging for this specific payment paymentParams.allowCardSurcharge = NO ``` If you're using a custom payment prompt, use the use the `SQMPPaymentHandle.totalMoneyWithProposedCardSurcharge` to display surcharge amounts to customers before payment completion. This ensures transparency and compliance with surcharging regulations. After an Online payment completes, access surcharge information from its `CardPaymentDetails` for receipt generation and record keeping: ```objectivec #import @import SquareMobilePaymentsSDK; - (void)paymentManager:(id)paymentManager didFinish:(id)payment { // Cast to SQMPOnlinePayment to access cardDetails if ([payment conformsToProtocol:@protocol(SQMPOnlinePayment)]) { id onlinePayment = (id)payment; id cardDetails = onlinePayment.cardDetails; if (cardDetails && cardDetails.appliedCardSurchargeDetails) { id surchargeDetails = cardDetails.appliedCardSurchargeDetails; NSLog(@"Base surcharge amount: %@", surchargeDetails.cardSurchargeMoney); if (surchargeDetails.taxOnCardSurchargeMoney) { NSLog(@"Tax on surcharge: %@", surchargeDetails.taxOnCardSurchargeMoney); } ``` ## Canceling payments The `SQMPPaymentHandle` provided by the Mobile Payments SDK during a payment can be used to cancel that payment. Note that only a payment where `autocomplete` is set to `false` can be canceled during processing. You can first check the value of `PaymentHandle.isPaymentCancelable`. If it's set to `true`, the payment can be canceled by calling `paymentHandle.cancelPayment()`. For example, if your code dismisses the view controller passed to `PaymentManager.startPayment` and the payment was not successful, you must call `cancelPayment`. During any payment flow, if the application is backgrounded or the application activity is interrupted, the payment in progress is canceled. ## Receipts Your application must provide buyers with the option to receive a digital or printed receipt. These receipts aren't sent directly by Square. Therefore, to remain compliant with EMV-certification requirements, you must generate receipts including the following fields from the payment response `cardDetails` object, when available: * `cardholderName` (example: James Smith) * `cardBrand` and `last4` (example: Visa 0094) * `authorizationCode` (example: Authorization 262921) * `applicationName` (example: AMERICAN EXPRESS) * `applicationId` (example: AID: A0 00 00 00 25 01 09 01) * `entryMethod` (example: Contactless) --- # Offline Payments > Source: https://developer.squareup.com/docs/mobile-payments-sdk/ios/offline-payments > Status: BETA > Languages: All > Platforms: iOS **Applies to:** [Mobile Payments SDK - iOS](https://developer.squareup.com/docs/sdk/mobile-payments/ios) | [Payments API](payments-refunds) {% subheading %}Learn how to take payments offline with the Mobile Payments SDK for iOS.{% /subheading %} {% line-break /%} {% toc hide=true /%} ## Overview The Mobile Payments SDK supports taking payments in offline mode, for example when a reader is used in a location with weak network connection or the application momentarily loses connection to Square servers. Offline payments are stored (queued) locally on the mobile device running the Mobile Payments SDK application and processed by Square the next time the device successfully connects to the Internet and Square servers. ## Requirements and limitations {% aside type="warning" %} Before upgrading to a new version of the Mobile Payments SDK or a new version of your application, you should ensure all offline payments have been uploaded by verifying that the offline payment queue is empty. {% /aside %} * Offline payments aren't supported in the Square Sandbox. * Interac debit cards don't work in Offline mode. Any offline transaction attempted with an Interac debit card results in a payment failure. * Your application must be connected to the Internet to connect a new Square reader. If you intend to take offline payments, Square recommends pairing any reader devices while online. * Offline Payments support is limited to the two most recent versions of Square Reader for contactless and chip, Square Reader for magstripe, and Square Stand second generation. To learn whether your reader device is supported, see [Hardware devices and capabilities](mobile-payments-sdk#hardware-devices-and-capabilities). * If you're using the Mobile Payments SDK with a [Square Reader for contactless and chip](https://squareup.com/us/en/hardware/contactless-chip-reader), both a bluetooth connection and a secure connection are required to take offline payments. * Bluetooth connection relies on device settings and physical distance. A reader must maintain a Bluetooth connection with a mobile device's POS application to take payments. * A secure connection is established when a reader is connected to a mobile device that has its POS application open and online. To take offline payments with the Mobile Payments SDK and a bluetooth Square reader: * The reader must be connected to a device that was online and had its POS application opened within the last 24 hours. * The POS device must have a bluetooth connection to the reader and have offline processing enabled before going offline. * The reader must maintain a bluetooth connection to your device throughout the offline payment. {% aside type="important" %} Sellers must contact Square and [opt-in to accept offline payments with the Mobile Payments SDK](#seller-onboarding). The seller is responsible for any expired, declined, or disputed payments accepted while offline. By opting in, providing their merchant ID, and using Offline Payments, the seller is aware of and accepting this risk. {% /aside %} [Context: Swift, iOS] ## Seller onboarding At this time, the Offline Payments feature for the Mobile Payments SDK is in Beta and requires Square sellers to opt in to this feature. If a seller using your application is interested in taking payments offline with the Mobile Payments SDK, send an email to developerbetas@squareup.com. In your message, include: * The seller's business name. * The seller's email address (this should be the owner or administrator for the seller's Square account). * Your application ID. Square contacts the seller directly and provides them with a seller onboarding form for this feature. After the seller is successfully onboarded, Square sends you (the developer) a confirmation email letting you know that you can accept offline payments for the seller. At any time, you can check the `isOfflineProcessingAllowed` value within the `PaymentSettings` to determine whether the seller that is authorized with your application can take payments offline. If your application tries to take an offline payment for a seller who doesn't have access to this feature, you receive a `merchantNotOptedIntoOfflineProcessing` [error](mobile-payments-sdk/ios/handling-errors). ## Transaction limits Each seller taking payments offline with the Mobile Payments SDK has a limit on each offline payment and a limit to the total amount they can store offline on their mobile device. These limits vary by seller. If your application attempts to take an offline payment that exceeds the limit for a single transaction, the Mobile Payments SDK returns an `offlineTransactionAmountExceeded` [error](mobile-payments-sdk/ios/handling-errors). If your application attempts to take an offline payment that exceeds the allowed offline payment total, the SDK returns an `offlineStoredAmountExceeded` error. Each device running the Mobile Payments SDK can take up to 1000 payments for up to 24 hours before reconnecting to the network. If this limit is reached, the reader fails to connect and your mobile device must connect to a network to process and upload these payments before accepting more. ```swift let paymentSettings = MobilePaymentsSDK.shared.settingsManager.paymentSettings let isOfflineProcessingAllowed = paymentSettings.isOfflineProcessingAllowed let offlineTransactionAmountLimit = paymentSettings.offlineTransactionAmountLimit let offlineTotalStoredAmountLimit = paymentSettings.offlineTotalStoredAmountLimit ``` ### Payment methods The payment methods available to customers are limited while offline and not all devices support every type of offline payment. Before taking any payment, your application should query the Payment Manager's `availableCardInputMethods()` and display the possible payment methods to customers. If you're using the `DEFAULT` [payment prompt](mobile-payments-sdk/ios/take-payments#create-prompt-parameters), the SDK automatically displays the card input methods available while offline. ## Take a payment offline When you're ready to [take a payment](mobile-payments-sdk/ios/take-payments) with the Mobile Payments SDK, you create `PaymentParameters` with details about the payment. The `processingMode` field is required, and determines whether the payment should be taken offline. You can choose from `onlineOnly`, `offlineOnly`, or `autoDetect`. It's recommended to set the `processingMode` to `autoDetect` to improve your application reliability. In this mode, the SDK checks the status of the local network connection and the performance of Square's servers to route the payment online or offline for the highest chance of success. For example, with the `processingMode` set to `autoDetect`, a seller who has not opted into offline processing always has their payment attempted online, since offline payments would fail when checking opt-in status. If you're using the `autoDetect` processing mode, the Payment object returned by `startPayment()` might be an `OnlinePayment` or `OfflinePayment`, and your application should account for both possibilities. In some situations, such as when a location has a sporadic or weak Internet connection, sellers might want to take all payments offline during a period of time. To do so, set the `processingMode` for payments to `offlineOnly`. All payments made with this mode are initially queued on the mobile device, even if there is a network connection. ```swift let paymentParams = PaymentParameters( paymentAttemptID: UUID().uuidString, amountMoney: Money(amount: 100, currency: .USD), processingMode: .autoDetect ) let paymentHandle = MobilePaymentsSDK.shared.paymentManager.startPayment( paymentParams, promptParameters: PromptParameters( mode: .default, additionalMethods: .all ), from: self, delegate: self ) ``` {% aside type="important" %} When an offline payment is queued, it hasn't yet been processed by Square. The transaction isn't returned from the [ListPayments](https://developer.squareup.com/reference/square/payments-api/list-payments) endpoint and doesn't have a Square payment ID value. If your application's workflow involves delayed payment capture or syncing Square payments with an outside transaction database, you must write logic to query Square for the completed payment and its details and then perform that sync. For more information, see [Payment IDs](#payment-ids). {% /aside %} ## Access offline payments The Mobile Payments SDK provides the `getOfflinePaymentQueue()` method in the Payment Manager to access all payments taken offline by the application on the current mobile device. This includes queued payments waiting to be processed and completed processed payments. Only payments that have a `locationId` matching the current application user's location ID are returned. This prevents two Square sellers logging in to your application on the same mobile device from viewing each other's payments. The `status` of an `OfflinePayment` indicates its current point in the payment workflow and whether it failed to upload or process. The `status` can be one of the following: * `QUEUED` - The payment is stored locally on the device running the Mobile Payments SDK application. The SDK attempts to upload the payment to Square after the network connection is restored. * `UPLOADED` - The payment has been uploaded to the Square server, but hasn't yet been processed. * `FAILED_TO_UPLOAD` - The payment couldn't be uploaded due to an unrecoverable error. * `FAILED_TO_PROCESS` - The connection was restored, but Square couldn't process this specific offline payment. This might be because of a declined card or another error with the card-issuing bank. An offline payment with this status cannot be recovered, and the seller doesn't receive funds from the transaction. * `PROCESSED` - Square processed your offline payment successfully. It can now be seen in the Square Dashboard. ```swift let offlinePaymentQueue = MobilePaymentsSDK.shared.paymentManager.offlinePaymentQueue // Grab total amount stored offlinePaymentQueue.getTotalStoredPaymentsAmount { [weak self] money, error in guard let self else { return } if let error { print("Error getting total stored payments amount: \(error)") return } print("Total stored amount: \(money.amount)") } // Grab offline payments offlinePaymentQueue.getPayments { [weak self] offlinePayments, error in guard let self else { return } if let error { print("Error getting offline payments: \(error)") return } // Get the total number of payments currently stored let totalNumberOfPayments = offlinePayments.count // Iterate over the offline payments offlinePayments.forEach { offlinePayment in switch offlinePayment.status { case .queued: // Payment is retained on the local device; awaiting upload by Mobile Payments SDK. break case .uploaded: // Payment has been successfully uploaded to the Square Server. break case .failedToUpload: // Upload of payment failed due to an unrecoverable error. break case .failedToProcess: // Processing of offline payment by Square Server failed, possibly due to card decline or other transaction issue. break case .processed: // Offline payment has been successfully processed by Square Server and is now visible in the merchant dashboard. break case .unknown: fallthrough @unknown default: // The status is unknown; verification could not be completed. break } } } ``` ### Payment IDs A payment taken offline with the Mobile Payments SDK has two identification values: `localID`, used to identify the payment on your mobile device before it's processed, and `id`, which represents the Square payment `id` value. The second value is always `null` until the SDK uploads the payment to Square and the payment is processed. When a payment's status changes to `PROCESSED`, you can access its `id` value from the mobile device and match it to the `id` value of payments returned by the [ListPayments](https://developer.squareup.com/reference/square/payments-api/list-payments) endpoint. You can now continue your application's payment workflow and use other Square APIs to access and manage the payment. `PROCESSED` payments are deleted from the mobile device to conserve storage space. ## Process offline payments The Mobile Payments SDK regularly checks for network connectivity and a connection to Square servers so that queued payments can be processed. This is done automatically while the application is open in the foreground of the device. Assuming that there are no errors in the `PaymentParameters` or issues like cards being declined, the funds are available to the seller in the Square Dashboard and the payment can be accessed and managed by the [Payments API](https://developer.squareup.com/reference/square/payments-api) after this processing is complete. {% aside type="important" %} The following actions result in queued payments being removed from the device. If this happens before the payment is uploaded and processed, it cannot be processed and the seller doesn't receive funds from the transaction: * Wiping the device cache * Authenticating the Mobile Payments SDK with a different application ID on the same device * Uninstalling the application from the device using the Mobile Payments SDK {% /aside %} Queued payments remain on the device when a user force-quits your application, switches to another application, or a seller logs out of your application. As a best practice, your application should query for any `QUEUED` payments on the device before calling `authorizationManager.deauthorize()`, so that you can alert the seller about any unprocessed payments. [Context: Objective C, iOS] ## Seller onboarding At this time, the Offline Payments feature for the Mobile Payments SDK is in Beta and requires Square sellers to opt in to this feature. If a seller using your application is interested in taking payments offline with the Mobile Payments SDK, send an email to developerbetas@squareup.com. In your message, include: * The seller's business name. * The seller's email address (this should be the owner or administrator for the seller's Square account). * Your application ID. Square contacts the seller directly and provides them with a seller onboarding form for this feature. After the seller is successfully onboarded, Square sends you (the developer) a confirmation email letting you know that you can accept offline payments for the seller. At any time, you can check the `isOfflineProcessingAllowed` value within the `SQMPPaymentSettings` to determine whether the seller that is authorized with your application can take payments offline. If your application tries to take an offline payment for a seller who doesn't have access to this feature, you receive an `merchantNotOptedIntoOfflineProcessing` [error](mobile-payments-sdk/ios/handling-errors). ## Transaction limits Each seller taking payments offline with the Mobile Payments SDK has a limit on each offline payment and a limit to the total amount they can store offline on their mobile device. These limits vary by seller. If your application attempts to take an offline payment that exceeds the limit for a single transaction, the Mobile Payments SDK returns an `offlineTransactionAmountExceeded` [error](mobile-payments-sdk/ios/handling-errors). If your application attempts to take an offline payment that exceeds the allowed offline payment total, the SDK returns an `offlineStoredAmountExceeded` error. Each device running the Mobile Payments SDK can take up to 1000 payments for up to 24 hours before reconnecting to the network. If this limit is reached, the reader fails to connect and your mobile device must connect to a network to process and upload these payments before accepting more. ```objectivec id paymentSettings = SQMPMobilePaymentsSDK.shared.settingsManager.paymentSettings; BOOL isOfflineProcessingAllowed = paymentSettings.isOfflineProcessingAllowed; SQMPMoney *offlineTransactionAmountLimit = paymentSettings.offlineTransactionAmountLimit; SQMPMoney *offlineTotalStoredAmountLimit = paymentSettings.offlineTotalStoredAmountLimit; ``` ### Payment methods The payment methods available to customers are limited while offline and not all devices support every type of offline payment. Before taking any payment, your application should query the Payment Manager's `availableCardInputMethods()` and display the possible payment methods to customers. If you're using the `DEFAULT` [payment prompt](mobile-payments-sdk/ios/take-payments#create-prompt-parameters), the SDK automatically displays the card input methods available while offline. ## Take a payment offline When you're ready to [take a payment](mobile-payments-sdk/ios/take-payments) with the Mobile Payments SDK, you create `SQMPPaymentParameters` with details about the payment. The `processingMode` field is required, and determines whether the payment should be taken offline. You can choose from `onlineOnly`, `offlineOnly`, or `autoDetect`. It's recommended to set the `processingMode` to `autoDetect` to improve your application reliability. In this mode, the SDK checks the status of the local network connection and the performance of Square's servers to route the payment online or offline for the highest chance of success. For example, with the `processingMode` set to `autoDetect`, a seller who has not opted into offline processing always has their payment attempted online, since offline payments would fail when checking opt-in status. If you're using the `autoDetect` processing mode, the Payment object returned by `startPayment()` might be an `OnlinePayment` or `OfflinePayment`, and your application should account for both possibilities. In some situations, such as when a location has a sporadic or weak Internet connection, sellers might want to take all payments offline during a period of time. To do so, set the `processingMode` for payments to `offlineOnly`. All payments made with this mode are initially queued on the mobile device, even if there is a network connection. ```objectivec SQMPPaymentParameters *paymentParams = [[SQMPPaymentParameters alloc] initWithpaymentAttemptID:[[NSUUID UUID] UUIDString] amountMoney:[[SQMPMoney alloc] initWithAmount:100 currency:SQMPCurrencyUSD] processingMode:SQMPProcessingModeAutoDetect]; id paymentHandle = [SQMPMobilePaymentsSDK.shared.paymentManager startPayment: [self makePaymentParameters] promptParameters: [[SQMPPromptParameters alloc] initWithMode:SQMPPromptModeDefault additionalMethods:SQMPAdditionalPaymentMethods.all] from:self delegate:self ]; ``` {% aside type="important" %} When an offline payment is queued, it hasn't yet been processed by Square. The transaction isn't returned from the [ListPayments](https://developer.squareup.com/reference/square/payments-api/list-payments) endpoint and doesn't have a Square payment ID value. If your application's workflow involves delayed payment capture or syncing Square payments with an outside transaction database, you must write logic to query Square for the completed payment and its details and then perform that sync. For more information, see [Payment IDs](#payment-ids). {% /aside %} ## Access offline payments The Mobile Payments SDK provides the `getOfflinePaymentQueue()` method in the Payment Manager to access all payments taken offline by the application on the current mobile device. This includes queued payments waiting to be processed and completed processed payments. Only payments that have a `locationId` matching the current application user's location ID are returned. This prevents two Square sellers logging in to your application on the same mobile device from viewing each other's payments. The `status` of an `SQMPOfflinePayment` indicates its current point in the payment workflow and whether it failed to upload or process. The `status` can be one of the following: * `QUEUED` - The payment is stored locally on the device running the Mobile Payments SDK application. The SDK attempts to upload the payment to Square after the network connection is restored. * `UPLOADED` - The payment has been uploaded to the Square server, but hasn't yet been processed. * `FAILED_TO_UPLOAD` - The payment couldn't be uploaded due to an unrecoverable error. * `FAILED_TO_PROCESS` - The connection was restored, but Square couldn't process this specific offline payment. This might be because of a declined card or another error with the card-issuing bank. An offline payment with this status cannot be recovered, and the seller doesn't receive funds from the transaction. * `PROCESSED` - Square processed your offline payment successfully. It can now be seen in the Square Dashboard. ```objectivec id offlinePaymentQueue = SQMPMobilePaymentsSDK.shared.paymentManager.offlinePaymentQueue; // Grab total amount stored [offlinePaymentQueue getTotalStoredPaymentsAmountWithCompletion:^(SQMPMoney *money, NSError *error) { if (error) { NSLog(@"Error getting total stored payments amount: %@", error.userInfo); return; } NSLog(@"Total stored amount: %lu", money.amount); }]; // Grab offline payments [offlinePaymentQueue getPaymentsWithCompletion:^(NSArray> *offlinePayments, NSError *error) { if (error) { NSLog(@"Error getting offline payments: %@", error.userInfo); return; } // Get the total number of payments currently stored NSLog(@"Number of offline payments: %lu", offlinePayments.count); // Iterate over the offline payments for (id offlinePayment in offlinePayments) { switch (offlinePayment.status) { case SQMPOfflineStatusQueued: // Payment is retained on the local device; awaiting upload by Mobile Payments SDK. break; case SQMPOfflineStatusUploaded: // Payment has been successfully uploaded to the Square Server. break; case SQMPOfflineStatusFailedToUpload: // Upload of payment failed due to an unrecoverable error. break; case SQMPOfflineStatusFailedToProcess: // Processing of offline payment by Square Server failed, possibly due to card decline or other transaction issue. break; case SQMPOfflineStatusProcessed: // Offline payment has been successfully processed by Square Server and is now visible in the merchant dashboard. break; case SQMPOfflineStatusUnknown: // The status is unknown; verification could not be completed. break; default: // The status is unknown; verification could not be completed. break; } } }]; ``` ### Payment IDs A payment taken offline with the Mobile Payments SDK has two identification values: `localID`, used to identify the payment on your mobile device before it's processed, and `id`, which represents the Square payment `id` value. The second value is always `null` until the SDK uploads the payment to Square and the payment is processed. When a payment's status changes to `PROCESSED`, you can access its `id` value from the mobile device and match it to the `id` value of payments returned by the [ListPayments](https://developer.squareup.com/reference/square/payments-api/list-payments) endpoint. You can now continue your application's payment workflow and use other Square APIs to access and manage the payment. `PROCESSED` payments are deleted from the mobile device to conserve storage space. ```objectivec @interface MyViewController () @end @implementation MyViewController - (void)paymentManager:(id)paymentManager didFinish:(id)payment { if ([payment conformsToProtocol:@protocol(SQMPOnlinePayment)]) { id onlinePayment = (id)payment; NSLog(@"Online Payment - ID: %@, status: %lu", onlinePayment.id, onlinePayment.status); } else if ([payment conformsToProtocol:@protocol(SQMPOfflinePayment)]) { id offlinePayment = (id)payment; NSLog(@"Offline Payment - ID: %@, status: %lu", offlinePayment.localID, offlinePayment.status); } } @end ``` ## Process offline payments The Mobile Payments SDK regularly checks for network connectivity and a connection to Square servers so that queued payments can be processed. This is done automatically while the application is open in the foreground of the device. Assuming that there are no errors in the `SQMPPaymentParameters` or issues like cards being declined, the funds are available to the seller in the Square Dashboard and the payment can be accessed and managed by the [Payments API](https://developer.squareup.com/reference/square/payments-api) after this processing is complete. {% aside type="important" %} The following actions result in queued payments being removed from the device. If this happens before the payment is uploaded and processed, it cannot be processed and the seller doesn't receive funds from the transaction: * Wiping the device cache * Authenticating the Mobile Payments SDK with a different application ID on the same device * Uninstalling the application from the device using the Mobile Payments SDK {% /aside %} Queued payments remain on the device when a user force-quits your application, switches to another application, or a seller logs out of your application. As a best practice, your application should query for any `QUEUED` payments on the device before calling `authorizationManager.deauthorize()`, so that you can alert the seller about any unprocessed payments. --- # Handling Errors > Source: https://developer.squareup.com/docs/mobile-payments-sdk/ios/handling-errors > Status: PUBLIC > Languages: All > Platforms: iOS Learn how to resolve errors in the Mobile Payments SDK for iOS. **Applies to:** [Mobile Payments SDK - iOS](https://developer.squareup.com/docs/sdk/mobile-payments/ios) {% subheading %}Learn how to resolve errors in the Mobile Payments SDK for iOS.{% /subheading %} {% toc hide=true /%} ## Authorization errors Errors might be returned when using the `AuthorizationManager`. These errors are surfaced by the `AuthorizeCompletionHandler` as part of `AuthorizationManager.authorize()`. To unwrap the returned authorization error message, include the following inside your error handling code: ```swift if let authError = AuthorizationError(rawValue: (error as NSError).code) { print(authError.debugInfo) } ``` {% table %} * Error {% width="275px" %} * Description --- * `alreadyAuthorized` * This device is already authorized with a Square account. --- * `alreadyInProgress` * An authorization is already in progress. Wait for this action to complete and try again. --- * `authorizationCodeAlreadyRedeemed` * The authorization code for this session was already used. Have the seller reauthorize their Square account with your application. --- * `deauthorizationInProgress` * A deauthorization is already in progress. Wait for this action to complete and try again. --- * `deviceTimeDoesNotMatchServerTime` * The local device time is out of sync with the server time. Check your device's time and attempt authorization again. --- * `emptyAccessToken` * No access token was provided to the `AuthorizationManager`. --- * `emptyLocationID` * No location ID was provided to the `AuthorizationManager`. --- * `expiredAuthorizationCode` * The authorization code for this session has expired. Have the seller reauthorize their Square account with your application. --- * `invalidAccessToken` * The access token provided to the `AuthorizationManager` is invalid. --- * `invalidAuthorizationCode` * The authorization code provided to the `AuthorizationManager` is invalid. --- * `invalidLocationID` * The location ID provided to the `AuthorizationManager` is invalid. --- * `locationNotActivatedForCardProcessing` * The seller's location isn't activated for credit card processing. Request the seller to reauthorize with another location ID. --- * `notAuthorized` * The Mobile Payments SDK isn't currently authorized with a Square seller account. Use the `AuthorizationManager` to authorize a Square account. --- * `noNetwork` * The Mobile Payments SDK couldn't connect to the network. --- * `unexpected` * An unexpected error occurred. Check your application's local logs for further information and contact Square developer support if the issue persists. --- * `unsupportedCountry` * The seller using your application is in a country unsupported by the Mobile Payments SDK. {% /table %} ## Bluetooth and pairing errors Errors might be returned when pairing readers using the `ReaderManager`. These errors are surfaced by the `ReaderPairingDelegate` as part of `ReaderPairingDidFail(withError error: Error)`. To unwrap the returned bluetooth or pairing error message, include the following inside your error handling code: ```swift if let pairingError = ReaderPairingError(rawValue: (error as NSError).code) { print(pairingError.debugInfo) } ``` {% table %} * Error {% width="275px" %} * Description --- * `bluetoothDisabled` * Bluetooth was disabled by the user. Prompt them to enable Bluetooth and try again. --- * `bluetoothNotReady` * The Bluetooth connection isn't ready. Wait and try again. --- * `bluetoothNotSupported` * The device doesn't support Bluetooth. --- * `bluetoothPermissionDenied` * Bluetooth access has been denied by the user. You should check for Bluetooth permission before trying to pair a reader. --- * `bluetoothPermissionNotDetermined` * The Mobile Payments SDK couldn't determine your application's Bluetooth permission. You should check for Bluetooth permission before trying to pair a reader. --- * `bluetoothPermissionRestricted` * Your application's Bluetooth access has been restricted in settings. You should check for Bluetooth permission before trying to pair a reader. --- * `bluetoothPermissionUnknownCase` * The Mobile Payments SDK couldn't determine your application's Bluetooth permission. You should check for Bluetooth permission before trying to pair a reader. --- * `bluetoothResetting` * Bluetooth is resetting. Try pairing again. --- * `bluetoothUnknownError` * An unknown Bluetooth error occurred. --- * `bondingRemoved` * An unknown Bluetooth error occurred. Prompt the user to go to the Bluetooth settings on their device and "forget" the reader they're attempting to pair. Then reopen your application and try pairing again. --- * `failedToConnect` * The Mobile Payments SDK failed to connect to the reader. Try pairing the reader again. --- * `notSupported` * Your application is currently authorized in a Square Sandbox account, where reader pairing isn't supported. Reauthorize with a production account. --- * `readerAlreadyPairing` * There is already a reader pairing in progress. Wait for the pairing to complete and try again. --- * `sandboxNotSupported` * Bluetooth reader pairing isn't supported in the Square Sandbox. Use a production account to authorize and test reader pairing. --- * `simulatorNotSupported` * Bluetooth reader pairing isn't supported on iOS simulators. Test on a physical device with Square hardware or use a mock reader with a Square Sandbox account in the simulator. --- * `timedOut` * The Mobile Payments SDK timed out while trying to pair with nearby readers. Try the pairing again. --- * `updateRequired` * This version of the Mobile Payments SDK isn't compatible with the reader. Update the SDK or use a compatible reader. {% /table %} ## Reader connection errors Errors might be returned if readers are unable to connect to Square servers. These errors are surfaced within `ReaderInfo.connectionInfo` and the `ReaderConnectionFailureInfo.failureReason`. If you receive one of these errors, you can check the [Square status page](https://issquareup.com/) or contact Square developer support if the issue persists. {% table %} * Error {% width="200px" %} * Description --- * `deniedByServer` * The connection was denied by the Square server. --- * `genericError` * A generic error occurred. --- * `maxReadersConnected` * The maximum number of readers are connected to your application. Unpair some readers and try again. --- * `networkTimeout` * The network timed out before the reader could connect. Try your action again. --- * `networkTransportError` * There was a network error while connecting to Square. --- * `notConnectedToInternet` * There is no Internet connection and the reader couldn't establish a connection to Square. --- * `readerTimeout` * The connection timed out while updating the reader firmware. --- * `revokedByDevice` * A device error occurred while attempting to establish a connection to Square. --- * `serverError` * There was a server error while connecting to Square. --- * `unknown` * An unknown error occurred. {% /table %} ## Reader update errors Errors related to reader firmware updates occurred. These errors are surfaced within `ReaderInfo.firmwareInfo.failureReason`. To unwrap the returned reader update error message, include the following inside your error handling code: ```swift if let updateError = ReaderFirmwareUpdateError(rawValue: (error as NSError).code) { print(updateError.debugInfo) } ``` {% table %} * Error {% width="200px" %} * Description --- * `connectionTimeout` * The connection timed out while updating the reader firmware. --- * `firmwareFailure` * The reader firmware failed during an update. --- * `serverCallFailure` * The Mobile Payments SDK failed to connect to the server while updating the reader firmware. --- * `unknownError` * An unknown error occurred while updating the reader firmware. {% /table %} ## Payment errors Errors might be returned when taking a payment with the `PaymentManager`. These errors are surfaced by the `PaymentManagerDelegate` as part of `paymentManager(_ paymentManager: PaymentManager, didFail payment: Payment, withError error: Error)`. To unwrap the returned payment error message, include the following inside your payment error handling code: ```swift if let paymentError = PaymentError(rawValue: (error as NSError).code) { print(paymentError.debugInfo) } ``` For errors that occur during the [payment flow](mobile-payments-sdk/ios/take-payments#start-the-payment), the Mobile Payments SDK provides an error screen as part of the payment UI. This is shown to the user for `invalidPaymentParameters`, `idempotencyKeyReused`, `notAuthorized`, and `unexpected` errors. `timedOut` and `unsupportedMode` errors present a similar screen with error details. ![A screenshot of the Mobile Payments SDK Payment UI showing a failed payment for 24 dollars. The error message reads "Square encountered an unexpected error. Please try again or contact support if the problem continues."](//images.ctfassets.net/1nw4q0oohfju/5Zbr4liyoZxjA2gafeBOh5/72f012db8a3c47b169c2a6dee6474b47/reader-sdk-error.png) {% table %} * Error {% width="300px" %} * Description --- * `deviceTimeDoesNotMatchServerTime` * The local device time is out of sync with the server time, which could lead to inaccurate payment reporting. Check your device's time and attempt your action again. --- * `invalidPaymentParameters` * The `PaymentParameters` provided were invalid. Check the request details and try the payment again. --- * `invalidPaymentSource` * The payment source provided didn't match the `AlternatePaymentMethod` given. Check the request details and try the payment again. --- * `locationPermissionNeeded` * Location permission hasn't been granted to your application. Prompt the user for location access and try the payment again. --- * `idempotencyKeyReused` * The idempotency key used for this payment has already been used. Review previous payments to ensure you're not processing a duplicate payment and then try again with a new idempotency key. --- * `merchantNotOptedIntoOfflineProcessing` * The seller using your application isn't part of the [Offline Payments feature](mobile-payments-sdk/ios/offline-payments) and cannot take offline payments with the Mobile Payments SDK. --- * `noNetwork` * The Mobile Payments SDK couldn't connect to the network and the payment couldn't be completed. --- * `notAuthorized` * The Mobile Payments SDK isn't currently authorized with a Square seller account. Use the `AuthorizationManager` to authorize a Square account. --- * `offlineStoredAmountExceeded` * Your application has exceeded the total amount available to be stored on the device. Wait until connection is restored and stored payments have processed before taking more offline payments. --- * `offlineTransactionAmountExceeded` * Your application is attempting an offline payment that exceeds the limit for a single transaction. Try again with a lower payment amount. --- * `sandboxUnsupportedForOfflineProcessing` * Your application is attempting to take an offline payment while authorized with a Square Sandbox account. Offline payments aren't supported in the Square Sandbox. Reauthorize with a production account to take offline payments. --- * `paymentAlreadyInProgress` * A payment is already in progress. Cancel the current payment or wait for it to complete. Then try the new payment again. --- * `timedOut` * The Mobile Payments SDK timed out while awaiting a payment. Try the payment again. --- * `unsupportedMode` * The user entered an unsupported mode while a payment was in process (for example, split screen mode isn't supported in the Mobile Payments SDK). Try the payment again. --- * `unexpected` * `PaymentManager.startPayment` was used in an unexpected or unsupported way. Check your local logs and try the payment again. {% /table %} ## Offline payment queue errors Errors might be returned when working with [offline payments](mobile-payments-sdk/ios/offline-payments). These errors are surfaced as part of the `OfflinePaymentQueue`'s `getTotalStoredPaymentsAmount(completion: TotalStoredPaymentsAmountCompletionHandler)` and `getPayments(completion: GetOfflinePaymentsCompletionHandler)`. {% table %} * Error {% width="200px" %} * Description --- * `notAuthorized` * The Mobile Payments SDK isn't currently authorized with a Square seller account. Use the `AuthorizationManager` to authorize a Square account. --- * `unsupportedSandboxEnvironment` * Your application is attempting to take an offline payment while authorized with a Square Sandbox account. Offline payments aren't supported in the Square Sandbox. Reauthorize with a production account to take offline payments. --- * `unexpected` * An unexpected error occurred. Check your application's local logs for further information and contact Square developer support if the issue persists. {% /table %} --- # Authorize your Android Application > Source: https://developer.squareup.com/docs/mobile-payments-sdk/android/configure-authorize > Status: PUBLIC > Languages: All > Platforms: Android **Applies to:** [Mobile Payments SDK - Android](https://developer.squareup.com/docs/sdk/mobile-payments/android) | [OAuth API](oauth-api/overview) | [Locations API](locations-api) | [Payments API](payments-refunds) {% subheading %}Learn how to configure and authorize your Mobile Payments SDK Android application.{% /subheading %} {% toc hide=true /%} ## Overview To enable your application to securely connect to a Square seller account, the Mobile Payments SDK must be authorized using an [OAuth access token](oauth-api/what-it-does) and a [location ID](locations-api). Each Square seller who uses your application must be authorized with an OAuth access token. The same process should be used even if you only plan to use the Mobile Payments SDK with your own Square account. To get started, see [OAuth documentation](oauth-api/what-it-does) and the [Mobile Payments SDK sample application](https://github.com/square/mobile-payments-sdk-android) for an example of how to authorize the SDK. When requesting an OAuth access token from a seller, your application must request the following permissions: * `MERCHANT_PROFILE_READ` is required to get a list of all of a seller's locations. * `PAYMENTS_WRITE` and `PAYMENTS_WRITE_IN_PERSON` are required to take payments with the Mobile Payments SDK. * `PAYMENTS_WRITE_ADDITIONAL_RECIPIENTS` is required if you want to collect [application fees](payments-api/take-payments-and-collect-fees). The Mobile Payments SDK is divided into [four managers](mobile-payments-sdk#mobile-payments-sdk-components) to provide specific areas of functionality. Authorization is handled by the `AuthorizationManager`. Use `authorizationManager.authorize()` to authorize your Mobile Payments SDK application with a Square seller's `accessToken` and `locationId`. You also pass in a `callback` to be notified of authorization errors and successes and display those to the user. {% tabset %} {% tab id="Kotlin" %} ```kotlin override fun onResume() { super.onResume() val authorizationManager = MobilePaymentsSdk.authorizationManager() // Authorize and handle authorization successes or failures callbackReference = authorizationManager.authorize(accessToken, locationId) { result -> when (result) { is Success -> { finishWithAuthorizedSuccess(result.value) } is Failure -> { when (result.errorCode) { NO_NETWORK -> // show error message and retry suggestion ... USAGE_ERROR -> // show error message ... } } } } } override fun onPause() { super.onPause() // Remove the callback reference to prevent memory leaks callbackReference?.clear() } ``` {% /tab %} {% tab id="Java" %} ```java @Override protected void onResume() { super.onResume(); AuthorizationManager authorizationManager = MobilePaymentsSdk.authorizationManager(); // Authorize and handle authorization successes or failures callbackReference = authorizationManager.authorize(accessToken, locationId, result -> { if (result.isSuccess()) { finishWithAuthorizedSuccess(result.value()); } else { AuthorizeErrorCode authorizeErrorCode = result.errorCode(); switch (authorizeErrorCode) { case NO_NETWORK: // show error message and retry suggestion ... break; case USAGE_ERROR: // show error message ... break; } } }); } @Override protected void onPause() { super.onPause(); // Remove the callback reference to prevent memory leaks callbackReference.clear(); } ``` {% /tab %} {% /tabset %} ## Authorization state You can check whether a user of your application is currently authorized by checking `AuthorizationState.isAuthorized()` prior to beginning authorization. To track changes in the authorization state, register a callback by using `authorizationManager.setAuthorizationStateChangedCallback()`. This callback can give you live updates to the `authorizationManager.authorizationState` whenever the Mobile Payments SDK is authorized or deauthorized. ## Session expiration Square OAuth access tokens expire after 30 days. After expiration, applications must generate a new OAuth access token using the refresh token received [when the authorization was first granted](oauth-api/receive-and-manage-tokens). The response looks like the following: ```json { "access_token": "EAAAEL_l5ncx260W8yWz2gGO0GtJeFBJqIdHIXZjpQZ_XW-yxh-Tl7MlF8vIE__n", "token_type": "bearer", "expires_at": "2024-05-15T19:36:00Z", "merchant_id": "TVSNN09QQY609", "refresh_token": "EQAAEInZRUFx8bgauwrDjXYIioyCDEB7vyOG0cScx-qfczgTpNtUjAGLResAKOe9" } ``` Square recommends tracking the `expires_at` value on your server and refreshing the authorization token before it expires. If the SDK detects an expired token, it deauthorizes the Square seller account and invokes the callback registered with `setAuthorizationStateChangedCallback` with `AuthorizationState(isAuthorized = false, isAuthorizationInProgress = false)`. ## Deauthorize the Mobile Payments SDK To deauthorize the Mobile Payments SDK and log out of a seller's Square account, use `authorizationManager.deauthorize()`. This method provides a completion handler, called when the SDK finishes deauthorizing. The seller remains authorized as long as their access token is valid. Therefore, it is a good idea to call this method when a user logs out of your application or has not had any activity within a period of time. This prevents your application from tracking a large number of dangling authorizations. Calling `authorizationManager.deauthorize()` doesn't expire a user's OAuth access token, it only deauthorizes the user from the mobile device running the Mobile Payments SDK. ## Next steps After authorizing your application, you're ready to [pair a card reader](mobile-payments-sdk/android/pair-manage-readers) and prepare to start [taking payments](mobile-payments-sdk/android/take-payments). --- # Pair and Manage Card Readers > Source: https://developer.squareup.com/docs/mobile-payments-sdk/android/pair-manage-readers > Status: PUBLIC > Languages: All > Platforms: Android **Applies to:** [Mobile Payments SDK - Android](https://developer.squareup.com/docs/sdk/mobile-payments/android) {% subheading %}Learn how to pair and manage card readers with the Mobile Payments SDK for Android.{% /subheading %} {% toc hide=true /%} ## Overview The Mobile Payments SDK's `ReaderManager` lets you pair and monitor changes in [Square Readers](https://squareup.com/shop/hardware/us/en/products/chip-credit-card-reader-with-nfc). {% aside type="tip" %} Physical reader devices cannot be used in the Square Sandbox. For testing purposes, you can use the [Mock Reader UI](mobile-payments-sdk/android#mock-readers) to pair simulated readers and process mock payments with your application in the Square Sandbox. {% /aside %} ## Settings Manager The Mobile Payments SDK offers a preconfigured reader settings screen, built from the SDK's public API, that you can use in your application by calling `settingsManager.showSettings()`. This screen includes two tabs. The **Devices** tab displays the model and connection status for readers paired to the merchant's phone or tablet and includes a button for pairing a new reader. The **About** tab displays information about the Mobile Payments SDK, authorized location, and environment used to take payments. Users can also enable or disable consent for [performance and analytics tracking](mobile-payments-sdk/android#data-privacy-consent) from this screen, if they are in a region where consent is required. Use the `SettingsManager` to programmatically retrieve information about the current `sdkEnvironment` (`PRODUCTION` or `SANDBOX`) and the current `sdkVersion`. You can also retrieve `PaymentSettings` for [offline payments](mobile-payments-sdk/android/offline-payments) with `settingsManager.getPaymentSettings`. ### Settings screen lifecycle You can check whether the settings screen is currently displayed with `settingsManager.isShowingSettings()` and programmatically dismiss it with `settingsManager.closeSettings()`. This is useful for kiosks, or when your application needs to respond to external events while settings are open. ![android-mpsdk-settings](//images.ctfassets.net/1nw4q0oohfju/1wktuMxQD4yLb3TWVApRBq/6e6f7b79a74e50156f7e004116674041/android-mpsdk-settings.png) {% tabset %} {% tab id="Kotlin" %} ```kotlin fun showSettings() { val settingsManager = MobilePaymentsSdk.settingsManager() settingsManager.showSettings { result -> when (result) { is Success -> { val settingsClosed = result.value logSettingsResult(settingsClosed) } is Failure -> { logSettingsFailure(result.errorCode, result.errorMessage) } } } } ``` {% /tab %} {% tab id="Java" %} ```java public void showSettings() { SettingsManager settingManager = MobilePaymentsSdk.settingsManager(); settingManager.showSettings(result -> { if (result.isSuccess()) { SettingsClosed settingsClosed = result.value(); logSettingsResult(settingsClosed); } else { logSettingsFailure(result.errorCode(), result.errorMessage()); } return null; }); } ``` {% /tab %} {% /tabset %} ## Reader Manager For more control over your reader pairing and management screens, you can create your own using information from the SDK's `ReaderManager`, which provides methods for pairing and forgetting readers, accessing information about a particular reader, and listening for reader status updates. ### Pairing a reader Pair a new reader using `readerManager.pairReader()`. Only one reader pairing can be in progress at one time, so check the Boolean value `readerManager.isPairingInProgress` and only begin pairing if it's `false`. `readerManager.pairReader` consumes a `callback` to notify your application when pairing completes. Use this callback to update progress indicators in your application and provide notifications to users based on whether reader pairing is successful. {% tabset %} {% tab id="Kotlin" %} ```kotlin fun pairReader() { val readerManager = MobilePaymentsSdk.readerManager() pairingHandle = readerManager.pairReader { result -> when (result) { is Success -> { val readerFound = result.value logPairingResult(readerFound) } is Failure -> { logPairingFailure(result.errorCode, result.errorMessage) } } } } fun onPause() { pairingHandle?.stop() } ``` {% /tab %} {% tab id="Java" %} ```java public void pairReader() { ReaderManager readerManager = MobilePaymentsSdk.readerManager(); pairingHandle = readerManager.pairReader(result -> { if (result.isSuccess()) { boolean readerFound = result.value(); logPairingResult(readerFound); } else { logPairingFailure(result.errorCode(), result.errorMessage()); } }); } public void onPause() { if (pairingHandle != null) { pairingHandle.stop(); } } ``` {% /tab %} {% /tabset %} The pairing callback is guaranteed to be called when pairing ends, even if no reader was successfully paired. When pairing completes, this callback's `success` value is a Boolean for whether a card reader paired. If the value is `true` a card reader was found, reported to the callback provided using `setReaderChangedCallback`, and added to the list of paired readers accessed with `ReaderManager.getReaders()`. A `false` value means the pairing was canceled. If pairing fails for any reason, the error description contains a `PairingErrorCode` with [details about the failure](mobile-payments-sdk/android/handling-errors). The Mobile Payments SDK also provides the `setReaderChangedCallback`, which is called when the [status of a reader](#reader-status) changes. Use this callback to notify your application when magstripe readers are inserted or removed, contactless and chip readers are paired or disconnected with Bluetooth, or the battery status changes. {% tabset %} {% tab id="Kotlin" %} ```kotlin fun observeReaderChanges() { val readerManager = MobilePaymentsSdk.readerManager() callbackReference = readerManager.setReaderChangedCallback { event -> val reader = event.reader val change = event.change val readerStatus = event.readerStatus when (change) { ADDED -> // show reader added message REMOVED -> // show reader removed message else -> // handle other reader status changes } } } fun onPause() { callbackReference?.clear() } ``` {% /tab %} {% tab id="Java" %} ```java public void observeReaderChanges() { ReaderManager readerManager = MobilePaymentsSdk.readerManager(); callbackReference = readerManager.setReaderChangedCallback(event -> { ReaderInfo reader = event.getReader(); ReaderChangedEvent.Change change = event.getChange(); ReaderInfo.Status readerStatus = event.getReaderStatus(); switch (change) { case ADDED: // show reader added message break; case REMOVED: // show reader removed message break; default: // handle other reader status changes break; } }); } public void onPause() { if (callbackReference != null) { callbackReference.clear(); } } ``` {% /tab %} {% /tabset %} Paired readers are remembered by the Mobile Payments SDK, so when a new card reader is paired to the application, it remains paired and present in the list of readers provided by `readerManager.getReaders()` and will automatically reconnect when the authorized Square seller loads your application. If you want to stop pairing before it completes, you can do so with the returned `pairingHandle` by calling `pairingHandle.stop()`. ## Reader information The `ReaderInfo` class provides information about Square readers paired with your application. These properties include: * The battery level and charging status. * The model (contactless and chip or magstripe). * The serial number. * The firmware info, including version and update status (see [Firmware info](#firmware-info)). * The card entry methods supported by the reader (`CONTACTLESS`, `EMV`, or `SWIPED`). You can use this information to notify merchants when a reader is unpaired or its battery is low. You can create your own screens to display information about the status of readers or use a [Square-provided settings screen](#settings-manager) for quick integration. ### Card entry methods Different readers offer different card entry methods. For example, Square Reader for magstripe can only accept swiped cards, while Square Reader for contactless and chip can accept tapped cards, dipped cards, or digital wallets. The card entry methods supported are available within a reader's `readerInfo.supportedCardEntryMethods`. To track changes in the entry methods (for example, if the NFC connection to a contactless reader times out) register a callback with `paymentManager.setAvailableCardEntryMethodChangedCallback`. {% tabset %} {% tab id="Kotlin" %} ```kotlin private fun updateAvailableMethods(view: TextView) { val paymentManager = MobilePaymentsSdk.paymentManager() // Set up a callback to update the card entry methods when they change callbackRef = paymentManager.setAvailableCardEntryMethodChangedCallback { methods -> updateCardEntryMethods(view, methods) } // Update the card entry methods immediately updateCardEntryMethods(view, paymentManager.getAvailableCardEntryMethods()) } private fun updateCardEntryMethods(view: TextView, methods: Set) { view.text = when (methods.size) { 0 -> "Reader not connected" 1 -> when (methods.first()) { CardEntryMethod.SWIPED -> "Swipe to pay" CardEntryMethod.CONTACTLESS -> "Tap to pay" CardEntryMethod.EMV -> "Insert to pay" } // Etc.. } } ``` {% /tab %} {% tab id="Java" %} ```java private void updateAvailableMethods(TextView view) { PaymentManager paymentManager = MobilePaymentsSdk.paymentManager(); // Set up a callback to update the card entry methods when they change callbackReference = paymentManager.setAvailableCardEntryMethodChangedCallback( methods -> updateCardEntryMethods(view, methods) ); // Update the card entry methods immediately updateCardEntryMethods(view, paymentManager.getAvailableCardEntryMethods()); } private void updateCardEntryMethods(TextView view, Set methods) { int size = methods.size(); if (size == 0) { view.setText("Reader not connected"); } else if (size == 1) { CardEntryMethod next = methods.iterator().next(); if (next == CardEntryMethod.SWIPED) { view.setText("Swipe to pay"); } else if (next == CardEntryMethod.CONTACTLESS) { view.setText("Tap to pay"); } else if (next == CardEntryMethod.EMV) { view.setText("Insert to pay"); } // Etc.. } } ``` {% /tab %} {% /tabset %} ### Reader status Your application can monitor the current status of connected readers with `readerInfo.status` to display updates and messages to users. The possible status values are: * `Ready`: The reader is paired, connected, and able to accept card payments. * Magstripe readers connect automatically and are always `Ready` until physically disconnected from the mobile device. * `ConnectingToSquare`: The reader is establishing a connection to Square's servers. * `ConnectingToDevice`: The reader is establishing a connection to the mobile device. * `Faulty`: The reader has encountered a hardware or connection error and is in an unrecoverable state. * `ReaderUnavailable`: The reader is connected but not able to take payments. If a reader is unavailable, check `ReaderUnavailable.reason` for specific details, which may include bluetooth failure, a blocking firmware update, or issues with the merchant’s Square account. Depending on the reason, you can prompt the user to take action, or retry the connection with Square's servers with `readerManager.retryConnection()`. {% aside type="info" %} `readerInfo.status` is available in Android Mobile Payments SDK version `2.3.0` and above. If your integration uses an earlier version of the SDK, monitor the status of connected readers with `readerInfo.state`. The available states are `Connecting`, `UpdatingFirmware`, `Disconnected`, or `FailedToConnect`. {% /aside %} {% tabset %} {% tab id="Kotlin" %} ```kotlin fun getReaders() { val readerManager = MobilePaymentsSdk.readerManager() val readers = readerManager.getReaders() // All readers ready to take payments val availableReaders = readers.filter { it.status == Ready }.size // All readers accepting tap payments val contactlessReaders = readers.filter { it.supportedCardEntryMethods.contains(CONTACTLESS) } // A specific Square reader val specificReader = readers.find { it.serialNumber == "4815162342LS815" } // Etc.. } ``` {% /tab %} {% tab id="Java" %} ```java public void getReaders() { ReaderManager readerManager = MobilePaymentsSdk.readerManager(); List readers = readerManager.getReaders(); // Do something with the readers int availableReaders = 0; List contactlessReaders = new ArrayList<>(); ReaderInfo specificReader = null; for (ReaderInfo reader : readers) { if (reader.getStatus() instanceof ReaderInfo.Status.Ready) { availableReaders++; } if (reader.getSupportedCardEntryMethods() .contains(CardEntryMethod.CONTACTLESS)) { contactlessReaders.add(reader); } if (Objects.equals(reader.getSerialNumber(), "4815162342LS815")) { specificReader = reader; } } // Etc.. } ``` {% /tab %} {% /tabset %} ### Firmware info The `ReaderInfo.firmwareInfo` property provides structured firmware data through the `ReaderFirmwareInfo` class, which includes: * `version: String?` — The current firmware version installed on the reader. * `updateStatus: FirmwareUpdateStatus` — The current firmware update status, represented as a sealed class with the following values: - `None` — No firmware update is available or in progress. - `Pending(updateDate: Date)` — A firmware update is scheduled for the specified date. - `InProgress(updatePercentage: Int?)` — A firmware update is currently being installed, with an optional progress percentage. {% aside type="warning" %} __Deprecation notice:__ * `readerInfo.firmwareVersion` is deprecated. Use `readerInfo.firmwareInfo.version` instead. * `readerInfo.firmwarePercent` is deprecated. Use `readerInfo.firmwareInfo.updateStatus` instead. {% /aside %} {% tabset %} {% tab id="Kotlin" %} ```kotlin fun checkFirmwareStatus() { val readerManager = MobilePaymentsSdk.readerManager() val readers = readerManager.getReaders() for (reader in readers) { val firmwareInfo = reader.firmwareInfo println("Firmware version: ${firmwareInfo.version}") when (val status = firmwareInfo.updateStatus) { is FirmwareUpdateStatus.None -> println("Firmware is up to date") is FirmwareUpdateStatus.Pending -> println("Update scheduled for: ${status.updateDate}") is FirmwareUpdateStatus.InProgress -> println("Updating: ${status.updatePercentage ?: "unknown"}%") } } } ``` {% /tab %} {% tab id="Java" %} ```java public void checkFirmwareStatus() { ReaderManager readerManager = MobilePaymentsSdk.readerManager(); List readers = readerManager.getReaders(); for (ReaderInfo reader : readers) { ReaderFirmwareInfo firmwareInfo = reader.getFirmwareInfo(); Log.d("Firmware", "Version: " + firmwareInfo.getVersion()); FirmwareUpdateStatus status = firmwareInfo.getUpdateStatus(); if (status instanceof FirmwareUpdateStatus.None) { Log.d("Firmware", "Firmware is up to date"); } else if (status instanceof FirmwareUpdateStatus.Pending) { Log.d("Firmware", "Update scheduled for: " + ((FirmwareUpdateStatus.Pending) status).getUpdateDate()); } else if (status instanceof FirmwareUpdateStatus.InProgress) { Log.d("Firmware", "Updating: " + ((FirmwareUpdateStatus.InProgress) status).getUpdatePercentage() + "%"); } } } ``` {% /tab %} {% /tabset %} ### Preferred firmware update time You can schedule firmware updates to occur at a preferred time of day using `readerSettings.preferredFirmwareUpdateTime`. This property accepts a `TimeOfDay` value with `hour` (0–23) and `minute` (0–59) properties. Setting this value allows sellers to schedule reader firmware updates during off-hours to avoid interruptions during business operations. {% tabset %} {% tab id="Kotlin" %} ```kotlin fun setFirmwareUpdateTime() { val readerManager = MobilePaymentsSdk.readerManager() val readerSettings = readerManager.readerSettings // Schedule firmware updates for 2:00 AM readerSettings.preferredFirmwareUpdateTime = TimeOfDay(hour = 2, minute = 0) } ``` {% /tab %} {% tab id="Java" %} ```java public void setFirmwareUpdateTime() { ReaderManager readerManager = MobilePaymentsSdk.readerManager(); ReaderSettings readerSettings = readerManager.getReaderSettings(); // Schedule firmware updates for 2:00 AM readerSettings.setPreferredFirmwareUpdateTime(new TimeOfDay(2, 0)); } ``` {% /tab %} {% /tabset %} ### Unpairing a reader Paired contactless and chip readers are remembered by the Mobile Payments SDK and remain paired until forgotten with `readerManager.forget(reader)` or by long-pressing the reader device's pair button. You can also unpair a reader using the Mobile Payments SDK [Settings screen](#settings-manager) UI. ## Next steps To test your application in the Square Sandbox without a physical Square reader, use the Mobile Payments SDK [Mock Reader UI](mobile-payments-sdk/android#mock-readers) to simulate a reader and accept test payments. When you've successfully paired a physical Square Reader device, you're ready to [take payments](mobile-payments-sdk/android/take-payments) in a production environment. --- # Take a Payment > Source: https://developer.squareup.com/docs/mobile-payments-sdk/android/take-payments > Status: PUBLIC > Languages: All > Platforms: Android **Applies to:** [Mobile Payments SDK - Android](https://developer.squareup.com/docs/sdk/mobile-payments/android) | [Payments API](payments-refunds) | [Orders API](orders-api/what-it-does) {% subheading %}Learn how to use the Mobile Payments SDK for Android to take a payment with a Square Reader.{% /subheading %} {% toc hide=true /%} ## Overview Payments in the Mobile Payments SDK are handled by the `PaymentManager`. Prior to starting a payment, you create `PaymentParameters` to represent details of an individual payment and `PromptParameters` indicating how the payment prompts are presented to the buyer. ## Requirements and limitations Before taking a payment with the SDK in a production environment, ensure that you have done the following: * [Requested the permissions](mobile-payments-sdk/android#device-permissions) necessary for the type of reader you're using. * [Installed and initialized](mobile-payments-sdk/android#quickstart) the Mobile Payments SDK in your Android application. * [Authorized the Mobile Payments SDK](mobile-payments-sdk/android/configure-authorize) with a Square account. Additionally, before taking a payment in production, you can test your application using [mock readers](mobile-payments-sdk/android#mock-readers) and the Square Sandbox or download the [Mobile Payments SDK sample application](https://github.com/square/mobile-payments-sdk-android) to see an example payment implementation. ## Create payment parameters To begin a payment with the Mobile Payments SDK, you need to create a `PaymentParameters` object, which includes attributes describing the payment you want to take. For example, there are parameters for the payment amount, optional tip, application fee (if applicable), and the processing mode, which determines whether [payments can be taken offline](mobile-payments-sdk/android/offline-payments). `AUTO_DETECT` is the recommended `processingMode`, as this directs the payment online or offline based on the highest chance of success. For this reason, the resulting Payment object might be an `OnlinePayment` or `OfflinePayment`, and your application should account for both if you're using the `AUTO_DETECT` processing mode. Merchants can optionally add [card surcharges](#card-surcharging) to payments, and your application can allow or override that setting with the `allowCardSurcharge` parameter. {% tabset %} {% tab id="Kotlin" %} ```kotlin val paymentParams = PaymentParameters.Builder( amount = Money(100, CurrencyCode.USD), processingMode = ProcessingMode.AUTO_DETECT, allowCardSurcharge = true ) .paymentAttemptId("unique-attempt-id") .build() ``` {% /tab %} {% tab id="Java" %} ```java PaymentParameters paymentParams = new PaymentParameters.Builder( new Money(100L, CurrencyCode.USD), ProcessingMode.AUTO_DETECT, true // allowCardSurcharge - enable surcharging ) .paymentAttemptId("unique-attempt-id") .build(); ``` {% /tab %} {% /tabset %} For the complete list of payment parameter values and details, see the [Android technical reference](https://developer.squareup.com/docs/sdk/mobile-payments/android). ### Idempotency and payment attempts {% aside type="important" %} In the Mobile Payments SDK version `2.2.0` and earlier, you generated and added your own idempotency key in your `paymentParameters`. In version `2.3.0` and later, the `idempotencyKey` parameter is deprecated and you instead provide a `paymentAttemptId`. This is the recommended way to handle idempotent payment requests in the Mobile Payments SDK, and offers both idempotency protection and support for Strong Customer Authentication (SCA) requirements. {% /aside %} [Square payment requests](https://developer.squareup.com/reference/square/payments-api/create-payment) contain an idempotency key, a unique string identifier which allows Square to recognize potential duplicate API calls. Using an idempotency key for each payment request ensures that a payment can only occur once, protecting against unintended outcomes like charging a customer twice for the same transaction. When you provide a `paymentAttemptId` in your `paymentParameters` for each call to `startPaymentActivity`, the Mobile Payments SDK generates a unique idempotency key for the payment request, and stores it along with your payment attempt ID. If multiple requests are made for the same payment attempt (for example, during SCA flows), the SDK generates a new idempotency key for each request and updates the stored idempotency key for the given payment attempt ID. You can't include both an `idempotencyKey` and a `paymentAttemptId` in your `paymentParameters`, only one. Along with a `paymentAttemptId`, you should include a unique `referenceId` value in your `PaymentParameters` for each payment. This persists with the payment and can be used to identify the payment within your own system if you need to reference it later. Your attempt ID and reference ID aren't interchangeable. You shouldn't use the same value for both parameters because sometimes a payment requires multiple attempts (for example, if the first payment attempt is declined for expiration or insufficient funds, you can retry the payment with the same `referenceId` and a new `paymentAttemptId`). Typically, the `referenceId` is used to match Square payments to an external system, but it can also be used to identify payments within Square. If you don't receive a server response from a payment made with the Mobile Payments SDK, you should check its status to determine whether to attempt the payment again. Use the [ListPayments](https://developer.squareup.com/reference/square/payments-api/list-payments) endpoint and query by location ID, total payment amount, or other fields to filter the list. You can use your unique `referenceId` to identify the correct payment and check its status. You might need to make a new payment attempt if the prior payment exists, but cannot be completed. In this situation, retrieve the final idempotency key used for the payment attempt with your payment attempt ID using `paymentManager.getIdempotencyKey(paymentAttemptId: String)`, and cancel the incomplete payment by using [CancelPaymentByIdempotencyKey](https://developer.squareup.com/reference/square/payments-api/cancel-payment-by-idempotency-key). ## Create prompt parameters Each payment also requires `PromptParameters`, consisting of a `mode` and a list of `additionalPaymentMethods`. `PromptParameters.mode` determines whether your application uses the `DEFAULT` Square payment prompt UI or a `CUSTOM` payment prompt where you build your own UI. The default UI provided by Square presents buyers with the payment options available from `paymentManager.availableCardInputMethods()`. While `PaymentParameters` are unique to each payment, you can likely reuse the same `PromptParameters` for most payments in your application. ![android-mpsdk-prompt](//images.ctfassets.net/1nw4q0oohfju/1iEfBHjH6uA5AUx1ahLO7j/e09d0c5891710a9cc0eb2948ceec1b19/android-mpsdk-prompt.png) `PromptParameters.additionalPaymentMethods` specifies a list of additional payment methods available to use for this payment. The current options are `KEYED` (a manually entered credit card payment) or `CASH`. When used with the `DEFAULT` `promptMode`, the Square payment prompt includes these alternative payment methods as options presented to buyers. If you create your own `CUSTOM` `promptMode`, you should use the `additionalPaymentMethods` available from the `PaymentHandle` to display these options to buyers in your own payment prompt UI. ## Start the payment After the callbacks have been written, you can begin processing a payment by calling `paymentManager.startPaymentActivity()` with the `PaymentParameters` and `PromptParameters` you created previously and calling a `callback` to notify your application of results or [errors](mobile-payments-sdk/android/handling-errors) from the payment flow. During the payment: * The SDK provides a `PaymentHandle` as a way for you to interact with the ongoing payment (for example, if you need to [cancel the payment](#canceling-payments)). * Square takes control of the screen display by launching a new Android Activity to ensure that buyer information is handled securely and that the final confirmation of the payment is correctly shown to the buyer. When the payment completes, regardless of whether it completed successfully, control is returned to the user interface and the `callback` is invoked with the result. Your application can then display [receipt](#receipts) or [error](mobile-payments-sdk/android/handling-errors) information to the user. {% aside type="info" %} Only one payment can be in process at a time. If you make a second call to `startPaymentActivity` before the first call completes, the second call fails immediately with a `USAGE_ERROR`, triggering the payment callbacks. The first payment call continues. {% /aside %} {% tabset %} {% tab id="Kotlin" %} ```kotlin fun startPaymentActivity() { val paymentManager = MobilePaymentsSdk.paymentManager() val paymentAttemptId = UUID.randomUUID().toString() // Configure the payment parameters val paymentParams = PaymentParameters.Builder( amount = Money(100, CurrencyCode.USD), paymentAttemptId = paymentAttemptId, processingMode = processingMode(ProcessingMode.AUTO_DETECT), allowCardSurcharge = true ) .referenceId("1234") .note("Chocolate Cookies and Lemonade") .autocomplete(true) .build() // Configure the prompt parameters val promptParams = PromptParameters( mode = PromptMode.DEFAULT, additionalPaymentMethods = listOf(AdditionalPaymentMethod .Type.KEYED) ) // Start the payment activity paymentHandle = paymentManager.startPaymentActivity(paymentParams, promptParams) { result -> // Handle the payment result when (result) { is Success -> // show payment details is Failure -> // show error message } } } override fun onDestroy() { paymentHandle?.cancel() } ``` {% /tab %} {% tab id="Java" %} ```java public void startPaymentActivity() { PaymentManager paymentManager = MobilePaymentsSdk.paymentManager(); String paymentAttemptId = UUID.randomUUID().toString(); // Configure the payment parameters PaymentParameters paymentParams = new PaymentParameters.Builder( new Money(100, CurrencyCode.USD), paymentAttemptId, ProcessingMode.AUTO_DETECT, true ) .referenceId("1234") .note("Chocolate Cookies and Lemonade") .autocomplete(true) .build(); // Configure the prompt parameters PromptParameters promptParams = new PromptParameters( PromptMode.DEFAULT, Collections.singletonList(AdditionalPaymentMethod.Type.KEYED) ); // Start the payment activity paymentHandle = paymentManager.startPaymentActivity(paymentParams, promptParams, result -> { // Handle the payment result if (result.isSuccess()) { // show payment details ... } else { // show error message ... } }); } @Override public void onDestroy() { if (paymentHandle != null) { paymentHandle.cancel(); } } ``` {% /tab %} {% /tabset %} ## Delay the capture of payments As part of your application workflow, you might want to authorize a customer's transaction but delay the capture of the payment (the transfer of funds from the customer to the seller) for a period of time. For example, in a restaurant with a kiosk ordering system, you might want to authorize a customer's credit card when they order, but not complete the payment until they receive their food. While creating `PaymentParameters` for a payment, set the `autocomplete` value to `false` if you want to delay the capture of a payment. By default, `autocomplete` is `true`, meaning the payment is authorized and captured immediately. {% aside type="info" %} Only one of the `autocomplete` and `acceptPartialAuthorization` values can be `true`. If you're accepting multiple payment methods for a single purchase (such as a gift card and credit card), you must set `autocomplete` to `false` and manage the delayed capture of the payment. {% /aside %} When `autocomplete` is `false`, there are two more `PaymentParameter` values that handle the delayed payment: * `delayDuration` - The number of milliseconds to wait before canceling the payment or taking another `delayAction`, in RFC 3339 format. By default, this is 36 hours for card reader payments and 7 days for manually entered payments. * `delayAction` - The action to take after the `delayDuration` passes with no other action on the payment. The possible options are `CANCEL` (which is the default) or `COMPLETE`. You can add a tip to the delayed payment by calling the [UpdatePayment](https://developer.squareup.com/reference/square/payments-api/update-payment) endpoint and setting `tip_money` prior to completing the payment. If you don't set the `delayAction` to automatically complete the payment, you can manually complete it by calling `paymentManager.completePayment`. For more information about delayed payment capture using the Square Payments API, see [Delayed Capture of a Card Payment](payments-api/take-payments/card-payments/delayed-capture). ## Card Surcharging A surcharge is an additional amount or percentage that sellers can set to pass on credit card processing fees to buyers. Sellers optionally set a surcharge percentage in their Square Dashboard. As a Mobile Payments SDK developer, you can include this surcharge or choose to override the dashboard settings and disallow surcharges on card payments in your application. {% aside type="important" %} * Surcharges with the Mobile Payments SDK are only available for credit card payments made in the US. * Surcharges are not available for offline payments, debit card payments, or pre-existing orders. {% /aside %} To add surcharges to credit card payments, your application must have `ITEMS_READ` permission in addition to the [standard payment permissions](mobile-payments-sdk#oauth-permissions). Use the `allowCardSurcharge` parameter in your `PaymentParameters` to control whether surcharges can be applied to individual payments. If you're using a custom payment prompt, use the use the `PaymentHandle.totalMoneyWithProposedCardSurcharge` to display surcharge amounts to customers before payment completion. This ensures transparency and compliance with surcharging regulations. After an Online payment completes, access surcharge information from its `CardPaymentDetails` for receipt generation and record keeping: {% tabset %} {% tab id="Kotlin" %} ```kotlin private fun handlePaymentResult(result: Result) { when (result) { is Result.Success -> { val payment = result.value if (payment is Payment.OnlinePayment) { val cardDetails = payment.cardDetails val surchargeDetails = cardDetails?.appliedCardSurchargeDetails if (surchargeDetails != null) { val baseSurcharge = surchargeDetails.cardSurchargeMoney val taxOnSurcharge = surchargeDetails.taxOnSurchargeMoney val totalSurcharge = surchargeDetails.totalSurchargeMoney // Display surcharge information to customer println("Base surcharge: ${baseSurcharge.amount} ${baseSurcharge.currencyCode}") println("Tax on surcharge: ${taxOnSurcharge?.amount ?: 0} ${baseSurcharge.currencyCode}") println("Total surcharge: ${totalSurcharge.amount} ${totalSurcharge.currencyCode}") // Use for receipt generation generateReceiptWithSurcharge(payment, surchargeDetails) } else { // No surcharge was applied to this payment generateStandardReceipt(payment) } } } is Result.Failure -> { // Handle payment errors handlePaymentError(result.errorCode) } } } ``` {% /tab %} {% tab id="Java" %} ```java private void handlePaymentResult(Result result) { if (result.isSuccess()) { Payment payment = result.value(); if (payment instanceof Payment.OnlinePayment) { Payment.OnlinePayment onlinePayment = (Payment.OnlinePayment) payment; CardPaymentDetails.OnlineCardPaymentDetails cardDetails = onlinePayment.getCardDetails(); if (cardDetails != null) { CardPaymentDetails.CardSurchargeDetails surchargeDetails = cardDetails.getAppliedCardSurchargeDetails(); if (surchargeDetails != null) { Money baseSurcharge = surchargeDetails.getCardSurchargeMoney(); Money taxOnSurcharge = surchargeDetails.getTaxOnSurchargeMoney(); Money totalSurcharge = surchargeDetails.getTotalSurchargeMoney(); // Display surcharge information to customer System.out.println("Base surcharge: " + baseSurcharge.getAmount() + " " + baseSurcharge.getCurrencyCode()); System.out.println("Tax on surcharge: " + (taxOnSurcharge != null ? taxOnSurcharge.getAmount() : 0) + " " + baseSurcharge.getCurrencyCode()); System.out.println("Total surcharge: " + totalSurcharge.getAmount() + " " + totalSurcharge.getCurrencyCode()); // Use for receipt generation generateReceiptWithSurcharge(payment, surchargeDetails); } else { // No surcharge was applied to this payment generateStandardReceipt(payment); } } } } else { // Handle payment errors handlePaymentError(result.errorCode()); } } ``` {% /tab %} {% /tabset %} ## Canceling payments If you need to cancel a payment in progress for any reason, use `paymentHandle.cancel()`. The `CancelResult` returned is `CANCELED`, `NO_PAYMENT_IN_PROGRESS` if there is no payment in progress to be canceled, or `NOT_CANCELABLE` if the payment in progress cannot be canceled. This can happen when the payment is actively being sent to Square servers or has already been completed. During any payment flow, if the application is backgrounded or the application activity is interrupted, the payment in progress is canceled. ## Receipts Your application must provide buyers with the option to receive a digital or printed receipt. These receipts aren't sent directly by Square. Therefore, to remain compliant with EMV-certification requirements, you must generate receipts including the following fields found in the `cardDetails` of the successful payment response object from `startPaymentActivity()`: * `card.cardholderName` (example: James Smith) * `card.brand` and `card.last4digits` (example: Visa 0094) * `authorizationCode` (example: Authorization 262921) (not available for offline payments) * `emvApplicationName` (example: AMERICAN EXPRESS) * `emvApplicationId` (example: AID: A0 00 00 00 25 01 09 01) * `entryMethod` (example: Contactless) {% line-break /%} {% tabset %} {% tab id="Kotlin" %} ```kotlin private fun showPaymentDetails(payment: Payment, receiptScreen: ReceiptScreen) { val cardDetails = (payment as OnlinePayment).cardDetails val card = cardDetails!!.card receiptScreen.setCardInformation( card.cardholderName, card.brand, card.lastFourDigits ) receiptScreen.setEmvInformation( cardDetails.authorizationCode, cardDetails.applicationName, cardDetails.applicationId ) receiptScreen.setEntryMethod(cardDetails.entryMethod) } ``` {% /tab %} {% tab id="Java" %} ```java private void showPaymentDetails(Payment payment, ReceiptScreen receiptScreen) { CardPaymentDetails.OnlineCardPaymentDetails cardDetails = payment.asOnlinePayment().getCardDetails(); Card card = cardDetails.getCard(); receiptScreen.setCardInformation( card.getCardholderName(), card.getBrand(), card.getLastFourDigits()); receiptScreen.setEmvInformation( cardDetails.getAuthorizationCode(), cardDetails.getApplicationName(), cardDetails.getApplicationId()); receiptScreen.setEntryMethod(cardDetails.getEntryMethod()); } ``` {% /tab %} {% /tabset %} --- # Offline Payments > Source: https://developer.squareup.com/docs/mobile-payments-sdk/android/offline-payments > Status: BETA > Languages: Java, Kotlin > Platforms: Android **Applies to:** [Mobile Payments SDK - Android](https://developer.squareup.com/docs/sdk/mobile-payments/android) | [Payments API](payments-refunds) {% subheading %}Learn how to take offline payments with the Mobile Payments SDK for Android.{% /subheading %} {% toc hide=true /%} ## Overview The Mobile Payments SDK supports taking payments in offline mode, which allows you to take payments when a reader is used in a location with weak network connection or the application momentarily loses connection to Square servers. Offline payments are stored (queued) locally on the mobile device running the Mobile Payments SDK application and processed by Square the next time the device successfully connects to the Internet and Square servers. ## Requirements and limitations {% aside type="warning" %} Before upgrading to a new version of the Mobile Payments SDK or a new version of your application, you should ensure all offline payments have been uploaded by verifying that the offline payment queue is empty. {% /aside %} * Offline payments aren't supported in the Square Sandbox. * Interac debit cards don't work in Offline mode. Any offline transaction attempted with an Interac debit card results in a payment failure. * Offline Payments support is limited to the two most recent versions of Square Reader for contactless and chip, Square Reader for magstripe, and Square Stand second generation. To learn whether your reader device is supported, see [Hardware devices and capabilities](mobile-payments-sdk#hardware-devices-and-capabilities). * If you're using the Mobile Payments SDK with a [Square Reader for contactless and chip](https://squareup.com/us/en/hardware/contactless-chip-reader), both a bluetooth connection and a secure connection are required to take offline payments. * Bluetooth connection relies on device settings and physical distance. A reader must maintain a Bluetooth connection with a mobile device's POS application to take payments. * A secure connection is established when a reader is connected to a mobile device that has its POS application open and online. To take offline payments with the Mobile Payments SDK and a bluetooth Square reader: * The reader must be connected to a device that was online and had its POS application opened within the last 24 hours. * The POS device must have a bluetooth connection to the reader and have offline processing enabled before going offline. * The reader must maintain a bluetooth connection to your device throughout the offline payment. {% aside type="important" %} Sellers must contact Square and [opt-in to accept offline payments with the Mobile Payments SDK](#seller-onboarding). The seller is responsible for any expired, declined, or disputed payments accepted while offline. By providing their merchant ID and using Offline Payments, the seller is aware of and accepting this risk. {% /aside %} Before upgrading to a new version of the Mobile Payments SDK or a new version of your application, you should upload all offline payments and verify that the offline payment queue is empty. ## Seller onboarding At this time, the Offline Payments feature for the Mobile Payments SDK is in Beta, and requires Square sellers to opt in to this feature. If a seller using your application is interested in taking payments offline with the Mobile Payments SDK, send an email to developerbetas@squareup.com. In your message, include: * The seller's business name. * The seller's email address (this should be the owner or administrator for the seller's Square account). * Your application ID. Square contacts the seller directly and provides them with a seller onboarding form for this Beta feature. After the seller is successfully onboarded, Square sends you (the developer) a confirmation email letting you know that you can accept offline payments for the seller. At any time, you can check the `isOfflineProcessingAllowed` value within the `PaymentSettings` to determine whether the seller that is authorized with your application can take payments offline. If your application tries to take an offline payment for a seller who doesn't have access to this feature, you receive a [`USAGE_ERROR`](mobile-payments-sdk/android/handling-errors). ## Transaction limits Each seller taking payments offline with the Mobile Payments SDK has a limit on each offline payment and a limit to the total amount they can store offline on their mobile device. These limits vary by seller. If your application attempts to take an offline payment that exceeds one of these limits, the Mobile Payments SDK returns a `USAGE_ERROR`. Each device running the Mobile Payments SDK can take up to 1000 payments for up to 24 hours before reconnecting to the network. If this limit is reached, the reader fails to connect and your mobile device must connect to a network to process and upload these payments before accepting more. {% tabset %} {% tab id="Kotlin" %} ```kotlin val paymentSettings = MobilePaymentsSdk.settingsManager().getPaymentSettings() val isOfflineProcessingAllowed = paymentSettings.isOfflineProcessingAllowed val offlineTransactionAmountLimit = paymentSettings.offlineTransactionAmountLimit val offlineTotalStoredAmountLimit = paymentSettings.offlineTotalStoredAmountLimit ``` {% /tab %} {% tab id="Java" %} ```java PaymentSettings paymentSettings = MobilePaymentsSdk.settingsManager().getPaymentSettings(); boolean isOfflineProcessingAllowed = paymentSettings.isOfflineProcessingAllowed(); Money offlineTransactionAmountLimit = paymentSettings.getOfflineTransactionAmountLimit(); Money offlineTotalStoredAmountLimit = paymentSettings.getOfflineTotalStoredAmountLimit(); ``` {% /tab %} {% /tabset %} ### Payment methods The payment methods available to customers are limited while offline and not all devices support every type of offline payment. Before taking any payment, your application should query the Payment Manager's `getAvailableCardEntryMethods()` and display the possible payment methods to customers. If you're using the `DEFAULT` [payment prompt](mobile-payments-sdk/android/take-payments#create-prompt-parameters), the SDK automatically displays the card entry methods available while offline. ## Take a payment offline When you're ready to [take a payment](mobile-payments-sdk/android/take-payments) with the Mobile Payments SDK, you create `PaymentParameters` with details about the payment. The `processingMode` field is required, and determines whether the payment should be taken offline. You can choose from `ONLINE_ONLY`, `OFFLINE_ONLY`, or `AUTO_DETECT`. It's recommended to set the `processingMode` to `AUTO_DETECT` to improve your application reliability. In this mode, the SDK checks the status of the local network connection and the performance of Square's servers to route the payment online or offline for the highest chance of success. For example, with the `processingMode` set to `AUTO_DETECT`, a seller who has not opted into offline processing always has their payment attempted online, since offline payments would fail when checking opt-in status. If you're using the `AUTO_DETECT` processing mode, the Payment object returned by `startPaymentActivity()` might be an `OnlinePayment` or `OfflinePayment`, and your application should account for both possibilities. In some situations, such as when a location has a sporadic or weak internet connection, sellers might want to take all payments offline during a period of time. To do so, set the `processingMode` for payments to `OFFLINE_ONLY`. All payments made with this mode are initially queued on the mobile device, even if there is a network connection. {% tabset %} {% tab id="Kotlin" %} ```kotlin val paymentManager = MobilePaymentsSdk.paymentManager() val baseMoney = Money(100L, USD) val builder = PaymentParameters.Builder( amount = baseMoney, paymentAttemptId = UUID.randomUUID().toString(), processingMode = processingMode(ProcessingMode.AUTO_DETECT) ) val paymentParameters = builder.build() val promptParameters = PromptParameters( mode = PromptMode.DEFAULT, additionalPaymentMethods = listOf(Type.KEYED) ) viewModel.startPaymentActivity(paymentParameters, promptParameters) ``` {% /tab %} {% tab id="Java" %} ```java PaymentManager paymentManager = MobilePaymentsSdk.paymentManager(); Money baseMoney = new Money(100L, CurrencyCode.USD); PaymentParameters.Builder builder = PaymentParameters.Builder( baseMoney, UUID.randomUUID().toString(), ProcessingMode.AUTO_DETECT ) PaymentParameters paymentParameters = builder.build(); PromptParameters promptParameters = new PromptParameters( PromptMode.DEFAULT, Collections.singletonList(AdditionalPaymentMethod.Type.KEYED) ); paymentManager.startPaymentActivity(paymentParameters, promptParameters); ``` {% /tab %} {% /tabset %} {% aside type="important" %} When an offline payment is queued, it hasn't yet been processed by Square. The transaction isn't returned from the [ListPayments](https://developer.squareup.com/reference/square/payments-api/list-payments) endpoint and doesn't have a Square payment ID value. If your application's workflow involves delayed payment capture or syncing Square payments with an outside transaction database, you must write logic to query Square for the completed payment and its details and then perform that sync. For more information, see [Payment IDs](#payment-ids). {% /aside %} ## Access offline payments The Mobile Payments SDK provides the `getOfflinePaymentQueue()` method in the Payment Manager to access all payments taken offline by the application on the current mobile device. This includes queued payments waiting to be processed and completed processed payments. Only payments that have a `locationId` matching the current application user's location ID are returned. This prevents two Square sellers logging in to your application on the same mobile device from viewing each other's payments. The `status` of an `OfflinePayment` indicates its current point in the payment workflow and whether it failed to upload or process. The `status` can be one of the following: * `QUEUED` - The payment is stored locally on the device running the Mobile Payments SDK application. The SDK attempts to upload the payment to Square after the network connection is restored. * `UPLOADED` - The payment has been uploaded to the Square server, but hasn't yet been processed. * `FAILED_TO_UPLOAD` - The payment couldn't be uploaded due to an unrecoverable error. * `FAILED_TO_PROCESS` - The connection was restored, but Square couldn't process this specific offline payment. This might be because of a declined card or another error with the card-issuing bank. An offline payment with this status cannot be recovered, and the seller doesn't receive funds from the transaction. * `PROCESSED` - Square processed your offline payment successfully. It can now be seen in the Square Dashboard. {% tabset %} {% tab id="Kotlin" %} ```kotlin val offlineQueue = MobilePaymentsSdk.paymentManager().getOfflinePaymentQueue() // Grab total amount stored when (val totalStoredAmountResult = offlineQueue.getTotalStoredPaymentAmount()) { is Failure -> { … } is Success -> { val totalStoredAmount = totalStoredAmountResult.value } } // Add callback val callbackReference = offlineQueue.addGetPaymentsCallback { result -> when (result) { is Failure -> { … } is Success -> { val offlinePayments = result.value // Number of payments currently stored val totalNumberOfPayments = offlinePayments.size // Show each OfflinePayment Status to user offlinePayments.forEach { offlinePayment -> when (offlinePayment.status) { OfflineStatus.QUEUED -> { //show user via UI } OfflineStatus.UPLOADED -> { //show user via UI } OfflineStatus.FAILED_TO_PROCESS -> { //show user via UI } OfflineStatus.FAILED_TO_UPLOAD -> { //show user via UI } OfflineStatus.PROCESSED -> { //show user via UI } } } } } } // Start async getPayments() offlineQueue.getPayments() // clean up when done fetching callbackReference.clear() ``` {% /tab %} {% tab id="Java" %} ```java OfflinePaymentQueue offlineQueue = MobilePaymentsSdk.paymentManager().getOfflinePaymentQueue(); // Grab total amount stored Result totalStoredAmountResult = offlineQueue.getTotalStoredPaymentAmount(); if (totalStoredAmountResult.isSuccess()) { Money totalStoredAmount = totalStoredAmountResult.value(); } else if (totalStoredAmountResult.isFailure()) { … } // Add callback CallbackReference callbackReference = offlineQueue.addGetPaymentsCallback(result -> { if (result.isFailure()) { … } else if (result.isSuccess()) { List offlinePayments = result.value(); // Number of payments currently stored int totalNumberOfPayments = offlinePayments.size(); // Show each OfflinePayment Status to user for (OfflinePayment offlinePayment : offlinePayments) { switch (offlinePayment.getStatus()) { case QUEUED: //show user via UI break; case UPLOADED: //show user via UI break; case FAILED_TO_PROCESS: //show user via UI break; case FAILED_TO_UPLOAD: //show user via UI break; case PROCESSED: //show user via UI break; } } } }); // Start async getPayments() offlineQueue.getPayments(); // clean up when done fetching callbackReference.clear(); ``` {% /tab %} {% /tabset %} ### Payment IDs A payment taken offline with the Mobile Payments SDK has two identification values: `localID`, used to identify the payment on your mobile device before it's processed, and `id`, which represents the Square payment `id` value. The second value is always `null` until the SDK uploads the payment to Square and the payment is processed. When a payment's status changes to `PROCESSED`, you can access its `id` value from the mobile device and match it to the `id` value of payments returned by the [ListPayments](https://developer.squareup.com/reference/square/payments-api/list-payments) endpoint. You can now continue your application's payment workflow and use other Square APIs to access and manage the payment. `PROCESSED` payments are deleted from the mobile device to conserve storage space. {% tabset %} {% tab id="Kotlin" %} ```kotlin val paymentManager = MobilePaymentsSdk.paymentManager() val handle = paymentManager.startPaymentActivity(paymentParams, promptParams) { result -> when (result) { is Failure -> { … } is Success -> { val payment = result.value when (payment) { is OnlinePayment -> { val paymentId = paymentId.id // not nullable } is OfflinePayment -> { val paymentId = payment.id // nullable val localPaymentId = payment.localId val status = payment.status } } } } } // clean up when done fetching handle.cancel() ``` {% /tab %} {% tab id="Java" %} ```java PaymentManager paymentManager = MobilePaymentsSdk.paymentManager(); PaymentHandle handle = paymentManager.startPaymentActivity(paymentParams, promptParams, result -> { if (result.isFailure()) { … } else if (result.isSuccess()) { Payment payment = result.value(); if (payment.isOnlinePayment()) { String paymentId = payment.asOnlinePayment().getId(); // not nullable } else if (payment.isOfflinePayment()) { String paymentId = payment.asOfflinePayment().getId(); // nullable String localPaymentId = payment.asOfflinePayment().getLocalId(); OfflineStatus status = payment.asOfflinePayment().getStatus(); } } }); // clean up when done fetching handle.cancel(); ``` {% /tab %} {% /tabset %} ## Process offline payments The Mobile Payments SDK regularly checks for network connectivity and a connection to Square servers so that queued payments can be processed. This is done automatically while the application is open in the foreground of the device. Assuming that there are no errors in the `PaymentParameters` or issues like cards being declined, the funds are available to the seller in the Square Dashboard and the payment can be accessed and managed by the [Payments API](https://developer.squareup.com/reference/square/payments-api) after this processing is complete. {% aside type="important" %} The following actions result in queued payments being removed from the device. If this happens before the payment is uploaded and processed, it cannot be processed and the seller doesn't receive funds from the transaction: * Wiping the device cache * Authenticating the Mobile Payments SDK with a different application ID on the same device * Uninstalling the application from the device using the Mobile Payments SDK {% /aside %} Queued payments remain on the device when a user force-quits your application, switches to another application, or a seller logs out of your application. As a best practice, your application should query for any `QUEUED` payments on the device before calling `authorizationManager.deauthorize()`, so that you can alert the seller about any unprocessed payments. --- # Handling Errors > Source: https://developer.squareup.com/docs/mobile-payments-sdk/android/handling-errors > Status: PUBLIC > Languages: All > Platforms: Android Learn how to handling errors in the Mobile Payments SDK for Android. **Applies to:** [Mobile Payments SDK - Android](https://developer.squareup.com/docs/sdk/mobile-payments/android) {% subheading %}Learn how to resolve errors in the Mobile Payments SDK for Android.{% /subheading %} {% toc hide=true /%} ## Authorization errors `AuthorizeErrorCodes` might be returned when using the `AuthorizationManager`. These errors are surfaced as a result of your authorization callback. {% table %} * Error {% width="200px" %} * Description --- * `NO_NETWORK` * The Mobile Payments SDK couldn't connect to the network. --- * `OBSOLETE_SDK` * The SDK version is obsolete and no longer supported. Update to a newer version of the Mobile Payments SDK. --- * `USAGE_ERROR` * `AuthorizationManager.authorize` was used in an unexpected or unsupported way. For more information, see the `debugCode` and `debugMessage` within `Result.Failure`. {% /table %} ## Bluetooth and pairing errors `PairingErrorCodes` might be returned when pairing readers using the `ReaderManager`. These errors are surfaced as a result of your pairing callback. {% table %} * Error {% width="300px" %} * Description --- * `BLUETOOTH_ALREADY_SCANNING` * Bluetooth scanning is already in progress. Only one scan can be active at a time. Wait for the first scan to complete and try again. --- * `BLUETOOTH_DISABLED` * Bluetooth was disabled by the user. Prompt the user to enable Bluetooth and try again. --- * `BLUETOOTH_PERMISSION_DENIED` * Your application is missing one or both Android runtime permissions for Bluetooth: `BLUETOOTH_CONNECT` or `BLUETOOTH_SCAN`. Check for these permissions and try again. --- * `BLUETOOTH_UNSUPPORTED` * This device doesn't support Bluetooth. --- * `NOT_AUTHORIZED` * The Mobile Payments SDK isn't currently authorized with a Square seller account. Use the `AuthorizationManager` to authorize a Square account. --- * `TIMEOUT` * The Mobile Payments SDK timed out while awaiting reader pairing. Try pairing again. --- * `USAGE_ERROR` * `ReaderManager.pairReader` was used in an unexpected or unsupported way. For more information, see the `debugCode` and `debugMessage`. {% /table %} ## Payment errors `PaymentErrorCodes` might be returned when taking a payment with the `PaymentManager`. These errors are surfaced as a result of your payment callback. {% table %} * Error {% width="300px" %} * Description --- * `CANCELED` * The payment was canceled before completion. --- * `CONSENT_NOT_PROVIDED` * The merchant is in a market that requires consent for [analytics and performance tracking](mobile-payments-sdk/android#data-privacy-consent), and consent has not been explicitly granted or denied. --- * `DEVICE_CLOCK_SKEWED` * The local device time is out of sync with the server time, which could lead to inaccurate payment reporting. Check your device's time and attempt your action again. --- * `LOCATION_SERVICES_DISABLED` * The device's location services were disabled and the payment couldn't be completed. Enable location services and try again. --- * `NOT_AUTHORIZED` * The Mobile Payments SDK isn't currently authorized with a Square seller account. Use the `AuthorizationManager` to authorize a Square account. --- * `OBSOLETE_SDK` * The SDK version is obsolete and no longer supported. Update to a newer version of the Mobile Payments SDK. --- * `TIMEOUT` * The Mobile Payments SDK timed out while awaiting a payment. Try the payment again. --- * `USAGE_ERROR` * `PaymentManager.startPaymentActivity` was used in an unexpected or unsupported way. For more information, see the `debugCode` and `debugMessage` within `Result.Failure`. {% /table %} --- # Events API > Source: https://developer.squareup.com/docs/events-api/overview > Status: BETA > Languages: All > Platforms: All Learn how the Events API can be used to search for and retrieve Square API events. **Applies to:** [Events API](https://developer.squareup.com/reference/square/events-api) | [OAuth API](oauth-api/overview) | [Square Webhooks](webhooks/overview) | [Webhook Subscriptions API](webhooks/webhook-subscriptions-api) {% subheading %}Learn how the Events API can be used to search for and retrieve Square API events.{% /subheading %} {% toc hide=true /%} ## Overview The [Events API](https://developer.squareup.com/reference/square/events-api) lets you search for and retrieve Square API events occurring within a 28-day period. You can use the API to manage event data when real-time responses to data changes aren't necessary. The Events API serves as a disaster recovery and reconciliation mechanism for missed webhook events due to server outages, misconfigured webhook subscriptions, network errors, and similar issues. By allowing access to and review of past events, the Events API helps you maintain data integrity and continuity during disruptions. ## Requirements and limitations * You can only retrieve events that occurred within the past 28 days. * You can search for all event types listed in [Events](https://developer.squareup.com/reference/square/webhooks), except for the deprecated [V1 PAYMENT_UPDATED](https://developer.squareup.com/reference/square/payments-api/webhooks/v1-PAYMENT_UPDATED) event type. ## Security considerations Because Square events are owned by the application and not by any one seller, you cannot use OAuth access tokens with the Events API. You can only access the Events API using your [personal access token](build-basics/access-tokens#get-a-personal-access-token). The Events API uses OAuth on the backend to authenticate whether your application is authorized to receive specific events. Your application must have OAuth access to an event at the time it occurs to see it in the search results. For example, with OAuth access to payment permissions of a seller's account, you can use the Events API to search for the `payment.created` event for that seller using your personal access token. For more information about OAuth processes, see [OAuth Best Practices](oauth-api/best-practices). ## Comparison with webhooks The Events API is a pull-based alternative to [webhooks](webhooks/overview). In addition to receiving real-time event notifications, you can periodically poll the Events API to retrieve events. The API gives you access to the event data directly, removing the need to rely on a notification URL. While the Events API allows you to manage event data in scenarios where real-time notifications aren't needed, it doesn't replace webhooks entirely. Instead, it complements the [Webhook Subscriptions API](webhooks/webhook-subscriptions-api) by providing a pull-based method to reconcile real-time events with historical ones (in order). ## Use cases Use case examples for the Events API include the following: - **Direct access to event data** - Retrieve event data directly without needing a notification URL. - **Disaster recovery** - If you miss events due to server downtime or network issues, you can use the Events API to recover them. - **Data reconciliation** - Regularly poll the Events API to ensure that your system's event data stays current and consistent with Square's records. - **Audit and reporting** - Access historical event data for audit trails, reporting, and analytics purposes without relying on real-time event notifications. ## Implementation steps Using the Events API involves the following steps: 1. **Authenticate your requests** - Obtain and use your personal access token to authenticate the Events API. 1. **Define polling intervals** - Determine and set intervals for polling the Events API to retrieve new events. 1. **Handle retrieved events** - Develop logic to process retrieved events based on the event's `created_at` timestamp. ## Endpoints The Events API includes one primary endpoint, `SearchEvents`, along with three supporting endpoints: `EnableEvents`, `DisableEvents`, and `ListEventTypes`. | Endpoint{% width="180px" %} | Action | |--------|-------------------------------| |[SearchEvents](https://developer.squareup.com/reference/square/events-api/search-events) | To search for Square API events that occurred within a 28-day period. {% line-break /%}{% line-break /%} You can filter events based on event types, seller IDs, location IDs, and `created_at` parameters. For a complete list of filters that you can use, see [SearchEventsFilter](https://developer.squareup.com/reference/square/objects/SearchEventsFilter). By default, Square sorts events by their creation time using the `created_at` timestamp. For a list of sort criteria that you can use, see [SearchEventsSort](https://developer.squareup.com/reference/square/objects/SearchEventsSort). |[EnableEvents](https://developer.squareup.com/reference/square/events-api/enable-events) | To enable events to make them searchable. {% line-break /%}{% line-break /%} Before you can search for events, you must first enable them using the `EnableEvents` endpoint. You cannot enable individual event types. The `EnableEvents` endpoint doesn’t have a request or response body. |[DisableEvents](https://developer.squareup.com/reference/square/events-api/disable-events) | To disable events to prevent them from being searchable. {% line-break /%}{% line-break /%} All events are disabled by default. You must enable events to make them searchable. You cannot disable individual event types. Disabling events for a specific time period prevents them from being searchable, even if you re-enable them later. The `DisableEvents` endpoint doesn’t have a request or response body. |[ListEventTypes](https://developer.squareup.com/reference/square/events-api/list-event-types) | To list event types that you can search for. ## Example use case The [SearchEvents](https://developer.squareup.com/reference/square/events-api/search-events) request searches for events with the type `labor.shift.created` and limits the number of results to three. To retrieve events beyond these three, send your original query along with the [pagination cursor](build-basics/common-api-patterns/pagination) provided in the response as shown in the following example. {% tabset %} {% tab id="Request" %} ```` If you don’t specify an `event_type` filter, the response includes all events. For a complete list of event types that you can filter by, see [Webhook Events](https://developer.squareup.com/reference/square/webhooks). You can filter events by seller ID. For example, you can retrieve all events for a single seller or a group of sellers. You can also filter events by their creation time using the `created_at` timestamp or the `location_id`. Note that the `created_at` timestamp is inclusive. For a complete list of filters that you can use, see [SearchEventsFilter](https://developer.squareup.com/reference/square/objects/SearchEventsFilter). {% /tab %} {% tab id="Response" %} ```json { "events": [ { "merchant_id": "1ZYMKZY1YFGBW", "type": "labor.shift.created", "event_id": "d2798d4e-8479-331a-b0cd-4f06cec84551", "created_at": "2022-12-22 19:46:43.431652523 +0000 UTC", "data": { "type": "labor", "id": "E5WVVC4X3NTKP", "object": { "shift": { ... } } } }, { "merchant_id": "1ZYMKZY1YFGBW", "type": "labor.shift.created", "event_id": "5ce40dc9-70f4-39bb-8641-be5d95510df8", "created_at": "2022-12-22 23:25:09.909082772 +0000 UTC", "data": { ... } } ], "metadata": [ { "event_id": "d2798d4e-8479-331a-b0cd-4f06cec84551", "api_version": "2022-07-20" }, { "event_id": "5ce40dc9-70f4-39bb-8641-be5d95510df8", "api_version": "2022-07-20" } ], "cursor": "c3EwaWRzLTZNM0FydWY3T20yaVBKbEFfR2VFQmcjMTY3MTc1MTUwOSM1Y2U0MGRjOS03MGY0LTM5YmItODY0MS1iZTVkOTU1MTBkZjg=" } ``` The payload sent by a webhook is identical to the `Event` object returned in this response. This response also includes an [EventMetadata](https://developer.squareup.com/reference/square/objects/EventMetadata) object that corresponds to the API version of each event. {% aside type="success" %} Sometimes, responses might only include a pagination cursor. In such cases, continue paginating to retrieve additional events. {% /aside %} {% /tab %} {% /tabset %} ### List event types The following example shows using the `ListEventTypes` endpoint to list the event types that you can search for: {% tabset %} {% tab id="Request" %} ```` {% /tab %} {% tab id="Response" %} ```json { "event_types": [ "bank_account.created", "card.updated", "invoice.updated", "payment_method_enrollment.updated", "terminal.refund.updated", ... ], "metadata": [ { "event_type": "bank_account.created", "api_version_introduced": "2020-02-26", "release_status": "PUBLIC" }, { "event_type": "card.updated", "api_version_introduced": "2021-06-16", "release_status": "PUBLIC" }, { "event_type": "invoice.updated", "api_version_introduced": "2020-07-22", "release_status": "PUBLIC" }, { "event_type": "terminal.refund.updated", "api_version_introduced": "2020-10-28", "release_status": "PUBLIC" }, ... ] } ``` {% /tab %} {% /tabset %} ## See also * [Webhook Subscriptions](webhooks/webhook-subscriptions-api) * [Square Webhooks](webhooks/overview) --- # Square eCommerce APIs > Source: https://developer.squareup.com/docs/ecommerce-api > Status: PUBLIC > Languages: All > Platforms: All eCommerce APIs are building blocks for online marketplaces, allowing developers to create seamless shopping experiences. {% subheading %}Learn how Square APIs can be used to create custom eCommerce solutions.{% /subheading %} ## Overview Square eCommerce APIs in the [Square Developer platform](homepage) are building blocks for online marketplaces. By connecting various features and services, developers can create seamless shopping experiences for any business type. Square APIs for eCommerce solutions offer: * Scalability for businesses to easily expand their online presence and offerings. * Flexible online experiences that meet specific needs of different businesses. * Comprehensive functionality through the integration of various Square products and services. ### Square Online store Sellers use the [Square Online](https://squareup.com/online-store) eCommerce platform to build and launch an online store. Square Online integrates with [Square Point of Sale](https://squareup.com/point-of-sale), enabling sellers to keep online and in-person orders, items, and inventory in sync — all in one place. Square Online checkouts use [Payment Links](https://squareup.com/payment-links) for PCI-DSS compliant payment processing and provide free fraud protection and payment dispute management. Square partner integrations are also available to help sellers with shipping and other eCommerce needs. [Learn more](https://squareup.com/help/article/5437-manage-your-square-app-marketplace-subscriptions) or [see all eCommerce apps](https://squareup.com/app-marketplace/category/e-commerce) available in the App Marketplace. ## Common eCommerce API integrations Developers can integrate Square features into their eCommerce solutions by calling RESTful Square APIs directly, using [language-based platform SDKs](sdks), or sending [Square GraphQL queries](devtools/graphql). Square also provides online and mobile payment SDKs. Many Square APIs have built-in integrations with other APIs that you can leverage in your custom solutions. ### Payment processing All eCommerce solutions need some way to accept online payments. Square provides options that support low code to advanced customizations and support one-time or [recurring payments](#recurring-payments) securely processed by Square. Online payment APIs and SDKs options include: * [Checkout API](checkout-api) - Generate shareable payment links, with optional [Orders API](orders-api/what-it-does) integration and support for [recurring payments](#recurring-payments). * [Payments API](payments-refunds) - Used with the [Web Payments SDK](web-payments/overview) and [In-App Payments SDK](in-app-payments-sdk/what-it-does) for card payments or the [Customers API](customers-api/what-it-does), [Cards API](cards-api/overview), and [Gift Cards API](gift-cards/using-gift-cards-api) for card-on-file payments. Both the Payments API and [Refunds API](refunds-api/overview) have built-in Orders API integration for order management. {% anchor id="order-management" /%} ### Order management Order management features help streamline and automate efficient end-to-end order processing. Key features include building orders for the cart, [inventory control](#inventory-control), and helping coordinate workflows for picking, packing, and shipping order fulfillments. The [Orders API](orders-api/what-it-does) is the primary API for managing the order lifecycle. Combine the Orders API with other APIs to build custom order management functionality: * [Catalog API](catalog-api/what-it-does) - Include detailed itemization and automatic taxes and discounts, with built-in [Inventory API](inventory-api/what-it-does) integration that automatically updates inventory levels for catalog item variations. * [Payments API](payments-refunds) and [Refunds API](refunds-api/overview) - Automatically update order details, including payment and refund history with detailed transaction information. * [Customers API](customers-api/what-it-does) and other [customer engagement](#customer-engagement) features - Facilitate customer service requests, inform customer analytics, and implement loyalty and gifting programs. {% anchor id="inventory-control" /%} ### Inventory control Use the Inventory API to manage and track product inventory levels in real-time, helping to prevent stockouts and overstocking. The [Inventory API](inventory-api/what-it-does) is the primary API for inventory control, including updating and tracking inventory changes and retrieving inventory counts. The Inventory API is used with the following APIs: * [Catalog API](catalog-api/what-it-does) - Manage the product catalog. Inventory quantities are tracked on item variations in the catalog. * [Orders API](orders-api/what-it-does) - Automatically update inventory levels for item variations sold or returned in an order. * [Locations API](locations-api) - Find stock availability for in-person pickups. ### Customer engagement Engaged customers are more likely to make purchases and often spend more. Regular engagement can build strong customer relationships that improve customer retention and increase referrals. The [Customers API](customers-api/what-it-does) is the primary API for customer relationship management (CRM). Combine the Customers API with other APIs for custom engagement strategies: * [Loyalty API](loyalty-api/overview) and [Gift Cards API](gift-cards/using-gift-cards-api) - Help drive new and repeat business through loyalty and gifting programs. * [Orders API](orders-api/what-it-does) and [Customer Segments API](customer-segments-api/what-it-does) - Analyze buying behavior (for segmentation, satisfaction, product affinity, and other insights). Integration with the Orders API also simplifies loyalty and gift card workflows. In addition, the [Payments API](payments-refunds) provides built-in integration by associating a customer with most payments. * [Customer Groups API](customer-groups-api/what-it-does) and [Customer Custom Attributes API](customer-custom-attributes-api/overview) - Enable personalized customer experiences. {% anchor id="recurring-payments" /%} ### Recurring payments with subscriptions Subscriptions offer a convenient recurring delivery of products or services to customers as well as a consistent and predictable revenue stream for businesses with automated payments. The [Subscriptions API](subscriptions/overview) is the primary API for managing subscriptions. It's used with the following APIs: * [Catalog API](catalog-api/what-it-does) - Configure the subscription plan and plan variation. * [Orders API](orders-api/what-it-does) - Create optional order templates for recurring orders for catalog items. * [Customers API](customers-api/what-it-does) - Allow customers to enroll in subscriptions. ## Square APIs for eCommerce Square APIs can be used for eCommerce, brick and mortar businesses, or both. Understanding the purpose and functionality of API capabilities can help you create a comprehensive eCommerce solution using multiple APIs. {% tabset %} {% tab id="Payment APIs & SDKs" imageWidth=371 imageHeight=190 imageUrl="//images.ctfassets.net/1nw4q0oohfju/3hQ2IGovhpwlmD9ihPELzF/7513e6a0dca8cccd257367053b7225c1/payments-highlight.png" %} {% card %} Process online payments securely — from instant payment links to recurring billing for subscription-based products and services — with support for various payment methods, acceptance flows, and levels of coding and customization. {% card-link-out href="online-payment-options" %}Online Payment APIs and SDKs{% /card-link-out %} {% /card %} {% /tab %} {% tab id="Commerce APIs" imageWidth=371 imageHeight=190 imageUrl="//images.ctfassets.net/1nw4q0oohfju/5406bYhhpgR7pr37TxLQNP/d39345101c2490006f892626c6452a09/commerce-highlight.png" %} {% card %} Manage the order lifecycle from creation to fulfillment, build and manage a catalog of products and services, update inventory pricing and availability. Let customers book appointments online and add snippets to Square Online sites. {% card-link-out href="commerce" %}Commerce APIs{% /card-link-out %} {% /card %} {% /tab %} {% tab id="Customer APIs" imageWidth=371 imageHeight=190 imageUrl="//images.ctfassets.net/1nw4q0oohfju/6KYlHBFtTwRpRZI1OOpzSX/c339e28c5ead5052c0aaf2241f3c32f8/customers-highlight.png" %} {% card %} Manage customer records as a foundation for customer relationship management and for engagement strategies that can encourage new and repeat business or enable personalization. {% card-link-out href="customers" %}Customer APIs{% /card-link-out %} {% /card %} {% /tab %} {% tab id="Merchant APIs" imageWidth=371 imageHeight=190 imageUrl="//images.ctfassets.net/1nw4q0oohfju/6neLhXOD5wCHp7EM3ZbY47/62241155a90dc38a55dc3eab2a6f6ca3/merchants-highlight.png" %} {% card %} Get details about Square sellers and their locations. Location details can enable eCommerce features such as stock availability and in-person pickups. {% card-link-out href="merchant-details" %}Merchant APIs{% /card-link-out %} {% /card %} {% /tab %} {% /tabset %} ## Security considerations Security is a critical concern for eCommerce API integrations. While many security features are built into Square APIs, developers must ensure that their calls to API endpoints are secure and data is encrypted both in transit and at rest. To prevent common security threats, developers should: * Use HTTPS to prevent man-in-the-middle attacks. * Apply strict input validation to protect against SQL injection and XSS. * Keep access tokens, application credentials, and sensitive data secure and out of the codebase and use environment variables or secrets management tools. For more information, see: * [OAuth Best Practices](oauth-api/best-practices) * [Best Practices for Collecting Information](build-basics/general-considerations/collecting-information) * [Strong Customer Authentication](sca-overview) ## Performance optimization To ensure fast and reliable API performance: * Implement caching strategies to reduce the load on API servers. * When possible, use batch and bulk requests to minimize the number of API calls. * Optimize API calls by requesting only the data needed and reducing payload size. Consider integrating [Square GraphQL queries](devtools/graphql) to minimize data transfer requests. * Subscribe for [webhook notifications](webhooks/overview) to reduce the need for polling. ## Error handling and debugging Effective error handling and debugging are crucial for maintaining a functional eCommerce API integration. Developers should: * Implement comprehensive error logging to track and resolve issues promptly. * Monitor responses for `429` [rate limiting errors](build-basics/general-considerations/handling-errors#rate-limiting-errors) and use a retry mechanism with an exponential backoff schedule to resend the requests at an increasingly slower rate. It's also a good practice to use a randomized delay (jitter) in your retry schedule. * Use debugging tools and monitor API response codes to identify and fix errors. For example, use [API logs](devtools/api-logs) to view the logs of the API calls from your application. ## API testing API testing ensures that integrations work as expected and can handle various scenarios. Developers should conduct: * Unit tests to validate individual API functions. * Integration tests to ensure APIs work together seamlessly. * End-to-end tests to simulate real-world scenarios with different product catalogs and [scoped OAuth permissions](oauth-api/square-permissions). --- # Web Payments SDK Quickstart > Source: https://developer.squareup.com/docs/web-payments/quickstart > Status: PUBLIC > Languages: All > Platforms: All Learn how to get started with the Web Payments SDK for your application to take secure payments and deploy to production. **Applies to:** [Web Payments SDK](https://developer.squareup.com/reference/sdks/web/payments) | [Payments API](payments-refunds) {% subheading %}Learn how to get started with the Web Payments SDK for your application to take secure payments and deploy to production.{% /subheading %} {% toc hide=true /%} ## Overview To accept a card payment from a buyer, you need a web client where the buyer enters payment card information and a backend that takes a payment with the card. The SDK produces a secure single-use payment token based on the card. Your web client sends the payment token to your backend where the payment is taken. In summary, a payment is taken with these steps: 1. **Generate a payment token** - Use the Web Payments SDK client library to render a card entry form and generate a payment token that your web client sends to your backend server. 2. **Create a payment with the token** - On your backend, use the Square [Payments API](payments-refunds) to create a payment. This quickstart guide shows you where to add HTML and JavaScript to your web client to integrate the Web Payments SDK and take a payment on your backend. You can follow along with the [quickstart sample repository](https://github.com/square/web-payments-quickstart) to set up a web application that's integrated with the Web Payments SDK for taking payments. {% aside type="important" %} If you're not familiar with building an application using Square client-side SDKs, Square recommends completing this quickstart using the GitHub project before you attempt to integrate the Web Payments SDK into your application. {% /aside %} ## Quickstart steps Use the following steps to take card payments in a web client with the Web Payments SDK: 1. [Set Up the Web Client Application](web-payments/quickstart/set-up-web-client-app) - Learn how to set up a web client application with the Web Payments SDK quickstart sample project. 2. [Add the Web Payments SDK to the Web Client](web-payments/quickstart/add-sdk-to-web-client) - Learn how to initialize the Web Payments SDK with the web client and a Square application to accept a card payment, generate a payment token with buyer verification, and send the resulting payment token to the server for payment verification. 3. [Deploy the Application](web-payments/quickstart/deploy-app) - Learn how to deploy the application with the quickstart project by completing the required deployment tasks. --- # Add the Web Payments SDK to the Web Client > Source: https://developer.squareup.com/docs/web-payments/quickstart/add-sdk-to-web-client > Status: PUBLIC > Languages: All > Platforms: All Learn how to add the Web Payments SDK to the web client. **Applies to:** [Web Payments SDK](web-payments/overview) | [Payments API](payments-refunds) {% subheading %}Learn how to initialize the Web Payments SDK with the web client and a Square application to accept a card payment, generate a payment token with buyer verification, and send the resulting payment token to the server for payment verification.{% /subheading %} {% toc hide=true /%} ## Overview At the highest level, to add the Web Payments SDK to the web client, you need to:  - Get your application credentials, set up your localhost development environment, and initialize the SDK. - Collect buyer input. - Tokenize the buyer input in a call to [`card.tokenize()`](https://developer.squareup.com/reference/sdks/web/payments/objects/Card#Card.tokenize).  - Pass the token for future use in a server-side call to the [CreatePayment](https://developer.squareup.com/reference/square/payments-api/create-payment) endpoint.  The following code demonstrates the basic order of operations:  ```javascript // Customer input, hard-coded for example only const verificationDetails = { amount: '1.00', billingContact: { givenName: 'John', familyName: 'Doe', email: 'john.doe@square.example', phone: '3214563987', addressLines: ['123 Main Street', 'Apartment 1'], city: 'London', state: 'LND', countryCode: 'GB', }, currencyCode: 'GBP', intent: 'CHARGE', customerInitiated: true, sellerKeyedIn: false, }; // Tokenize the input const token = await card.tokenize(verificationDetails); // Pass the token to create a Payment const payment = CreatePayment(token); ``` The following sections explain these steps in more detail and include sample code that you can add to the [quickstart repository](https://github.com/square/web-payments-quickstart) to test a concept.  ## 1. Get application credentials The quickstart application is configured to send requests to the Square Sandbox instead of your production Square account. To find your Sandbox credentials: 1. Open the [Developer Console](https://developer.squareup.com/apps) and choose the plus symbol under **Applications** to create a new application. 2. Open the application, and then choose **Credentials** in the left pane. 3. At the top of the page, set the Developer Console mode to **Sandbox** to get to the **Sandbox Application ID** and **Sandbox Access Token** values. 5. In the left pane, choose **Locations** to find the **Sandbox Location ID**. 6. Paste all of these Sandbox credentials (**Application ID**, **Location ID**, and **Sandbox Access Token**) into a temporary text file. {% aside type="important" %} Your Sandbox credentials are secure secrets. Don't share these values with anyone or upload them to the cloud. {% /aside %} ![An animation showing the process for getting application credentials and location ID in the Developer Console.](//images.ctfassets.net/1nw4q0oohfju/3wqbKLMA7F1K58FL7q3O7w/c6e9583a5d1ec0b6674e133601f6f322/get-app-credentials-developer-dashboard.gif) {% accordion expanded=false %} {% slot "heading" %} ### ⚠️ Critical Production Requirement {% /slot %} You must use your seller's location ID and access token when deploying to production. Your testing credentials will not work for processing real payments. To properly configure your production environment: 1. Replace your test access token with your seller's production token. - Obtain this token through the OAuth flow by calling the [ObtainToken](oauth-api/receive-and-manage-tokens#call-the-obtaintoken-endpoint) endpoint. 2. Replace your test location ID with your seller's actual location ID. - After obtaining the production token, [retrieve a list of the seller's locations](locations-api#retrieve-a-list-of-locations) to get the seller's valid location IDs. - Select the appropriate location ID for this deployment. ❌ **Common Issue**: Application payments often fail in production because developers forget to replace their test location ID with the seller's actual location ID. If payments are being rejected in production, verify that you're using the correct seller credentials, especially the location ID. {% /accordion %} ## 2. Configure the quickstart access token The quickstart server code calls the [CreatePayment](https://developer.squareup.com/reference/square/payments-api/create-payment) endpoint and needs to be updated to use your Sandbox access token. 1. In the project root folder, create a copy of the `.env.example` file and name it `.env.sandbox`. The [dotenv](https://www.npmjs.com/package/dotenv) library is used to manage secrets that shouldn't be made public. The `.env.sandbox` file should never be committed. 2. In .env.sandbox, define `SQUARE_ACCESS_TOKEN` with your Sandbox access token from the Developer Console. ```javascript SQUARE_ACCESS_TOKEN={SANDBOX_ACCESS_TOKEN} ``` 3. Restart your server for the Sandbox test environment (`npm run dev`) to use this new value. ## 3. Add pay elements to the page 1. Replace the contents of the `` in `public/index.html` with the following HTML elements: ```html







``` This HTML adds an element (`div id="card-container"`) that the Web Payments SDK attaches the card element to and adds a button that starts the tokenization process. {% aside type="tip" %} The SDK also enables the [Apple Pay](web-payments/apple-pay), [Google Pay](web-payments/google-pay), [ACH (bank transfer)](web-payments/add-ach), Square [gift card](web-payments/gift-card), and [Cash App Pay](web-payments/add-cash-app-pay) payment methods. {% /aside %} ## 4. Attach the Card payment method to the pay elements The quickstart code already includes the following ` ``` 1. Add an empty ` ``` 2. Add the following global constants inside the `
``` {% /accordion %} ## Verify the Payment The payment is credited to the Sandbox test account whose access token is used in the application that you just built. To see the payment in the Sandbox Square Dashboard, go to the [Developer Console](https://developer.squareup.com/apps). 1. In the left pane, choose **Sandbox test accounts**. 2. Choose **Default Test Account**. 3. Choose **Open in Square Dashboard**. 4. In the left pane, choose **Transactions**. ## Next step [Deploy the Application](web-payments/quickstart/deploy-app) --- # Add Strong Customer Authentication > Source: https://developer.squareup.com/docs/web-payments/quickstart/add-sca > Status: DEPRECATED > Languages: All > Platforms: All Learn how to add Strong Customer Authentication to the Web Payments SDK quickstart project. **Applies to:** [Web Payments SDK](web-payments/overview) | [Payments API](payments-refunds) {% subheading %}Learn how to add Strong Customer Authentication to the Web Payments SDK quickstart project.{% /subheading %} {% toc hide=true /%} {% aside type="important" %} This guide covers how to add Strong Customer Authentication with the deprecated `verifyBuyer()` method. To set up the quickstart project and add buyer verification with the [Card.tokenize()](https://developer.squareup.com/reference/sdks/web/payments/objects/Card#Card.tokenize) method, see [Add the Web Payments SDK to the Web Client](web-payments/quickstart/add-sdk-to-web-client#5-set-up-the-card-payment-tokenization-method). {% /aside %} ## Overview To add security to the payment method, add the [Strong Customer Authentication](sca-overview) (SCA) security protocol layer to the application and verify the identity of the payment card holder by using the `verifyBuyer` function. {% aside type="important" %} Your application should always attempt to create a payment with a verification token when a token is returned. It should also be prepared to respond to a payment failure in a small number of cases where a payment is rejected despite receiving a buyer verification token. {% /aside %} 1. Update the `storeCard` function to take the `verificationToken` parameter. ```javascript // verificationToken can be undefined, as it doesn't apply to all payment // methods. async function storeCard(token, verificationToken) { const bodyParameters = { locationId, sourceId: token, verificationToken }; const body = JSON.stringify(bodyParameters); // Same as in the cards example. const paymentResponse = await fetch('/payment', { method: 'POST', headers: { 'Content-Type': 'application/json', }, body, }); if (paymentResponse.ok) { return paymentResponse.json(); } const errorBody = await paymentResponse.text(); throw new Error(errorBody); } ``` 2. Define the `verifyBuyer` function with billing contact details after the `displayResults` function. Your production application should collect the billing address of the buyer. Although providing an empty `billingContact` is acceptable, by providing as much billing contact information as possible, you increase the chances of a successful authentication. This example uses an object that is declared with a hard-coded billing address. Your application might collect a billing address at payment time or, if the buyer is a customer on the seller Square account, from the buyer's customer record. {% aside type="info" %} The Web Payments SDK produces a payment token that can be used to make a payment with the presented card or to store the card on file. These operations are represented by two intents: `CHARGE` to make a payment and `STORE` to store the card. {% /aside %} The code in the following steps adds the billing contact values needed by SCA (with the [payments.verifyBuyer](https://developer.squareup.com/reference/sdks/web/payments/objects/Payments#Payments.verifyBuyer) function) to verify the authenticity of the card holder. ```javascript async function verifyBuyer(payments, token) { const verificationDetails = { billingContact: { addressLines: ['123 Main Street', 'Apartment 1'], familyName: 'Doe', givenName: 'John', email: 'jondoe@gmail.com', country: 'GB', phone: '3214563987', region: 'LND', city: 'London', }, intent: 'STORE', }; const verificationResults = await payments.verifyBuyer( token, verificationDetails ); return verificationResults.token; } ``` The `verifyBuyer` function creates a [StoreVerifyBuyerDetails](https://developer.squareup.com/reference/sdks/web/payments/objects/StoreVerifyBuyerDetails) object that verifies a card to be stored on file and provides the buyer and purchase details needed by 3DS. 3. Add the `verifyBuyer` function to the `handleStoreCardMethodSubmission` function and update the `storeCard` method call to include `verificationToken`. ```javascript async function handleStoreCardMethodSubmission( event, paymentMethod, customerId ) { event.preventDefault(); try { // disable the submit button as we await tokenization and make a payment request. cardButton.disabled = true; const token = await tokenize(paymentMethod); // Add verifyBuyer. let verificationToken = await verifyBuyer(payments, token); // Add verificationToken. const storeCardResults = await storeCard( token, customerId, verificationToken ); displayResults('SUCCESS'); console.debug('Store Card Success', storeCardResults); } catch (e) { cardButton.disabled = false; displayResults('FAILURE'); console.error('Store Card Failure', e); } } ``` 4. Test the application. 1. Navigate to `http://localhost:3000/` in your browser. 2. Use one of the test cards in the following table with a challenge type of “Modal with Verification Code": | Brand | Number{% width="140px" %} | CVV | Challenge type | Verification code | | ---------- | ---------- | ---------- | ---------- | ---------- | | Visa | 4800 0000 0000 0004 | 111 | No Challenge | N/A | | Mastercard | 5222 2200 0000 0005 | 111 | No Challenge | N/A | | Discover EU | 6011 0000 0020 1016 | 111 | No Challenge | 123456 | | Visa EU | 4310 0000 0020 1019 | 111 | Modal with {% line-break /%}Verification Code | 123456 | | Mastercard | 5248 4800 0021 0026 | 111 | Modal with {% line-break /%}Verification Code | 123456 | | Mastercard EU | 5500 0000 0020 1016 | 111 | Modal with {% line-break /%}Verification Code | 123456 | | American Express EU | 3700 000002 01014 | 1111 | Modal with {% line-break /%}Verification Code | 123456 | | Visa | 4811 1100 0000 0008 | 111 | No Challenge with {% line-break /%}Failed Verification | N/A | After you submit, you see the following window where you enter the verification code: ![A graphic showing the SCA cardholder authentication window that appears when the verifyBuyer function is called.](//images.ctfassets.net/1nw4q0oohfju/3TctpFWgIAL24CpnT9s6FU/fff475a31af64861932411c324ae5b27/challenge-form-sca-auth.png) 3. Verify that the application passed in the verification token with a successful response. Check the application's API log again in your developer account. {% aside type="info" %} You can see a complete code example using the [Web Payments Quickstart](https://github.com/square/web-payments-quickstart/blob/main/public/examples/card-payment.html) on GitHub. {% /aside %} ## Next step * [Deploy the Application](web-payments/quickstart/deploy-app) --- # Deploy the Application > Source: https://developer.squareup.com/docs/web-payments/quickstart/deploy-app > Status: PUBLIC > Languages: All > Platforms: All Learn how to deploy the application with the Web Payments SDK quickstart project. **Applies to:** [Web Payments SDK](web-payments/overview) | [Payments API](payments-refunds) {% subheading %}Learn how to deploy the application with the Web Payments SDK quickstart project.{% /subheading %} {% toc hide=true /%} ## Overview Deploy your application in your production environment with the following tasks: * Replace your Sandbox access token and application ID with production values. * Replace your Sandbox location ID with a seller's location ID. * Update your code to make API calls to Square production endpoints. {% aside type="important" %} Your account must be activated to accept payments. Be sure to activate your account before continuing with this quickstart. If the [Developer Console](https://developer.squareup.com/apps) **Credentials** page indicates that your account isn't activated, follow the steps to activate it. {% /aside %} ## Deployment tasks Deployment tasks include the following: 1. **Update script references** - In the [Attach the Card payment method to the pay elements](web-payments/quickstart/add-sdk-to-web-client#step-4-attach-the-card-payment-method-to-the-pay-elements) section, you added script references in index.html. Update the domain string in the JavaScript reference from `sandbox.web.squarecdn.com/v1/square.js` to `web.squarecdn.com/v1/square.js`. 1. **Provide your production application ID** - The Web Payments SDK requires a valid application ID to return a payment token. In the [Get application credentials](web-payments/quickstart/add-sdk-to-web-client#step-1-get-application-credentials) section, you provided a Sandbox application ID. Update the code by providing your production application ID. 1. **Configure your backend server to use a production access token** - In the [Configure the quickstart access token](web-payments/quickstart/add-sdk-to-web-client#step-2-configure-the-quickstart-access-token) section, you provided a Sandbox access token in the env.sandbox file. Replace it with the production access token returned after a seller authorizes your backend to process payments. 2. **Configure a production location ID** - Use the Locations API to get the seller's location ID to initialize the [Payments](https://developer.squareup.com/reference/sdks/web/payments/objects/Payments) object. If you want to test the application in a production environment (`squareup.com`), you must use an actual payment card. Note that Square actually charges payment cards in production. Therefore, if you must test in production, charge minimum amounts. {% aside type="tip" %} Note the following for future application Sandbox tests or application deployments: * If you have a Sandbox access token, use the `sandbox.web.squarecdn.com/v1/square.js` Sandbox URL for Sandbox tests. * If you have a production access token, use the `web.squarecdn.com/v1/square.js` production URL for deployments. After you declare the access token and URL, the Web Payments SDK initializes the square.js script each time you run the application. As a result, Square takes care of the payment processing tasks according to the access token and URL you specified. {% /aside %} ## Next steps Now that you're taking card-not-present payments, you can add additional payment methods or customize the appearance of the `Card` payment method. * [Customize the Card Entry Form](web-payments/customize-styles) * [Add Apple Pay](web-payments/apple-pay) * [Add Google Pay](web-payments/google-pay) * [Add ACH Bank Transfer](web-payments/add-ach) * [Add a Square Gift Card](web-payments/gift-card) * [Add Afterpay and Clearpay](web-payments/add-afterpay) * [Add Cash App Pay](web-payments/add-cash-app-pay) You can also read more information about how the Web Payments SDK takes card payments and performs buyer verification: - [Take a Card Payment](web-payments/take-card-payment) - [Strong Customer Authentication](sca-overview) With card information, you can also store card details and charge a card-on-file with additional code for your application. For more information, see [Charge and Store Cards for Online Payments](web-payments/charge-and-store-cards). The [Web Payments SDK API Reference](https://developer.squareup.com/reference/sdks/web/payments) also provides a complete reference about supported payment methods, objects, enums, errors, and code examples. --- # Terminal API Quickstart > Source: https://developer.squareup.com/docs/terminal-api/quickstart > Status: PUBLIC > Languages: All > Platforms: All Learn how to connect and set up a Square Terminal with the Terminal API. **Applies to:** [Terminal API](terminal-api/overview) | [Devices API](terminal-api/terminal-device-monitoring) | [Locations API](locations-api) | [OAuth API](oauth-api/overview) | [Webhooks](webhooks/overview) {% subheading %}Learn how to connect and set up a Square Terminal with the Terminal API.{% /subheading %} {% toc hide=true /%} ## Overview To connect a [Square Terminal](https://squareup.com/shop/hardware/us/en/products/terminal-credit-card-machine) with a third-party POS application, complete the following steps: 1. [Create a new device code](terminal-api/quickstart#1-create-a-new-device-code). 2. [Set up a Square Terminal](terminal-api/quickstart#2-set-up-a-square-terminal). 3. [Pair a Square Terminal with a POS application](terminal-api/quickstart#3-pair-a-square-terminal-with-a-pos-application). After you pair a Square Terminal, set up Terminal API webhook notifications and an OAuth flow so that you get notified of Terminal API events and establish access tokens for making checkout requests. Completing these steps establishes the integration between the Square Terminal and the POS application. It also allows you to use the Terminal API to send and receive requests for payment checkouts and other processes. After you establish the integration, see [Take Payments with the Terminal API](terminal-api/square-terminal-payments). ## Requirements and limitations * You've created a [Square developer account and an application](get-started/create-account-and-application). * You've subscribed to [webhook events](webhooks/step2subscribe). * You've create a new device code with the Devices API [CreateDeviceCode](https://developer.squareup.com/reference/square/devices-api/create-device-code) endpoint. * Your Square developer account allows you to host applications that you can use with the Terminal API for a seller's in-person business. When you subscribe to webhook events, you receive notifications of Terminal API related activity that occurred. ## 1. Create a new device code Provide the following details in the [device_code](https://developer.squareup.com/reference/square/devices-api/create-device-code#request__property-device_code) request body: * `name` - This is an optional property, but it's recommended to enter a name that identifies the system that the seller uses with the POS application and the Square Terminal. * `product_type` - Enter `TERMINAL_API`. * `location_id` - Enter the location ID that represents the seller's location. ```` The response returns several fields, including: * The friendly name you used in the request. * The device pairing status, which is currently `UNPAIRED`. * The device code to enter in the Square Terminal. * The date and time on which the device code expires if not used. ```json { id: "1234567890", name: "Counter 1", code: "AFZEFB", status: "UNPAIRED", location_id: "NHT...CGJ", product_type: "TERMINAL_API", pair_by: "1970-01-01 11:10", created_at: "1970-01-01 11:10", updated_at: "1970-01-01 11:10" } ``` {% aside type="info" %} If a location ID isn't set in the request, the `location_id` response value is the default location ID for the seller. {% /aside %} After a device code is created, the seller must use the device code to sign in to a Square Terminal within 5 minutes. If the device code isn't used within 5 minutes, the device code expires and you must request a new device code. After the initial sign-in, you can reuse the device code to sign in to the same Square Terminal for subsequent sign-in attempts. After a seller [signs in to a Square Terminal](terminal-api/integrate-square-terminal#sign-in-to-a-square-terminal) with the device code, the status changes to `PAIRED` and the `device_id` value of the Terminal device is available. The device ID is the serial number on the underside of the Square Terminal. When the seller signs in, the POS application is notified through a webhooks event notification. {% aside type="tip" %} The Square Sandbox doesn't support the [Devices API](https://developer.squareup.com/reference/square/devices-api). If you're testing a Terminal API application in the Sandbox, use a Sandbox device ID that simulates a Square Terminal from the list of [Sandbox test values for the Terminal API](devtools/sandbox/testing#terminal-api-checkouts), instead of production device IDs obtained with the Devices API. {% /aside %} {% anchor id="set-up-a-square-terminal" /%} ## 2. Set up a Square Terminal You must set up a new Square Terminal before use. If a previously used device is powered off, turn it on and check for software updates that might have been missed while the Square Terminal was powered off. 1. Turn on the Square Terminal and connect it to your WiFi network. 2. On the Square Terminal **Sign in Page**, choose **Change Settings**, choose **General**, and then choose **About Terminal**. If there are any pending software updates, update the Square Terminal to the latest version. ### Sign in to a Square Terminal When a device code is available for the requested Square Terminal, a seller signs in to the Square Terminal using the following steps: 1. On the **Sign in Page**, choose the **Device Code** button. 2. Request a new device code by sending a POST request to v2/devices/codes. 3. Display this code to the person performing the setup. 4. Use the device code your application gathered. The Terminal screen should look like the following: ![A graphic showing a Square Terminal Ready screen.](//images.ctfassets.net/1nw4q0oohfju/3XvXY74radJWveP7xqLoa2/a428f3c7b6a208c6c7bb1639209dbe17/square-terminal-ready-screen.png) {% anchor id="sign-in-to-square-terminal" /%} ### Sign out of a Square Terminal paired mode If your Square Terminal is paired with a POS application, you might want to sign out of the Terminal. Signing out lets you pair the Square Terminal with a different POS application or use the Square Point of Sale application. 1. Swipe from the left side of the screen to open the navigation drawer. 2. Choose **Settings**. 3. Choose **Sign Out** at the bottom of the menu. ## 3. Pair a Square Terminal with a POS application A seller might have more than one location where Square Terminals are used. In this case, when pairing a Square Terminal, the seller should pick the location of the Square Terminal to be paired. Otherwise, the default seller location is used. Before a POS application can use a Square Terminal to check out a buyer, the POS application must be paired to a Square Terminal at either the chosen location or the default location. {% aside type="important" %} The Terminal API can only be used with device codes returned by the [CreateDeviceCode](https://developer.squareup.com/reference/square/devices-api/create-device-code) endpoint. Other device codes, such as those created in the Square Dashboard, aren't compatible with the Terminal API. {% /aside %} The pairing process involves the following steps: 1. (Optional) The POS application uses the [Locations API](locations-api) to present a location picker for the seller. If a location ID isn't set in the request, the default location is used. 2. The POS application gets a device code from a [CreateDeviceCode](https://developer.squareup.com/reference/square/devices-api/create-device-code) request. 3. The seller enters the device code into the Square Terminal to sign in. 4. The Square Terminal notifies Square that it's signed in using the device code. 5. The POS application and Square Terminal are paired when the device code is used to sign in to the Terminal. 6. The POS application receives a webhook showing that pairing is enabled and provides a device ID to be used in checkout requests for the paired Terminal. The seller can log in to the Square Terminal multiple times with the same device code. ## Additional steps after pairing After pairing the Square Terminal, set up webhook notifications and your OAuth flow. ### Webhook notifications for status updates Square sends webhook notifications with each status update for a Square Terminal pairing request and for a Terminal API checkout request status update. If you add listening endpoints for these webhook notifications, you avoid polling a Square server to get the current status of either request. The application webhook endpoint should listen for the following notifications: * `device.code.paired` - Notifies of a pairing completion. * `terminal.checkout.created` - Acknowledges a new Terminal checkout. * `terminal.checkout.updated` - Notifies of a checkout status change. The webhook payload for `device.code.paired` is an instance of `DeviceCode` with the current state of the object. The webhook payload for the `terminal.checkout` notifications is an instance of the `TerminalCheckout` whose properties have changed as the connected Square Terminal processes the checkout. ### OAuth permissions for a Square Terminal When you register the POS application with the Developer Console, you get the access tokens needed to call Square APIs. For OAuth tokens, use the Developer Console to [test your OAuth flow in the Square Sandbox](oauth-api/walkthrough). When you set up your OAuth flow, request the minimum permissions necessary to pair a Square Terminal and request a checkout. Doing so might increase adoption of the POS application and reduce your liability. The following are the [minimum permissions](oauth-api/square-permissions#devices) you need to request: * `DEVICE_CREDENTIAL_MANAGEMENT` * `MERCHANT_PROFILE_READ` * `PAYMENTS_READ` * `PAYMENTS_WRITE` When sellers sign in to an integrated POS application, they should be redirected to a URL as shown in the following example: ```bash https://connect.squareup.com/oauth2/authorize?client_id=YOUR_APP_ID&scope=DEVICE_CREDENTIAL_MANAGEMENT,MERCHANT_PROFILE_READ,PAYMENTS_READ,PAYMENTS_WRITE ``` The Square authorization page asks sellers to accept the POS application request for the following permissions: * Access to their Square Terminal credentials (`DEVICE_CREDENTIAL_MANAGEMENT` permission). * Access to their seller profile (`MERCHANT_PROFILE_READ` permission). * Read/write access to payments in their Square account (`PAYMENTS_READ` and `PAYMENTS_WRITE` permissions, respectively). After the seller accepts the authorization request, the Square authorization page sends a GET response to the redirect URL that you specified for the POS application. For more information, see [Receive Seller Authorization and Manage Seller OAuth Tokens](oauth-api/receive-and-manage-tokens). {% aside type="important" %} If you're building an application for accounts other than your own, use the OAuth API to generate tokens for each of your customers. Each customer creates and uses their own device codes to put their Terminal into Connected Mode. {% /aside %} ### Optional: Listen for the device pairing webhook [Validate the webhook notification](webhooks/step3validate) for `device.code.paired`. The following example shows the payload of the webhook: ```json { "merchant_id": "6SSW...ST5", "location_id": "S8GW...3HF3", "type": "device.code.paired", "event_id": "d214f854-adb1-4f56-b078-4b8697a3187a", "created_at": "2020-02-15T04:38:13Z", "data": { "type": "device_code", "id": "bact:cgvL1yv43VFjexample", "object": { "device_code": { "id": "TQYQBS0P8B7AJ", "name": "Counter 1", "code": "TRXKEB", "device_id": "R5WNWB5BKNG9R", "product_type": "TERMINAL_API", "location_id": "S8GW...3HF3", "pair_by": "2020-03-20T19:49:19.000Z", "created_at": "2020-03-20T19:44:19.000Z", "status": "PAIRED", "status_changed_at": "2020-03-20T19:44:19.000Z" } } } } ``` ### Optional: Request the pairing status The Devices API returns the current status of a device pairing with a GET command, as shown in the following example: ```` If the device code hasn't expired, a response similar to the following example is returned: ```json { "device_code": { "id": "3YVR0WQ0VY6WG", "name": "Counter 2", "code": "QYXRJQ", "product_type": "TERMINAL_API", "location_id": "NHT82D0ENBCGJ", "pair_by": "2020-03-20T20:23:31.000Z", "created_at": "2020-03-20T20:18:31.000Z", "status": "UNPAIRED", "status_changed_at": "2020-03-20T20:18:31.000Z" } } ``` Check the `status` of the device code. If it isn't `PAIRED`, you need to request the device pairing again. Keep checking until the device is `PAIRED`. When paired, the POS client can send Terminal checkout requests. {% aside type="info" %} Expired device codes aren't returned in [ListDeviceCodes](https://developer.squareup.com/reference/square/devices-api/list-device-codes) and [GetDeviceCode](https://developer.squareup.com/reference/square/devices-api/get-device-code) operations. {% /aside %} --- # Take Payments Online > Source: https://developer.squareup.com/docs/online-payment-options > Status: PUBLIC > Languages: All > Platforms: All Learn about Square online payment solutions, identify APIs and SDKs that best suit your development goals, and build a payment integration. {% subheading %}Learn about Square online payment solutions, explore online payment use cases, and identify the APIs and SDKs that best suit your development goals and requirements to build a payment gateway integration.{% /subheading %} {% toc hide=true /%} ## Overview **Customizable payment solutions** - These solutions allow for extensive customization of the checkout flow but require a higher implementation effort. They provide you with the flexibility to integrate Square payments directly into your own custom payment flow. * [Web Payments SDK](web-payments/overview) - A JavaScript browser-client SDK that allows you to integrate various secure payment methods into your application and provides the flexibility to create a fully customizable checkout flow. * [In-App Payments SDK](in-app-payments-sdk/what-it-does) - Same as the Web Payments SDK, but for native mobile applications built on Android, iOS, Flutter, or React Native. Use these APIs to manage various aspects of the payment process: * [Payments API](payments-refunds) - Creates payments with secure tokens and manages the payment lifecycle. * [Cards API](cards-api/overview) - Saves a card on file and retrieves it as a payment source when the buyer makes purchases. **Square-hosted payment solutions** - These solutions allow for minimal customization of the checkout flow but require a lower implementation effort. They offer a secure checkout experience that's entirely hosted and branded by Square. - [Checkout API](checkout-api) - An out-of-the-box checkout solution that allows you to generate a link to a Square-hosted payment page that can be shared across any online channel. The page is equipped with prebuilt elements such as tipping, custom fields, and integrations with other Square products. - [Subscriptions API](subscriptions/overview) - Integrate [Square Subscriptions](https://squareup.com/ca/en/subscriptions) into your application and allow sellers to offer automatic fixed recurring billing for their products and services. - [Invoices API](invoices-api/overview) - Integrate [Square Invoices](https://squareup.com/us/en/invoices) into your application and allow sellers to issue formal payment requests to specific customers. ## Compare payment models and use cases Square online payment solutions support the following payment models: * **One-time payments** - Square sellers accept one-time payments as either an eCommerce business or as a business that provides services or products billable with invoice payments. * **Recurring payments** - Square sellers accept recurring payments when a buyer authorizes them to automatically charge their account at regular intervals for products or services. When building the application's payment gateway integration, there are various Square APIs and SDKs you can use to process one-time or recurring payments. Selecting the correct ones requires evaluating multiple factors to ensure they align with your needs as well as those of your sellers. Criteria to consider include the following: * **Checkout flow** - Decide whether to integrate Square payments into your own custom checkout flow for greater flexibility and customization, or opt for a Square-hosted and branded checkout experience for easier implementation. * **Application and seller requirements** - Evaluate factors such as your application type, payment methods to support, and seller regional availability. {% line-break /%} {% tabset %} {% tab id="One-time Payments" %} ### Checkout flow {% table %} * * Invoices API * Checkout API * Web Payments SDK * In-App Payments SDK --- * __Checkout flow customization__ * {% tooltip text="Low" %} Minimal control of the checkout flow, but with less implementation effort because you're leveraging a Square-hosted and branded checkout flow. {% /tooltip %} * {% tooltip text="Low" %} Minimal control of the checkout flow, but with less implementation effort because you're leveraging a Square-hosted and branded checkout flow. {% /tooltip %} * {% tooltip text="High" %} Extensive control of the checkout flow, but with a higher implementation effort because you're building your own checkout flow instead of leveraging Square's prebuilt offerings. {% /tooltip %} * {% tooltip text="High" %} Extensive control of the checkout flow, but with a higher implementation effort because you're building your own checkout flow instead of leveraging Square's prebuilt offerings. {% /tooltip %} --- * __Embed Square payments into a custom payment flow__ * ❌ {% align="left" %} * ❌ {% align="left" %} * ✅ {% align="left" %} * ✅ {% align="left" %} --- * __Square-branded and hosted checkout flow__ {% tooltip text="What does this criteria mean?" %} Involves Square managing the entire checkout process. You can integrate the checkout flow into a payment workflow with low effort, which enables buyers to get redirected to an Square-hosted and branded online checkout page. Square handles the user interface of the checkout flow and the payment processing for you. {% /tooltip %} * ✅ {% align="left" %} * ✅ {% align="left" %} * ❌ {% align="left" %} * ❌ {% align="left" %} --- * __Generate shareable Square payment links__ * ✅ {% align="left" %} * ✅ {% align="left" %} * ❌ {% align="left" %} * ❌ {% align="left" %} --- * __Square manages orders and payment requests__ {% tooltip text="What does this criteria mean?" %} As the backend provider, Square takes care of processing orders and payments and delivering payment requests to the appropriate service provider. {% /tooltip %} * ✅ {% align="left" %} * ✅ {% align="left" %} * ❌ {% align="left" %} * ❌ {% align="left" %} --- * __Customer__ * A specific customer * Any customer with the link * Any customer visiting the website or app * Any customer visiting the app --- * __Additional products needed__ * Orders API, Customers API, and Cards API * None * Payments API * Payments API {% /table %} ### Application, security, and payment method support {% table %} * * Invoices API * Checkout API * Web Payments SDK * In-App Payments SDK --- * __Web application support__ * ✅ {% align="left" %} * ✅ {% align="left" %} * ✅ {% align="left" %} * ❌ {% align="left" %} --- * __Mobile application support__ * ✅ {% align="left" %} * ✅ {% align="left" %} * ✅ {% align="left" %} * ✅ {% align="left" %} {% line-break /%} (Native mobile apps only) --- * __Device support__ * Any device (phone, tablet, laptop, desktop) * Any device (phone, tablet, laptop, desktop) * Any device (phone, tablet, laptop, desktop) * Mobile iOS and Android phones and tablets --- * __Payment interface__ * Web browser * Web browser * Web browser * Mobile app's native interface --- * __Flutter and React Native plug-in support__ * ❌ {% align="left" %} * ❌ {% align="left" %} * ❌ {% align="left" %} * ✅ {% align="left" %} --- * __Square [handles](https://squareup.com/us/en/payments/secure) PCI compliance, chargebacks, and disputed payments__ * ✅ {% align="left" %} * ✅ {% align="left" %} * ✅ {% align="left" %} * ✅ {% align="left" %} --- * __Supported payment methods__ * - Card payments - Apple Pay - Google Pay - Square gift cards - ACH Bank Transfer - Afterpay payments - Cash App payments * - Card payments - Apple Pay - Google Pay - Afterpay payment - Cash App payments * - Card payments - Apple Pay - Google Pay - Square gift cards - ACH Bank Transfer - Afterpay payments - Cash App payments * - Card payments - Apple Pay - Google Pay - Square gift cards --- * __Supported regions__ * {% colspan=5 align="left" %} United States, Canada, United Kingdom, Australia, Ireland, Spain, France, and Japan {% /table %} ## Applicable solutions for one-time payments * **Square-hosted payment solutions:** Checkout API and Invoices API * **Customizable payment solutions:** Web Payments SDK, In-App Payments SDK, and Payments API ### Payment integrations **For one-time eCommerce payments:** * If you want to embed Square payments into a custom checkout flow and offer a more tailored brand experience, use the Web Payments SDK or In-App Payments SDK to securely tokenize credit card payments. You can then pair either solution with the Payments API to process the payments. * If you don't have a custom checkout flow, but still want to offer a comprehensive checkout experience with minimal effort, use the Checkout API. This API allows you to generate a URL to a prebuilt Square-branded payment page fully hosted by Square. **For one-time invoice payments:** * For the simplest way to offer invoicing functionality with minimal effort, use the Invoices API to create and manage Square invoices and let Square handle the payment processing. {% aside type="info" %} To retrieve itemization details, use the Orders API and Customers API. {% /aside %} * If you already have your own custom invoicing system and application logic, you can use the Web Payments SDK or In-App Payments SDK for payments acceptance and the Payments API to manage the payments. ### Use cases for one-time payments * A booking application uses the Checkout API to generate a payment link URL accessible from their booking pages, which redirects to a Square-hosted checkout page to help sellers collect a payment. * An online form-builder application uses the Web Payments SDK to let sellers accept payments directly within their forms. * A platform for building custom-branded mobile applications uses the In-App Payments SDK to let sellers take payments on orders placed with the application. * An SMS texting application uses the Invoices API to let sellers request a payment by sending a Square invoice link from their application, along with an invoice receipt as a payment confirmation. {% /tab %} {% tab id="Recurring Payments" %} ### Checkout flow {% table %} * * Subscriptions API * Web Payments SDK * In-App Payments SDK --- * __Checkout flow customization__ * Low * High * High --- * __Embed Square payments into custom payment flow__ * ❌ {% align="left" %} * ✅ {% align="left" %} * ✅ {% align="left" %} --- * __Square-branded and hosted checkout flow__ * ✅ {% align="left" %} * ❌ {% align="left" %} * ❌ {% align="left" %} --- * __Built-in recurring payment logic__ * ✅ {% align="left" %} * ❌ {% align="left" %} * ❌ {% align="left" %} --- * __Prebuilt UI to manage recurring payments__ * ✅ {% align="left" %} * ❌ {% align="left" %} * ❌ {% align="left" %} --- * __Square-manage orders and payment requests__ * ✅ {% align="left" %} * ❌ {% align="left" %} * ❌ {% align="left" %} --- * __Additional products needed__ * - Payments API And one of the following: - Web Payments SDK + Cards API - In-App Payments SDK + Cards API - Checkout API * - Cards API - Payments API * - Cards API - Payments API {% /table %} ### Application, security, and payment method support {% table %} * * Subscriptions API * Web Payments SDK * In-App Payments SDK --- * __Web application support__ * ✅ {% align="left" %} * ✅ {% align="left" %} * ❌ {% align="left" %} --- * __Mobile application support__ * ✅ {% align="left" %} * ✅ {% align="left" %} * ✅ {% align="left" %} {% line-break /%} (Native mobile apps only) --- * __Payment interface__ * Web browser or mobile app's native interface * Web browser * App's native interface --- * __Flutter and React Native plug-in support__ * ❌ {% align="left" %} * ❌ {% align="left" %} * ✅ {% align="left" %} --- * __Square [handles](https://squareup.com/us/en/payments/secure) PCI compliance, chargebacks, and disputed payments__ * ✅ {% align="left" %} * ✅ {% align="left" %} * ✅ {% align="left" %} --- * __Supported payment methods__ * - Card payments - Apple Pay - Google Pay - Square gift cards - ACH Bank Transfer - Afterpay payments - Cash App payments * - Card payments - Apple Pay - Google Pay - ACH Bank Transfer - Afterpay payment - Cash App payments * - Card payments - Apple Pay - Google Pay --- * __Seller regional availability__ * {% colspan=5 align="left" %} United States, Canada, United Kingdom, Australia, Ireland, Spain, France, and Japan {% /table %} ## Applicable solutions for recurring payments * **Square-hosted payment solutions:** Subscriptions API and Checkout API * **Customizable payment solutions:** Web Payments SDK, In-App Payments SDK, Payments API, Cards API {% aside type="info" %} Invoices API doesn't support scheduling recurring online payments. For more information, see [Invoices API](invoices-api/overview#limitations). {% /aside %} ### Payment integrations **For fixed recurring payments:** * Use the Subscriptions API to create and manage Square subscriptions and let Square handle payment processing. * You also need to integrate with the Web Payments SDK or In-App Payments SDK, along with the Cards API or Checkout API, to capture and store a card on file. **For processing recurring payments with your own custom application logic:** * Use the Web Payments SDK or In-App Payments SDK, along with the Cards API and Payments API, to store a card on file and manage the payment. ### Use cases for recurring payments * A yoga studio application uses the Subscriptions API to allow businesses to sell fixed subscriptions for memberships and classes (a $100 monthly yoga membership for 12 months). * A business selling a direct-to-consumer medical device on their custom website uses the Subscriptions API to capture fixed monthly payments ($260/month/12 months) for the device and services provided. {% /tab %} {% /tabset %} ## Explore payment processing experiences From minimal to extensive complexity and coding, learn how each API or client SDK performs a payment processing experience suitable for your application with the following examples. {% aside type="tip" %} You can take your exploration even further in [API Explorer](https://developer.squareup.com/explorer/square) with a given API endpoint's request example and do more testing (click **Try in API Explorer** in the code block). {% /aside %} The following examples demonstrate how Square APIs create requests to generate invoices, subscriptions, and payments to be processed. #### Invoice request The following [CreateInvoice](https://developer.squareup.com/reference/square/invoices-api/create-invoice) request example demonstrates creating a new draft invoice that's delivered by email for an associated customer and order. Note that the invoice object contains the `order_id` and `customer_id` that are associated with the invoice order and customer, respectively. {% tabset %} {% tab id="POST v2/invoices" %} ```` {% /tab %} {% tab id="Response object" %} ```json { "invoice": { "id": "inv:0-ChBoaXkM5QOPv9UO9C_Zexample", "version": 0, "location_id": "S8GWD5example", "order_id": "AdSjVqPCzOAQqvTnzy46VLexample", "payment_requests": [ { "uid": "ccc0fc9b-c2a5-42a9-836d-92d01example", "request_type": "BALANCE", "due_date": "2022-09-30", "tipping_enabled": false, "computed_amount_money": { "amount": 2699, "currency": "USD" }, "total_completed_amount_money":{ "amount":0, "currency":"USD" }, "reminders": [ { "uid": "b0325b84-b231-4c8a-b3ca-d9e23example", "relative_scheduled_days": -1, "message": "Your invoice is due tomorrow", "status": "PENDING" } ], "automatic_payment_source": "NONE" } ], "primary_recipient": { "customer_id": "DJREAYPRBMSSFAB4TGAexample", "given_name": "John", "family_name": "Doe", "email_address": "doe@email.com" }, "invoice_number": "000028", "title": "My Invoice Title", "scheduled_at": "2022-09-01T09:00:00Z", "status": "DRAFT", "timezone": "Etc/UTC", "created_at": "2022-08-26T19:01:32Z", "updated_at": "2022-08-26T19:01:32Z", "accepted_payment_methods": { "card": true, "square_gift_card": true, "bank_account": false, "buy_now_pay_later": false, "cash_app_pay": false }, "delivery_method": "EMAIL", "sale_or_service_date": "2022-08-24", "store_payment_method_enabled": true } } ``` {% /tab %} {% /tabset %} With the `invoice_id` and `version` taken from the invoice response object, you can call [PublishInvoice](https://developer.squareup.com/reference/square/invoices-api/publish-invoice) to publish and send the invoice to the customer. {% tabset %} {% tab id="POST v2/invoices/{{INVOICE_ID}}/publish" %} ```` {% /tab %} {% tab id="Response object" %} ```json { "invoice": { "id": "inv:0-ChBoaXkM5QOPv9UO9C_Zexample", "version": 1, "location_id": "S8GWD5example", "order_id": "AdSjVqPCzOAQqvTnzy46VLexample", "payment_requests": [ { "uid": "ccc0fc9b-c2a5-42a9-836d-92d01example", "request_type": "BALANCE", "due_date": "2020-06-23", "tipping_enabled": false, "computed_amount_money": { "amount": 100, "currency": "USD" }, "total_completed_amount_money":{ "amount":100, "currency":"USD" }, "automatic_payment_source": "NONE", "reminders": [ { "uid": "b0325b84-b231-4c8a-b3ca-d9e23example", "relative_scheduled_days": -1, "message": "Your invoice is due tomorrow", "status": "PENDING" } ] } ], "invoice_number": "000009", "title": "New Invoice", "public_url": "https://squareupsandbox.com/pay-invoice/inv:0-ChBoaXkM5QOPv9UO9C_Zexample", "next_payment_amount_money": { "amount": 100, "currency": "USD" }, "status": "UNPAID", "timezone": "Etc/UTC", "created_at": "2020-06-23T19:01:32Z", "updated_at": "2020-06-23T19:05:01Z", "primary_recipient": { "customer_id": "DJREAYPRBMSSFAB4TGAexample", "given_name": "Nicole", "family_name": "Maulino", "email_address": "nicolemaulino123@gmail.com" }, "accepted_payment_methods": { "card": true, "square_gift_card": true, "bank_account": false, "buy_now_pay_later": false, "cash_app_pay": false }, "delivery_method": "EMAIL", "sale_or_service_date": "2020-06-23", "store_payment_method_enabled": true } } ``` {% /tab %} {% tab id="Invoice example" %} ![An image that depicts a screen capture of a generated customer invoice example.](//images.ctfassets.net/1nw4q0oohfju/GMq1TEbl6vdpq1r2T1maJ/4241a70bdcf03f6e065414e08c661fbe/example-square-customer-invoice.webp) {% /tab %} {% /tabset %} #### Subscription request The following [CreateSubscription](https://developer.squareup.com/reference/square/subscriptions-api/create-subscription) request example enrolls a customer into a subscription: {% tabset %} {% tab id="POST v2/subscriptions" %} ```` {% /tab %} {% tab id="Response object" %} ```json { "subscription": { "id": "7217d8ca-1fee-4446-a9e5-8540b5d8c9bb", "location_id": "LE40N37TVF5FT", "customer_id": "Y3MBJEF62GVTXAP56H7SD2AFJW", "start_date": "2023-02-15", "status": "ACTIVE", "version": 1, "created_at": "2023-02-15T16:15:08Z", "timezone": "UTC", "source": { "name": "My Application" }, "phases": [{ "uid": "2747cd38-e7a5-4879-9b59-88ef272ffacb", "ordinal": 0, "order_template_id": "x7ClfqqNapjeDMvrQOZhbgVFVKFZY", "plan_phase_uid": "CR7TS35JYEVXC5BSDV5N7Z4Y" }, { "uid": "750a5fa8-658c-482c-bfef-437d064afcd3", "ordinal": 1, "order_template_id": "EH54BLi8oWWbNIxd9nxgDh3UO1RZY", "plan_phase_uid": "AW9ES43NVGRFC8AQRK8J5X1S" }], "plan_variation_id": "CUPS23SKJ7J4FD4F3IMVAEOH" } } ``` {% /tab %} {% /tabset %} #### Payment request The following [CreatePayment](https://developer.squareup.com/reference/square/payments-api/create-payment) request example directs Square to charge $20 to the payment token specified as the `source_id`: {% tabset %} {% tab id="POST v2/payments" %} ```` {% /tab %} {% tab id="Response object" %} ```json { "payment":{ "id":"Zg81uQkAcCh1aJMAPymUzilP4ADZY", "created_at":"2021-12-22T03:54:17.125Z", "updated_at":"2021-12-22T03:54:17.319Z", "amount_money":{ "amount":2000, "currency":"USD" }, "status":"COMPLETED", "delay_duration":"PT168H", "source_type":"CARD", "card_details":{ "status":"CAPTURED", "card":{ "card_brand":"VISA", "last_4":"5858", "exp_month":12, "exp_year":2023, "fingerprint":"sq-1-INCyQnSb8QOHkoFASh566s5S-jwk6IPaJes7jREW-Zyprrx0smmoNP_J2zwL6j-1OA", "card_type":"CREDIT", "prepaid_type":"NOT_PREPAID", "bin":"453275" }, "entry_method":"KEYED", "cvv_status":"CVV_ACCEPTED", "avs_status":"AVS_ACCEPTED", "statement_description":"SQ *DEFAULT TEST ACCOUNT", "card_payment_timeline":{ "authorized_at":"2021-12-22T03:54:17.234Z", "captured_at":"2021-12-22T03:54:17.320Z" } }, "location_id":"S8GWD5R9QB376", "order_id":"SsTiD94XDwpPPjVDPt2be8w9U47YY" } } ``` {% /tab %} {% /tabset %} The following examples demonstrate how the quick checkout form requires minimal configuration with the Checkout API, while the card payment form and the mobile client payment form allow more payment acceptance customization with the Web Payments SDK and In-App Payments SDK, respectively. #### Quick checkout form The following [CreatePaymentLink](https://developer.squareup.com/reference/square/checkout-api/create-payment-link) request example creates a quick pay checkout page for the auto detailing order. The Square-hosted checkout page is configured with the Google Pay method and shows a total amount for the order. {% tabset %} {% tab id="POST v2/online-checkout/payment-links" %} ```` {% /tab %} {% tab id="Response object" %} ```json { "payment_link": { "id": "FWT463MU2JIG7S3D", "version": 1, "description": "", "order_id": "C0DMgui6YFmgyURVSRtxr4EShheZY", "url": "https://sandbox.square.link/u/jUjglZiR", "created_at": "2022-04-23T18:54:40Z" }, "related_resources": { "orders": [ { "id": "C0DMgui6YFmgyURVSRtxr4EShheZY", "location_id": "{{LOCATION_ID}}", "source": { "name": "Test Online Checkout Application" }, "line_items": [ { "uid": "8YX13D1U3jO7czP8JVrAR", "name": "Auto Detailing", "quantity": "1", "item_type": "ITEM", "base_price_money": { "amount": 12500, "currency": "USD" }, "variation_total_price_money": { "amount": 12500, "currency": "USD" }, "gross_sales_money": { "amount": 12500, "currency": "USD" }, "total_tax_money": { "amount": 0, "currency": "USD" }, "total_discount_money": { "amount": 0, "currency": "USD" }, "total_money": { "amount": 12500, "currency": "USD" } } ], "fulfillments": [ { "uid": "bBpNrxjdQxGQP16sTmdzi", "type": "DIGITAL", "state": "PROPOSED" } ], "net_amounts": { "total_money": { "amount": 12500, "currency": "USD" }, "tax_money": { "amount": 0, "currency": "USD" }, "discount_money": { "amount": 0, "currency": "USD" }, "tip_money": { "amount": 0, "currency": "USD" }, "service_charge_money": { "amount": 0, "currency": "USD" } }, "created_at": "2022-03-03T00:53:15.829Z", "updated_at": "2022-03-03T00:53:15.829Z", "state": "DRAFT", "version": 1, "total_money": { "amount": 12500, "currency": "USD" }, "total_tax_money": { "amount": 0, "currency": "USD" }, "total_discount_money": { "amount": 0, "currency": "USD" }, "total_tip_money": { "amount": 0, "currency": "USD" }, "total_service_charge_money": { "amount": 0, "currency": "USD" } } ] } } ``` {% /tab %} {% tab id="Checkout form" %} ![A graphic showing the basic checkout page.](//images.ctfassets.net/1nw4q0oohfju/2HaDoCVnv9T5qaS6w1zu6G/e22044585ecaf107e69a9a3321f5f18c/checkout-page-with-minimum-fields.png) {% /tab %} {% /tabset %} #### Card payment form The following example demonstrates how the Web Payments SDK renders a card payment form on a checkout page: {% tabset %} {% tab id="script.js" %} ```javascript const appId = '{APPLICATION_ID}'; const locationId = '{LOCATION_ID}'; async function initializeCard(payments) { const card = await payments.card(); await card.attach('#card-container'); return card; } async function createPayment(token, verificationToken) { const body = JSON.stringify({ locationId, sourceId: token, verificationToken, idempotencyKey: window.crypto.randomUUID(), }); const paymentResponse = await fetch('/payment', { method: 'POST', headers: { 'Content-Type': 'application/json', }, body, }); if (paymentResponse.ok) { return paymentResponse.json(); } const errorBody = await paymentResponse.text(); throw new Error(errorBody); } async function tokenize(paymentMethod) { const tokenResult = await paymentMethod.tokenize(); if (tokenResult.status === 'OK') { return tokenResult.token; } else { let errorMessage = `Tokenization failed with status: ${tokenResult.status}`; if (tokenResult.errors) { errorMessage += ` and errors: ${JSON.stringify( tokenResult.errors, )}`; } throw new Error(errorMessage); } } // Required in SCA Mandated Regions: Learn more at https://developer.squareup.com/docs/sca-overview async function verifyBuyer(payments, token) { const verificationDetails = { amount: '1.00', billingContact: { givenName: 'John', familyName: 'Doe', email: 'john.doe@square.example', phone: '3214563987', addressLines: ['123 Main Street', 'Apartment 1'], city: 'London', state: 'LND', countryCode: 'GB', }, currencyCode: 'GBP', intent: 'CHARGE', }; const verificationResults = await payments.verifyBuyer( token, verificationDetails, ); return verificationResults.token; } // status is either SUCCESS or FAILURE; function displayPaymentResults(status) { const statusContainer = document.getElementById( 'payment-status-container', ); if (status === 'SUCCESS') { statusContainer.classList.remove('is-failure'); statusContainer.classList.add('is-success'); } else { statusContainer.classList.remove('is-success'); statusContainer.classList.add('is-failure'); } statusContainer.style.visibility = 'visible'; } document.addEventListener('DOMContentLoaded', async function () { if (!window.Square) { throw new Error('Square.js failed to load properly'); } let payments; try { payments = window.Square.payments(appId, locationId); } catch { const statusContainer = document.getElementById( 'payment-status-container', ); statusContainer.className = 'missing-credentials'; statusContainer.style.visibility = 'visible'; return; } let card; try { card = await initializeCard(payments); } catch (e) { console.error('Initializing Card failed', e); return; } async function handlePaymentMethodSubmission(event, card) { event.preventDefault(); try { // disable the submit button as we await tokenization and make a payment request. cardButton.disabled = true; const token = await tokenize(card); const verificationToken = await verifyBuyer(payments, token); const paymentResults = await createPayment( token, verificationToken, ); displayPaymentResults('SUCCESS'); console.debug('Payment Success', paymentResults); } catch (e) { cardButton.disabled = false; displayPaymentResults('FAILURE'); console.error(e.message); } } const cardButton = document.getElementById('card-button'); cardButton.addEventListener('click', async function (event) { await handlePaymentMethodSubmission(event, card); }); }); ``` {% /tab %} {% tab id="index.html" %} ```html
``` {% /tab %} {% tab id="iOS" %} To initiate a Square Point of Sale transaction from your website, call the Square Point of Sale application with a URL using the following format: ```html square-commerce-v1://payment/create?data={REPLACE ME} ``` Add code to create a percent-encoded JSON object that contains the information that the Square Point of Sale application needs to process the transaction request. ```javascript ``` {% aside type="tip" %} * Information in the `notes` field is saved in the Square Dashboard and printed on receipts. * You need to use the `PAYPAY` enumeration for any kind of QR payment. {% /aside %} {% /tab %} {% /tabset %} --- # Custom Attributes for Merchants > Source: https://developer.squareup.com/docs/merchant-custom-attributes-api/overview > Status: BETA > Languages: All > Platforms: All Learn how to create and manage custom attributes for merchants using the Merchant Custom Attributes API. [Custom attributes](devtools/customattributes/overview) store additional properties or metadata about certain objects in the Square data model, allowing you to extend the functionality of your applications. Use the [Merchant Custom Attributes API](https://developer.squareup.com/reference/square/merchant-custom-attributes-api) to extend the data model and associate seller-specific or application-specific information with merchants using your application. For example, you might want to store information such as the number of locations a merchant has, the business owner's name, or an email address. A custom attribute obtains a `key` identifier, the `visibility` setting, allowed data types, and other properties from a custom attribute definition. This relationship is shown in the following diagram: ![A diagram showing a custom attribute definition for “business owner“ used by custom attributes on multiple merchants.](//images.ctfassets.net/1nw4q0oohfju/1FeGeTS223t1AcVGmiYL1m/2b5eedac63f7737e8263aa1c3496b1e4/custom-attributes-relationships-merchants.png) {% aside type="info" %} Working with custom attributes is different than working with native attributes on the `Merchant` object (such as `business_name` or `currency`) that are accessed using the [Merchants API](merchants-api). For example, custom attributes aren't returned in a [RetrieveMerchant](https://developer.squareup.com/reference/square/merchants-api/retrieve-merchant), [ListMerchants](https://developer.squareup.com/reference/square/merchants-api/list-merchants), or [ListMerchants](https://developer.squareup.com/reference/square/merchants-api/list-merchants) response. {% /aside %} ## Basic workflow Using the Merchant Custom Attributes API consists of the following workflow: 1. Create a custom attribute definition for a merchant (Square seller). 2. Assign a custom attribute value to a merchant. 3. Retrieve custom attributes from merchants. ### Create a custom attribute definition To create a merchant-related custom attribute, you must first define its properties by calling [CreateMerchantCustomAttributeDefinition](https://developer.squareup.com/reference/square/merchant-custom-attributes-api/create-merchant-custom-attribute-definition). The following request creates a custom attribute definition to represent the name of a merchant's business owner. The `schema` field indicates that the value of the custom attribute is a `String`. ```` The `key` identifier and `visibility` setting specified in the definition are used by the corresponding custom attributes. The `visibility` setting determines the [access level](devtools/customattributes/overview#access-control) that other applications (including other Square products) have to the definition and corresponding custom attributes. ### Assign custom attributes to merchants After the custom attribute definition is created, you create new custom attributes and assign them to specific sellers (merchants). The following [UpsertMerchantCustomAttribute](https://developer.squareup.com/reference/square/merchant-custom-attributes-api/upsert-merchant-custom-attribute) request sets the Business Owner custom attribute using the `merchant_id` and `key`. Note the following: * The `key` in the path is `business-owner`, which is the same as the key specified by the definition. * The `value` in the request body sets the custom attribute value for the merchant. This value must conform to the [data type](/devtools/customattributes/overview#data-types) specified by the `schema` field in the definition. In this case, it's a `String`. ```` {% aside type="info" %} Square also provides the [BulkUpsertMerchantCustomAttributes](https://developer.squareup.com/reference/square/merchant-custom-attributes-api/bulk-upsert-merchant-custom-attributes) endpoint to update multiple custom attributes for merchants in a single request. {% /aside %} ### Retrieve custom attributes from merchants You can now retrieve the custom attribute to get the value that was set for the merchant. The following [RetrieveMerchantCustomAttribute](https://developer.squareup.com/reference/square/merchant-custom-attributes-api/retrieve-merchant-custom-attribute) request retrieves the Business Owner custom attribute for a merchant using the `merchant_id` and `key` in the request path: ```` The following is an example response: ```json { "custom_attribute": { "key": "business-owner", "version": 1, "updated_at": "2023-04-10T21:13:48Z", "value": "Adam Cortez", "created_at": "2023-04-10T21:13:48Z", "visibility": "VISIBILITY_READ_WRITE_VALUES" } } ``` You can optionally include the `with_definition` query parameter to return the corresponding custom attribute definition in the same call. For example, you might want to retrieve the definition to get the custom attribute's data type, name, or description. ## Supported operations The Merchant Custom Attributes API supports the following operations: ### Working with merchant-related custom attribute definitions * [Create a merchant custom attribute definition](merchant-custom-attributes-api/custom-attribute-definitions#create-custom-attribute-definition) * [Update a merchant custom attribute definition](merchant-custom-attributes-api/custom-attribute-definitions#update-custom-attribute-definition) * [List merchant custom attribute definitions](merchant-custom-attributes-api/custom-attribute-definitions#list-custom-attribute-definitions) * [Retrieve a merchant custom attribute definition](merchant-custom-attributes-api/custom-attribute-definitions#retrieve-custom-attribute-definition) * [Delete a merchant custom attribute definition](merchant-custom-attributes-api/custom-attribute-definitions#delete-custom-attribute-definition) ### Working with merchant-related custom attributes * [Create or update a merchant custom attribute](merchant-custom-attributes-api/custom-attributes#create-update-merchant-custom-attribute) * [Bulk create or update merchant custom attributes](merchant-custom-attributes-api/custom-attributes#bulk-upsert-merchant-custom-attributes) * [List merchant custom attributes](merchant-custom-attributes-api/custom-attributes#list-merchant-custom-attributes) * [Retrieve a merchant custom attribute](merchant-custom-attributes-api/custom-attributes#retrieve-merchant-custom-attribute) * [Delete a merchant custom attribute](merchant-custom-attributes-api/custom-attributes#delete-merchant-custom-attribute) * [Bulk delete merchant custom attributes](merchant-custom-attributes-api/custom-attributes#delete-merchant-custom-attribute) ## Seller scope Each custom attribute definition is scoped to a specific seller. Some Square APIs that use custom attributes (for example [Customers](https://developer.squareup.com/reference/square/customer-custom-attributes-api) or [Bookings](https://developer.squareup.com/reference/square/booking-custom-attributes-api)) allow you to make custom attributes available to multiple sellers that connect to your application with OAuth. However, because each Square seller is represented by a `Merchant` object, merchant custom attributes and their definitions cannot be shared between merchants. ## Webhooks You can subscribe to receive notifications for merchant-related custom attribute events. Each event provides two options that allow you to choose when Square sends notifications: * `.owned` event notifications are sent when changes are made to custom attribute definitions and custom attributes that are owned by your application. A custom attribute definition is owned by the application that created it. A custom attribute is owned by the application that created the corresponding custom attribute definition. * `.visible` event notifications are sent when changes are made to custom attribute definitions and custom attributes that are visible to your application. These changes apply to: * All custom attribute definitions and custom attributes owned by your application. * All other custom attribute definitions or custom attributes whose `visibility` setting is `VISIBILITY_READ_ONLY` or `VISIBILITY_READ_WRITE_VALUES`. Notification payloads for both options contain the same information. ### Webhook events Subscribe to the following events to receive notifications for changes to custom attribute definitions and custom attributes that are owned by your application: | Event | Permission | Description | |------|------|------ |[merchant.custom_attribute_definition.owned.created](https://developer.squareup.com/reference/square/merchant-custom-attributes-api/webhooks/merchant.custom_attribute_definition.owned.created)|`MERCHANT_PROFILE_READ`|A custom attribute definition was created by your application. The application that created the custom attribute definition is the owner of the definition and corresponding custom attributes.| |[merchant.custom_attribute_definition.owned.updated](https://developer.squareup.com/reference/square/merchant-custom-attributes-api/webhooks/merchant.custom_attribute_definition.owned.updated)|`MERCHANT_PROFILE_READ`|A custom attribute definition owned by your application was updated. Note that only the definition owner can update a custom attribute definition.| |[merchant.custom_attribute_definition.owned.deleted](https://developer.squareup.com/reference/square/merchant-custom-attributes-api/webhooks/merchant.custom_attribute_definition.owned.deleted)|`MERCHANT_PROFILE_READ`|A custom attribute definition owned by your application was deleted. Note that only the definition owner can delete a custom attribute definition.| |[merchant.custom_attribute.owned.updated](https://developer.squareup.com/reference/square/merchant-custom-attributes-api/webhooks/merchant.custom_attribute.owned.updated)|`MERCHANT_PROFILE_READ`|A custom attribute owned by your application was created or updated for a merchant.| |[merchant.custom_attribute.owned.deleted](https://developer.squareup.com/reference/square/merchant-custom-attributes-api/webhooks/merchant.custom_attribute.owned.deleted)|`MERCHANT_PROFILE_READ`|A custom attribute owned by your application was deleted from a merchant.| Subscribe to the following events to receive notifications for changes to custom attribute definitions and custom attributes that are visible to your application. These `.visible` events include changes to all custom attribute definitions and custom attributes that are owned by your application. Therefore, you don't need to subscribe to an `.owned` event when you subscribe to the corresponding `.visible` event. | Event | Permission{% width="150px" %}| Description| |------|------|------ |[merchant.custom_attribute_definition.visible.created](https://developer.squareup.com/reference/square/merchant-custom-attributes-api/webhooks/merchant.custom_attribute_definition.visible.created)|`MERCHANT_PROFILE_READ`|A custom attribute definition that's visible to your application was created.| |[merchant.custom_attribute_definition.visible.updated](https://developer.squareup.com/reference/square/merchant-custom-attributes-api/webhooks/merchant.custom_attribute_definition.visible.updated)|`MERCHANT_PROFILE_READ`|A custom attribute definition that's visible to your application was updated.| |[merchant.custom_attribute_definition.visible.deleted](https://developer.squareup.com/reference/square/merchant-custom-attributes-api/webhooks/merchant.custom_attribute_definition.visible.deleted)|`MERCHANT_PROFILE_READ`|A custom attribute definition that's visible to your application was deleted.| |[merchant.custom_attribute.visible.updated](https://developer.squareup.com/reference/square/merchant-custom-attributes-api/webhooks/merchant.custom_attribute.visible.updated)|`MERCHANT_PROFILE_READ`|A custom attribute that's visible to your application was created or updated for a merchant.| |[merchant.custom_attribute.visible.deleted](https://developer.squareup.com/reference/square/merchant-custom-attributes-api/webhooks/merchant.custom_attribute.visible.deleted)|`MERCHANT_PROFILE_READ`|A custom attribute that's visible to your application was deleted from a merchant.| {% aside type="info" %} Upserting or deleting a custom attribute for a merchant doesn't invoke a `merchant.updated` webhook. {% /aside %} The following is an example `merchant.custom_attribute_definition.visible.created` notification: ```json { "merchant_id": "DM7VKY8Q63GNP", "type": "merchant.custom_attribute_definition.visible.created", "event_id": "347ab320-c0ba-48f5-959a-4e147b9aefcf", "created_at": "2023-01-20T02:41:37Z", "data": { "type": "custom_attribute_definition", "id": "business-owner", "object": { "created_at": "2023-01-20T02:41:37Z", "description": "The name of the business owner", "key": "business-owner", "name": "Business Owner", "schema": { "$ref": "https://developer-production-s.squarecdn.com/schemas/v1/common.json#squareup.common.String" }, "updated_at": "2023-01-20T02:41:37Z", "version": 1, "visibility": "VISIBILITY_READ_WRITE_VALUES" } } } ``` The following is an example `merchants.custom_attribute.visible.updated` notification: ```json { "merchant_id": "DM7VKY8Q63GNP", "type": "merchants.custom_attribute.visible.updated", "event_id": "1cc2925c-f6e2-4fb6-a597-07c198de59e1", "created_at": "2023-03-15T08:00:00Z", "data": { "type": "custom_attribute", "id": "business-owner", "object": { "created_at": "2023-01-20T02:41:37Z", "key": "business-owner", "updated_at": "2023-03-15T08:00:00Z", "value": "Christine Lee", "version": 2, "visibility": "VISIBILITY_READ_WRITE_VALUES" } } } ``` {% aside type="info" %} Custom attributes are a feature shared by multiple Square APIs. For general information common to all Square APIs that support custom attributes, see [Custom Attributes Overview](devtools/customattributes/overview). {% /aside %} ## See also * [Define Custom Attributes for Merchants](merchant-custom-attributes-api/custom-attribute-definitions) * [Use Custom Attributes for Merchants](merchant-custom-attributes-api/custom-attributes) * [API Reference: Merchant Custom Attributes API](https://developer.squareup.com/reference/square/merchant-custom-attributes-api) --- # Define Custom Attributes for Merchants > Source: https://developer.squareup.com/docs/merchant-custom-attributes-api/custom-attribute-definitions > Status: BETA > Languages: All > Platforms: All Learn how to define merchant-related custom attributes for Square sellers using the Merchant Custom Attributes API. **Applies to:** [Merchant Custom Attributes API](merchant-custom-attributes-api/overview) {% subheading %}Learn how to define merchant-related custom attributes for Square sellers using the Merchant Custom Attributes API.{% /subheading %} {% toc hide=true /%} ## Overview A custom attribute definition specifies the `key` identifier, the `visibility` setting, the `schema` data type, and other properties for a custom attribute. After the definition is created, an associated custom attribute can be created and assigned to a merchant. For more information about how merchant-related custom attributes work, see [Custom Attributes for Merchants](merchant-custom-attributes-api/overview). ## CustomAttributeDefinition object A custom attribute definition is represented by a `CustomAttributeDefinition` object. The following is an example custom attribute definition that defines a "charity" custom attribute of the `Boolean` data type: ```json { "custom_attribute_definition": { "key": "charity", "name": "Charitable Organization", "description": "Is this merchant a charitable organization with 501(c)(3) status?", "version": 1, "updated_at": "2023-01-20T02:41:37Z", "schema": { "$ref": "https://developer-production-s.squarecdn.com/schemas/v1/common.json#squareup.common.Boolean" }, "created_at": "2023-01-20T02:41:37Z", "visibility": "VISIBILITY_READ_WRITE_VALUES" } } ``` The following fields represent core properties of a custom attribute definition: |Field{% width="130px" %}|Description| |------|------| |`key`|The identifier for the definition and its corresponding custom attributes. This `key` value is unique for the application and cannot be changed after the definition is created.{% line-break /%}{% line-break /%}The field can contain up to 60 alphanumeric characters, periods (`.`), underscores (`_`), and hyphens (`-`) and must match the following regular expression: `^[a-zA-Z0-9\._-]{1,60}$`.| |`name`|The name for the custom attribute. This field is required unless the `visibility` field is set to `VISIBILITY_HIDDEN`.| |`description`|The description for the custom attribute. This field is required unless the `visibility` field is set to `VISIBILITY_HIDDEN`.| |`visibility`|The [access control](devtools/customattributes/overview#access-control) setting that determines whether other applications (including Square products such as the Square Dashboard) can view the definition and view or edit corresponding custom attributes. Valid values are `VISIBILITY_HIDDEN`, `VISIBILITY_READ_ONLY`, and `VISIBILITY_READ_WRITE_VALUES`.| |`schema`|The data type of the custom attribute value. For more information, see [Supported data types.](devtools/customattributes/overview#data-types) The total schema size cannot exceed 12 KB.| |`version`|The version number of the custom attribute definition. The version number is initially set to 1 and incremented each time the definition is updated. Include this field in update operations to enable [optimistic concurrency](build-basics/common-api-patterns/optimistic-concurrency) control and in read operations for strong consistency.| {% anchor id="create-custom-attribute-definition" /%} ## Create a merchant custom attribute definition Use the [CreateMerchantCustomAttributeDefinition](https://developer.squareup.com/reference/square/merchant-custom-attributes-api/create-merchant-custom-attribute-definition) endpoint to create a custom attribute definition for a seller account. This operation makes the custom attribute available to that merchant. The following request creates a custom attribute definition to represent the name of a merchant's business owner. [The `schema` field](devtools/customattributes/overview#data-types) indicates that the value of the custom attribute is a `String`. ```` The following is an example response: ```json { "custom_attribute_definition": { "key": "business-owner", "name": "Business Owner", "description": "The name of the business owner", "version": 1, "updated_at": "2023-01-20T02:41:37Z", "schema": { "$ref": "https://developer-production-s.squarecdn.com/schemas/v1/common.json#squareup.common.String" }, "created_at": "2023-01-20T02:41:37Z", "visibility": "VISIBILITY_READ_WRITE_VALUES" } } ``` Now that the custom attribute definition is created, you can set the custom attribute for the merchant [individually](merchant-custom-attributes-api/custom-attributes#create-update-merchant-custom-attribute) or [in bulk](merchant-custom-attributes-api/custom-attributes#bulk-upsert-merchant-custom-attributes). After a custom attribute definition is created, Square invokes the `merchant.custom_attribute_definition.owned.created` and `merchant.custom_attribute_definition.visible.created` webhooks. A seller account can have a maximum of 100 merchant-related custom attribute definitions per application. ### Selection data type For a `Selection` data type, the schema contains a `$schema` field that references a JSON meta-schema object, as well as additional fields. Note the following: * `$schema` references the `https://developer-production-s.squarecdn.com/meta-schemas/v1/selection.json meta-schema` hosted on the Square CDN. * `type` must be `array`. * `items` must include a `names` array that contains strings representing the display names of the predefined options that can be selected. Note that the order of the options might not be respected by all UIs. * `maxItems` is an integer that represents the maximum number of allowed selections. Corresponding custom attributes can have zero or more selected values, up to the specified maximum. The minimum value is 1 and cannot exceed the number of options in the `names` field. * `uniqueItems` must be `true`. The following example request creates a `Selection`-type custom attribute definition that contains six named options and allows for a selection of all six: ```` The following is an example response. For each named option, Square generates a UUID and adds it to the `enum` field. The options in the `names` field map by index to the UUIDs in the `enum` field. The first option maps to the first UUID, the second option maps to the second UUID, and so on. These UUIDs are used to set the value of the custom attribute or [update the option names](#update-selection-schema). ```json { "custom_attribute_definition": { "key": "diversity-label", "name": "Diversity label", "description": "The self-reported diversity label(s) for the business", "version": 1, "updated_at": "2022-12-06T15:57:23.211Z", "schema": { "$schema": "https://developer-production-s.squarecdn.com/meta-schemas/v1/selection.json", "maxItems": 3.0, "type": "array", "uniqueItems": true, "items": { "names": [ "Woman-owned", "Black-owned", "Asian-owned", "Indigenous-owned", "LGBTQ+ owned", "Veteran-owned" ], "enum": [ "46efa55a-1f1d-467f-9733-468f881a4f20", "954998e1-b666-43a4-baf3-89cb87afe25a", "610fa590-70cd-4ec9-b64c-1dad6ba3c8f9", "92ds8kzp-44tz-38d7-vjsg-rj35apkvg5vt", "2jrxqv8l-9pcn-adfg-g35u-65yi30ref2od", "b2f3cfed-c884-4621-9a16-c24932480c24" ] } }, "created_at": "2022-12-06T15:57:23.211Z", "visibility": "VISIBILITY_READ_ONLY" } } ``` {% anchor id="update-custom-attribute-definition" /%} ## Update a merchant custom attribute definition Use the [UpdateMerchantCustomAttributeDefinition](https://developer.squareup.com/reference/square/merchant-custom-attributes-api/update-merchant-custom-attribute-definition) endpoint to update a custom attribute definition for a seller account. The endpoint supports sparse updates, so only new or changed fields need to be included in the request. Only the following fields can be updated: * `name` * `description` * `visibility` * `schema` for a `Selection` data type Note the following about an `UpdateMerchantCustomAttributeDefinition` request: * A custom attribute definition can only be updated by the definition owner. * The `key` path parameter is the `key` of the custom attribute definition. * The `version` field must match the current version of the custom attribute definition to enable [optimistic concurrency](build-basics/common-api-patterns/optimistic-concurrency) control. If this isn't important for your application, `version` can be set to –1. For any other values, the request fails with a `BAD_REQUEST` error. Square increments the version number each time the definition is updated. * The `idempotency_key` is a unique ID for the request that can be optionally included to ensure [idempotency](build-basics/common-api-patterns/idempotency). * Changes to the `visibility` setting are propagated to corresponding custom attributes within a few seconds. At that time, the `updated_at` and `version` fields of the custom attributes are also updated. For `VISIBILITY_READ_ONLY` or `VISIBILITY_READ_WRITE_VALUES` settings, the definition must have both a `name` and a `description`. The following request updates the `visibility` setting of a definition: ```` The following is an example response: ```json { "custom_attribute_definition": { "key": "business-owner", "name": "Business Owner", "description": "The name of the business owner", "version": 2, "updated_at": "2023-02-02T04:17:09Z", "schema": { "$ref": "https://developer-production-s.squarecdn.com/schemas/v1/common.json#squareup.common.String" }, "created_at": "2023-01-20T02:41:37Z", "visibility": "VISIBILITY_READ_ONLY" } } ``` After a merchant-related custom attribute definition is updated, Square invokes the `merchant.custom_attribute_definition.owned.updated` and `merchant.custom_attribute_definition.visible.updated` webhooks. {% anchor id="update-selection-schema" /%} ### Updating a Selection schema For a `Selection` data type, you can update the maximum number of allowed selections and the set of predefined named options. {% aside type="info" %} Square validates custom attribute selections on upsert operations, so these changes apply only for future upsert operations. They don't affect custom attributes that have already been set on a merchant. {% /aside %} The information you send in the [UpdateMerchantCustomAttributeDefinition](https://developer.squareup.com/reference/square/merchant-custom-attributes-api/update-merchant-custom-attribute-definition) request depends on the change you want to make: * To change the maximum number of allowed selections, include the `maxItems` field with the new integer value. The minimum value is 1 and cannot exceed the number of options in the `names` field. * To change the set of predefined named options, include the `items` field with the complete `names` and `enum` arrays. The options in the `names` array map by index to the Square-assigned UUIDs in the `enum` array, which are unique per seller. The first option maps to the first UUID, the second option maps to the second UUID, and so on. * To add an option: * Add the name of the new option at the end of the `names` array. New options must always be added to the end of the array. * Don't change the `enum` array. Square generates a UUID for the new option and adds it to the end of the enum array. * To reorder the options: * Change the order of the names in the `names` array. * Change the order of the UUIDs in the `enum` array so that the order of the UUIDs matches the order of the corresponding named options. Note that the order might not be respected by all UIs. * To remove an option: * Remove the name of the option from the `names` array. * Remove the corresponding UUID from the `enum` array. The following `UpdateMerchantCustomAttributeDefinition` request adds two new options by adding their names at the end of the `names` array: ```` The following example response includes the UUIDs that Square generated for the new `Furniture consignment` and `Rug cleaning` options: ```json { "custom_attribute_definition": { "key": "diversity-label", "name": "Diversity label", "description": "The self-reported diversity label(s) for the business", "version": 2, "updated_at": "2023-01-09T15:57:23.211Z", "schema": { "$schema": "https://developer-production-s.squarecdn.com/meta-schemas/v1/selection.json", "maxItems": 8.0, "type": "array", "uniqueItems": true, "items": { "names": [ "Woman-owned", "Black-owned", "Asian-owned", "Indigenous-owned", "LGBTQ+ owned", "Veteran-owned", "Latin-owned", "Pacific Islander-owned" ], "enum": [ "46efa55a-1f1d-467f-9733-468f881a4f20", "954998e1-b666-43a4-baf3-89cb87afe25a", "610fa590-70cd-4ec9-b64c-1dad6ba3c8f9", "92ds8kzp-44tz-38d7-vjsg-rj35apkvg5vt", "2jrxqv8l-9pcn-adfg-g35u-65yi30ref2od", "b2f3cfed-c884-4621-9a16-c24932480c24", "6etk4juf-q3px-44jm-b7zp-vpwkv89dsok2", "46y4hveq-s4c5-7zvt-cyrb-2ferha95fvlv" ] } }, "created_at": "2022-12-06T15:57:23.211Z", "visibility": "VISIBILITY_READ_ONLY" } } ``` {% anchor id="list-custom-attribute-definitions" /%} ## List merchant custom attribute definitions Use the [ListMerchantCustomAttributeDefinitions](https://developer.squareup.com/reference/square/merchant-custom-attributes-api/list-merchant-custom-attribute-definitions) endpoint to list the custom attribute definitions from a seller account. The limit query parameter optionally specifies a maximum page size of 100 results. The default limit is 20 results. If the results are paged, the `cursor` field in the response contains a value that you can send with the `cursor` query parameter to retrieve the next page of results. The following example request includes the limit query parameter: ```` When all pages are retrieved, all custom attribute definitions created by the requesting application are included in the results. The `key` for these definitions is the `key` value that was provided when the definition was created. Custom attribute definitions created by other applications are included if their `visibility` setting is `VISIBILITY_READ_ONLY` or `VISIBILITY_READ_WRITE_VALUES`. The following is an example response containing four custom attribute definitions: ```json { "custom_attribute_definitions": [ { "key": "business-owner", "name": "Business Owner", "description": "The name of the business owner", "version": 2, "updated_at": "2023-02-02T04:17:09Z", "schema": { "$ref": "https://developer-production-s.squarecdn.com/schemas/v1/common.json#squareup.common.String" }, "created_at": "2023-01-20T02:41:37Z", "visibility": "VISIBILITY_READ_ONLY" }, { "key": "owner-email", "name": "Business Owner Email", "description": "The email address of the business owner", "version": 1, "updated_at": "2023-01-20T02:41:37Z", "schema": { "$ref": "https://developer-production-s.squarecdn.com/schemas/v1/common.json#squareup.common.Email" }, "created_at": "2023-01-20T02:41:37Z", "visibility": "VISIBILITY_HIDDEN" }, { "key": "employees", "name": "Number of employees", "description": "The number of full-time employees of this merchant", "version": 1, "updated_at": "2022-12-02T19:51:29.235Z", "schema": { "$ref": "https://developer-production-s.squarecdn.com/schemas/v1/common.json#squareup.common.Number" }, "created_at": "2022-12-02T19:51:29.235Z", "visibility": "VISIBILITY_READ_WRITE_VALUES" }, { "key": "diversity-label", "name": "Diversity label", "description": "The self-reported diversity label(s) for the business", "version": 2, "updated_at": "2022-12-06T15:57:23.211Z", "schema": { "$schema": "https://developer-production-s.squarecdn.com/meta-schemas/v1/selection.json", "maxItems": 8.0, "type": "array", "uniqueItems": true, "items": { "names": [ "Woman-owned", "Black-owned", "Asian-owned", "Indigenous-owned", "LGBTQ+ owned", "Veteran-owned", "Latin-owned", "Pacific Islander-owned" ], "enum": [ "46efa55a-1f1d-467f-9733-468f881a4f20", "954998e1-b666-43a4-baf3-89cb87afe25a", "610fa590-70cd-4ec9-b64c-1dad6ba3c8f9", "92ds8kzp-44tz-38d7-vjsg-rj35apkvg5vt", "2jrxqv8l-9pcn-adfg-g35u-65yi30ref2od", "b2f3cfed-c884-4621-9a16-c24932480c24", "6etk4juf-q3px-44jm-b7zp-vpwkv89dsok2", "46y4hveq-s4c5-7zvt-cyrb-2ferha95fvlv" ] } }, "created_at": "2022-12-06T15:57:23.211Z", "visibility": "VISIBILITY_READ_ONLY" } ] } ``` Note that the `"Business Owner"` and `"Business Owner email"` custom attribute definitions were created by the requesting application. Because `"Business Owner email"` is set to `VISIBILITY_HIDDEN`, it is returned only when requested by the definition owner. If no custom attribute definitions are found, Square returns an empty response. ```json {} ``` {% anchor id="retrieve-custom-attribute-definition" /%} ## Retrieve a merchant custom attribute definition Use the [RetrieveMerchantCustomAttributeDefinition](https://developer.squareup.com/reference/square/merchant-custom-attributes-api/retrieve-merchant-custom-attribute-definition) endpoint to retrieve a custom attribute definition using its `key`. Note the following: * The `key` path parameter is the `key` value of the custom attribute definition. * The `version` query parameter is used for strongly consistent reads to guarantee that you receive the most up-to-date data. When included in the request, Square returns the specified version or a later version if one exists. If the specified version is later than the current version, Square returns a `400 BAD_REQUEST` error. The following is an example request: ```` {% aside type="info" %} Square also returns custom attribute definitions for `RetrieveMerchantCustomAttribute` or `ListMerchantCustomAttributes` requests if you set the `with_definition` or `with_definitions` query parameter to `true`. For more information, see [Retrieve a merchant custom attribute](merchant-custom-attributes-api/custom-attributes#retrieve-merchant-custom-attribute) or [List merchant custom attributes](merchant-custom-attributes-api/custom-attributes#list-merchant-custom-attributes). {% /aside %} The following is an example response: ```json { "custom_attribute_definition": { "key": "business-owner", "name": "Business Owner", "description": "The name of the business owner", "version": 2, "updated_at": "2023-02-02T04:17:09Z", "schema": { "$ref": "https://developer-production-s.squarecdn.com/schemas/v1/common.json#squareup.common.String" }, "created_at": "2023-01-20T02:41:37Z", "visibility": "VISIBILITY_READ_ONLY" } } ``` If the custom attribute definition isn't found, Square returns an `errors` field that contains a `404 NOT_FOUND` error. {% anchor id="delete-custom-attribute-definition" /%} ## Delete a merchant custom attribute definition Use the [DeleteMerchantCustomAttributeDefinition](https://developer.squareup.com/reference/square/merchant-custom-attributes-api/delete-merchant-custom-attribute-definition) endpoint to delete a custom attribute definition from a seller account. Note the following: * Only the definition owner can delete a custom attribute definition. * The `key` path parameter is the `key` value of the custom attribute definition. * Deleting a custom attribute definition also deletes the corresponding custom attribute from all merchants on which it has been set. The following is an example request: ```` If successful, Square returns an empty object. ```json {} ``` After a custom attribute definition is deleted, Square invokes the `merchant.custom_attribute_definition.owned.deleted` and `merchant.custom_attribute_definition.visible.deleted` [webhooks](merchant-custom-attributes-api/overview#webhooks). --- # Use Custom Attributes for Merchants > Source: https://developer.squareup.com/docs/merchant-custom-attributes-api/custom-attributes > Status: BETA > Languages: All > Platforms: All Learn how to create and manage custom attribute values for Merchant objects. **Applies to:** [Merchant Custom Attributes API](merchant-custom-attributes-api/overview) {% subheading %}Learn how to create and manage custom attribute values for Merchant objects.{% /subheading %} {% toc hide=true /%} ## Overview Merchant-related custom attributes are used to store additional properties or metadata on `Merchant` objects. A custom attribute is based on a custom attribute definition in a Square seller account. After the [definition](merchant-custom-attributes-api/custom-attribute-definitions) is created, the custom attribute can be set for that merchant. For an overview about how merchant-related custom attributes work, see [Custom Attributes for Merchants](merchant-custom-attributes-api/overview). An individual custom attribute is accessed using the `merchant_id` and `key`. >`.../v2/merchants/{merchant_id}/custom-attributes/{key}` ## CustomAttribute object A custom attribute is represented by a [CustomAttribute](https://developer.squareup.com/reference/square/objects/CustomAttribute) object. Custom attributes obtain a `key` identifier, the `visibility` setting, allowed data types, and other properties from a custom attribute definition, which is represented by a [CustomAttributeDefinition](https://developer.squareup.com/reference/square/objects/CustomAttributeDefinition) object. The following is an example custom attribute: ```json { "custom_attribute": { "key": "business-owner", "version": 1, "updated_at": "2023-01-10T21:13:48Z", "value": "Adam Cortez", "created_at": "2023-01-10T21:13:48Z", "visibility": "VISIBILITY_READ_WRITE_VALUES" } } ``` The following table shows the core properties of a custom attribute: |Field{% width="120px" %}|Description| |------|------| |`key`|The identifier for the custom attribute, which is obtained from the custom attribute definition.| |`version`|The version number of the custom attribute. The version number is initially set to 1 and incremented each time the custom attribute value is updated. Include this field in upsert operations to enable [optimistic concurrency](build-basics/common-api-patterns/optimistic-concurrency) control and in read operations for strong consistency.| |`value`|The value of the custom attribute, which must conform to the schema specified by the definition. For more information, see [Supported data types](#value-data-types). The size of this field cannot exceed 5 KB.| |`visibility`|The [level of access](devtools/customattributes/overview#access-control) that other applications have to the custom attribute. Custom attributes obtain this setting from the `visibility` field of the current version of the definition.| |`definition`|The [CustomAttributeDefinition](https://developer.squareup.com/reference/square/objects/CustomAttributeDefinition) object that defines properties for the custom attribute. This field is included if the custom attribute is retrieved using the `with_definition` or `with_definitions` query parameter set to `true`.| {% anchor id="create-update-merchant-custom-attribute" /%} ## Create or update a merchant custom attribute To set the value of a custom attribute for a merchant, call [UpsertMerchantCustomAttribute](https://developer.squareup.com/reference/square/merchant-custom-attributes-api/upsert-merchant-custom-attribute) and provide the following information: * `merchant_id` - The ID of the `Merchant` object that represents the target merchant. * `custom_attribute` - The custom attribute with the following fields: * `key` - The `key` of the custom attribute to create or update. * If the requesting application isn't the definition owner, the `visibility` field value of the custom attribute must be `VISIBILITY_READ_ONLY` or `VISIBILITY_READ_WRITE_VALUES`. * `value` - The value of the custom attribute, which must conform to the schema specified by the definition. For more information, see [Supported data types](devtools/customattributes/overview#data-types). * `version` - The current version of the custom attribute, included to enable [optimistic concurrency](build-basics/common-api-patterns/optimistic-concurrency) when updating a value that was previously set for the merchant. If this isn't important for your application, `version` can be set to –1. For any other values, the request fails with a `BAD_REQUEST` error. Square increments the version number each time the definition is updated. * `idempotency_key` - A unique ID for the request that can be optionally included to ensure [idempotency](build-basics/common-api-patterns/idempotency). The following example request sets the value for a `String`-type custom attribute. The `key` value in this example is `business-owner`. ```` The following is an example response: ```json { "custom_attribute": { "key": "business-owner", "version": 1, "updated_at": "2023-01-10T21:13:48Z", "value": "Adam Cortez", "created_at": "2023-01-10T21:13:48Z", "visibility": "VISIBILITY_READ_WRITE_VALUES" } } ``` During upsert operations, Square validates the provided value against the schema specified by the definition. After a custom attribute is upserted, Square invokes the `merchant.custom_attribute.owned.updated` and `merchant.custom_attribute.visible.updated` webhooks. ### Upsert request examples for each data type You can set a corresponding custom attribute for a merchant by providing a value that conforms to the schema specified by the custom attribute definition. The size of this field cannot exceed 5 KB. The following sections contain `UpsertMerchantCustomAttribute` requests for each [supported data type](devtools/customattributes/overview#data-types). #### String A string with up to 1000 UTF-8 characters. Empty strings are allowed. ```` #### Email An email address consisting of ASCII characters that matches the [regular expression](https://developer.mozilla.org/en-US/docs/Web/HTML/Element/input/email#basic_validation) for the HTML5 `email` type. ```` #### PhoneNumber A string representation of a phone number in [E.164 format.](https://en.wikipedia.org/wiki/E.164) For example, `+17895551234`. ```` #### Address An [Address](https://developer.squareup.com/reference/square/objects/Address) object. For information about `Address` fields, see [Working with Addresses.](build-basics/common-data-types/working-with-addresses) You must provide a complete `Address` object in every upsert request. ```` #### Date A date in ISO 8601 format: `YYYY-MM-DD`. ```` #### DateTime A string representation of the date and time in the ISO 8601 format, starting with the year, followed by the month, day, hour, minutes, seconds, and milliseconds. For example, `2022-07-10 15:00:00.000`. ```` #### Duration A duration as defined by the ISO 8601 ABNF. For example, "P3Y6M4DT12H30M5S". ```` #### Boolean A `true` or `false` value. ```` #### Number A string representation of an integer or decimal with up to five digits of precision. Negative numbers are denoted using a - prefix. ```` #### Selection A selection from a set of named options. When working with a `Selection`-type custom attribute, you need to get the schema from the custom attribute definition. The schema shows the mapping between the named options and Square-assigned UUIDs and the maximum number of allowed selections. **Reading the schema** The following is an excerpt of an example `Selection`-type custom attribute definition: ```json { "custom_attribute_definition": { ... "schema": { "$schema": "https://developer-production-s.squarecdn.com/meta-schemas/v1/selection.json", "maxItems": 3, "type": "array", "uniqueItems": true, "items": { "names": [ "Option 1", "Option 2", "Option 3" ], "enum": [ "9492bdda-ab4d-4eeb-8496-0986c8f78499", // UUID for "Option 1" "6b96fba7-d8a5-ae72-48f4-8c3ee875633f", // UUID for "Option 2" "4032c1a2-d749-4c75-9c30-be6472cd2e08" // UUID for "Option 3" ] } }, ... } } ``` * The `maxItems` field represents the maximum number of allowed selections for the custom attribute value. * The `items` field contains two arrays: `names` and `enum`. The options in the `names` field map by index to the UUIDs in the `enum` field. The first option maps to the first UUID, the second option maps to the second UUID, and so on. **Setting a Selection value** To set a `Selection` value for a merchant, provide the target UUID (that maps to the target named option) in the `value` field. For this data type, `value` is an array that can contain zero or more UUIDs, up to the number specified in `maxItems`. The following request sets two selections for a custom attribute by providing two UUIDs: ```` The following request sets an empty selection by providing an empty array: ```` If necessary, you can update the maximum number of allowed selections and the set of predefined named options in the custom attribute definition.To learn more, see [Updating the Selection schema](merchant-custom-attributes-api/custom-attribute-definitions#update-selection-schema). {% anchor id="bulk-upsert-merchant-custom-attributes" /%} ## Bulk create or update merchant custom attributes To create or update one or more custom attributes for one or more merchants, call [BulkUpsertMerchantCustomAttributes](https://developer.squareup.com/reference/square/merchant-custom-attributes-api/bulk-upsert-merchant-custom-attributes). This endpoint accepts a `values` map with 1 to 25 objects that each contain: * An arbitrary ID for the individual upsert request, which corresponds to an entry in the response that has the same ID. The ID must be unique within the `BulkUpsertMerchantCustomAttributes` request. * An individual [upsert request](#create-update-merchant-custom-attribute) with the information needed to create or update a custom attribute for a merchant. During upsert operations, Square validates each provided value against the schema specified by the definition. The `version` field is only supported for update operations. The following `BulkUpsertMerchantCustomAttributes` request includes four upsert requests that set four custom attributes on different merchants: ```` The following is an example response. Note that: * Individual upsert requests aren't guaranteed to be returned in the same order. Each upsert response has the same ID as the corresponding upsert request, so you can use the ID to map individual requests and responses. * The `errors` field is returned for any individual requests that fail. ```json { "values": { "id2": { "merchant_id": "7WQ0KXC8ZSD90", "custom_attribute": { "key": "charity", "version": 2, "updated_at": "2023-05-30T00:16:23Z", "value": false, "created_at": "2023-05-20T20:20:35Z", "visibility": "VISIBILITY_READ_WRITE_VALUES" } }, "id1": { "merchant_id": "7WQ0KXC8ZSD90", "custom_attribute": { "key": "business-owner", "version": 3, "updated_at": "2023-05-30T00:16:23Z", "value": "Michael Francis", "created_at": "2023-01-01T00:16:23Z", "visibility": "VISIBILITY_READ_WRITE_VALUES" } }, "id3": { "errors": [ { "code": "CONFLICT", "detail": "Attempting to write to version 3, but current version is 4", "field": "version", "category": "INVALID_REQUEST_ERROR" } ] }, "id4": { "merchant_id": "HF0HKANA3R9FP8", "custom_attribute": { "key": "square:a0f1505a-2aa1-490d-91a8-8d31ff181808", "version": 2, "updated_at": "2023-05-30T00:16:23Z", "value": "person@company.com", "created_at": "2022-11-08T23:14:47Z", "visibility": "VISIBILITY_READ_WRITE_VALUES" } } } } ``` After each custom attribute is upserted, Square invokes the `merchant.custom_attribute.owned.updated` and `merchant.custom_attribute.visible.updated` webhooks. {% anchor id="list-merchant-custom-attributes" /%} ## List merchant custom attributes To list the custom attributes that are set for a merchant, call [ListMerchantCustomAttributes](https://developer.squareup.com/reference/square/merchant-custom-attributes-api/list-merchant-custom-attributes) and provide the `merchant_id` in the request path. The following parameters are optional: * `with_definitions` - Indicates whether to return the custom attribute definition in the `definition` field of each custom attribute. Set this parameter to `true` to get the name and description of each custom attribute, information about the data type, or other definition details. The default value is `false`. * `limit` - Specifies a maximum [page size](build-basics/common-api-patterns/pagination) of 100 results. The default limit is 20 results. If the results are paged, the `cursor` field in the response contains a value that you can send with the `cursor` query parameter to retrieve the next page of results. The following example request includes the `limit` query parameter: ```` When all pages are retrieved, the results include: * All custom attributes owned by the requesting application that have a value. The `key` for these custom attributes is the `key` value that was provided for the definition. * All custom attributes owned by other applications that have a `value` and a `visibility` setting of `VISIBILITY_READ_ONLY` or `VISIBILITY_WRITE_VALUES`. A custom attribute is owned by the application that created the corresponding definition. The following is an example response: ```json { "custom_attributes": [ { "key": "business-owner", "version": 2, "updated_at": "2023-02-02T04:17:09Z", "value": "Christine Lee", "created_at": "2023-01-20T02:41:37Z", "visibility": "VISIBILITY_READ_ONLY" }, { "key": "charity", "version": 1, "updated_at": "2023-01-20T02:41:37Z", "value": false, "created_at": "2023-01-20T02:41:37Z", "visibility": "VISIBILITY_READ_WRITE_VALUES" }, { "key": "employees", "version": 1, "updated_at": "2022-12-02T19:51:29.235Z", "value": 10, "created_at": "2022-12-02T19:51:29.235Z", "visibility": "VISIBILITY_READ_WRITE_VALUES" }, { "key": "diversity-label", "version": 1, "updated_at": "2022-12-06T15:57:23.211Z", "value": ["610fa590-70cd-4ec9-b64c-1dad6ba3c8f9" ], "created_at": "2022-12-06T15:57:23.211Z", "visibility": "VISIBILITY_READ_ONLY" } ] } ``` To see the custom attribute definitions along with the custom attributes, set the `with_definitions` query parameter to `true`: ```` The following is an excerpt of an example response showing the custom attribute definition in the definition field: ```json { "key": "charity", "version": 1, "definition": { "key": "charity", "name": "Charitable Organization", "description": "Is this merchant a charitable organization with 501(c)(3) status?", "version": 1, "updated_at": "2023-01-20T02:41:37Z", "schema": { "$ref": "https://developer-production-s.squarecdn.com/schemas/v1/common.json#squareup.common.Boolean" }, "created_at": "2023-01-20T02:41:37Z", "visibility": "VISIBILITY_READ_WRITE_VALUES" } "updated_at": "2023-01-20T02:41:37Z", "value": false, "created_at": "2023-01-20T02:41:37Z", "visibility": "VISIBILITY_READ_WRITE_VALUES" } ... ``` If no custom attributes are found, Square returns an empty object. ```json {} ``` {% anchor id="retrieve-merchant-custom-attribute" /%} ## Retrieve a merchant custom attribute To retrieve a custom attribute from a merchant, call [RetrieveMerchantCustomAttribute](https://developer.squareup.com/reference/square/merchant-custom-attributes-api/retrieve-merchant-custom-attribute) and provide the `merchant_id` in the request path, along with the `key` of the custom attribute to retrieve. The following parameters are optional: * `with_definition` - Indicates whether to return the custom attribute definition in the `definition` field of the custom attribute. Set this parameter to `true` to get the name and description of the custom attribute, information about the data type, or other definition details. The default value is `false`. * `version` - The current version of the custom attribute, used for strongly consistent reads to guarantee that you receive the most up-to-date data. When included in the request, Square returns the specified version or a later version if one exists. If the specified version is later than the current version, Square returns a `400 BAD_REQUEST` error. The following is an example request: ```` The response shows an `Address`-type custom attribute. The `value` field contains the value of the custom attribute. ```json { "custom_attribute": { "key": "businessAddress", "version": 1, "updated_at": "2022-05-26T17:08:57Z", "value": { "address_line_1": "333 2nd St", "locality": "San Francisco", "administrative_district_level_1": "California", "postal_code": "94107", "country": "US" }, "created_at": "2022-05-26T17:08:57Z", "visibility": "VISIBILITY_READ_ONLY" } } ``` To see the custom attribute definitions along with the custom attributes, set the `with_definition` query parameter to `true`: ```` The response shows the custom attribute definition in the `definition` field. This example defines a `Selection`-type custom attribute. The mapping information in the `schema.items` field is used to determine the custom attribute value. The `names` field contains the named options and the `enum` field contains the corresponding Square-assigned UUIDs. The named options map by index to the UUIDs. The first option maps to the first UUID, the second option maps to the second UUID, and so on. Therefore, the UUID in the `value` field of this custom attribute maps to the `"Reupholstery"` option. ```json { "custom_attribute": { "key": "diversity-label", "version": 2, "definition": { "key": "diversity-label", "name": "Diversity label", "description": "The self-reported diversity label(s) for the business", "version": 2, "updated_at": "2023-01-09T15:57:23.211Z", "schema": { "$schema": "https://developer-production-s.squarecdn.com/meta-schemas/v1/selection.json", "maxItems": 8.0, "type": "array", "uniqueItems": true, "items": { "names": [ "Woman-owned", "Black-owned", "Asian-owned", "Indigenous-owned", "LGBTQ+ owned", "Veteran-owned", "Latin-owned", "Pacific Islander-owned" ], "enum": [ "46efa55a-1f1d-467f-9733-468f881a4f20", "954998e1-b666-43a4-baf3-89cb87afe25a", "610fa590-70cd-4ec9-b64c-1dad6ba3c8f9", "92ds8kzp-44tz-38d7-vjsg-rj35apkvg5vt", "2jrxqv8l-9pcn-adfg-g35u-65yi30ref2od", "b2f3cfed-c884-4621-9a16-c24932480c24", ] } }, "created_at": "2022-12-06T15:57:23.211Z", "visibility": "VISIBILITY_READ_ONLY" }, "updated_at": "2023-01-09T15:57:23.211Z", "Value": [ "610fa590-70cd-4ec9-b64c-1dad6ba3c8f9" ], "created_at": "2022-12-06T15:57:23.211Z", "visibility": "VISIBILITY_READ_ONLY" } } ``` If the custom attribute isn't set for the specified merchant, Square returns the following response: ```json { "errors": [ { "code": "NOT_FOUND", "detail": "The requested Value `{key}` is not found", "category": "INVALID_REQUEST_ERROR" } ] } ``` If the custom attribute isn't available for the merchant, Square returns the following response: ```json { "errors": [ { "code": "BAD_REQUEST", "detail": "No matching definition found for value", "field": "key", "category": "INVALID_REQUEST_ERROR" } ] } ``` {% anchor id="delete-merchant-custom-attribute" /%} ## Delete a merchant custom attribute To delete a custom attribute from a merchant, call [DeleteMerchantCustomAttribute](https://developer.squareup.com/reference/square/merchant-custom-attributes-api/delete-merchant-custom-attribute) and provide the `merchant_id` in the request path, along with the `key` of the custom attribute to delete. If the requesting application isn't the definition owner, the `visibility` value of the definition must be `VISIBILITY_READ_ONLY` or `VISIBILITY_READ_WRITE_VALUES`. ```` If successful, Square returns an empty object. ```json {} ``` To delete all custom attributes for a merchant in a single request, call the [BulkDeleteMerchantCustomAttributes](https://developer.squareup.com/reference/square/merchant-custom-attributes-api/bulk-delete-merchant-custom-attributes) endpoint. After a custom attribute definition is deleted, Square invokes the `merchant.custom_attribute.owned.deleted` and `merchant.custom_attribute.visible.deleted` [webhooks](merchant-custom-attributes-api/overview#webhooks). --- # In-App Payment Solutions > Source: https://developer.squareup.com/docs/in-app-payments > Status: PUBLIC > Languages: All > Platforms: All Learn how to take payments with Square SDKs for buyer device applications. Use a Square SDK for mobile devices to take payments in a mobile application for Android and iOS platforms. The In-App Payments SDK provides a mobile application client and a customizable card payment interface that allow buyers to make purchases. The SDK generates a secure payment token that gets passed to the server backend, which creates the payment using the retrieved token. Use the Quickstart sample application to start building with the In-App Payments SDK. For more information, see [In-App Payments SDK Quickstart](in-app-payments-sdk/quick-start). --- # Square Web SDKs > Source: https://developer.squareup.com/docs/changelog/websdks > Status: PUBLIC > Languages: All > Platforms: All Learn about the release history of Square web SDKs. Square has published the [Web Payments SDK](web-payments/overview) to enable integration with Square on a web client. [See all Web Payments SDK release notes](changelog/webpaymentsdk). --- # International Payment Methods > Source: https://developer.squareup.com/docs/terminal-api/international-payment-methods > Status: PUBLIC > Languages: All > Platforms: All Learn about Terminal API support for international payment methods. **Applies to:** [Terminal API](terminal-api/overview) | [Refunds API](refunds-api/overview) {% subheading %}Learn about Terminal API support for international payment methods.{% /subheading %} {% toc hide=true /%} ## Overview Use the Square Terminal and the [Terminal API](https://developer.squareup.com/reference/square/terminal-api) to process the following payment solutions in non-US regions where they're supported: * [Refund Interac Payments](terminal-api/square-terminal-refunds) - Use a Square Terminal and the Terminal API to request a refund of Interac payments on a Square Terminal for Canadian sellers. All other payment types are refunded using the [Refunds API](https://developer.squareup.com/reference/square/refunds-api). * [E-Money Payments](terminal-api/e-money-payments) - Use the Terminal API to take e-money payments in regions where e-money is available. * [QR Code Payments for Digital Wallets](terminal-api/international-payment-methods/paypay-qr-code-payments) - Use the Terminal API to take QR code payments for multiple digital wallets in Japan. ## See also * [Supported Payment Methods by Country](payment-card-support-by-country) --- # Take E-Money Payments > Source: https://developer.squareup.com/docs/terminal-api/e-money-payments > Status: PUBLIC > Languages: All > Platforms: All Use the Square Terminal and Terminal API to take E-Money payments in regions where E-Money is available. **Applies to:** [Terminal API](terminal-api/overview) {% subheading %}Use the Square [Terminal API](https://developer.squareup.com/reference/square/terminal-api) to take electronic money (e-money) payments in regions where e-money is available.{% /subheading %} {% toc hide=true /%} ## Requirements and limitations * Square Terminal must be running version 4.11 or later to accept a FeliCa e-money payment. * Square Terminal must be activated and located in Japan. * The Square account location must be signed up for e-money in the Square Dashboard. * **Check Balance** must be selected by the buyer on the Square Terminal when you provide the `FELICA_ALL` option and is only supported for Transportation Group cards. * Using [CancelTerminalCheckout](https://developer.squareup.com/reference/square/terminal-api/cancel-terminal-checkout) to cancel an e-money payment after getting an error on the Square Terminal is currently not supported. To cancel an e-money payment, the buyer needs to manually cancel the payment on the Square Terminal. For more information, see [Cancel a Terminal checkout](https://developer.squareup.com/docs/terminal-api/square-terminal-payments#step-3-cancel-a-terminal-checkout). ## E-money card types The Terminal API supports the three e-money brands: iD, QUICPay, and Transportation Group (such as [Suica](https://www.jreast.co.jp/mobilesuica/index.html/), [PASMO](https://www.pasmo.co.jp/charge/), and ICOCA). ## Request an e-money Terminal checkout The Terminal API supports e-money by providing the [payment_type](https://developer.squareup.com/reference/square/objects/TerminalCheckout#definition__property-payment_type) field in the `TerminalCheckout` object and the [CheckoutOptionsPaymentType](https://developer.squareup.com/reference/square/enums/CheckoutOptionsPaymentType) enumeration. When a `payment_type` has any of the four `FELICA` enum values specified in the checkout request, the Terminal accepts the corresponding e-money card types. The current supported options for `payment_type` are enumerated by [CheckoutOptionsPaymentType](https://developer.squareup.com/reference/square/enums/CheckoutOptionsPaymentType) and include: * `CARD_PRESENT` - The default option that is automatically set when `payment_type` is left blank. This option is used to accept credit card or debit card payments using tap, dip, or swipe. * `FELICA_ALL` - Launches a checkout screen on the Square Terminal that allows the buyer to select a specific brand or select the Check Balance screen. This option is recommended for scenarios where the seller selects the FeliCa brand on the Terminal, before presenting it to the buyer. * `FELICA_QUICPAY` - Launches the QUICPay checkout screen for the buyer to complete. This option is recommended for scenarios where the buyer or seller selects the FeliCa brand on the custom point-of-sale system. * `FELICA_ID` - Launches the ID checkout screen for the buyer to complete. This option is recommended for scenarios where the buyer or seller selects the FeliCa brand on the custom Point of Sale system. * `FELICA_TRANSPORTATION_GROUP` - Launches the Transportation Group checkout screen for the buyer to complete. This option is recommended for scenarios where the buyer or seller selects the FeliCa brand on the custom Point of Sale system. ## See also * [Sony FeliCa contactless payment technology](https://www.sony.net/Products/felica/about/) --- # Webhook Subscriptions API > Source: https://developer.squareup.com/docs/webhooks/webhook-subscriptions-api > Status: PUBLIC > Languages: All > Platforms: All An introduction to the Webhook Subscriptions API, which you can use to programmatically subscribe to webhooks. **Applies to:** [Webhook Subscriptions API](https://developer.squareup.com/reference/square/webhook-subscriptions-api) | [Events API](events-api/overview) | [Square Webhooks](webhooks/overview) {% subheading %}Learn about the Webhook Subscriptions API, which you can use to programmatically subscribe to webhooks.{% /subheading %} {% toc hide=true /%} ## Overview Using the Developer Console to manually update webhook subscriptions can become complex when you have to update numerous applications for new event types or functionality. The [Webhook Subscriptions API](https://developer.squareup.com/reference/square/webhook-subscriptions-api) lets you programmatically manage your webhook subscriptions, including creating, updating, and deleting webhook subscriptions associated with an event. With the Webhook Subscriptions API, you can: * Subscribe to receive notifications of events you want to know about. To subscribe, you need to register a notification URL, which Square sends notifications to when events occur. * Retrieve all event types that an application can subscribe to. * List all subscriptions for an application. * Trigger a test notification to the subscription's notification URL. {% aside type="info" %} Because webhook subscriptions are owned by the application and not by any one seller, you cannot use OAuth access tokens with the Webhook Subscriptions API. You must use the application's [personal access token](build-basics/access-tokens). {% /aside %} The [Events API](events-api/overview) is a pull-based alternative to webhook subscriptions. In addition to receiving real-time event notifications, you can periodically poll the Events API to retrieve events. ## Example use cases With the Webhook Subscriptions API, you can integrate webhook subscriptions into CI/CD (Continuous Integration/Continuous Delivery) pipelines. For example, you can rotate the signature key used to sign webhooks, configure webhooks while bootstrapping applications and test environments, and update webhooks for new event types or API versions. ### Rotating the signature key Consider a scenario where you want to rotate the signature key every 90 days. You can call [UpdateWebhookSubscriptionSignatureKey](https://developer.squareup.com/reference/square/webhook-subscriptions-api/update-webhook-subscription-signature-key) to get a new key that you can use to validate all future webhooks with. ```json curl https://connect.squareup.com/v2/webhooks/subscriptions/wbhk_b35f6b3145074cf9ad513610786c19d5/signature-key \ -X POST \ -H 'Square-Version: 2022-08-17' \ -H 'Authorization: Bearer PERSONAL_ACCESS_TOKEN' \ -H 'Content-Type: application/json' \ -d '{ "idempotency_key": "ed80ae6b-0654-473b-bbab-a39aee89a60d" }' ``` The following is an example response: ```json { "signature_key": "mAskrnZb__o9fdCO42C8zg" } ``` ### Configure webhooks for an application from scratch The following steps show how to configure webhooks for an application from scratch: 1. Check whether the application has existing subscriptions with the [ListWebhookSubscriptions](https://developer.squareup.com/reference/square/webhook-subscriptions-api/list-webhook-subscriptions) endpoint. ```json curl https://connect.squareup.com/v2/webhooks/subscriptions \ -H 'Square-Version: 2022-08-17' \ -H 'Authorization: Bearer PERSONAL_ACCESS_TOKEN' \ -H 'Content-Type: application/json' ``` The following is an example response for an application with no existing subscriptions: ```json {} ``` 2. Use the [ListWebhookEventTypes](https://developer.squareup.com/reference/square/webhook-subscriptions-api/list-webhook-event-types) endpoint to see all the event types that you can subscribe to. ```json curl https://connect.squareup.com/v2/webhooks/event-types \ -H 'Square-Version: 2022-08-17' \ -H 'Authorization: Bearer PERSONAL_ACCESS_TOKEN' \ -H 'Content-Type: application/json' ``` The following is an example response: ```json { "event_types": [ "payment.created", "order.updated", "invoice.created", "booking.created", "card.disabled", "customer.created" ], "metadata": [ { "event_type": "payment.created", "api_version_introduced": "2020-02-26", "release_status": "PUBLIC" }, { "event_type": "order.updated", "api_version_introduced": "2020-04-22", "release_status": "BETA" }, { "event_type": "invoice.created", "api_version_introduced": "2020-07-22", "release_status": "PUBLIC" }, { "event_type": "booking.created", "api_version_introduced": "2020-12-16", "release_status": "PUBLIC" }, { "event_type": "card.disabled", "api_version_introduced": "2021-06-16", "release_status": "PUBLIC" }, { "event_type": "customer.created", "api_version_introduced": "2021-02-26", "release_status": "PUBLIC" } ] } ``` 3. Use the [CreateWebhookSubscription](https://developer.squareup.com/reference/square/webhook-subscriptions-api/create-webhook-subscription) endpoint to add your notification URL and list of events that you want to subscribe to. ```json curl https://connect.squareup.com/v2/webhooks/subscriptions \ -X POST \ -H 'Square-Version: 2022-08-17' \ -H 'Authorization: Bearer PERSONAL_ACCESS_TOKEN' \ -H 'Content-Type: application/json' \ -d '{ "idempotency_key": "63f84c6c-2200-4c99-846c-2670a1311fbf", "subscription": { "name": "Example Webhook Subscription", "event_types": [ "payment.create", "order.updated", "invoice.created" ], "notification_url": "https://example-webhook-url.com", "api_version": "2021-12-15" } }' ``` The following is an example response: ```json { "subscription": { "id": "wbhk_b35f6b3145074cf9ad513610786c19d5", "name": "Example Webhook Subscription", "enabled": true, "event_types": [ "payment.created", "order.updated", "invoice.created" ], "notification_url": "https://example-webhook-url.com", "api_version": "2021-12-15", "signature_key": "1k9bIJKCeTmSQwyagtNRLg", "created_at": "2022-08-17 23:29:48 +0000 UTC", "updated_at": "2022-08-17 23:29:48 +0000 UTC" } } ``` 4. To validate the notification URL, use the [TestWebhookSubscription](https://developer.squareup.com/reference/square/webhook-subscriptions-api/test-webhook-subscription) endpoint. ```json curl https://connect.squareup.com/v2/webhooks/subscriptions/wbhk_b35f6b3145074cf9ad513610786c19d5/test \ -X POST \ -H 'Square-Version: 2022-08-17' \ -H 'Authorization: Bearer PERSONAL_ACCESS_TOKEN' \ -H 'Content-Type: application/json' \ -d '{ "event_type": "payment.created" }' ``` The following is an example response: ```json { "subscription_test_result": { "id": "23eed5a9-2b12-403e-b212-7e2889aea0f6", "status_code": 404, "payload": " {\"merchant_id\":\"1ZYMKZY1YFGBW\",\"type\":\"payment.created\",\"event_id\":\"23e ed5a9-2b12-403e-b212-7e2889aea0f6\",\"created_at\":\"2022-01- 11T00:06:48.322945116Z\",\"data\":{\"type\":\"payment\",\"id\":\"KkAkhdMsgzn59SM8A89WgKwekxLZY\",\"object\":{\"payment\":{\"amount_money\":{\"amount\":100,\"currency\":\"USD\"},\"approved_money\":{\"amount\":100,\"currency\":\"USD\"},\"capabilities\":[\"EDIT_TIP_AMOUNT\",\"EDIT_TIP_AMOUNT_UP\",\"EDIT_TIP_AMOUNT_DOWN\"],\"card_details\":{\"avs_status\":\"AVS_ACCEPTED\",\"card\":{\"bin\":\"540988\",\"card_brand\":\"MASTERCARD\",\"card_type\":\"CREDIT\",\"exp_month\":11,\"exp_year\":2022,\"fingerprint\":\"sq-1-Tvruf3vPQxlvI6n0IcKYfBukrcv6IqWr8UyBdViWXU2yzGn5VMJvrsHMKpINMhPmVg\",\"last_4\":\"9029\",\"prepaid_type\":\"NOT_PREPAID\"},\"card_payment_timeline\":{\"authorized_at\":\"2020-11-22T21:16:51.198Z\"},\"cvv_status\":\"CVV_ACCEPTED\",\"entry_method\":\"KEYED\",\"statement_description\":\"SQ *DEFAULT TEST ACCOUNT\",\"status\":\"AUTHORIZED\"},\"created_at\":\"2020-11-22T21:16:51.086Z\",\"delay_action\":\"CANCEL\",\"delay_duration\":\"PT168H\",\"delayed_until\":\"2020-11-29T21:16:51.086Z\",\"id\":\"hYy9pRFVxpDsO1FB05SunFWUe9JZY\",\"location_id\":\"S8GWD5R9QB376\",\"order_id\":\"03O3USaPaAaFnI6kkwB1JxGgBsUZY\",\"receipt_number\":\"hYy9\",\"risk_evaluation\":{\"created_at\":\"2020-11-22T21:16:51.198Z\",\"risk_level\":\"NORMAL\"},\"source_type\":\"CARD\",\"status\":\"APPROVED\",\"total_money\":{\"amount\":100,\"currency\":\"USD\"},\"updated_at\":\"2020-11-22T21:16:51.198Z\",\"version_token\":\"FfQhQJf9r3VSQIgyWBk1oqhIwiznLwVwJbVVA0bdyEv6o\"}}}}", "created_at": "2022-08-17 00:06:48.322945116 +0000 UTC m=+3863.054453746", "updated_at": "2022-08-17 00:06:48.322945116 +0000 UTC m=+3863.054453746" } } ``` ### Update a webhook subscription Webhook subscriptions are versioned independent of the default version of your application. The version of a webhook subscription determines the version of the event that's sent to the webhook. Imagine you want the new event types or data object fields added in subsequent releases to show up in your webhooks. You can use the [UpdateWebhookSubscription](https://developer.squareup.com/reference/square/webhook-subscriptions-api/update-webhook-subscription) endpoint to change the `api_version` field to the newer version and add the newer `event_types` that you want to get notified for. You can also edit the subscription `name` or `notification_url`, as well as enable or disable the subscription. ```json curl https://connect.squareup.com/v2/webhooks/subscriptions/wbhk_b35f6b3145074cf9ad513610786c19d5 \ -X PUT \ -H 'Square-Version: 2022-08-17' \ -H 'Authorization: Bearer PERSONAL_ACCESS_TOKEN' \ -H 'Content-Type: application/json' \ -d '{ "subscription": { "api_version": "2022-08-17", "enabled": true, "event_types": [ "payment.created", "order.updated", "invoice.created", "customer.deleted" ], "name": "Updated Example Webhook Subscription" } }' ``` The following is an example response: ```json { "subscription": { "id": "wbhk_b35f6b3145074cf9ad513610786c19d5", "name": "Updated Example Webhook Subscription", "enabled": true, "event_types": [ "payment.created", "order.updated", "invoice.created", "customer.deleted" ], "notification_url": "https://example-webhook-url.com", "api_version": "2022-08-17", "created_at": "2022-08-17 23:29:48 +0000 UTC", "updated_at": "2022-08-17 23:45:51 +0000 UTC" } } ``` ## See also * [Square Webhooks](webhooks/overview) * [Events API](events-api/overview) --- # Refunds and Exchanges > Source: https://developer.squareup.com/docs/orders-api/order-returns-exchanges > Status: PUBLIC > Languages: All > Platforms: All Learn how order returns and exchanges are supported in the Square Orders API. **Applies to:** [Orders API](orders-api/what-it-does) | [Refunds API](refunds-api/overview) {% subheading %}Learn how refunds and exchanges are supported in the Orders API.{% /subheading %} {% toc hide=true /%} ## Overview After an order is paid for, a buyer might return one or more order items. In a return scenario, a seller can offer the buyer one of the following options: * A refund of some or all of the purchase price, where money flows from the seller back to the buyer. * A return of individual line items and the purchase price of those line items. * An exchange for a more suitable item. Depending on the exchange, the seller might refund money to the buyer or the buyer might owe money to the seller. In a like-for-like exchange, no money movement is required. The resulting `Order` object provides the return or exchange details. ## Order refunds A seller has two options to refund an order: * **Itemized refund** - A seller can refund a specific line item in an order. {% aside type="info" %} In the current implementation, the [Refunds API](https://developer.squareup.com/reference/square/refunds-api) doesn't support itemized refunds. However, your application can use the Orders API for itemized refunds. {% /aside %} * **Custom refund** - A custom refund refers to refunding a specific order amount. Square products and the Refunds API both support custom refunds. Both the itemized refund and custom refund create a return order (an `Order` object). An example skeleton return object is shown: ```json { "order":{ "id":"j7CWK5PozTAPsfm2XlGPKPzeV", ... "returns":[ ... ], "return_amounts":[ ... ], "refunds":[ ... ] } } ``` The information in the `returns` field (an instance of an [OrderReturn](https://developer.squareup.com/reference/square/objects/OrderReturn) object) varies for itemized and custom refunds. ### Itemized refunds For itemized refunds, the `returns` field provides the following information: * `item_type`, which is set to `ITEM` and indicates a line item. For custom refunds, it's `CUSTOM_AMOUNT`. * Catalog information of the refunded line item, such as `catalog_object_id` and `variation_name`. An example refund order fragment is shown: ```json { "order": { "id": "j7CWK5PozTAPsfm2XlGPKPzeV", ... }, "returns": [ { "source_order_id": "L5tvBZ6VwJ0XBMJ0MhTmsqjeV", "return_line_items": [ { "uid": "D2B3E994-BDBC-437E-A692-CBD3CA38494D", "source_line_item_uid": "36EFB2B5-4B53-4258-9E95-7D315753DFD8", "name": "Tea", "quantity": "1", "catalog_object_id": "FUNBA4YDZZOE2BLDWNHWLUI6", "catalog_version": 1598022506033, "variation_name": "Mug", "item_type": "ITEM", ... } ] ... } ``` ### Custom refunds For custom refunds, the `returns` field has the `item_type` set to `CUSTOM_AMOUNT` and no other catalog item information. ```json { "order": { "id": "XBcMoV9ryMGH6CF62lkze04eV", ... "returns": [ { "source_order_id": "9ImSxCWZcr7aQVwoEVmN1o2eV", "return_line_items": [ { "uid": "itemization:0F6B7865-70E2-4B14-8DF8-345A31B62735", "quantity": "1", "item_type": "CUSTOM_AMOUNT", ... } ] } ] } } ``` ### Get referenced refunds The `order.refunds[]` property references a [PaymentRefund](https://developer.squareup.com/reference/square/objects/PaymentRefund) object for each payment on the original order that's refunded. To get one of these refunds, call [GetPaymentRefund](https://developer.squareup.com/reference/square/refunds-api/get-payment-refund). The `{refund_id}` token in the following example is calculated by concatenating two order fields (`refund_id = order.refunds.tender_id + "_" + order.refunds.id`). For each payment refund ID, make the following request: ```` ## Order exchanges A buyer might choose to exchange an order line item. The resulting order reports the exchange as a new line item and a return in the same transaction. {% aside type="info" %} In the current implementation, the Orders API doesn't support programmatically exchanging order items. A seller can only perform order exchanges using Square products (such as Square Point of Sale). However, orders that result from exchanges can be accessed using the Orders API (for example, using the `SearchOrder` endpoint). {% /aside %} Depending on the exchange, the seller might refund money to the buyer, the buyer might owe money to the seller, or it might be an even exchange where no money movement is required. The following order example shows a buyer exchanging a large candle ($15) for a small candle ($10). In this case, the seller owes the buyer a refund. Note the following highlights in this order: * `line_items` shows the buyer purchased a small candle. * `returns` shows the buyer returned a large candle. * `return_taxes` shows the buyer gets $1.50 in taxes returned. * `refunds` shows the buyer gets a $6.75 refund. ```json { "id": "9MuB7WhEuxpuHtzbdrDqXIkeV", "location_id": "X9XWRESTK1CZ1", "line_items": [ { "uid": "C934D5A2-A33F-48BA-BB6E-E1408DDC6179", "catalog_object_id": "CV7HSSVBAL6H7GLGBG3SAHNX", "catalog_version": 1633235632885, "quantity": "1", "name": "Lavender candle", "variation_name": "Lavender candle (small)", "base_price_money": { "amount": 1000, "currency": "USD" }, "total_tax_money": { "amount": 250, "currency": "USD" }, "total_discount_money": { "amount": 0, "currency": "USD" }, "total_money": { "amount": 1250, "currency": "USD" }, "variation_total_price_money": { "amount": 1000, "currency": "USD" }, "applied_taxes": [...], "item_type": "ITEM" } ], "taxes": [...], "created_at": "2021-10-03T04:35:51.000Z", "updated_at": "2021-10-03T04:35:51.000Z", "state": "COMPLETED", "total_tax_money": { "amount": 250, "currency": "USD" }, ... "total_money": { "amount": 1250, "currency": "USD" }, "returns": [ { "source_order_id": "3V83oQoa3XDu90I5AW5wkUkeV", "return_line_items": [ { "uid": "09219A1A-F02B-496E-BD55-16689A0EFF5E", "source_line_item_uid": "29B7C6B4-8F61-4749-BB12-9E86C98EDE25", "name": "Lavender candle", "quantity": "1", "catalog_object_id": "Z7JOD6P746IBPOKKJJ4K2CEF", "catalog_version": 1633235632885, "variation_name": "Lavender candle (Large)", "item_type": "ITEM", "applied_taxes": [...], "base_price_money": { "amount": 1500, "currency": "USD" }, ... "total_tax_money": { "amount": 375, "currency": "USD" }, "total_money": { "amount": 1875, "currency": "USD" } } ], "return_taxes": [...] } ], "return_amounts": { "total_money": { "amount": 1875, "currency": "USD" }, "tax_money": { "amount": 375, "currency": "USD" }, ... "net_amounts": { "total_money": { "amount": -625, "currency": "USD" }, "tax_money": { "amount": -125, "currency": "USD" }, ..., "refunds": [ { "id": "IPATbcVj03b4AN3dHxw5S", ... "transaction_id": "3V83oQoa3XDu90I5AW5wkUkeV", "tender_id": "xgwQNEoBo9IcWZwVmgjxclxuuaB", ... "reason": "Test", "amount_money": { "amount": 625, "currency": "USD" }, "status": "APPROVED" } ] } ``` --- # Search Orders > Source: https://developer.squareup.com/docs/orders-api/manage-orders/search-orders > Status: PUBLIC > Languages: All > Platforms: All Learn about searching orders, how filtering and sorting works, and about filtering orders by a time range. **Applies to:** [Orders API](orders-api/what-it-does) {% subheading %}Learn about searching orders, how filtering and sorting works, and about filtering orders by a time range.{% /subheading %} {% toc hide=true /%} ## Overview The [SearchOrders](https://developer.squareup.com/reference/square/orders-api/search-orders) endpoint lets you find orders that match your filtering criteria. For example, you can search for orders created within a specific time range, requested by a particular customer, or to be delivered to that customer. Your request must include one or more `location_ids`. `SearchOrders` only returns the orders for those locations. You can provide a [SearchOrdersQuery](https://developer.squareup.com/reference/square/objects/SearchOrdersQuery) in your request, which consists of these properties: * `filter` - Restricts search results to your filter criteria. * `sort` - Returns the search results sorted by one of three `Order` timestamps in ascending or descending order. By default, `SearchOrders` returns the matching `Order` objects in their entirety. You can set `return_entries` to `true` and receive short summaries of the orders instead ([OrderEntry](https://developer.squareup.com/reference/square/objects/OrderEntry) objects). {% aside type="info" %} The `SearchOrders` endpoint might return a large number of orders, depending on your search criteria, so you might want to process the results one page at a time. For more information, see [Pagination](working-with-apis/pagination). {% /aside %} ## Using a search filter The `filter` parameter of a `query` lets you narrow the results from `SearchOrders`. Note that if you use more than one `filter` in a `query`, the results from all the filters are ANDed together. The following filters are available: * `customer_filter` - Orders for specified customers. * `fulfillment_filter` - Orders in selected fulfillment states and of selected fulfillment types. * `source_filter` - Orders whose `Order.source.name` matches any string you add to the `source_filter`. * `state_filter` - Orders in specific states: `OPEN`, `DRAFT`, `COMPLETED`, or `CANCELED`. * `date_time_filter` - Orders where an event occurred during a particular time period. For more information, see [Filtering and sorting within a date/time range](#filtering-and-sorting-within-a-datetime-range). The following `SearchOrders` request returns orders originated by the "MyOrderApp" application, whose pickup fulfillment is completed and sorted by the date/time they were created (in ascending order): ```` ## Sorting the results The `sort` parameter of a `query` returns the search results in a sorted order. There are two parameters available: * `sort_field` - The date and time when an event occurred. Valid values are as follows: * `CREATED_AT` - The timestamp when the order was created, which is the default. * `UPDATED_AT` - The timestamp when the order was last updated. * `CLOSED_AT` - The timestamp when the order was closed. * `sort_order` - The order in which results are returned. Valid values are as follows: * `DESC` - Newest to oldest, which is the default. * `ASC` - Oldest to newest. If you don't specify a [SearchOrdersSortField](https://developer.squareup.com/reference/square/objects/SearchOrdersSortField) in your query, the results are ordered by `CREATED_AT`, from newest to oldest. The following `SearchOrders` request returns orders that have been delivered: ```` ## Filtering and sorting within a date/time range Every `Order` object contains timestamps that represent events occurring in an order's lifecycle. `SearchOrders` can return orders within a date/time range for any of these events. You can specify a `date_time_filter` for any of the following event types: * `created_at` - The timestamp when the order was created. * `updated_at` - The timestamp when the order was last updated. * `closed_at` - The timestamp when the order was closed. Multiple event type filters are ANDed together in the query. Only orders whose event timestamps occur within all time/date ranges are returned. Each event type has `start_at` and `end_at` fields to specify the date/time range for the filter. You must provide these in [RFC 3339 timestamps](https://tools.ietf.org/html/rfc3339) format. If you want the results to be sorted by event type, you must provide a `sort_order` that matches the `date_time_filter`. date_time_filter | sort_field value -|- `created_at` | `CREATED_AT` `updated_at` | `UPDATED_AT` `closed_at` | `CLOSED_AT` {% aside type="important" %} If you specify the `CLOSED_AT` sort order, you must use a `state_filter` in your request. You must set `state_filter` so that it matches `COMPLETED` orders, `CANCELED` orders, or both. {% /aside %} ## Search examples ### Search for orders within a specific date/time range The following request returns orders sorted by closed date, created between May 18 and 21, and completed between May 30 and 31: ```` The following request returns orders that were completed during a specific time period. The orders are sorted by the `closed_at` timestamp, from oldest to newest. ```` ### Search for orders by fulfillment type and state {% tabset %} {% tab id="Request" %} The following request returns orders that are prepared and ready for pickup: ```` {% /tab %} {% tab id="Response" %} In the response, each order contains a `fulfillments` array with details about the fulfillment. ```json { "orders": [ { "id": "cpdycBiu7JlxPwOvksoIB0hpCWAZY", ... "fulfillments": [ { "uid": "dgjWH3mMEVL50YKhIJ267C", "type": "PICKUP", "state": "PROPOSED", "pickup_details": { "pickup_at": "2023-05-24T19:31:26.515Z", "schedule_type": "ASAP", "recipient": { "display_name": "John Q. Customer" }, "prep_time_duration": "P0DT0H30M0S" } } ] } ... ] } ``` {% /tab %} {% /tabset %} --- # Handle Bookings Webhook Events > Source: https://developer.squareup.com/docs/bookings-api/use-webhooks > Status: PUBLIC > Languages: cURL > Platforms: All Learn how to use the Bookings API to receive supported event notifications related to bookings. **Applies to:** [Bookings API](bookings-api/what-it-is) {% subheading %}Learn how to receive supported event notifications related to bookings.{% /subheading %} {% toc hide=true /%} ## Overview Webhooks help streamline the process of managing bookings. Your applications can use webhooks to receive notifications when a booking is created or updated and respond according to your application needs. Webhooks also enable integrating bookings with other applications to provide added value. For example, when a booking is created, you can add it to a list of upcoming appointments for the customer. When a booking is updated, you can notify the service provider of the changes. Applications with buyer-level permissions only receive event notifications for bookings they created. Applications with seller-level permissions receive event notifications for any booking that is visible in the [Bookings API](https://developer.squareup.com/reference/square/bookings-api). A visible booking in the API is one that is included in the response from calls to the [ListBookings](https://developer.squareup.com/reference/square/bookings-api/list-bookings) endpoint. For information about general webhooks requirements, components, and processes, see [Square Webhooks](webhooks/overview). ## Requirements and limitations The following requirements and limitations apply to webhooks for booking events: * Your notification URL must be a publicly available HTTPS URL. It must also return an `HTTP 2xx` response code within 10 seconds of receiving a notification. * Applications with buyer-level permissions using OAuth must have `APPOINTMENTS_READ` permission to subscribe to a booking event and receive notifications. * Applications with seller-level permissions using OAuth must have `APPOINTMENTS_READ` and `APPOINTMENTS_ALL_READ` permissions to subscribe to a booking event and receive notifications. ## How booking event notifications work A webhook is a subscription that registers your notification URL and the events that you want to be notified about. You can configure webhooks for the following booking events. Event | Description --------------|------------ [booking.created](https://developer.squareup.com/reference/square/bookings-api/webhooks/booking.created) | A booking is created. With buyer-level permissions, the event occurs when the [CreateBooking](https://developer.squareup.com/reference/square/bookings-api/create-booking) endpoint of the API is called. With seller-level permissions, the event occurs when a booking is created by calling the API, using the Square Dashboard, or using the seller's online booking site. [booking.updated](https://developer.squareup.com/reference/square/bookings-api/webhooks/booking.updated) | A booking is updated when the [UpdateBooking](https://developer.squareup.com/reference/square/bookings-api/update-booking) endpoint of the API is called against updatable booking properties or when updatable booking properties are modified in the Square Dashboard or on the seller's online booking site. When an event occurs, Square collects data about the event, creates a notification, and sends the notification as a POST request to the URL of all webhooks that are subscribed to the event. When an application creates or updates a booking on behalf of the seller, a webhook notification about the event is sent, although no email or SMS notification is. The application acts on behalf of the seller when it uses seller-level permissions. {% anchor id="subscribe-to-events" /%} ## Subscribe to booking events To subscribe to notifications about booking events, you can configure webhooks for your Square bookings application. A webhook registers the URL that Square should send notifications to, the events you want to be notified about, and the Square API version. **To configure a webhook** 1. In the [Developer Console](https://developer.squareup.com/apps), open the application to which you want to subscribe. 1. In the left pane, choose **Webhooks**. 1. At the top of the page, choose **Sandbox** or **Production**. Choose [Sandbox](testing/sandbox) for testing. 1. Choose **Add Endpoint**, and then configure the endpoint: 1. For **Webhook Name**, enter a name such as **Bookings Webhook**. 1. For **URL**, enter your notification URL. If you don't have a working URL yet, you can enter **https://example.com** as a placeholder. You can also sign on to [webhook.site](https://webhook.site) to obtain a test URL for webhook event notifications and use the obtained test URL here. 1. Optional. For **API Version**, choose a Square API version. By default, this is set to the same version as the application. 1. For **Events**, choose **booking.created** and **booking.updated**. If you want to receive notifications about other events at the same webhook URL, choose them or configure another endpoint. 1. Choose **Save**. {% aside type="info" %} In the production environment, ignore the **Enable Webhooks** setting on the **Webhooks** page. This setting applies to webhooks for Connect V1 APIs (deprecated). {% /aside %} {% anchor id="send-test-event" /%} **To validate your webhook configuration** You can send a generic notification from the [Developer Console](https://developer.squareup.com/apps) to validate that your webhook is configured correctly. 1. On the **Webhooks** page for your application, choose the webhook that you want to test. 2. In the **Endpoint Details** pane, choose **More**, and then choose **Send Test Event**. 3. Select an event and then choose **Send**. If the endpoint is configured correctly, the **Send Test Event** window displays the response code and notification body. {% anchor id="receive-event-notifications" /%} ## Receive booking event notifications When a booking is created or updated, Square sends a notification to any webhooks that are subscribed to the corresponding event. To handle notifications, applications typically perform the following steps: 1. Validate the authenticity of the notification. For more information, see [Validate Notifications](webhooks-api/validate-notifications). 1. Respond with an `HTTP 2xx` response code within 10 seconds of receiving the notification. For more information, see [Notification Delivery SLA](webhooks-api/delivery-sla). 1. Inspect, process, store, or forward the notification. The body of the notification is a JSON object that contains the following properties. | Property{% width="130px" %} | Description ---------|------------ `merchant_id` | The ID of the seller associated with the affected booking. `location_id` | The ID of the seller location to provide the booked service. `type` | The type of event: `booking.created` and `booking.updated`. `event_id` | The unique ID of the affected booking event, which is used for [idempotency support](webhooks-api/what-it-does#idempotency-support). `created_at` | A timestamp of when the event occurred (for example, `2020-12-16T21:59:15.286Z`). `data` | Information about the affected booking, represented by one of the following objects, depending on the event type: [BookingCreatedWebhookData](https://developer.squareup.com/reference/square/objects/BookingCreatedWebhookData) and [BookingUpdatedWebhookData](https://developer.squareup.com/reference/square/objects/BookingUpdatedWebhookData). The `data.object` property references the affected [Booking](https://developer.squareup.com/reference/square/objects/Booking) resource. {% anchor id="notifications-booking.created" /%} ### Notifications for booking.created events A `booking.created` event is dispatched when a booking is created. The following `booking.created` event is in response to the creation of a new booking. The application receiving the notification has seller-level permissions. ```json { "merchant_id": "ETCE8W0W8QDYP", "type": "booking.created", "event_id": "275e23ee-2c99-5093-963c-5097073fae2e", "created_at": "2021-11-30T01:58:19Z", "data": { "type": "booking", "id": "x0cw6tzpjbuic5:0", "object": { "booking": { "all_day": false, "appointment_segments": [ { "any_team_member": false, "duration_minutes": 30, "intermission_minutes": 0, "service_variation_id": "GUN7HNQBH7ZRARYZN52E7O4B", "service_variation_version": 1613077495453, "team_member_id": "2_uNFkqPYqV-AZB-7neN" } ], "created_at": "2021-11-30T01:58:19Z", "creator_details": { "creator_type": "TEAM_MEMBER", "team_member_id": "2_uNFkqPYqV-AZB-7neN" }, "customer_id": "K48SGF7H116G59WZJRMYJNJKA8", "customer_note": "Customer requested a window seat.", "id": "x0cw6tzpjbuic5", "location_id": "SNTR5190QMFGM", "location_type": "BUSINESS_LOCATION", "seller_note": "Complementary VIP service", "source": "API", "start_at": "2021-12-15T17:00:00Z", "status": "ACCEPTED", "transition_time_minutes": 0, "updated_at": "2021-11-30T01:58:19Z", "version": 0 } } } } ``` The included [Booking](https://developer.squareup.com/reference/square/objects/Booking) object describes the created booking. A booking created with seller-level permissions is always deemed as accepted. When created, the booking status is automatically set to `ACCEPTED`. This is different from the booking created with buyer-level permissions, where the booking status is set to `PENDING`. Only when the seller accepts or declines the pending booking, does the booking status change from `PENDING` to `ACCEPTED` or `DECLINED`, respectively. If the application receiving the event notification has buyer-level permissions, the received event data consists of a subset of the event data previously shown. For more information, see [Access scopes of booking data](bookings-api/use-the-api#access-scopes-of-booking-data). {% anchor id="notifications-booking.updated" /%} ### Notifications for booking.updated events A `booking.updated` event is dispatched when a booking is updated. The following `booking.updated` event is in response to an update to change the `start_at` field value of the previously created booking from `2021-12-20T17:00:00Z` to `2021-12-20T19:00:00Z`. No other aspect of the booking is modified. The application receiving the notification has seller-level permissions. ```json { "merchant_id": "ETCE8W0W8QDYP", "type": "booking.updated", "event_id": "6a38ffba-5c2e-5c81-87ea-dbba4ee18bc2", "created_at": "2021-11-30T03:56:58Z", "data": { "type": "booking", "id": "x0cw6tzpjbuic5:1", "object": { "booking": { "all_day": false, "appointment_segments": [ { "any_team_member": false, "duration_minutes": 30, "intermission_minutes": 0, "service_variation_id": "GUN7HNQBH7ZRARYZN52E7O4B", "service_variation_version": 1613077495453, "team_member_id": "2_uNFkqPYqV-AZB-7neN" } ], "created_at": "2021-11-30T01:58:19Z", "creator_details": { "creator_type": "TEAM_MEMBER", "team_member_id": "2_uNFkqPYqV-AZB-7neN" }, "customer_id": "K48SGF7H116G59WZJRMYJNJKA8", "id": "x0cw6tzpjbuic5", "location_id": "SNTR5190QMFGM", "location_type": "BUSINESS_LOCATION", "seller_note": "Complementary VIP service", "source": "API", "start_at": "2021-12-20T19:00:00Z", "status": "ACCEPTED", "transition_time_minutes": 0, "updated_at": "2021-11-30T03:56:58Z", "version": 1 } } } } ``` The included [Booking](https://developer.squareup.com/reference/square/objects/Booking) object describes the updated booking. If the application receiving the event notification has buyer-level permissions, the received event data consists of a subset of the event data previously shown. For more information, see [Access scopes of booking data](bookings-api/use-the-api#access-scopes-of-booking-data). {% anchor id="test-webhooks" /%} ## Test your webhooks To test your webhook with actual resources, create a booking or update an existing one in your account. Make sure to test with the same environment (Sandbox or Production) that you registered for the webhook. The following are some ways you can trigger booking event notifications. **Test in the Square Dashboard** 1. Open the Square Dashboard. * To test with Sandbox resources, open the [Developer Console](https://developer.squareup.com/apps). Under **Sandbox Test Accounts**, choose **Open** for your test account. * To test with Production resources, open the [Square Dashboard](https://app.squareup.com/dashboard). 1. In the left pane, choose **Appointments**, and then follow the on-screen instructions to create or update a booking. **Test using API Explorer** Sign in to API Explorer and choose the **Sandbox** or **Production** environment. Call the following Bookings API endpoints as needed to test your webhook: * [CreateBooking](https://developer.squareup.com/explorer/square/bookings-api/create-booking) * [UpdateBooking](https://developer.squareup.com/explorer/square/bookings-api/update-booking) **Test using cURL** Send cURL requests to Bookings API endpoints. For more information, see the following documentation: * [Create a booking](bookings-api/use-the-api#create-a-booking) * [Update a booking](bookings-api/use-the-api#update-a-booking) {% aside type="info" %} You can send a generic test notification from the Developer Console. {% /aside %} You should receive notifications for bookings events that you subscribe to. Square doesn't send notifications for events that fail. For information about troubleshooting Square webhooks, see [Troubleshoot Webhooks](webhooks-api/troubleshooting). --- # Bookings API > Source: https://developer.squareup.com/docs/bookings-api/what-it-is > Status: PUBLIC > Languages: cURL > Platforms: Command Line The Bookings API lets you create and manage bookings for Square sellers. **Applies to:** [Bookings API](https://developer.squareup.com/reference/square/bookings-api) | [Booking Custom Attributes API](booking-custom-attributes-api/overview) | [Locations API](locations-api) | [Team API](team/overview) | [Customers API](customers-api/what-it-does) | [Catalog API](catalog-api/what-it-does) {% subheading %}Learn about using the Bookings API to create applications for Square sellers and their customers to create and manage bookings.{% /subheading %} {% toc hide=true /%} ## Overview A booking refers to a reservation of a service provided by a member of the seller's staff for a customer over a specified time duration at a particular time and location. Both the seller (or a team member, called staff) and the customer (also known as the buyer) can create and manage a booking. However, the seller has more control and access to bookings than the buyer. Therefore, seller and buyer operations need different access permissions, called seller-level and buyer-level permissions in this topic. You can add custom attributes to the [Booking](https://developer.squareup.com/reference/square/objects/Booking) object. To do so, use the [Booking Custom Attributes API](booking-custom-attributes-api/overview). ## Seller-level and buyer-level permissions Seller-level permissions grant an application full visibility into a seller's calendar and they enable full control of the seller's bookings. A seller must have a subscription to Appointments Plus or Premium to use this feature. Buyer-level permissions grant partial visibility into a seller's calendar, limited to bookings created by the calling application. Buyer-level permissions enable limited control of bookings for buyers only. All sellers have access to this feature. With seller-level permissions, your application can do the following: * **Access and view every booking of a seller** - For example, calling [ListBookings](https://developer.squareup.com/reference/square/bookings-api/list-bookings) can return every booking in the seller's calendar. * **Generate bookings webhooks** - Every change to a booking is sent to webhooks, as a [booking.created](https://developer.squareup.com/reference/square/bookings-api/webhooks/booking.created) or [booking.updated](https://developer.squareup.com/reference/square/bookings-api/webhooks/booking.updated) event. * **Create double bookings** - Allows service of different customers at the same time or location. It can also create off-hour bookings outside the seller's regular business hours. With buyer-level permissions, your application can do the following: * **Access and view bookings that it created** - Calling `ListBookings` returns bookings created by the application only. * An application must create a booking to get event notifications about changes to a booking. This applies if the booking was created using the API or if an API-created booking is updated using the API, the Square Dashboard, or the seller's booking site. * An application cannot create double bookings for the user or create a booking outside the seller's regular business hours. ## Bookings API operations Using the Bookings API, your application can perform the following tasks: * **Retrieve bookings** - Inspect the details of each booking, including services to be provided, bookable team members providing the services, and the location where the customer receives the services. * **Search for the availability of a service, team member, and location** - The returned availability can be turned into a booking by adding a customer. * **Maintain bookings** - Including the creation, update, and cancellation of a booking. To create, update, or cancel a seller-level booking, the targeted seller must have subscribed to a paid Appointments subscription plan and your application must have seller-level permissions. ## Integration with paid subscription plans [Square Appointments Plus or Appointments Premium](https://squareup.com/appointments/subscription/choose_plan) is a monthly paid subscription plan to Square Appointments. When a seller subscribes to a paid subscription plan, you can call the Bookings API to create, update and cancel seller-level bookings with the seller. By default, a seller subscribes to the free subscription plan that offers basic Appointments features. With the free subscription plan, you can call the Bookings API to create, update or cancel buyer-level bookings with the seller and to access any readable property of a booking. To integrate the Bookings API with a paid Appointments subscription plan of a seller for creating, updating or canceling a seller-level booking, your application must have the writeable seller-level permissions. The OAuth scopes must include the following permissions: * `APPOINTMENTS_WRITE` * `APPOINTMENTS_ALL_WRITE` When using the Bookings API with the free Appointments subscription plan, the application must have all of the buyer-level permissions plus the readable seller-level permission. The OAuth scopes can include the following permissions: * `APPOINTMENTS_READ` * `APPOINTMENTS_WRITE` * `APPOINTMENTS_ALL_READ` * `APPOINTMENTS_BUSINESS_SETTINGS_READ` You can call the Bookings API to verify whether a seller supports creating, updating or canceling a seller-level booking, before attempting to carry out such operations. To do so, call [RetrieveBusinessBookingProfile](https://developer.squareup.com/reference/square/bookings-api/retrieve-business-booking-profile) and inspect the response for the [support_seller_level_writes](https://developer.squareup.com/reference/square/objects/BusinessBookingProfile#definition__property-support_seller_level_writes) attribute. Only when the returned value is `true` can you proceed successfully to create, update, or cancel seller-level bookings. When a seller doesn't have the Appointments Plus or Premium subscription plan, all the API calls targeted at the seller with buyer-level permissions and those with seller-level readable permissions succeed. However, API calls targeted at the seller with seller-level writeable permissions fail with a `403` response containing the following error message: ```json { "errors": [ { "category": "AUTHENTICATION_ERROR", "code": "FORBIDDEN", "detail": "Merchant subscription does not support write operations." } ] } ``` When a seller subscribes to an Appointments plan, the same plan applies to all active locations of the seller and each location is billed the same price of the chosen plan. A seller cannot subscribe to one plan at a location and another plan at another location. ## Integration with other Square APIs A booking application using the Bookings API uses several other Square APIs. They include: * The [Locations API](locations-api), which is used to choose a seller's business location where a customer receives a booked service provided by a team member of the seller. * The [Team API](team/overview), which is used to choose a team member of the seller to provide a booked service. * The [Customers API](customers-api/what-it-does), which is used to create a new customer or search for an existing customer for a booking. * The [Catalog API](catalog-api/what-it-does), which is used to create a bookable service that is represented by a [CatalogItemVariation](https://developer.squareup.com/reference/square/objects/CatalogItemVariation) object. A [team member](https://developer.squareup.com/reference/square/objects/TeamMember) who can be booked to provide a service must be a bookable team member. The seller or a designated representative of the seller can make a team member a bookable team member by adding the team member (an employee) to a service in the Square Dashboard. This task cannot be delegated to any third-party developer calling the Square API. ## See also * [Bookings API Concepts](bookings-api/get-ready-to-use-the-api) * [Onboard to Square Appointments](bookings-api/onboard-to-the-api) * [Create and Manage Bookings](bookings-api/use-the-api) * [Handle Bookings Webhook Events](bookings-api/use-webhooks) --- # Bookings API Concepts > Source: https://developer.squareup.com/docs/bookings-api/get-ready-to-use-the-api > Status: PUBLIC > Languages: cURL > Platforms: Command Line Learn basic concepts and prerequisites about bookings, appointments, availability, and appointment segments used in the Square Bookings API. **Applies to:** [Bookings API](bookings-api/what-it-is) {% subheading %}Learn basic concepts and prerequisites about bookings, appointments, availability, and appointment segments.{% /subheading %} {% toc hide=true /%} ## Overview The [Bookings API](https://developer.squareup.com/reference/square/bookings-api) makes use of the following concepts: * **Booking** - An agreement between a seller and a customer to provide a specific service or a set of services at a particular location in contiguous time slots of fixed durations starting at a specific time. * **Appointment** - A block of contiguous time slots, also known as the service segments or appointment segments. Each segment references a service and a team member to provide the service. * **Availability** - An inventory of available appointment segments pertaining to one or more services, team members as service providers, and service locations. * **Appointment segment** - A portion of an appointment in which a specific service is provided. A segment is time-bound and segments within an appointment are ordered and non-overlapping. * **Paid Appointments plan** - Appointments Plus or Appointments Premium is a paid subscription plan that is required to create, update, and cancel a seller-level booking. A seller can subscribe to only one (free or paid) Appointments plan, which is applied to all active locations of the seller. Each active location is billed, independently, according to the subscribed plan. ## Requirements and limitations Before using the Bookings API, make sure that the following requirements are met and limitations understood: * You must have a Square developer account. To create your developer account, [sign up for a Square developer account](https://squareup.com/signup?v=developers). * You must have at least one application created in your developer account. To create one, go to the [Square Developer Console](https://developer.squareup.com/apps). * You must have the application's access token ready when calling the API. For more information, see [Get a personal access token](build-basics/access-tokens#get-a-personal-access-token). * Your application must have appropriate buyer-level or seller-level permissions to access booking resources for buyer-initiated or seller-initiated operations, respectively: * For applications with buyer-level permissions, they must have `APPOINTMENTS_READ`, `APPOINTMENT_BUSINESS_SETTINGS_READ`, or both OAuth scopes for read operations and they must have `APPOINTMENTS_WRITE`, `APPOINTMENT_BUSINESS_SETTINGS_WRITE`, or both OAuth scopes for write operations. * For applications with seller-level permissions, they must have the `APPOINTMENTS_ALL_READ` OAuth scope plus `APPOINTMENTS_READ`, `APPOINTMENT_BUSINESS_SETTINGS_READ`, or both for read operations and they must have `APPOINTMENTS_ALL_WRITE` plus `APPOINTMENTS_WRITE`, `APPOINTMENT_BUSINESS_SETTINGS_WRITE`, or both for write operations. * You must ensure that a targeted seller has subscribed to a paid Appointments plan before creating, updating, or canceling a seller-level booking. * You cannot use the Bookings API to create team members or make them bookable to provide scheduled services offered by the seller. The seller must use the Square Dashboard to make a team member bookable by adding the team member to a bookable service for bookings. Nevertheless, you can call the [Team API](team/overview) to create team members. * The Bookings API is limited in international locales. For supported international locales, see [Square Appointments FAQs](https://squareup.com/help/us/en/article/6238-square-appointments-faqs). * You cannot currently use the Bookings API to create a booking with a non-zero cancellation fee. You must use the Square Dashboard to do that. --- # Create and Manage Bookings > Source: https://developer.squareup.com/docs/bookings-api/use-the-api > Status: PUBLIC > Languages: cURL > Platforms: Command Line Learn how to call the Bookings API to create and manage bookings for a Square seller. **Applies to:** [Bookings API](bookings-api/what-it-is) | [Locations API](locations-api) | [Customers API](customers-api/what-it-does) | [Team API](team/overview) | [Catalog API](catalog-api/what-it-does) {% subheading %}Learn how to create and manage bookings for a Square seller.{% /subheading %} {% toc hide=true /%} ## Overview You can use the [Bookings API](https://developer.squareup.com/reference/square/bookings-api) to create appointment-based applications that allow a customer of a Square seller to book an appointment for a particular service provided by the seller or one of the seller's team members. In addition to the Bookings API, you're likely to use other related Square APIs, such as the [Locations API](https://developer.squareup.com/reference/square/locations-api), [Customers API](https://developer.squareup.com/reference/square/customers-api), [Team API](https://developer.squareup.com/reference/square/team-api), and [Catalog API](https://developer.squareup.com/reference/square/catalog-api). In general, a booking application supports a frontend as an interface with a user to let the user book an appointment for a particular service at a particular location. At various stages of the user interaction, you need to perform the following operations targeted at the backend: * Call the Locations API to list and retrieve business locations for the user to choose from for a particular booking. * Call the Catalog API to create, list, or search for services that can be booked by customers online. * Call the Customers API to create or search for a customer profile representing the user to receive the service for a booking. * Call the Bookings API to list or retrieve a booking profile of a team member who can provide a service for a booking. * Call the Bookings API to retrieve the booking profile of a business that provides a service in a booking. * Call the Bookings API to search for available service segments that can be booked in a booking. * Call the Bookings API to create, inspect, or update a booking. Depending on the [permissions](bookings-api/what-it-is#seller-level-and-buyer-level-permissions) granted, the user might succeed in performing all or some of the actions or have access to the whole or part of resulting booking information. In the following sections, you learn how booking data can be accessed with buyer-level and seller-level permissions and how to call the API using cURL commands. {% anchor id="access-scopes-of-boooking-data" /%} ## Access scopes of booking data Applications with buyer-level permissions and those with seller-level permissions create different bookings and receive different booking event data. The differences are manifested in different scopes of access to the booking data by the two types of booking applications. The following table lists the different scopes of access to booking data, with buyer-level and seller-level permissions. Attributes with read/write access can be set when a booking is [created](https://developer.squareup.com/reference/square/bookings-api/create-booking) or modified when a booking is [updated](https://developer.squareup.com/reference/square/bookings-api/update-booking). Attributes with read-only or read/write access are included in the result from [RetrieveBooking](https://developer.squareup.com/reference/square/bookings-api/retrieve-booking) or [ListBookings](https://developer.squareup.com/reference/square/bookings-api/list-bookings) and they're included as part of event data in the webhook notification of the [booking.created](https://developer.squareup.com/reference/square/webhooks/booking.created) or [booking.updated](https://developer.squareup.com/reference/square/webhooks/booking.updated) event. !!!info When a deposit has been made to a booking, the appointment segments (as specified by the [appointment_segments](https://developer.squareup.com/reference/square/objects/Booking#definition__property-appointment_segments) attribute) of the booking cannot be updated. !!! {% table %} * Object * Field{% width="230px" %} * Buyer-level access * Seller-level access --- * [Booking](https://developer.squareup.com/reference/square/objects/Booking) * `id` * Read-only * Read-only --- * * `version` * Set for optimistic locking * Set for optimistic locking --- * * `status` * Read-only * Read-only --- * * `created_at` * Read-only * Read-only --- * * `updated_at` * Read-only * Read-only --- * * `start_at` * Read/write * Read/write --- * * `location_id` * Read/write[*] * Read/write[*] --- * * `address` * Read/write[*] * Read/write[*] --- * * `customer_id` * Read/write[*] * Read/write[*] --- * * `customer_note` * Read/write * Read/write --- * * `seller_note` * None * Read/write --- * * `transition_time_minutes` * None * Read-only --- * * `all_day` * Read-only * Read-only --- * * `creator_details` * None * Read-only --- * * `source` * None * Read-only --- * * `location_type` * Read/write * Read/write --- * * `appointment_segments` * Read/write[*] * Read/write --- * [AppointmentSegment](https://developer.squareup.com/reference/square/objects/AppointmentSegment) * `duration_minutes` * Read-only * Read/write --- * * `service_variation_id` * Read/write * Read/write --- * * `team_member_id` * Read/write * Read/write --- * * `service_variation_version` * Read/write * Read/write --- * * `any_team_member` * Read-only * Read-only --- * * `intermission_minutes` * None * Read-only --- * * `resource_ids` * None * Read-only {% /table %} [*] When set, the value becomes immutable and cannot be updated with the specified permissions. ## List business locations When booking a service, a booking application must choose a bookable business location for the scheduled appointment. A business location is represented by a [Location](https://developer.squareup.com/reference/square/objects/location) object and a booking is represented by a [Booking](https://developer.squareup.com/reference/square/objects/booking) object. To specify a business location for a booking, you reference the ID of the `Location` object in the `Booking` object. To create and manage a booking, you need to supply the business location ID of a Square seller. To determine the location ID, you can call the [ListLocations](https://developer.squareup.com/reference/square/locations-api/list-locations) endpoint of the Locations API and present the result to the user to a location. The following example shows how to call the `ListLocations` endpoint in a cURL command: ### Request: List business locations ```` ### Response: List business locations ```json { "locations": [ { "id": "EZDZF5AVRBXY4", "name": "Default Test Account", "address": { "address_line_1": "1600 Pennsylvania Ave NW", "locality": "Washington", "administrative_district_level_1": "DC", "postal_code": "20500", "country": "US" }, "timezone": "America/Los_Angeles", "capabilities": [ "CREDIT_CARD_PROCESSING" ], "status": "ACTIVE", "created_at": "2020-04-15T00:26:32Z", "merchant_id": "AM442MXDT6705", "country": "US", "language_code": "en-US", "currency": "USD", "phone_number": "+1 206-222-1111", "business_name": "Mr. Mo's Hair", "type": "PHYSICAL", "business_hours": { "periods": [ { "day_of_week": "MON", "start_local_time": "09:00:00", "end_local_time": "17:00:00" }, { "day_of_week": "TUE", "start_local_time": "09:00:00", "end_local_time": "17:00:00" }, { "day_of_week": "WED", "start_local_time": "09:00:00", "end_local_time": "17:00:00" }, { "day_of_week": "THU", "start_local_time": "09:00:00", "end_local_time": "17:00:00" }, { "day_of_week": "FRI", "start_local_time": "09:00:00", "end_local_time": "17:00:00" } ] }, "business_email": "sandbox-seller@squareup.com", "coordinates": { "latitude": 38.897675, "longitude": -77.036547 }, "mcc": "7299" } ] } ``` In this example, the seller runs the business at one location only. In addition to the business address, you can find the business hours in the result. Pay attention to the business hours so that you don't attempt to create a booking outside of the stated business hours. ## Retrieve location booking profiles When a seller has multiple business locations, the seller can enable some or all of the locations for bookings in an eligible subscription plan. This is done in the [Square Dashboard](https://app.squareup.com/dashboard) by choosing **Appointments**, **Settings**, **Manage Subscription**, and **Manage locations**. Locations enabled this way become bookable in that the seller can create and manage bookings in the Square Dashboard or on a Square POS device. For each bookable location, the seller can enable or disable online bookings for customers. Information about online bookings is encapsulated by the [LocationBookingProfile](https://developer.squareup.com/reference/square/objects/LocationBookingProfile) and includes the URL of the location-specific online booking site. When creating an application that supports online booking, you might want to find out which locations allow online booking so that your application presents only those locations for the user to choose from. To determine whether a location is enabled for booking, call the [ListLocationBookingProfiles](https://developer.squareup.com/reference/square/bookings-api/list-location-booking-profiles) endpoint without specifying any location IDs. To determine whether a bookable location is enabled for online booking, verify that the `online_booking_enabled` field is set to `true` on the returned `LocationBookingProfile` object. ### List location booking profiles request ```` ### List location booking profiles response The response contains all bookable locations that might be enabled for online booking. ```json { "location_booking_profiles": [ { "location_id": "SNTR9180QMFGM", "online_booking_enabled": true, "booking_site_url": "https://broadway.squareup.com/book/SNTR9180QMFGM/acme-inc-schenectady-ny" }, { "location_id": "LHNSEA3K7RYSE", "online_booking_enabled": false } ], "errors": [] } ``` Alternatively, you can call the [RetrieveLocationBookingProfile](https://developer.squareup.com/reference/square/bookings-api/retrieve-location-booking-profile) endpoint with a specific location ID. If the specified location isn't bookable, the result is a `404` response containing the following error message: ```json { "errors": [ { "category": "INVALID_REQUEST_ERROR", "code": "NOT_FOUND", "detail": "This location either does not exists, or is not enabled for Bookings." } ] } ``` If the location is bookable but not enabled for online booking, the corresponding `LocationBookingProfile` object containing `"online_booking_enabled": false` is returned. ## List booking profiles of team members When creating a booking, you need to specify a team member as the service provider. You reference the team member by the team member ID. Without specifying any team member IDs, you can retrieve booking profiles of team members by calling the [ListTeamMemberBookingProfiles](https://developer.squareup.com/reference/square/bookings-api/list-team-member-booking-profiles) endpoint, as shown in the following example: ### Request: List booking profiles of team members ```` ### Response: List booking profiles of team members ```json { "team_member_booking_profiles": [ { "team_member_id": "pRNYL8gtKDFeFUtvC_Tz", "display_name": "Sandbox Seller", "is_bookable": true } ], "errors": [] } ``` Each bookable team member has a booking profile that has the `is_bookable` attribute set to `true`. Only bookable team members can be assigned to provide the service in a booking. A seller might have other employees as team members who aren't bookable for any service. These employees aren't included in the response. Typically, you present the list of returned team members for the user to choose from to provide the service in a booking. When there is only one choice, simply make note of the returned `team_member_id` value and provide this ID to a booking afterwards. If team member IDs are readily accessible, you can retrieve the booking profiles of specific team members by calling the [RetrieveTeamMemberBookingProfile](https://developer.squareup.com/reference/square/bookings-api/retrieve-team-member-booking-profile) or [BulkRetrieveTeamMemberBookingProfiles](https://developer.squareup.com/reference/square/bookings-api/bulk-retrieve-team-member-booking-profiles) endpoint and specifying the team member IDs. ## Search for bookable services To create a booking, you must specify a bookable service to be provided by the seller or one of the seller's team members. A bookable service is represented by a [CatalogItemVariation](https://developer.squareup.com/reference/square/objects/CatalogItemVariation) object with its `available_for_booking` attribute set to `true`. To specify a bookable service, you reference the ID of the corresponding `CatalogItemVariation` object. To determine the ID of a bookable service, you can call the [SearchCatalogItems](https://developer.squareup.com/reference/square/catalog-api/search-catalog-items) endpoint, set the `product_types` query expression to `[APPOINTMENT_SERVICE]`, and inspect the result. The following example shows how to do this in cURL: ### Request: Search for appointment services ```` ### Response: Search for appointment services ```json { "items": [ { "type": "ITEM", "id": "GU3K6H36IETW5BJXNUVQIITT", "updated_at": "2020-10-26T05:03:12.977Z", "version": 1603688592977, "is_deleted": false, "present_at_all_locations": true, "item_data": { "name": "Hand Clean", "description": "House cleaning service", "variations": [ { "type": "ITEM_VARIATION", "id": "YW337JZR267JIALGVE5WWZR7", "updated_at": "2020-10-26T05:03:12.977Z", "version": 1603688592977, "is_deleted": false, "present_at_all_locations": true, "item_variation_data": { "item_id": "GU3K6H36IETW5BJXNUVQIITT", "name": "Regular", "ordinal": 1, "pricing_type": "FIXED_PRICING", "price_money": { "amount": 8000, "currency": "USD" }, "service_duration": 7200000, "available_for_booking": true, "no_show_fee": { "amount": 2500, "currency": "USD" }, "transition_time": 0 } }, { "type": "ITEM_VARIATION", "id": "KRV4AOIPRWAMSBPBSSU2A2UW", "updated_at": "2020-10-26T05:03:12.977Z", "version": 1603688592977, "is_deleted": false, "present_at_all_locations": true, "item_variation_data": { "item_id": "GU3K6H36IETW5BJXNUVQIITT", "name": "Power Clean", "ordinal": 2, "pricing_type": "FIXED_PRICING", "price_money": { "amount": 10000, "currency": "USD" }, "service_duration": 9000000, "available_for_booking": true, } } ], "product_type": "APPOINTMENTS_SERVICE", "skip_modifier_screen": false } }, { "type": "ITEM", "id": "EC66KHZQFDXS2CUMBELGF2YK", "updated_at": "2020-10-26T05:03:12.977Z", "version": 1603688592977, "is_deleted": false, "present_at_all_locations": true, "item_data": { "name": "Mr. Mo's Hair", "description": "Hair styling for men and women", "variations": [ { "type": "ITEM_VARIATION", "id": "RCTL5QBJIWUUDWGOX4YWOSNR", "updated_at": "2020-10-26T05:03:12.977Z", "version": 1603688592977, "is_deleted": false, "present_at_all_locations": true, "item_variation_data": { "item_id": "EC66KHZQFDXS2CUMBELGF2YK", "name": "Men's hair cut", "ordinal": 0, "pricing_type": "FIXED_PRICING", "price_money": { "amount": 2500, "currency": "USD" }, "service_duration": 1800000, "transition_time": 0 } }, { "type": "ITEM_VARIATION", "id": "RHMBHQBSCELBY6LUR75OCK5H", "updated_at": "2020-10-26T05:03:12.977Z", "version": 1603688592977, "is_deleted": false, "present_at_all_locations": true, "item_variation_data": { "item_id": "EC66KHZQFDXS2CUMBELGF2YK", "name": "Women's hair styling", "ordinal": 1, "pricing_type": "FIXED_PRICING", "price_money": { "amount": 10000, "currency": "USD" }, "service_duration": 7200000 } } ], "product_type": "APPOINTMENTS_SERVICE" } } ], "matched_variation_ids": [ "YW337JZR267JIALGVE5WWZR7", "KRV4AOIPRWAMSBPBSSU2A2UW", "RCTL5QBJIWUUDWGOX4YWOSNR", "RHMBHQBSCELBY6LUR75OCK5H" ] } ``` {% aside type="tip" %} In the previous response, the non-zero cancellation fee (as expressed by the `no_show_fee` object) is set in the Square Dashboard. It cannot be set using the Bookings API. The service with a non-zero `now_show_fee` value cannot be booked using the Bookings API. {% /aside %} You can infer the locations where the service is available from the `present_at_all_locations`, `present_at_locations_ids`, and `absent_at_location_ids` attribute values of the returned services. Make note of the ID and version number of the desired service item variation. You need to provide the ID when creating a booking afterwards. Don't use the ID of the parent item, as represented by a `CatalogItem` object. For a new bookable service, you must create a service variation, as represented by a `CatalogItemVariation` instance embedded within a `CatalogItem` object. You can do so in two ways: * Using the Catalog API, you can call the [UpsertCatalogObject](https://developer.squareup.com/reference/square/catalog-api/upsert-catalog-object) or [BatchUpsertCatalogObjects](https://developer.squareup.com/reference/square/catalog-api/batch-upsert-catalog-objects) endpoint to create a service variation and set the `available_for_booking` attribute to `true`. * Using the Square Dashboard, you can create a bookable service variation by enabling the **Bookable by Customers Online** option for the newly created service. ![A screenshot showing the Create Service page for creating a bookable service in the Square Dashboard.](//images.ctfassets.net/1nw4q0oohfju/7Jm1Q4Iisyuwb8L8dWCsw4/c4e412801c0c52533c2d8cd0eb98d4aa/create-service-page-seller-dashboard.png) ## Specify a customer for a booking To [create a booking](https://developer.squareup.com/reference/square/bookings-api/create-booking), you must specify a customer to receive the bookable service provided by the assigned or selected team member. In the Square API, a customer is represented by a [Customer](https://developer.squareup.com/reference/square/objects/Customer) object. To specify a customer, you reference the ID of the `Customer` object. ### Find the ID of a new customer For a new customer, you can call the Customers API to [create the customer](https://developer.squareup.com/reference/square/customers-api/create-customer), get the customer ID from the returned response, and specify the customer ID when creating a booking. The following example shows how to call the Customers API to create a new customer: #### Request: Create a new customer ```` When creating a customer to be used as an input to [CreateBooking](https://developer.squareup.com/reference/square/bookings-api/create-booking), the [Customer](https://developer.squareup.com/reference/square/objects/Customer) object must have the `phone_number` attribute defined. #### Response: Create a new customer ```json { "customer": { "id": "5XSG36ZZ4WTF32XPGK0A7NZNMC", "created_at": "2020-11-02T06:06:13.921Z", "updated_at": "2020-11-02T06:06:13Z", "given_name": "John", "family_name": "Doe", "email_address": "john.doe@acme.com", "phone_number": "1234567890", "preferences": { "email_unsubscribed": false }, "creation_source": "THIRD_PARTY", "version": 0 } } ``` Make note of the customer ID from the response. You need to supply it when creating a booking. ### Find the ID of an existing customer For an existing customer, you can call the [SearchCustomers](https://developer.squareup.com/reference/square/customers-api/search-customers) or [ListCustomers](https://developer.squareup.com/reference/square/customers-api/list-customers) endpoint of the Customers API to search for or retrieve the customer profile. The following cURL example shows how to call the `SearchCustomers` endpoint to find the ID of the customer whose email address is `joel@acme.com`: ### Request: Search for a customer by an exact email address ```` ### Response: Search for a customer by an exact email address ```json { "customers": [ { "id": "W3T65DYFQCXJXAW72Y677P5SW8", "created_at": "2020-07-24T19:49:02.070Z", "updated_at": "2020-07-24T19:49:02Z", "given_name": "Joel", "family_name": "Carpenter", "email_address": "joel@acme.com", "address": { "address_line_1": "1234 major street E", "administrative_district_level_1": "WA", "postal_code": "98101", "country": "US" }, "phone_number": "2061112222", "note": "not so private note", "company_name": "ACME", "preferences": { "email_unsubscribed": false }, "creation_source": "THIRD_PARTY", "birthday": "2001-01-01T00:00:00-00:00", "segment_ids": [ "AM442MXDT6705.REACHABLE", "gv2:Q4N92Z69694EDDNFYFC2D2Q5KG" ], "version": 3 } ] } ``` Make note of the `id` attribute value of the returned customer. You need to supply it when creating a booking. You can use different search filters to select an existing customer by other supported attributes, including the name and phone number. For more information, see [Search for Customer Profiles](customers-api/use-the-api/search-customers). ## Retrieve a business booking profile To determine how a Square seller accepts and manages bookings, you can call the [RetrieveBusinessBookingProfile](https://developer.squareup.com/reference/square/bookings-api/retrieve-business-booking-profile) endpoint of the Bookings API to retrieve the business booking profile of the seller. The seller identity is inferred from the access token obtained using the OAuth API. For more information, see [OAuth Walkthrough: Test Authorization with a Web Server](oauth-api/walkthrough). The following cURL example retrieves a business booking profile: ### Request: Retrieve a business booking profile ```` ### Response: Retrieve a business booking profile ```json { "business_booking_profile": { "seller_id": "AM442MXDT6705", "created_at": "2020-10-22T16:38:24Z", "booking_enabled": true, "customer_timezone_choice": "CUSTOMER_CHOICE", "booking_policy": "ACCEPT_ALL", "allow_user_cancel": true, "business_appointment_settings": { "location_types": [ "BUSINESS_LOCATION" ], "alignment_time": "HALF_HOURLY", "min_booking_lead_time_seconds": 0, "max_booking_lead_time_seconds": 31536000, "any_team_member_booking_enabled": true, "multiple_service_booking_enabled": true, "cancellation_fee_money": { "currency": "USD" }, "cancellation_policy": "CUSTOM_POLICY", "skip_booking_flow_staff_selection": false } }, "errors": [] } ``` By inspecting the returned business booking profile, you can determine the booking policy for the business concerning, for example, whether the seller accepts booking requests automatically, whether multiple bookings are allowed, the booking's lead time, whether the customer can cancel a booking, and whether the customer can choose a team member. ## Search for available slots An available slot, also called an availability, is a block of contiguous service segments that can be booked together by a customer at a particular location and starting time. Each segment includes a particular service, a particular team member providing the service, and the duration of the service offered in the segment. Before creating a booking, you should search for availabilities by calling the [SearchAvailability](https://developer.squareup.com/reference/square/bookings-api/search-availability) endpoint of the Bookings API. You can turn an availability into a booking by simply adding a customer to it. In other words, a booking is an availability plus a customer. The following cURL example shows how to call the `SearchAvailability` endpoint to retrieve availabilities for the service provided by specified team members between 9 AM December 1, 2021, and 9 AM December 2, 2021 (Pacific Standard Time). In the request body, the stated local times are converted to the corresponding UTC times (`2021-12-01T17:00:00Z` and `2020-12-01T17:00:00Z`), which in this case is 8 hours ahead of the local time. The service is referenced by `service_variation_id` and the team members are referenced by the `any` expression of the `team_member_id_filter`. In this example, there is only one team member. {% aside type="important" %} The specified time range to search for availabilities must be longer than or equal to 24 hours and shorter than or equal to 31 days. {% /aside %} ### Request: Calling SearchAvailability ```` For the `SearchAvailability` endpoint, the `all` query expression isn't supported by the `team_member_id_filter`. If you set the `start_at_range` filter to the following, you get an error because the specified time duration is 1 second less than 1 day: ```json { "start_at_range": { "start_at": "2021-12-15T16:00:00Z", "end_at": "2021-12-16T15:59:59Z" } } ``` On the other hand, if you set the `start_at_range` filter to the following, you get an error because the specified time duration is 1 second longer than 31 days: ```json { "start_at_range": { "start_at": "2021-10-01T17:00:00Z", "end_at": "2021-11-01T17:00:01Z" } } ``` ### Response: Calling SearchAvailability If successful, the previous request returns a response similar to the following, which contains the available time slots that can be used for bookings within the specified time period. Unlisted time slots within this time period are already booked. ```json { "availabilities": [ { "start_at": "2021-12-01T18:30:00Z", "location_id": "SNTR5190QMFGM", "appointment_segments": [ { "duration_minutes": 60, "team_member_id": "2_uNFkqPYqV-AZB-7neN", "service_variation_id": "GUN7HNQBH7ZRARYZN52E7O4B", "service_variation_version": 1613077495453 } ] }, { "start_at": "2021-12-01T19:00:00Z", "location_id": "SNTR5190QMFGM", "appointment_segments": [ { "duration_minutes": 60, "team_member_id": "2_uNFkqPYqV-AZB-7neN", "service_variation_id": "GUN7HNQBH7ZRARYZN52E7O4B", "service_variation_version": 1613077495453 } ] }, { "start_at": "2021-12-01T19:30:00Z", "location_id": "SNTR5190QMFGM", "appointment_segments": [ { "duration_minutes": 60, "team_member_id": "2_uNFkqPYqV-AZB-7neN", "service_variation_id": "GUN7HNQBH7ZRARYZN52E7O4B", "service_variation_version": 1613077495453 } ] }, { "start_at": "2021-12-01T20:00:00Z", "location_id": "SNTR5190QMFGM", "appointment_segments": [ { "duration_minutes": 60, "team_member_id": "2_uNFkqPYqV-AZB-7neN", "service_variation_id": "GUN7HNQBH7ZRARYZN52E7O4B", "service_variation_version": 1613077495453 } ] }, { "start_at": "2021-12-01T20:30:00Z", "location_id": "SNTR5190QMFGM", "appointment_segments": [ { "duration_minutes": 60, "team_member_id": "2_uNFkqPYqV-AZB-7neN", "service_variation_id": "GUN7HNQBH7ZRARYZN52E7O4B", "service_variation_version": 1613077495453 } ] }, { "start_at": "2021-12-01T21:00:00Z", "location_id": "SNTR5190QMFGM", "appointment_segments": [ { "duration_minutes": 60, "team_member_id": "2_uNFkqPYqV-AZB-7neN", "service_variation_id": "GUN7HNQBH7ZRARYZN52E7O4B", "service_variation_version": 1613077495453 } ] }, { "start_at": "2021-12-01T21:30:00Z", "location_id": "SNTR5190QMFGM", "appointment_segments": [ { "duration_minutes": 60, "team_member_id": "2_uNFkqPYqV-AZB-7neN", "service_variation_id": "GUN7HNQBH7ZRARYZN52E7O4B", "service_variation_version": 1613077495453 } ] }, { "start_at": "2021-12-01T22:00:00Z", "location_id": "SNTR5190QMFGM", "appointment_segments": [ { "duration_minutes": 60, "team_member_id": "2_uNFkqPYqV-AZB-7neN", "service_variation_id": "GUN7HNQBH7ZRARYZN52E7O4B", "service_variation_version": 1613077495453 } ] }, { "start_at": "2021-12-01T22:30:00Z", "location_id": "SNTR5190QMFGM", "appointment_segments": [ { "duration_minutes": 60, "team_member_id": "2_uNFkqPYqV-AZB-7neN", "service_variation_id": "GUN7HNQBH7ZRARYZN52E7O4B", "service_variation_version": 1613077495453 } ] }, { "start_at": "2021-12-01T23:00:00Z", "location_id": "SNTR5190QMFGM", "appointment_segments": [ { "duration_minutes": 60, "team_member_id": "2_uNFkqPYqV-AZB-7neN", "service_variation_id": "GUN7HNQBH7ZRARYZN52E7O4B", "service_variation_version": 1613077495453 } ] }, { "start_at": "2021-12-01T23:30:00Z", "location_id": "SNTR5190QMFGM", "appointment_segments": [ { "duration_minutes": 60, "team_member_id": "2_uNFkqPYqV-AZB-7neN", "service_variation_id": "GUN7HNQBH7ZRARYZN52E7O4B", "service_variation_version": 1613077495453 } ] }, { "start_at": "2021-12-02T00:00:00Z", "location_id": "SNTR5190QMFGM", "appointment_segments": [ { "duration_minutes": 60, "team_member_id": "2_uNFkqPYqV-AZB-7neN", "service_variation_id": "GUN7HNQBH7ZRARYZN52E7O4B", "service_variation_version": 1613077495453 } ] } ], "errors": [] } ``` The response body contains a list of time slots available for a customer to book the referenced service provided by the referenced team member in the referenced location. Each time slot can be an available appointment that starts at the time specified by `start_at` and lasts for the sum of all the `duration_minutes` values under `appointment_segments`. Appointment segments are continuous parts of an appointment in which a customer can receive one or more services provided by one or more team members. For example, if a barber cuts only hair in one appointment setting, the `appointment_segments` object has a single appointment segment. If a hair salon cuts, washes, and perms hair in one appointment setting, one appointment might have three segments of services each of which might be provided by a different team member or the same team member. In this example, an appointment has a single service segment of 60 minutes and can start on the hour or the half hour. If any appointment slot is already booked, that slot and any affected adjacent slots aren't returned in the response. In this example, the team member is already booked for another appointment between the local times of 12 PM and 1 PM on November 5, 2020 (or 2020-11-05T20:00:00Z and 2020-11-05T21:00:00Z) and, hence, is unavailable for any 60-minute appointments starting at 11:30 AM or 12:00 PM. The team member would be double booked during the last half of the 11:30 AM appointment and double booked during the entire 12:00 PM appointment. Missing in the response are the two time slots starting at 2020-11-05T19:30:00Z and 2020-11-05T20:00:00Z. In normal business operation, you need to display the available appointment slots for the customer to browse through and choose one. With the chosen appointment slot, you can proceed to create a booking. ## Create a booking With an available appointment slot returned from the [SearchAvailability](https://developer.squareup.com/reference/square/bookings-api/search-availability) request, you have all the required information, except for the customer ID, at your disposal to call [CreateBooking](https://developer.squareup.com/reference/square/bookings-api/create-booking) to create a booking. Ideally, you should already have the customer ID because you have interacted with the customer in the normal workflow of your application. {% aside type="important" %} You cannot use the Bookings API to book a service that has a non-zero cancellation fee set on its `no_show_fee` attribute. {% /aside %} You can provide a customer address when booking appointments, as long as the `location_type` is set to `Customer_Location`. The following cURL example creates a booking for the 60-minute service (`"service_variation_id": "GUN7HNQBH7ZRARYZN52E7O4B"`) provided by the team member (`"team_member_id": "2_uNFkqPYqV-AZB-7neN"`) in the location (`"location_id": "SNTR5190QMFGM"`) starting at 1 PM local time (or 2020-11-05T21:00:00Z UTC). By extracting this information from a retrieved availability, you can successfully create an appointment, provided that you supply a valid customer ID. ### Request: Create a booking ```` If your application has seller-level permissions or if the seller allows buyers to create a booking with multiple services, you can call the `CreateBooking` endpoint with more than one appointment segments (as elements of the `appointment_segments` list) with any valid combination of services and providers. The Bookings API requires that the [Customer](https://developer.squareup.com/reference/square/objects/Customer) object referenced by the input parameter of `customer_id` have the `phone_number` attribute defined. If the specified `Customer` doesn't have `phone_number` specified, you get a `400` error response with the following error message: ``` "errors": [ { "category": "INVALID_REQUEST_ERROR", "code": "BAD_REQUEST", "detail": "is invalid", "field": "phone" } ] ``` For the `seller_note` attribute (or another seller-accessible attribute) to be set in the catalog, the caller must have seller-level permissions. With buyer-level permissions, any application-set value is ignored. For more information about buyer-accessible and seller-accessible booking data, see [Access scopes of booking data](bookings-api/use-the-api#access-scopes-of-boooking-data). ### Response: Create a booking If successful, the previous request returns a response similar to the following: ```json { "booking": { "id": "zkras0xv0xwswx", "version": 0, "status": "ACCEPTED", "created_at": "2020-10-28T15:47:41Z", "updated_at": "2020-10-28T15:47:41Z", "location_id": "LEQHH0YY8B42M", "customer_id": "EX2QSVGTZN4K1E5QE1CBFNVQ8M", "customer_note": "", "seller_note": "", "location_type": "CUSTOMER_LOCATION", "start_at": "2020-11-26T13:00:00Z", "appointment_segments": [ { "duration_minutes": 60, "service_variation_id": "RU3PBTZTK7DXZDQFCJHOK2MC", "team_member_id": "TMXUrsBWWcHTt79t", "service_variation_version": 1599775456731 }, "address": { "address_line_1": "1955 Broadway", "address_line_2": "Suite 600", "locality": "Oakland", "administrative_district_level_1": "CA", "postal_code": "94612", } ] }, "errors": [] } ``` In this example, the caller has the seller-level permissions. Otherwise, the `seller_note` field wouldn't be present in the response and the `creator_type` would be `CUSTOMER`. Make note of the booking ID. You need to provide it later to retrieve or update this booking. Typically, you should let the customer keep a record of the booking ID and ask the customer to supply it when inquiring or changing the appointment in the future. ## Retrieve a booking To retrieve an existing booking, call the [RetrieveBooking](https://developer.squareup.com/reference/square/bookings-api/retrieve-booking) endpoint with the booking ID specified as a path parameter. The following cURL example retrieves the booking created in [Create a booking](#create-a-booking). {% aside type="info" %} The Bookings API also supports retrieving multiple bookings in a single call. To do so, call [BulkRetrieveBookings](https://developer.squareup.com/reference/square/bookings-api/bulk-retrieve-bookings) and specify one or more booking IDs. {% /aside %} ### Request: Retrieve a booking ```` ### Response: Retrieve a booking ```json { "booking": { "id": "k1jczlajuhy2xg", "version": 0, "status": "ACCEPTED", "created_at": "2021-11-29T19:14:41Z", "updated_at": "2021-11-29T19:14:41Z", "location_id": "SNTR5190QMFGM", "customer_id": "K48SGF7H116G59WZJRMYJNJKA8", "customer_note": "Window seat, please", "start_at": "2021-12-16T17:00:00Z", "all_day": false, "address": { "address_line_1": "1955 Broadway", "address_line_2": "Suite 600", "locality": "Oakland", "administrative_district_level_1": "CA", "postal_code": "94612", }, "appointment_segments": [ { "duration_minutes": 60, "service_variation_id": "GUN7HNQBH7ZRARYZN52E7O4B", "team_member_id": "2_uNFkqPYqV-AZB-7neN", "service_variation_version": 1613077495453, "any_team_member": false, "intermission_minutes": 0 } ], "seller_note": "Complementary VIP service", "transition_time_minutes": 0, "creator_details": { "creator_type": "TEAM_MEMBER", "team_member_id": "2_uNFkqPYqV-AZB-7neN" }, "source": "API", "location_type": "CUSTOMER_LOCATION" }, "errors": [] } ``` In this example, the caller has seller-level permissions. With buyer-level permissions, the result would be a subset of the above. For more information about buyer-accessible and seller-accessible booking data, see [Access scopes of booking data](bookings-api/use-the-api#access-scopes-of-boooking-data). ## List bookings To browse a collection of a seller's bookings, call the [ListBookings](https://developer.squareup.com/reference/square/bookings-api/list-bookings) endpoint. You can scope the retrieval to a particular customer, a service-providing team member, a service location, or a specific range of the service-starting time. You define the retrieval scopes by specifying in the URL the path parameters of `customer_id`, `team_member_id`, `location_id`, `start_at_min`, or `start_at_max`. Notice that the start-time range cannot be longer than 31 days. When calling `ListBookings`, you can specify a customer ID, location ID, team member ID, or range of start times. If none of these are set, their default values are used as follows: * If `customer_id` isn't specified, bookings of all customers of the seller are returned. * If `team_member_id` isn't specified, bookings of all team members of the seller are returned. * If `start_at_min` isn't specified, the current time becomes the earliest start time by which to retrieve bookings. * If `start_at_max` isn't specified, 31 days after `start_at_min` is the latest start time by which to retrieve bookings. The following is an example showing how to list bookings with explicit specifications of a location and a start-time range. ### Request: List bookings at a location and a start-time range The following cURL example retrieves all available bookings with services provided at a specific business location ("SNTR5190QMFGM") of a seller and starting between a specified time range ("2021-12-01T00:00:00Z" - "2021-12-30T23:59:59Z"): ```` ### Response: List bookings at a location and a start-time range The following shows an example response of two bookings that has their `start_at` times within the specified `start_at` duration: * They start between 17:00:00 UTC, December 1 (“2021-12-01T17:00:00Z”) and 17:00:00 UTC, December 15, 2021 (“2021-12-15T17:00:00Z”). * They're reserved for different customers ("SWPBCE0VRCXSQ57EEJ1PP77TKG" and "K48SGF7H116G59WZJRMYJNJKA8"). * The first booking is created by the customer and the second booking is created by the seller. * They're serviced by the same team member ("2_uNFkqPYqV-AZB-7neN"). ```json { "bookings": [ { "id": "b3s9u8hu1ceaug", "version": 0, "status": "ACCEPTED", "created_at": "2021-11-16T18:21:12Z", "updated_at": "2021-11-30T17:55:21Z", "location_id": "SNTR5190QMFGM", "customer_id": "SWPBCE0VRCXSQ57EEJ1PP77TKG", "customer_note": "John's hair", "start_at": "2021-12-01T18:00:00Z", "all_day": false, "address": { "address_line_1": "1955 Broadway", "address_line_2": "Suite 600", "locality": "Oakland", "administrative_district_level_1": "CA", "postal_code": "94612", }, "appointment_segments": [ { "duration_minutes": 30, "service_variation_id": "GUN7HNQBH7ZRARYZN52E7O4B", "team_member_id": "2_uNFkqPYqV-AZB-7neN", "service_variation_version": 1613077495453, "any_team_member": false, "intermission_minutes": 0 } ], "seller_note": "", "transition_time_minutes": 0, "creator_details": { "creator_type": "CUSTOMER" }, "source": "API", "location_type": "CUSTOMER_LOCATION" }, { "id": "k1jczlajuhy2xg", "version": 0, "status": "ACCEPTED", "created_at": "2021-11-29T19:14:41Z", "updated_at": "2021-11-29T19:14:41Z", "location_id": "SNTR5190QMFGM", "customer_id": "K48SGF7H116G59WZJRMYJNJKA8", "customer_note": "Window seat, please", "start_at": "2021-12-16T17:00:00Z", "all_day": false, "appointment_segments": [ { "duration_minutes": 60, "service_variation_id": "GUN7HNQBH7ZRARYZN52E7O4B", "team_member_id": "2_uNFkqPYqV-AZB-7neN", "service_variation_version": 1613077495453, "any_team_member": false, "intermission_minutes": 0 } ], "seller_note": "Complementary VIP service", "transition_time_minutes": 0, "creator_details": { "creator_type": "TEAM_MEMBER", "team_member_id": "2_uNFkqPYqV-AZB-7neN" }, "source": "API", "location_type": "BUSINESS_LOCATION" } ], "errors": [] } ``` In this example, the result contains two bookings. The first booking is created by the customer because `creator_type` has a value of `CUSTOMER`. The second booking is created by the seller because the `creator_type` has a value of `TEAM_MEMBER`. The caller has seller-level permissions. ## Update a booking After an appointment is created, your application user can call the [UpdateBooking](https://developer.squareup.com/reference/square/bookings-api/update-booking) endpoint to make certain changes. Because this endpoint supports sparse updates, you only need to specify the desired fields. Unspecified fields aren't affected by the operation. Updatable booking data varies depending on whether the caller has buyer-level or seller-level permissions. Updatable booking properties are summarized in the table in [Access scopes of booking data](bookings-api/use-the-api#access-scopes-of-booking-data). For updates that modify the appointment's start time and date (`start_at`) with buyer-level permissions, you should call [SearchAvailability](bookings-api/use-the-api#search-for-available-slots) first to retrieve available appointment segments to ensure that the attempted update doesn't result in duplicated bookings. With seller-level permissions, this isn't necessary if the seller permits double bookings. You must pass the entire `address` object when updating the `address` field; sparse updates are not allowed. For example, you cannot update only the `address_line_1` subfield. ### Request: Update a booking to a new start time and date The following cURL example moves an existing appointment's start time and date to 2021-12-17T18:00:00Z: ```` ### Response: Update a booking to a new start time and date ```json { "booking": { "id": "k1jczlajuhy2xg", "version": 1, "status": "ACCEPTED", "created_at": "2021-11-29T19:14:41Z", "updated_at": "2021-11-29T22:44:53Z", "location_id": "SNTR5190QMFGM", "customer_id": "K48SGF7H116G59WZJRMYJNJKA8", "start_at": "2021-12-16T18:00:00Z", "all_day": false, "address": { "address_line_1": "1955 Broadway", "address_line_2": "Suite 600", "locality": "Oakland", "administrative_district_level_1": "CA", "postal_code": "94612", }, "appointment_segments": [ { "duration_minutes": 60, "service_variation_id": "GUN7HNQBH7ZRARYZN52E7O4B", "team_member_id": "2_uNFkqPYqV-AZB-7neN", "service_variation_version": 1613077495453, "any_team_member": false, "intermission_minutes": 0 } ], "seller_note": "Complementary VIP service", "transition_time_minutes": 0, "creator_details": { "creator_type": "TEAM_MEMBER", "team_member_id": "2_uNFkqPYqV-AZB-7neN" }, "source": "API", "location_type": "CUSTOMER_LOCATION" }, "errors": [] } ``` ## Cancel a booking Your application user can call the [CancelBooking](https://developer.squareup.com/reference/square/bookings-api/cancel-booking) endpoint to cancel an existing booking as long as all of the following criteria are met: * With seller-level permissions, the caller can cancel a booking provided that the booking's status is `ACCEPTED`. * With buyer-level permissions, the caller can cancel a booking if all of the following are true: * The customer is allowed to cancel his or her bookings, which can be created by the customer or by others. You can determine whether the customer can cancel bookings by inspecting the [allow_user_cancel](https://developer.squareup.com/reference/square/objects/BusinessBookingProfile#definition__property-allow_user_cancel) attribute on the [BusinessBookingProfile](https://developer.squareup.com/reference/square/objects/BusinessBookingProfile) returned from a call to the [RetrieveBusinessBookingProfile](https://developer.squareup.com/reference/square/bookings-api/retrieve-business-booking-profile) endpoint. * The cancellation window hasn't elapsed for the booking under consideration. You can determine the duration of the cancellation window by inspecting the [cancellation_window_seconds](https://developer.squareup.com/reference/square/objects/BusinessAppointmentSettings#definition__property-cancellation_window_seconds) value on the [business_appointment_settings](https://developer.squareup.com/reference/square/objects/BusinessBookingProfile#definition__property-business_appointment_settings) attribute of [BusinessBookingProfile](https://developer.squareup.com/reference/square/objects/BusinessBookingProfile) returned from a call to the [RetrieveBusinessBookingProfile](https://developer.squareup.com/reference/square/bookings-api/retrieve-business-booking-profile) endpoint. The cancellation window for a booking has elapsed if the time interval (in seconds) from the booking's `start_time` to the current time is shorter than the `cancellation_window_seconds` value. * The booking's start time isn't in the past. * The booking's status is `PENDING` or `ACCEPTED`. ### Request: Cancel a booking The following cURL example shows how to cancel a booking: ```` The `booking_version` value must match the `version` value of the [Booking](https://developer.squareup.com/reference/square/objects/Booking) object. Otherwise, an error is returned. ### Response: Cancel a booking If successful, the previous request to cancel the booking returns a response similar to the following: ```json { "booking": { "id": "k1jczlajuhy2xg", "version": 2, "status": "CANCELLED_BY_SELLER", "created_at": "2021-11-29T19:14:41Z", "updated_at": "2021-11-30T00:20:31Z", "location_id": "SNTR5190QMFGM", "customer_id": "K48SGF7H116G59WZJRMYJNJKA8", "start_at": "2021-12-16T18:00:00Z", "all_day": false, "address": { "address_line_1": "1955 Broadway", "address_line_2": "Suite 600", "locality": "Oakland", "administrative_district_level_1": "CA", "postal_code": "94612", }, "appointment_segments": [ { "duration_minutes": 60, "service_variation_id": "GUN7HNQBH7ZRARYZN52E7O4B", "team_member_id": "2_uNFkqPYqV-AZB-7neN", "service_variation_version": 1613077495453, "any_team_member": false, "intermission_minutes": 0 } ], "seller_note": "Complementary VIP service", "transition_time_minutes": 0, "creator_details": { "creator_type": "TEAM_MEMBER", "team_member_id": "2_uNFkqPYqV-AZB-7neN" }, "source": "API", "location_type": "CUSTOMER_LOCATION" }, "errors": [] } ``` If the caller has buyer-level permissions, the returned `status` is `"CANCELLED_BY_CUSTOMER"`. Seller-specific information, such as `seller_note`, isn't included in the response. With buyer-permissions only, if the specified booking's start time is in the past, the caller gets the following error response: ```json { "errors": [ { "category": "INVALID_REQUEST_ERROR", "code": "BAD_REQUEST", "detail": "The cancellation period for this booking has ended.", "field": "base" } ] } ``` --- # Onboard to Square Appointments > Source: https://developer.squareup.com/docs/bookings-api/onboard-to-the-api > Status: PUBLIC > Languages: All > Platforms: All Learn about how to onboard a seller account or a developer Sandbox account to the Bookings API. **Applies to:** [Bookings API](bookings-api/what-it-is) {% subheading %}Learn how to onboard a seller account or developer Sandbox account to the Bookings API.{% /subheading %} {% toc hide=true /%} ## Overview To use the [Bookings API](https://developer.squareup.com/reference/square/bookings-api) and test your application built on the API, the Square Appointments services must be activated for targeted Square seller accounts. The process is known as onboarding and is a one-time operation performed in the Square Dashboard by the targeted seller. For testing purposes, you can use the following instructions to onboard your own Square account to Square Appointments. ## Onboard a Production account If you use your regular Square account to build and test a booking-related application, you must activate the Production account for the Bookings API. When Square sellers sign up for your application for booking appointments with their businesses, they or their representatives must onboard their Square Production accounts to Square Appointments. The following steps guide you through the process to onboard a Production account to Square Appointments. If you haven't accessed the Square Appointments service, do the following: 1. Sign in to the [Square Dashboard](https://app.squareup.com/dashboard). 2. In the left pane, choose **Appointments**. ![A screenshot showing the Appointments start page of the Square Dashboard in the production environment.](//images.ctfassets.net/1nw4q0oohfju/iX6mfSLbkgzvxfbbAo6cF/9136fee184fe1e4dce217e3754581bbf/appointments-start-page-seller-dashboard.png) 3. On the **Square Appointments** page, choose the **Get started** button to start initializing the Appointments service for the account. 4. On the **Just a few more details** page, enter or modify the business details, including the name, phone numbers, and time zone. Then, choose the **Get Started** button again. 5. Choose **Send Download Link** to receive a download link on the specified mobile device to install the Square Appointments application or choose **Skip** to forgo the option. 6. On the **Appointments** page, choose **Select New Subscription** to subscribe to a paid Appointments plan, if you want this account to support creating, updating, and canceling seller-level bookings. Then, choose **Add payment method** to provide a credit card on file or choose **Update payment method** to update the credit card on file. {% aside type="info" %} You can skip this step if the account won't be enabled for any paid subscriptions. {% /aside %} 7. On the **Appointments** page, choose **Services** in the left pane. Then, choose **Create Service** to add a new bookable service or choose an existing one from the list to update the bookable service. {% aside type="info" %} As an alternative, you can call the Catalog API to create a bookable service and skip this step. {% /aside %} 8. On the **Appointments** page, choose **Staff** in the left pane. To add a staff member, choose the **Add Employee** button at top-right corner to create a new employee and make the new employee a staff member of the business. The new employee is assigned a supported role and granted appropriate permissions including services the staff member can provide, whether customers can choose the staff member during an online booking, the staff member's hours, or management of the staff member's compensation. Although you can use the Team API to create a team member, you must follow this step to add a staff member. 9. Optionally, choose **Customer directory** in the Square Dashboard to add one or more users of your application to the directory. Such application users are clients to receive booked services from the seller. {% aside type="info" %} As an alternative, you can call the Customers API to add users as booking clients and skip this step. {% /aside %} The Square Production account is now onboarded to Appointments and to the Bookings API. To verify this, follow the instructions in [Retrieve a business booking profile](bookings-api/use-the-api#retrieve-a-business-booking-profile) to retrieve the business booking profile of the seller. Before a seller signs up for your application to let their customers make appointments, you can ask them to follow these or similar instructions to onboard their Square accounts to Square Appointments. ## Onboard a Sandbox account As an application developer, you might want to use your Square Sandbox developer account to test your applications using the Bookings API before deploying them for your customers to use. To do so, you must onboard the Sandbox account to Square Appointments and the Bookings API. Onboarding a Sandbox account is similar to onboarding a Production account. It is a one-time initialization performed in the Square Dashboard with your Sandbox account credentials. However, you must go through the Square Developer Console to sign in to the Square Dashboard with the Sandbox account credentials. 1. Sign in to the [Developer Console](https://developer.squareup.com/apps). Create an application if this is your first time. 2. Under **Applications** in the **Sandbox Test Accounts** section, choose **Open** to the right of **Default Test Account** to open the Square Dashboard with the default test account credentials. ![A screenshot showing the Applications page in the Square Developer Console to onboard a Sandbox account.](//images.ctfassets.net/1nw4q0oohfju/2oHCXxmQciUNmsC8Y1l0yc/3f08b28e899df8320e4945f27a9edc9d/applications-page-onboard-sandbox-account.png) {% aside type="info" %} The default test account is created for you as a Sandbox test account when you sign up for your developer account. You cannot delete the default test account. However, you can create a custom Sandbox test account, follow the same steps to onboard the custom test account to Square Appointments, and use the custom test account to test your bookings applications. {% /aside %} 3. Follow steps 2–9 in [Onboard a Production account](#onboard-a-production-account) to finish onboarding the Sandbox account. To verify whether your Sandbox account is onboarded to use the Bookings API, follow the instructions in [Retrieve a business booking profile](bookings-api/use-the-api#retrieve-a-business-booking-profile) with your Sandbox account credentials to verify the Sandbox account booking profile. ### Test integration with Appointments Plus or Premium in the Sandbox To test Bookings API integration with Appointments Plus or Appointments Premium in the Square Sandbox, you can subscribe to Appointments Plus or Appointments Premium in the Sandbox Square Dashboard. The following procedure describes how to subscribe your default test account to Appointments Plus or Appointments Premium using a test credit card that is never charged. You must repeat these steps for each test account that you want to subscribe to Appointments Plus or Appointments Premium. 1. Open the [Developer Console](https://developer.squareup.com/apps). 2. In the **Sandbox Test Accounts** section, choose **Open** next to **Default Test Account**. This opens the Sandbox Square Dashboard associated with the default test account. 3. In the Sandbox Square Dashboard, navigate to [Square Appointments](https://squareupsandbox.com/appointments) to onboard the test account to Square Appointments if you haven't already done so. 4. Follow the on-screen instructions to **Manage subscription**, and then choose the **Square Appointments Plus** or **Square Appointments Premium** subscription plan. 5. If you haven't already done so, provide test credit card information to ensure that the subscription in the Sandbox doesn't expire after 30 days: 1. On the **Subscription Pricing** page, choose **Add payment method** next to **Payment Method**. 1. Enter the following credit card information, and then choose **Confirm**: * For the name on the card, enter any name. * For the card number, enter 4111 1111 1111 1111. * For the CVV, enter 111. * For the expiration date, enter 12/40. * For the postal code, enter 22222 or a similar value for your locale. {% aside type="info" %} In the production environment, each seller using your application must also have an active or trial Appointments Plus or Appointments Premium subscription to create, update, or cancel seller-level bookings. {% /aside %} For more information about the Sandbox environment, see [Square Sandbox](devtools/sandbox/overview). --- # Move OAuth from the Sandbox to Production > Source: https://developer.squareup.com/docs/oauth-api/movetoprod > Status: PUBLIC > Languages: All > Platforms: All A list of tasks for a developer to take to move an application from using the Square Sandbox to a production environment. **Applies to:** [OAuth API](oauth-api/overview) {% subheading %}Learn how to move an application from the Square Sandbox to a production environment.{% /subheading %} {% toc hide=true /%} ## Overview When your application that uses OAuth 2.0 to perform operations on behalf of Square seller accounts is ready for production, there are several tasks you must complete. These tasks are designed to strengthen the safety of the OAuth flow and give the seller a better sign-in experience. In addition, review the Square [OAuth Best Practices](oauth-api/best-practices) before moving an application to production. If your application relies on a public client, regardless of whether it's a mobile application, single-page web application, or relies on a web browser, you should use the PKCE flow. Public clients can be decompiled and credentials such as the `client_secret` can be easily obtained. The PKCE flow process doesn't rely on the `client_secret` being stored on the client. For more information, see [PKCE flow](oauth-api/overview#pkce-flow). {% aside type="important" %} Partner developers must not request nor use personal access tokens from the Square sellers who use their applications. Personal access tokens never expire and they have all permissions associated with the account owner. OAuth access tokens should be used instead to access seller resources. {% /aside %} ## Square authorization page parameters A seller must have an account within the partner platform and have authenticated with that platform before being allowed to start the Square OAuth flow and authorize access to their Square account. The following requirements ensure a secure authorization experience: * Create a redirect URL for production that uses HTTPS. This should point to your OAuth application that receives the authorization response and that manages and stores OAuth tokens. * Create a URL that you provide to the seller to access the Square authorization page, which grants you a set of permissions to use on the seller's behalf. * Pass all needed parameters to the Square authorization page: * `client_id` - The `client_id` field must be set to the production application ID. * `scope` - The `scope` parameter is the permissions that your application is requesting for the seller's account. Only request permissions for APIs that your application calls. These are known as in-scope permissions. If the correct permissions aren't requested, API requests can fail with an `INSUFFICIENT_SCOPES` error. Make sure your application has the needed permissions before moving to production. An out-of-scope permission request is where the application is requesting permission for an API that isn't used. The returned access code gives too broad an access to a Square seller account, which can be a security risk. An example of an out-of-scope permission request is an application that lets a seller accept payments with the Square Web Payments SDK but doesn't create, update, or remove customers. The application is requesting `CUSTOMERS_WRITE` permission, which is an out-of-scope request. * `session` - The `session` parameter directs the Square authorization page to use the logged-in seller Square session, thereby removing the requirement to sign in to a Square account. Many sellers have multiple Square accounts and should be forced to sign in to one of them to ensure that they're authorizing your application for the correct Square account. Your application should set the `session` parameter to `false` to force the seller to sign in to one of their Square accounts. * `state` - The `state` parameter is a string that's passed to the Square authorization page and returned as a `state` parameter to the callback URL defined for your application. You can set the `state` value to a CSRF token that's a unique, random, and unpredictable value generated by your application server. When the `state` parameter is returned to your application's callback, your application should verify that the `state` value matches your generated CSRF token. * Provide a user-friendly authorization failure page. If an OAuth flow is denied by the seller or another error occurs, your application should show a user-friendly page to tell them that authorization failed. ## Secure OAuth token handling Be sure that your production application implements the following requirements for securely handling OAuth tokens: * **Don't store OAuth tokens on a public client** - Access tokens must not be sent to or persisted on a native mobile client. Instead, store them securely on your application server. All methods involving OAuth should be managed by a service layer hosted by an application server. * **Require access token renewal** - Square OAuth tokens expire every 30 days. To ensure that tokens remain valid, Square strongly recommends that all applications refresh their access tokens asynchronously every 7 days or less. * **Check for stale access tokens** - Your production application should implement logic that checks the age of each token when retrieved from your database before being used in a Square API call. If a token is older than 8 days, your application should notify you that there's a problem with your renewal login. Avoid silent token failures, which can result in your application breaking. This kind of break has caused partner outages in the past. * **Use access token encryption** - Your production application should use a strong encryption standard such as AES. Your production encryption key shouldn't be accessible to database administrators, business analysts, developers, or others who don't need it. The access tokens that this key protects can be used to perform any transaction on behalf of the seller and thus should be guarded like passwords. * **Show access token status** - An access token status feature in your application must always show the current state of a token (valid, expired, or revoked). Sellers must always be able to revoke an access token by using the `RevokeToken` endpoint. * **Verify that tokens are valid** - Square provides an `oauth.authorization.revoked` webhook event to alert partners if a token has been revoked in real time. An alternative is to periodically poll the `ListLocations` endpoint and check for valid and invalid responses. An invalid response indicates that a token is no longer valid. ## Error handling In production, OAuth errors must be handled appropriately and errors that impact the seller must be clearly communicated to the seller. These include: * Error codes such as `UNAUTHORIZED`, `ACCESS_TOKEN_EXPIRED`, and `ACCESS_TOKEN_REVOKED` must be handled. Sellers should be presented with a user-friendly message instead of API error responses. * If your application doesn't have the required permissions, API requests can fail with an `INSUFFICIENT_SCOPES` error. Make sure your application has the needed permissions before moving to production. * A common error that occurs when moving an application from the Square Sandbox to a production environment is forgetting to change the base URL. The base URL for calling Sandbox endpoints is https://connect.squareupsandbox.com. When you move your application to production, you need production credentials and you need to use https://connect.squareup.com as the base URL. ## See also * [Create the Redirect URL and Square Authorization Page URL](oauth-api/create-urls-for-square-authorization) * [Receive Seller Authorization and Manage Seller OAuth Tokens](oauth-api/receive-and-manage-tokens) * [OAuth Walkthrough: Test Authorization with a Web Server](oauth-api/walkthrough) * [OAuth Best Practices](oauth-api/best-practices) * [OAuth Permissions Reference](oauth-api/square-permissions) * [Video: OAuth Best Practices](https://www.youtube.com/watch?v=3gLqCJC6kLI) * [Blog post: New Authorization Tooling – Improved Usability and Security](https://developer.squareup.com/blog/new-authorization-tooling-improved-usability-and-security/) --- # OAuth Permissions Reference > Source: https://developer.squareup.com/docs/oauth-api/square-permissions > Status: PUBLIC > Languages: All > Platforms: All Reference for all OAuth permissions (scopes) needed to call Square API endpoints with an OAuth access token. **Applies to:** [OAuth API](oauth-api/overview) {% subheading %}View all OAuth permissions (scopes) needed to call Square API endpoints with an OAuth access token.{% /subheading %} {% toc hide=true /%} ## Overview To get a scoped OAuth access token used in calling a Square API endpoint, you need to specify the permissions that your application needs to access Square account resources. The permissions you specify are shown to the user in an authorization dialog that lets the user grant access to your application. The following sections list and describe all the Square API services, their endpoints, and the OAuth permissions needed to access them. As a [best practice](oauth-api/best-practices#requested-permissions-scope), only request the permissions that your application requires. ## Bank Accounts The [Bank Accounts API](bank-accounts-api) lets developers retrieve information about the bank accounts linked to a Square account. |API{% width="260px" %}| Permission | |:----------------------------|:-------------------------| |[CreateBankAccount](https://developer.squareup.com/reference/square/bank-accounts-api/create-bank-account) |`BANK_ACCOUNTS_WRITE` | |[DisableBankAccount](https://developer.squareup.com/reference/square/bank-accounts-api/disable-bank-account) |`BANK_ACCOUNTS_READ` | |[GetBankAccount](https://developer.squareup.com/reference/square/bank-accounts-api/get-bank-account) |`BANK_ACCOUNTS_READ` | |[ListBankAccounts](https://developer.squareup.com/reference/square/bank-accounts-api/list-bank-accounts) |`BANK_ACCOUNTS_READ` | |[GetBankAccountByV1Id](https://developer.squareup.com/reference/square/bank-accounts-api/get-bank-account-by-v1-id) |`BANK_ACCOUNTS_READ` | ## Bookings The [Bookings API](bookings-api/get-ready-to-use-the-api#requirements-and-limitations) creates and maintains service appointments. |API{% width="260px" %} | Permission | |:----------------------------------|:-------------------------| |[CreateBooking](https://developer.squareup.com/reference/square/bookings-api/create-booking) |`APPOINTMENTS_WRITE` (buyer-level). `APPOINTMENTS_WRITE` and `APPOINTMENTS_ALL_WRITE` (seller-level). | |[SearchAvailability](https://developer.squareup.com/reference/square/bookings-api/search-availability) |`APPOINTMENTS_READ` (buyer-level). `APPOINTMENTS_READ` and `APPOINTMENTS_ALL_READ` (seller-level). | |[RetrieveBusinessBookingProfile](https://developer.squareup.com/reference/square/bookings-api/retrieve-business-booking-profile) |`APPOINTMENTS_BUSINESS_SETTINGS_READ` | |[ListTeamMemberBookingProfiles](https://developer.squareup.com/reference/square/bookings-api/list-team-member-booking-profiles) |`APPOINTMENTS_BUSINESS_SETTINGS_READ` | |[RetrieveTeamMemberBookingProfile](https://developer.squareup.com/reference/square/bookings-api/retrieve-team-member-booking-profile) |`APPOINTMENTS_BUSINESS_SETTINGS_READ` | |[ListBookings](https://developer.squareup.com/reference/square/bookings-api/list-bookings) |`APPOINTMENTS_READ` (buyer-level). `APPOINTMENTS_READ` and `APPOINTMENTS_ALL_READ` (seller-level). | |[RetrieveBooking](https://developer.squareup.com/reference/square/bookings-api/retrieve-booking) |`APPOINTMENTS_READ` (buyer-level). `APPOINTMENTS_READ` and `APPOINTMENTS_ALL_READ` (seller-level). | |[UpdateBooking](https://developer.squareup.com/reference/square/bookings-api/update-booking) |`APPOINTMENTS_WRITE`(buyer-level). `APPOINTMENTS_WRITE` and `APPOINTMENTS_ALL_WRITE` (seller-level). | |[CancelBooking](https://developer.squareup.com/reference/square/bookings-api/cancel-booking) |`APPOINTMENTS_WRITE` (buyer-level). `APPOINTMENTS_WRITE` and `APPOINTMENTS_ALL_WRITE` (seller-level). | ## Booking Custom Attributes The [Booking Custom Attributes API](booking-custom-attributes-api/overview) lets you create and manage custom attributes for bookings. |API{% width="260px" %}| Permission | |:------|:------| |[CreateBookingCustomAttributeDefinition](https://developer.squareup.com/reference/square/booking-custom-attributes-api/create-booking-custom-attribute-definition)|Buyer-level: `APPOINTMENTS_WRITE`{% line-break /%} Seller-level: `APPOINTMENTS_WRITE` and `APPOINTMENTS_ALL_WRITE`| |[UpdateBookingCustomAttributeDefinition](https://developer.squareup.com/reference/square/booking-custom-attributes-api/update-booking-custom-attribute-definition)|Buyer-level: `APPOINTMENTS_WRITE`{% line-break /%} Seller-level: `APPOINTMENTS_WRITE` and `APPOINTMENTS_ALL_WRITE`| |[ListBookingCustomAttributeDefinitions](https://developer.squareup.com/reference/square/booking-custom-attributes-api/list-booking-custom-attribute-definitions)|Buyer-level: `APPOINTMENTS_READ`{% line-break /%} Seller-level: `APPOINTMENTS_READ` and `APPOINTMENTS_ALL_READ`| |[RetrieveBookingCustomAttributeDefinition](https://developer.squareup.com/reference/square/booking-custom-attributes-api/retrieve-booking-custom-attribute-definition)|Buyer-level: `APPOINTMENTS_READ`{% line-break /%} Seller-level: `APPOINTMENTS_READ` and `APPOINTMENTS_ALL_READ`| |[DeleteBookingCustomAttributeDefinition](https://developer.squareup.com/reference/square/booking-custom-attributes-api/delete-booking-custom-attribute-definition)|Buyer-level: `APPOINTMENTS_WRITE`{% line-break /%} Seller-level: `APPOINTMENTS_WRITE` and `APPOINTMENTS_ALL_WRITE`| |[UpsertBookingCustomAttribute](https://developer.squareup.com/reference/square/booking-custom-attributes-api/upsert-booking-custom-attribute)|Buyer-level: `APPOINTMENTS_WRITE`{% line-break /%} Seller-level: `APPOINTMENTS_WRITE` and `APPOINTMENTS_ALL_WRITE`| |[BulkUpsertBookingCustomAttributes](https://developer.squareup.com/reference/square/booking-custom-attributes-api/bulk-upsert-booking-custom-attributes)|Buyer-level: `APPOINTMENTS_WRITE`{% line-break /%} Seller-level: `APPOINTMENTS_WRITE` and `APPOINTMENTS_ALL_WRITE`| |[ListBookingCustomAttributes](https://developer.squareup.com/reference/square/booking-custom-attributes-api/list-booking-custom-attributes)|Buyer-level: `APPOINTMENTS_READ`{% line-break /%} Seller-level: `APPOINTMENTS_READ` and `APPOINTMENTS_ALL_READ`| |[RetrieveBookingCustomAttribute](https://developer.squareup.com/reference/square/booking-custom-attributes-api/retrieve-booking-custom-attribute)|Buyer-level: `APPOINTMENTS_READ`{% line-break /%} Seller-level: `APPOINTMENTS_READ` and `APPOINTMENTS_ALL_READ`| |[DeleteBookingCustomAttribute](https://developer.squareup.com/reference/square/booking-custom-attributes-api/delete-booking-custom-attribute)|Buyer-level: `APPOINTMENTS_WRITE`{% line-break /%} Seller-level: `APPOINTMENTS_WRITE` and `APPOINTMENTS_ALL_WRITE`| ## Cards The [Cards API](cards-api) provides endpoints to access a payment card stored on file. |API{% width="260px" %} | Permissions | |:----------------------------------------------------------------------------------------------------------------|:----------------| |[ListCards](https://developer.squareup.com/reference/square/cards-api/list-cards) |`PAYMENTS_READ` | |[CreateCard](https://developer.squareup.com/reference/square/cards-api/create-card) |`PAYMENTS_WRITE` | |[RetrieveCard](https://developer.squareup.com/reference/square/cards-api/retrieve-card) |`PAYMENTS_READ` | |[DisableCard](https://developer.squareup.com/reference/square/cards-api/disable-card) |`PAYMENTS_WRITE` | ## Cash Drawer Shifts The [Cash Drawer Shifts API](cashdrawershift-api/reporting) provides details about cash drawer shifts. |API{% width="260px" %} | Permission | |:----------------------------------|:-------------------------| |[ListCashDrawerShifts](https://developer.squareup.com/reference/square/cash-drawers-api/list-cash-drawer-shifts) |`CASH_DRAWER_READ` | |[ListCashDrawerShiftEvents](https://developer.squareup.com/reference/square/cash-drawers-api/list-cash-drawer-shift-events) |`CASH_DRAWER_READ` |[RetrieveCashDrawerShift](https://developer.squareup.com/reference/square/cash-drawers-api/retrieve-cash-drawer-shift) |`CASH_DRAWER_READ` | ## Catalog The [Catalog API](catalog-api/what-it-does) syncs items to Square Point of Sale to itemize payments consistently across all channels. |API{% width="260px" %} | Permission | |:----------------------------------|:-------------------------| |[BatchDeleteCatalogObjects](https://developer.squareup.com/reference/square/catalog-api/batch-delete-catalog-objects) |`ITEMS_WRITE` | |[BatchUpsertCatalogObjects](https://developer.squareup.com/reference/square/catalog-api/batch-upsert-catalog-objects) |`ITEMS_WRITE` | |[BatchRetrieveCatalogObjects](https://developer.squareup.com/reference/square/catalog-api/batch-retrieve-catalog-objects) |`ITEMS_READ` | |[CatalogInfo](https://developer.squareup.com/reference/square/catalog-api/catalog-info) |`ITEMS_READ` | |[CreateCatalogImage](https://developer.squareup.com/reference/square/catalog-api/create-catalog-image) |`ITEMS_WRITE` | |[DeleteCatalogObject](https://developer.squareup.com/reference/square/catalog-api/delete-catalog-object) |`ITEMS_WRITE` | |[ListCatalog](https://developer.squareup.com/reference/square/catalog-api/list-catalog) |`ITEMS_READ` | |[RetrieveCatalogObject](https://developer.squareup.com/reference/square/catalog-api/retrieve-catalog-object) |`ITEMS_READ` | |[SearchCatalogItems](https://developer.squareup.com/reference/square/catalog-api/search-catalog-items) |`ITEMS_READ` | |[SearchCatalogObjects](https://developer.squareup.com/reference/square/catalog-api/search-catalog-objects) |`ITEMS_READ` | |[UpdateItemTaxes](https://developer.squareup.com/reference/square/catalog-api/update-item-taxes) |`ITEMS_WRITE` | |[UpdateItemModifierLists](https://developer.squareup.com/reference/square/catalog-api/update-item-modifier-lists) |`ITEMS_WRITE` | |[UpsertCatalogObject](https://developer.squareup.com/reference/square/catalog-api/upsert-catalog-object) |`ITEMS_WRITE` | ## Checkout The [Checkout API](checkout-api-overview) accepts itemized payments on a Square-hosted web page. No frontend experience is required. |API{% width="260px" %} | Permission | |:----------------------------|:-------------------------| |[CreatePaymentLink](https://developer.squareup.com/reference/square/checkout-api/create-payment-link) |`ORDERS_WRITE`{% line-break /%} `ORDERS_READ`{% line-break /%}`PAYMENTS_WRITE`| ## Customers The [Customers API](customers-api/what-it-does) creates and manages customer profiles and syncs customer relationship management (CRM) systems with Square. |API{% width="260px" %}| Permission | |:----------------------------|:-------------------------| |[AddGroupToCustomer](https://developer.squareup.com/reference/square/customers-api/add-group-to-customer)|`CUSTOMERS_WRITE`| |[BulkCreateCustomers](https://developer.squareup.com/reference/square/customers-api/bulk-create-customers)|`CUSTOMERS_WRITE`| |[BulkDeleteCustomers](https://developer.squareup.com/reference/square/customers-api/bulk-delete-customers)|`CUSTOMERS_WRITE`| |[BulkRetrieveCustomers](https://developer.squareup.com/reference/square/customers-api/bulk-retrieve-customers)|`CUSTOMERS_READ` | |[BulkUpdateCustomers](https://developer.squareup.com/reference/square/customers-api/bulk-update-customers)|`CUSTOMERS_WRITE`| |[CreateCustomer](https://developer.squareup.com/reference/square/customers-api/create-customer) |`CUSTOMERS_WRITE` | |[CreateCustomerCard](https://developer.squareup.com/reference/square/customers-api/create-customer-card) (deprecated) |`CUSTOMERS_WRITE` | |[DeleteCustomer](https://developer.squareup.com/reference/square/customers-api/delete-customer) |`CUSTOMERS_WRITE` | |[DeleteCustomerCard](https://developer.squareup.com/reference/square/customers-api/delete-customer-card) (deprecated) |`CUSTOMERS_WRITE` | |[ListCustomers](https://developer.squareup.com/reference/square/customers-api/list-customers) |`CUSTOMERS_READ` | |[RemoveGroupFromCustomer](https://developer.squareup.com/reference/square/customers-api/remove-group-from-customer)|`CUSTOMERS_WRITE`| |[RetrieveCustomer](https://developer.squareup.com/reference/square/customers-api/retrieve-customer) |`CUSTOMERS_READ` | |[SearchCustomers](https://developer.squareup.com/reference/square/customers-api/search-customers) |`CUSTOMERS_READ` | |[UpdateCustomer](https://developer.squareup.com/reference/square/customers-api/update-customer) |`CUSTOMERS_WRITE` | ## Customer Custom Attributes The [Customer Custom Attributes API](customer-custom-attributes-api/overview) lets you create and manage custom attributes for customer profiles. |API{% width="260px" %} | Permission | |:------|:------| |[CreateCustomerCustomAttributeDefinition](https://developer.squareup.com/reference/square/customer-custom-attributes-api/create-customer-custom-attribute-definition)|`CUSTOMERS_WRITE`| |[UpdateCustomerCustomAttributeDefinition](https://developer.squareup.com/reference/square/customer-custom-attributes-api/update-customer-custom-attribute-definition)|`CUSTOMERS_WRITE`| |[ListCustomerCustomAttributeDefinitions](https://developer.squareup.com/reference/square/customer-custom-attributes-api/list-customer-custom-attribute-definitions)|`CUSTOMERS_READ`| |[RetrieveCustomerCustomAttributeDefinition](https://developer.squareup.com/reference/square/customer-custom-attributes-api/retrieve-customer-custom-attribute-definition)|`CUSTOMERS_READ`| |[DeleteCustomerCustomAttributeDefinition](https://developer.squareup.com/reference/square/customer-custom-attributes-api/delete-customer-custom-attribute-definition)|`CUSTOMERS_WRITE`| |[UpsertCustomerCustomAttribute](https://developer.squareup.com/reference/square/customer-custom-attributes-api/upsert-customer-custom-attribute)|`CUSTOMERS_WRITE`| |[BulkUpsertCustomerCustomAttributes](https://developer.squareup.com/reference/square/customer-custom-attributes-api/bulk-upsert-customer-custom-attributes)|`CUSTOMERS_WRITE`| |[ListCustomerCustomAttributes](https://developer.squareup.com/reference/square/customer-custom-attributes-api/list-customer-custom-attributes)|`CUSTOMERS_READ`| |[RetrieveCustomerCustomAttribute](https://developer.squareup.com/reference/square/customer-custom-attributes-api/retrieve-customer-custom-attribute)|`CUSTOMERS_READ`| |[DeleteCustomerCustomAttribute](https://developer.squareup.com/reference/square/customer-custom-attributes-api/delete-customer-custom-attribute)|`CUSTOMERS_WRITE`| ## Customer Groups The [Customer Groups API](customer-groups-api/what-it-does) manages customers by groups. |API{% width="260px" %} | Permission | |:----------------------------|:-------------------------| |[CreateCustomerGroup](https://developer.squareup.com/reference/square/customer-groups-api/create-customer-group)|`CUSTOMERS_WRITE`| |[DeleteCustomerGroup](https://developer.squareup.com/reference/square/customer-groups-api/delete-customer-group)|`CUSTOMERS_WRITE`| |[ListCustomerGroups](https://developer.squareup.com/reference/square/customer-groups-api/list-customer-groups)|`CUSTOMERS_READ`| |[RetrieveCustomerGroup](https://developer.squareup.com/reference/square/customer-groups-api/retrieve-customer-group)|`CUSTOMERS_READ`| |[UpdateCustomerGroup](https://developer.squareup.com/reference/square/customer-groups-api/retrieve-customer-group)|`CUSTOMERS_WRITE`| ## Customer Segments The [Customer Segments API](customer-segments-api/what-it-does) manages customers by segments. |API{% width="260px" %} | Permission | |:----------------------------|:-------------------------| |[ListCustomerSegments](https://developer.squareup.com/reference/square/customer-segments-api/list-customer-segments)|`CUSTOMERS_READ`| |[RetrieveCustomerSegment](https://developer.squareup.com/reference/square/customer-segments-api/retrieve-customer-segment)|`CUSTOMERS_READ`| ## Devices Use the [Devices API](https://developer.squareup.com/reference/square/devices-api) to configure a Square Terminal. |API{% width="260px" %} | Permission | |:----------------------------|:-------------------------| |[CreateDeviceCode](https://developer.squareup.com/reference/square/devices-api/create-device-code) |`DEVICE_CREDENTIAL_MANAGEMENT` | |[GetDeviceCode](https://developer.squareup.com/reference/square/devices-api/get-device-code) |`DEVICE_CREDENTIAL_MANAGEMENT` | |[ListDeviceCodes](https://developer.squareup.com/reference/square/devices-api/list-device-codes) |`DEVICE_CREDENTIAL_MANAGEMENT` | |[ListDevices](https://developer.squareup.com/reference/square/devices-api/list-devices) |`DEVICES_READ`| |[GetDevice](https://developer.squareup.com/reference/square/devices-api/get-device) |`DEVICES_READ`| ## Disputes Use the [Disputes API](disputes-api/overview) to manage disputes (chargebacks). |API{% width="260px" %} | Permission | |:----------------------------|:-------------------------| |[AcceptDispute](https://developer.squareup.com/reference/square/disputes-api/accept-dispute) |`DISPUTES_WRITE` | |[CreateDisputeEvidenceFile](https://developer.squareup.com/reference/square/disputes-api/create-dispute-evidence-file) |`DISPUTES_WRITE` | |[CreateDisputeEvidenceText](https://developer.squareup.com/reference/square/disputes-api/create-dispute-evidence-text) |`DISPUTES_WRITE` | |[ListDisputeEvidence](https://developer.squareup.com/reference/square/disputes-api/list-dispute-evidence) |`DISPUTES_READ` | |[ListDisputes](https://developer.squareup.com/reference/square/disputes-api/list-disputes) |`DISPUTES_READ` | |[DeleteDisputeEvidence](https://developer.squareup.com/reference/square/disputes-api/delete-dispute-evidence) |`DISPUTES_WRITE` | |[RetrieveDispute](https://developer.squareup.com/reference/square/disputes-api/retrieve-dispute) |`DISPUTES_READ` | |[RetrieveDisputeEvidence](https://developer.squareup.com/reference/square/disputes-api/retrieve-dispute-evidence) |`DISPUTES_READ` | |[SubmitEvidence](https://developer.squareup.com/reference/square/disputes-api/submit-evidence) |`DISPUTES_WRITE` | ## Employees Retrieves employees for a seller. The Employees API is deprecated and replaced by the [Team API](team/overview). |API{% width="260px" %} | Permission | |:----------------------------|:-------------------------| |[ListEmployees](https://developer.squareup.com/reference/square/employees-api/list-employees) (deprecated) |`EMPLOYEES_READ` | |[RetrieveEmployee](https://developer.squareup.com/reference/square/employees-api/retrieve-employee) (deprecated) |`EMPLOYEES_READ` ## Events The [Events API](events-api/overview) returns information about Square events. This is the same information included in webhook event notifications. To call Events API endpoints, provide the application's [personal access token](build-basics/access-tokens#get-a-personal-access-token) instead of an OAuth access token. Square uses OAuth on the backend to determine whether the application is authorized to access specific events. ## Gift Cards The [Gift Cards API](gift-cards/using-gift-cards-api) provides endpoints to create and manage gift cards. |API{% width="260px" %} | Permission | |:----------------------------|:-------------------------| |[ListGiftCards](https://developer.squareup.com/reference/square/gift-cards-api/list-gift-cards) |`GIFTCARDS_READ` | |[CreateGiftCard](https://developer.squareup.com/reference/square/gift-cards-api/create-gift-card) |`GIFTCARDS_WRITE` |[RetrieveGiftCard](https://developer.squareup.com/reference/square/gift-cards-api/retrieve-gift-card) |`GIFTCARDS_READ` |[RetrieveGiftCardFromGAN](https://developer.squareup.com/reference/square/gift-cards-api/retrieve-gift-card-from-gan) |`GIFTCARDS_READ` |[RetrieveGiftCardFromNonce](https://developer.squareup.com/reference/square/gift-cards-api/retrieve-gift-card-from-nonce) |`GIFTCARDS_READ` |[LinkCustomerToGiftCard](https://developer.squareup.com/reference/square/gift-cards-api/link-customer-to-gift-card) |`GIFTCARDS_WRITE` |[UnlinkCustomerFromGiftCard](https://developer.squareup.com/reference/square/gift-cards-api/unlink-customer-from-gift-card) |`GIFTCARDS_WRITE` ## Gift Card Activities The [Gift Card Activities API](gift-cards/using-gift-cards-api) provides endpoints to create gift card activities, such as activating a gift card, adding funds to a gift card, and redeeming a gift card. |API{% width="260px" %} | Permission | |:----------------------------|:-------------------------| |[ListGiftCardActivities](https://developer.squareup.com/reference/square/gift-card-activities-api/list-gift-card-activities) |`GIFTCARDS_READ` | |[CreateGiftCardActivity](https://developer.squareup.com/reference/square/gift-card-activities-api/create-gift-card-activity) |`GIFTCARDS_WRITE` ## Inventory The [Inventory API](inventory-api/what-it-does) keeps an inventory of catalog items in sync across all commerce channels. |API{% width="260px" %} | Permission | |:----------------------------|:-------------------------| |[BatchChangeInventory](https://developer.squareup.com/reference/square/inventory-api/batch-change-inventory) |`INVENTORY_WRITE` | |[BatchRetrieveInventoryCounts](https://developer.squareup.com/reference/square/inventory-api/batch-retrieve-inventory-counts) |`INVENTORY_READ` | |[BatchRetrieveInventoryChanges](https://developer.squareup.com/reference/square/inventory-api/batch-retrieve-inventory-changes) |`INVENTORY_READ` | |[RetrieveInventoryAdjustment](https://developer.squareup.com/reference/square/inventory-api/retrieve-inventory-adjustment) |`INVENTORY_READ` | |[RetrieveInventoryChanges](https://developer.squareup.com/reference/square/inventory-api/retrieve-inventory-changes) |`INVENTORY_READ` | |[RetrieveInventoryCount](https://developer.squareup.com/reference/square/inventory-api/retrieve-inventory-count) |`INVENTORY_READ` | |[RetrieveInventoryPhysicalCount](https://developer.squareup.com/reference/square/inventory-api/retrieve-inventory-physical-count) |`INVENTORY_READ` | ## Invoices Use the [Invoices API](invoices-api/overview) to manage invoices. |API{% width="260px" %} | Permissions | |:----------------------------|:-------------------------| |[CreateInvoice](https://developer.squareup.com/reference/square/invoices-api/create-invoice)|`ORDERS_WRITE`{% line-break /%}`INVOICES_WRITE`| |[PublishInvoice](https://developer.squareup.com/reference/square/invoices-api/publish-invoice)|`ORDERS_WRITE`{% line-break /%}`INVOICES_WRITE`{% line-break /%}`CUSTOMERS_READ` and `PAYMENTS_WRITE` (for Square to charge cards on file)| |[GetInvoice](https://developer.squareup.com/reference/square/invoices-api/get-invoice)|`INVOICES_READ`| |[ListInvoices](https://developer.squareup.com/reference/square/invoices-api/list-invoices)|`INVOICES_READ`| |[SearchInvoices](https://developer.squareup.com/reference/square/invoices-api/search-invoices)|`INVOICES_READ`| |[CreateInvoiceAttachment](https://developer.squareup.com/reference/square/invoices-api/create-invoice-attachment)|`ORDERS_WRITE`{% line-break /%}`INVOICES_WRITE`| |[DeleteInvoiceAttachment](https://developer.squareup.com/reference/square/invoices-api/delete-invoice-attachment)|`ORDERS_WRITE`{% line-break /%}`INVOICES_WRITE`| |[UpdateInvoice](https://developer.squareup.com/reference/square/invoices-api/update-invoice)|`ORDERS_WRITE`{% line-break /%}`INVOICES_WRITE`| |[DeleteInvoice](https://developer.squareup.com/reference/square/invoices-api/delete-invoice)|`ORDERS_WRITE`{% line-break /%}`INVOICES_WRITE`| |[CancelInvoice](https://developer.squareup.com/reference/square/invoices-api/cancel-invoice)|`ORDERS_WRITE`{% line-break /%}`INVOICES_WRITE`| ## Labor The [Labor API](labor-api/what-it-does) manages scheduled shifts, timecards (shifts), breaks, and wages for team members. {% table %} * API{% width="260px" %} * Permission --- * **Break Types** * --- * [CreateBreakType](https://developer.squareup.com/reference/square/labor-api/create-break-type) * `TIMECARDS_SETTINGS_WRITE` --- * [DeleteBreakType](https://developer.squareup.com/reference/square/labor-api/delete-break-type) * `TIMECARDS_SETTINGS_WRITE` --- * [GetBreakType](https://developer.squareup.com/reference/square/labor-api/get-break-type) * `TIMECARDS_SETTINGS_READ` --- * [ListBreakTypes](https://developer.squareup.com/reference/square/labor-api/list-break-types) * `TIMECARDS_SETTINGS_READ` --- * [UpdateBreakType](https://developer.squareup.com/reference/square/labor-api/update-break-type) * `TIMECARDS_SETTINGS_READ`{% line-break /%}`TIMECARDS_SETTINGS_WRITE` --- * **Scheduled Shifts** * --- * [BulkPublishScheduledShifts](https://developer.squareup.com/reference/square/labor-api/bulk-publish-scheduled-shifts) * `TIMECARDS_WRITE` --- * [CreateScheduledShift](https://developer.squareup.com/reference/square/labor-api/create-scheduled-shift) * `TIMECARDS_WRITE` --- * [PublishScheduledShift](https://developer.squareup.com/reference/square/labor-api/publish-scheduled-shift) * `TIMECARDS_WRITE` --- * [RetrieveScheduledShift](https://developer.squareup.com/reference/square/labor-api/retrieve-scheduled-shift) * `TIMECARDS_READ` --- * [SearchScheduledShifts](https://developer.squareup.com/reference/square/labor-api/search-scheduled-shifts) * `TIMECARDS_READ` --- * [UpdateScheduledShift](https://developer.squareup.com/reference/square/labor-api/update-scheduled-shift) * `TIMECARDS_WRITE` --- * **Shifts** * --- * [CreateShift](https://developer.squareup.com/reference/square/labor-api/create-shift) (deprecated) * `TIMECARDS_WRITE` --- * [DeleteShift](https://developer.squareup.com/reference/square/labor-api/delete-shift) (deprecated) * `TIMECARDS_WRITE` --- * [GetShift](https://developer.squareup.com/reference/square/labor-api/get-shift) (deprecated) * `TIMECARDS_READ` --- * [SearchShifts](https://developer.squareup.com/reference/square/labor-api/search-shifts) (deprecated) * `TIMECARDS_READ` --- * [UpdateShift](https://developer.squareup.com/reference/square/labor-api/update-shift) (deprecated) * `TIMECARDS_WRITE`{% line-break /%}`TIMECARDS_READ` --- * **Timecards** * --- * [CreateTimecard](https://developer.squareup.com/reference/square/labor-api/create-timecard) * `TIMECARDS_WRITE` --- * [DeleteTimecard](https://developer.squareup.com/reference/square/labor-api/delete-timecard) * `TIMECARDS_WRITE` --- * [RetrieveTimecard](https://developer.squareup.com/reference/square/labor-api/retrieve-timecard) * `TIMECARDS_READ` --- * [SearchTimecards](https://developer.squareup.com/reference/square/labor-api/search-timecards) * `TIMECARDS_READ` --- * [UpdateTimecard](https://developer.squareup.com/reference/square/labor-api/update-timecard) * `TIMECARDS_SETTINGS_READ`{% line-break /%}`TIMECARDS_SETTINGS_WRITE` --- * **Team Member Wages** * --- * [GetTeamMemberWage](https://developer.squareup.com/reference/square/labor-api/get-team-member-wage) * `EMPLOYEES_READ` --- * [ListTeamMemberWages](https://developer.squareup.com/reference/square/labor-api/list-team-member-wages) * `EMPLOYEES_READ` --- * **Workweek Configs** * --- * [ListWorkweekConfigs](https://developer.squareup.com/reference/square/labor-api/list-workweek-configs) * `TIMECARDS_SETTINGS_READ` --- * [UpdateWorkweekConfig](https://developer.squareup.com/reference/square/labor-api/update-workweek-config) * `TIMECARDS_SETTINGS_READ`{% line-break /%}`TIMECARDS_SETTINGS_WRITE` {% /table %} ## Locations The [Locations API](locations-api) gets a list of a seller's locations. |API{% width="260px" %} | Permission | |:----------------------------|:-------------------------| |[CreateLocation](https://developer.squareup.com/reference/square/locations-api/create-location) |`MERCHANT_PROFILE_WRITE` | |[ListLocations](https://developer.squareup.com/reference/square/locations-api/list-locations) |`MERCHANT_PROFILE_READ` | |[RetrieveLocation](https://developer.squareup.com/reference/square/locations-api/retrieve-location) |`MERCHANT_PROFILE_READ` | |[UpdateLocation](https://developer.squareup.com/reference/square/locations-api/update-location) |`MERCHANT_PROFILE_WRITE` | ## Location Custom Attributes The [Location Custom Attributes API](location-custom-attributes-api/overview) lets you create and manage custom attributes for locations. |API{% width="260px" %} | Permission | |:------|:------| |[CreateLocationCustomAttributeDefinition](https://developer.squareup.com/reference/square/location-custom-attributes-api/create-location-custom-attribute-definition)|`MERCHANT_PROFILE_WRITE`| |[UpdateLocationCustomAttributeDefinition](https://developer.squareup.com/reference/square/location-custom-attributes-api/update-location-custom-attribute-definition)|`MERCHANT_PROFILE_WRITE`| |[ListLocationCustomAttributeDefinitions](https://developer.squareup.com/reference/square/location-custom-attributes-api/list-location-custom-attribute-definitions)|`MERCHANT_PROFILE_READ`| |[RetrieveLocationCustomAttributeDefinition](https://developer.squareup.com/reference/square/location-custom-attributes-api/retrieve-location-custom-attribute-definition)|`MERCHANT_PROFILE_READ`| |[DeleteLocationCustomAttributeDefinition](https://developer.squareup.com/reference/square/location-custom-attributes-api/delete-location-custom-attribute-definition)|`MERCHANT_PROFILE_WRITE`| |[UpsertLocationCustomAttribute](https://developer.squareup.com/reference/square/location-custom-attributes-api/upsert-location-custom-attribute)|`MERCHANT_PROFILE_WRITE`| |[BulkUpsertLocationCustomAttributes](https://developer.squareup.com/reference/square/location-custom-attributes-api/bulk-upsert-location-custom-attributes)|`MERCHANT_PROFILE_WRITE`| |[ListLocationCustomAttributes](https://developer.squareup.com/reference/square/location-custom-attributes-api/list-location-custom-attributes)|`MERCHANT_PROFILE_READ`| |[RetrieveLocationCustomAttribute](https://developer.squareup.com/reference/square/location-custom-attributes-api/retrieve-location-custom-attribute)|`MERCHANT_PROFILE_READ`| |[DeleteLocationCustomAttribute](https://developer.squareup.com/reference/square/location-custom-attributes-api/delete-location-custom-attribute)|`MERCHANT_PROFILE_WRITE`| |[BulkDeleteLocationCustomAttributes](https://developer.squareup.com/reference/square/location-custom-attributes-api/bulk-delete-location-custom-attributes)|`MERCHANT_PROFILE_WRITE`| ## Loyalty The [Loyalty API](loyalty-api/overview) provides endpoints to work with loyalty programs, loyalty promotions, loyalty accounts, loyalty points, loyalty rewards, and loyalty events. {% table %} * API{% width="260px" %} * Permission --- * **Loyalty programs** * --- * [ListLoyaltyPrograms](https://developer.squareup.com/reference/square/loyalty-api/list-loyalty-programs) (deprecated) * `LOYALTY_READ` --- * [RetrieveLoyaltyProgram](https://developer.squareup.com/reference/square/loyalty-api/retrieve-loyalty-program) * `LOYALTY_READ` --- * **Loyalty promotions** * --- * [CancelLoyaltyPromotion](https://developer.squareup.com/reference/square/loyalty-api/cancel-loyalty-promotion) * `LOYALTY_WRITE` --- * [CreateLoyaltyPromotion](https://developer.squareup.com/reference/square/loyalty-api/create-loyalty-promotion) * `LOYALTY_WRITE` --- * [ListLoyaltyPromotions](https://developer.squareup.com/reference/square/loyalty-api/list-loyalty-promotions) * `LOYALTY_READ` --- * [RetrieveLoyaltyPromotion](https://developer.squareup.com/reference/square/loyalty-api/retrieve-loyalty-promotion) * `LOYALTY_READ` --- * **Loyalty accounts** * --- * [CreateLoyaltyAccount](https://developer.squareup.com/reference/square/loyalty-api/create-loyalty-account) * `LOYALTY_WRITE` --- * [RetrieveLoyaltyAccount](https://developer.squareup.com/reference/square/loyalty-api/retrieve-loyalty-account) * `LOYALTY_READ` --- * [SearchLoyaltyAccounts](https://developer.squareup.com/reference/square/loyalty-api/search-loyalty-accounts) * `LOYALTY_READ` --- * **Loyalty points** * --- * [AccumulateLoyaltyPoints](https://developer.squareup.com/reference/square/loyalty-api/accumulate-loyalty-points) * `LOYALTY_WRITE` --- * [AdjustLoyaltyPoints](https://developer.squareup.com/reference/square/loyalty-api/adjust-loyalty-points) * `LOYALTY_WRITE` --- * [CalculateLoyaltyPoints](https://developer.squareup.com/reference/square/loyalty-api/calculate-loyalty-points) * `LOYALTY_READ` --- * **Loyalty rewards** * --- * [CreateLoyaltyReward](https://developer.squareup.com/reference/square/loyalty-api/create-loyalty-reward) * `LOYALTY_WRITE` --- * [DeleteLoyaltyReward](https://developer.squareup.com/reference/square/loyalty-api/delete-loyalty-reward) * `LOYALTY_WRITE` --- * [RedeemLoyaltyReward](https://developer.squareup.com/reference/square/loyalty-api/redeem-loyalty-reward) * `LOYALTY_WRITE` --- * [RetrieveLoyaltyReward](https://developer.squareup.com/reference/square/loyalty-api/retrieve-loyalty-reward) * `LOYALTY_READ` --- * [SearchLoyaltyRewards](https://developer.squareup.com/reference/square/loyalty-api/search-loyalty-rewards) * `LOYALTY_READ` --- * **Loyalty events** * --- * [SearchLoyaltyEvents](https://developer.squareup.com/reference/square/loyalty-api/search-loyalty-events) * `LOYALTY_READ` {% /table %} ## Merchants Use the [Merchants API](merchants-api) to retrieve information about a Square merchant account. |API{% width="260px" %} | Permission | |:----------------------------|:-------------------------| |[ListMerchants](https://developer.squareup.com/reference/square/merchants-api/list-merchants) |`MERCHANT_PROFILE_READ` | |[RetrieveMerchant](https://developer.squareup.com/reference/square/merchants-api/retrieve-merchant) |`MERCHANT_PROFILE_READ` | ## Merchant Custom Attributes The [Merchant Custom Attributes API](merchant-custom-attributes-api/overview) lets you create and manage custom attributes for merchants. |API{% width="260px" %} | Permission | |:------|:------| |[CreateMerchantCustomAttributeDefinition](https://developer.squareup.com/reference/square/merchant-custom-attributes-api/create-merchant-custom-attribute-definition)|`MERCHANT_PROFILE_WRITE`| |[UpdateMerchantCustomAttributeDefinition](https://developer.squareup.com/reference/square/merchant-custom-attributes-api/update-merchant-custom-attribute-definition)|`MERCHANT_PROFILE_WRITE`| |[ListMerchantCustomAttributeDefinitions](https://developer.squareup.com/reference/square/merchant-custom-attributes-api/list-merchant-custom-attribute-definitions)|`MERCHANT_PROFILE_READ`| |[RetrieveMerchantCustomAttributeDefinition](https://developer.squareup.com/reference/square/merchant-custom-attributes-api/retrieve-merchant-custom-attribute-definition)|`MERCHANT_PROFILE_READ`| |[DeleteMerchantCustomAttributeDefinition](https://developer.squareup.com/reference/square/merchant-custom-attributes-api/delete-merchant-custom-attribute-definition)|`MERCHANT_PROFILE_WRITE`| |[UpsertMerchantCustomAttribute](https://developer.squareup.com/reference/square/merchant-custom-attributes-api/upsert-merchant-custom-attribute)|`MERCHANT_PROFILE_WRITE`| |[BulkUpsertMerchantCustomAttributes](https://developer.squareup.com/reference/square/merchant-custom-attributes-api/bulk-upsert-merchant-custom-attributes)|`MERCHANT_PROFILE_WRITE`| |[ListMerchantCustomAttributes](https://developer.squareup.com/reference/square/merchant-custom-attributes-api/list-merchant-custom-attributes)|`MERCHANT_PROFILE_READ`| |[RetrieveMerchantCustomAttribute](https://developer.squareup.com/reference/square/merchant-custom-attributes-api/retrieve-merchant-custom-attribute)|`MERCHANT_PROFILE_READ`| |[DeleteMerchantCustomAttribute](https://developer.squareup.com/reference/square/merchant-custom-attributes-api/delete-merchant-custom-attribute)|`MERCHANT_PROFILE_WRITE`| |[BulkDeleteMerchantCustomAttributes](https://developer.squareup.com/reference/square/merchant-custom-attributes-api/bulk-delete-merchant-custom-attributes)|`MERCHANT_PROFILE_WRITE`| ## Mobile Authorization The [Mobile Authorization API](mobile-authz/what-it-does) provides an endpoint for getting a mobile authorization code for use in Reader SDK applications. |API{% width="260px" %} | Permission | |:--------------------------------|:-------------------------| |[CreateMobileAuthorizationCode](https://developer.squareup.com/reference/square/mobile-authorization-api/create-mobile-authorization-code) |`PAYMENTS_WRITE_IN_PERSON`| ## Orders The [Orders API](orders-api/what-it-does) gets sales data for a Square seller, itemize payments, push orders to Point of Sale, and more. |API{% width="260px" %} | Permission | |:----------------------------|:-------------------------| |[CalculateOrder](https://developer.squareup.com/reference/square/orders-api/calculate-order)|N/A| |[CloneOrder](https://developer.squareup.com/reference/square/orders-api/clone-order)|`ORDERS_WRITE`| |[CreateOrder](https://developer.squareup.com/reference/square/orders-api/create-order) |`ORDERS_WRITE` | |[BatchRetrieveOrders](https://developer.squareup.com/reference/square/orders-api/batch-retrieve-orders) |`ORDERS_READ` | |[PayOrder](https://developer.squareup.com/reference/square/orders-api/pay-order) |`ORDERS_WRITE`{% line-break /%}`PAYMENTS_WRITE`| |[RetrieveOrder](https://developer.squareup.com/reference/square/orders-api/retrieve-order) |`ORDERS_WRITE`{% line-break /%}`ORDERS_READ`| |[SearchOrders](https://developer.squareup.com/reference/square/orders-api/search-orders) |`ORDERS_READ` | |[UpdateOrder](https://developer.squareup.com/reference/square/orders-api/update-order) |`ORDERS_WRITE` | ## Order Custom Attributes The [Order Custom Attributes API](orders-custom-attributes-api/overview) lets you create and manage custom attributes for orders. |API{% width="260px" %} | Permission | |:------|:------| |[CreateOrderCustomAttributeDefinition](https://developer.squareup.com/reference/square/order-custom-attributes-api/create-order-custom-attribute-definition)|`ORDERS_WRITE`| |[UpdateOrderCustomAttributeDefinition](https://developer.squareup.com/reference/square/order-custom-attributes-api/update-order-custom-attribute-definition)|`ORDERS_WRITE`| |[ListOrderCustomAttributeDefinitions](https://developer.squareup.com/reference/square/order-custom-attributes-api/list-order-custom-attribute-definitions)|`ORDERS_READ`| |[RetrieveOrderCustomAttributeDefinition](https://developer.squareup.com/reference/square/order-custom-attributes-api/retrieve-order-custom-attribute-definition)|`ORDERS_READ`| |[DeleteOrderCustomAttributeDefinition](https://developer.squareup.com/reference/square/order-custom-attributes-api/delete-order-custom-attribute-definition)|`ORDERS_WRITE`| |[UpsertOrderCustomAttribute](https://developer.squareup.com/reference/square/order-custom-attributes-api/upsert-order-custom-attribute)|`ORDERS_WRITE`| |[BulkUpsertOrderCustomAttributes](https://developer.squareup.com/reference/square/order-custom-attributes-api/bulk-upsert-order-custom-attributes)|`ORDERS_WRITE`| |[ListOrderCustomAttributes](https://developer.squareup.com/reference/square/order-custom-attributes-api/list-order-custom-attributes)|`ORDERS_READ`| |[RetrieveOrderCustomAttribute](https://developer.squareup.com/reference/square/order-custom-attributes-api/retrieve-order-custom-attribute)|`ORDERS_READ`| |[DeleteOrderCustomAttribute](https://developer.squareup.com/reference/square/order-custom-attributes-api/delete-order-custom-attribute)|`ORDERS_WRITE`| |[BulkDeleteOrderCustomAttributes](https://developer.squareup.com/reference/square/order-custom-attributes-api/bulk-delete-order-custom-attributes)|`ORDERS_WRITE`| ## Payments and Refunds The [Payments API](payments-api/overview) lets developers take and manage payments. The [Refunds API](refunds-api/overview) lets developers refund payments. |API{% width="260px" %} | Permission | |:----------------------------|:-------------------------| |[CancelPayment](https://developer.squareup.com/reference/square/payments-api/cancel-payment) |`PAYMENTS_WRITE` | |[CancelPaymentByIdempotencyKey](https://developer.squareup.com/reference/square/payments-api/cancel-payment-by-idempotency-key) |`PAYMENTS_WRITE` | |[CompletePayment](https://developer.squareup.com/reference/square/payments-api/complete-payment) |`PAYMENTS_WRITE` | |[CreatePayment](https://developer.squareup.com/reference/square/payments-api/create-payment) |`PAYMENTS_WRITE` {% line-break /%} `PAYMENTS_WRITE_ADDITIONAL_RECIPIENTS` | |[GetPayment](https://developer.squareup.com/reference/square/payments-api/get-payment) |`PAYMENTS_READ` | |[GetPaymentRefund](https://developer.squareup.com/reference/square/refunds-api/get-payment-refund) |`PAYMENTS_READ` | |[ListPayments](https://developer.squareup.com/reference/square/payments-api/list-payments) |`PAYMENTS_READ` | |[ListPaymentRefunds](https://developer.squareup.com/reference/square/refunds-api/list-payment-refunds) |`PAYMENTS_READ` | |[RefundPayment](https://developer.squareup.com/reference/square/refunds-api/refund-payment) |`PAYMENTS_WRITE`{% line-break /%}`PAYMENTS_WRITE_ADDITIONAL_RECIPIENTS` | ## Payouts Use the [Payouts API](payouts-api/overview) to see a list of deposits and withdrawals from a seller’s external bank account, a Square checking or savings account (available only in the United States), or a debit card (for instant transfers). |API{% width="260px" %} | Permission | |:----------------------------|:-------------------------| |[ListPayouts](https://developer.squareup.com/reference/square/payouts-api/list-payouts) |`PAYOUTS_READ` | |[GetPayout](https://developer.squareup.com/reference/square/payouts-api/get-payout) |`PAYOUTS_READ` | |[ListPayoutEntries](https://developer.squareup.com/reference/square/payouts-api/list-payout-entries) |`PAYOUTS_READ` | ## Sites Use the [Sites API](sites-api/overview) to list the Square Online sites for a seller account. |API{% width="260px" %} | Permissions | |:----------------------------|:-------------------------| |[ListSites](https://developer.squareup.com/reference/square/sites-api/list-sites)|`ONLINE_STORE_SITE_READ`| ## Snippets Use the [Snippets API](snippets-api/overview) to manage snippets on Square Online sites. |API{% width="260px" %} | Permissions | |:----------------------------|:-------------------------| |[UpsertSnippet](https://developer.squareup.com/reference/square/snippets-api/upsert-snippet)|`ONLINE_STORE_SNIPPETS_WRITE`| |[RetrieveSnippet](https://developer.squareup.com/reference/square/snippets-api/retrieve-snippet)|`ONLINE_STORE_SNIPPETS_READ`| |[DeleteSnippet](https://developer.squareup.com/reference/square/snippets-api/delete-snippet)|`ONLINE_STORE_SNIPPETS_WRITE`| ## Subscriptions Use the [Subscriptions API](subscriptions/overview) to manage subscriptions. For more information about required permissions to create and update subscriptions, see [Requirements and limitations.](subscriptions-api/overview#requirements-and-limitations) |API{% width="260px" %} |Permissions| |:----------------------------|:-------------------------| |[CreateSubscription](https://developer.squareup.com/reference/square/subscriptions-api/create-subscription)|`CUSTOMERS_READ`{% line-break /%}`PAYMENTS_WRITE`{% line-break /%}`SUBSCRIPTIONS_WRITE`{% line-break /%}`ITEMS_READ`{% line-break /%}`ORDERS_WRITE`{% line-break /%}`INVOICES_WRITE`| |[SearchSubscriptions](https://developer.squareup.com/reference/square/subscriptions-api/search-subscriptions)|`SUBSCRIPTIONS_READ`| |[RetrieveSubscription](https://developer.squareup.com/reference/square/subscriptions-api/retrieve-subscription)|`SUBSCRIPTIONS_READ`| |[UpdateSubscription](https://developer.squareup.com/reference/square/subscriptions-api/update-subscription)|`CUSTOMERS_READ`{% line-break /%}`PAYMENTS_WRITE`{% line-break /%}`SUBSCRIPTIONS_WRITE`{% line-break /%}`ITEMS_READ`{% line-break /%}`ORDERS_WRITE`{% line-break /%}`INVOICES_WRITE`| |[CancelSubscription](https://developer.squareup.com/reference/square/subscriptions-api/cancel-subscription)|`SUBSCRIPTIONS_WRITE`| |[ListSubscriptionEvents](https://developer.squareup.com/reference/square/subscriptions-api/list-subscription-events)|`SUBSCRIPTIONS_READ`| |[ResumeSubscription](https://developer.squareup.com/reference/square/subscriptions-api/resume-subscription)|`CUSTOMERS_READ`{% line-break /%}`PAYMENTS_WRITE`{% line-break /%}`SUBSCRIPTIONS_WRITE`{% line-break /%}`ITEMS_READ`{% line-break /%}`ORDERS_WRITE`{% line-break /%}`INVOICES_WRITE`| |[PauseSubscription](https://developer.squareup.com/reference/square/subscriptions-api/pause-subscription)|`CUSTOMERS_READ`{% line-break /%}`PAYMENTS_WRITE`{% line-break /%}`SUBSCRIPTIONS_WRITE`{% line-break /%}`ITEMS_READ`{% line-break /%}`ORDERS_WRITE`{% line-break /%}`INVOICES_WRITE`| |[SwapPlan](https://developer.squareup.com/reference/square/subscriptions-api/swap-plan)|`CUSTOMERS_READ`{% line-break /%}`PAYMENTS_WRITE`{% line-break /%}`SUBSCRIPTIONS_WRITE`{% line-break /%}`ITEMS_READ`{% line-break /%}`ORDERS_WRITE`{% line-break /%}`INVOICES_WRITE`| |[DeleteSubscriptionAction](https://developer.squareup.com/reference/square/subscriptions-api/delete-subscription-action)|`SUBSCRIPTIONS_WRITE`| ## Team The [Team API](team/overview) lets developers manage team members and job definitions. {% table %} * API{% width="260px" %} * Permission ----- * [BulkCreateTeamMembers](https://developer.squareup.com/reference/square/team-api/bulk-create-team-members) * `EMPLOYEES_WRITE` ----- * [BulkUpdateTeamMembers](https://developer.squareup.com/reference/square/team-api/bulk-update-team-members) * `EMPLOYEES_WRITE` ----- * [CreateTeamMember](https://developer.squareup.com/reference/square/team-api/create-team-member) * `EMPLOYEES_WRITE` ----- * [UpdateTeamMember](https://developer.squareup.com/reference/square/team-api/update-team-member) * `EMPLOYEES_WRITE` ----- * [RetrieveTeamMember](https://developer.squareup.com/reference/square/team-api/retrieve-team-member) * `EMPLOYEES_READ` ----- * [SearchTeamMembers](https://developer.squareup.com/reference/square/team-api/search-team-members) * `EMPLOYEES_READ` ----- * [UpdateWageSetting](https://developer.squareup.com/reference/square/team-api/update-wage-setting) * `EMPLOYEES_WRITE` ----- * [RetrieveWageSetting](https://developer.squareup.com/reference/square/team-api/retrieve-wage-setting) * `EMPLOYEES_READ` ----- * [CreateJob](https://developer.squareup.com/reference/square/team-api/create-job) * `EMPLOYEES_WRITE` ----- * [UpdateJob](https://developer.squareup.com/reference/square/team-api/update-job) * `EMPLOYEES_WRITE` ----- * [ListJobs](https://developer.squareup.com/reference/square/team-api/list-jobs) * `EMPLOYEES_READ` ----- * [RetrieveJob](https://developer.squareup.com/reference/square/team-api/retrieve-job) * `EMPLOYEES_READ` {% /table %} ## Terminal The [Terminal API](terminal-api/overview) lets developers request [Square Terminal](https://squareup.com/shop/hardware/us/en/products/terminal-credit-card-machine) checkouts and process Interac refunds. |API{% width="260px" %} | Permission | |:----------------------------|:-------------------------| |[CreateTerminalCheckout](https://developer.squareup.com/reference/square/terminal-api/create-terminal-checkout) |`PAYMENTS_WRITE` | |[CancelTerminalCheckout](https://developer.squareup.com/reference/square/terminal-api/cancel-terminal-checkout) |`PAYMENTS_WRITE` | |[GetTerminalCheckout](https://developer.squareup.com/reference/square/terminal-api/get-terminal-checkout) |`PAYMENTS_READ` | |[SearchTerminalCheckouts](https://developer.squareup.com/reference/square/terminal-api/search-terminal-checkouts) |`PAYMENTS_READ` | |[CreateTerminalRefund](https://developer.squareup.com/reference/square/terminal-api/create-terminal-refund) |`PAYMENTS_WRITE` | |[CancelTerminalRefund](https://developer.squareup.com/reference/square/terminal-api/cancel-terminal-refund) |`PAYMENTS_WRITE` | |[GetTerminalRefund](https://developer.squareup.com/reference/square/terminal-api/get-terminal-refund) |`PAYMENTS_READ` | |[SearchTerminalRefunds](https://developer.squareup.com/reference/square/terminal-api/search-terminal-refunds) |`PAYMENTS_READ` | |[CreateTerminalAction](https://developer.squareup.com/reference/square/terminal-api/create-terminal-action) |`PAYMENTS_WRITE` | |[CancelTerminalAction](https://developer.squareup.com/reference/square/terminal-api/cancel-terminal-action) |`PAYMENTS_WRITE` | |[GetTerminalAction](https://developer.squareup.com/reference/square/terminal-api/get-terminal-action) |`PAYMENTS_READ`{% line-break /%}`CUSTOMERS_READ` | |[SearchTerminalAction](https://developer.squareup.com/reference/square/terminal-api/search-terminal-actions) |`PAYMENTS_READ` | ## Vendors The [Vendors API](vendors-api/manage-vendors-in-apps) supports managing a seller's suppliers in an application. |API{% width="260px" %} | Permission | |:----------------------------|:-------------------------| |[BulkCreateVendors](https://developer.squareup.com/reference/square/vendors-api/bulk-create-vendors) |`VENDOR_WRITE` | |[BulkRetrieveVendors](https://developer.squareup.com/reference/square/vendors-api/bulk-retrieve-vendors) |`VENDOR_READ` | |[BulkUpdateVendors](https://developer.squareup.com/reference/square/vendors-api/bulk-update-vendors) |`VENDOR_WRITE` | |[CreateVendor](https://developer.squareup.com/reference/square/vendors-api/create-vendor) |`VENDOR_WRITE` | |[SearchVendors](https://developer.squareup.com/reference/square/vendors-api/search-vendors) |`VENDOR_READ` | |[RetrieveVendor](https://developer.squareup.com/reference/square/vendors-api/retrieve-vendor) |`VENDOR_READ` | |[UpdateVendors](https://developer.squareup.com/reference/square/vendors-api/update-vendor) |`VENDOR_WRITE` | ## Webhook Subscriptions The [Webhook Subscriptions API](webhooks/webhook-subscriptions-api) lets you programmatically manage webhook subscriptions. To call Webhook Subscriptions endpoints, provide the application's [personal access token](build-basics/access-tokens#get-a-personal-access-token) instead of an OAuth access token. Square uses OAuth on the backend to determine whether the application is authorized to access specific events. --- # Test Authorization with a Web Server > Source: https://developer.squareup.com/docs/oauth-api/walkthrough > Status: PUBLIC > Languages: All > Platforms: All Learn how to build a Square OAuth API flow to authorize your application to access a Square account. **Applies to:** [OAuth API](oauth-api/overview) | [Payments API](payments-refunds) {% subheading %}Learn how to use the OAuth code flow to authorize your application to access a Square account.{% /subheading %} {% toc hide=true /%} ## Overview Applications use OAuth access tokens to call Square APIs on behalf of Square sellers. Token acquisition includes the following high-level stages: 1. Get authorization from the seller - Provide the {% tooltip text="authorization URL" %}A URL to the Square authorization page that includes the permissions you're requesting, your application ID, and other parameters.{% /tooltip %} to the seller, which you simulate by signing in using a Sandbox test account. The authorization URL sends the seller to the Square authorize page where they can grant permissions to your application. 2. Callback and token request - Set up a {% tooltip text="redirect URL" %}The endpoint for your application or web page that processes the authorization response from Square. Your application's redirect URL is registered in the Developer Console.{% /tooltip %} for your application to receive the authorization code. Use this code to obtain OAuth access and refresh tokens. 3. Refresh and revoke OAuth tokens - Sandbox tokens behave like production tokens, allowing you to maintain access using the refresh token. Remember, an OAuth access token expires after 30 days. Square provides sample applications that demonstrate OAuth basics. This walkthrough uses the PHP sample in the [Sandbox](devtools/sandbox/overview) so you can test the OAuth flow without impacting the production environment or production accounts. After obtaining an access token, you refresh and then revoke the access token using API Explorer. {% aside type="important" %} In-production applications are required to [securely store and manage OAuth tokens](oauth-api/best-practices#manage-use-and-store-tokens-securely), which is outside the scope of the sample application. {% /aside %} ## Requirements and limitations * You have a [Square account and an application](get-started/create-account-and-application). * You created a Sandbox seller account to simulate the OAuth flow. This test account is different from your Default Test Account and must be configured to manually authorize your applications. {% accordion expanded=false %} {% slot "heading" %} #### More details {% /slot %} To create a Sandbox seller account for this walkthrough: 1. Open the [Developer Console](${APP_DASHBOARD). 2. In the left pane, choose **Sandbox test accounts**. 3. Choose **New sandbox test account**. 4. In the **Account Name** box, enter **Seller Test Account**. 5. In the **Country** box, choose any country. 6. Clear the **Automatically create authorizations for all my current apps** checkbox. 7. Choose **Create**. {% /accordion %} * You downloaded or cloned the [Square OAuth Examples](https://github.com/Square-Developers/oauth-examples) repository. This walkthrough uses the Square OAuth Flow Example (PHP) sample application, which is a PHP web server project. Set up instructions are provided in the following sections. {% accordion expanded=false %} {% slot "heading" %} #### More details {% /slot %} To download or clone the repository, do one of the following: * Download the repository as a [ZIP file](https://github.com/Square-Developers/oauth-examples/archive/main.zip) and unzip the contents to a local directory. * Clone `https://github.com/Square-Developers/oauth-examples.git` to a local directory. All of the OAuth sample applications in the repository have the same high-level workflow and concepts, even though the code and implementation differs by language. {% /accordion %} * This walkthrough configures the sample application to use the Sandbox environment, which doesn't work with production application credentials or production Square accounts. To test the sample application in production, configure the `.env` file to use the `production` environment, provide your production application ID and secret, and test with a production seller account. See the next section for more information about testing in production. ## OAuth code flow in production To implement the OAuth code flow in production, you need to use your production redirect URL and authentication URL, your production application ID and secret, and test with a production seller account. 1. Register the redirect URL for your application in the Developer Console for the production environment. This public endpoint is where your application receives the authorization code from the authorization response after the seller authorizes your application. 2. Build the authorization URL to sends the seller to Square authorization page where they can approve or deny your authorization request. This URL uses the production base URL (`https://connect.squareup.com/oauth2/authorize`) of the `Authorize` endpoint and includes your production application ID and the required [permissions](oauth-api/square-permissions) you're requesting from sellers. 3. Get the access token and refresh token using the `ObtainToken` endpoint, the authorization code from the authorization response, and your production application ID and secret. An OAuth access token obtained using the code flow expires after 30 days, so you'll need to call `ObtainToken` later to get a new access token before it expires. For more information, see [Create the Redirect URL and Square Authorization Page URL](oauth-api/create-urls-for-square-authorization), [Receive Seller Authorization and Manage Seller OAuth Tokens](oauth-api/receive-and-manage-tokens), and [Refresh, Revoke, and Limit the Scope of OAuth Tokens](oauth-api/refresh-revoke-limit-scope). Some values used for OAuth differ between the production and Sandbox environments: {% table %} * {% width="100px" %} * Production {% width="300px" %} * Sandbox {% width="300px" %} ----- * Protocol and domain * HTTPs is required; localhost isn't supported Example: https://my-server:3000/callback * HTTP and localhost supported Example: http://localhost:3000/callback ----- * Authorize endpoint base URL * https://connect.squareup.com/oauth2/authorize * https://connect.squareup**sandbox**.com/oauth2/authorize ----- * `session` parameter * `session=false` is required Example: https://connect.squareup.com/v2/authorize?client_id={YOUR_APP_ID}&scope={PERMISSIONS_LIST}&**session=false**&state={RANDOM_STRING} * Only `session=true` (default) is supported ----- * Application ID (also called client ID) * Prefixed with "sq0idp" Example: sq0idb-LB1Rr4Iob0hGXvAwlv7HIP * Prefixed with "sandbox-sq0idp" Example: sandbox-sq0idb-ioiyW39PwreFzgXoGyLtYq ----- * Application secret (also called client secret) * Prefixed with "sq0csp" Example: sq0csp-iiWQf_JFiv8Z5t__7T6y2CBALOEtEVE9k_cLotSY0F4 * Prefixed with "sandbox-sq0csp" Example: sandbox-sq0csb-desU-1-gr4wkeC2P2JP1Bxi5WrOgS4m6elVPG5ZffVL {% /table %} ## 1. Set the redirect URL and get your application credentials 1. Sign in to the [Developer Console](https://developer.squareup.com/apps) and open an application. 2. At the top of the page, set the environment toggle to **Sandbox**. 3. In the left pane, choose **OAuth**. 4. Register your {% tooltip text="redirect URL" %}The endpoint for your application or web page that processes the authorization response from Square. Your application's redirect URL is registered in the Developer Console.{% /tooltip %}: 1. In the **Redirect URL** box, choose **Update**. 2. Enter **http://localhost:8000/callback.php** (the callback endpoint for this sample application), and then choose **Confirm**. {% aside type="important" %} Using HTTP and localhost is supported for testing in Sandbox. For in-production applications, you must provide the HTTPS URL to your actual web server. {% /aside %} 5. Copy your application ID and secret: 1. In the **Application ID** box, copy the application ID. 2. In the **Application Secret** box, choose **Show**, and then copy the application secret. ## 2. Install the PHP project template For this walkthrough, you set up a simple web server that responds to a seller's authorization and gets an OAuth access token and refresh token. 2. Install Composer and the sample dependencies to the local directory: 1. In the local directory, open a command line and change to the `/php` subdirectory. 2. Install [Composer](https://getcomposer.org/download/). 3. Run the following command line to install the Square PHP SDK and other project dependencies: ``` composer install ``` 3. Note the following key sample files: * request_token.php - A web page that displays an **Authorize** button to a seller. When the seller clicks the button, they're directed to the Square-hosted authorization page (using the {% tooltip text="authorization URL" %}A URL to the Square authorization page that includes the permissions you're requesting, your application ID, and other parameters.{% /tooltip %}) where they can authorize your application. * callback.php - The redirect URL target that receives the authorization response and gets the OAuth tokens. After a seller authorizes your application, Square sends the authorization code to this endpoint, which then sends the application ID, application secret, and authorization code to the [ObtainToken](https://developer.squareup.com/reference/square/o-auth-api/obtain-token) endpoint to get the OAuth access token and refresh token. * messages.php - Contains helper functions to access tokens and display error messages. {% aside type="info" %} On a Mac, file names starting with "." are hidden by default. To view hidden files in Terminal, use the `ls -a` command. To view hidden files in Finder, hold down Cmd + Shift + .(period). {% /aside %} 4. Configure the sample to use the Sandbox environment with your Sandbox application credentials: 1. Make a copy of the `.env.example` file and rename it to `.env`. 2. In the `.env` file, replace the placeholder values: * Replace `your-environment` with `sandbox`. * Replace `your-application-id` with your Sandbox application ID. * Replace `your-application-secret` with your Sandbox application secret. 5. Run the following command to start the server: ``` php -S localhost:8000 ``` ## 3. Set up a seller test account and simulate the seller authorization Your Square developer account comes with a default test account in the Sandbox. To simulate third-party application development, you need to create a second Sandbox account to act as a seller account. In the Sandbox, the seller must be signed in to see the Square authorization page. Sign in to a seller test account by opening the Square Dashboard. In production, you can also control whether you force the seller to sign in explicitly by setting the `session` parameter to `false` (recommended). Create a Sandbox account as a seller test account: 1. Open the [Developer Console](https://developer.squareup.com/apps). 2. In the left pane, choose **Sandbox test accounts**. 3. Choose **New sandbox test account**. 4. In the **Account Name** box, enter **Seller Test Account**. 5. In the **Country** box, choose any country. 6. Clear the **Automatically create authorizations for all my current apps** checkbox. 7. Choose **Create**. The Developer Console should look like the following: ![A screenshot showing what the Developer Console should look like after creating a new Sandbox test account.](//images.ctfassets.net/1nw4q0oohfju/2xGlv5gKEIYWHAMneP4own/df3323b8a55d7a8263dd53d2cdb7ab9a/developer-dashboard-sandbox-test-account.png) 7. Choose **Open in Square Dashboard** for the new seller account. This opens the Square Dashboard for the account. Leave this page open in your browser. 8. Open a new browser window and enter `http://localhost:8000/request_token.php`. You should see the following: ![A graphic showing the Authorize button.](https://images.ctfassets.net/1nw4q0oohfju/7CIY3R0lI0pOkqIuM2wa2T/736c35e31f0c7ca5d143309dac779b54/authorize-button.png) {% aside type="important" %} When testing in the Sandbox, you need to have a Square Dashboard open so the request_token.php code can send the request to it. You're simulating what the seller does in a production environment when they receive the authorization request and approve it. {% /aside %} 9. Choose the **Authorize** button. 10. The page shows the authorization request for the new account. Choose **Allow**. 11. The page shows that the authorization succeeded. The callback.php code got the authorization code from the seller's authorization, submitted the OAuth API `ObtainToken` call, and received the access token and refresh token. The authorization returns the following parameters: * `state` is the CSRF token your application passed in the `state` parameter for the Square authorization page. Use this value to verify that this is a valid request. * `response_type` is `code`. This indicates that an authorization code was returned. * `code` is the authorization code. Use this value when you call `ObtainToken` to get the access token and refresh token for the seller account. The value you provide to the `ObtainToken` call must match this value exactly. For more information about the values returned in the seller authorization, see [Receive Seller Authorization and Manage Seller OAuth Tokens](oauth-api/receive-and-manage-tokens). You've now completed the OAuth process by obtaining the access token and refresh token for the test seller. The next steps show you how to use the access token and refresh token. ## 4. Use the seller access token to call a Square API on behalf of the seller After you get the seller OAuth tokens, use the access token to call the Square API endpoints that your application has permissions for. To keep this simple, use API Explorer to call the [CreatePayment](https://developer.squareup.com/reference/square/payments-api/createpayment) endpoint to take a $100.00 payment, with a $5 application fee going to your Square developer account and $95 going to the seller. 1. Go to [API Explorer](https://developer.squareup.com/explorer/square/payments-api/create-payment). 2. Make sure **Sandbox** is selected at the top of the page, paste the access token that you obtained in the OAuth process into the **Access token** box, and then choose **Save**. API Explorer uses this access token to make calls on behalf of the seller. 3. Set the following parameters in the body: * For `amount_money`, choose **Add**, enter 10000 for the amount, and then set the currency to the country you selected when you created your Square account. Note that money is represented in the lowest denomination for a currency, which for USD is cents. So the amount of 10000 is $100.00. * For `idempotency_key`, choose **Generate** to create a unique value to ensure that this payment is only made once. For more information, see [Idempotency](working-with-apis/idempotency). * For `source_id`, choose **cnon:card-nonce-ok**. This simulates a card payment token that represents a credit card that can be used for payment. For more information about card tokens, see [Online Payment Solutions](online-payment-options#square-payments-in-your-own-website-1). * For `app_fee_money`, choose **Add**, enter 500 for amount, and then set the currency to your Square account country. ![A screenshot showing a CreatePayment request in API Explorer.](//images.ctfassets.net/1nw4q0oohfju/2xubuemdUhx4WMlCPcENdC/0c2787aac803060f5f3dd0a17ab0e251/api-explorer.png) 4. Choose **Run Request**. The **Response** box displays a `200` response code and returns details about the payment in the body of the response. The payment has an `id` value that you can use to identify this particular payment when calling [ListPayments](https://developer.squareup.com/reference/square/payments-api/list-payments) or you can get it directly using [GetPayment](https://developer.squareup.com/reference/square/payments-api/get-payment). ![A screenshot showing the details of a response when a request is made using API Explorer.](//images.ctfassets.net/1nw4q0oohfju/44rWtjPj3vqExWeL4BWC7c/10336fb33747ba785abaefde9d1c8673/api-explorer-response.png) You've successfully taken a payment using the Square API on behalf of a seller. Look at the Square Dashboard to see what it looks like from the seller's point of view. 5. Open the [Developer Console](https://developer.squareup.com/apps), find the seller test account you created earlier in the **Sandbox Test Accounts** section, and then choose **Open**. 6. In the Sandbox Square Dashboard, choose **Transactions** in the left pane, and then choose the most recent transaction. The transaction details appear in a pane on the right. ![A screenshot showing the details of a transaction in the Square Dashboard.](//images.ctfassets.net/1nw4q0oohfju/4rt0uOobcWlZG86f9sTpDr/47c5deb5b67a8f2011accbee58430c7d/transaction-details-seller-dashboard.png) You see the $100 payment that was completed and the $5 application fee that your application collected and credited to your Sandbox developer account. In the **Other** row, you see the $5.00 application fee from the `CreatePayment` call. ## 5. Refresh the access token When you've completed the previous step, you know that you can use the seller's OAuth access token to make API calls on their behalf. Your application should be able to refresh the access token before it expires. To keep this simple, use API Explorer to call the [ObtainToken](https://developer.squareup.com/reference/square/o-auth/obtain-token) endpoint to refresh the seller token. 1. Go to Square [API Explorer](https://developer.squareup.com/explorer/square/o-auth/obtain-token). 2. Make sure **Sandbox** is selected at the top of the page, paste the seller's access token in the **Access token** box, and then choose **Save**. 3. Set the following parameters in the body: * For `client_id`, enter your application's Sandbox application ID. * For `client_secret`, enter your application's Sandbox application secret. * For `grant_type`, enter `refresh_token`. * For `refresh_token`, enter the seller's OAuth refresh token. 4. Choose **Run Request**. The **Response** box displays a 200 response code and returns information about the new access token. Use this new access token to call the Square APIs on the seller's behalf. ## 6. Revoke the access token Your application should enable sellers to revoke the access token if they choose to. To keep this simple, use API Explorer to call the [RevokeToken](https://developer.squareup.com/reference/square/o-auth/revoke-token) endpoint to revoke the seller token. 1. Go to [API Explorer](https://developer.squareup.com/explorer/square/o-auth/revoke-token). 2. Make sure **Sandbox** is selected at the top of the page, paste the seller's access token into the **Access token** box, and then choose **Save**. 3. Set the following parameters in the body: * For `client_secret`, enter your application's Sandbox application secret. * For `access_token`, enter the seller's access token. * For `client_id`, enter your application's Sandbox application ID. 4. Choose **Run Request**. The **Response** box displays a `200` response code and returns `"success":true`. ## Create a link to the Square authorization page The request_token.php code creates the URL link to the Square authorization page that you give to the seller so they can authorize your application. The code uses your developer application ID and secret and requests several permissions that are then incorporated into the URL. The permissions in the list are separated by a URL-encoded space (%20 or +). The `md5` function generates a random string that is stored in the session cookie and passed in the `state` parameter. The `state` parameter is returned by the Square authorization page. The callback compares the `state` value with the string stored in the session cookie and rejects the request if they don't match. The `state` parameter helps protect against cross-site request forgery (CSRF). The `session` parameter is omitted because the Sandbox only supports a default setting of `true`. For production, this value should be `false`. The `{APPLICATION_ID}` placeholder value for the `client_id` parameter is the Sandbox application ID you got from the Developer Console for your application. The completed URL looks like the following. For a complete review of the parameters used in the URL, see [Create the Redirect URL and Square Authorization Page URL](oauth-api/create-urls-for-square-authorization). ``` https://squareupsandbox.com/oauth2/authorize?client_id={APPLICATION_ID}&scope=ITEMS_READ+MERCHANT_PROFILE_READ+PAYMENTS_WRITE_ADDITIONAL_RECIPIENTS+PAYMENTS_WRITE+PAYMENTS_READ&state=0499178ad6fdf1946bcb184aeae355cdbf90fed7faf60dde36e35de6d2d91b09 ``` ```php load(); // Specify the permissions and url encode the spaced separated list. $permissions = urlencode( "ITEMS_READ " . "MERCHANT_PROFILE_READ " . "PAYMENTS_WRITE_ADDITIONAL_RECIPIENTS " . "PAYMENTS_WRITE " . "PAYMENTS_READ" ); // Set the Auth_State cookie with a random md5 string to protect against cross-site request forgery. // Auth_State will expire in 60 seconds (1 mins) after the page is loaded. $application_id = getenv('SQ_APPLICATION_ID'); $environment = getenv('SQ_ENVIRONMENT'); if ($environment == "sandbox") { $base_url = "https://connect.squareupsandbox.com"; } else if ($environment == "production") { $base_url = "https://connect.squareup.com"; } else { displayError("Unsupported SQ_ENVIRONMENT", "Set the SQ_ENVIRONMENT variable in .env file to 'sandbox' or 'production'."); } // Display the OAuth link. echo ' '; ?> ``` ## Exchange the authorization code for an OAuth token The callback.php code parses the query string that is returned after the seller allows (or denies) your application the requested permissions the Square authorization page redirects to the redirect URL. This is the URL that you set on the **OAuth** page of your application in the Developer Console. The POST request on your callback page includes a query string with an authorization code or a denial error. The code block parses the query string. If there's an authorization code, the `obtainOAuthToken` function is called to exchange the authorization code for OAuth tokens. The code block performs three functions: * **Validates the state parameter** - The first `if` statement checks the `state` parameter against the value stored in the cookie. If the values don't match, the `displayStateError` function is called to display a message indicating that the `state` check failed and this block is exited. * **Checks for authorization** - If the `state` check succeeds, the block checks for the `response_type` parameter. If the `response_type` parameter value is `code`, an authorization code is returned in the `code` parameter. * **Calls ObtainToken to get the access and refresh tokens** - The `obtainOAuthToken` function takes the authorization code and calls the [ObtainToken](https://developer.squareup.com/reference/square/oauth-api/obtain-token) endpoint to get the OAuth access token and refresh token. The `ObtainToken` endpoint takes your application ID, your application secret, a `grant_type` of `authorization_code`, and the authorization code. For this walkthrough, these tokens are displayed on the web page so you can get them easily. In production, you should never display the tokens. Instead, you should encrypt them and store them securely. For more information, see [OAuth Best Practices](oauth-api/best-practices). If there's no `response_type` parameter set, error states are handled (including the case where the seller chooses Deny) and an error message is displayed. ```php load(); // The obtainOAuthToken function shows you how to obtain an OAuth access token // with the OAuth API with the authorization code returned to OAuth callback. function obtainOAuthToken($authorizationCode) { // Initialize Square PHP SDK OAuth API client. $environment = getenv('SQ_ENVIRONMENT') == "sandbox" ? Environment::SANDBOX : Environment::PRODUCTION; $apiClient = new SquareClient([ 'environment' => $environment ]); $oauthApi = $apiClient->getOAuthApi(); // Initialize the request parameters for the ObtainToken request. $body_grantType = 'authorization_code'; $body = new ObtainTokenRequest( getenv('SQ_APPLICATION_ID'), getenv('SQ_APPLICATION_SECRET'), $body_grantType ); $body->setCode($authorizationCode); // Call obtainToken endpoint to get the OAuth tokens. try { $response = $oauthApi->obtainToken($body); if ($response->isError()) { $code = $response->getErrors()[0]->getCode(); $category = $response->getErrors()[0]->getCategory(); $detail = $response->getErrors()[0]->getDetail(); throw new Exception("Error Processing Request: obtainToken failed!\n" . $code . "\n" . $category . "\n" . $detail, 1); } } catch (ApiException $e) { error_log($e->getMessage()); error_log($e->getHttpResponse()->getRawBody()); throw new Exception("Error Processing Request: obtainToken failed!\n" . $e->getMessage() . "\n" . $e->getHttpResponse()->getRawBody(), 1); } // Extract the tokens from the response. $accessToken = $response->getResult()->getAccessToken(); $refreshToken = $response->getResult()->getRefreshToken(); $expiresAt = $response->getResult()->getExpiresAt(); $merchantId = $response->getResult()->getMerchantId(); // Return the tokens along with the expiry date/time and merchant ID. return array($accessToken, $refreshToken, $expiresAt, $merchantId); } // Handle the response. try { // Verify the state to protect against cross-site request forgery. if ($_SESSION["auth_state"] !== $_GET['state']) { displayStateError(); return; } // When the response_type is "code", the seller clicked Allow // and the authorization page returned the auth tokens. if ("code" === $_GET["response_type"]) { // Get the authorization code and use it to call the obtainOAuthToken wrapper function. $authorizationCode = $_GET['code']; list($accessToken, $refreshToken, $expiresAt, $merchantId) = obtainOAuthToken($authorizationCode); // Because we want to keep things simple and we're using Sandbox, // we call a function that writes the tokens to the page so we can easily copy and use them directly. // In production, you should never write tokens to the page. You should encrypt the tokens and handle them securely. writeTokensOnSuccess($accessToken, $refreshToken, $expiresAt, $merchantId); } elseif ($_GET['error']) { // Check to see if the seller clicked the Deny button and handle it as a special case. if(("access_denied" === $_GET["error"]) && ("user_denied" === $_GET["error_description"])) { displayError("Authorization denied", "You chose to deny access to the app."); } // Display the error and description for all other errors. else { displayError($_GET["error"], $_GET["error_description"]); } } else { // No recognizable parameters were returned. displayError("Unknown parameters", "Expected parameters weren't returned"); } } catch (Exception $e) { // If the obtainToken call fails, you'll fall through to here. displayError("Exception", $e->getMessage()); } ?> ``` ## See also * [Create the Redirect URL and Square Authorization Page URL](oauth-api/create-urls-for-square-authorization) * [Receive Seller Authorization and Manage Seller OAuth Tokens](oauth-api/receive-and-manage-tokens) * [Refresh, Revoke, and Limit the Scope of OAuth Tokens](oauth-api/refresh-revoke-limit-scope) * [OAuth Best Practices](oauth-api/best-practices) * [OAuth Permissions Reference](oauth-api/square-permissions) * [Video: OAuth Best Practices](https://www.youtube.com/watch?v=3gLqCJC6kLI) --- # Refresh, Revoke, and Limit the Scope of OAuth Tokens > Source: https://developer.squareup.com/docs/oauth-api/refresh-revoke-limit-scope > Status: PUBLIC > Languages: All > Platforms: All Learn how to refresh, revoke, and limit the scope of OAuth tokens. **Applies to:** [OAuth API](oauth-api/overview) | [Locations API](locations-api) {% subheading %}Learn how to use the [OAuth API](https://developer.squareup.com/reference/square/o-auth-api) to manage the scope of a seller's access tokens.{% /subheading %} {% toc hide=true /%} ## Overview When you have the access and refresh tokens for a seller, you must be able to refresh the access token, revoke the tokens, and limit the scope of the tokens if required. Your application must also provide a mechanism for sellers to view and manage the status of their OAuth tokens and manage the authorization for your application. Typically, this is done with a settings/configuration dashboard in your application. Your application must accurately show the status of the seller's OAuth access token with Square. The status of the OAuth access token must always be accurate and indicate the correct state of the access token (valid, expired, or revoked). Your application can check the validity of the token by calling [ListLocations](https://developer.squareup.com/reference/square/locations-api/list-locations) and checking the response. ## Refresh the access token Your application should be able to refresh the access token before it expires in 30 days. Square recommends that your application automatically renew OAuth access tokens every 7 days or less, regardless of whether the seller is actively interacting with your application. Renewing every 7 days or less provides sufficient time to discover and resolve errors. If your application only attempts to refresh tokens near the 30-day expiration date, it increases the risk of missing a failed token refresh and creating a poor experience for sellers or their customers. Your application should check access tokens when they're retrieved from your database to see whether they're older than 8 days. If this check fails, it should generate a notification (paging or other alerting mechanism) so that you can address any issues with your renewal logic. Silent token renewal failures result in breaking your application integration and potentially causing an outage for your sellers or their customers. For more best practice ideas, see [OAuth Best Practices](oauth-api/best-practices). ### Refresh token examples The request format to call `ObtainToken` to get a refresh token differs between the code flow and PKCE flow. Code flow refresh token request: ``` curl https://connect.squareup.com/oauth2/token \ -X POST \ -H 'Square-Version: 2022-04-20' \ -H 'Content-Type: application/json' \ -d '{ "client_id": "", "grant_type": "refresh_token", "redirect_uri": "", "client_secret": "", "refresh_token": "" }' ``` Code flow refresh token response: ``` { "access_token": "", "token_type": "bearer", "expires_at": "2022-06-03T22:19:44Z", "merchant_id": "", "refresh_token": "", "short_lived": false } ``` PKCE flow refresh token request: ``` curl https://connect.squareup.com/oauth2/token \ -X POST \ -H 'Square-Version: 2022-04-20' \ -H 'Content-Type: application/json' \ -d '{ "client_id": "", "grant_type": "refresh_token", "redirect_uri": "", "refresh_token": "" }' ``` PKCE flow refresh token response: ``` { "access_token": "", "token_type": "bearer", "expires_at": "2022-06-03T22:19:44Z", "merchant_id": "", "refresh_token": "", “refresh_token_expires_at”: “2022-08-03T22:19:44Z” "short_lived": false } ``` A successful call to [ObtainToken](https://developer.squareup.com/reference/square/oauth-api/obtain-token) using the refresh token returns a `200` response code and includes information about the new access token. Use this new access token for calling the Square APIs on the seller's behalf. ## Revoke the access token Your application should give the seller the ability to manage their OAuth tokens, including the ability to revoke the OAuth tokens if they choose to. Revoking the OAuth tokens stops your ability to manage resources on behalf of the seller. Your application can call the [RevokeToken](https://developer.squareup.com/reference/square/oauth-api/revoke-token) endpoint to revoke the seller token. To revoke an access token, you call `RevokeToken` with the following information: * `client_secret` - Your application's production application secret. * `access_token` - The seller's access token that you want to revoke. You can specify the access token or the `merchant_id`; you don't need to specify both. * `client_id` - Your application's production application ID. * `grant_type` - `refresh_token`. * `refresh_token` - The seller's refresh token. A call to `RevokeToken` to revoke an access token looks similar to the following: ```curl curl https://connect.squareup.com/oauth2/revoke \ -X POST \ -H 'Square-Version: 2021-07-21' \ -H 'Authorization: Client ' \ -H 'Content-Type: application/json' \ -d '{ "access_token": "EAAAEBfiiBO_WTd91g0qlxam5allf6KWIUWvN3U7_-y9PyLR9-_rZbSPMwsbAmb0", "client_id": "sandbox-sq0idb-fGFs-gh_Mm7jMo5r-MZrRA", "revoke_only_access_token": false }' ``` A successful call to `RevokeToken` returns a `200` response code and looks similar to the following: ```curl cache-control: max-age=0, private, must-revalidate content-encoding: gzip content-type: application/json date: Fri, 13 Aug 2021 18:24:03 GMT square-version: 2021-07-21 { "success": true } ``` ## Revoke authorization for a single OAuth access token The default behavior for the Square [RevokeToken](https://developer.squareup.com/reference/square/oauth-api/revoke-token) endpoint revokes the entire authorization for you to act on the behalf of a seller. However, you might need to revoke a specific access token without terminating the entire seller authorization. For example, if an access token is compromised, you want to revoke the compromised token and generate a new one without requiring a new seller authorization. The [revoke_only_access_token](https://developer.squareup.com/reference/square/oauth-api/revoke-token#request__property-revoke_only_access_token) is an optional field in the `RevokeToken` endpoint. This field lets you revoke a specified OAuth access token without terminating the entire authorization. A call to `RevokeToken` to revoke a single access token, but not terminate authorization, looks similar to the following: ``` curl curl https://connect.squareup.com/oauth2/revoke \ -X POST \ -H 'Square-Version: 2020-11-18' \ -H 'Authorization: Client ' \ -H 'Content-Type: application/json' \ -d '{ "access_token": "ACCESS_TOKEN", "client_id": "CLIENT_ID", "revoke_only_access_token": true }' ``` A successful call to `RevokeToken` returns a `200` response code and looks similar to the following: ```json { "success": true } ``` ## Modify the scope and duration of OAuth access tokens The default expiration for OAuth access tokens was 30 days because credentials were traditionally used from a tightly controlled access environment such as a secure server. As developers expand their use cases to include loosely controlled access environments such as web browsers, mobile applications, and public clients, there's a need for credentials with limited permissions and a shorter lifespan to prevent errors and mitigate risk. The PKCE flow is part of this process. The PKCE flow is designed for public clients and single-page web applications and uses a key exchange process to obtain an access token and uses single-use refresh tokens. For a complete explanation of the PKCE flow, see [PKCE flow](oauth-api/overview#pkce-flow). ### Create limited scope OAuth access tokens If you don't need all the permissions granted by an access token, you can create a new access token that has a reduced set of permissions from the ones granted when the seller approved your authorization. You do this by creating a new access token for the seller using the optional [scopes](https://developer.squareup.com/reference/square/oauth-api/obtain-token#request__property-scopes) field on the `ObtainToken` endpoint. For example, if a seller granted four permissions including `MERCHANT_PROFILE_READ`, `PAYMENTS_READ`, `PAYMENTS_WRITE`, and `BANK_ACCOUNTS_READ` and you find that you only need two permissions (`MERCHANT_PROFILE_READ` and `PAYMENTS_READ`), you can create a new access token with just those two permissions. A call to [ObtainToken](https://developer.squareup.com/reference/square/oauth-api/obtain-token) to limit the scope of an access token looks similar to the following: ```curl curl https://connect.squareup.com/oauth2/token \ -X POST \ -H 'Square-Version: 2020-11-18' \ -H 'Content-Type: application/json' \ -d '{ "scopes": [ "MERCHANT_PROFILE_READ", "PAYMENTS_READ" ], "grant_type": "refresh_token", "refresh_token": "REFRESH_TOKEN", "client_secret": "APPLICATION_SECRET", "client_id": "APPLICATION_ID" }' ``` The API response doesn't include a list of scopes. If a `200` response is returned, it can be assumed that the scopes have been added to the newly created OAuth access token. A successful call to `ObtainToken` returns a `200` response code and looks similar to the following: ```curl { "access_token": "ACCESS_TOKEN", "token_type": "bearer", "expires_at": "2021-01-02T00:14:15Z", "merchant_id": "MERCHANT_ID", "refresh_token": "REFRESH_TOKEN", "short_lived": false } ``` {% aside type="important" %} The newly created OAuth access token cannot be viewed in the Developer Console. Your application must store this new token for future use. {% /aside %} ### Create short-lived OAuth access tokens The default expiration for OAuth access tokens is 30 days. A 30-day lifespan isn't appropriate for use in less secure web or mobile clients. The 30-day expiration increases the risk duration for exposure and abuse. When working within loosely controlled access environments such as web browsers or mobile clients, you might prefer a credential with a shorter lifespan to prevent errors and mitigate risk. The [short_lived](https://developer.squareup.com/reference/square/oauth-api/obtain-token#request__property-short_lived) optional field within the [ObtainToken](https://developer.squareup.com/reference/square/oauth-api/obtain-token) endpoint lets you generate a short-lived access token that expires 24 hours after creation. To create an access token that expires in 24 hours, call `ObtainToken` and set the [short_lived](https://developer.squareup.com/reference/square/oauth-api/obtain-token#request__property-short_lived) field to `true`. The call looks similar to the following: ```curl curl https://connect.squareup.com/oauth2/token \ -X POST \ -H 'Square-Version: 2021-08-18' \ -H 'Content-Type: application/json' \ -d '{ "grant_type": "refresh_token", "refresh_token": "REFRESH_TOKEN", "client_secret": "APPLICATION_SECRET", "client_id": "APPLICATION_ID", "short_lived": true }' ``` A successful call to `ObtainToken` returns a `200` response code and looks similar to the following: ```json { "access_token": "ACCESS_TOKEN", "token_type": "bearer", "expires_at": "2020-12-04T00:16:17Z", "merchant_id": "MERCHANT_ID", "refresh_token": "REFRESH_TOKEN", "short_lived": true } ``` {% aside type="info" %} The lifespan of the short-lived access token cannot be customized. It always has a 24-hour lifespan. {% /aside %} ## See also * [Create the Redirect URL and Square Authorization Page URL](oauth-api/create-urls-for-square-authorization) * [Receive Seller Authorization and Manage Seller OAuth Tokens](oauth-api/receive-and-manage-tokens) * [OAuth Walkthrough: Test Authorization with a Web Server](oauth-api/walkthrough) * [OAuth Best Practices](oauth-api/best-practices) * [Move OAuth from the Sandbox to Production](oauth-api/movetoprod) * [OAuth Permissions Reference](oauth-api/square-permissions) * [Video: OAuth Best Practices](https://www.youtube.com/watch?v=3gLqCJC6kLI) * [Blog post: New Authorization Tooling – Improved Usability and Security](https://developer.squareup.com/blog/new-authorization-tooling-improved-usability-and-security/) --- # Migrate to the Square API OAuth Flow > Source: https://developer.squareup.com/docs/oauth-api/migrate-to-square-oauth-flow > Status: PUBLIC > Languages: All > Platforms: All Describes the migration tasks that update your application to use seller-scoped OAuth tokens appropriate for calling Square API endpoints. **Applies to:** [OAuth API](oauth-api/overview) | [Locations API](locations-api) | [Payments API](payments-refunds) {% subheading %}Learn how to use the [OAuth API](https://developer.squareup.com/reference/square/o-auth-api) to update your application to use seller-scoped OAuth tokens appropriate for calling Square API endpoints.{% /subheading %} {% toc hide=true /%} ## Overview An OAuth token used with Connect v1 endpoints is associated with an individual seller location. Each seller location is individually authorized to call Connect v1 endpoints. To get a Connect v1 token, the Square authorization web page challenges a seller for credentials, lets the seller select one of their locations, and authorizes your application for the requested permissions. An OAuth token used with a Square API endpoint is associated to the seller and works with all of the seller's locations. The token doesn't carry a location ID because it's scoped at the seller level. Some Square API endpoints require a location ID in the body of a request. Otherwise, the ID is be optional. When an ID is required, your application gets the ID and provide it in the API call. Use the [ListLocations](https://developer.squareup.com/reference/square/locations-api/list-locations) endpoint to get the seller's locations to be populated in a list for the seller to select from. {% aside type="important" %} You must migrate your application OAuth code to get a seller-scoped OAuth token before your application can make calls on the Square API. After your application gets a seller-scoped OAuth token, the previous location-scoped OAuth token should be revoked. {% /aside %} To learn how to get a Square API OAuth token, see [OAuth Walkthrough: Test Authorization with a Web Server](oauth-api/walkthrough). ## Create a new application registration To integrate with the Square API and make calls using a seller-scoped OAuth access token, you must replace the existing Connect v1 application ID for your application. To do this, create a new application registration in the [Developer Console](https://developer.squareup.com/apps) to get the new application ID. Be sure to add [Square webhook](webhooks-overview) subscriptions to replace any v1 webhook subscriptions that you might have configured in your original application. The new application uses seller-scoped tokens with webhook subscriptions that include events from all the seller's locations. Previously, webhook events were limited in scope to only the location that was authorized. When a Square webhook notification applies to an operation scoped to a seller location, the body of the notification contains a `location_id`. ## Update your OAuth application logic Assuming that your application instance has a deprecated location-scoped access token, complete the following steps to get a new seller-scoped access token: 1. [Link to the Square authorization page.](oauth-api/walkthrough#step-2-link-to-the-square-authorization-page) 1. [Exchange the authorization code for OAuth tokens.](oauth-api/walkthrough#step-3-exchange-the-authorization-code-for-oauth-tokens) 2. Add a [Location](https://developer.squareup.com/reference/square/objects/location) selection modal window to the application sign-in screen. ## Let the seller select a seller location In the original Connect v1 authentication flow for non-location-aware sellers, a seller is prompted to select a location to sign in to. Your Square API application must require a seller to select a location after signing in. Your application must [retrieve a list of locations](locations-api#retrieve-a-list-of-locations) and show a selection list to a seller. ## Make a Square API call When your application has a new OAuth access token and location ID, use these values to make a Square API call like the following [CreatePayment](https://developer.squareup.com/reference/square/payments-api/create-payment) call that creates a payment to be applied to the location selected by the user in the previous step: ```` ## Revoke location-scoped access tokens After you test your new application and put it into production, you need to revoke access to your Connect v1 application. To do this, revoke any access tokens that were issued for the old application ID. For more information, see [Refresh, Revoke, and Limit the Scope of OAuth Tokens](oauth-api/cookbook/revoke-oauth-tokens). ### Revoke an access token request In the following request, the client secret value is issued to the original Connect v1 application that you're replacing with a new application. `{CLIENT_ID}` is the application ID of your original Connect v1 application. To get the merchant ID of the seller whose tokens are to be revoked, sign in to the seller Square account and navigate to https://squareup.com/tracking.json. ```` ### Revoke a token response A success response looks like the following: ```json { "success": true } ``` A failure occurs if the values for the client ID and client secret come from different applications. ```json { "message": "Not Authorized", "type": "service.not_authorized" } ``` {% aside type="info" %} Location-scoped access tokens for Connect v1 endpoints cannot be migrated to seller-scoped access tokens. They must be revoked or allowed to expire. {% /aside %} --- # OAuth Best Practices > Source: https://developer.squareup.com/docs/oauth-api/best-practices > Status: PUBLIC > Languages: All > Platforms: All Learn about the best practices for using the Square OAuth API to authorize your application to access a Square account. **Applies to:** [OAuth API](oauth-api/overview) | [Locations API](locations-api) {% subheading %}Learn about best practices for using the [OAuth API](https://developer.squareup.com/reference/square/o-auth-api) to authorize your application to access a Square account.{% /subheading %} {% toc hide=true /%} ## Overview Use the following best practices when creating an application that uses OAuth. These best practices are in addition to the basics of programming a functioning application that correctly manages OAuth tokens and handles permission errors successfully. The following video provides an introduction to OAuth best practices. For an in-depth discussion of OAuth best practices, see the following sections. {% youtube src="https://www.youtube.com/embed/3gLqCJC6kLI" /%} ## Use the correct OAuth process Square supports two OAuth processes: a code flow and PKCE flow. The code flow is the process where clients obtain an authorization code that's then redeemed to get an access token and refresh token. When redeeming the authorization code, the client must pass in a `client_id` and `client_secret`. This is the best process for applications with confidential clients that connect to secure backend servers. The PKCE flow follows a similar process to the code flow, but removes the need to pass in the `client_secret` when redeeming the authorization code. This makes the PKCE flow ideal for mobile applications and applications with public clients, such as single-page websites and applications that rely on a web browser. ## Requested permissions (scope) When requesting authorization for permissions from the seller, set the scope to the least privileged permissions required for your application. Your application should only request permissions for APIs that your application calls. For more information about requesting permissions, see [Create the Redirect URL and Square Authorization Page URL](oauth-api/create-urls-for-square-authorization). For a list of permissions, see [OAuth Permissions Reference](oauth-api/square-permissions). To retrieve the permissions attached with the access token later, you can call the `RetrieveTokenStatus` endpoint with the access token. If you add features to your application or integrate with other systems that require additional permissions, you must ask for those permissions with a new authorization request to the seller. Though you don't want to request more permissions than you need, you must consider what permissions you need for future integrations or for additional features that your application might support in the future. Your application should have a process where the seller can approve additional permissions in addition to the permissions already authorized. ## Manage, use, and store tokens securely OAuth access tokens, refresh tokens, and the application secret all have privileged access (or the potential to get privileged access) to seller resources. You should use them in a secure environment and protect access to them using the following best practices: * OAuth operations that use a private client should be performed on a secure application server. This includes, for example, calls to `ObtainToken` to obtain the original OAuth access token and refresh token, subsequent calls to get a new OAuth access token using a refresh token, generating and validating the state parameter, encrypting the tokens and application secret, and revoking a token. * Never store the application secret, access token, or refresh token in a mobile application or on any public client. Use the PKCE flow for these scenarios. * OAuth access tokens and refresh tokens should be stored encrypted in a secure database or keychain. Your application should use a strong encryption standard such as AES. The production encryption keys shouldn't be accessible to database administrators, business analysts, developers, or anyone who doesn't need them. The tokens that these keys protect can be used to perform actions on behalf of the seller and should be guarded appropriately. The encryption keys shouldn't be stored in source control and should only be accessible by server administrators. * When you request authorization from a seller, record the permissions that you request. After the seller authorizes your request and you receive the authorization code, you cannot find what permissions are associated with the code or the access token you receive when you call `ObtainToken`. {% aside type="warning" %} Never store your credentials or access tokens in your version control system. The .env file is included in the .gitignore project to help prevent uploading confidential information. {% /aside %} You should never put the application secret in your source code. Instead, encrypt the secret and use an environment variable to reference the secret in your application. ## Refresh the access token regularly An OAuth access token expires after 30 days. If your application doesn't get a new access token, it cannot make calls on behalf of the seller. This can happen if your application doesn't have a token refresh process, but it can also happen if the call to [ObtainToken](https://developer.squareup.com/reference/square/oauth-api/obtain-token) fails and your application doesn't detect the failure and doesn't retry. For more information about refreshing access tokens, see [Refresh, Revoke, and Limit the Scope of OAuth Tokens](oauth-api/refresh-revoke-limit-scope). Your application should automatically renew OAuth access tokens every 7 days or less, regardless of whether the seller is actively interacting with your application. Renewing every 7 days or less provides sufficient time to discover and resolve errors. If your application only attempts to refresh tokens near the 30-day expiration date, it increases the risk of missing a failed token refresh and creating a poor experience for sellers or their customers. Your application should check tokens when they're retrieved from your database to see whether they're older than 8 days. If this check fails, it should generate a notification (paging or other alerting mechanism) so that you can address any issues with your renewal logic. Silent token renewal failures result in breaking your application integration and potentially causing an outage for your sellers or their customers. Refresh tokens used with PKCE are single-use tokens and expire in 90 days. ### Revocation An OAuth access token can be revoked in two ways: * The seller can disconnect the application through My Applications in the Square Dashboard. Disconnecting an application calls [RevokeToken](https://developer.squareup.com/reference/square/oauth-api/revoke-token) to revoke all OAuth tokens for the seller. * Your application can call `RevokeToken` to revoke a particular OAuth token or all OAuth tokens for a seller account. To ensure that a token is valid and not revoked, call [ListLocations](https://developer.squareup.com/reference/square/locations-api/list-locations) and check the response to confirm validity. ## Show the OAuth access token status to sellers and enable them to manage authorization Your application must provide a mechanism for sellers to view the status of their connection with Square (the OAuth access tokens status) and manage the authorization for your application. Typically, this done with a settings/configuration dashboard in your application. You should follow these practices: * Your application must accurately show the seller's correct OAuth access token status with Square. OAuth access token status must always be accurate and indicate the correct state of the access token (valid, expired, or revoked). Using the recommendation method in the previous section, your application can check the validity of the token by calling [ListLocations](https://developer.squareup.com/reference/square/locations-api/list-locations) and checking the response. * Your application must enable the seller to disconnect by revoking the access token. You can revoke OAuth access tokens by calling [RevokeToken](https://developer.squareup.com/reference/square/oauth-api/revoke-token). ## Handle token-based errors When your application uses an access token to call a Square API, OAuth-related errors can occur if a token is expired, is revoked, or has insufficient scope (unauthorized). Your application should handle these error codes and display a customer-friendly message that clearly communicates the error to the seller, their customer, or both. Errors include: * `ACCESS_TOKEN_EXPIRED` * `ACCESS_TOKEN_REVOKED` * `UNAUTHORIZED` Square retains expired access tokens for a limited time. During this time, the Square API returns the `ACCESS_TOKEN_EXPIRED` error. After that time, the Square API returns an `UNAUTHORIZED` error. Square API calls that return the `UNAUTHORIZED` error aren't cases of insufficient scope. Square API calls with insufficient scope return a `403 FORBIDDEN` error. ## See also * [Create the Redirect URL and Square Authorization Page URL](oauth-api/create-urls-for-square-authorization) * [Receive Seller Authorization and Manage Seller OAuth Tokens](oauth-api/receive-and-manage-tokens) * [Refresh, Revoke, and Limit the Scope of OAuth Tokens](oauth-api/refresh-revoke-limit-scope) * [OAuth Walkthrough: Test Authorization with a Web Server](oauth-api/walkthrough) * [Move OAuth from the Sandbox to Production](oauth-api/movetoprod) * [OAuth Permissions Reference](oauth-api/square-permissions) --- # Receive Seller Authorization and Manage Seller OAuth Tokens > Source: https://developer.squareup.com/docs/oauth-api/receive-and-manage-tokens > Status: PUBLIC > Languages: All > Platforms: All Shows how to create an application that receives the seller's OAuth authorization and manages the OAuth tokens. **Applies to:** [OAuth API](oauth-api/overview) {% subheading %}Learn how to create an application that receives the seller's OAuth authorization and manages the OAuth tokens.{% /subheading %} {% toc hide=true /%} ## Overview The next stage in the [OAuth](https://developer.squareup.com/reference/square/o-auth-api) authorization process is where the seller uses the authorization URL you provided and logs in to their Square seller account. Square shows an authorization page with the requested permissions and scope. After the seller accepts or denies the permissions, the page sends a GET response to the redirect URL you specified for your application. ## Requirements and limitations The application that's at the redirect URL endpoint must do the following: * Parse the parameters that are returned in the seller authorization response. * Use the authorization code in the response to call the OAuth API to obtain the seller's access and refresh tokens. * Manage and use the access and refresh tokens securely. * Encrypt the access and refresh tokens and store them securely. * If your application is using the PKCE flow, you must retain the `code_verifier` that was used to obtain the authorization code. You submit the `code_verifier` along with the authorization code when calling `ObtainToken`. * Verify that the token used for each API call is valid. * Refresh the access token in a timely manner. * If your application is using the PKCE flow, you must use the single-use refresh token within 90 days. * Provide the seller with the ability to revoke the access and refresh tokens. * Show the permissions granted by the access token to the seller and enable them to manage authorization. * Ensure that API calls made with the seller's tokens can handle token-based errors appropriately. ## Handle the authorization response The seller can approve or deny your authorization request. Your web page or application endpoint that receives the authorization redirect must handle the `Allow` or `Deny` responses in the query string. If the seller chooses `Allow`, a production response URL looks like the following: >`https://example.com/callback.php?code=sq0cgb-xJPZ8rwCk7KfapZz815Grw&response_type=code&state=jf0weoif3dfsk04imofpdgmlksadfwmvmf4oip` The URL returns the following parameters: * `state` is the CSRF token your application passed in the `state` parameter for the Square authorization page. Use this value to verify that this is a valid request. * `response_type` is `code`. This indicates that an authorization code was returned. * `code` is the authorization code. Use this value when you call `ObtainToken` to get the access token and refresh token for the seller account. The value you provide to the `ObtainToken` call must match this value exactly. If you're using the PKCE flow, you must also include the `code_verifier` in the request to `ObtainToken`. If the seller chooses `Deny`, or there's an error, a production response URL looks like the following: >`http://example.com/callback.php?error=access_denied&error_description=user_denied&state=59192b1e9f3c448569e0008b6856da50#` The URL returns the following parameters: * `state` is the CSRF token your application passed in the `state` parameter for the Square authorization page. * `error` is the error type. The `access_denied` value indicates that the seller denied the authorization request. * `error_description` provides more details about the error. If the error is `access_denied`, you need to contact the seller to determine the reason they denied authorization. Your application should show a user-friendly page to tell the seller that authorization failed. ## Call the ObtainToken endpoint If the seller authorizes your set of permissions, the `Authorize` endpoint sends a response with an authorization code to your redirect URL. You must use the authorization code (`code`) to call the [ObtainToken](https://developer.squareup.com/reference/square/o-auth-api/obtain-token) endpoint to get the seller's OAuth access token and refresh token. The authorization code expires 5 minutes after the Square authorization page generates the code. The value you include in the `ObtainToken` call must exactly match the authorization code you received. If the code expires before you get an access token, the seller must go to the Square authorization page again to create another authorization code. The request format to call `ObtainToken` differ between the code flow and PKCE flow. {% tabset %} {% tab id="Code flow" %} ```curl curl https://connect.squareupsandbox.com/oauth2/token \ -X POST \ -H 'Square-Version: 2021-05-13' \ -H 'Content-Type: application/json' \ -d '{ "client_id": "", "client_secret": "", "code": "", "grant_type": "authorization_code" }' ``` Response: ``` { “access_token”: ““, “token_type”: “bearer”, “expires_at”: “2022-06-03T22:19:44Z”, “merchant_id”: ““, “refresh_token”: ““, “short_lived”: false } ``` {% /tab %} {% tab id="PKCE flow" %} ```curl curl https://connect.squareup.com/oauth2/token \ -X POST \ -H 'Square-Version: 2022-04-20' \ -H 'Content-Type: application/json' \ -d '{ "client_id": "", "grant_type": "authorization_code", "redirect_uri": "", "code": "", "code_verifier":"" }' ``` Response: ``` { “access_token”: ““, “token_type”: “bearer”, “expires_at”: “2022-06-03T22:19:44Z”, “merchant_id”: ““, “refresh_token”: ““, “short_lived”: false “refresh_token_expires_at”: “2022-08-03T22:19:44Z” } ``` Refresh tokens returns by the PKCE flow can only be used once and expire in 90 days. {% /tab %} {% /tabset %} When you have successfully received the seller's access token and refresh token, you must [store the values securely](#token-storage). ## JWT access tokens By default, Square returns traditional access tokens but is transitioning to JWT (JSON Web Token) access tokens. JWT access tokens provide the same functionality as traditional access tokens but offer improved speed, reliability, and security. It's important to note that JWT access tokens are significantly longer than traditional access tokens. Ensure your storage system can handle the increased token length, and don't use token length for validation. Always rely on API response codes to verify token validity and authorization. **Traditional access token example:** ``` EAAAl5fLxkrN3PnVB_p9npkAkJxIZWkvXmQr8sYbT3gHwK92pL5RuMzN4vCxDpA7 ``` **JWT access token example:** ``` eyJraWQiOiJtYmFJYVEiLCJhbGciOiJFUzUxMiJ9.eyJqdGkiOiIxN2Y3OTIxMy1jOThiLTRjZDEtODA0My00ZmI5ZTM1ZTI4MWUiLCJpc3MiOiJzcXVhcmV1cC5jb20iLCJleHAiOjE3NjU1NzAxOTYsImlhdCI6MTc2Mjk3ODE5NiwicmV2b2NhdGlvbl9pZHMiOlsie1wia2V5XCI6MixcInZhbHVlXCI6XCIxMjYzMDY1MFwifSJdLCJzZXNzaW9uIjoiQ2wwS09Bb2hDQWNTSFhOeE1HbGtjeTFDTWxKV09WRmphVzFWY0hoQlJXcEZVbEUyYTJGUkVoRUlBeElOVFV3NVJGUllTRE5LV1ZRNVJ6Z0NFaE1LQUJJQkJDSU1Na0ZUVGxZeVUwZFRSamd5d0Q0QXlqNElNVEkyTXpBMk5UQT0iLCJyZXZvY2F0aW9uX3Njb3BlIjoiU1FVQVJFX09BVVRIIiwic3ViIjoic3EwaWRzLUFCQ0RFRjEyMzRYWVo1Nk1OT1BRUlNUVVYiLCJhdWQiOlsiQUJDRDEyMzRFRkdINTY3OCJdfQ.AStB9gtZqxxHxfEamWqEBuGn7HkAkuqUPLW8OsIt9vvUo_WGMNaHBgJaWscbVW8pGIDy2U2hlDhGz80vqxIrB0jHAcJOS7hCC1rZcdUlQ6Sw4GHuD1mf2Do_b6xsvcjyTx92gRqF0Ky8ZhM8bx4ETHdS0X5ab10a1eS5Rj0iVOqeO0hi ``` ### Migration To begin using JWTs for authorization, add the `use_jwt` parameter to your [ObtainToken](https://developer.squareup.com/reference/square/o-auth-api/obtain-token) request and set it to `true`. (Default is `false`). The access token returned is a JWT, and you use it in the same way as a traditional access token. You should also pass this parameter explicitly when requesting a [refresh token](oauth-api/refresh-revoke-limit-scope). The refresh token you receive stays in its current format (traditional access token or JWT). {% tabset %} {% tab id="Code flow" %} ```curl curl https://connect.squareupsandbox.com/oauth2/token \ -X POST \ -H 'Square-Version: 2025-12-17' \ -H 'Content-Type: application/json' \ -d '{ "client_id": "", "client_secret": "", "code": "", "grant_type": "authorization_code", "use_jwt": true }' ``` {% /tab %} {% tab id="PKCE flow" %} ``` curl https://connect.squareup.com/oauth2/token \ -X POST \ -H 'Square-Version: 2022-04-20' \ -H 'Content-Type: application/json' \ -d '{ "client_id": "", "grant_type": "authorization_code", "redirect_uri": "", "code": "", "code_verifier":"", "use_jwt": true }' ``` {% /tab %} {% /tabset %} {% anchor id="token-storage" /%} ## Manage, use, and store OAuth tokens securely OAuth access tokens, refresh tokens, and the application secret all have privileged access (or potential to get privileged access) to seller resources. You should use them in a secure environment and protect access to them. Follow these best practices: * OAuth operations that use a private client should be performed on a secure application server. This includes, for example, calls to `ObtainToken` to obtain the original OAuth access token and refresh token, subsequent calls to get a new OAuth access token using a refresh token, generating and validating the `state` parameter, encrypting the tokens and application secret, and revoking a token. * Never store the application secret, access token, or refresh token in a mobile application or on any public client. Use the PKCE flow for these scenarios. * OAuth access tokens and refresh tokens should be stored encrypted in a secure database or keychain. Your application should use a strong encryption standard such as AES. The production encryption keys shouldn't be accessible to database administrators, business analysts, developers, or anyone who doesn't need them. The tokens that these keys protect can be used to perform actions on behalf of the seller and should be guarded appropriately. The encryption keys shouldn't be stored in source control and should only be accessible by server administrators. * When you request authorization from a seller, record the permissions that you request. After the seller authorizes your request and you receive the authorization code, you cannot find what permissions are associated with the code or the access token you receive when you call `ObtainToken`. {% aside type="warning" %} Never store your credentials or access tokens in your version control system. The .env file is included in the .gitignore project to help prevent uploading confidential information. {% /aside %} You should never put the application secret in your source code. Instead, encrypt the secret and use an environment variable to reference the secret in your application. ## Ensure that tokens are valid Submitting an API request without a valid OAuth access token results in a poor experience for sellers and potentially their customers. In some cases, a seller might be prevented from taking payments. An OAuth access token can be invalid for two main reasons: expiration and revocation. Your application should automatically renew OAuth access tokens every 7 days or less, regardless of whether the seller is actively interacting with your application. For more information about refreshing an access token, see [OAuth Best Practices](oauth-api/best-practices). ### Expiration An OAuth access token expires after 30 days. If your application doesn't get a new access token, it cannot make calls on behalf of the seller. This can happen if your application doesn't have a token refresh process, but it can also happen if the call to [ObtainToken](https://developer.squareup.com/reference/square/oauth-api/obtain-token) fails and your application doesn't detect the failure and doesn't retry. To ensure that tokens remain in a valid state, Square requires all partner applications to renew at a frequent interval. Square recommends that your application automatically renew OAuth access tokens every 7 days or less, regardless of whether the seller is actively interacting with your application. Renewing every 7 days or less provides sufficient time to discover and resolve errors. If your application only attempts to refresh tokens near the 30-day expiration date, it increases the risk of missing a failed token refresh and creating a poor experience for sellers or their customers. Your application should check tokens when they're retrieved from your database to see whether they're older than 8 days. If this check fails, it should generate a notification (paging or other alerting mechanism) so that you can address any issues with your renewal logic. Silent token renewal failures result in breaking your application integration and potentially cause an outage for your sellers or their customers. Refresh tokens used with PKCE are single-use tokens and expire in 90 days. ### Revocation An OAuth access token can be revoked in two ways: * The seller can disconnect the application through My Applications in the Square Dashboard. Disconnecting an application calls [RevokeToken](https://developer.squareup.com/reference/square/oauth-api/revoke-token) to revoke all OAuth tokens for the seller. * Your application can call `RevokeToken` to revoke a particular OAuth token or all OAuth tokens for a seller account. To ensure that a token is valid and not revoked, call [ListLocations](https://developer.squareup.com/reference/square/locations-api/list-locations) and check the response to confirm validity. ## Show token status and enable sellers to manage authorization Your application must provide a mechanism for sellers to view the status of their OAuth tokens and manage the authorization for your application. Typically, this is done with a settings/configuration dashboard in your application. Your application must accurately show the seller's access token status with Square. Access token status must always be accurate and indicate the correct state of the access token (valid, expired, or revoked). Using the recommendation method in the previous section, your application can check the validity of the token by calling [ListLocations](https://developer.squareup.com/reference/square/locations-api/list-locations) and checking the response. Your application must let the seller revoke the access token. You revoke access tokens using [RevokeToken](https://developer.squareup.com/reference/square/oauth-api/revoke-token). For more information about revoking an access token, see [Refresh, Revoke, and Limit the Scope of OAuth Tokens](oauth-api/refresh-revoke-limit-scope). ## Handle token-based errors When your application uses an access token to call a Square API, OAuth-related errors can occur if a token is expired, is revoked, or has insufficient scope (unauthorized). Your application should handle these error codes and display a customer-friendly message that clearly communicates the error to the seller, their customer, or both. Errors include: * `ACCESS_TOKEN_EXPIRED` * `ACCESS_TOKEN_REVOKED` * `UNAUTHORIZED` Square retains expired access tokens for a limited time. During this time, the Square API returns the `ACCESS_TOKEN_EXPIRED` error. After that time, the Square API returns an `UNAUTHORIZED` error. Square API calls that return the `UNAUTHORIZED` error aren't cases of insufficient scope. Square API calls with insufficient scope return a `403 FORBIDDEN` error. ## See also * [Create the Redirect URL and Square Authorization Page URL](oauth-api/create-urls-for-square-authorization) * [Refresh, Revoke, and Limit the Scope of OAuth Tokens](oauth-api/refresh-revoke-limit-scope) * [OAuth Walkthrough: Test Authorization with a Web Server](oauth-api/walkthrough) * [OAuth Best Practices](oauth-api/best-practices) * [Walkthrough: Obtaining an Access Token in the Square Sandbox](oauth-api/movetoprod) * [OAuth Permissions Reference](oauth-api/square-permissions) * [Video: OAuth Best Practices](https://www.youtube.com/watch?v=3gLqCJC6kLI) --- # Create the Redirect URL and Square Authorization Page URL > Source: https://developer.squareup.com/docs/oauth-api/create-urls-for-square-authorization > Status: PUBLIC > Languages: All > Platforms: All The first step in the OAuth process is to create a URL that requests permissions and directs the seller to the authorization page. **Applies to:** [OAuth API](oauth-api/overview) {% subheading %}Learn how to register your redirect URL and build the authorization URL that directs sellers to the authorization page.{% /subheading %} {% toc hide=true /%} ## Overview Applications use an {% tooltip text="OAuth access token" %}Represents the set of permissions allowed by a seller. OAuth access tokens are obtained through an OAuth flow using your application credentials.{% /tooltip %} to call Square APIs on behalf of a Square seller. Before you can obtain access tokens, you must set up two URLs: * **Redirect URL** - Your application endpoint that receives the authorization response from Square. * **Authorization URL** - The URL that sends sellers to the Square authorization page where they can grant permissions to your application. You append parameters to the URL and provide it as a link or button from your application, web page, email, or automated response. After a seller grants permissions, Square appends an authorization code and other response parameters to your redirect URL and redirects the seller back to your application. {% anchor id="create-the-redirect-url" /%} {% anchor id="register-your-redirect-url" /%} ## Register your redirect URL The redirect URL is the endpoint where your application or web page receives authorization responses from Square. The following requirements apply for the [production environment](oauth-api/overview#production-and-sandbox-environments): * Your redirect endpoint must use HTTPS. This is also a requirement for the Square Sandbox environment. * Your endpoint must be able to process the `GET` authorization response and securely store the access and refresh tokens and the `code_verifier` if you're using the PKCE flow. For more information, see [Receive Seller Authorization and Manage Seller OAuth Tokens](oauth-api/receive-and-manage-tokens). * When Square redirects the seller back to your endpoint with the authorization response, you must display a user-friendly message indicating that the approval or denial was successfully processed. To register your redirect URL and get your application credentials: 1. Sign in to the [Developer Console](https://developer.squareup.com/apps) and choose **Open** for your application. If needed, you can add an application from the **Applications** page. 3. At the top of the page, choose the **Sandbox** (for testing) or **Production** environment. 4. In the left pane, choose **OAuth**. 5. Register your redirect URL: 1. In the **Redirect URL** box, choose **Update**, and then enter your exact redirect URL. 2. Choose **Confirm**. {% aside type="info" %} Mobile and desktop clients using the PKCE flow can use [dynamic ports](#use-dynamic-ports-for-pkce-redirect-urls). {% /aside %} 6. Copy your application credentials to use later in the OAuth process: 1. In the **Application ID** box, copy the application ID. 2. In the **Application Secret** box, choose **Show**, and then copy the application secret. The application secret is only used in the [code flow](oauth-api/overview#code-flow). {% anchor id="use-dynamic-ports-for-pkce-redirect-urls" /%} ### Use dynamic ports for PKCE redirect URLs Mobile and desktop clients that use the [PKCE flow](oauth-api/overview#pkce-flow) can dynamically define ports for the redirect URL at runtime. To use this feature, complete these steps: 1. In the Developer Console, register the redirect URL using the literal "<port>" in place of the port number. For example: * https://my-app:<port>/callback * http://localhost:<port> 2. In the authorization URL, specify the full redirect URL with the port number in the `redirect_uri` parameter. {% anchor id="create-the-authorization-url" /%} {% anchor id="build-the-authorization-url" /%} ## Build the authorization URL The authorization URL directs sellers to the Square authorization page where they can grant permissions to your application. You build the authorization URL by appending parameters such as `client_id` and the permissions `scope`, as shown in the following example: `https://connect.squareup.com/oauth2/authorize?client_id=sq0idp-LJ1Sr4Iim0hGGvsMrx83vF&scope=CUSTOMERS_WRITE+CUSTOMERS_READ&session=false&state=W4gMTIzNDU2N219deiBzYWd2Fp33z` The code flow and PKCE flow use different sets of [authorization URL parameters](#authorization-parameters). {% tabset %} {% tab id="Code flow examples" %} * **Production** ```html {% lineNumbers=false %} https://connect.squareup.com/oauth2/authorize ?client_id=sq0idp-LJ1Sr4Iim0hGGvsMrx83vF // your production application ID &scope=CUSTOMERS_WRITE+CUSTOMERS_READ // requested permissions &session=false // false for production apps &state=W4gMTIzNDU2N219deiBzYWd2Fp33z // CSRF token ``` * **Sandbox** - for testing only ```html {% lineNumbers=false %} https://connect.squareupsandbox.com/oauth2/authorize ?client_id=sandbox-sq0idb-ioiyW39PwrXoGyLt4 // your Sandbox application ID &scope=CUSTOMERS_WRITE+CUSTOMERS_READ // requested permissions &state=c2hvcnRfdG9rZW4x23SYc8a48hbXBsZ // CSRF token ``` Line breaks and comments in the examples are added for clarity. {% /tab %} {% tab id="PKCE flow examples" %} * **Production** ```html {% lineNumbers=false %} https://connect.squareup.com/oauth2/authorize ?client_id=sq0idp-LJ1Sr4Iim0hGvXj23cy6 // your production application ID &scope=CUSTOMERS_WRITE+CUSTOMERS_READ // requested permissions &session=false // false for production apps &state=dGhpcyBpcyBhIsZSB0b2tljM0nTY3ODkw // CSRF token &code_challenge=XohImNooBHFQpJ3NgPQ1mrX7W04 // encoded hash of code verifier &redirect_uri=https://my-app:40/callback // used for dynamic ports only ``` * **Sandbox** - for testing only ```html {% lineNumbers=false %} https://connect.squareupsandbox.com/oauth2/authorize ?client_id=sandbox-sq0idb-ioiyW39PwrU1mwH8o // your Sandbox application ID &scope=CUSTOMERS_WRITE+CUSTOMERS_READ // requested permissions &state=W5vdGhlciBzYW1wbGUgdG9rZWMTIz2N5A // CSRF token &code_challenge=zVc8-qzfnlJvAkE_7fSzB7gp6Oj // encoded hash of code verifier &redirect_uri=http://localhost:8000 // used for dynamic ports only ``` Line breaks and comments in the examples are added for clarity. {% /tab %} {% /tabset %} {% aside type="important" %} Make sure to provide sellers with the authorization URL for the production environment, which uses the production base URL and your production application ID. {% /aside %} {% anchor id="authorization-parameters" /%} ### Authorization parameters The following parameters can be used in the authorization URL for the [code flow](oauth-api/overview#code-flow), [PKCE flow](oauth-api/overview#pkce-flow), or both. {% table %} * Parameter {% width="135px" %} * Description * Flow {% width="100px" %} ----- * `client_id` * Your application ID, obtained from the **OAuth** page in the Developer Console. Make sure to use the correct application ID that corresponds to the [production or Sandbox environment](oauth-api/overview#production-and-sandbox-environments). * Code, PKCE ----- * `scope` * A list of the [OAuth permissions](oauth-api/square-permissions) to request from the seller, separated by a space or the `+` character. To align with the "least privilege" best practice, request only the permissions that your application requires. For more information, see [Set the scope parameter](#set-the-scope-parameter). * Code, PKCE ----- * `session` * Specifies whether sellers must log in to the Square authorization page. For a production application, this parameter must be set to `false` to help ensure that sellers with multiple Square accounts use the correct account to authorize your application. This value is ignored in the Sandbox. * Code, PKCE ----- * `state` * A cross-site request forgery (CSRF) token, which is a unique, random, and unpredictable string generated by your application server. Square returns this token in the `state` parameter in the redirect URL to enable your application to verify the authenticity of the response. This technique helps mitigate [CSRF](https://en.wikipedia.org/wiki/Cross-site_request_forgery) attacks. For more information, see [section 10.2](https://tools.ietf.org/html/rfc6749#section-10.12) of the OAuth 2.0 protocol specification (RFC 6749). * Code, PKCE ----- * `code_challenge` * A Base64 URL-encoded SHA256 hash of the code verifier, which is a unique, random, client-generated string your application provides in the `ObtainToken` request. Your client should generate these values as described in [RFC 7636](https://datatracker.ietf.org/doc/html/rfc7636). Including this parameter indicates that you're using the PKCE flow and requires that you include `code_verifier` in your `ObtainToken` call. If omitted, you cannot pass `code_verifier` to `ObtainToken`. * PKCE ----- * `redirect_uri` * The {% tooltip text="redirect URL" %}The endpoint for your application or web page that processes the authorization response from Square. Your application's redirect URL is registered in the Developer Console.{% /tooltip %}, which is required when using [dynamic ports](#use-dynamic-ports-for-pkce-redirect-urls). * PKCE ----- * `locale` * Optional. Forces the Square authorization page to display using a particular locale. Square detects the locale automatically, so only provide this parameter if your application can definitively determine the preferred locale and has a specific reason for doing so. Supported values are `en-US`, `en-CA`, `es-US`, `fr-CA`, and `ja-JP`. * Code, PKCE {% /table %} {% aside type="info" %} Square also accepts `response_type=code`, but you can omit it because only `code` is supported and it's the default value. The `token` response type isn't supported. {% /aside %} {% anchor id="set-the-scope-parameter" /%} ### Set the scope parameter The `scope` parameter lists the permissions your application is requesting from sellers. As a best practice, follow the least privilege principle and request only the permissions that your application requires. You can find required permissions for each endpoint in the [Square API Reference](https://developer.squareup.com/reference/square) and [OAuth Permissions Reference](oauth-api/square-permissions). For example, suppose you're building a simple invoicing application that processes payments and refunds, displays payment information to customers and sellers, and collects an application fee from payments. You need the following permissions: * `PAYMENTS_WRITE` - Required for [CreatePayment](https://developer.squareup.com/reference/square/payments-api/create-payment) and [RefundPayment](https://developer.squareup.com/reference/square/payments-api/refund-payment). * `PAYMENTS_READ` - Required for [ListPayments](https://developer.squareup.com/reference/square/payments-api/list-payments) and [GetPayment](https://developer.squareup.com/reference/square/payments-api/get-payment). * `PAYMENTS_WRITE_ADDITIONAL_RECIPIENTS` - Required for `CreatePayment` if you [collect an application fee](payments-api/take-payments-and-collect-fees). Some endpoints might require multiple permissions and others require permissions for specific access, such as [PayOrder](https://developer.squareup.com/reference/square/orders-api/pay-order) or [ListBookings](https://developer.squareup.com/reference/square/bookings-api/list-bookings). {% aside type="info" %} While it's important not to request more permissions than necessary, also consider permissions needed for future integrations and new features. If your application evolves to include new features or integrates with other systems that require additional permissions, you must request these permissions through a new authorization request to the seller. {% /aside %} You should explicitly specify the permissions that your application requires. If you don't set a scope (not recommended), the default permission scope is: * `MERCHANT_PROFILE_READ` * `PAYMENTS_READ` * `BANK_ACCOUNTS_READ` * `SETTLEMENTS_READ` Note that you cannot find which permissions are associated with an authorization code before you call `ObtainToken`. However, you can call [RetrieveTokenStatus](https://developer.squareup.com/reference/square/o-auth-api/retrieve-token-status) to get the permissions associated with an access token. ## See also * [Receive Seller Authorization and Manage Seller OAuth Tokens](oauth-api/receive-and-manage-tokens) * [Refresh, Revoke, and Limit the Scope of OAuth Tokens](oauth-api/refresh-revoke-limit-scope) * [OAuth Walkthrough: Test Authorization with a Web Server](oauth-api/walkthrough) * [OAuth Best Practices](oauth-api/best-practices) * [Move OAuth from the Sandbox to Production](oauth-api/movetoprod) * [OAuth Permissions Reference](oauth-api/square-permissions) * [Video: OAuth Best Practices](https://www.youtube.com/watch?v=3gLqCJC6kLI) --- # Migrate from Renew to Refresh OAuth Tokens > Source: https://developer.squareup.com/docs/oauth-api/migrate-to-refresh-tokens > Status: PUBLIC > Languages: All > Platforms: All Learn how to migrate your Square API authentication logic to use OAuth refresh tokens. **Applies to:** [OAuth API](oauth-api/overview) {% subheading %}Learn how to use the [OAuth API](https://developer.squareup.com/reference/square/o-auth-api) to migrate your Square API authentication logic to use OAuth refresh tokens.{% /subheading %} {% toc hide=true /%} ## Overview When updating your application to use Square API version 2019-03-13 or newer, your code must use the OAuth refresh token flow instead of the deprecated renew token flow. Renewable OAuth access tokens created with older versions of the Square API must be replaced by refreshable tokens before the older tokens expire. OAuth access tokens created using a Square API version prior to 2019-03-13 continue to work until they expire. However, [RenewToken](https://developer.squareup.com/reference/square/oauth-api/renew-token) is deprecated in Square API version 2019-03-13. `RenewToken` is retired on 2024-04-17. If you haven't migrated your application to use refreshable tokens before that date, users will not be able to authorize your application to access their Square accounts. ## Migrate from renewable to refreshable token If your application caches and uses the deprecated renewable token, do the following steps to migrate to refreshable tokens: 1. Call the `ObtainToken` endpoint with the `grant_type` parameter of `migration_token`, passing the old renewable token. 1. Get the new OAuth token from the response. 1. Get the refresh token from that same response. 1. Cache both of tokens from the response securely. !!!info If your application calls [ObtainToken](https://developer.squareup.com/reference/square/oauth-api/obtain-token) with the `migration_token` parameter but for some reason cannot or does not store the response, it can repeat the call as long as the renewable OAuth token is still valid. !!! Use the refreshable OAuth token flow with the following steps: 1. Use the new OAuth token in all Square API rest calls. 1. Before the OAuth token expires, refresh it by using the `refresh_token` grant type in the `ObtainToken` endpoint to get a new OAuth token. 1. If token expires without being refreshed, use the `authorization_code` grant type to restart the authentication flow. For more information about the new OAuth flow, see [OAuth API Overview](oauth-api/overview). ## Exchange a renewable token for a refreshable token Use the following migration process to replace a renewable token with a refreshable token: 1. In the [Developer Console](https://developer.squareup.com/apps), make sure your application is using Square API version 2019-03-13 or later. 2. POST a request to the [ObtainToken](https://developer.squareup.com/reference/square/oauth-api/obtain-token) endpoint. In the request body, specify the non-expired legacy access token as follows: * Set the `grant_type` parameter to `migration_token`. * Set the `migration_token` parameter to the non-expired renewable OAuth access token to migrate. ```` 3. In the response, Square returns a new access token along with a refresh token. You should persist both the access token and refresh token and use these credentials going forward. ```json { "access_token": "{{REFRESHABLE_ACCESS_TOKEN}}", "token_type": "bearer", "expires_at": "2020-11-26T21:15:07Z", "merchant_id": "{{MERCHANT_ID}}", "refresh_token": "{{REFRESH_TOKEN}}" } ``` {% aside type="important" %} The new access token expires 30 days after it's created. After it expires, you use the refresh token to generate a new access token by sending a request to the `ObtainToken` endpoint. {% /aside %} If any of the preceding steps fail, you can safely repeat the process with the legacy access token you're trying to migrate. As long as the legacy token isn't expired, this process provides a replacement access token and refresh token. --- # OAuth API > Source: https://developer.squareup.com/docs/oauth-api/overview > Status: PUBLIC > Languages: All > Platforms: All The OAuth API lets you request permissions from Square sellers to manage their resources and get access tokens to call Square APIs on their behalf. **Applies to:** [OAuth API](https://developer.squareup.com/reference/square/o-auth-api) {% subheading %}Use the OAuth API to connect your application to a seller's account using OAuth.{% /subheading %} {% toc hide=true /%} {% youtube src="https://www.youtube.com/embed/1eT2HeaZwjM" /%} ## Overview The Square OAuth API uses the [OAuth 2 protocol](https://tools.ietf.org/html/rfc6749) to obtain permission from Square sellers to access specific types of resources in their account. During this process, client applications request specific permissions and receive an authorization code, which is then exchanged for an access token and refresh token. These tokens allow you to manage resources for a seller and call Square APIs on their behalf. Typically, the OAuth flow is initiated when onboarding a Square seller to your application. The OAuth flow includes the following high-level stages: {% table %} * Stage 1: Authorization {% width="230px" %} * Stage 2: Callback {% width="230px" %} * Stage 3: Token request --- * Your application uses an {% tooltip text="authorization URL" %}A URL to the Square authorization page that includes the permissions you're requesting, your application ID, and other parameters.{% /tooltip %} to send the seller to the Square authorization page where they can sign in to Square and grant the permissions you requested. * Square uses your {% tooltip text="redirect URL" %}The endpoint for your application or web page that processes the authorization response from Square. Your application's redirect URL is registered in the Developer Console.{% /tooltip %} to send the seller back to your application and appends a `code` query parameter that contains an authorization code. * Your application calls `ObtainToken` and sends the authorization code, your application ID, and other fields. Square returns an access token and refresh token. {% /table %} ## Requirements and limitations * The OAuth API requires HTTPS for the redirect URL for the authorization callback. For testing purposes using the Square Sandbox, you can use HTTP with localhost. * Authorization codes returned by the Square authorization page expire after 5 minutes. An authorization code can only be used once. * Square OAuth access tokens expire after 30 days. To maintain access, you must generate a new OAuth access token using the refresh token received with the original authorization. For more information about managing OAuth access tokens and refresh tokens, see [OAuth API Best Practices](oauth-api/best-practices). * Refresh tokens obtained using the code flow don't expire. Refresh tokens obtained using the PKCE flow are single-use tokens and expire after 90 days. If you lose a refresh token, you must repeat the full OAuth authorization flow to obtain a new OAuth access token and refresh token. A refresh token only becomes invalid when the application's access has been completely revoked. * A refresh token obtained using the code flow can be used to get multiple active access tokens. You can call [ObtainToken](https://developer.squareup.com/reference/square/oauth-api/obtain-token) multiple times with a refresh token. Each access token expires 30 days after it is obtained and each can be individually revoked. Developers sometimes choose to have multiple access tokens for a seller when the seller has a multi-store eCommerce site and wants a separate access token for each store. ## OAuth flows Square offers two types of OAuth: a code flow and a PKCE (Proof Key for Code Exchange) flow: * The code flow is an OAuth flow that requires a confidential client to pass in the `client_id` and `client_secret` values when redeeming an authorization code from Square. Passing these types of sensitive data requires you to use a confidential client. * The PKCE flow is an OAuth flow for public clients that removes the need to pass the `client_secret` and replaces it with a `code_verifier`. The `code_verifier` is a unique string that the client application creates for every authorization request. The PKCE flow must be used by any client that cannot safely store secrets in the application, such as mobile applications, single-page applications, and native desktop applications. {% aside type="important" %} A confidential client is one where the application runs on a server and the seller interacts with the application by using a browser or an API. A public client, on the other hand, is a mobile or desktop application where the seller has the actual application on their device. Public clients shouldn't store secrets because the secret is stored inside the application and a debugger or disassembler can be used to find the secret. {% /aside %} The OAuth API uses the following OAuth terms when using the code flow or PKCE flow: * **Authorization code** - A code that is returned when calling the `Authorize` endpoint. This code is used to redeem an access token and a refresh token. * **Access token** - A token that grants access to a client's resources and has some privileges attached to it. Access tokens expire after a certain amount of time. * **Refresh token** - A token that is used to generate more access tokens. If you use the code flow, refresh tokens are valid until their access is revoked. If you use the PKCE flow, refresh tokens are single-use tokens and expire after 90 days. Square doesn't support OpenID or other single sign-on (SSO) protocols on top of the OAuth implementation. ## Code flow The OAuth code flow is designed for confidential client applications that run on a server and can store client information securely. The code flow uses the following OAuth terms: * `client_id` - The ID that is associated with an application using the OAuth process. This is a public variable and is called the **Application ID** in the Developer Console on the **OAuth** page. * `client_secret` - The secret that is associated with an application. It is used to redeem refresh tokens and should never be shared by a public client. Leaking this information is equivalent to leaking a password. This variable is called the **Application secret** in the Developer Console on the **OAuth** page. The code flow process is as follows: 1. Your client application [builds an authorization URL](oauth-api/create-urls-for-square-authorization#create-the-authorization-url) that you provide to the seller who approves the permissions you requested. The authorization URL contacts the `Authorize` endpoint. 2. The `Authorize` endpoint returns an authorization code by making a `GET` request to the [redirect URL you registered](oauth-api/create-urls-for-square-authorization#create-the-redirect-url) for your application in the Developer Console. 3. The client calls the `ObtainToken` endpoint and provides the client ID, client secret, and the authorization code. 4. The `ObtainToken` endpoint returns an access token and a refresh token. ![A graphic showing the process flow for the OAuth code flow.](//images.ctfassets.net/1nw4q0oohfju/3k5ubwx5BLKWaGlLxGdC5T/4e211a48aaa47fe5b0bf7768ce03b090/oauth-code-flow.png) ## PKCE flow The OAuth PKCE flow is designed for public clients that shouldn't store secret information in their application. The PKCE process removes the need to pass the `client_secret` and doesn't require a secure backend server. The PKCE flow adds two new terms: * `code_verifier` - A unique random string generated by the client. * `code_challenge` - A Base64-URL-encoded string of the SHA256 hash of the `code verifier`. The PKCE flow process is as follows: 1. The client application [builds an authorization URL](oauth-api/create-urls-for-square-authorization#create-the-authorization-url) that's the authorization request. The client application creates the `code_verifier` and uses the Base64-URL-encoding of its SHA256 hash to create the `code_challenge`. The authorization request calls the `Authorize` endpoint and includes the `code_challenge`. You provide this URL to the seller who approves the permissions you request. 2. The `Authorize` endpoint returns an authorization code by making a `GET` request to the [redirect URL you registered](oauth-api/create-urls-for-square-authorization#create-the-redirect-url) for your application in the Developer Console. The server retains the `code_challenge`. 3. The client calls the `ObtainToken` endpoint and provides the client ID, `code_verifier`, and authorization code. The server verifies that the `code_verifier` is the same value as the value that was encrypted to create the `code_challenge`. 4. The `ObtainToken` endpoint returns an access token and a single-use refresh token that expires in 90 days. ![A graphic showing the process flow for the OAuth PKCE flow.](//images.ctfassets.net/1nw4q0oohfju/xtLgKhqRLolcIeNihd5uH/83267d5231df212e409218016b262ad7/pkce-code-flow.png) ## Determine which OAuth flow applies to your application If your application has a confidential client, one that is able to securely authenticate with an authorization server and is able to store the `client_secret` securely, you should use the OAuth code flow for your application. Using the OAuth code flow lets you receive multiple-use refresh tokens that don't expire. If you have a public client that is unable to use registered client secrets or an application running in a browser or on a mobile device, you must use the OAuth PKCE flow. You should also choose the OAuth PKCE flow if you have a native desktop application, a single-page web application, or a mobile application. Refresh tokens expire after 90 days using the OAuth PKCE flow and you don't have to store the `client_secret`. You can determine which OAuth flow to use by answering the following questions: * Are you building a server application where you control the hosting? If yes, use the OAuth code flow. * Are you building a single-purpose application where the application needs an access token? If yes, use the PKCE flow and use a [short-lived token](oauth-api/refresh-revoke-limit-scope#short-lived-tokens). * Are you building a mobile application for installation on mobile devices around the world? If yes, use the PKCE flow and use a short-lived token. {% aside type="important" %} You cannot mix and match OAuth flows; you must choose either the code flow or the PKCE flow end to end. {% /aside %} To learn how to set up a basic website that uses the OAuth code flow, see [OAuth Walkthrough: Test Authorization with a Web Server](oauth-api/walkthrough). For more information about writing authentication code, see [OAuth Best Practices](oauth-api/best-practices). ## Webhooks A webhook is a subscription that notifies you when a Square event occurs. For more information about using webhooks, see [Square Webhooks](webhooks/overview). The OAuth API supports the following webhook event: | Event | Permission | Description | |-------------|------------|-----------------| |[oauth.authorization.revoked](https://developer.squareup.com/reference/square/oauth-api/webhooks/oauth.authorization.revoked)| N/A | Notifies an application whenever a seller revokes all access tokens and refresh tokens granted to the application.| If you use the OAuth API to get authorization to manage a seller's resources, you should create a webhook that notifies you of the `oauth.authorization.revoked` event. It indicates that a seller has removed your application's access to their resources. For a complete list of Square webhook events, see [Webhook Events Reference](webhooks/v2webhook-events-tech-ref). {% anchor id="production-and-sandbox-environments" /%} ## OAuth in the production and Sandbox environments Production is the live environment where Square sellers process real transactions and conduct business operations. The Square [Sandbox](devtools/sandbox) is an isolated testing environment that developers can use to test integrations without affecting real users or data. The base URL and application credentials must correspond to the target environment: {% table %} *   {% width="100px" %} * Production * Sandbox ------ * Domain * `squareup.com` * `squareupsandbox.com` ------ * OAuth API base URL * `https://connect.squareup.com/oauth2` * `https://connect.squareupsandbox.com/oauth2` ------ * Example authorization URL * `https://connect.squareup.com/oauth2/authorize?client_id=sq0idp-LJ1Sr4Iim0hGGvsMrx83&scope=ORDERS_READ+MERCHANT_PROFILE_READ&state=abc123` * `https://connect.squareupsandbox.com/oauth2/authorize?client_id=sandbox-sq0idb-ioiyW39PwrXoGy4&scope=ORDERS_READ+MERCHANT_PROFILE_READ&state=abc123` {% /table %} {% aside type="important" %} Make sure to provide sellers with the [authorization URL](oauth-api/create-urls-for-square-authorization#create-the-authorization-url) for the production environment, which uses the production base URL and your production application ID. The Sandbox is only used for testing. {% /aside %} ### Access tokens The tokens you obtain are also scoped to an environment. To call Square APIs (except the OAuth API), use the access token that corresponds to the base URL. {% tabset %} {% tab id="Production" %} Calls to `https://connect.squareup.com/v2` require a valid production access token. ```curl curl https://connect.squareup.com/v2/locations \ -H 'Square-Version: 2025-01-23' \ -H 'Authorization: Bearer {PRODUCTION_ACCESS_TOKEN}' \ -H 'Content-Type: application/json' ``` {% /tab %} {% tab id="Sandbox" %} Calls to `https://connect.squareupsandbox.com/v2` require a valid Sandbox access token. ```curl curl https://connect.squareupsandbox.com/v2/locations \ -H 'Square-Version: 2025-01-23' \ -H 'Authorization: Bearer {SANDBOX_ACCESS_TOKEN}' \ -H 'Content-Type: application/json' ``` {% /tab %} {% /tabset %} {% aside type="info" %} [Webhook Subscriptions API](https://developer.squareup.com/reference/square/webhook-subscriptions-api) and [Events API](https://developer.squareup.com/reference/square/events-api) endpoints require the developer's [personal access token](build-basics/access-tokens#get-personal-access-token). OAuth access tokens aren't valid with these APIs. {% /aside %} Mixing the access token environment results in an `AUTHENTICATION_ERROR` error with the `UNAUTHORIZED` error code. ### Sandbox testing When testing the OAuth flow in the Sandbox, you cannot sign in directly to the Square authorization page like you can in the production environment. Instead, you must open the Sandbox Square Dashboard for a Sandbox test account in a separate web page and then use the authorization URL to open the Square authorization page. For instructions, see step 3 in [OAuth Walkthrough: Test Authorization with a Web Server](oauth-api/walkthrough). This limitation is the reason the `session=false` parameter in the authorization URL isn't supported in the Sandbox. If you don't need to test the OAuth flow, you can create [Sandbox test accounts](devtools/sandbox/overview#create-a-sandbox-test-account) and quickly generate Sandbox access tokens to test with specific permissions. ## Common errors Authorization errors are typically caused by typos or mismatched credentials (Sandbox versus Production credentials). * Make sure you've updated placeholders and default values in the sample code with valid application credentials. * Make sure you've configured your credentials correctly. For example, if you're testing calls in production, make sure you're not using Sandbox credentials. * Make sure you're using the right credential type. For example, application IDs are used for OAuth API calls but access tokens are often used in other API calls. * Make sure the access token is sent as a bearer token (for example, `Authorization: Bearer {ACCESS_TOKEN}`). For more information, see [Authentication errors](build-basics/general-considerations/handling-errors#authentication-errors). ## See also * [Create the Redirect URL and Square Authorization Page URL](oauth-api/create-urls-for-square-authorization) * [Receive Seller Authorization and Manage Seller OAuth Tokens](oauth-api/receive-and-manage-tokens) * [Refresh, Revoke, and Limit the Scope of OAuth Tokens](oauth-api/refresh-revoke-limit-scope) * [OAuth Walkthrough: Test Authorization with a Web Server](oauth-api/walkthrough) * [OAuth Best Practices](oauth-api/best-practices) * [Move OAuth from the Sandbox to Production](oauth-api/movetoprod) * [OAuth Permissions Reference](oauth-api/square-permissions) * [Video: OAuth Best Practices](https://www.youtube.com/watch?v=3gLqCJC6kLI) --- # Migrate from Deprecated APIs > Source: https://developer.squareup.com/docs/migrate-from-v1 > Status: PUBLIC > Languages: All > Platforms: All Find migration information for Square APIs and Connect v1 APIs in the Square Developer platform that are scheduled for retirement. {% subheading %}Learn about depreciated APIs and how to migrate your code to use the replacement Square APIs.{% /subheading %} {% toc hide=true /%} ## Overview The following sections list the Square APIs that are deprecated and scheduled for retirement and where you can get help migrating from deprecated APIs. For information about the path from API deprecation to retirement, see [Square API Lifecycle](build-basics/api-lifecycle). ## Current status The following Square APIs are deprecated and scheduled for retirement or recently retired and no longer supported. For detailed guidance about migrating your code to use the replacement Square API, refer to the migration guide provided in the table for the deprecated API. ### Deprecated The following Square APIs and SDKs are deprecated. | API | Replacement |Deprecation |Retirement| |-|-|-|-| | Employees | [Team API](https://developer.squareup.com/reference/square/team-api){% line-break /%}[Migration guide](labor-api/migrate-to-teams) | 2020-08-26 | 2021-08-26 | | Transactions | [Payments API](https://developer.squareup.com/reference/square/payments-api){% line-break /%}[Migration guide](payments-api/migrate-from-transactions-api) | 2019-08-15 | TBD | | Reader SDK | [Mobile Payments SDK](mobile-payments-sdk) {% line-break/%}[Migration guide](mobile-payments-sdk/migrate)| 2025-02-20 | 2025-12-31 | | Mobile Authorization | [Mobile Payments SDK](mobile-payments-sdk){% line-break /%}[Migration guide](mobile-payments-sdk/migrate) | 2025-02-20 | 2025-12-31 | {% aside type="info" %} Square APIs that are in the General Availability (GA) or Beta state might have [deprecated endpoints and webhooks](https://developer.squareup.com/reference/square/deprecated) or [deprecated objects, fields, enums, and values](migrate-from-v1/current-status). {% /aside %} ## Where can I get help? If you have questions or need help migrating from deprecated APIs, [contact Developer Support](https://squareup.com/help/contact?panel=BF53A9C8EF68), [join our Discord community](https://discord.gg/squaredev), or reach out to your Square account manager. ## What happens if I call an API after retirement? **Your code will break**. Retired functionality cannot be used, regardless of the `Square-Version` provided during the API call. REST calls that attempt to use retired functionality return errors. Square SDKs released on or after retirement don't include retired features. --- # Deprecated Items in the Square Data Model > Source: https://developer.squareup.com/docs/migrate-from-v1/current-status > Status: PUBLIC > Languages: All > Platforms: All Learn about the current status of deprecated Square APIs. {% subheading %}Learn about the current status of deprecated Square objects, fields, enums, and values.{% /subheading %} {% toc hide=true /%} ## Overview To provide new features or improved functionality, Square might deprecate objects, fields, enums, or values in the data model. When items are deprecated, you should migrate to the replacement as soon as possible to avoid disruption when the item is retired in a future Square API version. The Square Developer Platform attempts to minimize changes that require code updates. {% aside type="info" %} All Connect v1 objects and enums are deprecated or retired. The [Deprecated](https://developer.squareup.com/reference/square/deprecated) page in the Square API Reference lists all deprecated endpoints and webhooks. Each deprecated endpoint documents its deprecation date and, where applicable, the replacement endpoint, estimated retirement date, and migration guide. {% /aside %} ## Deprecated objects and fields The following objects are deprecated, along with all of their fields: * [AdditionalRecipient](https://developer.squareup.com/reference/square/objects/AdditionalRecipient) * [EmployeeWage](https://developer.squareup.com/reference/square/objects/EmployeeWage) * [Employee](https://developer.squareup.com/reference/square/objects/Employee) * [Shift](https://developer.squareup.com/reference/square/objects/Shift) * [ShiftWage](https://developer.squareup.com/reference/square/objects/ShiftWage) * [ShiftSort](https://developer.squareup.com/reference/square/objects/ShiftSort) * [ShiftFilter](https://developer.squareup.com/reference/square/objects/ShiftFilter) * [ShiftQuery](https://developer.squareup.com/reference/square/objects/ShiftQuery) * [ShiftWorkday](https://developer.squareup.com/reference/square/objects/ShiftWorkday) * [Transaction](https://developer.squareup.com/reference/square/objects/Transaction) The following deprecated fields belong to objects that are not deprecated: * AccumulateLoyaltyPointsResponse.[event](https://developer.squareup.com/reference/square/objects/AccumulateLoyaltyPointsResponse#definition__property-event) * CardPaymentDetails.[device_details](https://developer.squareup.com/reference/square/objects/CardPaymentDetails#definition__property-device_details) * CatalogItem.[category_id](https://developer.squareup.com/reference/square/objects/CatalogItem#definition__property-category_id) * CatalogItem.[description](https://developer.squareup.com/reference/square/objects/CatalogItem#definition__property-description) * CatalogPricingRule.[apply_products_id](https://developer.squareup.com/reference/square/objects/CatalogPricingRule#definition__property-apply_products_id) * Checkout.[additional_recipients](https://developer.squareup.com/reference/square/objects/Checkout#definition__property-additional_recipients) * Dispute.[dispute_id](https://developer.squareup.com/reference/square/objects/Dispute#definition__property-dispute_id) * Dispute.[evidence_ids](https://developer.squareup.com/reference/square/objects/Dispute#definition__property-evidence_ids) * Dispute.[reported_date](https://developer.squareup.com/reference/square/objects/Dispute#definition__property-reported_date) * DisputeEvidence.[evidence_id](https://developer.squareup.com/reference/square/objects/DisputeEvidence#definition__property-evidence_id) * InvoicePaymentRequest.[request_method](https://developer.squareup.com/reference/square/objects/InvoicePaymentRequest#definition__property-request_method) * LoyaltyPromotionIncentivePointsMultiplierData.[points_multiplier](https://developer.squareup.com/reference/square/objects/LoyaltyPromotionIncentivePointsMultiplierData#definition__property-points_multiplier) * ObtainTokenResponse.[id_token](https://developer.squareup.com/reference/square/objects/ObtainTokenResponse#definition__property-id_token) * Payment.[employee_id](https://developer.squareup.com/reference/square/objects/Payment#definition__property-employee_id) * Refund.[additional_recipients](https://developer.squareup.com/reference/square/objects/Refund#definition__property-additional_recipients) * Tender.[additional_recipients](https://developer.squareup.com/reference/square/objects/Tender#definition__property-additional_recipients) * TerminalCheckout.[deadline_duration](https://developer.squareup.com/reference/square/objects/TerminalCheckout#definition__property-deadline_duration) ## Deprecated enums and values The following enums are deprecated, along with all of their values: * [EmployeeStatus](https://developer.squareup.com/reference/square/enums/EmployeeStatus) * [InvoiceRequestMethod](https://developer.squareup.com/reference/square/enums/InvoiceRequestMethod) * [ShiftStatus](https://developer.squareup.com/reference/square/enums/ShiftStatus) * [ShiftSortField](https://developer.squareup.com/reference/square/enums/ShiftSortField) * [ShiftFilterStatus](https://developer.squareup.com/reference/square/enums/ShiftFilterStatus) * [ShiftWorkdayMatcher](https://developer.squareup.com/reference/square/enums/ShiftWorkdayMatcher) * [TransactionProduct](https://developer.squareup.com/reference/square/enums/TransactionProduct) The following deprecated values belong to enums that are not deprecated: * CatalogItemProductType.[GIFT_CARD](https://developer.squareup.com/reference/square/enums/CatalogItemProductType#value-GIFT_CARD) * CheckoutOptionsPaymentType.[PAYPAY](https://developer.squareup.com/reference/square/enums/CheckoutOptionsPaymentType#value-PAYPAY) * DestinationType.[SQUARE_BALANCE](https://developer.squareup.com/reference/square/enums/DestinationType#value-SQUARE_BALANCE) * InventoryState.[IN_TRANSIT_TO](https://developer.squareup.com/reference/square/enums/InventoryState#value-IN_TRANSIT_TO) ## See also * [Square API Lifecycle](build-basics/api-lifecycle) * [Square API Reference](https://developer.squareup.com/reference/square) --- # Migrate from the Connect V1 Refunds API > Source: https://developer.squareup.com/docs/migrate-from-v1/guides/v1-refunds > Status: DEPRECATED > Languages: All > Platforms: All Learn about migrating your application from the V1 Refunds API to the V2 Refunds API. {% subheading %}Learn about migrating your application from the V1 Refunds API to the V2 Refunds API.{% /subheading %} {% toc hide=true /%} ## Overview The following information helps you migrate from the Connect V1 Refunds API to the correct Square API counterparts. For general guidance about the differences between Connect V1 and Square APIs, see [General Guidance](migrate-from-v1/general-guidance). Code relying on the following V1 Refunds API endpoints must be updated to avoid breaking when the V1 Refunds API reaches retirement: * V1 `CreateRefund` * V1 `ListRefunds` ## What you need to know ### Important dates * Deprecation: 2021-05-13 * Retirement: TBD ### Get help If you need help migrating to the Square API or need more time to complete your migration, [contact Developer Support](https://squareup.com/help/contact?panel=BF53A9C8EF68), [join our Discord community](https://discord.gg/squaredev), or reach out to your Square account manager. ## V1 CreateRefund endpoint The [CreateRefund](https://developer.squareup.com/reference/square/refunds-api/v1-v1-create-refund) endpoint is replaced by the Square [RefundPayment](https://developer.squareup.com/reference/square/refunds-api/refund-payment) endpoint. The following sections provide mapping information about the request fields, path parameters, and response fields. ### Request field mappings | V1 CreateRefund request field | Square RefundPayment request field | |------------------------------|-------------------------| | `payment_id` | `payment_id` | | `type` | N/A | | `reason` | `reason` | | `refunded_money` | `amount_money` | | `refunded_money.amount` | `amount_money.amount` | | `refunded_money.currency_code` | `amount_money.currency` | | `refunded_idempotency_key` | `idempotency_key` | Note the following: * N/A indicates that the field isn't used in the Square endpoint. ### Response field mappings The V1 `CreateRefund` endpoint returns refund information as a set of fields in the response body, whereas the Square `RefundPayment` creates two objects: [PaymentRefund](https://developer.squareup.com/reference/square/objects/PaymentRefund) and [Order](https://developer.squareup.com/reference/square/objects/Order). The `PaymentRefund` object provides the ID of the created `Order` object. The following table shows the field mappings. | V1 CreateRefund response field {% width="220px" %} | Map to Square PaymentRefund Object field {% width="220px" %} | Map to Square Order Object field| |------|---|-------| | `type`| N/A| | | `reason`| `reason` | | | `refunded_money`| `amount_money`| | | `refunded_money.processing_money` | `processing_fee`| | | `created_at`| `created_at` | | | `processed_at` | N/A | | | `payment_id`| `payment_id`| | | `merchant_id`| `location_id`|| | `refunded_tax_money` | | `return_amounts.tax_money` | | `refunded_additive_tax_money` | | No direct field mapping. Instead, manually aggregate across the objects in `returns.return_taxes`. | | `refunded_additive_tax`| | `returns.return_taxes` | | `refunded_inclusive_tax_money` | | No direct field mapping. Instead, manually aggregate across the objects in `returns.return_taxes`. | | `refunded_inclusive_tax` | | `returns.return_taxes` | | `refunded_tip_money` | | `return_amounts.tip_money` | | `refunded_discount_money` | | `return_amounts.discount_money` | | `refunded_surcharge_money` | | `return_amounts.service_charge_money` | | `refunded_surcharges` | | `returns.return_service_charges` | Note that a merchant can have one or more locations. Therefore, in this context, a `location_id` can serve the same purpose as the `merchant_id`. ## V1 ListRefunds endpoint The v1 [ListRefunds](https://developer.squareup.com/reference/square/refunds-api/v1-list-refunds) endpoint is replaced by the Square [ListPaymentRefunds](https://developer.squareup.com/reference/square/refunds-api/list-payment-refunds) endpoint. The following sections provide mapping information about the request fields (path parameters and query parameters) and the response fields. ### Path parameter mappings | V1 ListRefunds path parameters {% width="300px" %} | Square ListPaymentRefunds path parameters | |----|---| | `location_id` | Not available as a path parameter, but you can specify it as a `location_id` query parameter. | ### Query parameter mappings | V1 ListRefunds query parameters | Square ListPaymentRefunds query parameters | |-----|------| | `order` | `sort_order` | | `begin_time` | `begin_time` | | `end_time` | `end_time` | | `limit` | `limit` | | `batch_token` | `cursor` | ### Response field mappings The V1 `ListRefunds` endpoint returns payment information as an array of [V1Refund](https://developer.squareup.com/reference/square/objects/V1Refund) objects in the response body, whereas the Square `ListRefunds` endpoint returns an array of Square [PaymentRefund](https://developer.squareup.com/reference/square/objects/PaymentRefund) objects. This `PaymentRefund` object provides an `order_id`, if available, which you can use to retrieve the `Order` object. | V1 ListRefunds response field {% width="300px" %}| Mapping to Square PaymentRefund or Order object field | |------|---| | `items` | `refunds`| | `items.created_at` | `PaymentRefund.created_at` | | `items.is_exchange` | You can derive if the refund is related to an exchange by verifying the sum of the `line_items.total_money` with the sum of `returns.return_amounts` in the `Order` object. | | `items.merchant_id` | `PaymentRefund.location_id` | | `items.processed_at` | N/A. This field isn't available.| | `items.reason` | `PaymentRefund.reason` | | `items.refunded_additive_tax` | No direct field mapping. Instead, you aggregate manually across the objects in `Order.returns.return_taxes` where `return_taxes.type` is ADDITIVE. | | `items.refunded_additive_tax_money` | No direct field mapping. Instead, you aggregate manually across the objects in `Order.returns.return_taxes` where `return_taxes.type` is ADDITIVE. | | `items.refunded_discount_money` | Order.returns.return_amounts.tax_money | | `items.refunded_inclusive_tax` | No direct field mapping. Instead, you aggregate manually across the objects in `Order.returns.return_taxes` where `return_taxes.type` is INCLUSIVE. | | `items.refunded_inclusive_tax_money` | No direct field mapping. Instead, you aggregate manually across the objects in `Order.returns.return_taxes` where `return_taxes.type` is INCLUSIVE. | | `items.refunded_money` | `PaymentRefund.amount_money` | | `items.refunded_processing_fee_money` | `PaymentRefund.processing_fee.amount_money` | | `items.refunded_surcharge_money` | `Order.returns.return_amounts.service_charge_money`| | `items.refunded_surcharges` | `Order.returns.return_service_charges`| | `items.refunded_tax_money` | `Order.returns.return_amounts.tax_money`| | `items.refunded_tip_money` | `Order.returns.return_amounts.tip_money`| | `items.type` | You can determine whether the refund is full or partial based on the refund amount (`PaymentRefund.amount_money`) relative to the original order (`Order.total_money`). | --- # Migrate from the Connect V1 Payments API > Source: https://developer.squareup.com/docs/migrate-from-v1/guides/v1-payments > Status: PUBLIC > Languages: All > Platforms: All Learn how to migrate from using the deprecated V1 Payments API to using the Square Payments API. {% subheading %}Learn how to migrate from using the deprecated V1 Payments API to using the Square Payments API.{% /subheading %} {% toc hide=true /%} ## Overview The following information helps you migrate from the Connect V1 Payments API to the correct Square API counterparts. For general guidance about the differences between Connect V1 and Square APIs, see [General Guidance](migrate-from-v1/general-guidance). Code relying on the following V1 Payments API endpoints must be updated to avoid breaking when the V1 Payments API reaches retirement: * V1 `RetrievePayment` * V1 `ListPayment` ## Important dates * Deprecation: 2021-05-13 * Retirement: 2023-07-17 ### Get help If you need help migrating to the Square API or need more time to complete your migration, [contact Developer Support](https://squareup.com/help/contact?panel=BF53A9C8EF68), [join our Discord community](https://discord.gg/squaredev), or reach out to your Square account manager. ## V1 RetrievePayment endpoint The [RetrievePayment](https://developer.squareup.com/reference/square/payments-api/v1-v1-retrieve-payment) endpoint is replaced by the Square [GetPayment](https://developer.squareup.com/reference/square/payments-api/get-payment) endpoint. The following sections provide mapping information about the request fields, path parameters, and response fields. ### Path parameter mappings | V1 RetrievePayment path parameter | Square GetPayment path parameter | |---------------------------------|---------------------------------| | `location_id` | N/A | | `payment_id` | `payment_id` | ### Response field mappings The V1 `RetrievePayment` endpoint returns payment information as a set of fields in the response body, while the Square `GetPayment` endpoint returns a [Payment](https://developer.squareup.com/reference/square/objects/Payment) object. This `Payment` object provides an `order_id`, if available, which you can use to retrieve the [Order](https://developer.squareup.com/reference/square/objects/Order) object. {% aside type="important" %} If you want to retrieve the associated [Order](https://developer.squareup.com/reference/square/objects/order), your application needs `ORDERS_READ` [OAuth permission](oauth-api/square-permissions#orders) to call the [RetrieveOrder](https://developer.squareup.com/reference/square/orders-api/retrieve-order) endpoint. {% /aside %} | V1 RetrievePayment response field {% width="330px" %}| Mapping to Square Payment or Order object field| |----|-----| | `id`|`Payment.id`| | `merchant_id`| `Payment.location_id`| | `created_at`| `Payment.created_at`| | `creator_id`| `Payment.team_member_id`| | `device`| `Payment.device_details`| | `device.id`| `Payment.device_details.device_id`| | `device.name`| `Payment.device_details.device_name` | | `payment_url`| N/A. The field isn't available.| | `receipt_url`| `Payment.receipt_url`| | `inclusive_tax_money`| No direct field mapping. Instead, manually aggregate across the objects in `Orders.taxes` where `OrderLineItemTax.type` is INCLUSIVE.| | `additive_tax_money`| No direct field mapping. Instead, manually aggregate across the objects in `Orders.taxes` where `OrderLineItemTax.type` is ADDITIVE.| | `tax_money`| `Order.total_tax_money`| | `tip_money`| `Payment.tip_money`| | `discount_money`| `Order.total_discount_money`| | `total_collected_money`| `Order.net_amounts.total_money`| | `processing_fee_money`| `Payment.processing_fee`| | `net_total_money`| This field represents the final balance of sale and return amounts, so the mapping varies by order type. For more information, see [Mapping net_total_money](#mapping-net_total_money).| | `refunded_money`| `Payment.refunded_money`| | `swedish_rounding_money`| `Orders.rounding_adjuestment`| | `gross_sales_money`| `Payment.total_money`| | `net_sales_money`| Calculate the value: `Payment.total_money` minus `Order.total_tax_money`.| | `inclusive_tax`| No direct field mapping. Instead, manually aggregate across the objects in `Orders.taxes` where `OrderLineItemTax.type` is INCLUSIVE.| | `additive_tax`| No direct field mapping. Instead, manually aggregate across the objects in `Orders.taxes` where `OrderLineItemTax.type` is ADDITIVE.| | `tender`| There are no multiple tenders. The `Payment` represents a single tender.| | `tenders.id`| `Payment.id`| | `tenders.type`| `Payment.source_type`| | `tenders.name`| There are no tenders in the `Payment` object. Instead, use `source_type` as `tenders.name`.| | `tenders.employee_id`| `Payment.team_member_id`| | `tenders.receipt_url`| `Payment.receipt_url`| | `tenders.card_brand`| `Payment.card_details.card.card_brand`| | `tenders.pan_suffix`| `Payment.card_details.card.last_4`| | `tenders.entry_method`| `Payment.card_details.entry_method`| | `tenders.payment_note`| `Payment.note`| | `tenders.total_money`| `Payment.total_money`| | `tenders.tendered_money`| `Payment.cash_details.amount_money`| | `tenders.tendered_at` | `Payment.created_at`| | `tenders.settled_at`| `Payment.card_details.card_payment_timeline.captured_at`| | `tenders.change_back_money`| `Payment.cash_details.change_back_money`| | `tenders.refunded_money`| `Orders.refunds.amount_money`| | `tenders.is_exchange`| You can determine whether the order is an exchange order by verifying the presence of the `line_items` and returns in the `Order` object.| | `refunds`| Retrieve `Payment.refund_ids` and then use the Refunds API to retrieve the `PaymentRefund` objects.| | `refunds.type`| You can determine whether the refund is full or partial based on the refund amount (`PaymentRefund.amount_money`) relative to the original order (`Order.total_money`).| | `refunds.reason`| `PaymentRefund.reason`| | `refunds.refunded_money`| `PaymentRefund.amount_money`| | `refunds.refunded_processing_fee_money`| `PaymentRefund.processing_fee.amount_money`| | `refunds.refunded_tax_money`| `Order.returns.return_amounts.tax_money`| | `refunds.refunded_additive_tax_money`| No direct field mapping. Instead, manually aggregate across the objects in `Order.returns.return_taxes` where `return_taxes.type` is ADDITIVE.| | `refunds.refunded_additive_tax`| No direct field mapping. Instead, manually aggregate across the objects in `Order.returns.return_taxes` where return_taxes.type is ADDITIVE.| | `refunds.refunded_inclusive_tax_money`| No direct field mapping. Instead, manually aggregate across the objects in `Order.returns.return_taxes` where `return_taxes.type` is INCLUSIVE.| | `refunds.refunded_inclusive_tax`| No direct field mapping. Instead, manually aggregate across the objects in `Order.returns.return_taxes` where `return_taxes.type` is INCLUSIVE.| | `refunds.refunded_tip_money`| `Order.returns.return_amounts.tip_money`| | `refunds.refunded_discount_money`| `Order.returns.return_amounts.tax_money`| | `refunds.refunded_surcharge_money`| `Order.returns.return_amounts.service_charge_money`| | `refunds.refunded_surcharges`| `Order.returns.return_service_charges`| | `refunds.created_at`| `PaymentRefund.created_at`| | `refunds.processed_at`| N/A. This field isn't available.| | `refunds.payment_id`| `PaymentRefund.payment_id`| | `refunds.merchant_id`| `PaymentRefund.location_id`| | `refunds.is_exchange`| You can determine whether the refund is related to an exchange by verifying the sum of the `line_items.total_money` with the sum of `returns.return_amounts` in the `Order` object. | | `itemizations`| `Order.line_items`| | `itemizations.name`| `OrderLineItem.name`| | `itemizations.quantity`| `OrderLineItem.quantity`| | `itemizations.itemization_type`| `OrderLineItem.item_type`| | `itemizations.item_detail`| Use the `OrderLineItem.catalog_object_id` to retrieve the catalog information.| | `itemizations.item_detail.category_name`| Use the `OrderLineItem.catalog_object_id` to retrieve the catalog information.| | `itemizations.item_detail.sku`| N/A. Not available in a `Payment` or `Order` object.| | `itemizations.item_detail.item_id`|`OrderLineItem.catalog_object_id`| | `itemizations.item_detail.item_variation_id` | `OrderLineItem.catalog_object_id`| | `itemizations.notes`| `OrderLineItem.note`| | `itemizations.item_variation_name`| `OrderLineItem.variation_name`| | `itemizations.total_money`| `OrderLineItem.total_money`| | `itemizations.single_quantity_money`| `OrderLineItem.base_price_money`| | `itemizations.gross_sales_money`| `OrderLineItem.gross_sales_money`| | `itemizations.discount_money`| `OrderLineItem.total_discount_money`| | `itemizations.net_sales_money`| No direct field mapping. Instead, add `OrderLineItem.gross_sales_money` and `OrderLineItem.total_discount_money`.| | `itemizations.taxes`| `OrderLineItem.applied_taxes.OrderLineItemAppliedTax`| | `itemizations.taxes.name`| `Order.taxes.name`| | `itemizations.taxes.applied_money`| `OrderLineItemAppliedTax.applied_money`| | `itemizations.taxes.rate`| `Order.taxes.percentage`| | `itemizations.taxes.inclusion_type`| `Order.taxes.type`| | `itemizations.taxes.fee_id`| `OrderLineItem.applied_taxes.tax_uid`| | `itemizations.discounts`| `OrderLineItem.applied_discounts.OrderLineItemAppliedDiscount`| | `itemizations.discounts.name`| `Order.discounts.name`| | `itemizations.discounts.applied_money`| `OrderLineItemAppliedDiscount.applied_money`. Note that this `amount` is a positive integer, unlike the negative integer used for `amount` in the V1 Payments API.| | `itemizations.discounts.discount_id`| `OrderLineItemAppliedDiscount.discount_uid`| | `itemizations.modifiers`| `OrderLineItem.modifiers.OrderLineItemModifier`| | `itemizations.modifiers.name`| `OrderLineItemModifier.name`| | `itemizations.modifiers.applied_money`| `OrderLineItemModifier.total_price_money`| | `itemizations.modifiers.modifier_option_id`| `OrderLineItemModifier.catalog_object_id`| | `surcharge_money`| `Order.total_service_charge_money`| | `surcharges`| `Order.service_charges.OrderServiceCharge`| | `surcharges.name`| `OrderServiceCharge.name`| | `surcharges.applied_money`| `OrderServiceCharge.applied_money`| | `surcharges.rate`| `OrderServiceCharge.percentage`| | `surcharges.amount_money`| `OrderServiceCharge.amount_money`| | `surcharges.type`| `OrderServiceCharge.type`| | `surcharges.taxable`| `OrderServiceCharge.taxable`| | `surcharges.taxes`| `OrderServiceCharge.applied_taxes`| | `surcharges.surcharge_id`| `OrderServiceCharge.catalog_object_id`| | `is_partial`| To determine whether the order is partially paid, do the following: {% line-break /%} 1. From the `Payment` object, get the `order_id` and retrieve the `Order` using the Orders API. {% line-break /%} 2. For each `tender` in `Order.tenders`, get the `payment_id` and retrieve the `Payment` object. {% line-break /%} 3. Aggregate the `Payment.total_money` values only for the completed payments (`Payment` status is `COMPLETED`). {% line-break /%} 4. If the resulting sum is less than the `Order.total_money`, the order is partially paid.| ## V1 ListPayments endpoint The [ListPayments](https://developer.squareup.com/reference/square/payments-api/v1-v1-list-payments) endpoint is replaced by the Square [ListPayments](https://developer.squareup.com/reference/square/payments-api/list-payments) endpoint. The following sections provide mapping information about the request fields, path parameters, and response fields. {% aside type="important" %} The [ListPayments](https://developer.squareup.com/reference/square/payments-api/list-payments) endpoint returns declined payments (`FAILED` status). The V1 `ListPayments` endpoint doesn't return declined payments. {% /aside %} ### Path parameter mappings The following table shows how the V1 `ListPayments` path parameters map to the Square `ListPayments` endpoint. | V1 ListPayments path parameter{% width="330px" %} | Square ListPayments path parameter | |---------------------------------|---------------------------------| | `location_id` | Not available as a path parameter, but you can specify it as a `location_id` query parameter. | ### Query parameter mappings The following table shows how the V1 `ListPayments` query parameters map to the Square `ListPayments` endpoint. | V1 ListPayments query parameter | Square ListPayments query parameter | |----------------------------------|--------------------------------------| | `order` | `sort_order` | | `begin_time` | `begin_time` | | `end_time` | `end_time` | | `limit` | `limit` | | `batch_token` | `cursor` | | `include_partial` | N/A | ### Response field mappings The V1 `ListPayments` endpoint returns payment information as an array of `items` in the response body, which are [V1Payment](https://developer.squareup.com/reference/square/objects/v1Payment) objects. The Square `ListPayments` endpoint returns an array of Square [Payment](https://developer.squareup.com/reference/square/objects/Payment) objects. The new `Payment` object provides an `order_id`, which you can use to retrieve the [Order](https://developer.squareup.com/reference/square/objects/Order) object. | V1 ListPayments `items` response field {% width="330px" %}| Mapping to Square Payment or Order object field| |-----|----| | `V1Payment`| `Payment` object| | `id`| `id`| | `additive_tax`| No direct field mapping. Instead, manually aggregate across the objects in `Orders.taxes` where `OrderLineItemTax.type` is ADDITIVE.| | `additive_tax_money`| No direct field mapping. Instead, manually aggregate across the objects in `Orders.taxes` where `OrderLineItemTax.type` is ADDITIVE.| | `created_at`| `created_at`| | `creator_id`| `team_member_id`| | `device`| `device_details`| | `discount_money`| `Order.total_discount_money`| | `gross_sales_money`| `total_money`| | `inclusive_tax`| No direct field mapping. Instead, manually aggregate across the objects in `Orders.taxes` where `OrderLineItemTax.type` is INCLUSIVE.| | `inclusive_tax_money`| No direct field mapping. Instead, manually aggregate across the objects in `Orders.taxes` where `OrderLineItemTax.type` is INCLUSIVE.| | `is_partial`| To determine if the order isn't fully paid, do the following: {% line-break /%} 1. From the `Payment` object, get the `order_id` and retrieve the `Order` using the Orders API. {% line-break /%} 2. Check the `order.state` for `COMPLETED`. If not completed, the order is unpaid or partially paid.| | `itemizations`| `Order.line_items`| | `merchant_id`| `location_id`| | `net_sales_money`| `total_money` minus `Order.total_tax_money`| | `net_total_money`| This field represents the final balance of sale and return amounts, so the mapping varies by order type. For more information, see [Mapping net_total_money](#mapping-net_total_money).| | `payment_url`| Not available.| | `processing_fee_money`| `processing_fee`| | `receipt_url`| `receipt_url`| | `refunded_money`| `Order.return_amounts.total_money` | | `refunds`| Retrieve `refund_ids` and then use the Refunds API to retrieve the `PaymentRefund` objects.| | `surcharge_money`| `Order.total_service_charge_money` | | `surcharges`| `Order.service_charges`| | `swedish_rounding_money`| `Orders.rounding_adjuestment` | | `tax_money`| `Order.total_tax_money`| | `tender`| Multiple tenders are represented in the `Order.tenders` field. The `Payment` represents a single tender.| | `tip_money`| `tip_money`| | `total_collected_money`| `Order.net_amounts.total_money`| #### Mapping net_total_money In a V1 payment response, the `net_total_money` field represents the final balance of sale and return amounts. Mapping to the equivalent `Order` field depends on the type of order, as follows: * **Standard sale transactions** - If the corresponding order contains a `net_amounts` field, use the following mapping: `net_total_money` = `Order.net_amounts.total_money` * **Standard return transactions** - If the corresponding order contains a `return_amounts` field and the return amount is not zero, use the following mapping: `net_total_money` = `Order.return_amounts.total_money` Note that `net_total_money` amounts are negative for return orders but `return_amounts.total_money` amounts are positive. * **All other transactions** - If the previous conditions don't apply, use the following mapping: `net_total_money` = `Order.total_money` --- # Release Notes Overview > Source: https://developer.squareup.com/docs/release-notes > Status: PUBLIC > Languages: All > Platforms: All The Square Developer platform is periodically updated with new API features, additional documentation, and fixes for known issues. The [Square Developer platform](/) is periodically updated with new API features, additional documentation, and fixes for known issues. These release notes document these updates with new notes at every release of an updated API or new API. ### Release note types Each type of technology that makes up the Square Developer Platform has its own section in the release notes: * [Square APIs and SDKs](changelog/connect) - These are the REST APIs that expose the Square account data that is updated by the create, retrieve, update, and delete operations of the APIs. The Square SDKs for each supported language expose these operations in compiled libraries that you can reference in your code. * [Mobile SDKs](changelog/mobile) - Square mobile SDKs for Android and iOS provide a client-side frontend for taking in-person and in-app payments. * [Web SDKs](changelog/websdks) - Square web SDKs provide a client-side frontend for taking online payments. * [App Markeplace Requirements](changelog/requirements) - Square App Markeptlace app listing requirements. --- # Create and Manage Custom Attribute for Bookings > Source: https://developer.squareup.com/docs/booking-custom-attributes-api/custom-attributes > Status: PUBLIC > Languages: All > Platforms: All Learn how to create and manage custom attribute values for Booking objects. **Applies to:** [Booking Custom Attributes API](booking-custom-attributes-api/overview) {% subheading %}Learn how to create and manage custom attribute values for `Booking` objects using the Booking Custom Attributes API.{% /subheading %} {% toc hide=true /%} ## Overview Booking-related custom attributes are used to store seller-specific or application-specific properties or metadata for a booking. A custom attribute is represented by a [CustomAttribute](https://developer.squareup.com/reference/square/objects/CustomAttribute) object that takes a custom attribute value of the type specified in the corresponding custom attribute definition. The `CustomAttribute` and the corresponding [CustomAttributeDefinition](https://developer.squareup.com/reference/square/objects/CustomAttributeDefinition) objects share the same `key` value and the `visibility` setting. After the definition is created, the custom attribute can be set for bookings. For an overview of how booking-related custom attributes work, see [Custom Attributes for Bookings](booking-custom-attributes-api/overview). Custom attributes related to a specific booking in a seller account are accessible using the following URL path: >`.../v2/bookings/{booking_id}/custom-attributes` An individual custom attribute is accessible with the `key` parameter appended to the URL path. If the requesting application isn't the definition owner, `key` is a {% tooltip text="qualified key" %}The key provided when the definition was created, prefixed by the application ID of the definition owner: {application ID}:{key}.{% /tooltip %}. >`.../v2/bookings/{booking_id}/custom-attributes/{key}` ## CustomAttribute object The following example shows a `CustomAttribute` object: ```json { "custom_attribute": { "key": "favorite-drink", "version": 1, "updated_at": "2022-11-16T00:07:20Z", "value": "Mango Juice", "created_at": "2022-11-16T00:07:20Z", "visibility": "VISIBILITY_READ_WRITE_VALUES" } } ``` A custom attribute has the following core properties: |Field{% width="150px" %}|Description| |:------|:------| |`key`|The identifier for the custom attribute, which is obtained from the custom attribute definition.{% line-break /%}{% line-break /%}If the requesting application isn't the definition owner, the `key` is a qualified key. For more information, see [Qualified keys](#qualified-keys).| |`version`|The version number of the custom attribute. The version number is initially set to 1 and incremented each time the custom attribute value is updated. Include this field in upsert operations to enable [optimistic concurrency](build-basics/common-api-patterns/optimistic-concurrency) control and in read operations for strong consistency.| |`visibility`|The level of access that other applications have to the custom attribute. Custom attributes obtain this setting from the `visibility` field of the current version of the definition.| |`definition`|The [CustomAttributeDefinition](https://developer.squareup.com/reference/square/objects/CustomAttributeDefinition) object that defines properties for the custom attribute. This field is included if the custom attribute is retrieved using the `with_definition` or `with_definitions` query parameter set to `true`.| |`value`|The value of the custom attribute, which must conform to the `schema` specified by the definition. For more information, see [Value data types](#value-data-types). The size of this field can't exceed 5 KB.| {% anchor id="qualified-keys" /%} ### Qualified keys When working with custom attributes owned by other applications, you must provide a qualified key for the following endpoints: * `UpsertBookingCustomAttribute` * `BulkUpsertBookingCustomAttributes` * `RetrieveBookingCustomAttribute` * `DeleteBookingCustomAttribute` * `BulkDeleteBookingCustomAttributes` Square generates a qualified key in the `{application ID}:{key}` format, using the application ID of the definition owner and the `key` that was provided when the definition was created. The following example is a qualified key generated for a third-party application: >`sq0idp-BuahoY39o1X-GPxRRUWc0A:businessEmail` You can call the following endpoints to get a qualified key for an object created by another application: * [ListBookingCustomAttributeDefinitions](https://developer.squareup.com/reference/square/booking-custom-attributes-api/list-booking-custom-attribute-definitions) - Custom attributes use the same `key` as the corresponding custom attribute definition. * [ListBookingCustomAttributes](https://developer.squareup.com/reference/square/booking-custom-attributes-api/list-booking-custom-attributes) - Only custom attributes that have a value are returned. If the `?with_definitions=true` query expression is included in the request, custom attribute definitions are also returned. For more information, see [List booking custom attributes.](booking-custom-attributes-api/custom-attributes#list-booking-custom-attributes) Square returns qualified keys for custom attributes and custom attribute definitions when the requesting application isn't the definition owner. {% aside type="info" %} In addition, the `visibility` setting of the custom attribute must be `VISIBILITY_READ_ONLY` or `VISIBILITY_READ_WRITE_VALUES`. For more information, see [Access control](booking-custom-attributes-api/overview#access-control). {% /aside %} ### Value data types The following data types are supported for booking-related custom attributes: |Data type|Example value| |:------|:------| |[String](#string)|`"Nellie"`{% line-break /%}`"The quick brown fox."`| |[Email](#email)|`"person@company.com"`| |[PhoneNumber](#phonenumber)|`"+12085551234"`| |[Address](#address)|`{`{% line-break /%}`"address_line_1": "Chez Mireille COPEAU Apartment 3",`{% line-break /%}`"address_line_2": "Entrée A Bâtiment Jonquille",`{% line-break /%}`"postal_code": "33380 MIOS",`{% line-break /%}`"locality": "CAUDOS",`{% line-break /%}`"country": "FR"`{% line-break /%}`}`| |[Date](#date)|`"2022-05-12"`| |[Boolean](#boolean)|`true`{% line-break /%}`false`| |[Number](#number)|`"48"`{% line-break /%}`"12.3"`| |[Selection](#selection)|`[`{% line-break /%}`"6b96fba7-d8a5-ae72-48f4-8c3ee875633f",`{% line-break /%}`"46c2716e-f559-4b75-c015-764897e3c4a0"`{% line-break /%}`]`| {% aside type="info" %} For more information about these data types, including constraints and example requests for setting custom attribute values, see [Upsert request examples for each data type](#upsert-custom-attribute-examples). {% /aside %} The data type of a custom attribute is specified by the `schema` field of the custom attribute definition. You can call the following endpoints to retrieve a definition: * [RetrieveBookingCustomAttributeDefinition](https://developer.squareup.com/reference/square/booking-custom-attributes-api/retrieve-booking-custom-attribute-definition) * [RetrieveBookingCustomAttribute](https://developer.squareup.com/reference/square/booking-custom-attributes-api/retrieve-booking-custom-attribute) using the `?with_definition=true` query expression. For more information, see [Retrieve a booking custom attribute](booking-custom-attributes-api/custom-attributes#retrieve-booking-custom-attribute). All data types except `Selection` are specified using a simple URL reference to an object hosted on the Square CDN. A `Selection` data type provides additional information. The following is an example `String`-type custom attribute definition: ```json { "custom_attribute_definition": { "key": "favorite-drink", "name": "Favorite Drink", "description": "The favorite drink of the customer", "version": 1, "updated_at": "2022-11-16T02:41:37Z", "schema": { "$ref": "https://developer-production-s.squarecdn.com/schemas/v1/common.json#squareup.common.String" }, "created_at": "2022-11-16T02:41:37Z", "visibility": "VISIBILITY_READ_WRITE_VALUES" } } ``` The following is an excerpt of an example `Selection`-type custom attribute definition: ```json { "custom_attribute_definition": { ... "schema": { "$schema": "https://developer-production-s.squarecdn.com/meta-schemas/v1/selection.json", "maxItems": 3, "type": "array", "uniqueItems": true, "items": { "names": [ "Option 1", "Option 2", "Option 3" ], "enum": [ "9492bdda-ab4d-4eeb-8496-0986c8f78499", // UUID for "Option 1" "6b96fba7-d8a5-ae72-48f4-8c3ee875633f", // UUID for "Option 2" "4032c1a2-d749-4c75-9c30-be6472cd2e08" // UUID for "Option 3" ] } }, ... } } ``` Note the following: * The `maxItems` field represents the maximum number of allowed selections for the custom attribute value. * The `items` field contains two arrays: `names` and `enum`. The options in the `names` field map by index to the UUIDs in the `enum` field. The first option maps to the first UUID, the second option maps to the second UUID, and so on. This mapping is used to set the custom attribute value. For example, the value of the following custom attribute maps to option 2: ```json { "custom_attribute": { "key": "favoritebook", "version": 1, "updated_at": "2022-11-16T00:07:20Z", "value": [ "6b96fba7-d8a5-ae72-48f4-8c3ee875633f" ], "created_at": "2022-11-16T00:07:20Z", "visibility": "VISIBILITY_READ_WRITE_VALUES" } } ``` For more example `UpsertBoookingCustomAttribute` requests, see [Upsert request examples for each data type](#upsert-custom-attribute-examples). {% anchor id="upsert-booking-custom-attribute" /%} ## Create or update a booking custom attribute To set the value of a custom attribute for a booking, call [UpsertBookingCustomAttribute](https://developer.squareup.com/reference/square/booking-custom-attributes-api/upsert-booking-custom-attribute) and provide the following information: * `booking_id` - The `id` of the [Booking](https://developer.squareup.com/reference/square/objects/Booking) object to add the custom attribute to. * `key` - The `key` of the custom attribute to create or update. * If the requesting application is the definition owner, use the `key` that was provided when the definition was created. * If the requesting application isn't the definition owner, use the {% tooltip text="qualified key" %}The key provided when the definition was created, prefixed by the application ID of the definition owner: {application ID}:{key}.{% /tooltip %}. The `visibility` of the custom attribute must be `VISIBILITY_READ_WRITE_VALUES`. For more information, see [Qualified keys](#qualified-keys). * `custom_attribute` - The custom attribute with the following fields: * `value` - The `value` of the custom attribute, which must conform to the `schema` specified by the definition. For more information, see [Value data types](#value-data-types). * `version` - The current version of the custom attribute, optionally included to enable [optimistic concurrency](build-basics/common-api-patterns/optimistic-concurrency) control when updating a value that was previously set for the booking. If the specified version is earlier than the current version of the custom attribute, the request fails with a `CONFLICT` error. If the specified version is later than the current version, Square returns a `BAD_REQUEST` error. * `idempotency_key` - A unique ID for the request that can be optionally included to ensure [idempotency](booking-custom-attributes-api/overview#idempotency). The following example request sets the value for a `String`-type custom attribute. The `key` in this example is `favoritebook`. ```` The following is an example response: ```json { "custom_attribute": { "key": "favoritebook", "version": 1, "updated_at": "2022-11-16T00:07:20Z", "value": "Dune", "created_at": "2022-11-16T00:07:20Z", "visibility": "VISIBILITY_READ_WRITE_VALUES" } } ``` During upsert operations, Square validates the provided value against the `schema` specified by the definition. After a custom attribute is upserted, Square invokes the `booking.custom_attribute.owned.updated` and `booking.custom_attribute.visible.updated` [webhooks](booking-custom-attributes-api/overview#webhooks). {% anchor id="upsert-custom-attribute-examples" /%} ### Upsert request examples for each data type You can set a corresponding custom attribute for a booking by providing a `value` that conforms to the `schema` specified by the custom attribute definition. The size of this field can't exceed 5 KB. For information about getting the `schema`, see [Value data types](#value-data-types). The following sections contain `UpsertBookingCustomAttribute` requests for each supported data type. #### String A string with up to 1000 UTF-8 characters. Empty strings are allowed. ```` #### Email An email address consisting of ASCII characters that matches the [regular expression](https://developer.mozilla.org/en-US/docs/Web/HTML/Element/input/email#basic_validation) for the HTML5 `email` type. ```` {% aside type="info" %} The `Email` data type for booking custom attributes takes a string value. {% /aside %} #### PhoneNumber A string representation of a phone number in [E.164 format.](https://en.wikipedia.org/wiki/E.164) For example, `+17895551234`. ```` {% aside type="info" %} The `PhoneNumber` data type for booking custom attributes takes a string value. {% /aside %} #### Address An [Address](https://developer.squareup.com/reference/square/objects/Address) object. For information about `Address` fields, see [Working with Addresses.](build-basics/common-data-types/working-with-addresses) You must provide a complete `Address` object in every upsert request. ```` #### Date A date in ISO 8601 format: `YYYY-MM-DD`. ```` {% aside type="info" %} The `Date` data type for booking custom attributes takes a string value. {% /aside %} #### DateTime A string representation of the date and time in the ISO 8601 format, starting with the year, followed by the month, day, hour, minutes, seconds, and milliseconds. For example, `2022-07-10 15:00:00.000`. ```` {% aside type="info" %} The `DateType` data type for booking custom attributes takes a string value. {% /aside %} #### Boolean A `true` or `false` value. A Toggle custom field created by sellers in Square Appointments is a Boolean. ```` #### Number A string representation of an integer or decimal with up to 5 digits of precision. Negative numbers are denoted using a `-` prefix. The absolute value cannot exceed (2^63-1)/10^5 or 92233720368547. ```` {% aside type="info" %} The `Number` data type for booking custom attributes takes a string value. {% /aside %} #### Duration A string representation of duration as defined by the ISO 8601 ABNF. ```` {% aside type="info" %} The `Duration` data type for booking custom attributes takes a string value. {% /aside %} #### Selection A selection from a set of named options. When working with a `Selection`-type custom attribute, you need to get the `schema` from the custom attribute definition. The `schema` shows the mapping between the named options and Square-assigned UUIDs and the maximum number of allowed selections. **Reading the schema** The following is an excerpt of an example `Selection`-type custom attribute definition: ```json { "custom_attribute_definition": { ... "schema": { "$schema": "https://developer-production-s.squarecdn.com/meta-schemas/v1/selection.json", "maxItems": 3, "type": "array", "uniqueItems": true, "items": { "names": [ "Option 1", "Option 2", "Option 3" ], "enum": [ "9492bdda-ab4d-4eeb-8496-0986c8f78499", // UUID for "Option 1" "6b96fba7-d8a5-ae72-48f4-8c3ee875633f", // UUID for "Option 2" "4032c1a2-d749-4c75-9c30-be6472cd2e08" // UUID for "Option 3" ] } }, ... } } ``` Note the following: * The `maxItems` field represents the maximum number of allowed selections for the custom attribute value. * The `items` field contains two arrays: `names` and `enum`. The options in the `names` field map by index to the UUIDs in the `enum` field. The first option maps to the first UUID, the second option maps to the second UUID, and so on. **Setting a selection value** To set a selection value for a booking, you provide the target UUID (that maps to the target named option) in the `value` field. For this data type, `value` is an array that can contain zero or more UUIDs, up to the number specified in `maxItems`. The following example request sets two selections for a custom attribute by providing two UUIDs: ```` The following example request sets an empty selection by providing an empty array: ```` {% anchor id="bulk-upsert-booking-custom-attributes" /%} ## Bulk create or update booking custom attributes To create or update one or more custom attributes for one or more bookings, call [BulkUpsertBookingCustomAttributes](https://developer.squareup.com/reference/square/booking-custom-attributes-api/bulk-upsert-booking-custom-attributes). This endpoint accepts a `values` map with 1 to 25 objects that each contain: * An arbitrary ID for the individual upsert request, which corresponds to an entry in the response that has the same ID. The ID must be unique within the `BulkUpsertBookingCustomAttributes` request. * An individual upsert request with the information needed to create or update a custom attribute for a booking. The following example includes two upsert requests that set two custom attributes for two bookings: ```json { "values": { "id1": { "custom_attribute": { "key": "favoritebook", "value": "Alice in Wonderland" }, "booking_id": "SY8EMWRNDN3TQDP2H4KS1QWMMM", "idempotency_key": "{UNIQUE_KEY}" }, "id2": { "custom_attribute": { "key": "favoritemovie", "value": "Brazil", "version": 3 // Only supported when updating an existing value }, "booking_id": "N3NCVYY3WS27HF0HKANA3R9FP8", "idempotency_key": "{UNIQUE_KEY}" } } } ``` During upsert operations, Square validates each provided value against the `schema` specified by the definition. The optional `version` field is only supported for update operations. {% aside type="tip" %} If you're providing idempotency keys, you can use them as the arbitrary ID for individual upsert requests. {% /aside %} An individual upsert request contains the information needed to set the value of a custom attribute for a booking. Each request includes the following fields: * `booking_id` - The `id` of the targeted [Booking](https://developer.squareup.com/reference/square/objects/Booking) object to set or update the custom attribute. * `custom_attribute` - The custom attribute with following fields: * `key` - The key of the custom attribute to set or update. * If the requesting application is the definition owner, use the `key` that was provided when the definition was created. * If the requesting application isn't the definition owner, use the {% tooltip text="qualified key" %}The key provided when the definition was created, prefixed by the application ID of the definition owner: {application ID}:{key}.{% /tooltip %}. The `visibility` of the custom attribute must be `VISIBILITY_READ_WRITE_VALUES`. For more information, see [Qualified keys](#qualified-keys). * `value` - The value of the custom attribute, which must conform to the `schema` specified by the definition. For more information, see [Value data types](#value-data-types). The size of this field can't exceed 5 KB. * `version` - The current version of the custom attribute, which is optionally included to enable [optimistic concurrency](build-basics/common-api-patterns/optimistic-concurrency) control when updating a value that was previously set for the booking. If the specified version is earlier than the current version of the custom attribute, the request fails with a `CONFLICT` error. If the specified version is later than the current version, Square returns a `BAD_REQUEST` error. * `idempotency_key` - A unique ID for the individual request that can be optionally included to ensure [idempotency](booking-custom-attributes-api/overview#idempotency). The following example `BulkUpsertBookingCustomAttributes` request includes five individual upsert requests: ```` The following is an example response. Note that the `errors` field is returned for any individual requests that fail: ```json { "values": { "id2": { "booking_id": "SY8EMWRNDN3TQDP2H4KS1QWMMM", "custom_attribute": { "key": "favoritebook", "version": 3, "updated_at": "2022-11-16T20:16:23Z", "value": "Through the Looking Glass", "created_at": "2022-11-16T10:20:35Z", "visibility": "VISIBILITY_READ_WRITE_VALUES" } }, "id1": { "booking_id": "N3NCVYY3WS27HF0HKANA3R9FP8", "custom_attribute": { "key": "favoritebook", "version": 1, "updated_at": "2022-11-16T00:16:23Z", "value": "Dune", "created_at": "2022-11-16T00:16:23Z", "visibility": "VISIBILITY_READ_WRITE_VALUES" } }, "id3": { "errors": [ { "code": "CONFLICT", "detail": "Attempting to write to version 3, but current version is 4", "field": "version", "category": "INVALID_REQUEST_ERROR" } ] }, "id4": { "booking_id": "N3NCVYY3WS27HF0HKANA3R9FP8", "custom_attribute": { "key": "square:a0f1505a-2aa1-490d-91a8-8d31ff181808", "version": 1, "updated_at": "2022-11-16T16:16:23Z", "value": "10.5", "created_at": "2022-11-16T13:14:47Z", "visibility": "VISIBILITY_READ_WRITE_VALUES" } }, "id5": { "booking_id": "70548QG1HN43B05G0KCZ4MMC1G", "custom_attribute": { "key": "sq0ids-0evKIskIGaY45fCyNL66aw:backupemail", "version": 2, "updated_at": "2022-11-16T04:16:23Z", "value": "person@company.com", "created_at": "2022-11-16T03:51:18Z", "visibility": "VISIBILITY_READ_WRITE_VALUES" } } } } ``` Individual upsert requests aren't guaranteed to be returned in the same order. Each upsert response has the same ID as the corresponding upsert request, so you can use the ID to map individual requests and responses. After each custom attribute is set or updated, Square invokes the `booking.custom_attribute.owned.updated` and `booking.custom_attribute.visible.updated` [webhooks](booking-custom-attributes-api/overview#webhooks). {% anchor id="list-booking-custom-attributes" /%} ## List booking custom attributes To list the custom attributes that are set on a booking, call [ListBookingCustomAttributes](https://developer.squareup.com/reference/square/booking-custom-attributes-api/list-booking-custom-attributes) and provide the following information: * `booking_id` - The `id` of the [Booking](https://developer.squareup.com/reference/square/objects/Booking) object that represents the target booking. * `with_definitions` - Indicates whether to return the custom attribute definition in the `definition` field of each custom attribute. Set this parameter to `true` to get the name and description of each custom attribute, information about the data type, or other definition details. The default value is `false`. * `limit` - The maximum [page size](build-basics/common-api-patterns/pagination) of 1 to 100 results to return in the response. The default value is 20. If the results are paged, the `cursor` field in the response contains a value that you can send with the `cursor` query parameter to get the next page of results. The following example request includes the `limit` query parameter: ```` When all pages are retrieved, the results include: * All custom attributes owned by the requesting application that have a value. The `key` for these custom attributes is the `key` that was provided for the definition. * All custom attributes owned by other applications that have a value and a `visibility` setting of `VISIBILITY_READ_ONLY` or `VISIBILITY_READ_WRITE_VALUES`. The `key` for these custom attributes is a {% tooltip text="qualified key" %}The key provided when the definition was created, prefixed by the application ID of the definition owner: {application ID}:{key}.{% /tooltip %}. For more information, see [Qualified keys](#qualified-keys). A custom attribute is owned by the application that created the corresponding definition. The following is an example response: ```json { "custom_attributes": [ { "key": "entity-id", "version": 1, "updated_at": "2022-11-16T09:44:42Z", "value": "mbj_004508", "created_at": "2022-11-16T09:44:42Z", "visibility": "VISIBILITY_HIDDEN" }, { "key": "favoritebook", "version": 3, "updated_at": "2022-11-16T10:16:23Z", "value": "Through the Looking Glass", "created_at": "2022-11-16T08:20:35Z", "visibility": "VISIBILITY_READ_WRITE_VALUES" }, { "key": "sq0idp-BuahoY39o1X-GPxRRUWc0A:businessAddress", "version": 2, "updated_at": "2022-11-16T17:40:28Z", "value": { "address_line_1": "1455 Market Street", "postal_code": "94103", "country": "US", "administrative_district_level_1": "California", "locality": "San Francisco" }, "created_at": "2022-11-16T17:08:57Z", "visibility": "VISIBILITY_READ_WRITE_VALUES" }, { "key": "square:a0f1505a-2aa1-490d-91a8-8d31ff181808", "version": 4, "updated_at": "2022-11-16T00:16:23Z", "value": "10.5", "created_at": "2022-11-16T00:14:47Z", "visibility": "VISIBILITY_READ_WRITE_VALUES" } ], "cursor": "O5tF0DmcskdGTrPOAPjlIL...BxACXlOQYbdKq0RC4LZ" } ``` The following example request includes the `with_definitions` query parameter set to `true`: ```` The following is an excerpt of an example response that shows the custom attribute definition in the `definition` field: ```json { "custom_attributes": [ { "key": "entity-id", "version": 1, "definition": { "key": "entity-id", "name": "Entity ID", "version": 1, "updated_at": "2022-11-16T23:23:30Z", "schema": { "$ref": "https://developer-production-s.squarecdn.com/schemas/v1/common.json#squareup.common.String" }, "created_at": "2022-11-16T23:23:30Z", "visibility": "VISIBILITY_HIDDEN" }, "updated_at": "2022-10-19T09:44:42Z", "value": "mbj_004508", "created_at": "2022-10-19T09:44:42Z", "visibility": "VISIBILITY_HIDDEN" }, ... ] } ``` If no custom attributes are found, Square returns a response containing an empty `errors` object. ```json { "errors": {} } ``` {% anchor id="retrieve-booking-custom-attribute" /%} ## Retrieve a booking custom attribute To retrieve a custom attribute associated with a booking, call [RetrieveBookingCustomAttribute](https://developer.squareup.com/reference/square/booking-custom-attributes-api/retrieve-booking-custom-attribute) and provide the following information: * `booking_id` - The `id` of the [Booking](https://developer.squareup.com/reference/square/objects/Booking) object that represents the target booking. * `key` - The `key` of the custom attribute to retrieve. * If the requesting application is the definition owner, use the `key` that was provided when the definition was created. * If the requesting application isn't the definition owner, use the {% tooltip text="qualified key" %}The key provided when the definition was created, prefixed by the application ID of the definition owner: {application ID}:{key}.{% /tooltip %}. The `visibility` of the custom attribute must be `VISIBILITY_READ_ONLY` or `VISIBILITY_READ_WRITE_VALUES`. For more information, see [Qualified keys](#qualified-keys). * `with_definition` - Indicates whether to return the custom attribute definition in the `definition` field of the custom attribute. Set this parameter to `true` to get the name and description of the custom attribute, information about the data type, or other definition details. The default value is `false`. * `version` - The current version of the custom attribute, which is optionally included for strongly consistent reads to guarantee that you receive the most up-to-date data. When included in the request, Square returns the specified version or a higher version if one exists. If the specified version is higher than the current version, Square returns a `400 BAD_REQUEST` error. The following is an example request: ```` The following is an example response for an `Address`-type custom attribute. The `value` field contains the value of the custom attribute. ```json { "custom_attribute": { "key": "sq0idp-BuahoY39o1X-GPxRRUWc0A:bca-address", "version": 1, "updated_at": "2022-11-16T17:08:57Z", "value": { "address_line_1": "43 Main Street", "address_line_2": "The Liberties", "locality": "Dublin 20", "administrative_district_level_1": "Co. Dublin", "postal_code": "D08XK58", "country": "IE" }, "created_at": "2022-11-16T17:08:57Z", "visibility": "VISIBILITY_READ_WRITE_VALUES" } } ``` The following example request includes the `with_definition` query parameter: ```` The following example response shows the custom attribute definition in the `definition` field. This example defines a `Selection`-type custom attribute. The mapping information in the `schema.items` field is used to determine the custom attribute value. The `names` field contains the named options and the `enum` field contains the corresponding Square-assigned UUIDs. The named options map by index to the UUIDs. The first option maps to the first UUID, the second option maps to the second UUID, and so on. Therefore, the UUID in the `value` field of this custom attribute maps to the Small option. ```json { "custom_attribute": { "key": "bca-select-size", "version": 1, "definition": { "key": "bca-select-size", "name": "Default size", "description": "The default size ordered by the customer.", "version": 1, "updated_at": "2022-11-16T00:27:17Z", "schema": { "$schema": "https://developer-production-s.squarecdn.com/meta-schemas/v1/selection.json", "maxItems": 1, "type": "array", "uniqueItems": true, "items": { "names": [ "Small", "Medium", "Large" ], "enum": [ "1a052285-7224-4d25-9232-69f941bb0612", "4034d1bb-ff6c-4f7f-9108-a01625e8aadd", "fb27f80b-24e1-463b-9aa1-d32fcec6b22a" ] } }, "created_at": "2022-11-16T00:27:17Z", "visibility": "VISIBILITY_READ_WRITE_VALUES" }, "updated_at": "2022-11-16T16:19:07Z", "value": [ "1a052285-7224-4d25-9232-69f941bb0612" ], "created_at": "2022-11-16T16:19:07Z", "visibility": "VISIBILITY_READ_WRITE_VALUES" } } ``` If the custom attribute isn't set for the specified booking, Square returns the following response: ```json { "errors": [ { "code": "NOT_FOUND", "detail": "The requested Value `{key}` is not found", "category": "INVALID_REQUEST_ERROR" } ] } ``` If the custom attribute isn't available for bookings in the seller account, Square returns the following response: ```json { "errors": [ { "code": "BAD_REQUEST", "detail": "No matching definition found for value", "field": "key", "category": "INVALID_REQUEST_ERROR" } ] } ``` {% anchor id="delete-booking-custom-attribute" /%} ## Delete a booking custom attribute To delete a custom attribute from a booking, call [DeleteBookingCustomAttribute](https://developer.squareup.com/reference/square/booking-custom-attributes-api/delete-booking-custom-attribute) and provide the following information: * `booking_id` - The `id` of the [Booking](https://developer.squareup.com/reference/square/objects/Booking) object that represents the target booking. * `key` - The `key` of the custom attribute to delete. * If the requesting application is the definition owner, use the `key` that was provided when the definition was created. * If the requesting application isn't the definition owner, use the {% tooltip text="qualified key" %}The key provided when the definition was created, prefixed by the application ID of the definition owner: {application ID}:{key}.{% /tooltip %}. The `visibility` of the custom attribute must be `VISIBILITY_READ_WRITE_VALUES`. For more information, see [Qualified keys](#qualified-keys). The following is an example request: ```` If the operation is successful, Square returns a response containing an empty `errors` object: ```json { "errors": {} } ``` To delete all custom attributes of one or more bookings in a single request, call the [BulkDeleteBookingCustomAttributes](https://developer.squareup.com/reference/square/booking-custom-attributes-api/bulk-delete-booking-custom-attributes). After a custom attribute is deleted, Square invokes the `booking.custom_attribute.owned.deleted` and `booking.custom_attribute.visible.deleted` [webhooks](booking-custom-attributes-api/overview#webhooks). ## See also * [Custom Attributes for Bookings](booking-custom-attributes-api/overview) * [Create and Manage Custom Attribute Definitions for Bookings](booking-custom-attributes-api/custom-attribute-definitions) * [Custom Attributes](devtools/customattributes/overview) * [API Reference: Custom Attributes for Bookings](https://developer.squareup.com/reference/square/booking-custom-attributes-api) --- # Custom Attributes for Bookings > Source: https://developer.squareup.com/docs/booking-custom-attributes-api/overview > Status: PUBLIC > Languages: All > Platforms: All Learn how custom attributes can support additional properties on the Booking object. **Applies to:** [Booking Custom Attributes API](https://developer.squareup.com/reference/square/booking-custom-attributes) | [OAuth API](oauth-api/overview) | [Bookings API](bookings-api/what-it-is) {% subheading %}Learn how to create and manage custom attributes for Square bookings using the Booking Custom Attributes API.{% /subheading %} {% toc hide=true /%} ## Overview Custom attributes for [Booking](https://developer.squareup.com/reference/square/objects/Booking) objects store properties or metadata (which can be added to the `Booking` objects to support custom business logic) that aren't available in the Square-defined `Booking` object. For example, you might want to associate a specific genre of background music with a particular booking. The customer can choose the selected genre to be played during a booked event. Such a scenario involves the following tasks: 1. Create a custom attribute definition with at least a name and a key. The name and key values can be `Ambient Music` and `ambient-music`, respectively. 2. Create a new booking for a wedding reception or select an existing one to assign a custom attribute to. 3. Create a custom attribute of `Ambient Music` with the following: * The key (`ambient-music`) as defined in the custom attribute definition. * The booking ID of the [Booking](https://developer.squareup.com/reference/square/objects/Booking) object for the reserved wedding reception. * A value (`Jazz`) of the type as specified in the custom attribute definition. At the booked event, the service provider can review the `Ambient Music` custom attribute to choose the music genre or let an application retrieve the `Ambient Music` custom attribute and play the selected background music. You can use the [Booking Custom Attributes API](https://developer.squareup.com/reference/square/booking-custom-attributes) to define, update, and set custom attributes for bookings. In the following section, you learn how to use the API to define and manage a custom attribute definition and to create and update a custom attribute for a booking. For general discussions about custom attributes, see [Custom Attributes](devtools/customattributes/overview). ## Requirements and limitations The following requirements, limitations, and other considerations apply when working with customer-related custom attributes: * **Minimum Square version** - Square version 2022-11-16 or later is required to work with the Booking Custom Attributes API. * **Sensitive data** - Custom attributes are intended to store additional information or store associations with an entity in another system. Don't use custom attributes to store any PCI data, such as credit card details. PII is supported in custom attribute values, but applications that create or read this data should observe applicable privacy laws and data regulations such as requesting the hard deletion of custom attribute data when a GDPR request for erasure is received. Never store secret-level information in a custom attribute. The use of custom attributes is subject to developers adhering to the Square API Data Policy Disclosures. * **Unsupported data types** - You can only create booking-related custom attribute definitions that specify a `schema` for a [supported data type](#supported-data-types). The following data types aren't supported for booking-related custom attributes: * `DateTime` * `Duration` * **Search support** - The Bookings API doesn't currently support search for custom attributes. * **Limits** - A seller account can have a maximum of 100 booking-related custom attribute definitions per application. * **Unique name** - If the `visibility` of a booking-related custom attribute definition is `VISIBILITY_READ_ONLY` or `VISIBILITY_READ_WRITE_VALUES`, the `name` must be unique (case-sensitive) across all visible booking-related custom attribute definitions for the seller. This requirement is intended to help sellers differentiate between custom attributes that are visible in the Square Appointments and other Square products. * **Maximum value for Number custom attributes** - The absolute value of a `Number`-type custom attribute cannot exceed (2^63-1)/10^5 or 92233720368547. * **OAuth permissions** - Applications that use OAuth require `APPOINTMENTS_READ` or `APPOINTMENTS_WRITE` permission to work with buyer-level booking-related custom attributes. Applications that use OAuth require `APPOINTMENTS_READ` and `APPOINTMENTS_ALL_READ` or `APPOINTMENTS_WRITE` and `APPOINTMENTS_ALL_WRITE` permissions to work with seller-level, booking-related custom attributes. For more information, see [OAuth API](oauth-api/overview) and [Booking Custom Attributes](oauth-api/square-permissions#booking-custom-attributes). If a seller revokes the permissions of the application that created a custom attribute definition, or if the token expires, the application cannot access the definition or corresponding custom attributes until permissions are restored. However, the definition and custom attributes remain available to other applications according to the `visibility` setting. {% anchor id="idempotency" /%} * **Idempotency** - Including an idempotency key in a request guarantees that the request is processed only once. The following endpoints allow you to specify an `idempotency_key`: * `CreateBookingCustomAttributeDefinition` * `UpdateBookingCustomAttributeDefinition` * `UpsertBookingCustomAttribute` * `BulkUpsertBookingCustomAttributes` You should generate a unique idempotency key for each request. If an idempotency key is reused in requests to the same endpoint on behalf of the same seller, Square returns the response from the first request that was successfully processed using the key. Square doesn't process subsequent requests that use the same key, even if they contain different fields. For more information, see [Idempotency](build-basics/common-api-patterns/idempotency). ## Basic workflow using the API In general, using the API to enable custom attributes for a booking involves the following types of programming tasks: 1. Call [CreateBookingCustomAttributeDefinition](https://developer.squareup.com/reference/square/booking-custom-attributes/create-booking-custom-attribute-definition) to create a [CustomAttributeDefinition](https://developer.squareup.com/reference/square/objects/CustomAttributeDefinition) object, specifying in the input appropriate values on the `key`, `name`, `schema`, `visibility`, and other fields: * The `key` value uniquely identifies the custom attribute definition and the corresponding custom attribute. * The `schema` field specifies the format of the custom attribute value. * The `visibility` field defines how the custom attribute can be accessed by other applications. 2. Call [UpsertBookingCustomAttribute](https://developer.squareup.com/reference/square/booking-custom-attributes/upsert-booking-custom-attribute) to set a [CustomAttribute](https://developer.squareup.com/reference/square/objects/CustomAttribute) object for a booking according to the custom attribute definition, specifying the `key`, `booking_id`, `value`, and possibly other field values in the input: * The `key` field must be assigned the same value as the `key` field of the corresponding `CustomAttributeDefinition`. * The `booking_id` is the ID of the [Booking](https://developer.squareup.com/reference/square/objects/Booking) object to associate the custom attribute with. * The `value` field takes an assigned value of the custom attribute. Its format must conform to the schema of the corresponding `CustomAttributeDefinition` object. 3. Retrieve one or more custom attributes from a booking and perform appropriate operations supporting the retrieved custom attributes. ### Creating a custom attribute definition for bookings The following example shows how to define an `Ambient Music` custom attribute of the `String` type: ```` The `key` identifier and `visibility` setting that you specify for the definition are also used by corresponding custom attributes. The `visibility` setting determines the [access level](#access-control) that other applications have to view or update the definition and corresponding custom attributes. ### Setting custom attributes for a booking After a custom attribute definition is created, you can create the custom attribute based on the definition and set the custom attribute on a booking in the seller account. To create and set a custom attribute for a booking, call [UpsertBookingCustomAttribute](https://developer.squareup.com/reference/square/booking-custom-attributes-api/upsert-booking-custom-attribute). The following example shows how to create and set the `Ambient Music` custom attribute on a specific booking. Note the following: * The `booking_id` path parameter specifies the associated booking. * The `key` path parameter (`ambient-music`) must match the `key` field value of the corresponding custom attribute definition of `Ambient Music`. * The `value` body parameter in the request assigns a value to the custom attribute. This value must conform to the `schema` specification stated in the custom attribute definition. In this example, the value (`"Jazz"`) is of the `String` type. ```` {% aside type="info" %} Square also provides the [BulkUpsertBookingCustomAttributes](https://developer.squareup.com/reference/square/booking-custom-attributes-api/bulk-upsert-booking-custom-attributes) endpoint to support creating multiple custom attributes for specified bookings in a single request. {% /aside %} ### Retrieving custom attributes from bookings To retrieve the custom attribute set on a booking, call [RetrieveBookingCustomAttribute](https://developer.squareup.com/reference/square/booking-custom-attributes-api/retrieve-booking-custom-attribute), specifying the ID of the booking and the key of the custom attribute. The following example shows how to retrieve the `Ambient Music` custom attribute (identified by the `key` parameter) for a specified booking (identified by `booking_id`): ```` The successful request returns in the response a payload similar to the following: ```json { "custom_attribute": { "key": "ambient-music", "version": 1, "updated_at": "2022-11-16T21:13:48Z", "value": "Jazz", "created_at": "2022-11-16T21:13:48Z", "visibility": "VISIBILITY_READ_ONLY" } } ``` You can include the `?with_definition=true` query parameter in the request URL to have the corresponding custom attribute definition returned in the same call. This is useful, for example, if you want to inspect in details the shape and meaning of the custom attribute. {% anchor id="supported-operations" /%} ## Supported operations The [Booking Custom Attributes API](https://developer.squareup.com/reference/square/booking-custom-attributes-api) supports the following operations. ### Working with booking-related custom attribute definitions * [Create a custom attribute definition for bookings](booking-custom-attributes-api/custom-attribute-definitions#create-booking-custom-attribute-definition) * [Update a booking custom attribute definition](booking-custom-attributes-api/custom-attribute-definitions#update-a-booking-custom-attribute-definition) * [List booking custom attribute definitions](booking-custom-attributes-api/custom-attribute-definitions#list-booking-custom-attribute-definitions) * [Retrieve a booking custom attribute definition](booking-custom-attributes-api/custom-attribute-definitions#retrieve-booking-custom-attribute-definition) * [Delete a booking custom attribute definition](booking-custom-attributes-api/custom-attribute-definitions#delete-a-booking-custom-attribute-definition) ### Working with booking-related custom attributes * [Create or update a booking custom attribute](booking-custom-attributes-api/custom-attributes#upsert-booking-custom-attribute) (upsert) * [Bulk create or update booking custom attributes](booking-custom-attributes-api/custom-attributes#bulk-upsert-booking-custom-attributes) (bulk upsert) * [List booking custom attributes](booking-custom-attributes-api/custom-attributes#list-booking-custom-attributes) * [Retrieve a booking custom attribute](booking-custom-attributes-api/custom-attributes#retrieve-booking-custom-attribute) * [Delete a booking custom attribute](booking-custom-attributes-api/custom-attributes#delete-booking-custom-attribute) {% aside type="info" %} Working with custom attributes is different than working with native attributes on the `Booking` object that are accessed using the [Bookings API](https://developer.squareup.com/reference/square/bookings-api). For example, custom attributes aren't returned in a `RetrieveBooking` or `ListBookings` response or managed using `CreateBooking` or `UpdateBooking`. {% /aside %} {% anchor id="supported-data-types" /%} ## Supported data types The data type of a custom attribute is specified in the `schema` field of the custom attribute definition. For all data types except `Selection`, this field contains a simple URL reference to a schema object hosted on the Square CDN. Booking-related custom attributes support the following data types: * `Address` * `Boolean` * `Date` * `DateTime` * `Duration` * `Email` * `Number` * `PhoneNumber` * `Selection` * `String` {% aside type="info" %} The `Date`, `DateTime`, `Duration`, `Email`, `Number`, or `PhoneNumber` data type takes a string value. {% /aside %} For information about defining the data type for a booking-related custom attribute, see [Specifying the schema](booking-custom-attributes-api/custom-attribute-definitions#specify-schema). ## Seller scope A `CreateBookingCustomAttributeDefinition` request is scoped to a specific seller. Creating a definition makes the corresponding custom attribute available to all bookings in the seller account. To make the custom attribute available to other sellers, you must call `CreateBookingCustomAttributeDefinition` on behalf of each target seller. Using OAuth, you can do so by calling this endpoint for each seller using their access token. You can reuse the same `key` for your custom attribute definition across sellers. The `key` must be unique for your application but not for a given seller. However, if you provide a `name`, it must be unique (case-sensitive) across all visible booking-related custom attribute definitions for the seller. {% aside type="tip" %} To simplify management, you might want to keep all definitions that use the same `key` synchronized across seller accounts. Therefore, if you change a definition for one seller, you should consider making the same change for all other sellers. {% /aside %} {% anchor id="access-control" /%} ## Access control The application that creates a custom attribute definition is the definition owner. The definition owner always has `READ` and `WRITE` permissions to the definition and all instances of the corresponding custom attribute. The `visibility` specified by a custom attribute definition determines how other applications that make calls on behalf of a seller can access the definition and corresponding custom attributes. The following table shows the access permitted to other applications by each supported `visibility` setting: | | Custom attribute{% line-break /%}definition{% colspan=2 %} | {% line-break /%}Custom attribute{% colspan=2 %} | | | | ---------- | ---------- | ---------- | ---------- | ---------- | | **Visibility setting** | **READ** | **WRITE** | **READ** | **WRITE** | | `VISIBILITY_HIDDEN` (default) | No | No | No | No | | `VISIBILITY_READ_ONLY` | Yes | No | Yes | No | | `VISIBILITY_READ_WRITE_VALUES`| Yes | No | Yes | Yes | #### Accessing custom attributes owned by other applications To access custom attributes or definitions owned by other applications, the following conditions must be met: * The `visibility` field must be set to one of the following: * `VISIBILITY_READ_ONLY` - Allows other applications to view the definition and corresponding custom attributes. * `VISIBILITY_READ_WRITE_VALUES` - Additionally allows other applications to set the value of the custom attribute for bookings or delete the custom attribute from bookings. * The requesting application must use the {% tooltip text="qualified key" %}The key provided when the definition was created, prefixed by the application ID of the definition owner: {application ID}:{key}.{% /tooltip %} of a custom attribute for the following requests: * `RetrieveBookingCustomAttributeDefinition` * `UpsertBookingCustomAttribute` * `BulkUpsertBookingCustomAttributes` * `RetrieveBookingCustomAttribute` * `DeleteBookingCustomAttribute` To obtain a qualified key, call `ListBookingCustomAttributeDefinitions` or `ListBookingCustomAttributes`. These endpoints return qualified keys for custom attribute definitions and custom attributes that are owned by other applications and visible to your application. For more information, see [List booking custom attribute definitions](booking-custom-attributes-api/custom-attribute-definitions#list-booking-custom-attribute-definitions) and [List booking custom attributes](booking-custom-attributes-api/custom-attributes#list-booking-custom-attributes). {% aside type="info" %} Be aware of the following behaviors when using custom attributes that are owned by other applications: * If the `visibility` of a custom attribute definition is updated, the change propagates to all corresponding custom attributes within a few seconds. * If a custom attribute definition is deleted, all corresponding custom attributes are also deleted from bookings. {% /aside %} ## Webhooks You can subscribe to receive notifications for booking-related custom attribute events. Each event provides two options that allow you to choose when Square sends notifications: * `.owned` event notifications are sent when changes are made to custom attribute definitions and custom attributes that are owned by your application. A custom attribute definition is owned by the application that created it. A custom attribute is owned by the application that created the corresponding custom attribute definition. * `.visible` event notifications are sent when changes are made to custom attribute definitions and custom attributes that are visible to your application. These changes apply to: * All custom attribute definitions and custom attributes owned by your application. * All other custom attribute definitions or custom attributes whose `visibility` setting is `VISIBILITY_READ_ONLY` or `VISIBILITY_READ_WRITE_VALUES`. Event payloads for both options contain the same information. ### Webhook events Subscribe to the following events to receive notifications for changes to custom attribute definitions and custom attributes that are owned by your application: |Event{% width="200px" %}|Description| |------|------| |[booking.custom_attribute_definition.owned.created](https://developer.squareup.com/reference/square/booking-custom-attributes-api/webhooks/booking.custom_attribute_definition.owned.created)|A custom attribute definition was created by your application. The application that created the custom attribute definition is the owner of the definition and corresponding custom attributes.| |[boooking.custom_attribute_definition.owned.updated](https://developer.squareup.com/reference/square/booking-custom-attributes-api/webhooks/booking.custom_attribute_definition.owned.updated)|A custom attribute definition owned by your application was updated. Note that only the definition owner can update a custom attribute definition.| |[booking.custom_attribute_definition.owned.deleted](https://developer.squareup.com/reference/square/booking-custom-attributes-api/webhooks/booking.custom_attribute_definition.owned.deleted)|A custom attribute definition owned by your application was deleted. Note that only the definition owner can delete a custom attribute definition.| |[booking.custom_attribute.owned.updated](https://developer.squareup.com/reference/square/booking-custom-attributes-api/webhooks/booking.custom_attribute.owned.updated)|A custom attribute owned by your application was created or updated for a booking.| |[booking.custom_attribute.owned.deleted](https://developer.squareup.com/reference/square/booking-custom-attributes-api/webhooks/booking.custom_attribute.owned.deleted)|A custom attribute owned by your application was deleted from a booking. | Subscribe to the following events to receive notifications for changes to custom attribute definitions and custom attributes that are visible to your application. These `.visible` events include changes to all custom attribute definitions and custom attributes that are owned by your application, so you don't need to subscribe to an `.owned` event when you subscribe to the corresponding `.visible` event. |Event{% width="200px" %}|Description| |:------|:------| |[booking.custom_attribute_definition.visible.created](https://developer.squareup.com/reference/square/booking-custom-attributes-api/webhooks/booking.custom_attribute_definition.visible.created)|A custom attribute definition that's visible to your application was created.| |[booking.custom_attribute_definition.visible.updated](https://developer.squareup.com/reference/square/booking-custom-attributes-api/webhooks/booking.custom_attribute_definition.visible.updated)|A custom attribute definition that's visible to your application was updated.| |[booking.custom_attribute_definition.visible.deleted](https://developer.squareup.com/reference/square/booking-custom-attributes-api/webhooks/booking.custom_attribute_definition.visible.deleted)|A custom attribute definition that's visible to your application was deleted.| |[booking.custom_attribute.visible.updated](https://developer.squareup.com/reference/square/booking-custom-attributes-api/webhooks/booking.custom_attribute.visible.updated)|A custom attribute that's visible to your application was created or updated for a booking.| |[booking.custom_attribute.visible.deleted](https://developer.squareup.com/reference/square/booking-custom-attributes-api/webhooks/booking.custom_attribute.visible.deleted)|A custom attribute that's visible to your application was deleted from a booking.| {% aside type="info" %} Upserting or deleting a custom attribute for a booking doesn't invoke a `booking.updated` webhook. {% /aside %} The following is an example `booking.custom_attribute_definition.visible.created` notification: ```json { "merchant_id": "DM7VKY8Q63GNP", "type": "booking.custom_attribute_definition.visible.created", "event_id": "347ab320-c0ba-48f5-959a-4e147b9aefcf", "created_at": "2022-11-16T21:40:49.943Z", "data": { "type": "custom_attribute_definition", "id": "sq0idp-BushoY39o1X-GPxRRUWc0A:businessEmail", "object": { "created_at": "2022-11-16T21:40:49Z", "description": "Work email address", "key": "sq0idp-BushoY39o1X-GPxRRUWc0A:businessEmail", "name": "Work email", "schema": { "$ref": "https://developer-production-s.squarecdn.com/schemas/v1/common.json#squareup.common.Email" }, "updated_at": "2022-11-16T21:40:49Z", "version": 1, "visibility": "VISIBILITY_READ_WRITE_VALUES" } } } ``` The following is an example `booking.custom_attribute.visible.updated` notification: ```json { "merchant_id": "DM7VKY8Q63GNP", "type": "booking.custom_attribute.visible.updated", "event_id": "1cc2925c-f6e2-4fb6-a597-07c198de59e1", "created_at": "2022-11-16T01:22:29Z", "data": { "type": "custom_attribute", "id": "sq0idp-BushoY39o1X-GPxRRUWc0A:businessEmail:BOOKING:TNQC0TYTWMRSFFQ157KK4V7MVR", "object": { "created_at": "2022-11-16T00:40:54Z", "key": "sq0idp-BushoY39o1X-GPxRRUWc0A:businessEmail", "updated_at": "2022-11-16T01:22:29Z", "value": "dana@company.com", "version": 2, "visibility": "VISIBILITY_READ_WRITE_VALUES" } } } ``` Note the following: * Your application receives booking custom attribute webhook events if the application has permissions to access the booking associated with custom attribute. * With the buyer-level permission ( `APPOINTMENTS_READ`), the application receives notifications of custom attribute events for the bookings it created. * With the seller-level permissions (`APPOINTMENTS_READ` and `APPOINTMENTS_ALL_READ`), the application receives notifications of all custom attribute events for all bookings in the seller account. * The `key` of the custom attribute definition or custom attribute in the notification is always the {% tooltip text="qualified key" %}The key provided when the definition was created, prefixed by the application ID of the definition owner: {application ID}:{key}.{% /tooltip %}. * If you subscribe to the `.owned` and `.visible` options for the same event, Square sends both notifications for changes to custom attribute definitions and custom attributes owned by the subscribing application. * The value of the `data.id` in the notification depends on the affected object: * For custom attribute definition events, `data.id` is the qualified key. * For custom attribute events, `data.id` is generated using the qualified key and the ID of the affected booking. This `data.id` cannot be used directly with the Booking Custom Attributes API. For more information about custom attribute webhooks, see [Subscribing to webhooks](devtools/customattributes/overview#subscribing-to-webhooks). For more information about how to subscribe to events and validate notifications, see [Square Webhooks](webhooks/overview). ## See also * [Create and Manage Custom Attribute Definitions for Bookings](booking-custom-attributes-api/custom-attribute-definitions) * [Create and Manage Custom Attribute for Bookings](booking-custom-attributes-api/custom-attributes) * [Custom Attributes](devtools/customattributes/overview) * [API Reference: Custom Attributes for Bookings](https://developer.squareup.com/reference/square/booking-custom-attributes-api) --- # Create and Manage Custom Attribute Definitions for Bookings > Source: https://developer.squareup.com/docs/booking-custom-attributes-api/custom-attribute-definitions > Status: PUBLIC > Languages: All > Platforms: All Learn how to define custom attributes to extend Booking properties. **Applies to:** [Booking Custom Attributes API](booking-custom-attributes-api/overview) {% subheading %}Learn how to create and manage booking-related custom attribute definitions for Square sellers using the Booking Custom Attributes API.{% /subheading %} {% toc hide=true /%} ## Overview A custom attribute definition determines the shape and format of a custom attribute. The `key` property is used to identify the custom attribute definition and the corresponding custom attribute. The `visibility` setting specifies how other applications can access the definition. The `schema` field specifies the data type of the custom attribute. Other fields can be used to describe other information about the custom attribute definition. After a booking-related custom attribute definition is created, instances of the corresponding custom attribute can be created with appropriate values for bookings in the seller account. For more information about how to work with booking-related custom attributes, see [Custom Attributes for Bookings](booking-custom-attributes-api/overview). ## CustomAttributeDefinition object A custom attribute definition is represented by a [CustomAttributeDefinition](https://developer.squareup.com/reference/square/objects/CustomAttributeDefinition) object. The following example shows a custom attribute definition that defines a "Favorite Drink" custom attribute of the `String` data type: ```json { "custom_attribute_definition": { "key": "favorite-drink", "name": "Favorite Drink", "description": "The favorite drink of the customer", "version": 1, "updated_at": "2022-05-20T02:41:37Z", "schema": { "$ref": "https://developer-production-s.squarecdn.com/schemas/v1/common.json#squareup.common.String" }, "created_at": "2022-05-20T02:41:37Z", "visibility": "VISIBILITY_READ_WRITE_VALUES" } } ``` Using this custom attribute definition, you can create custom attributes of various drinks for a customer to choose when, for example, the customer books a wedding event. A custom attribute definition has the following core properties: |Field{% width="120px" %}|Description| |:------|:------| |`key`|The identifier for the definition and its corresponding custom attributes. This key is unique for the application and cannot be changed after the definition is created.{% line-break /%}{% line-break /%}If the requesting application isn't the definition owner, the value is a qualified key. A qualified key is the application ID of the definition owner followed by the `key` that was provided when the definition was created, in the following format: `{application ID}:{key}`.{% line-break /%}{% line-break /%}For custom fields created by sellers in Square Appointments, the qualified key is `square:{key}`.| |`name`|The name for the custom attribute. This name must be unique (case-sensitive) across all visible booking-related custom attribute definitions for the seller. This field is required if `visibility` is `VISIBILITY_READ_ONLY` or `VISIBILITY_READ_WRITE_VALUES`.| |`description`|The description for the custom attribute. This field is required if `visibility` is `VISIBILITY_READ_ONLY` or `VISIBILITY_READ_WRITE_VALUES`.| |`visibility`|The access control setting that determines whether other applications can view the definition and view or edit corresponding custom attributes. Valid values are `VISIBILITY_HIDDEN`, `VISIBILITY_READ_ONLY`, and `VISIBILITY_READ_WRITE_VALUES`. For more information, see [Access control](booking-custom-attributes-api/overview#access-control).{% line-break /%}{% line-break /%}Regardless of the `visibility` setting, all custom attribute data is visible to sellers when booking data is exported.| |`schema`|The data type of the custom attribute value. For more information, see [Specifying the schema](#specify-schema). The total schema size cannot exceed 12 KB.| |`version`|The version number of the custom attribute definition. The version number is initially set to 1 and incremented each time the definition is updated. Include this field in update operations to enable [optimistic concurrency](build-basics/common-api-patterns/optimistic-concurrency) control and in read operations for strong consistency.| {% anchor id="create-booking-custom-attribute-definition" /%} ## Create a custom attribute definition for bookings Call the [CreateBookingCustomAttributeDefinition](https://developer.squareup.com/reference/square/booking-custom-attributes-api/create-booking-custom-attribute-definition) endpoint to create a custom attribute definition for bookings in a seller account. Note the following: * `key` is the identifier of the definition and its corresponding custom attributes. The value must be unique for the application. It can contain up to 60 alphanumeric characters, periods (`.`), underscores (`_`), and hyphens (`-`) and must match the following regular expression: >`^[a-zA-Z0-9\._-]{1,60}$` * `visibility` is the [access control](booking-custom-attributes-api/overview#access-control) setting that determines whether other applications can view the definition and view or edit corresponding custom attributes. The following are valid values: * `VISIBILITY_HIDDEN` (default) * `VISIBILITY_READ_ONLY` * `VISIBILITY_READ_WRITE_VALUES` * `schema` is the data type of the custom attribute. For more information, see [Specifying the schema](#specify-schema). * `name` and `description` are the name and description of the custom attribute. Each field can contain up to 255 characters. Both fields are required when `visibility` is set to `VISIBILITY_READ_ONLY` or `VISIBILITY_READ_WRITE_VALUES`. If provided, `name` must be unique (case-sensitive) across all visible booking-related custom attribute definitions for the seller. Seller-facing custom attributes should be given a friendly name and description. * `idempotency_key` is a unique ID for the request that can be optionally included to ensure [idempotency](booking-custom-attributes-api/overview#idempotency). The following example request defines a "Favorite Drink" custom attribute of the `String` type: ```` The successful response is similar to the following: ```json { "custom_attribute_definition": { "key": "favorite-drink", "name": "Favorite Drink", "description": "The favorite drink of the customer", "version": 1, "updated_at": "2022-11-16T02:41:37Z", "schema": { "$ref": "https://developer-production-s.squarecdn.com/schemas/v1/common.json#squareup.common.String" }, "created_at": "2022-11-16T02:41:37Z", "visibility": "VISIBILITY_READ_WRITE_VALUES" } } ``` Now that the custom attribute definition is created, you can proceed to create a corresponding custom attribute and set its value for a booking in the seller account. For more information, see [Create or update a booking custom attribute](booking-custom-attributes-api/custom-attributes#upsert-booking-custom-attribute) or [Bulk create or update booking custom attributes](booking-custom-attributes-api/custom-attributes#bulk-upsert-booking-custom-attributes). After a custom attribute definition is created, the `booking.custom_attribute_definition.owned.created` and `booking.custom_attribute_definition.visible.created` [webhook events](booking-custom-attributes-api/overview#webhooks) are dispatched to subscribing applications. A seller account can have a maximum of 100 booking-related custom attribute definitions per application. {% anchor id="specify-schema" /%} ### Specifying the schema The data type of a custom attribute is specified by the `schema` field of the definition. Square uses the `schema` to validate the custom attribute value when it is assigned to a booking. The total schema size cannot exceed 12 KB. When setting the value of the custom attribute for a booking, the total value size cannot exceed 5 KB. The following data types are supported for booking-related custom attributes: * `Address` * `Boolean` * `Date` * `DateTime` * `Duration` * `Email` * `Number` * `PhoneNumber` * `Selection` * `String` {% aside type="info" %} The `Date`, `DateTime`, `Duration`, `Email`, `Number`, or `PhoneNumber` data type takes a string value. {% /aside %} In a [CreateBookingCustomAttributeDefinition](https://developer.squareup.com/reference/square/booking-custom-attributes-api/create-booking-custom-attribute-definition) request, the `schema` field specifies a data type by referencing a JSON schema or meta-schema object hosted on the Square CDN. #### JSON schema objects For the data types in the following table, specify a `$ref` value that references the corresponding schema object, as shown in the following example: ```json "schema": { "$ref": "https://developer-production-s.squarecdn.com/schemas/v1/common.json#squareup.common.String" }, ``` |Data type{% width="120px" %}|Description| |:------|:------| |`String`|A string with up to 1000 UTF-8 characters. Empty strings are allowed.{% line-break /%}{% line-break /%}`$ref` value:{% line-break /%}https://developer-production-s.squarecdn.com/schemas/v1/common.json#squareup.common.String| |`Email`|An email address consisting of ASCII characters that matches the [regular expression](https://developer.mozilla.org/en-US/docs/Web/HTML/Element/input/email#basic_validation) for the HTML5 `email` type.{% line-break /%}{% line-break /%}`$ref` value:{% line-break /%}https://developer-production-s.squarecdn.com/schemas/v1/common.json#squareup.common.Email| |`PhoneNumber`|A string representation of a phone number in [E.164 format.](https://en.wikipedia.org/wiki/E.164) For example, `+17895551234`.{% line-break /%}{% line-break /%}`$ref` value:{% line-break /%}https://developer-production-s.squarecdn.com/schemas/v1/common.json#squareup.common.PhoneNumber| |`Address`|An [Address](https://developer.squareup.com/reference/square/objects/Address) object. For information about `Address` fields, see [Working with Addresses.](build-basics/common-data-types/working-with-addresses){% line-break /%}{% line-break /%}`$ref` value:{% line-break /%}https://developer-production-s.squarecdn.com/schemas/v1/common.json#squareup.common.Address| |`Date`|A date in ISO 8601 format: `YYYY-MM-DD`. Booking-related custom attributes don't support `DateTime` or `Duration` data types.{% line-break /%}{% line-break /%}`$ref` value:{% line-break /%}https://developer-production-s.squarecdn.com/schemas/v1/common.json#squareup.common.Date| |`Boolean`|A `true` or `false` value.{% line-break /%}{% line-break /%}`$ref` value:{% line-break /%}https://developer-production-s.squarecdn.com/schemas/v1/common.json#squareup.common.Boolean| |`Number`|A string representation of an integer or decimal with up to 5 digits of precision. Negative numbers are denoted using a `-` prefix. The absolute value cannot exceed (2^63-1)/10^5 or 92233720368547.{% line-break /%}{% line-break /%}For numeric values that act as identifiers rather than representing a quantity (such as account numbers), consider using the `String` data type so that the value isn't subject to limitations of a number range.{% line-break /%}{% line-break /%}`$ref` value:{% line-break /%}https://developer-production-s.squarecdn.com/schemas/v1/common.json#squareup.common.Number| #### JSON meta-schema object {% anchor id="selection-data-type" /%} For a `Selection` data type, the `schema` contains a `$schema` field that references a JSON meta-schema object and additional fields. Note the following: * `$schema` references the `https://developer-production-s.squarecdn.com/meta-schemas/v1/selection.json` meta-schema hosted on the Square CDN. * `type` must be `array`. * `items` must include a `names` array that contains strings representing the display names of the predefined options that can be selected. Note that the order of the options might not be respected by all UIs. * `maxItems` is an integer that represents the maximum number of allowed selections. Corresponding custom attributes can have zero or more selected values, up to the specified maximum. The minimum value is 1 and cannot exceed the number of options in the `names` field. * `uniqueItems` must be `true`. The following example request creates a `Selection`-type custom attribute definition that contains three named options and allows one selection: ```` The following is an example response. For each named option, Square generates a UUID and adds it to the `enum` field. The options in the `names` field map by index to the UUIDs in the `enum` field. The first option maps to the first UUID, the second option maps to the second UUID, and so on. These UUIDs are used to set the value of the custom attribute or update the option names. ```json { "custom_attribute_definition": { "key": "fruit-juice-selection", "name": "Default fruit juice selection", "description": "The default fruit juice selection ordered by the customer.", "version": 1, "updated_at": "2022-11-16T02:41:37Z", "schema": { "$schema": "https://developer-production-s.squarecdn.com/meta-schemas/v1/selection.json", "maxItems": 1, "type": "array", "uniqueItems": true, "items": { "names": [ "Apple", "Orange", "Pineapple" ], "enum": [ "a5fc0632-b5cf-4855-af35-7bfc88bdc9f6", // UUID for "Apple" "e875633f-a5d8-4872-aef4-6b96fba78c3d", // UUID for "Orange" "30528ff7-b11b-425a-aa11-26ff5cf1996g" // UUID for "Pineapple" ] } }, "created_at": "2022-11-16T02:41:37Z", "visibility": "VISIBILITY_READ_WRITE_VALUES" } } ``` {% aside type="info" %} In API Explorer, use the `Custom` option for `schema` to specify the JSON object. {% /aside %} {% anchor id="update-customer-custom-attribute-definition" /%} ## Update a booking custom attribute definition Use the [UpdateBookingCustomAttributeDefinition](https://developer.squareup.com/reference/square/booking-custom-attributes-api/update-booking-custom-attribute-definition) endpoint to update a custom attribute definition for a seller account. Only the following fields can be updated: * `name` * `description` * `visibility` * `schema` for a `Selection` data type Only new or changed fields need to be included in the request. For more information, see [Updatable definition fields](#updatable-fields). Note the following about an `UpdateBookingCustomAttributeDefinition` request: * A custom attribute definition can be updated only by the definition owner. * The `key` path parameter is the `key` of the to-be-updated custom attribute definition. * The `version` field can be optionally included to enable [optimistic concurrency](build-basics/common-api-patterns/optimistic-concurrency) control. If included, `version` must match the current version of the custom attribute definition; otherwise, the request fails with a `CONFLICT` error. Square increments the version number each time the definition is updated. * The `idempotency_key` is a unique ID for the request that can be optionally included to ensure [idempotency](customer-custom-attributes-api/overview#idempotency). The following example request updates the `visibility` setting of a definition: ```` The following is an example response: ```json { "custom_attribute_definition": { "key": "favorite-drink", "name": "Favorite Drink", "description": "The favorite drink of the customer", "version": 2, "updated_at": "2022-11-16T04:17:09Z", "schema": { "$ref": "https://developer-production-s.squarecdn.com/schemas/v1/common.json#squareup.common.String" }, "created_at": "2022-11-16T02:41:37Z", "visibility": "VISIBILITY_READ_ONLY" } } ``` After a custom attribute definition is updated, the `booking.custom_attribute_definition.owned.updated` and `booking.custom_attribute_definition.visible.updated` [webhook events](booking-custom-attributes-api/overview#webhooks) are dispatched to subscribing applications. {% anchor id="updatable-fields" /%} ### Updatable definition fields The `UpdateBookingCustomAttributeDefinition` endpoint can be used to update one or more of the following fields. The endpoint supports sparse updates, so only new or changed fields need to be included in the request. Square ignores custom attribute definition fields that are unchanged or read-only. * `name` - The name of the custom attribute of up to 255 characters. Seller-facing custom attributes should be given a user-friendly name. The name must be unique (case-sensitive) across all visible booking-related custom attribute definitions for the seller. * `description` - The description of the custom attribute of up to 255 characters. Seller-facing custom attributes should be given a user-friendly description. * `visibility` - The [access control](booking-custom-attributes-api/overview#access-control) setting that determines whether other applications can view the definition and view or edit corresponding custom attributes. The following are valid values: * `VISIBILITY_HIDDEN` (default) * `VISIBILITY_READ_ONLY` * `VISIBILITY_READ_WRITE_VALUES` Changes to the `visibility` setting are propagated to corresponding custom attributes within a few seconds. At that time, the `updated_at` and `version` fields of the custom attributes are also updated. For `VISIBILITY_READ_ONLY` or `VISIBILITY_READ_WRITE_VALUES` settings, both `name` and `description` are required. * `schema` - For a `Selection` data type. Only changes to the named options and maximum number of selections are supported, as described in the following section. The total `schema` size cannot exceed 12 KB. {% aside type="tip" %} To simplify management, you might want to keep all definitions that use the same key synchronized across seller accounts. Therefore, if you change the definition for one seller, you should consider making the same change for all other sellers. {% /aside %} {% anchor id="update-selection-schema" /%} #### Updating a Selection schema For a `Selection` data type, you can update the maximum number of allowed selections and the set of predefined named options. {% aside type="info" %} Square validates custom attribute selections on upsert operations, so these changes apply only to future upsert operations. They don't affect custom attributes that have already been set on bookings. {% /aside %} The information you send in the `UpdateBookingCustomAttributeDefinition` request depends on the change you want to make: * To change the maximum number of allowed selections, include the `maxItems` field with the new integer value. The minimum value is 1 and cannot exceed the number of options in the `names` field. * To change the set of predefined named options, include the `items` field with the complete `names` and `enum` arrays. The options in the `names` array map by index to the Square-assigned UUIDs in the `enum` array, which are unique per seller. The first option maps to the first UUID, the second option maps to the second UUID, and so on. * To add an option: * Add the name of the new option at the end of the `names` array. New options must always be added to the end of the array. * Don't change the `enum` array. Square generates a UUID for the new option and adds it to the end of the `enum` array. * To reorder the options: * Change the order of the names in the `names` array. * Change the order of the UUIDs in the `enum` array so that the order of the UUIDs matches the order of the corresponding named options. Note that the order might not be respected by all UIs. * To remove an option: * Remove the name of the option from the `names` array. * Remove the corresponding UUID from the `enum` array. The following example `UpdateBookingCustomAttributeDefinition` request adds two new options by adding the names at the end of the `names` array. ```` The following example response includes the UUID that Square generated for the new `X-Small` and `X-Large` options: ```json { "custom_attribute_definition": { "key": "fruit-juice-selection", "name": "Default fruit juice selection", "description": "The default fruit juice selection ordered by the customer.", "version": 2, "updated_at": "2022-11-16T15:55:42Z", "schema": { "$schema": "https://developer-production-s.squarecdn.com/meta-schemas/v1/selection.json", "maxItems": 1, "type": "array", "uniqueItems": true, "items": { "names": [ "Apple", "Orange", "Pineapple", "Mango", "Strawberry" ], "enum": [ "a5fc0632-b5cf-4855-af35-7bfc88bdc9f5", "e875633f-a5d8-4872-aef4-6b96fba78c3e", "30528ff7-b11b-425a-aa11-26ff5cf1996f", "18fb06bd-9be0-4709-9c7f-737a1fd40e44", "6031c1b2-d749-4c78-9c40-ae5472ed2e03" ] } }, "created_at": "2022-11-16T02:41:37Z", "visibility": "VISIBILITY_READ_WRITE_VALUES" } } ``` {% anchor id="list-booking-custom-attribute-definitions" /%} ## List booking custom attribute definitions Use the [ListBookingCustomAttributeDefinitions](https://developer.squareup.com/reference/square/booking-custom-attributes-api/list-booking-custom-attribute-definitions) endpoint to list the booking custom attribute definitions in a seller account. Note the following: * The `limit` query parameter optionally specifies a maximum [page size](build-basics/common-api-patterns/pagination) of 1 to 100 results. The default limit is 20. If the results are paged, the `cursor` field in the response contains a value that you can send with the `cursor` query parameter to get the next page of results. The following example request includes the `limit` query parameter: ```` When all pages are retrieved, all custom attribute definitions created by the requesting application are included in the results. The `key` for these definitions is the `key` that was provided when the definition was created. Custom attribute definitions created by other applications are included if their `visibility` is `VISIBILITY_READ_ONLY` or `VISIBILITY_READ_WRITE_VALUES`. The `key` for these definitions is a {% tooltip text="qualified key" %}The key provided when the definition was created, prefixed by the application ID of the definition owner: {application ID}:{key}.{% /tooltip %}. The following is an example response: ```json { "custom_attribute_definitions": [ { "key": "favorite-drink", "name": "Favorite Drink", "description": "The favorite drink of the customer", "version": 2, "updated_at": "2022-11-16T04:17:09Z", "schema": { "$ref": "https://developer-production-s.squarecdn.com/schemas/v1/common.json#squareup.common.String" }, "created_at": "2022-11-16T21:30:16Z", "visibility": "VISIBILITY_READ_WRITE_VALUES" }, { "key": "entity-id", "name": "Entity ID", "version": 1, "updated_at": "2022-11-16T09:44:42Z", "schema": { "$ref": "https://developer-production-s.squarecdn.com/schemas/v1/common.json#squareup.common.String" }, "created_at": "2022-11-16T09:44:42Z", "visibility": "VISIBILITY_HIDDEN" }, { "key": "sq0idp-BuahoY39o1X-GPxRRUWc0A:businessEmail", "name": "Work email", "description": "Work email address", "version": 1, "updated_at": "2022-11-16T03:23:15Z", "schema": { "$ref": "https://developer-production-s.squarecdn.com/schemas/v1/common.json#squareup.common.Email" }, "created_at": "2022-11-16T03:23:15Z", "visibility": "VISIBILITY_READ_WRITE_VALUES" }, { "key": "square:0460be56-6783-4482-8d55-634f9ae61684", "name": "Is Premium Member", "description": "Created via the Customers Directory.", "version": 1, "updated_at": "2022-11-16T23:15:51Z", "schema": { "$ref": "https://developer-production-s.squarecdn.com/schemas/v1/common.json#squareup.common.Boolean" }, "created_at": "2022-11-16T23:15:51Z", "visibility": "VISIBILITY_READ_WRITE_VALUES" } ], "cursor": "ODmcskdO5tF0GTrPAPjlGQ...QxACXlOQYbdKq0FZ4LC" } ``` The example response contains four custom attribute definitions: * `"Favorite Drink"` and `"Entity ID"` were created by the requesting application. Because `"Entity ID"` is set to `VISIBILITY_HIDDEN`, it is returned only when requested by the definition owner. * `"Work email"` was created by another third-party application. Note that the qualified key includes the ID of the application that created the custom attribute definition. * `"Is Premium Member"` was created by the seller in the Square Appointments. For first-party Square products, the `application_id` is `square`. If no custom attribute definitions are found, Square returns an empty response. ```json {} ``` {% anchor id="retrieve-booking-custom-attribute-definition" /%} ## Retrieve a booking custom attribute definition Use the [RetrieveBookingCustomAttributeDefinition](https://developer.squareup.com/reference/square/booking-custom-attributes-api/retrieve-booking-custom-attribute-definition) endpoint to retrieve a custom attribute definition using the `key`. Note the following: * The `key` path parameter is the `key` of the custom attribute definition. * If the requesting application is the definition owner, use the `key` that was provided when the definition was created. * If the requesting application isn't the definition owner, use the {% tooltip text="qualified key" %}The key provided when the definition was created, prefixed by the application ID of the definition owner: {application ID}:{key}.{% /tooltip %}. The `visibility` of the definition must be `VISIBILITY_READ_ONLY` or `VISIBILITY_READ_WRITE_VALUES`. * The `version` query parameter is optionally used for strongly consistent reads to guarantee that you receive the most up-to-date data. When included in the request, Square returns the specified version or a later version if one exists. If the specified version is later than the current version, Square returns a `400 BAD_REQUEST` error. The following is an example request: ```` {% aside type="info" %} Square also returns custom attribute definitions for `RetrieveBookingCustomAttribute` or `ListBookingCustomAttributes` requests if you set the `with_definition` or `with_definitions` query parameter to `true`, respectively. For more information, see [Retrieve a booking custom attribute](booking-custom-attributes-api/custom-attributes#retrieve-booking-custom-attribute) or [List booking custom attributes](booking-custom-attributes-api/custom-attributes#list-booking-custom-attributes). {% /aside %} The following is an example response: ```json { "custom_attribute_definition": { "key": "favorite-drink", "name": "Favorite Drink", "description": "The favorite drink of the customer", "version": 1, "updated_at": "2022-11-16T02:41:37Z", "schema": { "$ref": "https://developer-production-s.squarecdn.com/schemas/v1/common.json#squareup.common.String" }, "created_at": "2022-11-16T02:41:37Z", "visibility": "VISIBILITY_READ_WRITE_VALUES" } } ``` If the custom attribute definition isn't found, Square returns an `errors` field that contains a `404 NOT_FOUND` error. {% anchor id="delete-booking-custom-attribute-definition" /%} ## Delete a booking custom attribute definition Use the [DeleteBookingCustomAttributeDefinition](https://developer.squareup.com/reference/square/booking-custom-attributes-api/delete-booking-custom-attribute-definition) endpoint to delete a custom attribute definition from a seller account. Note the following: * A custom attribute definition can be deleted only by the definition owner. * The `key` path parameter is the `key` of the custom attribute definition. * Deleting a custom attribute definition also deletes the corresponding custom attribute from all bookings in the seller account. The following is an example request: ```` If successful, Square returns a `200 OK` response containing an empty `errors` object. ```json { "errors": [] } ``` After a custom attribute definition is deleted, Square invokes the `booking.custom_attribute_definition.owned.deleted` and `booking.custom_attribute_definition.visible.deleted` [webhook events](booking-custom-attributes-api/overview#webhooks). ## See also * [Custom Attributes for Bookings](booking-custom-attributes-api/overview) * [Create and Manage Custom Attribute for Bookings](booking-custom-attributes-api/custom-attributes) * [Custom Attributes](devtools/customattributes/overview) * [API Reference: Custom Attributes for Bookings](https://developer.squareup.com/reference/square/booking-custom-attributes-api) --- # How It Works > Source: https://developer.squareup.com/docs/orders-api/how-it-works > Status: PUBLIC > Languages: All > Platforms: All Learn how the Orders API processes and returns information about purchase transactions. Take a deeper look at the Orders API. {% toc hide=true /%} ## Orders objects and data types ### Orders Each order is represented by an [Order](https://developer.squareup.com/reference/square/objects/Order) object. An `Order` provides detailed information about a commerce-related event, such as a sale, fulfillment, return, or exchange. An `Order` also provides access to additional data that can be found in other Square APIs. For example, you can use the fields within an `Order` to: * Determine the customer's name and address from the Customers API. * Look up item variations (such as sizes or colors) from the Catalog API. * Retrieve detailed payment data from the Payments API. ### Line items An [OrderLineItem](https://developer.squareup.com/reference/square/objects/OrderLineItem) contains details about an item, such as its name, quantity, base price, and price adjustments (discounts, service charges, and taxes). Within an `Order`, the `line_items` array contains the `OrderLineItem` objects for that order. There are two ways to define an `OrderLineItem`: 1. **Specify a catalog item ID** - If you've already [set up your catalog](catalog-api/what-it-does), you can provide a valid `catalog_object_id` in the `OrderLineItem`. This automatically populates the item with product details from the Catalog API. It also automatically updates your inventory when the `Order` is closed or charged. 2. **Define the line item ad hoc** - If you don't have a `catalog_object_id` to reference, you can define the `OrderLineItem` details manually. ### Fulfillments A [Fulfillment](https://developer.squareup.com/reference/square/objects/Fulfillment) lets you track additional details that are required to close the order. Within an `Order`, the `fulfillments` array contains all the `Fulfillment` objects for the order. There are four types of `Fulfillment`: 1. `SHIPMENT` - A shipping carrier ships the fulfillment to a recipient. 2. `PICKUP` - A recipient picks up the fulfillment at a physical location. 3. `DELIVERY` - A courier delivers the fulfillment to the recipient. 4. `IN_STORE` - A buyer receives the fulfillment at the seller's location at the time of sale. For more information, see [Manage Order Fulfillments](orders-api/fulfillments). {% aside type="info" %} If you use the Orders API to create a fulfillment order, the order appears in the Square Point of Sale application after it is charged. The order payment must be approved with delayed capture. For more information, see [Using the Orders API (PayOrder endpoint)](orders-api/pay-for-orders#using-the-orders-api-payorder-endpoint). {% /aside %} ### Price adjustments You can specify one or more price adjustments to modify the total cost of an order or individual line items. Price adjustments are defined at the `Order` level. They can then be applied to the order as a whole or to individual items in the order. There are three types of price adjustments: 1. **Discounts** - A discount is defined by an [OrderLineItemDiscount](https://developer.squareup.com/reference/square/objects/OrderLineItemDiscount) object in the `discounts` array of the `Order`. You can scope an `OrderLineItemDiscount` so that it can apply to the entire order or to one or more line items. 2. **Service charges** - A service charge is defined by an [OrderServiceCharge](https://developer.squareup.com/reference/square/objects/OrderServiceCharge) object in the `service_charges` array of the `Order`. An `OrderServiceCharge` can be based on the total amount of the order or apportioned based on the individual items in the order. 3. **Taxes** - A tax is defined by an [OrderLineItemTax](https://developer.squareup.com/reference/square/objects/OrderLineItemTax) object in the `taxes` array of the `Order`. You can scope an `OrderLineItemTax` so it can apply to the entire order or to one or more line items. ### ID fields Every `Order` object has a read-only `id` field, which contains a system-generated unique identifier for the order (for example, 7j32iSjnCZFuTwFA06Jy5fDKb0GZY). The embedded objects within an `Order` have `uid` fields (unique IDs) to distinguish individual objects from each other. For example, suppose an order's `taxes` array contains two elements for sales taxes: one for the city and one for the state. You could set the `uid` for the first element to `CITYTAX` and the `uid` for the second element to `STATETAX`. If you don't provide values for the unique ID fields, the Orders API generates unique values for them and returns them in the API responses. {% aside type="info" %} ID fields are limited to 60 characters and limited to letters, numbers, hyphens, underscores, and periods. {% /aside %} ## Order creation process flow Orders can be created by Square products such as Square Point of Sale or the Reader SDK integration. Orders can also be created manually using the [CreateOrder](https://developer.squareup.com/reference/square/orders-api/CreateOrder) endpoint. At a high level, your application can manually create an order using the following steps: 1. The application gathers information about the order and builds an [Order](https://developer.squareup.com/reference/square/objects/order) object. 1. The application sends the `Order` to the [CreateOrder](https://developer.squareup.com/reference/square/orders-api/CreateOrder) endpoint. 1. The `CreateOrder` endpoint determines the initial item totals, discounts, service charges, and taxes. 1. The `CreateOrder` endpoint returns the updated `Order` to the application. ![A diagram showing the Orders API process flow for manually creating an order.](//images.ctfassets.net/1nw4q0oohfju/1y1fd8K4wGv8l5iuMIkIux/16f2e71fd84cfd7f7a14f3c956f9f6c6/order-api-overview-flow.png) {% aside type="important" %} Managing the order state is critical to ensure that customers are properly charged. When an `Order` object is created, Square takes a snapshot of the state of the objects included and uses that snapshot to process the transaction. Even if the price of the item changes before the transaction completes, the Orders API uses that original price to calculate the total. You should create `Order` objects immediately before processing the transaction. Otherwise, you need to create a new `Order` object to capture any changes that occur. {% /aside %} ## Reporting on orders All order details are available through the [BatchRetrieveOrders](https://developer.squareup.com/reference/square/orders-api/batchretrieveorders) and [SearchOrders](https://developer.squareup.com/reference/square/orders-api/searchorders) endpoints. Fulfillment orders only appear in the Square Dashboard after they're charged. Note that fulfillment orders must have `delay_capture` set to `true`. ## See also * [Create Orders](orders-api/create-orders) * [Pay for Orders](orders-api/pay-for-orders) * [Order Price Adjustments](orders-api/price-adjustments) * [Order Service Charges](orders-api/service-charges) * [Order Discounts](orders-api/discounts) * [Order Taxes](orders-api/taxes) --- # Token Introspection > Source: https://developer.squareup.com/docs/oauth-api/token-introspection > Status: PUBLIC > Languages: All > Platforms: All Learn how to get scope details about the scope of an access token. **Applies to:** [OAuth API](oauth-api/overview) {% subheading %}Learn how to use the OAuth API to get the scope details of an access token.{% /subheading %} {% toc hide=true /%} ## Overview The [RetrieveTokenStatus](https://developer.squareup.com/reference/square/oauth-api/retrieve-token-status) endpoint performs token introspection of an [OAuth access token](build-basics/access-tokens#get-an-oauth-access-token) or an application's [personal access token](build-basics/access-tokens#get-a-personal-access-token). With the `RetrieveTokenStatus` endpoint, you can ensure that a token grants all the permissions you need without having to find the scope through trial and error by calling different Square endpoints. The following is an example `RetrieveTokenStatus` request where `access_token` is a valid production authorization credential (see [Get a personal access token)](build-basics/access-tokens#get-a-personal-access-token). ```json curl https://connect.squareup.com/oauth2/token/status \ -X POST \ -H 'Square-Version: 2022-12-14' \ -H 'Authorization: Bearer ’ \ -H 'Content-Type: application/json' ``` The following is an example response: ```json { "scopes": [ "PAYMENTS_READ", "PAYMENTS_WRITE" ], "expires_at": "2022-10-20T22:03:46Z", "client_id": "clientid", "merchant_id": "merchantId" } ``` ## Example use cases You can use the [RetrieveTokenStatus](https://developer.squareup.com/reference/square/oauth-api/retrieve-token-status) endpoint to gracefully handle revoked or expired access tokens, check the scopes of different seller access tokens, and check whether an access token is valid before a nightly batch job. ### Handling revoked or expired access tokens Consider a scenario where your application gets a large number of requests that it handles in parallel to stay responsive. A batch of requests receives `401` errors because their access tokens have expired. You can use the [RetrieveTokenStatus](https://developer.squareup.com/reference/square/oauth-api/retrieve-token-status) endpoint to first check whether a request has a valid access token. ### Checking scopes for seller's access tokens Consider a CLI application that runs a set of tasks to update a catalog for a coffee shop and ensures that the catalog is accurate. You can use the [RetrieveTokenStatus](https://developer.squareup.com/reference/square/oauth-api/retrieve-token-status) endpoint to first check the scope of the seller's access token and then run all the necessary tasks. ### Checking access tokens before nightly batch jobs Consider a scenario where an enterprise plugin uses an access token that expires every 24 hours. You can use the [RetrieveTokenStatus](https://developer.squareup.com/reference/square/oauth-api/retrieve-token-status) endpoint to check whether the access token is valid every hour so that you can refresh the access token, if needed, in time for the next batch job. --- # Migrate from Employees to Team Members > Source: https://developer.squareup.com/docs/labor-api/migrate-to-teams > Status: PUBLIC > Languages: All > Platforms: All Learn about migrating your Labor API application code to reference team members in the Team API. {% subheading %}Learn about migrating your Labor API application code to reference team members in the Team API.{% /subheading %} {% toc hide=true /%} ## Overview The Labor API (version 2020-08-26) continues to support the deprecated `Employee` object during the deprecation period of the Employees API. Use this guide to migrate your Labor API code to using the Team API [TeamMember](https://developer.squareup.com/reference/square/objects/TeamMember) object when making calls with the Labor API version 2020-08-26 or later. ### Important dates * **Deprecation:** 2020-08-26 * **Retirement:** 2021-08-26 ### If you need help If you need help migrating to Square APIs or need more time to complete your migration, [contact Developer Support](https://squareup.com/help/contact?panel=BF53A9C8EF68), [join our Discord community](https://discord.gg/squaredev), or reach out to your Square account manager. ## Endpoints The Team API and Labor API wage setting endpoints replace the employee role endpoints in the v1 Employees API. The Square Labor API endpoints for employee wages are deprecated and replaced with team member wage endpoints as shown in the following table: |Deprecated Labor endpoint| Replacement | |:------------------------|:-------------------------------------------------------------------------| |GetEmployeeWage |[GetTeamMemberWage](https://developer.squareup.com/reference/square/labor-api/get-team-member-wage) | |ListEmployeeWages |[ListTeamMemberWages](https://developer.squareup.com/reference/square/labor-api/list-team-member-wages)| ## Object mapping The Team API provides wage setting objects for each team member to replace the employee wage object for an employee. These objects are returned by the endpoints noted in the previous section. |Deprecated object| Replacement | |:----------------|:----------------| |EmployeeWage |[TeamMemberWage](https://developer.squareup.com/reference/square/objects/TeamMemberWage) | ## Field mapping The [Shift](https://developer.squareup.com/reference/square/objects/shift) and [ShiftFilter](https://developer.squareup.com/reference/square/objects/ShiftFilter) objects are updated to include team member ID fields. The employee ID fields remain in the objects to support the `Employee` object until it is retired. |Deprecated field| Replacement | |:------------------------|:-------------------------------------------------------------------------| |`Shift.employee_id` |`Shift.team_member_id` | |`ShiftFilter.employee_ids` |`ShiftFilter.team_member_ids`| ## Update the Labor API for team_member_id To update your Labor API application code, change the references of `employee_id` to `team_member_id` in each request call. No other functionalities have been affected here. ### List team member wages Developers must reference `team_member_id` in the request for the response to return `team_member_id` populated with the same employee ID. Note that an employee ID value can be set as the value of the `team_member_id`. **Example request** **Labor API request with employee_id** ```` **Labor API request with team_member_id** ```` **Example response** **Labor API employee_id response** ```json { "employee_wages": [{ "id": "employee_wage_id", "employee_id": "employeeid", "title": "Chef", "hourly_rate": { "amount": 6000, "currency": "USD" } }], "cursor": "CURSOR" } ``` **Labor API team_member_id response** ```json { "team_member_wages": [{ "id": "employee_wage_id", "team_member_id": "employeeid", "title": "Chef", "hourly_rate": { "amount": 6000, "currency": "USD" } }] } ``` ### Get team member wage The response of team member wage returns a payload with `team_member_id` populated. **Example request** **Labor API request with employee_id** ```` **Labor API request with team_member_id** ```` **Example response** **Labor API employee_id response** ```json { "employee_wage": { "id": "employee_wage_id", "employee_id": "employeeid", "title": "Chef", "hourly_rate": { "amount": 6000, "currency": "USD" } } } ``` **Labor API team_member_id response** ```json { "team_member_wage": { "id": "pXS3qCv7BERPnEGedM4S8mhm", "team_member_id": "33fJchumvVdJwxV0H6L9", "title": "Manager", "hourly_rate": { "amount": 2000, "currency": "USD" } } } ``` ### Create shift External developers can reference either `employee_id` or `team_member_id` in the request, and the response returns both `employee_id` and `team_member_id` populated with the same employee ID. **Example request** **Labor API request with employee_id** ```` **Labor API request with team_member_id** ```` **Example response** Regardless of which of the previous requests are made, the response has an `employee_id` and a `team_member_id`, both of which contain the same value. {% aside type="info" %} When the Employee API is retired, the `employee_id` is no longer returned. {% /aside %} **Labor API response with team_member_id** ```json { "shift": { "id": "shift_id", "employee_id": "employee_token", "team_member_id": "employee_token", "location_id": "location_id", "start_at": "2020-07-01T08:43:00Z", "wage": { "hourly_rate": { "amount": 0, "currency": "USD" } }, "status": "OPEN", "version": 1, "created_at": "2020-07-01T20:47:55Z", "updated_at": "2020-07-01T20:47:55Z" } } ``` ### Update shift External developers can reference either `employee_id` or `team_member_id` in the request, and the response returns both `employee_id` and `team_member_id` populated with the same employee ID. **Example request** **Labor API request with employee_id** ```` **Labor API request with team_member_id** ```` **Example response** Regardless of which of the previous requests are made, the response has an `employee_id` and a `team_member_id`, both of which contain the same value. ```json { "shift": { "id": "shift_id", "employee_id": "employee_token", "team_member_id": "employee_token", "location_id": "location_id", "start_at": "2020-07-01T08:43:00Z", "end_at": "2020-07-01T12:43:00Z", "wage": { "hourly_rate": { "amount": 0, "currency": "USD" } }, "status": "CLOSED", "version": 2, "created_at": "2020-07-01T20:47:55Z", "updated_at": "2020-07-01T20:47:55Z" } } ``` ### Get shift The response of `shift` returns a payload with both `employee_id` and `team_member_id` populated. **Example response** Regardless of which of the previous requests are made, the response has an `employee_id` and a `team_member_id`, both of which contain the same value. ```json { "shift": { "id": "shift_id", "employee_id": "employee_token", "team_member_id": "employee_token", "location_id": "location_id", "start_at": "2020-07-01T08:43:00Z", "end_at": "2020-07-01T12:43:00Z", "wage": { "hourly_rate": { "amount": 0, "currency": "USD" } }, "status": "CLOSED", "version": 2, "created_at": "2020-07-01T20:47:55Z", "updated_at": "2020-07-01T20:47:55Z" } } ``` --- # Monitor Sold-out Item Variations or Modifiers > Source: https://developer.squareup.com/docs/inventory-api/monitor-sold-out-status-on-item-variation > Status: PUBLIC > Languages: All > Platforms: All Learn how to use the Catalog API to set or inspect a sold-out item or to have it enabled to be set as sold out when its inventory count reaches zero. **Applies to:** [Inventory API](inventory-api/what-it-does) | [Catalog API](catalog-api/what-it-does) {% subheading %}Learn how to set up inventory tracking for a location and monitor for changes in the sold-out status of items.{% /subheading %} {% toc hide=true /%} ## Overview Item variations can become sold out in two ways: automatically when [inventory tracking](https://developer.squareup.com/reference/square/objects/CatalogItemVariation#definition__property-track_inventory) is enabled and the count reaches zero, or manually when a merchant marks an item as unavailable. The [sold_out](https://developer.squareup.com/reference/square/objects/ItemVariationLocationOverrides#definition__property-sold_out) field in [location_overrides](https://developer.squareup.com/reference/square/objects/CatalogItemVariation#definition__property-location_overrides) captures both scenarios, making it the single source of truth for item availability regardless of whether the merchant tracks inventory. {% aside type="info" %} * You do not need to enable `track_inventory` to monitor sold-out status. The `sold_out` field in `location_overrides` works independently and captures both automatic (inventory-based) and manual (merchant-marked) sold-out events. * Currently, the seller can also set a [modifier](https://developer.squareup.com/reference/square/objects/CatalogModifier) as sold out in [specified locations](https://developer.squareup.com/reference/square/objects/ModifierLocationOverrides) using the Square Dashboard or a Square POS device. The sold-out status is visible to a third-party application through the corresponding [ModifierLocationOverrides.sold_out](https://developer.squareup.com/reference/square/objects/ModifierLocationOverrides#definition__property-sold_out) field. {% /aside %} ## How item variations become sold out A seller can use the Square Dashboard to manually mark an item variation as sold out even if its inventory count isn't zero. Until the seller manually turns off the sold-out status, the sold-out status remains true on the item variation. Furthermore, the seller can set a time beyond when the sold-out status assigned to the item variation ceases to be true. A seller can use the Square Dashboard or an application developer can call the [Catalog API](https://developer.squareup.com/reference/square/catalog-api) to enable inventory tracking to monitor the sold-out status of an item variation globally for all seller locations or locally at specific locations. A location-specific inventory tracking specification overrides the global specification applicable for that location. To use the Catalog API to enable the global inventory tracking, set the [track_inventory](https://developer.squareup.com/reference/square/objects/CatalogItemVariation#definition__property-track_inventory) attribute to `true` on the item variation. To use the Catalog API to override the global settings for a particular location, set the [track_inventory](https://developer.squareup.com/reference/square/objects/ItemVariationLocationOverrides#definition__property-track_inventory) attribute to `true` on a particular element in the [location_overrides](https://developer.squareup.com/reference/square/objects/CatalogItemVariation#definition__property-location_overrides) list of the item variation. Each element in the `location_overrides` list defines an override for a specified location. When an item variation becomes sold out, a `catalog.version.updated` event notification is sent through the Catalog API webhook to all applications registered to receive the event. You can sign up for the webhook to receive the event to synchronize the sold-out status of item variations between your application and the Square inventory. This way, your application doesn't mistakenly present sold-out items to users as still available for purchase. To handle sold-out items programmatically, you're likely to perform the following common programming tasks: * Enable the automatic sold-out status on an item variation. * Determine the sold-out status of an item variation. * Use a webhook to sync the sold-out status on an item between the frontend and backend. ## Enable automatic sold-out status with inventory tracking {% aside type="info" %} This section is optional. You only need to enable `track_inventory` if you want Square to automatically mark items as sold out when inventory reaches zero. If your merchants manually manage sold-out status or don't track precise inventory counts (common in food & beverage), you can skip this section and proceed to [Inspect an item variation for the sold-out status](inventory-api/monitor-sold-out-status-on-item-variation#inspect-an-item-variation-for-the-sold-out-status). {% /aside %} In the Square Dashboard, you can choose the **Mark Item as Sold Out Online and in Point of Sale** option when editing an item variation. Using the Catalog API, your application can call [UpsertCatalogObject](https://developer.squareup.com/reference/square/catalog-api/upsert-catalog-object) (when creating or updating an item variation) to set [track_inventory](https://developer.squareup.com/reference/square/objects/CatalogItemVariation#definition__property-track_inventory) to `true` on [CatalogItemVariation](https://developer.squareup.com/reference/square/objects/CatalogItemVariation) to enable event tracking for all the seller's locations. You can also call `UpsertCatalogObject` to set [track_inventory](https://developer.squareup.com/reference/square/objects/ItemVariationLocationOverrides#definition__property-track_inventory) to `true` on a particular element in the [location_overrides](https://developer.squareup.com/reference/square/objects/CatalogItemVariation#definition__property-location_overrides) list of the `CatalogItemVariation` object to override the global setting. ### Request: Create an item with inventory tracking The following example creates an item with a single item variation that has inventory tracking enabled to automatically set the tracked item variation as sold out when its inventory count reaches zero or when the inventory count isn't zero: ```` Notice that this call enables event tracking for all the seller's locations. ### Response: Create an item with inventory tracking The successful response returns a payload similar to the following: ```json { "catalog_object": { "type": "ITEM", "id": "CKO7R744BIWIGAAXHEF6RAD7", "updated_at": "2022-01-25T04:58:46.835Z", "created_at": "1754-08-30T22:43:41.128Z", "version": 1643086726835, "is_deleted": false, "present_at_all_locations": true, "item_data": { "name": "item testing sold out", "description": "Item for testing sold out", "variations": [ { "type": "ITEM_VARIATION", "id": "LCN2AW6H4JINRJKJBKLT4ALR", "updated_at": "2022-01-25T04:58:46.835Z", "created_at": "1754-08-30T22:43:41.128Z", "version": 1643086726835, "is_deleted": false, "present_at_all_locations": true, "item_variation_data": { "item_id": "CKO7R744BIWIGAAXHEF6RAD7", "name": "item variation for inventory tracking", "ordinal": 0, "pricing_type": "FIXED_PRICING", "price_money": { "amount": 500, "currency": "USD" }, "location_overrides": [ { "location_id": "SNTR5190QMFGM", "track_inventory": true, "sold_out": true } ], "track_inventory": true, "sellable": true, "stockable": true } } ], "product_type": "REGULAR" } }, "id_mappings": [ { "client_object_id": "#item", "object_id": "CKO7R744BIWIGAAXHEF6RAD7" }, { "client_object_id": "#ivar", "object_id": "LCN2AW6H4JINRJKJBKLT4ALR" } ] } ``` When created, the item variation has zero stock in the inventory. Hence, `"sold_out": true` is returned in the response. When working with an existing item variation that doesn't have event tracking enabled, you can call `UpsertCatalogObject` to update the item variation to turn on `track_inventory` in a specific location. This involves specifying `"track_inventory": true` in a location-specific element of the [location_overrides](https://developer.squareup.com/reference/square/objects/CatalogItemVariation#definition__property-location_overrides) list of the item variation. ### Request: Update an item variation to enable inventory tracking The following example updates an item variation to override the global inventory-tracking unenabled setting (as shown by the absence of the `track_inventory` attribute on the item variation) to enable location-specific event tracking of the item variation (as specified in an element inside the `location_overrides` list of the item variation): ```` Notice that you must specify the actual Square-assigned object ID and the current object `version` number when calling `UpsertCatalogObject` to update an existing catalog object. ### Response: Update an item variation to enable the sold-out feature ```json { "catalog_object": { "type": "ITEM_VARIATION", "id": "7GJBJSMFDREKKOL6543I7BKH", "updated_at": "2022-01-26T04:35:31.693Z", "created_at": "2022-01-25T01:38:39.791Z", "version": 1643171731693, "is_deleted": false, "present_at_all_locations": true, "item_variation_data": { "item_id": "G4E2D6FJV7D7SZUO27WJZ5YV", "name": "item variation for inventory tracking", "pricing_type": "FIXED_PRICING", "price_money": { "amount": 500, "currency": "USD" }, "location_overrides": [ { "location_id": "SNTR5190QMFGM", "track_inventory": true, "sold_out": true } ], "sellable": true, "stockable": true } } } ``` Because the seller hasn't stocked any unit of the item variation, the inventory count is effectively zero. Therefore, `"sold_out": true` is present in the response. ## Inspect an item variation for the sold-out status As seen in the previous section, when an item variation is created with inventory tracking enabled, the newly created item variation is in the sold-out state. After the seller stocks the product, the item variation sold-out status is automatically turned off at a particular location. You can verify this by retrieving the item variation and inspecting the [sold_out](https://developer.squareup.com/reference/square/objects/ItemVariationLocationOverrides#definition__property-sold_out) attribute in a location-specific element of the [location_overrides](https://developer.squareup.com/reference/square/objects/CatalogItemVariation#definition__property-location_overrides) list. ### Add item variations to the inventory After you create an item variation with inventory tracking enabled, the item variation is in the sold-out state because the inventory count for it is zero. You must initialize its inventory count to a positive number to get the sold-out synchronization flow started. To accomplish this, call the Square Inventory API. #### Request: Add 100 units of an item variation to the inventory The following request uses the [BatchChangeInventory](https://developer.squareup.com/reference/square/inventory-api/batch-change-inventory) endpoint of the [Inventory API](https://developer.squareup.com/reference/square/inventory-api) to add 100 units to the inventory of an item variation just created according to the instructions in [Enable the automatic sold-out status on an item variation.](inventory-api/monitor-sold-out-status-on-item-variation#enable-the-automatic-sold-out-status-on-an-item-variation) ```` Specifications of `"from_state": "NONE"` and `"to_state": "IN_STOCK"` indicate that this request is an initial adjustment to the item variation's inventory count. #### Response: Add 100 units of an item variation to the inventory The successful response contains a result similar to the following payload: ```json { "counts": [ { "catalog_object_id": "KIPW2ZRGP6NXY45C36ADJW5A", "catalog_object_type": "ITEM_VARIATION", "state": "IN_STOCK", "location_id": "SNTR5190QMFGM", "quantity": "100", "calculated_at": "2022-01-29T05:37:27.409Z", "availability_state": "AVAILABLE" } ], "changes": [ { "type": "ADJUSTMENT", "adjustment": { "id": "4GVER7WTZHYRN3YC2XYUC3GV", "from_state": "NONE", "to_state": "IN_STOCK", "from_location_id": "SNTR5190QMFGM", "to_location_id": "SNTR5190QMFGM", "catalog_object_id": "KIPW2ZRGP6NXY45C36ADJW5A", "catalog_object_type": "ITEM_VARIATION", "quantity": "100", "occurred_at": "2022-01-28T11:20:00Z", "created_at": "2022-01-29T05:37:27.408Z", "source": { "product": "EXTERNAL_API", "application_id": "sq0ids-hLgkXFJ58T_vJI5g1Dpoww", "name": "HelloCustomers" } } } ] } ``` The item variation now has 100 units in stock at the given location (`SNTR5190QMFGM`), as indicated by `"state": "IN_STOCK"` and `"quantity": "100"`. You expect its `sold_out` attribute to be absent or set to `false`. You can verify this by retrieving the updated item variation and examining the `sold_out` attribute. ### Retrieve an item variation to examine the sold-out status To retrieve an item variation of a given ID, call [RetrieveCatalogObject](https://developer.squareup.com/reference/square/catalog-api/retrieve-catalog-object). From the result, you can examine the location-specific element of the `location_overrides` list to see that the `sold_out` attribute is absent or set to `false`. #### Request: Retrieve an item variation to examine the sold-out status The following request retrieves the item variation (`KIPW2ZRGP6NXY45C36ADJW5A`) that has 100 units just added to the inventory. In the request, the item variation ID is set as the `object_id` path parameter value. ```` #### Response: Retrieve an item variation to examine the sold-out status ```json { "object": { "type": "ITEM_VARIATION", "id": "KIPW2ZRGP6NXY45C36ADJW5A", "updated_at": "2022-01-29T05:37:28.468Z", "created_at": "2022-01-26T20:33:22.432Z", "version": 1643434648468, "is_deleted": false, "present_at_all_locations": true, "item_variation_data": { "item_id": "AJH676Z3IMY3XP3LNG3PHSYS", "name": "item variation for inventory tracking", "ordinal": 0, "pricing_type": "FIXED_PRICING", "price_money": { "amount": 500, "currency": "USD" }, "location_overrides": [ { "location_id": "SNTR5190QMFGM", "track_inventory": true } ], "track_inventory": true, "sellable": true, "stockable": true } } } ``` {% aside type="important" %} The absence of the `sold_out` attribute inside `location_overrides` confirms that the item variation is no longer sold out. {% /aside %} ## Sync the item variation sold-out status To improve the user experience of your application that displays items for sale for a seller, make sure that sold-out items are marked as such and become unavailable for purchase. To achieve this, you must keep the sold-out status of item variations in your application in sync with the Square inventory. You must also inform the user that an item is out of stock or unavailable for purchase when the corresponding item variation becomes sold out. An efficient way to synchronize the sold-out status involves using Square API [webhooks](webhooks/overview). When a sold-out status change occurs on an item variation — whether from an inventory count reaching zero or a merchant manually marking an item as unavailable — a [catalog.version.updated](https://developer.squareup.com/reference/square/catalog-api/webhooks/catalog.version.updated) event is sent through the Catalog API webhook to applications that have registered to receive the event notification. You can then call [SearchCatalogObjects](https://developer.squareup.com/reference/square/catalog-api/search-catalog-objects) to retrieve updated item variations and inspect the [sold_out](https://developer.squareup.com/reference/square/objects/ItemVariationLocationOverrides#definition__property-sold_out) attribute in [element objects](https://developer.squareup.com/reference/square/objects/ItemVariationLocationOverrides) of the [location_overrides](https://developer.squareup.com/reference/square/objects/CatalogItemVariation#definition__property-location_overrides) list. For item variations with `"sold_out": true` specified, disable them in all components of your application, especially the UI for the applicable locations. For item variations without the `sold_out` attribute present or with `"sold_out": false` specified, enable the item variations in the application's UI or any other components. {% aside type="important" %} Catalog webhooks can be noisy — multiple webhooks can fire for a single update, and events can arrive out of order. Do not use the exact `updated_at` timestamp from a webhook to search for a specific item. Instead, store the timestamp of your last catalog sync and use it as the `begin_time` when searching. This ensures you capture all changes without missing updates or creating duplicates. For more information, see [How catalog.version.updated Works](catalog-api/webhooks#how-catalogversionupdated-works). {% /aside %} The following is an end-to-end walkthrough illustrating how to programmatically synchronize an item variation's sold-out status between your application and the backend. In particular, it covers the following configuration and programming tasks: * Configure your application to receive the [catalog.version.updated](https://developer.squareup.com/reference/square/catalog-api/webhooks/catalog.version.updated) event through the Catalog API webhook. * Reduce the item variation's inventory count to zero to make the item sold out. * Inspect the received `catalog.version.updated` event data to obtain the `updated_at` timestamp. * Compare the `updated_at` timestamp against your stored last sync time and, if newer, search for updated `CatalogItemVariation` objects to inspect for `"sold_out": true`. Omitted is the application-specific logic to disable sold-out item variations or enable restocked item variations in your application, depending on whether the `sold_out` status is `true` or `false`, respectively. ### Subscribe to catalog.version.updated event notifications To subscribe to [catalog.version.updated](https://developer.squareup.com/reference/square/catalog-api/webhooks/catalog.version.updated) event notifications, you must configure webhooks for your Square application. A webhook registers the URL to which Square should send notifications, the events you want to be notified about, and the Square API version. For more information, see [Square Webhooks Overview](webhooks/overview). **To configure a webhook** 1. In the [Developer Console](https://developer.squareup.com/apps), open the application to which you want to subscribe. 1. In the left pane, choose **Webhooks**. 1. At the top of the page, choose **Sandbox** or **Production**. Choose [Sandbox](testing/sandbox) for testing. 1. Choose **Add Endpoint**, and then configure the endpoint: 1. For **Webhook Name**, enter a name such as **Item Sold Out Webhook**. 1. For **URL**, enter your notification URL. If you don't have a working URL yet, you can enter **https://example.com** as a placeholder. To use [Webhook.site](https://webhook.site) for testing, copy the **Your unique URL** value on the website and paste it into the **URL** box. 1. Optional. For **API Version**, choose a Square API version. By default, this is set to the same version as the application. 1. For **Events**, choose **catalog.version.updated**. If you want to receive notifications about other events at the same webhook URL, choose them or configure another endpoint. 1. Choose **Save**. With the webhook configured, test the webhook workflow as follows. ### Deduct 100 units of item variations from the inventory Suppose the previously added 100 units of the item variation are all sold in 1 day. To perform a daily update of the inventory count, call `BatchChangeInventory` of the Inventory API to deduct the 100 units from the inventory. The following example shows how this can be done. #### Request: Deduct 100 units of an item variation from the inventory The following example request reduces the inventory count of an item variation (`"catalog_object_id": "KIPW2ZRGP6NXY45C36ADJW5A"`) at a particular location (`"location_id": "SNTR5190QMFGM"`) by 100 units: ```` Notice that the reduction is specified by `"from_state": "IN_STOCK"`, `"to_state": "SOLD"`, and `"quantity": "100"`. #### Response: Deduct 100 units of an item variation from the inventory The successful response returns a result containing a payload similar to the following: ```json { "counts": [ { "catalog_object_id": "KIPW2ZRGP6NXY45C36ADJW5A", "catalog_object_type": "ITEM_VARIATION", "state": "IN_STOCK", "location_id": "SNTR5190QMFGM", "quantity": "0", "calculated_at": "2022-01-26T20:57:37.463Z", "availability_state": "AVAILABLE" } ], "changes": [ { "type": "ADJUSTMENT", "adjustment": { "id": "PYEHJWDOL64YAH3BZE74KLK7", "from_state": "IN_STOCK", "to_state": "SOLD", "from_location_id": "SNTR5190QMFGM", "to_location_id": "SNTR5190QMFGM", "catalog_object_id": "KIPW2ZRGP6NXY45C36ADJW5A", "catalog_object_type": "ITEM_VARIATION", "quantity": "100", "occurred_at": "2022-01-26T11:20:00Z", "created_at": "2022-01-26T20:57:37.462Z", "source": { "product": "EXTERNAL_API", "application_id": "sq0ids-hLgkXFJ58T_vJI5g1Dpoww", "name": "HelloCustomers" } } } ] } ``` Notice that the unit of item variation in stock is now 0, as is shown by `"state": "IN_STOCK"` and `"quantity": "0"`. In response to this change, a `catalog.version.updated` event is triggered and sent to the previously configured webhook event listener where you can inspect for the timestamp where the item variation's catalog version is updated. #### Event: Inspect the catalog.version.updated event The following `catalog.version.updated` event shows an example of what the event data structure looks like: ```json { "merchant_id": "ETCE8W0W8QDYP", "type": "catalog.version.updated", "event_id": "9118d935-84ca-427d-897e-c12bfc701768", "created_at": "2022-01-26T20:57:43.064534045Z", "data": { "type": "catalog", "id": "", "object": { "catalog_version": { "updated_at": "2022-01-26T20:57:38.885Z" } } } } ``` Notice that this event data doesn't say explicitly which object is affected or whether an affected item variation is sold out. In fact, you receive a similar event for the inventory adjustment that added the first 100 units of the item variation, although with an earlier `updated_at` timestamp. To determine the `sold_out` status, compare the webhook's `updated_at` timestamp against your application's stored last sync time. If `updated_at` is more recent, search for all item variations updated since your last sync and inspect the `sold_out` attribute on each. #### Search for updated item variations and parse the sold_out status To determine `sold_out`, call the [SearchCatalogObjects](https://developer.squareup.com/reference/square/catalog-api/search-catalog-objects) endpoint of the Catalog API using your stored last sync time as the `begin_time`. Then inspect the results for the `sold_out` attribute of each returned item variation. #### Request: Search for updated item variations to inspect the sold-out status The following example request searches for item variations (`"object_types": ["ITEM_VARIATION"]`) that have been updated since your application's last catalog sync. Set `begin_time` to the timestamp of your last sync: ```` After processing the response, update your stored last sync time to the `latest_time` value returned in the response. This ensures your next sync captures all subsequent changes. #### Response: Search for updated item variations to inspect the sold-out status The successful response returns all item variations updated since your last sync time. The following is an example payload: ```json { "objects": [ { "type": "ITEM_VARIATION", "id": "KIPW2ZRGP6NXY45C36ADJW5A", "updated_at": "2022-01-26T20:57:38.885Z", "created_at": "2022-01-26T20:33:22.432Z", "version": 1643230658885, "is_deleted": false, "present_at_all_locations": true, "item_variation_data": { "item_id": "AJH676Z3IMY3XP3LNG3PHSYS", "name": "item variation for inventory tracking", "ordinal": 0, "pricing_type": "FIXED_PRICING", "price_money": { "amount": 500, "currency": "USD" }, "location_overrides": [ { "location_id": "SNTR5190QMFGM", "track_inventory": true, "sold_out": true } ], "track_inventory": true, "sellable": true, "stockable": true } } ], "latest_time": "2022-01-26T20:57:38.885Z" } ``` The presence of `"sold_out": true` (within the `location_overrides` list) confirms that the item variation is indeed sold out at the specified location (`SNTR5190QMFGM`). Because you're searching across a time range rather than a single timestamp, the response might return multiple item variations. Inspect the `sold_out` attribute in each item variation's `location_overrides` to determine which items have changed status. Item variations without the `sold_out` attribute or with `"sold_out": false` are in stock and available for purchase. --- # Manage Order Fulfillments > Source: https://developer.squareup.com/docs/orders-api/fulfillments > Status: PUBLIC > Languages: All > Platforms: All Learn how to create and manage order fulfillment using the Square Orders API. **Applies to:** [Orders API](orders-api/what-it-does) {% subheading %}Learn how to create, update, cancel, and split an order fulfillment.{% /subheading %} {% toc hide=true /%} ## Overview A seller might add fulfillment information to an order when it's created or updated. They can use Square products or your Orders API-integrated application to manage their fulfillments. {% aside type="tip" %} If you want to track the progress of order fulfillments that are managed in a Square product, you should subscribe to Orders [webhooks](webhooks/v2webhook-events-tech-ref#orders-api) for notification of fulfillment events triggered outside of your application. {% /aside %} The Orders API stores fulfillment information in the [Order.fulfillments](https://developer.squareup.com/reference/square/objects/Order#definition__property-fulfillments) field (an array of [Fulfillment](https://developer.squareup.com/reference/square/objects/Fulfillment) objects). Each `Fulfillment` includes the following: * `uid` - A Square-assigned unique identifier. * `type` - The type of fulfillment. * `state` - Initially, the fulfillment state is `PROPOSED`. * Fulfillment details - Depending on the `type`, fulfillment details are stored in [pickup_details](https://developer.squareup.com/reference/square/objects/FulfillmentPickupDetails), [shipment_details](https://developer.squareup.com/reference/square/objects/FulfillmentShipmentDetails), [delivery_details](https://developer.squareup.com/reference/square/objects/FulfillmentDeliveryDetails), or [in_store_details](https://developer.squareup.com/reference/square/objects/FulfillmentInStoreDetails). The Orders API supports fulfillments of these types: * `DELIVERY` (Beta) * `IN_STORE` (Beta) * `PICKUP` * `SHIPMENT` (Beta) ## Requirements and limitations * **One fulfillment limit** - Developers can add only one fulfillment to an order using the Orders API, either during or after creation. * **No fulfillment splitting** - All items for an order created with the Orders API must be fulfilled at the same location. * **Limited delivery fulfillment support** - Any order you create with the DELIVERY fulfillment type is not available to a seller and not shown in the Square Point of Sale unless you have a formal partnership agreement with Square. Please reach out to your Square Partner Manager to request Beta access. To become an app partner, [submit a partnership request](https://squareup.com/us/en/partnerships/app-partner). * **Limited in-store fulfillment support** - The IN_STORE fulfillment type is available as a restricted (closed) Beta. If your application isn't enrolled in the Beta, requests that include an IN_STORE fulfillment return an error. Reach out to your Square Partner Manager to request Beta access. To become an app partner, [submit a partnership request](https://squareup.com/us/en/partnerships/app-partner). * **Only paid orders are visible** - Orders with fulfillments appear on Square products (such as the Square Dashboard and Point of Sale application) only after they're paid for. Sellers can then manage fulfillments for these orders using these Square products. * **Immutable fields** - Most fulfillment fields are immutable based on the fulfillment `state`. Editable fields include: * `state` (if the order is being managed through a developer's application). * `delivery_details` fields, such as the `deliver_at` or `dropoff_notes` field. * `in_store_details` fields, such as the `note` field. * `pickup_details` fields, such as the `pickup_at` or `note` field. * `recipient` field, such as `address` or `phone_number`. * `shipment_details` fields, such as `tracking_number` or `tracking_url`. ## Multiple-fulfillment orders A seller can create orders using your application or through Square products like Square Online. Orders retrieved by your application may have multiple fulfillments, which track the fulfillment of order line items across different seller locations. For information about how a seller can create a multiple-fulfillment order using Square, see [Manage cross location orders with Square for Retail](https://squareup.com/help/us/en/article/7588-cross-location-orders-with-square-for-retail). {% aside type="info" %} If your application retrieves a `DELIVERY` fulfillment order, it cannot access fulfillment [delivery_details](https://developer.squareup.com/reference/square/objects/Fulfillment#definition__property-delivery_details) unless you are a Square partner developer and have signed up for the closed `DELIVERY` Beta. For more information, see [DELIVERY type fulfillment](#delivery-beta). {% /aside %} If your application lets sellers see the state of any order fulfillments in their Square account, then it should handle cases where the `Order.fulfillments` array contains multiple items. While your application can only create single-fulfillment orders, it has access to fulfillment orders created by Square applications. ## SHIPMENT type fulfillment The following `Order` fragment shows a `SHIPMENT` [Fulfillment](https://developer.squareup.com/reference/square/objects/Fulfillment): ```json { "order": { "id": "uuVIIBP9Nl8L7xq6MJQayNuo8LdZY", "location_id": "S8GWD5R9QB376", "line_items": [ … ], "fulfillments": [ { "type": "SHIPMENT", "shipment_details": { "recipient": { "display_name": "John Doe" } } } ] } } ``` The `recipient.display_name` is the only [shipment_details](https://developer.squareup.com/reference/square/objects/FulfillmentShipmentDetails) field required when a fulfillment is created. Other `shipment_details` fields are optional: `carrier`, `shipping_note`, `shipping_type`, `tracking_number`, and `tracking_url`. ### Fulfillment state changes As a `SHIPMENT` fulfillment order moves through stages, the fulfillment state is updated and corresponding timestamps are set: * `in_progress_at` - state changes to `RESERVED` * `packaged_at` - state changes to `PREPARED` * `shipped_at` - state changes to `COMPLETED` * `canceled_at` - state changes to `CANCELED` * `failed_at` - state changes to `FAILED` ## PICKUP type fulfillment This `Order` fragment shows a `PICKUP` [Fulfillment](https://developer.squareup.com/reference/square/objects/Fulfillment) scheduled for delivery ASAP but with a 30 minute prep time. Note the `pickup_at` time is 30 minutes after the order is created: {% tabset %} {% tab id="Request" %} ```json { "order": { "id": "sfADX2Xqb8F4uZaFuAp3xlShefbZY", "location_id": "S8GWD5R9QB376", "line_items": [ … ], "fulfillments": [ { "type": "PICKUP", "state": "PROPOSED", "uid": "pickup1", "pickup_details": { "schedule_type": "ASAP", "prep_time_duration": "PT30M15S", "recipient": { "customer_id": "{{customer_id}}" } } } ], } } ``` {% /tab %} {% tab id="Response" %} ```json { "order": { "id": "sfADX2Xqb8F4uZaFuAp3xlShefbZY", "location_id": "{LOCATION_ID}", "line_items": [ { "uid": "gWyZ9FpCEJlKMHdDuXc0N", "quantity": "1", "name": "New York Strip Steak", "variation_name": "Regular", "base_price_money": { "amount": 100, "currency": "USD" }, "gross_sales_money": { "amount": 100, "currency": "USD" }, "total_tax_money": { "amount": 100, "currency": "USD" }, "total_discount_money": { "amount": 0, "currency": "USD" }, "total_money": { "amount": 200, "currency": "USD" }, "variation_total_price_money": { "amount": 100, "currency": "USD" }, "applied_taxes": [ { "uid": "73e6adf8-5a95-4f93-a5d7-99f5be4425b1", "tax_uid": "314cb5c2-0f5f-4375-8943-9dad81636615", "applied_money": { "amount": 10, "currency": "USD" } } ], "item_type": "ITEM", "total_service_charge_money": { "amount": 0, "currency": "USD" } } ], "taxes": [ { "uid": "314cb5c2-0f5f-4375-8943-9dad81636615", "catalog_object_id": "3U6CY3DXYCFSJN5GLTBUSSQJ", "catalog_version": 1712009260987, "name": "Sales tax", "percentage": "10.0", "type": "ADDITIVE", "applied_money": { "amount": 10, "currency": "USD" }, "scope": "LINE_ITEM", "auto_applied": true } ], "fulfillments": [ { "uid": "pickup1", "type": "PICKUP", "state": "PROPOSED", "pickup_details": { "pickup_at": "2024-09-10T22:31:49.013Z", "schedule_type": "ASAP", "recipient": { "customer_id": "QKZMSWM0SKSHFYS7S20SH62EQR", "display_name": "Abraham Lincoln", "email_address": "johnporter@example.org", "phone_number": "1-425-555-4321", "address": { "address_line_1": "500 Electric Ave", "address_line_2": "Suite 600", "locality": "Sinking Spring Farm", "administrative_district_level_1": "KY", "postal_code": "90000", "country": "US" } }, "prep_time_duration": "PT30M15S" } } ], "created_at": "2024-09-10T22:01:34.011Z", "updated_at": "2024-09-10T22:01:34.011Z", "state": "OPEN", "version": 1, "reference_id": "my-order-0003", "total_tax_money": { "amount": 100, "currency": "USD" }, "total_discount_money": { "amount": 0, "currency": "USD" }, "total_tip_money": { "amount": 0, "currency": "USD" }, "total_money": { "amount": 200, "currency": "USD" }, "total_service_charge_money": { "amount": 0, "currency": "USD" }, "net_amounts": { "total_money": { "amount": 200, "currency": "USD" }, "tax_money": { "amount": 100, "currency": "USD" }, "discount_money": { "amount": 0, "currency": "USD" }, "tip_money": { "amount": 0, "currency": "USD" }, "service_charge_money": { "amount": 0, "currency": "USD" } }, "source": { "name": "Sandbox for sq0idp-IzilfMqQrp250DGdNk7FQw" }, "customer_id": "QKZMSWM0SKSHFYS7S20SH62EQR", "pricing_options": { "auto_apply_discounts": true, "auto_apply_taxes": true }, "net_amount_due_money": { "amount": 200, "currency": "USD" } } } ``` {% /tab %} {% /tabset %} The `pickup_at` and `recipient.display_name` fields are the only [pickup_details](https://developer.squareup.com/reference/square/objects/FulfillmentPickupDetails) fields required when creating a fulfillment. The following apply for the other `pickup_details` fields: * The `schedule_type` value determines the following: * If set to `SCHEDULED`, `pickup_at` is required. * If set to `ASAP`, `prep_time_duration` or `pickup_at` is required. * These fields can only be set while the order fulfillment `state` is `PROPOSED`: `expires_at`, `auto_complete_duration`, `prep_time_duration`, and `schedule_type`. ### Prep time duration A scheduled order does not move to the 'Active' tab in Order Manager (and show up on a KDS or print from kitchen printers) until pickup time _minus prep time_. Although `prep_time_duration` is not required for the `SCHEDULED` type, Square recommends that your application sets the value. If a prep time is not provided, a `SCHEDULED` order becomes active immediately — behaving the same as an `ASAP` order — rather than waiting until the scheduled pickup time. If the `schedule_type` is `ASAP` and the `prep_time_duration` is set then Square sets the `pickup_at` time to now plus `prep_time_duration`. If your application sets `pickup_at` for an `ASAP` pickup, `prep_time_duration` is ignored even if you've set that value too. ### Fulfillment state changes As a `PICKUP` fulfillment order moves through stages, the fulfillment state is updated and corresponding timestamps are set: * `accepted_at` - The state changes to `RESERVED` * `ready_at` - The state changes to `PREPARED` * `pick_up_at` - The state changes to `COMPLETED`. * `canceled_at` - The state changes to `CANCELED` * `rejected_at` - The state changes to `FAILED` {% anchor id="delivery-beta" /%} ## DELIVERY type fulfillment This is a restricted (closed) Beta. You need to be a Square partner developer and have signed up for the closed `DELIVERY` Beta. Please reach out to your Square Partner Manager to request Beta access. To become an app partner, [submit a partnership request](https://squareup.com/us/en/partnerships/app-partner). {% aside type="important" %} Requests to create a `DELIVERY` fulfillment order succeed with a 200 response even if you don't have a partnership agreement and are enrolled in the delivery beta program. However, the delivery order you create cannot be accessed by a seller and does not appear in the Square Order Manager. {% /aside %} This `Order` fragment shows a `DELIVERY` fulfillment: ```json { "order":{ "id":"MgVVrx8GhOy4K7LO7LtYwgM3RUaZY", "location_id":"7WQ0KXC8ZSD90", "line_items":[ { } ], "fulfillments":[ { "uid":"uYJmomsp8OjA2iY8PZR2IC", "type":"DELIVERY", "state":"PROPOSED", "delivery_details":{ "recipient":{ "display_name":"John Doe", "phone_number":"2065129261", "address":{ "address_line_1":"111 Maple", "locality":"Seattle" } }, "deliver_at":"2022-05-25T20:59:33.123Z" } } ] "state":"OPEN", "version":1, } } ``` Note the following about [delivery_details](https://developer.squareup.com/reference/square/objects/FulfillmentDeliveryDetails): ### Required delivery fields The following information is required when creating a delivery fulfillment: * `recipient` details - The `display_name`, `address`, and `phone_number` are required if there's no third-party managing delivery (`managed_delivery` is set to `false`). * `schedule_type` - It can be set to `SCHEDULED` (default) or `ASAP`. * `deliver_at` - If `schedule_type` is set to `ASAP`, this field is automatically set to the time the order is created plus the `prep_time_duration`. This field is required when `schedule_type` is set to `SCHEDULED`. ### Optional delivery fields Applications can provide optional `delivery_detail` information, such as: * `prep_time_duration`. The time it takes to prepare and deliver the fulfillment. * A combination of `deliver_at` and `delivery_window_duration` identifying the order delivery window. * Courier information (such as `courier_provider_name`, `courier_support_phone_number`, and the combination of `courier_pickup_at` and `courier_pickup_window_duration` identifying the courier pickup window). * Other information (such as optional drop-off notes and whether the delivery is a no-contact delivery). ### Third-party managed delivery For a delivery managed by a third party: * Set the `managed_delivery` field to `true`. This makes the recipient information optional, such as `display_name` and `address`. * The `courier_provider_name` and `courier_support_phone_number` fields are required. ### Fulfillment state changes As an order moves through stages of fulfillment, the state of the fulfillment is updated and corresponding timestamps are set: * `delivery_details.in_progress_at` - The state changes to `RESERVED` * `delivery_details.ready_at` - The state changes to `PREPARED` * `delivery_details.canceled_at` - The state changes to `CANCELED` * `delivery_details.rejected_at` - The state changes to `FAILED` * `delivery_details.completed_at` - The state changes to `COMPLETED`. {% anchor id="in-store-beta" /%} ## IN_STORE type fulfillment This is a restricted (closed) Beta. You need to be a Square partner developer and have signed up for the closed `IN_STORE` Beta. Please reach out to your Square Partner Manager to request Beta access. To become an app partner, [submit a partnership request](https://squareup.com/us/en/partnerships/app-partner). An `IN_STORE` fulfillment represents an order that the buyer receives at the seller's location at the time of sale. For example, a buyer orders at the counter and is handed their items when they're ready, a diner is served at their table, or a buyer purchases an item off the shelf and takes it with them. Because the buyer is already present, an `IN_STORE` fulfillment isn't scheduled for a future time. Unlike `PICKUP` and `DELIVERY` fulfillments, there is no `schedule_type` and no expiration. The seller can begin preparing the order immediately and complete the fulfillment when the buyer receives their items. This `Order` fragment shows an `IN_STORE` fulfillment: ```json { "order": { "id": "CAISENgvlJ6jLWAzERDzjyHVybY", "location_id": "S8GWD5R9QB376", "line_items": [ … ], "fulfillments": [ { "uid": "instore1", "type": "IN_STORE", "state": "PROPOSED", "in_store_details": { "note": "Table 7", "recipient": { "display_name": "John Doe" } } } ] } } ``` The [in_store_details](https://developer.squareup.com/reference/square/objects/FulfillmentInStoreDetails) object is required when creating an `IN_STORE` fulfillment, but none of its individual fields are required. The following `in_store_details` fields are optional: * `note` - Instructions or additional information about the fulfillment, displayed in the Square Point of Sale application (maximum 550 characters). * `recipient` - Information about the person the order is for, such as `display_name`, `phone_number`, or `customer_id`. The remaining `in_store_details` fields (`in_progress_at`, `prepared_at`, `completed_at`, and `canceled_at`) are read only. Square sets them automatically as the fulfillment state changes. ### Fulfillment state changes As an `IN_STORE` fulfillment order moves through stages, the fulfillment state is updated and corresponding timestamps are set: * `in_progress_at` - The state changes to `RESERVED` * `prepared_at` - The state changes to `PREPARED` * `completed_at` - The state changes to `COMPLETED` * `canceled_at` - The state changes to `CANCELED` A fulfillment can move directly from any non-terminal state (`PROPOSED`, `RESERVED`, or `PREPARED`) to `COMPLETED` or `CANCELED`. For example, an order that's rung up and handed to the buyer in a single interaction can move from `PROPOSED` directly to `COMPLETED`. ## Create a fulfillment Applications can create an order with fulfillment or first create an order and later update the order to include fulfillment. ### Example 1: Create an order with fulfillment This example is a [CreateOrder](https://developer.squareup.com/reference/square/orders-api/createorder) request that creates an order for four sandwiches. The order includes fulfillment details. The order type is a `PICKUP` order and the customer, John Doe, has selected curbside pickup at a specific time. ```` The following is an example response fragment: ```json { "order": { "id": "sfADX2Xqb8F4uZaFuAp3xlShefbZY", "location_id": "S8GWD5R9QB376", "line_items": [ { "uid": "U0PzEdJgoOPWE7AxvCRldC", "quantity": "4", "name": "Sandwich", "base_price_money": { "amount": 1500, "currency": "USD" }, "note": "ad hoc item", "gross_sales_money": { "amount": 6000, "currency": "USD" }, … ], "fulfillments": [ { "uid": "VnDwb1Yu42mMjrPEWHLYW", "type": "PICKUP", "state": "PROPOSED", "pickup_details": { "pickup_at": "2022-02-12T23:00:00.000Z", "recipient": { "display_name": "John Doe", "phone_number": "111-111-1111" }, "is_curbside_pickup": true } } ], … } } ``` ### Example 2: Create an order and update the order to add fulfillment In this example, you create an order and then update the order to add fulfillment. Note that you cannot add a fulfillment if the order `state` is `COMPLETED`. 1. Call `CreateOrder` to create an order without a fulfillment. ```` 2. Call `UpdateOrder` to update the order and add fulfillment details. The example adds the `PICKUP` type fulfillment to the order. ```` {% aside type="info" %} To view the fulfillments for an existing order, call [RetrieveOrder](https://developer.squareup.com/reference/square/orders-api/retrieveorder). The fulfillments appear in the [Order.fulfillments](https://developer.squareup.com/reference/square/objects/Order#definition__property-fulfillments) object of the `RetrieveOrder` response. {% /aside %} ## Update a fulfillment In the current implementation, there are limitations to updating fulfillments using the Orders API. For more information, see [Guidelines and limitations](#guidelines-and-limitations). {% aside type="info" %} If you're attempting to update a fulfillment to set its state to `COMPLETE`, all payments on the order must already be complete. For information about completing payments on a order, see [Using the Orders API PayOrder endpoint](orders-api/pay-for-orders#using-the-orders-api-payorder-endpoint). {% /aside %} Suppose you created an order for an ad hoc item. The following `UpdateOrder` example updates the fulfillment state, recipient display name, pickup detail note, and recipient display name: ```` The following is an example response fragment: ```json { "order": { "id": "sfADX2Xqb8F4uZaFuAp3xlShefbZY", "location_id": "S8GWD5R9QB376", "line_items": [ { … } ], "fulfillments": [ { "uid": "VnDwb1Yu42mMjrPEWHLYW", "type": "PICKUP", "state": "PREPARED", "pickup_details": { "pickup_at": "2022-02-12T23:00:00.000Z", "note": "updated note", "accepted_at": "2022-02-26T00:24:07.316Z", "ready_at": "2022-02-26T00:24:07.316Z", "recipient": { "display_name": "Jane Doe", "phone_number": "111-111-1111" }, "is_curbside_pickup": true } } ], … "version": 2, } } ``` ### Best practices for updating a DELIVERY type fulfillment A `DELIVERY` type fulfillment completes when the items are delivered to the buyer. However, there are times when a seller (or deliver service) cancels the fulfillment or the fulfillment fails to complete. The following are the suggested best practices for an application to update an order as the `DELIVERY` type fulfillment progresses: **Fulfillment item is delivered** Before attempting to set a `fulfillment.state` to `COMPLETED`, the order must be paid for. * If the `fulfillment.state` isn't `COMPLETED`: * Set `FulfillmentDeliveryDetails.delivered_at` to the timestamp when delivery occurred. * Set `fulfillment.state` to `COMPLETED`. * Set `order.state` to `COMPLETED` if no other fulfillments are pending and all payments on the order have been completed. * If the `fulfillment.state` is `COMPLETED` (this can happen if a seller marks it as `COMPLETED` after they hand off the goods to the delivery service but before the delivery is completed): * The application can update `delivered_at` after a fulfillment is marked as `COMPLETED` but before the order `state` is `COMPLETED`. If `deliver_at` cannot be updated, the application might save the `delivered_at` timestamp as a note in the `order.fulfillments.delivery_details.note` field. * Set `order.state` to `COMPLETED` if no other fulfillments are pending and all payments on the order have been completed. **Fulfillment is canceled by the seller or delivery service** * Specify the cancellation reason in the `FulfillmentDeliveryDetails.notes` field. * Set `order.state` to `COMPLETED` if no other fulfillments are pending. * Set `order.state` to `COMPLETED` or `CANCELED`. Note that you cannot set `order.state` to `CANCELED` if: * A completed payment exists on the order. * The order contains a completed fulfillment. The seller needs to perform a refund in Square Point of Sale if necessary after the order is `COMPLETED`. Note that `order.state` cannot be set to `CANCELED` if the order contains a completed fulfillment. The seller needs to perform a refund in Square Point of Sale if necessary after the order is `COMPLETED`. **Fulfillment fails to complete** * Specify a reason why the fulfillment failed in the `FulfillmentDeliveryDetails.notes` field. * Set `fulfillment.state` to `FAILED`. * Set `order.state` to `COMPLETED` if all payments on the order have been completed. Note that `order.state` cannot be set to `CANCELED` if the order contains a completed fulfillment. The seller needs to perform a refund in Square Point of Sale if necessary after the order is `COMPLETED`. ## Cancel a fulfillment You cannot delete a fulfillment from an order. You can only cancel a fulfillment using the `UpdateOrder` endpoint as shown: ```bash curl https://connect.squareupsandbox.com/v2/orders/{ORDER_ID} \ -X PUT \ -H 'Square-Version: 2022-09-21' \ -H 'Authorization: Bearer {ACCESS_TOKEN}' \ -H 'Content-Type: application/json' \ -d '{ "idempotency_key": "{UNIQUE_KEY}", "order": { "version": 2, "fulfillments": [ { "uid": "{FULFILLMENT_UID}", "state": "CANCELED" } ] } }' ``` In the request, provide the `Order` object with the following information in the request body: * The `version` of the order. * The `fulfillments` array identifying the fulfillment to be canceled. Provide the fulfillment UID being updated and set the value of `state` to `CANCELED`. {% aside type="tip" %} An order cannot be canceled if its fulfillments are not in a `CANCELED` state. {% /aside %} ## Split fulfillments A seller might split a fulfillment using Square products. The Orders API can retrieve these split fulfillments. For example, the [Order.fulfillments](https://developer.squareup.com/reference/square/objects/Order#definition__property-fulfillments) object includes two fields (`entries` and `line_item_application`) that applications can use to determine which line items belong to which fulfillment. --- # Metadata > Source: https://developer.squareup.com/docs/orders-api/metadata > Status: BETA > Languages: All > Platforms: All Use metadata to store additional information about Square API resources. **Applies to:** [Orders API](orders-api/what-it-does) {% subheading %}Learn about using metadata to store application logic-supporting strings in an order.{% /subheading %} {% toc hide=true /%} ## Overview Metadata fields store strings that support application logic, such as references to resources outside of Square or brief information about an order. Developers can fill these fields with any string values their application needs. Square doesn't process this field; it just stores and returns it in API calls. Metadata entries from one application aren't visible to other applications. {% aside type="warning" %} Don't use metadata to store any sensitive information (such as personally identifiable information and card details). Square doesn't validate metadata contents to ensure that your application is following these important guidelines. {% /aside %} ## How metadata works Metadata is a map of string keys to string values in a property named `metadata`. Metadata can be written at the `Order` level or order sub-type level. Metadata has the following restrictions: * **Keys** - Keys written by applications must be 60 characters or less and must be in the following character set: a-z, A-Z, 0-9, _ or -. Entries can also include metadata generated by Square. These keys are prefixed with a namespace, separated from the key with a `:` character. * **Value length** - Values have a maximum length of 255 characters. * **Metadata map length** - An application can map up to 10 entries per metadata field. * **Privacy** - Entries written by applications are private and can only be read or modified by the same application. You can read and write metadata to these Order API types: * [Order](https://developer.squareup.com/reference/square/objects/order) * [OrderFulfillment](https://developer.squareup.com/reference/square/objects/orderfulfillment) * [OrderLineItem](https://developer.squareup.com/reference/square/objects/orderlineitem) * [OrderLineItemTax](https://developer.squareup.com/reference/square/objects/orderlineitemtax) * [OrderLineItemDiscount](https://developer.squareup.com/reference/square/objects/orderlineitemdiscount) * [OrderServiceCharge](https://developer.squareup.com/reference/square/objects/orderservicecharge) ## Example metadata The following example `Order` object has metadata mapped in its fulfillments (line 90) and the order itself (line 166): ```json { "order": { "id": "aOqBokk0BGMIenv2FLxf81rPCQ6YY", "location_id": "E78VDDVFW1EYX", "line_items": [ { "uid": "pPE0m2p0KHAjnBjMRqKTJB", "catalog_object_id": "32VNHUXOSP4UIRS3DV5TAIAY", "catalog_version": 1738622146579, "quantity": "1", "name": "One-off coffee mug", "variation_name": "Coffee cup - brown", "base_price_money": { "amount": 100, "currency": "USD" }, "gross_sales_money": { "amount": 100, "currency": "USD" }, "total_tax_money": { "amount": 9, "currency": "USD" }, "total_discount_money": { "amount": 0, "currency": "USD" }, "total_money": { "amount": 109, "currency": "USD" }, "variation_total_price_money": { "amount": 100, "currency": "USD" }, "applied_taxes": [ { "uid": "7d8b3f81-f94e-4e48-a0f6-bbdadba68b04", "tax_uid": "0f8e9c2c-a39b-4b7e-8d70-7f3ebacf8d42", "applied_money": { "amount": 9, "currency": "USD" } } ], "item_type": "ITEM", "total_service_charge_money": { "amount": 0, "currency": "USD" } } ], "taxes": [ { "uid": "0f8e9c2c-a39b-4b7e-8d70-7f3ebacf8d42", "catalog_object_id": "UCQQDWUYMYIZD3NZZBG7GLQK", "catalog_version": 1649720625765, "name": "Washington", "percentage": "8.9", "type": "ADDITIVE", "applied_money": { "amount": 9, "currency": "USD" }, "scope": "LINE_ITEM", "auto_applied": true } ], "discounts": [ { "uid": "ARy34sogRd1AmuBZiUg2G", "catalog_object_id": "YPQO34UERK4BGC7P7WXEL7ZX", "catalog_version": 1738713513765, "name": "Weekday Coffee Discount", "percentage": "5.0", "applied_money": { "amount": 0, "currency": "USD" }, "type": "FIXED_PERCENTAGE", "scope": "LINE_ITEM" } ], "fulfillments": [ { "uid": "KbGTRwmKLFPb8v1DYhNNzC", "type": "PICKUP", "state": "PROPOSED", "metadata": { "external-PO": "ABC1234", "courier-identity": "John Q Public" }, "pickup_details": { "pickup_at": "2023-11-30T01:01:05.000Z", "note": "Just a little cream please", "schedule_type": "ASAP", "recipient": { "display_name": "A. CoffeeDrinker", "email_address": "recipient email address", "phone_number": "1 (234) 567 8900" }, "pickup_window_duration": "P1W3D", "prep_time_duration": "P1W3D" } } ], "created_at": "2025-02-04T23:14:33.159Z", "updated_at": "2025-02-04T23:58:58.698Z", "state": "OPEN", "version": 3, "total_tax_money": { "amount": 9, "currency": "USD" }, "total_discount_money": { "amount": 0, "currency": "USD" }, "total_tip_money": { "amount": 0, "currency": "USD" }, "total_money": { "amount": 109, "currency": "USD" }, "total_service_charge_money": { "amount": 0, "currency": "USD" }, "net_amounts": { "total_money": { "amount": 109, "currency": "USD" }, "tax_money": { "amount": 9, "currency": "USD" }, "discount_money": { "amount": 0, "currency": "USD" }, "tip_money": { "amount": 0, "currency": "USD" }, "service_charge_money": { "amount": 0, "currency": "USD" } }, "source": { "name": "app for marketplace" }, "customer_id": "KZSXNTC1TD14MH7H13MQ07TF4C", "pricing_options": { "auto_apply_discounts": true, "auto_apply_taxes": true }, "net_amount_due_money": { "amount": 109, "currency": "USD" }, "metadata": { "recurring_date": "20180213", "house_account": "123-56-A" } } } ``` {% aside type="important" %} When any application updates metadata on an order, the `Order.version` number is incremented. If another application changes its metadata on that order, your application will see the higher version number but not the new metadata values. To your application, the order looks the same except for the higher version number. {% /aside %} --- # Work with Images > Source: https://developer.squareup.com/docs/catalog-api/cookbook/create-catalog-image > Status: BETA > Languages: All > Platforms: All **Applies to:** [Catalog API](catalog-api/what-it-does) {% subheading %}Learn about uploading and attaching images to your product catalog with the Catalog API.{% /subheading %} {% toc hide=true /%} ## Overview Images are compelling and enable rich online store experiences. You can attach one or more images to [Item](https://developer.squareup.com/reference/square/objects/CatalogItem), [Item Variation](https://developer.squareup.com/reference/square/objects/CatalogItemVariation), [Catalog Category](https://developer.squareup.com/reference/square/objects/CatalogCategory), and [Modifier List](https://developer.squareup.com/reference/square/objects/CatalogModifierList) objects. The images provide visual representations of products for sale and services for hire by a seller. When you upload an image and attach it to an item such as a Catalog Category, it appears in the Square Dashboard as shown in the following image: ![A screenshot of the Category Edit dialog in the Square Dashboard with an uploaded image shown.](//images.ctfassets.net/1nw4q0oohfju/5LaSDW2HSeL58taih52QBp/1e2034fc70132c89ed8b5ec1c9d8a7f0/catalog-images.png) The Catalog API performs the same operation as a seller dragging an image onto the dialog. ## Requirements and limitations * An image can use the JPEG, PJPEG, PNG, or GIF format. * An image file cannot be larger than 15 MB. * There can be no more than 250 images attached to a catalog object. * There can be no more than 10,000 unattached images per Square account. * There can be no more than 5 million images per Square account. ## Manage catalog images The following tasks manage the lifecycle of a catalog image: * [Upload an image](catalog-api/upload-and-attach-images#upload-an-image-and-attach-it-to-an-image-supporting-object) - Use the `CreateCatalogImage` endpoint to upload an image file. It's stored as a [CatalogImage](https://developer.squareup.com/reference/square/objects/CatalogImage) object. An image is attached if its ID is in the `image_ids` list of a catalog object. Otherwise, it's unattached. * [Attach an image](catalog-api/upload-and-attach-images#attach-an-image-as-primary-image) - Add the image's ID to the `image_ids` list of a catalog object using the [UpsertCatalogObject](https://developer.squareup.com/reference/square/catalog-api/upsert-catalog-object) endpoint. * [Detach an image](catalog-api/manage-images#detach-an-image-from-an-attached-object) - Remove the image's ID from the `image_ids` list using the `UpsertCatalogObject` endpoint. * [Update an image file](catalog-api/manage-images#replace-the-image-file-of-a-catalogimage-object) - Use the `UpdateCatalogImage` endpoint with the image object ID and new image file path. * **Update image metadata** - Update metadata like name and caption using the `UpsertCatalogObject` endpoint. * **Retrieve attached images** - Use the [SearchCatalogObjects](https://developer.squareup.com/reference/square/catalog-api/search-catalog-objects), [RetrieveCatalogObject](https://developer.squareup.com/reference/square/catalog-api/retrieve-catalog-object), or [BatchRetrieveCatalogObjects](https://developer.squareup.com/reference/square/catalog-api/batch-retrieve-catalog-objects) endpoints with the `include_related_objects` property enabled. * **Remove an image** - Call the [DeleteCatalogObject](https://developer.squareup.com/reference/square/catalog-api/delete-catalog-object) endpoint with the image object ID to delete it. ## See also * [Upload and Attach Images](catalog-api/upload-and-attach-images) * [Manage Images in a Square Catalog](catalog-api/manage-images) --- # Manage Images in a Square Catalog > Source: https://developer.squareup.com/docs/catalog-api/manage-images > Status: BETA > Languages: All > Platforms: All Learn how to manage uploaded images using the Square Catalog API. **Applies to:** [Catalog API](catalog-api/what-it-does) {% subheading %}Learn how to manage uploaded images using the Catalog API.{% /subheading %} {% toc hide=true /%} ## Overview After uploading images and possibly attaching them to objects, you can perform the following image-management tasks: * Call [UpdateCatalogImage](https://developer.squareup.com/reference/square/catalog-api/update-catalog-image) to replace the image file of an existing [CatalogImage](https://developer.squareup.com/reference/square/objects/CatalogImage) object. * Call [UpserCatalogObject](https://developer.squareup.com/reference/square/catalog-api/upsert-catalog-object) to attach an uploaded image to an image-supporting object. * Call [UpsertCatalogObject](https://developer.squareup.com/reference/square/catalog-api/upsert-catalog-object) to rearrange the order of the attached images by reshuffling the elements of the `image_ids` list of the target object. * Call [UpsertCatalogObject](https://developer.squareup.com/reference/square/catalog-api/upsert-catalog-object) to detach an image from an image-supporting object by removing the image object ID from the object's `image_ids` list. * Call [DeleteCatalogObject](https://developer.squareup.com/reference/square/catalog-api/delete-catalog-object) to remove the image object from the catalog and detach the image object from its attached object. In the following sections, you learn how to use the Catalog API to perform these tasks in detail. ## Replace the image file of a CatalogImage object To replace the image file of a [CatalogImage](https://developer.squareup.com/reference/square/objects/CatalogImage) object with a new image file, call the new [UpdateCatalogImage](https://developer.squareup.com/reference/square/catalog-api/update-catalog-image) endpoint, supplying the new image file in the input. The result retains the ID and other attributes of the `CatalogItem` object, but swaps the existing image file with the new one. Any attachment of this image object to an image-supporting catalog object remains intact. {% aside type="info" %} Updating the image file has no effect on other attributes of the `CatalogImage` object. To modify other mutable attributes of the `CatalogImage` object, call the [UpsertCatalogObject](https://developer.squareup.com/reference/square/catalog-api/upsert-catalog-object) endpoint. {% /aside %} ### Request The following example shows how to call the [UpdateCatalogImage](https://developer.squareup.com/reference/square/catalog-api/update-catalog-image) endpoint to replace the existing image file (image_example.png) in the previously created [CatalogImage](https://developer.squareup.com/reference/square/objects/CatalogImage) object (`BQC5NCY7VIKL6WQN5MOBJL3V`) with a new image file (image_example_new.png): ```` ### Response The successful response returns the `CatalogImage` object as follows: ```json { "image": { "type": "IMAGE", "id": "BQC5NCY7VIKL6WQN5MOBJL3V", "updated_at": "2021-12-15T20:03:45.142Z", "created_at": "2021-12-15T05:36:15.441Z", "version": 1632168225142, "is_deleted": false, "present_at_all_locations": true, "image_data": { "name": "Image name", "url": "https://items-images-staging.s3.us-west-2.amazonaws.com/files/{UNIQUE_IMAGE_ID}/original.png", "caption": "Image caption" } } } ``` The resulting image object has an updated version and updated timestamp. If the image file in the request is different from the existing image file, the `UNQIQUE_IMAGE_ID` assumes a new value. If the image file in the request is the same as the existing one, the `UQNIUE_IMAGE_ID` value remains the same. ## Attach an uploaded image to an object Suppose you've uploaded an image file to the catalog. The image file is encapsulated by a `CatalogImage` object. To use the Catalog API to attach the uploaded image to a catalog item, item variation, category or modifier list, call [UpsertCatalogObject](https://developer.squareup.com/reference/square/catalog-api/upsert-catalog-object) or [BatchUpsertCatalogObjects](https://developer.squareup.com/reference/square/catalog-api/batch-upsert-catalog-objects), specifying a new or existing object and the ID of the catalog image object in the `image_ids` list of the object. `UpsertCatalogObject` can be used to create a new catalog object (other than `CatalogImage`) or to update attributes of a catalog object (including `CatalogImage`). ### Attach an uploaded image to a new item To create a new item and attach an uploaded image (the ID of which is `XOMHAUUSKU2XWHRQMXU22LXP`) to it at the same time, call `UpsertCatalogObject` as follows: #### Request ```` The specified `CatalogItem` is a new instance because a temporary ID (`#item`) is used. {% aside type="tip" %} To attach an image to an object using a version prior to 2021-12-15, set the image object ID on the legacy `image_id` attribute, instead of in the `image_ids` list. {% /aside %} #### Response The successful response returns the newly created item (of the Square-generated ID of `BDWYGZO5QQWWEVFV6PAEP3BS`) with the `image_ids` list containing the specified image object ID (`7WWYBOW5AYLEWFW62HQX7EP4`). ```json { "catalog_object": { "type": "ITEM", "id": "JOIBESOPRL42QUMKXR57SEQA", "updated_at": "2021-12-15T04:14:22.829Z", "created_at": "2021-12-15T04:14:22.829Z", "version": 1638936862829, "is_deleted": false, "present_at_all_locations": true, "item_data": { "name": "Item with images", "description": "test item to attach images to", "variations": [ { "type": "ITEM_VARIATION", "id": "7X7ZFRSJAPOIJOYQ2MVGZFXL", "updated_at": "2021-12-15T04:14:22.829Z", "created_at": "2021-12-15T04:14:22.829Z", "version": 1638936862829, "is_deleted": false, "present_at_all_locations": true, "item_variation_data": { "item_id": "JOIBESOPRL42QUMKXR57SEQA", "name": "Item for sale", "ordinal": 0, "pricing_type": "FIXED_PRICING", "price_money": { "amount": 1999, "currency": "USD" }, "sellable": true, "stockable": true } } ], "product_type": "REGULAR", "image_ids": [ "XOMHAUUSKU2XWHRQMXU22LXP" ] } }, "id_mappings": [ { "client_object_id": "#item", "object_id": "JOIBESOPRL42QUMKXR57SEQA" }, { "client_object_id": "#variation", "object_id": "7X7ZFRSJAPOIJOYQ2MVGZFXL" } ] } ``` The specified image object (`XOMHAUUSKU2XWHRQMXU22LXP`) is now attached to the newly created item (`JOIBESOPRL42QUMKXR57SEQA`) as the sole element of the `image_ids` list. ### Attach an uploaded image to an existing item Now, try to attach another uploaded image object (`XOGYYRVXFY7YSUFQG2UOTGUA`) to the previously created item (`JOIBESOPRL42QUMKXR57SEQA`) by appending the new image ID to the item's `image_ids` list. When calling the `UpsertCatalogObject` endpoint to update a catalog object, you must provide in the input all the required information about the object to be updated, even if some aren't changed. One way to do this is to retrieve the catalog item first, make necessary changes to it, and then supply the modified item in the `UpsertCatalogObject` request to complete the update. #### Request In this example, you only need to change the `image_ids` list by appending the new image object ID to it. ```` #### Response If successful, the request returns a response similar to the following: ```json { "catalog_object": { "type": "ITEM", "id": "JOIBESOPRL42QUMKXR57SEQA", "updated_at": "2021-12-15T04:47:58.833Z", "created_at": "2021-12-15T04:14:22.829Z", "version": 1638938878833, "is_deleted": false, "present_at_all_locations": true, "item_data": { "name": "Item with images", "description": "test item to attach images to", "variations": [ { "type": "ITEM_VARIATION", "id": "7X7ZFRSJAPOIJOYQ2MVGZFXL", "updated_at": "2021-12-15T04:47:58.833Z", "created_at": "2021-12-15T04:14:22.829Z", "version": 1638938878833, "is_deleted": false, "present_at_all_locations": true, "item_variation_data": { "item_id": "JOIBESOPRL42QUMKXR57SEQA", "name": "Item for sale", "ordinal": 0, "pricing_type": "FIXED_PRICING", "price_money": { "amount": 1999, "currency": "USD" }, "sellable": true, "stockable": true } } ], "product_type": "REGULAR", "image_ids": [ "XOMHAUUSKU2XWHRQMXU22LXP", "XOGYYRVXFY7YSUFQG2UOTGUA" ] } } } ``` The response shows that the new image object (`XOGYYRVXFY7YSUFQG2UOTGUA`) is added to the end of the `image_ids` list. The update operation doesn't change the primary image of the item. You could add the new image object to the head of the `image_ids` list, thereby updating the item's primary image, as well. ### Reorder the image list on an item When the `image_ids` list already has more than one elements, you can reorder the `image_ids` list on an item or variation by calling the [UpsertCatalogObject](https://developer.squareup.com/reference/square/catalog-api/upsert-catalog-object) endpoint on the item while shuffling the elements of the `image_ids` list in the desired order. Using the previous example, you can rotate the `image_ids` list of: ```json "image_ids": ["XOMHAUUSKU2XWHRQMXU22LXP", "XOGYYRVXFY7YSUFQG2UOTGUA"] ``` by calling `UpsertCatalogObject` again, while specifying the `image_ids` list of: ```json "image_ids": ["XOGYYRVXFY7YSUFQG2UOTGUA", "XOMHAUUSKU2XWHRQMXU22LXP"] ``` in the input. The reordering makes the image (`XOGYYRVXFY7YSUFQG2UOTGUA`) the primary image of the item. ## Detach an image from an attached object To detach an image from an attached object, you remove the image object ID from the `image_ids` list of the attached catalog object, when calling the [UpsertCatalogObject](https://developer.squareup.com/reference/square/catalog-api/upsert-catalog-object) endpoint. Setting the `image_ids` list to an empty list or null in the call removes all the images attached to the object. Detached image objects aren't deleted from the catalog. If you delete an image object attached to a catalog object by calling the [DeleteCatalogObject](https://developer.squareup.com/reference/square/catalog-api/delete-catalog-object) endpoint on the image object ID, the deleted image object ID is also removed from the `image_ids` list of the catalog object. The deleted image is detached from the catalog object. --- # Upload and Attach Images > Source: https://developer.squareup.com/docs/catalog-api/upload-and-attach-images > Status: BETA > Languages: All > Platforms: All Learn how to upload images to a Square catalog and attach them to supporting objects in the catalog. **Applies to:** [Catalog API](catalog-api/what-it-does) {% subheading %}Learn how to upload images to a Square catalog and attach them to supporting objects in the catalog.{% /subheading %} {% toc hide=true /%} ## Overview Uploading an image file to the catalog involves creating a [CatalogImage](https://developer.squareup.com/reference/square/objects/CatalogImage) object, specifying the local path to the image file and, optionally, the name or caption of the image. When creating a `CatalogImage` object, you can also specify the ID of the catalog object you are attaching the image to. This way you can manage to upload an image and attach the uploaded image object to an image-attachable catalog object in a single operation. To create a catalog image, call the [CreateCatalogImage](https://developer.squareup.com/reference/square/catalog-api/create-catalog-image) endpoint. This is different from creating any other types of [CatalogObject](https://developer.squareup.com/reference/square/objects/CatalogObject) where you call the [UpsertCatalogObject](https://developer.squareup.com/reference/square/catalog-api/upsert-catalog-object) or [BatchUpsertCatalogObjects](https://developer.squareup.com/reference/square/catalog-api/batch-upsert-catalog-objects) endpoint. You can attach an image object to any of the following catalog objects: * [CatalogItem](https://developer.squareup.com/reference/square/objects/CatalogItem) * [CatalogItemVariation](https://developer.squareup.com/reference/square/objects/CatalogItemVariation) * [CatalogCategory](https://developer.squareup.com/reference/square/objects/CatalogCategory) * [CatalogModifierList](https://developer.squareup.com/reference/square/objects/CatalogModifierList) ## Catalog API image management behaviors Your application business logic should let a seller upload and attach images with these considerations: * **Attach during upload** - In the `CreateCatalogImage` request, set the `object_id` parameter to the ID of the catalog object you're attaching the image to. If the parameter isn't set, the image is unattached when created. * **Attach after upload** - To attach the image after it's created, use `UpsertCatalogObject` or `BatchUpsertCatalogObjects` to update the `image_ids` list property of the catalog object you're attaching the image to. * **Attach to multiple objects** - An image that's already attached to one object can also be attached to others. Also, multiple images can be attached to the same catalog object using the `image_ids` list. * **Set a primary image** - To make an image the primary one, set its ID as the first element in the `image_ids` list and set `is_primary` to `true`. For API versions `2021-12-15` and later, the default for `is_primary` is `false`; for earlier versions, it's `true`. The primary image is displayed in Square first-party products, such as Square Point of Sale and Square Online. * **Duplicate an image check** - If you upload an already existing image, no new image is created. The response includes the existing image object. ## Upload and attach an image The following example shows how to call the `CreateCatalogImage` endpoint to upload a local image file (image_example_1.png) as a `CatalogImage` object and attach the resulting image object to an existing `CatalogItem` (`GQKOOBBI4PE3B7MLXDQ7YUSM`) that has one variation and no attached images yet: {% tabset %} {% tab id="Request" %} ```` {% /tab %} {% tab id="Response" %} The resulting `CatalogImage` object has an ID of `6SLTAD44Z2QGPBUTMS3KAXEL`. This image is attached to the `CatalogItem` object (`GQKOOBBI4PE3B7MLXDQ7YUSM`) specified in the request. ```json { "image": { "type": "IMAGE", "id": "6SLTAD44Z2QGPBUTMS3KAXEL", "updated_at": "2021-12-15T22:45:20.293Z", "created_at": "2021-12-15T05:36:15.441Z", "version": 1630709120293, "is_deleted": false, "present_at_all_locations": true, "image_data": { "name": "Image name 1", "url": "https://items-images-sandbox.s3.us-west-2.amazonaws.com/files/{UNIQUE_ID}/original.png", "caption": "Image caption 1" } } } ``` {% /tab %} {% /tabset %} ## Upload without attaching The following example shows how to call the `CreateCatalogImage` endpoint to upload a local image file named `image_example.png` as an unattached `CatalogImage` object: {% tabset %} {% tab id="Request" %} ```` The `filename` parameter can be an absolute path to the image file, such as `"/myapp/data/image_example.png"`. If the folder path (such as `"/myapp/data/"`) isn't given, the default folder is the working directory where you invoke the command. The `image` object is an instance of [CatalogImage](https://developer.squareup.com/reference/square/objects/CatalogImage), also known as an `IMAGE` type of [CatalogObject](https://developer.squareup.com/reference/square/objects/CatalogObject). For the image object, you must set only the image-specific data on the [image_data](https://developer.squareup.com/reference/square/objects/CatalogObject#definition__property-image_data) attribute of the `CatalogObject`. The resulting image object is unattached because the request body doesn't specify the `object_id` attribute. {% /tab %} {% tab id="Response" %} A successful call returns a [CatalogImage](https://developer.squareup.com/reference/square/objects/catalogImage) object that includes the image data and a Square-generated image URL used to access the stored image file. ```json { "image": { "type": "IMAGE", "id": "BQC5NCY7VIKL6WQN5MOBJL3V", "updated_at": "2021-12-15T22:34:42.362Z", "created_at": "2021-12-15T05:36:15.441Z", "version": 1630708482362, "is_deleted": false, "present_at_all_locations": true, "image_data": { "name": "Image name", "url": "https://items-images-sandbox.s3.us-west-2.amazonaws.com/files/{UNIQUE_ID}/original.png", "caption": "Image caption" } } } ``` When the request succeeds, the local image file (image_example.png) is uploaded to an AWS S3 location (`https://items-images-sandbox.s3.us-west-2.amazonaws.com/files/{UNIQUE_ID}/original.png`). The local file name has no resemblance to the remote file name. The `{UNIQUE_ID}` value identifies the image file. {% aside type="tip" %} Anyone with the S3 image URL can download the image to their browser, but they cannot upload any modification to the image or delete it from the seller's Square account. {% /aside %} In this example, the ID of the resulting `CatalogImage` object is `BQC5NCY7VIKL6WQN5MOBJL3V`. Make note of the image object ID value. You need it to reference this uploaded image (for example, when attaching the image object to an existing image-attachable catalog object). {% /tab %} {% /tabset %} ## Attach an image To attach an image to a `CatalogItem`, `CatalogItemVariation`, `CatalogCategory`, or `CatalogModifierList`, add the ID of the image to the `image_ids` list property of the catalog object. {% aside type="tip" %} A single image can be attached to many catalog objects. {% /aside %} ### Get the image and item to update The following example retrieves the image to be attached and the catalog item to attach it to. The [BatchRetrieveObjects](https://developer.squareup.com/reference/square/catalog-api/batch-retrieve-catalog-objects) endpoint is used. The catalog item is then modified with the updated `image_ids` property. {% tabset %} {% tab id="Request" %} The following example retrieves an image (`BQC5NCY7VIKL6WQN5MOBJL3V`) and a catalog item (`GQKOOBBI4PE3B7MLXDQ7YUSM`): ```` {% /tab %} {% tab id="Response" %} The response returns the request objects. ```json { "objects": [ { "type": "ITEM", "id": "GQKOOBBI4PE3B7MLXDQ7YUSM", "updated_at": "2024-10-01T23:26:16.904Z", "created_at": "2024-04-09T20:59:24.983Z", "version": 1727825176904, "is_deleted": false, "present_at_all_locations": true, "item_data": { "name": "Croissant Plus", "description": "Light and super flaky buttery croissant", "abbreviation": "CR", "is_taxable": true, "variations": [ { "type": "ITEM_VARIATION", "id": "7BBN5JSBZZTWKQD4K5RQVZ3E", "updated_at": "2024-09-30T21:48:21.676Z", "created_at": "2024-04-09T20:59:24.983Z", "version": 1727732901676, "is_deleted": false, "present_at_all_locations": true, "item_variation_data": { "item_id": "WNLJVOEWXOENUW5ZC63VFVMI", "name": "Regular", "ordinal": 0, "pricing_type": "FIXED_PRICING", "price_money": { "amount": 500, "currency": "USD" }, "sellable": true, "stockable": true } } ], "product_type": "REGULAR", "description_html": "

Light and super flaky buttery croissant

", "description_plaintext": "Light and super flaky buttery croissant", "is_archived": false } }, { "type": "IMAGE", "id": "BQC5NCY7VIKL6WQN5MOBJL3V", "updated_at": "2025-01-07T23:41:14.98Z", "created_at": "2025-01-07T23:41:15.015Z", "version": 1736293274980, "is_deleted": false, "present_at_all_locations": true, "image_data": { "name": "54206309396_532cce86c8_k.jpg", "url": "https://items-images-sandbox.s3.us-west-2.amazonaws.com/files/52691fe1075447613f517868a0d1d8709e4df012/original.jpeg" } } ] } ``` {% /tab %} {% /tabset %} ### Update the catalog item To attach the image to the catalog item, the `CatalogItem` is updated to add an `image_ids` property with the ID of the image to attach. {% tabset %} {% tab id="Request" %} ```` {% /tab %} {% tab id="Response" %} When the request succeeds, a `200 OK` response is returned with a payload similar to the following: ```json { "catalog_object": { "type": "ITEM", "id": "GQKOOBBI4PE3B7MLXDQ7YUSM", "updated_at": "2024-10-01T23:46:01.904Z", "created_at": "2024-04-09T20:59:24.983Z", "version": 2127825176934, "is_deleted": false, "present_at_all_locations": true, "item_data": { "name": "Croissant Plus", "description": "Light and super flaky buttery croissant", "abbreviation": "CR", "is_taxable": true, "variations": [ { "type": "ITEM_VARIATION", "id": "7BBN5JSBZZTWKQD4K5RQVZ3E", "updated_at": "2024-09-30T21:48:21.676Z", "created_at": "2024-04-09T20:59:24.983Z", "version": 1727732901676, "is_deleted": false, "present_at_all_locations": true, "item_variation_data": { "item_id": "WNLJVOEWXOENUW5ZC63VFVMI", "name": "Regular", "ordinal": 0, "pricing_type": "FIXED_PRICING", "price_money": { "amount": 500, "currency": "USD" }, "sellable": true, "stockable": true } } ], "product_type": "REGULAR", "description_html": "

Light and super flaky buttery croissant

", "description_plaintext": "Light and super flaky buttery croissant", "is_archived": false, "image_ids": [ "BQC5NCY7VIKL6WQN5MOBJL3V" ] } } } ``` With Square API version 2021-12-15 or later, the attached image objects are referenced by the IDs in the `image_ids` list of the returned catalog object. In this example, the newly created catalog image object ID (`6SLTAD44Z2QGPBUTMS3KAXEL`) is a member of the `image_ids` list. Using an earlier version of the Square API, the ID of the last attached image object is returned in the response. Instead of `"image_ids": ["6SLTAD44Z2QGPBUTMS3KAXEL"]`, the response contains `"image_id": "6SLTAD44Z2QGPBUTMS3KAXEL"`. {% /tab %} {% /tabset %} ## Attach an image as the primary image When multiple images are attached to a catalog object, the first element of the `image_ids` list is the primary image of the object. A primary image is displayed when the image-supporting object is processed in Square Point of Sale and the Square Online Store. When another image is attached to the catalog object using Square API version 2021-12-15 or later, the new image object ID is appended to the `image_ids` list by default. To attach the new image as a primary image, set the `is_primary` input parameter to `true` when calling `CreateCatalogImage`, as shown in the following example: {% tabset %} {% tab id="Request" %} ```` {% /tab %} {% tab id="Response" %} Suppose that the new image object ID is `RABIUKVX5EVWO6SOEICY64KM`. You can [retrieve the object](catalog-api/upload-and-attach-images#verify-an-image-is-attached-to-a-specified-catalog-object) against the `object_id` (`GQKOOBBI4PE3B7MLXDQ7YUSM`) value. You should see the new image object ID appearing as the first element of the object identified by `GQKOOBBI4PE3B7MLXDQ7YUSM`, as shown in the following example: ```json { "object": { "type": "ITEM", "id": "GQKOOBBI4PE3B7MLXDQ7YUSM", "updated_at": "2021-12-15T22:46:38.456Z", "created_at": "2021-12-15T05:36:15.441Z", "version": 1630709198456, "is_deleted": false, "present_at_all_locations": true, "item_data": { "name": "Item with images", "variations": [ { ... } ], ..., "image_ids": [ "RABIUKVX5EVWO6SOEICY64KM", "6SLTAD44Z2QGPBUTMS3KAXEL" ] } } } ``` If you set `is_primary` to `false` or leave it unspecified when calling `CreateCatalogImage` using Square API version 2021-12-15 or later, the newly created image object ID appears as the last element of the `image_ids` list. {% /tab %} {% /tabset %} --- # Update Orders > Source: https://developer.squareup.com/docs/orders-api/manage-orders/update-orders > Status: PUBLIC > Languages: All > Platforms: All Learn how to update orders and specify sparse objects in an update request to add, update, and delete fields. **Applies to:** [Orders API](orders-api/what-it-does) {% subheading %}Learn how to update orders by using sparse objects in an update request.{% /subheading %} {% toc hide=true /%} ## Overview Use the [UpdateOrder](https://developer.squareup.com/reference/square/orders-api/update-order) endpoint to add, update, or clear properties in an order created using the Orders API. Property values calculated by Square cannot be updated. {% aside type="warning" %} The `UpdateOrder` endpoint cannot update orders made in the Square Point of Sale application. {% /aside %} ## Sparse Order objects To update an order, your request should only include the properties that you want to add, update, or clear. This is known as a sparse order request. Unchanged and immutable properties are ignored by the update. ### Optimistic concurrency The Orders API uses [optimistic concurrency](build-basics/common-api-patterns/optimistic-concurrency) to ensure that any update your application makes to an order doesn't overwrite a change made by another application. Your request must include the `order.version` property. `version` must be set to the current version of the order or your request returns an error. You can get the current version number by retrieving the order to be updated immediately before calling `UpdateOrder`. The following example shows request to update an order with a new modifier that adds cream to a coffee. The `UpdateOrder` request body has the current version number and a new `modifiers` property: ```` {% aside type="tip" %} If you don't provide a new [idempotency_key](https://developer.squareup.com/reference/square/orders-api/update-order#request__property-idempotency_key) with each update request, you get a 200 response but the returned order doesn't reflect any of your updates. For example, if you update an order to change its status to `CANCELED`, the order won't actually be canceled unless you have also used a new idempotency key in the request. {% /aside %} ## Invoiced orders After an order's ID is referenced by an invoice, you cannot update order fields that affect the order amount (or their child fields), such as: * `line_items` * `taxes` * `discounts` To update these immutable fields, you must cancel the invoice, which also cancels the order. You can then create a new order and a new invoice. However, you can update order fields that don't affect the cart. Order tenders, service charges, and returns properties are updated by Square when the invoice is updated with those values. The `state` of an order cannot be changed by `UpdateOrder`. To update the order state, use an Invoices API endpoint. For more information, see [Pay or Refund Invoices](invoices-api/pay-refund-invoices). ## Example order Use the following cURL command to create the example order that you use in subsequent sections: {% tabset %} {% tab id="Request" %} ```` {% /tab %} {% tab id="Response" %} ```json { "order": { "id": "bbqUSK89inhJeMe2shKzrNYwerLZY", "location_id": "EWVV7AYQC45SS", "line_items": [ { "uid": "IWHZ75FFODV3Y6F265JIDT36", "quantity": "1", "name": "Small Coffee", "base_price_money": { "amount": 500, "currency": "USD" }, "gross_sales_money": { "amount": 500, "currency": "USD" }, "total_tax_money": { "amount": 0, "currency": "USD" }, "total_discount_money": { "amount": 100, "currency": "USD" }, "total_money": { "amount": 400, "currency": "USD" }, "variation_total_price_money": { "amount": 500, "currency": "USD" }, "applied_discounts": [ { "uid": "dollar_off_coffee_uid", "discount_uid": "dollar_discount_uid", "applied_money": { "amount": 100, "currency": "USD" } } ], "item_type": "ITEM", "total_service_charge_money": { "amount": 0, "currency": "USD" } } ], "discounts": [ { "uid": "dollar_discount_uid", "name": "Sale - $1.00 off", "amount_money": { "amount": 100, "currency": "USD" }, "applied_money": { "amount": 100, "currency": "USD" }, "type": "FIXED_AMOUNT", "scope": "LINE_ITEM", "apply_per_quantity": false } ], "created_at": "2024-08-20T23:13:13.884Z", "updated_at": "2024-08-20T23:13:13.884Z", "state": "OPEN", "version": 1, "total_tax_money": { "amount": 0, "currency": "USD" }, "total_discount_money": { "amount": 100, "currency": "USD" }, "total_tip_money": { "amount": 0, "currency": "USD" }, "total_money": { "amount": 400, "currency": "USD" }, "total_service_charge_money": { "amount": 0, "currency": "USD" }, "net_amounts": { "total_money": { "amount": 400, "currency": "USD" }, "tax_money": { "amount": 0, "currency": "USD" }, "discount_money": { "amount": 100, "currency": "USD" }, "tip_money": { "amount": 0, "currency": "USD" }, "service_charge_money": { "amount": 0, "currency": "USD" } }, "source": { "name": "apitester" }, "net_amount_due_money": { "amount": 400, "currency": "USD" }, "channels": [ { "uid": "aQCf9FYjKdMrW2S2xcuQeB", "channel_id": "CH_Y2JjUqOtguUMFsBB0E16agtdnoQ9JrkS4gEd5PlQuYC", "type": "SALES" } ] } } ``` {% /tab %} {% /tabset %} ## Add an order property To add a property to an open order, send an `UpdateOrder` request with a sparse `Order` object that contains the changes you want to make. Your sparse `Order` requires the following: * The current version number. * The property you want to add. * A new idempotency key. The following request adds an additional line item to an order with the given UID: ```` ## Update an order property To update a property, you need to send a request to the `UpdateOrder` endpoint. Your request requires the following: * The current version number. * The `uid` of the property you want to update if it's part of a list. * Any property details you want to add or update. For example, the following request updates the quantity of the cookie added in the previous example. Five cookies are now on the order. The previous example of adding a property incremented the order `version`, which is now `2`. ```json { "idempotency_key": "{UNIQUE_KEY}", "order": { "version": 2, "line_items": [ { "uid": "cookie_uid", "quantity": "5" } ] } } ``` Line item properties such as `line_items[].name` or `line_items[].base_price` can be ad hoc or they can be derived from a referenced catalog item variation. Derived properties are overridden in an update request when your application provides a new value in the request. If you update the base price of a line item, Square recalculates all the numeric properties where `base_price` is a calculation input. ### Read-only properties Square-calculated order properties are read-only and cannot be updated by your request. If you try to update a field such as `order.net_amount_due_money` or other calculated property, the property update requests are silently ignored. In some cases, Square adds supporting catalog detail to line items that reference a `Catalog` object. If these details cannot be overridden, an attempt to update them results in an error. For example, the following update requests tries to change the `quantity_unit.precision` of the fractional quantity defined in the catalog for the cookie line item: ```` Square returns the following error response indicating the `precision` value cannot be changed using the API: ```json { "errors": [ { "code": "INVALID_VALUE", "detail": "Immutable field cannot be changed.", "field": "order.line_items[RHlv1L5q4LR1ldOWxwkk2B].quantity_unit", "category": "INVALID_REQUEST_ERROR" } ] } ``` ## Clear an order property To clear a property in an order, you need to send a request to the `UpdateOrder` endpoint. Your request must specify: * The current version number of `Order` object. * The properties you want to clear in the `fields_to_clear` array. For example: ```` {% anchor id="identifying-fields-to-delete" /%} ### Specify a property to clear You can specify the order properties to clear by listing them in the `fields_to_clear` array. For example, setting `fields_to_clear` as follows clears `order.discounts` and all of its properties: ```json { "fields_to_clear": [ "discounts" ] } ``` The `UpdateOrder` endpoint uses dot notation to clear properties within arrays. The dot notation path starts within the `Order` object. Clear specific elements in an array of order properties by identifying a property UID in brackets. For example, setting `fields_to_clear` as follows clears the coffee line item in the [example order](#example-order): ```json { "fields_to_clear": [ "line_items[small_coffee_uid]" ] } ``` You can then use dot notation to access properties within that specific element in the array. For example, setting `fields_to_clear` as follows clears the $1 discount applied to the coffee line item: ```json { "fields_to_clear": [ "line_items[small_coffee_uid].applied_discounts[dollar_off_coffee_uid]" ] } ``` In this example, the discount no longer applies to the line item; however, the discount is still listed in the order in the order-level `discounts` field. None of the order's line items reference the discount, which effectively cancels the discount. In this case, it is a good idea to remove the `discount` property since it is no longer used. If you try to clear a required property such as `order.source`, your request returns a `200` response, but the Orders API ignores the property in the request. ```json { "fields_to_clear": [ "source", "customer_id" ] } ``` {% aside type="important" %} On a `200` response, Square has incremented the order version, even if all requested property changes are ignored and no changes are actually made. {% /aside %} --- # Retrieve Orders > Source: https://developer.squareup.com/docs/orders-api/manage-orders/retrieve-orders > Status: PUBLIC > Languages: All > Platforms: All Learn how to use the RetrieveOrder and BatchRetrieveOrders endpoints to retrieve one or more orders. **Applies to:** [Orders API](orders-api/what-it-does) | [Catalog API](catalog-api/what-it-does) | [Payments API](https://developer.squareup.com/reference/square/payments-api) {% subheading %}Learn how to retrieve orders, catalog attributes, and payments made on an order.{% /subheading %} {% toc hide=true /%} ## Overview Learn how to use the [RetrieveOrder](https://developer.squareup.com/reference/square/orders-api/retrieve-order) and [BatchRetrieveOrders](https://developer.squareup.com/reference/square/orders-api/batch-retrieve-orders) endpoints to retrieve one or more orders. For an order line item that is a catalog item, you learn how to use the [Catalog API](https://developer.squareup.com/reference/square/catalog-api) to access additional catalog attributes. ## Retrieve one or more orders You can retrieve a single order or a set of orders using their IDs and the following endpoints. These endpoints return orders regardless of how or when they entered the Square ecosystem (Square Point of Sale, invoices, or the Orders API). ### RetrieveOrder request A [RetrieveOrder](https://developer.squareup.com/reference/square/orders-api/retrieve-order) request retrieves a single order. Provide the ID of the order you want to get. The endpoint returns that order regardless of the business location where the order was created. ```` ### BatchRetrieveOrders request A [BatchRetrieveOrders](https://developer.squareup.com/reference/square/orders-api/batch-retrieve-orders) request retrieves a set of orders. In the request, provide a list of order IDs regardless of seller locations. If you need to limit the response to the orders in that list to a single location, add a location ID. This scopes the returned orders from the global list to those that were opened at the specified location. `BatchRetrieveOrders` is useful when you've retrieved a set of [Payment](https://developer.squareup.com/reference/square/objects/Payment) objects and want to get the associated order for each payment. You add the `Payment.order_id` for each payment to the list of order IDs in the `BatchRetrieveOrders` request. Let's say you're building a transaction report with section breaks by seller location. You might load all the payment order IDs into a `BatchRetrieveOrders` request and call the endpoint once for each location, putting that location's ID in the request. With each call, you get back only the orders for the location's report section. In the following example, the request asks for eight orders and limits the response to a single location: ```` The response returns only those orders from location `X9XWRESTK1CZ1`. In this case, `1iFbiC2iFbilandL4PLS7sMF` and `2bORnot2bodmQCXwftwJftMF` are returned. ## Retrieve catalog attributes of a line item The details about what is being purchased in an order are contained in order line items. If a line item refers to a catalog item variation, the item isn't ad hoc and exists in the seller's item library (catalog). The catalog has more information about the item than is stored in the order. For example, the item's availability, description, SKU, or category can be retrieved from the catalog with one or two API calls. Developers creating a sales activity report usually need to retrieve these attributes. {% aside type="tip" %} If a seller is using inventory tracking, an inventory adjustment record is created each time a catalog item is sold. You can use that `order.line_items[].catalog_object_id` when calling [BatchRetrieveInventoryChanges](https://developer.squareup.com/reference/square/inventory/BatchRetrieveInventoryChanges) to retrieve adjustments by item variation, location, and adjustment states such as `SOLD`. {% /aside %} The order stores the `line_items[].`[catalog_object_id](https://developer.squareup.com/reference/square/objects/OrderLineItem#definition__property-catalog_object_id) and [catalog_version](https://developer.squareup.com/reference/square/objects/OrderLineItem#definition__property-catalog_version) of the item variation. Use the object ID to retrieve item variation properties by calling [RetrieveCatalogObject](https://developer.squareup.com/reference/square/catalog-api/retrieve-catalog-object) on the Catalog API. For example, you want to get the `sku` and `category_name` properties of a line item. These are properties of [CatalogObject](https://developer.squareup.com/reference/square/objects/CatalogObject) subtypes: * `sku` is an optional property of [CatalogItemVariation](https://developer.squareup.com/reference/square/objects/CatalogItemVariation). * `category_name` is the `name` property of [CatalogCategory](https://developer.squareup.com/reference/square/objects/CatalogCategory). You can retrieve the `CatalogCategory` from the [CatalogItem.reporting_category](https://developer.squareup.com/reference/square/objects/CatalogItem#definition__property-reporting_category). You can access these `Catalog` objects using the [RetrieveCatalogObject](https://developer.squareup.com/reference/square/catalog-api/retrieve-catalog-object) endpoint with the following steps: 1. Make sure you have the `catalog_object_id` and `catalog_version` of the line item from your `Order` object. 2. Call [RetrieveCatalogObject](https://developer.squareup.com/reference/square/catalog-api/retrieve-catalog-object) by providing: * `catalog_object_id` as the `object_id` path parameter value. * `catalog_version` as the query parameter value. If the `catalog_version` isn't specified, the current version is assumed. * `include_related_objects` with a `true` value so that the parent `CatalogItem` is returned with the item variation. {% tabset %} {% tab id="Request" %} ```` {% /tab %} {% tab id="Response" %} In response, you get a `Catalog` object of the `ITEM_VARIATION` type and a `related_objects` property. The following is an example response. The `item_variation_data` ([CatalogItemVariation](https://developer.squareup.com/reference/square/objects/CatalogItemVariation) type) provides the `sku`. ```json { "object": { "type": "ITEM_VARIATION", "id": "IWHZ75FFODV3Y6F265JIDT36", "updated_at": "2024-08-06T20:46:09.781Z", "created_at": "2024-08-06T20:46:09.781Z", "version": 1722977169781, "is_deleted": false, "present_at_all_locations": true, "item_variation_data": { "item_id": "Q3PYGPBCNLLRVM5B5OONA7WY", "name": "French Fries", "ordinal": 0, "pricing_type": "FIXED_PRICING", "price_money": { "amount": 500, "currency": "USD" }, "sellable": true, "stockable": true } }, "related_objects": [ { "type": "ITEM", "id": "Q3PYGPBCNLLRVM5B5OONA7WY", "updated_at": "2024-09-05T22:09:20.555Z", "created_at": "2024-08-06T20:46:09.781Z", "version": 1725574160555, "is_deleted": false, "present_at_all_locations": true, "item_data": { "name": "Side Orderxx", "is_taxable": true, "tax_ids": [ "MD66EEZEZPG7JJTB7IXUT2DO" ], "variations": [ { "type": "ITEM_VARIATION", "id": "IWHZ75FFODV3Y6F265JIDT36", "updated_at": "2024-08-06T20:46:09.781Z", "created_at": "2024-08-06T20:46:09.781Z", "version": 1722977169781, "is_deleted": false, "present_at_all_locations": true, "item_variation_data": { "item_id": "Q3PYGPBCNLLRVM5B5OONA7WY", "name": "French Fries", "ordinal": 0, "pricing_type": "FIXED_PRICING", "price_money": { "amount": 500, "currency": "USD" }, "sellable": true, "stockable": true } } ], "product_type": "REGULAR", "is_archived": false, "reporting_category": { "id": "RFECWJWLWUGARTRQ6ZXY4DG7", "ordinal": -2251799813685248 } } } ] } ``` {% /tab %} {% /tabset %} 3. Call [RetrieveCatalogObject](https://developer.squareup.com/reference/square/catalog-api/retrieve-catalog-object) by providing: * `reporting_category.id` as the `object_id` path parameter value (a category is also a `Catalog` object). Therefore, you specify the category ID as the ID of the `Catalog` object to retrieve. * `catalog_version` as the query parameter value. {% tabset %} {% tab id="Request" %} This example gets a category at the specified version: ```` {% /tab %} {% tab id="Response" %} In response, you get a `Catalog` object of the `CATEGORY` type. The following is an example response. The `category_data` provides the `name` of the category of your line item in the order. ```json { "object": { "type": "CATEGORY", "id": "RFECWJWLWUGARTRQ6ZXY4DG7", "updated_at": "2021-07-12T19:02:57.355Z", "version": 1626116577355, "is_deleted": false, "present_at_all_locations": true, "category_data": { "name": "Burgers" } } } ``` {% /tab %} {% /tabset %} ## Retrieve the payments made on an order When an order is paid, an `order.tenders[]` list is populated with [Tender](https://developer.squareup.com/reference/square/objects/tender) objects that provide details about all payments on the order. They refer to [Payment](https://developer.squareup.com/reference/square/objects/payment) objects that record the actual payments. Normally, there's only one item in an `order.tenders[]`, but in the case of a split payment on an order, there's a tender for each split payment. The following example shows the `tenders` property in an order with a single payment of $1.19, which is captured with a credit card. The details of the capture are recorded in a `Payment` object whose ID is `DXjUoKXdD1WPl19Gq52e3BQr4cMZY`. ```json { "tenders": [ { "id": "DXjUoKXdD1WPl19Gq52e3BQr4cMZY", "location_id": "[LOCATION_ID]", "transaction_id": "hITuEXBNk3ipAknWv2jdEl2IUl6YY", "created_at": "2022-10-03T21:46:58Z", "amount_money": { "amount": 100, "currency": "USD" }, "processing_fee_money": { "amount": 19, "currency": "USD" }, "type": "CARD", "card_details": { "status": "CAPTURED", "card": { "card_brand": "MASTERCARD", "last_4": "6952", "fingerprint": "sq-1-HVU...BE8Gkh_EtOTe0A" }, "entry_method": "KEYED" }, "payment_id": "DXjUoKXdD1WPl19Gq52e3BQr4cMZY" } ] } ``` To get the payment, call [GetPayment](https://developer.squareup.com/reference/square/payments-api/get-payment) using the `payment_id` value from the `tender` object. {% tabset %} {% tab id="Request" %} ```` {% /tab %} {% tab id="Response" %} The response provides the requested `Payment` object. In this example, the payment was taken on a Square Point of Sale called "Counter Terminal 1". ```json { "payment": { "id": "DXjUoKXdD1WPl19Gq52e3BQr4cMZY", "created_at": "2022-10-03T21:46:58.409Z", "updated_at": "2022-10-03T21:47:01.912Z", "amount_money": { "amount": 100, "currency": "USD" }, "status": "COMPLETED", "delay_duration": "PT168H", "source_type": "CARD", "card_details": { "status": "CAPTURED", "card": { "card_brand": "MASTERCARD", "last_4": "6952", "exp_month": 12, "exp_year": 2028, "fingerprint": "sq-1-HVUCWbGnSiLMYlh...ulygOr_JBEtOTe0A", "card_type": "CREDIT", "bin": "512081" }, "entry_method": "KEYED", "cvv_status": "CVV_ACCEPTED", "avs_status": "AVS_ACCEPTED", "auth_result_code": "DkpIUm", "statement_description": "SQ *MY BUSINESS GOSQ.COM", "card_payment_timeline": { "authorized_at": "2022-10-03T21:46:58.557Z", "captured_at": "2022-10-03T21:46:59.662Z" } }, "location_id": "90A9W5RRYD2GQ", "order_id": "hITuEXBNk3ipAknWv2jdEl2IUl6YY", "processing_fee": [ { "effective_at": "2022-10-03T23:47:00.000Z", "type": "INITIAL", "amount_money": { "amount": 19, "currency": "USD" } } ], "customer_id": "KW9QGDM6YS7G5BREP6DSVNPFWC", "total_money": { "amount": 100, "currency": "USD" }, "approved_money": { "amount": 100, "currency": "USD" }, "employee_id": "bxrMsKrMAMzWgYGGo8BL", "receipt_number": "DXjU", "receipt_url": "https://squareup.com/receipt/preview/DXjUcMZY", "delay_action": "CANCEL", "delayed_until": "2022-10-10T21:46:58.409Z", "team_member_id": "bxrMsKrMAMzWgYGGo8BL", "device_details": { "device_name": "Counter Terminal 1", "device_installation_id": "sq0ids-Pw67AZAlLVB7hsRmwlJPuA", "device_id": "6F217C17C2P-11G5-4662-A63A-7B025E372447" }, "application_details": { "square_product": "SQUARE_POS", "application_id": "sq0ids-Pw67AZAlLVB7hsRmwlJPuA" }, "version_token": "qWeotSPKuw0jhqJlUV8Gt9ODv4zMzG1v8DkmwFhnI2G6o" } } ``` {% /tab %} {% /tabset %} Among the properties of a `Payment` object, you can find relevant payment information, such as the following: * **Payment card details** - For example, the time when the payment was authorized and then captured. If delayed capture is enabled for the payment, you can see the gap between authorization and capture. For a food and beverage business, this lets you know whether a server is closing tickets in a timely manner. * **[TeamMember](https://developer.squareup.com/reference/square/objects/team-member)** - The person who took the payment. This is usually the team member who was using the hardware that read the buyer's payment card to create the payment. * **Card reader details** - The `device_details` about the hardware (such as Square Terminal, Square Register, or a seller's mobile device) that read the payment card and created the payment. * **Application details** - Lets you know whether your application took the payment. The application ID in this sub-object should be compared with the application ID for the application you created in the Developer Console. * **Customer** - The `payment.customer_id` value is used to retrieve details about the buyer who paid for the order. This is usually the same person. ## See also * [Create Orders](orders-api/create-orders) * [Pay for Orders](orders-api/pay-for-orders) --- # Migrate to Updated API Entities > Source: https://developer.squareup.com/docs/inventory-api/migrate-to-updated-api-entities > Status: PUBLIC > Languages: All > Platforms: All Learn which updated Inventory API endpoints to call to migrate from deprecated endpoint URLs. **Applies to:** [Inventory API](inventory-api/what-it-does) {% subheading %}Learn which updated Inventory API endpoints to call to migrate from deprecated endpoint URLs.{% /subheading %} {% toc hide=true /%} ## Overview As the [Inventory API](https://developer.squareup.com/reference/square/inventory-api) evolves, some of the API entities are updated, some are deprecated for backward compatibility, and some are retired and no longer supported. The following information can help you migrate to updated API entities until they're retired. ## Migrate to updated endpoint URLs The following endpoints have updated URLs to conform to the standard REST API convention. Their deprecated URLs are now part of the respective deprecated endpoints with the `Deprecated` prefix in their names. Support of these deprecated endpoints ends when they're retired in about 12 months. Each pair of the updated endpoints and the corresponding deprecated endpoints share the same behavior. |Updated endpoint {% width="350px" %} | Deprecated URL | |--------------------|--------------------| |[RetrieveInventoryAdjustment](https://developer.squareup.com/reference/square/inventory-api/Retrieve-Inventory-Adjustment){% line-break /%}`GET /v2/inventory/adjustments/{adjustment_id}` |[DeprecatedRetrieveInventoryAdjustment](https://developer.squareup.com/reference/square/inventory-api/Deprecated-Retrieve-Inventory-Adjustment){% line-break /%}`GET /v2/inventory/adjustment/{adjustment_id}`| | [BatchChangeInventory](https://developer.squareup.com/reference/square/inventory-api/Batch-Change-Inventory){% line-break /%} `POST /v2/inventory/changes/batch-create`| [DeprecatedBatchChangeInventory](https://developer.squareup.com/reference/square/inventory-api/Deprecated-Batch-Change-Inventory){% line-break /%} `POST /v2/inventory/batch-change`| | [BatchRetrieveInventoryChanges](https://developer.squareup.com/reference/square/inventory-api/Batch-Retrieve-Inventory-Changes){% line-break /%} `POST /v2/inventory/changes/batch-retrieve`| [DeprecatedBatchRetrieveInventoryChanges](https://developer.squareup.com/reference/square/inventory-api/Deprecated-Batch-Retrieve-Inventory-Changes){% line-break /%} `POST /v2/inventory/batch-retrieve-changes`| | [BatchRetrieveInventoryCounts](https://developer.squareup.com/reference/square/inventory-api/Batch-Retrieve-Inventory-Counts){% line-break /%} `POST /v2/inventory/counts/batch-retrieve`| [DeprecatedBatchRetrieveInventoryCounts](https://developer.squareup.com/reference/square/inventory-api/Deprecated-Batch-Retrieve-Inventory-Counts){% line-break /%} `POST /v2/inventory/batch-retrievve-counts`| | [RetrieveInventoryPhysicalCount](https://developer.squareup.com/reference/square/inventory-api/Retrieve-Inventory-Physical-Count){% line-break /%} `GET /v2/inventory/physical-counts/{physical_count_id}`  | [DeprecatedRetrieveInventoryPhysicalCount](https://developer.squareup.com/reference/square/inventory-api/Deprecated-Retrieve-Inventory-Physical-Count){% line-break /%} `GET /v2/inventory/physical-count/{physical_count_id}`| ## Migrate from TRANSFER inventory changes Starting with Square version `2026-07-15`, movement of stock between seller locations is represented as an `ADJUSTMENT` type [InventoryChange](https://developer.squareup.com/reference/square/objects/InventoryChange) with explicit locations, and the `TRANSFER` representation is retired: * The `TRANSFER` value of `InventoryChangeType`, the `InventoryTransfer` object, and the `RetrieveInventoryTransfer` endpoint are retired. `RetrieveInventoryTransfer` returns an error at Square version `2026-07-15` or later. * `InventoryAdjustment.location_id` is retired and replaced by `from_location_id` and `to_location_id`. For single-location adjustments, both fields contain the same location ID. * Movement that was previously split into a synthetic `TRANSFER` and `ADJUSTMENT` pair (movement that crosses locations *and* states, such as a return received at a different location) is returned as a single `ADJUSTMENT`. Requests made with earlier Square versions continue to receive and write the legacy `TRANSFER` shape without changes. The following example shows how the same movement of 5 units between two locations is represented at old and new Square versions: {% tabset %} {% tab id="2026-07-15 and later" %} ```json { "type": "ADJUSTMENT", "adjustment": { "id": "UDMOEO78BG6K2P4JOSLEBCGD", "from_state": "IN_STOCK", "to_state": "IN_STOCK", "from_location_id": "EF6D9SACKWBKZ", "to_location_id": "9BXNEQGVGHK8A", "catalog_object_id": "6F4K33KPNUVDWKZ43KUIFH6K", "catalog_object_type": "ITEM_VARIATION", "quantity": "5", "occurred_at": "2026-07-16T14:20:00.000Z", "created_at": "2026-07-16T14:20:04.000Z" } } ``` {% /tab %} {% tab id="Earlier versions" %} ```json { "type": "TRANSFER", "transfer": { "id": "UDMOEO78BG6K2P4JOSLEBCGD", "state": "IN_STOCK", "from_location_id": "EF6D9SACKWBKZ", "to_location_id": "9BXNEQGVGHK8A", "catalog_object_id": "6F4K33KPNUVDWKZ43KUIFH6K", "catalog_object_type": "ITEM_VARIATION", "quantity": "5", "occurred_at": "2026-07-16T14:20:00.000Z", "created_at": "2026-07-16T14:20:04.000Z" } } ``` {% /tab %} {% /tabset %} To migrate: * **Reads** - Query the change history with `types=["ADJUSTMENT"]`. Transfer-like changes are the adjustments whose `from_location_id` and `to_location_id` differ. (The `types=["TRANSFER"]` filter isn't supported at any Square version.) * **Writes** - Write an `ADJUSTMENT` with matching states and differing locations instead of relying on Square products to create transfers. * **RetrieveInventoryTransfer** - Use [RetrieveInventoryAdjustment](https://developer.squareup.com/reference/square/inventory-api/Retrieve-Inventory-Adjustment) with the adjustment ID instead. --- # Enable Stock Conversion > Source: https://developer.squareup.com/docs/inventory-api/enable-stock-conversion > Status: BETA > Languages: cURL > Platforms: All Use component inventory to enable selling a product in different measurement units with a specified stock conversion. **Applies to:** [Inventory API](inventory-api/what-it-does) | [Catalog API](catalog-api/what-it-does) {% subheading %}Learn how to enable selling a product in different measurement units with a specified stock conversion.{% /subheading %} {% toc hide=true /%} ## Overview Basic inventory tracking works when a seller manages products in a single unit, such as a wine store that buys, stocks, and sells whole bottles. However, businesses that sell items in different units than they stock (such as a restaurant that purchases wine by the bottle but sells it both by the bottle and by the glass) require an inventory system capable of handling unit conversions. {% aside type="important" %} To use stock conversion, you must have a [Square for Retail Plus](https://squareup.com/help/us/en/article/5776-get-started-with-square-for-retail) subscription. {% /aside %} ## Enable selling an item in multiple unit types In the restaurant example, a bottle is the stocking unit and also a sale unit. On the other hand, a glass is only another sale unit. The seller needs to set up conversion rates between different units of the same product. For example, if one wine bottle equals five glasses: * Selling one bottle reduces inventory by 1 bottle (or 5 glasses). * Selling two glasses reduces inventory by 2/5 of a bottle (or 2 glasses). The main inventory tracks physical items (bottles), while the sellable inventory (glasses) is calculated using these conversion rates. ## 1. Add an item with stockable and sellable-only variations Use the [Catalog API](https://developer.squareup.com/reference/square/catalog-api) to create items with item variations in different units of measurement. The following example shows how to create a Red Wine item in the Catalog API with two variations: Bottles (for stocking and selling) and Glasses (for selling only). The conversion rate is set to 5 glasses per bottle according to the rule stipulated in the `stockable_conversion` property of the request. Before creating this configuration, you need: * A [CatalogTax](https://developer.squareup.com/reference/square/objects/CatalogTax) object ID (`KBPWWOXZHOGNOSQ2LIVS4H27`), unless your location is tax-free. * A wine category ID (`JXVXTYYDLZRPXMQ7SMNJXVVG`). * Two [CatalogMeasurementUnit](https://developer.squareup.com/reference/square/objects/CatalogMeasurementUnit) IDs: * One for bottles (`SQKOHTEZUX2QWIZXMH3Z5WGW`) * One for glasses (`DPCQ2HA44EN3EIJT3WEXN5FE`) You can create these measurement units separately using [UpsertCatalogObject](https://developer.squareup.com/reference/square/catalog-api/upsert-catalog-object) or all at once using [BatchUpsertCatalogObjects](https://developer.squareup.com/reference/square/catalog-api/batch-upsert-catalog-objects). {% aside type="important" %} Don't forget to replace the catalog object IDs in the example request with the IDs you create in your test account. {% /aside %} The category of the item, as referenced by `{"category_id": "JXVXTYYDLZRPXMQ7SMNJXVVG"}`, refers to wine for sale at the seller locations. {% tabset %} {% tab id="Request" %} ```` Make sure that the two item variations subject to the stock conversion are assigned the same `SKU` value. Otherwise, you get two separate stockable variations. {% /tab %} {% tab id="Response" %} When the request succeeds, a `200 OK` response is returned with the body similar to the following: ```json { "catalog_object": { "type": "ITEM", "id": "WWXPVSBT3TUXKNXT3VSXQXMX", "updated_at": "2021-06-11T03:16:49.531Z", "version": 1623381409531, "is_deleted": false, "present_at_all_locations": true, "item_data": { "name": "Vin", "description": "Vin Rouge", "category_id": "JXVXTYYDLZRPXMQ7SMNJXVVG", "tax_ids": [ "KBPWWOXZHOGNOSQ2LIVS4H27" ], "variations": [ { "type": "ITEM_VARIATION", "id": "PMUUU2EFXNRBKTUAMTC5SQTZ", "updated_at": "2021-06-11T03:16:49.531Z", "version": 1623381409531, "is_deleted": false, "present_at_all_locations": true, "item_variation_data": { "item_id": "WWXPVSBT3TUXKNXT3VSXQXMX", "name": "Bottle", "sku": "wine-123-r", "ordinal": 0, "pricing_type": "FIXED_PRICING", "price_money": { "amount": 2500, "currency": "USD" }, "track_inventory": true, "measurement_unit_id": "SQKOHTEZUX2QWIZXMH3Z5WGW", "stockable": true } }, { "type": "ITEM_VARIATION", "id": "IUD2QMXX4K62W35HW5CVQGL6", "updated_at": "2021-06-11T03:16:49.531Z", "version": 1623381409531, "is_deleted": false, "present_at_all_locations": true, "item_variation_data": { "item_id": "WWXPVSBT3TUXKNXT3VSXQXMX", "name": "Glass", "sku": "wine-123-r", "ordinal": 1, "pricing_type": "FIXED_PRICING", "price_money": { "amount": 800, "currency": "USD" }, "track_inventory": true, "measurement_unit_id": "DPCQ2HA44EN3EIJT3WEXN5FE", "stockable": false, "composition_id": "LO3T2SO2RCEZXXJARZJJKPWI", "stockable_conversion": { "stockable_item_variation_id": "PMUUU2EFXNRBKTUAMTC5SQTZ", "stockable_quantity": "1", "nonstockable_quantity": "5" } } } ], "product_type": "REGULAR" } }, "id_mappings": [ { "client_object_id": "#wine", "object_id": "WWXPVSBT3TUXKNXT3VSXQXMX" }, { "client_object_id": "#bottle", "object_id": "PMUUU2EFXNRBKTUAMTC5SQTZ" }, { "client_object_id": "#glass", "object_id": "IUD2QMXX4K62W35HW5CVQGL6" } ] } ``` The ID of the stockable variation (`#bottle`) is `PMUUU2EFXNRBKTUAMTC5SQTZ` and the ID of the sellable-only variation (`#glass`) is `IUD2QMXX4K62W35HW5CVQGL6`. They're used later to adjust inventory counts when a bottle or glass is ordered. {% /tab %} {% /tabset %} ## 2. Add the stockable variation to the inventory In the example, a bottle is the unit of the stockable variation. When the seller takes delivery of bottles of the wine, the quantity must be added to the seller's inventory. The associated inventory state changes from `NONE` to `IN_STOCK`. {% aside type="info" %} You can add the stockable variation to the inventory in the item library in the Square Dashboard. Look for **Adjust inventory** or **Manage stock**. {% /aside %} To add a delivery of 24 bottles of wine to the inventory, call the [BatchChangeInventory](https://developer.squareup.com/reference/square/inventory-api/batch-change-inventory) endpoint of the [Inventory API](https://developer.squareup.com/reference/square/inventory-api) on the stockable variation (`PMUUU2EFXNRBKTUAMTC5SQTZ`). This is shown in the following example request: {% tabset %} {% tab id="Request" %} ```` {% /tab %} {% tab id="Response" %} A successful request returns two inventory counts: * 24 bottles (the actual physical inventory) * 120 glasses (calculated from 24 bottles × 5 glasses per bottle) This shows both how many physical bottles the seller has and how many glasses they can serve from them. ```json { "counts": [ { "catalog_object_id": "IUD2QMXX4K62W35HW5CVQGL6", "catalog_object_type": "ITEM_VARIATION", "state": "IN_STOCK", "location_id": "SNTR5190QMFGM", "quantity": "120", "calculated_at": "2021-06-11T17:23:40.6115Z", "is_estimated": true }, { "catalog_object_id": "PMUUU2EFXNRBKTUAMTC5SQTZ", "catalog_object_type": "ITEM_VARIATION", "state": "IN_STOCK", "location_id": "SNTR5190QMFGM", "quantity": "24", "calculated_at": "2021-06-11T17:23:40.6115Z" } ], "changes": [ { "type": "ADJUSTMENT", "adjustment": { "from_state": "NONE", "to_state": "IN_STOCK", "from_location_id": "SNTR5190QMFGM", "to_location_id": "SNTR5190QMFGM", "catalog_object_id": "PMUUU2EFXNRBKTUAMTC5SQTZ", "catalog_object_type": "ITEM_VARIATION", "quantity": "10", "occurred_at": "2021-06-11T17:12:00.4125Z", "source": { "product": "EXTERNAL_API", "application_id": "sq0ids-hLgkXFJ58T_vJI5g1Dpoww", "name": "HelloCustomers" } } } ] } ``` {% /tab %} {% /tabset %} ## 3. Sell one unit of the stockable variation After the wine is in stock, sales can begin. When someone buys a bottle, the system updates the following: * Reduces bottle inventory by 1 * Reduces available glasses by 5 (because each bottle equals 5 glasses) The following example request shows a call to the `BatchChangeInventory` endpoint on the stockable variation (`PMUUU2EFXNRBKTUAMTC5SQTZ`) to adjust the inventory accordingly: {% tabset %} {% tab id="Request" %} ```` {% aside type="info" %} In the Virtual Terminal in the Square Dashboard, the previous request corresponds to taking a payment for one bottle of wine. {% /aside %} {% /tab %} {% tab id="Response" %} After a successful update, the system shows the new inventory levels: * Bottles decreased by 1 (now 23 bottles) * Glasses decreased by 5 (now 115 glasses) The system automatically calculates these changes based on the conversion rate of 5 glasses per bottle. ```json { "counts": [ { "catalog_object_id": "PMUUU2EFXNRBKTUAMTC5SQTZ", "catalog_object_type": "ITEM_VARIATION", "state": "IN_STOCK", "location_id": "SNTR5190QMFGM", "quantity": "23", "calculated_at": "2021-06-11T17:51:51.6115Z" }, { "catalog_object_id": "IUD2QMXX4K62W35HW5CVQGL6", "catalog_object_type": "ITEM_VARIATION", "state": "IN_STOCK", "location_id": "SNTR5190QMFGM", "quantity": "115", "calculated_at": "2021-06-11T17:51:51.6115Z", "is_estimated": true } ], "changes": [ { "type": "ADJUSTMENT", "adjustment": { "from_state": "IN_STOCK", "to_state": "SOLD", "from_location_id": "SNTR5190QMFGM", "to_location_id": "SNTR5190QMFGM", "catalog_object_id": "PMUUU2EFXNRBKTUAMTC5SQTZ", "catalog_object_type": "ITEM_VARIATION", "quantity": "1", "occurred_at": "2021-06-11T17:50:00.6115Z", "source": { "product": "EXTERNAL_API", "application_id": "sq0ids-hLgkXFJ58T_vJI5g1Dpoww", "name": "HelloCustomers" } } } ] } ``` {% /tab %} {% /tabset %} ## 4. Sell two units of sellable-only variations In this scenario, a customer orders two glasses of wine. To update the inventory to account for this transaction, call the `BatchChangeInventory` endpoint on the sellable-only variation (`IUD2QMXX4K62W35HW5CVQGL6`), specifying the quantity `2`. This is shown in the following example request: {% tabset %} {% tab id="Request" %} ```` {% aside type="info" %} In the Virtual Terminal in the Square Dashboard, the previous request corresponds to taking a payment for two glasses of wine. {% /aside %} {% /tab %} {% tab id="Response" %} After a successful update, the new inventory shows: * Bottles decreased by 0.4 (now 22.6 bottles) * Glasses decreased by 2 (now 113 glasses) The system calculated the bottle reduction (0.4) because selling 2 glasses uses up 2/5 of a bottle. ```json { "counts": [ { "catalog_object_id": "PMUUU2EFXNRBKTUAMTC5SQTZ", "catalog_object_type": "ITEM_VARIATION", "state": "IN_STOCK", "location_id": "SNTR5190QMFGM", "quantity": "22.60000", "calculated_at": "2021-06-11T17:56:01.4135Z" }, { "catalog_object_id": "IUD2QMXX4K62W35HW5CVQGL6", "catalog_object_type": "ITEM_VARIATION", "state": "IN_STOCK", "location_id": "SNTR5190QMFGM", "quantity": "113", "calculated_at": "2021-06-11T17:56:01.4135Z", "is_estimated": true } ], "changes": [ { "type": "ADJUSTMENT", "adjustment": { "id": "YUGSU46HZJIKV2TTXU77E4Q4", "from_state": "IN_STOCK", "to_state": "COMPOSED", "from_location_id": "SNTR5190QMFGM", "to_location_id": "SNTR5190QMFGM", "catalog_object_id": "PMUUU2EFXNRBKTUAMTC5SQTZ", "catalog_object_type": "ITEM_VARIATION", "quantity": "0.40000", "occurred_at": "2021-06-11T17:52:00.6115Z", "created_at": "2021-06-11T17:52:00.1112Z", "source": { "product": "EXTERNAL_API", "application_id": "sq0ids-hLgkXFJ58T_vJI5g1Dpoww", "name": "HelloCustomers" }, "adjustment_group": { "id": "adjGrp_4GH4NVSK6UFHJUI5", "from_state": "IN_STOCK", "to_state": "SOLD" } } }, { "type": "ADJUSTMENT", "adjustment": { "id": "UQ4TDTMP7IYSWBD2WMUA4YMO", "from_state": "COMPOSED", "to_state": "SOLD", "from_location_id": "SNTR5190QMFGM", "to_location_id": "SNTR5190QMFGM", "catalog_object_id": "IUD2QMXX4K62W35HW5CVQGL6", "catalog_object_type": "ITEM_VARIATION", "quantity": "2", "occurred_at": "2021-06-11T17:52:00.6115Z", "created_at": "2021-06-11T17:52:00.1112Z", "source": { "product": "EXTERNAL_API", "application_id": "sq0ids-hLgkXFJ58T_vJI5g1Dpoww", "name": "HelloCustomers" }, "adjustment_group": { "id": "adjGrp_4GH4NVSK6UFHJUI5", "root_adjustment_id": "UQ4TDTMP7IYSWBD2WMUA4YMO", "from_state": "IN_STOCK", "to_state": "SOLD" } } } ] } ``` {% /tab %} {% /tabset %} Adjusting the inventory on the sellable-only variation involves two separate adjustments: * The inventory adjustment on the stockable variation moves from the `IN_STOCK` state to the `COMPOSED` state. * The inventory adjustment on the sellable-only variation moves from the `COMPOSED` state to the `SOLD` state. The two component inventory adjustments are included in an adjustment group that represents a single inventory change event transitioning from a representative `from_state` of `IN_STOCK` to a representative `to_state` of `SOLD`. This behavior is different from the inventory change on a stockable variation. --- # Create Customer Group Discounts > Source: https://developer.squareup.com/docs/catalog-api/configure-customer-group-discounts > Status: PUBLIC > Languages: cURL > Platforms: All Use a pricing rule to make customers in selected customer groups eligible to receive specified discounts to matched products. **Applies to:** [Catalog API](catalog-api/what-it-does) | [Customer Groups API](customer-groups-api/how-to-use-it) | [Customers API](customers-api/use-the-api/get-started) {% subheading %}Learn how to use a pricing rule to make customers in selected customer groups eligible to receive specified discounts to matched products. {% /subheading %} {% toc hide=true /%} ## Overview In addition to using [CatalogPricingRule](https://developer.squareup.com/reference/square/objects/CatalogPricingRule) to have a discount automatically applied to specified products sold to any buyer, you can use it to have the discount automatically applied to customers belonging to one or more customer groups. This second use case is referred to as customer group discounts. To set up customer group discounts, you must provide a means to accept input from the seller to determine which groups of customers can receive what type of discounts to which product sets. When the decision is finalized, you can proceed to create or update a pricing rule to configure the discount and eligibility of specific customers. In general, the programming workflow involves the following steps: * Use the [Customer Groups API](customer-groups-api/how-to-use-it) to get the ID of a customer group containing customers eligible for receiving discounts. If the customer group hasn't been created, you must call the Customer Groups API to create the group. If necessary, you also need to call the [Customers API](customers-api/use-the-api/get-started) to create customer profiles for targeted customers and add the customers to the newly created customer group. * Use the [Catalog API](catalog-api/build-with-catalog) and call the [UpsertCatalogObject](https://developer.squareup.com/reference/square/catalog-api/upsert-catalog-object) endpoint to create or update an existing [CatalogDiscount](https://developer.squareup.com/reference/square/objects/CatalogDiscount) object to configure the planned discount. * Use the [Catalog API](catalog-api/build-with-catalog) and call the [UpsertCatalogObject](https://developer.squareup.com/reference/square/catalog-api/upsert-catalog-object) endpoint to create or update an existing [CatalogProductSet](https://developer.squareup.com/reference/square/objects/CatalogProductSet) object to include the products to which the discount applies. * Use the [Catalog API](catalog-api/build-with-catalog) and call the [UpsertCatalogObject](https://developer.squareup.com/reference/square/catalog-api/upsert-catalog-object) endpoint to create or update an existing [CatalogPricingRule](https://developer.squareup.com/reference/square/objects/CatalogPricingRule) object to set up the rule to have the specified discount automatically applied to matched products when an eligible customer orders a matched product item. ## Retrieve or create a customer group If the targeted customers are already members of an existing customer group, you can call the [ListCustomerGroups](https://developer.squareup.com/reference/square/customer-groups-api/list-customer-groups) endpoint of the Customer Groups API to retrieve available groups, examine the result to extract the customer group of interest, and obtain the group ID. ### Example to retrieve a customer group ```` The successful response might look similar to the following: ```json { "groups":[ { "id":"6B8DE9B3-9AF2-4CDA-9938-D1A5BC5D87E0", "name":"Students", "created_at":"2021-02-24T14:32:07.334Z", "updated_at":"2021-02-24T14:35:45Z" } ] } ``` In this example, the seller has only one customer group named `Students`. The group ID is `6B8DE9B3-9AF2-4CDA-9938-D1A5BC5D87E0`. Make note of the group ID. You need it later to configure customer group discounts. If the targeted customers don't belong to any known customer group, you can call the Customer Groups API [CreateCustomerGroup](https://developer.squareup.com/reference/square/customer-groups-api/create-customer-group) endpoint to create a new customer group and then call [AddGroupToCustomer](https://developer.squareup.com/reference/square/customers-api/add-group-to-customer) to make selected customers members of the group. Make sure to note the group ID before proceeding. ## Create or retrieve a discount For a new promotional campaign, you must create a new discount as represented by a [CatalogDiscount](https://developer.squareup.com/reference/square/objects/CatalogDiscount) object. To do so, call the [UpsertCatalogObject](https://developer.squareup.com/reference/square/catalog-api/upsert-catalog-object) endpoint, or its batched version, of the Catalog API. ### Example to create a discount ```` The successful response is similar to the following output: ```json { "catalog_object":{ "type":"DISCOUNT", "id":"BY676RE3HE5UWOUDCM6ISM5Z", "updated_at":"2021-03-17T19:46:30.624Z", "version":1614714390624, "is_deleted":false, "present_at_all_locations":true, "discount_data":{ "name":"Student Discount", "discount_type":"FIXED_PERCENTAGE", "percentage":"10.0" } }, "id_mappings":[ { "client_object_id":"#StudentDiscount", "object_id":"BY676RE3HE5UWOUDCM6ISM5Z" } ] } ``` In this example, the newly created `CatalogDiscount` object encapsulates a discount off the sale price by 10%. Make note of the returned `CatalogDiscount` object ID (`BY676RE3HE5UWOUDCM6ISM5Z`). You need it to configure the pricing rule later. If you want to use an existing discount object, you can call the [SearchCatalogObjects](https://developer.squareup.com/reference/square/catalog-api/search-catalog-objects) endpoint to retrieve the discount object. In any case, make note of the ID of the returned `CatalogDiscount` object. ## Create or retrieve a product set The following example shows how to create a new product set to apply a discount to. The product set includes any product for sale by the seller. ### Example to create a product set ```` The `"all_products": true` attribute makes the resulting product set to include all products in the seller's catalog. The successful response looks similar to the following output: ```json { "catalog_object":{ "type":"PRODUCT_SET", "id":"MRNVLLYM77NZJNP3FMIJMGCX", "updated_at":"2021-03-17T19:50:49.076Z", "version":1614714649076, "is_deleted":false, "present_at_all_locations":true, "product_set_data":{ "name":"All Product Set", "all_products":true } }, "id_mappings":[ { "client_object_id":"#AllProductSet", "object_id":"MRNVLLYM77NZJNP3FMIJMGCX" } ] } ``` Make note of the returned `CatalogProductSet` object ID (`MRNVLLYM77NZJNP3FMIJMGCX`). You need it to configure the pricing rule later. ## Create or update a pricing rule to apply customer group discounts With the discount, product sets, and customer groups in hand (as referenced by their respective IDs), it's time to set up a pricing rule to automatically apply the discount to the products sold to the members of a customer group. You can do so by creating a new `CatalogPricingRule` object or updating an existing one. The following example shows creating a pricing rule object to apply a fixed discount to any product sold to customers in any of the specified customer groups. ### Example to create a pricing rule to configure a customer group discount To create a pricing rule, call the `UpsertCatalogObject` endpoint to create a `CatalogPricingRule` object, with a rule to have a specific discount applied to a specified product set purchased by members of specified customer groups. ```` The discount, product set, and customer groups are all referenced by their respective IDs. The successful REST API response is similar to the following output: ```json { "catalog_object":{ "type":"PRICING_RULE", "id":"5SUNA6NKIYPKFZZBEJZKZ243", "updated_at":"2021-03-17T19:53:20.43Z", "version":1614714800430, "is_deleted":false, "present_at_all_locations":true, "pricing_rule_data":{ "name":"Student Discount Pricing Rule", "discount_id":"BY676RE3HE5UWOUDCM6ISM5Z", "match_products_id":"MRNVLLYM77NZJNP3FMIJMGCX", "customer_group_ids_any":[ "6B8DE9B3-9AF2-4CDA-9938-D1A5BC5D87E0" ] } }, "id_mappings":[ { "client_object_id":"#StudentDiscountPricingRule", "object_id":"5SUNA6NKIYPKFZZBEJZKZ243" } ] } ``` The resulting pricing rule is automatically applied to itemized products in a shopping cart when a matched customer places an order of any of the seller's product. For example, when an eligible customer orders a $5.00 latte, this pricing rule reduces the charge by $0.50. The customer pays only $4.50 for the drink at the cash register or checkout. --- # Add a Catalog Item > Source: https://developer.squareup.com/docs/catalog-api/build-with-catalog > Status: PUBLIC > Languages: All > Platforms: All Create a simple catalog using the Square Catalog API. **Applies to:** [Catalog API](catalog-api/what-it-does) {% subheading %}Learn how to build a simple product catalog for a cafe that serves coffee in small and large sizes, with skim or whole milk.{% /subheading %} {% toc hide=true /%} ## Overview The Catalog API manages the item library in the Square Dashboard. Use it to add, update, or delete items. An item is made up of related catalog objects like taxes, modifiers, and options. ## Requirements and limitations * You have a Square account enabled for payment processing. If you haven't enabled payment processing on your account (or you're not sure), visit [squareup.com/activation](https://squareup.com/activation). * You're familiar with HTTPS. If this is your first time working with HTTPS, see [TLS and HTTPS](working-with-apis/tls-and-https) before continuing. * You need a valid access token. You should test with Sandbox credentials whenever possible. For more information, see [Access Tokens and Other Square Credentials](build-basics/access-tokens). ## Item options and variations The [Catalog API](https://developer.squareup.com/reference/square/catalog-api) includes several objects that enable efficient and standardized definitions of item variations in the seller's inventory. These objects include the following: * [Items](https://developer.squareup.com/reference/square/objects/CatalogItem) - Generalized items such as "Shirt". * [Item variation](https://developer.squareup.com/reference/square/objects/CatalogItemVariation) - Specific items for sale such as "Polo shirt: Lg, red". * [Item options](https://developer.squareup.com/reference/square/objects/CatalogItemOption) - Standardized attributes such as color, size, and style. To add an item to a seller's library, use the [UpsertCatalogObject](https://developer.squareup.com/reference/square/catalog-api/upsert-catalog-object) endpoint to create catalog objects for the item (for example, a cup of coffee). For information about using item options to set variation characteristics, see [Define Item Variations Using Options](catalog-api/item-options). ## Example: Cup of coffee Before selling coffee, the catalog needs an item called "Cup of Coffee" without a size, a price, or modifiers. To charge for the coffee, include variations specifying the size, the price, and any modifiers. Add two variations (Small Coffee and Large Coffee), a [CatalogTax](https://developer.squareup.com/reference/square/objects/CatalogTax) object for taxes, and two optional [CatalogModifier](https://developer.squareup.com/reference/square/objects/CatalogModifier) objects (with Skim Milk and Whole Milk). These include: * A [CatalogItem](https://developer.squareup.com/reference/square/objects/CatalogItem) object named `Coffee` for coffee drinks. * Two [CatalogItemVariation](https://developer.squareup.com/reference/square/objects/CatalogItemVariation) objects named `Small` and `Large` for the coffee drink size variations. * A [CatalogTax](https://developer.squareup.com/reference/square/objects/CatalogTax) object for the sales tax applied when a payment is made on the coffee drink order. * Two [CatalogModifier](https://developer.squareup.com/reference/square/objects/CatalogModifier) objects for the two milk choices. * A [CatalogModifierList](https://developer.squareup.com/reference/square/objects/CatalogModifierList) object to hold the two [CatalogModifier](https://developer.squareup.com/reference/square/objects/CatalogModifier) objects to apply the milk choices to the coffee item. The following steps apply to creating other types of catalog objects, except for image uploads. For details about uploading and attaching images to items, variations, or categories, see [Work with Images](catalog-api/cookbook/create-catalog-image). ## 1. Add a coffee item to a catalog {% aside type="important" %} When creating an item, you must specify at least one variation. Otherwise, you get an `INVALID_REQUEST` error. {% /aside %} To add a coffee item to a catalog as a product offering of a seller, call the [UpsertCatalogObject](https://developer.squareup.com/reference/square/catalog-api/upsert-catalog-object) endpoint to create a [CatalogItem](https://developer.squareup.com/reference/square/objects/CatalogItem) object in the catalog. This is shown in the following REST API example: {% tabset %} {% tab id="Request" %} ```` In this example, the `Coffee` item has two variations (`Small` and `Large`). `#coffee` is a temporary ID used as a placeholder for the permanent ID generated by Square. In the same request, you can use this temporary ID to reference the new object. The two variations in this example use `#coffee` to identify their parent item. If created in a separate request, use their Square-generated permanent IDs instead. Because the `UpsertCatalogObject` endpoint creates various catalog objects, the data object must match the specified type. For example: * **Item** - Set the `item_data` property to a [CatalogItem](https://developer.squareup.com/reference/square/objects/CatalogItem) object for the `ITEM` type. * **Item Variation** - Set `item_variation_data` to a [CatalogItemVariation](https://developer.squareup.com/reference/square/objects/CatalogItemVariation) object for the `ITEM_VARIATION` type. * **Item Discount** - Set `discount_data` to a [CatalogDiscount](https://developer.squareup.com/reference/square/objects/CatalogDiscount) object for a `DISCOUNT`. {% aside type="warning" %} The `type` property must match the `{object_type}_data` property. Otherwise, the request fails. {% /aside %} {% /tab %} {% tab id="Response" %} When the request is successful, you get a `200 OK` response with a payload similar to the following: ```json { "catalog_object": { "type": "ITEM", "id": "FX3LTXC2CCFCGHLGMSFLBSDO", "updated_at": "2021-06-15T18:48:16.262Z", "version": 1623782896262, "is_deleted": false, "present_at_all_locations": true, "item_data": { "name": "Coffee", "description": "Coffee Drink", "abbreviation": "Co", "variations": [ { "type": "ITEM_VARIATION", "id": "OXRR3XANRU5TEQ3FQMDW5IJK", "updated_at": "2021-06-15T18:48:16.262Z", "version": 1623782896262, "is_deleted": false, "present_at_all_locations": true, "item_variation_data": { "item_id": "FX3LTXC2CCFCGHLGMSFLBSDO", "name": "Small", "ordinal": 0, "pricing_type": "FIXED_PRICING", "price_money": { "amount": 300, "currency": "USD" }, "stockable": true } }, { "type": "ITEM_VARIATION", "id": "3EFNOI25E4NUK53CU4KMUHXX", "updated_at": "2021-06-15T18:48:16.262Z", "version": 1623782896262, "is_deleted": false, "present_at_all_locations": true, "item_variation_data": { "item_id": "FX3LTXC2CCFCGHLGMSFLBSDO", "name": "Large", "ordinal": 1, "pricing_type": "FIXED_PRICING", "price_money": { "amount": 350, "currency": "USD" }, "stockable": true } } ], "product_type": "REGULAR" } }, "id_mappings": [ { "client_object_id": "#coffee", "object_id": "FX3LTXC2CCFCGHLGMSFLBSDO" }, { "client_object_id": "#small_coffee", "object_id": "OXRR3XANRU5TEQ3FQMDW5IJK" }, { "client_object_id": "#large_coffee", "object_id": "3EFNOI25E4NUK53CU4KMUHXX" } ] } ``` Note that the response returns the ID mapping between the temporary ID (`id_mappings.client_object_id`) value and the Square-generated ID (`object_id`) value. From now on, you must reference these objects by their respective `object_id` values. In this example, the coffee item's `product_type` is unspecified in the request. This is equivalent to setting `product_type` to `REGULAR`. {% /tab %} {% /tabset %} ## 2. Create a CatalogTax object for the coffee drink In most locales, a sales tax must be levied on a sold product. To support taking taxes on an order, you must first create a [CatalogTax](https://developer.squareup.com/reference/square/objects/CatalogTax) object to set up the tax to be applied when the payment is made on the order. {% tabset %} {% tab id="Request" %} The following code example shows how to create a tax object and add it to the catalog: ```` In this example, the drink tax is 7.5% of the pretax subtotal of an order and it applies to catalog-item-based line items and ad hoc order line items. If you don't specify the property, the new tax is created with `"applies_to_custom_amounts": true`. {% /tab %} {% tab id="Response" %} When successful, the request returns a `200 OK` response with the payload similar to the following: ```json { "catalog_object": { "type": "TAX", "id": "TEROS7KLG76NDY4J7TYFZVGA", "updated_at": "2021-06-15T19:12:49.613Z", "version": 1623784369613, "is_deleted": false, "present_at_all_locations": true, "tax_data": { "name": "Drink Tax", "calculation_phase": "TAX_SUBTOTAL_PHASE", "inclusion_type": "ADDITIVE", "percentage": "7.5", "applies_to_custom_amounts": false, "enabled": true } }, "id_mappings": [ { "client_object_id": "#sales_tax", "object_id": "TEROS7KLG76NDY4J7TYFZVGA" } ] } ``` {% /tab %} {% /tabset %} ### Alternative batch operation Alternatively, you can combine the calls to create the `Coffee` item with the `Small` and `Large` variations and the `Drink Tax` object into a single call to the [BatchUpsertCatalogObjects](https://developer.squareup.com/reference/square/catalog-api/batch-upsert-catalog-objects) endpoint, as shown: ```` In the previous example, note that the catalog item `item_data` property includes the `tax_ids` sub-property: ```json "tax_ids": [ "#sales_tax" ] ``` This property connects the new `CatalogTax` to the `CatalogItem` created in the batch request. In an Orders API [CreateOrder](https://developer.squareup.com/reference/square/orders/CreateOrder) request, that tax is automatically applied to the coffee if the `CreateOrder` request includes the `pricing_options` property as shown in the following example: ```json "pricing_options": { "auto_apply_discounts": false, "auto_apply_taxes": true } ``` ## 3. Create a modifier list to contain two modifiers To enable sellers to offer the choices of adding skim milk and whole milk to the coffee drink, you can create two catalog modifiers to apply to the `Coffee` item. One way to add the modifiers is to create a modifier list containing individual modifiers as its entries. {% tabset %} {% tab id="Request" %} The following example shows how to call the [UpsertCatalogObject](https://developer.squareup.com/reference/square/catalog-api/batch-upsert-catalog-objects) endpoint to create the [CatalogModifierList](https://developer.squareup.com/reference/square/objects/CatalogModifierList) object with two [CatalogModifier](https://developer.squareup.com/reference/square/objects/CatalogModifier) objects for `Skim Milk` and `Whole Milk`: ```` {% /tab %} {% tab id="Response" %} The successful operation returns a `200 OK` response with a payload similar to the following: ```json { "catalog_object": { "type": "MODIFIER_LIST", "id": "ZVSGY6U63IGCZQL4IOPZAKYW", "updated_at": "2020-06-15T20:01:39.58Z", "version": 1623784369656, "is_deleted": false, "present_at_all_locations": true, "modifier_list_data": { "name": "Milk Options", "modifiers": [ { "type": "MODIFIER", "id": "MNXLZRO2PIBULOX2RX56DG25", "updated_at": "2020-06-15T20:01:39.58Z", "version": 1623784369656, "is_deleted": false, "present_at_all_locations": true, "modifier_data": { "name": "Whole Milk", "price_money": { "amount": 125, "currency": "USD" }, "ordinal": 0, "modifier_list_id": "ZVSGY6U63IGCZQL4IOPZAKYW" } }, { "type": "MODIFIER", "id": "Q6R5X5VMSZTYVKM37QRHNZWM", "updated_at": "2020-06-15T20:01:39.58Z", "version": 1623784369656, "is_deleted": false, "present_at_all_locations": true, "modifier_data": { "name": "Skim Milk", "price_money": { "amount": 130, "currency": "USD" }, "ordinal": 1, "modifier_list_id": "ZVSGY6U63IGCZQL4IOPZAKYW" } } ] } }, "id_mappings": [ { "client_object_id": "#modifier_list", "object_id": "ZVSGY6U63IGCZQL4IOPZAKYW" }, { "client_object_id": "#whole_milk", "object_id": "MNXLZRO2PIBULOX2RX56DG25" }, { "client_object_id": "#skim_milk", "object_id": "Q6R5X5VMSZTYVKM37QRHNZWM" } ] } ``` {% /tab %} {% /tabset %} For the modifiers in the modifier list to be applied to the `Coffee` item, you must have the resultant modifier list applied to the `Coffee` item, as explained in step 4. ## 4. Apply the modifier list to the coffee item To apply the modifier list created in step 3, call the `UpdateItemModifierLists` endpoint as shown in the following example: {% tabset %} {% tab id="Request" %} ```` {% /tab %} {% tab id="Response" %} If successful, the operation returns a `200 OK` response with a payload similar to the following: ```json { "updated_at": "2020-06-15T18:36:39.58Z" } ``` {% /tab %} {% /tabset %} Alternatively, you can call the [BatchUpsertCatalogObjects](https://developer.squareup.com/reference/square/catalog-api/batch-upsert-catalog-objects) endpoint to create a modifier list with appropriate modifier entries and add the modifier list to the `Coffee` item, together with the required item variations, in a single call to create all related [CatalogObject](https://developer.squareup.com/reference/square/objects/CatalogObject) instances at once. ## 5. Verify the catalog you just built After building your catalog, you can view and verify it by calling the [ListCatalog](https://developer.squareup.com/reference/square/catalog-api/list-catalog) endpoint to inspect the catalog items. The following request shows an example: {% tabset %} {% tab id="Request" %} ```` {% /tab %} {% tab id="Response" %} In response, the payload contains the catalog objects: ```json { "objects": [ { "type": "ITEM", "id": "FX3LTXC2CCFCGHLGMSFLBSDO", "updated_at": "2021-06-15T18:48:16.262Z", "version": 1623782896262, "is_deleted": false, "present_at_all_locations": true, "item_data": { "name": "Coffee", "description": "Coffee Drink", "abbreviation": "Co", "modifier_list_info": [ { "modifier_list_id": "ZVSGY6U63IGCZQL4IOPZAKYW", "enabled": true } ], "variations": [ { "type": "ITEM_VARIATION", "id": "3EFNOI25E4NUK53CU4KMUHXX", "updated_at": "2021-06-15T18:48:16.262Z", "version": 1623782896262, "is_deleted": false, "present_at_all_locations": true, "item_variation_data": { "item_id": "FX3LTXC2CCFCGHLGMSFLBSDO", "name": "Large", "pricing_type": "FIXED_PRICING", "price_money": { "amount": 350, "currency": "USD" } } }, { "type": "ITEM_VARIATION", "id": "OXRR3XANRU5TEQ3FQMDW5IJK", "updated_at": "2021-06-15T18:48:16.262Z", "version": 1623782896262, "is_deleted": false, "present_at_all_locations": true, "item_variation_data": { "item_id": "FX3LTXC2CCFCGHLGMSFLBSDO", "name": "Small", "pricing_type": "FIXED_PRICING", "price_money": { "amount": 300, "currency": "USD" } } } ], "product_type": "REGULAR" } }, { "type": "TAX", "id": "TEROS7KLG76NDY4J7TYFZVGA", "updated_at": "2021-06-15T19:12:49.613Z", "version": 1623784369613, "is_deleted": false, "present_at_all_locations": true, "tax_data": { "name": "Drink Tax", "calculation_phase": "TAX_SUBTOTAL_PHASE", "inclusion_type": "ADDITIVE", "percentage": "7.5", "applies_to_custom_amounts": true, "enabled": true } }, { "type": "MODIFIER_LIST", "id": "ZVSGY6U63IGCZQL4IOPZAKYW", "updated_at": "2020-06-15T20:01:39.58Z", "version": 1623784369656, "is_deleted": false, "present_at_all_locations": true, "modifier_list_data": { "name": "Milk Options", "modifiers": [ { "type": "MODIFIER", "id": "MNXLZRO2PIBULOX2RX56DG25", "updated_at": "2020-06-15T20:01:39.58Z", "version": 1623784369656, "is_deleted": false, "present_at_all_locations": true, "modifier_data": { "name": "Whole Milk", "price_money": { "amount": 125, "currency": "USD" }, "ordinal": 0, "modifier_list_id": "ZVSGY6U63IGCZQL4IOPZAKYW" } }, { "type": "MODIFIER", "id": "Q6R5X5VMSZTYVKM37QRHNZWM", "updated_at": "2020-06-15T20:01:39.58Z", "version": 1623784369656, "is_deleted": false, "present_at_all_locations": true, "modifier_data": { "name": "Skim Milk", "price_money": { "amount": 130, "currency": "USD" }, "ordinal": 1, "modifier_list_id": "ZVSGY6U63IGCZQL4IOPZAKYW" } } ] } } ] } ``` {% /tab %} {% /tabset %} ## Create items with other product types {% tabset %} {% tab id="Food and beverage" %} You can set `product_type` to `FOOD_AND_BEV` to create a food and beverage item with product-specific details. This is useful if you want to include details such as the calorie count, ingredients, or dietary preferences. For example, the following request recreates the coffee item with an explicit `product_type` of `FOOD_AND_BEV` to contain information about the calorie count and dietary preference in the `food_and_beverage_details` property: {% tabset %} {% tab id="Request" %} ```` {% /tab %} {% tab id="Response" %} The additional food and beverage details are returned in the successful response: ```json { "catalog_object": { "type": "ITEM", "id": "H2Y6VVVMYKHOUTVFQIPMSQ67", "updated_at": "2023-12-13T22:20:16.697Z", "created_at": "2023-12-13T22:20:16.697Z", "version": 1702506016697, "is_deleted": false, "present_at_all_locations": true, "item_data": { "name": "Coffee", "description": "Coffee Drink", "abbreviation": "Co", "is_taxable": true, "variations": [ { "type": "ITEM_VARIATION", "id": "A2ZOF5UEXL6V6X2JATH7K2Q7", "updated_at": "2023-12-13T22:20:16.697Z", "created_at": "2023-12-13T22:20:16.697Z", "version": 1702506016697, "is_deleted": false, "present_at_all_locations": true, "item_variation_data": { "item_id": "H2Y6VVVMYKHOUTVFQIPMSQ67", "name": "Small", "ordinal": 0, "pricing_type": "FIXED_PRICING", "price_money": { "amount": 300, "currency": "USD" }, "sellable": true, "stockable": true } }, { "type": "ITEM_VARIATION", "id": "U7UEUIFP6GCAWUMD7TV2CO7R", "updated_at": "2023-12-13T22:20:16.697Z", "created_at": "2023-12-13T22:20:16.697Z", "version": 1702506016697, "is_deleted": false, "present_at_all_locations": true, "item_variation_data": { "item_id": "H2Y6VVVMYKHOUTVFQIPMSQ67", "name": "Large", "ordinal": 1, "pricing_type": "FIXED_PRICING", "price_money": { "amount": 350, "currency": "USD" }, "sellable": true, "stockable": true } } ], "product_type": "FOOD_AND_BEV", "description_html": "

Coffee Drink

", "description_plaintext": "Coffee Drink", "is_archived": false, "food_and_beverage_details": { "calorie_count": 10, "dietary_preferences": [ { "type": "STANDARD", "standard_name": "GLUTEN_FREE" } ] } } }, "id_mappings": [ { "client_object_id": "#coffee", "object_id": "H2Y6VVVMYKHOUTVFQIPMSQ67" }, { "client_object_id": "#small_coffee", "object_id": "A2ZOF5UEXL6V6X2JATH7K2Q7" }, { "client_object_id": "#large_coffee", "object_id": "U7UEUIFP6GCAWUMD7TV2CO7R" } ] } ``` If you create the coffee or another food or beverage as a `REGULAR` item and include the food and beverage details in the request, the specified food and beverage details are ignored and not returned in the response. {% /tab %} {% /tabset %} {% /tab %} {% tab id="Donations" %} A donation catalog item handles item variation properties differently than other products. In the Square Dashboard, many usual item properties are missing. However, you can still categorize a donation and set suggested amounts, modifiers, and custom attributes. ### Suggested donation amounts To set a suggested donation amount for a donation item, add an item variation referencing the donation item. Set the variation's `pricing_type` to `FIXED_PRICING` and `price_money` to the desired amount. Then, call `UpsertCatalogObject`. Square adds the suggested donation amount you specified. If you include multiple variations in a batch request, those amounts are listed as suggested donations in the item library. A donation item with two variations that set suggested donation amounts is shown in the following example from the Square Dashboard item library: ![An image of the Square Dashboard item library with the donation settings section of the Create Item page.](//images.ctfassets.net/1nw4q0oohfju/6H0YbvcMAmwRLq5OLP01K/8d02e58d5de37f2e2bb8000e319e2dd0/square-dashboard-item-library-donation-settings.png) When a donation item includes at least one suggested donation amount, the **Allow custom donation amounts** option is disabled by default. However, a seller can still enable custom amounts manually. If there are no suggested donation amounts (that is, the `CatalogItem` for the donation has no variations), the **Allow custom donation amounts** option is enabled by default and the seller cannot disable it. {% tabset %} {% tab id="Request" %} This example creates an item "Donation for a hospital charity" with two suggested donation amounts: $334.00 and $734.00. {% aside type="info" %} The order that the suggested donations appear in the Square Dashboard is the order of the donations that you set in the request. If you want donations to be sorted in ascending order by amount, you need to add them to your request in that order. {% /aside %} ```` {% aside type="important" %} **Canadian sellers** - The following donation restrictions apply: * Items with the `product_type` of `DONATION` are now required to provide the purpose of the donation in the `item_data.description` property. * If the donation item description contains the words "donate", "donation", or "faire un don", the `product_type` must be set to `DONATION`. Otherwise, the `UpsertCatalogObject` request fails. * Custom donation amounts are no longer supported for Canadian sellers. Canadian sellers must specify suggested donation amounts, and the suggested amounts cannot exceed $999 CAD. * You cannot set `DONATION` as the default item product type. Default values are set on the Square Dashboard item library [Settings](https://squareup.com/dashboard/items/settings/item-defaults) page. {% /aside %} {% /tab %} {% tab id="Response" %} The response shows that two item variations were created. Note that even though the request specified variation names, the Square Dashboard doesn't show them in the suggested donation amount list. ```json { "catalog_object": { "type": "ITEM", "id": "L62HXHFTZBGNTPGU6PA2WJ43", "updated_at": "2024-11-21T23:59:33.06Z", "created_at": "2024-11-20T22:33:56.951Z", "version": 1732233573060, "is_deleted": false, "present_at_all_locations": true, "item_data": { "name": "Donation for a hospital charity", "description": "Multiple donation level hospital charity donation", "abbreviation": "Big-Donation", "is_taxable": false, "visibility": "PRIVATE", "available_online": true, "available_for_pickup": false, "available_electronically": true, "variations": [ { "type": "ITEM_VARIATION", "id": "MCI5QJFNIZNHGFS4AA34LS4A", "updated_at": "2024-11-21T23:59:33.06Z", "created_at": "2024-11-20T22:33:56.951Z", "version": 1732233573060, "is_deleted": false, "present_at_all_locations": true, "item_variation_data": { "item_id": "L62HXHFTZBGNTPGU6PA2WJ43", "name": "Donation to Mary Bridge Hospital", "ordinal": 0, "pricing_type": "FIXED_PRICING", "price_money": { "amount": 33400, "currency": "USD" }, "track_inventory": false, "available_for_booking": false, "sellable": true, "stockable": true } }, { "type": "ITEM_VARIATION", "id": "7N3PYB53MJQID4I3KBFFPUMN", "updated_at": "2024-11-21T23:59:33.06Z", "created_at": "2024-11-21T23:59:33.06Z", "version": 1732233573060, "is_deleted": false, "present_at_all_locations": true, "item_variation_data": { "item_id": "L62HXHFTZBGNTPGU6PA2WJ43", "name": "Donation to Samaritan Hospital", "ordinal": 1, "pricing_type": "FIXED_PRICING", "price_money": { "amount": 73400, "currency": "USD" }, "track_inventory": false, "available_for_booking": false, "sellable": true, "stockable": true } } ], "product_type": "REGULAR", "skip_modifier_screen": false, "description_html": "

Multiple donation level hospital charity donation

", "description_plaintext": "Multiple donation level hospital charity donation", "is_archived": false } }, "id_mappings": [ { "client_object_id": "#new-variation", "object_id": "7N3PYB53MJQID4I3KBFFPUMN" } ] } ``` {% /tab %} {% /tabset %} {% /tab %} {% /tabset %} ## See also * [Video: Sandbox 101: Catalog API Explained](https://www.youtube.com/watch?v=PX7TdOOu-0c) * [Design a Catalog](catalog-api/design-a-catalog) * [Catalog API](catalog-api/what-it-does) * [Work with Images](catalog-api/cookbook/create-catalog-image) --- # Update Catalog Objects > Source: https://developer.squareup.com/docs/catalog-api/update-catalog-objects > Status: PUBLIC > Languages: cURL > Platforms: All The UpsertCatalogObject endpoint updates one item at a time, whereas the BatchUpsertCatalogObjects endpoint can update multiple objects at the same time. **Applies to:** [Catalog API](catalog-api/what-it-does) {% subheading %}Learn how to update one catalog object at a time or multiple catalog objects at the same time.{% /subheading %} {% aside type="important" %} Sparse updates are not supported by the Catalog API. You must provide the full existing object in any update requests. {% /aside %} {% toc hide=true /%} ## Perform update operations {% aside type="info" %} If you experience a delay when performing an update operation, make sure to refresh your application to clear the client-side cache and retry the call. In rare occasions, the cause of the delay might be attributed to the backend, although Square makes every effort to update the catalog in real time. {% /aside %} To update a catalog object, call the [UpsertCatalogObject](https://developer.squareup.com/reference/square/catalog-api/upsert-catalog-object) or [BatchUpsertCatalogObjects](https://developer.squareup.com/reference/square/catalog-api/batch-upsert-catalog-objects) endpoint. The first endpoint updates one item at a time, whereas the second endpoint can handle updates of multiple objects at the same time. These are the same endpoints used to create items, item variations, and other types of catalog objects. To update an object, you must specify the object ID, version number, and type as well as other object properties. To create an object, you must specify the object type in addition to other object properties. The object ID and version number are created for you when the object is created. Given that the following item exists in a catalog: ```json { "object": { "type": "ITEM", "id": "YNDDANS6FVWXOUZ7HRTEE57I", "updated_at": "2020-11-02T21:36:30.016Z", "version": 1604352990016, "is_deleted": false, "present_at_all_locations": true, "item_data": { "name": "Coaching", "description": "I coach and you learn", "variations": [ { "type": "ITEM_VARIATION", "id": "GUN7HNQBH7ZRARYZN52E7O4B", "updated_at": "2020-11-02T21:36:30.016Z", "version": 1604352990016, "is_deleted": false, "present_at_all_locations": true, "item_variation_data": { "item_id": "YNDDANS6FVWXOUZ7HRTEE57I", "name": "Regular", "ordinal": 1, "pricing_type": "FIXED_PRICING", "price_money": { "amount": 8000, "currency": "USD" }, "service_duration": 3600000, "available_for_booking": true, "team_member_ids": [ "2_uNFkqPYqV-AZB-7neN" ] } } ], "product_type": "APPOINTMENTS_SERVICE", "skip_modifier_screen": false } } } ``` This item represents a `Coaching` service that the seller advertised with a tagline of `I coach and you learn`. At present, the seller only offers the `Regular` type of session that last 3,600,000 milliseconds (that is, 1 hour) and is billed at $80/hr. Suppose the seller wants to lower the price for a regular session from $80/hr to $70/hr to attract new customers. You can call the `UpsertCatalogObject` or `BatchUpsertCatalogObjects` endpoint and specify the item and the included item variation to be updated as the input. You can also call the endpoint and provide the item variation only as the input, because the update involves only the included item variation and doesn't otherwise affect the containing item. For reasons discussed next, you should perform the update operation on an object, instead of its parent object, with its own attribute values being modified. For this example, you should call the update endpoint on the affected item variation, instead of its containing item. The `UpsertCatalogObject` (or its batch version `BatchUpsertCatalogObjects`) endpoint embodies a POST operation. As such, the specified input overrides the original object. This means, when applying the endpoint on an item variation to lower the service price only, you must also preserve other previously assigned attribute values by explicitly restating all of them in the input. The following code example shows how to lower the session charge from $80/hr to $70/hr by updating the `price_money` from `8000` to `7000` on the embedded item variation only: ```` When the request succeeds, a `200 OK` response is returned with a payload similar to the following: ```json { "catalog_object": { "type": "ITEM_VARIATION", "id": "GUN7HNQBH7ZRARYZN52E7O4B", "updated_at": "2021-02-02T18:57:02.351Z", "version": 1612292222351, "is_deleted": false, "present_at_all_locations": true, "item_variation_data": { "item_id": "YNDDANS6FVWXOUZ7HRTEE57I", "name": "Regular", "pricing_type": "FIXED_PRICING", "price_money": { "amount": 7000, "currency": "USD" }, "service_duration": 3600000, "available_for_booking": true, "team_member_ids": [ "2_uNFkqPYqV-AZB-7neN" ] } } } ``` Notice that in the request payload, the original values of other attributes, such as `name`, `service_duration`, and `team_member_ids`, are also explicitly specified. If you fail to do so, these attributes are reassigned to their default values or not set at all and, hence, excluded from the updated object. As an illustration, try the following example request without explicitly specifying the `name`, `service_duration`, and `team_member_ids` attribute values and see what happens: ```` When the previous update request succeeds, a `200 OK` response returns the following result: ```json { "catalog_object": { "type": "ITEM_VARIATION", "id": "GUN7HNQBH7ZRARYZN52E7O4B", "updated_at": "2021-02-01T23:55:37.269Z", "version": 1612223737269, "is_deleted": false, "present_at_all_locations": true, "item_variation_data": { "item_id": "YNDDANS6FVWXOUZ7HRTEE57I", "name": "", "pricing_type": "FIXED_PRICING", "price_money": { "amount": 7000, "currency": "USD" }, "available_for_booking": true } } } ``` Notice that the `name` attribute is now an empty string, whereas the `service_duration` and `team_member_ids` are excluded from the updated item variation. ### Ensure continued inventory tracking To further demonstrate the need of performing the update options properly, examine how a catalog object should be updated while preserving its inventory tracking. When `track_inventory` is activated on an item variation, the in-stock quantity of the item variation is decremented when sales are made of the product represented by the item variation. When updating the price of a product, failing to also specify the `tracking_inventory = true` in the input accidentally interrupts the inventory tracking of the item variation, because the default value is `false`. ## Object version as a point of time Each time you call the `UpsertCatalogObject` endpoint, the affected catalog objects have their version numbers incremented as well. Updating an item variation affects both the item variation and its containing item. The `version` numbers on the item and item variation are both updated to the same value. You can verify this by calling the `RetrieveCatalogObject` endpoint and specifying the `id` (`YNDDANS6FVWXOUZ7HRTEE57I`) to retrieve the containing item. ```` The result is shown as follows: ```json { "object": { "type": "ITEM", "id": "YNDDANS6FVWXOUZ7HRTEE57I", "updated_at": "2021-02-02T18:57:02.351Z", "version": 1612292222351, "is_deleted": false, "present_at_all_locations": true, "item_data": { "name": "Coaching", "description": "I coach and you learn", "variations": [ { "type": "ITEM_VARIATION", "id": "GUN7HNQBH7ZRARYZN52E7O4B", "updated_at": "2021-02-02T18:57:02.351Z", "version": 1612292222351, "is_deleted": false, "present_at_all_locations": true, "item_variation_data": { "item_id": "YNDDANS6FVWXOUZ7HRTEE57I", "name": "Regular", "pricing_type": "FIXED_PRICING", "price_money": { "amount": 7000, "currency": "USD" }, "service_duration": 3600000, "price_description": "$80/hr", "available_for_booking": true, "team_member_ids": [ "2_uNFkqPYqV-AZB-7neN" ] } } ], "product_type": "APPOINTMENTS_SERVICE", "skip_modifier_screen": false } } } ``` Comparing the `version` value of the object of the `ITEM` type and the `version` value of the object of the `ITEM_VARIATION` type, you see both are upgraded to `1612292222351` from `1612242853018`. {% aside type="important" %} Unlike with item variation updates, if you update a [CatalogItem](https://developer.squareup.com/reference/square/objects/CatalogItem), only its version number is incremented. The version numbers of its variations are not incremented. {% /aside %} The version number thus represents a point of time in the history of a catalog. To ensure that no part of the history is rewritten, you must explicitly specify the object version when calling `UpsertCatalogObject` or `BatchUpsertCatalogObjects`. As an object version represents a point of time, a catalog version represents a time period up to and including the specified point of time as represented by the specified version number. Hence, calling [ListCatalog](https://developer.squareup.com/reference/square/catalog-api/list-catalog) with a specified catalog version returns all catalog objects with version numbers less than or equal to the specified version number. If the catalog version isn't specified, it returns all the catalog objects. For more information, see [Retrieve Catalog Objects](catalog-api/retrieve-catalog-objects). {% aside type="tip" %} When you call [CreateOrder](https://developer.squareup.com/reference/square/orders-api/CreateOrder) with a line item that includes a catalog variation ID and [catalog_version](https://developer.squareup.com/reference/square/objects/OrderLineItem#definition__property-catalog_version), the order uses the catalog object values from that specified version, not the current version. For instance, it uses the item variation price from the specified version instead of the current price. {% /aside %} ## Required attributes and modifiable properties When calling the `UpserCatalogObject` or `BatchUpsertCatalogObjects` endpoint, the input you specify as the payload overrides the original object values. However, some attributes are required, while others are optional. Certain required attributes serve to identify the object of interest. The `id`, `version`, and `type` attributes fall into such required attributes and must be explicitly specified in every call. Other required attributes depend on the presence or a specific value of a related property. For example, when updating an item variation, if `pricing_type` on an item variation is set to `FIXED_PRICING`, the `price_money` property must be specified. Another required attribute is the ID of the containing item (`item_id`) that is part of the `item_variation_data`. Failing to specify a required attribute in the input of the request results in a `400` error response. The resulting error message tells you what has gone wrong and can be useful to resolve the error. For example, if you forget to specify the `pricing_type` attribute value when `pricing_money` is set, you get the following error response: ```json { "errors": [ { "category": "INVALID_REQUEST_ERROR", "code": "INVALID_VALUE", "detail": "Item Variation with id GUN7HNQBH7ZRARYZN52E7O4B has no pricing_type" } ] } ``` On the other hand, if you attempt to set a `price_money` value on an item variation of the `VARIABLE_PRICING` type, you also get a `400` error response with the following error message: ```json { "errors": [ { "category": "INVALID_REQUEST_ERROR", "code": "INVALID_VALUE", "detail": "Item Variation with id GUN7HNQBH7ZRARYZN52E7O4B has VARIABLE_PRICING pricing_type with price_money set" } ] } ``` This offers an example of when an attribute must not be present in the update request payload. ## Change a service session from fixed pricing to variable pricing To update an item variation from `pricing_type` of `FIXED_PRICING` to `VARIABLE_PRICING`, follow this example to call the `UpsertCatalogObject` endpoint: ```` A successful response is as follows: ```json { "catalog_object": { "type": "ITEM_VARIATION", "id": "GUN7HNQBH7ZRARYZN52E7O4B", "updated_at": "2021-02-02T02:07:47.485Z", "version": 1612231667485, "is_deleted": false, "present_at_all_locations": true, "item_variation_data": { "item_id": "YNDDANS6FVWXOUZ7HRTEE57I", "name": "Regular", "pricing_type": "VARIABLE_PRICING", "service_duration": 3600000, "team_member_ids": [ "2_uNFkqPYqV-AZB-7neN" ] } } } ``` --- # Retrieve Catalog Objects > Source: https://developer.squareup.com/docs/catalog-api/retrieve-catalog-objects > Status: PUBLIC > Languages: All > Platforms: All Learn how to retrieve Square catalog objects of given IDs or versions using the Catalog API. **Applies to:** [Catalog API](catalog-api/what-it-does) | [Orders API](orders-api/what-it-does) {% subheading %}Learn how to use the Catalog API to get specific Square catalog objects by their IDs and versions.{% /subheading %} {% toc hide=true /%} ## Overview In the lifecycle of a catalog, a catalog object version represents a snapshot of the object at a particular time. The current version of any catalog object is available through the Catalog API. Earlier object versions are also available when your application uses the Orders API. When a seller creates an [Order](https://developer.squareup.com/reference/square/objects/order) and includes a catalog item variation, Square saves the version number of that variation at the time the order is created. If you later retrieve the order, you can view the item variations as they were when the order was created. {% aside type="tip" %} Order discounts, service charges, and taxes are also `Catalog` based and can be retrieved by the ID and version number stored in an `Order`. {% /aside %} ## Retrieve a catalog object by ID and version If you have the ID of an object, `RetrieveCatalogObject` lets you return the specified `Catalog` object. If the object has multiple versions (that is, they're created or updated at different times), you can specify an `Order.line_items[].catalog_version` value to get the catalog item variation in its state at the time the order was created. {% tabset %} {% tab id="Request" %} To get a catalog object by ID and version, an object with that ID and version must exist. If that combination of values doesn't exist, an error is returned. The following example retrieves a catalog object by ID and version: ```` {% /tab %} {% tab id="Response" %} ```json { "object": { "type": "ITEM", "id": "QZEQSRNMTCXWXQD2QLEVCSRA", "updated_at": "2020-08-25T22:56:43.556Z", "version": 1598396203556, "is_deleted": false, "present_at_all_locations": true, "item_data": { "name": "Product1", "description": "product", "visibility": "PRIVATE", "variations": [ { "type": "ITEM_VARIATION", "id": "C6MGLXXDLJ6I4QYZ6NHWOHO4", "updated_at": "2020-08-25T22:56:43.556Z", "version": 1598396203556, "is_deleted": false, "present_at_all_locations": true, "item_variation_data": { "item_id": "QZEQSRNMTCXWXQD2QLEVCSRA", "name": "Regular", "sku": "12345", "ordinal": 0, "pricing_type": "FIXED_PRICING", "price_money": { "amount": 2500, "currency": "USD" }, "location_overrides": [ { "location_id": "SNTR5190QMFGM", "track_inventory": true, "inventory_alert_type": "LOW_QUANTITY", "inventory_alert_threshold": 10 } ] } } ], "product_type": "REGULAR", "skip_modifier_screen": false, "ecom_available": false, "ecom_visibility": "UNINDEXED" } } } ``` If you provided a valid object ID and an invalid version, the error "Catalog object with ID `{OBJECT_ID}` not found" is returned. Retry the operation without specifying a version number. If an object is successfully returned, you know the version number from the first try isn't valid. {% /tab %} {% /tabset %} ### Get a catalog object used in an order An [Order](https://developer.squareup.com/reference/square/objects/order) that references catalog objects has a snapshot of those catalog objects at the time the order is created. If a seller updates their catalog items frequently, older orders are likely to reference the previous versions of those catalog items. To retrieve catalog objects from an [Order](https://developer.squareup.com/reference/square/objects/order), such as in `Order.taxes`, use the `Order.taxes[].catalog_object_id` and `Order.taxes[].catalog_version` values in your request. This returns the catalog tax object at that version, which might not be the current version. To get the current version, omit the `catalog_version` value in your next retrieve request. ``` "taxes": [ { "uid": "266ecbe5-51e1-4109-8c02-f6ae9a30c020", "catalog_object_id": "VS7Z2Z3ABXCDB7DUB57BA4W2", "catalog_version": 1715632004035, "name": "10PCTax", "percentage": "10.0", "type": "ADDITIVE", "applied_money": { "amount": 30, "currency": "USD" }, "scope": "LINE_ITEM", "auto_applied": true } ] ``` ## Retrieve multiple catalog objects by IDs and version If you have multiple object IDs, `BatchRetrieveCatalogObjects` lets you return the specified objects in a single call. If the objects have multiple versions, you can specify a version to filter the results. For example, if you request multiple catalog objects and specify version `1598467546497`, only the objects that match that version or older versions are returned. For example, if one object is at version `1598467546497` and another is at version `2198467546497`, only the object at version `1598467546497` is returned. {% tabset %} {% tab id="Request" %} The following cURL request shows how to retrieve two items at the catalog version of `1598467546497`: ```` {% /tab %} {% tab id="Response" %} The response includes the two requested objects because they were created or updated on or before the specified catalog version of `1598467546497`: ```json { "objects": [ { "type": "ITEM", "id": "QZEQSRNMTCXWXQD2QLEVCSRA", "updated_at": "2020-08-26T16:37:03.648Z", "version": 1598459823648, "is_deleted": false, "present_at_all_locations": true, "image_id": "6PM4GCSHU5LYKW2NHB2MXZHM", "item_data": { "name": "Product1", "description": "product", "visibility": "PRIVATE", "variations": [ { "type": "ITEM_VARIATION", "id": "C6MGLXXDLJ6I4QYZ6NHWOHO4", "updated_at": "2020-08-25T22:56:43.556Z", "version": 1598396203556, "is_deleted": false, "present_at_all_locations": true, "item_variation_data": { "item_id": "QZEQSRNMTCXWXQD2QLEVCSRA", "name": "Regular", "sku": "12345", "ordinal": 0, "pricing_type": "FIXED_PRICING", "price_money": { "amount": 2500, "currency": "USD" }, "location_overrides": [ { "location_id": "SNTR5190QMFGM", "track_inventory": true, "inventory_alert_type": "LOW_QUANTITY", "inventory_alert_threshold": 10 } ] } } ], "product_type": "REGULAR", "skip_modifier_screen": false, "ecom_available": false, "ecom_visibility": "UNINDEXED" } }, { "type": "ITEM", "id": "3KZ5V3SFVKGRCFQZI6JIMGVW", "updated_at": "2020-08-26T18:45:46.497Z", "version": 1498467546497, "is_deleted": false, "present_at_all_locations": true, "item_data": { "name": "AA Service", "variations": [ { "type": "ITEM_VARIATION", "id": "3RJAVZQKCD5T6GPVWQCYK647", "updated_at": "2020-08-26T18:45:46.497Z", "version": 1498467546497, "is_deleted": false, "present_at_all_locations": true, "image_id": "7WWYBOW5AYLEWFW62HQX7EP4", "item_variation_data": { "item_id": "3KZ5V3SFVKGRCFQZI6JIMGVW", "name": "AA SERVICE", "ordinal": 0, "pricing_type": "FIXED_PRICING", "price_money": { "amount": 50000, "currency": "USD" }, "inventory_alert_type": "NONE" } } ], "product_type": "APPOINTMENTS_SERVICE" } } ] } ``` {% /tab %} {% /tabset %} ## Retrieve a catalog object with referenced objects In a Square catalog, an object references other objects by their IDs. To retrieve the referenced objects with their properties, set the [include_related_objects](https://developer.squareup.com/reference/square/catalog-api/retrieve-catalog-object#query__property-include_related_objects) query parameter to `true` when calling [RetrieveCatalogObject](https://developer.squareup.com/reference/square/catalog-api/retrieve-catalog-object) or its [batch variant](https://developer.squareup.com/reference/square/catalog-api/batch-retrieve-catalog-objects). For example, a `CatalogPricingRule` object can reference a `CatalogDiscount`, `CatalogProductSet`, `CatalogTax`, and others. When calling `RetrieveCatalogObject`, specifying the ID of a pricing rule object and using defaults for all other input options, you get a compact result as follows: ```json { "object": { "type": "PRICING_RULE", "id": "DYOXHWTDIGV75BPSRY7E7FOD", "updated_at": "2021-04-23T04:36:33.649Z", "version": 1619152593649, "is_deleted": false, "present_at_all_locations": true, "pricing_rule_data": { "discount_id": "E3GXIY42XBSI7LRLFF42DYTS", "match_products_id": "FQAZS2FAPQKOXK5OUW3B7FXU", "exclude_products_id": "F4W3VBGEMPEPSI6Z27E5MT3F", "exclude_strategy": "MOST_EXPENSIVE", "application_mode": "AUTOMATIC", "discount_target_scope": "LINE_ITEM" } } } ``` {% tabset %} {% tab id="Request" %} The following example shows `include_related_objects` being explicitly set to `true`: ```` {% /tab %} {% tab id="Response" %} The response shows the following results, with detailed information about the (recursively) referenced objects: ```json { "object": { "type": "PRICING_RULE", "id": "DYOXHWTDIGV75BPSRY7E7FOD", "updated_at": "2021-04-23T04:36:33.649Z", "version": 1619152593649, "is_deleted": false, "present_at_all_locations": true, "pricing_rule_data": { "discount_id": "E3GXIY42XBSI7LRLFF42DYTS", "match_products_id": "FQAZS2FAPQKOXK5OUW3B7FXU", "exclude_products_id": "F4W3VBGEMPEPSI6Z27E5MT3F", "exclude_strategy": "MOST_EXPENSIVE", "application_mode": "AUTOMATIC", "discount_target_scope": "LINE_ITEM" } }, "related_objects": [ { "type": "DISCOUNT", "id": "E3GXIY42XBSI7LRLFF42DYTS", "updated_at": "2021-04-23T04:36:33.649Z", "version": 1619152593649, "is_deleted": false, "present_at_all_locations": true, "discount_data": { "name": "BOGO", "discount_type": "FIXED_PERCENTAGE", "percentage": "50.0", "application_method": "MANUALLY_APPLIED", "modify_tax_basis": "MODIFY_TAX_BASIS" } }, { "type": "PRODUCT_SET", "id": "FQAZS2FAPQKOXK5OUW3B7FXU", "updated_at": "2021-04-23T04:36:33.649Z", "version": 1619152593649, "is_deleted": false, "present_at_all_locations": true, "product_set_data": { "product_ids_all": [ "F4W3VBGEMPEPSI6Z27E5MT3F", "HXQMTXD223N5XQTDBMBUNDIH" ], "quantity_exact": 1 } }, { "type": "PRODUCT_SET", "id": "F4W3VBGEMPEPSI6Z27E5MT3F", "updated_at": "2021-04-23T04:36:33.649Z", "version": 1619152593649, "is_deleted": false, "present_at_all_locations": true, "product_set_data": { "product_ids_any": [ "QZEQSRNMTCXWXQD2QLEVCSRA" ], "quantity_exact": 2, "all_products": false } }, { "type": "ITEM", "id": "QZEQSRNMTCXWXQD2QLEVCSRA", "updated_at": "2021-04-27T21:08:38.635Z", "version": 1619557718635, "is_deleted": false, "custom_attribute_values": { "sq0ids-tDPX2MkYWBjjQSKR88V-BQ:online_readiness": { "name": "online_readiness", "custom_attribute_definition_id": "FSHYJTVR2BZ3E3LDZFCTD5AU", "type": "NUMBER", "number_value": "0.88742", "key": "sq0ids-tDPX2MkYWBjjQSKR88V-BQ:online_readiness" } }, "present_at_all_locations": true, "image_id": "6PM4GCSHU5LYKW2NHB2MXZHM", "item_data": { "name": "Safari adventure", "description": "service", "visibility": "PRIVATE", "category_id": "LPKD3DOEDBF6TKBYHX26E3DM", "tax_ids": [ "KBPWWOXZHOGNOSQ2LIVS4H27" ], "variations": [ { "type": "ITEM_VARIATION", "id": "C6MGLXXDLJ6I4QYZ6NHWOHO4", "updated_at": "2021-04-27T21:08:38.635Z", "version": 1619557718635, "is_deleted": false, "present_at_all_locations": true, "item_variation_data": { "item_id": "QZEQSRNMTCXWXQD2QLEVCSRA", "name": "Regular", "sku": "12345", "ordinal": 0, "pricing_type": "FIXED_PRICING", "price_money": { "amount": 2500, "currency": "USD" }, "location_overrides": [ { "location_id": "SNTR5190QMFGM", "track_inventory": true, "inventory_alert_type": "LOW_QUANTITY", "inventory_alert_threshold": 10 } ], "measurement_unit_id": "SDC4U3C332O5WJDARTUF6BAA" } } ], "product_type": "REGULAR", "skip_modifier_screen": false, "ecom_available": false, "ecom_visibility": "UNINDEXED" } }, { "type": "PRODUCT_SET", "id": "F4W3VBGEMPEPSI6Z27E5MT3F", "updated_at": "2021-04-23T04:36:33.649Z", "version": 1619152593649, "is_deleted": false, "present_at_all_locations": true, "product_set_data": { "product_ids_any": [ "QZEQSRNMTCXWXQD2QLEVCSRA" ], "quantity_exact": 2, "all_products": false } }, { "type": "PRODUCT_SET", "id": "HXQMTXD223N5XQTDBMBUNDIH", "updated_at": "2021-04-26T22:21:26.328Z", "version": 1619475686328, "is_deleted": false, "present_at_all_locations": true, "product_set_data": { "quantity_min": 1, "quantity_max": 3, "all_products": false } } ] } ``` {% /tab %} {% /tabset %} ## List catalog objects of any version When a call to the `ListCatalog` endpoint is expected to return a large set of objects, you might need to use [pagination](build-basics/common-api-patterns/pagination) to retrieve the results page by page. {% aside type="tip" %} When you call [CreateOrder](https://developer.squareup.com/reference/square/orders-api/CreateOrder) with a line item that includes a catalog variation ID and [catalog_version](https://developer.squareup.com/reference/square/objects/OrderLineItem#definition__property-catalog_version), the order uses the catalog object values from that specified version, not the current version. For instance, it uses the item variation price from the specified version instead of the current price. {% /aside %} To retrieve a catalog object without its ID, use [ListCatalog](https://developer.squareup.com/reference/square/catalog-api/list-catalog) to get a paged list of all objects created up to the time of the call. If you have specific information about the catalog objects, use [SearchCatalogObjects](catalog-api/search-catalog-objects) to filter and get a list based on that information. {% tabset %} {% tab id="Request" %} The following cURL example returns all the objects of any version in a (small) catalog: ```` {% /tab %} {% tab id="Response" %} ```json { "objects": [ { "type": "MEASUREMENT_UNIT", "id": "4RW2GG2JAZJUZJ2PICQWLOCE", "updated_at": "2020-08-25T21:26:38.674Z", "version": 1598390798674, "is_deleted": false, "present_at_all_locations": true, "measurement_unit_data": { "measurement_unit": { "volume_unit": "GENERIC_CUP", "type": "TYPE_VOLUME" }, "precision": 0 } }, { "type": "CATEGORY", "id": "BCXXYC5OXEQK4BQHFA22QEUI", "updated_at": "2020-08-25T22:42:33.028Z", "version": 1598395353028, "is_deleted": false, "present_at_all_locations": true, "category_data": { "name": "coffee" } }, { "type": "ITEM", "id": "BDWYGZO5QQWWEVFV6PAEP3BS", "updated_at": "2020-11-02T21:25:44.14Z", "version": 1604352344140, "is_deleted": false, "present_at_all_locations": true, "image_id": "7WWYBOW5AYLEWFW62HQX7EP4", "item_data": { "name": "adventure", "variations": [ { "type": "ITEM_VARIATION", "id": "PRAVBIFA4IDWI3IPO6KQVV2B", "updated_at": "2020-11-02T21:25:44.14Z", "version": 1604352344140, "is_deleted": false, "present_at_all_locations": true, "item_variation_data": { "item_id": "BDWYGZO5QQWWEVFV6PAEP3BS", "name": "8-day explore", "ordinal": 0, "pricing_type": "FIXED_PRICING", "price_money": { "amount": 250000, "currency": "USD" }, "transition_time": 0 } } ], "product_type": "APPOINTMENTS_SERVICE", "skip_modifier_screen": false } }, { "type": "MEASUREMENT_UNIT", "id": "AR3VHRKBMOMM3GSUVJOPDROE", "updated_at": "2020-10-26T23:42:21.33Z", "version": 1603755741330, "is_deleted": false, "present_at_all_locations": true, "measurement_unit_data": { "measurement_unit": { "time_unit": "GENERIC_DAY", "type": "TYPE_TIME" }, "precision": 1 } }, { "type": "MEASUREMENT_UNIT", "id": "D4O5QM2G4OK7UGL43QO6YSCG", "updated_at": "2020-10-26T23:44:17.751Z", "version": 1603755857751, "is_deleted": false, "present_at_all_locations": true, "measurement_unit_data": { "measurement_unit": { "time_unit": "GENERIC_HOUR", "type": "TYPE_TIME" }, "precision": 3 } }, ... ] } ``` {% /tab %} {% /tabset %} ## List catalog objects at a specific catalog version By specifying a catalog version as an input to the `ListCatalog` endpoint, you can determine all changes made at a particular point of time throughout the history of the catalog. {% tabset %} {% tab id="Request" %} To inspect what is added to or changed in the catalog, you can call `ListCatalog` with a specific catalog version as a query parameter to get only those objects of the specified version as well as those of earlier versions. The following cURL example returns `CatalogItem` objects at the catalog version of `1598467546497`: ```` {% /tab %} {% tab id="Response" %} The results include only objects created or updated up to the particular point of time corresponding to the specified catalog version. ```json { "objects": [ { "type": "ITEM", "id": "QZEQSRNMTCXWXQD2QLEVCSRA", "updated_at": "2020-08-26T16:37:03.648Z", "version": 1598459823648, "is_deleted": false, "present_at_all_locations": true, "image_id": "6PM4GCSHU5LYKW2NHB2MXZHM", "item_data": { "name": "Product1", "description": "product", "visibility": "PRIVATE", "variations": [ { "type": "ITEM_VARIATION", "id": "C6MGLXXDLJ6I4QYZ6NHWOHO4", "updated_at": "2020-08-25T22:56:43.556Z", "version": 1598396203556, "is_deleted": false, "present_at_all_locations": true, "item_variation_data": { "item_id": "QZEQSRNMTCXWXQD2QLEVCSRA", "name": "Regular", "sku": "12345", "ordinal": 0, "pricing_type": "FIXED_PRICING", "price_money": { "amount": 2500, "currency": "USD" }, "location_overrides": [ { "location_id": "SNTR5190QMFGM", "track_inventory": true, "inventory_alert_type": "LOW_QUANTITY", "inventory_alert_threshold": 10 } ] } } ], "product_type": "REGULAR", "skip_modifier_screen": false, "ecom_available": false, "ecom_visibility": "UNINDEXED" } }, { "type": "ITEM", "id": "TTWX5A7GKJAISB6XPT7NIHF5", "updated_at": "2020-08-26T18:45:46.497Z", "version": 1598467546497, "is_deleted": false, "present_at_all_locations": true, "image_id": "7WWYBOW5AYLEWFW62HQX7EP4", "item_data": { "name": "Service", "product_type": "APPOINTMENTS_SERVICE" } }, { "type": "ITEM", "id": "3KZ5V3SFVKGRCFQZI6JIMGVW", "updated_at": "2020-08-26T18:45:46.497Z", "version": 1598467546497, "is_deleted": false, "present_at_all_locations": true, "item_data": { "name": "AA Service", "variations": [ { "type": "ITEM_VARIATION", "id": "3RJAVZQKCD5T6GPVWQCYK647", "updated_at": "2020-08-26T18:45:46.497Z", "version": 1598467546497, "is_deleted": false, "present_at_all_locations": true, "image_id": "7WWYBOW5AYLEWFW62HQX7EP4", "item_variation_data": { "item_id": "3KZ5V3SFVKGRCFQZI6JIMGVW", "name": "AA SERVICE", "ordinal": 0, "pricing_type": "FIXED_PRICING", "price_money": { "amount": 50000, "currency": "USD" }, "inventory_alert_type": "NONE" } } ], "product_type": "APPOINTMENTS_SERVICE" } } ] } ``` {% /tab %} {% /tabset %} --- # Apply Taxes, Discounts, and Service Charges > Source: https://developer.squareup.com/docs/orders-api/apply-taxes-and-discounts > Status: BETA > Languages: All > Platforms: All Learn how to apply taxes and discount to an order's price calculation when using the Square Orders API. **Applies to:** [Orders API](orders-api/what-it-does) | [Catalog API](catalog-api/what-it-does) {% subheading %}Learn how to apply taxes and discount to an order's price calculation.{% /subheading %} {% toc hide=true /%} ## Overview Your application can apply taxes and discounts to orders and line items using either of the following options: * Your business logic applies taxes and discounts to order line items. * Square automatically applies taxes and discounts to order line items based on pricing rules and taxes that a seller defines in the catalog. With the first option, the application of taxes and discounts is encoded in your application. With the second option, the application of taxes and discounts is controlled by a seller who provides the application rules in their catalog. For information about how automatic taxes and discounts are applied by Square, see [Discounts, service charges, and taxes](orders-api/how-it-works#discounts-servicecharges-taxes). ## Your business logic applies taxes and discounts Set a fixed tax percentage or discount amount for an order or to its items. The values can be defined in a [CatalogTax](https://developer.squareup.com/reference/square/objects/CatalogTax), a [CatalogDiscount](https://developer.squareup.com/reference/square/objects/CatalogDiscount), or your own business logic. After your application receives these values, add `taxes` or `discounts` attributes to the order with the values. If you want to apply the values to individual line items, add `applied_taxes` or `applied_discounts` to those line items. If your taxes and discounts apply to the whole order, set the `taxes` or `discounts` scope to `ORDER`. Otherwise, set the scope to `LINE_ITEM`. Square calculates the tax and discounts to apply based on your values. The following are examples of `taxes` attributes you can add to an order: * The `taxes` that reference a predefined catalog tax to be applied. ```json { "taxes": [ { "uid": "STATE_SALES_TAX_UID", "catalog_object_id": "STATE_SALES_TAX_CATALOG_ID", "scope": "ORDER" } ] } ``` * The `taxes` that use business-logic-derived tax percentages. ```json { "taxes": [ { "uid": "STATE_SALES_TAX_UID", "scope": "ORDER", "name": "State Sales Tax", "percentage": "7.0" } ] } ``` The following are examples of `discounts` attributes that you can add to an order: * The `discounts` attributes that reference a predefined catalog discount to be applied. ```json { "discounts": [ { "uid": "EXPLICIT_DISCOUNT_UID", "scope": "ORDER", "catalog_object_id": "EXPLICIT_DISCOUNT_CATALOG_ID" } ] } ``` * The `discounts` attributes that define a business-logic-derived discount. ```json { "discounts": [ { "uid": "EXPLICIT_DISCOUNT_UID", "name": "Sale - $1.00 off", "amount_money": { "amount": 100, "currency": "USD" }, "scope": "ORDER" } ] } ``` The preceding examples set `ORDER` as the scope. Therefore, these values apply to all line items in the order. If the scope is limited to `LINE_ITEM`, individual line items must include `applied_taxes` or `applied_discounts` corresponding to the tax or discount that applies. The following examples are [CreateOrder](https://developer.squareup.com/reference/square/orders-api/create-order) requests that configure taxes and discounts explicitly for the order: * **Create an order with explicit taxes scoped to the entire order** - The following `CreateOrder` request defines an `ORDER`-scoped tax that applies to every line item in the order: ```` Similarly, you can explicitly define `discounts` that apply to the entire order. * **Create an order with explicit taxes scoped to line items** - The following `CreateOrder` request defines a tax that's scoped to `LINE_ITEM`. Individual line items to which the tax applies must include `applied_taxes` with a reference to the defined tax. The following example shows two line items, with the tax applied only to the second line item: ```` Similarly, you can define `discounts` and add `applied_discounts` to specific line items. You can create `LINE_ITEM` taxes and discounts ahead of time without referencing them from any line items. Later, when you're ready for the tax or discount to take effect, you can update the order to reference the tax or discount from the line-item level. {% aside type="info" %} If you use the `discounts`/`applied_discounts` method of applying discounts to an order or line items, any loyalty redemption rewards are also applied to the order. In this case, Square applies discount and reward in an additive fashion. {% /aside %} ### Block ORDER-scoped discounts and taxes from applying to individual line items When you have `ORDER`-scoped taxes or discounts, you can add the `pricing_blocklists` attribute to individual line items to identify the `ORDER`-scoped discounts or taxes you don't want to apply. ```json { "pricing_blocklists": { "blocked_discounts": [ { "uid": "BLOCKED_DISCOUNT_UID", "discount_uid": "ORDER_SCOPED_DISCOUNT_UID" } ], "blocked_taxes": [ { "uid": "BLOCKED_TAX_UID", "tax_uid": "ORDER_SCOPED_TAX_UID" } ] } } ``` {% anchor id="square-applies-values" /%} ## Square applies taxes and discounts When you set the `pricing_options` attribute for taxes or discounts to `true`, you are telling Square to calculate these values using pre-configured rules that you defined in the Square catalog. In this case, do not add Order `taxes`, `discounts`, `applied_taxes`, or `applied_discounts` fields. Instead, let Square add tax and discount amounts from your catalog rules For example, you can create a `CatalogTax` object defining a tax percentage (such as 10%). You can then enable the tax on a catalog item by setting the `tax_ids` attribute on the catalog item to be taxed. When your order line item refers to that taxed catalog item, Square taxes the order line item according to the catalog item `tax_ids` references. To apply these preconfigured taxes and discounts to an order's price calculation, set the `pricing_options` [(OrderPricingOptions](https://developer.squareup.com/reference/square/objects/OrderPricingOptions)) in the order to enable the automatic application of these preconfigured taxes and discounts. * Automatically apply discounts. ```json { "pricing_options": { "auto_apply_discounts": true } } ``` * Automatically apply taxes. ```json { "pricing_options": { "auto_apply_taxes": true } } ``` This automatic application of preconfigured taxes and discounts applies to all order lines whose catalog items are taxable. ### Block the automatic application of preconfigured taxes and discounts When you specify `pricing_options`, preconfigured taxes and discounts are automatically applied to an order's price calculation. You can block this automatic application to individual line items when creating an order or after the order is created. You might choose to block a preconfigured tax or discount if they shouldn't be applied to an order based on the business or tax rules. When creating an order, you can add `pricing_blocklists` [(OrderLineItemPricingBlocklists](https://developer.squareup.com/reference/square/objects/OrderLineItemPricingBlocklists)) to individual line items to identify preconfigured discounts and taxes that you don't want applied. ```json { "pricing_blocklists": { "blocked_discounts": [ { "uid": "BLOCKED_DISCOUNT_UID", "discount_catalog_object_id": "DISCOUNT_CATALOG_OBJECT_ID" } ], "blocked_taxes": [ { "uid": "BLOCKED_TAX_UID", "tax_catalog_object_id": "TAX_CATALOG_OBJECT_ID" } ] } } ``` ## Update an order to remove applied taxes and discounts After an order is created, you can call [UpdateOrder](https://developer.squareup.com/reference/square/orders-api/update-order) to unapply taxes and discounts previously applied to individual line items. In the request, you include `fields_to_clear` and specify the line item and specific tax or discount you want removed. ```json { "fields_to_clear": [ "line_items[LINE_ITEM_UID].applied_discounts[APPLIED_DISCOUNT_UID]", "line_items[LINE_ITEM_UID].applied_taxes[{{APPLIED_TAX_UID]" ] } ``` ## See also * [Square-Applied Order Discounts](orders-api/apply-taxes-and-discounts/auto-apply-discounts) * [Square-Applied Order Taxes](orders-api/apply-taxes-and-discounts/auto-apply-taxes) --- # Apply Catalog Taxes to Orders > Source: https://developer.squareup.com/docs/orders-api/apply-taxes-and-discounts/auto-apply-taxes > Status: BETA > Languages: All > Platforms: All Learn how to apply preconfigured taxes to an order using the Orders API. **Applies to:** [Orders API](orders-api/what-it-does) | [Catalog API](catalog-api/what-it-does) {% subheading %}Learn how to create orders with automatically applied catalog taxes.{% /subheading %} {% toc hide=true /%} ## Overview Pricing options configured for an order affect the order's price calculation. Use the pricing option to have Square apply catalog-defined taxes to line items, whether they're ad hoc items or based on catalog item variations. Before this automatic tax application feature was available, your application relied on the presence of an `order.taxes` object in the order as shown in the following example: ```json { "taxes": [ { "uid": "STATE_SALES_TAX_UID", "catalog_object_id": "BME4AVPBJG7ZCMJAK3PCQGK4", "scope": "ORDER" } ] } ``` If the `order.taxes` property isn't present in a `CreatOrder` request, Square cannot apply a tax to the order. For more information about manually taxing an order, see [Apply taxes and discounts](orders-api/apply-taxes-and-discounts#your-business-logic-applies-taxes-and-discounts). Instead of adding an `order.taxes` property to a `CreateOrder` request, add the `order.pricing_options` property as shown in the following example: ```json { "pricing_options": { "auto_apply_discounts": true, "auto_apply_taxes": true } } ``` When taxes are automatically applied, Square gets tax information from the seller's catalog. For catalog-based line items, taxes associated with the catalog item are applied. For ad hoc items, Square applies all [CatalogTax](https://developer.squareup.com/reference/square/objects/CatalogTax) objects that can be applied to custom amounts. {% aside type="important" %} If your `CreateOrder` request includes the `order.taxes` and `order.pricing_options.auto_apply_taxes` properties, the resulting order includes both types of taxes. This might result in the same taxes being applied twice to an order. {% /aside %} The following `CreateOrder` request creates an order for a cup of coffee, which is taxed twice. There's an automatically applied line item tax for the tax associated with the coffee catalog item and there's an order tax manually applied to the order: {% tabset %} {% tab id="Request" %} ```` {% /tab %} {% tab id="Response" %} The response shows the manually applied order-level tax of 40% and the 7.5% beverage tax applied to the coffee: ```json { "order": { "id": "eeOAZb3RIAlwIMwYX4SZ0o5Nd6LZY", "location_id": "VJN4XSBFTVPK9", "line_items": [ { "uid": "TpkTFofUspCyqTsYKuz6oB", "catalog_object_id": "WPDQBTNAZIEY22GPHS6GSQGM", "catalog_version": 1726603863060, "quantity": "1", "name": "Coffee", "variation_name": "Small", "base_price_money": { "amount": 100, "currency": "USD" }, "gross_sales_money": { "amount": 100, "currency": "USD" }, "total_tax_money": { "amount": 48, "currency": "USD" }, "total_discount_money": { "amount": 0, "currency": "USD" }, "total_money": { "amount": 148, "currency": "USD" }, "variation_total_price_money": { "amount": 100, "currency": "USD" }, "applied_taxes": [ { "uid": "1427b05f-ed9c-46aa-9e3c-2a305b405908", "tax_uid": "57b76431-5a7e-470f-a419-822183f70c50", "applied_money": { "amount": 8, "currency": "USD" } }, { "uid": "SOEFTaSjXOjaoYRydfqdEC", "tax_uid": "STATE_SALES_TAX_UID", "applied_money": { "amount": 40, "currency": "USD" } } ], "item_type": "ITEM", "total_service_charge_money": { "amount": 0, "currency": "USD" } } ], "taxes": [ { "uid": "STATE_SALES_TAX_UID", "catalog_object_id": "BME4AVPBJG7ZCMJAK3PCQGK4", "catalog_version": 1726603863060, "name": "catalog item tax", "percentage": "40.0", "type": "ADDITIVE", "applied_money": { "amount": 40, "currency": "USD" }, "scope": "ORDER" }, { "uid": "57b76431-5a7e-470f-a419-822183f70c50", "catalog_object_id": "65EJB2LTBA4E3LGIMHWGBCFX", "catalog_version": 1726597444206, "name": "Drink Tax", "percentage": "7.5", "type": "ADDITIVE", "applied_money": { "amount": 8, "currency": "USD" }, "scope": "LINE_ITEM", "auto_applied": true } ], "created_at": "2024-09-17T20:41:19.246Z", "updated_at": "2024-09-17T20:41:19.246Z", "state": "OPEN", "version": 1, "reference_id": "my-order-0001", "total_tax_money": { "amount": 48, "currency": "USD" }, "total_discount_money": { "amount": 0, "currency": "USD" }, "total_tip_money": { "amount": 0, "currency": "USD" }, "total_money": { "amount": 148, "currency": "USD" }, "total_service_charge_money": { "amount": 0, "currency": "USD" }, "net_amounts": { "total_money": { "amount": 148, "currency": "USD" }, "tax_money": { "amount": 48, "currency": "USD" }, "discount_money": { "amount": 0, "currency": "USD" }, "tip_money": { "amount": 0, "currency": "USD" }, "service_charge_money": { "amount": 0, "currency": "USD" } }, "source": { "name": "Sandbox for sq0idp-IzilfMqQrp250DGdNk7FQw" }, "customer_id": "QKZMSWM0SKSHFYS7S20SH62EQR", "pricing_options": { "auto_apply_discounts": true, "auto_apply_taxes": true }, "net_amount_due_money": { "amount": 148, "currency": "USD" } } } ``` {% /tab %} {% /tabset %} ## Ad hoc line items If a seller wants to charge an arbitrary amount on an order without referencing an item from the catalog, they create an order line item without first selecting one from the Item library. In the `order.line_items[].name` property, your application uses whatever item name and price the seller inputs. For example, a buyer gets a pair of socks from a sale bin on the sidewalk in front of a store. All the socks in the bin are discounted to $1 and are no longer in the catalog. The clerk types "socks" in the checkout page of your application and inputs $1.00. Your application creates an ad hoc item with the name "socks" and a custom price of `100` ($1.00). The `order.line_items[].base_price_money` property holds whatever amount the seller wants to charge. It has a custom amount because the base price doesn't come from the catalog. The ad hoc line item doesn't reference a catalog item variation. For more information about taxing ad hoc items, see [Catalog taxes](#catalog-taxes). {% anchor id="catalog-taxes" /%} ## Catalog taxes Before your application can apply preconfigured taxes to an order, the seller needs to define one or more [CatalogTax](https://developer.squareup.com/reference/square/objects/CatalogTax) items. The `CatalogTax` has properties that define how the tax is calculated in an order. However, the property that differentiates a catalog tax that applies to catalog items and a tax that also applies to ad hoc items is the `applies_to_custom_amounts` Boolean property. The following two tax object examples show both types of catalog taxes: {% tabset %} {% tab id="Catalog-item-only tax" %} This tax doesn't apply to ad hoc line items. ```json { "type": "TAX", "id": "QZEJM5A6Y3KFTKHWAVDKXU2O", "updated_at": "2024-09-11T22:25:20.797Z", "created_at": "2024-09-11T22:25:20.797Z", "version": 1726093520797, "is_deleted": false, "present_at_all_locations": true, "tax_data": { "name": "catalog item tax", "calculation_phase": "TAX_SUBTOTAL_PHASE", "inclusion_type": "ADDITIVE", "percentage": "10.0", "applies_to_custom_amounts": false, "enabled": true } } ``` {% /tab %} {% tab id="Ad hoc item compatible" %} This tax applies all order line items, ad hoc and catalog backed. ```json { "type": "TAX", "id": "3U6CY3DXYCFSJN5GLTBUSSQJ", "updated_at": "2024-04-01T22:07:40.987Z", "created_at": "2024-04-01T22:07:40.987Z", "version": 1712009260987, "is_deleted": false, "present_at_all_locations": true, "tax_data": { "name": "Sales tax", "calculation_phase": "TAX_SUBTOTAL_PHASE", "inclusion_type": "ADDITIVE", "percentage": "40.0", "applies_to_custom_amounts": true, "enabled": true } } ``` {% /tab %} {% /tabset %} {% aside type="important" %} The default value of a new `CatalogTax.applies_to_custom_amounts` property is `true`. You need to set `"applies_to_custom_amounts": false` in your `UpsertCatalogObject` request if you want the tax to apply to only catalog-item-based line items. {% /aside %} ## Taxing for ad hoc items When your application creates an order that specifies a line item without referencing a catalog item variation, but just supplies an item name, quantity, and base price, it's creating an ad hoc item as shown in the following example `CreateOrder` request and response. {% tabset %} {% tab id="Request" %} The following request shows an order for a pair of bright red wool socks from the sale bin in front of the store. Because the seller defined the 40% catalog tax (shown previously) and this order is asking for an automatically applied tax, Square applies all applicable taxes as shown in the response. ```json { "idempotency_key": "PBU2WR26J7RUMISJBAT5YEG3", "order": { "reference_id": "my-order-0009", "location_id": "{LOCATION_ID}", "customer_id": "{CUSTOMER_ID}", "line_items": [ { "name": "Last year's wool socks", "quantity": "1", "variation_name": "Medium", "base_price_money": { "amount": 100, "currency": "USD" } } ], "pricing_options": { "auto_apply_discounts": true, "auto_apply_taxes": true } } } ``` {% /tab %} {% tab id="Response" %} Square applies the 40% tax to the order, which means the buyer pays a $0.40 tax. ```json { "order": { "id": "yOPflvpBOwhyIvlMV584DLobOqCZY", "location_id": "{LOCATION_ID}", "line_items": [ { "uid": "VDgUgyJ4xZEIqZtn5yE5WD", "quantity": "1", "name": "Last year's wool socks", "variation_name": "Medium", "base_price_money": { "amount": 100, "currency": "USD" }, "gross_sales_money": { "amount": 100, "currency": "USD" }, "total_tax_money": { "amount": 40, "currency": "USD" }, "total_discount_money": { "amount": 0, "currency": "USD" }, "total_money": { "amount": 140, "currency": "USD" }, "variation_total_price_money": { "amount": 100, "currency": "USD" }, "applied_taxes": [ { "uid": "9b281221-b221-47a3-ba45-765403e9f9c0", "tax_uid": "cff9816d-f3e9-454a-8d55-fa227459df01", "applied_money": { "amount": 40, "currency": "USD" } } ], "item_type": "ITEM", "total_service_charge_money": { "amount": 0, "currency": "USD" } } ], "taxes": [ { "uid": "cff9816d-f3e9-454a-8d55-fa227459df01", "catalog_object_id": "BME4AVPBJG7ZCMJAK3PCQGK4", "catalog_version": 1726093602329, "name": "catalog item tax", "percentage": "40.0", "type": "ADDITIVE", "applied_money": { "amount": 40, "currency": "USD" }, "scope": "LINE_ITEM", "auto_applied": true } ], "created_at": "2024-09-11T22:33:15.077Z", "updated_at": "2024-09-11T22:33:15.077Z", "state": "OPEN", "version": 1, "reference_id": "my-order-0009", "total_tax_money": { "amount": 40, "currency": "USD" }, "total_discount_money": { "amount": 0, "currency": "USD" }, "total_tip_money": { "amount": 0, "currency": "USD" }, "total_money": { "amount": 140, "currency": "USD" }, "total_service_charge_money": { "amount": 0, "currency": "USD" }, "net_amounts": { "total_money": { "amount": 140, "currency": "USD" }, "tax_money": { "amount": 40, "currency": "USD" }, "discount_money": { "amount": 0, "currency": "USD" }, "tip_money": { "amount": 0, "currency": "USD" }, "service_charge_money": { "amount": 0, "currency": "USD" } }, "source": { "name": "Sandbox for sq0idp-IzilfMqQrp250DGdNk7FQw" }, "customer_id": "QKZMSWM0SKSHFYS7S20SH62EQR", "pricing_options": { "auto_apply_discounts": true, "auto_apply_taxes": true }, "net_amount_due_money": { "amount": 140, "currency": "USD" } } } ``` {% /tab %} {% /tabset %} ## Taxing for catalog-based line items First, create the products you want to sell and a tax you want to use. Then, create example orders to explore how having Square apply preconfigured taxes affects the order's pricing calculation: * Create an order for coffee. In the request, specify the pricing option for Square to apply a preconfigured tax. The tax applies to all line items in the order. * Update the order to remove the Square-applied tax from specific line items. * Create an order with Square-applied taxes enabled, but block specific line items. For more information, see [Square applies taxes and discounts](orders-api/apply-taxes-and-discounts#square-applies-values). ### Create a coffee product for sale Call [BatchUpsertCatalogObjects](https://developer.squareup.com/reference/square/catalog-api/batch-upsert-catalog-objects) to create two items in the catalog: * A [CatalogTax](https://developer.squareup.com/reference/square/objects/CatalogTax) object with a 10% tax that applies to all line items. * A [CatalogItem](https://developer.squareup.com/reference/square/objects/CatalogItem) coffee object with the tax enabled. ```` In the response, verify that the catalog objects are created. The coffee items (of the `ITEM` type) should have the `tax_ids` field showing the tax enabled on it. You need the coffee item variation ID to place the coffee order in the next step. {% aside type="info" %} If you created the two taxes shown in [Catalog taxes](#catalog-taxes), both apply to this example. `"applies_to_custom_amounts": true` means the tax applies to catalog items and ad hoc items. `"applies_to_custom_amounts": false` means the tax applies to only catalog items. {% /aside %} ### Test Square-applied taxes #### Create an order with Square-applied taxes enabled Call [CreateOrder](https://developer.squareup.com/reference/square/orders-api/create-order) to create an order for a cup of coffee. In the request, include `pricing_options` to enable `auto_apply_taxes`. ```` In the response, see how pricing calculations are affected by Square's application of preconfigured taxes for the item. For example: * The line item includes `applied_taxes`, which identifies the applied taxes. * The order includes `taxes`, which provides details about the applied taxes. Square calculates taxes using rounding rules known as Bankers' Rounding. For information about these rounding rules, see [Rounding rules](orders-api/price-adjustments#rounding-rules). The following example response shows a partial `Order` object with only the relevant fields: ```json { "order": { "id": "tf5qPnDsDZmMFL1URXuGw6XyPg4F", "location_id": "7WQ0KXC8ZSD90", "line_items": [ { "uid": "NG6toHsDGEQ55E9xrIU3DB", "catalog_object_id": "UOYGJJLCO6IPMLS74RBHBXP6", "quantity": "1", "name": "8 oz coffee", "variation_name": "", "base_price_money": { "amount": 300, "currency": "USD" }, "total_tax_money": { "amount": 30, "currency": "USD" }, "applied_taxes": [ { "uid": "2htIbrU5QIHrV3QRy1jnED", "tax_uid": "EUzV9RDN1IwueboPLyw6B", "applied_money": { "amount": 30, "currency": "USD" } } ], } ], "taxes": [ { "uid": "EUzV9RDN1IwueboPLyw6B", "catalog_object_id": "EJPKOFCKEQPMERIW5N6PMHYE", "name": "10PCTax", "percentage": "10.0", "type": "ADDITIVE", "applied_money": { "amount": 30, "currency": "USD" }, "scope": "LINE_ITEM", "auto_applied": true } ], "total_tax_money": { "amount": 30, "currency": "USD" }, "total_money": { "amount": 330, "currency": "USD" }, "pricing_options": { "auto_apply_taxes": true } } } ``` #### Update an order to remove previously applied taxes You can call [UpdateOrder](https://developer.squareup.com/reference/square/orders-api/update-order) to remove specific taxes applied to specific line items. Add `fields_to_clear` to identify specific line items and specific the taxes to remove. Update the preceding order by removing the specific taxes applied to the line item. Make sure you provide the order ID, location ID, line item ID, and ID of the applied tax that you want to remove. ```` In the response, review the pricing calculation updates. For example: * The line item includes `pricing_blocklists`, showing the taxes that are blocked from being automatically applied. * The specific line item shows no taxes and the order pricing is updated accordingly. The response shows the line item with specific taxes blocked that were previously applied. ```json { "order": { "id": "tf5qPnDsDZmMFL1URXuGw6XyPg4F", "location_id": "7WQ0KXC8ZSD90", "line_items": [ { "uid": "NG6toHsDGEQ55E9xrIU3DB", "catalog_object_id": "UOYGJJLCO6IPMLS74RBHBXP6", "quantity": "1", "name": "8 oz coffee", "variation_name": "", "base_price_money": { "amount": 300, "currency": "USD" }, "total_tax_money": { "amount": 0, "currency": "USD" }, "total_money": { "amount": 300, "currency": "USD" }, "item_type": "ITEM", "pricing_blocklists": { "blocked_taxes": [ { "uid": "kREIvFWsK344VAoDXgQ7bB", "tax_catalog_object_id": "EJPKOFCKEQPMERIW5N6PMHYE" } ] } } ], "total_tax_money": { "amount": 0, "currency": "USD" }, "total_money": { "amount": 300, "currency": "USD" }, "pricing_options": { "auto_apply_taxes": true } } } ``` #### Create an order with Square-applied taxes enabled, but block specific line items Call `CreateOrder` to create an order for the coffee. In the request: * Specify `pricing_options` for Square-applied taxes. * For the specific line item, add `pricing_blocklists` and include the ID of the `CatalogTax` object to block it from having taxes applied by Square. Make sure you provide the coffee item variation ID, location ID, and ID of the tax (you previously created) that you want to block from application by Square. ```` In the response, verify the pricing calculations. Because you blocked the line item from having taxes applied by Square, there are no taxes applied. The following is an example response fragment: ```json { "order": { "id": "TUKUwDEc8KyJzDhDm9OIvxg7Hd4F", "location_id": "7WQ0KXC8ZSD90", "line_items": [ { "uid": "xjltiLQzOGHmitTPlLjD3", "catalog_object_id": "UOYGJJLCO6IPMLS74RBHBXP6", "quantity": "1", "name": "8 oz coffee", "variation_name": "", "base_price_money": { "amount": 300, "currency": "USD" }, "total_tax_money": { "amount": 0, "currency": "USD" }, "pricing_blocklists": { "blocked_taxes": [ { "uid": "blocked-tax-uid1", "tax_catalog_object_id": "EJPKOFCKEQPMERIW5N6PMHYE" } ] } } ], "total_tax_money": { "amount": 0, "currency": "USD" }, "total_discount_money": { "total_money": { "amount": 300, "currency": "USD" }, "tax_money": { "amount": 0, "currency": "USD" }, "pricing_options": { "auto_apply_taxes": true } } } ``` --- # Apply Square-Defined Discounts to Orders > Source: https://developer.squareup.com/docs/orders-api/apply-taxes-and-discounts/auto-apply-discounts > Status: BETA > Languages: All > Platforms: All An example walkthrough showing how to apply preconfigured discounts to an order (the Orders API). **Applies to:** [Orders API](orders-api/what-it-does) | [Catalog API](catalog-api/what-it-does) {% subheading %}Learn how to apply preconfigured discounts to an order.{% /subheading %} {% toc hide=true /%} ## Overview Pricing options configured for an order affect the way an order's price is calculated. For more information, see [Square applies taxes and discounts](orders-api/apply-taxes-and-discounts#square-applies-values). Use the pricing option to have Square apply discounts based on pricing rules you defined in the catalog. First, create the products you want to sell. Define discounts on these items by creating a pricing rule. Using the Catalog API, do the following: * Create two products ([CatalogItem](https://developer.squareup.com/reference/square/objects/CatalogItem) objects). For this exercise, coffee and tea items are created. * Create a pricing rule that offers a 10% discount on these products: * Create a product set ([CatalogProductSet](https://developer.squareup.com/reference/square/objects/CatalogProductSet) object) consisting of the coffee and tea items. The pricing rule you create is applied by Square to items in the product set. * Create a discount ([CatalogDiscount](https://developer.squareup.com/reference/square/objects/CatalogDiscount) object) that defines the percentage discount (10%). * Create a pricing rule ([CatalogPricingRule](https://developer.squareup.com/reference/square/objects/CatalogPricingRule) object) that identifies the discount and the product set to which the discount applies. You then create example orders to explore how the Square-applied discounts affect the order's pricing calculation: * Create an order for the coffee and tea items. In the request, specify the pricing option ([OrderPricingOptions](https://developer.squareup.com/reference/square/objects/OrderPricingOptions)) to request a Square-applied discount. The discount applies to all line items in the order. * Create an order to explore how the pricing list ([OrderLineItemPricingBlocklists](https://developer.squareup.com/reference/square/objects/OrderLineItemPricingBlocklists)) is used to block Square from applying the discount to specific line items. * Update the order to remove the Square-applied discount from specific line items. You can explore how to use `fields_to_clear` in [UpdateOrder](https://developer.squareup.com/reference/square/orders-api/update-order) to remove discounts from specific line items. For more information, see [How pricing rule-based discounts work](catalog-api/cookbook/auto-apply-discounts#how-pricing-rule-based-discounts-work). ## 1. Create two products for sale Call [BatchUpsertCatalogObjects](https://developer.squareup.com/reference/square/catalog-api/batch-upsert-catalog-objects) to create two `CatalogItem` objects (coffee and tea items). ```` Verify the response. Note the following information: * You need the item IDs to create a product set. * You need the item variation IDs to place an order. The following is an example response fragment: ```json { "objects": [ { "type": "ITEM", }, { "type": "ITEM", } ], "id_mappings": [ { "client_object_id": "#my-coffee", "object_id": "A7AMURM7GOAIKXPOIEYRHQBL" }, { "client_object_id": "#my-tea", "object_id": "L2T4V6U5HZTXUVLDTXV5NHLO" }, { "client_object_id": "#small-hot-coffee", "object_id": "TUC4Z3GUU7FSMVGOHKHZRW7N" }, { "client_object_id": "#small-hot-tea", "object_id": "FJRIZ2O4AI4EMCA6KP5FLDAJ" } ] } ``` ## 2. Create a rule-based discount for the products This step configures the products with a rule-based discount. The pricing rule you create applies to a product set. Therefore, you first create a product set consisting of the coffee and tea items: * Create a [CatalogProductSet](https://developer.squareup.com/reference/square/objects/CatalogProductSet) object to which the rule applies. * Create a [CatalogDiscount](https://developer.squareup.com/reference/square/objects/CatalogDiscount) object that defines a percentage-based discount. * Create a [CatalogPricingRule](https://developer.squareup.com/reference/square/objects/CatalogPricingRule) object that identifies the discount and the product set to which the discount applies. Call [BatchUpsertCatalogObjects](https://developer.squareup.com/reference/square/catalog-api/batch-upsert-catalog-objects) to create all these items in a single request. Update the code by providing the IDs of the coffee and tea items for the product set. ```` The following is an example response fragment: ```json { "objects": [ { "type": "PRODUCT_SET", "id": "2TFKNV52NE4OUL4TQ36JXDUX", "product_ids_any": [ "A7AMURM7GOAIKXPOIEYRHQBL", "L2T4V6U5HZTXUVLDTXV5NHLO" ] } }, { "type": "DISCOUNT", "id": "NQGJHG7AJJKMMW4ZCBBJJ4RG", "discount_data": { "name": "10% discount", "discount_type": "FIXED_PERCENTAGE", "percentage": "10.0" } }, { "type": "PRICING_RULE", "pricing_rule_data": { "name": "PRICINGRULE10PCCOFFEEDISCOUNT", "discount_id": "NQGJHG7AJJKMMW4ZCBBJJ4RG", "match_products_id": "2TFKNV52NE4OUL4TQ36JXDUX", "application_mode": "AUTOMATIC" } } ], "id_mappings": [ { "client_object_id": "#ProductSetID", "object_id": "2TFKNV52NE4OUL4TQ36JXDUX" }, { "client_object_id": "#DiscountID", "object_id": "NQGJHG7AJJKMMW4ZCBBJJ4RG" }, { "client_object_id": "#my-first-pricing-rule1", "object_id": "TL3AYTOI4DB4HYTL2WK3QJ6J" } ] } ``` ## 3. Test Square-applied discounts Now you're ready to create orders and explore Square-applied discounts using pricing options. ### 3.1 Create an order with Square-applied discounts enabled Call [CreateOrder](https://developer.squareup.com/reference/square/orders-api/create-order) to create an order for a cup of coffee. The request includes the `pricing_options` with `auto_apply_discounts` enabled. Make sure you provide the variation ID of the small coffee in the request. ```` In the response, notice how pricing calculations are affected by the Square's application of the discounts configured for the items. For example: * The line item includes `applied_discounts`, which identifies the applied discount. * The order includes `discounts`, which provides details about the applied discount. The following is an example response fragment: ```json { "order":{ "id":"5FLV8dgGYHgRdrE4XOR9W8RMxh4F", "location_id":"7WQ0KXC8ZSD90", "line_items":[ { "uid":"PpAcZ9GNazqgGpy99BHbUC", "catalog_object_id":"TUC4Z3GUU7FSMVGOHKHZRW7N", "quantity":"1", "name":"8 oz coffee", "variation_name":"", "base_price_money":{ "amount":300, "currency":"USD" }, "total_discount_money":{ "amount":30, "currency":"USD" }, "applied_discounts":[ { "uid":"ApDUTXKYyDukeiA98cG6mD", "discount_uid":"a5nircWuDBWzPBh797O5SD", "applied_money":{ "amount":30, "currency":"USD" } } ], "item_type":"ITEM" } ], "discounts":[ { "uid":"a5nircWuDBWzPBh797O5SD", "catalog_object_id":"NQGJHG7AJJKMMW4ZCBBJJ4RG", "name":"10% discount", "percentage":"10.0", "applied_money":{ "amount":30, "currency":"USD" }, "type":"FIXED_PERCENTAGE", "scope":"LINE_ITEM", "pricing_rule_id":"TL3AYTOI4DB4HYTL2WK3QJ6J" } ], "total_money":{ "amount":270, "currency":"USD" }, "pricing_options":{ "auto_apply_discounts":true } } } ``` ### 3.2 Update an order to remove previously applied discounts You can call [UpdateOrder](https://developer.squareup.com/reference/square/orders-api/update-order) to remove discounts applied to specific line items. Add `fields_to_clear` to identify the line items and discounts you want to remove. Update the preceding order by removing the discount applied to the line item. Make sure you provide the order ID, location ID, line item ID, and ID of the discount you want to remove. ```` In the response, review the pricing calculation updates. For example: * The line item includes `pricing_blocklists`, which shows the discount that's blocked from being applied by Square. * The line item shows no discount and the order pricing is updated accordingly. ```json { "order": { "id": "5FLV8dgGYHgRdrE4XOR9W8RMxh4F", "location_id": "7WQ0KXC8ZSD90", "line_items": [ { "uid": "PpAcZ9GNazqgGpy99BHbUC", "catalog_object_id": "TUC4Z3GUU7FSMVGOHKHZRW7N", "quantity": "1", "name": "8 oz coffee", "variation_name": "", "base_price_money": { "amount": 300, "currency": "USD" }, "total_discount_money": { "amount": 0, "currency": "USD" }, "pricing_blocklists": { "blocked_discounts": [ { "uid": "5vcvLw4SgLJhCtxzXESzRD", "discount_catalog_object_id": "NQGJHG7AJJKMMW4ZCBBJJ4RG" } ] } } ], } } ``` ### 3.3 Create an order with Square-applied discounts enabled, but block specific line items Create an order for both coffee and tea, but block one of the items from the Square-applied discount. In the following `CreateOrder` request: * `pricing_options` is specified to request Square-applied discounts. * One of the line items specifies `pricing_blocklists` and includes `discount_catalog_object_id` to block the discount from being applied. Make sure you provide the coffee and tea item variation IDs, location ID, and the ID of the `CatalogDiscount` you created in step 2. ```` In the response, verify the pricing calculations. The discount is applied by Square to only one item. The following is an example response fragment: ```json { "order": { "id": "H6cee9rVqMpk72u7PBNHpXwRzb4F", "location_id": "7WQ0KXC8ZSD90", "line_items": [ { "uid": "65LYqUkTc8RRpnvDCQGMFD", "catalog_object_id": "C4GMNPPM72TKN6ZCQ2P6I7EA", "quantity": "1", "name": "8 oz coffee", "variation_name": "", "base_price_money": { "amount": 300, "currency": "USD" }, "total_discount_money": { "amount": 30, "currency": "USD" }, "applied_discounts": [ { "uid": "BMzT5qieOsZE6xxV9YukI", "discount_uid": "BQbtlz2qPEDm1Krbb8W4s", "applied_money": { "amount": 30, "currency": "USD" } } ], }, { "uid": "DGguEBcQASRM1b4QdUNNfD", "catalog_object_id": "4I3XGUSLC4GYG5TV3RGYFCLE", "quantity": "1", "name": "8 oz tea", "variation_name": "", "base_price_money": { "amount": 200, "currency": "USD" }, "total_discount_money": { "amount": 0, "currency": "USD" }, "pricing_blocklists": { "blocked_discounts": [ { "uid": "blocked-discount-uid1", "discount_catalog_object_id": "62PZMXOYOVQFAAPH6XXNGOWB" } ] } } ], "discounts": [ { "uid": "BQbtlz2qPEDm1Krbb8W4s", "catalog_object_id": "62PZMXOYOVQFAAPH6XXNGOWB", "name": "10% discount", "percentage": "10.0", "applied_money": { "amount": 30, "currency": "USD" }, "type": "FIXED_PERCENTAGE", "scope": "LINE_ITEM", "pricing_rule_id": "MJU7VWXVBTVDEGME7SWUTQD7" } ], "total_discount_money": { "amount": 30, "currency": "USD" }, "total_money": { "amount": 470, "currency": "USD" }, "net_amounts": { "total_money": { "amount": 470, "currency": "USD" }, "discount_money": { "amount": 30, "currency": "USD" }, }, "pricing_options": { "auto_apply_discounts": true } } } ``` --- # Search for Items and Objects > Source: https://developer.squareup.com/docs/catalog-api/search-catalog > Status: PUBLIC > Languages: cURL > Platforms: All Learn how to search for objects programmatically using the SearchCatalogItems and SearchCatalogObjects endpoints. **Applies to:** [Catalog API](catalog-api/what-it-does) {% subheading %}Learn how to search for catalog items of any product type or catalog objects of any type.{% /subheading %} {% toc hide=true /%} ## Overview A Square catalog can include different [types](https://developer.squareup.com/reference/square/objects/CatalogObject#definition__property-type) of objects, such as `ITEM`, `ITEM_VARIATION`, `CATEGORY`, `TAX`, and `DISCOUNT`. As the catalog grows, it's crucial to have strong search capabilities to find the most relevant data for an application's needs. To support catalog searches, the [Catalog API](https://developer.squareup.com/reference/square/catalog-api) offers the [SearchCatalogItems](https://developer.squareup.com/reference/square/catalog-api/search-catalog-items) and [SearchCatalogObjects](https://developer.squareup.com/reference/square/catalog-api/search-catalog-objects) endpoints, which can use various query filters. These filters help refine searches by matching conditions against the following attributes: * **System attributes** - Such as the creation time of an object, its current status (active or deleted), and whether related objects should be included. * **Searchable attributes** - Such as `name`, `description`, and `SKU`. * **Custom attributes** - Defined by the seller or developer, these attributes are specific to `ITEM` or `ITEM_VARIATION` types and are based on the [CatalogCustomAttributeDefinition](https://developer.squareup.com/reference/square/objects/CatalogCustomAttributeDefinition) type. ## Endpoints The Catalog API offers two endpoints for searching a Square catalog, each suited to different needs: * [SearchCatalogItems](https://developer.squareup.com/reference/square/catalog-api/search-catalog-items) - This endpoint only searches among catalog items or item variations and uses various query filters, including custom attribute filters. It's particularly useful when items have custom attributes. * [SearchCatalogObjects](https://developer.squareup.com/reference/square/catalog-api/search-catalog-objects) - This endpoint allows you to search for any type of catalog object using multiple search properties, including [CatalogQuery](https://developer.squareup.com/reference/square/objects/CatalogQuery). It can return deleted objects if the `include_deleted_objects` filter is set to `true`. However, it doesn't support custom attribute filters. The key differences between the endpoints: * **SearchCatalogItems** - Only searches `ITEM` and `ITEM_VARIATION` object types, supports custom attribute filters, and offers flexible and expressive query expressions. * **SearchCatalogObjects** - Searches all object types and returns deleted objects but lacks support for custom attribute filters. The endpoints use different input formats and query filters. If a search is expected to return many objects, [pagination](build-basics/common-api-patterns/pagination) might be necessary to retrieve results in batches. ## See also * [Call the SearchCatalogItems Endpoint](catalog-api/search-catalog-items) * [Call the SearchCatalogObjects Endpoint](catalog-api/search-catalog-objects) --- # Call the SearchCatalogItems Endpoint > Source: https://developer.squareup.com/docs/catalog-api/search-catalog-items > Status: PUBLIC > Languages: cURL > Platforms: All Learn how to search for items or item variations using one or more supported query filters. **Applies to:** [Catalog API](catalog-api/what-it-does) {% subheading %}Learn how to search for items or item variations using one or more supported query filters.{% /subheading %} {% toc hide=true /%} ## Overview The [SearchCatalogItems](https://developer.squareup.com/reference/square/catalog-api/search-catalog-items) endpoint can take one or more of the following query filters: * The [category_ids](https://developer.squareup.com/reference/square/catalog-api/search-catalog-items#request__property-category_ids) filter returns catalog items or item variations of specified category IDs. * The [custom_attribute_filters](https://developer.squareup.com/reference/square/catalog-api/search-catalog-items#request__property-custom_attribute_filters) query expressions return items or item variations of the specified custom attributes. * The [enabled_Location_ids](https://developer.squareup.com/reference/square/catalog-api/search-catalog-items#request__property-enabled_location_ids) filter returns items or item variations with the specified enabled locations. * The [product_types](https://developer.squareup.com/reference/square/catalog-api/search-catalog-items#request__property-product_types) filter returns items or item variations of the specified product types. * The [stock_levels](https://developer.squareup.com/reference/square/catalog-api/search-catalog-items#request__property-stock_levels) filter returns items or item variations of the specified stock levels. * The [text_filter](https://developer.squareup.com/reference/square/catalog-api/search-catalog-items#request__property-text_filter) query returns items or item variations containing the specified text terms in searchable attributes. * The [custom_attribute_filters](https://developer.squareup.com/reference/square/catalog-api/search-catalog-items#request__property-custom_attribute_filters) returns items or item variations matching specified custom attributes. When you use more than one filter, the returned result contains items and item variations that satisfy all the query conditions. ## Search with a category ID filter Search with category IDs means to query catalog items of given categories as identified by the specified category IDs. {% tabset %} {% tab id="Request" %} The following cURL example searches for items by matching the items' `category_id` attribute against the specified `category_token` filter expressed as a list of category IDs: ```` {% /tab %} {% tab id="Response" %} The successful response looks similar to the following result: ```json { "items": [ { "type": "ITEM", "id": "3ZDFHLLYFEE2SUUI65MVBK73", "updated_at": "2020-06-23T18:03:31.656Z", "version": 1592935411656, "is_deleted": false, "present_at_all_locations": true, "item_data": { "name": "Item of Category One", "description": "Item of category 1", "abbreviation": "itm_c1", "available_for_pickup": true, "available_electronically": true, "category_id": "GCCTVZOTCOPI246SREKXNMYX", "variations": [ { "type": "ITEM_VARIATION", "id": "A6QZQQSLDZPV3TM7TQIKEIXZ", "updated_at": "2020-06-23T18:03:31.656Z", "version": 1592935411656, "is_deleted": false, "present_at_all_locations": true, "item_variation_data": { "item_id": "3ZDFHLLYFEE2SUUI65MVBK73", "name": "Item variations of category", "ordinal": 0, "pricing_type": "FIXED_PRICING", "price_money": { "amount": 100, "currency": "USD" }, "inventory_alert_type": "LOW_QUANTITY", "inventory_alert_threshold": 10 } } ], "product_type": "REGULAR" } } ], "matched_variation_ids": [ "A6QZQQSLDZPV3TM7TQIKEIXZ" ] } ``` {% /tab %} {% /tabset %} ## Search with a text filter You can search for items or their variations by using a text filter. This involves matching specific words or phrases, known as tokens, with the searchable attributes of items, such as their name and description. A match can be found on a full or partial token match. Text-based searching is a type of free-text search where your search input is broken down into tokens. The search process involves comparing these tokens with the tokens from the item's attributes. The order of the tokens doesn't matter; the search checks for matches between the tokens in your query and those in the item's information. {% tabset %} {% tab id="Request" %} The following example fetches items or item variation containing the `Coffee` and `Drink` tokens: ```` {% /tab %} {% tab id="Response" %} The successful response returns the result similar to the following, if the catalog has one. Otherwise, the result is an empty set. ```json { "items": [ { "type": "ITEM", "id": "QRIAAXI7PEBG6WDEX6DG6WHL", "updated_at": "2020-05-29T22:25:47.216Z", "version": 1590791147216, "is_deleted": false, "present_at_all_locations": true, "item_data": { "name": "Coffee", "description": "Coffee Drink", "abbreviation": "Co", "variations": [ { "type": "ITEM_VARIATION", "id": "LBHSVD65G6MXCNYV2AP2TYPP", "updated_at": "2020-05-29T20:38:28.304Z", "version": 1590784708304, "is_deleted": false, "present_at_all_locations": true, "item_variation_data": { "item_id": "QRIAAXI7PEBG6WDEX6DG6WHL", "name": "Small", "pricing_type": "FIXED_PRICING", "price_money": { "amount": 300, "currency": "USD" } } }, { "type": "ITEM_VARIATION", "id": "AH2XNLUYOV4RCVBSJX66F7RV", "updated_at": "2020-05-29T20:58:34.455Z", "version": 1590785914455, "is_deleted": false, "present_at_all_locations": true, "item_variation_data": { "item_id": "QRIAAXI7PEBG6WDEX6DG6WHL", "name": "Large", "pricing_type": "FIXED_PRICING", "price_money": { "amount": 350, "currency": "USD" } } } ], "product_type": "REGULAR" } } ], "matched_variation_ids": [ "AH2XNLUYOV4RCVBSJX66F7RV", "LBHSVD65G6MXCNYV2AP2TYPP" ] } ``` Because matching is independent of the token orders, you get the same result if you use the following `text_filter`: ```JSON { "text_filter": "Drink Coffee" } ``` Additionally, a token in your search can match part of a token in an item's attribute. Therefore, the following version of the previous text filter gives you the same results as before. ```JSON { "text_filter": "Coff Drin" } ``` {% /tab %} {% /tabset %} ## Search with text and product types filters You can search for specific product types along with a text search when using the `SearchCatalogItems` endpoint. This gives you results that match all parts of your search. For example, you can look for items and their variations that are a certain product type and also have "Coffee" in their searchable details. {% tabset %} {% tab id="Request" %} ```` {% /tab %} {% tab id="Response" %} The successful response returns a result similar to the following: ```json { "items": [ { "type": "ITEM", "id": "QRIAAXI7PEBG6WDEX6DG6WHL", "updated_at": "2020-05-29T22:25:47.216Z", "version": 1590791147216, "is_deleted": false, "present_at_all_locations": true, "item_data": { "name": "Coffee", "description": "Coffee Drink", "abbreviation": "Co", "variations": [ { "type": "ITEM_VARIATION", "id": "LBHSVD65G6MXCNYV2AP2TYPP", "updated_at": "2020-05-29T20:38:28.304Z", "version": 1590784708304, "is_deleted": false, "present_at_all_locations": true, "item_variation_data": { "item_id": "QRIAAXI7PEBG6WDEX6DG6WHL", "name": "Small", "pricing_type": "FIXED_PRICING", "price_money": { "amount": 300, "currency": "USD" } } }, { "type": "ITEM_VARIATION", "id": "AH2XNLUYOV4RCVBSJX66F7RV", "updated_at": "2020-05-29T20:58:34.455Z", "version": 1590785914455, "is_deleted": false, "present_at_all_locations": true, "item_variation_data": { "item_id": "QRIAAXI7PEBG6WDEX6DG6WHL", "name": "Large", "pricing_type": "FIXED_PRICING", "price_money": { "amount": 350, "currency": "USD" } } } ], "product_type": "REGULAR" } } ], "matched_variation_ids": [ "AH2XNLUYOV4RCVBSJX66F7RV", "LBHSVD65G6MXCNYV2AP2TYPP" ] } ``` If your catalog doesn't contain any items satisfying the both query expressions, you receive an empty payload in a `200 OK` response. {% /tab %} {% /tabset %} ## Search with custom attribute filters When items or their variations have [custom attribute values](https://developer.squareup.com/reference/square/objects/CatalogCustomAttributeValue), you can use the [SearchCatalogItems](https://developer.squareup.com/reference/square/catalog-api/search-catalog-items) endpoint to find them based on these attributes. To do this, you provide a list of search expressions for custom attributes, written as JSON objects. For example, if you want to search for a custom attribute whose `key` is "cocoa_brand", you write it as `{"key": "cocoa_brand"}`. {% tabset %} {% tab id="Request" %} The following cURL example shows how to call `SearchCatalogItems` to search for items with a custom attribute filter: ```` On the other hand, if you know the custom attribute definition ID (`"NPQJUZVDBE6EKZ25EU3GPLC5"`) of the custom attribute value, you can express the `custom_attribute_query filters` as follows: ```JSON { "custom_attribute_filters": [ { "custom_attribute_definition_token": "NPQJUZVDBE6EKZ25EU3GPLC5" } ] } ``` If the custom attribute value has the `string_value` property assigned the `"Cocoa Magic"` value, you can call the `SearchCatalogItems` endpoint with the following `custom_attribute_filters`: ```JSON "custom_attribute_filters": [ { "string_filter": "Cocoa Magic" } ] ``` {% /tab %} {% tab id="Response" %} If such items are present in the catalog and the request succeeds, you get the result in a response similar to the following: ```json { "items": [ { "type": "ITEM", "id": "GPOKJPTV2KDLVKCADJ7I77EZ", "updated_at": "2020-06-18T17:55:56.646Z", "version": 1592502956646, "is_deleted": false, "custom_attribute_values": { "cocoa_brand": { "name": "Brand", "string_value": "Cocoa Magic", "custom_attribute_definition_id": "NPQJUZVDBE6EKZ25EU3GPLC5", "type": "STRING", "key": "cocoa_brand" } }, "present_at_all_locations": true, "item_data": { "name": "Hot Cocoa", "variations": [ { "type": "ITEM_VARIATION", "id": "VBJNPHCOKDFECR6VU25WRJUD", "updated_at": "2020-06-18T17:55:56.646Z", "version": 1592502956646, "is_deleted": false, "custom_attribute_values": { "topping": { "name": "Tasting Notes", "custom_attribute_definition_id": "EI7IJQDUKYSHULREPIPH6HNU", "type": "SELECTION", "selection_uid_values": [ "VF4QVHAT63I6KO356BDDHNC3", "A54CJAXS32EUXINOTUPRXQAL" ], "key": "topping" } }, "present_at_all_locations": true, "item_variation_data": { "item_id": "GPOKJPTV2KDLVKCADJ7I77EZ", "name": "Small", "ordinal": 0, "pricing_type": "FIXED_PRICING", "price_money": { "amount": 500, "currency": "USD" } } } ], "product_type": "REGULAR" } } ], "matched_variation_ids": [ "VBJNPHCOKDFECR6VU25WRJUD" ] } ``` {% /tab %} {% /tabset %} ### Narrow the search scope If items or their variations in your catalog have different custom attributes with the same key, you can make your search more specific by adding extra conditions. For example, you can add a string filter to the key when using `SearchCatalogItems`. This allows you to find items with a custom attribute key of "cocoa_brand" and a value that includes "Cocoa Magic". ```JSON "custom_attribute_filters": [ { "key": "cocoa_brand", "string_filter": "Cocoa Magic" } ] ``` When you use a `selection_tokens_filter`, the search results include items or variations that match any of the specified selection tokens with the `selection_uid_values` of their custom attribute values. You can add multiple conditions in one filter to make your search more focused or selective. Additionally, you can apply several filters to the `custom_attribute_filters` input, like the following: ```JSON "custom_attribute_filters": [ { "custom_attribute_definition_token": "NPQJUZVDBE6EKZ25EU3GPLC5" }, { "key": "cocoa_brand" } ] ``` The search results include items that have custom attribute values matching all the conditions in your filters. Because an item can have many custom attribute values, using multiple filters helps make the search more specific and focused. --- # Call the SearchCatalogObjects Endpoint > Source: https://developer.squareup.com/docs/catalog-api/search-catalog-objects > Status: PUBLIC > Languages: cURL > Platforms: All Learn how to use the SearchCatalogObjects endpoint to search for objects of any type programmatically. **Applies to:** [Catalog API](catalog-api/what-it-does) {% subheading %}Learn how to programmatically search for objects of any type.{% /subheading %} {% toc hide=true /%} {% youtube src="https://www.youtube.com/embed/SLkKFKgmsmY" /%} ## Overview You can call the [SearchCatalogObjects](https://developer.squareup.com/reference/square/catalog-api/search-catalog-objects) endpoint to search for catalog objects of any type using the following query filters assigned as a `query` parameter value: {% table %} * Filter {% width="10px" %} * Purpose --- * `exact_query` - [CatalogQueryExact](https://developer.squareup.com/reference/square/objects/CatalogQueryExact) * Returns any types of objects matching an attribute name and value exactly. --- * `prefix_query` - [CatalogQueryPrefix](https://developer.squareup.com/reference/square/objects/CatalogQueryPrefix) * Returns any types of objects matching a prefix of an attribute value. --- * `range_query` - [CatalogQueryRange](https://developer.squareup.com/reference/square/objects/CatalogQueryRange) * Returns any types of objects matching a numerical range of an attribute value. --- * `text_query` - [CatalogQueryText](https://developer.squareup.com/reference/square/objects/CatalogQueryText) * Returns any types of objects matching keywords against searchable attribute values. Searchable attributes include `name` and `description`. --- * `sorted_attribute_query` - [CatalogQuerySortedAttribute](https://developer.squareup.com/reference/square/objects/CatalogQuerySortedAttribute) * Sorts returned results in a specified order by an attribute. --- * `items_for_tax_query` - [CatalogQueryItemsForTax](https://developer.squareup.com/reference/square/objects/CatalogQueryItemsForTax) * Returns items with specified catalog tax IDs. --- * `items_for_modifier_list_query` - [CatalogQueryItemsForModifierList](https://developer.squareup.com/reference/square/objects/CatalogQueryItemsForModifierList) * Returns items enabled with specified modifier lists as identified by their IDs. --- * `items_for_item_options` - [CatalogQueryItemsForItemOptions](https://developer.squareup.com/reference/square/objects/CatalogQueryItemsForItemOptions) * Returns items with specified item options as identified by their IDs. --- * `items_variations_for_item_option_values_query` - [CatalogQueryItemVariationsForItemOptionValues](https://developer.squareup.com/reference/square/objects/CatalogQueryItemVariationsForItemOptionValues) * Returns item variations with specified item option values as identified by their IDs. {% /table %} In addition, you can call the `SearchCatalogObjects` endpoint to search for catalog objects by matching values of the following system attributes: * A `begin_time` attribute returns objects last modified since the specified time. * An `include_category_path_to_root` Boolean attribute includes a `path_to_root` list for each returned category instance if set to `true`. This attribute is useful if objects in the catalog belong to categories nested within other categories. If set to `true`, `include_deleted_objects` must be set to `false`. * An `include_deleted_objects` Boolean attribute returns deleted objects in the results list (`true`) or not (`false`, the default). If set to `true`, `include_category_path_to_root` must be set to `false`. * An `include_related_objects` attribute of a Boolean flag returns (`true`) or not (`false`) objects related to those matching other specified query filters. * An `object_types` attribute returns objects of the specified types matching other specified query filters. {% aside type="important" %} A `SearchCatalogObjects` request fails if both `include_deleted_objects` and `include_category_path_to_root` parameters are set to `true`. Only one of the two attributes can be `true` at a time. {% /aside %} You cannot call `SearchCatalogObjects` with custom attribute query filters. ## Search with an exact query filter To search for catalog objects of a known attribute name and value, call the `SearchCatalogObjects` endpoint while supplying the `exact_query` filter in the `query` parameter. This is shown in the following examples. {% tabset %} {% tab id="Request" %} This example searches for catalog objects with the `name` attribute with a value of `coffee`: ```` When using an exact query filter, the names of the attributes must match exactly with what you specify. However, the values of these attributes are matched without worrying about uppercase or lowercase letters. {% /tab %} {% tab id="Response" %} A successful response returns all objects that match your query. Otherwise, the response payload is an empty JSON object. ```json { "objects": [ { "type": "ITEM", "id": "QRIAAXI7PEBG6WDEX6DG6WHL", "updated_at": "2020-05-29T22:25:47.216Z", "version": 1590791147216, "is_deleted": false, "present_at_all_locations": true, "item_data": { "name": "Coffee", "description": "Coffee Drink", "abbreviation": "Co", "modifier_list_info": [ { "modifier_list_id": "ZVSGY6U63IGCZQL4IOPZAKYW", "enabled": true } ], "variations": [ { "type": "ITEM_VARIATION", "id": "AH2XNLUYOV4RCVBSJX66F7RV", "updated_at": "2020-05-29T20:58:34.455Z", "version": 1590785914455, "is_deleted": false, "present_at_all_locations": true, "item_variation_data": { "item_id": "QRIAAXI7PEBG6WDEX6DG6WHL", "name": "Large", "pricing_type": "FIXED_PRICING", "price_money": { "amount": 350, "currency": "USD" }, "sellable": true, "stockable": true } }, { "type": "ITEM_VARIATION", "id": "LBHSVD65G6MXCNYV2AP2TYPP", "updated_at": "2020-05-29T20:38:28.304Z", "version": 1590784708304, "is_deleted": false, "present_at_all_locations": true, "item_variation_data": { "item_id": "QRIAAXI7PEBG6WDEX6DG6WHL", "name": "Small", "pricing_type": "FIXED_PRICING", "price_money": { "amount": 300, "currency": "USD" }, "sellable": true, "stockable": true } } ], "product_type": "REGULAR" } } ], "latest_time": "2020-06-10T03:23:41.067Z" } ``` {% /tab %} {% /tabset %} ## Search with a combination of query filters You can combine a query with other search conditions to return the result that satisfies all the specified query expressions and search conditions. {% tabset %} {% tab id="Request" %} The following cURL example shows how to call the `SearchCatalogObjects` endpoint to search for objects of the `ITEM_VARIATION` type matching their `name` attribute value to `coffee`, without including any related object: ```` {% /tab %} {% tab id="Response" %} ```json { "objects": [ { "type": "ITEM_VARIATION", "id": "LBHSVD65G6MXCNYV2AP2TYPP", "updated_at": "2020-05-29T20:38:28.304Z", "version": 1590784708304, "is_deleted": false, "present_at_all_locations": true, "item_variation_data": { "item_id": "QRIAAXI7PEBG6WDEX6DG6WHL", "name": "Small", "pricing_type": "FIXED_PRICING", "price_money": { "amount": 300, "currency": "USD" } } }, { "type": "ITEM_VARIATION", "id": "VBJNPHCOKDFECR6VU25WRJUD", "updated_at": "2020-06-18T17:55:56.646Z", "version": 1592502956646, "is_deleted": false, "custom_attribute_values": { "topping": { "name": "Tasting Notes", "custom_attribute_definition_id": "EI7IJQDUKYSHULREPIPH6HNU", "type": "SELECTION", "selection_uid_values": [ "VF4QVHAT63I6KO356BDDHNC3", "A54CJAXS32EUXINOTUPRXQAL" ], "key": "topping" } }, "present_at_all_locations": true, "item_variation_data": { "item_id": "GPOKJPTV2KDLVKCADJ7I77EZ", "name": "Small", "ordinal": 0, "pricing_type": "FIXED_PRICING", "price_money": { "amount": 500, "currency": "USD" } } } ], "related_objects": [ { "type": "ITEM", "id": "QRIAAXI7PEBG6WDEX6DG6WHL", "updated_at": "2020-05-29T22:25:47.216Z", "version": 1590791147216, "is_deleted": false, "present_at_all_locations": true, "item_data": { "name": "Coffee", "description": "Coffee Drink", "abbreviation": "Co", "product_type": "REGULAR" } }, { "type": "ITEM", "id": "GPOKJPTV2KDLVKCADJ7I77EZ", "updated_at": "2020-06-18T17:55:56.646Z", "version": 1592502956646, "is_deleted": false, "custom_attribute_values": { "cocoa_brand": { "name": "Brand", "string_value": "Cocoa Magic", "custom_attribute_definition_id": "NPQJUZVDBE6EKZ25EU3GPLC5", "type": "STRING", "key": "cocoa_brand" } }, "present_at_all_locations": true, "item_data": { "name": "Hot Cocoa", "product_type": "REGULAR" } } ], "latest_time": "2020-06-23T18:03:31.656Z" } ``` Because the `include_related_objects` flag is set to `true`, the `related_objects` is included in the result. If this flag isn't set or set to `false`, the related items aren't returned. {% /tab %} {% /tabset %} ## Search with a prefix query filter To search for catalog objects with a given attribute value starting with a specified text string, call `SearchCatalogObject` while supplying a `prefix_query` filter in the `query` parameter. {% tabset %} {% tab id="Request" %} The following example searches for objects whose `name` attribute starts with the text of "sma": ```` {% /tab %} {% tab id="Response" %} ```json { "objects": [ { "type": "ITEM_VARIATION", "id": "LBHSVD65G6MXCNYV2AP2TYPP", "updated_at": "2020-05-29T20:38:28.304Z", "version": 1590784708304, "is_deleted": false, "present_at_all_locations": true, "item_variation_data": { "item_id": "QRIAAXI7PEBG6WDEX6DG6WHL", "name": "Small", "pricing_type": "FIXED_PRICING", "price_money": { "amount": 300, "currency": "USD" }, "sellable": true, "stockable": true } } ], "latest_time": "2020-06-10T03:23:41.067Z" } ``` The response returns the `Small` item variation available for search at the time of the call. Notice that matching against the specified attribute value is case-insensitive. {% /tab %} {% /tabset %} As another example, try to search for objects with "happy" as a prefix to the `name` attribute value: {% tabset %} {% tab id="Request" %} ```` {% /tab %} {% tab id="Response" %} ```json { "objects": [ { "type": "PRICING_RULE", "id": "3GULP4ZWYKLJPEU6YPFFA2MC", "updated_at": "2020-06-02T19:27:34.968Z", "version": 1591126054968, "is_deleted": false, "present_at_all_locations": true, "pricing_rule_data": { "name": "Happy Hour", "time_period_ids": [ "DE4AZASOM7WGFIJSBZEWEMRG" ], "discount_id": "GAJS57APBZX445NOYMINZZUC", "match_products_id": "IAPA75F4ZUBMCF6IVIP7FC2E", "application_mode": "AUTOMATIC" } } ], "latest_time": "2020-06-10T03:23:41.067Z" } ``` This call returns a catalog pricing rule object named `Happy Hour`, which is the only matching object in this catalog. {% /tab %} {% /tabset %} ## Search with a text query filter Search with a `text_query` filter is like free-text search that returns objects by matching searchable attribute values of objects against the specified list of keywords. The search result doesn't depend on the order of the keywords specified. {% tabset %} {% tab id="Request" %} The following example uses a `text_query` filter to search for objects containing the words "one", "free", and "drink" in any of their searchable attributes: ```` {% /tab %} {% tab id="Response" %} ```json { "objects": [ { "type": "PRICING_RULE", "id": "7MZW6RTZ2FSDDPPJLLAQ3WF4", "updated_at": "2020-06-02T00:04:28.467Z", "version": 1591056268467, "is_deleted": false, "present_at_all_locations": true, "pricing_rule_data": { "name": "Buy One Drink Get One Free Pricing Rule", "discount_id": "FJYAGNWCJSX42774FCLQZ25Z", "match_products_id": "NS5Z4ZNTUPVESPT6JBJWU3IZ", "exclude_products_id": "WSPNQO56GCYDCFSQWXS534TS", "application_mode": "AUTOMATIC" } } ], "latest_time": "2020-06-23T18:03:31.656Z" } ``` The result is a `CatalogPricingRule` object named "Buy One Drink Get One Free Pricing". Apparently, this is the only object matching the query filter in this particular catalog. {% /tab %} {% /tabset %} ## Search with items for a modifier list filter The `SearchCatalogObjects` endpoint also supports searching for catalog items with the specified modifier list enabled. To do so, use the `items_for_modifier_list_query` filter in the `query` parameter. The filter defines the IDs of modifier lists enabled for the items. {% tabset %} {% tab id="Request" %} The following example searches for the catalog items that have a specific modifier list (`["ZVSGY6U63IGCZQL4IOPZAKYW"]`) enabled. The specified modifier list is named `Milk Options` and contains two modifiers defined for the `Skim Milk` and `Whole Milk` variations enabled for the item. ```` {% /tab %} {% tab id="Response" %} The successful response returns the result similar to the following, if the queried objects are found: ```json { "objects": [ { "type": "ITEM", "id": "QRIAAXI7PEBG6WDEX6DG6WHL", "updated_at": "2020-05-29T22:25:47.216Z", "version": 1590791147216, "is_deleted": false, "present_at_all_locations": true, "item_data": { "name": "Coffee", "description": "Coffee Drink", "abbreviation": "Co", "modifier_list_info": [ { "modifier_list_id": "ZVSGY6U63IGCZQL4IOPZAKYW", "enabled": true } ], "variations": [ { "type": "ITEM_VARIATION", "id": "AH2XNLUYOV4RCVBSJX66F7RV", "updated_at": "2020-05-29T20:58:34.455Z", "version": 1590785914455, "is_deleted": false, "present_at_all_locations": true, "item_variation_data": { "item_id": "QRIAAXI7PEBG6WDEX6DG6WHL", "name": "Large", "pricing_type": "FIXED_PRICING", "price_money": { "amount": 350, "currency": "USD" } } }, { "type": "ITEM_VARIATION", "id": "LBHSVD65G6MXCNYV2AP2TYPP", "updated_at": "2020-05-29T20:38:28.304Z", "version": 1590784708304, "is_deleted": false, "present_at_all_locations": true, "item_variation_data": { "item_id": "QRIAAXI7PEBG6WDEX6DG6WHL", "name": "Small", "pricing_type": "FIXED_PRICING", "price_money": { "amount": 300, "currency": "USD" } } } ], "product_type": "REGULAR" } } ], "latest_time": "2020-06-10T03:23:41.067Z" } ``` The search returns the `Coffee` item for which the specified modifier list (as identified by the modifier list ID of `ZVSGY6U63IGCZQL4IOPZAKYW`) is enabled. {% /tab %} {% /tabset %} ## Search for deleted objects When a catalog object is deleted, its `is_deleted` attribute is set to `true`. To retrieve a deleted object, you can set `include_deleted_objects` to `true` when calling the `SearchCatalogObjects` endpoint and then inspect the result to filter those with `"is_deleted": true`. {% tabset %} {% tab id="Request" %} The following example searches for the catalog items that can include the deleted ones: ```` {% /tab %} {% tab id="Response" %} The successful response returns deleted catalog items, if any, along with active ones. This is shown in the following example: ```json { "objects": [ { "type": "ITEM", "id": "BDWYGZO5QQWWEVFV6PAEP3BS", "updated_at": "2021-05-19T03:58:12.86Z", "version": 1621396692860, "is_deleted": false, "custom_attribute_values": { "sq0ids-tDPX2MkYWBjjQSKR88V-BQ:online_readiness": { "name": "online_readiness", "custom_attribute_definition_id": "FSHYJTVR2BZ3E3LDZFCTD5AU", "type": "NUMBER", "number_value": "0.22118", "key": "sq0ids-tDPX2MkYWBjjQSKR88V-BQ:online_readiness" } }, "present_at_all_locations": true, "image_id": "7WWYBOW5AYLEWFW62HQX7EP4", "item_data": { "name": "adventure", "variations": [ { "type": "ITEM_VARIATION", "id": "PRAVBIFA4IDWI3IPO6KQVV2B", "updated_at": "2020-11-02T21:25:44.14Z", "version": 1604352344140, "is_deleted": false, "present_at_all_locations": true, "item_variation_data": { "item_id": "BDWYGZO5QQWWEVFV6PAEP3BS", "name": "8-day explore", "ordinal": 0, "pricing_type": "FIXED_PRICING", "price_money": { "amount": 250000, "currency": "USD" }, "transition_time": 0, "stockable": true } } ], "product_type": "APPOINTMENTS_SERVICE", "skip_modifier_screen": false } }, { "type": "ITEM", "id": "I4BKTYZ3J4JF3PRWVAARFXOG", "updated_at": "2020-11-02T21:34:50.997Z", "version": 1604352890997, "is_deleted": true, "present_at_all_locations": true, "image_id": "7WWYBOW5AYLEWFW62HQX7EP4", "item_data": { "name": "Virtual adventure", "product_type": "APPOINTMENTS_SERVICE", "skip_modifier_screen": false } } ] } ``` {% /tab %} {% /tabset %} --- # Configure Preset Charges for Quick Payments > Source: https://developer.squareup.com/docs/catalog-api/cookbook/set-quick-amounts > Status: BETA > Languages: All > Platforms: All Learn how to add as many as three custom quick amounts to the Square Register custom amount dialog. **Applies to:** [Catalog API](catalog-api/what-it-does) {% subheading %}Learn how to add up to three custom amounts to the Square Register Quick Amounts dialog.{% /subheading %} {% toc hide=true /%} ## Overview Using configured quick amounts settings, the Square Register displays the preset charges in the **Quick Amounts** dialog on the checkout screen. The quick amounts settings are seller and location dependent. You can call the [Catalog API](https://developer.squareup.com/reference/square/catalog-api) to configure quick amounts manually. Alternatively, Square can determine them automatically based on seller's order history at a location. When a `QUICK_AMOUNTS_SETTINGS` catalog object is created for a location, the seller at that location sees a quick amount configuration screen on Square POS with the settings from the `QUICK_AMOUNTS_SETTINGS` object. {% line-break /%} ![A screenshot showing the Quick Amounts configuration screen on Square Point of Sale.](//images.ctfassets.net/1nw4q0oohfju/2QM6KfcgahizN5wIy231rp/9bb8463723418d04224804763bb18ce5/square-pos-emulator-quick-amount.png) In this example, the Square POS shows the two quick amounts set by the seller for the specific location. Unlike other catalog objects, a `QUICK_AMOUNTS_SETTINGS` object doesn't require items or item variations being added to the catalog item collection. The presence of a [CatalogQuickAmountSettings](https://developer.squareup.com/reference/square/objects/CatalogQuickAmountsSettings) object only configures and enables quick amount values. ## Create a quick amount setting To create a `QUICK_AMOUNTS_SETTINGS` object, call the [UpsertCatalogObject](https://developer.squareup.com/reference/square/catalog-api/upsert-catalog-object) endpoint, specifying `QUICK_AMOUNTS_SETTINGS` as the object's [type](https://developer.squareup.com/reference/square/objects/CatalogObject#definition__property-type) property and providing an appropriate [CatalogQuickAmountsSettings](https://developer.squareup.com/reference/square/objects/CatalogQuickAmountsSettings) object on the [quick_amounts_settings_data](https://developer.squareup.com/reference/square/objects/CatalogObject#definition__property-quick_amounts_settings_data) property. The following cURL command shows how to use the Catalog API to create a `QuickAmountsSettings` object: ```` In the request body, the `present_at_all_locations` field must be set to `false` to indicate that the resulting quick amounts settings apply to the specified location (`{{LOCATION_ID}}`) as referenced in the `present_at_locations_ids` field. In this example, the `option` field of `quick_amounts_settings_data` is set to `MANUAL`. This option lets the seller choose manually created quick amounts as specified herein. You can set `option` to `AUTO` to let the seller to choose automatically created quick amounts based on the seller's payment-receiving trends. When successfully created, a `CatalogQuickAmountsSettings` object similar to the following is returned: ```json { "catalog_object": { "type": "QUICK_AMOUNTS_SETTINGS", "id": "IXEVKMKA6CWG6CH4MFB32YPV", "updated_at": "2020-04-17T20:50:44.31Z", "version": 1587156644310, "is_deleted": false, "present_at_all_locations": false, "present_at_location_ids": [ "{{LOCATION_ID}}" ], "quick_amounts_settings_data": { "option": "MANUAL", "eligible_for_auto_amounts": false, "amounts": [ { "type": "QUICK_AMOUNT_TYPE_MANUAL", "amount": { "amount": 855, "currency": "USD" }, "score": 100, "ordinal": 1 }, { "type": "QUICK_AMOUNT_TYPE_MANUAL", "amount": { "amount": 85, "currency": "USD" }, "score": 100, "ordinal": 1 } ] } }, "id_mappings": [ { "client_object_id": "#quick_amount_1", "object_id": "IXEVKMKA6CWG6CH4MFB32YPV" } ] } ``` {% aside type="info" %} A location can have only one `QUICK_AMOUNTS_SETTINGS` object configured for it. If you attempt to create a second object of this type, you get an error. {% /aside %} ## Get an existing quick amount setting To obtain any of the existing `QUICK_AMOUNTS_SETTINGS` objects for a seller's location, call the [SearchCatalogObjects](https://developer.squareup.com/reference/square/catalog-api/search-catalog-objects) endpoint, specifying `QUICK_AMOUNTS_SETTINGS` in the `object_types` list. The following cURL command shows the API request to retrieve non-deleted quick amounts settings: ```` The response returns an array of non-deleted `QUICK_AMOUNTS_SETTINGS` objects, one per location, as shown: ```json { "objects": [ { "type": "QUICK_AMOUNTS_SETTINGS", "id": "CP4I57JIFFVMRSZU63WPH6UD", "updated_at": "2020-04-17T20:58:19.397Z", "version": 1587157099397, "is_deleted": false, "present_at_all_locations": false, "present_at_location_ids": [ "{{LOCATION_ID}}" ], "quick_amounts_settings_data": { "option": "MANUAL", "eligible_for_auto_amounts": true, "amounts": [ { "type": "QUICK_AMOUNT_TYPE_MANUAL", "amount": { "amount": 855, "currency": "USD" }, "score": 100, "ordinal": 1 }, { "type": "QUICK_AMOUNT_TYPE_MANUAL", "amount": { "amount": 85, "currency": "USD" }, "score": 100, "ordinal": 1 } ] } } ], "latest_time": "2020-04-17T22:37:22.213Z" } ``` ## Update a quick amount setting To update an existing `QUICK_AMOUNTS_SETTINGS` object, call the [UpsertCatalogObject](https://developer.squareup.com/reference/square/catalog-api/upsert-catalog-object) specifying an `CatalogQuickAmountsSettings` object whose `id` field is set to the ID of the existing object and whose `quick_amounts_settings_data` field contains the updated settings. Set the `id` field to the `object_id` value in the previous response. Set the `version` to the `version` returned in the previous response. ```` ## Disable quick amounts To disable preset quick amounts, call the `UpsertCatalogObject` endpoint and specify the `option` field of the `quick_amounts_settings_data` object to `DISABLE`. ```` The response returns the following: ```json { "catalog_object": { "type": "QUICK_AMOUNTS_SETTINGS", "id": "CP4I57JIFFVMRSZU63WPH6UD", "updated_at": "2020-04-17T22:37:22.213Z", "version": 1587163042213, "is_deleted": false, "present_at_all_locations": false, "present_at_location_ids": [ "{{LOCATION_ID}}" ], "quick_amounts_settings_data": { "option": "DISABLED", "eligible_for_auto_amounts": false } } } ``` --- # Add Custom Attributes > Source: https://developer.squareup.com/docs/catalog-api/add-custom-attributes > Status: PUBLIC > Languages: cURL > Platforms: All Learn how to add custom attributes to your catalog objects. **Applies to:** [Catalog API](catalog-api/what-it-does) {% subheading %}Learn how to add custom attributes to your catalog objects and delete custom attribute definitions.{% /subheading %} {% toc hide=true /%} ## Overview Custom attributes can be used to associate additional information with supported catalog [objects](https://developer.squareup.com/reference/square/objects/CatalogObject). For example, a quick service restaurant uses an order-ahead application from a partner developer. The application needs additional information for each menu item: * An application-specific menu item name, such as "Chicken" instead of the original item name of "CHK". * An application-specific price. * Allergen information. Because catalog items don't have properties for this information, the seller can have custom attributes added to a [CatalogItem](https://developer.squareup.com/reference/square/objects/CatalogItem) object in their catalog to capture the additional details. The following catalog object types can accept custom attributes: * `ITEM` - Attributes are visible in the Square Dashboard and the API. * `ITEM_VARIATION` - Attributes are visible in the Square Dashboard and the API. * `MODIFIER` (2023-04-19 or later) - Attributes are visible only with the API. * `MODIFIER_LIST` (2024-04-17 or later) - Attributes are visible only with the API. * `CATEGORY` (2024-04-17 or later) - Attributes are visible only with the API. {% aside type="important" %} The Square Point of Sale application doesn't show custom attributes for any object type. {% /aside %} ## Limitations * Each Square account can have up to 10 seller-visible and 10 seller-hidden custom attributes. * You cannot edit the `source_application`, `type`, `key`, `max_allowed_selections`, or `allowed_object_types` of a custom attribute after creation. * You cannot edit the configuration for `STRING` type attributes after creation. * Custom attributes are available for Square version 2020-03-25 or later. ## How it works A catalog custom attribute has two parts: a definition and a set of values that can be empty. A value can be saved after the definition is set for supported object types. After a custom attribute definition is set to be applicable to an object, such as a [CatalogItem](https://developer.squareup.com/reference/square/objects/CatalogItem) or [CatalogItemVariation](https://developer.squareup.com/reference/square/objects/CatalogItemVariation), that definition is available for all objects of that type. In the Square Dashboard, the seller edits an item to input a custom attribute value. A seller sees placeholders for all available definitions in every supported object even if values haven't yet been assigned. ### Example Suppose a seller creates the following custom attribute definitions and allows them for items and item variations unless otherwise noted: * Brand * Components Brand * Filling types * Helmet Brand * Shoe Brand * Shoelace types - item variation only * Tasting Notes * Tea Brand Because most of the definitions can be set on items and item variations, they appear on every item and item variation in the seller's catalog. The following image from the Square Dashboard shows a shoelace item variation with a selected value for "Shoelace types" and no values for any other custom attributes. ![An image of the Square Dashboard Item Library with the Edit Item page open to the Custom attributes section.](//images.ctfassets.net/1nw4q0oohfju/huPzMZpJTPqZr8lkXgNdt/9487d908964fc2c2c247322d75870085/edit-variation.png) The `CatalogItemVariation` for the shoelaces has a `custom_attribute_values` property like the following example: {% tabset %} {% tab id="Request" %} The following example creates a new item variation for shoelaces. The variation is an 8" lace with a custom attribute set for the first of two possible values defined for shoelace types. ```bash curl https://connect.squareupsandbox.com/v2/catalog/object \ -X POST \ -H 'Square-Version: 2025-02-20' \ -H 'Authorization: Bearer {YOUR_ACCESS_TOKEN}' \ -H 'Content-Type: application/json' \ -d '{ "idempotency_key": "f1c31066-7b94-4d32-90a6-12a4398f1406", "object": { "type": "ITEM_VARIATION", "id": "HXSNEZN7N3NBGJX2XJ2Z6R5Q", "updated_at": "2025-02-19T23:20:25.835Z", "created_at": "2024-08-29T17:34:20.395Z", "version": 1740007225835, "is_deleted": false, "custom_attribute_values": { "Shoelace_Types": { "name": "Shoelace types", "custom_attribute_definition_id": "RLBNUGHJ3CVQXXUV37VMFYZW", "type": "SELECTION", "selection_uid_values": [ "INYXXB6WEZVCPM3AMD343LY2" ], "key": "Shoelace_Types" } }, "present_at_all_locations": true, "item_variation_data": { "item_id": "QWNIQEIK4VSPPQHEKZOZ4EYJ", "name": "8'' laces", "ordinal": 1, "pricing_type": "FIXED_PRICING", "price_money": { "amount": 234, "currency": "USD" }, "location_overrides": [ { "location_id": "E78VDDVFW1EYX", "track_inventory": false }, { "location_id": "LFF3HK0DN6A61", "track_inventory": false } ], "track_inventory": false, "measurement_unit_id": "QTSYO4OCO6RIV2UWZOP6BRLV", "sellable": true, "stockable": true } } }' ``` {% /tab %} {% tab id="Response" %} ```json { "catalog_object": { "type": "ITEM_VARIATION", "id": "HXSNEZN7N3NBGJX2XJ2Z6R5Q", "updated_at": "2025-02-21T18:47:33.793Z", "created_at": "2024-08-29T17:34:20.395Z", "version": 1740163653793, "is_deleted": false, "custom_attribute_values": { "Shoelace_Types": { "name": "Shoelace types", "custom_attribute_definition_id": "RLBNUGHJ3CVQXXUV37VMFYZW", "type": "SELECTION", "selection_uid_values": [ "INYXXB6WEZVCPM3AMD343LY2" ], "key": "Shoelace_Types" } }, "present_at_all_locations": true, "item_variation_data": { "item_id": "QWNIQEIK4VSPPQHEKZOZ4EYJ", "name": "8' laces", "ordinal": 1, "pricing_type": "FIXED_PRICING", "price_money": { "amount": 234, "currency": "USD" }, "location_overrides": [ { "location_id": "E78VDDVFW1EYX", "track_inventory": false }, { "location_id": "LFF3HK0DN6A61", "track_inventory": false } ], "track_inventory": false, "measurement_unit_id": "QTSYO4OCO6RIV2UWZOP6BRLV", "sellable": true, "stockable": true, "channels": [ "CH_QsN9pXIZiVwCMWjFr8NXQqPO54qnOXkyQRkiBQlQuYC" ] } } } ``` {% /tab %} {% /tabset %} Note that the item doesn't show custom attributes for the definitions that don't have values. ### Attribute key/value pairs The [custom_attribute_values](https://developer.squareup.com/reference/square/objects/CatalogObject#definition__property-custom_attribute_values) property of a catalog object is a key/value pair, allowing you to add an attribute value for each custom attribute you define. For example, you might add custom attributes to a bicycle item variation. Modifiers like size and color should be buyer-selectable and visible at the point of sale. You might also associate the brand of a component group by creating custom attribute definitions for the component brand and ID. ```json { "custom_attribute_values": { "component_brand": { "key": "component_brand", "custom_attribute_definition_id": "IQN73SQGHTOWP4JKZQNQDSKB", "name": "Brand", "type": "STRING", "string_value": "Shimano" } } } ``` Because `custom_attribute_values` is a map, you need to define a map key, such as `component_brand`. This key string should match the key assigned to the custom attribute definition. Additionally, set the key field in the map object to the same string as the map key. An [application](https://app.squareup.com/dashboard/apps/my-applications) can create up to 10 seller-visible custom attribute definitions defined by a [CatalogCustomAttributeDefinition](https://developer.squareup.com/reference/square/objects/CatalogCustomAttributeDefinition) object. Custom attribute definitions appear on the **Edit Item** page in the Square Dashboard, where people with sufficient permissions can see and edit the custom attribute values. ## Visibility You can control whether a seller or another application can see your custom attribute values applied to catalog items by setting the [CatalogCustomAttributeDefinition](https://developer.squareup.com/reference/square/objects/CatalogCustomAttributeDefinition) [app_visibility](https://developer.squareup.com/reference/square/objects/CatalogCustomAttributeDefinition#definition__property-app_visibility) and [seller_visibility](https://developer.squareup.com/reference/square/objects/CatalogCustomAttributeDefinition#definition__property-seller_visibility) fields. Note that the application that created a custom attribute definition always has the ability to retrieve, search, and update the values of any custom attribute that uses that definition. ### Options for app_visibility The `app_visibility` field controls whether the custom attribute and its definition are readable or writable by other applications: * `APP_VISIBILITY_READ_ONLY` - The attribute definition and value are read-only, visible, and searchable by other applications. * `APP_VISIBILITY_READ_WRITE_VALUES` - The attribute definition and value are read-write for other applications. * `APP_VISIBILITY_HIDDEN` - The attribute definition and its attribute values aren't visible to other applications. ### Options for seller_visibility The `seller_visibility` field controls whether the custom attribute definition and value appear in the UI of Square products, such as the Square Point of Sale application or the Square Dashboard: * `SELLER_VISIBILITY_READ_WRITE_VALUES` - Sellers can search for and edit the custom attribute. For example, an application can set a custom attribute definition with `seller_visibility` set to `SELLER_VISIBILITY_READ_WRITE_VALUES`. This allows sellers to read and write the custom attribute values from the Square Dashboard. Sellers can also search for this custom attribute, which is useful for storing important data. * `SELLER_VISIBILITY_HIDDEN` - Sellers cannot see custom attribute definitions or the associated values. In the following example, the item library shows two custom attribute definitions created in the Square Dashboard and two created with the Catalog API. The custom attributes created with the Catalog API show the creating applications in parentheses because they were created with `seller_visibility` set to `SELLER_VISIBILITY_READ_WRITE_VALUES`. ![A screenshot of the Square Dashboard item library custom attributes list.](//images.ctfassets.net/1nw4q0oohfju/RUU7RMLh3Ycs4g5jPAxXD/f183f44334abf8415b60e092dd80db32/custom-attributes.png) Any custom attribute definition that's visible in the custom attribute definition list can also be added to a catalog item, variation, modifier list, or category. ## Types of custom attributes A custom attribute can be of one of the following types: * **Selection** - A set of up to 100 value strings that a seller can input and then choose from. * **String** - A free-form string input by the seller. * **Number** - A five digit number input by the seller. * **Boolean** - A true or false value selected by the seller. ### Selection A `SELECTION` [type](https://developer.squareup.com/reference/square/objects/CatalogCustomAttributeDefinition#definition__property-type) custom attribute has multiple selectable values defined by the developer in the [CatalogCustomAttributeDefinitionSelectionConfig](https://developer.squareup.com/reference/square/objects/CatalogCustomAttributeDefinitionSelectionConfig) object. `SELECTION` type attributes can also allow single or multiple value selections. You can predefine up to 100 choice value properties and each item can have up to 100 of these choices active at any time. For example, a restaurant seller might create a custom attribute for cheese to apply to all menu items with cheese. They can list every type of cheese and activate specific ones like "Cheddar" and "Pepper Jack" for hamburgers and "American Cheese" and "Munster" for macaroni and cheese, leaving out others like "Gouda". ### String A `STRING` type custom attribute can take any free-form string value of up to 255 characters. The string value can include any [Unicode character code](https://unicode.org/charts/). Empty strings are also allowed. ### Number Each custom attribute with the `NUMBER` type can store values with up to 5 decimal places and can support values up to approximately 90 trillion (exact value 263/100,000). ### Boolean A `true` or `false` value. For example, `BOOLEAN` type custom attributes can be used to set whether an item is available for delivery in a third-party delivery application. ## Add a custom attribute to a catalog object To use custom attributes, you need to: 1. Create a [CatalogCustomAttributeDefinition](https://developer.squareup.com/reference/square/objects/CatalogCustomAttributeDefinition), define a `CatalogObject` with the type `CUSTOM_ATTRIBUTE_DEFINITION` and assign the relevant data to the `custom_attribute_definition_data` object. This data should include the attribute type and the allowed hosting object types. {% aside type="tip" %} You don't need to set the `app_visibility` and `seller_visibility` if you want to use the default values of `SELLER_VISIBILITY_READ_WRITE_VALUES` and `APP_VISIBILITY_HIDDEN`. {% /aside %} 1. Accept seller input and assign that value to the custom attribute on a specified hosting catalog item, item variation, or modifier. In the following example, custom attributes are created to help a seller keep track of the brand of cocoa and type of topping for a Hot Cocoa item. These attributes use `STRING` and `SELECTION` values. The `key` you choose in the definition becomes the name of the attribute in the catalog item. For example, if you use the `key` "cocoa_brand", the catalog item needs to have a `custom_attribute_values.cocoa_brand` object to store the attribute values. The example also includes a custom attribute definition from another application. The `custom_attribute_values.a-different-application_id:ingredients` object refers to that definition and provides a string value. ```bash curl https://connect.squareupsandbox.com/v2/catalog/batch-upsert \ -X POST \ -H 'Square-Version: 2025-02-20' \ -H 'Authorization: Bearer {YOUR_ACCESS_TOKEN}' \ -H 'Content-Type: application/json' \ -d '{ "idempotency_key": "sdsd-4876-b3cf-3sexy332", "batches": [ { "objects": [ { "id": "#tea_brand", "type": "CUSTOM_ATTRIBUTE_DEFINITION", "custom_attribute_definition_data": { "allowed_object_types": [ "ITEM", "ITEM_VARIATION" ], "name": "Tea Brand", "type": "STRING", "key": "tea_brand" } }, { "id": "#filling", "type": "CUSTOM_ATTRIBUTE_DEFINITION", "custom_attribute_definition_data": { "allowed_object_types": [ "ITEM", "ITEM_VARIATION" ], "name": "Filling types", "type": "SELECTION", "key": "filling", "selection_config": { "allowed_selections": [ { "name": "Marshmallow", "uid": "#marshmallow" }, { "name": "Whipped Cream", "uid": "#whipped_cream" } ], "max_allowed_selections": 2 } } }, { "id": "#hot-tea", "type": "ITEM", "custom_attribute_values": { "tea_brand": { "key": "tea_brand", "custom_attribute_definition_id": "#tea_brand", "name": "Brand", "type": "STRING", "string_value": "Tea Magic" }, "Filling": { "key": "Filling", "custom_attribute_definition_id": "#filling", "name": "Filling", "type": "SELECTION", "selection_uid_values": [ "#marshmallow", "#whipped_cream" ] } }, "item_data": { "name": "Hot Tea", "variations": [ { "id": "#hot-tea-small", "type": "ITEM_VARIATION", "item_variation_data": { "name": "Small", "pricing_type": "FIXED_PRICING", "price_money": { "amount": 500, "currency": "USD" } } } ] } } ] } ] }' ``` {% aside type="info" %} You need to specify the `allowed_object_types` for your new custom attribute definitions to be displayed in the Square Dashboard. You cannot change the list of allowed object types after you've set it in your create request. {% /aside %} {% anchor id="important_note" /%} In the previous example, the `custom_attribute_values` field includes `"custom_attribute_definition_id": "#cocoa_brand"`. When you're creating a `batch-upsert` request, be sure to include this field when you use the `custom_attribute_values` field. ## Change a custom attribute on an item An application can change which custom attribute definition a catalog object references, regardless of who created the definition. To prevent your custom attribute definitions from being removed, set their visibility to `APP_VISIBILITY_READ_ONLY`. ## Delete a custom attribute definition The custom attribute definition that you intend to delete might be referenced by a catalog object. You should get these catalog objects and update them to clear their custom attribute values and reference to the custom attribute definition that you're deleting. To delete a custom attribute definition from the catalog, call the [DeleteCatalogObject](https://developer.squareup.com/reference/square/catalog-api/delete-catalog-object) endpoint while supplying the custom attribute definition ID as the `object_id` path parameter value. In the following example, the custom attribute definition object ID is assumed to be `VEER7NOZJRW75LXVVVS4BX25`: ```` ## See also * [Video: Catalog Custom Attributes](https://www.youtube.com/watch?v=T9zu7SrDwFo) --- # Keep Your External Catalog Synced > Source: https://developer.squareup.com/docs/catalog-api/webhooks > Status: PUBLIC > Languages: cURL > Platforms: Command Line Learn how to use a webhook to accept notifications to sync your offline catalog. **Applies to:** [Catalog API](catalog-api/what-it-does) {% subheading %}Learn how to use a webhook to accept notifications to sync your offline catalog.{% /subheading %} {% toc hide=true /%} ## Overview The Catalog API supports the following webhook: | Event | Permission{% width="120px" %} | Description | |---------------|-------------------------------|------------------| |[catalog.version.updated](https://developer.squareup.com/reference/square/catalog-api/webhooks/catalog.version.updated) |`ITEMS_READ`|The catalog was updated. Webhook notification data is packaged as ` "catalog_version": { "updated_at": "2019-05-14T17:51:27Z"}`.| Use the `catalog.version.updated` webhook to build real-time notifications that help you keep the seller's item library in sync with your external catalog. If you're using your catalog to render, for example, a restaurant menu or an online catalog, responding immediately to item library updates is important. ## Catalog versions The version of a seller's catalog increments whenever a catalog object is mutated (created, updated, or deleted). The mutated object gets the new version number, while unmutated objects keep any of the previous version numbers. The webhook body includes a timestamp for when a new catalog version number is generated, which corresponds to the time when an object mutation is made. You can use this webhook to notify you when it's time to sync your catalog. {% aside type="tip" %} If your webhook endpoint goes offline for any reason, you can use the [Events API](events-api/overview) to play back webhook notifications that your endpoint might have missed while it was offline. {% /aside %} There's no need to refetch a seller's entire item library when you sync it with your catalog. Use the webhook notification to retrieve only the catalog objects that were mutated since the last time your endpoint received this webhook notification. ## Notification frequency Catalog objects can be mutated by the Square Dashboard, Square Point of Sale, or Catalog API integrations such as the one that you're developing. The `catalog.version.updated` webhook notifies your application of mutations generated in an item library regardless of what triggered the change. This means you get mutation notifications for events that your application didn't originate. Your webhook POST endpoint might be busy but it captures all mutations, regardless of the origin. This is a critical advantage if you need to keep your external catalog synced in real time. For example, if a seller updates the description of each cheese variation they sell, saving an edited variation increments the catalog version and triggers a webhook notification. In another common example, a seller imports an entire item library from a single source file. In this case, each imported item triggers a webhook notification rather than a single notification for the whole import. You can handle each notification and call `SearchCatalogObjects` to retrieve the mutated object or handle a notification every minute to get all objects mutated since the previous handled notification. Object mutations from Catalog API upsert and batch upsert requests also trigger webhook notifications. For a batch upsert, a single notification is sent for the entire batch, regardless of its size. {% aside type="tip" %} If you regularly poll `SearchCatalogObjects` for updates, you can replace regular polling with this webhook and potentially reduce the number of syncing operations you perform. {% /aside %} ## Subscribe to catalog.version.updated To subscribe to notifications of `catalog.version.updated` events, you need to configure webhooks for your application. A webhook registers the POST endpoint that Square should send notifications to, the events you want to be notified about, and the Square API version. **To configure a webhook** 1. In the [Developer Console](https://developer.squareup.com/apps), open the application that you want to receive webhook events. 1. In the left pane, choose **Webhooks**. 1. At the top of the page, choose **Sandbox** or **Production**. Choose [Sandbox](testing/sandbox) for testing. 1. Choose **Add Endpoint** and then configure the endpoint: 1. **Webhook Name** - Enter a name such as **Catalog Webhook**. 1. **URL** - Enter your notification URL. If you don't have a working POST endpoint yet, you can enter **https://example.com** as a placeholder. You can also sign in to [webhook.site](https://webhook.site/#!/ee19f4f8-dd1d-425b-a21e-bcda20590605) to obtain a test URL for webhook event notifications and use the obtained test URL. 1. **API Version** - Choose a Square API version. By default, this is set to the same version as your application. The API version sets the webhook event body to the Square API version that you use in your application. 1. **Events** - Choose **catalog.version.updated**. If you want to receive notifications about other events at the same webhook URL, choose them or configure another endpoint. 1. Choose **Save**. {% aside type="info" %} In the production environment, ignore the **Enable Webhooks** setting on the **Webhooks** page. This setting applies to webhooks for Connect V1 APIs, which are now Retired. {% /aside %} For more information, see [Square Webhooks](webhooks/overview). ## How catalog.version.updated works The `catalog.version.updated` webhook sends a notification any time any catalog object is created, updated, or deleted. For `catalog.version.updated` notifications, the `data` field includes a timestamp indicating when the catalog was last updated. ```bash { "type": "catalog.version.updated", "event_id": , "created_at": "2019-05-14T17:51:44Z", "merchant_id": "MERCHANT123", "data": { "type": "catalog_version", "id": "", "object": { "catalog_version": { "updated_at": "2019-05-14T17:51:27Z" } } } } ``` You don't need to use the `updated_at` timestamp from the webhook in the recommended sync flow. It's provided for convenience, but the value you pass to `SearchCatalogObjects` is the timestamp of the last time you synced. When you receive a `catalog.version.updated` notification, call the [SearchCatalogObjects](https://developer.squareup.com/reference/square/catalog-api/search-catalog-objects) endpoint and set the `begin_time` field to the timestamp of the last time you synced your catalog. This retrieves all the [CatalogObjects](https://developer.squareup.com/reference/square/objects/CatalogObject) updated after the timestamp listed in `begin_time`. You should store the `latest_time` value returned by the `SearchCatalogObjects` endpoint, so you can use it in your next call to `SearchCatalogObjects`. Using a locally generated timestamp might cause you to miss updates as a result of potential time discrepancies between the Square server and your application. A sample call to `SearchCatalogObjects` is as follows: ```` To include catalog objects that have been deleted since `BEGIN_TIME` in the search results, add `"include_deleted_objects":true` to the `bodyParameters`. ```` --- # Orders API > Source: https://developer.squareup.com/docs/orders-api/what-it-does > Status: PUBLIC > Languages: All > Platforms: All Learn more about processing orders with the Square Orders API. **Applies to:** [Orders API](https://developer.squareup.com/reference/square/orders-api) | [Catalog API](catalog-api/what-it-does) | [Customers API](customers-api/what-it-does) {% subheading %}Learn about the Orders API and how to track and manage the lifecycle of a purchase.{% /subheading %} {% toc hide=true /%} ## Overview The [Orders API](https://developer.squareup.com/reference/square/orders-api) can record purchase items, calculate totals, confirm payments, track an order's progress through fulfillment, and update a catalog inventory. It can also create fulfillment orders and send them to the Square Point of Sale application for fulfillment. {% aside type="important" %} There is no transaction fee for orders paid using Square payments. If you want to use the Square Orders API with a non-Square payments provider, there is a 1% fee per transaction. For more information, [contact us](https://squareup.com/help/contact?prefill=developer_api). {% /aside %} {% youtube src="https://www.youtube.com/embed/cyJlgGFQimg" /%} ## Orders components The following are some of the key data elements for the Orders API: * **Orders** - An order is a top-level container representing a request to purchase goods or services from a business. Every order includes fields for line item details, fulfillment details, and order summary data, such as the location ID credited with the order and the total amount of taxes collected. * **Line items** - Individual items that are purchased as part of the order (for example, an order for a sandwich and two cups of tea). Each line item can have one or more modifiers to represent an available size or color (for example, a chicken sandwich with extra mustard). Line items and modifiers can be built from [CatalogItemVariation](https://developer.squareup.com/reference/square/objects/CatalogItemVariation) and [CatalogModifier](https://developer.squareup.com/reference/square/objects/CatalogModifier) objects or created ad hoc (at the time of creation). * **Price adjustments** - An order (or individual line items) might be eligible for discounts or subject to service charges and taxes. The Orders API calculates and applies any price adjustments at the order or line item level. Price adjustments can be configured as Catalog API objects or created ad hoc. For more information, see [Order Price Adjustments](orders-api/price-adjustments). * **Fulfillment information** - Additional details about how to fulfill an order, such as the customer's name or the order pick up time. Every order that has fulfillment information is pushed to the Square Dashboard Order Manager when paid, so that sellers can manage order fulfillment. For more information, see [Manage Order Fulfillments](orders-api/fulfillments). * **Order source** - Tracks the digital or physical source of the order. Orders can be searched or retrieved by the source. For more information, see [Orders objects and data types](orders-api/how-it-works#orders-objects-and-datatypes). ## Integrating with the Orders API The Orders API integrates seamlessly with other Square APIs and resources to expand the functionality of your application. ### Square Order visibility Orders with fulfillment that have been fully paid are pushed to the Square Point of Sale and Square Dashboard Order Manager so that sellers can manage fulfillment with Square. The Orders API supports four types of fulfillment orders: Pickup, Shipment, Delivery, and In-store. For more information, see [Add fulfillment details](orders-api/create-orders#add-fulfillment-details). The Orders API can also get orders that are originated and completed on the Square Point of Sale. Such an order might have the `Order.source` field set to `SQUARE_POS`. Any associated payments will have the `Payment.application_details.`[square_product](https://developer.squareup.com/reference/square/enums/ApplicationDetailsExternalSquareProduct) field set to `SQUARE_POS`. If an order is created while Point of Sale is in Offline mode, the `created_at` timestamp is set to the time that a Square server received the create request from Point of Sale. Any Order that is created for the Square account that your application is connected to is visible to your application, regardless if it was created by Square, your application, or an application published by another developer. If another application attaches [custom attributes](orders-custom-attributes-api/overview) to an order, your application may not see them depending on the [visibility](orders-custom-attributes-api/custom-attribute-definitions#create-an-order-custom-attribute-definition) of the custom attribute. ### Payments Link your payments to `Order` objects to itemize sales and apply price modifiers such as taxes, discounts, and service charges. You can also use the Orders API to retrieve any payment activity associated with a sale, whether from the Square Point of Sale, invoices, or an integration build with the Payments API and Orders API. For more information, see [Pay for Orders](orders-api/pay-for-orders). ### Catalog Line items, line item modifiers, taxes, and discounts can all be defined as catalog objects. The Orders API reaches its full range of capabilities when orders are built using Square [Catalog objects](catalog-api/what-it-does). Key advantages to using catalog item variations and other catalog objects include: * Orders that reference catalog IDs for taxes and discounts are automatically calculated and applied to these price modifiers. * Orders with ad-hoc items can still get the correct tax amounts when letting Square [automatically apply taxes](orders-api/apply-taxes-and-discounts/auto-apply-taxes) by using a seller-defined [CatalogTax](https://developer.squareup.com/reference/square/objects/CatalogTax). * Orders that reference catalog line items use details defined in the catalog, such as the item name, price, and [measurement unit](orders-api/create-orders#catalog-variations-with-measurement-units). * When these orders are completed or refunded, Square updates the inventory for those items. Use the Catalog API to [build a catalog](catalog-api/build-with-catalog) and unlock the full range of capabilities of the Orders API. For more information about integrating orders with the catalog, see [Create Orders](orders-api/create-orders). {% aside type="tip" %} Orders can also be built from ad hoc line items defined when the `Order` object is created. You only need to supply an item name and price. {% /aside %} ### Customers `Order` objects can reference a customer profile. You can later use `SearchOrders` to search orders by customer. For more information about making customer profiles, see [Manage Customer Profiles](customers-api/use-the-api/keep-records). To learn about considerations for assigning a customer to an order, see [Linking customers to orders and payments](customers-api/use-the-api/integrate-with-other-services#link-customers-to-orders). ## Webhooks A webhook is a subscription that notifies you when a Square event occurs. The Orders API supports the following events: | Event |Permission{% width="140px" %}| Description | |---------|-----------------------------|----------------| |[order.created](https://developer.squareup.com/reference/square/webhooks/order.created) |`ORDERS_READ`|An [Order](https://developer.squareup.com/reference/square/objects/Order) was created.| |[order.fulfillment.updated](https://developer.squareup.com/reference/square/webhooks/order.fulfillment.updated) |`ORDERS_READ`|An [OrderFulfillment](https://developer.squareup.com/reference/square/objects/OrderFulfillment) was created or updated.| |[order.updated](https://developer.squareup.com/reference/square/webhooks/order.updated) |`ORDERS_READ`|An [Order](https://developer.squareup.com/reference/square/objects/order) was updated.| For more information about using webhooks, see [Square Webhooks](webhooks/overview). For a list of webhook events you can subscribe to, see [Webhook Events Reference](webhooks/v2webhook-events-tech-ref). ## See also * [Create Orders](orders-api/create-orders) * [Pay for Orders](orders-api/pay-for-orders) * [Video: Manage Orders with the Orders API](https://www.youtube.com/watch?v=sldn3byppJU&t=5s) --- # Pay for Orders > Source: https://developer.squareup.com/docs/orders-api/pay-for-orders > Status: PUBLIC > Languages: cURL > Platforms: Command Line You can pay for your orders with the Payments API (the CreatePayment endpoint) or the Orders API (the PayOrder endpoint). **Applies to:** [Orders API](orders-api/what-it-does) | [Payments API](payments-refunds) {% subheading %}Learn about paying for orders using the Orders API or Payments API.{% /subheading %} {% toc hide=true /%} ## Overview You can pay for your orders in two ways: with the Payments API [(CreatePayment](https://developer.squareup.com/reference/square/payments-api/create-payment) endpoint) or with the Orders API ([PayOrder](https://developer.squareup.com/reference/square/orders-api/pay-order) endpoint). The following sections explain when to use each API. {% aside type="info" %} If you're creating a `CASH` payment for an order, you need to call `CreatePayment` to create the cash payment and then call `PayOrder` to actually pay for the order. {% /aside %} ## Using the Orders API Sometimes customers want to apply multiple payments to an order (for example, to pay a portion of an order using a gift card and then apply a credit card for the remaining amount). To apply multiple payments to an order, applications must use the Orders API ([PayOrder](https://developer.squareup.com/reference/square/orders-api/pay-order) endpoint). These payments must be previously authorized (see [Delayed Capture of a Card Payment](payments-api/take-payments/card-payments/delayed-capture)). For example, to pay for an order using three payments, do the following: * Call `CreatePayment` three times. In each request, specify the order ID and set the `autocomplete` field to `false` (to obtain only authorization). * Call `PayOrder` by specifying the authorized payment IDs. The endpoint captures the previously authorized payments. {% aside type="important" %} You cannot set the `fulfillment.state` of any order fulfillment to `COMPLETED` until after you call `PayOrder`. {% /aside %} The endpoint also sets the order state to `COMPLETED`, provided that: * The sum of all these payments is equal to the order total (`total_money`). * The order doesn't include fulfillments. If the order does include a fulfillment, you need to call [UpdateOrder](https://developer.squareup.com/reference/square/orders-api/update-order) after you've called `PayOrder`. In your `UpdateOrder` request, set the state of any fulfillments to `COMPLETED` and the state of the order itself to `COMPLETED`. The following `PayOrder` example pays for an order by specifying the payment IDs of previously authorized payments: ```` Use the `PayOrder` endpoint to apply a $0 payment. The request doesn't include any payment IDs. ```` ## Using the Payments API When you want an application to pay for an order using a single payment, use the Payments API ([(CreatePayment](https://developer.squareup.com/reference/square/payments-api/create-payment) endpoint). Note the following: * The `CreatePayment` request must include an order ID. * The payment amount must match the order total (the `total_money` in the `Order` object). The following `CreatePayment` example charges the specified payment source $2 to pay for the specified order: ```` ## Make a $0 payment Suppose you create an order for $20 and apply a $20 discount. You then need to make a $0 payment before you can set the order `state` to `COMPLETED`. Applications can use either the Payments API or Orders API. Use the `CreatePayment` endpoint to record a $0 `CASH` or `EXTERNAL` payment for an order. ```` After you record a cash payment, the order isn't paid until you call the `PayOrder` endpoint with the ID of your cash payment. For more information about how to use payments, see [Take Payments](payments-api/take-payments). --- # Create Orders > Source: https://developer.squareup.com/docs/orders-api/create-orders > Status: PUBLIC > Languages: cURL > Platforms: Command Line Learn how to create an order, add line items, and track fulfillment. **Applies to:** [Orders API](orders-api/what-it-does) | [Catalog API](catalog-api/what-it-does) {% subheading %}Learn how to create an order, add line items, and track fulfillment.{% /subheading %} {% toc hide=true /%} ## Overview You can create `Order` objects by calling the [CreateOrder](https://developer.squareup.com/reference/square/orders-api/create-order) endpoint. `Order` objects can be created with any combination of line items, fulfillments, taxes, and discounts. They can also be created empty and [updated](orders-api/manage-orders/update-orders) with elements over time. Sellers can view orders in the Square Dashboard; however, Square pushes orders to the Square Dashboard only if the orders meet specific conditions. For more information, see [View orders in the Square Dashboard or Square products](#view_orders). ## Create line items You have two options for creating line items: * **Reference a catalog item variation** - Strongly recommended because this kind of line item inherits the catalog price and quantity unit from the catalog. * **Ad hoc line items** - A catalog item is not referenced. Line item price and quantity unit are input at time of order. ### Create a line item for a catalog object The following [CreateOrder](https://developer.squareup.com/reference/square/orders-api/create-order) request creates an order using a catalog item variation and a buyer-selected modifier. To test this scenario, you need an item with one or more variations (such as small and large) and an item modifier (such as sugar or milk) in your item library. For more information, see [Build a Simple Catalog](catalog-api/build-with-catalog). In addition to adding your access token, update the following example request by providing `catalog_object_id` values from your item library (for both the line item and modifier) and your `location_id`: ```` A line item can have one or more modifiers. In the preceding example, the order contains a line item with a quantity of 1. The line item can have a modifier, which has its own quantity field. For example, suppose a restaurant offers hamburgers. When a customer orders a hamburger, the restaurant records the order by creating an `Order` object with a line item (Hamburger). If the buyer wants a cheeseburger instead (a hamburger with cheese), the line item includes a modifier (cheese) with a quantity of 1. If the customer wants extra cheese, the modifier quantity can be 2 or more. Conversely, if the customer doesn't want any cheese, you don't need to add the `modifiers` list at all. #### Ad hoc line items with a fractional quantity If you call `CreateOrder` or `CalculateOrder` with items sold by fractional units, Square calculates the line item total as the base price multiplied by the quantity as a decimal. When a seller wants to sell a fraction of the item, the order line item quantity can specify a decimal quantity such as .50, meaning half of the item. {% aside type="important" %} An ad hoc line item that's sold by a fractional quantity must have a `quantity_unit` property ([OrderQuantityUnit](https://developer.squareup.com/reference/square/objects/OrderQuantityUnit)). {% /aside %} The following example is a `quantity_unit` property for an ad hoc item sold by the gallon, which is sold by the 1/100th of a gallon (`"precision": 2`). ```json "quantity_unit": { "measurement_unit": { "volume_unit": "GENERIC_GALLON" }, "precision": 2 } ``` {% tabset %} {% tab id="Request" %} The following example `CreateOrder` request shows selling a 50/100th of a gallon of liquid fertilizer, which is normally sold by the gallon: ```` {% /tab %} {% tab id="Response" %} The order returned in the response shows that 1/2 of a gallon of fertilizer was sold. The base price of the gallon is still $1 but only $.50 is charged as shown in the `variation_total_price_money` property of the order line item. ```json { "order": { "id": "MFeawlhJs7Eam9GDV0WvNBUT9adZY", "location_id": "VJN4XSBFTVPK9", "line_items": [ { "uid": "YSJLMLmYIPbxMOt4qBHiqC", "quantity": "0.50", "name": "Rose fertilizer - Liquid", "variation_name": "Medium", "base_price_money": { "amount": 100, "currency": "USD" }, "gross_sales_money": { "amount": 50, "currency": "USD" }, "total_tax_money": { "amount": 5, "currency": "USD" }, "total_discount_money": { "amount": 0, "currency": "USD" }, "total_money": { "amount": 55, "currency": "USD" }, "variation_total_price_money": { "amount": 50, "currency": "USD" }, "applied_taxes": [ { "uid": "7aaa594e-75c0-4d12-ac86-be9a4eb6fe92", "tax_uid": "35c70c38-4ed8-429a-90db-d63b4067eef2", "applied_money": { "amount": 1, "currency": "USD" } }, { "uid": "bj5r8QUqITUKRdstflM17", "tax_uid": "STATE_SALES_TAX_UID", "applied_money": { "amount": 4, "currency": "USD" } } ], "item_type": "ITEM", "quantity_unit": { "measurement_unit": { "volume_unit": "GENERIC_GALLON" } }, "total_service_charge_money": { "amount": 0, "currency": "USD" } } ], "taxes": [ { "uid": "STATE_SALES_TAX_UID", "catalog_object_id": "BME4AVPBJG7ZCMJAK3PCQGK4", "catalog_version": 1726778089811, "name": "catalog item tax", "percentage": "40.0", "type": "ADDITIVE", "applied_money": { "amount": 4, "currency": "USD" }, "scope": "ORDER" }, { "uid": "35c70c38-4ed8-429a-90db-d63b4067eef2", "catalog_object_id": "65EJB2LTBA4E3LGIMHWGBCFX", "catalog_version": 1726597444206, "name": "Garden Supplies Tax", "percentage": "7.5", "type": "ADDITIVE", "applied_money": { "amount": 1, "currency": "USD" }, "scope": "LINE_ITEM", "auto_applied": true } ], "created_at": "2024-09-25T17:34:59.832Z", "updated_at": "2024-09-25T17:34:59.832Z", "state": "OPEN", "version": 1, "reference_id": "my-order-0001", "total_tax_money": { "amount": 5, "currency": "USD" }, "total_discount_money": { "amount": 0, "currency": "USD" }, "total_tip_money": { "amount": 0, "currency": "USD" }, "total_money": { "amount": 55, "currency": "USD" }, "total_service_charge_money": { "amount": 0, "currency": "USD" }, "net_amounts": { "total_money": { "amount": 55, "currency": "USD" }, "tax_money": { "amount": 5, "currency": "USD" }, "discount_money": { "amount": 0, "currency": "USD" }, "tip_money": { "amount": 0, "currency": "USD" }, "service_charge_money": { "amount": 0, "currency": "USD" } }, "source": { "name": "Sandbox for sq0idp-IzilfMqQrp250DGdNk7FQw" }, "customer_id": "QKZMSWM0SKSHFYS7S20SH62EQR", "pricing_options": { "auto_apply_discounts": true, "auto_apply_taxes": true }, "net_amount_due_money": { "amount": 55, "currency": "USD" } } } ``` {% /tab %} {% /tabset %} {% anchor id="specify-item-quantity-and-measurement-unit" /%} #### Catalog variations with measurement units If the catalog item variation referenced by the line item has a `measurement_unit_id` when the order is created, a [quantity_unit](https://developer.squareup.com/reference/square/objects/OrderLineItem#definition__property-quantity_unit) property is added to the line item. `quantity_unit` tells you how the item is sold on the order. For example, the item might be sold by the ounce, in which case the `order.line_items[].quantity` attribute indicates how many ounces are sold on the order. A quantity of `2` means that two ounces are sold. {% aside type="info" %} Starting on September 18, 2024, orders created in the Square Point of Sale application or other Square products might have a fractional `Order.line_items[].quantity` value with no `quantity_unit` property. {% /aside %} In the following example, the line item is sold by the pound and can be as small as one pound (`1`). This item cannot be sold by the fraction of a pound. ```json "quantity_unit": { "measurement_unit": { "weight_unit": "IMPERIAL_POUND", "type": "TYPE_WEIGHT" }, "precision": 0, "catalog_object_id": "QTSYO4OCO6RIV2UWZOP6BRLV", "catalog_version": 1724952893872 } ``` If an item is usually sold by the pound but can be portioned and sold by the ounce, the precision should be four decimal points (`"precision": 4`). This allows a seller to set a quantity of one ounce (0.0625) out of a pound. {% tabset %} {% tab id="Request" %} In the following request, the `Catalog` object `HXSNEZN7N3NBGJX2XJ2Z6R5Q` is liquid photo chemicals used to process black and white film. This specialty chemical is sold for $2.34 per ounce and the buyer has ordered one ounce. ```` {% /tab %} {% tab id="Response" %} The response shows that one ounce of "Ecktol" is sold and the measurement unit details are in the order. In the seller's catalog, the measurement unit is stored as a [CatalogMeasurementUnit](https://developer.squareup.com/reference/square/objects/CatalogMeasurementUnit) and referenced by the `CatalogItemVariation.measurement_unit_id`. ```json { "order": { "location_id": "E78VDDVFW1EYX", "line_items": [ { "uid": "gPpCZ1gxndYwM1oeTdBTPC", "catalog_object_id": "HXSNEZN7N3NBGJX2XJ2Z6R5Q", "catalog_version": 1724952893872, "quantity": "1", "name": "Ecktol", "variation_name": "Regular", "base_price_money": { "amount": 234, "currency": "USD" }, "gross_sales_money": { "amount": 234, "currency": "USD" }, "total_tax_money": { "amount": 0, "currency": "USD" }, "total_discount_money": { "amount": 0, "currency": "USD" }, "total_money": { "amount": 234, "currency": "USD" }, "variation_total_price_money": { "amount": 234, "currency": "USD" }, "item_type": "ITEM", "quantity_unit": { "measurement_unit": { "weight_unit": "IMPERIAL_WEIGHT_OUNCE", "type": "TYPE_WEIGHT" }, "precision": 0, "catalog_object_id": "QTSYO4OCO6RIV2UWZOP6BRLV", "catalog_version": 1724952893872 }, "total_service_charge_money": { "amount": 0, "currency": "USD" } } ], "created_at": "2024-08-29T20:26:10.634Z", "updated_at": "2024-08-29T20:26:10.634Z", "state": "OPEN", "version": 1, "total_tax_money": { "amount": 0, "currency": "USD" }, "total_discount_money": { "amount": 0, "currency": "USD" }, "total_tip_money": { "amount": 0, "currency": "USD" }, "total_money": { "amount": 234, "currency": "USD" }, "total_service_charge_money": { "amount": 0, "currency": "USD" }, "net_amounts": { "total_money": { "amount": 234, "currency": "USD" }, "tax_money": { "amount": 0, "currency": "USD" }, "discount_money": { "amount": 0, "currency": "USD" }, "tip_money": { "amount": 0, "currency": "USD" }, "service_charge_money": { "amount": 0, "currency": "USD" } }, "customer_id": "0V2VTQ2XQZJRNA8WXVSF81EWH0", "net_amount_due_money": { "amount": 234, "currency": "USD" } } } ``` {% /tab %} {% /tabset %} ### Create an ad hoc line item The following `CreateOrder` request creates an order with one ad hoc line item (hamburger) and one modifier (cheese): ```` {% aside type="tip" %} If you create ad hoc line items, you cannot apply catalog rule-based discounts to those line items. {% /aside %} ## Add taxes and discounts If an order is taxable (either a tax on the order total or on individual line items), it needs to have taxing and discount details. Before calling [CalculateOrder](https://developer.squareup.com/reference/square/orders-api/calculate-order), be sure to add tax and discount details to the order. For more information, see [Apply Taxes and Discounts](orders-api/apply-taxes-and-discounts). {% anchor id="fulfillments" /%} ## Add fulfillment details To create a pickup order, you need to add a `fulfillments` object to your order. The following sample request creates a pickup order for a small coffee: ```` This request specifies the Sandbox environment (`https://connect.squareupsandbox.com/v2/orders`). {% anchor id="view_orders" /%} ## View orders in the Square Dashboard or Square products An order appears in the Square Dashboard or Square products (such as Square Point of Sale) if both the following conditions are true: * The order includes fulfillment. * The order is paid. If you're using a Sandbox test account to validate your code, the order appears in the **Square Dashboard** for the account you're testing with. For more information, see [Square Sandbox](devtools/sandbox/overview). ![A screenshot showing the Sandbox test accounts page in the Developer Console.](//images.ctfassets.net/1nw4q0oohfju/5c1kYt2m4SZmIwQbxXq9Zl/b6fbe201d05c329158fe404f819c1a00/developer-dashboard-sandbox-test-accounts.png) ## Calculate an order The [CalculateOrder](https://developer.squareup.com/reference/square/orders-api/calculate-order) endpoint allows applications to preview prices without creating an order. For example, Square Virtual Terminal uses this endpoint in the application flow to show a purchase total to the buyer without creating an actual order. Purchase total previews are also useful when applications integrate advanced pricing components, such as rewards and discounts. For example, an eCommerce application might integrate a [Square loyalty program](loyalty/overview) to offer buyer loyalty discounts. The application can use the `CalculateOrder` endpoint to show buyers a preview of applying loyalty points to their orders without locking loyalty points until the buyers are ready to pay for the orders. In the `CalculateOrder` request, provide the following: * **An order** - The order you provide can be an existing order or an order that hasn't been created. * **Proposed rewards** - The rewards to apply. The endpoint returns a view of the order to be created with the specified discount applied. Applications can then show the order as a preview to help the buyer make a decision. ## Create a draft order The [CreateOrder](https://developer.squareup.com/reference/square/orders-api/update-order) endpoint by default sets the `state` of the order it creates to `OPEN`. An `OPEN` state indicates that the order can be fulfilled and payment can be processed. In some application scenarios, such as an eCommerce cart building application, buyers add items to the cart only to later abandon the order. In such scenarios, applications can create temporary orders by explicitly setting the order `state` to `DRAFT` in a `CreateOrder` request. ```json { "order": { "line_items": …, "state": "DRAFT" } } ``` Orders in the `DRAFT` state cannot be fulfilled or paid. For example, Square products or the Payments API cannot process payments for a `DRAFT` order. When the buyer is ready to make the purchase, the application can call [UpdateOrder](https://developer.squareup.com/reference/square/orders-api/update-order) to set the order `state` to `OPEN` so that the order can be fulfilled or payment can be processed. ```json { "order": { "id": …, "version": …, "state": "OPEN" } } ``` Note that applications can use `UpdateOrder` to change the `state` and fulfill the order at the same time. The Orders API doesn't provide an endpoint to delete an order. However, Square reserves the right to delete `DRAFT` orders that haven't been updated in 30 days. Applications can use the order `state` as a search filter in `SearchOrders` to retrieve only orders that can be fulfilled (where the `state` is `OPEN`), as shown in the following example: ```` In summary, a `DRAFT` order differs from an `OPEN` order as follows: * A `DRAFT` order cannot be fulfilled. You can create fulfillments, but they cannot progress beyond the initial `PROPOSED` fulfillment state. * A `DRAFT` order cannot be paid. That is, a `DRAFT` order doesn't have tenders added. * There's no guarantee you can retrieve a `DRAFT` order 30 days after creation. * A `DRAFT` order doesn't appear in Sales Summary reports in the Square Dashboard. If your application is using the [Subscriptions API](subscriptions/overview) to create and manage subscriptions, you're using draft orders to create [order templates](subscriptions-api/manage-subscriptions#phases-and-order-templates) that model the order created with each period of a subscription. ## Clone an order The [CloneOrder](https://developer.squareup.com/reference/square/orders-api/clone-order) endpoint allows applications to reorder without having to create an order from scratch. In the request, you provide the ID of an existing order to clone. You can clone any existing order regardless of its `state`, but the cloned order is initially `DRAFT`. The clone is like any other order created using the `CreateOrder` endpoint. It follows the normal order lifecycle and can be modified like any other order. When cloning an existing order, `CloneOrder` copies only the applicable fields in the new order, such as: * `location_id` * `customer_id` * `line_items` (except for Square-computed fields) * `taxes` * `discounts` * `service_charges` * `pricing_options` Orders have other fields that are specific to individual orders, such as `fulfillments`, `tenders`, `metadata`, `reference_id`, `rewards`, and the timestamp fields. These field values aren't copied. For more information and an example, see [CloneOrder](https://developer.squareup.com/reference/square/orders-api/clone-order). ## See also * [Apply Taxes and Discounts](orders-api/apply-taxes-and-discounts) * [Pay for Orders](orders-api/pay-for-orders) * [Video: Ad Hoc Line-Items on an Order](https://www.youtube.com/watch?v=HoglY4Pplcs) --- # Verify your Pickup Order > Source: https://developer.squareup.com/docs/orders-api/quick-start/step-5 > Status: PUBLIC > Languages: cURL, Node.js > Platforms: Command Line **Applies to:** [Orders API](orders-api/what-it-does) {% subheading %}Learn how to verify a pickup order generated with the sample application in the Square Dashboard.{% /subheading %} {% toc hide=true /%} ## Overview Now that you have your developer credentials, configured the sample application, generated catalog items, and taken a pickup order, you're ready to verify your pickup order. You can verify your pickup order by checking the Square Dashboard for your application in your Sandbox test account. 1. Open the [Developer Console](https://developer.squareup.com/apps) and scroll down to **Sandbox Test Accounts**. 2. Find the test account you used for the order-ahead sample application, and then choose the **Open** button. ![A graphic showing the Applications page of the Developer Console with the test account you used for the order-ahead sample application. ](//images.ctfassets.net/1nw4q0oohfju/2oXHkg3exO0VOzfc4ylOTC/4a8b4e85ce3b4115c75abb3ee32cf7ce/test-account-applications-page-developer-dashboard.png) 3. In the left pane, choose **Orders**. Your pickup order should appear in the list of open orders. ![A graphic showing the pickup order in the Square Dashboard.](//images.ctfassets.net/1nw4q0oohfju/1u6sgYo3q4OSwA1hPeceJs/0d266e5312263f8faea8bdbb99b56c9f/pickup-order-seller-dashboard.png) {% aside type="success" %} You've completed a pickup order with the order-ahead sample application. {% /aside %} ## See also * [Create Orders](orders-api/create-orders) * [Pay for Orders](orders-api/pay-for-orders) --- # Get Developer Credentials > Source: https://developer.squareup.com/docs/orders-api/quick-start/step-1 > Status: PUBLIC > Languages: All > Platforms: All Get your developer credentials and test account for the Orders API sample application. **Applies to:** [Orders API](orders-api/what-it-does) {% subheading %}Learn how to get Sandbox developer credentials and create an optional test account.{% /subheading %} {% toc hide=true /%} ## Developer credentials Get Sandbox developer credentials for your default test application: 1. Open the [Developer Console](https://developer.squareup.com/apps). You're prompted to sign in or create an account. 1. Create a Square application and name it **Order-Ahead App**. 1. Choose **Order-Ahead App** to open your Square application settings page. 2. Confirm that **Sandbox** mode is selected at the top of the page. 3. On the **Credentials** page, scroll down and copy the values for **Sandbox Application ID**. ![An animation showing the process for getting application credentials and location ID in the Developer Console.](//images.ctfassets.net/1nw4q0oohfju/4VD8YmCpVXhASu4yHCgS6x/2fa0d4a19009b17b92aaef6ff1823020/get-app-credentials-developer-dashboard.gif) ## Sandbox test account You should create a new test account for this sample application. If you've been creating catalog items in an existing test account, the sample application displays them in the menu page along with the food items seeded by the sample. To create a new Sandbox test account: 1. Open the [Developer Console](https://developer.squareup.com/apps). 2. In the left pane, choose **Sandbox Test Accounts**. 3. Choose **+ New sandbox test account** to create a new account. 4. In the **Sandbox test account name** box, enter **Cate's Deli** or whatever name you want to use. 5. In the **Country** box, choose your country. 7. Choose **Save**. ## Get a Sandbox access token You need to authorize your application to access the new Sandbox test account instead of the default test account that was created for you. To grant authorization, follow these steps: 1. In the Developer Console, choose the **Order-Ahead** application. 2. In the left pane, choose **OAuth**. 3. Choose **Authorize test account**. 4. Choose the new Sandbox test account. 5. Leave all individual permissions selected. 6. Choose **Save**. 7. Copy the new access token from the **Access token** column of the table. Use the access token to configure the sample application. {% aside type="tip" %} In your production application, you can use the OAuth API to let sellers grant your application access to their account. For more information, see [OAuth Walkthrough](oauth-api/walkthrough). {% /aside %} --- # Configure the Order-Ahead Sample Application > Source: https://developer.squareup.com/docs/orders-api/quick-start/step-2 > Status: PUBLIC > Languages: cURL > Platforms: Command Line Configure the Orders API sample application with your developer credentials. **Applies to:** [Orders API](orders-api/what-it-does) | [OAuth API](oauth-api/overview) {% subheading %}Learn how to configure the sample application and test your credentials.{% /subheading %} {% toc hide=true /%} ## Configure the application Download the order-ahead sample application from GitHub and complete the following steps to configure the sample application for your environment. 1. Download the [order-ahead sample application](https://github.com/square/connect-api-examples/tree/master/connect-examples/v2/node_orders-payments) from GitHub. 2. In the root directory of the sample, create a copy of the .env.example file and name the new file **.env**. 3. In the .env file, replace the placeholder `SQUARE_SANDBOX_ACCESS_TOKEN` and `SQUARE_SANDBOX_APPLICATION_ID` values with the Sandbox credentials that you copied in [Step 1: Get Developer Credentials](orders-api/quick-start/step-1). The following shows an example of new values: ``` # Sandbox Credentials SQUARE_ACCESS_TOKEN=GmbHQbFdRGhiYCNp8sxVzdcfwhXPEi6KU-qbZohsWQeBC55iGHq5TB6Msexample SQUARE_APPLICATION_ID=sandbox-sq0idb-ueuyW79WprkFzwXexample ... ``` You can optionally set your production credentials; however, you work in the Square Sandbox for the rest of this tutorial. {% aside type="important" %} You should use your own credentials only for testing the sample application. If you plan to make a version of this sample application available for your own purposes, use the [OAuth API](oauth-api/overview) to securely obtain and manage access to Square accounts. {% /aside %} ## Test your credentials When you've finished setting up your credentials, you can test the order-ahead sample application to confirm that you've authorized your application. To test the order-ahead sample application: 1. Run the following command in the root directory of the order-ahead sample application: ```bash npm test ``` 2. Open localhost:3000 in your browser. If your sample application is set, you should see a gray screen with your business location name at the top. {% aside type="tip" %} Don't worry if you see the following error message: "Cannot read property ‘image_data’ of undefined." You work on importing catalog items in [Step 3: Generate Test Catalog Items](orders-api/quick-start/step-3). {% /aside %} --- # Take a Pickup Order and Pay for It > Source: https://developer.squareup.com/docs/orders-api/quick-start/step-4 > Status: PUBLIC > Languages: cURL > Platforms: Command Line Create and pay for a pickup order using the Orders API sample application. **Applies to:** [Orders API](orders-api/what-it-does) {% subheading %}Learn how to create and pay for a pickup order using the sample application.{% /subheading %} {% toc hide=true /%} ## Overview Now that you have your developer credentials, configured the sample application, and generated catalog items, you're ready to take a pickup order and pay for it. Try taking a pickup order and paying for it using your application. 1. Choose any item. 2. In the popup menu, choose **Buy This**. 3. Choose a pickup time, enter a test customer name and phone number in the **Pickup Name** box and **Pickup Phone Number** box, and then choose **Continue to Payment**. 4. Pay for your order using the following test value: Card information | Value ---------------- | ------------------- Card number | 4111 1111 1111 1111 Expiration date | 12/21 CVV | 111 ## Test values To get more test credit card values, including some for generating error states, see [Sandbox Test Values](testing/test-values). --- # Order-Ahead Application Use Case > Source: https://developer.squareup.com/docs/orders-api/order-ahead-usecase > Status: PUBLIC > Languages: All > Platforms: All An example use case of how an order-ahead application can use the Orders API. **Applies to:** [Orders API](orders-api/what-it-does) | [Catalog API](catalog-api/what-it-does)| [Loyalty API](loyalty-api/overview) | [Payments API](payments-refunds) | [Web Payments SDK](web-payments/overview) {% subheading %}Learn how the Orders, Catalog, Payment API, and Web Payment SDK can power an order-ahead application.{% /subheading %} {% toc hide=true /%} ## Overview Square offers an order-ahead sample application project that you can download, configure with your Square credentials, build, and run. For more information, see [Order-Ahead Sample Application](orders-api/quick-start). Suppose you're building an order-ahead application for a coffee shop that uses Square for its payment processing. Customers can visit the shop's browser page to order and pay for drinks ahead of time. This allows the staff to start preparing the customer's order and have it ready for pickup when the customer arrives. Assuming the coffee shop has [built a catalog](catalog-api/build-with-catalog) with the Catalog API, your order-ahead application uses Square APIs to: * Create an order for the customer using [catalog items](catalog-api/search-catalog-items). * Notify the seller through Order Manager in Square Point of Sale. * Apply a tax and discount. * Capture and associate a payment with the order. * Track the order's fulfillment state and update the customer through the order-ahead application. ## Display a coffee menu The buyer starts the process by opening a coffee shop menu page on their browser. The page is built with catalog items returned to your application by the [SearchCatalogItems](catalog-api/search-catalog-items#search-with-a-category-id-filter) endpoint. To ensure that the `SearchCatalogItems` endpoint returns the coffee items to fill the coffee menu, these items should be grouped under the [CatalogCategory](https://developer.squareup.com/reference/square/objects/CatalogCategory) that the shop created for coffee items. For more information about building a menu in a browser page, see [Order-Ahead Sample Application](orders-api/quick-start). ## Create an order The buyer orders one small coffee using the order-ahead application, pays using the application, and picks up the order at the coffee shop. To facilitate this process, your application calls [CreateOrder](https://developer.squareup.com/reference/square/orders-api/createorder) to create an order for the buyer. The following example references the catalog object IDs for the coffee item and the size modifier: {% tabset %} {% tab id="Request" %} The following example request adds the coffee as a line item and asks for a catalog sales tax to be applied to the coffee: ```` {% /tab %} {% tab id="Response" %} The order returned in the response shows that a cup of coffee was ordered and Washington state sales tax was automatically applied to the order. The scope of the tax is set to `LINE_ITEM` so it applies to the coffee. ```json { "order": { "id": "aOqBokk0BGMIenv2FLxf81rPCQ6YY", "location_id": "E78VDDVFW1EYX", "line_items": [ { "uid": "pPE0m2p0KHAjnBjMRqKTJB", "catalog_object_id": "32VNHUXOSP4UIRS3DV5TAIAY", "catalog_version": 1738622146579, "quantity": "1", "name": "One-off coffee mug", "variation_name": "Coffee cup - brown", "base_price_money": { "amount": 100, "currency": "USD" }, "gross_sales_money": { "amount": 100, "currency": "USD" }, "total_tax_money": { "amount": 9, "currency": "USD" }, "total_discount_money": { "amount": 0, "currency": "USD" }, "total_money": { "amount": 109, "currency": "USD" }, "variation_total_price_money": { "amount": 100, "currency": "USD" }, "applied_taxes": [ { "uid": "7d8b3f81-f94e-4e48-a0f6-bbdadba68b04", "tax_uid": "0f8e9c2c-a39b-4b7e-8d70-7f3ebacf8d42", "applied_money": { "amount": 9, "currency": "USD" } } ], "item_type": "ITEM", "total_service_charge_money": { "amount": 0, "currency": "USD" } } ], "taxes": [ { "uid": "0f8e9c2c-a39b-4b7e-8d70-7f3ebacf8d42", "catalog_object_id": "UCQQDWUYMYIZD3NZZBG7GLQK", "catalog_version": 1649720625765, "name": "Washington", "percentage": "8.9", "type": "ADDITIVE", "applied_money": { "amount": 9, "currency": "USD" }, "scope": "LINE_ITEM", "auto_applied": true } ], "created_at": "2025-02-04T23:14:33.159Z", "updated_at": "2025-02-04T23:14:33.159Z", "state": "OPEN", "version": 1, "total_tax_money": { "amount": 9, "currency": "USD" }, "total_discount_money": { "amount": 0, "currency": "USD" }, "total_tip_money": { "amount": 0, "currency": "USD" }, "total_money": { "amount": 109, "currency": "USD" }, "total_service_charge_money": { "amount": 0, "currency": "USD" }, "net_amounts": { "total_money": { "amount": 109, "currency": "USD" }, "tax_money": { "amount": 9, "currency": "USD" }, "discount_money": { "amount": 0, "currency": "USD" }, "tip_money": { "amount": 0, "currency": "USD" }, "service_charge_money": { "amount": 0, "currency": "USD" } }, "source": { "name": "app for marketplace" }, "customer_id": "KZSXNTC1TD14MH7H13MQ07TF4C", "pricing_options": { "auto_apply_discounts": true, "auto_apply_taxes": true }, "net_amount_due_money": { "amount": 109, "currency": "USD" } } } ``` {% /tab %} {% /tabset %} Referencing catalog IDs enables you to pull seller-defined data from Square-defined details into your order, such as an item name and price. If inventory is tracked for catalog items, adding their IDs to an order lets Square update item inventory when the order is fulfilled. For more information, see [Create Orders](orders-api/create-orders). ## Add fulfillment information to the order Your order-ahead application adds a `fulfillment` object to define and track the fulfillment status and details. The fulfillment type is defined as `PICKUP` because the customer has chosen to pick up the order at the location. {% tabset %} {% tab id="Request" %} The following example [UpdateOrder](https://developer.squareup.com/reference/square/orders-api/UpdateOrder) request references the ID of the order that was created in the previous step. Because the Orders API supports sparse updates, your update request only needs to include the sub-resource that you're adding or changing in an order. In this case, the request is adding a [Fulfillment](https://developer.squareup.com/reference/square/objects/Fulfillment) resource to the order. ```` {% /tab %} {% tab id="Response" %} The response carries the updated order with an incremented version number and the fulfillment added by the update request. ```json { "order": { "id": "aOqBokk0BGMIenv2FLxf81rPCQ6YY", "location_id": "E78VDDVFW1EYX", "line_items": [ { "uid": "pPE0m2p0KHAjnBjMRqKTJB", "catalog_object_id": "32VNHUXOSP4UIRS3DV5TAIAY", "catalog_version": 1738622146579, "quantity": "1", "name": "One-off coffee mug", "variation_name": "Coffee cup - brown", "base_price_money": { "amount": 100, "currency": "USD" }, "gross_sales_money": { "amount": 100, "currency": "USD" }, "total_tax_money": { "amount": 9, "currency": "USD" }, "total_discount_money": { "amount": 0, "currency": "USD" }, "total_money": { "amount": 109, "currency": "USD" }, "variation_total_price_money": { "amount": 100, "currency": "USD" }, "applied_taxes": [ { "uid": "7d8b3f81-f94e-4e48-a0f6-bbdadba68b04", "tax_uid": "0f8e9c2c-a39b-4b7e-8d70-7f3ebacf8d42", "applied_money": { "amount": 9, "currency": "USD" } } ], "item_type": "ITEM", "total_service_charge_money": { "amount": 0, "currency": "USD" } } ], "taxes": [ { "uid": "0f8e9c2c-a39b-4b7e-8d70-7f3ebacf8d42", "catalog_object_id": "UCQQDWUYMYIZD3NZZBG7GLQK", "catalog_version": 1649720625765, "name": "Washington", "percentage": "8.9", "type": "ADDITIVE", "applied_money": { "amount": 9, "currency": "USD" }, "scope": "LINE_ITEM", "auto_applied": true } ], "fulfillments": [ { "uid": "KbGTRwmKLFPb8v1DYhNNzC", "type": "PICKUP", "state": "PROPOSED", "pickup_details": { "pickup_at": "2023-11-30T01:01:05.000Z", "note": "Just a little cream please", "schedule_type": "ASAP", "recipient": { "display_name": "A. CoffeeDrinker", "email_address": "recipient email address", "phone_number": "1 (234) 567 8900" }, "pickup_window_duration": "P1W3D", "prep_time_duration": "P1W3D" } } ], "created_at": "2025-02-04T23:14:33.159Z", "updated_at": "2025-02-04T23:21:24.167Z", "state": "OPEN", "version": 2, "total_tax_money": { "amount": 9, "currency": "USD" }, "total_discount_money": { "amount": 0, "currency": "USD" }, "total_tip_money": { "amount": 0, "currency": "USD" }, "total_money": { "amount": 109, "currency": "USD" }, "total_service_charge_money": { "amount": 0, "currency": "USD" }, "net_amounts": { "total_money": { "amount": 109, "currency": "USD" }, "tax_money": { "amount": 9, "currency": "USD" }, "discount_money": { "amount": 0, "currency": "USD" }, "tip_money": { "amount": 0, "currency": "USD" }, "service_charge_money": { "amount": 0, "currency": "USD" } }, "source": { "name": "app for marketplace" }, "customer_id": "KZSXNTC1TD14MH7H13MQ07TF4C", "pricing_options": { "auto_apply_discounts": true, "auto_apply_taxes": true }, "net_amount_due_money": { "amount": 109, "currency": "USD" } } } ``` {% /tab %} {% /tabset %} As this order moves through fulfillment states, the Orders API automatically updates the status field. For more information about creating fulfillment orders, see [Create a draft order](orders-api/create-orders#create-a-draft-order). ## Apply a discount Before paying for the order, the customer supplies a coupon for a discount on the coffee. You have both the automatically applied tax and the discount defined in your catalog. The order-ahead application applies the discount to the order by populating the order-level discounts field with references to the catalog object IDs. The discount scope is set to `LINE_ITEM` and applies only to the cookie line item. {% tabset %} {% tab id="Request" %} The following example shows that a catalog discount is being added to the order and applied to the coffee line item. The [OrderLineItemDiscount](https://developer.squareup.com/reference/square/objects/OrderLineItemDiscount) is added to the order and the [OrderLineItem](https://developer.squareup.com/reference/square/objects/OrderLineItem) is updated to add the `applied_discounts` property that references the order discount. ```` {% /tab %} {% tab id="Response" %} The response shows that a 5% discount has been added to the order and applied to the coffee line item. ```json { "order": { "id": "aOqBokk0BGMIenv2FLxf81rPCQ6YY", "location_id": "E78VDDVFW1EYX", "line_items": [ { "uid": "pPE0m2p0KHAjnBjMRqKTJB", "catalog_object_id": "32VNHUXOSP4UIRS3DV5TAIAY", "catalog_version": 1738622146579, "quantity": "1", "name": "One-off coffee mug", "variation_name": "Coffee cup - brown", "base_price_money": { "amount": 100, "currency": "USD" }, "gross_sales_money": { "amount": 100, "currency": "USD" }, "total_tax_money": { "amount": 9, "currency": "USD" }, "total_discount_money": { "amount": 5, "currency": "USD" }, "total_money": { "amount": 104, "currency": "USD" }, "variation_total_price_money": { "amount": 100, "currency": "USD" }, "applied_taxes": [ { "uid": "7d8b3f81-f94e-4e48-a0f6-bbdadba68b04", "tax_uid": "0f8e9c2c-a39b-4b7e-8d70-7f3ebacf8d42", "applied_money": { "amount": 9, "currency": "USD" } } ], "applied_discounts": [ { "uid": "Dg3xIxKgtDJQAYE2ZqXRz", "discount_uid": "ARy34sogRd1AmuBZiUg2G", "applied_money": { "amount": 5, "currency": "USD" } } ], "item_type": "ITEM", "total_service_charge_money": { "amount": 0, "currency": "USD" } } ], "taxes": [ { "uid": "0f8e9c2c-a39b-4b7e-8d70-7f3ebacf8d42", "catalog_object_id": "UCQQDWUYMYIZD3NZZBG7GLQK", "catalog_version": 1649720625765, "name": "Washington", "percentage": "8.9", "type": "ADDITIVE", "applied_money": { "amount": 9, "currency": "USD" }, "scope": "LINE_ITEM", "auto_applied": true } ], "discounts": [ { "uid": "ARy34sogRd1AmuBZiUg2G", "catalog_object_id": "YPQO34UERK4BGC7P7WXEL7ZX", "catalog_version": 1738713513765, "name": "Weekday Coffee Discount", "percentage": "5.0", "applied_money": { "amount": 5, "currency": "USD" }, "type": "FIXED_PERCENTAGE", "scope": "LINE_ITEM" } ], "fulfillments": [ { "uid": "KbGTRwmKLFPb8v1DYhNNzC", "type": "PICKUP", "state": "PROPOSED", "pickup_details": { "pickup_at": "2023-11-30T01:01:05.000Z", "note": "Just a little cream please", "schedule_type": "ASAP", "recipient": { "display_name": "A. CoffeeDrinker", "email_address": "recipient email address", "phone_number": "1 (234) 567 8900" }, "pickup_window_duration": "P1W3D", "prep_time_duration": "P1W3D" } } ], "created_at": "2025-02-04T23:14:33.159Z", "updated_at": "2025-02-05T00:07:04.598Z", "state": "OPEN", "version": 4, "total_tax_money": { "amount": 9, "currency": "USD" }, "total_discount_money": { "amount": 5, "currency": "USD" }, "total_tip_money": { "amount": 0, "currency": "USD" }, "total_money": { "amount": 104, "currency": "USD" }, "total_service_charge_money": { "amount": 0, "currency": "USD" }, "net_amounts": { "total_money": { "amount": 104, "currency": "USD" }, "tax_money": { "amount": 9, "currency": "USD" }, "discount_money": { "amount": 5, "currency": "USD" }, "tip_money": { "amount": 0, "currency": "USD" }, "service_charge_money": { "amount": 0, "currency": "USD" } }, "source": { "name": "app for marketplace" }, "customer_id": "KZSXNTC1TD14MH7H13MQ07TF4C", "pricing_options": { "auto_apply_discounts": true, "auto_apply_taxes": true }, "net_amount_due_money": { "amount": 104, "currency": "USD" } } } ``` {% /tab %} {% /tabset %} For more information about applying taxes and discounts, see [Apply Taxes and Discounts](orders-api/apply-taxes-and-discounts). ## Pay for the order The Orders API automatically calculates the order total including taxes and discounts. The order-ahead application then processes a payment for the order. After the order is paid, the stock is automatically updated. The order-ahead application accepts the buyer's payment card using the [Web Payments SDK](web-payments/overview) and then creates a `Payment` object using the [Payments API](payments-api/take-payments/card-payments) and references the order ID. ```` ## Award loyalty points The seller who uses your application might have an active Square loyalty program and the buyer's purchase might give them new reward points. [Retrieve the seller's loyalty program](loyalty-api/loyalty-programs) and, if their program is active, add the earned loyalty points to the buyer's loyalty account. All you need is the loyalty account ID and the order ID to add the points for the buyer. For more information, see [Accumulate loyalty points from a purchase](loyalty-api/loyalty-points#accumulate-loyalty-points-from-a-purchase). ## Close the order When the order is paid for, it appears in Square Point of Sale, where it can print a receipt if the seller has configured it to do so. The coffee shop staff then marks the order as in-progress in Order Manager in Square Point of Sale and begins to prepare the coffee. This updates the fulfillment state in the order, so the application can show the customer that the order is in-progress. When the customer picks up the coffee, the staff marks the order as fulfilled. ## See also * [Order-Ahead Sample Application](orders-api/quick-start) * [Create Orders](orders-api/create-orders) * [Pay for Orders](orders-api/pay-for-orders) --- # Generate Test Catalog Items > Source: https://developer.squareup.com/docs/orders-api/quick-start/step-3 > Status: PUBLIC > Languages: cURL > Platforms: Command Line Generate test catalog items that work with the Orders API sample application. **Applies to:** [Orders API](orders-api/what-it-does) | [Catalog API](catalog-api/what-it-does) {% subheading %}Learn how to generate catalog items in your test account using a script.{% /subheading %} {% toc hide=true /%} ## Overview The order-ahead sample application automatically reads your existing catalog item data (including images and prices) and imports them into the application. ## Catalog items To generate some test catalog items: 1. Run the following command in the root directory of the sample application: ``` npm run seed ``` On success, you see a list of successfully generated catalog items. ``` > NODE_ENV=sandbox node ./bin/script/seed-catalog.js generate Successfully uploaded item: #Salmon with Zucchini Successfully uploaded item: #Fried Chicken Sandwich Successfully uploaded item: #Italian Sandwich Successfully uploaded item: #Autumn Soup Successfully uploaded item: #Oatmeal with Fruit Successfully uploaded item: #Sunny-Side Egg on Toast Successfully uploaded item: #Steak Tacos Successfully uploaded item: #Mediterranean Yogurt Bowl Successfully uploaded item: #Meatballs Successfully uploaded item: #Pancakes with Fruit Successfully uploaded item: #Grilled Steak Successfully uploaded item: #Bacon Cheeseburger ``` 2. Go to localhost:3000 and refresh the page. It should now be populated with test catalog items. ![A graphic showing the populated test catalog items.](https://images.ctfassets.net/1nw4q0oohfju/1lUGqjKaFK25YHzpar3qiD/4dfec7f5538949a028ac8ff66639178a/order-ahead-sample-app-menu.png) --- # Create Volume Discounts > Source: https://developer.squareup.com/docs/catalog-api/cookbook/auto-apply-discounts/volume-discounts > Status: PUBLIC > Languages: All > Platforms: All Create discounts based on the number of products, such as "Buy One Get One Free" or "10% Off Three or More Items". **Applies to:** [Catalog API](catalog-api/what-it-does) {% subheading %}Learn how to create discounts based on the number of products, such as "Buy One Get One Free" or "10% Off Three or More Items".{% /subheading %} {% toc hide=true /%} ## Overview Using the [Catalog API](https://developer.squareup.com/reference/square/catalog-api) to create volume discounts involves the following programming tasks, assuming any referenced [CatalogCategory](https://developer.squareup.com/reference/square/objects/CatalogCategory) objects have already been created: * Create a [CatalogDiscount](https://developer.squareup.com/reference/square/objects/CatalogDiscount) object to specify a desired discount to be applied to a product category. For a half-price discount, the discount rate is 50% to be applied to a product set. For a Buy One Get One free (BOGO) discount, the discount rate is 100% to be applied to one free item for every two items purchased. * Create one or more [CatalogProductSet](https://developer.squareup.com/reference/square/objects/CatalogProductSet) objects to specify what products to apply the discount to and, if any, which part of the products to exclude from the application of the discount. For a BOGO Free discount, a free item is offered for every two items purchased. In general, BOGO Free can be extended to mean buying two items of one product while getting one free item of another product. In this topic, BOGO carries the generalized semantics. To set up a pricing rule for a BOGO Free discount, three `CatalogProductSet` objects are needed, as described as follows: * A `CatalogProductSet` object to contain 2 counts of a specified category. * A `CatalogProductSet` object to contain 1 count of a specified category. * A `CatalogProductSet` object to contain the above two product sets as the target of a pricing rule, with the 2-count product set excluded from the application. For a regular discount on one or more product categories, a single `CatalogProductSet` specifying desired categories is needed and used as the target of the pricing rule. * Create a [CatalogPricingRule](https://developer.squareup.com/reference/square/objects/CatalogPricingRule) object to set up a pricing rule for the specified discount to be applied to the targeted product sets, when any specified conditions are met. {% aside type="important" %} Point of Sale applications must be of version 5.15 or later to take advantage of pricing rules. For questions or feedback, [contact Support](https://squareup.com/help/contact?prefill=developer_api). {% /aside %} ## 1. Create Beer and Pizza Catalog Categories Because this example uses a BOGO discount for customers to buy two beers and get one free pizza, you must have Beer and Pizza [CatalogCategory](https://developer.squareup.com/reference/square/objects/CatalogCategory) objects created in your catalog. To create them, follow this [example](catalog-api/cookbook/auto-apply-discounts#create-a-drinks-category). ## 2. Set up a discount and three product sets To create a BOGO discount rule for Buy Two Beers Get One Free Pizza, you must create following catalog objects: * **Discount** - A [CatalogDiscount](https://developer.squareup.com/reference/square/objects/CatalogDiscount) object, specifying the 100% discount to be applied to the targeted product sets. * **Any Two Beers product set** - A [CatalogProductSet](https://developer.squareup.com/reference/square/objects/CatalogProductSet) object associated with the Beer category to be included as part of the discount base. Set the `quantity_exact` value to 2 as the threshold of this product set to trigger the pricing rule. * **One Free Pizza product set** - A second `CatalogProductSet` object associated with the Pizza category to be included as part of the target of the discount. Setting the `quantity_exact` value to 1 for the threshold of this product set. This product set and the Any Two Beers product set together ensures that one free pizza is offered for every two beers purchased. * **Rule-matching product set** - A third `CatalogProductSet` object to contain the previous two product sets to match the target of the pricing rule. * **BOGO pricing rule** - A [CatalogPricingRule](https://developer.squareup.com/reference/square/objects/CatalogPricingRule) object to contain the BOGO discount (which is 100%), matching product sets (Any Two Beers and One Free Pizza), and an excluded product set (Any Two beers). In this BOGO example, the 100% discount takes effect when the targeted product sets match the Any Two Beers product set and the One Free Pizza product set. The exclusion clause subtracts the Any Two Beers product set from the final application of the rule. {% aside type="info" %} Although having a net effect of 50% discount, a BOGO discount is different from a regular 50% discount in that the discount is set as 100%, certain quantity thresholds and an exclusionary condition must be met for the discount to take effect. {% /aside %} ### Set up a discount To set up a discount, create a [CatalogDiscount](https://developer.squareup.com/reference/square/objects/CatalogDiscount) object. The following example is for a Buy One Get One (BOGO) discount to offer one free pizza for every two beers purchased: ```` The `percentage` of `100` means that a customer gets a free offer of an item. If successful, the operation returns the payload of a `200 OK` response similar to the following: ```json { "catalog_object": { "type": "DISCOUNT", "id": "FJYAGNWCJSX42774FCLQZ25Z", "updated_at": "2023-02-27T17:58:25.27Z", "version": 1591034305270, "is_deleted": false, "present_at_all_locations": true, "discount_data": { "name": "Buy one get one free", "discount_type": "FIXED_PERCENTAGE", "percentage": "100.0" } }, "id_mappings": [ { "client_object_id": "#bogoDiscount", "object_id": "FJYAGNWCJSX42774FCLQZ25Z" } ] } ``` The BOGO discount logic is specified by a combination of the rule-matching product set, which references a full-price product set of two items and a discounted product set of one item and an exclusion clause to exclude the full-price items from the discount application. ### Create the Any Two Beers product set To apply the BOGO discount to any two beers in an order, first create a [CatalogProductSet](https://developer.squareup.com/reference/square/objects/CatalogProductSet) object to contain two quantities of items of the [Drinks](catalog-api/cookbook/auto-apply-discounts#create-a-drinks-category) category. #### Request The following request creates the Any Two Beers product set using the [UpsertCatalogObject](https://developer.squareup.com/reference/square/catalog-api/upsert-catalog-object) endpoint of the Catalog API: ```` The entry in the `product_ids_any` list, `GXFTT46M3RCBR6LV54HKALC6`, is the ID of the Beer category object already created in the catalog. #### Response If the request to create Any Two Beers product set is successful, a `200 OK` response is returned with a payload similar to the following: ```json { "catalog_object": { "type": "PRODUCT_SET", "id": "NS5Z4ZNTUPVESPT6JBJWU3IZ", "updated_at": "2023-02-27T18:23:30.461Z", "version": 1591035810461, "is_deleted": false, "present_at_all_locations": true, "product_set_data": { "product_ids_any": [ "GXFTT46M3RCBR6LV54HKALC6" ], "quantity_exact": 2 } }, "id_mappings": [ { "client_object_id": "#AnyTwoBeers", "object_id": "NS5Z4ZNTUPVESPT6JBJWU3IZ" } ] } ``` The resulting product set is used as the fully priced product set when setting up the pricing rule for the BOGO discount. In production code, you can call the [SearchCatalogObjects](https://developer.squareup.com/reference/square/catalog-api/search-catalog-objects) endpoint to search for the Beer category using an exact query filter to match the `name` attribute with the `Beer` string value. ```` Extract the Beer category ID value from the search result, as shown: ```json { "objects": [ { "type": "CATEGORY", "id": "GXFTT46M3RCBR6LV54HKALC6", "updated_at": "2023-02-27T18:17:18.159Z", "version": 1591035438159, "is_deleted": false, "present_at_all_locations": true, "category_data": { "name": "Beer" } } ], "latest_time": "2023-02-27T19:27:34.968Z" } ``` ### Create the One Free Pizza product set Creating the One Free Pizza product set is similar to creating the Any Two Beers product set except that the `quantity_exact` value is set to 1, which is the default value if you don't set it explicitly. This is shown in the following examples: #### Request ```` The entry in the `product_ids_any` list is the ID (`HYEST56N3RDBR6LV57AGALC5`) of the `Pizza` category mentioned earlier. You can call the [SearchCatalogObjects](https://developer.squareup.com/reference/square/catalog-api/search-catalog-objects) endpoint with an `exact_filter` matching the `name` attribute to the `Pizza` value to retrieve the category instance and obtain the ID value. #### Response The successful response returns the created product set in the payload, as shown: ```json { "catalog_object": { "type": "PRODUCT_SET", "id": "WSPNQO56GCYDCFSQWXS534TS", "updated_at": "2023-02-27T22:28:04.545Z", "version": 1591050484545, "is_deleted": false, "present_at_all_locations": true, "product_set_data": { "product_ids_any": [ "HYEST56N3RDBR6LV57AGALC5" ], "quantity_exact": 1 } }, "id_mappings": [ { "client_object_id": "#OneFreePizza", "object_id": "WSPNQO56GCYDCFSQWXS534TS" } ] } ``` The resulting product set is used as the discounted product set when setting up the pricing rule for the BOGO discount. ### Create a rule-matching product set For the pricing engine to apply the BOGO discount previously specified, you must also create a `CatalogProductSet` object to contain targeted product sets to apply the discount to. #### Request ```` The `product_ids_all` property references the Any Two Beers product set (`NS5Z4ZNTUPVESPT6JBJWU3IZ`) and One Free Pizza product set (`WSPNQO56GCYDCFSQWXS534TS`) created earlier. #### Response ```json { "catalog_object": { "type": "PRODUCT_SET", "id": "QONA975IOCAD73204NQER02G", "updated_at": "2023-02-27T22:29:04.545Z", "version": 1591050484545, "is_deleted": false, "present_at_all_locations": true, "product_set_data": { "product_ids_all": [ "NS5Z4ZNTUPVESPT6JBJWU3IZ", "WSPNQO56GCYDCFSQWXS534TS" ], "quantity_exact": 1 } }, "id_mappings": [ { "client_object_id": "#MatchProductSet", "object_id": "QONA975IOCAD73204NQER02G" } ] } ``` The resulting rule-matching product set is referenced in the `CatalogPricingRule` object to set up the BOGO discount rule. ### Batch alternative to configuring discounts and product sets As an alternative to individually configuring discounts and product sets, you can batch the operations together in a single call. To do so, follow this example: #### Request The following example shows how to create required product sets and the discount rule in a single call: ```` #### Response The successful response returns a payload similar to the following: ```json { "objects": [ { "type": "DISCOUNT", "id": "FJYAGNWCJSX42774FCLQZ25Z", "updated_at": "2023-02-27T23:40:44.326Z", "version": 1591054844326, "is_deleted": false, "present_at_all_locations": true, "discount_data": { "name": "\"Buy one get one free\"", "discount_type": "FIXED_PERCENTAGE", "percentage": "100.0" } }, { "type": "PRODUCT_SET", "id": "NS5Z4ZNTUPVESPT6JBJWU3IZ", "updated_at": "2023-02-27T23:40:44.326Z", "version": 1591054844326, "is_deleted": false, "present_at_all_locations": true, "product_set_data": { "product_ids_any": [ "GXFTT46M3RCBR6LV54HKALC6" ], "quantity_exact": 2 } }, { "type": "PRODUCT_SET", "id": "WSPNQO56GCYDCFSQWXS534TS", "updated_at": "2023-02-27T23:40:44.326Z", "version": 1591054844326, "is_deleted": false, "present_at_all_locations": true, "product_set_data": { "product_ids_any": [ "HYEST56N3RDBR6LV57AGALC5" ], "quantity_exact": 1 } }, { "type": "PRODUCT_SET", "id": "QONA975IOCAD73204NQER02G", "updated_at": "2023-02-27T22:29:04.545Z", "version": 1591050484545, "is_deleted": false, "present_at_all_locations": true, "product_set_data": { "product_ids_all": [ "NS5Z4ZNTUPVESPT6JBJWU3IZ", "WSPNQO56GCYDCFSQWXS534TS" ], "quantity_exact": 1 } } ], "id_mappings": [ { "client_object_id": "#BOGODiscount", "object_id": "FJYAGNWCJSX42774FCLQZ25Z" }, { "client_object_id": "#AnyTwoBeers", "object_id": "NS5Z4ZNTUPVESPT6JBJWU3IZ" }, { "client_object_id": "#OneFreePizza", "object_id": "WSPNQO56GCYDCFSQWXS534TS" }, { "client_object_id": "#MatchProductSet", "object_id": "QONA975IOCAD73204NQER02G" } ] } ``` ## 3. Set up the BOGO pricing rule To set up a pricing rule for the (Buy One Get One) BOGO discount to be applied to given product categories, create the [CatalogPricingRule](https://developer.squareup.com/reference/square/objects/CatalogPricingRUle). ### Set up a pricing rule for the BOGO discount To set up a BOGO pricing rule for the BOGO discount, create a [CatalogPricingRule](https://developer.squareup.com/reference/square/objects/CatalogPricingRule), object with following properties specified in the `pricing_rule_data` property: * Assign the ID of the `CatalogDiscount` object to the `discount_id` property to select the discount to apply. * Assign the ID of the rule-matching `CatalogProductSet` object to the `match_products_id` to specify targeted products to apply the discount to. * Assign the ID of the full-price `CatalogProductSet` object to the `exclude_products_id` to exclude the specified products from the discount. #### Request The following cURL example shows how to make a REST API request to create the BOGO pricing rule: ```` The `pricing_rule_data` shows the BOGO logic as follows: * Apply a 100% discount to the rule-matching product set (`QONA975IOCAD73204NQER02G`), which contains a any two beers purchased and a free pizza offered. This is specified by `match_products_id`. * Exclude the Two Beers product set from the rule application. #### Response The successful response returns in a payload the result similar to the following: ```json { "catalog_object": { "type": "PRICING_RULE", "id": "7MZW6RTZ2FSDDPPJLLAQ3WF4", "updated_at": "2023-02-27T20:04:28.467Z", "version": 1591056268467, "is_deleted": false, "present_at_all_locations": true, "pricing_rule_data": { "name": "BOGO Rule for Buy Two Beers and Get One Free Pizza", "discount_id": "FJYAGNWCJSX42774FCLQZ25Z", "match_products_id": "QONA975IOCAD73204NQER02G", "exclude_products_id": "NS5Z4ZNTUPVESPT6JBJWU3IZ", "application_mode": "AUTOMATIC" } }, "id_mappings": [ { "client_object_id": "#BOGOPricingRule", "object_id": "7MZW6RTZ2FSDDPPJLLAQ3WF4" } ] } ``` The resulting discount rule is applied automatically when the specified conditions are met. --- # Create Time-Based Discounts > Source: https://developer.squareup.com/docs/catalog-api/cookbook/auto-apply-discounts/timeframe-discounts > Status: PUBLIC > Languages: All > Platforms: All Create discounts that apply during a specific active time period, such as a holiday sale. **Applies to:** [Catalog API](catalog-api/what-it-does) {% subheading %}Learn how to create discounts that apply during a specific active time period, such as a holiday sale.{% /subheading %} {% toc hide=true /%} ## Overview Time-based discounts automatically apply during an active time period that you specify in your pricing rule. In this example, you learn how to define a Happy Hour discount to apply a 25% discount to all drinks purchased every day from 3 PM to 6 PM. The local time is determined by the device running the Point of Sale application. {% aside type="important" %} Point of Sale applications must be version 5.15 or later to take advantage of pricing rules. For questions or feedback, [contact Support](https://squareup.com/help/contact?prefill=developer_api). {% /aside %} ## 1. Create a Drinks category You must have a Drinks category of the `CatalogCategory` type created in your catalog. To create the Drinks category, follow this [example](catalog-api/cookbook/auto-apply-discounts#create-a-drinks-category). ## 2. Create a discount, product set, and time period for a time-based discount Create a 25% discount that is applied during the Happy Hour sale. Create a product set and assign your Drink category as `product_ids_any` to include all available drinks. Create a time period of 1 PM – 7 PM for 50 weeks beginning May 23, 2019. ### Create a Happy Hour discount The following cURL example shows how to call the Catalog API [UpsertCatalogObject](https://developer.squareup.com/reference/square/catalog-api/upsert-catalog-object) endpoint to create a 25% Off Happy Hour discount: #### Request ```` #### Response If successful, the operation returns the configured `CatalogDiscount` object for the 25% off Happy Hour discount as the payload of a `200 OK` response similar to the following: ```json { "catalog_object": { "type": "DISCOUNT", "id": "GAJS57APBZX445NOYMINZZUC", "updated_at": "2020-06-02T18:10:35.233Z", "version": 1591121435233, "is_deleted": false, "present_at_all_locations": true, "discount_data": { "name": "25% Off Happy Hour", "discount_type": "FIXED_PERCENTAGE", "percentage": "25.0" } }, "id_mappings": [ { "client_object_id": "#25% Off Happy Hour", "object_id": "GAJS57APBZX445NOYMINZZUC" } ] } ``` ### Create a Drinks product set #### Request The following cURL example shows how to call the Catalog API [UpsertCatalogObject](https://developer.squareup.com/reference/square/catalog-api/upsert-catalog-object) endpoint to create a [CatalogProductSet](https://developer.squareup.com/reference/square/objects/CatalogProductSet) object containing the [Drinks](catalog-api/cookbook/auto-apply-discounts#create-a-drinks-category) category. The category ID is `GXFTT46M3RCBR6LV54HKALC6`. ```` #### Response If successful, the operation returns the created `CatalogProductSet` object for the Drinks category as the payload of a `200 OK` response similar to the following: ```json { "catalog_object": { "type": "PRODUCT_SET", "id": "IAPA75F4ZUBMCF6IVIP7FC2E", "updated_at": "2020-06-02T18:17:42.589Z", "version": 1591121862589, "is_deleted": false, "present_at_all_locations": true, "product_set_data": { "product_ids_all": [ "GXFTT46M3RCBR6LV54HKALC6" ] } }, "id_mappings": [ { "client_object_id": "#Drinks", "object_id": "IAPA75F4ZUBMCF6IVIP7FC2E" } ] } ``` You might want to make note of the `object_id` value (`IAPA75F4ZUBMCF6IVIP7FC2E`) for future references to this object. ### Create a Happy Hour time period #### Request The following cURL example shows how to call the Catalog API [UpsertCatalogObject](https://developer.squareup.com/reference/square/catalog-api/upsert-catalog-object) endpoint to create a [CatalogTimePeriod](https://developer.squareup.com/reference/square/objects/CatalogTimePeriod) object containing the discount event time period: ```` #### Response If successful, the operation returns the payload of a `200 OK` response similar to the following: ```json { "catalog_object":{ "type":"TIME_PERIOD", "id":"DE4AZASOM7WGFIJSBZEWEMRG", "updated_at":"2020-06-02T19:03:11.698Z", "version":1591124591698, "is_deleted":false, "present_at_all_locations":true, "time_period_data":{ "event":"BEGIN:VEVENT\nDURATION:PT6H\nRRULE:FREQ=WEEKLY;COUNT=50\nDTSTART:20190523T130000\nEND:VEVENT\n" } }, "id_mappings":[ { "client_object_id":"#Happy hour time period", "object_id":"DE4AZASOM7WGFIJSBZEWEMRG" } ] } ``` ## 3. Configure a pricing rule for a time-based discount Create a pricing rule that applies the 25% discount to your Drinks product set during an active time period of 1 PM – 7 PM for 50 weeks beginning May 23, 2019. #### Request The following cURL example shows how to call the Catalog API [UpsertCatalogObject](https://developer.squareup.com/reference/square/catalog-api/upsert-catalog-object) endpoint to create a [CatalogPricingRule](https://developer.squareup.com/reference/square/objects/CatalogPricingRule) object specifying a discount (as identified by the `discount_id` value) to be applied to a given product (as identified by the `match_products_id` value) in the given time period (as identified by the `time_period_ids` value): ```` In the example: * `DE4AZASOM7WGFIJSBZEWEMRG` in `time_period_ids` is the ID of the `CatalogTimePeriod` object created earlier. * `IAPA75F4ZUBMCF6IVIP7FC2E` is the ID of the `CatalogProductSet` object created earlier. * `GAJS57APBZX445NOYMINZZUC` is the ID of the `CatalogDiscount` object created earlier. #### Response If successful, the operation returns the configured `CatalogPricingRule` object specifying the automatic application of the Happy Hour discount of 25% off drinks as the payload of a `200 OK` response similar to the following: ```json { "catalog_object": { "type": "PRICING_RULE", "id": "3GULP4ZWYKLJPEU6YPFFA2MC", "updated_at": "2020-06-02T19:27:34.968Z", "version": 1591126054968, "is_deleted": false, "present_at_all_locations": true, "pricing_rule_data": { "name": "Happy Hour", "time_period_ids": [ "DE4AZASOM7WGFIJSBZEWEMRG" ], "discount_id": "GAJS57APBZX445NOYMINZZUC", "match_products_id": "IAPA75F4ZUBMCF6IVIP7FC2E", "application_mode": "AUTOMATIC" } }, "id_mappings": [ { "client_object_id": "#Happy Hour", "object_id": "3GULP4ZWYKLJPEU6YPFFA2MC" } ] } ``` You now have configured the pricing rule for the automatic discount for happy hours between 1 PM and 7 PM, lasting 50 weeks, and beginning on May 23, 2019. --- # Create Bundled Discounts > Source: https://developer.squareup.com/docs/catalog-api/cookbook/auto-apply-discounts/bundle-discounts > Status: PUBLIC > Languages: All > Platforms: All Create discounts that apply when customers buy a combination of items (for example, an entree and a side dish). **Applies to:** [Catalog API](catalog-api/what-it-does) {% subheading %}Learn how to create discounts that apply when customers buy a combination of items.{% /subheading %} {% toc hide=true /%} {% aside type="important" %} Point of Sale applications must be version 5.15 or later to take advantage of pricing rules. For questions or feedback, [contact Support](https://squareup.com/help/contact?prefill=developer_api). {% /aside %} ## 1. Create Meal and Drinks Catalog Categories * You need to create a Meal category of the `CatalogCategory` type in your catalog. To create a Meal `CatalogCategory` object, follow this [example](catalog-api/cookbook/auto-apply-discounts#create-a-meal-category). * You need to create a Drinks category of the `CatalogCategory` type in your catalog. To create a Drinks `CatalogCategory` object, follow this [example](catalog-api/cookbook/auto-apply-discounts#create-a-drinks-category). ## 2. Configure a discount and a product set To create a bundled discount, you need two catalog objects: * A `DISCOUNT` type catalog object that applies a 10% discount to a meal and drink combo. * A `PRODUCT_SET` type catalog object that groups exactly one meal and one drink. ### Create a bundled discount To configure a bundled discount, create a discount first. #### Request The following request creates a 10% discount for drinks and meals: ```` #### Response The successful response returns a payload similar to the following: ```json { "catalog_object": { "type": "DISCOUNT", "id": "GHJNSI4B2WQMC3SFMOZXTUH2", "updated_at": "2020-06-02T01:14:47.325Z", "version": 1591060487325, "is_deleted": false, "present_at_all_locations": true, "discount_data": { "discount_type": "FIXED_PERCENTAGE", "percentage": "10.0" } }, "id_mappings": [ { "client_object_id": "#10% Drink and Meal Discount", "object_id": "GHJNSI4B2WQMC3SFMOZXTUH2" } ] } ``` The temporary ID (of the `#10% Drink and Meal Discount` form) is optional unless the object is referenced elsewhere in the same request payload. You might need to make note of the returned `object_id` for future references to this discount object. ### Create a bundled product set to which to apply a discount In addition to creating a discount, you must set products targeted for the discount. To do this, create product set of the `CatalogProductSet` object. #### Request The following request creates a product set consisting of a Drinks category (`GXFTT46M3RCBR6LV54HKALC6` in the `product_ids_all` list) and a Meal category (`GCCTVZOTCOPI246SREKXNMYX` in the `product_ids_all` list): ```` The temporary ID (of the `#Meals and Drinks` form) is optional unless it's referenced elsewhere in the same request payload. #### Response The successful response returns a payload similar to the following: ```json { "catalog_object": { "type": "PRODUCT_SET", "id": "P47IPUGNDUIILQIYJMDKEDZO", "updated_at": "2020-06-02T01:02:08.712Z", "version": 1591059728712, "is_deleted": false, "present_at_all_locations": true, "product_set_data": { "product_ids_all": [ "GXFTT46M3RCBR6LV54HKALC6", "GCCTVZOTCOPI246SREKXNMYX" ], "quantity_exact": 1 } }, "id_mappings": [ { "client_object_id": "#Meals and Drinks", "object_id": "P47IPUGNDUIILQIYJMDKEDZO" } ] } ``` ## 3. Configure a pricing rule to apply discounts to products The pricing rule object determines when the discount is applied and to which items to apply it. Set the Meals and Drinks product set to `match_product_id` so the discount applies any time a Meal or Drinks category is in a cart. ### Create a CatalogObject of the PRICING_RULE Type #### Request The following request creates a pricing rule to enable automatic application of the 10% Drink and Meal Discount (`"discount_id": "GHJNSI4B2WQMC3SFMOZXTUH2"`) to Meals and Drinks products and services (`"match_products_id": "P47IPUGNDUIILQIYJMDKEDZO"`): ```` You might need to call the [SearchCatalogObjects](https://developer.squareup.com/reference/square/catalog-api/search-catalog-objects) endpoint to retrieve the desired discount and product set from the catalog to determined the IDs used as input to the request. #### Response The successful response returns a payload similar to the following: ```json { "catalog_object": { "type": "PRICING_RULE", "id": "VQACJLLOOEIDFZKWNNSZ6VLB", "updated_at": "2020-06-02T01:20:25.035Z", "version": 1591060825035, "is_deleted": false, "present_at_all_locations": true, "pricing_rule_data": { "name": "10% Off Meal and Drink", "discount_id": "GHJNSI4B2WQMC3SFMOZXTUH2", "match_products_id": "P47IPUGNDUIILQIYJMDKEDZO", "application_mode": "AUTOMATIC" } }, "id_mappings": [ { "client_object_id": "#10 Meal and Drink Discount Pricing Rule", "object_id": "VQACJLLOOEIDFZKWNNSZ6VLB" } ] } ``` You've now configured the pricing rule to enable the automatic application of the specified discount to the specified type of orders. --- # Automatically Apply Discounts > Source: https://developer.squareup.com/docs/catalog-api/cookbook/auto-apply-discounts > Status: PUBLIC > Languages: All > Platforms: All Create pricing rules to apply discounts based on the number of products (volume), a combination of items (bundle), or a specific time period (timeframe). **Applies to:** [Catalog API](catalog-api/what-it-does) {% subheading %}Learn how to create pricing rules for discounts based on the number of products, a combination of items, or a specific time period.{% /subheading %} {% toc hide=true /%} ## Overview You can use the [Catalog API](https://developer.squareup.com/reference/square/catalog-api) to configure pricing rules to enable the automatic application of discounts to orders completed with Square POS applications or the [Orders API](orders-api/what-it-does). These applications include [Square for Retail](https://squareup.com/point-of-sale/retail), [Square for Restaurants](https://squareup.com/point-of-sale/restaurants), and [Square Appointments](https://squareup.com/appointments). For information about automatically applying discounts with the Orders API version 2020-07-22 or higher, see [Square-applied Order Discounts](orders-api/apply-taxes-and-discounts/auto-apply-discounts) The discount can be a volume discount like a Buy One Get One (BOGO), a minimum order discount, or an exact quantity purchase discount. It can be a bundled discount applying to a combination of categories of purchased items. It can also be a time-based discount applied over a specified period of time, like a happy hour. ## Requirements and limitations * Pricing rule-based discounts aren't supported in the Reader SDK or the Checkout API. * Pricing rules created through the Catalog API aren't editable in Square Point of Sale. ## How pricing rule-based discounts work Pricing rule-based discounts can be applied based on: * Specific items (or categories of items) purchased. * The time of day, the day of the week, or the duration of a promotion. To set pricing rules to enable the automatic application of discounts, you typically use the following types of [CatalogObject](https://developer.squareup.com/reference/square/objects/CatalogObject) instances: * [Product Set](https://developer.squareup.com/reference/square/objects/CatalogProductSet) - Represents a collection of catalog products. Product sets can be a collection of different Catalog object types, such as an `ITEM`, `CATEGORY`, or `ITEM_VARIATION`. You can also specify whether one or all products must be present and in what quantity. * [Pricing Rule](https://developer.squareup.com/reference/square/objects/CatalogPricingRule) - Represents a set of conditions under which a discount or fixed price applies to a product set. * [Time Period](https://developer.squareup.com/reference/square/objects/CatalogTimePeriod) - Represents a (potentially recurring) time period. Dates and times use the [iCal Date-Time Format](https://www.kanzaki.com/docs/ical/dateTime.html). {% aside type="important" %} Square Point of Sale applications must be version 5.15 or later to take advantage of pricing rules. For questions or feedback, [contact Support](https://squareup.com/help/contact?prefill=developer_api). {% /aside %} ## Create categories To complete the following discount exercises, you must have a Drinks category and a Meal category created in your catalog: * [Create Volume Discounts](catalog-api/cookbook/auto-apply-discounts/volume-discounts) * [Create Bundled Discounts](catalog-api/cookbook/auto-apply-discounts/bundle-discounts) * [Create Time-Based Discounts](catalog-api/cookbook/auto-apply-discounts/timeframe-discounts) * [Create Customer Group Discounts](catalog-api/configure-customer-group-discounts) ### Create a Drinks category Follow the example to create the Drinks category. Make sure you copy the ID of the resulting `CatalogObject` of the `CATEGORY` type. You need the ID later. #### Request ```` The `"id": "#drinks"` key-value pair is optional. It's required only if the Drinks category object is referenced elsewhere in the same request payload. #### Response The successful operation returns a `200 OK` response with the payload similar to the following: ```json { "catalog_object": { "type": "CATEGORY", "id": "GXFTT46M3RCBR6LV54HKALC6", "updated_at": "2020-06-01T18:17:18.159Z", "version": 1591035438159, "is_deleted": false, "present_at_all_locations": true, "category_data": { "name": "Drinks" } }, "id_mappings": [ { "client_object_id": "#drinks", "object_id": "GXFTT46M3RCBR6LV54HKALC6" } ] } ``` ### Create a Meal category Follow the example to create the Meal category. Make sure you copy the ID of the resulting `CatalogObject` of the `CATEGORY` type. You need the ID later. #### Request ```` The `"id": "#meal_category"` key-value pair is optional. It's required only if the Meal category is referenced elsewhere in the same request payload. #### Response The successful operation returns a `200 OK` response with the payload similar to the following: ```json { "catalog_object": { "type": "CATEGORY", "id": "GCCTVZOTCOPI246SREKXNMYX", "updated_at": "2020-06-02T00:15:13.884Z", "version": 1591056913884, "is_deleted": false, "present_at_all_locations": true, "category_data": { "name": "Meal" } }, "id_mappings": [ { "client_object_id": "#meal_category", "object_id": "GCCTVZOTCOPI246SREKXNMYX" } ] } ``` ## See also * [Create Volume Discounts](catalog-api/cookbook/auto-apply-discounts/volume-discounts) * [Create Bundled Discounts](catalog-api/cookbook/auto-apply-discounts/bundle-discounts) * [Create Time-Based Discounts](catalog-api/cookbook/auto-apply-discounts/timeframe-discounts) --- # Handle Inventory Event Notifications > Source: https://developer.squareup.com/docs/inventory-api/webhooks > Status: PUBLIC > Languages: cURL > Platforms: All Learn how to use inventory webhooks to receive notifications when quantities are updated for catalog item variations. **Applies to:** [Inventory API](inventory-api/what-it-does) | [Orders API](orders-api/what-it-does) | [Catalog API](catalog-api/what-it-does) {% subheading %}Learn how to use inventory webhooks to receive notifications when quantities are updated for catalog item variations.{% /subheading %} {% toc hide=true /%} ## Overview The [Inventory API](https://developer.squareup.com/reference/square/inventory-api) exposes a [webhook](webhooks/overview) to dispatch `inventory.count.updated` events every time an inventory quantity is updated for a catalog item variation. Your application can subscribe to the webhook to receive `inventory.count.updated` event notifications to track inventory for item variations and changes in near real time reliably and accurately. ## Requirements and limitations The following requirements and limitations apply to webhooks for inventory events: * Your notification URL must be a publicly available HTTPS URL. It must also return an `HTTP 2xx` response code within 10 seconds of receiving a notification. * Applications that use OAuth must have `INVENTORY_READ` permission to subscribe to an inventory event and receive notifications. ## How inventory event notifications work Each inventory event notification includes basic information, such as the event type and event ID. The `data` field of each webhook notification contains detailed information about the specific event. {% anchor id="notifications-inventory.count.updated" /%} ### Inventory.count.updated event An `inventory.updated` event is invoked when an inventory count is updated. Inventory counts can be updated on the following actions: * **Sale of an item variation** - A seller completes a sale in Square Point of Sale or completes an order generated by an Orders API integration. * **Square Dashboard, item library action** - A seller updates the count of an item variation using the **Item library - Manage stock** dialog. * **Stock tracking event** - If stock tracking is enabled, any stock action such as sold, received, recounted, restocked, or transferred triggers the event. * **API-driven count update** - Using the [BatchChangeInventory](https://developer.squareup.com/reference/square/inventory-api/batch-change-inventory) endpoint. The following shows an example of the `inventory.count.updated` event: ```json { "merchant_id": "6SSW7HV8K2ST5", "type": "inventory.count.updated", "event_id": "df5f3813-a913-45a1-94e9-fdc3f7d5e3b6", "created_at": "2020-12-29T18:38:45.455006797Z", "data": { "type": "inventory_counts", "id": "84e4ac73-d605-4dbd-a9e5-ffff794ddb9d", "object": { "inventory_counts": [ { "calculated_at": "2020-12-29T18:38:45.10296Z", "catalog_object_id": "6F4K33KPNUVDWKZ43KUIFH6K", "catalog_object_type": "ITEM_VARIATION", "location_id": "EF6D9SACKWBKZ", "quantity": "90", "state": "IN_STOCK" } ] } } } ``` ### State adjustments The `inventory.count.updated` webhook event also sends notifications when an item variation stock changes state. For state adjustments, `inventory.count.updated` sends a single notification containing two inventory counts: one count that describes the quantity and state before the state change and one that describes the quantity and state after the state change. ### Bulk updates A single webhook notification can contain up to 100 inventory counts. If a bulk update includes more than 100 updates, the event data spans multiple webhook notifications. ## Process inventory event notifications To process inventory event notifications, do the following: * Meet requirements and understand limitations. * Subscribe to inventory event notifications. * Handle received event notifications. * Test and deploy your application. The following sections describe each of these tasks. For information about general webhooks requirements, components, and processes, see [Square Webhooks](webhooks/overview). {% anchor id="subscribe-to-events" /%} ### Subscribe to inventory event notifications To subscribe to inventory event notifications, you can configure webhooks for your Square inventory application. A webhook registers the URL that Square sends notifications to, the events you want to be notified about, and the Square API version that your integration is using. **To configure a webhook** 1. In the [Developer Console](https://developer.squareup.com/apps), open the application to which you want to subscribe. 1. In the left pane, choose **Webhooks**. 1. At the top of the page, choose **Sandbox** or **Production**. Use the [Sandbox](testing/sandbox) environment for testing. 1. Choose **Add Endpoint**, and then configure the endpoint: 1. For **Webhook Name**, enter a name such as **Inventory Webhook**. 1. For **URL**, enter your notification URL. If you don't have a working URL yet, you can enter **https://example.com** as a placeholder. 1. Optional. For **API Version**, choose a Square API version. By default, this is set to the same version as the application. 1. For **Events**, choose **inventory.count.updated**. If you want to receive notifications about other events at the same webhook URL, choose them or configure another endpoint. 1. Choose **Save**. {% anchor id="send-test-event" /%} **To validate your webhook configuration** You can send a generic notification from the [Developer Console](https://developer.squareup.com/apps) to validate that your webhook is configured correctly. 1. On the **Webhooks** page for your application, choose the webhook that you want to test. 2. In the **Endpoint Details** pane, choose •••, and then choose **Send Test Event**. 3. Select an event and then choose **Send**. If the endpoint is configured correctly, the **Send Test Event** window displays the response code and notification body. {% anchor id="receive-event-notifications" /%} ### Receive inventory event notifications To handle notifications, applications typically perform the following steps: 1. Validate the authenticity of the notification. For more information, see [Verify and Validate an Event Notification](webhooks/step3validate). 1. Respond with an `HTTP 2xx` response code within 10 seconds of receiving the notification. 1. Inspect, process, store, or forward the notification. The body of the notification is a JSON object that contains the following properties. Property{% width="120px" %} | Description ---------|------------ `merchant_id`| The ID of the seller associated with the inventory count. `location_id`| The ID of the seller location where the inventory is stored. `type`| The type of event: `inventory.count.updated` `event_id` | The unique ID of the inventory event, which is used for idempotency support. For more information, see [Idempotency](working-with-apis/idempotency). `created_at` | A timestamp of when the event occurred (for example, `2020-12-28T21:59:15.286Z`). `data` | Information about the inventory count change, represented by the [InventoryCountUpdatedSquareEventData](https://developer.squareup.com/reference/square/objects/InventoryCountUpdatedSquareEventData) object. {% anchor id="test-webhooks" /%} ### Test your webhooks To test your webhook with actual resources, change an inventory quantity of an item variation in your account. Make sure to test with the same environment (Sandbox or Production) where you registered for the webhook. The following are some ways you can trigger inventory event notifications. **Test with a Sandbox account** 1. Open the [Developer Console](https://developer.squareup.com/apps). 1. In the left pane, choose **Sandbox test accounts**. 2. On the **Sandbox test accounts** page, choose **Square Dashboard** for your test account. **Test with a production account** 1. Open the [Square Dashboard](https://app.squareup.com/dashboard). 1. In the left pane, choose **Items & orders**, and then choose **Items**. 1. Choose an item to open the **Edit Item** page. 1. Choose stock and turn on tracking if it's not already on. 1. Choose an adjustment reason. 1. Update the stock count. **Test from API Explorer** Sign in to API Explorer and choose your Sandbox or production environment. Call the Inventory API [BatchChangeInventory](https://developer.squareup.com/explorer/square/inventory-api/batch-change-inventory) endpoint as needed to test your webhook. **Test using cURL** Send cURL requests to the Inventory API endpoint. For more information, see [Build and Manage a Simple Inventory](inventory-api/build-with-inventory). {% aside type="info" %} You can also send a generic test notification from the Developer Console. {% /aside %} You should receive notifications for inventory events that you subscribe to. Square doesn't send notifications for events that fail. For information about troubleshooting Square webhooks, see [Troubleshoot Webhooks](webhooks/troubleshooting). --- # Inventory API > Source: https://developer.squareup.com/docs/inventory-api/what-it-does > Status: PUBLIC > Languages: All > Platforms: All Use the Square Inventory API to adjust inventory quantities and review inventory changes for products in a Square catalog. **Applies to:** [Inventory API](https://developer.squareup.com/reference/square/inventory-api) | [Catalog API](catalog-api/what-it-does) {% subheading %}Learn about using the Inventory API to adjust inventory quantities and review inventory changes for items in a Square catalog.{% /subheading %} {% toc hide=true /%} ## Overview A Square seller tracks inventory to monitor the quantity of items for sale. Inventory tracking records events that change inventory levels and item status. For example, when an online order for a leather collar and heavy sweater is processed, an inventory adjustment records the number of purchased units moving from `IN_STOCK` to `SOLD`. ![A diagram showing inventory state changes for inventory-tracked products.](//images.ctfassets.net/1nw4q0oohfju/2peBhr2lcG7cEnpUwXEDvM/acb0fc3d13b7cbbba76923a1df9f13b5/inventory-api-overview-flow.png) In addition to updating inventory on hand when an item is sold or returned, Square supports receiving stock, marking waste, and reconciliation. With inventory, a seller can answer questions like "How much do I have in stock at my main location now?" and "How many of a particular item were lost?" Historical data can also show trends, such as how fast a product sells or when it should be restocked. For items or services to be tracked in an inventory, they must be defined as item variations in the Square catalog. In the Square Dashboard, managing the catalog and maintaining the inventory are integrated in the item library. The Inventory API allows you to manage inventories programmatically for Square sellers. You can adjust inventory quantities and review all adjustments for any sellable object in item library. To track new items, enable your application to call the [Catalog API](catalog-api/what-it-does) to create items with required variations. Applications can also record *why* a quantity changed using [adjustment reasons](inventory-api/adjustment-reasons) (including seller-defined custom reasons), [track what the seller paid](inventory-api/track-costs-and-vendors) by recording costs and vendors on stock-receiving adjustments, and represent movement between locations as [cross-location adjustments](inventory-api/how-it-works#cross-location-adjustments). ## Requirements and limitations * Inventory quantities can only be tracked on items of the [CatalogItemVariation](https://developer.squareup.com/reference/square/objects/CatalogItemVariation) type. For more information about working with the Square item library, see [Catalog API](catalog-api/what-it-does). * The Inventory API doesn't support the tracking of subcomponents, ingredients, or product bundling. * The OAuth `INVENTORY_READ` permission is needed to read inventory information. * The OAuth `INVENTORY_WRITE` permission is needed to modify inventory quantities. ## API components The Inventory API provides objects to represent inventory adjustments and physical counts for item variations and transitions to relevant inventory states. Key data types include: * [InventoryCount](https://developer.squareup.com/reference/square/objects/InventoryCount) - Defines the calculated quantity of an item variation at a specific location with a specific inventory state. Square recalculates the quantity on an adjustment or physical count. * [InventoryAdjustment](https://developer.squareup.com/reference/square/objects/InventoryAdjustment) - Describes the quantity of an item variation transitioning from one inventory state to another. * [InventoryPhysicalCount](https://developer.squareup.com/reference/square/objects/InventoryPhysicalCount) - Defines the verified quantity of an item variation at a location with a specific state as determined by a manual count or trusted system. * [InventoryTransfer](https://developer.squareup.com/reference/square/objects/InventoryTransfer) - Defines the quantity of an item variation transferred from one location to another. A transfer can only be initiated in a Square product such as the Square Dashboard. The Inventory API can only read inventory transfer information. * [SourceApplication](https://developer.squareup.com/reference/square/objects/SourceApplication) - Describes the application that makes an inventory change and helps trace sources of inventory changes. `InventoryCount` and `InventoryPhysicalCount` objects are similar in that they both describe the current quantity of a `CatalogItemVariation`, but `InventoryPhysicalCount` is a provided value and `InventoryCount` is a computed value. `InventoryPhysicalCount` represents the actual quantity of an item variation physically present, such as from an employee count or syncing with an external system. `InventoryCount` represents the quantity Square estimates based on inventory adjustments since the last physical count. Ideally, both values match, but discrepancies can occur due to item loss, damage, or human error. ## Inventory adjustments example In this example, a seller receives stock, sells some, wastes some, and then does a physical recount. The physical recount shows a different quantity on hand than Square's calculated amount so the actual physical count overrides the calculation. Consider the case where a seller receives a quantity of dog collars into inventory. Initially, there are no collars in stock. In the morning, the seller receives 100 small leather collars and adds them to inventory, changing their status from NONE to IN_STOCK. During the day: * Three collars are sold in-store, moving three units from IN_STOCK to SOLD. * An online customer buys one collar, moving one unit from IN_STOCK to SOLD. * Two collars are accidentally damaged, so the seller moves two units from IN_STOCK to WASTE. At this point, the calculated inventory count for small leather collars in the `IN_STOCK` state is 100 − 3 − 1 − 2 = 94 units. At the end of the day, the seller counts all the small leather collars in the store and finds that there are only 93 collars available for sale. To reconcile the computed and verified counts, the seller pushes the physical count to Square, which triggers a dog collar inventory count calculation and updates the `IN_STOCK` quantity of small leather collars to 93. ![A diagram showing common inventory adjustments at various inventory states.](//images.ctfassets.net/1nw4q0oohfju/5GnhH0m6sihcxj4Qy659Gl/83ebfbaf86840e5867c7f0a4d067d698/inventory-api-example.png) The main point to understand is that inventory adjustments are handled by moving quantities of item variations at a given location from one state to another rather than assigning and decrementing a single quantity. ## See also * [Build and Manage a Simple Inventory](inventory-api/build-with-inventory) * [Inventory API: How It Works](inventory-api/how-it-works) --- # Inventory API Process Flow > Source: https://developer.squareup.com/docs/inventory-api/how-it-works > Status: PUBLIC > Languages: All > Platforms: All **Applies to:** [Inventory API](inventory-api/what-it-does) {% subheading %}Learn about the inventory process flow and how the [Inventory API](https://developer.squareup.com/reference/square/inventory-api) works.{% /subheading %} {% toc hide=true /%} ## Overview Square tracks inventory by adding up all adjustments since the last physical count. If a seller has never done a physical count, Square starts from zero. Because inventory adjustments and physical counts can arrive in any order (like when processing offline sales), each update needs a client-generated [RFC 3339 timestamp](https://www.rfc-editor.org/rfc/rfc3339). This helps Square put all changes in the right sequence. For example, an item variation starts with 100 units. Updates might come from both offline POS sales and your application's API calls. The RFC 3339 timestamp includes time zone information that's taken into account when Square determines the order of inventory transactions. {% aside type="tip" %} When automatic inventory tracking is enabled, Square automatically updates seller inventory counts whenever an `Order` is completed through the [Orders API](orders-api/what-it-does). In this case, step one in the following example is done by Square when your `Order` is completed. {% /aside %} 1. At 1:10 PM GMT, your application sends a [BatchChangeInventory](https://developer.squareup.com/reference/square/inventory-api/batch-change-inventory) request (type `ADJUSTMENT`) to record a sale of 3 items. This reduces the in-stock count from 100 to 97. 1. At 1:20 PM, the POS goes offline. During this time, the seller: 1. Sells 2 items. 1. Starts counting their remaining inventory. 1. At 1:30 PM, the seller counts 95 items. Your application sends a `BatchChangeInventory` request (type `PHYSICAL_COUNT`) to update Square's system from its calculated count of 97 to the actual count of 95. 1. At 1:35 PM, the POS reconnects and reports the offline sale of 2 items (type `IN_STOCK` to `SOLD`). Even though this update arrives last, Square applies it using its original timestamp (1:20 PM), before the `BatchChangeInventory` physical count at 1:30 PM. The final count stays at 95 because the physical count has the latest timestamp. 1. At 1:40 PM, your application sends a `BatchChangeInventory` request to move 2 items from `IN_STOCK` to `WASTE`. Because this timestamp is after the physical count, the system updates to 93 items in stock and 2 in waste. ![A diagram showing inventory state transitions involving a Square application, the Square backend, and Square Point of Sale.](//images.ctfassets.net/1nw4q0oohfju/6qRPkgdVABMxXyeZMmytdn/0c0977f0fc57d4971618cf2d8457af68/inventory-api-process-flow.png) ## Reconciliation with InventoryPhysicalCount `InventoryPhysicalCount` should only be used to reconcile the inventory count computed by Square with the results of performing a physical count or syncing with a trusted external system. {% aside type="warning" %} Don't calculate inventory levels and return them to Square as a physical count. Your application might miss sales made through Square POS while offline, leading to incorrect calculations. A physical count adjustment should be based on an actual count of items at a location and posted with the correct `occurred_at` time. {% /aside %} Consider the case where Square Point of Sale captures a sale after your application gets an inventory count from Square but before your application sends a new physical count. In the following example, the application subtracted an arbitrary 3 units from the last calculated stock level and returned it as a new physical count. Had the seller done an actual physical count before sending the inventory physical count, they would have accounted for the 2 offline sales that were made. Because Square Point of Sale was offline, Square sent an inventory count of 10 rather than 8. ![An image showing an Inventory API reconciliation flow done incorrectly.](//images.ctfassets.net/1nw4q0oohfju/VhA3EOoey63AaJWzDNyEv/2bee903bc8c5de587ff11cb4ea57d97f/inventory_flow_-_incorrect.jpg) In this example, the application knows that 3 units were sold through a non-Square channel. It calls the Inventory API, which shows 10 units in `IN_STOCK`. Meanwhile, Square Point of Sale sells 2 units, moving them from `IN_STOCK` to `SOLD`, leaving 8 units in `IN_STOCK`. The application incorrectly believes there are 10 units in `IN_STOCK`. If it uses `InventoryChange.type == PHYSICAL_COUNT` to reduce the count by three, it *forces* the count to seven units (10 – 3), instead of the correct five units (10 – 2 – 3). If your application doesn't integrate the Orders API to track sales, you can track sales made through your application using `BatchChangeInventory` with `InventoryChange.type == ADJUSTMENT`, which ensures that inventory changes are applied in the correct order. ![An image of an Inventory API reconciliation flow done correctly.](//images.ctfassets.net/1nw4q0oohfju/2Il68jD6F3KmWwzJzK6q53/555a2b0f72b9c28246388ddbd45c62a5/inventory-api-reconcilliation-flow-correct.png) ## Batched state transitions Square records inventory operations based on client timestamps and batched updates succeed or fail as atomic operations. For example, one request batches these changes for a single item variation: * 100 units move from the `NONE` state to the `IN_STOCK` state. * 5 units move from the `IN_STOCK` state to the `WASTE` state. * Record a physical count of 90 units. ![A diagram showing batch inventory state transitions.](//images.ctfassets.net/1nw4q0oohfju/45TH2NpGSi0r5sdpcg2RBO/aa41bc9bdfdee7ba8fdb42b1049b1ddd/inventory-api-batched-state-transitions.png) Each change in a batch request is recorded with its own timestamp, but all changes are applied together as a single request. Assuming the inventory count for the catalog item starts at zero: 1. 100 units move from `NONE` to `IN_STOCK` with a timestamp of 11:00 PM GMT, making the calculated inventory count 100. 1. 5 units move from `IN_STOCK` to `WASTE` with a timestamp of 11:10 PM, making the calculated inventory count 95. 1. Square records a physical count of 90 units with a timestamp of 11:30 PM, resetting the calculated inventory count to 90. If all three changes succeed, the new calculated inventory count for `IN_STOCK` units is 90. However, if any of the individual changes fail, the entire update fails and the calculated inventory count remains unchanged at zero. Inventory quantities are also affected by the Square Orders API and POS applications. For example, when the Square Point of Sale records an order, it moves 3 units from `IN_STOCK` to `SOLD`. If the order timestamp is after the batch update, the new `IN_STOCK` count is 87. ## Special InventoryState values ### NONE `NONE` isn't an actual inventory state; it's just a placeholder used when a new `CatalogItemVariation` is initially added to the system. While inventory can move from `NONE` to other states, nothing can move back to `NONE`. ### IN_STOCK Items can move both in and out of the `IN_STOCK` state. This movement doesn't reduce the total quantity, it just tracks which state items are in. For example, if an item has 100 units and 3 units are damaged, you have 97 units in `IN_STOCK` and 3 in `WASTE`, still totaling 100 units. The `IN_STOCK` state is special because Square Point of Sale and Square Dashboard use it to show available units for sale. ### SOLD The `SOLD` state is a final state where units are no longer tracked. Moving quantities from SOLD to another state adds new inventory instead of changing the `SOLD` quantity. For example, if "Small Leather Collar" has 100 units in `IN_STOCK` and 8 units are sold, 92 units remain tracked. If 2 units are returned, there are 94 units tracked: 92 in `IN_STOCK` and 2 in `RETURNED_BY_CUSTOMER`. ### UNTRACKED `UNTRACKED` is a read-only placeholder state, similar to `NONE`, used on adjustments Square generates for sales of variations that aren't inventory tracked. These adjustments exist to carry cost information; they don't affect any calculated quantity. ## Supported state transitions Inventory state transitions represent real-world changes to inventory quantities. As a result, some state changes are permitted (such as `IN_STOCK` to `SOLD`) while others aren't (such as `WASTE` to `RETURNED_BY_CUSTOMER`). Square supports the following inventory state transitions: ![An updated diagram showing supported inventory state transitions.](//images.ctfassets.net/1nw4q0oohfju/4vRgA5Z1EUQEnjAgzYNLoF/df03c591c42342b3fec744296e10c916/inventory-api-supported-state-transactions.png) {% table %} * From state {% width="150px" %} * To state {% width="100px" %} * Related event --- * `NONE` * `IN_STOCK` * A quantity of items was received and is available for sale. --- * `IN_STOCK` * `SOLD` * A quantity of items was sold. --- * `IN_STOCK` * `WASTE` * A quantity of items was damaged or lost and cannot be sold. --- * `IN_STOCK` * `NONE` * A quantity of items was removed from inventory tracking, such as a decrease recorded with a seller-defined [adjustment reason](inventory-api/adjustment-reasons). --- * `IN_STOCK` * `IN_STOCK` (different location) * A quantity of items was moved from one seller location to another. See [Cross-location adjustments](#cross-location-adjustments). --- * `UNLINKED_RETURN` * `IN_STOCK` * A quantity of items was returned by the customer and is available for sale. The return isn't affiliated with a specific transaction. --- * `UNLINKED_RETURN` * `WASTE` * A quantity of items was returned by the customer and deemed to be unsellable. The return isn't affiliated with a specific transaction. {% /table %} The Inventory API might also show additional read-only states in the change history of an item variation. Transitions to or from these read-only states can only be initiated by Square products. ## Cross-location adjustments An adjustment describes movement between locations as well as movement between states. [InventoryAdjustment](https://developer.squareup.com/reference/square/objects/InventoryAdjustment) carries a `from_location_id` and a `to_location_id`. For adjustments that happen at a single location (such as marking items as waste), the two values are the same. To move stock between locations, write an `ADJUSTMENT` whose `from_state` and `to_state` are the same (typically `IN_STOCK`) and whose `from_location_id` and `to_location_id` differ. If you're migrating from the retired `TRANSFER` change type, see [Migrate from TRANSFER inventory changes](inventory-api/migrate-to-updated-api-entities#migrate-from-transfer-inventory-changes). For managed transfer workflows with a full lifecycle (draft, in-transit, receiving, and damaged/missing reconciliation), consider the [Transfer Orders API](transfer-orders-api). ## Adjustments generated by Square The change history also includes read-only adjustments that Square products generate on the seller's behalf. * **Inferred adjustments** - When a physical count differs from the calculated quantity, Square generates an adjustment to reconcile the difference. Two read-only fields connect the records: `InventoryPhysicalCount.adjustment_id` references the generated adjustment, and `InventoryAdjustment.physical_count_id` references the source count. These adjustments can't be edited with [UpdateInventoryAdjustment](https://developer.squareup.com/reference/square/inventory-api/update-inventory-adjustment); correct the count instead by submitting a new physical count. * **Untracked sales** - Sales of variations that aren't inventory tracked but have a default cost are recorded as adjustments from the `UNTRACKED` state to `SOLD`, so that cost reporting stays complete. * **Component adjustments** - Stock movements of composed products (such as bundles, stock conversions, and recipes) generate adjustments for the composed item and its stockable components. See [Enable Stock Conversion](inventory-api/enable-stock-conversion). ## Automatic IN_STOCK adjustments If inventory tracking is enabled in the Square Dashboard, completing an itemized transaction with Square products automatically moves the quantity sold from the `IN_STOCK` state to the `SOLD` state. For example, consider a [Payment API request that references an Order object](payments-api/take-payments#orders-integration) containing three catalog line items: a small leather dog collar, a 5-foot retractable leash, and Chewy chicken trainer treats. ![A diagram showing the inventory state after the inventory count is reconciled.](//images.ctfassets.net/1nw4q0oohfju/3fAhnByZsutOkHRmHDJO1D/bdaf600207223f9bb434183d3a08a793/inventory-api-automatic-in-stock-adjustments.png) When the [CompletePayment](https://developer.squareup.com/reference/square/payments-api/complete-payment) or [PayOrder](https://developer.squareup.com/reference/square/orders-api/pay-order) endpoint is called to process the transaction, Square automatically adjusts the `IN_STOCK` quantities by moving one unit of the small leather dog collar from `IN_STOCK` to `SOLD`, one unit of the 5-foot retractable leash from `IN_STOCK` to `SOLD`, and two units of Chewy chicken trainer treats from `IN_STOCK` to `SOLD`. ## ignore_unchanged_counts flag The `BatchChangeInventory` endpoint has an `ignore_unchanged_counts` flag (enabled by default) that skips inventory updates when: * The new count matches the previous count. * No adjustments occurred between counts. This prevents duplicate entries in the Square Dashboard when third-party systems send repeated data. To record consecutive physical count adjustments with the same quantity, disable the flag. --- # Build and Manage a Simple Inventory > Source: https://developer.squareup.com/docs/inventory-api/build-with-inventory > Status: PUBLIC > Languages: Java > Platforms: SDK Learn how to build inventory management solutions with the Square Inventory API. **Applies to:** [Inventory API](inventory-api/what-it-does) | [Catalog API](catalog-api/what-it-does) {% subheading %}Learn how to manage the stock level of item variations by increasing inventory amounts and changing them for spoiled items.{% /subheading %} {% toc hide=true /%} ## Overview If you're processing itemized payments with Square APIs or hardware, quantities for item variations with inventory tracking enabled are automatically updated. For other operations that change quantities, you need to apply the adjustment manually. ## Requirements and limitations * You have item variations defined in your Square product catalog. For information about working with the Catalog API, see [Add a Catalog Item](catalog-api/build-with-catalog). * Applications using OAuth must have `INVENTORY_READ` permission to read inventory information and `INVENTORY_WRITE` permission to update inventory states. * You need a valid access token. You should test with Sandbox credentials whenever possible. For more information, see [Access Tokens and Other Square Credentials](build-basics/access-tokens). ## 1. Create or search for catalog item variations to track Building and maintaining an inventory amounts to specifying a quantity of stock for selected product item variations in the item library. Before setting inventory amounts, your application needs to create the item variation to track or find the existing item variation that you want to set inventory amounts for. **New products**: 1. Use the [UpsertCatalogObject](https://developer.squareup.com/reference/square/catalog-api/upsert-catalog-object) endpoint to create item variations. For information about adding item variations, see [Add a Catalog Item](catalog-api/build-with-catalog). 1. Use [BatchChangeInventory](https://developer.squareup.com/reference/square/inventory-api/batch-change-inventory) to set their stock levels. **Existing products**: 1. Use [SearchCatalogItems](https://developer.squareup.com/reference/square/catalog-api/search-catalog-items) to find the variation IDs. For information about searching the catalog, see [Search for Items and Objects](catalog-api/search-catalog). 1. Use `BatchChangeInventory` to update their stock levels. ### Search for item variations to track in inventory The following cURL example calls the `SearchCatalogItems` endpoint of the Catalog API to find previously created item variations representing `Medium` sized shirts: {% tabset %} {% tab id="Request" %} ```` {% /tab %} {% tab id="Response" %} The `SearchCatalogItems` request returns items containing matched item variations. If the request is successful, a response similar to the following is returned: ```json { "items": [ { "type": "ITEM", "id": "3RJ4KVW64QXHXYDJ5CS6J4LE", "updated_at": "2020-10-17T00:08:15.13Z", "version": 1602893295130, "is_deleted": false, "present_at_all_locations": true, "item_data": { "name": "Shirt", "description": "Shirt", "variations": [ { "type": "ITEM_VARIATION", "id": "F3P54C436KUEUGMRCUFYBEIZ", "updated_at": "2020-10-17T00:08:15.13Z", "version": 1602893295130, "is_deleted": false, "present_at_all_locations": true, "item_variation_data": { "item_id": "3RJ4KVW64QXHXYDJ5CS6J4LE", "name": "Small red shirt", "ordinal": 0, "pricing_type": "FIXED_PRICING", "price_money": { "amount": 2500, "currency": "USD" } } }, { "type": "ITEM_VARIATION", "id": "IJBAQDICELYUAUTHM352X3AI", "updated_at": "2020-10-17T00:08:15.13Z", "version": 1602893295130, "is_deleted": false, "present_at_all_locations": true, "item_variation_data": { "item_id": "3RJ4KVW64QXHXYDJ5CS6J4LE", "name": "Medium red shirt", "ordinal": 1, "pricing_type": "FIXED_PRICING", "price_money": { "amount": 3000, "currency": "USD" } } }, { "type": "ITEM_VARIATION", "id": "5JMHD2SBPVG3A7ZFN5HDXSY6", "updated_at": "2020-10-17T00:08:15.13Z", "version": 1602893295130, "is_deleted": false, "present_at_all_locations": true, "item_variation_data": { "item_id": "3RJ4KVW64QXHXYDJ5CS6J4LE", "name": "Large red shirt", "ordinal": 2, "pricing_type": "FIXED_PRICING", "price_money": { "amount": 3500, "currency": "USD" } } }, { "type": "ITEM_VARIATION", "id": "FQZGFI5ZQZY4RYK3H5X3QG2X", "updated_at": "2020-10-17T00:08:15.13Z", "version": 1602893295130, "is_deleted": false, "present_at_all_locations": true, "item_variation_data": { "item_id": "3RJ4KVW64QXHXYDJ5CS6J4LE", "name": "Small blue shirt", "ordinal": 3, "pricing_type": "FIXED_PRICING", "price_money": { "amount": 2500, "currency": "USD" } } }, { "type": "ITEM_VARIATION", "id": "6F4K33KPNUVDWKZ43KUIFH6K", "updated_at": "2020-10-17T00:08:15.13Z", "version": 1602893295130, "is_deleted": false, "present_at_all_locations": true, "item_variation_data": { "item_id": "3RJ4KVW64QXHXYDJ5CS6J4LE", "name": "Medium blue shirt", "ordinal": 4, "pricing_type": "FIXED_PRICING", "price_money": { "amount": 3000, "currency": "USD" } } }, { "type": "ITEM_VARIATION", "id": "H6QGZ6Q3XBEIL672DZYQW5SH", "updated_at": "2020-10-17T00:08:15.13Z", "version": 1602893295130, "is_deleted": false, "present_at_all_locations": true, "item_variation_data": { "item_id": "3RJ4KVW64QXHXYDJ5CS6J4LE", "name": "Large blue shirt", "ordinal": 5, "pricing_type": "FIXED_PRICING", "price_money": { "amount": 3500, "currency": "USD" } } } ], "product_type": "REGULAR" } } ], "matched_variation_ids": [ "IJBAQDICELYUAUTHM352X3AI", "6F4K33KPNUVDWKZ43KUIFH6K" ] } ``` Notice that the previous example result includes item variations for `Small *`, `Medium *`, and `Large *` shirts, even though `Medium` is specified on the `text_filter` of the request body. This is because they're part of the item containing the `Medium *` variations, as their sibling item variations. However, the `matched_variation_ids` at the end of the response body refers to only the item variations for `Medium * shirts`; namely, the `Medium blue shirt` item variation ID is `6F4K33KPNUVDWKZ43KUIFH6K`, whereas the `Medium red shirt` item variation ID is `IJBAQDICELYUAUTHM352X3AI`. Make note of the matched item variation IDs. You need them to set their inventory counts or track their stock levels next. {% /tab %} {% /tabset %} ## 2. Increase the in-stock quantity of an item variation When the seller receives new inventory (such as 100 blue medium shirts at their store), they can update the system using the [BatchChangeInventory](https://developer.squareup.com/reference/square/inventory-api/batch-change-inventory) endpoint. This call tells the Inventory API to add the items to stock at that location, changing their status from `NONE` to `IN_STOCK`. ### Receive 100 blue medium shirts {% tabset %} {% tab id="Request" %} ```` When updating inventory, you need four key pieces of information: the item's variation ID (to identify the specific product), the inventory state change, the location ID (to specify which store), and a timestamp (to track when the change happened). {% /tab %} {% tab id="Response" %} When the request is successful, a response similar to the following is returned: ```json { "counts": [ { "catalog_object_id": "6F4K33KPNUVDWKZ43KUIFH6K", "catalog_object_type": "ITEM_VARIATION", "state": "IN_STOCK", "location_id": "EF6D9SACKWBKZ", "quantity": "100", "calculated_at": "2020-12-18T21:10:34.12189Z" } ] } ``` The inventory now shows 100 `IN_STOCK` units of medium blue shirts referenced by `6F4K33KPNUVDWKZ43KUIFH6K` at the location identified by `EF6D9SACKWBKZ`. {% /tab %} {% /tabset %} ## 3. Record items received as damaged The seller might find a few of the new shirts to be damaged. To track these items, the seller needs to report the shirts as damaged and deduct them from `IN_STOCK` inventory. Call the `BatchChangeInventory` endpoint, specify a quantity of two units of the shirts, and change their inventory state from `IN_STOCK` to `WASTE`. ### Record two damaged shirts {% tabset %} {% tab id="Request" %} The following cURL example shows how to update the inventory to account for two units of damaged item variation (`Medium blue shirt`) as unsellable: ```` {% /tab %} {% tab id="Response" %} If the request is successful, a response similar to the following is returned: ```json { "counts": [ { "catalog_object_id": "6F4K33KPNUVDWKZ43KUIFH6K", "catalog_object_type": "ITEM_VARIATION", "state": "IN_STOCK", "location_id": "EF6D9SACKWBKZ", "quantity": "98", "calculated_at": "2020-12-18T21:19:51.12189Z" }, { "catalog_object_id": "6F4K33KPNUVDWKZ43KUIFH6K", "catalog_object_type": "ITEM_VARIATION", "state": "WASTE", "location_id": "EF6D9SACKWBKZ", "quantity": "2", "calculated_at": "2020-12-18T21:19:51.12189Z" } ] } ``` The result shows that the previous 100 `IN_STOCK` medium blue shirts have been updated to 98 `IN_STOCK` shirts and 2 `WASTE` shirts. {% /tab %} {% /tabset %} --- # Reconcile Inventory Count with Actual Physical Count > Source: https://developer.squareup.com/docs/inventory-api/cookbook/reconcile-computed-quantity > Status: PUBLIC > Languages: Java > Platforms: SDK Use the Inventory API to reconcile the inventory count calculated by Square with the results of a physical count. **Applies to:** [Inventory API](inventory-api/what-it-does) {% subheading %}Learn how to reconcile the inventory count calculated by Square with the results of a physical count.{% /subheading %} {% toc hide=true /%} ## Overview Sometimes a seller's Square inventory count might not match their actual physical count. When this happens, your application can manually update the system to match reality by: * Using the `BatchChangeInventory` endpoint in the [Inventory API](https://developer.squareup.com/reference/square/inventory-api). * Entering the actual physical count a seller has taken. The system automatically adjusts the difference. For example, a seller's account shows 98 Medium Blue Shirts, but they actually only have 95 shirts. You can update the system with the physical count (95) using an [InventoryPhysicalCount](https://developer.squareup.com/reference/square/objects/InventoryPhysicalCount) object in the request. The system: * Reduces the inventory by 3 shirts. * Marks these 3 shirts as "WASTE". * Updates the status from "IN_STOCK" to "WASTE". If the physical count finds more items than expected (like 101 instead of 98), the system: * Adds the extra items. * Marks them as new stock ("NONE" to "IN_STOCK"). ## Reset an in-stock inventory count {% tabset %} {% tab id="Request" %} The following example shows how to reset the quantity of an item variation (`6F4K33KPNUVDWKZ43KUIFH6K`) with a specified change in `physical_count`: ```` Notice that each `changes` list entry in the request body consists of an [InventoryChange](https://developer.squareup.com/reference/square/objects/InventoryChange) object for [InventoryPhysicalCount](https://developer.squareup.com/reference/square/objects/InventoryPhysicalCount) and an [InventoryChangeType](https://developer.squareup.com/reference/square/objects/InventoryChangeType) of `PHYSICAL_COUNT`. {% /tab %} {% tab id="Response" %} If the request is successful, a response similar to the following is returned: ```json { "counts": [ { "catalog_object_id": "6F4K33KPNUVDWKZ43KUIFH6K", "catalog_object_type": "ITEM_VARIATION", "state": "IN_STOCK", "location_id": "EF6D9SACKWBKZ", "quantity": "95", "calculated_at": "2020-12-29T01:30:14.12291Z" } ] } ``` The inventory quantity of the item variation is now reset to 95. {% /tab %} {% /tabset %} --- # Retrieve Inventory Quantities for Item Variations > Source: https://developer.squareup.com/docs/inventory-api/cookbook/retrieve-specific-instock-quantity > Status: PUBLIC > Languages: cURL > Platforms: All Retrieve in-stock quantities for a specific item variation. **Applies to:** [Inventory API](inventory-api/what-it-does) {% subheading %}Learn how to retrieve in-stock quantities for a specific item variation.{% /subheading %} {% toc hide=true /%} ## Overview Business owners need to check their available stock regularly. The [Inventory API](https://developer.squareup.com/reference/square/inventory-api) makes this easy with two options: [RetrieveInventoryCount](https://developer.squareup.com/reference/square/inventory-api/retrieve-inventory-count) for single items and [BatchRetrieveInventoryCounts](https://developer.squareup.com/reference/square/inventory-api/batch-retrieve-inventory-counts) for multiple items at once. You can also look up historical physical counts from specific dates. ## Retrieve the in-stock inventory count of an item variation The [RetrieveInventoryCount](https://developer.squareup.com/reference/square/inventory-api/retrieve-inventory-count) endpoint retrieves the in-stock quantity of a specified item variation. That is, the inventory state of the item variation is `IN_STOCK`. ### Retrieve the inventory count of an item variation {% tabset %} {% tab id="Request" %} The following example shows how to check the current stock level for a specific item at a particular location. You need two pieces of information: the item's variation ID (`6F4K33KPNUVDWKZ43KUIFH6K`) and the location ID. ```` {% /tab %} {% tab id="Response" %} The successful request returns a response similar to the following, containing the stock level of the specified item variation: ```json { "counts": [ { "catalog_object_id": "6F4K33KPNUVDWKZ43KUIFH6K", "catalog_object_type": "ITEM_VARIATION", "state": "IN_STOCK", "location_id": "EF6D9SACKWBKZ", "quantity": "95", "calculated_at": "2020-12-29T01:30:14.12291Z" } ] } ``` {% /tab %} {% /tabset %} ## Retrieve inventory counts of multiple item variations The [BatchRetrieveInventoryCounts](https://developer.squareup.com/reference/square/inventory-api/batch-retrieve-inventory-counts) endpoint is more flexible than checking single items. You can use it to: * Check multiple inventory states (not just `IN_STOCK`). * Get counts for different locations, items, or states at once. You only need to provide one search criteria, but you can combine them to get more specific results. For example: * Search by location to see all items at specific locations, regardless of state. * Search by item to see stock levels across all locations and inventory states. * Search by state to see all items in a particular status (such as `IN_STOCK` or `SOLD`). The input to a `BatchRetrieveInventoryCounts` call is declared as the request body. You can combine different types of input parameters in a single call to narrow the scope of the results. ### Retrieve inventory counts of multiple item variations The following example shows how to check stock levels for multiple items at one location. You need to provide: * A list of item IDs you want to check. * The location ID where you want to check. {% tabset %} {% tab id="Request" %} ```` {% /tab %} {% tab id="Response" %} Because the request didn't specify which inventory states to check, the response shows all available counts: both items that are `IN_STOCK` and items marked as `WASTE`. ```json { "counts": [ { "catalog_object_id": "IJBAQDICELYUAUTHM352X3AI", "catalog_object_type": "ITEM_VARIATION", "state": "IN_STOCK", "location_id": "EF6D9SACKWBKZ", "quantity": "75", "calculated_at": "2020-12-18T21:56:31.12189Z" }, { "catalog_object_id": "6F4K33KPNUVDWKZ43KUIFH6K", "catalog_object_type": "ITEM_VARIATION", "state": "WASTE", "location_id": "EF6D9SACKWBKZ", "quantity": "2", "calculated_at": "2020-12-18T21:19:51.12189Z" }, { "catalog_object_id": "6F4K33KPNUVDWKZ43KUIFH6K", "catalog_object_type": "ITEM_VARIATION", "state": "IN_STOCK", "location_id": "EF6D9SACKWBKZ", "quantity": "95", "calculated_at": "2020-12-29T01:30:14.12291Z" } ] } ``` {% /tab %} {% /tabset %} ## Retrieve a reconciled inventory physical count When you manually count your inventory and update Square with the numbers, the system creates a record of this count. Each count gets a unique ID (`physical_count_id`). To find a specific count ID and its details: 1. Use the [RetrieveInventoryChanges](https://developer.squareup.com/reference/square/inventory-api/retrieve-inventory-changes) endpoint. 1. Look through the results for your recorded count. 1. Use the record ID and [RetrieveInventoryPhysicalCount](https://developer.squareup.com/reference/square/inventory-api/retrieve-inventory-physical-count) to retrieve complete details. For an example, see [Inspect the Inventory Change History](inventory-api/cookbook/inventory-change-history). ### Retrieve a reconciled inventory physical count The following example retrieves the inventory physical count reconciled with the physical count ID of `NN3V72CNW2ZTHKUOM2HUIGNS` as the URL path parameter value: {% tabset %} {% tab id="Request" %} ```` {% /tab %} {% tab id="Response" %} A successful response is shown as follows: ```json { "count": { "id": "NN3V72CNW2ZTHKUOM2HUIGNS", "catalog_object_id": "6F4K33KPNUVDWKZ43KUIFH6K", "catalog_object_type": "ITEM_VARIATION", "state": "IN_STOCK", "location_id": "EF6D9SACKWBKZ", "quantity": "95", "source": { "product": "EXTERNAL_API", "application_id": "sandbox-sq0idb-_nrujCaIUWI1tG41i2rRuw", "name": "Sandbox for sq0idp-oumq_1XqglftCHKsbhnvyw" }, "occurred_at": "2020-12-28T21:28:01.12289Z", "created_at": "2020-12-29T01:30:14.12291Z" } } ``` Notice that the inventory physical count applies only to the `IN_STOCK` inventory count. {% /tab %} {% /tabset %} --- # Inspect the Inventory Change History > Source: https://developer.squareup.com/docs/inventory-api/cookbook/inventory-change-history > Status: PUBLIC > Languages: cURL > Platforms: All Retrieve the inventory change history for an item. **Applies to:** [Inventory API](inventory-api/what-it-does) {% subheading %}Learn how to retrieve the inventory change history for an item.{% /subheading %} {% toc hide=true /%} ## Overview To see how an item's inventory has changed over time: * Use [RetrieveInventoryChanges](https://developer.squareup.com/reference/square/inventory-api/retrieve-inventory-changes) for a single item. * Use [BatchRetrieveInventoryChanges](https://developer.squareup.com/reference/square/inventory-api/batch-retrieve-inventory-changes) for multiple items. You can filter the results by location or [adjustment reason](inventory-api/adjustment-reasons), control the sort order, and use these records as an audit log to track all inventory updates. ## Retrieve inventory changes of a specific item variation The following example retrieves the change history of the item variation identified by its ID value of `6F4K33KPNUVDWKZ43KUIFH6K`: {% tabset %} {% tab id="Request" %} ```` {% /tab %} {% tab id="Response" %} A successful response is shown as follows. In this example, the history includes: * An adjustment that adds 100 units to the inventory when the inventory state changed from `NONE` to `IN_STOCK`. * An adjustment that marks 2 units as damaged items when the inventory state changed from `IN_STOCK` to `WASTE`. * A reset of the in-stock count by an actual physical count. ```json { "changes": [ { "type": "PHYSICAL_COUNT", "physical_count": { "id": "NN3V72CNW2ZTHKUOM2HUIGNS", "catalog_object_id": "6F4K33KPNUVDWKZ43KUIFH6K", "catalog_object_type": "ITEM_VARIATION", "state": "IN_STOCK", "location_id": "EF6D9SACKWBKZ", "quantity": "95", "source": { "product": "EXTERNAL_API", "application_id": "sandbox-sq0idb-_nrujCaIUWI1tG41i2rRuw", "name": "Sandbox for sq0idp-oumq_1XqglftCHKsbhnvyw" }, "occurred_at": "2020-12-28T21:28:01.12289Z", "created_at": "2020-12-29T01:30:14.12291Z" } }, { "type": "ADJUSTMENT", "adjustment": { "id": "L4UVSZ6XSLEMPKJI6IK4Y43Z", "from_state": "IN_STOCK", "to_state": "WASTE", "from_location_id": "EF6D9SACKWBKZ", "to_location_id": "EF6D9SACKWBKZ", "reason_id": { "type": "DAMAGED" }, "catalog_object_id": "6F4K33KPNUVDWKZ43KUIFH6K", "catalog_object_type": "ITEM_VARIATION", "quantity": "2", "occurred_at": "2020-12-18T21:19:00.12189Z", "created_at": "2020-12-18T21:19:51.12189Z", "source": { "product": "EXTERNAL_API", "application_id": "sandbox-sq0idb-_nrujCaIUWI1tG41i2rRuw", "name": "Sandbox for sq0idp-oumq_1XqglftCHKsbhnvyw" } } }, { "type": "ADJUSTMENT", "adjustment": { "id": "HA4STFR47RAEORFWXHOYPRG5", "from_state": "NONE", "to_state": "IN_STOCK", "from_location_id": "EF6D9SACKWBKZ", "to_location_id": "EF6D9SACKWBKZ", "reason_id": { "type": "RECEIVED" }, "catalog_object_id": "6F4K33KPNUVDWKZ43KUIFH6K", "catalog_object_type": "ITEM_VARIATION", "quantity": "100", "occurred_at": "2020-12-18T21:10:00.12189Z", "created_at": "2020-12-18T21:10:34.12189Z", "source": { "product": "EXTERNAL_API", "application_id": "sandbox-sq0idb-_nrujCaIUWI1tG41i2rRuw", "name": "Sandbox for sq0idp-oumq_1XqglftCHKsbhnvyw" } } } ] } ``` {% /tab %} {% /tabset %} ## Retrieve inventory changes of multiple item variations The following cURL example retrieves the change history of the item variations identified by their ID values of `6F4K33KPNUVDWKZ43KUIFH6K` and `IJBAQDICELYUAUTHM352X3AI`. The input values are specified in the `catalog_object_ids` of the request body. {% tabset %} {% tab id="Request" %} ```` {% /tab %} {% tab id="Response" %} The response shows the four inventory changes for these items: * For the first item (`6F4K33KPNUVDWKZ43KUIFH6K`): * Added 100 units as new stock (`NONE` to `IN_STOCK`). * Marked 2 units as damaged (`IN_STOCK` to `WASTE`). * Updated the count to 95 after the physical count. * For the second item (`IJBAQDICELYUAUTHM352X3AI`): * Added 75 units after the physical count. ```json { "changes": [ { "type": "ADJUSTMENT", "adjustment": { "id": "HA4STFR47RAEORFWXHOYPRG5", "from_state": "NONE", "to_state": "IN_STOCK", "from_location_id": "EF6D9SACKWBKZ", "to_location_id": "EF6D9SACKWBKZ", "reason_id": { "type": "RECEIVED" }, "catalog_object_id": "6F4K33KPNUVDWKZ43KUIFH6K", "catalog_object_type": "ITEM_VARIATION", "quantity": "100", "occurred_at": "2020-12-18T21:10:00.12189Z", "created_at": "2020-12-18T21:10:34.12189Z", "source": { "product": "EXTERNAL_API", "application_id": "sandbox-sq0idb-_nrujCaIUWI1tG41i2rRuw", "name": "Sandbox for sq0idp-oumq_1XqglftCHKsbhnvyw" } } }, { "type": "ADJUSTMENT", "adjustment": { "id": "L4UVSZ6XSLEMPKJI6IK4Y43Z", "from_state": "IN_STOCK", "to_state": "WASTE", "from_location_id": "EF6D9SACKWBKZ", "to_location_id": "EF6D9SACKWBKZ", "reason_id": { "type": "DAMAGED" }, "catalog_object_id": "6F4K33KPNUVDWKZ43KUIFH6K", "catalog_object_type": "ITEM_VARIATION", "quantity": "2", "occurred_at": "2020-12-18T21:19:00.12189Z", "created_at": "2020-12-18T21:19:51.12189Z", "source": { "product": "EXTERNAL_API", "application_id": "sandbox-sq0idb-_nrujCaIUWI1tG41i2rRuw", "name": "Sandbox for sq0idp-oumq_1XqglftCHKsbhnvyw" } } }, { "type": "PHYSICAL_COUNT", "physical_count": { "id": "YB3YFKVNO476NY3EFWHQDXB6", "catalog_object_id": "IJBAQDICELYUAUTHM352X3AI", "catalog_object_type": "ITEM_VARIATION", "state": "IN_STOCK", "location_id": "EF6D9SACKWBKZ", "quantity": "75", "source": { "product": "EXTERNAL_API", "application_id": "sandbox-sq0idb-_nrujCaIUWI1tG41i2rRuw", "name": "Sandbox for sq0idp-oumq_1XqglftCHKsbhnvyw" }, "occurred_at": "2020-12-18T21:56:00.12189Z", "created_at": "2020-12-18T21:56:31.12189Z" } }, { "type": "PHYSICAL_COUNT", "physical_count": { "id": "NN3V72CNW2ZTHKUOM2HUIGNS", "catalog_object_id": "6F4K33KPNUVDWKZ43KUIFH6K", "catalog_object_type": "ITEM_VARIATION", "state": "IN_STOCK", "location_id": "EF6D9SACKWBKZ", "quantity": "95", "source": { "product": "EXTERNAL_API", "application_id": "sandbox-sq0idb-_nrujCaIUWI1tG41i2rRuw", "name": "Sandbox for sq0idp-oumq_1XqglftCHKsbhnvyw" }, "occurred_at": "2020-12-28T21:28:01.12289Z", "created_at": "2020-12-29T01:30:14.12291Z" } } ] } ``` {% /tab %} {% /tabset %} ## Sort the results By default, `BatchRetrieveInventoryChanges` returns the oldest changes first. Use the `sort` field to control the order: ```json { "catalog_object_ids": ["6F4K33KPNUVDWKZ43KUIFH6K"], "sort": { "field": "OCCURRED_AT", "order": "DESC" } } ``` --- # Catalog API > Source: https://developer.squareup.com/docs/catalog-api/what-it-does > Status: PUBLIC > Languages: All > Platforms: All Learn about creating and managing a product catalog with the Square Catalog API. **Applies to:** [Catalog API](https://developer.squareup.com/reference/square/catalog-api) | [Inventory API](inventory-api/what-it-does) | [Orders API](orders-api/what-it-does) {% subheading %}Learn about creating and managing a seller's item library (also known as a catalog) with the Catalog API.{% /subheading %} {% toc hide=true /%} ## Overview The Square [item library](https://squareup.com/dashboard/items/library) allows sellers to record detailed information about their products and business processes. It includes products or services, variations, options, categories, discounts, and taxes. It also supports pricing rules for automatic price adjustments under certain conditions. The [Catalog API](https://developer.squareup.com/reference/square/catalog-api) allows you to manage a seller's item library programmatically. You can create, view, update, or delete catalog items and update inventory levels of stocked items using the [Inventory API](inventory-api/what-it-does). Create and track customer orders using the [Orders API](https://developer.squareup.com/reference/square/orders-api). As an order is created, its line items are selected from the item library and on completion of an order, the line items sold are subtracted from the inventory of the items. The Catalog API supports individual or batch operations to reduce the number of API calls. It also handles large result sets page by page to reduce server load. Without the Catalog API, you need to use the Item Editor in the Square Dashboard to manage items one by one. The API integrates the item library with other Square or third-party services. New items created with the Catalog API are immediately visible in the Square Dashboard and Point of Sale across all locations. Use the Catalog API for item libraries and the Inventory API for inventory management. ## Requirements and limitations * Applications using OAuth must have `ITEMS_READ` [permission](https://developer.squareup.com/reference/square/oauth-api#type-oauthpermission) to read catalog objects and `ITEMS_WRITE` [permission](https://developer.squareup.com/reference/square/oauth-api#type-oauthpermission) to create, update, or delete catalog objects. * Individual catalog items can have up to 250 item variations. ## Catalog objects An item library entry for a product or service is called a catalog item. For example, a shirt from a specific brand of a specific style should be an item. Variations, like different sizes of the shirt, are called item variations. This makes it easy to retrieve related products together. Without item variations, you need to retrieve items one by one or filter them yourself. Your application should allow a seller to define items with details like description and unit of measure, create item variations, and set sale-time variation modifiers for buyers. The seller decides whether an item is defined by its brand, style, or other characteristics, as well as the number and nature of item variations. For more details, see [Design a Catalog](catalog-api/design-a-catalog). Discounts and taxes are also catalog entries, called catalog discount and catalog tax. These are examples of the various types of entries in the Square catalog representing different business data or processes. ### Object inheritance The Catalog API exposes catalog entries as generic [CatalogObject](https://developer.squareup.com/reference/square/objects/CatalogObject) instances, which act as a wrapper for various types of Square catalog objects. Each `CatalogObject` instance has a specific type such as a [CatalogItem](https://developer.squareup.com/reference/square/objects/CatalogItem). For example, an item variation is both a `CatalogObject` and a [CatalogItemVariation](https://developer.squareup.com/reference/square/objects/CatalogItemVariation). Taxes are `CatalogObject` and [CatalogTax](https://developer.squareup.com/reference/square/objects/CatalogTax) types. These are examples of the different types of catalog entries used in managing a seller's business. The following diagram of `CatalogObject` instances of the `ITEM`, `ITEM_VARIATION`, and `TAX` types illustrates this relationship. Each instance has an `idempotency_key` property, which is required when the object is created or updated, and an `object` property, whose value depends on the `type` specified. ![A diagram showing the relationship between the nested catalog api objects that represent items, item variations, and taxes.](//images.ctfassets.net/1nw4q0oohfju/5R22mhtHGFOie43bsm2Wom/b38a3e4e11aa7732459035b991e41449/catalog-api-objects.png) ## Create catalog objects To create a catalog entry, choose the appropriate type and provide matching data. For example, to add an item, create a `CatalogObject` with `ITEM` as the type and assign item data. The resulting instance is both a `CatalogObject` and a [CatalogItem](https://developer.squareup.com/reference/square/objects/CatalogItem). Similarly, to add an item variation, set the type to `ITEM_VARIATION` and provide item variation data. The result is both a `CatalogObject` and a [CatalogItemVariation](https://developer.squareup.com/reference/square/objects/CatalogItemVariation). Setting a mismatched data field causes an error. Additional examples: * To add an item option to a catalog, create a `CatalogObject` instance and set its `type` property value as `ITEM_OPTION` and its `item_option_data` field value as a [CatalogItemOption](https://developer.squareup.com/reference/square/objects/CatalogItemOption) instance. * To add a tax entry to a catalog, create a `CatalogObject` instance and set its `type` property value as `TAX` and its `tax_data` field value as a [CatalogTax](https://developer.squareup.com/reference/square/objects/CatalogTax) instance. * To add a pricing rule to a catalog, create a `CatalogObject` instance and set its `type` property value as `PRICING_RULE` and its `pricing_rule_data` field value as a [CatalogPricingRule](https://developer.squareup.com/reference/square/objects/CatalogPricingRule) instance. {% anchor id="catalog-api-types" /%} {% accordion %} {% slot "heading" %} ## Catalog API types {% /slot %} There are many Catalog API types. Each type models a particular data type. The following list of `CatalogObject` types are also more specific types: {% line-break /%}{% line-break /%}{% line-break /%} {% table %} * Type * API object * Purpose --- * [CATEGORY](https://developer.squareup.com/reference/square/enums/CatalogObjectType#value-CATEGORY) * [CatalogCategory](https://developer.squareup.com/reference/square/objects/CatalogCategory) * Models a category as an association of a group of related catalog items. --- * [CUSTOM_ATTRIBUTE_DEFINITION](https://developer.squareup.com/reference/square/enums/CatalogObjectType#value-CUSTOM_ATTRIBUTE_DEFINITION) * [CatalogCustomAttributeDefinition](https://developer.squareup.com/reference/square/objects/CatalogCustomAttributeDefinition) * Defines a custom attribute to supplement another `CatalogObject`. --- * [DISCOUNT](https://developer.squareup.com/reference/square/enums/CatalogObjectType#value-DISCOUNT) * [CatalogDiscount](https://developer.squareup.com/reference/square/objects/CatalogDiscount) * Models a discount applicable to a catalog item. --- * [IMAGE](https://developer.squareup.com/reference/square/enums/CatalogObjectType#value-IMAGE) * [CatalogImage](https://developer.squareup.com/reference/square/objects/CatalogImage) * Represents an image file that can be associated with a catalog item, item variation, or category. --- * [ITEM](https://developer.squareup.com/reference/square/enums/CatalogObjectType#value-ITEM) * [CatalogItem](https://developer.squareup.com/reference/square/objects/CatalogItem) * Represents a product for sale or a service for hire. --- * [ITEM_VARIATION](https://developer.squareup.com/reference/square/enums/CatalogObjectType#value-ITEM_VARIATION) * [CatalogItemVariation](https://developer.squareup.com/reference/square/objects/CatalogItemVariation) * Models the variations of a product or service so that the variations can be treated as a single product or service. For example, a small-, medium-, or large-sized shirt is just a shirt, possibly with the same or different price. --- * [MEASUREMENT_UNIT](https://developer.squareup.com/reference/square/enums/CatalogObjectType#value-MEASUREMENT_UNIT) * [CatalogMeasurementUnit](https://developer.squareup.com/reference/square/objects/CatalogMeasurementUnit) * Models the unit of products or services as specified in an item variation or the precision of numerical quantities. --- * [MODIFIER](https://developer.squareup.com/reference/square/enums/CatalogObjectType#value-MODIFIER) * [CatalogModifier](https://developer.squareup.com/reference/square/objects/CatalogModifier) * Represents a modification to an item at the time of sale. --- * [MODIFIER_LIST](https://developer.squareup.com/reference/square/enums/CatalogObjectType#value-MODIFIER_LIST) * [CatalogModifierList](https://developer.squareup.com/reference/square/objects/CatalogModifierList) * Represents a list of modifiers used to apply the contained modifiers to an item. --- * [PRICING_RULE](https://developer.squareup.com/reference/square/enums/CatalogObjectType#value-PRICING_RULE) * [CatalogPricingRule](https://developer.squareup.com/reference/square/objects/CatalogPricingRule) * Specifies rules for automatic cost adjustments, including discounts. --- * [PRODUCT_SET](https://developer.squareup.com/reference/square/enums/CatalogObjectType#value-PRODUCT_SET) * [CatalogProductSet](https://developer.squareup.com/reference/square/objects/CatalogProductSet) * Represents a set of products to which price adjustments and other operations can be applied. --- * [QUICK_AMOUNTS_SETTINGS](https://developer.squareup.com/reference/square/enums/CatalogObjectType#value-QUICK_AMOUNTS_SETTINGS) * [CatalogQuickAmountsSettings](https://developer.squareup.com/reference/square/objects/CatalogQuickAmountsSettings) * Represents preset charges for quick transactions. --- * [TAX](https://developer.squareup.com/reference/square/enums/CatalogObjectType#value-TAX) * [CatalogTax](https://developer.squareup.com/reference/square/objects/CatalogTax) * Represents a tax applicable to an item. --- * [TIME_PERIOD](https://developer.squareup.com/reference/square/enums/CatalogObjectType#value-TIME_PERIOD) * [CatalogTimePeriod](https://developer.squareup.com/reference/square/objects/CatalogTimePeriod) * Represents a time span during which a specified operation or condition is applicable. {% /table %} To learn more about Square catalog object types, see [Build a Simple Catalog](catalog-api/build-with-catalog#catalog-object-types). To search for or retrieve catalog objects, you can specify a type to narrow the results to that type of `CatalogObject` instances. If you don't specify a type, the results include all types of catalog objects that meet the query conditions. {% /accordion %} ## Reference other objects by their IDs When a catalog object references other catalog objects, it uses their IDs. For example, a tax applied to an item is referenced through the `tax_ids` property on the `CatalogItem` object. You must first create the tax object, get its ID, and then reference it from the item. Catalog objects can be created individually. When creating a new object and its dependent objects in the same batch request, you need to use client-assigned temporary IDs. These IDs are #-prefixed unique strings. After creation, Square assigns unique IDs to these objects. The batch response provides a mapping between your temporary ID and the ID assigned by Square. For example, the following `BatchUpsertCatalogObjects` request payload shows how temporary IDs are used to identify and reference catalog objects to be created in the same request: {% tabset %} {% tab id="Request" %} ```` {% /tab %} {% tab id="Response" %} The corresponding response looks similar to the following: ```json { "objects": [ { "type": "ITEM", "id": "YROAMETK37LN3EBO3N2I3UJZ", "updated_at": "2020-07-30T23:54:04.021Z", "version": 1596153244021, "is_deleted": false, "present_at_all_locations": true, "item_data": { "name": "Product", "tax_ids": [ "HXAKDGIAUCJ3XFLM77GOP7FW" ], "product_type": "REGULAR" } }, { "type": "TAX", "id": "HXAKDGIAUCJ3XFLM77GOP7FW", "updated_at": "2020-07-30T23:54:04.021Z", "version": 1596153244021, "is_deleted": false, "present_at_all_locations": true, "tax_data": { "name": "Applicable tax", "percentage": "10.0", "enabled": true } } ], "id_mappings": [ { "client_object_id": "#item", "object_id": "YROAMETK37LN3EBO3N2I3UJZ" }, { "client_object_id": "#tax", "object_id": "HXAKDGIAUCJ3XFLM77GOP7FW" } ] } ``` The resulting `CatalogItem` object (`"id": "YROAMETK37LN3EBO3N2I3UJZ"`) references the applicable tax by the resulting `CatalogTax` object ID (`"tax_ids": ["HXAKDGIAUCJ3XFLM77GOP7FW"]`). {% /tab %} {% /tabset %} ## Reference objects as nested objects In some cases, objects can be referenced as nested objects. For example, a `CatalogItem` instance references dependent item variations through the nested `CatalogItemVariation` instances. The following example illustrates an `ITEM` and two nested `ITEM_VARIATION` instances: {% tabset %} {% tab id="Request" %} ```` In the previous request, the `CatalogItem` instance references the dependent item variation as a nested `CatalogItemVariation` instance declared as an element of the `variations` list. {% /tab %} {% tab id="Response" %} The successful request returns a payload similar to the following: ```json { "objects": [ { "type": "ITEM", "id": "MPNKY5VHGDAPIIFB7QEIXRJZ", "updated_at": "2020-07-31T00:23:08.786Z", "version": 1596154988786, "is_deleted": false, "present_at_all_locations": true, "item_data": { "name": "Product", "variations": [ { "type": "ITEM_VARIATION", "id": "EF27LLTCW5D33Y5LZX4KZIEZ", "updated_at": "2020-07-31T00:23:08.786Z", "version": 1596154988786, "is_deleted": false, "present_at_all_locations": true, "item_variation_data": { "item_id": "MPNKY5VHGDAPIIFB7QEIXRJZ", "name": "Variation", "sku": "11910345", "ordinal": 0, "pricing_type": "FIXED_PRICING", "price_money": { "amount": 500, "currency": "USD" } } } ], "product_type": "REGULAR" } } ], "id_mappings": [ { "client_object_id": "#item", "object_id": "MPNKY5VHGDAPIIFB7QEIXRJZ" }, { "client_object_id": "#item_variation", "object_id": "EF27LLTCW5D33Y5LZX4KZIEZ" } ] } ``` Notice that the request automatically populates the `item_id` attribute value with the newly created `CatalogItem` object ID. If the item and item variation are created with individual calls, you need to set the `item_id` value explicitly when creating the item variation. {% /tab %} {% /tabset %} ## Idempotency keys A POST or PUT request of the Catalog API must include an idempotency key in the request body. For more information, see [Idempotency](working-with-apis/idempotency). ## Pagination All Catalog API endpoints that have the potential to return a large number of objects use pagination. For more information, see [Pagination](working-with-apis/pagination). ## See also * [Design a Catalog](catalog-api/design-a-catalog) * [Build a Simple Catalog](catalog-api/build-with-catalog) --- # Design a Catalog > Source: https://developer.squareup.com/docs/catalog-api/design-a-catalog > Status: PUBLIC > Languages: All > Platforms: All When designing a product catalog, learn where to draw the line between an item, item variation, and item modifier. **Applies to:** [Catalog API](catalog-api/what-it-does) {% subheading %}Learn about items, item variations, and item modifiers and how to use them when designing a product catalog.{% /subheading %} {% toc hide=true /%} ## Catalog object types The [Catalog API](https://developer.squareup.com/reference/square/catalog-api) exposes Square catalog data entries as objects of the [CatalogObject](https://developer.squareup.com/reference/square/objects/CatalogObject) type. `CatalogObject` is a generic wrapper for all the classes across the catalog object model. A specific `CatalogObject` instance is of a specific type with a matching set of data. It's an error to set unmatched data on a given type of catalog objects. For examples of catalog objects of specific types, see [Catalog API types](catalog-api/what-it-does#catalog-api-types). You can follow this pattern to determine which data property on the `CatalogObject` instance to use for defining data of a given type. Object types include: * [Items](#items) * [Variations](#item-variations) * [Modifiers](#modifiers) * [Categories](#categories) * [Discounts](#discounts) * [Pricing Rules](#pricing-rules) * [Taxes](#taxes) * [Quick amount settings](#quick-amount-settings) * [Custom attributes](#custom-attributes) {% anchor id="items" /%} ### Items A catalog item (`CatalogItem`) represents a product for sale (such as a latte) or a service for hire (such as dog walking). Generally speaking, catalog items can represent: * Digital items (such as a PDF printable item). * Event items (such as a concert or show). * Food and beverage items (such as coffee and donuts). * Physical items (such as shirts and pants). * Services (such as personal training and dog walking). * Donations and dues (such as artistic patronage and club memberships). A `CatalogItem` doesn't have a price or SKU. Instead, it contains one or more variations that have prices and SKUs. Catalog items represent products you can sell, while item variations represent those product items but with specifics such as physical attributes, price, and SKU. Item examples are shown in the following table. {% table %} * Seller offering * Catalog item --- * Hot caffeinated drinks * - Coffee - Mocha - Espresso --- * Pet care * - Dog walking - Grooming - Training {% /table %} {% anchor id="item-variations" /%} ### Variations A [CatalogItemVariation](https://developer.squareup.com/reference/square/objects/CatalogItemVariation) represents the specific details of the product being sold (e.g., a medium coffee for $2). Item variations often have an SKU and a price. Examples of variations for "Coffee" and "Dog Walking" items are shown in the following table. {% table %} * Catalog item * Variation --- * Coffee * - Large - Medium - Small --- * Dog walking * - 60-minute session - 90-minute session {% /table %} A [CatalogItem](https://developer.squareup.com/reference/square/objects/CatalogItem) must have at least one variation (`CatalogItemVariation`) before it can be added to a purchase or used in a transaction. The item can have no more than 250 variations. Item variations are added to a catalog item as nested objects assigned to the `variations` property of the `CatalogItem` instance. In the Point of Sale app and Square Dashboard, items with only one variation show the variation's price and SKU as properties of the item. When a second variation is added, the variations appear as a list of prices and SKUs within the item. Different versions of a given product might: * Have different SKUs. * Have different prices. * Only be offered in specific store locations. * Be offered in specific quantities based on location. {% anchor id="modifiers" /%} ### Modifiers Modifiers allow customization of an order line item at purchase. They enable flexible product configuration without requiring separate catalog items for every possible combination. There are two types: text-based and list-based modifiers. #### Text-based modifiers Text-based modifiers allow buyers to provide custom text input. For example, custom text printed or embroidered onto a piece of clothing, personalized gift messages, or custom engraving. These modifiers are represented by a [CatalogModifierList](https://developer.squareup.com/reference/square/objects/CatalogModifierList) object with its `modifier_type` set to `TEXT`. #### List-based modifiers List-based modifiers present buyers with predefined customization options. They're represented by [CatalogModifier](https://developer.squareup.com/reference/square/objects/CatalogModifier) objects grouped into a [CatalogModifierList](https://developer.squareup.com/reference/square/objects/CatalogModifierList) object with its `modifier_type` set to `LIST`. These modifiers can have an associated price but no SKU. Use modifier lists to group modifiers, control the quantities of modifiers that can be added to an item, and set selection limits or requirements. For more information, see [Enable Product Customization with Modifiers](catalog-api/enable-modifiers-on-items). {% table %} * Catalog item * Modifier list * Example --- * Latte * Milk type: - Whole - 2% - Almond - Coconut - Soy * - Single selection required - No quantities allowed - Upcharge for non-dairy milk --- * Large pizza * Toppings: - Pepperoni - Mushrooms - Bell pepper - Jalapeño pepper - Pineapple - Extra cheese * - Any number of toppings allowed - Can request double portions of a topping - Each topping has a set price {% /table %} {% anchor id="categories" /%} ### Categories Catalog categories ([CatalogCategory](https://developer.squareup.com/reference/square/objects/CatalogCategory)) provide a basic structure for organizing catalog items. They assist sellers in organizing their inventory, enhancing operational efficiency, and providing a user-friendly shopping experience. Categories appear on the Categories page in the Square Dashboard and the Categories tab in the Point of Sale app. To assign an item to a category, add the category ID and its position among items in the category to the [categories](https://developer.squareup.com/reference/square/objects/CatalogItem#definition__property-categories) list of the [CatalogItem](https://developer.squareup.com/reference/square/objects/CatalogItem). Your application should let a seller set the item position. If an item belongs to multiple categories, the seller might prioritize its position differently in each category. {% aside type="tip" %} Only `CatalogItem` objects can be assigned to categories. Other types such as taxes, discounts, pricing rules, and product sets cannot be categorized because they are not for-sale items and do not appear in the item list of the Square Dashboard or Point of Sale. {% /aside %} {% anchor id="discounts" /%} ### Discounts The [CatalogDiscount](https://developer.squareup.com/reference/square/objects/CatalogDiscount) object provides information for reducing the total price of an order. Discounts can be a fixed value, a percentage, or a dynamic value entered at the time of sale. Discounts are listed on the **Discounts** page of the Square Dashboard and on the **Discounts** tab of the items library in the Square Point of Sale application. {% anchor id="pricing-rules" /%} ### Pricing rules The [CatalogPricingRule](https://developer.squareup.com/reference/square/objects/CatalogPricingRule) defines how discounts are automatically applied to orders or purchases: * During a specified time with a [CatalogTimePeriod](https://developer.squareup.com/reference/square/objects/CatalogTimePeriod) to define the discount period * On bundled products or services with a [CatalogProductSet](https://developer.squareup.com/reference/square/objects/CatalogProductSet) * For multiple sale items with a `CatalogProductSet`. For more information, see [Automatically Apply Discounts](catalog-api/cookbook/auto-apply-discounts). {% anchor id="taxes" /%} ### Taxes The [CatalogTax](https://developer.squareup.com/reference/square/objects/CatalogTax) object is used for calculating taxes on item variations, which are percentage-based and apply to all items in a sale associated with that tax. Each `CatalogItem` comes with default taxes that can be modified by sellers at the time of sale. A new `CatalogItem` does not have any taxes unless a `CatalogTax` object is linked to it. These taxes are displayed on the Taxes page of the Square Dashboard. A `CatalogTax` can be either additive or inclusive. An additive tax is added on top of the item price. For instance, a 10% additive tax on a $100 item results in a total of $110. An inclusive tax is already included in the item price. For example, a $100 item with a 10% inclusive tax keeps the total at $100, where the base cost is $90.91 and the tax is $9.09. Taxes can be applied during the "subtotal" or "total" phase of payment. Subtotal phase taxes are calculated on the item's base cost alone, and this is where most taxes are applied. Total phase taxes are calculated on the base cost plus any taxes from the subtotal phase. If a CatalogItem is subject to both additive and inclusive taxes, the additive tax is calculated on the base cost after subtracting the inclusive tax. For example, for a $100 item with a 10% inclusive tax and a 5% additive tax, the 5% additive tax is calculated on the $90.91 base cost. For a more detailed look at how taxes and discounts are calculated, see [Discounts, service charges, and taxes](orders-api/how-it-works#discounts-service-charges-and-taxes). {% anchor id="quick-amount-settings" /%} ### Quick amount settings To allow custom payments without choosing a catalog item, the Square register lets users enter a custom amount on the checkout screen. The Catalog API allows a seller to define up to three custom payment amounts for this option. The [CatalogQuickAmountsSettings](https://developer.squareup.com/reference/square/objects/CatalogQuickAmountsSettings) object defines quick payment amounts for use in a Square Point of Sale (POS) device. When enabled, it shows up to three quick amounts in the specified order. These quick amounts let a seller collect any of three possible payments without selecting an item from the catalog. Sales using quick amounts are reported as custom amounts in the Square Dashboard. The three quick amount choices can be set by the seller using the API or calculated by the Catalog API based on the seller's order history at that location. {% anchor id="custom-attributes" /%} ### Custom attributes You can add [custom attributes](https://developer.squareup.com/reference/square/objects/CatalogCustomAttributeValue) to a [Catalog](https://developer.squareup.com/reference/square/objects/CatalogObject) object to store additional information for the catalog. ## Designing a product catalog Designing a product catalog is both an art and a science. Deciding to model a product as an item, an item variation, or an item modifier can be nuanced and depends on the products offered. Different business types and sizes use various patterns for creating a product catalog. For example: * Smaller retail accounts often use basic variations for better tracking and reporting, but few modifiers. * Food and beverage accounts frequently use item variations and modifiers due to high levels of purchase customization. * Service businesses extensively use item variations but may not use modifiers, as service customization is usually captured as an item variation. ### Practical example Consider the case where a seller provides personal training and offers the following catalog of services: * On-site training * In-home training * Fitness evaluation * Nutritional evaluation At first glance, it might seem like only the first two products (on-site training and in-home training) need variations. {% table %} * Product * Variation --- * On-site training * Variations include: - 30-minute session - 60-minute session --- * In-home training * Variations include: - 60-minute session - 90-minute session --- * Fitness evaluation * n/a --- * Nutritional evaluation * n/a {% /table %} However, every catalog item must have at least one variation, so this approach doesn't work. One solution is to group "Fitness evaluation" and "Nutritional evaluation" under a common offering (Health evaluation) with two variations: one for fitness level and one for nutrition. In this case, we created a generalized evaluation "Health evaluation" item and made the specific kinds of health evaluations into variations. This allows us to define unique values for variation descriptions, prices, booking options, and more. Examples are shown in the following table. {% table %} * Product * Variation --- * On-site training * Variations include: - 30-minute session - 60-minute session --- * In-home training * Variations include: - 60-minute session - 90-minute session --- * Health evaluation * Possible variations include: - Fitness evaluation - Nutritional evaluation {% /table %} Now consider a situation where some of the evaluations don't need to be in person. In this case, it might make more sense to keep the original product listing and add variations based on how the evaluation takes place. Examples are shown in the following table. {% table %} * Product * Variation --- * On-site training * Possible variations include: - 30-minute session - 60-minute session --- * In-home training * Possible variations include: - 60-minute session - 90-minute session --- * Fitness evaluation * Variation includes: - In-person consult --- * Nutritional evaluation * Possible variations include: - In-person consult - Online/VC consult {% /table %} By default, Square products like the Point of Sale application and the Square Dashboard assign the item variation name "Regular" to items with only one variation. These items are displayed in a simplified view. The following table shows the differences in how Square products display items with one variation versus multiple variations. {% table %} * Item * One item variation * Multiple item variations --- * Item editing * The variation name is hidden The variation price, SKU, and inventory counts are inlined into the item. * Variations are listed in a table containing the name, SKU, price, and inventory count. --- * Adding to cart * The employee isn't prompted to select a variation. * The employee is prompted to select a variation. --- * Receipts and Square Online pickup tickets * Only the item name is printed. * The item name and variation name are printed. {% /table %} In general, consider these two questions when deciding if something should be an item variation or an item modifier: * Does it represent something with a SKU and assigned price? If so, it should probably be an item variation. * Does it represent a customization that might add a cost to something with a SKU and base price, or a property that could apply to many item variations? If so, it should probably be a modifier. ## See also * [Build a Simple Catalog](catalog-api/build-with-catalog) * [Update Catalog Objects](catalog-api/update-catalog-objects) * [Retrieve Catalog Objects](catalog-api/retrieve-catalog-objects) * [Search for Items and Objects](catalog-api/search-catalog) --- # Search for Vendors in a Seller Account > Source: https://developer.squareup.com/docs/vendors-api/search-for-vendors > Status: BETA > Languages: All > Platforms: All Learn how to use the Vendors API to search vendors as suppliers to a Square seller. **Applies to:** [Vendors API](vendors-api/manage-vendors-in-apps) {% subheading %}Learn how to search for vendors in a seller account and sort them by creation time.{% /subheading %} {% toc hide=true /%} ## Overview To search for vendors in a seller account, call the [SearchVendors](https://developer.squareup.com/reference/square/vendors-api/search-vendors) endpoint using a query filter. You can filter the result by the vendor's `name`, `status`, or both attributes. The search is based on the prefix matching where the specified filter value is matched against the beginning of each phrase in the targeted property value. For example, the `name` filter value of `Vendor` finds a match in vendors whose name might be "Vendor", "Vendor A", or "Vendor123". To sort the returned vendors, set the `name` or `created_at` sorter in the input to the `SearchVendors` call to have the result sorted by the corresponding sort key in an ascending or descending order. ## Search for vendors by names To search for vendors by names, use the `name` filter to specify part or all of the targeted vendor names. ### Request: Search for vendors by names The following example searches for vendors whose name starts with "Vendor": ```` ### Response: Search for vendors by names The successful response returns the result as a `vendors` list as shown: ```json { "vendors": [ { "id": "D6PT5UDV6IWTSIYW", "created_at": "2021-12-10T19:52:06.103Z", "updated_at": "2021-12-10T19:52:06.103Z", "name": "Vendor 1", "account_number": "12345", "version": 1, "status": "ACTIVE" }, { "id": "BRAIKC6UT3MQGLTZ", "created_at": "2021-12-16T01:51:10.95Z", "updated_at": "2021-12-16T01:51:10.95Z", "name": "Vendor 11a", "address": { "locality": "New York", "administrative_district_level_1": "NY", "postal_code": "10003", "country": "US" }, "contacts": [ { "id": "RWHNPSMBIAI3CMXK", "name": "Joe Burrow", "email_address": "joe@joesfreshseafood.com", "phone_number": "1-212-555-4250", "removed": false, "ordinal": 0 } ], "account_number": "123456", "version": 1, "status": "ACTIVE" }, { "id": "CARJMAFUWDYBTPO2", "created_at": "2022-01-16T03:57:11.128Z", "updated_at": "2022-01-16T03:57:11.128Z", "name": "Vendor 2A", "contacts": [ { "id": "IPSTXCGSCXC5HU2P", "name": "Vendor B's Contact", "email_address": "annie@acme.com", "phone_number": "1-212-555-4251", "removed": false, "ordinal": 0 } ], "version": 1, "status": "ACTIVE" }, { "id": "5VPCRLENAFZXFZNA", "created_at": "2022-01-16T03:57:11.205Z", "updated_at": "2022-01-16T03:57:11.205Z", "name": "Vendor A", "address": { "address_line_1": "101 Main Street", "address_line_2": "Suite 1", "locality": "City", "administrative_district_level_1": "State", "postal_code": "10003", "country": "US" }, "contacts": [ { "id": "HB5S4SB2EXYGKVJ3", "name": "Vendor A's Contact", "email_address": "joe@acme.com", "phone_number": "1-212-555-4250", "removed": false, "ordinal": 0 } ], "account_number": "4025391", "note": "a vendor", "version": 1, "status": "ACTIVE" } ] } ``` In the previous example, the `name` filter value is `Vendor`. The result includes `Vendor` objects named "Vendor 1", "Vendor 11a", "Vendor 2A", and "Vendor A". If the `name` filter is as follows, the result includes only objects named "Vendor 1" and "Vendor 11a" because neither "Vendor 2A" nor "Vendor A" match "Vendor 1": ```json { "filter": { "name": ["Vendor 1"] } } ``` In addition, the string matching isn't case-sensitive. You get the same result if specify the `name` filter as follows: ```json { "filter": { "name": ["vendor 1"] } } ``` ## Sort searched vendors by creation time To sort searched vendors by creation time, set the `CREATED_AT` sorter with either the ascending (ASC) or descending (DESC) order. ### Request: Sort searched vendors by creation time in ascending order The following example sorts the searched vendors by creation time in ascending order: ```` ### Response: Sort searched vendors by creation time in ascending order The successful response returns the result as a `vendors` list. ```json { "vendors": [ { "id": "D6PT5UDV6IWTSIYW", "created_at": "2022-01-10T19:52:06.103Z", "updated_at": "2022-01-10T19:52:06.103Z", "name": "Vendor 1", "account_number": "12345", "version": 1, "status": "ACTIVE" }, { "id": "G47IRHQ2YFWYWY5Z", "created_at": "2022-01-14T04:21:03.606Z", "updated_at": "2022-01-14T04:21:03.606Z", "name": "Vendor 1a", "account_number": "12345a", "version": 1, "status": "ACTIVE" }, { "id": "L2CSGWWIGRQZIPLQ", "created_at": "2022-01-16T00:11:05.522Z", "updated_at": "2022-01-16T00:11:05.522Z", "name": "Vendor 123", "address": { "address_line_1": "505 Electric Ave", "address_line_2": "Suite 600", "locality": "New York", "administrative_district_level_1": "NY", "postal_code": "10003", "country": "US" }, "contacts": [ { "id": "JXRHMI4RL47YB7OW", "name": "Joe Burrow", "email_address": "joe@joesfreshseafood.com", "phone_number": "1-212-555-4250", "removed": false, "ordinal": 0 } ], "account_number": "123456", "version": 1, "status": "ACTIVE" }, { "id": "BRAIKC6UT3MQGLTZ", "created_at": "2021-12-16T01:51:10.95Z", "updated_at": "2021-12-16T01:51:10.95Z", "name": "Vendor 11a", "address": { "locality": "New York", "administrative_district_level_1": "NY", "postal_code": "10003", "country": "US" }, "contacts": [ { "id": "RWHNPSMBIAI3CMXK", "name": "Joe Burrow", "email_address": "joe@joesfreshseafood.com", "phone_number": "1-212-555-4250", "removed": false, "ordinal": 0 } ], "account_number": "123456", "version": 1, "status": "ACTIVE" } ] } ``` --- # Receive Vendors Webhook Events > Source: https://developer.squareup.com/docs/vendors-api/receive-vendors-events > Status: BETA > Languages: All > Platforms: All Learn how to call the Vendors API to set up webhooks to receive supported Vendors API event notifications. **Applies to:** [Vendors API](vendors-api/manage-vendors-in-apps) {% subheading %}Learn how to set up webhooks to receive supported event notifications.{% /subheading %} {% toc hide=true /%} ## Overview When a vendor is created or updated in the backend, you might want to update your application to synchronize with the newly created or updated vendor. For example, when a vendor's status is updated, you want to be notified so that you don't attempt in your application to send a purchase order to the vendor if its status has become `INACTIVE`. To get your application notified of vendor-created or vendor-updated events, you can use Square API [webhooks](webhooks/overview). When a vendor is created or updated, a [vendor.created](https://developer.squareup.com/reference/square/vendors-api/webhooks/vendor.created) or [vendor.updated](https://developer.squareup.com/reference/square/vendors-api/webhooks/vendor.updated) event is sent, respectively, through the Vendors API webhook to applications that have registered to receive the event notification. Your application can parse the received event data and act on the information following your application's business logic. The following discussion presents a walkthrough to illustrate how to subscribe to the Vendors API webhook events for your application and how to parse the received event data in your application. In particular, it covers the following tasks: * Configuring your application to receive the [vendor.created](https://developer.squareup.com/reference/square/vendors-api/webhooks/vendor.created) or [vendor.updated](https://developer.squareup.com/reference/square/vendors-api/webhooks/vendor.updated) event through the Vendors API webhook. * Inspecting received `vendor.created` or `vendor.updated` event data. To test receiving the webhook events, follow the instructions in [Create Vendors for a Square Seller](vendors-api/create-vendors) and [Update Vendor Information](vendors-api/update-vendors) to have the `vendor.created` and `vendor.updated` events fired, respectively. ## Subscribe to the Vendors API event notifications To subscribe to the Vendors API event notifications, you must register your application with the Square API webhook through which Square sends notifications to the application. For more information, see [Square Webhooks](webhooks/overview). To subscribe to [vendor.created](https://developer.squareup.com/reference/square/vendors-api/webhooks/vendor.created) or [vendor.updated](https://developer.squareup.com/reference/square/vendors-api/webhooks/vendor.updated) event notifications, configure the webhook for your Square application as follows. **To configure a webhook** 1. In the [Developer Console](https://developer.squareup.com/apps), open the application to which you want to subscribe. 1. In the left pane, choose **Webhooks**. 1. At the top of the page, choose **Sandbox** or **Production**. Choose [Sandbox](devtools/sandbox/testing) for testing. 1. Choose **Add Endpoint**, and then configure the endpoint: 1. For **Webhook Name**, enter a name such as **Vendors API Webhook**. 1. For **URL**, enter your notification URL. If you don't have a working URL yet, you can enter **https://example.com** as a placeholder. To use [Webhook.site](https://webhook.site) for testing, copy the **Your unique URL** on the website and paste it in the **URL** box. 1. Optional. For **API Version**, choose a Square API version. By default, this is set to the same version as the application. 1. For **Events**, choose **vendor.created** and **vendor.updated**. If you want to receive notifications about other events at the same webhook URL, choose them or configure another endpoint. 1. Choose **Save**. {% aside type="info" %} In the production environment, ignore the **Enable Webhooks** setting on the **Webhooks** page. This setting applies to webhooks for deprecated Connect V1 APIs. {% /aside %} With the webhook configured, you can proceed to test the webhook workflow as follows. ## Inspect the vendor.created event When a new vendor is created, using either the Square API or Square Dashboard, an instance of the [vendor.created](https://developer.squareup.com/reference/square/vendors-api/webhooks/vendor.created) event is sent to your application registered for the webhook event. The following example shows a `vendor.created` webhook event received when a vendor is created: ```json { "merchant_id": "ETCE****QDYP", "type": "vendor.created", "event_id": "4edd919d-ed19-492d-bcb0-1a1ef65dda1a", "created_at": "2022-03-16T01:04:37.308555597Z", "data": { "type": "vendor", "id": "5b041563-c3fa-4989-baaf-dec90e81de0b", "object": { "operation": "CREATED", "vendor": { "address": { "administrative_district_level_1": "NY", "country": "US", "locality": "New York", "postal_code": "10003" }, "contacts": [ { "email_address": "joe@joesfreshseafood.com", "id": "W43ANBJLR5UAV7WT", "name": "Joe Burrow", "ordinal": 0, "phone_number": "1-212-555-4250" } ], "created_at": "2022-03-16T01:04:12.581Z", "id": "BXIDSDOUIU34VY2V", "name": "Vendor 20", "status": "ACTIVE", "updated_at": "2022-03-16T01:04:12.581Z", "version": 1 } } } } ``` ## Inspect the vendor.updated event When an existing vendor is updated, an instance of the [vendor.updated](https://developer.squareup.com/reference/square/vendors-api/webhooks/vendor.updated) event is sent to your application. The following example shows a `vendor.updated` event received when the vendor's name is updated from `A Vendor` to `Macro Brewing` and a note of `Preferred beer supplier` is added to the vendor: ```json { "merchant_id": "ETCE****QDYP", "type": "vendor.updated", "event_id": "1ae8cc43-bf73-48f6-a767-90bdfa197421", "created_at": "2022-03-16T01:15:35.780283073Z", "data": { "type": "vendor", "id": "1e8d9885-21dc-41b9-8a8f-6ccf64da5462", "object": { "operation": "UPDATED", "vendor": { "address": { "administrative_district_level_1": "NY", "country": "US", "locality": "New York", "postal_code": "10003" }, "contacts": [ { "email_address": "joe@joesfreshseafood.com", "id": "W43ANBJLR5UAV7WT", "name": "Joe Burrow", "ordinal": 0, "phone_number": "1-212-555-4250" } ], "created_at": "2022-03-16T01:04:12.581Z", "id": "BXIDSDOUIU34VY2V", "name": "Macro Brewing", "note": "Preferred beer supplier", "status": "ACTIVE", "updated_at": "2022-03-16T01:15:35.774Z", "version": 2 } } } } ``` --- # Retrieve Vendors of Specified IDs > Source: https://developer.squareup.com/docs/vendors-api/retrieve-vendors > Status: BETA > Languages: All > Platforms: All Learn how to call the Vendors API to retrieve vendors of specified IDs or to search for vendors based on specified query conditions. **Applies to:** [Vendors API](vendors-api/manage-vendors-in-apps) {% subheading %}Learn how to retrieve vendors of specified IDs or search for vendors based on specified query conditions.{% /subheading %} {% toc hide=true /%} ## Overview If you know the ID of a [Vendor](https://developer.squareup.com/reference/square/objects/Vendor) object, you can call the [RetrieveVendor](https://developer.squareup.com/reference/square/vendors-api/retrieve-vendor) or [BulkRetrieveVendors](https://developer.squareup.com/reference/square/vendors-api/bulk-retrieve-vendors) endpoint to retrieve the vendor object. The `BulkRetrieveVendors` endpoint can take more than one vendor ID to retrieve multiple vendors at a time. ## Retrieve a single vendor at a time To retrieve a single vendor, call [RetrieveVendor](https://developer.squareup.com/reference/square/vendors-api/retrieve-vendor) while specifying the vendor's ID value as the `vendor_id` path parameter value. ### Request: Retrieve a single vendor at a time The following example shows how to call `RetrieveVendor` to retrieve a vendor of a known vendor ID: ```` ### Response: Retrieve a single vendor The successful response returns a payload similar to the following: ```json { "vendor": { "id": "CARJMAFUWDYBTPO2", "created_at": "2022-01-16T03:57:11.128Z", "updated_at": "2022-01-16T03:57:11.128Z", "name": "Vendor 2A", "contacts": [ { "id": "IPSTXCGSCXC5HU2P", "name": "Vendor B's Contact", "email_address": "annie@acme.com", "phone_number": "1-212-555-4251", "removed": false, "ordinal": 0 } ], "version": 1, "status": "ACTIVE" } } ``` ## Retrieve multiple vendors at a time To retrieve multiple vendors at a time, call [BulkRetrieveVendors](https://developer.squareup.com/reference/square/vendors-api/bulk-retrieve-vendors) while specify the IDs of the vendors in the `vendors_ids` list of the request payload. ### Request: Retrieve multiple vendors at a time The following example retrieves two vendors with the `CARJMAFUWDYBTPO2` and `5VPCRLENAFZXFZNA` IDs: ```` ### Response: Retrieve multiple vendors at once When successful, the response returns a payload similar to the following, where the `responses` object is a map of vendors indexed by the vendor ID: ```json { "responses": { "5VPCRLENAFZXFZNA": { "vendor": { "id": "5VPCRLENAFZXFZNA", "created_at": "2022-01-16T03:57:11.205Z", "updated_at": "2022-01-16T03:57:11.205Z", "name": "Vendor A", "address": { "address_line_1": "101 Main Street", "address_line_2": "Suite 1", "locality": "City", "administrative_district_level_1": "State", "postal_code": "10003", "country": "US" }, "contacts": [ { "id": "HB5S4SB2EXYGKVJ3", "name": "Vendor A's Contact", "email_address": "joe@acme.com", "phone_number": "1-212-555-4250", "removed": false, "ordinal": 0 } ], "account_number": "4025391", "note": "a vendor", "version": 1, "status": "ACTIVE" } }, "CARJMAFUWDYBTPO2": { "vendor": { "id": "CARJMAFUWDYBTPO2", "created_at": "2022-01-16T03:57:11.128Z", "updated_at": "2022-01-16T03:57:11.128Z", "name": "Vendor 2A", "contacts": [ { "id": "IPSTXCGSCXC5HU2P", "name": "Vendor B's Contact", "email_address": "annie@acme.com", "phone_number": "1-212-555-4251", "removed": false, "ordinal": 0 } ], "version": 1, "status": "ACTIVE" } } } } ``` If you specify an invalid or non-existing vendor ID in the input parameter of `vendor_ids` in the `BulkRetrieveVendors` request call, as illustrated: ```json { "vendor_ids": ["CARJMAFUWDYBTPO2", "5VPCRLENAFZXFZNA_"] } ``` The response returns a payload similar to the following, where the found vendor (`CARJMAFUWDYBTPO2`) is returned as expected, but for the invalid or non-existing vendor ID (`5VPCRLENAFZXFZNA_`) an error is returned: ```json { "responses": { "5VPCRLENAFZXFZNA_": { "errors": [ { "category": "INVALID_REQUEST_ERROR", "code": "NOT_FOUND", "detail": "Resource not found." } ] }, "CARJMAFUWDYBTPO2": { "vendor": { "id": "CARJMAFUWDYBTPO2", "created_at": "2022-01-16T03:57:11.128Z", "updated_at": "2022-01-16T03:57:11.128Z", "name": "Vendor 2A", "contacts": [ { "id": "IPSTXCGSCXC5HU2P", "name": "Vendor B's Contact", "email_address": "annie@acme.com", "phone_number": "1-212-555-4251", "removed": false, "ordinal": 0 } ], "version": 1, "status": "ACTIVE" } } } } ``` --- # Update Vendor Information > Source: https://developer.squareup.com/docs/vendors-api/update-vendors > Status: BETA > Languages: All > Platforms: All Learn how to call the Vendors API to update existing vendors. **Applies to:** [Vendors API](vendors-api/manage-vendors-in-apps) {% subheading %}Learn how to update information for a single vendor or multiple vendors.{% /subheading %} {% toc hide=true /%} ## Overview To update information about a vendor, call the [UpdateVendor](https://developer.squareup.com/reference/square/vendors-api/update-vendor) endpoint with a `Vendor` object containing properties you want to update. To update multiple vendors at once, call the [BulkUpdateVendors](https://developer.squareup.com/reference/square/vendors-api/bulk-update-vendors) endpoint. When you call `BulkUpdateVendors`, you specify whatever properties that need to be changed in a vendor object and specify that vendor in the map, as the input, with the vendor's ID as the key. You can update the following properties: * The vendor's status * The vendor's contact list * The vendor's physical address * The vendor's name and note ## Add or update a vendor's contact information After creating a vendor without specifying any contact, you can call [UpdateVendor](https://developer.squareup.com/reference/square/vendors-api/update-vendor) to add a contact to the vendor. You can also call this endpoint to update an existing contact of the vendor. ### Request: Add a vendor's contact information The following example shows how to add a new contact to a vendor, as referenced by the `7HRKHFRCOI4U7XDW` ID: ```` When adding a contact to an existing vendor, don't specify the ID for the new contact. The ID of the new contact is returned when it's added to the vendor. When updating an existing contact, you must specify the contact ID in the input. When specifying a contact on the input, you must set an `ordinal` value that is unique across all contacts of the vendor. You must specify the current version of the vendor when updating any information of the vendor. You can call the [RetrieveVendor](https://developer.squareup.com/reference/square/vendors-api/retrieve-vendor) endpoint to find out the current version of the vendor. ### Response: Add or update a vendor's contact information The successful response returns a payload similar to the following: ```json { "vendor": { "id": "G47IRHQ2YFWYWY5Z", "created_at": "2021-12-14T04:21:03.606Z", "updated_at": "2022-02-22T18:13:19.726Z", "name": "Vendor 1a", "contacts": [ { "id": "GYP6Z6HK556PWGZ4", "name": "Test Vendor Contact", "email_address": "johndoe@acme.com", "ordinal": 0 } ], "account_number": "12345a", "version": 2, "status": "ACTIVE" } } ``` Note that the `UpdateVendor` (or `BulkUpdateVendors`) endpoint uses the so-called sparse update, where only affected attributes need to be specified in the input to the update request. Unspecified attributes remain unchanged by the update operation. ## Add or update multiple vendor addresses When you want to add or update addresses for multiple vendors, you can call [BulkUpdateVendors](https://developer.squareup.com/reference/square/vendors-api/bulk-update-vendors) to get the addresses added or updated all at once. ### Request: Add or update multiple vendor addresses The following example adds or updates two vendor addresses: ```` ### Response: Add or update multiple vendor addresses ```json { "responses": { "7HRKHFRCOI4U7XDW": { "vendor": { "id": "7HRKHFRCOI4U7XDW", "created_at": "2022-02-07T20:06:00.544Z", "updated_at": "2022-02-08T03:47:32.696Z", "name": "Test Vendor Updated", "address": { "address_line_1": "101 Main Street", "address_line_2": "Suite 1", "locality": "New York", "administrative_district_level_1": "NY", "postal_code": "10003", "country": "US" }, "contacts": [ { "id": "VSRR2WJVVO6LQQ3F", "name": "Test Vendor Contact", "email_address": "johndoe@acme.com", "ordinal": 0 } ], "note": "New note for test vendor", "version": 3, "status": "ACTIVE" } }, "CARJMAFUWDYBTPO2": { "vendor": { "id": "CARJMAFUWDYBTPO2", "created_at": "2021-12-16T03:57:11.128Z", "updated_at": "2022-02-08T03:47:32.749Z", "name": "Vendor 2A", "address": { "address_line_1": "102 Minor Street", "address_line_2": "Suite 2", "locality": "Seattle", "administrative_district_level_1": "WA", "postal_code": "98105", "country": "US" }, "contacts": [ { "id": "IPSTXCGSCXC5HU2P", "name": "Vendor 2A's Contact", "email_address": "annie@acme.com", "phone_number": "1-212-555-4251", "ordinal": 0 } ], "note": "More Updated note about vendor ... 2", "version": 13, "status": "ACTIVE" } } } } ``` ## Update a vendor's name and note To update a vendor's name and note, call [UpdateVendor](https://developer.squareup.com/reference/square/vendors-api/update-vendor) while specifying a new name and a new note for a specified vendor. ### Request: Update a vendor's name and note Suppose you reactivated a vendor and the vendor has rebranded itself. Now you want to change the vendor's name and update the vendor note accordingly. The following example shows how to call `UpdateVendor` to accomplish these tasks: ```` ### Response: Update a vendor's name and note ```json { "vendor": { "id": "7HRKHFRCOI4U7XDW", "created_at": "2022-02-07T20:06:00.544Z", "updated_at": "2022-02-22T18:33:12.796Z", "name": "MicroBrew", "address": { "address_line_1": "101 Main Street", "address_line_2": "Suite 1", "locality": "New York", "administrative_district_level_1": "NY", "postal_code": "10002", "country": "US" }, "contacts": [ { "id": "VSRR2WJVVO6LQQ3F", "name": "Test Vendor Contact", "email_address": "johndoe@acme.com", "ordinal": 0 } ], "note": "Preferred beer supplier.", "version": 7, "status": "ACTIVE" } } ``` ## Deactivate multiple vendors To deactivate a vendor, call the [UpdateVendor](https://developer.squareup.com/reference/square/vendors-api/update-vendor) or [BulkUpdateVendors](https://developer.squareup.com/reference/square/vendors-api/bulk-update-vendors) endpoint to change the vendor status to `INACTIVE`. When deactivated, the vendor is no longer a supplier to the seller and doesn't receive any more purchase orders from the seller. ### Request: Deactivate multiple vendors The following example deactivates two vendors as referenced by the ID values (`CARJMAFUWDYBTPO2` and `7HRKHFRCOI4U7XDW`): ```` Make sure to use the most recent version numbers in the input to the request. You might want to call `BulkRetrieveVendors` first to obtain the most recent version numbers of the specified vendors. ### Response: Deactivate multiple vendors The successful response returns a payload similar to the following: ```json { "responses": { "7HRKHFRCOI4U7XDW": { "vendor": { "id": "7HRKHFRCOI4U7XDW", "created_at": "2022-02-07T20:06:00.544Z", "updated_at": "2022-02-08T04:02:30.718Z", "name": "Test Vendor Updated", "address": { "address_line_1": "101 Main Street", "address_line_2": "Suite 1", "locality": "New York", "administrative_district_level_1": "NY", "postal_code": "10003", "country": "US" }, "contacts": [ { "id": "VSRR2WJVVO6LQQ3F", "name": "Test Vendor Contact", "email_address": "johndoe@acme.com", "ordinal": 0 } ], "note": "New note for test vendor", "version": 4, "status": "INACTIVE" } }, "CARJMAFUWDYBTPO2": { "vendor": { "id": "CARJMAFUWDYBTPO2", "created_at": "2021-12-16T03:57:11.128Z", "updated_at": "2022-02-08T04:02:30.764Z", "name": "Vendor 2AA", "address": { "address_line_1": "102 Minor Street", "address_line_2": "Suite 2", "locality": "Seattle", "administrative_district_level_1": "WA", "postal_code": "98105", "country": "US" }, "contacts": [ { "id": "IPSTXCGSCXC5HU2P", "name": "Vendor B's Contact", "email_address": "annie@acme.com", "phone_number": "1-212-555-4251", "ordinal": 0 } ], "note": "More Updated note about vendor ... 2", "version": 15, "status": "INACTIVE" } } } } ``` --- # Create Vendors for a Square Seller > Source: https://developer.squareup.com/docs/vendors-api/create-vendors > Status: BETA > Languages: All > Platforms: All Learn how to use the Vendors API to create vendors for a Square seller. **Applies to:** [Vendors API](vendors-api/manage-vendors-in-apps) {% subheading %}Learn how to create a single vendor or multiple vendors for a Square seller.{% /subheading %} {% toc hide=true /%} ## Overview To add a vendor to a seller account, create a [Vendor](https://developer.squareup.com/reference/square/objects/Vendor) object in the seller account by calling the [CreateVendor](https://developer.squareup.com/reference/square/vendors-api/create-vendor) or [BulkCreateVendors](https://developer.squareup.com/reference/square/vendors-api/buld-create-vendors) endpoint. The `CreateVendor` endpoint creates a single vendor at a time, while `BulkCreateVendors` creates multiple vendors at a time. When creating a vendor, you must specify at a minimum the name and status. Optionally, you can specify an address for the vendor or one or more contact persons for the vendor. You can also assign the vendor an account number or add a custom note about the vendor. ## Add a vendor with the most basic information To create a vendor with the most basic information, call the [CreateVendor](https://developer.squareup.com/reference/square/vendors-api/create-vendor) endpoint, specifying the vendor's name and status and, optionally, assigning an account ID. With this basic operation, the vendor's address or contacts aren't present in the resulting [Vendor](https://developer.squareup.com/reference/square/objects/Vendor) object, but can be added later by calling the [UpdateVendor](https://developer.squareup.com/reference/square/vendors-api/update-vendor) endpoint. ### Request: Create a vendor without an address or contacts The following example creates a vendor with the most basic information, including the vendor's name and status: ```` The vendor name must be unique across the seller account. If the `name` attribute value is the same as an existing vendor name, you get a `400 BAD_REQUEST` response stating that the `name` attribute value isn't unique. ### Response: Create a vendor without an address or contacts The successful response to the simple vendor creation request contains a payload similar to the following: ```json { "vendor": { "id": "G47IRHQ2YFWYWY5Z", "created_at": "2021-12-14T04:21:03.606Z", "updated_at": "2021-12-14T04:21:03.606Z", "name": "Vendor 1", "account_number": "12345", "version": 1, "status": "ACTIVE" } } ``` ## Create a vendor with an address and contacts If an address is known or contacts are known, you can specify them in the input when calling `CreateVendor`. The following example shows how to create a vendor while specifying the vendor's address and a contact. ### Request: Create a vendor with an address and contacts ```` For the vendor's address, you use `address_line_1` or `address_line_2` for the vendor's street address, `locality` for the city, and `administrative_district_level_1` for the state or province. A vendor can have more than one contact. In the `contacts` list of a vendor, each contact entry must have an `ordinal` value. You can use this `ordinal` value to sort contacts. ### Response: Create a vendor with an address and contacts The successful response to the previous request contains a payload similar to the following: ```json { "vendor": { "id": "L2CSGWWIGRQZIPLQ", "created_at": "2021-12-16T00:11:05.522Z", "updated_at": "2021-12-16T00:11:05.522Z", "name": "Vendor 123", "address": { "address_line_1": "505 Electric Ave", "address_line_2": "Suite 600", "locality": "New York", "administrative_district_level_1": "NY", "postal_code": "10003", "country": "US" }, "contacts": [ { "id": "JXRHMI4RL47YB7OW", "name": "Joe Burrow", "email_address": "joe@joesfreshseafood.com", "phone_number": "1-212-555-4250", "ordinal": 0 } ], "account_number": "123456", "version": 1, "status": "ACTIVE" } } ``` ## Create multiple vendors at once To create multiple vendors at once, call the [BulkCreateVendors](https://developer.squareup.com/reference/square/vendors-api/bulk-create-vendors) endpoint. The `vendors` input parameter contains the list of the to-be-created vendors. This parameter is a map of [Vendor](https://developer.squareup.com/reference/square/objects/Vendor) objects. A key of the map is an [idempotency](working-with-apis/idempotency) key used to ensure that the object isn't duplicated no matter how many times the object creation is attempted. If a specified vendor object shares the name with another vendor object, the specified vendor object isn't created. Other specified vendor objects can be successfully created in a call to `BulkCreateVendors`, as long as their names are unique among themselves and other existing vendor objects. Bulk operations differ from batch operations in that the former permits partial successes, whereas the latter does not. You can use `BulkCreateVendors` to add a single vendor by making the `vendors` map contain a single idempotency_key-object pair. ### Request: Create two vendors at once ```` ### Response: Create two vendors at once The successful response returns a payload similar to the following. The `responses` field is an object map containing idempotency_key-vendor pairs. The key is the same as specified in the request and the object is the corresponding `Vendor` object just created. ```json { "responses": { "0432162f-e3d4-4627-ad5f-f60794f220c3": { "vendor": { "id": "CARJMAFUWDYBTPO2", "created_at": "2021-12-16T03:57:11.128Z", "updated_at": "2021-12-16T03:57:11.128Z", "name": "Vendor 2A", "contacts": [ { "id": "IPSTXCGSCXC5HU2P", "name": "Vendor B's Contact", "email_address": "annie@acme.com", "phone_number": "1-212-555-4251", "ordinal": 0 } ], "version": 1, "status": "ACTIVE" } }, "0e5785ba-8371-48ed-8317-909edc33a08f": { "vendor": { "id": "5VPCRLENAFZXFZNA", "created_at": "2021-12-16T03:57:11.205Z", "updated_at": "2021-12-16T03:57:11.205Z", "name": "Vendor A", "address": { "address_line_1": "101 Main Street", "address_line_2": "Suite 1", "locality": "City", "administrative_district_level_1": "State", "postal_code": "10003", "country": "US" }, "contacts": [ { "id": "HB5S4SB2EXYGKVJ3", "name": "Vendor A's Contact", "email_address": "joe@acme.com", "phone_number": "1-212-555-4250", "ordinal": 0 } ], "account_number": "4025391", "note": "a vendor", "version": 1, "status": "ACTIVE" } } } } ``` If you call the same [BulkCreateVendors](https://developer.squareup.com/reference/square/vendors-api/bulkd-create-vendors) request again, you get the same previous response. You can call [SearchVendors](https://developer.squareup.com/reference/square/vendors-api/search-vendors), querying against the vendors' `name` values, to verify that no duplicate vendor objects are created by repeated calls to `BulkCreateVendors`. --- # Vendors API > Source: https://developer.squareup.com/docs/vendors-api/manage-vendors-in-apps > Status: BETA > Languages: All > Platforms: All Learn about the Vendors API and how to use it in a Square application. **Applies to:** [Vendors API](https://developer.squareup.com/reference/square/vendors-api) {% subheading %}Learn about the Vendors API and how an application can manage vendors for a seller.{% /subheading %} {% toc hide=true /%} ## Overview A seller typically has a list of vendors to supply items for sale. Vendors are also referred to as suppliers. A Square seller can be a vendor for another Square seller, but a vendor might not be a Square seller. The Square Dashboard lets a seller add, search, update, or remove a vendor. The Vendors API lets your application manage vendors for a seller. For example, when a new Square seller signs up for your application, your application can call the Vendors API to programmatically add the seller as a supplier for other Square sellers. At a later time, your application can present the vendor list for a seller to choose a supplier to stock a particular type of item. In addition, your application can create an ad hoc vendor and add it to the list of vendors of a Square seller. ## Requirements and limitations Your application must have permissions with the OAuth scope of `VENDOR_READ` or `VENDOR_WRITE` to call the Vendors API for read or write operations, respectively. ## Data model The Vendors API exposes the following objects to represent a vendor and the vendor's contact information and to facilitate managing vendors: * [Vendor](https://developer.squareup.com/reference/square/objects/Vendor) - An object encapsulating a vendor, including the vendor's name, account number, address, phone number, and associated contacts. * [VendorContact](https://developer.squareup.com/reference/square/objects/VendorContact) - An object encapsulating a contact associated with a given vendor, including the name, email address, and phone number of a contact for the vendor. ## Supported Operations The Vendors API supports the following endpoints and webhook events to enable vendor management operations. ### Endpoints * [CreateVendor](https://developer.squareup.com/reference/square/vendors-api/create-vendor) or [BulkCreateVendors](https://developer.squareup.com/reference/square/vendors-api/bulk-create-vendors) - Used to create a single vendor or multiple vendors, respectively. * [RetrieveVendor](https://developer.squareup.com/reference/square/vendors-api/retrieve-vendor) or [BulkRetrieveVendors](https://developer.squareup.com/reference/square/vendors-api/bulk-retrieve-vendors) - Used to retrieve the single `Vendor` object of a specified vendor ID or multiple vendors of a list of specified vendor IDs, respectively. * [UpdateVendor](https://developer.squareup.com/reference/square/vendors-api/update-vendor) or [BulkUpdateVendors](https://developer.squareup.com/reference/square/vendors-api/bulk-update-vendors) - Used to update one or more (batch version) vendors. * [SearchVendors](https://developer.squareup.com/reference/square/vendors-api/search-vendors) - Used to search for vendors that match specified queried expressions and be sorted in a specified order. ### Webhooks The Vendors API supports the following webhook events: * [vendor.created](https://developer.squareup.com/reference/square/vendors-api/webhooks/vendor.created) - Notifies of an event when a vendor is created. * [vendor.updated](https://developer.squareup.com/reference/square/vendors-api/webhooks/vendor.updated) - Notifies of an event when a vendor is updated. --- # Square SDKs > Source: https://developer.squareup.com/docs/sdks > Status: PUBLIC > Languages: All > Platforms: All Summarizes the available Square APIs and SDKs that you can use to build solutions. {% subheading %}Learn about the available Square SDKs that you can use to build solutions.{% /subheading %} {% toc hide=true /%} ## Overview You can call Square APIs directly from [API Explorer](https://developer.squareup.com/explorer/square) to test their capabilities and perform actions on objects within a Square account. For an introduction, see [Get Started](square-get-started). However, when you’re ready to develop your own integration, Square recommends using the Square server-side SDKs instead of calling APIs directly from your application. These SDKs insulate your code from the mechanics of API requests and replies and provide useful abstractions to simplify your code. This helps you focus on writing business logic, rather than low-level details. When writing and testing your integration, you can use API Explorer to [generate language-specific requests](devtools/api-explorer#generate-language-specific-requests-for-your-applications). {% card-layout type="grid" iconBorder=false%} {% card iconPath="//images.ctfassets.net/1nw4q0oohfju/60QENBp0uPrTekxQJIa2Rg/e2cbe1e9a221e23529ad2bb2d4908393/go-color.svg" href="sdks/go" iconWidth=100 iconHeight=100 iconBorder=false%} **Go SDK** * [pkg.go.dev](https://pkg.go.dev/github.com/square/square-go-sdk/v2) * [GitHub](https://github.com/square/square-go-sdk) * [Quickstart](sdks/go/quick-start) {% /card %} {% card iconPath="//images.ctfassets.net/1nw4q0oohfju/5AfiaNxQJtvnSklqJ0gmdx/a972b3209b8f392575a51d16ad9aa9ac/svg-java-color.svg" href="sdks/java" iconWidth=100 iconHeight=100 iconBorder=false%} **Java SDK** * [Maven](https://central.sonatype.com/artifact/com.squareup/square) * [GitHub](https://github.com/square/square-java-sdk) * [Quickstart](sdks/java/quick-start) {% /card %} {% card iconPath="//images.ctfassets.net/1nw4q0oohfju/2FHPjmx8Wb5vewG5egyck8/e4156508f525b0b0bee6c28b1e55b668/svg-net-color.svg" href="sdks/dotnet" iconWidth=100 iconHeight=100 iconBorder=false%} **.NET SDK** * [Nuget](https://www.nuget.org/packages/Square) * [GitHub](https://github.com/square/square-dotnet-sdk) * [Quickstart](sdks/dotnet/quick-start) {% /card %} {% card iconPath="//images.ctfassets.net/1nw4q0oohfju/4doaJQ8JxMehJasvMCY8Ql/ad2df4208eb996797cbf788ddef4f6ae/svg-node-color.svg" href="sdks/nodejs" iconWidth=100 iconHeight=100 iconBorder=false%} **Node.js SDK** * [npm](https://www.npmjs.com/package/square) * [GitHub](https://github.com/square/square-nodejs-sdk) * [Quickstart](sdks/nodejs/quick-start) {% /card %} {% card iconPath="//images.ctfassets.net/1nw4q0oohfju/44Je7g1Lr7wVCZ9dopoG1d/d47d30131fa4f719999990f862f30ae8/svg-php-color.svg" href="sdks/php" iconWidth=100 iconHeight=100 iconBorder=false%} **PHP SDK** * [Packagist](https://packagist.org/packages/square/square) * [GitHub](https://github.com/square/square-php-sdk) * [Quickstart](sdks/php/quick-start) {% /card %} {% card iconPath="//images.ctfassets.net/1nw4q0oohfju/1kMM0Cph3fyAJWtIq7oL7u/2c552ba2153e8edad08371a299213938/svg-python-color.svg" href="sdks/python" iconWidth=100 iconHeight=100 iconBorder=false%} **Python SDK** * [PyPI](https://pypi.org/project/squareup/) * [GitHub](https://github.com/square/square-python-sdk) * [Quickstart](sdks/python/quick-start) {% /card %} {% card iconPath="//images.ctfassets.net/1nw4q0oohfju/3bC0NIpcq2jpEUk4rBoAmp/7cd6c9fb16d65995a852cc0667005e8d/svg-ruby-color.svg" href="sdks/ruby" iconWidth=100 iconHeight=100 iconBorder=false%} **Ruby SDK** * [RubyGems](https://rubygems.org/gems/square.rb) * [GitHub](https://github.com/square/square-ruby-sdk) * [Quickstart](sdks/ruby/quick-start) {% /card %} {% /card-layout %} ## Mobile SDKs {% card-layout type="grid" %} {% card iconPath="//images.ctfassets.net/1nw4q0oohfju/1L0PRVOwxhO1cXOGhYYKAQ/00274442e344a759c0ff7a35d0538138/sq-reader-teal.svg" href="mobile-payments-sdk" %} **Mobile Payments SDK** {% line-break /%} Embed the Square payment flow directly into native iOS or Android mobile applications and connect to a [Square Reader](https://squareup.com/hardware/contactless-chip-reader) or [Square Stand](https://squareup.com/hardware/stand) to process in-person payments. {% icon-container iconPath="//images.ctfassets.net/1nw4q0oohfju/2w6xVp2ceGaGF5u9hpRArn/19c6e1b3d82c387a5f7812126799cb77/svg-android-color.svg" %} **[Android](mobile-payments-sdk/android)** {% /icon-container %} {% icon-container iconPath="//images.ctfassets.net/1nw4q0oohfju/mN59OE2rC4NNu7xQ38cMe/f2017d62668ca6d49144c29d19b2f747/svg-apple-color.svg" %} **[iOS](mobile-payments-sdk/ios)** {% /icon-container %} {% icon-container iconPath="//images.ctfassets.net/1nw4q0oohfju/7zxhGCvmdBu44VraUClCti/d438e3d09bb9adf5a7c577bfba21971a/svg-flutter-color.svg" %} **[Flutter](mobile-payments-sdk/flutter)** {% /icon-container %} {% icon-container iconPath="//images.ctfassets.net/1nw4q0oohfju/3sFH1Q9DGWEOBdUEp51b8b/355f6d04256b63c5cb9fd751e9ea1572/svg-react-color.svg" %} **[React Native](mobile-payments-sdk/react-native)** {% /icon-container %} {% /card %} {% card iconPath="//images.ctfassets.net/1nw4q0oohfju/30hF1ajg8eFTX5LuTnI6bE/523da55c4abfc81e7bc41dd0181fb8d8/sq-stand-teal.svg" href="pos-api/what-it-does" %} **Point of Sale API** {% line-break /%} Opens Square Point of Sale on top of an iOS or Android mobile application UI to take payments with a [Square Reader](https://squareup.com/hardware/contactless-chip-reader) or [Square Stand](https://squareup.com/hardware/stand). {% icon-container iconPath="//images.ctfassets.net/1nw4q0oohfju/2w6xVp2ceGaGF5u9hpRArn/19c6e1b3d82c387a5f7812126799cb77/svg-android-color.svg" %} **[Android](pos-api/build-on-android)** {% /icon-container %} {% icon-container iconPath="//images.ctfassets.net/1nw4q0oohfju/mN59OE2rC4NNu7xQ38cMe/f2017d62668ca6d49144c29d19b2f747/svg-apple-color.svg" %} **[iOS](pos-api/build-on-ios)** {% /icon-container %} {% /card %} {% card iconPath="//images.ctfassets.net/1nw4q0oohfju/1xcY1FsmMj2UhYohnb2sEk/ffbfa7066f444d95550366bd226b1221/sq-checkmark-teal.svg" href="in-app-payments-sdk/what-it-does" %} **In-App Payments SDK** {% line-break /%} Create a fully customized payment flow and accept credit card and digital wallet payments directly in your native iOS or Android mobile applications. {% icon-container iconPath="//images.ctfassets.net/1nw4q0oohfju/2w6xVp2ceGaGF5u9hpRArn/19c6e1b3d82c387a5f7812126799cb77/svg-android-color.svg" %} **[Android](in-app-payments-sdk/build-on-android)** {% /icon-container %} {% icon-container iconPath="//images.ctfassets.net/1nw4q0oohfju/mN59OE2rC4NNu7xQ38cMe/f2017d62668ca6d49144c29d19b2f747/svg-apple-color.svg" %} **[iOS](in-app-payments-sdk/build-on-ios)** {% /icon-container %} {% icon-container iconPath="//images.ctfassets.net/1nw4q0oohfju/7zxhGCvmdBu44VraUClCti/d438e3d09bb9adf5a7c577bfba21971a/svg-flutter-color.svg" %} **[Flutter](in-app-payments-sdk/flutter)** {% /icon-container %} {% icon-container iconPath="//images.ctfassets.net/1nw4q0oohfju/3sFH1Q9DGWEOBdUEp51b8b/355f6d04256b63c5cb9fd751e9ea1572/svg-react-color.svg" %} **[React Native](in-app-payments-sdk/react-native)** {% /icon-container %} {% /card %} {% /card-layout %} ## Frontend SDKs {% card-layout %} {% card iconPath="//images.ctfassets.net/1nw4q0oohfju/5gcN3tWAMUy8kGBXd40L34/261d681e49688c4bfc2157865db9cd1f/card-swipe-mult-teal.svg" href="web-payments/overview" %} **Web Payments SDK** {% line-break /%} Build a custom payment flow into your website to accept card and digital wallet payments. Create a fully customized payment flow to accept credit card, ACH, and digital wallet payments. {% /card %} {% /card-layout %} ## See also * [Square SDK and Mobile Samples](sample-apps) --- # Use Custom Attributes for Orders > Source: https://developer.squareup.com/docs/orders-custom-attributes-api/custom-attributes > Status: BETA > Languages: All > Platforms: All Learn how to create and manage custom attributes for Square orders using the Order Custom Attributes API. **Applies to:** [Order Custom Attributes API](orders-custom-attributes-api/overview) {% subheading %}Learn how to create and manage custom attributes for Square orders using the Order Custom Attributes API.{% /subheading %} {% toc hide=true /%} ## Overview Order-related custom attributes are used to store properties or metadata for an order. A custom attribute is based on a custom attribute definition in a Square seller account. After the definition is created, the custom attribute can be set for orders. For an overview of how order-related custom attributes work, see [Custom Attributes for Orders](orders-custom-attributes-api/overview). Order-related custom attributes are stored as a collection for an order. >`.../v2/orders/{order_id}/custom-attributes` An individual custom attribute is accessed using the `order_id` and `key`. If the requesting application isn't the definition owner, then `key` is a {% tooltip text="qualified key" %}The key provided when the definition was created, prefixed by the application ID of the definition owner: {application ID}:{key}.{% /tooltip %}. >`.../v2/orders/{order_id}/custom-attributes/{key}` ## CustomAttribute object A custom attribute is represented by a [CustomAttribute](https://developer.squareup.com/reference/square/objects/CustomAttribute) object. Custom attributes obtain a `key` identifier, `visibility` setting, allowed data type, and other properties from a custom attribute definition, which is represented by a [CustomAttributeDefinition](https://developer.squareup.com/reference/square/objects/CustomAttributeDefinition) object. The following is an example custom attribute: ```json { "custom_attribute": { "key": "table-number", "version": 1, "updated_at": "2022-10-06T20:41:22.673Z", "value": "42", "created_at": "2022-10-06T20:41:22.673Z", "visibility": "VISIBILITY_READ_WRITE_VALUES" } } ``` The following fields represent core properties of a custom attribute: |Field{% width="150px" %}|Description| |:------|:------| |`key`|The identifier for the custom attribute, which is obtained from the custom attribute definition.{% line-break /%}{% line-break /%}If the requesting application isn't the definition owner, the `key` is a qualified key. For more information, see [Qualified keys](#qualified-keys).| |`version`|The version number of the custom attribute. The version number is initially set to 1 and incremented each time the custom attribute value is updated. Include this field in upsert operations to enable [optimistic concurrency](build-basics/common-api-patterns/optimistic-concurrency) control and in read operations for strong consistency.| |`visibility`|The level of access that other applications have to the custom attribute. Custom attributes obtain this setting from the `visibility` field of the current version of the definition.| |`definition`|The [CustomAttributeDefinition](https://developer.squareup.com/reference/square/objects/CustomAttributeDefinition) object that defines properties for the custom attribute. This field is included if the custom attribute is retrieved using the `with_definition` or `with_definitions` query parameter set to `true`.| |`value`|The value of the custom attribute, which must conform to the `schema` specified by the definition. For more information, see [Value data types](#value-data-types). | ### Qualified keys When working with custom attributes owned by other applications, you must provide a qualified key for the following endpoints: * `UpsertOrderCustomAttribute` * `BulkUpsertOrderCustomAttributes` * `RetrieveOrderCustomAttribute` * `DeleteOrderCustomAttribute` Square generates a qualified key in the format `{application ID}:{key}`, using the application ID of the definition owner and the `key` that was provided when the definition was created. The following example is a qualified key generated for a third-party application: >`sq0idp-BuahoY39o1X-GPxRRUWc0A:businessEmail` The following example is a qualified key for a seller-defined custom field. The application ID for first-party Square products is `square`. >`square:0460be56-6783-4482-8d55-634f9ae61684` You can call the following endpoints to retrieve a qualified key: * [ListOrderCustomAttributeDefinitions](https://developer.squareup.com/reference/square/order-custom-attributes-api/list-order-custom-attribute-definitions) - Custom attributes use the same `key` as the corresponding definition. * [ListOrderCustomAttributes](https://developer.squareup.com/reference/square/order-custom-attributes-api/list-order-custom-attributes) - Only custom attributes that have a value are returned. If the `with_definitions` query parameter is included in the request, custom attribute definitions are also returned. For more information, see [List order custom attribute definitions](orders-custom-attributes-api/custom-attribute-definitions#list-order-custom-attribute-definitions). Square returns qualified keys for custom attributes and custom attribute definitions when the requesting application isn't the definition owner. {% aside type="info" %} In addition, the `visibility` setting of the custom attribute must be `VISIBILITY_READ_ONLY` or `VISIBILITY_READ_WRITE_VALUES`. For more information, see [Access control](orders-custom-attributes-api/overview#access-control). {% /aside %} ### Value data types The following data types are supported for order-related custom attributes: |Data type|Example value| |:------|:------| |[String](#string)|`"Nellie"`{% line-break /%}`"The quick brown fox."`| |[Email](#email)|`"person@company.com"`| |[PhoneNumber](#phonenumber)|`"+12085551234"`| |[Address](#address)|`{`{% line-break /%}`"address_line_1": "Chez Mireille COPEAU Apartment 3",`{% line-break /%}`"address_line_2": "Entrée A Bâtiment Jonquille",`{% line-break /%}`"postal_code": "33380 MIOS",`{% line-break /%}`"locality": "CAUDOS",`{% line-break /%}`"country": "FR"`{% line-break /%}`}`| |[Date](#date)|`"2022-05-12"`| |[Boolean](#boolean)|`true`{% line-break /%}`false`| |[Number](#number)|`"48"`{% line-break /%}`"12.3"`| |[Selection](#selection)|`[`{% line-break /%}`"6b96fba7-d8a5-ae72-48f4-8c3ee875633f",`{% line-break /%}`"46c2716e-f559-4b75-c015-764897e3c4a0"`{% line-break /%}`]`| For more information about these data types, including constraints and example requests for setting custom attribute values, see [Create or update a custom attribute for an order](orders-custom-attributes-api/custom-attributes#create-or-update-a-custom-attribute-for-an-order). {% aside type="info" %} Order-related custom attributes don't support `DateTime` or `Duration` data types. {% /aside %} The data type of a custom attribute is specified by the `schema` field of the custom attribute definition. You can call the following endpoints to retrieve a definition: * [RetrieveOrderCustomAttributeDefinition](https://developer.squareup.com/reference/square/order-custom-attributes-api/retrieve-order-custom-attribute-definition) * [RetrieveOrderCustomAttribute](https://developer.squareup.com/reference/square/order-custom-attributes-api/retrieve-order-custom-attribute) using the `with_definition` query parameter. For more information, see [Retrieve a custom attribute for an order](orders-custom-attributes-api/custom-attributes#retrieve-a-custom-attribute-for-an-order). All data types except `Selection` are specified using a simple URL reference to an object hosted on the Square CDN. A `Selection` data type provides additional information. The following is an example `Number`-type custom attribute definition: ```json { "custom_attribute_definition": { "key": "cover-count", "name": "Cover count", "description": "The number of people seated at a table", "version": 1, "updated_at": "2022-10-06T16:53:23.141Z", "schema": { "$ref": "https://developer-production-s.squarecdn.com/schemas/v1/common.json#squareup.common.Number" }, "created_at": "2022-10-06T16:53:23.141Z", "visibility": "VISIBILITY_READ_WRITE_VALUES" } } ``` The following is an excerpt of an example `Selection`-type custom attribute definition: ```json { "custom_attribute_definition": { ... "schema": { "$schema": "https://developer-production-s.squarecdn.com/meta-schemas/v1/selection.json", "maxItems": 3, "type": "array", "uniqueItems": true, "items": { "names": [ "Cookie", "Cake", "Pie" ], "enum": [ "9492bdda-ab4d-4eeb-8496-0986c8f78499", // UUID for "Option 1" "6b96fba7-d8a5-ae72-48f4-8c3ee875633f", // UUID for "Option 2" "4032c1a2-d749-4c75-9c30-be6472cd2e08" // UUID for "Option 3" ] } }, ... } } ``` Note the following: * The `maxItems` field represents the maximum number of allowed selections for the custom attribute value. * The `items` field contains two arrays: `names` and `enum`. The options in the `names` field map by index to the UUIDs in the `enum` field. The first option maps to the first UUID, the second option maps to the second UUID, and so on. This mapping is used to set the custom attribute value. For example, the value of the following custom attribute maps to "Cake": ``` { "custom_attribute": { "key": "favorite-dessert", "version": 1, "updated_at": "2022-11-16T00:07:20Z", "value": [ "6b96fba7-d8a5-ae72-48f4-8c3ee875633f" ], "created_at": "2022-11-16T00:07:20Z", "visibility": "VISIBILITY_READ_WRITE_VALUES" } } ``` For more example `UpsertOrderCustomAttribute` requests, see [Create or update a custom attribute for an order](orders-custom-attributes-api/custom-attributes#create-or-update-a-custom-attribute-for-an-order). ## Create or update a custom attribute for an order To set the value of a custom attribute for an order, call [UpsertOrderCustomAttribute](https://developer.squareup.com/reference/square/order-custom-attributes-api/upsert-order-custom-attribute) and provide the following information: * `order_id` - The `id` of the [Order](https://developer.squareup.com/reference/square/objects/Order) object that represents the target order. * `key` - The `key` of the custom attribute to create or update. * If the requesting application is the definition owner, use the `key` that was provided when the definition was created. * If the requesting application isn't the definition owner, use the {% tooltip text="qualified key" %}The key provided when the definition was created, prefixed by the application ID of the definition owner: {application ID}:{key}.{% /tooltip %}. The `visibility` of the custom attribute must be `VISIBILITY_READ_WRITE_VALUES`. For more information, see [Qualified keys](#qualified-keys). * `custom_attribute` - The custom attribute with the following fields: * `value` - The `value` of the custom attribute, which must conform to the `schema` specified by the definition. For more information, see [Value data types](#value-data-types). * `version` - The current version of the custom attribute, optionally included to enable [optimistic concurrency](build-basics/common-api-patterns/optimistic-concurrency) control when updating a value that was previously set for the order. If the specified version is less than the current version of the custom attribute, the request fails with a `CONFLICT` error. If the specified version is higher than the current version, Square returns a `BAD_REQUEST` error. * `idempotency_key` - A unique ID for the request that can be optionally included to ensure [idempotency](orders-custom-attributes-api/overview#requirements-and-limitations). The following example request sets the value for a `Number`-type custom attribute. The `key` in this example is `seat-number`. ```` The following is an example response: ```json { "custom_attribute": { "key": "table-number", "version": 1, "updated_at": "2022-10-06T20:41:22.673Z", "value": "42", "created_at": "2022-10-06T20:41:22.673Z", "visibility": "VISIBILITY_READ_WRITE_VALUES" } } ``` During upsert operations, Square validates the provided value against the `schema` specified by the definition. After a custom attribute is upserted, Square invokes the `order.custom_attribute.owned.updated` and `order.custom_attribute.visible.updated` [webhooks](orders-custom-attributes-api/overview#webhooks). You can set a corresponding custom attribute for an order by providing a `value` that conforms to the `schema` specified by the custom attribute definition. For information about retrieving the `schema`, see [Value data types](#value-data-types). ## Bulk create or update custom attributes for orders To create or update multiple custom attributes for one or more orders, call [BulkUpsertOrderCustomAttributes](https://developer.squareup.com/reference/square/order-custom-attributes-api/bulk-upsert-order-custom-attributes). This endpoint accepts a `values` map with 1 to 25 objects that each contain: * An arbitrary ID for the individual upsert request, which corresponds to an entry in the response that has the same ID. The ID must be unique within the `BulkUpsertOrderCustomAttributes` request. * An individual upsert request with the information needed to create or update a custom attribute for an order. The following example includes two upsert requests that set two custom attributes for an order: ```` During upsert operations, Square validates each provided value against the `schema` specified by the definition. The optional `version` field is only supported for update operations. {% aside type="tip" %} If you're providing idempotency keys, you can use them as the arbitrary ID for individual upsert requests. {% /aside %} An individual upsert request contains the information needed to set the value of a custom attribute for an order. Each request includes the following fields: * `order_id` - The `id` of the [Order](https://developer.squareup.com/reference/square/objects/Order) object that represents the target order. * `custom_attribute` - The custom attribute with following fields: * `key` - The key of the custom attribute to create or update. * If the requesting application is the definition owner, use the `key` that was provided when the definition was created. * If the requesting application isn't the definition owner, use the {% tooltip text="qualified key" %}The key provided when the definition was created, prefixed by the application ID of the definition owner: {application ID}:{key}.{% /tooltip %}. The `visibility` of the custom attribute must be `VISIBILITY_READ_WRITE_VALUES`. For more information, see [Qualified keys](#qualified-keys). * `value` - The value of the custom attribute, which must conform to the `schema` specified by the definition. For more information, see [Value data types](#value-data-types). The size of this field cannot exceed 5 KB. * `version` - The current version of the custom attribute, optionally included to enable [optimistic concurrency](build-basics/common-api-patterns/optimistic-concurrency) control when updating a value that was previously set for the order. If the specified version is less than the current version of the custom attribute, the request fails with a `CONFLICT` error. If the specified version is higher than the current version, Square returns a `BAD_REQUEST` error. * `idempotency_key` - A unique ID for the individual request that can be optionally included to ensure [idempotency](orders-custom-attributes-api/overview#requirements-and-limitations). Individual upsert requests aren't guaranteed to be returned in the same order. Each upsert response has the same ID as the corresponding upsert request, so you can use the ID to map individual requests and responses. After each custom attribute is upserted, Square invokes the `order.custom_attribute.owned.updated` and `order.custom_attribute.visible.updated` [webhooks](orders-custom-attributes-api/overview#webhooks. ## List custom attributes for an order To list the custom attributes that are set for an order, call [ListOrderCustomAttributes](https://developer.squareup.com/reference/square/order-custom-attributes-api/list-order-custom-attributes) and provide the following information: * `order_id` - The `id` of the [Order](https://developer.squareup.com/reference/square/objects/Order) object that represents the target order. * `with_definitions` - Indicates whether to return the custom attribute definition in the `definition` field of each custom attribute. Set this parameter to `true` to retrieve the name and description of each custom attribute, information about the data type, or other definition details. The default value is `false`. * `limit` - The maximum [page size](build-basics/common-api-patterns/pagination) (of 1 to 100 results) to return in a response. The default value is 20. If the results are paged, the `cursor` field in the response contains a value that you can send with the `cursor` query parameter to retrieve the next page of results. The following example request includes the `limit` query parameter: ```` When all pages are retrieved, the results include: * All custom attributes owned by the requesting application that have a value. The `key` for these custom attributes is the `key` that was provided for the definition. * All custom attributes owned by other applications that have a value and a `visibility` setting of `VISIBILITY_READ_ONLY` or `VISIBILITY_READ_WRITE_VALUES`. The `key` for these custom attributes is a {% tooltip text="qualified key" %}The key provided when the definition was created, prefixed by the application ID of the definition owner: {application ID}:{key}.{% /tooltip %}. For more information, see [Qualified keys](#qualified-keys). If no custom attributes are found, Square returns an empty object. ```json {} ``` ## Retrieve a custom attribute for an order To retrieve a custom attribute for an order, call [RetrieveOrderCustomAttribute](https://developer.squareup.com/reference/square/order-custom-attributes-api/retrieve-order-custom-attribute) and provide the following information: * `order_id` - The `id` of the [Order](https://developer.squareup.com/reference/square/objects/Order) object that represents the target order. * `key` - The `key` of the custom attribute to retrieve. * If the requesting application is the definition owner, use the `key` that was provided when the definition was created. * If the requesting application isn't the definition owner, use the {% tooltip text="qualified key" %}The key provided when the definition was created, prefixed by the application ID of the definition owner: {application ID}:{key}.{% /tooltip %}. The `visibility` of the custom attribute must be `VISIBILITY_READ_ONLY` or `VISIBILITY_READ_WRITE_VALUES`. For more information, see [Qualified keys](#qualified-keys). * `with_definition` - Indicates whether to return the custom attribute definition in the `definition` field of the custom attribute. Set this parameter to `true` to retrieve the name and description of the custom attribute, information about the data type, or other definition details. The default value is `false`. * `version` - The current version of the custom attribute, optionally included for strongly consistent reads to guarantee that you receive the most up-to-date data. When included in the request, Square returns the specified version or a higher version if one exists. If the specified version is higher than the current version, Square returns a `400 BAD_REQUEST` error. The following is an example request: ```` ## Delete a custom attribute for an order To delete a custom attribute for an order, call [DeleteOrderCustomAttribute](https://developer.squareup.com/reference/square/order-custom-attributes-api/delete-order-custom-attribute) and provide the following information: * `order_id` - The `id` of the [Order](https://developer.squareup.com/reference/square/objects/Order) object that represents the target order. * `key` - The `key` of the custom attribute to delete. * If the requesting application is the definition owner, use the `key` that was provided when the definition was created. * If the requesting application isn't the definition owner, use the {% tooltip text="qualified key" %}The key provided when the definition was created, prefixed by the application ID of the definition owner: {application ID}:{key}.{% /tooltip %}. The `visibility` of the custom attribute must be `VISIBILITY_READ_WRITE_VALUES`. For more information, see [Qualified keys](#qualified-keys). The following is an example request: ```` If the operation is successful, Square returns an empty object: ```json {} ``` To delete all custom attributes of one or more orders in a single request, call [BulkDeleteOrderCustomAttributes](https://developer.squareup.com/reference/square/order-custom-attributes-api/bulk-delete-order-custom-attributes). After a custom attribute is deleted, Square invokes the `order.custom_attribute.owned.deleted` and `order.custom_attribute.visible.deleted` [webhooks](orders-custom-attributes-api/overview#webhooks). ## See also * [Custom Attributes for Orders](orders-custom-attributes-api/overview) * [Create and Manage Custom Attribute Definitions for Orders](orders-custom-attributes-api/custom-attribute-definitions) * [Custom Attributes](devtools/customattributes/overview) * [API Reference: Custom Attributes for Orders](https://developer.squareup.com/reference/square/order-custom-attributes-api) --- # Custom Attributes for Orders > Source: https://developer.squareup.com/docs/orders-custom-attributes-api/overview > Status: BETA > Languages: All > Platforms: All Learn how to create and manage custom attributes for Square orders using the Order Custom Attributes API. **Applies to:** [Order Custom Attributes API](https://developer.squareup.com/reference/square/order-custom-attributes-api) {% subheading %}Learn how to create and manage custom attributes for Square orders using the Order Custom Attributes API.{% /subheading %} {% toc hide=true /%} ## Overview With custom attributes for orders, you can define your own properties and associate them with individual [Order](https://developer.squareup.com/reference/square/objects/Order) objects. For example, in a restaurant scenario, you can define fields such as Table Number, Seat Number, or Cover Count (how many people are seated at the table). When an order is ready, you can use the [Order Custom Attributes API](https://developer.squareup.com/reference/square/order-custom-attributes-api) to match the order with the table that requested it. ## Requirements and limitations The following requirements, limitations, and other considerations apply when working with custom attributes for orders: * **Minimum Square version** - Square version 2022-11-16 or later is required to work with the Order Custom Attributes API. * **Sensitive data** - Custom attributes are intended to store additional information or store associations with an entity in another system. Don't use custom attributes to store any PCI data, such as credit card details. PII is supported in custom attribute values, but applications that create or read this data should observe applicable privacy laws and data regulations such as requesting the hard deletion of custom attribute data when a GDPR request for erasure is received. Never store secret-level information in a custom attribute. The use of custom attributes is subject to developers adhering to the Square API Data Policy Disclosures. * **Limits** - A seller account can have a maximum of 100 order-related custom attribute definitions per application. * **Unique name** - If the `visibility` of an order-related custom attribute definition is `VISIBILITY_READ_ONLY` or `VISIBILITY_READ_WRITE_VALUES`, the `name` must be unique (case-sensitive) across all visible order-related custom attribute definitions for the seller. This requirement is intended to help sellers differentiate between custom attributes that are visible in the Customer Directory and other Square products. * **Maximum value for Number custom attributes** - The absolute value of a `Number`-type custom attribute cannot exceed (2^63-1)/10^5 or 92233720368547. * **OAuth permissions** - Applications that use OAuth require `ORDER_READ` or `ORDER_WRITE` permission to work with order-related custom attributes. For more information, see [OAuth API](oauth-api/overview) and [Order Custom Attributes](oauth-api/square-permissions#order-custom-attributes). If a seller revokes the permissions of the application that created a custom attribute definition or the token expires, the application cannot access the definition or corresponding custom attributes until permissions are restored. However, the definition and custom attributes remain available to other applications according to the `visibility` setting. * **Idempotency** - Including an idempotency key in a request guarantees that the request is processed only once. The following endpoints allow you to specify an `idempotency_key`: * `CreateOrderCustomAttributeDefinition` * `UpdateOrderCustomAttributeDefinition` * `UpsertOrderCustomAttribute` * `BulkUpsertOrderCustomAttributes` Be sure to generate a unique idempotency key for each request. If an idempotency key is reused in requests to the same endpoint on behalf of the same seller, Square returns the response from the first request that was successfully processed using the key. Square doesn't process subsequent requests that use the same key, even if they contain different fields. For more information, see [Idempotency](build-basics/common-api-patterns/idempotency). ## Basic workflow The basic workflow for order custom attributes involves the following types of operations: 1. Creating a custom attribute definition for `Order` objects. 2. Setting a custom attribute for an order, according to the associated custom attribute definition. 3. Retrieving one or more custom attributes from an order and performing other operations with those custom attributes. ### Creating a custom attribute definition for orders To create a new custom attribute for orders, you must first define its properties. To do this, you call [CreateOrderCustomAttributeDefinition](https://developer.squareup.com/reference/square/order-custom-attributes-api/create-order-custom-attribute-definition). The following example request defines a Cover Count custom attribute. The `schema` field indicates that the value of the custom attribute is a `Number`. ```` The `key` identifier and `visibility` setting that you specify for the definition are also used by corresponding custom attributes. The `visibility` setting determines the [access level](#access-control) that other applications (including the Customer Directory and other Square products) have to the definition and corresponding custom attributes. ### Setting custom attributes for an order After you create a custom attribute definition, you can set that custom attribute for any order. The following example `UpsertOrderCustomAttribute` request sets the Cover Count custom attribute using the `order_id` and `key`. Note the following: * The `key` in the path is `cover-count`, which is the key specified by the definition. * The `value` in the request body sets the custom attribute value for the order. This value must conform to the `Number` data type specified by the `schema` field in the definition. ```` {% aside type="info" %} Square also provides the `BulkUpsertOrderCustomAttributes` endpoint to update multiple custom attributes for an order in a single request. {% /aside %} ### Retrieving custom attributes from an order You can now retrieve the custom attribute to retrieve the value that was set for the order. The following example `RetrieveOrderCustomAttribute` request retrieves the Cover Count custom attribute for an order using the `order_id` and `key`: ```` The `value` field in the following example represents the custom attribute value: ```json { "custom_attribute": { "key": "cover-count", "version": 1, "updated_at": "2022-11-16T18:00:09.502Z", "value": "4", "created_at": "2022-11-16T18:00:09.502Z", "visibility": "VISIBILITY_READ_WRITE_VALUES" } } ``` You can include the `with_definition` query parameter to return the corresponding custom attribute definition in the same call. For example, you might want to retrieve the definition to retrieve the custom attribute's data type or name. {% aside type="info" %} Square also provides the `ListOrderCustomAttributes` endpoint to retrieve all the custom attributes associated with an order. {% /aside %} ## Supported operations The Order Custom Attributes API supports the following operations: ### Working with order-related custom attribute definitions * [CreateOrderCustomAttributeDefinition](https://developer.squareup.com/reference/square/order-custom-attributes-api/create-order-custom-attribute-definition) * [UpdateOrderCustomAttributeDefinition](https://developer.squareup.com/reference/square/order-custom-attributes-api/update-order-custom-attribute-definition) * [ListOrderCustomAttributeDefinitions](https://developer.squareup.com/reference/square/order-custom-attributes-api/list-order-custom-attribute-definitions) * [RetrieveOrderCustomAttributeDefinition](https://developer.squareup.com/reference/square/order-custom-attributes-api/retrieve-order-custom-attribute-definition) * [DeleteOrderCustomAttributeDefinition](https://developer.squareup.com/reference/square/order-custom-attributes-api/delete-order-custom-attribute-definition) ### Working with order-related custom attributes * [UpsertOrderCustomAttribute](https://developer.squareup.com/reference/square/order-custom-attributes-api/upsert-order-custom-attribute) * [ListOrderCustomAttributes](https://developer.squareup.com/reference/square/order-custom-attributes-api/list-order-custom-attributes) * [RetrieveOrderCustomAttribute](https://developer.squareup.com/reference/square/order-custom-attributes-api/retrieve-order-custom-attribute) * [DeleteOrderCustomAttribute](https://developer.squareup.com/reference/square/order-custom-attributes-api/delete-order-custom-attribute) ## Supported data types The data type of a custom attribute is specified in the `schema` field of the custom attribute definition. For all data types except `Selection`, this field contains a simple URL reference to a schema object hosted on the Square CDN. Order-related custom attributes support the following data types: * `String` * `Email` * `PhoneNumber` * `Address` * `Date` * `Boolean` * `Number` * `Selection` For information about defining the data type for an order-related custom attribute, see [Specifying the schema](orders-custom-attributes-api/custom-attribute-definitions#specifying-the-schema). ## Seller scope A `CreateOrderCustomAttributeDefinition` request is scoped to a specific seller. To make the custom attribute available to other sellers, you must call `CreateOrderCustomAttributeDefinition` on behalf of each seller. To do so when using OAuth, call this endpoint for each seller using their access token. {% aside type="info" %} To simplify management, you might want to keep all definitions that use the same `key` synchronized across seller accounts. Therefore, if you change a definition for one seller, you should consider making the same change for all other sellers. {% /aside %} ## Access control The application that creates a custom attribute definition is the definition owner. The definition owner always has `READ` and `WRITE` permissions to the definition and to all instances of the corresponding custom attribute. The `visibility` of a custom attribute definition determines how other applications that make calls on behalf of a seller can access the definition (and its corresponding custom attributes). This access control applies to third-party applications and Square products, such as the Customer Directory. The following table shows the access permitted by each supported `visibility` setting: | | Custom attribute{% line-break /%}definition{% colspan=2 %} | {% line-break /%}Custom attribute{% colspan=2 %} | | | | ---------- | ---------- | ---------- | ---------- | ---------- | | **Visibility setting** | **READ** | **WRITE** | **READ** | **WRITE** | | `VISIBILITY_HIDDEN` (default) | No | No | No | No | | `VISIBILITY_READ_ONLY` | Yes | No | Yes | No | | `VISIBILITY_READ_WRITE_VALUES`| Yes | No | Yes | Yes | ## Webhooks You can subscribe to receive notifications for order-related custom attribute events. Each event provides two options that allow you to choose when Square sends notifications: 1. `.owned` event notifications are sent when changes are made to custom attribute definitions and custom attributes that are owned by your application. A custom attribute definition is owned by the application that created it. A custom attribute is owned by the application that created the corresponding custom attribute definition. 2. `.visible` event notifications are sent when changes are made to custom attribute definitions and custom attributes that are visible to your application. These changes apply to: * All custom attribute definitions and custom attributes owned by your application. * All other custom attribute definitions or custom attributes whose `visibility` setting is `VISIBILITY_READ_ONLY` or `VISIBILITY_READ_WRITE_VALUES`. This includes seller-defined custom attributes (also known as custom fields), which are always set to `VISIBILITY_READ_WRITE_VALUES`. Notification payloads for both options contain the same information. ### Webhook events Subscribe to the following events to receive notifications for changes to custom attribute definitions and custom attributes that are owned by your application: |Event{% width="200px" %}|Permission{% width="120px" %}|Description| |:------|:------|:------ |[order.custom_attribute_definition.owned.created](https://developer.squareup.com/reference/square/order-custom-attributes-api/webhooks/order.custom_attribute_definition.owned.created)|`ORDERS_READ`|A custom attribute definition was created by your application. The application that created the custom attribute definition is the owner of the definition and corresponding custom attributes.| |[order.custom_attribute_definition.owned.updated](https://developer.squareup.com/reference/square/order-custom-attributes-api/webhooks/order.custom_attribute_definition.owned.updated)|`ORDERS_READ`|A custom attribute definition owned by your application was updated. Note that only the definition owner can update a custom attribute definition.| |[order.custom_attribute_definition.owned.deleted](https://developer.squareup.com/reference/square/order-custom-attributes-api/webhooks/order.custom_attribute_definition.owned.deleted)|`ORDERS_READ`|A custom attribute definition owned by your application was deleted. Note that only the definition owner can delete a custom attribute definition.| |[order.custom_attribute.owned.updated](https://developer.squareup.com/reference/square/order-custom-attributes-api/webhooks/order.custom_attribute.owned.updated)|`ORDERS_READ`|A custom attribute owned by your application was created or updated for an order.| |[order.custom_attribute.owned.deleted](https://developer.squareup.com/reference/square/order-custom-attributes-api/webhooks/order.custom_attribute.owned.deleted)|`ORDERS_READ`|A custom attribute owned by your application was deleted from an order.| Subscribe to the following events to receive notifications for changes to custom attribute definitions and custom attributes that are visible to your application. These `.visible` events include changes to all custom attribute definitions and custom attributes that are owned by your application, so you do not need to subscribe to an `.owned` event when you subscribe to the corresponding `.visible` event. |Event{% width="200px" %}|Permission{% width="120px" %}|Description| |:------|:------|:------ |[order.custom_attribute_definition.visible.created](https://developer.squareup.com/reference/square/order-custom-attributes-api/webhooks/order.custom_attribute_definition.visible.created)|`ORDERS_READ`|A custom attribute definition that's visible to your application was created.| |[order.custom_attribute_definition.visible.updated](https://developer.squareup.com/reference/square/order-custom-attributes-api/webhooks/order.custom_attribute_definition.visible.updated)|`ORDERS_READ`|A custom attribute definition that's visible to your application was updated.| |[order.custom_attribute_definition.visible.deleted](https://developer.squareup.com/reference/square/order-custom-attributes-api/webhooks/order.custom_attribute_definition.visible.deleted)|`ORDERS_READ`|A custom attribute definition that's visible to your application was deleted.| |[order.custom_attribute.visible.updated](https://developer.squareup.com/reference/square/order-custom-attributes-api/webhooks/order.custom_attribute.visible.updated)|`ORDERS_READ`|A custom attribute that's visible to your application was created or updated for an order.| |[order.custom_attribute.visible.deleted](https://developer.squareup.com/reference/square/order-custom-attributes-api/webhooks/order.custom_attribute.visible.deleted)|`ORDERS_READ`|A custom attribute that's visible to your application was deleted from an order.| {% aside type="info" %} Upserting or deleting a custom attribute for an order doesn't invoke an `order.updated` webhook. {% /aside %} The following is an example `order.custom_attribute_definition.visible.created` notification: ```json { "merchant_id": "DM7VKY8Q63GNP", "type": "order.custom_attribute_definition.visible.created", "event_id": "347ab320-c0ba-48f5-959a-4e147b9aefcf", "created_at": "2022-11-16T21:40:49.943Z", "data": { "type": "custom_attribute_definition", "id": "sq0idp-BushoY39o1X-GPxRRUWc0A:homeEmail", "object": { "created_at": "2022-11-16T21:40:49Z", "description": "Home email address", "key": "sq0idp-NarsfT33p3V-HZtTHEPg3F:homeEmail", "name": "Home email", "schema": { "$ref": "https://developer-production-s.squarecdn.com/schemas/v1/common.json#squareup.common.Email" }, "updated_at": "2022-11-16T21:40:49Z", "version": 1, "visibility": "VISIBILITY_READ_WRITE_VALUES" } } } ``` The following is an example `order.custom_attribute.visible.updated` notification: ```json { "merchant_id": "DM7VKY8Q63GNP", "type": "order.custom_attribute.visible.updated", "event_id": "1cc2925c-f6e2-4fb6-a597-07c198de59e1", "created_at": "2022-11-16T01:22:29Z", "data": { "type": "custom_attribute", "id": "sq0idp-BushoY39o1X-GPxRRUWc0A:homeEmail:ORDER:74PfERnDQ23tFjqxpDFAt45NJKp7VC", "object": { "created_at": "2022-11-16T21:40:54Z", "key": "sq0idp-NarsfT33p3V-HZtTHEPg3F:homeEmail", "updated_at": "2022-11-16T01:22:29Z", "value": "john@example.com", "version": 2, "visibility": "VISIBILITY_READ_WRITE_VALUES" } } } ``` Note the following: * The `ORDERS_READ` permission is required to receive notifications about order-related custom attribute events. * The `key` of the custom attribute definition or custom attribute in the notification is always the {% tooltip text="qualified key" %}The key provided when the definition was created, prefixed by the application ID of the definition owner: {application ID}:{key}.{% /tooltip %}. * If you subscribe to the `.owned` and `.visible` options for the same event, Square sends both notifications for changes to custom attribute definitions and custom attributes owned by the subscribing application. * The value of the `data.id` in the notification depends on the affected object: * For custom attribute definition events, `data.id` is the qualified key. * For custom attribute events, `data.id` is generated using the qualified key and the ID of the affected order. This `data.id` cannot be used directly with the Order Custom Attributes API. For more information about custom attribute webhooks, see [Subscribing to webhooks](devtools/customattributes/overview#subscribing-to-webhooks). For more information about how to subscribe to events and validate notifications, see [Square Webhooks](webhooks/overview). ## See also * [Define Custom Attributes for Orders](orders-custom-attributes-api/custom-attribute-definitions) * [Use Custom Attributes for Orders](orders-custom-attributes-api/custom-attributes) * [Custom Attributes](devtools/customattributes/overview) * [API Reference: Custom Attributes for Orders](https://developer.squareup.com/reference/square/order-custom-attributes-api) --- # Define Custom Attributes for Orders > Source: https://developer.squareup.com/docs/orders-custom-attributes-api/custom-attribute-definitions > Status: BETA > Languages: All > Platforms: All Learn how to create and manage order-related custom attribute definitions for Square sellers using the Order Custom Attributes API. **Applies to:** [Order Custom Attributes API](orders-custom-attributes-api/overview) {% subheading %}Learn how to create and manage order-related custom attribute definitions for Square sellers using the Order Custom Attributes API.{% /subheading %} {% toc hide=true /%} ## Overview To create a custom attribute definition, you must specify its `key` identifier, `visibility` setting, `schema` data type, and other properties. After you create the definition, you can set the custom attribute for orders. Custom attribute definitions are stored as a collection for a Square seller. >`.../v2/orders/custom-attribute-definitions` ## CustomAttributeDefinition object Every custom attribute definition is represented by a [CustomAttributeDefinition](https://developer.squareup.com/reference/square/objects/CustomAttributeDefinition) object. The following is an example custom attribute definition that defines a "Cover Count" custom attribute of data type `Number`: ```json { "custom_attribute_definition": { "key": "cover-count", "name": "Cover count", "description": "The number of people seated at a table", "version": 1, "updated_at": "2022-10-06T16:53:23.141Z", "schema": { "$ref": "https://developer-production-s.squarecdn.com/schemas/v1/common.json#squareup.common.Number" }, "created_at": "2022-10-06T16:53:23.141Z", "visibility": "VISIBILITY_READ_WRITE_VALUES" } } ``` The following fields represent core properties of a custom attribute definition: |Field{% width="150px" %}|Description| |:------|:------| |`key`|The identifier for the custom attribute definition. This key is unique for the application, and it cannot be changed after the definition is created.{% line-break /%}{% line-break /%}If the requesting application isn't the definition owner, the value is a qualified key. A qualified key is the application ID of the definition owner followed by the `key` that was provided when the definition was created, in the following format: `{application ID}:{key}`.| |`name`|A name for the custom attribute. This name must be unique (case-sensitive) across all visible order-related custom attribute definitions for the seller.{% line-break /%}{% line-break /%}This field is required if `visibility` is `VISIBILITY_READ_ONLY` or `VISIBILITY_READ_WRITE_VALUES`.| |`description`|The description for the custom attribute.{% line-break /%}This field is required if `visibility` is `VISIBILITY_READ_ONLY` or `VISIBILITY_READ_WRITE_VALUES`.| |`visibility`|The access control setting that determines whether other applications (including first-party Square products such as the Square Dashboard) can view the definition and view or edit corresponding custom attributes. Valid values are `VISIBILITY_HIDDEN`, `VISIBILITY_READ_ONLY`, `VISIBILITY_READ_WRITE_VALUES`. For more information, see [Access control](orders-custom-attributes-api/overview#access-control).{% line-break /%}{% line-break /%}All custom attribute data is visible to sellers when exporting order data, regardless of the `visibility` setting.| |`schema`|The data type of the custom attribute value. For more information, see [Specifying the schema](#specifying-the-schema). | |`version`|The version number of the custom attribute definition. The version number is initially set to 1 and incremented each time the definition is updated.{% line-break /%}Include this field in update operations to enable [optimistic concurrency](build-basics/common-api-patterns/optimistic-concurrency) control and in read operations for strong consistency.| ## Create an order custom attribute definition To create a custom attribute definition for orders, use the [CreateOrderCustomAttributeDefinition](https://developer.squareup.com/reference/square/order-custom-attributes-api/create-order-custom-attribute-definition) endpoint. Note the following: * `key` is the identifier for the definition and its corresponding custom attributes. The value must be unique for the application. It can contain up to 60 alphanumeric characters, periods (`.`), underscores (`_`), and hyphens (`-`) and must match the following regular expression: >`^[a-zA-Z0-9\._-]{1,60}$` * `visibility` is the [access control](orders-custom-attributes-api/overview#access-control) setting that determines whether other applications can view the definition and view or edit corresponding custom attributes. The following are valid values: * `VISIBILITY_HIDDEN` (default) * `VISIBILITY_READ_ONLY` * `VISIBILITY_READ_WRITE_VALUES` Sellers can view all custom attributes in exported order data, including those set to `VISIBILITY_HIDDEN`. * `schema` is the data type of the custom attribute. For more information, see [Specifying the schema](#specify-schema). * `name` and `description` are the name and description of the custom attribute. Each field can contain up to 255 characters. Both fields are required when `visibility` is set to `VISIBILITY_READ_ONLY` or `VISIBILITY_READ_WRITE_VALUES`. If provided, `name` must be unique (case-sensitive) across all visible order-related custom attribute definitions for the seller. Seller-facing custom attributes should be given a friendly name and description. * `idempotency_key` is a unique ID for the request that can be optionally included to ensure [idempotency](orders-custom-attributes-api/overview). The following example request defines a "Cover Count" custom attribute whose value can be a `Number`: ```` The following is an example response: ```json { "custom_attribute_definition": { "key": "cover-count", "name": "Cover count", "description": "The number of people seated at a table", "version": 1, "updated_at": "2022-10-06T16:53:23.141Z", "schema": { "$ref": "https://developer-production-s.squarecdn.com/schemas/v1/common.json#squareup.common.Number" }, "created_at": "2022-10-06T16:53:23.141Z", "visibility": "VISIBILITY_READ_WRITE_VALUES" } } ``` After a custom attribute definition is created, Square invokes the following [webhooks](orders-custom-attributes-api/overview#webhooks): * `order.custom_attribute_definition.owned.created` * `order.custom_attribute_definition.visible.created` You can now set the custom attribute for the seller's orders. For more information, see the following: * [Create or update a custom attribute for an order](orders-custom-attributes-api/custom-attributes#create-or-update-a-custom-attribute-for-an-order) * [Bulk create or update custom attributes for orders](orders-custom-attributes-api/custom-attributes#bulk-create-or-update-custom-attributes-for-orders) {% aside type="info" %} A seller account can have a maximum of 100 order-related custom attribute definitions per application. {% /aside %} ### Specifying the schema The data type of a custom attribute is specified by the `schema` field of the definition. Square uses the `schema` to validate the custom attribute value when it's assigned to an order. The following data types are supported for order-related custom attributes: * `String` * `Email` * `PhoneNumber` * `Address` * `Date` * `Boolean` * `Number` * `Selection` In a `CreateOrderCustomAttributeDefinition` request, the `schema` field specifies a data type by referencing a JSON schema or meta-schema object hosted on the Square CDN. #### JSON schema objects For the data types in the following table, specify a `$ref` value that references the corresponding schema object, as shown in the following example: ```json "schema": { "$ref": "https://developer-production-s.squarecdn.com/schemas/v1/common.json#squareup.common.String" }, ``` |Data type{% width="130px" %}|Description| |:------|:------| |`String`|A string with up to 1000 UTF-8 characters. Empty strings are allowed.{% line-break /%}{% line-break /%}`$ref` value:{% line-break /%}https://developer-production-s.squarecdn.com/schemas/v1/common.json#squareup.common.String| |`Email`|An email address consisting of ASCII characters that matches the [regular expression](https://developer.mozilla.org/en-US/docs/Web/HTML/Element/input/email#basic_validation) for the HTML5 `email` type.{% line-break /%}{% line-break /%}`$ref` value:{% line-break /%}https://developer-production-s.squarecdn.com/schemas/v1/common.json#squareup.common.Email| |`PhoneNumber`|A string representation of a phone number in [E.164 format.](https://en.wikipedia.org/wiki/E.164) For example, `+17895551234`.{% line-break /%}{% line-break /%}`$ref` value:{% line-break /%}https://developer-production-s.squarecdn.com/schemas/v1/common.json#squareup.common.PhoneNumber| |`Address`|An [Address](https://developer.squareup.com/reference/square/objects/Address) object. For information about `Address` fields, see [Working with Addresses.](build-basics/common-data-types/working-with-addresses){% line-break /%}{% line-break /%}`$ref` value:{% line-break /%}https://developer-production-s.squarecdn.com/schemas/v1/common.json#squareup.common.Address| |`Date`|A date in ISO 8601 format: `YYYY-MM-DD`. Order-related custom attributes don't support `DateTime` or `Duration` data types.{% line-break /%}{% line-break /%}`$ref` value:{% line-break /%}https://developer-production-s.squarecdn.com/schemas/v1/common.json#squareup.common.Date| |`Boolean`|A `true` or `false` value.{% line-break /%}{% line-break /%}`$ref` value:{% line-break /%}https://developer-production-s.squarecdn.com/schemas/v1/common.json#squareup.common.Boolean| |`Number`|A string representation of an integer or decimal with up to 5 digits of precision. Negative numbers are denoted using a `-` prefix. The absolute value cannot exceed (2^63-1)/10^5 or 92233720368547.{% line-break /%}{% line-break /%}For numeric values that act as identifiers rather than representing a quantity (such as account numbers), you might consider using the `String` data type because it supports an exact match search and isn't subject to this limit. In contrast, a number-range search is used for `Number` data types.{% line-break /%}{% line-break /%}`$ref` value:{% line-break /%}https://developer-production-s.squarecdn.com/schemas/v1/common.json#squareup.common.Number| #### JSON meta-schema object For a `Selection` data type, the `schema` contains a `$schema` field that references a JSON meta-schema object, as well as additional fields. Note the following: * `$schema` references the `https://developer-production-s.squarecdn.com/meta-schemas/v1/selection.json` meta-schema hosted on the Square CDN. * `type` must be `array`. * `items` must include a `names` array that contains strings representing the display names of the predefined options that can be selected. Note that the order of the options might not be respected by all UIs. * `maxItems` is an integer that represents the maximum number of allowed selections. Corresponding custom attributes can have zero or more selected values, up to the specified maximum. The minimum value is 1 and cannot exceed the number of options in the `names` field. * `uniqueItems` must be `true`. The following example request creates a `Selection`-type custom attribute definition that contains three named options and allows one selection: ```` The following is an example response. For each named option, Square generates a UUID and adds it to the `enum` field. The options in the `names` field map by index to the UUIDs in the `enum` field. The first option maps to the first UUID, the second option maps to the second UUID, and so on. These UUIDs are used to set the value of the custom attribute or update the option names. ```json { "custom_attribute_definition": { "key": "shirt-size", "name": "Default shirt size", "description": "The default shirt size ordered by the customer.", "version": 1, "updated_at": "2022-11-16T17:38:19.783Z", "schema": { "$schema": "https://developer-production-s.squarecdn.com/meta-schemas/v1/selection.json", "maxItems": 1, "type": "array", "uniqueItems": true, "items": { "names": [ "Small", "Medium", "Large" ], "enum": [ "4fc37499-6d68-4cdc-a64f-9ba2fd9a2943", "6ddaffce-7428-4f6c-bfe4-7f5922be71fd", "a1700eeb-0866-458f-bbe9-79e0d74acffa" ] } }, "created_at": "2022-11-16T17:38:19.783Z", "visibility": "VISIBILITY_READ_WRITE_VALUES" } } ``` ## Update an order custom attribute definition Use the [UpdateOrderCustomAttributeDefinition](https://developer.squareup.com/reference/square/order-custom-attributes-api/update-order-custom-attribute-definition) endpoint to update a custom attribute definition for a seller account. Only the following fields can be updated: * `name` * `description` * `visibility` * `schema` for a `Selection` data type Only new or changed fields need to be included in the request. For more information, see [Updatable definition fields](#updatable-definition-fields). Note the following about an `UpdateOrderCustomAttributeDefinition` request: * A custom attribute definition can be updated only by the definition owner. * The `key` path parameter is the `key` of the custom attribute definition. * The `version` field can be optionally included to enable [optimistic concurrency](build-basics/common-api-patterns/optimistic-concurrency) control. If included, `version` must match the current version of the custom attribute definition; otherwise, the request fails with a `CONFLICT` error. Square increments the version number each time the definition is updated. * The `idempotency_key` is a unique ID for the request that can be optionally included to ensure [idempotency](orders-custom-attributes-api/overview). The following example request updates the `visibility` setting of a definition: ```` The following is an example response: ```json { "custom_attribute_definition": { "key": "cover-count", "name": "Cover count", "description": "The number of people seated at a table", "version": 2, "updated_at": "2022-11-16T17:44:11.436Z", "schema": { "$ref": "https://developer-s.squarecdn.com/schemas/v1/common.json#squareup.common.Number" }, "created_at": "2022-11-16T16:53:23.141Z", "visibility": "VISIBILITY_READ_ONLY" } } ``` After a custom attribute definition is updated, Square invokes the `order.custom_attribute_definition.owned.updated` and `order.custom_attribute_definition.visible.updated` [webhooks](orders-custom-attributes-api/overview#webhooks). ### Updatable definition fields The `UpdateOrderCustomAttributeDefinition` endpoint supports sparse updates, so only new or changed fields need to be included in the request. Square ignores custom attribute definition fields that are unchanged or read-only. You can update one or more of the following fields: * `name` - The name of the custom attribute. * `description` - The description of the custom attribute. * `visibility` - The [access control](orders-custom-attributes-api/overview#access-control) setting that determines whether other applications can view the definition and view or edit corresponding custom attributes. The following are valid values: * `VISIBILITY_HIDDEN` (default) * `VISIBILITY_READ_ONLY` * `VISIBILITY_READ_WRITE_VALUES` Changes to the `visibility` setting are propagated to corresponding custom attributes within a couple seconds. At that time, the `updated_at` and `version` fields of the custom attributes are also updated. For `VISIBILITY_READ_ONLY` or `VISIBILITY_READ_WRITE_VALUES` settings, both `name` and `description` are required. * `schema` - For a `Selection` data type. You can only change the named options and the maximum number of selections, as described in the following section. {% aside type="tip" %} To simplify management, you might want to keep all definitions that use the same key synchronized across seller accounts. Therefore, if you change the definition for one seller, you should consider making the same change for all other sellers. {% /aside %} #### Updating a Selection schema For a `Selection` data type, you can update the maximum number of allowed selections and the set of predefined named options. {% aside type="info" %} Square validates custom attribute selections on upsert operations, so these changes apply only for future upsert operations. They don't affect custom attributes that have already been set on orders. {% /aside %} The information you send in the `UpdateOrderCustomAttributeDefinition` request depends on the change you want to make: * To change the maximum number of allowed selections, include the `maxItems` field with the new integer value. The minimum value is 1 and cannot exceed the number of options in the `names` field. * To change the set of predefined named options, include the `items` field with the complete `names` and `enum` arrays. The options in the `names` array map by index to the Square-assigned UUIDs in the `enum` array, which are unique per seller. The first option maps to the first UUID, the second option maps to the second UUID, and so on. * To add an option: * Add the name of the new option at the end of the `names` array. New options must always be added to the end of the array. * Don't change the `enum` array. Square generates a UUID for the new option and adds it to the end of the `enum` array. * To reorder the options: * Change the order of the names in the `names` array. * Change the order of the UUIDs in the `enum` array so that the order of the UUIDs matches the order of the corresponding named options. Note that the order might not be respected by all UIs. * To remove an option: * Remove the name of the option from the `names` array. * Remove the corresponding UUID from the `enum` array. The following example `UpdateOrderCustomAttributeDefinition` request adds two new options by adding the names at the end of the `names` array. ```` The following example response includes the UUID that Square generated for the new `X-Small` and `X-Large` options: ```json { "custom_attribute_definition": { "key": "shirt-size", "name": "Default shirt size", "description": "The default shirt size ordered by the customer.", "version": 4, "updated_at": "2022-11-16T17:57:37.227Z", "schema": { "$schema": "https://developer-production-s.squarecdn.com/meta-schemas/v1/selection.json", "maxItems": 1, "type": "array", "uniqueItems": true, "items": { "names": [ "Small", "Medium", "Large", "X-Small", "X-Large" ], "enum": [ "cbebfe6e-5d1d-4ce2-8bfb-eadbbf548f3b", "1ff6e493-31ed-4f9b-a570-948cf54eb94f", "a760af07-139d-44aa-acdc-6b706fda79de", "35f555a6-ce8b-405b-8e75-c09b3b757550", "09f056fd-07dd-4419-b675-4b950d1b2d81" ] } }, "created_at": "2022-11-16T17:52:00.098Z", "visibility": "VISIBILITY_READ_WRITE_VALUES" } } ``` ## List order custom attribute definitions To list the custom attribute definitions of a seller account, use the [ListOrderCustomAttributeDefinitions](https://developer.squareup.com/reference/square/order-custom-attributes-api/list-order-custom-attribute-definitions) endpoint. Note the following: * The `limit` query parameter optionally specifies a maximum [page size](build-basics/common-api-patterns/pagination) of 1 to 100 results. The default limit is 20. * If the results are paginated, the `cursor` field in the response contains a value that you can send with the `cursor` query parameter to retrieve the next page of results. The following example request includes the `limit` query parameter: ```` When all pages are retrieved, all custom attribute definitions created by the requesting application are included in the results. The `key` for these definitions is the `key` that was provided when the definition was created. Custom attribute definitions created by other applications are included if their `visibility` is `VISIBILITY_READ_ONLY` or `VISIBILITY_READ_WRITE_VALUES`. The `key` for these definitions is a {% tooltip text="qualified key" %}The key provided when the definition was created, prefixed by the application ID of the definition owner: {application ID}:{key}.{% /tooltip %}. The following is an example response: ```json { "custom_attribute_definitions": [ { "key": "cover-count", "name": "Cover count", "description": "The number of people seated at a table", "version": 1, "updated_at": "2022-11-16T18:03:44.051Z", "schema": { "$ref": "https://developer-s.squarecdn.com/schemas/v1/common.json#squareup.common.Number" }, "created_at": "2022-11-16T18:03:44.051Z", "visibility": "VISIBILITY_READ_WRITE_VALUES" }, { "key": "seat-number", "name": "Seat number", "description": "The identifier for a particular seat", "version": 1, "updated_at": "2022-11-16T18:04:32.059Z", "schema": { "$ref": "https://developer-s.squarecdn.com/schemas/v1/common.json#squareup.common.Number" }, "created_at": "2022-11-16T18:04:32.059Z", "visibility": "VISIBILITY_READ_WRITE_VALUES" }, { "key": "table-number", "name": "Table number", "description": "The identifier for a particular table", "version": 1, "updated_at": "2022-11-16T18:04:21.912Z", "schema": { "$ref": "https://developer-s.squarecdn.com/schemas/v1/common.json#squareup.common.Number" }, "created_at": "2022-11-16T18:04:21.912Z", "visibility": "VISIBILITY_READ_WRITE_VALUES" } ] } ``` If no custom attribute definitions are found, Square returns an empty response. ```json {} ``` ## Retrieve an order custom attribute definition Use the [RetrieveOrderCustomAttributeDefinition](https://developer.squareup.com/reference/square/order-custom-attributes-api/retrieve-order-custom-attribute-definition) endpoint to retrieve a custom attribute definition using the `key`. Note the following: * The `key` path parameter is the `key` of the custom attribute definition. * If the requesting application is the definition owner, use the `key` that was provided when the definition was created. * If the requesting application isn't the definition owner, use the {% tooltip text="qualified key" %}The key provided when the definition was created, prefixed by the application ID of the definition owner: {application ID}:{key}.{% /tooltip %}. The `visibility` of the definition must be `VISIBILITY_READ_ONLY` or `VISIBILITY_READ_WRITE_VALUES`. * The `version` query parameter is optionally used for strongly consistent reads to guarantee that you receive the most up-to-date data. When included in the request, Square returns the specified version or a higher version if one exists. If the specified version is higher than the current version, Square returns a `400 BAD_REQUEST` error. The following is an example request: ```` {% aside type="info" %} Square also returns custom attribute definitions for `RetrieveOrderCustomAttribute` or `ListOrderCustomAttributes` requests if you set the `with_definition` or `with_definitions` query parameter to `true`. {% /aside %} The following is an example response: ```json { "custom_attribute_definition": { "key": "cover-count", "name": "Cover count", "description": "The number of people seated at a table", "version": 1, "updated_at": "2022-10-06T16:53:23.141Z", "schema": { "$ref": "https://developer-production-s.squarecdn.com/schemas/v1/common.json#squareup.common.Number" }, "created_at": "2022-10-06T16:53:23.141Z", "visibility": "VISIBILITY_READ_WRITE_VALUES" } } ``` If the custom attribute definition isn't found, Square returns an `errors` field that contains a `404 NOT_FOUND` error. ## Delete an order custom attribute definition To delete a custom attribute definition from a seller account, use the [DeleteOrderCustomAttributeDefinition](https://developer.squareup.com/reference/square/order-custom-attributes-api/delete-order-custom-attribute-definition) endpoint. Note the following: * Only the definition owner can delete a custom attribute definition. * The `key` path parameter is the `key` of the custom attribute definition. * Deleting a custom attribute definition also deletes the corresponding custom attribute from all orders. The following is an example request: ```` If successful, Square returns an empty object. ```json {} ``` After deleting a custom attribute definition, Square invokes the `order.custom_attribute_definition.owned.deleted` and `order.custom_attribute_definition.visible.deleted` [webhooks](orders-custom-attributes-api/overview#webhooks). ## See also * [Custom Attributes for Orders](orders-custom-attributes-api/overview) * [Use Custom Attributes for Orders](orders-custom-attributes-api/custom-attributes) * [Custom Attributes](devtools/customattributes/overview) * [API Reference: Custom Attributes for Orders](https://developer.squareup.com/reference/square/order-custom-attributes-api) --- # Order-Ahead Sample Application > Source: https://developer.squareup.com/docs/orders-api/quick-start > Status: PUBLIC > Languages: All > Platforms: All Use the Order-Ahead Sample Application to start taking pickup orders. **Applies to:** [Orders API](orders-api/what-it-does) | [Catalog API](catalog-api/what-it-does)| [Loyalty API](loyalty-api/overview) | [Payments API](payments-refunds) | [Web Payments SDK](web-payments/overview) {% subheading %}Use the order-ahead sample application to start taking pickup orders.{% /subheading %} {% toc hide=true /%} ## Overview The order-ahead sample web application demonstrates these functions: * Takes pickup orders from customers * Charges for their orders * Rewards loyalty points * Sends order details to the Square Point of Sale application so sellers can manage fulfillment. When the sample runs, it shows the catalog items in the Square account that it is accessing. ![A graphic showing a menu for the Order-Ahead sample application.](https://images.ctfassets.net/1nw4q0oohfju/1lUGqjKaFK25YHzpar3qiD/4dfec7f5538949a028ac8ff66639178a/order-ahead-sample-app-menu.png) ## Get started Use the following steps to set up the Node.js order-ahead sample application and start taking pickup orders: 1. [Get Developer Credentials](orders-api/quick-start/step-1) 2. [Configure the Order-Ahead Sample Application](orders-api/quick-start/step-2) 3. [Generate Test Catalog Items](orders-api/quick-start/step-3) 4. [Take a Pickup Order and Pay for It](orders-api/quick-start/step-4) 5. [Verify your Pickup Order](orders-api/quick-start/step-5) {% aside type="important" %} Make sure you have [the latest version of Node.js](https://nodejs.org/en/download/) installed before you start. {% /aside %} --- # Build eCommerce Applications for Square Online > Source: https://developer.squareup.com/docs/online-api > Status: PUBLIC > Languages: All > Platforms: All Find information about the Square Snippets and Sites APIs that you can use to add custom functionality to Square Online sites. {% subheading %}Find information about the Square Snippets and Sites APIs that you can use to add custom functionality to Square Online sites.{% /subheading %} {% toc hide=true /%} ## Overview [Square Online](https://squareup.com/online-store) provides all the tools that Square sellers need to quickly build eCommerce websites and start selling online for free. As a developer, you can use the Snippets and Sites APIs to create new integrations and third-party applications that extend Square Online features to help meet the many needs of Square sellers. {% aside type="info" %} If you're looking for information about website payment processing options for the Square Developer Platform, see [Online Payment Solutions](online-payment-options). {% /aside %} ## Snippets API The [Snippets API](snippets-api/overview) lets you insert snippets that provide custom functionality into Square Online sites. A snippet is a script that is injected into the `` element of all pages on a site, except for checkout pages. ### Building with the Snippets API 1. [Sign up](https://squareup.com/signup?v=developers) for a Square developer account and create your first Square application. 2. Create a free [Square Online site](https://squareup.com/help/article/6852-get-started-with-square-online-store). 3. Sign in to [API Explorer](https://developer.squareup.com/explorer/square/snippets-api/upsert-snippet) and try out the Snippets and Sites APIs. 4. Build and test your snippet code. 5. Use the Snippets API to insert the snippet into your site, and then test it on your site. ## Sites API The [Sites API](sites-api/overview) provides the `ListSites` endpoint used to retrieve metadata about the Square Online sites that belong to a Square seller, such as the site title, domain, and published status. {% aside type="info" %} Developers can also write embeddable code that Square sellers can add directly to their sites. For more information, see [Add External Content and Widgets with Embedded Code in Square Online Store](https://squareup.com/help/article/6899-add-external-content-and-widgets-with-embedded-code-in-square-online-store). {% /aside %} {% anchor id="eap-for-square-online-apis" /%} ## Early access program for Square Online APIs The Sites API and Snippets API are publicly available to all developers as part of an early access program (EAP). These APIs can be used to build production-ready applications for Square Online. During the EAP, Square might contact developers who are using these APIs to gather feedback that can help improve the developer experience. Square doesn't provide a sandbox eCommerce environment for testing calls to Square Online APIs. For information about testing in the production environment, see [Test your application.](snippets-api/add-a-snippet#test-your-application) ## See also * [Snippets API](snippets-api/overview) * [Use the Snippets API](snippets-api/use-the-api) * [Add a Snippet to a Site](snippets-api/add-a-snippet) * [Sites API](sites-api/overview) * [Use the Sites API](sites-api/use-the-api) * [API Reference: Snippets API](https://developer.squareup.com/reference/square/snippets-api) * [API Reference: Sites API](https://developer.squareup.com/reference/square/sites-api) --- # Sites API > Source: https://developer.squareup.com/docs/sites-api/overview > Status: PUBLIC > Languages: All > Platforms: All Learn about the Sites API, which you can use to list the Square Online sites that belong to a Square seller. **Applies to:** [Sites API](https://squareup.com/online-store) | [Snippets API](snippets-api/overview) {% subheading %}Learn about the Sites API, which you can use to list the Square Online sites that belong to a Square seller.{% /subheading %} {% toc hide=true /%} ## Overview Square sellers use [Square Online](https://squareup.com/online-store) to build eCommerce websites by choosing from a variety of built-in templates and features. Developers can create integrations and third-party applications that extend Square Online features and add custom functionality. The Sites API lets you retrieve basic details about the sites that belong to a seller (such as site ID, title, and domain). You can use the Sites API in combination with the [Snippets API](snippets-api/overview) to add a snippet to a Square Online site. {% aside type="info" %} Square Online APIs are publicly available as part of an early access program. For more information, see [Early access program for Square Online APIs.](online-api#early-access-program-for-square-online-apis) {% /aside %} ## Requirements and limitations * Applications that use OAuth require the `ONLINE_STORE_SITE_READ` permission to access site resources for a Square seller account. Depending on its functionality, your application might also require other Square permissions. For more information, see [OAuth API](oauth-api/overview). * Square doesn't provide a sandbox eCommerce environment for testing calls to the Sites API. * The Sites API cannot be used to access or manage Square Online orders. To work with orders, use `SearchOrders` and other Orders API endpoints. For more information, see [Orders API](orders-api/what-it-does). ## See also * [Use the Sites API](sites-api/use-the-api) * [API Reference: Sites API](https://developer.squareup.com/reference/square/sites-api) --- # Use the Sites API > Source: https://developer.squareup.com/docs/sites-api/use-the-api > Status: PUBLIC > Languages: All > Platforms: All Learn how to use the Sites API to list the sites for a Square seller account. **Applies to:** [Sites API](sites-api/overview) | [Snippets API](snippets-api/overview) {% subheading %}Learn how to use the Sites API to list the sites for a Square seller account.{% /subheading %} {% toc hide=true /%} ## Overview You can use the Sites API to retrieve metadata about Square Online sites. The Sites API is used with the Snippets API to add and manage snippets on a Square Online site. For more information, see [Snippets API](snippets-api/overview). {% aside type="info" %} Square Online APIs are publicly available as part of an early access program. For more information, see [Early access program for Square Online APIs.](online-api#early-access-program-for-square-online-apis) {% /aside %} {% anchor id="list-sites" /%} ## List sites The [ListSites](https://developer.squareup.com/reference/square/sites-api/list-sites) endpoint retrieves the Square Online sites for a seller account. The following is an example request: ```` If successful, this endpoint returns a `200 OK` status code and a JSON response. * If the associated account has one or more sites, the response contains the sites. Sites are listed in descending order by the `created_at` date: ```json { "sites": [ { "id": "site_27807527648example", "site_title": "My Second Site", "domain": "mysite2.square.site", "is_published": false, "created_at": "2020-10-28T13:22:51.000000Z", "updated_at": "2021-01-13T09:58:32.000000Z" }, { "id": "site_10272534583example", "site_title": "My First Site", "domain": "mysite1.square.site", "is_published": true, "created_at": "2020-06-18T17:45:13.000000Z", "updated_at": "2020-11-23T02:19:10.000000Z" } ] } ``` * If the associated account has no sites, the response contains an empty object: ```json {} ``` ## See also * [Sites API](sites-api/overview) --- # Snippets API > Source: https://developer.squareup.com/docs/snippets-api/overview > Status: PUBLIC > Languages: All > Platforms: All Learn how applications can integrate with the Snippets API to add custom functionality to Square Online sites. **Applies to:** [Snippets API](https://developer.squareup.com/reference/square/snippets-api) | [Sites API](sites-api/overview) {% subheading %}Learn how applications can integrate with the Snippets API to add custom functionality to Square Online sites.{% /subheading %} {% toc hide=true /%} ## Overview Square sellers use [Square Online](https://squareup.com/online-store) to build eCommerce websites with a rich set of features. Sellers can also add custom functionality to their sites through third-party applications. You can use the Snippets API to create applications that help sellers streamline business operations and create a better online experience. {% aside type="info" %} Square Online APIs are publicly available as part of an early access program. For more information, see [Early access program for Square Online APIs.](online-api#early-access-program-for-square-online-apis) {% /aside %} ## Requirements and limitations You should be aware of the following requirements, limitations, and other considerations when working with snippets and the Snippets API: * Snippets can be added to Square Online sites only. * Integration with the checkout flow isn't supported. A snippet is injected at the end of the `` element on all pages on a site, except checkout pages. You shouldn't attempt to integrate with any part of the checkout flow on a Square Online site. * An application can add one snippet per site. A site can contain snippets from multiple applications, but only one snippet from a given application. * You must disclose information to the seller about your snippet, such as how to use the snippet, the information that it collects, and how to enable or disable it. * Sellers cannot view or edit your snippet code from the Square Dashboard. If a seller disconnects your application or revokes its permissions, Square removes your snippet from the site. For more information, see [Subscribe to the token revoked event](#subscribe-to-revoked-event). * Square doesn't provide a sandbox eCommerce environment for testing snippets or calls to the Sites or Snippets API. For more information, see [Test your application](snippets-api/add-a-snippet#testing-snippet-applications). For best practices and additional requirements for snippets and applications that integrate with the Snippets API, see [Best practices](#best-practices). ## How it works Applications can use the Snippets API to add a snippet to a Square Online site. Snippets are scripts that can run as various site components (such as modals, pop ups, or background jobs) and offer a range of functionality. For example, a snippet can integrate with Square and external products or services, improve customer acquisition and engagement, and provide industry-specific or general tools that help businesses run more efficiently. For more integration ideas, see [Introducing Snippets API](https://youtu.be/JbytzNibk54). ![A graphic showing that snippets can run as various site components and provide a range of functionality.](https://images.ctfassets.net/1nw4q0oohfju/6LCz8gpzLf2Iv2r49tdw9E/aefed557f669704246633983d53fb699/snippets-api-overview.png) When a seller decides to add your snippet to their site, they connect their Square account to your application. The seller is then redirected to your application, where they can configure preferences, options, or any other details your application needs to generate your snippet. When the snippet is ready, your application calls the Snippets API to add the snippet to the target site. This operation injects the snippet at the end of the `` element on all pages of the site, except for checkout pages. A snippet application includes the following components: * **Snippet code** - A string that can contain valid HTML, CSS, and JavaScript. The code is sent to the Snippets API in the `content` field of a [Snippet](https://developer.squareup.com/reference/square/objects/Snippet) object, as shown in the following example request body: ```json { "snippet": { "content": "{YOUR SNIPPET CODE HERE}" } } ``` An application can have only one snippet on a given site at a time. Although the snippet is limited to a single string, it can contain multiple HTML elements and reference external JavaScript libraries. In addition, you can build the snippet dynamically per site before sending it to the Snippets API. Snippets aren't intended to interact directly with Square APIs. To integrate with orders, customers, or other Square features, your application can call Square APIs and then call `UpsertSnippet` to update the snippet as needed. {% aside type="info" %} If your application sends a high number of calls to Square APIs in a short period of time, you should make sure to handle potential rate limiting errors. For more information, see [RATE_LIMIT_ERROR](https://developer.squareup.com/reference/square/enums/ErrorCategory#value-RATE_LIMIT_ERROR). {% /aside %} * **Management dashboard** - If you offer snippets through your application, you must provide a UI and dashboard that allow sellers to manage their snippets on one or more sites. This is required because sellers cannot use Square products or tools to manage snippets. Depending on your workflows, your dashboard might call the Snippets and Sites APIs to perform the following tasks: * [List sites](sites-api/use-the-api#list-sites) * [Add or update a snippet](snippets-api/use-the-api#upsert-snippet) * [Retrieve a snippet](snippets-api/use-the-api#retrieve-snippet) * [Delete a snippet](snippets-api/use-the-api#delete-snippet) Applications can only access their own snippet for a given site; they cannot access snippets created by other applications. {% aside type="info" %} Square also requires that your application allows sellers to view the status of their Square OAuth access token and to disconnect your application by revoking the access token. For more information, see [OAuth Best Practices](oauth-api/best-practices). {% /aside %} ### OAuth requirements Applications that use OAuth require the following OAuth permissions to access and manage site and snippet resources for a Square seller account: * `ONLINE_STORE_SITE_READ` * `ONLINE_STORE_SNIPPETS_READ` * `ONLINE_STORE_SNIPPETS_WRITE` Your application uses these permissions to call the Snippets and Sites APIs on behalf of a seller. Depending on its functionality, your application might also require other Square permissions. For more information, see [OAuth API](oauth-api/overview). A snippet is tied to a particular application through the `client_id` parameter provided in the OAuth flow. {% aside type="important" %} Make sure to periodically refresh your OAuth tokens. This is especially important when your application calls other Square APIs. If a token expires, your calls to Square APIs will fail. For more information, see [Refresh the access token](oauth-api/refresh-revoke-limit-scope#refresh-the-access-token). You must follow best practices for obtaining and handling customer data and OAuth access tokens. For more information, see [Best Practices for Collecting Information](build-basics/collecting-information) and [OAuth Best Practices](oauth-api/best-practices). {% /aside %} {% anchor id="subscribe-to-revoked-event" /%} ### Subscribe to the token revoked event (recommended) If a seller disconnects your application from the Square Dashboard, Square revokes the OAuth permissions for your application and triggers the [oauth.authorization.revoked](https://developer.squareup.com/reference/square/webhooks/oauth.authorization.revoked) webhook event. Square listens for this event and then removes your snippet code from the seller's site. If you store customer data or OAuth access tokens for sellers, you should also subscribe to this event. Then, you can use the `merchant_id` field in the event notification to find and delete any information you stored for the seller. 1. In the [Developer Console](https://developer.squareup.com/apps), open your application. {% aside type="info" %} For information about signing up for a Square account and creating an application, see [Get Started](get-started). {% /aside %} 2. At the top of the page, choose **Production**. The Snippets API isn't available in the Sandbox environment. 3. In the left pane, expand **Webhooks**, and then choose **Subscriptions**. 4. Choose **Add subscription**, and then configure the subscription: 1. For **Webhook name**, enter a name such as **Access Revoked**. 1. For **URL**, enter the URL of your listener. If you don't have a working URL yet, you can enter **https://example.com** as a placeholder. 1. Optional. For **API version**, choose a Square API version. By default, this is set to the same version as the application. 1. For **Events**, choose **oauth.authorization.revoked**. 1. Choose **Save**. Your listener must [validate the notification](webhooks/step3validate) and respond with an HTTP 2xx response code in a timely manner. For general information about webhooks, see [Square Webhooks](webhooks/overview). For information about viewing webhook logs, see [Webhook Event Logs](devtools/webhook-logs). {% aside type="info" %} Square doesn't send webhook notifications for snippet events because a snippet can be accessed only by the application that added it to the site. It cannot be accessed by the seller or other applications. {% /aside %} {% anchor id="security-considerations" /%} ## Security considerations You should be aware of the following security considerations when working with snippets and the Snippets API: * **Snippets integration must be approved for Square App Marketplace** - Applications that integrate with the Snippets API must receive explicit approval from Square before they can be listed in the Square App Marketplace. Snippet applications that are submitted for approval are subject to a stringent review and vetting process. * **Integration with the checkout flow isn't supported** - Snippets are injected at the end of the `` element on all pages of the site, except for checkout pages. This reduces the risk that a snippet can access sensitive customer or payment information. You shouldn't attempt to integrate with any part of the checkout flow on a Square Online site. * **The session cookie is protected** - Cookies are stored on the `.square.site` domain or on a custom domain, so the Square session cannot be accessed or hijacked. ## Best practices The following best practices and additional requirements apply when working with snippets: * **Avoid blocking code in your snippet** - Snippets are inserted into the `` element of site pages, so you should avoid any code that might cause pages to load slowly or prevent the rest of the page from loading. You can have your snippet code execute after the [Document Object Model (DOM) is loaded](https://developer.mozilla.org/en-US/docs/Web/API/Window/DOMContentLoaded_event). Many JavaScript libraries have this functionality built in. * **Use CDNs to load remote assets** - When possible, your snippet should use content delivery networks [(CDNs](https://developer.mozilla.org/en-US/docs/Glossary/CDN)) to load remote assets (using the [HTTPS](https://developer.mozilla.org/en-US/docs/Glossary/HTTPS) and [TLS](https://developer.mozilla.org/en-US/docs/Glossary/TLS) protocols). Also when possible, the assets should be loaded asynchronously. * **Use appropriate HTML elements** - Your snippet should include only HTML elements that are permitted in the `` element, such as `", "created_at": "2021-03-11T25:40:09.000000Z", "updated_at": "2021-03-11T25:40:09.000000Z" } } ``` {% aside type="info" %} The snippet ID isn't required for requests to the Snippets API because an application can add only one snippet to a site. {% /aside %} If the site cannot be found, this endpoint returns a `404 Not Found` status code and the following response: ```json { "errors": [ { "category": "INVALID_REQUEST_ERROR", "code": "NOT_FOUND", "detail": "Resource not found." } ] } ``` {% aside type="info" %} If you encounter issues when running cURL commands from a terminal window (such as valid snippet code that returns a `BAD_REQUEST` error or encoded HTML in the response), try using [API Explorer](https://developer.squareup.com/explorer/square/snippets-api/upsert-snippet), Postman, or another tool to send your requests. {% /aside %} {% anchor id="retrieve-snippet" /%} ## Retrieve a snippet The [RetrieveSnippet](https://developer.squareup.com/reference/square/snippets-api/retrieve-snippet) endpoint retrieves a snippet from a Square Online site. A site can contain snippets from multiple applications, but you can retrieve only the snippet that was added by your application. The following is an example request. To get the site ID, call the [ListSites](https://developer.squareup.com/reference/square/sites-api/list-sites) endpoint to retrieve the sites that belong to a seller. ```` If successful, this endpoint returns a `200 OK` status code and a response similar to the following example: ```json { "snippet": { "id": "snippet_5d178150-a6c0-11eb-a9f1-437e6example", "site_id": "site_27807527648example", "content": "", "created_at": "2021-03-11T25:40:09.000000Z", "updated_at": "2021-03-11T25:40:09.000000Z" } } ``` If the snippet cannot be found, this endpoint returns a `404 Not Found` status code and the following response: ```json { "errors": [ { "category": "INVALID_REQUEST_ERROR", "code": "NOT_FOUND", "detail": "Resource not found." } ] } ``` {% anchor id="delete-snippet" /%} ## Delete a snippet The [DeleteSnippet](https://developer.squareup.com/reference/square/snippets-api/delete-snippet) endpoint removes a snippet from a Square Online site. You can delete only the snippet that was added by your application. The following is an example request. To get the site ID, call the [ListSites](https://developer.squareup.com/reference/square/sites-api/list-sites) endpoint to retrieve the sites that belong to a seller. ```` If successful, this endpoint returns a `200 OK` status code and an empty JSON object: ```json {} ``` If there is no snippet for the specified site, this endpoint returns a `404 Not Found` status code and the following response: ```json { "errors": [ { "category": "INVALID_REQUEST_ERROR", "code": "NOT_FOUND", "detail": "Resource not found." } ] } ``` ## See also * [Snippets API](snippets-api/overview) * [Add a Snippet to a Site](snippets-api/add-a-snippet) * [Square Online Store Snippets Example](https://github.com/square/connect-api-examples/tree/master/connect-examples/v2/rails_snippet) * [Video: Sandbox Sessions: Snippets API](https://www.youtube.com/watch?v=QADTT8olOTA) --- # Add a Snippet to a Site > Source: https://developer.squareup.com/docs/snippets-api/add-a-snippet > Status: PUBLIC > Languages: All > Platforms: All Learn how to use the Snippets API and Sites API to add a snippet to a Square Online site **Applies to:** [Snippets API](snippets-api/overview) | [Sites API](sites-api/overview) {% subheading %}Learn how to use the Snippets API and Sites API to add a snippet to a Square Online site.{% /subheading %} {% toc hide=true /%} ## Overview Applications can use the Snippets API and Sites API to add a snippet to a Square Online site. Applications must provide a management dashboard that allows Square sellers to add and manage your snippet on their sites. For more information, see [Snippets API](snippets-api/overview). {% aside type="info" %} Square Online APIs are publicly available as part of an early access program. For more information, see [Early access program for Square Online APIs.](online-api#early-access-program-for-square-online-apis) {% /aside %} ## Add a snippet The following steps show a typical application flow for adding a snippet to a site: 1. Call [ListSites](https://developer.squareup.com/reference/square/sites-api/list-sites) to get a list of the seller's Square Online sites: Replace `{ACCESS_TOKEN}` with a valid access token. This token can be one of the following: * The personal access token for the production environment (not the Sandbox) that you [copy from the Developer Console](#get-production-access-token). This token allows unrestricted access to the resources in your Square account. * An OAuth access token that you obtain through the [OAuth authentication flow](oauth-api/overview). This token allows scoped access to the resources in the Square account that granted permission. ```` The following is an example `ListSites` response: ```json { "sites": [ { "id": "site_27807527648example", "site_title": "My Second Site", "domain": "mysite2.square.site", "is_published": true, "created_at": "2020-10-28T13:22:51.000000Z", "updated_at": "2021-01-13T09:58:32.000000Z" }, { "id": "site_10272534583example", "site_title": "My First Site", "domain": "mysite1.square.site", "is_published": true, "created_at": "2020-06-18T17:45:13.000000Z", "updated_at": "2020-11-23T02:19:10.000000Z" } ] } ``` For more information about obtaining and using access tokens, see [Access Tokens and Other Square Credentials](build-basics/access-tokens). 2. If a seller has multiple sites, you must allow sellers to choose the sites where they want to add your snippet. You can use the `site_title`, `domain`, and other fields from the `ListSites` response to display the sites to the sellers so they can select the target site or sites. Then, use the `id` of the selected site as the `site_id` parameter in your Snippet API requests. If the seller has only one site, you can just use the `id` of the site without prompting the seller to select a site. 3. Allow the seller to configure the snippet as needed. For example, you might provide custom settings or allow sellers to choose the functionality they want to add to their site. Although an application can define only one snippet, you can build your snippet code dynamically per site and concatenate multiple HTML elements. 4. For each selected site, call [UpsertSnippet](https://developer.squareup.com/reference/square/snippets-api/upsert-snippet) to add your snippet. * Replace `{ACCESS_TOKEN}` with your access token. * Replace `{{SITE_ID}}` with the ID of the target site. You can get this value from the `id` field in the `ListSites` response. * Replace the example value in the `content` field with your snippet code, which can include valid HTML, CSS, and JavaScript. The string has a maximum length of 65,535 characters. The snippet in the following example request is a [google-site-verification](https://developers.google.com/search/docs/advanced/crawling/special-tags) `meta` tag used to verify site ownership: ```` {% aside type="info" %} To see another snippet example, check out the [Square Online Store Snippets Example](https://github.com/square/connect-api-examples/tree/master/connect-examples/v2/rails_snippet/app/views/snippets/_inject.html.erb) sample application, which lets you choose an emoji to use as the cursor on a site. {% /aside %} The following is an example `UpsertSnippet` response: ```json { "snippet": { "id": "snippet_5d178150-a6c0-11eb-a9f1-437e6example", "site_id": "site_27807527648example", "content": "", "created_at": "2021-03-11T25:40:09.000000Z", "updated_at": "2021-03-11T25:40:09.000000Z" } } ``` {% aside type="info" %} If you encounter issues when running cURL commands from a terminal window (such as valid snippet code that returns a `BAD_REQUEST` error or encoded HTML in the response), try using [API Explorer](https://developer.squareup.com/explorer/square/snippets-api/upsert-snippet), Postman, or another tool to send your requests. {% /aside %} 5. Now that you added a snippet to the site, you can call [RetrieveSnippet](https://developer.squareup.com/reference/square/snippets-api/retrieve-snippet), [UpsertSnippet](https://developer.squareup.com/reference/square/snippets-api/upsert-snippet), and [DeleteSnippet](https://developer.squareup.com/reference/square/snippets-api/delete-snippet) as needed to retrieve, update, or delete the snippet. Square also requires that your application allows sellers to view the status of their Square OAuth access token and to disconnect your application by revoking the access token. For more information, see [OAuth Best Practices](oauth-api/best-practices). ## Next steps * Use [API Explorer](https://developer.squareup.com/explorer/square) to build and test more calls to the Snippets API and Sites API. API Explorer runs against the resources in your account and generates syntax that you can use for cURL commands and language-specific SDK requests. For more information, see [API Explorer](testing/api-explorer). Note that the Sites API and Snippets API aren't supported in the Square Sandbox. * Try out the [Square Online Store Snippets Example](https://github.com/square/connect-api-examples/tree/master/connect-examples/v2/rails_snippet). This Ruby sample shows what a snippet application might look like. The sample can run locally using Docker Compose. * If you want to start building your own application using a [Square SDK](sdks), install the SDK in your preferred language. Make sure to use the production environment for your Sites API and Snippets API requests. {% anchor id="testing-snippet-applications" /%} ## Test your application Square doesn't provide a sandbox eCommerce environment for testing snippets or calls to the Sites API or Snippets API. Therefore, you must test snippets and API calls using a Square Online site in the production environment and an access token for production resources. ### To create a test site 1. In the [Square Dashboard](https://app.squareup.com/dashboard), choose **Online** in the left pane. * If you haven't created any sites, choose **Get started**. * If you want to create another site, choose **Add site** from your account menu in the upper right. 2. Follow the UI prompts to create and publish your site. For more information, see [Get Started with Square Online](https://squareup.com/help/us/en/article/6852-get-started-with-square-online-store) and [How to Start a Free Online Store from Your Square Account](https://squareup.com/townsquare/how-to-start-a-free-online-store). {% anchor id="get-production-access-token" /%} ### To get your production access token 1. In the [Developer Console](https://developer.squareup.com/apps), open your application. If you don't have a Square account, you need to create one. 2. At the top of the page, in the **Sandbox** and **Production** toggle, choose **Production**. 3. On the **Credentials** page, under **Production Access Token**, choose **Show**, and then copy the token. The token grants full access to the resources in your account. Use your access token to test your calls to the Snippets API and Sites API from your management dashboard. After calling `UpsertSnippet` to add the snippet to your test site, you can test the snippet functionality from your site. {% aside type="info" %} To learn how to obtain an {% tooltip text="OAuth access token" %}Represents the set of permissions allowed by a seller. OAuth access tokens are obtained through an OAuth flow using your application credentials.{% /tooltip %} that you can use in API requests to access resources in other Square accounts, see [OAuth API](oauth-api/overview). {% /aside %} ## See also * [Snippets API](snippets-api/overview) * [Use the Snippets API](snippets-api/use-the-api) * [Square Online Store Snippets Example](https://github.com/square/connect-api-examples/tree/master/connect-examples/v2/rails_snippet) * [Video: Sandbox Sessions: Snippets API](https://www.youtube.com/watch?v=QADTT8olOTA) --- # What's Next > Source: https://developer.squareup.com/docs/get-started/what-next > Status: PUBLIC > Languages: All > Platforms: All After exploring the Get Started walkthrough, learn about areas to explore as a Square developer. Now that you've signed up for a Square account, created an application, and tested some API requests, you can start building. {% toc hide=true /%} ## A quick look at the Square Developer platform The following video shows how your application connects with Square sellers and how Square APIs work together. {% youtube src="https://www.youtube.com/embed/hoAUHJfokbg" /%} ## Build business solutions The Square Developer platform provides a collection of APIs and a variety of development tools. Square APIs provide capabilities that let you create applications for a wide range of business needs: * [Payments](payments-overview) - Take payments any time with flexible tools. * [Commerce](commerce) - Process orders, manage catalogs, track inventory, and book reservations. * [Customers](customers) - Help sellers grow their businesses and build customer relationships. * [Staff](staff) - Integrate with team management and time-recording tools. ## Development tools * [Square API](https://developer.squareup.com/reference/square) - A collection of backend APIs that allow developers to build solutions for a wide range of business needs. * [Square GraphQL](devtools/graphql) - A fast and compact transfer of Square data. You can build and send test queries using [GraphQL Explorer](https://developer.squareup.com/explorer/graphql). * [Square SDKs](sdks) - Platform SDKs for common languages that simplify backend development. * [Client payment SDKs and plugins](payments-overview) - Square payments can be started across multiple channels, including [in person](in-person-payment-options) on Square hardware and [online](online-payment-options). These client libraries are supported by the server-side [Payments API](payments-api/take-payments), which completes a payment. * [API Explorer](testing/api-explorer) - An interactive tool you can use to build, view, and send HTTP requests that call Square APIs. * [API Logs](devtools/api-logs) - An interactive tool you can use to view your API call history when testing and debugging applications, troubleshooting API issues, and getting a real-time view of activity across integrations. * [Sample applications](sample-apps) - OAuth samples, Square SDK samples, and Square mobile samples written in common programming languages. * [Webhooks](webhooks/overview) - Push notifications for changes in Square account data. * [Square Sandbox](testing/sandbox#sandbox-connect-api-support) - An isolated sandbox API testing environment. {% aside type="tip" %} You can extend the Square data model for some Square APIs by using [custom attributes](devtools/customattributes/overview). {% /aside %} ## Two-step verification You should enable two-factor authentication (2FA) on your Square account. 2FA provides protection against unauthorized access to your account (for example, using social engineering attacks, [credential stuffing](https://en.wikipedia.org/wiki/Credential_stuffing), or any other account takeover (ATO) techniques). To enable 2FA: 1. Log in to the [Square Dashboard](https://squareup.com/login). 2. Choose **My Business** (upper right), and then choose **Account settings**. 3. In the left pane, choose the **Personal Information**. 4. Choose **Enable 2-step verification**. When prompted, choose **SMS** or **Authentication App**. After two-step verification is enabled, if you're using a trusted device, you can select the **Remember this device for 30 days** checkbox after you log in. You're then only prompted for two-step verification every 30 days instead of every time. --- # Verify the Payment > Source: https://developer.squareup.com/docs/get-started/verify-transaction-in-seller-dashboard > Status: PUBLIC > Languages: All > Platforms: All Learn how to view Square transactions in the Sandbox Square Dashboard. So far, this Get Started exercise has used API Explorer and the Developer Console. Now, you use the {% tooltip text="Sandbox Square Dashboard" %}The Sandbox version of the Square Dashboard. The Square Dashboard is where sellers manage their daily business operations.{% /tooltip %} to see how sellers verify the payment. 1. On the **Sandbox test accounts** page in the Developer Console, choose **Square Dashboard** next to **Default Test Account**. This link opens the Sandbox Square Dashboard associated with the default test account. ![A screenshot of the Sandbox test accounts page in the Developer Console.](//images.ctfassets.net/1nw4q0oohfju/74g0TtelePjPTpemf7E3Do/411bbc76fa3ed7257c6f4c807751a9ff/sandbox-test-accounts-page.png) 2. In the **Sandbox Square Dashboard**, choose **Transactions**. 3. On the **Transactions** page, choose the payment you made. If you don't see your payment, select a date range that includes your payment. --- # View the API Logs > Source: https://developer.squareup.com/docs/get-started/view-log > Status: PUBLIC > Languages: All > Platforms: All Learn how to view a Square transaction in the Square API log. You can view [API logs](devtools/api-logs) for your application in the Developer Console. 1. In the **Response** pane of [your first API call](get-started/make-api-request) in API Explorer, choose **View Logs**. This opens the Developer Console to the **API Logs** page for your application. 2. Choose the API call from the results list. 3. To view the HTTP request, choose **Request**. 4. To view the response, choose **Response**. After reviewing the logs, back out of the application and return to the Developer Console. ![An animation showing the API Logs user interface in the Developer Console.](//images.ctfassets.net/1nw4q0oohfju/1FrvkokWBZeATQzAU5EuEd/274715ab4604aebd117a473094883d14/api-logs-showing-history-of-payment-requests.png) --- # Make your First API Call > Source: https://developer.squareup.com/docs/get-started/make-api-request > Status: PUBLIC > Languages: All > Platforms: All Learn how to get started and make a Square API request. After you [create an account and application](get-started/create-account-and-application), you can use [API Explorer](https://developer.squareup.com/explorer/square) to call Square APIs. This exercise creates a payment in the {% tooltip text="Square Sandbox" %}An isolated server environment used for testing. API calls in the Sandbox use the "connect.squareupsandbox.com" domain and require an access token that's valid for Sandbox.{% /tooltip %}. ## Create a payment In the Developer Console, your application displays the following blue banner: ![An image of the "create your first test payment" banner.](//images.ctfassets.net/1nw4q0oohfju/55Ce4nWowcwiLZ5H329vBI/dcc97171d06335c0271cd8710a12e5fb/blue-dot-banner.png) 1. Choose the **Open API Explorer** link on the banner. This opens API Explorer and populates all the fields that are required to send a `CreatePayment` request to the Payments API. {% aside type="info" %} Don't see the banner? Use this [API Explorer link](https://developer.squareup.com/explorer/square/payments-api/create-payment?params=N4IgRg9gJgngCgQwE4ILYFMAu6kGcQBcoaEArgHaYD6qE56MhxtFmhAjAAycA0IAxqSRJ05fowIgAqgGUAIiAC%2BfXGST90VAJZRCA8nQL9kUALQGx6UxADWIPjvSoADhGxiYVGwz0AWflAAbACcCPwA7KbsAMxg0aa%2BAEzhnKZxAKz8pgBm6FCJwcnhvlAAHLrKIABuOLhadHrsAHScSkA&env=sandbox&v=1) to open the prepopulated view. {% /aside %} 2. In API Explorer, choose **Run Request**. 4. Review the **Request** and **Response** panes: * The **Request** pane shows the request that was sent. You can change the default cURL view to see the request in another programming language. * The **Response** pane shows the response from Square. If the payment is successful, Square returns a `Payment` object with the `status` field set to `COMPLETED`. If the request failed, Square returns an [error](build-basics/general-considerations/handling-errors). ![An image of API Explorer populated with CreatePayment values.](//images.ctfassets.net/1nw4q0oohfju/1qSpObmixe0rTUR3hRJRkX/93883634d6ff57d2add552dafc06c12e/api-explorer-populated-with-create-payment-values.png) The `source_id` in the request is a [Sandbox payment token](devtools/sandbox/payments#payment-tokens-for-testing-the-payments-api) that represents a credit card. In production, payment tokens are generated by the [Web Payments SDK](web-payments/overview) or [In-App Payments SDK](in-app-payments-sdk/what-it-does). For more information, see [Take Payments](payments-api/take-payments). {% aside type="tip" %} For this Get Started exercise, API Explorer prefilled the **Access token** field for you. In the future, after signing in, you need to choose an API and endpoint and then choose your access token. {% /aside %} --- # Create an Account and Application > Source: https://developer.squareup.com/docs/get-started/create-account-and-application > Status: PUBLIC > Languages: All > Platforms: All Learn how to create a Square account for developers and your first application. To start building on the [Square Developer platform](/), create a free Square developer account. The sign-up process involves a short series of prompts that collect information to create your account and register your first application. {% aside type="info" %} If you already have a Square account and an application, [sign in](https://developer.squareup.com/apps) and skip ahead to [Make your First API Call](get-started/make-api-request). {% /aside %} Be ready to provide the following: * **Information about you** - Your name, an email address, a new password, and your country. * **Agreement with Square's Terms** - Including the Privacy Policy and E-Sign Consent. * **Business name** - If you're employed by a Square merchant, enter the merchant's name. Otherwise, enter the name of your own software development business. * **Application name** - The name of your project, which you can change later. * **Preferences** - Optional information Square uses to suggest relevant samples, help content, and snippets: * **Use case** - The business scenario your application will address. * **Language used** - Your preferred coding language or platform. * **Audience** - Who you're building your application for. You can add or update this information later on the application's **App details** page in the Developer Console. ## Get started 1. Open the [Square Developer sign-up](https://squareup.com/signup?v=developers) page. 2. Provide information for your account and application. When the sign-up process is complete, Square opens your new application in the Developer Console. If you already have a Square account and you need to create an application, sign in to the [Developer Console](devtools/developer-dashboard) using the **Account** menu. You can create and access your applications from the **Applications** page. ![A drop-down menu that shows the Developer Console and Square Dashboard options.](//images.ctfassets.net/1nw4q0oohfju/1wkrfgn9DR0UzcKoiRvi05/16fb109bdd2edaf3c137825a4536f0a9/developer-colsole-account-dropdown.png) {% aside type="important" %} When you're ready to take payments in the production environment, you must activate your Square account at [squareup.com/activation](https://squareup.com/activation). {% /aside %} --- # Get Started > Source: https://developer.squareup.com/docs/square-get-started > Status: PUBLIC > Languages: All > Platforms: All Learn how to quickly sign up for a Square account and test APIs. Create an account and make your first Square API call in minutes. With the [Square Developer platform](/), you can build custom applications that help Square sellers take payments, create and track orders, manage inventory, organize customers, and more. Get started building with the following steps: 1. [Create an Account and Application](get-started/create-account-and-application) 2. [Make your First API Call](get-started/make-api-request) 3. [View the API Logs](get-started/view-log) 4. [Verify the Payment](get-started/verify-transaction-in-seller-dashboard) These steps introduce the foundational knowledge that you need to work with the Square API, along with some Square developer tools. --- # Refund Interac Payments > Source: https://developer.squareup.com/docs/terminal-api/square-terminal-refunds > Status: PUBLIC > Languages: All > Platforms: All Learn how to refund a payment using a Square Terminal and the Terminal API. **Applies to:** [Terminal API](terminal-api/overview) | [Refunds API](refunds-api/overview) {% subheading %}Learn how to refund an Interac payment using a Square Terminal and the Terminal API.{% /subheading %} {% toc hide=true /%} ## Overview [Interac](https://www.interac.ca/) card payments in Canada can only be refunded when the payment card is present and the original payment is no more than 365 days old. This means that an integration must use a connected Square Terminal to process an Interac refund. Use a Square Terminal and the [CreateTerminalRefund](https://developer.squareup.com/reference/square/terminal-api/create-terminal-refund) endpoint to request a refund of Interac payments on a Square Terminal for Canadian sellers. All other payment types are refunded using the [Refunds API](https://developer.squareup.com/reference/square/refunds-api). {% aside type="tip" %} You can test your [Terminal API](https://developer.squareup.com/reference/square/terminal-api) integration in the Square Sandbox. Use [Sandbox test values](testing/test-values#terminal-api-endpoint-testing) to test your integration against successful and failed Terminal refunds. {% /aside %} ## Requirements and limitations * Applications must have the following OAuth permissions: `PAYMENTS_WRITE` to process refunds and `PAYMENTS_READ` to retrieve refunds. * You cannot refund non-Interac payments with the Terminal API. ## Verify that the payment requires an in-person refund The [Payment.CardPaymentDetails](https://developer.squareup.com/reference/square/objects/CardPaymentDetails) object has a [refund_requires_card_presence](https://developer.squareup.com/reference/square/objects/CardPaymentDetails#definition__property-refund_requires_card_presence) Boolean field that when set to `true` requires that any refunds occur in-person and on a Square Terminal. To get the `Payment` object to be refunded, review the [TerminalCheckout.payment_ids](https://developer.squareup.com/reference/square/objects/TerminalCheckout#definition__property-payment_ids) collection to get the payment IDs used in the checkout. For any payments that must be refunded in person, use the Terminal API. Other payments must use the [Refunds API](https://developer.squareup.com/reference/square/refunds). ## Search for a Terminal checkout payment Completed Terminal checkout requests are only held for 30 days. To refund an older Interac payment, you should provide a list of completed [Payment](https://developer.squareup.com/reference/square/objects/payment) objects for the seller to select from. The following example lists all payments for a seller location within a time range and in descending order: ```` An Interac payment refund can be completed when the following requirements are met: * The status of the payment must be `COMPLETED`. * The [CardPaymentDetails.refund_requires_card_presence](https://developer.squareup.com/reference/square/objects/CardPaymentDetails#definition__property-refund_requires_card_presence) must be `true`. * The payment card processed by the payment must be an Interac payment card and the transaction must be in Canadian dollars (CAD). * The requested refund amount isn't greater than the initial payment minus the sum of completed refunds. {% aside type="important" %} Refunds must be requested from the seller who took the original Interac payment but can be requested from any of the seller's locations. {% /aside %} ## Create a Terminal refund Request a refund using the following example. The `TerminalCheckout` might have been completed with multiple payment cards, which results in multiple payment IDs. Payment cards are refunded individually, which requires a refund request for each card. Note that the amount of a refund request isn't the Terminal checkout total. Instead, it's the [Payment.total_money](https://developer.squareup.com/reference/square/objects/Payment#definition__property-total_money) minus [Payment.refunded_money](https://developer.squareup.com/reference/square/objects/Payment#definition__property-refunded_money) for each payment to be refunded. ```` After a Terminal refund is created, it's in a `PENDING` state for a short period of time while the Square Terminal receives the refund request and starts the process with the buyer. When the Square Terminal starts interacting with the buyer, the Terminal refund moves to the `IN_PROGRESS` state. When the buyer is done with the refund flow, the Terminal refund moves to the `COMPLETED` state. The buyer might also cancel the flow from the Square Terminal interface, in which case it moves to the `CANCELED` state. When a Terminal refund is in the `COMPLETED` state, it includes a refund ID that you can reference when calling the [Refunds API](https://developer.squareup.com/reference/square/refunds-api) (that is, to call `GetRefund`). ### Webhook notifications If your application is accepting the `terminal.refund.updated` and `payment.updated` webhook notifications, the application receives a notification when the refund request is completed and another notification when the payment is refunded. The [Payment.refunded_money](https://developer.squareup.com/reference/square/objects/Payment#definition__property-refunded_money) field is incremented with the refunded amount. ## Get a Terminal refund To check the status of your Terminal refund, you can issue a GET request with the ID returned from your initial POST request. Terminal refund objects are specified by appending a Terminal refund ID to the `GetTerminalRefund` endpoint URL. ```` The response includes a [TerminalRefund](https://developer.squareup.com/reference/square/objects/TerminalRefund). ```json { "terminal_refund": { "id": "08YceKh7B3ZqO", "refund_id": "UNOE3kv2BZwqHlJ830RCt5YCuaB", "amount_money": { "amount": 2610, "currency": "CAD" }, "reason": "Item returned", "device_id": "dbb5d83a-7838-11ea-bc55-0242ac130003", "status": "COMPLETED", "created_at": "2020-04-06T16:39:32.545Z", "updated_at": "2020-04-06T16:39:323.001Z", "app_id": "APP_ID", "deadline_duration": "PT10M" } } ``` ## Cancel a Terminal refund You can cancel a Terminal refund request as long as the status of the request is `PENDING`. The following is an example of a cancel refund request: ```` ### Webhook notifications If your application is accepting the `terminal.refund.updated` webhook notification, the application receives a notification when the refund request is canceled and a notification when the payment is refunded. The [Payment.refunded_money](https://developer.squareup.com/reference/square/objects/Payment#definition__property-refunded_money) field is incremented with the refunded amount. ## Search for Terminal refunds You can retrieve a filtered list of Terminal refund requests created by the seller making the request. In this example, a list of completed Terminal refunds is requested: ```` ## Terminal refund webhooks To get notification of status changes on a Square Terminal Interac refund request, you should configure your application to receive the following webhook events: * `terminal.refund.created` * `terminal.refund.updated` * `payment.updated` When a refund request is created or the state of the request is updated, a full copy of the `TerminalRefund` object is sent to your application at the URL you specify. --- # Square Java SDK Quickstart > Source: https://developer.squareup.com/docs/sdks/java/quick-start > Status: PUBLIC > Languages: All > Platforms: All Learn how to quickly set up and test the Square Java SDK. {% subheading %}Learn how to quickly set up and test the Square Java SDK.{% /subheading %} {% toc hide=true /%} ## Prepare for the Quickstart Before you begin, you need a Square account and account credentials. You use the Square Sandbox for the Quickstart exercise. 1. Create a Square account and an application. For more information, see [Create an Account and Application](get-started/create-account-and-application). 2. Get a Sandbox access token from the Developer Console. For more information, see [Get a personal access token](build-basics/access-tokens#get-a-personal-access-token). 3. Install the following: * [Oracle Java SE Development Kit](https://www.oracle.com/java/technologies/downloads/) - Square supports Java version 8 or later. * [Apache Maven](https://maven.apache.org/install.html) for dependency management. Square supports both Maven and Gradle, but you use Maven in the Quickstart. {% aside type="info" %} If you prefer to skip the following setup steps, download the [Square Java SDK Quickstart](https://github.com/Square-Developers/java-getting-started) sample and follow the instructions in the README. {% /aside %} ## Create a project 1. Open a new terminal window. Use the Maven command-line interface (`mvn`) to create a simple project. ``` mvn archetype:generate \ -DinteractiveMode=false \ -DgroupId=com.square.examples \ -DartifactId=quickstart \ -DarchetypeArtifactId=maven-archetype-quickstart ``` 2. After the command completes, go to your new project directory and familiarize yourself with the directory structure and supporting files. ```bash cd quickstart ``` 3. Your project is defined by its project object model (POM). Open the `pom.xml` file in a text editor and replace its contents with the following: ```xml 4.0.0 com.square.examples quickstart jar 1.0-SNAPSHOT quickstart http://maven.apache.org com.squareup square SDK_VERSION_HERE compile junit junit 3.8.1 test org.codehaus.mojo exec-maven-plugin 3.0.0 com.square.examples.Quickstart false org.apache.maven.plugins maven-compiler-plugin 3.8.1 8 8 ``` 4. Replace **SDK_VERSION_HERE** with the latest version of the [Square Java SDK](https://github.com/square/square-java-sdk): ``47.0.1.20260715`` 5. When finished, save the `pom.xml` file. ## Write code 1. In your project's `src/main/java/com/square/examples` subdirectory, create a new file named `Quickstart.java` with the following content: ```java package com.square.examples; import java.io.IOException; import java.io.InputStream; import java.util.Properties; import com.squareup.square.AsyncSquareClient; import com.squareup.square.core.Environment; import com.squareup.square.types.Location; import com.squareup.square.types.Error; import com.squareup.square.core.SquareApiException; import com.squareup.square.types.Address; public class Quickstart { public static void main(String[] args) { InputStream inputStream = Quickstart.class.getResourceAsStream("/config.properties"); Properties prop = new Properties(); try { prop.load(inputStream); } catch (IOException e) { System.out.println("Error reading properties file"); e.printStackTrace(); } AsyncSquareClient client = AsyncSquareClient.builder() .token(prop.getProperty("SQUARE_ACCESS_TOKEN")) .environment(Environment.SANDBOX) .build(); client.locations().list() .thenAccept(result -> { System.out.println("Location(s) for this account:"); result.getLocations().ifPresent(locations -> { for (Location l : locations) { // Build location details safely StringBuilder locationInfo = new StringBuilder(); // Add ID if present l.getId().ifPresent(id -> locationInfo.append("ID: ").append(id)); // Add name if present l.getName().ifPresent(name -> locationInfo.append(locationInfo.length() > 0 ? ", " : "") .append("Name: ").append(name)); // Handle address details if present l.getAddress().ifPresent(address -> { // Add address line 1 if present address.getAddressLine1().ifPresent(line1 -> locationInfo.append(locationInfo.length() > 0 ? ", " : "") .append("Address: ").append(line1)); // Add locality (city) if present address.getLocality().ifPresent(locality -> locationInfo.append(locationInfo.length() > 0 ? ", " : "") .append("City: ").append(locality)); }); // Print the complete location information System.out.println(locationInfo.toString()); } }); }) .exceptionally(exception -> { if (exception.getCause() instanceof SquareApiException) { SquareApiException apiException = (SquareApiException) exception.getCause(); apiException.errors().forEach(error -> { System.out.println("Category: " + error.getCategory()); System.out.println("Code: " + error.getCode()); System.out.println("Detail: " + error.getDetail()); }); } else { System.out.println("An unexpected error occurred:"); exception.printStackTrace(); } return null; }) .join(); } } ``` 2. Save the `Quickstart.java` file. This code does the following: * Reads a configuration file that contains your Square Sandbox access token. For more information, see [Set your Square credentials](#set-your-square-credentials). * Creates a client object that uses your credentials to authenticate with Square. * Calls the `list` method of the Locations API to retrieve the locations associated with the Square account. * If the request is successful, the code prints the location information in the terminal. ## Set your Square credentials The Java code in this Quickstart reads your Square Sandbox access token from a separate configuration file. This helps avoid the use of hardcoded credentials in the code. 1. Create a new subdirectory in your project (`src/main/resources`) and within that subdirectory, create a file named `config.properties` with the following content: ```bash SQUARE_ACCESS_TOKEN=yourSandboxAccessToken ``` 2. Replace `yourSandboxAccessToken` with your Square Sandbox access token. 3. When finished, save the `config.properties` file. ## Run the application 1. Run the following command: ```bash mvn package -DskipTests ``` Maven compiles your program into bytecode and prepares it for execution. 2. Finally, run your Quickstart program: ```bash mvn exec:java -Dexec.mainClass="com.square.examples.Quickstart" ``` 3. Verify the result. You should see at least one location (Square creates one location when you create a Square account). --- # Square Developer Tools > Source: https://developer.squareup.com/docs/devtools/overview > Status: PUBLIC > Languages: All > Platforms: All An overview of the various tools that Square provides for developers who are creating applications that use the Square APIs. {% subheading %}Learn about the various tools that Square provides for developers who are creating applications that use the Square APIs.{% /subheading %} {% toc hide=true /%} ## Developer Console Square developers use the [Developer Console](devtools/developer-dashboard) to find credentials and manage permissions, versions, and other application settings. In addition, they can use the dashboard to access the Sandbox Square Dashboard for test accounts and manage webhook subscriptions and other capabilities. ## Square Dashboard The [Square Dashboard](devtools/seller-dashboard) allows Square sellers to monitor activities and manage daily business operations. Many Square APIs integrate with Square Dashboard features. For example, when you create a customer using the Customers API, the new customer profile is added to the Customer Directory in the Square Dashboard. ## Square Sandbox The [Square Sandbox](devtools/sandbox/overview) consists of a free, isolated server environment, a set of Sandbox seller test accounts, and a Sandbox Square Dashboard for each account. Every developer gets their own Sandbox after they create an application in the [Developer Console](https://developer.squareup.com/apps). The Sandbox environment separates transactions from the production environment. Use the Square Sandbox to create transactions by calling Square APIs using API Explorer or your own code. You can make API calls using the default test account or you can create your own test account. ## API Explorer Square [API Explorer](https://developer.squareup.com/explorer/square) is an interactive interface you can use to build, view, and send HTTP requests that call Square APIs. API Explorer lets you test your requests using actual Sandbox or production resources in your account such as customers, orders, and catalog objects. You can also use API Explorer to quickly populate resources in your account. You can then interact with the new resources in the Square Dashboard. ## API Logs Square APIs write transaction information to a central log [(API Logs)](devtools/api-logs) that you can use for diagnostics, troubleshooting, and auditing. The logs consist of an overview page showing all entries and a detailed page for each log entry that shows the transaction request and response, as well as a summary of the API call. You can view the logs on the API Logs page for your application in the [Developer Console](https://developer.squareup.com/apps) and in [API Explorer](https://developer.squareup.com/explorer/square). ## Webhook event logs To troubleshoot issues with webhooks, you can use the [webhook event logs](devtools/webhook-logs) to determine when a webhook was sent and received, what was the retry reason if there was a retry, and the payload that was sent. ## Webhook event subscriptions A [webhook event subscription](webhooks/overview) is a subscription that notifies you when events created by the Square APIs occur. You create a subscription using a notification URL and the events that you want to be notified about. When an event occurs, Square collects data about the event, creates an event notification, and sends the event notification to the notification URL for all webhook subscriptions that are subscribed to the event. There are more than 60 webhook events you can subscribe to. ## Integration with Postman [Postman](devtools/postman) is an application for easy RESTful API exploration. You can use Postman to test Square API calls multiple times without having to write code or install Square SDKs. You can save multiple sets of credentials to quickly test Square API calls in the Sandbox and in production. --- # Custom Attributes > Source: https://developer.squareup.com/docs/devtools/customattributes/overview > Status: BETA > Languages: All > Platforms: All An overview of custom attributes, which are a lightweight way to include additional properties in the Square data model. {% subheading %}Learn about custom attributes, which are a lightweight way to include additional properties in the Square data model.{% /subheading %} {% toc hide=true /%} ## Overview Custom attributes are a lightweight way to extend the Square data model and add new properties to some objects, thereby making them more specific to the business problem you're solving. You can use custom attributes in a number of scenarios, such as when a seller has certain attributes they want to capture that aren't native to the Square data model. For example, a veterinary clinic could store pet names, breeds, and ages for each customer using several custom attributes or a restaurant could use custom attributes to denote table numbers and server names for in-person orders. ## Supported custom attribute The following APIs currently support custom attributes: * [Bookings](https://developer.squareup.com/reference/square/booking-custom-attributes-api) * [Customers](https://developer.squareup.com/reference/square/customer-custom-attributes-api) * [Locations](https://developer.squareup.com/reference/square/location-custom-attributes-api) (beta) * [Merchants](https://developer.squareup.com/reference/square/merchant-custom-attributes-api) (beta) * [Orders](https://developer.squareup.com/reference/square/order-custom-attributes-api) (beta) There are five custom attribute terms to be familiar with: * **Custom attribute definition** - This specifies the characteristics of a custom attribute. It defines the data type, schema, addressable endpoints, and configuration of the custom attribute. The custom attribute definition uses the Square custom attribute `schema` field to specify the type information for a custom attribute. Every custom attribute has a definition that's associated with a specific seller. After a custom attribute is defined, the values for that attribute are available to the seller. You can also specify the `visibility` of the custom attribute for the seller and to other applications. * **Custom attribute key** - Every custom attribute definition has a key that's unique to each application and seller. The key allows you to define and access a custom attribute for any seller you work with. For example, suppose you create a custom attribute definition called favorite-color. If you work with several sellers, you could use the definition to create Favorite Color custom attributes for each seller. You use the custom attribute `key` and the parent resource ID to access the custom attribute. Some custom attribute APIs allow you to work with seller-defined custom attributes. When doing so, you use a qualified key. * **Custom attribute** - This is the entity containing the custom attribute data and references to the custom attribute definition that defines it. * **Custom attribute value** - This value is used to distinguish between the custom attribute itself and its value. * **Custom attribute visibility** - When you create a custom attribute definition, you specify the `visibility` of the custom attribute. This determines not only whether other applications and sellers can see the custom attribute, but it also determines what actions other applications can take regarding the custom attribute. Visibility is described in greater detail in the following sections. There are also several behaviors that apply to custom attributes that you should know: * For any Square API you work with, the `Retrieve{ResourceType}` and `List{ResourceTypes}` endpoint responses don't include custom attribute values. Use the custom attributes endpoint that's specific to the API you're working with to list the available custom attributes. * If the `visibility` of a custom attribute definition is updated, the change is propagated within a few seconds to its corresponding custom attributes. * If a custom attribute definition is deleted, all corresponding custom attributes are also deleted. * Square validates custom attribute selections on upsert operations, so any changes that you make to the definition schema apply only to future upsert operations. They don't affect custom attributes that have already been set. For example, a selection definition can be changed from allowing a maximum number of three items to only allowing a maximum number of one item. Any value with more than one item remains in place and can still be retrieved, but the value cannot be saved until the value is changed to match the current custom attribute definition. {% aside type="important" %} Custom attributes are intended to store additional information about a resource or associations with an entity in another system. Don't use custom attributes to store any PCI data (such as card details). PII data is supported in custom attribute values, but applications that create or read this data should observe applicable privacy laws and data regulations such as avoiding logging custom attribute data when a deletion request is received. {% /aside %} ## Custom attribute workflow For a high-level understanding of how to work with custom attributes, it's helpful to focus on three common workflows: * Define the properties and create a custom attribute definition for a seller. * Set custom attributes. * Assign custom attribute values. For details about how to perform these actions for each of the supported APIs, see the following: * [Custom Attributes for Bookings](booking-custom-attributes-api/overview) * [Custom Attributes for Customers](customer-custom-attributes-api/overview) * [Custom Attributes for Orders](orders-custom-attributes-api/overview) * [Custom Attributes for Locations](location-custom-attributes-api/overview) * [Custom Attributes for Merchants](merchant-custom-attributes-api/overview) {% anchor id="access-control" /%} ## Access control The application that creates a custom attribute definition is the definition owner. The definition owner always has `READ` and `WRITE` permissions to the definition and all instances of the corresponding custom attributes. The `visibility` setting specified by a custom attribute definition determines how other applications can access the definition and corresponding custom attributes: * `VISIBILITY_HIDDEN` (default) - The definition and corresponding custom attributes are only visible to the definition owner. * `VISIBILITY_READ_ONLY` - Allows other applications to view the custom attribute definition and corresponding custom attributes. * `VISIBILITY_READ_WRITE_VALUES` - Allows other applications to set or delete the custom attribute. The following table shows access control permissions for other applications that make calls on behalf of a seller, including Square products: | | Custom attribute{% line-break /%}definition{% colspan=2 %} | {% line-break /%}Custom attribute{% colspan=2 %} | | | | ---------- | ---------- | ---------- | ---------- | ---------- | | **Visibility setting** | **READ** | **WRITE** | **READ** | **WRITE** | | `VISIBILITY_HIDDEN` (default) | No | No | No | No | | `VISIBILITY_READ_ONLY` | Yes | No | Yes | No | | `VISIBILITY_READ_WRITE_VALUES`| Yes | No | Yes | Yes | #### Accessing custom attributes owned by other applications To access custom attribute definitions created by other applications or their corresponding custom attributes, the following conditions must be true: * The `visibility` field of the definition must be set to one of the following: * `VISIBILITY_READ_ONLY` - Allows other applications to view the custom attribute definition and corresponding custom attributes. * `VISIBILITY_READ_WRITE_VALUES` - Additionally allows other applications to set or delete the custom attribute. {% aside type="info" %} If the visibility of a custom attribute definition is updated, the change is propagated within a few seconds to its corresponding custom attributes. If a custom attribute definition is deleted, all corresponding custom attributes are also deleted. {% /aside %} {% anchor id="data-types" /%} ## Supported data types The data type of a custom attribute is specified by the `schema` field of the custom attribute definition. Square uses the schema to validate the custom attribute value when it's assigned to a resource, such as a customer or location. All data types except `Selection` are specified using a simple URL reference to an object hosted on the Square CDN. For more information, see [Selection data type](#selection-type). Custom attributes support the following data types. Note that not all APIs support all the data types. | Data type | Description{% width="300px" %}|$ref value| |---------|-------------|----| | String | A string with up to 1000 UTF-8 characters. Empty strings are allowed. | https://developer-production-s.squarecdn.com/{% line-break /%}schemas/v1/common.json#squareup.common.String | | Number | A string representation of an integer or decimal with up to five digits of precision that matches the following regular expression: `^-?[0-9]*(\.[0-9]{0,5})?$`. This limit might vary by API. Negative numbers are denoted using a `-` prefix. | https://developer-production-s.squarecdn.com/{% line-break /%}schemas/v1/common.json#squareup.common.Number | | Boolean | A `true` or `false` value.| https://developer-production-s.squarecdn.com/{% line-break /%}schemas/v1/common.json#squareup.common.Boolean | | PhoneNumber | A string representation of a phone number in [E.164 format.](https://en.wikipedia.org/wiki/E.164) For example, `+17895551234`. | https://developer-production-s.squarecdn.com/{% line-break /%}schemas/v1/common.json#squareup.common.PhoneNumber | | Email | An email address consisting of ASCII characters that matches the [regular expression](https://developer.mozilla.org/en-US/docs/Web/HTML/Element/input/email#basic_validation) for the HTML5 `email` type. | https://developer-production-s.squarecdn.com/{% line-break /%}schemas/v1/common.json#squareup.common.Email | | Date | A date in ISO 8601 format: `YYYY-MM-DD`. | https://developer-production-s.squarecdn.com/{% line-break /%}schemas/v1/common.json#squareup.common.Date | | DateTime | A string representation of the date and time in the ISO 8601 format, starting with the year, followed by the month, day, hour, minutes, seconds, and milliseconds. For example, `2022-07-10 15:00:00.000`.| https://developer-production-s.squarecdn.com/{% line-break /%}schemas/v1/common.json#squareup.common.DateTime | | Duration | A duration as defined by the ISO 8601 ABNF. For example, "P3Y6M4DT12H30M5S". | https://developer-production-s.squarecdn.com/{% line-break /%}schemas/v1/common.json#squareup.common.Duration | | Address | An [Address](https://developer.squareup.com/reference/square/objects/Address) object. For information about `Address` fields, see [Working with Addresses.](build-basics/common-data-types/working-with-addresses) | https://developer-production-s.squarecdn.com/{% line-break /%}schemas/v1/common.json#squareup.common.Address | | Selection | A selection from a set of named values specified in the custom attribute definition. | See [JSON meta-schema object](devtools/customattributes/overview#selection-type) | {% anchor id="selection-type" /%} ### Selection data type (JSON meta-schema object) For a `Selection` data type, the schema contains a `$schema` field that references a JSON meta-schema object, as well as additional fields. Note the following: * `$schema` references the `https://developer-production-s.squarecdn.com/meta-schemas/v1/selection.json meta-schema` hosted on the Square CDN. * `type` must be `array`. * `items` must include a `names` array that contains strings representing the display names of the predefined options that can be selected. Note that the order of the options might not be respected by all UIs. * `maxItems` is an integer that represents the maximum number of allowed selections. Corresponding custom attributes can have zero or more selected values, up to the specified maximum. The minimum value is 1 and cannot exceed the number of options in the `names` field. * `uniqueItems` must be `true`. The following call to the `CreateCustomerCustomAttributeDefinition` endpoint creates a `Selection`-type customer custom attribute definition. The definition contains three named options and allows for one selection. ```` The following is an example response. For each named option, Square generates a UUID and adds it to the `enum` field. The options in the `names` field map by index to the UUIDs in the `enum` field. The first option maps to the first UUID, the second option maps to the second UUID, and so on. These UUIDs are used to set the value of the custom attribute or update the option names. ```json { "custom_attribute_definition": { "key": "shirt-size", "name": "Default shirt size", "description": "The default shirt size ordered by the customer.", "version": 1, "updated_at": "2022-05-20T02:41:37Z", "schema": { "$schema": "https://developer-production-s.squarecdn.com/meta-schemas/v1/selection.json", "maxItems": 1, "type": "array", "uniqueItems": true, "items": { "names": [ "Small", "Medium", "Large" ], "enum": [ "a5fc0632-b5cf-4855-af35-7bfc88bdc9f5", // UUID for "Small" "e875633f-a5d8-4872-aef4-6b96fba78c3e", // UUID for "Medium" "30528ff7-b11b-425a-aa11-26ff5cf1996f" // UUID for "Large" ] } }, "created_at": "2022-05-20T02:41:37Z", "visibility": "VISIBILITY_READ_WRITE_VALUES" } } ``` ## Strong consistency for reads You can enforce strong consistency when reading a custom attribute by using the `version` field. When you set the `version` field on a custom attribute to a given value, you receive custom attribute data with that version or later. For example, if your read request asks for version 5, you get data from version 5 or later. If you don't specify a version in your request, you could get an earlier version containing stale data if the current version hasn't been replicated to the data store you're reading from. Most replication typically completes quickly, but to ensure consistency, you should provide a value for the `version` field when reading data. ## Subscribing to webhooks Two types of webhook event notifications are generated for custom attributes: * `.owned` event notifications are sent when changes are made to custom attribute definitions and custom attributes that are owned by your application. A custom attribute definition is owned by the application that created it. A custom attribute is owned by the application that created the corresponding custom attribute definition. * `.visible` event notifications are sent when changes are made to custom attribute definitions and custom attributes that are visible to your application. These changes apply to: * All custom attribute definitions and custom attributes owned by your application. * All other custom attribute definitions or custom attributes whose `visibility` setting is `VISIBILITY_READ_ONLY` or `VISIBILITY_READ_WRITE_VALUES`. --- # Node.js SDK > Source: https://developer.squareup.com/docs/sdks/nodejs > Status: PUBLIC > Languages: All > Platforms: All Use the Square Node.js library to build with Square APIs in a language-idiomatic way that reduces complexity without sacrificing API functionality. {% subheading %}The Square Node.js library supports Square APIs in a language-idiomatic way that reduces complexity without sacrificing API functionality.{% /subheading %} {% toc hide=true /%} {% card-layout %} {% card iconPath="//images.ctfassets.net/1nw4q0oohfju/5PHxq0emenEGat8NifHt0f/df65b59b51746e508dd871b4574f31a1/NPM__1_.svg" href="https://www.npmjs.com/package/square" %} {% card-link-out %}SDK package{% /card-link-out %} {% /card %} {% card iconPath="//images.ctfassets.net/1nw4q0oohfju/6foMeNHsmKw27jkpa7lPHk/6d5da15335dcf70d1fd1c28ca3bb540e/Github.svg" href="https://github.com/square/square-nodejs-sdk/blob/master/README.md#sdk-reference" %} {% card-link-out %}Reference library docs{% /card-link-out %} {% /card %} {% /card-layout %} {% line-break /%} **Latest SDK Version:** 45.0.1 Each SDK version is tied to a specific [Square API version](build-basics/versioning-overview). As features are added, Square releases a new Square API version and a new SDK version. To use new features, you must update the SDK version in your application. Review the [release notes](changelog/connect) to learn about changes in each API version. An increase in the SDK major version number indicates a breaking change. You should always test your application before deploying a change to production. {% aside type="important" %} Version `40.0.0` of the Node.js SDK represents a full rewrite of the SDK, with a number of breaking changes, including client construction and parameter names. When upgrading from version `39.1.0` or earlier, read the [migration guide](sdks/nodejs/migration) to learn what to update and how to use the new SDK and the legacy version side by side. {% /aside %} ## Installation Install the latest version with your choice of package manager. {% tabset %} {% tab id="npm" %} ```bash npm install square ``` {% /tab %} {% tab id="pnpm" %} ```bash pnpm install square ``` {% /tab %} {% tab id="yarn" %} ```bash yarn add square ``` {% /tab %} {% tab id="bun" %} ```bash bun install square ``` {% /tab %} {% /tabset %} ## Quickstart * Follow along with the [Quickstart guide](sdks/nodejs/quick-start) to set up and test the Square Node.js SDK in your own project. --- # Square Python SDK Quickstart > Source: https://developer.squareup.com/docs/sdks/python/quick-start > Status: PUBLIC > Languages: All > Platforms: All Learn how to quickly set up and test the Square Python SDK. {% subheading %}Learn how to quickly set up and test the Square Python SDK.{% /subheading %} {% toc hide=true /%} ## Prepare for the Quickstart Before you begin, you need a Square account and account credentials. You use the Square Sandbox for the Quickstart exercise. 1. [Create a Square account and an application](get-started/create-account-and-application). 2. [Get a Sandbox access token from the Developer Console](build-basics/access-tokens#get-a-personal-access-token). 3. Install the following: * [Python](https://www.python.org/downloads/) - Square supports Python version 3.8 and later. * Square Python SDK - To install it, use the `pip` command: ```bash pip install squareup ``` {% aside type="info" %} If you prefer to skip the following setup steps, download the [Square Python SDK Quickstart](https://github.com/Square-Developers/python-getting-started) sample and follow the instructions in the README. {% /aside %} ## Create a project 1. Open a new terminal window. Create a new directory for your project, and then go to that directory. ```bash mkdir quickstart cd ./quickstart ``` 2. Set your square credentials in an `.env` file. In your project directory, create a new file named `.env` with the following content, replacing `yourSandboxAccessToken` with your Square Sandbox access token: ```bash SQUARE_ACCESS_TOKEN=yourSandboxAccessToken ``` ## Write code 1. In your project directory, create a new file named `quickstart.py` with the following content: ```python from square import Square from square.environment import SquareEnvironment from square.core.api_error import ApiError from dotenv import load_dotenv import os load_dotenv() client = Square( environment=SquareEnvironment.SANDBOX, token=os.environ['SQUARE_ACCESS_TOKEN'] ) try: response = client.locations.list() for location in response.locations: print(f"{location.id}: ", end="") print(f"{location.name}, ", end="") print(f"{location.address}, ", end="") except ApiError as e: for error in e.errors: print(error.category) print(error.code) print(error.detail) ``` 2. Save the `quickstart.py` file. This code does the following: * Loads the environment file containing your Square access token. * Creates a Client object using your Square access token. * Calls the `locations.list` method on the client object. * If the request is successful, the code prints the location information on the terminal. ## Run the application 1. Run the following command: ```bash python ./quickstart.py ``` 2. Verify the result. You should see at least one location (Square creates one sandbox location when you create a Square account). --- # Common Square API Patterns > Source: https://developer.squareup.com/docs/sdks/python/common-square-api-patterns > Status: PUBLIC > Languages: All > Platforms: All Learn how the Square Python SDK supports the common Square API features. {% subheading %}Learn how the Square Python SDK supports the common Square API features.{% /subheading %} {% toc hide=true /%} ## Overview Some of the Square API patterns are used across various APIs. These include the following: * **Pagination** - Many Square API operations limit the size of the response. When the result of the API operation exceeds the limit, the API truncates the result. You must make a series of requests to retrieve all the data. This is referred to as pagination. * **Idempotency key** - Most Square APIs that perform create, update, or delete operations require idempotency keys to protect against making duplicate calls that can have negative consequences (for example, charging a card on file twice). * **Object versioning** - Some Square resources (for example, the `Customer` object) have versions assigned. The version numbers enable optimistic concurrency, which is the ability for multiple transactions to complete without interfering with each other. * **Clear API object fields** - Square API update endpoints that support sparse updates allow you to clear fields by setting the value to `None`. Note that `update_order` requires an `X-Clear-Null: true` HTTP header to indicate that the request contains a `None` field update. These Square API patterns are exposed in the Square Python SDK. ## Pagination Square API [pagination](working-with-apis/pagination) support lets you split a full query result set into pages that are retrieved over a sequence of requests. For example, when you call `client.customers.list`, you can limit the number of customers returned in each response. To iterate over all customers, you can use a `for` loop and the SDK makes additional HTTP requests for you to retrieve additional pages of data. ```python customers = client.customers.list( limit=10, sortField="DEFAULT", sortOrder="DESC" ) for customer in customers: print( f"Customer: ID: {customer.id}, " f"Version: {customer.version}, " f"Given name: {customer.given_name}, " f"Family name: {customer.family_name}" ) ``` ## Idempotency key When an application calls a Square API, it must be able to repeat an API operation when needed and get the same result each time. For example, if a network error occurs while updating a catalog item, the application might retry the same request and must ensure that the item updates only once. This behavior is called idempotency. Most Square APIs that modify data (create, update, or delete) require you to provide an idempotency key that uniquely identifies the request. This allows you to retry the request if necessary, without duplicating work. You can provide a custom unique key or simply generate one. There are language specific functions that you can use to generate unique keys. For more information, see [Idempotency](working-with-apis/idempotency). In the following example, you can see how the `idempotency_key` is generated in a Python application to create an order: ```python client.orders.create( idempotency_key=str(uuid.uuid4()), order={ "location_id": location.id } ) ``` ## Optimistic concurrency and object versioning Some Square API resources support versioning. For example, each `Customer` object has a version field. Initially, the version number is 0. Each update increases the version number. If you don't specify a version number in the request, the latest version is assumed. This resource version number enables optimistic concurrency; multiple transactions can complete without interfering with each other. As a best practice, you should include the version field in the request to enable optimistic concurrency. The value must be set to the current version. For more information, see [Optimistic Concurrency](working-with-apis/optimistic-concurrency). The following code example updates a customer name. The `client.customers.update` method also includes a version number. The method succeeds only if the specified version number is the latest version of the `Customer` object on the server. ```python from square.core.api_error import ApiError try: response = client.customers.update( customer_id="GZ48C4P2CWVXV7F7K2ZH795RSG", given_name="Fred", family_name="Jones", version=7 ) customer = response.customer print( f"Customer: ID: {customer.id}, " f"Version: {customer.version}, " f"Given name: {customer.given_name}, " f"Family name: {customer.family_name}" ) except ApiError as e: print(e.status_code) print(e.message) ``` ## Clear API object fields For update operations that support sparse updates, your request only needs to specify the fields you want to change (along with any fields required by the update operation). If you want to clear a field without setting a new value, set its value to `None`. For more information, see [Clear a field with a null](build-basics/clearing-fields#clear-a-field-with-a-null). The following `update_location` example clears the `twitter_username` field and sets the `website_url` field: ```python client.locations.update( location_id="M8AKAD8160XGR", location={ "website_url": "https://developer.squareup.com", "twitter_username": None } ) ``` `order.update` requests require an additional header. ### update_order requests If you're using `None` to clear fields in an order, you must add the `X-Clear-Null: true` HTTP header to signal your intention. In the Square Python SDK, the `Client` class provides an `additional_headers` parameter that you can use for this purpose: ```python from square.core import RequestOptions client.orders.update( order_id="A4BMDU4438ZLB", order={ "reference_id": "Order1322", "ticket_name": None } request_options=RequestOptions( additional_headers={"X-Clear-Null": "true"} ) ) ``` --- # Test the Disputes API > Source: https://developer.squareup.com/docs/disputes-api/sandbox-testing > Status: PUBLIC > Languages: All > Platforms: All Learn how to test the Disputes API in the Square Sandbox. **Applies to:** [Disputes API](disputes-api/overview) | [Payments API](payments-refunds) {% subheading %}Use the [Disputes API](https://developer.squareup.com/reference/square/disputes-api) to programmatically complete the dispute process.{% /subheading %} {% toc hide=true /%} ## Overview To test your application without creating actual payment disputes with a bank, make calls to the Disputes API using the [Square Sandbox](devtools/sandbox/overview). This topic walks through the following steps: 1. Trigger a dispute in the Sandbox. 2. Get new disputes. 3. Respond by accepting or challenging the dispute. 4. Verify the state of the dispute. {% aside type="important" %} Test disputes you create in the Square Sandbox aren't visible in the Developer Console or Square Dashboard. You can only access and manage them through the Disputes API. Actual payment disputes initiated by customers are visible to sellers in the Square Dashboard. {% /aside %} ### Outline of the dispute process The following flowchart outlines the steps of the dispute process and possible outcomes, beginning with the customer's initial chargeback request. For more information about the seller’s role in the dispute process and details about the use of each Disputes API endpoint in a production application, see [Process Disputes](disputes-api/process-disputes). ![A diagram showing the dispute process from initiation through resolution.](//images.ctfassets.net/1nw4q0oohfju/14F6DZ5vwU0QHl16fRAky2/844acbc7727f1e736f98c1d75294600d/dispute-process-flow.png) ## Trigger a dispute in the Sandbox To trigger a test dispute in the Square Sandbox, send a [CreatePayment](https://developer.squareup.com/reference/square/payments-api/create-payment) request with one of the following charge amounts. The Sandbox creates a `Dispute` object whose `reason` corresponds to the charge amount set. |Charge amount | Dispute reason | |:-------------|:-----------------------| |8801 |AMOUNT_DIFFERS | |8802 |CANCELLED | |8803 |DUPLICATE | |8804 |NO_KNOWLEDGE | |8805 |NOT_AS_DESCRIBED | |8806 |NOT_RECEIVED | |8807 |PAID_BY_OTHER_MEANS | |8808 |CUSTOMER_REQUESTS_CREDIT| |8809 |EMV_LIABILITY_SHIFT | {% aside type="info" %} The amounts shown are in the lowest denomination of the currency provided in the request. For example, USD is in cents. {% /aside %} The following Sandbox request creates a payment for the amount of $88.03 USD. This generates a `Dispute` with the reason of `DUPLICATE`. When testing payments in the Sandbox, you can use one of the [test payment tokens](devtools/sandbox/payments#payments-api-endpoint-testing) as the `source_id` in the request. ```` The following is an example response: ```json { "payment": { "id": "BqzL87eLnz9gJRuoiIYSY44p9ORZY", "created_at": "2022-05-02T15:08:42.217Z", "updated_at": "2022-05-02T15:08:42.481Z", "amount_money": { "amount": 8803, "currency": "USD" }, "status": "COMPLETED", "delay_duration": "PT168H", "source_type": "CARD", "card_details": { "status": "CAPTURED", "card": { "card_brand": "VISA", "last_4": "5858", "exp_month": 5, "exp_year": 2024, "fingerprint": "sq-1-il5Ik5fUhNr9fTjLEWcZWaLpV0Ozij13Sry1jvqRiybpgAgbv4rOT3DPxVjs_tJOzQ", "card_type": "CREDIT", "prepaid_type": "NOT_PREPAID", "bin": "453275" }, "entry_method": "KEYED", "cvv_status": "CVV_ACCEPTED", "avs_status": "AVS_ACCEPTED", "statement_description": "SQ *DEFAULT TEST ACCOUNT", "card_payment_timeline": { "authorized_at": "2022-05-02T15:08:42.327Z", "captured_at": "2022-05-02T15:08:42.482Z" } }, "location_id": "L1HN3ZMTZEB87", "order_id": "QKE7BmUeP58xIxdVeL4ps2CQ5c4F", "risk_evaluation": { "created_at": "2022-05-02T15:08:42.327Z", "risk_level": "NORMAL" }, "total_money": { "amount": 8803, "currency": "USD" }, "approved_money": { "amount": 8803, "currency": "USD" }, "receipt_number": "7tMe", "receipt_url": "https://squareupsandbox.com/receipt/preview/7tMeeuCCMOF3Xh1iRyGmdd1MuSBZY", "delay_action": "CANCEL", "delayed_until": "2022-05-09T15:08:42.217Z", "application_details": { "square_product": "ECOMMERCE_API", "application_id": "sandbox-sq0idb-TINhb_yF4yhyks_OiADYzA" }, "version_token": "iI6Z7ot8md2wc9V6Xp0sF2hBdiKzT4f2LxcANqA86yw6o" } } ``` ## Get new disputes Your application receives new `Dispute` objects by listening for the [dispute.created](https://developer.squareup.com/reference/square/disputes-api/webhooks/dispute.created) webhook or by calling the [ListDisputes](https://developer.squareup.com/reference/square/disputes-api/list-disputes) endpoint. ### Listen for the dispute.created notification If you set up a subscription for [disputes webhooks,](disputes-api/process-disputes#webhook-notifications) your listening endpoint receives a `dispute.created` notification whenever a new dispute is created. The body of the notification contains the new `Dispute` object. ```json { "merchant_id": "MGYG72TMMXMCQ", "location_id": "L1HN3ZMTZEB87", "type": "dispute.created", "event_id": "4f5cf45b-ff26-4ec1-b720-4d4e934883f9", "created_at": "2022-05-02T15:08:42.217Z", "data": { "type": "dispute", "id": "OWo09e15R49UrfXjG5Bod", "object": { "dispute": { "amount_money": { "amount": 8803, "currency": "USD" }, "brand_dispute_id": "P9td9draSX6ACrUO3KEI6Q", "card_brand": "VISA", "created_at": "2022-05-02T15:08:42.217Z", "disputed_payment": { "payment_id": "BqzL87eLnz9gJRuoiIYSY44p9ORZY" }, "due_at": "2022-05-16T00:00:00.000Z", "id": "OWo09e15R49UrfXjG5Bod", "location_id": "L1HN3ZMTZEB87", "reason": "DUPLICATE", "reported_at": "2022-05-02T15:08:42.217Z", "state": "EVIDENCE_REQUIRED", "updated_at": "2022-05-02T15:40:42.978Z" } } } } ``` ### Get a list of disputes If you don't want to use webhook notifications, you can make periodic calls to [ListDisputes](https://developer.squareup.com/reference/square/disputes-api/list-disputes). An unfiltered request returns all disputes, so it might be helpful to filter the request to only return disputes awaiting seller action. {% aside type="important" %} A seller typically has 14 days or less to respond to a new dispute. Depending on how often your application calls `ListDisputes`, information about disputes might be delayed getting to sellers. Consider implementing webhook notifications to receive dispute data as it is created. {% /aside %} The following [ListDisputes](https://developer.squareup.com/reference/square/disputes-api/list-disputes) request is filtered to return only open disputes in the `EVIDENCE_REQUIRED` state (that is, awaiting seller action): ```` The following sample response shows two disputes: the `DUPLICATE` dispute created in the previous step and a dispute with the `reason` of `NOT_RECEIVED`. Both are awaiting action. ```json { "disputes": [ { "amount_money": { "amount": 8803, "currency": "USD" }, "reason": "DUPLICATE", "state": "EVIDENCE_REQUIRED", "due_at": "2022-05-16T00:00:00.000Z", "disputed_payment": { "payment_id": "BqzL87eLnz9gJRuoiIYSY44p9ORZY" }, "card_brand": "VISA", "created_at": "2022-05-02T15:08:42.217Z", "updated_at": "2022-05-02T15:08:42.481Z", "brand_dispute_id": "P9td9draSX6ACrUO3KEI6Q", "location_id": "L1HN3ZMTZEB87", "id": "OWo09e15R49UrfXjG5Bod", "reported_at": "2022-05-02T00:00:00.000Z" }, { "amount_money": { "amount": 8806, "currency": "USD" }, "reason": "NOT_RECEIVED", "state": "EVIDENCE_REQUIRED", "due_at": "2022-06-16T00:00:00.000Z", "disputed_payment": { "payment_id": "rRozdpYme93hXWPPUIXEjvB8kdVZY" }, "card_brand": "VISA", "created_at": "2022-06-02T15:46:06.585Z", "updated_at": "2022-06-02T15:52:28.759Z", "brand_dispute_id": "PGAM7Z22So2Y5kZVYCEbQA", "version": 2, "location_id": "L1HN3ZMTZEB87", "id": "yVD4obqS9rn7Zrr9MIS3P", "reported_at": "2022-06-02T00:00:00.000Z" } ] } ``` {% aside type="important" %} * If the `due_at` deadline passes with no action from the seller, Square automatically challenges the dispute on the seller’s behalf. * If a seller takes an initial action on a dispute by [using the Disputes Dashboard](https://squareup.com/help/us/en/article/3882), the dispute state changes to `PROCESSING` and your application cannot take further action. {% /aside %} ## Respond to the dispute Sellers respond by either accepting or challenging the dispute. ### Accepting the dispute To accept the dispute on behalf of a seller, have your application call [AcceptDispute](https://developer.squareup.com/reference/square/disputes-api/accept-dispute). This isn't reversible. If a dispute is accepted, it cannot be challenged later. ```` The following response shows that the `state` of the test dispute has changed to `ACCEPTED`: ```json { "dispute":{ "amount_money": { "amount": 8803, "currency": "USD" }, "reason": "DUPLICATE", "state": "ACCEPTED", "due_at": "2022-05-16T00:00:00.000Z", "disputed_payment": { "payment_id": "BqzL87eLnz9gJRuoiIYSY44p9ORZY" }, "card_brand": "VISA", "created_at": "2022-05-02T15:46:06.585Z", "updated_at": "2022-05-02T15:52:28.759Z", "brand_dispute_id": "PGAM7Z22So2Y5kZVYCEbQA", "version": 2, "location_id": "L1HN3ZMTZEB87", "id": "OWo09e15R49UrfXjG5Bod", "reported_at": "2022-05-02T00:00:00.000Z" } } ``` ### Challenging the dispute Challenging a dispute using the Disputes API is a two-step process: 1. **Upload evidence** - Your application provides one or more pieces of [evidence](/disputes-api/process-disputes#evidence-types) related to the payment. These can be images, PDFs, or text. For more information about the requirements and best practices for uploading evidence, see [Uploading evidence.](disputes-api/process-disputes#uploading-evidence) 2. **Submit the evidence** - Your application calls the [SubmitEvidence](https://developer.squareup.com/reference/square/disputes-api/submit-evidence) endpoint to submit the provided evidence to the bank. #### Testing a dispute challenge For testing purposes, disputes managed in the Square Sandbox can be `WON` or `LOST` by submitting a piece of evidence with the name evidence_won or evidence_lost. Submitting any of the allowed file types with either of these names causes an automatic `WON` or `LOST` state change. Suppose you're testing a sample dispute in the Sandbox with the `reason` of `NOT_RECEIVED`. The following example call to [CreateDisputeEvidenceFile](https://developer.squareup.com/reference/square/disputes-api/create-dispute-evidence-file) uploads an image delivery-confirmation.png as `PROOF_OF_DELIVERY_DOCUMENTATION`. ```` To complete testing and trigger an automatic `WON` or `LOST` state for the dispute, make another call to `CreateDisputeEvidenceFile` and include a file of the `application/pdf` type named evidence_won.pdf (to test a winning dispute state) or evidence_lost.pdf (to test a losing dispute state). ```` Finally, submit the evidence using the [SubmitEvidence](https://developer.squareup.com/reference/square/disputes-api/submit-evidence) endpoint. Don't call `SubmitEvidence` for each piece of uploaded evidence. Call the endpoint after the complete body of evidence has been uploaded to Square. By calling `SubmitEvidence`, the challenge process starts and you can no longer add or remove evidence. ```` The following is an example response: ```json { "dispute": { "amount_money": { "amount": 8806, "currency": "USD" }, "reason": "NOT_RECEIVED", "state": "PROCESSING", "due_at": "2022-06-16T00:00:00.000Z", "disputed_payment": { "payment_id": "rRozdpYme93hXWPPUIXEjvB8kdVZY" }, "card_brand": "VISA", "created_at": "2022-06-02T16:38:37.460Z", "updated_at": "2022-06-03T15:36:53.297Z", "brand_dispute_id": "P9td9draSX6ACrUO3KEI6Q", "version": 5, "location_id": "L1HN3ZMTZEB87", "id": "yVD4obqS9rn7Zrr9MIS3P", "reported_at": "2022-06-02T00:00:00.000Z" } } ``` ## Verify dispute state After a seller submits evidence to challenge a dispute, the `state` changes to `PROCESSING` while the bank deliberates. Your application can listen for the `dispute.state.updated` webhook notification to receive the most timely notification when a bank responds to the dispute challenge. When testing the Disputes API in the Square Sandbox, you can cause a dispute state change to `WON` or `LOST` by submitting a piece of evidence named evidence_won or evidence_lost, respectively. Because there is no bank involved in Sandbox disputes, if you submit a dispute without any evidence with these names, the state changes to `PROCESSING`, but doesn't resolve. In the previous step, delivery-confirmation.png and evidence_won.pdf were submitted as evidence for a dispute. The `state` changes to `WON`, and the webhook notification contains the following data: ```json { "merchant_id": "MGYG72TMMXMCQ", "location_id": "L1HN3ZMTZEB87", "type": "dispute.state.updated", "event_id": "a6c77a1e-d426-4659-a585-db13fbd76c12", "created_at": "2022-06-02T14:55:09.831Z", "data": { "type": "dispute", "id": "yVD4obqS9rn7Zrr9MIS3P", "object": { "dispute": { "amount_money": { "amount": 8806, "currency": "USD" }, "brand_dispute_id": "P9td9draSX6ACrUO3KEI6Q", "card_brand": "VISA", "created_at": "2022-06-02T16:38:37.460Z", "disputed_payment": { "payment_id": "rRozdpYme93hXWPPUIXEjvB8kdVZY" }, "due_at": "2022-06-16T00:00:00.000Z", "id": "yVD4obqS9rn7Zrr9MIS3P", "location_id": "L1HN3ZMTZEB87", "reason": "NOT_RECEIVED", "reported_at": "2022-06-02T00:00:00.000Z", "state": "WON", "updated_at": "2022-06-02T14:55:09.831Z", "version": 6 } } } } ``` Another way to receive information about a dispute is to call [RetrieveDispute](https://developer.squareup.com/reference/square/disputes-api/retrieve-dispute) with a dispute ID. Note that it might take a bank several days or more to respond to a dispute challenge. Therefore, if your application regularly queries for information about open disputes, it might take time to receive new information. ```` The following is an example response: ```json { "dispute": { "amount_money": { "amount": 8806, "currency": "USD" }, "reason": "NOT_RECEIVED", "state": "WON", "due_at": "2022-06-16T00:00:00.000Z", "disputed_payment": { "payment_id": "rRozdpYme93hXWPPUIXEjvB8kdVZY" }, "card_brand": "VISA", "created_at": "2022-06-02T16:38:37.460Z", "updated_at": "2022-06-03T15:36:53.297Z", "brand_dispute_id": "PGAM7Z22So2Y5kZVYCEbQA", "version": 6, "location_id": "L1HN3ZMTZEB87", "id": "yVD4obqS9rn7Zrr9MIS3P", "reported_at": "2022-06-02T00:00:00.000Z" } } ``` --- # Payouts API > Source: https://developer.squareup.com/docs/payouts-api/overview > Status: PUBLIC > Languages: All > Platforms: All Learn how to use the Payouts API to track payouts made from a Square account to a seller's bank for credits and vice versa for debits. **Applies to:** [Payouts API](https://developer.squareup.com/reference/square/payouts-api) {% subheading %}Learn how the Square API represents payouts.{% /subheading %} {% toc hide=true /%} ## Overview A payout is a transfer of funds from a seller's Square account to another banking destination, most often the seller’s external bank account. In the United States, a typical payout includes transactions made after 5PM PST on one business day and before 5PM PST on the next business day. In Australia, Japan, and the United Kingdom, the cutoff is 12AM local time. Due to this payout schedule, there can be a discrepancy between the orders that a seller processes on a given business day, reflected in their Square Dashboard balance and the funds in their bank account. A payout generates a `Payout` object and corresponding `PayoutEntry` objects: * `Payout` summarizes a transfer of funds. Calls to [ListPayouts](https://developer.squareup.com/reference/square/payouts-api/list-payouts) and [GetPayout](https://developer.squareup.com/reference/square/payouts-api/get-payout) return `Payout` objects. * `PayoutEntry` lists each transaction included in a `Payout`. Calls to [ListPayoutEntries](https://developer.squareup.com/reference/square/payouts-api/list-payout-entries) return `PayoutEntry` objects. With the Payouts API, you can reconcile a seller's Square Dashboard balance to their bank account balance. You can also combine calls to the Payouts API with requests to the Payments API and Orders API to model the seller’s Square balance in your application. {% aside type="info" %} The Payouts API doesn’t include data that's older than January 2021. To access this historical data, use the Square Dashboard. {% /aside %} ## How the Payouts API works ### Payout object Calls to [ListPayouts](https://developer.squareup.com/reference/square/payouts-api/list-payouts) and [GetPayout](https://developer.squareup.com/reference/square/payouts-api/get-payout) return `Payout` objects. A `Payout` object represents a payout, which is the sum of all transactions included in a transfer of funds from a seller’s Square account to an external banking destination. The following example `Payout` represents a transfer of $97.10 from a seller’s Square account to their bank account: ```json { "payout": { "id": "po_1234567890abcdef", "status": "PAID", "location_id": "loc_0987654321fedcba", "created_at": "2024-12-04T00:09:10Z", "updated_at": "2024-12-04T00:09:10Z", "amount_money": { "amount": 9710, "currency_code": "USD" }, "destination": { "type": "BANK_ACCOUNT", "id": "bact_abcdef1234567890" }, "version": 1, "type": "BATCH", "arrival_date": "2024-12-04", "end_to_end_id": "e2e_1234abcd5678efgh" } } ``` The following list describes some of the key `Payout` response fields. For a comprehensive definition of the object that details each field, see [Payout](https://developer.squareup.com/reference/square/objects/Payout) in the API Reference. * `id` - A unique identifier for the payout. Pass an `id` in a request to [ListPayoutEntries](https://developer.squareup.com/reference/square/payouts-api/list-payout-entries) to look up the transactions included in the payout. Each transaction is represented as a `PayoutEntry`. * `status` - The state of the `Payout` are: - `SENT` - The initial status of the payout. - `PAID` - The payout is successfully deposited. - `FAILED` - The seller's bank notified Square that the payout failed. A payout that's initially marked as `PAID` can transition to `FAILED` if the response from the seller's bank comes back later than Square expects. ![A diagram showing the Payouts API states.](//images.ctfassets.net/1nw4q0oohfju/6DpdkMDHr4gtSbRi3gjj5R/d2403eba6dc881b0863d0e47bee54398/payout-api-states.png) {% aside type="info" %} You can set up webhooks to notify you of payout state changes. For example, you might use a webhook to set up an email alert for when a payout state changes from `PAID` to `FAILED`. For more information about using webhooks, see [Square Webhooks](webhooks/overview). {% /aside %} * `created_at` - The timestamp of when the payout is sent to the banking destination. * `amount_money` - The amount and currency of the payout that's either sent to or pulled from the seller's banking destination. A positive value for the `amount_money` field represents a credit that increases the balance of the seller's banking destination. A negative value for the `amount_money` field represents a debit and decreases the balance of the seller's banking destination. * `destination` - The type and ID, where applicable, of the banking destination to which the payout is made. If the `amount_money` field is negative, the funds reflected in this `Payout` were deducted from the `destination`. * `version` - The version number, which starts at `0` and is incremented each time an update is made to the payout record. You can use the version field for [optimistic concurrency](build-basics/common-api-patterns/optimistic-concurrency). * `type` - The type of payout: `BATCH` or `SIMPLE`. A `BATCH` payout is a transfer of a seller's entire Square balance. Most payouts are `BATCH` payouts. A `SIMPLE` payout is a transfer of any amount less than the entire balance. * `end_to_end_id` - A unique ID for the payout that might appear on the seller's bank statement, if the seller is based in the United States. The seller must enable the automatic transfer setting for the `end_to_end_id` field to appear. ### PayoutEntry object Calls to [ListPayoutEntries](https://developer.squareup.com/reference/square/payouts-api/list-payout-entries) return `PayoutEntry` objects. A `PayoutEntry` represents one or more transactions included in a payout. The following `PayoutEntry` corresponds to the previous $97.10 example `Payout`. The `payout_entries` array includes two objects that represent a credit card charge of $150 and a refund of $50, respectively. After fees, the final amount transferred to the seller's bank account is $97.10. ```json { "payout_entries": [ { "id": "poe_1a2b3c4d5e6f7g8h9i0j", "payout_id": "po_12345678-90ab-cdef-1234-567890abcdef", "effective_at": "2022-03-24T03:07:09Z", "type": "CHARGE", "gross_amount_money": { "amount": 15000, "currency_code": "USD" }, "fee_amount_money": { "amount": 465, "currency_code": "USD" }, "net_amount_money": { "amount": 14535, "currency_code": "USD" }, "type_charge_details": { "payment_id": "HVdG62H5K3291d0SGJS6IWd4cSi8YY" } }, { "id": "poe_0a1b2c3d4e5f6g7h8i9j", "payout_id": "po_abcdef12-3456-7890-abcd-ef1234567890", "effective_at": "2022-03-24T03:07:09Z", "type": "REFUND", "gross_amount_money": { "amount": -5000, "currency_code": "USD" }, "fee_amount_money": { "amount": 0, "currency_code": "USD" }, "net_amount_money": { "amount": -5000, "currency_code": "USD" }, "type_refund_details": { "payment_id": "ZVdG62HeMlti8YYf94oxrZ", "refund_id": "ZVdG62HeMlti8YYf94oxrN_dR8Nztxg7umf94oxrN12Ji5r2KW14FAZ" } } ] } ``` For detailed descriptions of each response field, see [PayoutEntry](https://developer.squareup.com/reference/square/objects/PayoutEntry) in the API Reference. ## Advanced payout types ### Cost Plus Cost Plus is a custom pricing plan that a seller negotiates with Square. Under Cost Plus, Square charges an estimated fee at the time of each transaction. At the end of the month, Square makes a one-time adjustment to capture the final fee. {% aside type="important" %} When reconciling transactions for a Cost Plus seller, you need to account for estimated versus final transactions. {% /aside %} For example, Square charges an initial estimated $1 fee for a transaction. One of the `payout_entries` for the next day's `Payout` represents the transaction and accounts for the fee, as shown in the following example: ```json { "payout_entries": [ { "id": "poe_1a2b3c4d5e6f7g8h9i0j", "payout_id": "po_4d28e6c4-7dd5-4de4-8ec9-a059277646a6", "effective_at": "2022-03-24T03:07:09Z", "type": "CHARGE", "gross_amount_money": { "amount": 3462, "currency_code": "USD" }, "fee_amount_money": { "amount": 100, "currency_code": "USD" }, "net_amount_money": { "amount": 3362, "currency_code": "USD" }, "type_charge_details": { "payment_id": "JkL9M8N7O6P5Q4R3S2T1U0V9W8X7Y6Z5" } } ] } ``` At the end of the month, after the Cost Plus adjustment, the final fee for the transaction is only $0.75. Square returns $0.25 to the seller in a reconciliation `Payout`. This reconciliation `Payout` includes all the Cost Plus adjustments for the month as distinct payout entries. Each `PayoutEntry` has a `type` of `FEE`. The example $0.25 `PayoutEntry` for the Cost Plus reconciliation takes the following shape: ```json { "payout_entries": [ { "id": "poe_1234567890abcdef1234567890abcdef", "payout_id": "po_abcdef1234567890abcdef1234567890", "effective_at": "2022-03-24T03:07:09Z", "type": "FEE", "gross_amount_money": { "amount": 25, "currency_code": "USD" }, "fee_amount_money": { "amount": 0, "currency_code": "USD" }, "net_amount_money": { "amount": 25, "currency_code": "USD" }, "type_fee_details": { "payment_id": "JkL9M8N7O6P5Q4R3S2T1U0V9W8X7Y6Z5" } } ] } ``` The `payment_id` is the same `payment_id` attached to the `PayoutEntry` for the original `CHARGE`. ### Gross Settlement Gross Settlement is a custom pricing setup that a seller negotiates with Square. With Gross Settlement, Square doesn't charge transaction fees upfront. Instead, Square debits all processing fees in one lump sum on a monthly basis. This is generally on the 10th of every month, unless the seller and Square arrange otherwise. {% aside type="important" %} When reconciling transactions for a Gross Settlement seller, you need to account for the monthly lump sum debit. {% /aside %} For example, a seller processes a $34.62 transaction. Square doesn't charge a fee. One of the payout entries for the next day’s `Payout` represents the transaction. The `fee_amount_money` value is `0`, as shown in the following example: ```json { "payout_entries": [ { "id": "poe_1a2b3c4d5e6f7g8h9i0j", "payout_id": "po_1a2b3c4d5e6f7g8h9i0j", "effective_at": "2022-03-24T03:07:09Z", "type": "CHARGE", "gross_amount_money": { "amount": 3462, "currency_code": "USD" }, "fee_amount_money": { "amount": 0, "currency_code": "USD" }, "net_amount_money": { "amount": 3462, "currency_code": "USD" }, "type_charge_details": { "payment_id": "XyZ9A8B7C6D5E4F3G2H1I0J9K8L7M6N5" } } ] } ``` At the end of the month, Square charges a $0.75 fee for the transaction. Square debits $0.75 from the seller as part of the reconciliation `Payout`. This reconciliation `Payout` includes all the transaction fees for the month as distinct payout entries. Each `PayoutEntry` has a `type` of `FEE`. The `fee_amount_money` value is always `0`. The $0.75 fee adjustment for a Gross Settlement `PayoutEntry` takes the following shape: ```json { "payout_entries": [ { "id": "poe_1234567890abcdef", "payout_id": "po_0987654321fedcba", "effective_at": "2022-03-24T03:07:09Z", "type": "FEE", "gross_amount_money": { "amount": -75, "currency_code": "USD" }, "fee_amount_money": { "amount": 0, "currency_code": "USD" }, "net_amount_money": { "amount": -75, "currency_code": "USD" } } ] } ``` {% aside type="important" %} Any time that you sync a `PayoutEntry` type of `FEE` or `PROCESSING_FEE`, the `gross_amount_money` value is an update to a previous fee. {% /aside %} ### Instant Deposit {% aside type="info" %} Instant Deposit is currently available in the US, the UK, Canada, and Australia. {% /aside %} With Instant Deposit, a seller can deposit their funds to a linked bank account or debit card within seconds. A seller triggers an Instant Deposit from the Square Dashboard or Square Point of Sale. Square charges a service fee for Instant Deposit. An Instant Deposit generates a `Payout` object and an associated `PayoutEntry` with a `type` of `DEPOSIT_FEE`. {% aside type="warning" %} If the Instant Deposit is transferred to a card, a `payout.payout_fee` is also returned. An Instant Deposit transferred to bank accounts doesn't return this field. For consistency, always use `PayoutEntry` instead of `payout.payout_fee` to calculate fees. {% /aside %} The following example Instant Deposit `Payout` represents a transfer of $70.73 from a seller's Square account to their card. Square charges a $1.26 fee for the transfer, as reflected in `payout.payout_fee`. ```json { "payout": { "id": "po_6542107a-323c-6a93-b9df-cggg3949b7e", "status": "PAID", "location_id": "XZKT883AFFSS4E", "created_at": "2025-01-23T22:04:59Z", "updated_at": "2025-01-23T23:09:09.684Z", "amount_money": { "amount": 7073, "currency_code": "USD" }, "destination": { "type": "CARD", "id": "ccof:e3se0xPa3TF7tOe03GB" }, "version": 2, "type": "BATCH", "payout_fee": [ { "amount_money": { "amount": 126, "currency_code": "USD" }, "effective_at": "2025-01-23T22:04:59Z", "type": "TRANSFER_FEE" } ], "arrival_date": "2025-01-23", "number_of_entries": 4, "end_to_end_id": "613485392229" } } ``` A call to [ListPayoutEntries](https://developer.squareup.com/reference/square/payouts-api/list-payout-entries) returns the following `PayoutEntry` objects for the example `Payout`. In this case, there are three `CHARGE` entries. The sum of their `net_amount` values totals $71.79. Subtracting the one `DEPOSIT_FEE` `net_amount` of $1.26, the total value transferred in the payout to the card is $70.73. ```json { "payout_entries": [ { "id": "poe_GwriiDHHhkgs8kqfQg1bkA2GUxs", "payout_id": "po_6542107a-323c-6a93-b9df-cggg3949b7e", "effective_at": "2025-01-23T22:04:59Z", "type": "DEPOSIT_FEE", "gross_amount_money": { "amount": -126, "currency_code": "USD" }, "fee_amount_money": { "amount": 0, "currency_code": "USD" }, "net_amount_money": { "amount": -126, "currency_code": "USD" }, "type_deposit_fee_details": { "payout_id": "po_6542107a-323c-6a93-b9df-cggg3949b7e" } }, { "id": "poe_Akd_9DYNNA8DBxj9sG8QACRpHx1", "payout_id": "po_6542107a-323c-6a93-b9df-cggg3949b7e", "effective_at": "2025-01-23T21:06:16Z", "type": "CHARGE", "gross_amount_money": { "amount": 2996, "currency_code": "USD" }, "fee_amount_money": { "amount": 88, "currency_code": "USD" }, "net_amount_money": { "amount": 2908, "currency_code": "USD" }, "type_charge_details": { "payment_id": "TVkjM7i1BXWSwQwp7ZVxZyQjwJCZY" } }, { "id": "poe_QJUQa8cew6DFyQ3yixbympU_u8F", "payout_id": "po_6542107a-323c-6a93-b9df-cggg3949b7e", "effective_at": "2025-01-23T20:08:01Z", "type": "CHARGE", "gross_amount_money": { "amount": 2140, "currency_code": "USD" }, "fee_amount_money": { "amount": 66, "currency_code": "USD" }, "net_amount_money": { "amount": 2074, "currency_code": "USD" }, "type_charge_details": { "payment_id": "bXbR15tELfb6ChVeh5A0Ye6EvTAZY" } }, { "id": "poe_9lnaZeIyJFQKzRanQRSsxLHAbr9", "payout_id": "po_6542107a-323c-6a93-b9df-cggg3949b7e", "effective_at": "2025-01-23T18:39:48Z", "type": "CHARGE", "gross_amount_money": { "amount": 2286, "currency_code": "USD" }, "fee_amount_money": { "amount": 69, "currency_code": "USD" }, "net_amount_money": { "amount": 2217, "currency_code": "USD" }, "type_charge_details": { "payment_id": "vHAg6urZptF4FVmX78MxRKgaWfJZY" } } ] } ``` ### Scheduled Deposit A Scheduled Deposit is an Instant Deposit that a seller schedules to occur at their close of business on a specific day of the week. A Scheduled Deposit `Payout` has an associated `PayoutEntry` with a `type` of `DEPOSIT_FEE`, like the previous example for an Instant Deposit. ## Payouts API operations You can execute the following operations with the Payouts API: * [ListPayouts](https://developer.squareup.com/reference/square/payouts-api/list-payouts) - Retrieve a list of payouts for a provided location ID. * [GetPayout](https://developer.squareup.com/reference/square/payouts-api/get-payout) - Retrieve details about a specific payout. * [ListPayoutEntries](https://developer.squareup.com/reference/square/payouts-api/list-payout-entries) - Retrieve a list of all the payout entries associated with a provided payout ID. --- # List Payouts > Source: https://developer.squareup.com/docs/payouts-api/list-payouts > Status: PUBLIC > Languages: All > Platforms: All The ListPayouts endpoint provides a list of payouts for a location. If you don't specify a location, the main or default location is used. **Applies to:** [Payouts API](payouts-api/overview) | [OAuth API](oauth-api/overview) {% subheading %}Learn how to filter payouts by location ID, status, and time range and sort them in ascending or descending order.{% /subheading %} {% toc hide=true /%} ## Overview The [ListPayouts](https://developer.squareup.com/reference/square/payouts-api/list-payouts) endpoint provides a list of payouts for a location. If you don't specify a location, the [main or default location](locations-api) is used. To call this endpoint, set `PAYOUTS_READ` for the OAuth scope. The `ListPayouts` endpoint supports pagination and a limit field that your application can use to indicate the page size (the number of items to return in the response). The default and maximum page size is 100 items. For more information, see [Pagination](build-basics/common-api-patterns/pagination). ```` The following is an example response: ```json { "payouts": [ { "id": "po_d001cb2c-82cd-11ec-b8a4-02420a140004", "status": "SENT", "location_id": "{LOCATION_ID}", "created_at": "2022-01-31T19:41:41Z", "updated_at": "2022-01-31T19:41:41Z", "amount_money": { "amount": -88, "currency_code": "EUR" }, "destination": { "type": "BANK_ACCOUNT", "id": "bact:cgvL1yv43VFjexample" }, "version": 1, "type": "BATCH", "arrival_date": "2022-02-02", "end_to_end_id": "L2100000006" }, { "id": "po_989fdac5-7fa9-11ec-b8a4-02420a140004", "status": "SENT", "location_id": "{LOCATION_ID}", "created_at": "2022-01-27T19:44:53Z", "updated_at": "2022-01-27T19:44:53Z", "amount_money": { "amount": 3997, "currency_code": "EUR" }, "destination": { "type": "BANK_ACCOUNT", "id": "bact:cgvL1yv43VFjexample" }, "version": 1, "type": "BATCH", "arrival_date": "2022-01-28", "end_to_end_id": "L2100000005" }, { "id": "po_eb4dd46f-29f9-11ec-aaa1-02420a140004", "status": "SENT", "location_id": "{LOCATION_ID}", "created_at": "2021-10-10T18:43:11Z", "updated_at": "2021-10-10T18:43:11Z", "amount_money": { "amount": 229, "currency_code": "EUR" }, "destination": { "type": "BANK_ACCOUNT", "id": "bact:cgvL1yv43VFjexample" }, "version": 1, "type": "BATCH", "end_to_end_id": "L2100000004" }, { "id": "po_3cd4afed-f878-11eb-a8bb-02420a140009", "status": "SENT", "location_id": "{LOCATION_ID}", "created_at": "2021-08-08T18:41:27Z", "updated_at": "2021-08-08T18:41:27Z", "amount_money": { "amount": 26, "currency_code": "EUR" }, "destination": { "type": "BANK_ACCOUNT", "id": "bact:cgvL1yv43VFjexample" }, "version": 1, "type": "BATCH", "end_to_end_id": "L2100000003" }, { "id": "po_dd5909a2-ee44-11eb-a8bb-02420a140009", "status": "SENT", "location_id": "{LOCATION_ID}", "created_at": "2021-07-26T19:08:30Z", "updated_at": "2021-07-26T19:08:30Z", "amount_money": { "amount": 239, "currency_code": "EUR" }, "destination": { "type": "BANK_ACCOUNT", "id": "bact:cgvL1yv43VFjexample" }, "version": 1, "type": "BATCH", "end_to_end_id": "L2100000002" }, { "id": "po_dd590570-ee44-11eb-a8bb-02420a140009", "status": "SENT", "location_id": "{LOCATION_ID}", "created_at": "2021-07-26T19:08:30Z", "updated_at": "2021-07-26T19:08:30Z", "amount_money": { "amount": 91, "currency_code": "EUR" }, "destination": { "type": "BANK_ACCOUNT", "id": "bact:cgvL1yv43VFjexample" }, "version": 1, "type": "BATCH", "end_to_end_id": "L2100000001" }, { "id": "po_070431e4-e351-11eb-a8bb-02420a140009", "status": "SENT", "location_id": "{LOCATION_ID}", "created_at": "2021-07-12T20:37:51Z", "updated_at": "2022-03-27T20:37:51Z", "amount_money": { "amount": 457, "currency_code": "EUR" }, "destination": { "type": "BANK_ACCOUNT", "id": "bact:cgvL1yv43VFjexample" }, "version": 1, "type": "BATCH", "arrival_date": "2021-07-13", "end_to_end_id": "L2100000000" } ] } ``` To see payouts for a specific location, specify the location ID: ```` The following is an example response: ```json { "payouts": [ { "id": "po_d001cb2c-82cd-11ec-b8a4-02420a140004", "status": "SENT", "location_id": "{LOCATION_ID}", "created_at": "2022-01-31T19:41:41Z", "updated_at": "2022-01-31T19:41:41Z", "amount_money": { "amount": -88, "currency_code": "EUR" }, "destination": { "type": "BANK_ACCOUNT", "id": "bact:cgvL1yv43VFjexample" }, "version": 1, "type": "BATCH", "arrival_date": "2022-02-02", "end_to_end_id": "L2100000006" }, { "id": "po_989fdac5-7fa9-11ec-b8a4-02420a140004", "status": "SENT", "location_id": "{LOCATION_ID}", "created_at": "2022-01-27T19:44:53Z", "updated_at": "2022-01-27T19:44:53Z", "amount_money": { "amount": 3997, "currency_code": "EUR" }, "destination": { "type": "BANK_ACCOUNT", "id": "bact:cgvL1yv43VFjexample" }, "version": 1, "type": "BATCH", "arrival_date": "2022-01-28", "end_to_end_id": "L2100000005" }, { "id": "po_eb4dd46f-29f9-11ec-aaa1-02420a140004", "status": "SENT", "location_id": "{LOCATION_ID}", "created_at": "2021-10-10T18:43:11Z", "updated_at": "2021-10-10T18:43:11Z", "amount_money": { "amount": 229, "currency_code": "EUR" }, "destination": { "type": "BANK_ACCOUNT", "id": "bact:cgvL1yv43VFjexample" }, "version": 1, "type": "BATCH", "end_to_end_id": "L2100000004" }, { "id": "po_3cd4afed-f878-11eb-a8bb-02420a140009", "status": "SENT", "location_id": "{LOCATION_ID}", "created_at": "2021-08-08T18:41:27Z", "updated_at": "2021-08-08T18:41:27Z", "amount_money": { "amount": 26, "currency_code": "EUR" }, "destination": { "type": "BANK_ACCOUNT", "id": "bact:cgvL1yv43VFjexample" }, "version": 1, "type": "BATCH", "end_to_end_id": "L2100000003" }, { "id": "po_dd5909a2-ee44-11eb-a8bb-02420a140009", "status": "SENT", "location_id": "{LOCATION_ID}", "created_at": "2021-07-26T19:08:30Z", "updated_at": "2021-07-26T19:08:30Z", "amount_money": { "amount": 239, "currency_code": "EUR" }, "destination": { "type": "BANK_ACCOUNT", "id": "bact:cgvL1yv43VFjexample" }, "version": 1, "type": "BATCH", "end_to_end_id": "L2100000002" }, { "id": "po_dd590570-ee44-11eb-a8bb-02420a140009", "status": "SENT", "location_id": "{LOCATION_ID}", "created_at": "2021-07-26T19:08:30Z", "updated_at": "2021-07-26T19:08:30Z", "amount_money": { "amount": 91, "currency_code": "EUR" }, "destination": { "type": "BANK_ACCOUNT", "id": "bact:cgvL1yv43VFjexample" }, "version": 1, "type": "BATCH", "end_to_end_id": "L2100000001" }, { "id": "po_070431e4-e351-11eb-a8bb-02420a140009", "status": "SENT", "location_id": "{LOCATION_ID}", "created_at": "2021-07-12T20:37:51Z", "updated_at": "2022-03-27T20:37:51Z", "amount_money": { "amount": 457, "currency_code": "EUR" }, "destination": { "type": "BANK_ACCOUNT", "id": "bact:cgvL1yv43VFjexample" }, "version": 1, "type": "BATCH", "arrival_date": "2021-07-13", "end_to_end_id": "L2100000000" } ] } ``` By default, results are returned from oldest to newest (or Z to A) in descending order. To switch to ascending order, set `sort_order` to `ASC`. For more details, see [SortOrder](https://developer.squareup.com/reference/square/enums/SortOrder). To see payouts in a specific time range, specify the dates in the following format (see [Working with Dates](build-basics/common-data-types/working-with-dates)): ```` The following is an example response: ```json { "payouts": [ { "id": "po_dd590570-ee44-11eb-a8bb-02420a140009", "status": "SENT", "location_id": "{LOCATION_ID}", "created_at": "2021-07-26T19:08:30Z", "updated_at": "2021-07-26T19:08:30Z", "amount_money": { "amount": 91, "currency_code": "EUR" }, "destination": { "type": "BANK_ACCOUNT", "id": "bact:cgvL1yv43VFjexample" }, "version": 1, "type": "BATCH", "end_to_end_id": "L2100000000" }, { "id": "po_dd5909a2-ee44-11eb-a8bb-02420a140009", "status": "SENT", "location_id": "{LOCATION_ID}", "created_at": "2021-07-26T19:08:30Z", "updated_at": "2021-07-26T19:08:30Z", "amount_money": { "amount": 239, "currency_code": "EUR" }, "destination": { "type": "BANK_ACCOUNT", "id": "bact:cgvL1yv43VFjexample" }, "version": 1, "type": "BATCH", "end_to_end_id": "L2100000001" }, { "id": "po_070431e4-e351-11eb-a8bb-02420a140009", "status": "SENT", "location_id": "{LOCATION_ID}", "created_at": "2021-07-12T20:37:51Z", "updated_at": "2022-03-27T20:37:51Z", "amount_money": { "amount": 457, "currency_code": "EUR" }, "destination": { "type": "BANK_ACCOUNT", "id": "bact:cgvL1yv43VFjexample" }, "version": 1, "type": "BATCH", "arrival_date": "2021-07-13", "end_to_end_id": "L2100000002" } ] } ``` ## See also * [Bank Accounts API](bank-accounts-api) * [Payment APIs and SDKs](payments-overview) * [Disputes API](disputes-api/overview) * [Pagination](build-basics/common-api-patterns/pagination) --- # Get Payout > Source: https://developer.squareup.com/docs/payouts-api/get-payout > Status: PUBLIC > Languages: All > Platforms: All The GetPayout endpoint provides details about a specific payout. You need to pass the payout ID as an argument to this endpoint. **Applies to:** [Payouts API](payouts-api/overview) {% subheading %}Learn how to view details about a specific payout.{% /subheading %} {% toc hide=true /%} ## Overview The [GetPayout](https://developer.squareup.com/reference/square/payouts-api/get-payout) endpoint provides details about a specific payout. You need to pass the payout ID as an argument to this endpoint. To call this endpoint, set `PAYOUTS_READ` for the OAuth scope. If you don't specify a location, the [main or default location](locations-api) is used. ```` The following is an example response: ```json { "payout": { "id": "po_070431e4-e351-11eb-a8bb-02420a140009", "status": "SENT", "location_id": "{LOCATION_ID}", "created_at": "2021-07-12T20:37:51Z", "updated_at": "2021-07-12T20:37:51Z", "amount_money": { "amount": 457, "currency_code": "EUR" }, "destination": { "type": "BANK_ACCOUNT", "id": "bact:cgvL1yv43VFjexample" }, "version": 1, "type": "BATCH", "end_to_end_id": "L2100000000" } } ``` ## See also * [Bank Accounts API](bank-accounts-api) * [Payment APIs and SDKs](payments-overview) * [Disputes API](disputes-api/overview) --- # Square Node.js SDK Quickstart > Source: https://developer.squareup.com/docs/sdks/nodejs/quick-start > Status: PUBLIC > Languages: All > Platforms: All Learn how to quickly set up and test the Square Node.js SDK. {% subheading %}Learn how to quickly set up and test the Square Node.js SDK.{% /subheading %} {% toc hide=true /%} ## Prepare for the Quickstart Before you begin, you need a Square account and account credentials. You use the Square Sandbox for the Quickstart exercise. 1. Create a Square account and an application. For more information, see [Create an Account and Application](get-started/create-account-and-application). 2. Get a Sandbox access token from the Developer Console. For more information, see [Get a personal access token](build-basics/access-tokens#get-a-personal-access-token). 3. Install [Node.js](https://nodejs.org/en/). Square supports Node.js version 10 or later. {% aside type="info" %} If you prefer to skip the following setup steps, download the [Square Node SDK Quickstart](https://github.com/Square-Developers/node-getting-started) sample and follow the instructions in the README. {% /aside %} ## Create a project 1. Open a new terminal window. Create a new directory for your project and then go to that directory. ```bash mkdir quickstart cd ./quickstart ``` 2. Use the `npm` command to create a simple project definition file (package.json). ```bash npm init --yes ``` 4. Install the Square Node.js SDK. ```bash npm install square ``` ## Write code 1. In your project directory, create a file named quickstart.js with the following content: ```javascript const { SquareClient, SquareEnvironment, SquareError } = require("square"); require('dotenv').config() const client = new SquareClient({ token: process.env.SQUARE_ACCESS_TOKEN, environment: SquareEnvironment.Sandbox, }); async function getLocations() { try { let listLocationsResponse = await client.locations.list(); let locations = listLocationsResponse.locations; locations.forEach(function (location) { console.log( location.id + ": " + location.name + ", " + location.address.addressLine1 + ", " + location.address.locality ); }); } catch (error) { if (error instanceof SquareError) { error.errors.forEach(function (e) { console.log(e.category); console.log(e.code); console.log(e.detail); }); } else { console.log("Unexpected error occurred: ", error); } } }; getLocations(); ``` 2. Save the quickstart.js file. This code does the following: * Creates a new `SquareClient` object using your Square access token. For more information, see [Set your Square credentials](sdks/nodejs/quick-start#set-your-square-credentials). * Calls the `client.locations.list` method. * If the request is successful, the code prints the location information on the terminal. ## Set your Square credentials The code in this Quickstart reads your Square Sandbox access token from the `SQUARE_ACCESS_TOKEN` environment variable. This helps avoid the use of hardcoded credentials in your code. For the following commands, replace `yourSandboxAccessToken` with your Square Sandbox access token: ### Linux or macOS ```bash export SQUARE_ACCESS_TOKEN=yourSandboxAccessToken ``` ### Windows: PowerShell ```bash Set-item -Path Env:SQUARE_ACCESS_TOKEN -Value yourSandboxAccessToken ``` ### Windows: Command shell ```bash set SQUARE_ACCESS_TOKEN=yourSandboxAccessToken ``` ## Run the application 1. Run the following command: ```bash node quickstart.js ``` 2. Verify the result. You should see at least one location (Square creates one location when you create a Square account). ## See also * [Common Square API Patterns](sdks/nodejs/common-square-api-patterns) --- # List Payout Entries > Source: https://developer.squareup.com/docs/payouts-api/list-payout-entries > Status: PUBLIC > Languages: All > Platforms: All The ListPayoutEntries endpoint provides a list of payout entries associated with a specific payout. **Applies to:** [Payouts API](payouts-api/overview) | [Orders API](orders-api/what-it-does) {% subheading %}Learn how to retrieve a list of payout entries associated with a specific payout.{% /subheading %} {% toc hide=true /%} ## Overview A payout is a transfer of funds from a seller's Square account to another banking destination. This is most often the seller’s external bank account. A payout generates a `Payout` object and corresponding `PayoutEntry` objects. A `PayoutEntry` details the individual transactions included in a `Payout`. `PayoutEntry` objects can be retrieved using the [ListPayoutEntries](https://developer.squareup.com/reference/square/payouts-api/list-payout-entries) endpoint. ## How to use the endpoint {% aside type="important" %} To call `ListPayoutEntries`, your application needs to ask the sellers who install it for permission to read data about their payouts. Specify `PAYOUTS_READ` for the OAuth scope. For more information, see [OAuth API](oauth-api/overview). {% /aside %} Pass the `payout_id` of the target `Payout` as a path parameter, as in `/payouts/{payout_id}/payout-entries`. You can retrieve the `payout_id` from a call to [ListPayouts](payouts-api/list-payouts). The following example requests all payout entries associated with the payout with the ID `po_1234567890abcdef`: ```curl curl https://connect.squareup.com/v2/payouts/​​po_1234567890abcdef/payout-entries \ -H 'Authorization: Bearer {ACCESS_TOKEN}' \ -H 'Content-Type: application/json' ``` Square responds with a `PayoutEntry` like the following. The example `payout_entries` array includes two objects that represent a credit card charge of $150 and a refund of $50, respectively. ```json { "payout_entries": [ { "id": "poe_1a2b3c4d5e6f7g8h9i0j", "payout_id": "po_12345678-90ab-cdef-1234-567890abcdef", "effective_at": "2022-03-24T03:07:09Z", "type": "CHARGE", "gross_amount_money": { "amount": 15000, "currency_code": "USD" }, "fee_amount_money": { "amount": 465, "currency_code": "USD" }, "net_amount_money": { "amount": 14535, "currency_code": "USD" }, "type_charge_details": { "payment_id": "HVdG62H5K3291d0SGJS6IWd4cSi8YY" } }, { "id": "poe_0a1b2c3d4e5f6g7h8i9j", "payout_id": "po_abcdef12-3456-7890-abcd-ef1234567890", "effective_at": "2022-03-24T03:07:09Z", "type": "REFUND", "gross_amount_money": { "amount": -5000, "currency_code": "USD" }, "fee_amount_money": { "amount": 0, "currency_code": "USD" }, "net_amount_money": { "amount": -5000, "currency_code": "USD" }, "type_refund_details": { "payment_id": "ZVdG62HeMlti8YYf94oxrZ", "refund_id": "ZVdG62HeMlti8YYf94oxrN_dR8Nztxg7umf94oxrN12Ji5r2KW14FAZ" } } ] } ``` {% aside type="info" %} For comprehensive definitions of each `PayoutEntry` response object field, see [API Reference](https://developer.squareup.com/reference/square/objects/PayoutEntry). {% /aside %} {% aside type="tip" %} The `ListPayoutEntries` endpoint supports [pagination](build-basics/common-api-patterns/pagination). {% /aside %} ## How to use the \_details field The `_details` response field includes any additional information about the payout entry, if available. You can use this information in subsequent requests to other endpoints to learn more about the transaction. For example, the following `PayoutEntry` represents a credit card charge of $150: ```json { "payout_entries": [ { "id": "poe_1a2b3c4d5e6f7g8h9i0j", "payout_id": "po_12345678-90ab-cdef-1234-567890abcdef", "effective_at": "2022-03-24T03:07:09Z", "type": "CHARGE", "gross_amount_money": { "amount": 15000, "currency_code": "USD" }, "fee_amount_money": { "amount": 465, "currency_code": "USD" }, "net_amount_money": { "amount": 14535, "currency_code": "USD" }, "type_charge_details": { "payment_id": "HVdG62H5K3291d0SGJS6IWd4cSi8YY" } } ] } ``` You can use the `payment_id` returned under `type_charge_details` to retrieve the `Payment` object for the transaction. Pass the ID as a path parameter in a request to [GetPayment](https://developer.squareup.com/reference/square/payments-api/get-payment), as in `/payments/{payment_id}`. The following example requests shows details about the payment with the ID `HVdG62H5K3291d0SGJS6IWd4cSi8YY`: ```curl curl https://connect.squareup.com/v2/payments/​​HVdG62H5K3291d0SGJS6IWd4cSi8YY \ -H 'Authorization: Bearer {ACCESS_TOKEN}' \ -H 'Content-Type: application/json' ``` Square returns a [Payment](https://developer.squareup.com/reference/square/objects/Payment) object. You can use the response details to look up even more information. For example, if the payment includes an associated order ID, you can call [RetrieveOrder](https://developer.squareup.com/reference/square/orders-api/retrieve-order) to get details such as any corresponding taxes or tips. {% aside type="important" %} Not all payout entry types include `_details`. All possible `_details` values are listed in the [ListPayoutEntries](https://developer.squareup.com/reference/square/payouts-api/list-payout-entries) API Reference. {% /aside %} ## PayoutEntry types Every `PayoutEntry` includes a `type` field that indicates the type of transaction that generated the entry. The following payout entry types are supported: __A - G__ [ADJUSTMENT](#adjustment) | [APP_FEE_REFUND](#app_fee_refund) | [APP_FEE_REVENUE](#app_fee_revenue) | [AUTOMATIC_BITCOIN_CONVERSIONS](#automatic_bitcoin_conversions) | [AUTOMATIC_BITCOIN_CONVERSIONS_REVERSED](#automatic_bitcoin_conversions_reversed) | [AUTOMATIC_SAVINGS](#automatic_savings) | [AUTOMATIC_SAVINGS_REVERSED](#automatic_savings_reversed) | [BALANCE_FOLDERS_TRANSFER](#balance_folders_transfer) | [BALANCE_FOLDERS_TRANSFER_REVERSED](#balance_folders_transfer_reversed) | [CHARGE ](#charge) | [CREDIT_CARD_REPAYMENT](#credit_card_repayment) | [CREDIT_CARD_REPAYMENT_REVERSED](#credit_card_repayment_reversed) | [DEPOSIT_FEE](#deposit_fee) | [DEPOSIT_FEE_REVERSED](#deposit_fee_reversed) | [DISPUTE](#dispute) | [ESCHEATMENT](#escheatment) | [FEE](#fee) | [FREE_PROCESSING](#free_processing) | [GIFT_CARD_LOAD_FEE](#gift_card_load_fee) | [GIFT_CARD_LOAD_FEE_REFUND](#gift_card_load_fee_refund) | [GIFT_CARD_POOL_TRANSFER](#gift_card_pool_transfer) | [GIFT_CARD_POOL_TRANSFER_REVERSED](#gift_card_pool_transfer_reversed) | __H - P__ [HOLD_ADJUSTMENT](#hold_adjustment) | [INITIAL_BALANCE_CHANGE](#initial_balance_change) | [LOCAL_OFFERS_CASHBACK](#local_offers_cashback) | [LOCAL_OFFERS_FEE](#local_offers_fee) | [MONEY_TRANSFER](#money_transfer) | [MONEY_TRANSFER_REVERSAL](#money_transfer_reversal) | [OPEN_DISPUTE](#open_dispute) | [OTHER](#other) | [OTHER_ADJUSTMENT](#other_adjustment) | [PAID_SERVICE_FEE](#paid_service_fee) | [PAID_SERVICE_FEE_REFUND](#paid_service_fee_refund) | [PAYOUT](#payout) | [PERCENTAGE_PROCESSING_DEACTIVATION](#percentage_processing_deactivation) | [PERCENTAGE_PROCESSING_ENROLLMENT](#percentage_processing_enrollment) | [PERCENTAGE_PROCESSING_REPAYMENT](#percentage_processing_repayment) | [PERCENTAGE_PROCESSING_REPAYMENT_REVERSED](#percentage_processing_repayment_reversed) | [PROCESSING_FEE](#processing_fee) | [PROCESSING_FEE_REFUND](#processing_fee_refund) __R - Z__ [REDEMPTION_CODE](#redemption_code) | [REFUND](#refund) | [RELEASE_ADJUSTMENT](#release_adjustment) | [RESERVE_HOLD](#reserve_hold) | [RESERVE_RELEASE](#reserve_release) | [RETURNED_PAYOUT](#returned_payout) | [SQUARE_CAPITAL_PAYMENT](#square_capital_payment) | [SQUARE_CAPITAL_REVERSED_PAYMENT](#square_capital_reversed_payment) | [SQUARE_PAYROLL_TRANSFER](#square_payroll_transfer) | [SQUARE_PAYROLL_TRANSFER_REVERSED](#square_payroll_transfer_reversed) | [SUBSCRIPTION_FEE](#subscription_fee) | [SUBSCRIPTION_FEE_PAID_REFUND](#subscription_fee_paid_refund) | [SUBSCRIPTION_FEE_REFUND](#subscription_fee_refund) | [TAX_ON_FEE](#tax_on_fee) | [THIRD_PARTY_FEE](#third_party_fee) | [THIRD_PARTY_FEE_REFUND](#third_party_fee_refund) | [UNDO_GIFT_CARD_LOAD_FEE_REFUND](#undo_gift_card_load_fee_refund) | [UNDO_PROCESSING_FEE_REFUND](#undo_processing_fee_refund) ### ADJUSTMENT A manual adjustment applied to the seller's account by Square. ```json { "id": "{id}", "payout_id": "{payout_id}", "effective_at": "2023-04-18T22:26:33Z", "type": "ADJUSTMENT", "gross_amount_money": { "amount": -2500, "currency_code": "USD" }, "fee_amount_money": { "amount": 0, "currency_code": "USD" }, "net_amount_money": { "amount": -2500, "currency_code": "USD" } } ``` ### APP_FEE_REFUND A refund for an application fee on a payment. ```json { "id": "{id}", "payout_id": "{payout_id}", "effective_at": "2023-01-05T18:20:44Z", "type": "APP_FEE_REFUND", "gross_amount_money": { "amount": -40, "currency_code": "EUR" }, "fee_amount_money": { "amount": 0, "currency_code": "EUR" }, "net_amount_money": { "amount": -40, "currency_code": "EUR" }, "type_app_fee_refund_details": { "payment_id": "{payment_id}", "location_id": "{location_id}" } } ``` ### APP_FEE_REVENUE Revenue generated from an application fee on a payment. ```json { "id": "{id}", "payout_id": "{payout_id}", "effective_at": "2023-01-05T18:20:44Z", "type": "APP_FEE_REVENUE", "gross_amount_money": { "amount": 100, "currency_code": "EUR" }, "fee_amount_money": { "amount": 0, "currency_code": "EUR" }, "net_amount_money": { "amount": 100, "currency_code": "EUR" }, "type_app_fee_revenue_details": { "payment_id": "{payment_id}", "location_id": "{location_id}" } } ``` ### AUTOMATIC_BITCOIN_CONVERSIONS Indicates that the portion of each payment withheld by Square was automatically converted into bitcoin using Cash App. The seller manages their bitcoin in their Cash App account. ```json { "id": "{id}", "payout_id": "{payout_id}", "effective_at": "2023-04-04T20:22:06Z", "type": "AUTOMATIC_BITCOIN_CONVERSIONS", "gross_amount_money": { "amount": -858, "currency_code": "USD" }, "fee_amount_money": { "amount": 0, "currency_code": "USD" }, "net_amount_money": { "amount": -858, "currency_code": "USD" } } ``` ### AUTOMATIC_BITCOIN_CONVERSIONS_REVERSED Indicates that a withheld payment, which was scheduled to be converted into bitcoin using Cash App, was deposited back to the Square payments balance. ```json { "id": "{id}", "payout_id": "{payout_id}", "effective_at": "2023-04-04T21:22:06Z", "type": "AUTOMATIC_BITCOIN_CONVERSIONS_REVERSED", "gross_amount_money": { "amount": 858, "currency_code": "USD" }, "fee_amount_money": { "amount": 0, "currency_code": "USD" }, "net_amount_money": { "amount": 858, "currency_code": "USD" } } ``` ### AUTOMATIC_SAVINGS An automatic transfer from the payment processing balance to the Square Savings account. These are generally proportional to the seller's sales. ```json { "id": "{id}", "payout_id": "{payout_id}", "effective_at": "2023-04-25T17:13:40Z", "type": "AUTOMATIC_SAVINGS", "gross_amount_money": { "amount": -702, "currency_code": "USD" }, "fee_amount_money": { "amount": 0, "currency_code": "USD" }, "net_amount_money": { "amount": -702, "currency_code": "USD" }, "type_automatic_savings_details": { "payment_id": "{payment_id}", "payout_id": "{payout_id}" } } ``` ### AUTOMATIC_SAVINGS_REVERSED An automatic transfer from the Square Savings account back to the processing balance. These are generally proportional to the seller's refunds. ```json { "id": "{id}", "payout_id": "{payout_id}", "effective_at": "2023-04-25T17:15:40Z", "type": "AUTOMATIC_SAVINGS_REVERSED", "gross_amount_money": { "amount": 702, "currency_code": "USD" }, "fee_amount_money": { "amount": 0, "currency_code": "USD" }, "net_amount_money": { "amount": 702, "currency_code": "USD" }, "type_automatic_savings_reversed_details": { "payment_id": "{payment_id}", "payout_id": "{payout_id}" } } ``` ### BALANCE_FOLDERS_TRANSFER A transfer of funds to a banking folder. In the United States, the folder name is 'Checking Folder'; in Canada, it's 'Balance Folder'. ```json { "payout_entries": [ { "id": "{id}", "payout_id": "{payout_id}", "effective_at": "2024-02-13T00:46:17Z", "type": "BALANCE_FOLDERS_TRANSFER", "gross_amount_money": { "amount": -5, "currency_code": "CAD" }, "fee_amount_money": { "amount": 0, "currency_code": "CAD" }, "net_amount_money": { "amount": -5, "currency_code": "CAD" } } ] } ``` The following is an example of a `SIMPLE` type payout: ```json { "payout": { "id": "{id}", "status": "PAID", "location_id": "{location_id}", "created_at": "2024-02-12T00:44:14Z", "updated_at": "2024-02-12T01:44:28.667Z", "amount_money": { "amount": 5, "currency_code": "CAD" }, "destination": { "type": "SQUARE_STORED_BALANCE", "id": "" }, "version": 2, "type": "SIMPLE", "arrival_date": "2024-02-11", "number_of_entries": 0 } } ``` ### BALANCE_FOLDERS_TRANSFER_REVERSED A reversal of the transfer of funds from a banking folder. In the United States, the folder name is 'Checking Folder'; in Canada, it's 'Balance Folder'. ```json { "payout_entries": [ ... { "id": "{id}", "payout_id": "{payout_id}", "effective_at": "2024-02-13T00:46:17Z", "type": "BALANCE_FOLDERS_TRANSFER_REVERSED", "gross_amount_money": { "amount": 5, "currency_code": "CAD" }, "fee_amount_money": { "amount": 0, "currency_code": "CAD" }, "net_amount_money": { "amount": 5, "currency_code": "CAD" } } ] } ``` The following is an example of a `SIMPLE` type payout: ```json { "payout": { "id": "{id}", "status": "PAID", "location_id": "{location_id}", "created_at": "2024-02-12T00:44:14Z", "updated_at": "2024-02-12T01:44:28.667Z", "amount_money": { "amount": -5, "currency_code": "CAD" }, "destination": { "type": "SQUARE_STORED_BALANCE", "id": "" }, "version": 2, "type": "SIMPLE", "arrival_date": "2024-02-11", "number_of_entries": 0 } } ``` ### CHARGE A credit card payment capture. ```json { "id": "{id}", "payout_id": "{payout_id}", "effective_at": "2023-01-05T18:20:44Z", "type": "CHARGE", "gross_amount_money": { "amount": 1000, "currency_code": "EUR" }, "fee_amount_money": { "amount": 54, "currency_code": "EUR" }, "net_amount_money": { "amount": 946, "currency_code": "EUR" }, "type_charge_details": { "payment_id": "{payment_id}" } } ``` ### CREDIT_CARD_REPAYMENT Indicates that a repayment toward the outstanding balance on the seller's Square credit card was made. ```json { "id": "{id}", "payout_id": "{payout_id}", "effective_at": "2023-04-28T22:13:30Z", "type": "CREDIT_CARD_REPAYMENT", "gross_amount_money": { "amount": -1077, "currency_code": "USD" }, "fee_amount_money": { "amount": 0, "currency_code": "USD" }, "net_amount_money": { "amount": -1077, "currency_code": "USD" } } ``` ### CREDIT_CARD_REPAYMENT_REVERSED Indicates that a repayment toward the outstanding balance on the seller's Square credit card was reversed. ```json { "id": "{id}", "payout_id": "{payout_id}", "effective_at": "2023-04-28T22:23:30Z", "type": "CREDIT_CARD_REPAYMENT_REVERSED", "gross_amount_money": { "amount": 1077, "currency_code": "USD" }, "fee_amount_money": { "amount": 0, "currency_code": "USD" }, "net_amount_money": { "amount": 1077, "currency_code": "USD" } } ``` ### DEPOSIT_FEE A `PayoutEntry` has a type of `DEPOSIT_FEE` if the entry represents the service fee associated with an Instant Deposit. A seller triggers an Instant Deposit from the Square Dashboard or the Square Point of Sale application. The following example `PayoutEntry` object represents a $1.26 fee for an Instant Deposit: ```json { "id": "poe_GwriiDHHhkgs8kqfQg1bkA2GUxs", "payout_id": "po_6542107a-323c-6a93-b9df-cggg3949b7e", "effective_at": "2025-01-23T22:04:59Z", "type": "DEPOSIT_FEE", "gross_amount_money": { "amount": -126, "currency_code": "USD" }, "fee_amount_money": { "amount": 0, "currency_code": "USD" }, "net_amount_money": { "amount": -126, "currency_code": "USD" }, "type_deposit_fee_details": { "payout_id": "po_6542107a-323c-6a93-b9df-cggg3949b7e" } } ``` {% aside type="info" %} The service fee for a Scheduled Deposit, a type of Instant Deposit, also has a payout entry type of `DEPOSIT_FEE`. {% /aside %} ### DEPOSIT_FEE_REVERSED Indicates that Square returned a fee that was previously assessed because of a deposit, such as an instant deposit, back to the seller's account. ```json { "id": "{id}", "payout_id": "{payout_id}", "effective_at": "2023-04-24T20:03:08Z", "type": "DEPOSIT_FEE_REVERSED", "gross_amount_money": { "amount": 26, "currency_code": "AUD" }, "fee_amount_money": { "amount": 0, "currency_code": "AUD" }, "net_amount_money": { "amount": 26, "currency_code": "AUD" }, "type_deposit_fee_reversed_details": { "payout_id": "{payout_id}" } } ``` ### DISPUTE The balance change due to a dispute event. ```json { "id": "{id}", "payout_id": "{payout_id}", "effective_at": "2023-04-18T21:37:37Z", "type": "DISPUTE", "gross_amount_money": { "amount": 5000, "currency_code": "USD" }, "fee_amount_money": { "amount": 0, "currency_code": "USD" }, "net_amount_money": { "amount": 5000, "currency_code": "USD" }, "type_dispute_details": { "payment_id": "{payment_id}" } } ``` ### ESCHEATMENT An escheatment entry for remittance. ```json { "id": "{id}", "payout_id": "{payout_id}", "effective_at": "2023-05-18T02:11:24Z", "type": "ESCHEATMENT", "gross_amount_money": { "amount": -4022, "currency_code": "AUD" }, "fee_amount_money": { "amount": 0, "currency_code": "AUD" }, "net_amount_money": { "amount": -4022, "currency_code": "AUD" } } ``` ### FEE A `PayoutEntry` has a type of `FEE` if the entry represents a Cost Plus fee adjustment. Cost Plus is a custom pricing plan that a seller negotiates with Square. Under Cost Plus, Square charges an estimated fee at the time of each transaction. At the end of the month, Square makes a one-time adjustment to capture the final fee. This one-time adjustment is represented as a `PayoutEntry` with the type of `FEE`. For example, Square charges an initial estimated $1 fee for a transaction at the beginning of a month. At the end of the month, after the Cost Plus adjustment, the final fee for the transaction is only $0.75. Square returns $0.25 to the seller. The `PayoutEntry` for the $0.25 Cost Plus fee adjustment takes the following shape: ```json { "payout_entries": [ { "id": "poe_1234567890abcdef1234567890abcdef", "payout_id": "po_abcdef1234567890abcdef1234567890", "effective_at": "2022-03-24T03:07:09Z", "type": "FEE", "gross_amount_money": { "amount": 25, "currency_code": "USD" }, "fee_amount_money": { "amount": 0, "currency_code": "USD" }, "net_amount_money": { "amount": 25, "currency_code": "USD" }, "type_fee_details": { "payment_id": "JkL9M8N7O6P5Q4R3S2T1U0V9W8X7Y6Z5" } } ] } ``` The `payment_id` is the ID associated with the `CHARGE` `PayoutEntry` for the original transaction at the beginning of the month. ### FREE_PROCESSING Square offers free payments processing for a variety of business scenarios, including seller referrals or when Square wants to apologize (for example, for a bug, customer service, or repricing complication). This entry represents a credit to the seller for the purposes of free processing. ```json { "id": "{id}", "payout_id": "{payout_id}", "effective_at": "2023-04-07T20:52:22Z", "type": "FREE_PROCESSING", "gross_amount_money": { "amount": 190, "currency_code": "USD" }, "fee_amount_money": { "amount": 0, "currency_code": "USD" }, "net_amount_money": { "amount": 190, "currency_code": "USD" }, "type_free_processing_details": { "payment_id": "{payment_id}" } } ``` ### GIFT_CARD_LOAD_FEE The fee collected during the sale or reload of a gift card. This fee, which is a portion of the amount loaded on the gift card, is deducted from the merchant's payment balance. ```json { "payout_entries": [ { "id": "{id}", "payout_id": "{payout_id}", "effective_at": "2024-02-09T20:44:05Z", "type": "GIFT_CARD_LOAD_FEE", "gross_amount_money": { "amount": -125, "currency_code": "USD" }, "fee_amount_money": { "amount": 0, "currency_code": "USD" }, "net_amount_money": { "amount": -125, "currency_code": "USD" } }, ] } ``` ### GIFT_CARD_LOAD_FEE_REFUND The refund for a fee charged during the sale or reload of a gift card. ```json { "payout_entries": [ { "id": "{id}", "payout_id": "{payout_id}", "effective_at": "2024-02-10T22:34:34Z", "type": "GIFT_CARD_LOAD_FEE_REFUND", "gross_amount_money": { "amount": 28, "currency_code": "USD" }, "fee_amount_money": { "amount": 0, "currency_code": "USD" }, "net_amount_money": { "amount": 28, "currency_code": "USD" } } ] } ``` ### GIFT_CARD_POOL_TRANSFER A transfer of gift card funds to a central gift card pool account. In franchises, when gift cards are loaded or reloaded at any location, the money transfers to the franchisor's account. ```json { "payout_entries": [ { "id": "{id}", "payout_id": "{payout_id}", "effective_at": "2024-01-11T18:43:29Z", "type": "GIFT_CARD_POOL_TRANSFER", "gross_amount_money": { "amount": -4700, "currency_code": "USD" }, "fee_amount_money": { "amount": 0, "currency_code": "USD" }, "net_amount_money": { "amount": -4700, "currency_code": "USD" } }, ] } ``` ### GIFT_CARD_POOL_TRANSFER_REVERSED A reversal of the transfer of gift card funds from a central gift card pool account. In franchises, when gift cards are loaded or reloaded at any location, the money transfers to the franchisor's account. ```json { "payout_entries": [ { "id": "{id}", "payout_id": "{payout_id}", "effective_at": "2024-01-11T18:43:29Z", "type": "GIFT_CARD_POOL_TRANSFER_REVERSED", "gross_amount_money": { "amount": 4700, "currency_code": "USD" }, "fee_amount_money": { "amount": 0, "currency_code": "USD" }, "net_amount_money": { "amount": -4700, "currency_code": "USD" } }, ] } ``` ### HOLD_ADJUSTMENT An adjustment made by Square related to holding a payment. ```json { "id": "{id}", "payout_id": "{payout_id}", "effective_at": "2023-04-10T19:29:37Z", "type": "HOLD_ADJUSTMENT", "gross_amount_money": { "amount": -1000, "currency_code": "USD" }, "fee_amount_money": { "amount": 0, "currency_code": "USD" }, "net_amount_money": { "amount": -1000, "currency_code": "USD" }, "type_hold_adjustment_details": { "payment_id": "{payment_id}" } } ``` ### INITIAL_BALANCE_CHANGE An external change to a seller's balance (in the sense that it causes the creation of the other activity types, such as a hold and refund). ```json { "id": "{id}", "payout_id": "{payout_id}", "effective_at": "2023-02-08T21:53:41Z", "type": "INITIAL_BALANCE_CHANGE", "gross_amount_money": { "amount": 10000, "currency_code": "USD" }, "fee_amount_money": { "amount": 0, "currency_code": "USD" }, "net_amount_money": { "amount": 10000, "currency_code": "USD" } } ``` ### LOCAL_OFFERS_CASHBACK The cashback amount given by a Square Local Offers seller to their customer for a purchase. ```json { "payout_entries": [ { "id": "{id}", "payout_id": "{payout_id}", "effective_at": "2024-02-08T15:49:45Z", "type": "LOCAL_OFFERS_CASHBACK", "gross_amount_money": { "amount": -50, "currency_code": "USD" }, "fee_amount_money": { "amount": 0, "currency_code": "USD" }, "net_amount_money": { "amount": -50, "currency_code": "USD" } } ] } ``` ### LOCAL_OFFERS_FEE A commission fee paid by a Square Local Offers seller to Square for a purchase discovered through Square Local Offers. ```json { "payout_entries": [ { "id": "{id}", "payout_id": "{payout_id}", "effective_at": "2024-02-08T15:49:45Z", "type": "LOCAL_OFFERS_FEE", "gross_amount_money": { "amount": -20, "currency_code": "USD" }, "fee_amount_money": { "amount": 0, "currency_code": "USD" }, "net_amount_money": { "amount": -20, "currency_code": "USD" } } ] } ``` ### MONEY_TRANSFER The balance change from a money transfer. ```json { "id": "{id}", "payout_id": "{payout_id}", "effective_at": "2023-05-29T20:14:11Z", "type": "MONEY_TRANSFER", "gross_amount_money": { "amount": 440, "currency_code": "USD" }, "fee_amount_money": { "amount": 0, "currency_code": "USD" }, "net_amount_money": { "amount": 440, "currency_code": "USD" } } ``` ### MONEY_TRANSFER_REVERSAL The reversal of a money transfer. ```json { "id": "{id}", "payout_id": "{payout_id}", "effective_at": "2023-05-29T16:46:55Z", "type": "MONEY_TRANSFER_REVERSAL", "gross_amount_money": { "amount": -440, "currency_code": "USD" }, "fee_amount_money": { "amount": 0, "currency_code": "USD" }, "net_amount_money": { "amount": -440, "currency_code": "USD" } } ``` ### OPEN_DISPUTE The balance change for a chargeback that's been filed. ```json { "id": "{id}", "payout_id": "{payout_id}", "effective_at": "2023-04-17T21:37:37Z", "type": "OPEN_DISPUTE", "gross_amount_money": { "amount": -5000, "currency_code": "USD" }, "fee_amount_money": { "amount": 0, "currency_code": "USD" }, "net_amount_money": { "amount": -5000, "currency_code": "USD" }, "type_open_dispute_details": { "payment_id": "{payment_id}", "dispute_id": "{dispute_id}" } } ``` ### OTHER Any other type that doesn't belong in the rest of the types. ```json { "id": "{id}", "payout_id": "{payout_id}", "effective_at": "2023-03-28T20:52:45Z", "type": "OTHER", "gross_amount_money": { "amount": -30, "currency_code": "USD" }, "fee_amount_money": { "amount": 0, "currency_code": "USD" }, "net_amount_money": { "amount": -30, "currency_code": "USD" }, "type_other_details": { "payment_id": "{payment_id}" } } ``` ### OTHER_ADJUSTMENT Any other type of adjustment that doesn't fall under existing types. ```json { "id": "{id}", "payout_id": "{payout_id}", "effective_at": "2022-02-22T10:23:15Z", "type": "OTHER_ADJUSTMENT", "gross_amount_money": { "amount": 2426, "currency_code": "USD" }, "fee_amount_money": { "amount": 0, "currency_code": "USD" }, "net_amount_money": { "amount": 2426, "currency_code": "USD" } } ``` ### PAID_SERVICE_FEE A fee paid to a third-party seller. ```json { "id": "{id}", "payout_id": "{payout_id}", "effective_at": "2022-10-02T07:58:31Z", "type": "PAID_SERVICE_FEE", "gross_amount_money": { "amount": -500, "currency_code": "USD" }, "fee_amount_money": { "amount": 0, "currency_code": "USD" }, "net_amount_money": { "amount": -500, "currency_code": "USD" } } ``` ### PAID_SERVICE_FEE_REFUND A fee refunded to a third-party seller. ```json { "id": "{id}", "payout_id": "{payout_id}", "effective_at": "2022-10-18T17:20:45Z", "type": "PAID_SERVICE_FEE_REFUND", "gross_amount_money": { "amount": 290, "currency_code": "USD" }, "fee_amount_money": { "amount": 0, "currency_code": "USD" }, "net_amount_money": { "amount": 290, "currency_code": "USD" } } ``` ### PAYOUT The balance change due to a money transfer. Note that this type is never returned by the Payouts API. ```json { "id": "{id}", "payout_id": "{payout_id}", "effective_at": "2023-04-18T14:50:22Z", "type": "PAYOUT", "gross_amount_money": { "amount": 1950, "currency_code": "GBP" }, "fee_amount_money": { "amount": 0, "currency_code": "GBP" }, "net_amount_money": { "amount": 1950, "currency_code": "GBP" } } ``` ### PERCENTAGE_PROCESSING_DEACTIVATION Deducting the outstanding Percentage Processing balance from the seller’s account. It's the final installment in repaying the dispute-induced negative balance through percentage processing. ```json { "payout_entries": [ { "id": "{id}", "payout_id": "{payout_id}", "effective_at": "2023-12-19T02:40:21Z", "type": "PERCENTAGE_PROCESSING_DEACTIVATION", "gross_amount_money": { "amount": -91231, "currency_code": "GBP" }, "fee_amount_money": { "amount": 0, "currency_code": "GBP" }, "net_amount_money": { "amount": -91231, "currency_code": "GBP" } } ] } ``` ### PERCENTAGE_PROCESSING_ENROLLMENT When activating Percentage Processing, a credit is applied to the seller’s account to offset any negative balance caused by a dispute. ```json { "payout_entries": [ { "id": "{id}", "payout_id": "{payout_id}", "effective_at": "2023-11-28T01:49:54Z", "type": "PERCENTAGE_PROCESSING_ENROLLMENT", "gross_amount_money": { "amount": 81600, "currency_code": "GBP" }, "fee_amount_money": { "amount": 0, "currency_code": "GBP" }, "net_amount_money": { "amount": 81600, "currency_code": "GBP" } } ] } ``` ### PERCENTAGE_PROCESSING_REPAYMENT The withheld funds from a payment to cover a negative balance. It's an installment to repay the amount from a dispute that was offset during Percentage Processing enrollment. ```json { "payout_entries": [ { "id": "{id}", "payout_id": "{payout_id}", "effective_at": "2023-12-18T07:51:14Z", "type": "PERCENTAGE_PROCESSING_REPAYMENT", "gross_amount_money": { "amount": -200, "currency_code": "GBP" }, "fee_amount_money": { "amount": 0, "currency_code": "GBP" }, "net_amount_money": { "amount": -200, "currency_code": "GBP" } } ] } ``` ### PERCENTAGE_PROCESSING_REPAYMENT_REVERSED The reversal of a Percentage Processing repayment that happens, for example, when a refund is issued for a payment. ```json { "payout_entries": [ { "id": "{id}", "payout_id": "{payout_id}", "effective_at": "2023-12-19T07:51:14Z", "type": "PERCENTAGE_PROCESSING_REPAYMENT_REVERSED", "gross_amount_money": { "amount": 200, "currency_code": "GBP" }, "fee_amount_money": { "amount": 0, "currency_code": "GBP" }, "net_amount_money": { "amount": 200, "currency_code": "GBP" } } ] } ``` ### PROCESSING_FEE A `PayoutEntry` has a `type` of `PROCESSING_FEE` if the entry represents a Gross Settlement adjustment. Gross Settlement is a custom pricing setup that a seller negotiates with Square. With Gross Settlement, Square doesn't charge transaction fees upfront. Instead, Square debits all processing fees in one lump sum on a monthly basis. This is generally on the 10th of every month, unless the seller and Square arrange otherwise. For example, at the beginning of the month a seller processes a $34.62 transaction. Square doesn't charge a fee. At the end of the month, Square debits the seller a $0.75 fee for the transaction. The reconciliation `PayoutEntry` has a `type` of `PROCESSING_FEE`. The `fee_amount_money` value is always `0`. The $0.75 fee adjustment for a Gross Settlement `PayoutEntry` takes the following shape: ```json { "payout_entries": [ { "id": "poe_1a2b3c4d5e6f7g8h9i0j", "payout_id": "po_1a2b3c4d5e6f7g8h9i0j", "effective_at": "2022-03-24T03:07:09Z", "type": "CHARGE", "gross_amount_money": { "amount": 3462, "currency_code": "USD" }, "fee_amount_money": { "amount": 0, "currency_code": "USD" }, "net_amount_money": { "amount": 3462, "currency_code": "USD" }, "type_charge_details": { "payment_id": "XyZ9A8B7C6D5E4F3G2H1I0J9K8L7M6N5" } } ] } ``` ### PROCESSING_FEE_REFUND The processing fee for a payment refund issued by sellers enrolled in Gross Settlement. The refunded processing fee is recorded separately as a new payout entry, not as part of the `REFUND` payout entry. ```json { "payout_entries": [ { "id": "{id}", "payout_id": "{payout_id}", "effective_at": "2024-02-09T21:10:21Z", "type": "PROCESSING_FEE_REFUND", "gross_amount_money": { "amount": 85, "currency_code": "USD" }, "fee_amount_money": { "amount": 0, "currency_code": "USD" }, "net_amount_money": { "amount": 85, "currency_code": "USD" } } ] } ``` ### REDEMPTION_CODE A repayment for a redemption code. ```json { "id": "{id}", "payout_id": "{payout_id}", "effective_at": "2022-03-17T19:35:22Z", "type": "REDEMPTION_CODE", "gross_amount_money": { "amount": 1000, "currency_code": "USD" }, "fee_amount_money": { "amount": 0, "currency_code": "USD" }, "net_amount_money": { "amount": 1000, "currency_code": "USD" } } ``` ### REFUND A refund for an existing card payment. ```json { "id": "{id}", "payout_id": "{payout_id}", "effective_at": "2023-01-05T18:20:44Z", "type": "REFUND", "gross_amount_money": { "amount": -400, "currency_code": "EUR" }, "fee_amount_money": { "amount": -12, "currency_code": "EUR" }, "net_amount_money": { "amount": -388, "currency_code": "EUR" }, "type_refund_details": { "payment_id": "{payment_id}", "refund_id": "{refund_id}" } } ``` ### RELEASE_ADJUSTMENT An adjustment made by Square related to releasing a payment. ```json { "id": "{id}", "payout_id": "{payout_id}", "effective_at": "2023-04-21T18:00:00Z", "type": "RELEASE_ADJUSTMENT", "gross_amount_money": { "amount": 87, "currency_code": "USD" }, "fee_amount_money": { "amount": 0, "currency_code": "USD" }, "net_amount_money": { "amount": 87, "currency_code": "USD" }, "type_release_adjustment_details": { "payment_id": "{payment_id}" } } ``` ### RESERVE_HOLD Fees paid for a funding risk reserve. ```json { "id": "{id}", "payout_id": "{payout_id}", "effective_at": "2023-04-21T22:54:31Z", "type": "RESERVE_HOLD", "gross_amount_money": { "amount": -5000, "currency_code": "USD" }, "fee_amount_money": { "amount": 0, "currency_code": "USD" }, "net_amount_money": { "amount": -5000, "currency_code": "USD" }, "type_reserve_hold_details": { "payment_id": "{payment_id}" } } ``` ### RESERVE_RELEASE Fees released from a risk reserve. ```json { "id": "{id}", "payout_id": "{payout_id}", "effective_at": "2023-04-14T18:00:09Z", "type": "RESERVE_RELEASE", "gross_amount_money": { "amount": 2000, "currency_code": "USD" }, "fee_amount_money": { "amount": 0, "currency_code": "USD" }, "net_amount_money": { "amount": 2000, "currency_code": "USD" }, "type_reserve_release_details": { "payment_id": "{payment_id}" } } ``` ### RETURNED_PAYOUT An entry created when Square receives a response for the ACH file that Square sent indicating that the settlement of the original entry failed. ```json { "id": "{id}", "payout_id": "{payout_id}", "effective_at": "2023-04-18T14:50:22Z", "type": "RETURNED_PAYOUT", "gross_amount_money": { "amount": 1950, "currency_code": "GBP" }, "fee_amount_money": { "amount": 0, "currency_code": "GBP" }, "net_amount_money": { "amount": 1950, "currency_code": "GBP" } } ``` ### SQUARE_CAPITAL_PAYMENT A capital merchant cash advance (MCA) assessment. These are generally proportional to the merchant's sales but can be issued for other reasons related to the MCA. ```json { "id": "{id}", "payout_id": "{payout_id}", "effective_at": "2023-04-25T17:13:40Z", "type": "SQUARE_CAPITAL_PAYMENT", "gross_amount_money": { "amount": -2808, "currency_code": "USD" }, "fee_amount_money": { "amount": 0, "currency_code": "USD" }, "net_amount_money": { "amount": -2808, "currency_code": "USD" }, "type_square_capital_payment_details": { "payment_id": "{payment_id}" } } ``` ### SQUARE_CAPITAL_REVERSED_PAYMENT A capital merchant cash advance (MCA) assessment refund. These are generally proportional to the merchant's refunds but can be issued for other reasons related to the MCA. ```json { "id": "{id}", "payout_id": "{payout_id}", "effective_at": "2023-04-17T21:39:50Z", "type": "SQUARE_CAPITAL_REVERSED_PAYMENT", "gross_amount_money": { "amount": 162, "currency_code": "USD" }, "fee_amount_money": { "amount": 0, "currency_code": "USD" }, "net_amount_money": { "amount": 162, "currency_code": "USD" }, "type_square_capital_reversed_payment_details": { "payment_id": "{payment_id}" } } ``` ### SQUARE_PAYROLL_TRANSFER A payroll payment that was transferred to a team member's bank account. ```json { "id": "{id}", "payout_id": "{payout_id}", "effective_at": "2023-04-17T21:39:50Z", "type": "SQUARE_PAYROLL_TRANSFER", "gross_amount_money": { "amount": -858, "currency_code": "USD" }, "fee_amount_money": { "amount": 0, "currency_code": "USD" }, "net_amount_money": { "amount": -858, "currency_code": "USD" }, "type_square_payroll_transfer_details": { "payment_id": "{payment_id}" } } ``` ### SQUARE_PAYROLL_TRANSFER_REVERSED A payroll payment to a team member's bank account was deposited back to the seller's account by Square. ```json { "id": "{id}", "payout_id": "{payout_id}", "effective_at": "2023-04-17T21:39:50Z", "type": "SQUARE_PAYROLL_TRANSFER_REVERSED", "gross_amount_money": { "amount": 858, "currency_code": "USD" }, "fee_amount_money": { "amount": 0, "currency_code": "USD" }, "net_amount_money": { "amount": 858, "currency_code": "USD" }, "type_square_payroll_transfer_reversed_details": { "payment_id": "{payment_id}" } } ``` ### SUBSCRIPTION_FEE A fee charged for subscription to a Square product. ```json { "id": "{id}", "payout_id": "{payout_id}", "effective_at": "2022-09-01T15:01:23Z", "type": "SUBSCRIPTION_FEE", "gross_amount_money": { "amount": -3261, "currency_code": "USD" }, "fee_amount_money": { "amount": 0, "currency_code": "USD" }, "net_amount_money": { "amount": -3261, "currency_code": "USD" } } ``` ### SUBSCRIPTION_FEE_PAID_REFUND A Square subscription fee that's been refunded. ```json { "id": "{id}", "payout_id": "{payout_id}", "effective_at": "2022-02-18T14:34:35Z", "type": "SUBSCRIPTION_FEE_PAID_REFUND", "gross_amount_money": { "amount": 980, "currency_code": "USD" }, "fee_amount_money": { "amount": 0, "currency_code": "USD" }, "net_amount_money": { "amount": 980, "currency_code": "USD" } } ``` ### SUBSCRIPTION_FEE_REFUND The refund of a previously charged Square product subscription fee. ```json { "id": "{id}", "payout_id": "{payout_id}", "effective_at": "2023-04-16T15:00:22Z", "type": "SUBSCRIPTION_FEE_REFUND", "gross_amount_money": { "amount": 1900, "currency_code": "USD" }, "fee_amount_money": { "amount": 0, "currency_code": "USD" }, "net_amount_money": { "amount": 1900, "currency_code": "USD" } } ``` ### TAX_ON_FEE The tax paid on fee amounts. ```json { "id": "{id}", "payout_id": "{payout_id}", "effective_at": "2023-04-23T04:30:05Z", "type": "TAX_ON_FEE", "gross_amount_money": { "amount": -1, "currency_code": "AUD" }, "fee_amount_money": { "amount": 0, "currency_code": "AUD" }, "net_amount_money": { "amount": -1, "currency_code": "AUD" }, "type_tax_on_fee_details": { "payment_id": "{payment_id}" } } ``` ### THIRD_PARTY_FEE Fees collected by a third-party platform. ```json { "id": "{id}", "payout_id": "{payout_id}", "effective_at": "2023-01-05T18:20:44Z", "type": "THIRD_PARTY_FEE", "gross_amount_money": { "amount": -100, "currency_code": "EUR" }, "fee_amount_money": { "amount": 0, "currency_code": "EUR" }, "net_amount_money": { "amount": -100, "currency_code": "EUR" }, "type_third_party_fee_details": { "payment_id": "{payment_id}" } } ``` ### THIRD_PARTY_FEE_REFUND Refunded fees from a third-party platform. ```json { "id": "{id}", "payout_id": "{payout_id}", "effective_at": "2023-01-05T18:20:44Z", "type": "THIRD_PARTY_FEE_REFUND", "gross_amount_money": { "amount": 40, "currency_code": "EUR" }, "fee_amount_money": { "amount": 0, "currency_code": "EUR" }, "net_amount_money": { "amount": 40, "currency_code": "EUR" }, "type_third_party_fee_refund_details": { "payment_id": "{payment_id}" } } ``` ### UNDO_GIFT_CARD_LOAD_FEE_REFUND The undoing of a refund for a fee charged during the sale or reload of a gift card. ```json { "payout_entries": [ { "id": "{id}", "payout_id": "{payout_id}", "effective_at": "2024-01-11T19:22:33Z", "type": "UNDO_GIFT_CARD_LOAD_FEE_REFUND", "gross_amount_money": { "amount": -25, "currency_code": "USD" }, "fee_amount_money": { "amount": 0, "currency_code": "USD" }, "net_amount_money": { "amount": -25, "currency_code": "USD" }, "type_other_details": { "payment_id": "BulHgSvkhNVMG4vqqbZI1q6O58YZY" } } ] } ``` ### UNDO_PROCESSING_FEE_REFUND When undoing a processing fee refund in a Gross Settlement payment, this payout entry type is used. ```json { "payout_entries": [ { "id": "{id}", "payout_id": "{payout_id}", "effective_at": "2024-02-09T21:13:04Z", "type": "UNDO_PROCESSING_FEE_REFUND", "gross_amount_money": { "amount": -85, "currency_code": "USD" }, "fee_amount_money": { "amount": 0, "currency_code": "USD" }, "net_amount_money": { "amount": -85, "currency_code": "USD" } } ] } ``` ## See also * [Bank Accounts API](bank-accounts-api) * [Payment APIs and SDKs](payments-overview) * [Disputes API](disputes-api/overview) * [Pagination](build-basics/common-api-patterns/pagination) --- # Payments API Integration > Source: https://developer.squareup.com/docs/pos-api/payments-integration > Status: PUBLIC > Languages: All > Platforms: All Learn how to get payment details from a Point of Sale API transaction ID. **Applies to:** [Point of Sale API - iOS](https://developer.squareup.com/docs/api/point-of-sale) | [Point of Sale API - Android](https://developer.squareup.com/docs/api/point-of-sale/android) | [Payments API](payments-refunds) | [Orders API](orders-api/what-it-does) {% subheading %}Learn how to get payment details from a Point of Sale API transaction ID.{% /subheading %} {% toc hide=true /%} ## Overview There is no direct way to retrieve payment details for a Point of Sale or Reader SDK payment using the [Payments API](https://developer.squareup.com/reference/square/payments-api). However, the transaction ID returned by either of these SDKs on transaction completion can be used to retrieve an [Order](https://developer.squareup.com/reference/square/objects/order) by order ID where the order ID is the transaction ID. {% aside type="info" %} The following procedure doesn't work for cash payments made with Square Point of Sale. The resulting client transaction ID doesn't correspond to an order ID. {% /aside %} ## Retrieve an order Use the transaction ID value as the order ID as shown in the following operation: ```` The response is an `Order` object that includes a `tenders` array. Each item in the array is the ID of a `Payment` object. ```json { "orders": [ { "id": "oHyQ6w9wEc72nlKaIptsnc3CLnSZY", "location_id": "VJN4XSBFTVPK9", "line_items": [ { "uid": "333r2", "quantity": "1", "name": "A Widget", "base_price_money": { "amount": 100, "currency": "USD" }, "gross_sales_money": { "amount": 100, "currency": "USD" }, "total_tax_money": { "amount": 0, "currency": "USD" }, "total_discount_money": { "amount": 0, "currency": "USD" }, "total_money": { "amount": 100, "currency": "USD" }, "variation_total_price_money": { "amount": 100, "currency": "USD" } } ], "created_at": "2021-05-20T22:38:25.167Z", "updated_at": "2021-05-20T22:40:40.000Z", "state": "COMPLETED", "version": 4, "total_tax_money": { "amount": 0, "currency": "USD" }, "total_discount_money": { "amount": 0, "currency": "USD" }, "total_tip_money": { "amount": 0, "currency": "USD" }, "total_money": { "amount": 100, "currency": "USD" }, "closed_at": "2021-05-20T22:40:39.091Z", "tenders": [ { "id": "l2CwYK0ox8LvhNYYFm5N8wbVFlNZY", "location_id": "VJN4XSBFTVPK9", "transaction_id": "oHyQ6w9wEc72nlKaIptsnc3CLnSZY", "created_at": "2021-05-20T22:40:38Z", "amount_money": { "amount": 100, "currency": "USD" }, "type": "CARD", "card_details": { "status": "CAPTURED", "card": { "card_brand": "VISA", "last_4": "5858", "fingerprint": "sq-1-Gg4tFVdtVF6tOSc8REcyHNW1aBKSZp3iQb3ZzdVG_JtpLftLvVkQhlXizopHIGbIgQ" }, "entry_method": "KEYED" }, "payment_id": "l2CwYK0ox8LvhNYYFm5N8wbVFlNZY" } ], "total_service_charge_money": { "amount": 0, "currency": "USD" }, "net_amounts": { "total_money": { "amount": 100, "currency": "USD" }, "tax_money": { "amount": 0, "currency": "USD" }, "discount_money": { "amount": 0, "currency": "USD" }, "tip_money": { "amount": 0, "currency": "USD" }, "service_charge_money": { "amount": 0, "currency": "USD" } }, "source": { "name": "Sandbox for sq0idp-qsHFd8ECFSnT-l3YV8oeUg" }, "customer_id": "W13EWDK1C4SXDCFBHM4E3S02GM" } ] } ``` There should be a single payment ID in the `tenders` array. Use that ID to make the following call: ```` The response is a `Payment` object with the details of the payment. ```json { "payment": { "id": "l2CwYK0ox8LvhNYYFm5N8wbVFlNZY", "created_at": "2021-05-20T22:40:38.862Z", "updated_at": "2021-05-20T22:40:39.066Z", "amount_money": { "amount": 100, "currency": "USD" }, "status": "COMPLETED", "delay_duration": "PT168H", "source_type": "CARD", "card_details": { "status": "CAPTURED", "card": { "card_brand": "VISA", "last_4": "5858", "exp_month": 5, "exp_year": 2023, "fingerprint": "sq-1-Gg4tFVdtVF6tOSc8REcyHNW1aBKSZp3iQb3ZzdVG_JtpLftLvVkQhlXizopHIGbIgQ", "card_type": "DEBIT", "prepaid_type": "NOT_PREPAID", "bin": "453275" }, "entry_method": "KEYED", "cvv_status": "CVV_ACCEPTED", "avs_status": "AVS_ACCEPTED", "statement_description": "SQ *DEFAULT TEST ACCOUNT", "card_payment_timeline": { "authorized_at": "2021-05-20T22:40:38.973Z", "captured_at": "2021-05-20T22:40:39.066Z" } }, "location_id": "VJN4XSBFTVPK9", "order_id": "oHyQ6w9wEc72nlKaIptsnc3CLnSZY", "risk_evaluation": { "created_at": "2021-05-20T22:40:38.974Z", "risk_level": "NORMAL" }, "processing_fee": [ { "effective_at": "2021-05-21T00:40:39.000Z", "type": "INITIAL", "amount_money": { "amount": 33, "currency": "USD" } } ], "customer_id": "W13EWDK1C4SXDCFBHM4E3S02GM", "total_money": { "amount": 100, "currency": "USD" }, "approved_money": { "amount": 100, "currency": "USD" }, "receipt_number": "l2Cw", "receipt_url": "https://squareupsandbox.com/receipt/preview/l2CwYK0ox8LvhNYYFm5N8wbVFlNZY", "delay_action": "CANCEL", "delayed_until": "2021-05-27T22:40:38.862Z", "version_token": "EyyyosIhkvX7UyqWk1lyNLDcdfBcc4ahyTDIlPYUuMN6o" } } ``` ## See also * [Point of Sale API](pos-api/what-it-does) * [Payments API](payments-refunds) * [Orders API](orders-api/what-it-does) --- # Walkthrough: Create and Publish Invoices > Source: https://developer.squareup.com/docs/invoices-api/walkthrough > Status: PUBLIC > Languages: All > Platforms: All Learn how to use the Invoices API to send an invoice to a customer and to automatically charge a card on file. **Applies to:** [Invoices API](invoices-api/overview) | [Orders API](orders-api/what-it-does) | [Customers API](customers-api/what-it-does) | [Cards API](cards-api/overview) {% subheading %}Learn how to send an invoice to a customer or automatically charge a card on file.{% /subheading %} {% toc hide=true /%} ## Overview In this walkthrough, you use the [Invoices API](https://developer.squareup.com/reference/square/invoices-api) to create and publish invoices and then simulate the customer experience of paying an invoice. You also use the [Orders API](https://developer.squareup.com/reference/square/orders-api) to create orders and the [Customers API](https://developer.squareup.com/reference/square/customers-api) and [Cards API](https://developer.squareup.com/reference/square/cards-api) to create a customer and add a card on file. These resources are created in the Square Sandbox test environment, which provides test credit cards and tokens used to simulate payments from the buyer. ## Requirements and limitations Before you begin the walkthrough, do the following: * [Review Sandbox testing considerations](#square-sandbox-testing-considerations) to understand how you use the Square Sandbox for testing. * [Gather account information](#gather-account-information) to use for your API requests. You need your Sandbox access token to authorize API requests and your location ID to create orders. * [Create a customer and a card on file](#create-a-customer-and-a-card-on-file) in the seller's Customer Directory. The customer profile includes an email address where Square sends invoices and receipts. The card on file associated with the customer profile enables automatic payments. The procedures in this walkthrough show you how to configure two invoices. The first procedure directs Square to email the invoice to request payment from the customer. The second procedure directs Square to automatically charge a card on file. {% aside type="info" %} It's also possible for customers to remit a payment directly to a seller using a credit card, check, cash, or other accepted form of payment. The seller can then record the payment using the Square Dashboard, Point of Sale (POS) application, or Square Invoices application. {% /aside %} {% anchor id="invoices-walkthrough-sandbox-considerations" /%} {% anchor id="square-sandbox-testing-considerations" /%} ### Review Sandbox testing considerations In this walkthrough, you create your customer, order, and invoice resources in the Sandbox. The Sandbox is an isolated server environment provisioned for each Sandbox test account. You should use the Sandbox for testing. For more information, see [Square Sandbox](devtools/sandbox/overview). Invoices define a payment schedule that specifies payment amounts, due dates, and whether Square should send the customer an invoice requesting payment or automatically charge a card on file. You use [Sandbox test payment values](devtools/sandbox/payments) to test both payment flows: * **Test credit card** - For example 1 of this walkthrough, you use a Sandbox credit card to pay an invoice on the Square-hosted invoice payment page. * **Test payment token** - To prepare for this walkthrough, you use the Sandbox payment token to add a card on file for a customer. Then, for example 2, you specify the ID of the card on file so Square can charge the card automatically. Sandbox payment methods are never charged. You can also use the Sandbox Square Dashboard to view your Sandbox resources and verify the changes that you make with the Square API. {% anchor id="invoices-walkthrough-account-information" /%} ### Gather account information Follow these steps to get the access token and location ID used in this walkthrough. 1. Sign in to the [Developer Console](https://developer.squareup.com/apps) and open your application. If you don't have a Square account, see [Get Started](get-started) to learn how to create an account and an application. 2. Get your Sandbox access token: 1. At the top of the page, in the **Sandbox** and **Production** toggle, choose **Sandbox**. 1. On the **Credentials** page, under **Sandbox Access Token**, choose **Show** and then copy the token. All Square API requests require an access token for authorization. This [personal access token](build-basics/access-tokens) grants full access to the Sandbox resources in your account. {% aside type="important" %} The Sandbox access token is a secure secret. Don't share it with anyone. {% /aside %} 3. Get your location ID: 1. In the left pane, choose **Locations**. 1. On the **Locations** page, keep **Default Test Account** selected and copy a location ID. ![An animation showing how to get the Sandbox access token and location ID in the Developer Console.](//images.ctfassets.net/1nw4q0oohfju/1qM4MIFJxxbESkevva9dXN/7ccff399610661d0a2f1fd92d6b1c66a/get-sandbox-access-token-and-location-id.gif) {% aside type="info" %} To retrieve location IDs programmatically, call [ListLocations.](https://developer.squareup.com/reference/square/locations-api/list-locations) {% /aside %} {% anchor id="invoices-walkthrough-create-customers" /%} ### Create a customer and a card on file To prepare for this walkthrough, you create a customer profile in your Customer Directory and then add a card on file. 1. Call [CreateCustomer](https://developer.squareup.com/reference/square/customers-api/create-customer) to create a customer profile with an email address. Square sends invoices and receipts to this email address. Replace `{ACCESS_TOKEN}` with your Sandbox access token and `{UNIQUE_KEY}` with a unique string. A unique idempotency key guarantees that Square processes a request only once. ```` The following is an example response: ```json { "customer":{ "id": "DJREAYPRBMSSFAB4TGAexample", "created_at": "2021-05-30T18:38:16.973Z", "updated_at": "2021-05-30T18:38:17Z", "given_name": "John", "family_name": "Doe", "email_address": "johndoe@company.com", "preferences": { "email_unsubscribed": false }, "creation_source": "THIRD_PARTY", "version": 0 } } ``` 2. Copy the customer ID from the response. You use it to save a card on file in the next step and also when you create orders and invoices. 3. Call [CreateCard](https://developer.squareup.com/reference/square/cards-api/create-card) to associate a card on file with the customer profile. * Replace `{ACCESS_TOKEN}` with your Sandbox access token. * Replace the example value for `customer_id` with the customer ID you copied. ```` {% aside type="info" %} For simplicity, this walkthrough uses the Sandbox payment token for `source_id`. It skips the process of generating a payment token using the [Web Payments SDK](web-payments/overview) or [In-App Payments SDK](in-app-payments-sdk/what-it-does). Note that when using the `cnon:card-nonce-ok` payment token to create a card in the Sandbox, you must specify `94103` as the postal code. {% /aside %} 4. Copy the card ID from the response. You use it to define invoice payment requests that automatically charge the card on file. To retrieve an existing card ID, you can call [ListCards](https://developer.squareup.com/reference/square/cards-api/list-cards) and include the `customer_id` query parameter. {% anchor id="invoice-example-1-request-payment-in-full" /%} ## Invoice example 1: Send an invoice to request payment in full In this example, you create an order, create an invoice for the order, and then publish the invoice. The invoice settings direct Square to send an invoice to the customer requesting one payment for the full order amount. Then, you pay the invoice on the invoice payment page and retrieve the invoice to verify the payment status. {% aside type="info" %} If you want to share the URL of the invoice payment page with the customer directly, set the `delivery_method` field to `SHARE_MANUALLY` in your `CreateInvoice` request. This setting tells Square not to send the invoice to the customer. The URL is returned in the {% tooltip text="public_url" %}A temporary link to the Square-hosted payment page where the customer can pay the invoice. If the link expires, customers can provide the email address or phone number associated with the invoice and request a new link directly from the expired payment page.{% /tooltip %} field of the `PublishInvoice` response. {% /aside %} ### Create an order In this step, you create an order to associate with your invoice. To create the invoice in the next step, you must provide the ID of an order that was created using the Orders API. 1. Call [CreateOrder](https://developer.squareup.com/reference/square/orders-api/create-order) to create a sample order for a $1.00 item. * Replace `{ACCESS_TOKEN}` with your Sandbox access token and `{UNIQUE_KEY}` with a unique string. * Replace the example values for `location_id` and `customer_id` with your actual values. ```` The following is an excerpt of the example response: ```json { "order": { "id": "AdSjVqPCzOAQqvTnzy46VLexample", "location_id": "S8GWD5example", "line_items": [ { ... } ], ... "total_money": { "amount": 100, "currency": "USD" }, ... "customer_id": "DJREAYPRBMSSFAB4TGAexample" } } ``` When you create an invoice, the Invoices API uses the `total_money` of the associated order to calculate percentage-based payments and ensure that the sum of all invoice payment requests equals the total order amount. 2. Copy the order ID from the response. You use it in the next step to create an invoice. ### Create and publish an invoice In this step, you create a draft invoice and then publish it. Square takes no action on an invoice until it's published. 1. Call [CreateInvoice](https://developer.squareup.com/reference/square/invoices-api/create-invoice) to create a draft invoice. The invoice in this example specifies one payment request for the full order amount, due by the specified date. It also enables the credit or debit card payment option on the invoice payment page and directs Square to use email to send invoice-related communication to the customer. * Replace `{ACCESS_TOKEN}` with your Sandbox access token and `{UNIQUE_KEY}` with a unique string. * Replace the example values for `order_id` and `customer_id` with your actual values. * Replace the example due date with a date in YYYY-MM-DD format. ```` The following example response contains the draft invoice: ```json { "invoice": { "id": "inv:0-ChC9tyZuZGGkQ1op9mVTSDexample", "version": 0, "location_id": "S8GWD5example", "order_id": "AdSjVqPCzOAQqvTnzy46VLexample", "payment_requests": [ { "uid": "ccc0fc9b-c2a5-42a9-836d-92d01example", "request_type": "BALANCE", "due_date": "2021-06-30", "computed_amount_money": { "amount": 100, "currency": "USD" }, "total_completed_amount_money": { "amount": 0, "currency": "USD" }, "automatic_payment_source": "NONE" } ], "invoice_number": "000006", "status": "DRAFT", "timezone": "America/Los_Angeles", "created_at": "2021-05-30T19:01:32Z", "updated_at": "2021-05-30T19:01:32Z", "primary_recipient": { "customer_id": "DJREAYPRBMSSFAB4TGAexample", "given_name": "John", "family_name": "Doe", "email_address": "johndoe@company.com" }, "accepted_payment_methods": { "card": true, "square_gift_card": false, "bank_account": false, "buy_now_pay_later": false, "cash_app_pay": false }, "delivery_method": "EMAIL", "store_payment_method_enabled": false } } ``` Note the following invoice fields: * `version` is 0 because this is the first version of the invoice. * `status` is `DRAFT` because the invoice hasn't been published. * `computed_amount_money` is the amount due for the payment request. * `total_completed_amount_money` is the amount the customer has paid for the payment request, in this case 0. * `primary_recipient` includes additional customer profile information retrieved by the Invoices API. * `accepted_payment_methods` are the payment methods customers can use to pay the invoice on the invoice payment page. 2. Copy the invoice ID from the response. You use it to publish and retrieve the invoice. 3. Optionally, review the draft invoice in the Sandbox Square Dashboard as follows: 1. Sign in to the [Developer Console](https://developer.squareup.com/apps). 2. On the **Sandbox test accounts** page, choose **Square Dashboard** for the **Default Test Account**. This opens the Sandbox Square Dashboard associated with the default test account. 3. In the left pane, choose **Payments**, and then choose **Invoices**. 4. Verify that the unpaid invoice is created and that the status is `DRAFT`. 4. Call [PublishInvoice](https://developer.squareup.com/reference/square/invoices-api/publish-invoice) to publish the draft invoice. * Replace `{ACCESS_TOKEN}` with your Sandbox access token and `{UNIQUE_KEY}` with a unique string. * Replace the example invoice ID in the path with your actual invoice ID. ```` Square generates the invoice page and processes the invoice based on the payment requests, scheduled date, delivery method, and other invoice settings. For more information, see [Configuring how Square processes an invoice](invoices-api/create-publish-invoices#configure-invoice-processing). The following is an example response: ```json { "invoice": { "id": "inv:0-ChC9tyZuZGGkQ1op9mVTSDexample", "version": 1, "location_id": "S8GWD5example", "order_id": "AdSjVqPCzOAQqvTnzy46VLexample", "payment_requests": [ { "uid": "ccc0fc9b-c2a5-42a9-836d-92d01example", "request_type": "BALANCE", "due_date": "2021-06-30", "computed_amount_money": { "amount": 100, "currency": "USD" }, "total_completed_amount_money": { "amount": 0, "currency": "USD" }, "automatic_payment_source": "NONE" } ], "invoice_number": "000006", "public_url": "https://squareupsandbox.com/pay-invoice/invtmp:5e22a2c2-47c1-46d6-b061-808764dfe2b9", "status": "UNPAID", "timezone": "America/Los_Angeles", "created_at": "2021-05-30T19:01:32Z", "updated_at": "2021-05-30T19:05:01Z", "primary_recipient": { "customer_id": "DJREAYPRBMSSFAB4TGAexample", "given_name": "John", "family_name": "Doe", "email_address": "johndoe@company.com" }, "accepted_payment_methods": { "card": true, "square_gift_card": false, "bank_account": false, "buy_now_pay_later": false, "cash_app_pay": false }, "next_payment_amount_money": { "amount": 100, "currency": "USD" }, "delivery_method": "EMAIL", "store_payment_method_enabled": false } } ``` The published invoice has the following changes: * `version` changed to 1. * `status` changed from `DRAFT` to `UNPAID`. * `public_url` is added to the invoice. This is a temporary link to the Square-hosted invoice payment page where the customer can pay the invoice. If the link expires before the invoice is paid, the customer can request a new link from the expired payment page. * `next_payment_amount_money` is added to the invoice. This example requests one payment in full, so the amount equals the total order amount. If you request multiple payments, the field shows the amount that is due next based on the payment schedule. If one or more payments are overdue, the field includes the overdue amount. For example, consider an invoice for $2 that requires a deposit of $1 and the balance of $1 at a later date. If the deposit is overdue, this field indicates $2 as the next payment amount. The following is an example email sent to the customer. The customer can choose **Pay Invoice** to open the invoice payment page and make a payment. ![An example invoice that Square emails to customers, which includes a "Pay Invoice" button that opens to the invoice payment page.](https://images.ctfassets.net/1nw4q0oohfju/3ewm8gLx3j0evad0x51jsd/9703288c8ccae5d346f901905586ebfd/example-square-customer-invoice.png) Although not supported in the Sandbox environment, Square also emails the invoice to the seller. For more information about invoice-related communication from Square, see [Automatic communication from Square](invoices-api/overview#automatic-communication-from-square). ### Pay the invoice and verify status The customer has the following options to pay the invoice: * Choose **Pay Invoice** in the emailed invoice to open the invoice payment page and pay the invoice. * Contact the seller and pay by credit card, cash, or other accepted payment method. Sellers can record the payment in the Square Dashboard, POS application, or Square Invoices application. In this step, you pay the invoice on the invoice payment page. 1. Open the invoice payment page. You can find the payment link in the `public_url` field in the `PublishInvoice` response. 2. Use the Sandbox [test credit card](devtools/sandbox/payments#web-and-mobile-client-testing) information to pay the invoice. 3. Call [GetInvoice](https://developer.squareup.com/reference/square/invoices-api/get-invoice) to retrieve the invoice and verify status. * Replace `{ACCESS_TOKEN}` with your Sandbox access token. * Replace the example invoice ID in the path with your actual invoice ID. ```` If you paid in full, the invoice in the response has the following changes: * `status` is PAID. * `total_completed_amount_money` specifies 100 for the amount paid. * `next_payment_amount_money` is removed from the invoice. You can also verify the changes in the Sandbox Square Dashboard. {% anchor id="invoice-example-2-request-a-deposit-and-charge-a-card-on-file" /%} ## Invoice example 2: Charge a card on file for deposit and balance payments In this example, you create an order, create an invoice for the order, and then publish the invoice. The invoice settings direct Square to automatically charge a card on file for a deposit when the invoice is published and a balance at a later date. Then, you retrieve the invoice to verify the payment status. ### Create an order In this step, you create an order to associate with your invoice. To create the invoice in the next step, you must provide the ID of an order that was created using the Orders API. 1. Call [CreateOrder](https://developer.squareup.com/reference/square/orders-api/create-order) to create a sample order for $4.00. * Replace `{ACCESS_TOKEN}` with your Sandbox access token and `{UNIQUE_KEY}` with a unique string. * Replace the example values for `location_id` and `customer_id` with your actual values. ```` 2. Copy the order ID from the response. You use it in the next step to create an invoice. ### Create and publish an invoice In this step, you create a draft invoice and then publish it. Square takes no action on an invoice until it's published. 1. Call [CreateInvoice](https://developer.squareup.com/reference/square/invoices-api/create-invoice) to create a draft invoice. The invoice in this example specifies a deposit payment request for 25% of the order amount and a balance payment request. Both payment requests direct Square to charge a card on file and provide the card ID. The invoice sets the delivery method that Square uses for invoice-related communication with the customer to `EMAIL`, which is required for automatic payments. It also enables the credit or debit card and Square gift card payment options on the invoice payment page. * Replace `{ACCESS_TOKEN}` with your Sandbox access token and `{UNIQUE_KEY}` with a unique string. * Replace the example values for `order_id`, `customer_id`, and `card_id` with your actual values. * Replace the example values for `due_date` with dates in YYYY-MM-DD format. Use the current date for the deposit (so Square charges the card immediately and you can verify the charge) and a future date for the balance. ```` {% aside type="info" %} Instead of specifying percentage-based payment amounts, you can specify exact amounts. The sum of the exact amounts must match the `total_money` of the order. For more information, see [Configuring payment requests](invoices-api/create-publish-invoices#payment-requests). {% /aside %} The following is an example response: ```json { "invoice": { "id": "inv:0-ChB1vUizal7VFGWas0H1Bexample", "version": 0, "location_id": "S8GWD5example", "order_id": "8NW3YYM7Ho58Ur7k9vkLexample", "payment_requests": [ { "uid": "968d4546-3d4b-4be7-8411-cddcbexample", "request_type": "DEPOSIT", "due_date": "2021-05-30", "percentage_requested": "25", "card_id": "ccof:aC1D4q9aUXTkexample", "computed_amount_money": { "amount": 100, "currency": "USD" }, "total_completed_amount_money": { "amount": 0, "currency": "USD" }, "automatic_payment_source": "CARD_ON_FILE" }, { "uid": "8e1e2012-c9fc-491b-9545-6380fexample", "request_type": "BALANCE", "due_date": "2021-06-15", "card_id": "ccof:aC1D4q9aUXTkexample", "computed_amount_money": { "amount": 300, "currency": "USD" }, "total_completed_amount_money": { "amount": 0, "currency": "USD" }, "automatic_payment_source": "CARD_ON_FILE" } ], "invoice_number": "000007", "status": "DRAFT", "timezone": "America/Los_Angeles", "created_at": "2021-05-30T03:09:48Z", "updated_at": "2021-05-30T03:09:48Z", "primary_recipient": { "customer_id": "DJREAYPRBMSSFAB4TGAexample", "given_name": "John", "family_name": "Doe", "email_address": "johndoe@company.com" }, "accepted_payment_methods": { "card": true, "square_gift_card": true, "bank_account": false, "buy_now_pay_later": false, "cash_app_pay": false }, "delivery_method": "EMAIL", "store_payment_method_enabled": false } } ``` Note the following invoice fields: * `version` is 0 because this is the first version of the invoice. * `status` is `DRAFT` because the invoice hasn't been published. * `computed_amount_money` is the amount due for each payment request. * `total_completed_amount_money` is the amount the customer has paid for the payment request. * `accepted_payment_methods` are the payment methods customers can use to pay the invoice on the invoice payment page. At least one payment method must be set to `true`. This setting is independent of any automatic payment requests for the invoice. You can review the draft invoice in the Sandbox Square Dashboard as described in the [first walkthrough example](#invoice-example-1-request-payment-in-full). 2. Call [PublishInvoice](https://developer.squareup.com/reference/square/invoices-api/publish-invoice) to publish the invoice. * Replace `{ACCESS_TOKEN}` with your Sandbox access token and `{UNIQUE_KEY}` with a unique string. * Replace the example invoice ID in the path with your actual invoice ID. ```` Square generates the invoice page and processes the invoice based on the payment requests, scheduled date, delivery method, and other invoice settings. For more information, see [Configuring how Square processes an invoice](invoices-api/create-publish-invoices#configure-invoice-processing). The following is an example response: ```json { "invoice": { "id": "inv:0-ChB1vUizal7VFGWas0H1Bexample", "version": 1, "location_id": "S8GWD5example", "order_id": "8NW3YYM7Ho58Ur7k9vkLexample", "payment_requests": [ { "uid": "968d4546-3d4b-4be7-8411-cddcbexample", "request_type": "DEPOSIT", "due_date": "2021-05-30", "percentage_requested": "25", "card_id": "ccof:aC1D4q9aUXTkexample", "computed_amount_money": { "amount": 100, "currency": "USD" }, "total_completed_amount_money": { "amount": 0, "currency": "USD" }, "automatic_payment_source": "CARD_ON_FILE" }, { "uid": "8e1e2012-c9fc-491b-9545-6380fexample", "request_type": "BALANCE", "due_date": "2021-05-30", "card_id": "ccof:aC1D4q9aUXTkexample", "computed_amount_money": { "amount": 300, "currency": "USD" }, "total_completed_amount_money": { "amount": 0, "currency": "USD" }, "automatic_payment_source": "CARD_ON_FILE" } ], "invoice_number": "000007", "public_url": "https://squareupsandbox.com/pay-invoice/invtmp:5e22a2c2-47c1-46d6-b061-808764dfe2b9", "status": "UNPAID", "timezone": "America/Los_Angeles", "created_at": "2021-05-30T03:09:48Z", "updated_at": "2021-05-30T03:12:33Z", "primary_recipient": { "customer_id": "DJREAYPRBMSSFAB4TGAexample", "given_name": "John", "family_name": "Doe", "email_address": "johndoe@company.com" }, "accepted_payment_methods": { "card": true, "square_gift_card": true, "bank_account": false, "buy_now_pay_later": false, "cash_app_pay": false }, "next_payment_amount_money": { "amount": 100, "currency": "USD" }, "delivery_method": "EMAIL", "store_payment_method_enabled": false } } ``` The published invoice has the following changes: * `version` is incremented. The value depends on whether Square started processing the payment before returning the response. * `status` changed from `DRAFT` to `UNPAID` or `PAYMENT_PENDING`. The value depends on whether Square started processing the payment before returning the response. * `public_url` is added to the invoice. This is a temporary link to the Square-hosted invoice payment page where the customer can pay the invoice. If the link expires before the invoice is paid, the customer can request a new link from the expired payment page. * `next_payment_amount_money` is added to the invoice. Soon after the invoice is published, Square charges the customer's card on file if you specified the current date for the deposit. Square sends an invoice receipt to both the seller and customer (in the Production environment only). If the due date is in the future, the customer can optionally choose **Make Early Payment** to pay the invoice sooner. ### Verify the invoice status In this step, you verify that Square automatically charged the card on file for the deposit amount. 1. Call [GetInvoice](https://developer.squareup.com/reference/square/invoices-api/get-invoice) to retrieve the invoice and verify status. * Replace `{ACCESS_TOKEN}` with your Sandbox access token. * Replace the example invoice ID in the path with your actual invoice ID. ```` After Square charges the card for the deposit, the invoice in the response has the following changes: * `status` changed to `PARTIALLY_PAID`. * `total_completed_amount_money` for the deposit is 100, which equals the `computed_amount_money` and indicates that the deposit was paid. * `next_payment_amount_money` is 300, which is the amount of the balance payment request. You can also verify the changes in the Sandbox Square Dashboard or on the invoice payment page. ## See also * [Retrieve, list, or search invoices](invoices-api/retrieve-list-search-invoices) * [Create or delete invoice attachments](invoices-api/attachments) * [Update an invoice](invoices-api/update-invoices) * [Cancel or delete an invoice](invoices-api/cancel-delete-invoices) --- # Common Square API Patterns > Source: https://developer.squareup.com/docs/sdks/nodejs/common-square-api-patterns > Status: PUBLIC > Languages: All > Platforms: All Learn how the Square Node.js SDK supports the common Square API features. {% subheading %}Learn how the Square Node.js SDK supports the common Square API features.{% /subheading %} {% toc hide=true /%} ## Overview Some of the Square API patterns are used across various APIs. These include the following: * **Pagination** - Many Square API operations limit the size of the response. When the result of the API operation exceeds the limit, the API truncates the result. You must make a series of requests to retrieve all the data. This is referred to as pagination. * **Idempotency key** - Most Square APIs that perform create, update, or delete operations require idempotency keys to protect against making duplicate calls that can have negative consequences (for example, charging a card on file twice). * **Object versioning** - Some Square resources (for example, the `Customer` object) have versions assigned. The version numbers enable optimistic concurrency, which is the ability for multiple transactions to complete without interfering with each other. * **Clear API object fields** - Square API update endpoints that support sparse updates allow you to clear fields by setting the value to `null`. Note that `updateOrder` requires an `X-Clear-Null: true` HTTP header to indicate that the request contains a `null` field update. These Square API patterns are exposed in the Square Node.js SDK. ## Pagination Square API [pagination](working-with-apis/pagination) support lets you split a full query result set into pages that are retrieved over a sequence of requests. For example, when you call `client.customers.list()`, you can limit the number of customers returned per page in the response. You can check whether there are more customers to retrieve using `customerPager.hasNextPage()`. If there's another page, you can get those results using `customerPager.getNextPage()`. To get a single page of data, use the `customerPager.data` property. To iterate over all customers, you can use a `for await(… of …)` loop. The SDK makes additional HTTP requests to retrieve additional pages of data. ```javascript import { SquareClient, SquareError } from "square"; const client = new SquareClient({ token: process.env.SQUARE_ACCESS_TOKEN }); listCustomers(); async function listCustomers() { const limit = 10; try { let customerPager = await client.customers.list({ limit, sortField: "DEFAULT", sortOrder: "DESC" }); for await (const customer of customerPager) { console.log("customer: ID: " + customer.id, "Version: " + customer.version + ",", "Given name: " + customer.givenName + ",", "Family name: " + customer.familyName); } } catch (error) { if (error instanceof SquareError) { console.error("Error occurred: " + error.message); } else { console.error("Unexpected error occurred: ", error); } } } ``` ## Idempotency key When an application calls a Square API, it must be able to repeat an API operation when needed and get the same result each time. For example, if a network error occurs while updating a catalog item, the application might retry the same request and must ensure that the item updates only once. This behavior is called idempotency. Most Square APIs that modify data (create, update, or delete) require you to provide an idempotency key that uniquely identifies the request. This allows you to retry the request if necessary, without duplicating work. You can provide a custom unique key or simply generate one. There are language specific functions that you can use to generate unique keys. For more information, see [Idempotency](working-with-apis/idempotency). The following example shows how the `idempotencyKey` is generated in a Node.js application to create an order: ```javascript import { SquareClient, SquareError } from "square"; import { randomUUID } from 'crypto'; const client = new SquareClient({ token: process.env.SQUARE_ACCESS_TOKEN, }); async function createOrder() { try { const idempotencyKey = randomUUID(); const locationId = getLocationId(); const order = await client.orders.create({ idempotencyKey: idempotencyKey, order: { locationId: locationId, lineItems: [ { name: "New Item", quantity: "1", basePriceMoney: { amount: BigInt(100), currency: "USD", }, }, ], }, }); } catch (error) { if (error instanceof SquareError) { console.error("Error occurred: " + error.message); } else { console.error("Unexpected error occurred: ", error); } } } createOrder(); ``` ## Optimistic concurrency and object versioning Some Square API resources support versioning. For example, each `Customer` object has a version field. Initially, the version number is 0. Each update increases the version number. If you don't specify a version number in the request, the latest version is assumed. This resource version number enables optimistic concurrency; multiple transactions can complete without interfering with each other. As a best practice, you should include the version field in the request to enable optimistic concurrency. The value must be set to the current version. For more information, see [Optimistic Concurrency](working-with-apis/optimistic-concurrency). The following code example updates a customer name. The update request also includes a version number. It succeeds only if the specified version number is the latest version of the customer object on the server. ```javascript import { SquareClient, SquareError } from "square"; const client = new SquareClient({ token: process.env.SQUARE_ACCESS_TOKEN, }); async function updateCustomer() { try { let updateCustomerResponse = await client.customers.update( { customerId: "GZ48C4P2CWVXV7F7K2ZH795RSG", givenName: "Fred", familyName: "Jones", version: BigInt(11) } ); } catch (error) { if (error instanceof SquareError) { console.error("Error occurred: " + error.message); } else { console.error("Unexpected error occurred: ", error); } } } updateCustomer(); ``` ## Clear API object fields For update operations that support sparse updates, your request only needs to specify the fields you want to change (along with any fields required by the update operation). If you want to clear a field without setting a new value, set its value to `null`. For more information, see [Clear a field with a null](build-basics/clearing-fields#clear-a-field-with-a-null). The following `client.locations.update()` example clears the `twitterUsername` field and sets the `websiteUrl` field: ```javascript import { SquareClient, SquareError } from "square"; const client = new SquareClient({ token: process.env.SQUARE_ACCESS_TOKEN }); async function updateLocation() { try { let updateLocationResponse = await client.locations.update({ locationId: 'M8AKAD8160XGR', location: { twitterUsername: null, websiteUrl: 'https://developer.squareup.com', }, }); console.log(updateLocationResponse.location); } catch (error) { if (error instanceof SquareError) { console.error("Error occurred: " + error.message); } else { console.error("Unexpected error occurred: ", error); } } }; updateLocation(); ``` `updateOrder` requests require an additional header. ### updateOrder requests If you're using `null` to clear fields in an order, you must add the `X-Clear-Null: true` HTTP header to signal your intention. In the Square Node.js SDK, you can pass additional `headers` to each method for this purpose. ```javascript await client.orders.update( { orderId: "K1BZGPD0QB7ER26AFXFYKBG9K0", idempotencyKey: idempotencyKey, order: { locationId: locationId, referenceId: null }, }, { headers: { "X-Clear-Null": "true" } } ); ``` --- # Accept E-Money Payments in Japan > Source: https://developer.squareup.com/docs/pos-api/cookbook/electronic-payments > Status: PUBLIC > Languages: Java, Swift > Platforms: Android, iOS **Applies to:** [Point of Sale API - iOS](https://developer.squareup.com/docs/api/point-of-sale) | [Point of Sale API - Android](https://developer.squareup.com/docs/api/point-of-sale/android) {% subheading %}Learn about taking electronic payments in Japan using the Point of Sale API.{% /subheading %} {% line-break /%} {% toc hide=true /%} ## Accept e-money payments The Point of Sale API supports accepting [electronic money](https://squareup.com/jp/ja/payments/e-money) (e-money) payments in Japan using the Square Point of Sale application and Square Reader. E-money compatible payment card brands include transportation group cards (such as Suica and PASMO), iD, and QUICPay. {% aside type="important" %} E-money payments are supported only in Japan. If you're developing a Point of Sale API integration for other regions, the content of this topic doesn't apply. {% /aside %} To accept e-money payments, sellers must complete a short application process in the [Square Dashboard](https://app.squareup.com/dashboard). When approved, a seller using your application sees the e-money option when your application launches Square Point of Sale using the Point of Sale API. If a seller is approved to accept e-money payments, the e-money option appears if your application supports the CARD tender type. ![A graphic showing the Point of Sale application running on a device in Japan and showing a localized payment page.](https://images.ctfassets.net/1nw4q0oohfju/CVjpjk8VEbHowfsCQGbUL/53877081e4b632d5a7881c62bb6d66f7/pos-app-japan-localized-payment-page.png) {% anchor id="initiate-a-mobile-web-transaction-android" /%} ## Initiate an electronic payment from your application {% tabset %} {% tab id="Android" %} Add code that creates a new charge request and uses it to initiate a transaction in the Point of Sale application. The following function uses [ChargeRequest.Builder](https://developer.squareup.com/docs/api/point-of-sale/android/) to create a charge for ¥1 JPY and restrict the tender type to CARD. It then uses that request to create a `ChargeRequest` and initiate the transaction with an `Intent` object. Create a new charge request as shown: ```java {"line_numbers": true, "": true, "id": "starttransaction"} // create a new charge request and initiate a Point of Sale transaction private static final int CHARGE_REQUEST_CODE = 1; public void startTransaction() { Set tenderTypes = EnumSet.of(CARD); ChargeRequest request = new ChargeRequest.Builder( 100, CurrencyCode.JPY) .restrictTendersTo(tenderTypes) .build(); try { Intent intent = posClient.createChargeIntent(request); startActivityForResult(intent, CHARGE_REQUEST_CODE); } catch (ActivityNotFoundException e) { AlertDialogHelper.showDialog( this, "Error", "Square Point of Sale is not installed" ); posClient.openPointOfSalePlayStoreListing(); } } ``` {% aside type="info" %} The `AlertDialogHelper` object that is used in this code block is an example of a helper class instance and isn't part of the Point of Sale SDK. {% /aside %} {% /tab %} {% tab id="iOS" %} Create an [`SCCAPIRequest`](https://developer.squareup.com/docs/api/point-of-sale#sccapirequest) object with the details of your payment. {% aside type="tip" %} Information in the `notes` field is saved in the Square Dashboard and printed on receipts. {% /aside %} ```swift import Foundation // Replace with your app's callback URL as set in the // Square ApplicationDashboard [https://connect.squareup.com/apps] // You must also declare this URL scheme in <#YOUR_PROJECT#>.plist, // under URL types. let yourCallbackURL = URL(string: "hellocharge://callback")! // Specify the amount of money to charge. var amount: SCCMoney? do { amount = try SCCMoney(amountCents: 100, currencyCode: "JPY") } catch {} // Your client ID is the same as your Square Application ID. // Note: You only need to set your client ID once, before creating your first request. SCCAPIRequest.clientID = YOUR_CLIENT_ID var request: SCCAPIRequest? do { request = try SCCAPIRequest(callbackURL: callbackURL, amount: amount, userInfoString: nil, merchantID: nil, notes: "Coffee", customerID: nil, supportedTenderTypes: SCCAPIRequestTenderTypeCard, clearsDefaultFees: false, returnAutomaticallyAfterPayment: false) } catch {} ``` {% /tab %} {% /tabset %} ## Initiate a payment from your mobile web application Mobile web transactions are initiated by choosing a link to the Square Point of Sale application. Because the request URL includes details about the transaction, you should build the URL dynamically instead of hardcoding it. The link URL includes the transaction information as parameters and is formatted differently for Android and iOS applications. {% tabset %} {% tab id="Android" %} The request URLs of the Square Point of Sale application for Android are formatted as intent requests. For example: ```html {"id": "mobile-web-setup-01", "": true} Start Transaction ``` Android requires URLs to be wrapped with Android start and end tokens when they contain key-value pairs delimited with semicolons. The Android start and end tokens are `intent:#Intent;` and `end`. To build your request URL: 1. Create a JavaScript file called open_pos.js. 2. Add code to define some useful constants, configure your mobile web application, and set the transaction total. ```javascript // The URL where the Point of Sale app will send the transaction results. var callbackUrl = "{YOUR CALLBACK URL}"; // Your application ID var applicationId = "{YOUR APPLICATION ID}"; // The total and currency code should come from your transaction flow. // For now, we are hardcoding them. var transactionTotal = "{TRANSACTION TOTAL}"; var currencyCode = "JPY"; // The version of the Point of Sale SDK that you are using. var sdkVersion = "v2.0"; ``` 3. Add code to build the request URL. For a detailed list of all possible URL parameters, see [Mobile Web Technical Reference](pos-api/web-technical-reference). ```javascript function openURL(){ // Configure the allowable tender types var tenderTypes = "com.squareup.pos.TENDER_CARD; var posUrl = "intent:#Intent;" + "action=com.squareup.pos.action.CHARGE;" + "package=com.squareup;" + "S.com.squareup.pos.WEB_CALLBACK_URI=" + callbackUrl + ";" + "S.com.squareup.pos.CLIENT_ID=" + applicationId + ";" + "S.com.squareup.pos.API_VERSION=" + sdkVersion + ";" + "i.com.squareup.pos.TOTAL_AMOUNT=" + transactionTotal + ";" + "S.com.squareup.pos.CURRENCY_CODE=" + currencyCode + ";" + "S.com.squareup.pos.TENDER_TYPES=" + tenderTypes + ";" + "end"; window.open(posUrl); } ``` 4. Add the following script tag to your HTML head to load your open_pos.js file: ```html ``` 5. Add a button to your mobile web application that runs open-POS.js. ```html ``` {% /tab %} {% tab id="iOS" %} To initiate a Square Point of Sale transaction from your website, call the Square Point of Sale application with a URL using the following format: ```html {"id": "mobile-web-setup-06", "": false} square-commerce-v1://payment/create?data={REPLACE ME} ``` Add code to create a percent-encoded JSON object that contains the information that the Square Point of Sale application needs to process the transaction request. ```javascript {"id": "mobile-web-setup-07", "": true} ``` {% aside type="tip" %} Information in the `notes` field is saved in the Square Dashboard and printed on receipts. {% /aside %} {% /tab %} {% /tabset %} --- # Process Disputes > Source: https://developer.squareup.com/docs/disputes-api/process-disputes > Status: PUBLIC > Languages: All > Platforms: All Learn how to process disputes using the Square Disputes API. **Applies to:** [Disputes API](disputes-api/overview) {% subheading %}Use the [Disputes API](https://developer.squareup.com/reference/square/disputes-api) to access disputes, accept a dispute, or challenge a dispute by uploading and submitting evidence.{% /subheading %} {% toc hide=true /%} ## Overview `Dispute` objects are created by Square when a bank sends a notification that a cardholder is initiating a chargeback. Your application gets new `Dispute` objects by listening for dispute [webhook events](webhooks/overview), polling the Disputes API periodically by calling [ListDisputes](https://developer.squareup.com/reference/square/disputes-api/list-disputes), or calling [RetrieveDispute](https://developer.squareup.com/reference/square/disputes-api/retrieve-dispute) if the dispute ID is known. The `Dispute` object provides important details, including the `reason` for the dispute, the current `state` of the dispute, and the `due_at` deadline by which the seller must respond (by accepting or challenging the dispute). {% aside type="important" %} * Sellers can manage disputes with your application or [their Disputes Dashboard](https://squareup.com/help/us/en/article/3882-payment-disputes-walkthrough). * When sellers use your application to upload and submit evidence with the Disputes API, they can no longer take action on the dispute using the Square Dashboard. The evidence and dispute status aren't updated in the Square Dashboard. Your application should provide sellers with timely information about their disputes so they can make the most appropriate decision regarding the dispute. {% /aside %} {% anchor id="accept-dispute" /%} ## Accepting the Dispute To accept a dispute, call the [AcceptDispute](https://developer.squareup.com/reference/square/disputes-api/accept-dispute) endpoint. Square returns the disputed amount to the cardholder and updates the dispute state to `ACCEPTED`. The dispute is now closed. ```` ## Challenging the dispute When a seller challenges a dispute, they must provide evidence that the payment was valid. Ultimately, the card-issuing bank determines the outcome of the dispute. However, the better the evidence provided by the seller, the better chance they have of winning the dispute. Challenging a dispute using the Disputes API is a two-step process: 1. **Upload evidence** - Your application provides one or more pieces of evidence related to the payment. These can be images, PDFs, or text. If available, Square automatically includes information such as business and cardholder details or receipts to supplement this evidence. 2. **Submit the evidence** - Your application calls the [SubmitEvidence](https://developer.squareup.com/reference/square/disputes-api/submit-evidence) endpoint to submit the provided evidence to the bank. Square changes the dispute state to `PROCESSING`. If the `due_at` deadline passes with no action from the seller, Square automatically challenges the dispute on the seller's behalf. {% anchor id="evidence-types" /%} ### Evidence types Before a seller can challenge a dispute, they need to see the reason. Your application must display the [Dispute.reason](https://developer.squareup.com/reference/square/objects/Dispute#definition__property-reason), which lets the seller decide what evidence to provide to support the validity of the transaction. Your application can upload evidence of any [DisputeEvidenceType](https://developer.squareup.com/reference/square/disputes-api/create-dispute-evidence-file#request__property-evidence_type) for a dispute regardless of the reason, but choosing the most appropriate evidence type helps the seller make the best case to the bank, which increases their chances of winning a dispute. If no evidence type is provided, Square assigns the `GENERIC_EVIDENCE` type. The following table lists suggested evidence types to submit for each dispute reason. These suggestions are based on card network rules to help the seller make their best case when challenging a dispute. |Dispute reason |Suggested evidence type| |---------------|----------------------| |`AMOUNT_DIFFERS` |`AUTHORIZATION_DOCUMENTATION`| |`CANCELLED` |`CANCELLATION_OR_REFUND_DOCUMENTATION`{% line-break /%}`SERVICE_RECEIVED_DOCUMENTATION`{% line-break /%}`PROOF_OF_DELIVERY_DOCUMENTATION`{% line-break /%}`TRACKING_NUMBER`| |`CUSTOMER_REQUESTS_CREDIT`{% line-break /%}`PAID_BY_OTHER_MEANS`|`CANCELLATION_OR_REFUND_DOCUMENTATION`{% line-break /%}`SERVICE_RECEIVED_DOCUMENTATION`{% line-break /%}`PROOF_OF_DELIVERY_DOCUMENTATION`{% line-break /%}`TRACKING_NUMBER`| |`DUPLICATE` |`DUPLICATE_CHARGE_DOCUMENTATION`{% line-break /%}`RELATED_TRANSACTION_DOCUMENTATION`| |`NO_KNOWLEDGE` |`AUTHORIZATION_DOCUMENTATION`{% line-break /%}`ONLINE_OR_APP_ACCESS_LOG`{% line-break /%}`RELATED_TRANSACTION_DOCUMENTATION`| |`NOT_RECEIVED` |`AUTHORIZATION_DOCUMENTATION`{% line-break /%}`ONLINE_OR_APP_ACCESS_LOG`{% line-break /%}`RELATED_TRANSACTION_DOCUMENTATION`| |`NOT_AS_DESCRIBED`|`CANCELLATION_OR_REFUND_DOCUMENTATION`{% line-break /%}`SERVICE_RECEIVED_DOCUMENTATION`{% line-break /%}`PROOF_OF_DELIVERY_DOCUMENTATION`{% line-break /%}`TRACKING_NUMBER`| {% anchor id="uploading-evidence" /%} ## Uploading evidence Call the [CreateDisputeEvidenceFile](https://developer.squareup.com/reference/square/disputes-api/create-dispute-evidence-file) or [CreateDisputeEvidenceText](https://developer.squareup.com/reference/square/disputes-api/create-dispute-evidence-text) endpoint to provide evidence to start challenging the request. * Use [CreateDisputeEvidenceText](https://developer.squareup.com/reference/square/disputes-api/create-dispute-evidence-text) for evidence such as tracking numbers, explanations, product descriptions, or any information that can be conveyed in a string with a maximum length of 500 characters. * Use [CreateDisputeEvidenceFile](https://developer.squareup.com/reference/square/disputes-api/create-dispute-evidence-file) for evidence such as receipts, screenshots of email threads with customers, or any evidence in image or PDF format. * Square supports these file types: image/tiff, application/pdf, image/jpeg, image/png, and image/heif. The file you upload can be up to 5 MB. The following example shows a call to the [CreateDisputeEvidenceFile](https://developer.squareup.com/reference/square/disputes-api/create-dispute-evidence-file) endpoint, using a receipt scanned as a .tiff file as the evidence. In the request: * The `dispute_id` is provided in the endpoint URL. * The `Authorization` header specifies the access token of the seller responsible for the dispute. * The request includes the path of the file to upload. * The request body provides the `evidence_type` and `idempotency_key`. For more information, see [Idempotency](working-with-apis/idempotency). ```` The following is an example response: ```json { "evidence":{ "dispute_id": "bVTprrwk0gygTLZ96VX1oB", "evidence_file": { "filename": "receipt.tiff", "filetype": "image/tiff" }, "uploaded_at": "2022-03-03T15:30:39.000Z", "id": "Xi2jwjEmqW7LlGAWyylaUB" } } ``` {% aside type="important" %} The seller must maintain a copy of the uploaded evidence if they want to reference it later. The evidence itself cannot be downloaded after it's been uploaded. The [ListDisputeEvidence](https://developer.squareup.com/reference/square/disputes-api/list-dispute-evidence) endpoint returns metadata about uploaded evidence, rather than the evidence itself. {% /aside %} To upload text evidence as a string, use the [CreateDisputeEvidenceText](https://developer.squareup.com/reference/square/disputes-api/create-dispute-evidence-text) endpoint as shown: ```` ## Managing evidence Prior to submission, your application can display a list of evidence provided for a dispute by calling the [ListDisputeEvidence](https://developer.squareup.com/reference/square/disputes-api/list-dispute-evidence) endpoint. If you know the `evidence_id`, you can call [RetrieveDisputeEvidence](https://developer.squareup.com/reference/square/disputes-api/retrieve-dispute-evidence). Note that these endpoints don't return the evidence itself, only metadata about the uploaded evidence. Sellers should retain copies of any evidence submitted in case they want to reference it later. If you need to remove a piece of evidence, call [DeleteDisputeEvidence](https://developer.squareup.com/reference/square/disputes-api/delete-dispute-evidence) with the `dispute_id` and `evidence_id` for the evidence you want to remove. Square doesn't send the bank any evidence that's removed. Note that you cannot remove evidence after submitting it to the bank using [SubmitEvidence](https://developer.squareup.com/reference/square/disputes-api/submit-evidence). ## Submitting evidence After uploading all relevant evidence for the dispute, call [SubmitEvidence](https://developer.squareup.com/reference/square/disputes-api/submit-evidence) to submit the provided evidence to the card-issuing bank. Square changes the dispute state to `PROCESSING`. At this point, the evidence for this dispute can no longer be removed or changed. ```` The following is an example response: ```json { "dispute": { "amount_money": { "amount": 2273, "currency": "USD" }, "reason": "DUPLICATE", "state": "PROCESSING", "due_at": "2022-03-16T00:00:00.000Z", "disputed_payment": { "payment_id": "BqzL87eLnz9gJRuoiIYSY44p9ORZY" }, "card_brand": "VISA", "created_at": "2022-03-02T16:38:37.460Z", "updated_at": "2022-03-03T15:36:53.297Z", "brand_dispute_id": "P9td9draSX6ACrUO3KEI6Q", "version": 5, "location_id": "L1HN3ZMTZEB87", "id": "bVTprrwk0gygTLZ96VX1oB", "reported_at": "2022-03-02T00:00:00.000Z" } } ``` {% aside type="important" %} Don't call `SubmitEvidence` for each piece of uploaded evidence. Call the endpoint after the complete body of evidence has been uploaded to Square. By calling `SubmitEvidence`, the challenge process starts and you can no longer add or remove any evidence. {% /aside %} When available, Square automatically provides information to the card-issuing bank on a seller's behalf to supplement the other evidence provided. This information might be business or cardholder details (name, address, phone number), Square receipts, related transactions, or tracking numbers. ## Dispute outcomes When the seller challenges a dispute, there are three possible outcomes: * **Win** - The bank accepts the evidence as sufficient proof of a legitimate payment. Square updates the dispute state to `WON` and releases the held funds back to the seller's bank account. * **Lose** - The bank rejects the evidence as insufficient proof. Square updates the dispute state to `LOST` and the cardholder is refunded. * **Bank asks for more information** - The bank is still deliberating and is requesting additional evidence. Square updates the dispute state to `EVIDENCE_REQUIRED`. In this case, the seller can upload more evidence or [accept the cardholder's dispute](#accept-dispute). {% anchor id="webhook-notifications" /%} ## Webhook notifications To receive the most timely information about disputes, subscribe to the `dispute.created` and `dispute.state.updated` webhooks. When a bank notifies Square of a new payment dispute, Square creates a dispute and sends the `dispute.created` webhook event notification, which includes the entire dispute object in its data. ```json { "merchant_id": "MLFG72TMMXMCQ", "location_id": "L1HN3ZMTZEB87", "type": "dispute.created", "event_id": "3ad92963-cddd-4f80-9c87-9fd75b4954e5", "created_at": "2022-03-02T16:38:37.46Z", "data": { "type": "dispute", "id": "bVTprrwk0gygTLZ96VX1oB", "object": { "dispute": { "amount_money": { "amount": 2273, "currency": "USD" }, "brand_dispute_id": "P9td9draSX6ACrUO3KEI6Q", "card_brand": "VISA", "created_at": "2022-03-02T16:38:37.460Z", "disputed_payment": { "payment_id": "BqzL87eLnz9gJRuoiIYSY44p9ORZY" }, "due_at": "2022-03-16T00:00:00.000Z", "id": "OWo09e15R49UrfXjG5Bod", "location_id": "L1HN3ZMTZEB87", "reason": "DUPLICATE", "reported_at": "2022-03-02T00:00:00.000Z", "state": "EVIDENCE_REQUIRED", "updated_at": "2022-03-02T16:38:37.460Z" } } } } ``` The Disputes API supports the following webhooks: | Event | Description | |---------|----------------| |[dispute.created](https://developer.squareup.com/reference/square/disputes-api/webhooks/dispute.created) |A cardholder has initiated a chargeback and a dispute was created.| |[dispute.state.updated](https://developer.squareup.com/reference/square/disputes-api/webhooks/dispute.state.updated) |The state of a dispute has been updated. When the bank reaches a dispute resolution, the state changes to either `WON` or `LOST`. During the dispute process, the state can also change to `PROCESSING` or `EVIDENCE_REQUIRED`. The event data includes details about what was updated.| |[dispute.evidence.created](https://developer.squareup.com/reference/square/disputes-api/webhooks/dispute.evidence.created) |Evidence was added to a dispute from the Disputes Dashboard in the [Square Dashboard](https://app.squareup.com/dashboard), in the Square Point of Sale application, or by [uploading evidence with the Disputes API](#uploading-evidence). | |[dispute.evidence.deleted](https://developer.squareup.com/reference/square/disputes-api/webhooks/dispute.evidence.deleted) |Evidence was removed from a dispute in the Disputes Dashboard in the [Square Dashboard](https://app.squareup.com/dashboard), in the Square Point of Sale application, or by calling [DeleteDisputeEvidence](https://developer.squareup.com/reference/square/disputes-api/delete-dispute-evidence) in the Disputes API.| --- # Disputes API > Source: https://developer.squareup.com/docs/disputes-api/overview > Status: PUBLIC > Languages: All > Platforms: All An introduction to processing disputes using the Square Disputes API. **Applies to:** [Disputes API](https://developer.squareup.com/reference/square/disputes-api) {% subheading %}Learn how to use the Disputes API to processing payment disputes.{% /subheading %} {% toc hide=true /%} ## Overview The Disputes API allows a seller to use your application to complete the steps of the disputes process. To provide the most timely information about disputes, Square provides [webhook notifications](disputes-api/process-disputes#webhook-notifications) for each step of the dispute process. Your application should provide the seller with important information from the `Dispute` object, including the `reason` for the dispute, the current `state` of the dispute, and the `due_at` deadline by which the seller must respond (by accepting or challenging the dispute), so that the seller can make the most appropriate decision regarding the dispute. A payment dispute, or chargeback, occurs when a cardholder contacts their card-issuing bank to request a payment reversal when they believe a payment isn't valid. For instance, if they were charged twice for the same item, the item wasn't delivered correctly, or the charge itself is fraudulent. ## Requirements and limitations * Required OAuth permissions: `DISPUTES_WRITE` and `DISPUTES_READ`. * Square doesn't decide who wins or loses the dispute; that decision is up to the card-issuing bank of the cardholder. * After your application uploads dispute evidence to Square using the Disputes API, the seller can no longer challenge or accept the dispute using the [Disputes Dashboard](https://squareup.com/dashboard/sales/disputes). ## How the dispute process works When a cardholder requests a charge reversal with their bank, the bank notifies Square of the request. Square then notifies the seller and adds the dispute to the seller's [Disputes Dashboard](https://squareup.com/dashboard/sales/disputes). At this time, Square withholds the disputed funds from the seller's Square account balance until the bank issues a final resolution on the case. If there are insufficient funds in the Square account balance, the funds are removed (debited) from the seller's most recently linked bank account. Square doesn't decide who wins or loses the dispute; that decision is up to the cardholder's bank. However, Square communicates with the bank on the seller's behalf, provides the seller with updates, and helps them navigate the process. The steps in the dispute process are as follows: 1. Square notifies the seller of a dispute. 2. The seller responds within the specified deadline, either accepting or challenging the chargeback request. 3. If challenging the request, the seller provides evidence that the purchase was valid. 4. The seller waits for the bank to determine the dispute resolution. ![A diagram showing the dispute process from initiation through resolution.](//images.ctfassets.net/1nw4q0oohfju/14F6DZ5vwU0QHl16fRAky2/844acbc7727f1e736f98c1d75294600d/dispute-process-flow.png) {% aside type="tip" %} Some chargebacks are generated because of fraudulent activity. To reduce the possibility of fraudulent charges, sellers can use the [Square Risk Manager](https://squareup.com/help/us/en/article/6816-navigating-square-risk-manager) to set up rules for online transactions, which can alert them or decline the payment if the transaction appears risky or is likely to result in a chargeback. Additionally, you can use Risk Manager with [Strong Customer Authentication](sca-overview) to require a card issuer to verify the buyer when a payment card is used. If the buyer is verified by the issuer, any chargebacks are the responsibility of the issuer and a dispute isn't created. {% /aside %} Square sellers can [access and respond to disputes using the Disputes Dashboard](https://squareup.com/help/us/en/article/3882) or through your application using the Disputes API. ## See also * [Process Disputes](disputes-api/process-disputes) * [Test the Disputes API](disputes-api/sandbox-testing) --- # Python SDK > Source: https://developer.squareup.com/docs/sdks/python > Status: PUBLIC > Languages: All > Platforms: All Use the Square Python library to build with Square APIs in a language-idiomatic way that reduces complexity without sacrificing API functionality. {% subheading %}The Square Python library supports Square APIs in a language-idiomatic way that reduces complexity without sacrificing API functionality.{% /subheading %} {% toc hide=true /%} {% card-layout %} {% card iconPath="//images.ctfassets.net/1nw4q0oohfju/3nDe2JNURBjpRjfhcKhsKN/3e2fcb4cb1e9d42514d11ef663e60432/pypi.svg" href="https://pypi.org/project/squareup/" %} {% card-link-out %}SDK package{% /card-link-out %} {% /card %} {% card iconPath="//images.ctfassets.net/1nw4q0oohfju/6foMeNHsmKw27jkpa7lPHk/6d5da15335dcf70d1fd1c28ca3bb540e/Github.svg" href="https://github.com/square/square-python-sdk/blob/master/README.md#sdk-reference" %} {% card-link-out %}Reference library docs{% /card-link-out %} {% /card %} {% /card-layout %} {% line-break /%} **Latest SDK Version:** 45.0.1.20260715 Each SDK version is tied to a specific [Square API version](build-basics/versioning-overview). As features are added, Square releases a new Square API version and a new SDK version. To use new features, you must update the SDK version in your application. Review the [release notes](changelog/connect) to learn about changes in each API version. An increase in the SDK major version number indicates a breaking change. You should always test your application before deploying a change to production. {% aside type="important" %} Version `42.0.0.20250416` of the Python SDK represents a full rewrite of the SDK, with a number of breaking changes, including client construction and parameter names. When upgrading from version `41.0.0.20250319` or earlier, read the [migration guide](sdks/python/migration) to learn what to update and how to use the new SDK and the legacy version side by side. {% /aside %} ## Installation Install the latest version of the Square Python SDK with the following command: ```bash pip install squareup ``` ## Quickstart * Follow along with the [Quickstart guide](sdks/python/quick-start) to set up and test the Square Python SDK in your own project. * Download the [Square Python SDK Quickstart sample app](https://github.com/Square-Developers/python-getting-started) and follow the instructions in the README. --- # Bank Accounts API > Source: https://developer.squareup.com/docs/bank-accounts-api > Status: PUBLIC > Languages: All > Platforms: All Learn how to use the Bank Accounts API to retrieve information about an external bank account linked to a Square account. **Applies to:** [Bank Accounts API](https://developer.squareup.com/reference/square/bank-accounts-api) {% subheading %}Use the Bank Accounts API to retrieve information about the bank accounts linked to a Square account.{% /subheading %} {% toc hide=true /%} ## Overview Sellers can [link bank accounts to their Square accounts](https://squareup.com/help/us/en/article/3896-link-and-edit-your-bank-account) in the Square Dashboard or Square app. A seller needs to link a bank account in order to transfer money into or out of Square. When a seller links a bank account in their dashboard, Square generates a `BankAccount` object. A `BankAccount` represents the connected account. With the Bank Accounts API, you can: * Retrieve a list of all of a seller’s linked bank accounts with a call to [ListBankAccounts](https://developer.squareup.com/reference/square/bank-accounts-api/list-bank-accounts) * Retrieve a specific connected bank account with a call to [GetBankAccount](https://developer.squareup.com/reference/square/bank-accounts-api/get-bank-account) These endpoints are useful if you want to display a seller’s bank account information in your application. ## How the Bank Accounts API works ### Requirements and Limitations * OAuth applications must have `BANK_ACCOUNTS_READ` [permissions](https://developer.squareup.com/docs/oauth-api/square-permissions) to use the Bank Accounts API ### BankAccount object Square generates a `BankAccount` object when a seller links a bank account to their Square account. Calls to [ListBankAccounts](https://developer.squareup.com/reference/square/bank-accounts-api/list-bank-accounts) and [GetBankAccount](https://developer.squareup.com/reference/square/bank-accounts-api/get-bank-account) return `BankAccount` objects. The `BankAccount` represents the linked account. The below example `BankAccount` represents a US bank account linked to a seller’s US Square account. ```json { "bank_account": { "id": "w3yRgCGYQnwmdl0R3GB", "account_number_suffix": "971", "country": "US", "currency": "USD", "account_type": "CHECKING", "holder_name": "Jane Doe", "primary_bank_identification_number": "112200303", "location_id": "MER9ST0SUIQ9W", "status": "VERIFIED", "creditable": true, "debitable": true, "version": 3, "bank_name": "Checking and Savings Bank" } } ``` {% aside type="info" %} For comprehensive details about every `BankAccount` field, see the [BankAccount](https://developer.squareup.com/reference/square/objects/BankAccount) reference. {% /aside %} #### International Bank Accounts The `primary_bank_identification_number` and optional `secondary_bank_identification_number` field formats vary depending on the country where the bank is located, as detailed in the following table. | Country of the bank | ISO country code | `primary_bank_identification_number` | `secondary_bank_identification_number` | | ---------- | ---------- | ---------- | ---------- | | United States | US | Routing number | N/A | | Japan | JP | Bank code | Branch code | | United Kingdom | GB | Sort code | N/A | | Canada | CA | Institution number | Transit number | | Australia | AU | BSB code | N/A | | SEPA countries | Country code of the BIC | Swift BIC | N/A | See [International Development](https://developer.squareup.com/docs/international-development) for more information about building Square applications that support sellers in multiple countries. ### Operations You can execute the following operations with the Bank Accounts API: * [ListBankAccounts](https://developer.squareup.com/reference/square/bank-accounts-api/list-bank-accounts): Retrieve a list of a seller’s linked bank accounts. * [GetBankAccount](https://developer.squareup.com/reference/square/bank-accounts-api/get-bank-account): Retrieve a specific connected bank account. ### Webhooks You can subscribe to the following webhooks to get notified when there are changes to a `BankAccount`: | Event | Permission{% width="180px" %} | Description | |--------|-------------------------------|----------------| |[bank_account.disabled](https://developer.squareup.com/reference/square/bank-accounts-api/webhooks/bank_account.disabled) | `BANK_ACCOUNTS_READ` | Published when Square sets the status of a bank account to DISABLED. | |[bank_account.verified](https://developer.squareup.com/reference/square/bank-accounts-api/webhooks/bank_account.verified) | `BANK_ACCOUNTS_READ` |Published when Square sets the status of a bank account to VERIFIED. | |[bank_account.created](https://developer.squareup.com/reference/square/bank-accounts-api/webhooks/bank_account.created) | `BANK_ACCOUNTS_READ` |Published when you link a seller's or buyer's bank account to a Square account. Square sets the initial status to VERIFICATION_IN_PROGRESS and publishes the event.| #### BankAccount.version and Webhooks The `BankAccount.version` field is useful when processing webhook events. The version is assigned when the `BankAccount` is created, and increments every time the `BankAccount.status` changes. The status changes when Square makes any update to the `BankAccount`, including when Square verifies, disables, or reenables the `BankAccount`. See [Square Webhooks](webhooks/overview) for more information about using webhooks with Square, and the [Webhook Events Reference](webhooks/v2webhook-events-tech-ref) for a list of all supported webhooks. --- # Move Webhook Event Notifications to Production > Source: https://developer.squareup.com/docs/webhooks/movetoprod > Status: PUBLIC > Languages: All > Platforms: All A list of tasks for developers to take to move an application that uses webhooks from Sandbox testing to a production environment. {% subheading %}Review the list of tasks for developers to take to move an application that uses webhooks from Sandbox testing to a production environment.{% /subheading %} {% toc hide=true /%} ## Overview When your application is ready to be moved from the Sandbox environment to production, there are several tasks you need to complete to manage webhook event notifications in production. These include the following: * **Get production application credentials** - In the Developer Console, open your application, and then choose **Production** on the environment toggle at the top of the page. In the left pane, choose **Credentials**, and then copy the production application ID and the production access token. * **Enter production subscription information** - In the left pane, choose **Webhooks**, and then choose **Subscriptions**. Choose **Add subscription**, and then enter the webhook event subscription name and the production notification URL. Choose the API version, choose only the events your application needs, and then choose **Save**. * **Update your access token and application ID** - Replace your Sandbox access token and application ID with production values in your application. * **Update API calls** - Update your code to make API calls to Square production endpoints. * **Use idempotency** - A generated idempotency value is included as the `event_id` field in the body of each event notification. Design your application to use this value to bypass processing if it's a repeated value. * **Use message versioning** - If your application passes Square data to another application, you should add versioning to the data before passing it to avoid duplication and to make auditing of the data transfer easier. * **Validate the webhook event notification** - A non-Square post can potentially compromise your application. All webhook notifications from Square include an `x-square-hmacsha256-signature` header. The value of this header is an HMAC-SHA256 signature generated using your webhook signature key, the notification URL, and the raw body of the request. You can validate the webhook notification by generating the HMAC-SHA256 in your own code and comparing it to the signature of the event notification you received. For more information and code examples that show how to validate the signature of an event notification, see [Verify and Validate an Event Notification](webhooks/step3validate). {% aside type="important" %} The base URL for calling Sandbox endpoints is https://connect.squareupsandbox.com. When you move your application to production, you need production credentials and you need to use https://connect.squareup.com as the base URL. {% /aside %} ## See also * [Create a Notification URL](webhooks/step1createurl) * [Subscribe to Event Notifications](webhooks/step2subscribe) * [Verify and Validate an Event Notification](webhooks/step3validate) * [Manage Webhook Operations](webhooks/step4manage) --- # Mobile Web Technical Reference > Source: https://developer.squareup.com/docs/pos-api/web-technical-reference > Status: PUBLIC > Languages: All > Platforms: All Technical Reference for mobile web integrations with the Square Point of Sale API. **Applies to:** [Point of Sale API - iOS](https://developer.squareup.com/docs/api/point-of-sale) | [Point of Sale API - Android](https://developer.squareup.com/docs/api/point-of-sale/android) {% subheading %}Review the technical reference for the Point of Sale API Mobile Web.{% /subheading %} {% toc hide=true /%} ## Overview For Japanese sellers, e-money payments are supported with these Mobile Web SDK URL parameters: * **Android** - `TENDER_TYPES.TENDER_CARD`. * **iOS** - `supported_tender_types.CREDIT_CARD`. ## Mobile Web on Android To initiate a transaction from your website, you supply a specially crafted link or button similar to the following to direct the user to the Square Point of Sale application. The following example starts a $1 USD transaction: ```html Start Transaction ``` Notice that a list of key-value pairs is delimited with a semicolon and wrapped by special Android start and end tokens (`intent:#Intent;` and `end`) and is embedded in the target URL. For step-by-step guidance opening the Point of Sale application from your mobile web application, see [Build on Mobile Web](pos-api/build-mobile-web). ### Android URL parameters |Name{% width="300px" %}|Description| |:----------|:------------| |action|**Required** - This must be `com.squareup.pos.action.CHARGE.` This represents a Square transaction request.| |`S.com.squareup.pos.CUSTOMER_ID`|**Optional** - The ID of the customer.| |`S.com.squareup.pos.WEB_CALLBACK_URI`|**Required** - The URL that the Square Point of Sale application sends its response to.{% line-break /%}{% line-break /%}For native applications, the protocol of this URL (for example, `myapp-url-scheme` in the previous JSON example) must match the custom URL scheme you specified in the Developer Console. {% line-break /%}{% line-break /%}For web applications, this value must match the callback URL you specified in the Developer Console.| |`S.com.squareup.pos.CLIENT_ID`|**Required** - Your client ID.| |`S.com.squareup.pos.LOCATION_ID`|**Optional** - The location ID of the seller.| |`S.com.squareup.pos.API_VERSION`|**Required** - The targeted version of the Square Point of Sale API (such as V2.0).| |`l.com.squareup.pos.AUTO_RETURN_TIMEOUT_MS`|**Optional** - The number of milliseconds that the Square Point of Sale application should wait for the **Thank You** screen before automatically returning to the calling application. The timer begins when the **Thank You** screen loads. {% line-break /%}{% line-break /%} If the seller chooses **Add Customer** or **Save Card On File** on the **Thank You** screen, automatic return is disabled. The seller can also manually return to the calling application by choosing **New Sale**.{% line-break /%}– The minimum value is 3200.{% line-break /%}– The maximum value is 10000.| |`S.com.squareup.pos.CURRENCY_CODE`|**Required** - The currency code (such as USD).| |`i.com.squareup.pos.TOTAL_AMOUNT`|**Required** - The total amount represented in the smallest unit of the supplied currency (for example, a value of 100 corresponds to $1.00 USD).| |`S.com.squareup.pos.TENDER_TYPES`|**Required** - Provides the tender types that are allowed and displayed by the Square Point of Sale application, which must be a non-empty comma-delimited set of the following:{% line-break /%}– `com.squareup.pos.TENDER_CARD`{% line-break /%}– `com.squareup.pos.TENDER_CARD_ON_FILE`{% line-break /%}– `com.squareup.pos.TENDER_CASH`{% line-break /%}– `com.squareup.pos.TENDER_OTHER`{% line-break /%}– `com.squareup.pos.TENDER_PAYPAY`| |package|**Recommended** - If set, this must be 'com.squareup', which identifies the package name of the application responding to this intent.| |`S.browser_fallback_url`|**Optional** - If the Point of Sale application isn't installed, Android routes to this supplied URL. If missing, Android routes to the Play Store if the package parameter is provided.| |`S.com.squareup.pos.NOTE`|**Optional** - A note to add to your transaction if completed successfully.| |`S.com.squareup.pos.REQUEST_METADATA`|**Optional** - The state parameter that's returned in the response for the developer's use.| ### Receiving a response from the Android Point of Sale application If successful, the Android Point of Sale application returns to your callback URL with the same parameters set in your URL. The parameters contains information about the completed transaction. Android results are returned as query parameter values with the form `com.squareup.pos.{RESULT_NAME}`. |Name{% width="190px" %} |Type{% width="80px" %} | Description| |:-------|:------| :--------------| |`SERVER_TRANSACTION_ID`|`string`|The unique ID of the processed transaction, if it succeeds. You can use this ID to get the full details of the payment with the [RetrieveTransaction endpoint](https://developer.squareup.com/reference/square/transactions-api/retrieve-transaction). This parameter is absent if an error occurs or if the transaction was processed in [Offline Mode](https://squareup.com/help/article/5095).| |`CLIENT_TRANSACTION_ID`|`string`|The transaction's device-specified ID, generated in case the payment needed to be processed in [Offline Mode](https://squareup.com/help/article/5095). Note that this value is present even if the payment isn't processed in Offline Mode.{% line-break /%} This parameter is absent if an error occurs.| |`REQUEST_METADATA`|`string`|The state parameter that's returned in the response for the developer's use.| |`ERROR_CODE`|`string`|A code, such as `TRANSACTION_CANCELED`, that indicates the type of error that occurs, if any. See [Android error codes](#androiderrorcodes) for possible values and what they indicate.| |`ERROR_DESCRIPTION`|`string`|The description of the error.| If a Point of Sale API transaction fails for any reason, the Square Point of Sale application returns an error code as the value of the `com.squareup.pos.ERROR_CODE` query parameter in the response. {% anchor id="androiderrorcodes" /%} ### Android error codes Android error codes are returned as query parameter values with the form `com.squareup.pos.{ERROR_CODE}`. |Error code{% width="300px" %}|Description| |:---------|:----------| |`CUSTOMER_MANAGEMENT_NOT_SUPPORTED`|The Square account used doesn't support customer management.| |`DISABLED`|The Point of Sale API isn't currently available.| |`ILLEGAL_LOCATION_ID`|The provided location ID doesn't correspond to the location currently logged in to Square Point of Sale.| |`INVALID_CUSTOMER_ID`|The provided customer ID is invalid.| |`INVALID_REQUEST`|The information provided in this transaction request is invalid (such as, a required field is missing or malformed).| |`NO_EMPLOYEE_LOGGED_IN`|Employee management is enabled but no employee is logged in to Square Point of Sale.| |`NO_NETWORK`|Square Point of Sale was unable to validate the Point of Sale API request because the Android device didn't have an active network connection.| |`NO_RESULT`|Square Point of Sale didn't return a transaction result.| |`TRANSACTION_ALREADY_IN_PROGRESS`|Another Square Point of Sale transaction is already in progress.| |`TRANSACTION_CANCELED`|The transaction was canceled in Square Point of Sale.| |`UNAUTHORIZED_CLIENT_ID`|The application with the provided client ID isn't authorized to use the Point of Sale API.| |`UNEXPECTED`|An unexpected error occurs.| |`UNSUPPORTED_API_VERSION`|The installed version of Square Point of Sale doesn't support this version of the Point of Sale SDK.| |`UNSUPPORTED_WEB_API_VERSION`|The Web API used isn't supported in the supplied API version, which must be version 1.3 or later.| |`USER_NOT_ACTIVATED`|Square Point of Sale tried to process a credit card transaction, but the associated Square account isn't activated for card processing.| |`USER_NOT_LOGGED_IN`|No user is currently logged in to Square Point of Sale.| ## Mobile Web on iOS To initiate a Square Point of Sale transaction from your website, you open a URL with a single query parameter called `data`. The `data` parameter is a percent-encoded JSON object that contains the information that Square Point of Sale needs to process the transaction request. ```html square-commerce-v1://payment/create?data={REPLACE ME} ``` For step-by step-guidance opening the Point of Sale application from your mobile web application, see [Build on Mobile Web](pos-api/build-mobile-web). ### iOS data fields |Name{% width="130px" %} | Type | Description | |:--------|:-------------|:----------| |`amount_money`|[Money](https://developer.squareup.com/reference/square/objects/Money)|**Required** - The amount of money to charge with Square Point of Sale, in the smallest unit of the corresponding currency. For US dollars, this value is in cents.| |`callback_url`|string|**Required** - The URL that Square Point of Sale sends its response to.{% line-break /%}For native applications, the protocol of this URL (for example, `myapp-url-scheme` in the previous JSON example) must match the custom URL scheme you specified in the Developer Console. For web applications, this value must match the callback URL you specified in the Developer Console.| |`client_id`|string|**Required** - Your application ID, which is available in the Developer Console.| |`options`|object|**Required** - Contains additional payment options, described in [Specifying additional payment options](#specifying-additional-payment-options).| |`version`|string|**Required** - The version of the Point of Sale API to use to process the transaction. This value should be 1.3, which is the current version of the API. {% line-break /%}If the installed version of Square Point of Sale doesn't support the specified version of the Point of Sale API, an `unsupported_api_version` error is returned.{% line-break /%}| |`location_id`|string|**Optional** - Provide the ID of one of the business locations in this parameter to require that the transaction be processed by that location. If the specified location isn't currently signed in to Square Point of Sale, the transaction fails with an error. {% line-break /%} You can get your location ID using the [ListLocations](https://developer.squareup.com/reference/square/locations-api/list-locations) endpoint.| |`state`|string|**Optional** - If you provide this value, it's included in the Square Point of Sale response to your application after the payment completes. Use this parameter to associate any helpful state information with the payment request.| |`notes`|string|**Optional** - A custom note to associate with the resulting payment.{% line-break /%}This note is included in the `itemizations` field of `Payment` objects returned by the `ListPayments` and `RetrievePayment` endpoints.| |`customer_id`|string|**Optional** - Provide the ID of one of the business customers in this parameter to require that the transaction be linked with that customer. If the Square account doesn't support customer management or an invalid customer ID is specified, the transaction fails with an error. {% line-break /%}{% line-break /%}An Internet connection is also required for Square Point of Sale to retrieve the customer's details for the specified customer ID. If there is no Internet connection, the transaction fails with an error. {% line-break /%}You can fetch a seller's customer IDs using the [ListCustomers](https://developer.squareup.com/reference/square/locations-api/list-customers) or [SearchCustomers](https://developer.squareup.com/reference/square/locations-api/search-customers) endpoint.| #### Specifying additional payment options You can specify additional payment options by adding the `option` field to your `data` object. |Name{% width="200px" %} |Type{% width="90px" %} |Description| |:-------|:---------|:---------| |`supported_tender_types`|`string[]`|**Required** - The types of tender that Square Point of Sale is allowed to accept for the payment. The following tender types are supported:{% line-break /%}– `CREDIT_CARD`{% line-break /%}– `CASH`{% line-break /%}– `OTHER`{% line-break /%}– `SQUARE_GIFT_CARD`{% line-break /%}– `CARD_ON_FILE`{% line-break /%}– `PAYPAY`| |`clear_default_fees`|`boolean`|**Optional** - If `true`, default fees (such as taxes) that the seller has created in Square Point of Sale aren't automatically applied to the payment.{% line-break /%}The default value is `false`.| |`auto_return`|`boolean`|**Optional** - If `true`, Square Point of Sale automatically switches back to your application following a short timeout after the transaction completes. Otherwise, the seller must choose the **New Sale** button in Square Point of Sale to return to your application. {% line-break /%}{% line-break /%}If the seller chooses the **Add Customer** button or the **Save Card On File** button after the transaction completes to add or modify information about the customer associated with the transaction or to save the customer's card on file, then Square Point of Sale doesn't automatically switch back to your application, even if this option is set to `true`.| |`skip_receipt`|`boolean`|**Optional** - The default value is `false`. Set `skip_receipt` to `false` to show the digital receipt options screen after the transaction completes. To prevent the options screen from showing, set `skip_receipt` to `true`. | ### Receiving a response from the iOS Point of Sale application After the Square Point of Sale application finishes processing a transaction (or encounters an error), it switches back to your application using the `callback_url` you provided in the original request. Depending on the result of the transaction, the `data` object includes some or all of the following fields: |Name{% width="190px" %} |Type{% width="75px" %}| Description| |:-------|:------| :--------------| |`transaction_id`|`string`|The unique ID of the processed transaction, if it succeeds. You can use this ID to get the complete details of the payment with the [RetrieveTransaction](https://developer.squareup.com/reference/square/transactions-api/retrieve-transaction) endpoint. This parameter is absent if an error occurs or if the transaction was processed in [Offline Mode](https://squareup.com/help/article/5095).| |`client_transaction_id`|`string`|The transaction's device-specified ID, generated in case the payment needs to be processed in [Offline Mode](https://squareup.com/help/article/5095). Note that this value is present even if the payment isn't processed in Offline Mode. This parameter is absent if an error occurs.| |`status`|`string`|This value is either `ok` if the payment succeeds or `error` if an error occurs.| |`error_code`|`string`|A code, such as `payment_canceled`, that indicates the type of error that occurs, if any. For possible values and what they indicate, see [iOS error codes](#ioserrorcodes).| |`state`|`string`|This value is the same value you specified for `state` in your original request, if any.| {% anchor id="ioserrorcodes" /%} ### iOS error codes If an error occurs during a Point of Sale API transaction, the `error_code` field of the JSON object returned to your application has one of the following values: |Name{% width="290px" %} |Description | |:--------|:---------| |`amount_invalid_format`|The request has a missing or invalid amount to charge.| |`amount_too_large`|The request amount to charge is too large.| |`amount_too_small`|The request amount to charge is too small.| |`client_not_authorized_for_user`|Point of Sale versions prior to 4.53 require the developer to guide sellers through OAuth before allowing them to take payments with the Point of Sale API. As of Square Point of Sale 4.53, this error type is deprecated. For more information, see [OAuth API](oauth-api/how-it-works).| |`could_not_perform`|The request couldn't be performed. This is usually because there is an unfinished transaction pending in Square Point of Sale. The seller must open Square Point of Sale and complete the transaction before initiating a new request.| |`currency_code_mismatch`|The currency code provided in the request doesn't match the currency associated with the current business.| |`currency_code_missing`|The currency code provided in the request is missing or invalid.| |`customer_management_not_supported`|This seller account doesn't support customer management and therefore cannot associate transactions with customers.| |`data_invalid`|The URL sent to Square Point of Sale has missing or invalid information.| |`invalid_customer_id`|The customer ID provided in the request doesn't correspond to a customer signed in to the seller's Customer Directory.| |`invalid_tender_type`|The request included an invalid tender type.| |`no_network_connection`|The transaction failed because the device has no network connection.| |`not_logged_in`|A seller isn't currently logged in to Square Point of Sale.| |`payment_canceled`|The seller canceled the payment in Square Point of Sale.| |`unsupported_api_version`|The installed version of Square Point of Sale doesn't support the specified version of the Point of Sale API.| |`unsupported_currency_code`|The currency code provided in the request isn't currently supported by the Point of Sale API.| |`unsupported_tender_type`|The request included a tender type that isn't currently supported by the Point of Sale API.| |`user_id_mismatch`|The business location currently signed in to Square Point of Sale doesn't match the location represented by the `location_id` you provided in your request.| |`user_not_active`|The currently signed-in location hasn't activated card processing.| --- # Postman > Source: https://developer.squareup.com/docs/devtools/postman > Status: PUBLIC > Languages: All > Platforms: All You can use Postman to test API calls multiple times without having to write code or install Square SDKs. {% subheading %}Learn about Postman and how to test API calls multiple times without having to write code or install Square SDKs.{% /subheading %} {% toc hide=true /%} ## Before you start The API call example in this topic creates a new Sandbox charge. To make the call, you must have a valid payment token. You can use the Sandbox test payment token (`cnon:card-nonce-ok`) or get a payment token from the Square [Web Payments SDK](web-payments/overview) with credit card [Sandbox test values](testing/test-values). ## What is Postman? [Postman](https://www.getpostman.com) is an application for easy RESTful API exploration. You can use Postman to test API calls multiple times without having to write code or install Square SDKs. You can save multiple sets of credentials to quickly test API calls in the Sandbox and in production. ## 1. Get the Postman collection 1. If you haven't already installed Postman, visit the [Postman website](https://www.getpostman.com) and install the preferred version for your system. 2. Choose the following **Run in Postman** button to open Postman and import the Square Connect API Postman collection. [![A graphic showing the Run in Postman button.](//images.ctfassets.net/1nw4q0oohfju/1aqx7B1TeIMNKxgApu1EvQ/2ecd8a5cad09a0d9c2fb54852dc9ca50/run-in-postman-button.png)](https://app.getpostman.com/run-collection/36406701-2ccfeb38-520e-4353-9d2e-386295e72165) ## 2. Create your Postman environment The Square collection makes use of Postman environment variables. Start by creating a Sandbox environment. 1. Choose the gear icon to open the **Environment options** panel, and then choose **Manage Environments**. 2. To create a new environment, choose **Add**. 3. Name your environment with a descriptive title that indicates it's using Sandbox credentials (for example, Square Sandbox). 4. Add a key/value pair with `access_token` as the key and your Sandbox access token as the value. 5. Add a key/value pair with `location_id` as the key and a Sandbox location ID as the value. 6. Add a key/value pair with `host` as the key and `connect.squareupsandbox.com` as the value. 7. When you're finished adding key/value pairs, choose **Save**. Now, any test calls you make using this environment automatically fill the `access_token` and `location_id` with your Sandbox credentials. You can also create production environments that use your production credentials, locations, and the host set to `connect.squareup.com` instead of your Sandbox assets. ## 3. Call the CreatePayment endpoint Make a call to the `CreatePayment` endpoint using your sandbox environment: 1. On the drop-down menu next to the gear icon, choose your Sandbox environment. 1. Open the **Payments** folder, and then choose **CreatePayment**. 1. Choose the **Body** tab to see the body of the `CreatePayment` request. 1. Update line 8 of the JSON body to: `"source_id": "cnon:card-nonce-ok",`. 1. Choose **Send**. Postman now uses your Sandbox credentials to make the call. The Square API collection includes folders for each Square API with preconfigured calls you can use to test each endpoint. Read [Getting started with Postman and Square’s APIs](https://medium.com/square-corner-blog/getting-started-with-postman-and-squares-apis-e6bd0f2a8a75) on the Square Corner blog for a step-by-step walkthrough demonstrating how to create a customer profile and reference it in a Sandbox payment. --- # Webhook Event Logs > Source: https://developer.squareup.com/docs/devtools/webhook-logs > Status: PUBLIC > Languages: All > Platforms: All Learn about webhook event logs, which show the webhook event triggered during an API call. {% subheading %}Learn about webhook event logs, which show the webhook events triggered from API calls or seller actions.{% /subheading %} {% toc hide=true /%} ## Overview Webhook event logs let you view the webhook event notifications sent by Square. The logs include information such as: * The status code your endpoint or gateway responded with after receiving the notification. * The event type. * The URL the notification was sent to. * The timestamp when the event was triggered and when the notification was sent. * The Square API version associated with the webhook subscription. * The reason why a retry occurred for the notification. ## View webhook event logs Webhook event logs are maintained for a rolling 28-day period. You can view the logs in the Developer Console. 1. Sign in to the [Developer Console](https://developer.squareup.com/apps) and open your application. 2. In the left pane, choose **Webhooks**, and then choose **Logs**. 3. At the top of the page, choose **Sandbox** or **Production** to toggle to the target environment. The following screenshot shows the main **Webhook logs** page: ![A screenshot of webhook event logs with numbered UI items matching the description shown.](//images.ctfassets.net/1nw4q0oohfju/1QWjOBwj5THSSwdPfc7IZY/72bd45d2c0fa25ccadcf0c91c7fed9d5/webhook-logs-features.png) 1. Use the filter to find webhook events by date. 2. Select an event to see more details, including the notification headers and payload sent to the notification URL for your webhook subscription. 3. Search webhook events by event type, event ID, and other attributes. 4. Set **Automatic Refresh** to **On** to automatically update the webhook events page. 5. Show additional columns on the page. You can set which columns are shown using the "**+**" to the right of the column headings. Columns include **Status code**, **Event type**, **Notification URL**, **Sent at**, **Triggered at**, **Square version**, **Retry reason**, and **Test event**. ![A screenshot of the Webhook Logs page, with filters selected.](//images.ctfassets.net/1nw4q0oohfju/56v9FRmAeohSVYdXHnwyIO/8559981ffe43736ab4d69ee00fc299c8/Webhooks_filters.png) {% aside type="info" %} The **Status code** column shows the status code that Square received from your application in response to the event notification; it's not a response from Square. For example, a `504` status code likely indicates that your workflow took too long to process the notification and failed to respond in a timely manner. {% /aside %} When you select an event from the webhook events page, you can see a summary of the webhook event and the payload that was sent to your notification URL. For more information about webhook event fields, see [Format of an event notification](webhooks/step2subscribe#format-of-an-event-notification). ![A screenshot showing the summary of the webhook event and the payload that was sent to the webhook event notification endpoint.](//images.ctfassets.net/1nw4q0oohfju/5jqLB7Vz2UHaPoVDJXNWxP/ee2f295394e807dfa3ad2490c2a31bc1/Webhooks_summary.png) The **Payload** tab shows the notification that was sent to your notification URL. ![A screenshot of the Payload tab showing the notification that was sent to your webhook event notification endpoint.](//images.ctfassets.net/1nw4q0oohfju/4Ie2W8iVedJ6gYLeOaLF6e/1e0e6341ba30adc29c499647298c35c5/Webhooks_payload.png) {% aside type="tip" %} Applications can use the [Events API](events-api/overview) to recover and reconcile missed event notifications. {% /aside %} ## See also * [Square Webhooks](webhooks/overview) * [Webhook Subscriptions API](webhooks/webhook-subscriptions-api) * [Events API](events-api/overview) * [Developer Console](devtools/developer-dashboard) --- # Test Square APIs in the Sandbox > Source: https://developer.squareup.com/docs/devtools/sandbox/testing > Status: PUBLIC > Languages: All > Platforms: All A quick reference for walkthroughs for various Square APIs that use the Sandbox for testing. {% subheading %}Learn about the Square APIs that use the Sandbox for testing.{% /subheading %} {% toc hide=true /%} ## Overview Many of the Square APIs have walkthroughs and examples that use the Sandbox test environment. The following is a quick reference to these walkthroughs and examples. {% aside type="important" %} Some of the APIs require special test values when creating transactions in the Sandbox, especially when processing test payments. For more information about these test payment values, see [Sandbox Payments](devtools/sandbox/payments). {% /aside %} ## Cards API The Cards API has several walkthroughs using the Sandbox. These include the following: * [Create a Card on File from a Payment ID](cards-api/walkthrough/card-from-payment-id) * [Create a Card on File and a Payment](cards-api/walkthrough-seller-card) * [Create a Shared Card on File and Make a Payment](cards-api/walkthrough-shared-card) You can use a payment token generated with one of the test payment cards or you can use the values in the following table with calls to [CreateCard](https://developer.squareup.com/reference/square/cards-api/create-card) and successfully create a card on file for a customer. |Field |Value | |----------------------------|----------------- | |`source_id` |cnon:card-nonce-ok | |`billing_address.postal_code`|94103 | {% aside type="important" %} If you use a Sandbox test payment token with the [CreateCard](https://developer.squareup.com/reference/square/cards-api/create-card) endpoint, you must provide 94103 as the postal code in the `billing_address` field or the request fails and returns an invalid postal code error. {% /aside %} ## Catalog API [Build a Simple Catalog](catalog-api/build-with-catalog) shows how to create a catalog in the Square Sandbox. ## Devices API Use Sandbox device IDs and locations to test the following Devices API endpoints in the Square Sandbox: * [ListDevices](https://developer.squareup.com/reference/square/devices-api/list-devices) returns a list of Square Terminals and filters devices based on `location_id`. The `location_id` represents a fake location for the test environment. * [GetDevice](https://developer.squareup.com/reference/square/devices-api/get-device) returns a positive test case with the given device ID. If you test with a device ID that isn't a Sandbox test value, `GetDevice` returns a `NOT_FOUND` error. ## Disputes API A dispute can be accepted or challenged with evidence using the Disputes API. [Test the Disputes API](disputes-api/sandbox-testing) shows how to validate that your Disputes API integration can complete these actions in the Square Sandbox. Use these predefined payment amounts that map to specific dispute reasons. When you set one of these amounts in a [CreatePayment](https://developer.squareup.com/reference/square/payments-api/create-payment) request, Square generates a Sandbox dispute with the corresponding reason. The amounts shown are in the lowest denomination of the currency you provide in the `CreatePayment` request. For example, for USD, the amount is in cents. |Charge amount | Dispute reason | |:-------------|:-----------------------| |8801 |AMOUNT_DIFFERS | |8802 |CANCELLED | |8803 |DUPLICATE | |8804 |NO_KNOWLEDGE | |8805 |NOT_AS_DESCRIBED | |8806 |NOT_RECEIVED | |8807 |PAID_BY_OTHER_MEANS | |8808 |CUSTOMER_REQUESTS_CREDIT| |8809 |EMV_LIABILITY_SHIFT | ## Gift Cards API The Gift Cards API has several walkthroughs that use the Sandbox. These include the following: * [Sell a Gift Card](gift-cards/walkthrough-1) * [Use a Gift Card](gift-cards/walkthrough-2) ## Inventory API [Build and Manage a Simple Inventory](inventory-api/build-with-inventory) shows several examples using cURL to create an inventory in the Sandbox using the Inventory API. ## Invoices API You can use the Invoices API to create and manage invoices for orders created using the Orders API. You cannot use Square APIs to pay invoices or manage payment status. In [Create and Publish Invoices](invoices-api/walkthrough), which uses the Sandbox for testing, you use the Invoices API to create and publish invoices and then simulate the customer experience of paying an invoice. ## Labor API [Build with the Labor API](labor-api/build-with-labor) shows how to use the Labor API to capture the start, breaks, and end of a team member's shift and the hourly rate for the shift. ## Loyalty API Sellers use Square Loyalty to reward their customers and increase repeat business. Developers can use the Loyalty API to integrate Square Loyalty into third-party applications. You can use the Loyalty API to get information about loyalty programs, create loyalty accounts, enable buyers to earn and redeem points, and access loyalty event history. The following walkthroughs use the Sandbox to test the Loyalty API: * In this [walkthrough](loyalty-api/walkthrough1), you use the Orders API to create orders and the Loyalty API to manage loyalty accounts and redeem loyalty points. * In this [walkthrough](loyalty-api/walkthrough2), you use the Catalog API to create items in your product catalog, the Orders API to create orders, and the Loyalty API to manage loyalty accounts and redeem loyalty points. You test the sample walkthrough in the Square Sandbox environment. After creating a loyalty program, you need a phone number to set up a loyalty account. In the Sandbox, you provide a Sandbox phone number, instead of a real phone number, using the following format: ``` +1555 ``` For example, +14255551111. ## Locations API Your Sandbox account comes with one mock location per application. This location is unrelated to the production locations listed in the Square Developer Console. The Sandbox location ID is listed on the **Locations** page for each application in the [Developer Console](https://developer.squareup.com/apps). You can also retrieve the location ID programmatically by calling [ListLocations](https://developer.squareup.com/reference/square/locations-api/list-locations?redirect_hash=navsection-locations) with a Sandbox access token. ## OAuth API [OAuth Walkthrough: Test Authorization with a Web Server](oauth-api/walkthrough) lets you test each of the three stages of OAuth without using production seller accounts. The OAuth API is used to obtain permission from a seller to manage their resources. ## Orders API Many of the code examples for the Orders API use the Sandbox. Some of these topics include the following: * [Create Orders](orders-api/create-orders) * [Update Orders](orders-api/manage-orders/update-orders) * [Retrieve Orders](orders-api/manage-orders/retrieve-orders) * [Pay for Orders](orders-api/pay-for-orders) * [Order-Ahead Application Use Case](orders-api/order-ahead-usecase) ## Subscriptions API [Create a Subscription Plan and Manage Subscriptions](subscriptions-api/walkthrough) is a cURL-based walkthrough where you set up a subscription program for a gym membership, create customer subscriptions, and verify customer billing. {% anchor id="terminal" /%} ## Terminal API (checkouts) Sandbox test values can be used to test [Terminal checkouts](https://developer.squareup.com/reference/square/objects/TerminalCheckout) in the Square Sandbox. The Terminal API supports a collection of special `device_id` values you can use to simulate Terminal checkouts in the Sandbox without connecting to a physical Square Terminal. Successful Sandbox requests result in a payment generated in the Sandbox and shown in the Square Dashboard for your test account. Use the following information to generate Sandbox terminal checkouts. ### Terminal checkout test device IDs | Device ID{% width="290px" %}|Result| Details{% width="310px" %} | |---------------------------------------|--------------|---------------------------------------------------------------------------------------------| |9fa747a2-25ff-48ee-b078-04381f7c828f |Success |The checkout is successfully completed by the buyer using a credit card.{% line-break /%}{% line-break /%}Approved payments are up to $25 USD. Larger amounts fail and the checkout remains `PENDING` until it times out.{% line-break /%}{% line-break /%}**Note:** This behavior is indistinguishable from initial failures followed by a successful payment.| |22cd266c-6246-4c06-9983-67f0c26346b0 |Success |The credit card payment for the full amount is approved, with a 20% tip.{% line-break /%}{% line-break /%}Approved payments are up to $25 USD. Larger amounts fail and the checkout remains `PENDING` until it times out.| |4mp4e78c-88ed-4d55-a269-8008dfe14e9 |Success |The checkout is successfully completed by the buyer using a Square gift card. {% line-break /%}{% line-break /%}Approved payments are up to $25 USD. Larger amounts fail and the checkout remains `PENDING` until it times out. |388b5a08-a77c-48ef-ad2a-4a790e6f2789 |Success |An Interac credit card payment for the full amount is approved. Only supports CAD amounts.| |2b0b734b-b187-47f0-9d6f-288745210bdb |Success |An Interac credit card payment for the full amount is approved, with a 20% tip. Only supports CAD amounts.| |19a01fbd-3dcd-4d9f-a499-a641684af745 |Success |An eMoney/FeLiCa credit card payment for the full amount is approved.| |819f8d79-961e-4097-8f70-ef70b3e7db28 |Success |The Afterpay payment for the full amount is approved. {% line-break /%}{% line-break /%}Approved payments are up to $25 USD. Larger amounts fail and the checkout remains `PENDING` until it times out. |cae0ee02-f83b-11ec-b939-0242ac120002 |Success |The PayPay QR code payment for the full amount is approved. {% line-break /%}{% line-break /%}**Note:** The sandbox location must be based in Japan. |841100b9-ee60-4537-9bcf-e30b2ba5e215 |Failure |The checkout is canceled by the buyer. {% line-break /%}{% line-break /%}**Note:** This is the behavior when individual payment attempts fail and the buyer cancels on the device.| |0a956d49-619a-4530-8e5e-8eac603ffc5e |Failure |The checkout is timed out by Square.{% line-break /%}{% line-break /%}**Note:** This action immediately times out the checkout as if the timeout period has elapsed.| |da40d603-c2ea-4a65-8cfd-f42e36dab0c7 |Failure |The checkout isn't picked up by a Square Terminal and can be canceled by the developer.{% line-break /%}{% line-break /%}This behavior simulates an offline Terminal and can be canceled by the developer. If not canceled, this checkout times out.| ## Terminal API (Interac refunds) Sandbox test values can be used to test Terminal Interac refund requests in the Square Sandbox. Successful Sandbox requests result in a refund generated in the Sandbox and shown in the Square Dashboard for your test account. ### Terminal Interac refund test device IDs Before you can test your integration for an Interac refund, you must create an Interac checkout/payment using an Interac device ID in the previous table. Use the following to generate Sandbox Terminal Interac refund requests. | Device ID{% width="290px" %}|Result| Details{% width="310px" %} | |:---------------------------------------|:--------------|:---------------------------------------------------------------------------------------------| |f72dfb8e-4d65-4e56-aade-ec3fb8d33291|Success|The Interac refund request is successfully completed by the buyer. {% line-break /%}The refund is limited to the amount of the original payment and can only be applied to payments that require card-present refunds.| |aafea9fa-350c-4ab2-b033-b2fbb672e712 |Failure |The terminal refund is canceled by the buyer. {% line-break /%}**Note:** This is the behavior when individual refund attempts fail and the buyer cancels on the device.| |e371fb66-29a2-45a6-a928-f8de0e864242 |Failure |The terminal refund is timed out by Square.{% line-break /%}**Note:** This action immediately times out the terminal refund as if the timeout period has elapsed.| |7647344e-aea2-4cff-ac53-513644de434d |Failure |The terminal refund isn't picked up by Square Terminal and can be canceled by the developer.{% line-break /%}This behavior simulates an offline Terminal and can be canceled by the developer. If not canceled, this terminal refund times out.| {% aside type="info" %} Use the [Refunds API](payments-api/refund-payments) to request refunds on all other card networks. {% /aside %} ## Terminal API (actions) Sandbox test values can be used to test [Terminal actions](https://developer.squareup.com/reference/square/objects/TerminalAction) in the Square Sandbox. {% aside type="important" %} Terminal actions are currently in Beta. {% /aside %} The Terminal API supports a collection of special `device_id` values you can use to simulate Terminal actions in the Sandbox without connecting to a physical Square Terminal. The success case varies based on the action type. Failed requests simulate a customer canceling the operation, a server timed out, or the Square Terminal not picking up the request. Use the following information to generate Sandbox Terminal actions. {% table %} * Device ID * Result * Details --- * jg260ny-11t2-4xy2-kg21-tl949bp350ca * Success * The Terminal action successfully completes the request: - For `CONFIRMATION`, the buyer agrees to the terms. - For `SIGNATURE`, adds a sample John Hancock signature to the action. --- * fgw34tg-qwe1-fod2-e03e-e0fk0qiabcfk * Success * The Terminal action successfully completes the request with the specified buyer behavior. For `CONFIRMATION`, the buyer disagrees to the terms. --- * aafea9fa-350c-4ab2-b033-b2fbb672e712 * Failure * The Terminal action is canceled by the buyer. This is the behavior when a Terminal action attempt fails and the buyer cancels on the device. --- * e371fb66-29a2-45a6-a928-f8de0e864242 * Failure * The Terminal action is timed out by Square. This action immediately times out the Terminal action as if the timeout period has elapsed. --- * 7647344e-aea2-4cff-ac53-513644de434d * Failure * The Terminal action isn't picked up by Square Terminal and can be canceled by the developer. This behavior simulates an offline Terminal and can be canceled by the developer. If not canceled, this Terminal action times out. {% /table %} --- # API Explorer > Source: https://developer.squareup.com/docs/devtools/api-explorer > Status: PUBLIC > Languages: All > Platforms: All Learn about API Explorer features and how to use API Explorer to test Square APIs. {% subheading %}Learn about API Explorer features and how to use API Explorer to test Square APIs.{% /subheading %} {% toc hide=true /%} ## Overview [API Explorer](https://developer.squareup.com/explorer/square) is an interactive web application you can use to build, view, and send HTTP requests that call Square APIs. API Explorer lets you test your requests using actual Sandbox or production resources in your account such as customers, orders, and catalog objects. You can also use API Explorer to quickly populate resources in your account. You can then interact with the new resources in the Square Dashboard. For example, if you use API Explorer to create a customer in the Sandbox, the customer is displayed in the [Sandbox Square Dashboard](devtools/developer-dashboard#sandbox-square-dashboard). ## Requirements and limitations * To interact with resources in your account using pre-populated access tokens and resource IDs, you must sign in to API Explorer with your Square account. If you don't have an account, follow the [Get Started](square-get-started) steps to quickly create a free account and an application. Your account must contain at least one application. {% aside type="important" %} Don't share [access tokens](build-basics/access-tokens). They can be used to impersonate the account owner and gain access to account resources. {% /aside %} * API Explorer supports only publicly available Square APIs. The following APIs, SDKs, and plugins aren't supported: * Mobile APIs, SDKs, and plugins: * Reader SDK * Point of Sale API * In-App Payments SDK and plugins * Web Payments SDK * Deprecated Square APIs might not be available. ## API Explorer features API Explorer provides many features that help you build and test HTTP requests that call Square APIs. ![A graphic showing the interactive API Explorer interface, numbered with 1 - 4 to correspond to the following list of features.](//images.ctfassets.net/1nw4q0oohfju/4vfh8ryRnsDAnVmXo9L6vb/a6544a35a76aa0ce174ffffb1f2ae417/explorer-numbered_a.png) **1. Sandbox and Production toggle** If you're signed in to your Square account, you can choose to work with the Sandbox or the Production environment for your account. The Sandbox is an isolated server environment provisioned for each Sandbox test account. When you created an account, Square created a default test account for you. Square recommends using the Sandbox for testing. For more information, see [Square Sandbox](devtools/sandbox/overview). **2. API and endpoint selector** Select the Square API category and endpoint that you want to try. API Explorer displays the HTTP method, path, and description for the selected endpoint. If the endpoint requires a URL parameter or request body, or if it supports query parameters, API Explorer displays fields where you can provide values. **3. Share API link** Select the icon to create a link that includes the API endpoint and all parameters you entered so you can share the API request with others. Note that the link doesn't include the access token you used. **4. Dynamic requests** API Explorer provides a boilerplate request for each endpoint. As you enter values for the request in the page form, API Explorer automatically updates the contents of the **Request** pane. This pane also contains copy, expand, and run buttons. ![A graphic showing the interactive API Explorer interface, numbered with 5 - 8 to correspond to the following list of features.](//images.ctfassets.net/1nw4q0oohfju/pRZgoN2pF45OXXqoWvwkl/cb4d583c72811008576d141ed1b82d2c/explorer-numbered_b.png) **5. Real-time responses** If you're signed in to your Square account, the **Response** pane displays the response for the requests that you run. This pane also contains copy and expand buttons. After you run a request, the pane displays a **View Logs** link that opens the Developer Console and shows the [API logs](devtools/api-logs) for your application. **6. Access token selector** If you're signed in to your Square account, you can select an access token to use for your requests in the {% tooltip text="Square Sandbox" %}An isolated server environment used for testing. API calls in the Sandbox use the "connect.squareupsandbox.com" domain and require an access token that's valid for Sandbox.{% /tooltip %} or production environment. Access tokens are used to grant read and write permissions to resources in a Square account. For more information, see [Test access permissions](#using-access-tokens). {% aside type="important" %} Don't share [access tokens](build-basics/access-tokens). They can be used to impersonate the account owner and gain access to account resources. {% /aside %} **7. API version selector** Select the Square API version to use for the request. By default, API Explorer uses the latest API version, but you can choose an earlier version. This feature is useful for testing an application that's based on an earlier API version and for testing API changes before you update an application to a later API version. For more information, see [Versioning in Square APIs](build-basics/versioning-overview) and [Release notes for Square APIs and SDKs](changelog/connect). **8. Language selector for requests** Select the programming language that API Explorer uses for the request. API Explorer provides requests in cURL and languages for [Square SDK platforms](sdks). For more information, see [Generate language-specific requests for your applications](testing/api-explorer#language-specific-requests). ### Integration with documentation Each endpoint description includes an **API Reference** link that opens the endpoint documentation in the [Square API Reference](https://developer.squareup.com/reference/square). Each parameter and attribute can also display a description in a tooltip: * For a request, choose the attribute name in the page form. If the attribute is an object data type, you can choose the object name. * For a response, choose the attribute name in the **Response** pane. ![An animation showing integrated documentation features of API Explorer.](//images.ctfassets.net/1nw4q0oohfju/6kv2X1SwvSSdvS0Hijgb3n/945894a9f7a31f82597fdb79ef149638/field-descriptions.gif) {% aside type="tip" %} In the Square API Reference and from code blocks in guides, you can use the **Try in API Explorer** button to open the endpoint in API Explorer. {% /aside %} ### Inline tools for fields Specific field types provide inline tools that make it easier to enter values: * **Idempotency key generator** - For `idempotency_key` values, you can generate a random ID for the request. Using an idempotency key guarantees that Square processes a request only once, even if you send the same request multiple times. For more information, see [Idempotency](working-with-apis/idempotency). * **Payment token and card-on-file test values** - When creating a payment in the Sandbox, you can select a test payment token or card on file for the `source_id` value. You can also enter a payment token that you obtain using one of the Sandbox test values or the ID of a card on file or a gift card. For more information, see [Payment tokens for testing the Payments API](devtools/sandbox/payments#payment-tokens-for-testing-the-payments-api). * **Prepopulated resource IDs** - API Explorer prepopulates some fields that contain resource IDs, such as `customer_id`. * **File upload utility** - Fields that represent image files and other file formats include a file selector that you can use to select and upload a local file. * **Typeahead search for enum values** - Fields that represent `enum` values provide typeahead search suggestions that make it easier to find supported values. You can use your mouse to select a value or use the down-arrow key on the keyboard followed by Enter or Return. * **Formatted timestamp examples** - Many fields that represent `timestamp` values display example values that use the supported [RFC 3339](https://tools.ietf.org/html/rfc3339) format (for example, `2022-07-30T21:59:15.286Z`). For more information, see [Working with Dates](build-basics/common-data-types/working-with-dates). ### Share a link that's a copy of your request You can select an API endpoint, enter parameters for the API call, and then send that API request as a link to API Explorer so others can run your request. Note that the link doesn't include the access token you used. {% anchor id="language-specific-requests" /%} ### Generate language-specific requests for your applications In addition to cURL, API Explorer supports languages that correspond to [Square SDK platforms](sdks). You can select a programming language in the **Request** pane to generate language-specific requests that you can paste into your applications. For languages that correspond to strongly typed Square SDKs (such as Java, PHP, and C#), API Explorer uses the appropriate data models and syntax for the requests. {% aside type="info" %} You can also select a programming language on the API Explorer [home page](https://developer.squareup.com/explorer/square) to view API requests in your preferred language by default instead of cURL. {% /aside %} Requests generated by API Explorer should work as though in your application, assuming that the application is ready to call the Square APIs. For example, your application must be set up to use the target Square SDK and your code must initialize the SDK client object. After you paste the request from API Explorer into your application, you can add application-specific logic for handling success and failure conditions in your response code blocks. {% anchor id="using-access-tokens" /%} ### Test access permissions All Square API requests require a bearer access token in the `Authorization` header that grants permissions to Square resources, such as orders and customers. If you're signed in to your Square account, the **Access Token** selector provides a list of access tokens associated with your account. When the **Production** environment is selected, the selector displays the production access tokens for your applications. When **Sandbox** is selected, the selector displays the Sandbox access tokens for the test accounts associated with your applications, including the default test account. If you select an expired access token, you can renew the token with one click. {% aside type="important" %} Don't share [access tokens](build-basics/access-tokens). They can be used to impersonate the account owner and gain access to account resources. {% /aside %} The access token for the default test account is granted full permissions to all of your Sandbox resources. To test the OAuth permissions required by your application, use access tokens that allow specific permissions, check the responses, and make sure that your application handles success and failure scenarios. For this testing, you can select an access token for Sandbox test accounts that you created and configured in the Developer Console. Alternatively, you can paste an access token that you obtain through the OAuth API. For more information, see [Access Tokens and Other Square Credentials](build-basics/access-tokens). {% aside type="info" %} In the Sandbox, the application and default test account are issued the same access token. {% /aside %} {% anchor id="get-started" /%} ## Get started with API Explorer The following procedure describes how to use API Explorer to send simple GET and POST requests to Square APIs. For more information about working with Square APIs, see [Using the REST API](build-basics/using-rest-api). ### Step 1: Sign in and get an access token 1. In your web browser, sign in to [API Explorer](https://developer.squareup.com/explorer/square) with your Square account. 2. From the **Select API** menu, choose an API. 3. From the **Select token** box, choose an access token to use in the `Authorization` header of your requests. For this exercise, keep **Sandbox** selected. Square recommends using the {% tooltip text="Square Sandbox" %}An isolated server environment used for testing. API calls in the Sandbox use the "connect.squareupsandbox.com" domain and require an access token that's valid for Sandbox.{% /tooltip %} to test Square APIs when possible. For more information, see [Test access permissions](#using-access-tokens). ![An animation showing how to enter an access token in API Explorer.](//images.ctfassets.net/1nw4q0oohfju/59piZB822KYcbP8ITD0scg/301827921b5c4ac72802b25300386540/token-select.gif) Now you're ready to send requests to Square APIs. ### Step 2: Send a GET request 1. On the **Select API** menu, choose **Locations**. By default, this loads the `ListLocations` endpoint. API Explorer displays the HTTP method and path for the endpoint, along with a description and link to the endpoint documentation in the [Square API Reference](https://developer.squareup.com/reference/square). Note the **Request** and **Response** panes: * The **Request** pane displays a cURL request that includes the endpoint URL and required headers. cURL is selected by default, but you can optionally select a language for supported Square SDK platforms. For more information, see [Generate language-specific requests for your applications](#language-specific-requests). * The **Response** pane displays the JSON response after you run the request. 2. To run the request, choose **Run Request** at the top of the page: * If the request succeeds, the API returns a `200` status code and a JSON object that represents your locations. The response should contain the location that was automatically added to your Sandbox environment. * If the request fails, the API returns an error status code and any errors that occurred during the request. ![An animation showing how to select a language and run a request in API Explorer.](//images.ctfassets.net/1nw4q0oohfju/12lTbnwl5VKTOt1MjgiJCd/25e35d8a34021d80ec0ff7f347680201/run-request.gif) {% aside type="tip" %} To view the request or response in a larger window, choose the expand button in the **Request** or **Response** pane. {% /aside %} ### Step 3: Send a POST request Many endpoints accept path parameters, query parameters, or a request body. For these endpoints, API Explorer displays fields where you can provide parameter and property values. The information you provide is dynamically added to the request. 1. Select **Customers** and **Create customer**. Note that the **Request** pane displays a partial request that contains an empty body. The page form displays fields for all required and optional properties in the request. If the property is an object data type, choose **Add** to expand it. * To see the description for a property, choose the property name. * To see the description for an object, choose the object name. For example, for the `address` property, choose **Address**. 2. Enter a value for at least one of the following fields: `given_name`, `family_name`, `company_name`, `email_address`, or `phone_number`. 3. For **idempotency_key**, choose **Generate**. This generates a random GUID that represents a unique ID for this request. 4. Run the request: * If the request succeeds, the API returns a `200` status code and a JSON object that represents the new customer. * If the request fails, the API returns an error status code and any errors that occurred during the request. ![An animation showing how to enter parameters and run a request in API Explorer.](//images.ctfassets.net/1nw4q0oohfju/5OWphs0f6y85lyp90A5RtB/16fbe7ca96ac5bf03ecda514fa65cafe/edit-request.gif) 5. To view the new customer in the Sandbox Square Dashboard: 1. Open the [Developer Console](https://developer.squareup.com/apps). 1. On the **Sandbox Test Accounts** page, choose **Open** for your test account. 1. In the Sandbox Square Dashboard, in the left pane, choose **Marketing & loyalty**, and then choose **Customer directory**. ## See also * [Video: Sandbox Short: API Explorer](https://www.youtube.com/watch?v=8ZFQdPlZAUM) * [Video: Sandbox 101: Using API Explorer](https://www.youtube.com/watch?v=5Z7v_dIC0qI) --- # Troubleshoot Webhooks > Source: https://developer.squareup.com/docs/webhooks/troubleshooting > Status: PUBLIC > Languages: All > Platforms: All Common issues developers encounter when implementing Square webhooks. {% subheading %}Learn about common issues developers encounter when implementing Square webhooks.{% /subheading %} {% toc hide=true /%} ## Overview If you're encountering issues with webhooks, review the following for the most likely causes and solutions. ## I didn't receive my webhook notification ### Likely cause Square webhook notifications are typically sent within 60 seconds of the associated event. Applications must respond as soon as possible with an HTTP `2xx` status code to acknowledge the successful delivery. Unsuccessful deliveries are [retried](webhooks/overview#retry-schedule) for up to 24 hours. After 24 hours, the notification is discarded and not sent again. ### Solution Verify that your application is responding to notification deliveries in a timely manner with an HTTP `2xx` status code. ### Likely cause Square webhook notifications require specific [OAuth permissions](webhooks/v2webhook-events-tech-ref). For example, you can only receive `payment.created` notifications if the seller grants the `PAYMENTS_READ` permission scope to your application. ### Solution Make sure that your application has the appropriate OAuth authorization for each seller. For more information, see [OAuth API](oauth-api/overview). {% aside type="tip" %} [Webhook logs](devtools/webhook-logs) and the [Events API](events-api/overview) can be useful for troubleshooting missed event notifications. {% /aside %} ## I cannot validate a webhook notification against my webhook subscription ### Likely cause You've defined more than one webhook subscription for the client ID that identifies your application. You might have configured one V1 webhook subscription and one V2 webhook subscription or configured two V2 webhook subscriptions to be sent to a common webhook listener address. If so, you're matching the notification signature for one webhook event with the subscription signature of a different webhook. ### Solution Define a unique webhook listener for each subscription and then update each webhook subscription with the notification URL intended to handle events on that subscription. You shouldn't define a V2 webhook subscription that emits events for the same API that you're already handling with a V1 webhook subscription. Instead, deprecate your V1 webhook subscription and replace it with a V2 subscription. ## See also * [Square Webhooks](webhooks/overview) * [Create a Notification URL](webhooks/step1createurl) * [Subscribe to Event Notifications](webhooks/step2subscribe) * [Verify and Validate an Event Notification](webhooks/step3validate) * [Manage Webhook Operations](webhooks/step4manage) * [Video: Webhooks](https://www.youtube.com/watch?v=hxU4qGSYNsY) * [Webhook Events Reference](webhooks/v2webhook-events-tech-ref) * [Webhook Subscriptions API](webhooks/webhook-subscriptions-api) * [Events API](events-api/overview) --- # Create a Notification URL > Source: https://developer.squareup.com/docs/webhooks/step1createurl > Status: PUBLIC > Languages: All > Platforms: All The first step to create Square webhooks is to create a notification URL that receives and processes the webhook event information. {% subheading %}Learn about the first step to creating Square webhooks, which is to create a notification URL that receives and processes the webhook event information.{% /subheading %} {% toc hide=true /%} ## Overview The notification URL receives event notifications from Square. These notifications come as JSON data from a POST request. The notification URL must confirm the successful receipt of the data. Applications need at least one reachable notification URL to receive and process webhook events from Square. The notification URL is specified on the **Webhooks** page of your application in the [Developer Console](https://developer.squareup.com/apps). The notification URL must do the following: * Receive a POST event notification. * Respond with a `2xx` HTTP status in a timely manner. * Require that connections use HTTPS. * Store the event notification data safely. * Use the generated idempotency value that's included as the `event_id` field in the body of each event notification. Design your application to use this value to bypass processing if it's a repeated value. * Use message versioning. If your application passes Square event data to another application, you should add versioning to the data to avoid duplication and to make auditing of the data transfer easier. You can use a server endpoint as a notification URL or you can create a serverless endpoint on services such as Amazon Web Services (AWS) or Google Cloud Platform. You can test a notification URL with sites such as webhook.site. You add the notification URL to the webhooks information for your application in [Subscribe to Event Notifications](webhooks/step2subscribe). ## See also * [Subscribe to Event Notifications](webhooks/step2subscribe) * [Verify and Validate an Event Notification](webhooks/step3validate) * [Manage Webhook Operations](webhooks/step4manage) * [Webhook Events Reference](webhooks/v2webhook-events-tech-ref) * [Webhook Subscriptions API](webhooks/webhook-subscriptions-api) * [Video: Webhooks](https://www.youtube.com/watch?v=hxU4qGSYNsY) --- # Webhook Events Reference > Source: https://developer.squareup.com/docs/webhooks/v2webhook-events-tech-ref > Status: PUBLIC > Languages: All > Platforms: All Shows all the V2 webhooks for Square API endpoints. {% subheading %}Learn about the V2 webhooks for Square API endpoints.{% /subheading %} {% toc hide=true /%} ## Overview Webhooks let you subscribe to Square API events and receive notice when an event occurs. For more information about how to set up a webhook subscription, see [Square Webhooks](webhooks/overview). ## Bank Accounts API | Event | Permission{% width="180px" %} | Description | |--------|-------------------------------|----------------| |[bank_account.disabled](https://developer.squareup.com/reference/square/bank-accounts-api/webhooks/bank_account.disabled) | `BANK_ACCOUNTS_READ` | Published when Square sets the status of a bank account to DISABLED. | |[bank_account.verified](https://developer.squareup.com/reference/square/bank-accounts-api/webhooks/bank_account.verified) | `BANK_ACCOUNTS_READ` |Published when Square sets the status of a bank account to VERIFIED. | |[bank_account.created](https://developer.squareup.com/reference/square/bank-accounts-api/webhooks/bank_account.created) | `BANK_ACCOUNTS_READ` |Published when you link a seller's or buyer's bank account to a Square account. Square sets the initial status to VERIFICATION_IN_PROGRESS and publishes the event.| For information about using the Bank Accounts API, see [Bank Accounts API](bank-accounts-api). ## Bookings API Event | Permission{% width="170px" %} | Description --------------|------------|------------ [booking.created](https://developer.squareup.com/reference/square/bookings-api/webhooks/booking.created) | `APPOINTMENTS_READ` | A booking is created by calling [CreateBooking](https://developer.squareup.com/reference/square/bookings-api/create-booking). [booking.updated](https://developer.squareup.com/reference/square/bookings-api/webhooks/booking.updated) | `APPOINTMENTS_READ` | An API-created booking is updated in the Square Dashboard, on the seller's online booking site, or by calling [UpdateBooking](https://developer.squareup.com/reference/square/bookings-api/update-booking). For more information about booking events, see [Handle Booking Event Notifications with Webhooks](bookings-api/use-webhooks). For information about using the Bookings API, see [Manage Bookings for Square Sellers](bookings-api/what-it-is). ## Booking Custom Attributes API Subscribe to the following events to receive notifications for changes to custom attribute definitions and custom attributes that are owned by your application: |Event{% width="200px" %}|Description| |------|------| |[booking.custom_attribute_definition.owned.created](https://developer.squareup.com/reference/square/booking-custom-attributes-api/webhooks/booking.custom_attribute_definition.owned.created)|A custom attribute definition was created by your application. The application that created the custom attribute definition is the owner of the definition and corresponding custom attributes.| |[boooking.custom_attribute_definition.owned.updated](https://developer.squareup.com/reference/square/booking-custom-attributes-api/webhooks/booking.custom_attribute_definition.owned.updated)|A custom attribute definition owned by your application was updated. Note that only the definition owner can update a custom attribute definition.| |[booking.custom_attribute_definition.owned.deleted](https://developer.squareup.com/reference/square/booking-custom-attributes-api/webhooks/booking.custom_attribute_definition.owned.deleted)|A custom attribute definition owned by your application was deleted. Note that only the definition owner can delete a custom attribute definition.| |[booking.custom_attribute.owned.updated](https://developer.squareup.com/reference/square/booking-custom-attributes-api/webhooks/booking.custom_attribute.owned.updated)|A custom attribute owned by your application was created or updated for a booking.| |[booking.custom_attribute.owned.deleted](https://developer.squareup.com/reference/square/booking-custom-attributes-api/webhooks/booking.custom_attribute.owned.deleted)|A custom attribute owned by your application was deleted from a booking. | Subscribe to the following events to receive notifications for changes to custom attribute definitions and custom attributes that are visible to your application. These `.visible` events include changes to all custom attribute definitions and custom attributes that are owned by your application, so you don't need to subscribe to an `.owned` event when you subscribe to the corresponding `.visible` event. |Event{% width="200px" %}|Description| |:------|:------| |[booking.custom_attribute_definition.visible.created](https://developer.squareup.com/reference/square/booking-custom-attributes-api/webhooks/booking.custom_attribute_definition.visible.created)|A custom attribute definition that's visible to your application was created.| |[booking.custom_attribute_definition.visible.updated](https://developer.squareup.com/reference/square/booking-custom-attributes-api/webhooks/booking.custom_attribute_definition.visible.updated)|A custom attribute definition that's visible to your application was updated.| |[booking.custom_attribute_definition.visible.deleted](https://developer.squareup.com/reference/square/booking-custom-attributes-api/webhooks/booking.custom_attribute_definition.visible.deleted)|A custom attribute definition that's visible to your application was deleted.| |[booking.custom_attribute.visible.updated](https://developer.squareup.com/reference/square/booking-custom-attributes-api/webhooks/booking.custom_attribute.visible.updated)|A custom attribute that's visible to your application was created or updated for a booking.| |[booking.custom_attribute.visible.deleted](https://developer.squareup.com/reference/square/booking-custom-attributes-api/webhooks/booking.custom_attribute.visible.deleted)|A custom attribute that's visible to your application was deleted from a booking.| For more information about booking-related custom attribute events, see [Webhooks.](booking-custom-attributes-api/overview#webhooks) For information about using the Booking Custom Attributes API, see [Custom Attributes for Bookings.](booking-custom-attributes-api/overview) ## Cards API {% table %} * Event * Permission{% width="140px" %} * Description ------ * [card.automatically_updated](https://developer.squareup.com/reference/square/cards-api/webhooks/card.automatically_updated) * `PAYMENTS_READ` * Published when Square automatically updates the expiration date or primary account number (PAN) of a card or adds or removes an issuer alert. ------ * [card.created](https://developer.squareup.com/reference/square/cards-api/webhooks/card.created) * `PAYMENTS_READ` * Published when a card is created or imported. ------ * [card.disabled](https://developer.squareup.com/reference/square/cards-api/webhooks/card.disabled) * `PAYMENTS_READ` * Published when a card is disabled. ------ * [card.forgotten](https://developer.squareup.com/reference/square/cards-api/webhooks/card.forgotten) * `PAYMENTS_READ` * Published when a card is GDPR forgotten or vaulted. ------ * [card.updated](https://developer.squareup.com/reference/square/cards-api/webhooks/card.updated) * `PAYMENTS_READ` * Published when a card is updated by the seller in the Square Dashboard. {% /table %} For information about using the Cards API, see [Cards API](cards-api/overview). ## Catalog API | Event | Permission{% width="120px" %} | Description | |---------------|-------------------------------|------------------| |[catalog.version.updated](https://developer.squareup.com/reference/square/catalog-api/webhooks/catalog.version.updated) |`ITEMS_READ`|The catalog was updated. Webhook notification data is packaged as ` "catalog_version": { "updated_at": "2019-05-14T17:51:27Z"}`.| For more information about catalog events, see [Webhooks](catalog-api/webhooks). For information about using the Catalog API, see [What It Does](catalog-api/what-it-does). ## Checkout API | Event | Permission{% width="200px" %} | Description | |---------------|-------------------------------|------------------| |[online_checkout.location_settings.updated](https://developer.squareup.com/reference/square/checkout-api/webhooks/online_checkout.location_settings.updated)|`MERCHANT_PROFILE_WRITE`, `MERCHANT_PROFILE_READ`|Published when online checkout location settings are updated.| |[online_checkout.merchant_settings.updated](https://developer.squareup.com/reference/square/checkout-api/webhooks/online_checkout.merchant_settings.updated)|`MERCHANT_PROFILE_WRITE`, `MERCHANT_PROFILE_READ`|Published when online checkout merchant settings are updated.| For information about using the Checkout API, see [Checkout API](checkout-api). ## Customers API {% table %} * Event * Permission {% width="140px" %} * Description --- * [customer.created](https://developer.squareup.com/reference/square/customers-api/webhooks/customer.created) * `CUSTOMERS_READ` * A customer profile is created, including when customer profiles are [merged](customers-api/use-the-api/customer-webhooks#customer-profile-merges) into a new customer profile. --- * [customer.deleted](https://developer.squareup.com/reference/square/customers-api/webhooks/customer.deleted) * `CUSTOMERS_READ` * A customer profile is deleted, including when customer profiles are [merged](customers-api/use-the-api/customer-webhooks#customer-profile-merges) into a new customer profile. --- * [customer.updated](https://developer.squareup.com/reference/square/customers-api/webhooks/customer.updated) * `CUSTOMERS_READ` * An attribute on a customer profile is changed, except for the `segment_ids` field. {% /table %} For more information about customer events, see [Use Customer Webhooks](customers-api/use-the-api/customer-webhooks). For information about using the Customers API, see [Manage Customers and Integrate with Other Services](customers-api/what-it-does). ## Customer Custom Attributes API Subscribe to the following events to receive notifications for changes to custom attribute definitions and custom attributes that are owned by your application: |Event|Permission|Description| |:------|:------|:------ |[customer.custom_attribute_definition.owned.created](https://developer.squareup.com/reference/square/customer-custom-attributes-api/webhooks/customer.custom_attribute_definition.owned.created)|`CUSTOMERS_READ`|A custom attribute definition was created by your application. The application that created the custom attribute definition is the owner of the definition and corresponding custom attributes.{% line-break /%}{% line-break /%}This event replaces the deprecated `customer.custom_attribute_definition.created` event.| |[customer.custom_attribute_definition.owned.updated](https://developer.squareup.com/reference/square/customer-custom-attributes-api/webhooks/customer.custom_attribute_definition.owned.updated)|`CUSTOMERS_READ`|A custom attribute definition owned by your application was updated. Note that only the definition owner can update a custom attribute definition.{% line-break /%}{% line-break /%}This event replaces the deprecated `customer.custom_attribute_definition.updated` event.| |[customer.custom_attribute_definition.owned.deleted](https://developer.squareup.com/reference/square/customer-custom-attributes-api/webhooks/customer.custom_attribute_definition.owned.deleted)|`CUSTOMERS_READ`|A custom attribute definition owned by your application was deleted. Note that only the definition owner can delete a custom attribute definition.{% line-break /%}{% line-break /%}This event replaces the deprecated `customer.custom_attribute_definition.deleted` event.| |[customer.custom_attribute.owned.updated](https://developer.squareup.com/reference/square/customer-custom-attributes-api/webhooks/customer.custom_attribute.owned.updated)|`CUSTOMERS_READ`|A custom attribute owned by your application was created or updated for a customer profile.{% line-break /%}{% line-break /%}This event replaces the deprecated `customer.custom_attribute.updated` event.| |[customer.custom_attribute.owned.deleted](https://developer.squareup.com/reference/square/customer-custom-attributes-api/webhooks/customer.custom_attribute.owned.deleted)|`CUSTOMERS_READ`|A custom attribute owned by your application was deleted from a customer profile.{% line-break /%}{% line-break /%}This event replaces the deprecated `customer.custom_attribute.deleted` event.| Subscribe to the following events to receive notifications for changes to custom attribute definitions and custom attributes that are visible to your application. These `.visible` events include changes to all custom attribute definitions and custom attributes that are owned by your application, so you do not need to subscribe to an `.owned` event when you subscribe to the corresponding `.visible` event. |Event|Permission|Description| |------|------|------ |[customer.custom_attribute_definition.visible.created](https://developer.squareup.com/reference/square/customer-custom-attributes-api/webhooks/customer.custom_attribute_definition.visible.created)|`CUSTOMERS_READ`|A custom attribute definition that's visible to your application was created.{% line-break /%}{% line-break /%}This event replaces the deprecated `customer.custom_attribute_definition.public.created` event.| |[customer.custom_attribute_definition.visible.updated](https://developer.squareup.com/reference/square/customer-custom-attributes-api/webhooks/customer.custom_attribute_definition.visible.updated)|`CUSTOMERS_READ`|A custom attribute definition that's visible to your application was updated.{% line-break /%}{% line-break /%}This event replaces the deprecated `customer.custom_attribute_definition.public.updated` event.| |[customer.custom_attribute_definition.visible.deleted](https://developer.squareup.com/reference/square/customer-custom-attributes-api/webhooks/customer.custom_attribute_definition.visible.deleted)|`CUSTOMERS_READ`|A custom attribute definition that's visible to your application was deleted.{% line-break /%}{% line-break /%}This event replaces the deprecated `customer.custom_attribute_definition.public.deleted` event.| |[customer.custom_attribute.visible.updated](https://developer.squareup.com/reference/square/customer-custom-attributes-api/webhooks/customer.custom_attribute.visible.updated)|`CUSTOMERS_READ`|A custom attribute that's visible to your application was created or updated for a customer profile.{% line-break /%}{% line-break /%}This event replaces the deprecated `customer.custom_attribute.public.updated` event.| |[customer.custom_attribute.visible.deleted](https://developer.squareup.com/reference/square/customer-custom-attributes-api/webhooks/customer.custom_attribute.visible.deleted)|`CUSTOMERS_READ`|A custom attribute that's visible to your application was deleted from a customer profile.{% line-break /%}{% line-break /%}This event replaces the deprecated `customer.custom_attribute.public.deleted` event.| For more information about customer-related custom attribute events, see [Webhooks.](customer-custom-attributes-api/overview#webhooks) For information about using the Customer Custom Attributes API, see [Custom Attributes for Customer Profiles](customer-custom-attributes-api/overview). ## Devices API | Event | Permission{% width="160px" %} | Description | ------------|-------------------------------|--------------| |[device.code.paired](https://developer.squareup.com/reference/square/devices-api/webhooks/device.code.paired) |`DEVICE_CREDENTIAL_MANAGEMENT` | A Square Terminal has been paired with a Terminal API client and the `device_id` of the paired Square Terminal is available.| |[device.created](https://developer.squareup.com/reference/square/devices-api/webhooks/device.created) |`DEVICES_READ` | A new Square Terminal was created. This means the Square Terminal has been associated with the given seller's account. | For information about using the Devices API, see [Connect a Square Terminal](terminal-api/integrate-square-terminal) and [Terminal Device Monitoring](terminal-api/terminal-device-monitoring). ## Disputes API | Event | Permission{% width="160px" %} | Description | |----------|:----------------------|:----------------------| |[dispute.created](https://developer.squareup.com/reference/square/disputes-api/webhooks/dispute.created) |`PAYMENTS_READ`| A dispute was created.| |**DEPRECATED**: [dispute.state.changed](https://developer.squareup.com/reference/square/disputes-api/webhooks/dispute.state.changed) |`PAYMENTS_READ`| The state of a dispute changed. This includes the dispute resolution (WON or LOST) reported by the bank. The event data includes details about what changed.| |[dispute.state.updated](https://developer.squareup.com/reference/square/disputes-api/webhooks/dispute.state.updated) |`PAYMENTS_READ`| The state of a dispute changed. This includes the dispute resolution (WON or LOST) reported by the bank. The event data includes details about what changed.| |**DEPRECATED**: [dispute.evidence.added](https://developer.squareup.com/reference/square/disputes-api/webhooks/dispute.evidence.added) |`PAYMENTS_READ`| Evidence was added to a dispute from the Disputes Dashboard in the [Square Dashboard](https://app.squareup.com/dashboard), in the Square Point of Sale application, or by calling the Disputes API [(CreateDisputeEvidenceFile](https://developer.squareup.com/reference/square/disputes-api/create-dispute-evidence-file) or [CreateDisputeEvidenceText](https://developer.squareup.com/reference/square/disputes-api/create-dispute-evidence-text)).| |[dispute.evidence.created](https://developer.squareup.com/reference/square/disputes-api/webhooks/dispute.evidence.created) |`PAYMENTS_READ`| Evidence was added to a dispute from the Disputes Dashboard in the [Square Dashboard](https://app.squareup.com/dashboard), in the Square Point of Sale application, or by calling the Disputes API [(CreateDisputeEvidenceFile](https://developer.squareup.com/reference/square/disputes-api/create-dispute-evidence-file) or [CreateDisputeEvidenceText](https://developer.squareup.com/reference/square/disputes-api/create-dispute-evidence-text)).| |[dispute.evidence.deleted](https://developer.squareup.com/reference/square/disputes-api/webhooks/dispute.evidence.deleted) |`PAYMENTS_READ`| Evidence was removed from a dispute from the Disputes Dashboard in the [Square Dashboard](https://app.squareup.com/dashboard), in the Square Point of Sale application, or by calling [DeleteDisputeEvidence.](https://developer.squareup.com/reference/square/disputes-api/delete-dispute-evidence)| |**DEPRECATED**: [dispute.evidence.removed](https://developer.squareup.com/reference/square/disputes-api/webhooks/dispute.evidence.removed) |`PAYMENTS_READ`| Evidence was removed from a dispute from the Disputes Dashboard in the [Square Dashboard](https://app.squareup.com/dashboard), in the Square Point of Sale application, or by calling [DeleteDisputeEvidence.](https://developer.squareup.com/reference/square/disputes-api/delete-dispute-evidence)| For more information about dispute events, see [Disputes webhook notifications](disputes-api/process-disputes#disputes-webhook-notifications). For information about using the Disputes API, see [Disputes API](disputes-api/overview). ## Gift Cards API | Event | Permission{% width="140px" %} | Description | |---------|-------------------------------|--------------| |[gift_card.created](https://developer.squareup.com/reference/square/giftcards-api/webhooks/gift_card.created)|`GIFTCARDS_READ`| A digital gift card was created or a physical gift card was registered.| |[gift_card.updated](https://developer.squareup.com/reference/square/giftcards-api/webhooks/gift_card.updated)|`GIFTCARDS_READ`| A gift card was updated. The `balance_money`, `state`, and `customer_ids` fields of a gift card can be updated through a gift card activity or when a customer is linked or unlinked.| |[gift_card.customer_linked](https://developer.squareup.com/reference/square/giftcards-api/webhooks/gift_card.customer_linked)|`GIFTCARDS_READ`| A customer was linked to a gift card.| |[gift_card.customer_unlinked](https://developer.squareup.com/reference/square/giftcards-api/webhooks/gift_card.customer_unlinked)|`GIFTCARDS_READ`| A customer was unlinked from a gift card.| |[gift_card.activity.created](https://developer.squareup.com/reference/square/giftcards-api/webhooks/gift_card.activity.created)|`GIFTCARDS_READ`| A gift card activity was created.| |[gift_card.activity.updated](https://developer.squareup.com/reference/square/giftcards-api/webhooks/gift_card.activity.updated)|`GIFTCARDS_READ`| A `REDEEM` or `IMPORT` gift card activity was updated.{% line-break /%}{% line-break /%}For `REDEEM` activities, this event is invoked when the `status` changes from `PENDING` to `COMPLETED` or `CANCELED`. This status change applies only when the gift card was redeemed using Square Point of Sale or the Square Dashboard.{% line-break /%}{% line-break /%}For `IMPORT` activities, this event is invoked when the balance of an [imported third-party gift card](gift-cards/using-gift-cards-api#third-party-gift-cards) is updated by Square.| For more information about gift card events, see [Gift Card Webhooks](gift-cards/webhooks). For information about using the Gift Cards API and Gift Card Activities API, see [Gift Cards API](gift-cards/using-gift-cards-api). ## Inventory API | Event | Permission {% width="140px" %}| Description | |--------|-------------------------------|----------------| |[inventory.count.updated](https://developer.squareup.com/reference/square/inventory-api/webhooks/inventory.count.updated) |`INVENTORY_READ`|The quantity was updated for a catalog item variation. Webhook notification data is packaged as [InventoryCount[]](https://developer.squareup.com/reference/square/objects/InventoryCount). | For information about using the Inventory API, see [What It Does](inventory-api/what-it-does). ## Invoices API {% table %} * Event * Permission {% width="140px" %} * Description --- * [invoice.created](https://developer.squareup.com/reference/square/invoices-api/webhooks/invoice.created) * `INVOICES_READ` * A draft invoice was created. --- * [invoice.published](https://developer.squareup.com/reference/square/invoices-api/webhooks/invoice.published) * `INVOICES_READ` * An invoice was published. This also applies to invoices that are published but scheduled to be processed at a later time. --- * [invoice.updated](https://developer.squareup.com/reference/square/invoices-api/webhooks/invoice.updated) * `INVOICES_READ` * An invoice was changed. This event is also invoked following `invoice.published` and `invoice.canceled` events. Note that link expiry and dynamic link generation for the {% tooltip text="public_url" %}A temporary link to the Square-hosted payment page where the customer can pay the invoice. If the link expires, customers can provide the email address or phone number associated with the invoice and request a new link directly from the expired payment page.{% /tooltip %} field don't trigger an event. --- * [invoice.payment_made](https://developer.squareup.com/reference/square/invoices-api/webhooks/invoice.payment_made) * `INVOICES_READ` * A payment was made for an invoice. --- * [invoice.scheduled_charge_failed](https://developer.squareup.com/reference/square/invoices-api/webhooks/invoice.scheduled_charge_failed) * `INVOICES_READ` * A scheduled automatic payment has failed. --- * [invoice.canceled](https://developer.squareup.com/reference/square/invoices-api/webhooks/invoice.canceled) * `INVOICES_READ` * An invoice was canceled. --- * [invoice.refunded](https://developer.squareup.com/reference/square/invoices-api/webhooks/invoice.refunded) * `INVOICES_READ` * A refund was processed for an invoice. --- * [invoice.deleted](https://developer.squareup.com/reference/square/invoices-api/webhooks/invoice.deleted) * `INVOICES_READ` * A draft invoice was deleted. A deleted invoice is removed entirely from the seller account (including any attachments) and cannot be retrieved. {% /table %} For information about using the Invoices API, see [Invoices API](invoices-api/overview). ## Labor API ### Scheduled shifts {% table %} * Event * Permission {% width="135px" %} * Description --- * [labor.scheduled_shift.created](https://developer.squareup.com/reference/square/labor-api/webhooks/labor.scheduled_shift.created) * `TIMECARDS_READ` * A scheduled shift was created. The event data contains the new [ScheduledShift](https://developer.squareup.com/reference/square/objects/ScheduledShift) object. --- * [labor.scheduled_shift.updated](https://developer.squareup.com/reference/square/labor-api/webhooks/labor.scheduled_shift.updated) * `TIMECARDS_READ` * A scheduled shift was updated. The event data contains the updated [ScheduledShift](https://developer.squareup.com/reference/square/objects/ScheduledShift) object. --- * [labor.scheduled_shift.published](https://developer.squareup.com/reference/square/labor-api/webhooks/labor.scheduled_shift.published) * `TIMECARDS_READ` * A scheduled shift was published. The event data contains the published [ScheduledShift](https://developer.squareup.com/reference/square/objects/ScheduledShift) object. For bulk operations, this event is triggered after each individual publish request succeeds. A publish operation also triggers a `labor.scheduled_shift.updated` event. --- * [labor.scheduled_shift.deleted](https://developer.squareup.com/reference/square/labor-api/webhooks/labor.scheduled_shift.deleted) * `TIMECARDS_READ` * A scheduled shift was permanently deleted (hard delete). The event data contains the `id` of the deleted shift and the `deleted` field for the event is set to` true`. This event occurs in two scenarios: * An update operation deletes a shift that was never published. It also triggers `labor.scheduled_shift.updated`. * A publish operation deletes a previously published shift. Also triggers `labor.scheduled_shift.updated` and `labor.scheduled_shift.published`. For more information, see [Deleting scheduled shifts](labor-api/manage-scheduled-shifts#deleting-scheduled-shifts). {% /table %} ### Timecards (shifts) {% table %} * Event * Permission {% width="135px" %} * Description --- * [labor.timecard.created](https://developer.squareup.com/reference/square/labor-api/webhooks/labor.timecard.created) * `TIMECARDS_READ` * A timecard was created at the start of a shift. The event data contains the complete [Timecard](https://developer.squareup.com/reference/square/objects/Timecard) object. --- * [labor.timecard.updated](https://developer.squareup.com/reference/square/labor-api/webhooks/labor.timecard.updated) * `TIMECARDS_READ` * A timecard was updated. The event data contains the complete [Timecard](https://developer.squareup.com/reference/square/objects/Timecard) object. --- * [labor.timecard.deleted](https://developer.squareup.com/reference/square/labor-api/webhooks/labor.timecard.deleted) * `TIMECARDS_READ` * A timecard was deleted. The event data contains only the `id` of the deleted timecard and the `deleted` field set to `true`. --- * [labor.shift.created](https://developer.squareup.com/reference/square/labor-api/webhooks/labor.shift.created) * `TIMECARDS_READ` * A shift was started. The event data contains the complete [Shift](https://developer.squareup.com/reference/square/objects/Shift) object. Deprecated at Square API version 2025-05-21 and replaced by `labor.timecard.created`. --- * [labor.shift.updated](https://developer.squareup.com/reference/square/labor-api/webhooks/labor.shift.updated) * `TIMECARDS_READ` * A shift was updated. The event data contains the complete [Shift](https://developer.squareup.com/reference/square/objects/Shift) object. Deprecated at Square API version 2025-05-21 and replaced by `labor.timecard.updated`. --- * [labor.shift.deleted](https://developer.squareup.com/reference/square/labor-api/webhooks/labor.shift.deleted) * `TIMECARDS_READ` * A shift was deleted. The event data contains only the `id` of the deleted shift and the `deleted` field set to `true`. Deprecated at Square API version 2025-05-21 and replaced by `labor.timecard.deleted`. {% /table %} **Deprecation notice** - The `Shift` object is deprecated in Square API version 2025-05-21 and replaced by `Timecard`. You should unsubscribe from `Shift` events and subscribe to `Timecard` events after [migrating your application](labor-api/what-it-does#migration-notes) to `Timecard` endpoints. **Duplicate events** - Until `Shift` endpoints are retired, `Shift` or `Timecard` operations trigger both `Shift` and `Timecard` events. For example, creating a shift or timecard triggers both `labor.shift.created` and `labor.timecard.created` events. Note that the new shift and new timecard have the same ID, but each event has a different event ID. To avoid receiving duplicate notifications for the same operation, subscribe to either `Shift` or `Timecard` events, but not both. {% line-break /%} For information about using the Labor API, see [Labor API](labor-api/what-it-does). ## Locations API | Event | Permission | Description | |--------------|------------|---------------| |[location.created](https://developer.squareup.com/reference/square/locations-api/webhooks/location.created) |`MERCHANT_PROFILE_READ`|A [Location](https://developer.squareup.com/reference/square/objects/location) was created. | |[location.updated](https://developer.squareup.com/reference/square/locations-api/webhooks/location.updated) |`MERCHANT_PROFILE_READ`|A [Location](https://developer.squareup.com/reference/square/objects/location) was updated. | For information about using the Locations API, see [Locations API](locations-api). ## Location Custom Attributes API Subscribe to the following events to receive notifications for changes to custom attribute definitions and custom attributes that are owned by your application: |Event|Permission{% width="150px" %}|Description| |-----|-----|----- |[location.custom_attribute_definition.owned.created](https://developer.squareup.com/reference/square/location-custom-attributes-api/webhooks/location.custom_attribute_definition.owned.created)|`MERCHANT_PROFILE_READ`|A custom attribute definition was created by your application. The application that created the custom attribute definition is the owner of the definition and corresponding custom attributes.| |[location.custom_attribute_definition.owned.updated](https://developer.squareup.com/reference/square/location-custom-attributes-api/webhooks/location.custom_attribute_definition.owned.updated)|`MERCHANT_PROFILE_READ`|A custom attribute definition owned by your application was updated. Note that only the definition owner can update a custom attribute definition.| |[location.custom_attribute_definition.owned.deleted](https://developer.squareup.com/reference/square/location-custom-attributes-api/webhooks/location.custom_attribute_definition.owned.deleted)|`MERCHANT_PROFILE_READ`|A custom attribute definition owned by your application was deleted. Note that only the definition owner can delete a custom attribute definition.| |[location.custom_attribute.owned.updated](https://developer.squareup.com/reference/square/location-custom-attributes-api/webhooks/location.custom_attribute.owned.updated)|`MERCHANT_PROFILE_READ`|A custom attribute owned by your application was created or updated for a location.| |[location.custom_attribute.owned.deleted](https://developer.squareup.com/reference/square/location-custom-attributes-api/webhooks/location.custom_attribute.owned.deleted)|`MERCHANT_PROFILE_READ`|A custom attribute owned by your application was deleted from a location.| Subscribe to the following events to receive notifications for changes to custom attribute definitions and custom attributes that are visible to your application. These `.visible` events include changes to all custom attribute definitions and custom attributes that are owned by your application. Therefore, you do not need to subscribe to an `.owned` event when you subscribe to the corresponding `.visible` event. |Event|Permission{% width="200px" %}|Description| |:------|:------|:------ |[location.custom_attribute_definition.visible.created](https://developer.squareup.com/reference/square/location-custom-attributes-api/webhooks/location.custom_attribute_definition.visible.created)|`MERCHANT_PROFILE_READ`|A custom attribute definition that's visible to your application was created.| |[location.custom_attribute_definition.visible.updated](https://developer.squareup.com/reference/square/location-custom-attributes-api/webhooks/location.custom_attribute_definition.visible.updated)|`MERCHANT_PROFILE_READ`|A custom attribute definition that's visible to your application was updated.| |[location.custom_attribute_definition.visible.deleted](https://developer.squareup.com/reference/square/location-custom-attributes-api/webhooks/location.custom_attribute_definition.visible.deleted)|`MERCHANT_PROFILE_READ`|A custom attribute definition that's visible to your application was deleted.| |[location.custom_attribute.visible.updated](https://developer.squareup.com/reference/square/location-custom-attributes-api/webhooks/location.custom_attribute.visible.updated)|`MERCHANT_PROFILE_READ`|A custom attribute that's visible to your application was created or updated for a location.| |[location.custom_attribute.visible.deleted](https://developer.squareup.com/reference/square/location-custom-attributes-api/webhooks/location.custom_attribute.visible.deleted)|`MERCHANT_PROFILE_READ`|A custom attribute that's visible to your application was deleted from a location.| For more information about location-related custom attribute events, see [Webhooks.](location-custom-attributes-api/overview#webhooks) For information about using the Location Custom Attributes API, see [Custom Attributes for Locations](location-custom-attributes-api/overview). ## Loyalty API {% table %} * Event * Permission {% width="130px" %} * Description --- * [loyalty.account.created](https://developer.squareup.com/reference/square/loyalty-api/webhooks/loyalty.account.created) * `LOYALTY_READ` * A loyalty account was created for a buyer. A loyalty account can be created using any of the following methods, which all publish this event: - An application calls the `CreateLoyaltyAccount` endpoint. - A buyer enrolls in the program from a Square Point of Sale application. - The seller enrolls a buyer using the Customer Directory. - The seller merges two customer accounts into one account using the Customer Directory. In this process, sellers might merge the two corresponding loyalty accounts by creating a new account and deleting the existing accounts. --- * [loyalty.account.updated](https://developer.squareup.com/reference/square/loyalty-api/webhooks/loyalty.account.updated) * `LOYALTY_READ` * A loyalty account was updated. For example: - The seller updates the phone number registered for the loyalty account using the Square Dashboard. For more information, see [Square Loyalty FAQ](https://squareup.com/help/us/en/article/6462-square-loyalty-faqs#can-i-edit-my-customers-phone-number-associated-to-loyalty). - Any change in the loyalty point balance, such as points added for visits, points expiration, or a manual adjustment to the point balance that a seller might perform. - The customer ID of the loyalty account was changed. For example, the loyalty account moved to another customer. --- * [loyalty.account.deleted](https://developer.squareup.com/reference/square/loyalty-api/webhooks/loyalty.account.deleted) * `LOYALTY_READ` * Published when a loyalty account is deleted. The published event does not contain the `customer_id` that was associated with the deleted account. The following actions to delete the account can publish this event: - The seller deletes an account using the Square Dashboard. - The seller merges two customer profiles using the Customer Directory. In this process, sellers might merge the two corresponding loyalty accounts by creating a new account and deleting the existing accounts. --- * [loyalty.program.created](https://developer.squareup.com/reference/square/loyalty-api/webhooks/loyalty.program.created) * `LOYALTY_READ` * A loyalty program was created. Loyalty programs can only be created from the Square Dashboard. --- * [loyalty.program.updated](https://developer.squareup.com/reference/square/loyalty-api/webhooks/loyalty.program.updated) * `LOYALTY_READ` * A loyalty program was updated. Loyalty programs can only be updated from the Square Dashboard. --- * [loyalty.promotion.created](https://developer.squareup.com/reference/square/loyalty-api/webhooks/loyalty.promotion.created) * `LOYALTY_READ` * A loyalty promotion was created. --- * [loyalty.promotion.updated](https://developer.squareup.com/reference/square/loyalty-api/webhooks/loyalty.promotion.updated) * `LOYALTY_READ` * A loyalty promotion was canceled. --- * [loyalty.event.created](https://developer.squareup.com/reference/square/loyalty-api/webhooks/loyalty.event.created) * `LOYALTY_READ` * A balance-changing event occurred. Square Loyalty maintains a ledger of events that occur over the lifetime of a loyalty account. Square publishes notifications for each loyalty event logged to the ledger. These loyalty events are immutable, which means they are never updated or deleted. For example, when a buyer redeems a reward and then returns the order, Square publishes separate notifications for the corresponding `CREATE_REWARD` and `DELETE_REWARD` events. Similarly, Square publishes a notification for the `OTHER` event when points are deducted after a purchase that accrued points is refunded. {% /table %} For information about using the Loyalty API, see [Loyalty API](loyalty-api/overview). ## Merchant Custom Attributes API Subscribe to the following events to receive notifications for changes to custom attribute definitions and custom attributes that are owned by your application: | Event | Permission | Description | |------|------|------ |[merchant.custom_attribute_definition.owned.created](https://developer.squareup.com/reference/square/merchant-custom-attributes-api/webhooks/merchant.custom_attribute_definition.owned.created)|`MERCHANT_PROFILE_READ`|A custom attribute definition was created by your application. The application that created the custom attribute definition is the owner of the definition and corresponding custom attributes.| |[merchant.custom_attribute_definition.owned.updated](https://developer.squareup.com/reference/square/merchant-custom-attributes-api/webhooks/merchant.custom_attribute_definition.owned.updated)|`MERCHANT_PROFILE_READ`|A custom attribute definition owned by your application was updated. Note that only the definition owner can update a custom attribute definition.| |[merchant.custom_attribute_definition.owned.deleted](https://developer.squareup.com/reference/square/merchant-custom-attributes-api/webhooks/merchant.custom_attribute_definition.owned.deleted)|`MERCHANT_PROFILE_READ`|A custom attribute definition owned by your application was deleted. Note that only the definition owner can delete a custom attribute definition.| |[merchant.custom_attribute.owned.updated](https://developer.squareup.com/reference/square/merchant-custom-attributes-api/webhooks/merchant.custom_attribute.owned.updated)|`MERCHANT_PROFILE_READ`|A custom attribute owned by your application was created or updated for a merchant.| |[merchant.custom_attribute.owned.deleted](https://developer.squareup.com/reference/square/merchant-custom-attributes-api/webhooks/merchant.custom_attribute.owned.deleted)|`MERCHANT_PROFILE_READ`|A custom attribute owned by your application was deleted from a merchant.| Subscribe to the following events to receive notifications for changes to custom attribute definitions and custom attributes that are visible to your application. These `.visible` events include changes to all custom attribute definitions and custom attributes that are owned by your application. Therefore, you don't need to subscribe to an `.owned` event when you subscribe to the corresponding `.visible` event. | Event | Permission{% width="150px" %}| Description| |------|------|------ |[merchant.custom_attribute_definition.visible.created](https://developer.squareup.com/reference/square/merchant-custom-attributes-api/webhooks/merchant.custom_attribute_definition.visible.created)|`MERCHANT_PROFILE_READ`|A custom attribute definition that's visible to your application was created.| |[merchant.custom_attribute_definition.visible.updated](https://developer.squareup.com/reference/square/merchant-custom-attributes-api/webhooks/merchant.custom_attribute_definition.visible.updated)|`MERCHANT_PROFILE_READ`|A custom attribute definition that's visible to your application was updated.| |[merchant.custom_attribute_definition.visible.deleted](https://developer.squareup.com/reference/square/merchant-custom-attributes-api/webhooks/merchant.custom_attribute_definition.visible.deleted)|`MERCHANT_PROFILE_READ`|A custom attribute definition that's visible to your application was deleted.| |[merchant.custom_attribute.visible.updated](https://developer.squareup.com/reference/square/merchant-custom-attributes-api/webhooks/merchant.custom_attribute.visible.updated)|`MERCHANT_PROFILE_READ`|A custom attribute that's visible to your application was created or updated for a merchant.| |[merchant.custom_attribute.visible.deleted](https://developer.squareup.com/reference/square/merchant-custom-attributes-api/webhooks/merchant.custom_attribute.visible.deleted)|`MERCHANT_PROFILE_READ`|A custom attribute that's visible to your application was deleted from a merchant.| For information about using the Merchant Custom Attributes API, see [Custom Attributes for Merchants](merchant-custom-attributes-api/overview). ## OAuth API | Event | Permission | Description | |-------------|------------|-----------------| |[oauth.authorization.revoked](https://developer.squareup.com/reference/square/oauth-api/webhooks/oauth.authorization.revoked)| N/A | Notifies an application whenever a seller revokes all access tokens and refresh tokens granted to the application.| For information about using the OAuth API, see [OAuth API](oauth-api/overview). ## Orders API Events on an [Order](https://developer.squareup.com/reference/square/objects/order) object can be triggered by your Orders API call or by a seller's action on an order within a Square product such as the Square Point of Sale. | Event | Permission{% width="120px" %} | Description | |------------|-----------------------|--------------------| |[order.created](https://developer.squareup.com/reference/square/orders-api/webhooks/order.created) |`ORDERS_READ`|An [Order](https://developer.squareup.com/reference/square/objects/Order) was created. This event is triggered when an order is created by a Square product or your application. | |[order.fulfillment.updated](https://developer.squareup.com/reference/square/orders-api/webhooks/order.fulfillment.updated) |`ORDERS_READ`|An [OrderFulfillment](https://developer.squareup.com/reference/square/objects/OrderFulfillment) was created or updated. This event is triggered when a Square product updates an order fulfillment or when a fulfillment is updated by an [UpdateOrder](https://developer.squareup.com/reference/square/orders-api/update-order) endpoint call. | |[order.updated](https://developer.squareup.com/reference/square/orders-api/webhooks/order.updated) |`ORDERS_READ`|An [Order](https://developer.squareup.com/reference/square/objects/Order) was updated. This event is triggered only by the [UpdateOrder](https://developer.squareup.com/reference/square/orders-api/update-order) endpoint call or when a seller updates an order using a Square product. | For information about using the Orders API, see [Orders API](orders-api/what-it-does). ## Order Custom Attributes API Subscribe to the following events to receive notifications for changes to custom attribute definitions and custom attributes that are owned by your application: |Event{% width="200px" %}|Permission{% width="120px" %}|Description| |:------|:------|:------ |[order.custom_attribute_definition.owned.created](https://developer.squareup.com/reference/square/order-custom-attributes-api/webhooks/order.custom_attribute_definition.owned.created)|`ORDERS_READ`|A custom attribute definition was created by your application. The application that created the custom attribute definition is the owner of the definition and corresponding custom attributes.| |[order.custom_attribute_definition.owned.updated](https://developer.squareup.com/reference/square/order-custom-attributes-api/webhooks/order.custom_attribute_definition.owned.updated)|`ORDERS_READ`|A custom attribute definition owned by your application was updated. Note that only the definition owner can update a custom attribute definition.| |[order.custom_attribute_definition.owned.deleted](https://developer.squareup.com/reference/square/order-custom-attributes-api/webhooks/order.custom_attribute_definition.owned.deleted)|`ORDERS_READ`|A custom attribute definition owned by your application was deleted. Note that only the definition owner can delete a custom attribute definition.| |[order.custom_attribute.owned.updated](https://developer.squareup.com/reference/square/order-custom-attributes-api/webhooks/order.custom_attribute.owned.updated)|`ORDERS_READ`|A custom attribute owned by your application was created or updated for an order.| |[order.custom_attribute.owned.deleted](https://developer.squareup.com/reference/square/order-custom-attributes-api/webhooks/order.custom_attribute.owned.deleted)|`ORDERS_READ`|A custom attribute owned by your application was deleted from an order.| Subscribe to the following events to receive notifications for changes to custom attribute definitions and custom attributes that are visible to your application. These `.visible` events include changes to all custom attribute definitions and custom attributes that are owned by your application, so you do not need to subscribe to an `.owned` event when you subscribe to the corresponding `.visible` event. |Event{% width="200px" %}|Permission{% width="120px" %}|Description| |:------|:------|:------ |[order.custom_attribute_definition.visible.created](https://developer.squareup.com/reference/square/order-custom-attributes-api/webhooks/order.custom_attribute_definition.visible.created)|`ORDERS_READ`|A custom attribute definition that's visible to your application was created.| |[order.custom_attribute_definition.visible.updated](https://developer.squareup.com/reference/square/order-custom-attributes-api/webhooks/order.custom_attribute_definition.visible.updated)|`ORDERS_READ`|A custom attribute definition that's visible to your application was updated.| |[order.custom_attribute_definition.visible.deleted](https://developer.squareup.com/reference/square/order-custom-attributes-api/webhooks/order.custom_attribute_definition.visible.deleted)|`ORDERS_READ`|A custom attribute definition that's visible to your application was deleted.| |[order.custom_attribute.visible.updated](https://developer.squareup.com/reference/square/order-custom-attributes-api/webhooks/order.custom_attribute.visible.updated)|`ORDERS_READ`|A custom attribute that's visible to your application was created or updated for an order.| |[order.custom_attribute.visible.deleted](https://developer.squareup.com/reference/square/order-custom-attributes-api/webhooks/order.custom_attribute.visible.deleted)|`ORDERS_READ`|A custom attribute that's visible to your application was deleted from an order.| For information about using the Order Custom Attributes API, see [Custom Attributes for Orders](orders-custom-attributes-api/overview). ## Payments API | Event |Permission{% width="140px" %}| Description | |----------|-----------------------------|--------------| |[payment.created](https://developer.squareup.com/reference/square/payments-api/webhooks/payment.created) |`PAYMENTS_READ`|A [Payment](https://developer.squareup.com/reference/square/objects/payment) was created. | |[payment.updated](https://developer.squareup.com/reference/square/payments-api/webhooks/payment.updated) |`PAYMENTS_READ`|A [Payment](https://developer.squareup.com/reference/square/objects/payment) field was updated. For example, the `payment.status` or `card_details.status` field is updated when a payment is authorized, canceled, or completed.| For information about using the Payments API, see [Payments API](payments-refunds). ## Payouts API |Event | Permission| Description| |------|-----------|------ |[payout.failed](https://developer.squareup.com/reference/square/payouts-api/webhooks/payout.failed)|`PAYOUTS_READ`|A [Payout](https://developer.squareup.com/reference/square/objects/payout) has failed.| |[payout.paid](https://developer.squareup.com/reference/square/payouts-api/webhooks/payout.paid)|`PAYOUTS_READ`|A [Payout](https://developer.squareup.com/reference/square/objects/payout) was completed.| |[payout.sent](https://developer.squareup.com/reference/square/payouts-api/webhooks/payout.sent)|`PAYOUTS_READ`|A [Payout](https://developer.squareup.com/reference/square/objects/payout) was sent.| For information about using the Payouts API, see [Payouts API](payouts-api/overview). ## Refunds API | Event | Permission{% width="140px" %} | Description | |----------|-------------------------|-----------------------| |[refund.created](https://developer.squareup.com/reference/square/refunds-api/webhooks/refund.created) |`PAYMENTS_READ`|A [Refund](https://developer.squareup.com/reference/square/objects/refund) was created. | |[refund.updated](https://developer.squareup.com/reference/square/refunds-api/webhooks/refund.updated) |`PAYMENTS_READ`|A [Refund](https://developer.squareup.com/reference/square/objects/refund) was updated. Typically, the `refund.status` field changes when a refund is completed. | For information about using the Refunds API, see [Refunds API](refunds-api/overview). ## Subscriptions API | Event{% width="160px" %} | Permission{% width="180px" %} | Description | |--------|-------------------------------|--------------| | [subscription.created](https://developer.squareup.com/reference/square/subscriptions-api/webhooks/subscription.created)|`SUBSCRIPTIONS_READ`| A `Subscription` object was created.| | [subscription.updated](https://developer.squareup.com/reference/square/subscriptions-api/webhooks/subscription.updated)|`SUBSCRIPTIONS_READ`| A `Subscription` object was updated.| For information about using the Subscriptions API, see [Manage Subscriptions Using the Subscriptions API](subscriptions-api/overview). ## Team API {% table %} * Event * Permission {% width="140px" %} * Description ----- * [team_member.created](https://developer.squareup.com/reference/square/team-api/webhooks/team_member.created) * `EMPLOYEES_READ` * A team member was created. ----- * [team_member.updated](https://developer.squareup.com/reference/square/team-api/webhooks/team_member.updated) * `EMPLOYEES_READ` * A team member was updated. ----- * [team_member.wage_setting.updated](https://developer.squareup.com/reference/square/team-api/webhooks/team_member.wage_setting.updated) * `EMPLOYEES_READ` * A team member's wage setting was updated. ----- * [job.created](https://developer.squareup.com/reference/square/team-api/webhooks/job.created) * `EMPLOYEES_READ` * A job was created. ----- * [job.updated](https://developer.squareup.com/reference/square/team-api/webhooks/job.updated) * `EMPLOYEES_READ` * A job was updated. {% /table %} For information about using the Team API, see [Team API.](team/overview) ## Terminal API | Event | Permission {% width="150px" %} | Description | |---------|----------|-----------------------| |[terminal.checkout.created](https://developer.squareup.com/reference/square/terminal-api/webhooks/terminal.checkout.created)|`PAYMENTS_READ`|A `TerminalCheckout` request was created. |[terminal.checkout.updated](https://developer.squareup.com/reference/square/terminal-api/webhooks/terminal.checkout.updated)|`PAYMENTS_READ`|A `TerminalCheckout` status was changed. | |[terminal.refund.created](https://developer.squareup.com/reference/square/terminal-api/webhooks/terminal.refund.created)|`PAYMENTS_READ`|A `TerminalRefund` request was created. |[terminal.refund.updated](https://developer.squareup.com/reference/square/terminal-api/webhooks/terminal.refund.updated)|`PAYMENTS_READ`|A `TerminalRefund` status was changed. | |[terminal.action.created](https://developer.squareup.com/reference/square/terminal-api/webhooks/terminal.action.created)|`PAYMENTS_READ`|A `TerminalAction` request was created. |[terminal.action.updated](https://developer.squareup.com/reference/square/terminal-api/webhooks/terminal.action.updated)|`PAYMENTS_READ`|A `TerminalAction` status was updated. For information about using the Terminal API, see [Terminal API](terminal-api/overview). ## Transfer Order API | Event | Permission{% width="200px" %} | Description | |---------------|-------------------------------|------------------| |[TransferOrder.transfer_order_created](https://developer.squareup.com/reference/square/transfer-order-api/webhooks/transfer_order.created)|`INVENTORY_WRITE`, `INVENTORY_READ`|Published when a new transfer order is created.| |[TransferOrder.transfer_order_updated](https://developer.squareup.com/reference/square/transfer-order-api/webhooks/transfer_order.updated)|`INVENTORY_WRITE`, `INVENTORY_READ`|Published when a transfer order is updated.| |[TransferOrder.transfer_order_deleted](https://developer.squareup.com/reference/square/transfer-order-api/webhooks/transfer_order.deleted)|`INVENTORY_WRITE`|Published when a transfer order is updated.| For information about using the Transfer Orders API, see [Transfer Orders API](transfer-orders-api). ## Vendors API Event | Permission {% width="120px" %} | Description --------------|------------|------------ [vendor.created](https://developer.squareup.com/reference/square/webhooks/vendor.created) | `VENDOR_READ` | Published when a vendor is created by calling [CreateVendor](https://developer.squareup.com/reference/square/vendors-api/create-vendor) or [BulkCreateVendors](https://developer.squareup.com/reference/square/vendors-api/bulk-create-vendors), as well as using the Square Dashboard. [vendor.updated](https://developer.squareup.com/reference/square/webhooks/vendor.updated) | `VENDOR_READ` | Published when a vendor is updated by calling [UpdateVendor](https://developer.squareup.com/reference/square/vendors-api/update-vendor) or [BulkUpdateVendors](https://developer.squareup.com/reference/square/vendors-api/bulk-update-vendors), as well as using the Square Dashboard. For more information about vendor events, see [Receive Vendors Webhook Events](vendors-api/receive-vendors-events). For information about using the Vendors API, see [Manage Suppliers of a Seller](vendors-api/manage-vendors-in-apps). --- # Subscribe to Event Notifications > Source: https://developer.squareup.com/docs/webhooks/step2subscribe > Status: PUBLIC > Languages: All > Platforms: All The second step to create Square webhooks is to subscribe to the events you want to monitor. {% subheading %}Learn about the second step to creating Square webhooks, which is to subscribe to the events you want to monitor.{% /subheading %} {% toc hide=true /%} ## Overview To subscribe to notifications about customer events, you configure webhooks for your Square application. A webhook registers the notification URL that Square sends notifications to, the events you want to be notified about, and the Square API version. You can use the Developer Console to create webhook subscriptions. To use the Developer Console to subscribe to event notifications: 1. Open the [Developer Console](https://developer.squareup.com/apps) and choose **Open** for the application you want to use. 2. In the left pane, under **Webhooks**, choose **Subscriptions**. 3. Choose **Add subscription**. 4. Enter a name for the webhook and provide the notification URL. 5. Choose an API version that includes the events you want to be notified about, choose the events you want to be notified about, and then choose **Save**. 7. Choose the name of the the webhook endpoint you created under **Subscriptions** to open the **Endpoint Details** page. 8. In **Endpoint Details**, choose **Show** in the **Signature Key** box. Copy the signature key; you use this key later when you verify the event notification. {% aside type="important" %} The notification URL must be formatted correctly, use the HTTPS protocol, and be reachable. Otherwise, the error message "Your webhook for webhook was not created. URL is not valid" is displayed when you choose **Save**. {% /aside %} ## Format of an event notification The event notification that's sent to your notification URL includes the following metadata headers: * `x-square-hmacsha256-signature` - An HMAC-SHA256 signature used to validate the event authenticity. * `square-environment` - The Square account environment that generated the webhook event. The value can be Production or Sandbox. * `square-initial-delivery-timestamp` - The time of the initial notification delivery, as an [RFC 3339](https://tools.ietf.org/html/rfc3339) timestamp. * `square-retry-number` - The number of times Square has resent a notification for the given event (including the current retry) as an integer. The retry number doesn't include the original notification and is only present when there has been at least one unsuccessful delivery. * `square-retry-reason` - The reason why the last notification delivery failed. The retry reason is only present when there's at least one unsuccessful delivery and has the following possible values: * `http_timeout` - The client server took longer than 10 seconds to respond. * `http_error` - The client server responded with a non-2xx status code. * `ssl_error` - Square couldn't verify the client's SSL certificate. * `other_error` - An unexpected error occurred. The following screenshot shows headers from an event notification displayed on webhook.site: ![A screenshot showing headers for a webhook event notification displayed on webhook.site.](//images.ctfassets.net/1nw4q0oohfju/7owdYscg2JP88Qe5GSQBoq/da5ba0ba40a2fff8dbdd7490d80a308a/webhook-notification-headers.png) The body of the event notification has a common structure, in JSON format: * `merchant_id` - The ID of the merchant account (merchant token) where the event occurred. * `location_id` - (optional) The ID of the location or `UnitToken` associated with the event. The ID is included only if an event is tied to a unit or location for a merchant. * `type` - The type of event this notice represents. * `event_id` - The idempotency (UUID) value that uniquely identifies the event. * `created_at` - The time when the event notification was created, as an RFC 3339 timestamp. * `data` - The data associated with the event: * `type` - The name of the affected object's type. * `id` - The ID of the affected object. * `deleted` - A Boolean value set to `true` if the affected object was deleted. This field is included only when an object is deleted. * `object` - The affected object at the time the event was triggered (for example, the updated `Customer` object for a `customer.updated` event). This field might not be included for `.deleted` events. Check the [webhook documentation](https://developer.squareup.com/reference/square/webhooks) for the specific event. The following is an example of an event notification body: ```json { "merchant_id": "{MERCHANT_ID}", "type": "customer.created", "event_id": "edce24d3-bf56-46b4-b5ea-40266mnaa5a84", "created_at": "2021-05-17T22:46:29Z", "data": { "type": "customer", "id": "{CUSTOMER_ID}", "object": { "customer": { "created_at": "2021-05-17T22:46:28.856Z", "creation_source": "THIRD_PARTY", "email_address": "customer@mysite.com", "family_name": "Customer", "given_name": "MyFirst", "id": "{CUSTOMER_ID}", "preferences": { "email_unsubscribed": false }, "updated_at": "2021-05-17T22:46:29Z", "version": 0 } } } } ``` ## See also * [Create a Notification URL](webhooks/step1createurl) * [Verify and Validate an Event Notification](webhooks/step3validate) * [Manage Webhook Operations](webhooks/step4manage) * [Webhook Events Reference](webhooks/v2webhook-events-tech-ref) * [Webhook Subscriptions API](webhooks/webhook-subscriptions-api) * [Video: Webhooks](https://www.youtube.com/watch?v=hxU4qGSYNsY) --- # Manage Webhook Operations > Source: https://developer.squareup.com/docs/webhooks/step4manage > Status: PUBLIC > Languages: All > Platforms: All The final step to creating Square webhooks is to have your application safely process and store the event information. {% subheading %}Learn about the final step to creating Square webhooks, which is to have your application safely process and store the event information.{% /subheading %} {% toc hide=true /%} ## Overview There are two aspects of Square webhook events that you need to understand: when events are triggered in a transaction and how to manage event notifications. ## Understand when events are triggered Events that you can subscribe to using webhooks are generated by the various Square applications and Square APIs. For example, during a sales transaction, several events could be generated including an updated customer record and inventory adjustment along with an invoice creation. ## Manage event notifications When your notification URL endpoint receives an event notification, you must respond in a timely manner to the POST request and store the event information securely. Cloud-based serverless applications, microservices, and function as a service (FaaS) applications let you handle event notifications without setting up a server. The [Sandbox 101: Implementing Webhooks](https://www.youtube.com/watch?v=HkpFBZrWf-Y) video shows how to create a serverless application on Amazon Web Services that responds to event notifications and stores the data for later retrieval. It includes [sample code](https://github.com/mootrichard/square-webhooks-sam-app) on GitHub. For more information about using FaaS applications with Square webhook event notifications, see the blog post [Stop Using Servers to Handle Webhooks](https://developer.squareup.com/blog/stop-using-servers-to-handle-webhooks/). ## Disable failed webhooks If your notification URL endpoint doesn't respond with a single 2xx HTTP status code within three weeks, Square takes the following actions: 1. Sends a warning email after the first week. 2. Sends a warning email after the second week. 3. Sends a final warning email after the third week. Following this final email, Square automatically disables your webhook subscription. To diagnose issues with your webhook subscription, see [Troubleshoot Webhooks](webhooks/troubleshooting). ## Webhooks best practices * **Use idempotency** - A generated idempotency value is included as the `event_id` field in the body of each event notification. Design your application to use this value to bypass processing if it's a repeated value. * **Use message versioning** - If your application passes Square data to another application, you should add versioning to the data before passing it to avoid duplication and to make auditing of the data transfer easier. ## See also * [Create a Notification URL](webhooks/step1createurl) * [Subscribe to Event Notifications](webhooks/step2subscribe) * [Verify and Validate an Event Notification](webhooks/step3validate) * [Video: Webhooks](https://www.youtube.com/watch?v=hxU4qGSYNsY) --- # Verify and Validate an Event Notification > Source: https://developer.squareup.com/docs/webhooks/step3validate > Status: PUBLIC > Languages: All > Platforms: All The third step to creating Square webhooks is to have your application verify the event notification and validate the data included. {% subheading %}Learn about the third step for setting up Square webhooks, which is to verify that you receive the event notification and validate that the notification originated from Square.{% /subheading %} {% toc hide=true /%} ## Verify that you receive a notification You can verify the creation and receipt of an event notification using either a test endpoint you create or a public site such as webhook.site. You can use [API Explorer](testing/api-explorer) to generate events that webhooks can subscribe to. To verify your event notification subscription using webhook.site: 1. Go to webhook.site in a browser, copy the provided unique URL to the clipboard, and leave the page open. 2. Create a webhook subscription by following the steps in [Subscribe to Event Notifications](webhooks/step2subscribe). For testing purposes, choose **Select All** under **Events**. 3. Enter the unique URL you copied from webhook.site as your notification URL. 4. Trigger an event from [API Explorer](https://developer.squareup.com/explorer/square). For example, generate a `customer.created` event by calling the `CreateCustomer` endpoint in the Customers API and providing a first or last name, company name, email address, or phone number. 5. Return to the webhook.site page to view the event notification. After you verify that your webhook subscription is working, you need to add code to your notification URL so that your application can process the event. ## Validate that the notification is from Square Your notification URL is public and can be called by anyone, so you must validate each event notification to confirm that it originated from Square. A non-Square post can potentially compromise your application. Requests that fail validation cannot be trusted and should be discarded. All webhook notifications from Square include an `x-square-hmacsha256-signature` header. The value of this header is an HMAC-SHA-256 signature generated using: * The signature key for your webhook subscription. * The notification URL for your webhook subscription. * The raw body of the request. To validate the webhook notification, generate the HMAC-SHA-256 signature in your own code and compare it to the `x-square-hmacsha256-signature` of the event notification you received. If needed, you can find your signature key and notification URL for your application's webhook subscription under **Webhooks** in the Developer Console. {% aside type="important" %} A malicious agent can compromise your notification endpoint by using a timing analysis attack to determine the key you're using to decrypt and compare webhook signatures. You should use a constant-time crypto library to prevent such attacks by masking the actual time taken to decrypt and compare signatures. {% /aside %} ### Validation examples The following examples show how to use the `WebhooksHelper` utility in the [Square SDKs](sdks) to generate an HMAC-SHA256 signature from a signature key, notification URL, and raw event notification body. The generated signature is then compared with the event notification's `x-square-hmacsha256-signature` sent in the test cURL request. ### Node.js The following examples use the Node.js SDK. For installation instructions, see [Square Node.js SDK Quickstart](sdks/nodejs/quick-start). {% tabset %} {% tab id="Version 40.0.0 and later" %} ```javascript // server.mjs import * as http from 'http'; import { WebhooksHelper } from "square"; // The URL where event notifications are sent. const NOTIFICATION_URL = 'https://example.com/webhook'; // The signature key defined for the subscription. const SIGNATURE_KEY = 'asdf1234'; // Generate a signature from the notification url, signature key, // and request body and compare it to the Square signature header. async function isFromSquare(signature, body) { return await WebhooksHelper.verifySignature({ requestBody: body, signatureHeader: signature, signatureKey: SIGNATURE_KEY, notificationUrl: NOTIFICATION_URL }); } async function requestHandler(request, response) { let body = ''; request.setEncoding('utf8'); request.on('data', function(chunk) { body += chunk; }); request.on('end', async function() { const signature = request.headers['x-square-hmacsha256-signature']; if (await isFromSquare(signature, body)) { // Signature is valid. Return 200 OK. console.info("Request body: " + body); response.writeHead(200); } else { // Signature is invalid. Return 403 Forbidden. console.info("Invalid signature"); response.writeHead(403); } response.end(); }); } // Start a simple server for local testing. // Different frameworks may provide the raw request body in other ways. // INSTRUCTIONS // After installing the SDK: // 1. Run the server: // node server.mjs // 2. Send the following request from a separate terminal: // curl -vX POST localhost:8000 -d '{"hello":"world"}' -H "X-Square-HmacSha256-Signature: 2kRE5qRU2tR+tBGlDwMEw2avJ7QM4ikPYD/PJ3bd9Og=" const server = http.createServer(requestHandler); server.listen(8000); ``` {% /tab %} {% tab id="Version 39.1.0 and earlier" %} ```javascript // server.js import * as http from 'http'; import { WebhooksHelper } from 'square'; // The URL where event notifications are sent. const NOTIFICATION_URL = 'https://example.com/webhook'; // The signature key defined for the subscription. const SIGNATURE_KEY = 'asdf1234'; // Generate a signature from the notification url, signature key, // and request body and compare it to the Square signature header. function isFromSquare(signature, body) { return WebhooksHelper.isValidWebhookEventSignature( body, signature, SIGNATURE_KEY, NOTIFICATION_URL ); } function requestHandler(request, response) { let body = ''; request.setEncoding('utf8'); request.on('data', function(chunk) { body += chunk; }); request.on('end', function() { const signature = request.headers['x-square-hmacsha256-signature']; if (isFromSquare(signature, body)) { // Signature is valid. Return 200 OK. response.writeHead(200); console.info("Request body: " + body); } else { // Signature is invalid. Return 403 Forbidden. response.writeHead(403); console.info("Invalid signature"); } response.end(); }); } // Start a simple server for local testing. // Different frameworks may provide the raw request body in other ways. // INSTRUCTIONS // After installing the SDK: // 1. Run the server: // node server.js // 2. Send the following request from a separate terminal: // curl -vX POST localhost:8000 -d '{"hello":"world"}' -H "X-Square-HmacSha256-Signature: 2kRE5qRU2tR+tBGlDwMEw2avJ7QM4ikPYD/PJ3bd9Og=" const server = http.createServer(requestHandler); server.listen(8000); ``` {% /tab %} {% /tabset %} ### Python The following example uses the Python SDK. For installation instructions, see [Square Python SDK Quickstart](sdks/python/quick-start). ``` python # server.py from http.server import BaseHTTPRequestHandler, HTTPServer from square.utilities.webhooks_helper import is_valid_webhook_event_signature # The URL where event notifications are sent. NOTIFICATION_URL = 'https://example.com/webhook' # The signature key defined for the subscription. SIGNATURE_KEY = 'asdf1234' class MainHandler(BaseHTTPRequestHandler): def do_POST(self): length = int(self.headers.get('content-length', 0)) body = self.rfile.read(length).decode('utf-8') square_signature = self.headers.get('x-square-hmacsha256-signature') # Generate a signature from the notification url, signature key, # and request body and compare it to the Square signature header. is_from_square = is_valid_webhook_event_signature(body, square_signature, SIGNATURE_KEY, NOTIFICATION_URL) if is_from_square: # Signature is valid. Return 200 OK. self.send_response(200) print("Request body: {}".format(body)) else: # Signature is invalid. Return 403 Forbidden. self.send_response(403) self.end_headers() # Start a simple server for local testing. # Different frameworks may provide the raw request body in other ways. # INSTRUCTIONS # After installing the SDK: # 1. Run the server: # python server.py # 2. Send the following request from a separate terminal: # curl -vX POST localhost:8000 -d '{"hello":"world"}' -H "X-Square-HmacSha256-Signature: 2kRE5qRU2tR+tBGlDwMEw2avJ7QM4ikPYD/PJ3bd9Og=" server = HTTPServer(("0.0.0.0", 8000), MainHandler) server.serve_forever() ``` ### C# The following example uses the .NET SDK. For installation instructions, see [Square .NET SDK Quickstart](sdks/dotnet/quick-start). ``` csharp using Square.Utilities; using System.IO; using System.Net; using System.Text; using System.Threading.Tasks; public class Server { /// The URL where event notifications are sent. private const string NOTIFICATION_URL = "https://example.com/webhook"; /// The signature key defined for the subscription. private const string SIGNATURE_KEY = "asdf1234"; /// /// Generate a signature from the notification url, signature key, /// and request body and compare it to the Square signature header. /// private static async Task IsFromSquare(HttpListenerRequest request) { using (var reader = new StreamReader(request.InputStream, Encoding.UTF8)) { var signature = request.Headers.Get("x-square-hmacsha256-signature") ?? ""; var requestBody = await reader.ReadToEndAsync(); return WebhooksHelper.IsValidWebhookEventSignature(requestBody, signature, SIGNATURE_KEY, NOTIFICATION_URL); } } /// /// Start a simple server for local testing. Different frameworks may provide the raw request body in other ways. /// /// /// INSTRUCTIONS /// After installing the SDK: /// 1. Run the server: /// (You will first need to include your own csharp.csproj file.) /// dotnet run /// 2. Send the following request from a separate terminal: /// curl -vX POST localhost:8000 -d '{"hello":"world"}' -H "X-Square-HmacSha256-Signature: 2kRE5qRU2tR+tBGlDwMEw2avJ7QM4ikPYD/PJ3bd9Og=" /// public static void Main(string[] args) { HttpListener server = new HttpListener(); server.Prefixes.Add("http://localhost:8000/"); server.Start(); while (true) { HttpListenerContext context = server.GetContext(); var task = IsFromSquare(context.Request); task.Wait(); bool isFromSquare = task.Result; using (HttpListenerResponse response = context.Response) { if (isFromSquare) { // Signature is valid. Return 200 OK. response.StatusCode = 200; } else { // Signature is invalid. Return 403 Forbidden. response.StatusCode = 403; } } } } } } ``` ### Go The following example uses the Go SDK. For installation instructions, see [Square Go SDK Quickstart](sdks/go/quick-start). ``` go // server.go package main import ( "context" "fmt" "io/ioutil" "net/http" "os" "github.com/square/square-go-sdk" squareclient "github.com/square/square-go-sdk/client" ) // The URL where event notifications are sent. // The signature key defined for the subscription. const ( NOTIFICATION_URL = "https://example.com/webhook" SIGNATURE_KEY = "asdf1234" ) // Generate a signature from the notification url, signature key, // and request body and compare it to the Square signature header. func isFromSquare(signature string, body []byte) bool { client := squareclient.NewClient() err := client.Webhooks.VerifySignature( context.TODO(), &square.VerifySignatureRequest{ RequestBody: string(body), SignatureHeader: signature, SignatureKey: SIGNATURE_KEY, NotificationURL: NOTIFICATION_URL, }, ); return err == nil } func requestHandler(w http.ResponseWriter, r *http.Request) { signature := r.Header.Get("X-Square-HmacSha256-Signature") body, err := ioutil.ReadAll(r.Body) if err != nil { http.Error(w, "Failed to read request body", http.StatusInternalServerError) return } if isFromSquare(signature, body) { // Signature is valid. Return 200 OK. w.WriteHeader(http.StatusOK) fmt.Fprintf(w, "Request body: %s\n", body) } else { // Signature is invalid. Return 403 Forbidden. w.WriteHeader(http.StatusForbidden) fmt.Fprintln(w, "Invalid signature") } } // Start a simple server for local testing. // Different frameworks may provide the raw request body in other ways. // INSTRUCTIONS // After initializing a new Go module and installing the SDK: // 1. Run the server: // go run server.go // 2. Send the following request from a separate terminal: // curl -vX POST localhost:8000 -d '{"hello":"world"}' -H "X-Square-HmacSha256-Signature: 2kRE5qRU2tR+tBGlDwMEw2avJ7QM4ikPYD/PJ3bd9Og=" func main() { http.HandleFunc("/", requestHandler) port := "8000" fmt.Printf("Server is listening on port %s\n", port) if err := http.ListenAndServe(":"+port, nil); err != nil { fmt.Fprintf(os.Stderr, "Failed to start server: %v\n", err) os.Exit(1) } } ``` ### Java The following example uses the [Java SDK](sdks/java). For instructions to run this example, see [Setup steps for Java](#setup-steps-for-java). {% tabset %} {% tab id="Version 44.0.0.20250319 and later" %} ```java // Server.java package com.square.examples; import com.squareup.square.utilities.WebhooksHelper; import com.sun.net.httpserver.HttpServer; import java.net.InetSocketAddress; import java.util.logging.Level; import java.util.logging.Logger; public class Server { // The URL where event notifications are sent. private static final String NOTIFICATION_URL = "https://example.com/webhook"; // The signature key defined for the subscription. private static final String SIGNATURE_KEY = "asdf1234"; // Start a simple server for local testing. // Different frameworks may provide the raw request body in other ways. // INSTRUCTIONS // After installing the SDK: // 1. Run the server: // See the setup steps below. // 2. Send the following request from a separate terminal: // curl -vX POST localhost:8000 -d '{"hello":"world"}' -H "X-Square-HmacSha256-Signature: 2kRE5qRU2tR+tBGlDwMEw2avJ7QM4ikPYD/PJ3bd9Og=" public static void main(String[] args) { try { HttpServer server = HttpServer.create(new InetSocketAddress(8000), 0); server.createContext("/", httpExchange -> { var sigHeaders = httpExchange.getRequestHeaders().get("x-square-hmacsha256-signature"); var requestBody = new String(httpExchange.getRequestBody().readAllBytes()); boolean isFromSquare = false; if (sigHeaders.size() == 1) { String signature = sigHeaders.get(0); // Generate a signature from the notification url, signature key, // and request body and compare it to the Square signature header. isFromSquare = WebhooksHelper.verifySignature(requestBody, signature, SIGNATURE_KEY, NOTIFICATION_URL); } if (isFromSquare) { // Signature is valid. Return 200 OK. httpExchange.sendResponseHeaders(200, 0); Logger.getLogger(Server.class.getName()).log(Level.INFO, "Request body: " + requestBody); } else { // Signature is invalid. Return 403 Forbidden. httpExchange.sendResponseHeaders(403, 0); Logger.getLogger(Server.class.getName()).log(Level.INFO, "Invalid signature"); } httpExchange.getResponseBody().close(); }); server.start(); } catch (Throwable tr) { tr.printStackTrace(); } } } ``` {% /tab %} {% tab id="Version 43.1.0.20250220 and earlier" %} ```java //Server.java package com.square.examples; import com.squareup.square.utilities.WebhooksHelper; import com.sun.net.httpserver.HttpServer; import java.net.InetSocketAddress; import java.util.logging.Level; import java.util.logging.Logger; public class Server { // The URL where event notifications are sent. private static final String NOTIFICATION_URL = "https://example.com/webhook"; // The signature key defined for the subscription. private static final String SIGNATURE_KEY = "asdf1234"; // Start a simple server for local testing. // Different frameworks may provide the raw request body in other ways. // INSTRUCTIONS // After installing the SDK: // 1. Run the server: // See the setup steps below. // 2. Send the following request from a separate terminal: // curl -vX POST localhost:8000 -d '{"hello":"world"}' -H "X-Square-HmacSha256-Signature: 2kRE5qRU2tR+tBGlDwMEw2avJ7QM4ikPYD/PJ3bd9Og=" public static void main(String[] args) { try { HttpServer server = HttpServer.create(new InetSocketAddress(8000), 0); server.createContext("/", httpExchange -> { var sigHeaders = httpExchange.getRequestHeaders().get("x-square-hmacsha256-signature"); var requestBody = new String(httpExchange.getRequestBody().readAllBytes()); boolean isFromSquare = false; if (sigHeaders.size() == 1) { String signature = sigHeaders.get(0); // Generate a signature from the notification url, signature key, // and request body and compare it to the Square signature header. isFromSquare = WebhooksHelper.isValidWebhookEventSignature(requestBody, signature, SIGNATURE_KEY, NOTIFICATION_URL); } if (isFromSquare) { // Signature is valid. Return 200 OK. httpExchange.sendResponseHeaders(200, 0); Logger.getLogger(Server.class.getName()).log(Level.INFO, "Request body: " + requestBody); } else { // Signature is invalid. Return 403 Forbidden. httpExchange.sendResponseHeaders(403, 0); Logger.getLogger(Server.class.getName()).log(Level.INFO, "Invalid signature"); } httpExchange.getResponseBody().close(); }); server.start(); } catch (Throwable tr) { tr.printStackTrace(); } } } ``` {% /tab %} {% /tabset %} {% accordion expanded=false %} {% slot "heading" %} #### Setup steps for Java {% /slot %} This exercise requires [Oracle Java SE Development Kit](https://www.oracle.com/java/technologies/downloads/) (Java version 8 or later) and [Apache Maven](https://maven.apache.org/install.html) for dependency management. 1. Create a directory for your project and create the pom.xml configuration file. ``` mkdir webhook-example && cd webhook-example && touch pom.xml ``` 2. Paste the following content into pom.xml, and then replace **SDK_VERSION_HERE** with the target SDK version. For example: ``${CONNECT_JAVA_SDK_CURRENT_VERSION}`` ``` 4.0.0 com.square.examples webhook-example 1.0-SNAPSHOT com.squareup square SDK_VERSION_HERE ``` 3. Create the Server.java file in the package directory. ``` mkdir -p src/main/java/com/square/examples && touch src/main/java/com/square/examples/Server.java ``` 4. Paste the example server code into Server.java. 5. Run the following commands from the /webhook-example directory: 1. Download project dependencies. ``` mvn dependency:copy-dependencies ``` 2. Start the server. ``` javac -cp "target/dependency/*" src/main/java/com/square/examples/Server.java && java -cp "target/dependency/*:src/main/java" com.square.examples.Server ``` 7. After the server starts, send the test cURL command from a separate terminal. ``` curl -vX POST localhost:8000 -d '{"hello":"world"}' -H "X-Square-HmacSha256-Signature: 2kRE5qRU2tR+tBGlDwMEw2avJ7QM4ikPYD/PJ3bd9Og=" ``` {% /accordion %} ### PHP The following examples use the PHP SDK. For installation instructions, see [Square PHP SDK Quickstart](sdks/php/quick-start). {% tabset %} {% tab id="Version 41.0.0.20250220 and later" %} ```php ``` {% /tab %} {% tab id="Version 40.0.0.20250123 and earlier" %} ```php ``` {% /tab %} {% /tabset %} ### Ruby The following example uses the Ruby SDK. For installation instructions, see [Square Ruby SDK Quickstart](sdks/ruby/quick-start). ``` ruby # server.rb require 'base64' require 'openssl' require 'sinatra' require 'square' # The URL where event notifications are sent. NOTIFICATION_URL = "https://example.com/webhook" # The signature key defined for the subscription. SIGNATURE_KEY = "asdf1234" # Generate a signature from the notification url, signature key, # and request body and compare it to the Square signature header. def is_from_square(signature, body) return Square::WebhooksHelper.is_valid_webhook_event_signature(body, signature, SIGNATURE_KEY, NOTIFICATION_URL) end # Start a simple server for local testing. # Different frameworks may provide the raw request body in other ways. # INSTRUCTIONS # After installing the SDK: # 1. Run the server: # (You may need to `gem install sinatra` first.) # ruby server.rb # 2. Send the following request from a separate terminal: # curl -vX POST localhost:8000 -d '{"hello":"world"}' -H "X-Square-HmacSha256-Signature: 2kRE5qRU2tR+tBGlDwMEw2avJ7QM4ikPYD/PJ3bd9Og=" set :port, 8000 post '/' do signature = request.env['HTTP_X_SQUARE_HMACSHA256_SIGNATURE'] body = request.body.read if is_from_square(signature, body) # Signature is valid. Return 200 OK. status 200 puts "Request body: %s" % body else # Signature invalid valid. Return 403 Forbidden. status 403 end end ``` ## See also * [Create a Notification URL](webhooks/step1createurl) * [Subscribe to Event Notifications](webhooks/step2subscribe) * [Manage Webhook Operations](webhooks/step4manage) * [Webhook Events Reference](webhooks/v2webhook-events-tech-ref) * [Webhook Subscriptions API](webhooks/webhook-subscriptions-api) * [Video: Webhooks](https://www.youtube.com/watch?v=hxU4qGSYNsY) --- # Square Webhooks > Source: https://developer.squareup.com/docs/webhooks/overview > Status: PUBLIC > Languages: All > Platforms: All Square webhooks let developers receive real-time notifications of events, such as inventory changes and point of sale payments. {% subheading %}Learn about Square webhooks, which let developers receive real-time notifications of events, such as inventory changes and Point of Sale payments.{% /subheading %} {% toc hide=true /%} ## Overview A webhook is a subscription that registers a notification URL and a list of [event types](webhooks/v2webhook-events-tech-ref) to be notified about. When an event occurs, Square collects data about the event, creates an event notification, and sends it to the notification URL for all webhook subscriptions that are subscribed to that event. Your application must respond with a `2xx` status code as soon as possible to acknowledge that the notification was received. Events can originate from the Square Dashboard, a Point of Sale (POS) application, other Square products, and third-party applications calling Square APIs. For each event occurrence, Square sends a POST request to your notification URL with the event details in JSON format. You can use webhooks to trigger additional events when an event occurs and integrate with external systems. For example: * Send email notifications when an event occurs, such as: * A refund is more than a certain limit. * The inventory for an item is getting too low. * A high-value item was sold. * Pass data to another system after an event, such as sending customer data to a CRM. * Connect a third-party POS system to a Square Terminal. * Trigger other applications to respond to an event. {% aside type="tip" %} Webhooks can be sent more than once. You can bypass the processing of repeated notifications using the idempotency value included as the `event_id` field in the body of each event notification. {% /aside %} ## Requirements and limitations Before you start: * Define a notification URL that points to your application - This is an endpoint that directs webhook event notifications to your application. * Determine the Square API version - The API version you select must include the webhook events that you want to subscribe to. * Determine the Square API events that you want to subscribe to - This is the set of [webhook events](webhooks/v2webhook-events-tech-ref) that trigger an event notification for your application. Applications need at least one reachable notification URL to receive and process webhook events from Square. The notification URL endpoint must: * Require a connection that uses HTTPS. * Expect JSON data from a POST request. * Respond to Square with a `2xx` HTTP status code as soon as possible to acknowledge the successful receipt of the event notification. If your application fails to acknowledge the notification in a timely manner, a duplicate event is sent and your application has 10 seconds to respond. Notification URLs are specified on the **Webhook subscriptions** page for your application in the [Developer Console](https://developer.squareup.com/apps) or using the [Webhook Subscriptions API](webhooks/webhook-subscriptions-api). Square provides the following SLA for webhook event notifications: * In most cases, event notifications arrive in well under 60 seconds of the associated event. * There's no guarantee of the delivery order of event notices. ## Static IP address Webhooks from Square originate from the following IP addresses. These are provided so you can allow access by these addresses through a firewall you're using. Production IP addresses: * 54.245.1.154 * 34.202.99.168 Sandbox IP addresses: * 54.212.177.79 * 107.20.218.8 {% anchor id="retry-schedule" /%} ## Notification retries If a response with a `2xx` HTTP status code isn't received in a timely manner or if any other status code is returned, Square assumes that the delivery is unsuccessful and starts retry attempts. Square resends the event notification for up to 24 hours after the originating event, using exponential backoff to avoid spamming applications. After 24 hours, the notification is discarded and no further retry attempts are made. The retry schedule is as follows: {% table %} * Retry attempt * Time since last attempt * Time since event ----- * 1 * 1 minute * 1 minute ----- * 2 * 2 minutes * 3 minutes ----- * 3 * 4 minutes * 7 minutes ----- * 4 * 8 minutes * 15 minutes ----- * 5 * 16 minutes * 31 minutes ----- * 6 * 32 minutes * 63 minutes ----- * 7 * 60 minutes * 2 hours ----- * 8 * 2 hours * 4 hours ----- * 9 * 4 hours * 8 hours ----- * 10 * 8 hours * 16 hours ----- * 11 * 8 hours * 24 hours {% /table %} For example, if a `2xx` status code isn't received in a timely manner after the initial event notification, Square resends the notification after 1 minute (retry attempt 1). If a `2xx` status code isn't received in a timely manner, Square resends the notification after 2 minutes (retry attempt 2). Retried notifications include the `square-retry-number` and `square-retry-reason` headers. For more information, see [Format of an event notification](webhooks/step2subscribe#format-of-an-event-notification). {% aside type="tip" %} Applications can use the [Events API](events-api/overview) to recover and reconcile missed event notifications. {% /aside %} ## APIs not supporting webhooks The following Square APIs don't support webhooks: * Snippets API * Sites API * Merchants API * Cash Drawer Shifts API * Mobile Authorization API * Customer Groups API * Customer Segments API * Apple Pay API ## See also * [Create a Notification URL](webhooks/step1createurl) * [Subscribe to Event Notifications](webhooks/step2subscribe) * [Verify and Validate an Event Notification](webhooks/step3validate) * [Manage Webhook Operations](webhooks/step4manage) * [Webhook Subscriptions API](webhooks/webhook-subscriptions-api) * [Video: Webhooks](https://www.youtube.com/watch?v=hxU4qGSYNsY) --- # How It Works > Source: https://developer.squareup.com/docs/pos-api/how-it-works > Status: PUBLIC > Languages: All > Platforms: All You can use the Point of Sale API to build custom POS solutions that requires payments, without worrying about hardware integrations or PCI compliance. **Applies to:** [Point of Sale API - iOS](https://developer.squareup.com/docs/api/point-of-sale) | [Point of Sale API - Android](https://developer.squareup.com/docs/api/point-of-sale/android) {% subheading %}Learn about the Point of Sale API process flow and data flow. {% /subheading %} {% toc hide=true /%} ## Overview The [Point of Sale API](pos-api/what-it-does) lets mobile applications open the Square Point of Sale application to process in-person payments using Square hardware. Developers can use the Point of Sale API to build customized POS solutions or any other application that requires payments, without worrying about hardware integrations or PCI compliance. The Point of Sale API is available for native and web applications on iOS and Android. ## Process flow The following example process flow shows how mobile application code interacts with the Square Point of Sale API: 1. The seller mobile application determines the total amount to charge a customer. 1. The seller mobile application packages the transaction information and sends it in a request to the Square Point of Sale application. 1. The mobile device running the seller mobile application automatically opens the Square Point of Sale application. 1. The charge amount is pre-populated in the Square Point of Sale application based on the provided transaction information. 1. The transaction is completed with the Square Point of Sale application checkout flow. 1. The Square Point of Sale application sends completed transaction information to the provided callback URL. 1. The device reactivates the seller mobile application to receive and display the transaction results. ![A diagram showing the mobile client to Square server process flow in a Point of Sale API integration.](//images.ctfassets.net/1nw4q0oohfju/4VrEo6iNfFmRJxhyy1mGL0/da8283075f103bc0cebb90dec2c65b5c/point-of-sale-api-process-flow.png) If the payment is successful, the Point of Sale application response includes a transaction ID and tender IDs that can be used with other [Square Connect APIs](https://developer.squareup.com/reference/square) to pull more information or issue refunds at a later date. Failed or canceled payment results include an error code indicating why the request failed. All callbacks include any reference information packaged with the original checkout flow request. ## Data model The seller mobile application needs to package a request object with the following required information and send it to the Square Point of Sale API: * **Total amount** - The total transaction amount represented in the smallest unit of the supplied currency. For example, a value of 100 corresponds to $1 USD. * **Currency code** - The currency code of the transaction (for example, USD). * **Tender types** - The tender types allowed as payment. The selected tender types are displayed by the Square Point of Sale application during payment processing. * **Callback URL** - The callback URL that Square Point of Sale uses to pass results back to the seller mobile application. * **Application ID** - The Square-issued application ID of the seller mobile application. * **API version** - The targeted version of the Square Point of Sale API (for example, v2.0). The Square Point of Sale API receives a request object with transaction information and opens the Point of Sale application prepopulated with: * A note to be associated with the transaction. * Reference information that is returned when the transaction completes. * A Square customer ID to be associated with the transaction. Mobile applications package transaction information and send it to the Square Point of Sale application. The Point of Sale API uses URLs with custom schemes to communicate between mobile web applications and the Square Point of Sale application. Square Point of Sale accepts URLs with the scheme `square-commerce-v1` and sends transaction results back to the calling application using the URL scheme. Mobile web applications open the Point of Sale API by opening a URL with parameters that contain the required information. --- # Build on Android > Source: https://developer.squareup.com/docs/pos-api/build-on-android > Status: PUBLIC > Languages: Java > Platforms: Android Open the Square Point of Sale application from your mobile Android application to process in-person payments using Square hardware. **Applies to:** [Point of Sale API - Android](https://developer.squareup.com/docs/api/point-of-sale/android) {% subheading %}Learn how to open the Square Point of Sale application from your mobile Android application to process in-person payments using Square hardware.{% /subheading %} {% toc hide=true /%} ## Requirements and limitations * You've read the introductory review of this API. * You need a valid access token. You should test with Sandbox credentials whenever possible. For more information, see [Access Tokens and Other Square Credentials](build-basics/access-tokens). * **You're building an Android application** - For information about building an iOS application, see [Build on iOS](pos-api/build-on-ios). For information about building a Mobile Web application, see [Build on Mobile Web](pos-api/build-mobile-web). * **You're using the Point of Sale SDK for Android version 2.0 and the Square Point of Sale application v4.64 and later** - The Point of Sale SDK provides a helpful wrapper around the Point of Sale API, which simplifies the development process. * **You're using version 15 as the minimum supported Android SDK version** - If you're using an earlier version, you might need to update your SDK to use the sample code in this topic. * **You're using Java** - The Point of Sale SDK only supports Java on Android. ## 1. Install the Square Point of Sale application You should install the latest version of the Square Point of Sale application from the [Google Play Store](https://play.google.com/store/apps/details?id=com.squareup). If you choose to use an older version of the Point of Sale application, you need to confirm that the version is compatible with the Android Point of Sale SDK version you're using. |Application version|Android SDK version| |:----------|:------------------| |4.64 and later|v2.0| |4.48 and later|v1.| |4.41 and later|v1.0| There are two ways to determine the current version of the Square Point of Sale application: * Look it up in the device settings. * Run the following command using [ADB](https://developer.android.com/studio/command-line/adb): ```bash adb shell dumpsys package com.squareup | grep versionName ``` ## 2. Register your application The Square Point of Sale application for Android only accepts requests if it can authenticate the source of the request. Square uses the following information to authenticate application requests: * **SHA-1 fingerprint** - The Square Point of Sale application uses the SHA-1 fingerprint of an application to validate the source of incoming requests. * **Package name (such as com.example.myapp)** - A Java-language-style package name for your Android application. This needs to match the name you use in the `package` attribute in [the Android manifest for your application](https://developer.android.com/guide/topics/manifest/manifest-element). To register your application: 1. [Obtain your Android application fingerprint](pos-api/cookbook/find-your-android-fingerprint). 1. Open the [Developer Console](https://developer.squareup.com/apps). 2. In the left pane, choose **Point of Sale API**. 3. In the **Android** section, choose **Add a new Android Package**. 4. Enter your package name and fingerprint. 5. Choose **Save**. ## 3. Add the Square Point of Sale SDK to your project ### Install the Point of Sale SDK manually To install the Point of Sale SDK manually, download the [point-of-sale-android-sdk repo in GitHub](https://github.com/square/point-of-sale-android-sdk). ### Add the Point of Sale SDK to a Gradle project If you develop with [Gradle](https://gradle.org/), add the following dependency that is appropriate for your plugin to your build.gradle file and rebuild your project. #### Android plugin for Gradle 3.0.0 and later [Context: Android] ```gradle dependencies { implementation 'com.squareup.sdk:point-of-sale-sdk:2.+' } ``` #### Android plugin for Gradle 2 and later ```gradle dependencies { compile 'com.squareup.sdk:point-of-sale-sdk:2.+' } ``` ### Add the Point of Sale SDK to a Maven project If you develop with [Maven](http://maven.apache.org/), add the following dependency to your pom.xml file and rebuild your project: [Context: Android] ```xml {"": true, "id" : "mavendependency"} com.squareup.sdk point-of-sale-sdk 2.0 aar ``` ## 4. Update your project AndroidManifest If your project targets Android 11 or newer, you must add the following object to your manifest: ```xml ``` {% anchor id="initiate-a-mobile-web-transaction-android" /%} ## 5. Add code to initiate a transaction from your application 1. Set your application ID. To find your application ID, open the [Developer Console](https://developer.squareup.com/apps), and choose an application. 2. Add a constructor that configures an instance of [PosClient](https://developer.squareup.com/docs/api/point-of-sale/android/com/squareup/sdk/pos/PosClient.html). 3. Add code that creates a new charge request and uses it to initiate a transaction in the Point of Sale application. The following function uses [ChargeRequest.Builder](https://developer.squareup.com/docs/api/point-of-sale/android/) to create a charge for $1 USD and then uses that request to create a `ChargeRequest` and initiate the transaction with an `Intent` object. [Context: Java, Android] Set your application ID as shown: ```java { "": true, "id": "applicationiddeclaration"} private static final String APPLICATION_ID = "{REPLACE ME}"; ``` Add a constructor as shown: ```java {"line_numbers": true, "": true, "id": "oncreate"} public class MainActivity extends Activity { private PosClient posClient; @Override protected void onCreate(Bundle savedInstanceState) { super.onCreate(savedInstanceState); setContentView(R.layout.main_activity); // Replace APPLICATION_ID with a Square-assigned application ID posClient = PosSdk.createClient(this, APPLICATION_ID); } } ``` Create a new charge request as shown: ```java {"line_numbers": true, "": true, "id": "starttransaction"} // create a new charge request and initiate a Point of Sale transaction private static final int CHARGE_REQUEST_CODE = 1; public void startTransaction() { ChargeRequest request = new ChargeRequest.Builder( 100, CurrencyCode.USD) .build(); try { Intent intent = posClient.createChargeIntent(request); startActivityForResult(intent, CHARGE_REQUEST_CODE); } catch (ActivityNotFoundException e) { AlertDialogHelper.showDialog( this, "Error", "Square Point of Sale is not installed" ); posClient.openPointOfSalePlayStoreListing(); } } ``` {% aside type="info" %} The `AlertDialogHelper` object that is used in the step 4 and step 5 code blocks is an example of a helper class instance and not part of the Point of Sale SDK. {% /aside %} ## 6. Add code to receive data from the Square Point of Sale application When the Square Point of Sale application completes a transaction (or encounters an error), it returns the UI focus to your application and calls the [onActivityResult()](https://developer.android.com/reference/android/app/Activity) method of the activity that initiated the transaction. Add code to parse the response. [Context: Java, Android] ```java {"line_numbers": true, "": true, "id": "onactivityresult"} @Override protected void onActivityResult(int requestCode, int resultCode, Intent data) { // Handle unexpected errors if (data == null || requestCode != CHARGE_REQUEST_CODE) { AlertDialogHelper.showDialog(this, "Error: unknown", "Square Point of Sale was uninstalled or stopped working"); return; } // Handle expected results if (resultCode == Activity.RESULT_OK) { // Handle success ChargeRequest.Success success = posClient.parseChargeSuccess(data); AlertDialogHelper.showDialog(this, "Success", "Client transaction ID: " + success.clientTransactionId); } else { // Handle expected errors ChargeRequest.Error error = posClient.parseChargeError(data); AlertDialogHelper.showDialog(this, "Error" + error.code, "Client transaction ID: " + error.debugDescription); } return; } ``` For more information about the `ChargeRequest` class, see the [Android Point of Sale API Technical Reference](https://developer.squareup.com/docs/api/point-of-sale/android/). {% aside type="tip" %} Your application should keep track of whether a Point of Sale API request has been issued and whether a callback has been received. Because of the constraints of application-switching APIs, sellers can leave Square Point of Sale during an API request and return to your application. It's your responsibility to direct them to return to Square and finish the transaction. {% /aside %} ## 7. Test your code 1. Sign in to the Square Point of Sale application with the business location that you want to use to accept payments. 1. Open your application and initiate a transaction. 1. Test your callbacks: * Test the cancellation callback by canceling a transaction. * Test the success callback by completing a cash transaction. The Sandbox doesn't support credit card testing for mobile. For alternatives, see [Testing for supported countries](payment-card-support-by-country#testing-for-supported-countries). ## See also * [Find your Android Application Certificate Fingerprint](pos-api/cookbook/find-your-android-fingerprint) * [Use the Point of Sale API in Offline Mode](pos-api/cookbook/offline-mode) --- # PHP SDK > Source: https://developer.squareup.com/docs/sdks/php > Status: PUBLIC > Languages: All > Platforms: All Use the Square PHP library to build with Square APIs in a language-idiomatic way that reduces complexity without sacrificing API functionality. {% subheading %}The Square PHP library supports Square APIs in a language-idiomatic way that reduces complexity without sacrificing API functionality.{% /subheading %} {% toc hide=true /%} {% card-layout %} {% card iconPath="//images.ctfassets.net/1nw4q0oohfju/5kJ0awbMM6kFcPnB5vdLOD/9ae94d451a1b8a106141e1fa3cdb4213/packagist.svg" href="https://packagist.org/packages/square/square" %} {% card-link-out %}SDK package{% /card-link-out %} {% /card %} {% card iconPath="//images.ctfassets.net/1nw4q0oohfju/6foMeNHsmKw27jkpa7lPHk/6d5da15335dcf70d1fd1c28ca3bb540e/Github.svg" href="https://github.com/square/square-php-sdk/blob/master/README.md#sdk-reference" %} {% card-link-out %}Reference library docs{% /card-link-out %} {% /card %} {% /card-layout %} {% line-break /%} **Latest SDK Version:** 46.0.1.20260715 Each SDK version is tied to a specific [Square API version](build-basics/versioning-overview). As features are added, Square releases a new Square API version and a new SDK version. To use new features, you must update the SDK version in your application. Review the [release notes](changelog/connect) to learn about changes in each API version. An increase in the SDK major version number indicates a breaking change. You should always test your application before deploying a change to production. {% aside type="important" %} Version `41.0.0.20250220` of the PHP SDK represents a full rewrite of the SDK, with a number of breaking changes, including client construction and parameter names. When upgrading from version `40.0.0.20250123` or earlier, read the [migration guide](sdks/php/migration) to learn what to update and how to use the new SDK and the legacy version side by side. {% /aside %} ## Installation Install the latest version by running the following command: ```bash composer require square/square ``` ## Quickstart * Follow along with the [Quickstart guide](sdks/php/quick-start) to set up and test the Square PHP SDK in your own project. --- # Use the Point of Sale API in Offline Mode > Source: https://developer.squareup.com/docs/pos-api/cookbook/offline-mode > Status: PUBLIC > Languages: All > Platforms: All The Point of Sale API supports payment processing with the Square Point of Sale application in Offline Mode. **Applies to:** [Point of Sale API - iOS](https://developer.squareup.com/docs/api/point-of-sale) | [Point of Sale API - Android](https://developer.squareup.com/docs/api/point-of-sale/android) {% subheading %}Learn how to continue processing payments offline during moments of limited connection to the Internet.{% /subheading %} {% toc hide=true /%} ## Requirements and limitations If you're using the Point of Sale API with a [Square Reader for contactless and chip](https://squareup.com/us/en/hardware/contactless-chip-reader), both a Bluetooth connection and a secure connection are required to take offline payments. * A Bluetooth connection relies on device settings and physical distance. A reader must maintain a Bluetooth connection with a mobile device's POS application to take payments. * A secure connection is established when a reader is connected to a mobile device that has its POS application open and online. To take offline payments with the Point of Sale API and a Square reader: * The reader must be connected to a device that was online and had the POS application opened within the last 24 hours. * The POS device must have a Bluetooth connection to the reader and have offline processing enabled before going offline. * The reader must maintain a Bluetooth connection to your device throughout the offline payment. ## Accept offline payments The Point of Sale API supports payment processing with the Square Point of Sale application in [Offline Mode](https://squareup.com/help/us/en/article/7777-process-card-payments-with-offline-mode). To accept offline payments with the Point of Sale API: 1. Sign in to the Square Point of Sale application, choose **≡ More**, and then choose **Settings**. 2. Choose **Checkout**, choose **Offline payments**, and then toggle on **Allow**. {% aside type="important" %} Offline payments are processed automatically when you reconnect your device to the Internet. Payments might be declined if not processed within 24 hours. {% /aside %} ## Offline payment results Offline payment results don't include a `transaction_id` field because Square backend systems haven't received and processed the transaction. Instead, the response includes a `client_transaction_id` field, which matches the value of `client_id` in `Transaction` objects. Use `client_transaction_id` to retrieve the transaction details using the Transactions API [ListTransactions](https://developer.squareup.com/reference/square/transactions-api/list-transactions) endpoint when Internet connection is restored and the Square Point of Sale application processes the staged transactions. It's not currently possible to filter `ListTransactions` results by the `client_id` field. --- # Build on iOS > Source: https://developer.squareup.com/docs/pos-api/build-on-ios > Status: PUBLIC > Languages: Swift, Objective C > Platforms: iOS **Applies to:** [Point of Sale API - iOS](https://developer.squareup.com/docs/api/point-of-sale) {% subheading %}Learn how to open the Square Point of Sale application from your mobile iOS application to process in-person payments using Square hardware.{% /subheading %} {% line-break /%} {% toc hide=true /%} ## Requirements and limitations * You've read the introductory review of this API. * You need a valid access token. You should test with Sandbox credentials whenever possible. For more information, see [Access Tokens and Other Square Credentials](build-basics/access-tokens). * **You're using the Point of Sale SDK for iOS** - The [Point of Sale SDK for iOS](https://github.com/square/SquarePointOfSaleSDK-iOS) provides a helpful wrapper around the Point of Sale API, which simplifies the development process. * **You're using a personal access token as your authorization token** - The Point of Sale API doesn't support the Square Sandbox at this time. Personal access tokens are appropriate for testing and development. ## 1. Install the Square Point of Sale application You should install the latest version of the Square Point of Sale application from the Apple [App Store](https://apps.apple.com/us/app/square-register-point-sale/id335393788) to use with the latest version of the [Point of Sale SDK for iOS](https://github.com/square/SquarePointOfSaleSDK-iOS). To check your installed version of the Point of Sale application: 1. Open the Point of Sale application. 1. Choose **Help**, and then choose **Support**. 1. Scroll to the bottom of the **Support** screen. If you must use an older version of the Point of Sale SDK, you need to install a compatible version of the Point of Sale application: |Point of Sale version |iOS SDK version |iOS version | |:----------|:------------------|:------------------| |4.59 and later|v1.3|14| |4.53 and later|v1.2|14| |4.50 and later|v1.1|14| |4.34 and later|v1.0|14| ## 2. Register your application The Square Point of Sale application for iOS only accepts requests if it can authenticate the source of the request. Square uses the following to authenticate application requests: * **Application bundle ID** - The Square Point of Sale application uses the bundle ID of an application to validate the source of incoming requests. * **Application URL scheme** - For example, `myapp-url-scheme`. The URL scheme you provide must match the `CFBundleURLSchemes` attribute of the Info.plist file for your application. To register your application: 1. Open the [Developer Console](https://developer.squareup.com/apps). 2. In the left pane, choose **Point of Sale API**. 3. In the **iOS** section, enter your application bundle IDs and URL schemes. 4. Choose **Save**. ## 3. Add the Square Point of Sale SDK to your project ### Install the Point of Sale SDK manually To install the Point of Sale SDK manually, download the [SquarePointOfSaleSDK-iOS repo in GitHub](https://github.com/square/SquarePointOfSaleSDK-iOS). ### Add the Point of Sale SDK to a Cocoapods project If you use [Cocoapods](https://cocoapods.org/) to manage your dependencies, install the Point of Sale SDK by adding the following to your podfile: [Context: Command Line] ```bash {"id": "podinstallPOSsdk", "": true} platform :ios, '9.0' pod 'SquarePointOfSaleSDK' ``` When installed, you can use the following commands to ensure that you have the most recent version of Point of Sale SDK installed. ```bash {"id": "podversioncheck", "": true} pod update pod install --repo-update ``` ### Add the Point of Sale SDK to a Carthage project If you use [Carthage](https://github.com/Carthage/Carthage) to manage your dependencies, install the Point of Sale SDK with the following shell command: ```bash {"id": "carthageinstallPOSsdk", "": true} github "Square/SquarePointOfSaleSDK-iOS" ``` ## 4. Add your URL schemes Set your URL scheme as `square-commerce-v1` and set your custom response URL scheme. [Context: iOS] 1. Add the request URL scheme as a `LSApplicationQueriesSchemes` key into your Info.plist file to indicate that your application uses the `square-commerce-v1` URL scheme to open Square Point of Sale. ```xml {"id": "setup-ios-requestURL-scheme", "": true} LSApplicationQueriesSchemes square-commerce-v1 ``` 2. Add your custom response URL scheme as `CFBundleURLTypes` keys in your Info.plist file. ```xml {"id": "setup-ios-responseURL-scheme", "": true} CFBundleURLTypes CFBundleTypeRole Editor CFBundleURLName YOUR_BUNDLE_URL_NAME CFBundleURLSchemes myapp-url-scheme ``` For more information about defining custom URL schemes and handling requests that use them, see Apple's [App Programming Guide for iOS](https://developer.apple.com/library/ios/documentation/iPhone/Conceptual/iPhoneOSProgrammingGuide/Inter-AppCommunication/Inter-AppCommunication.html). ## 5. Add code to initiate a payment from your application Create an [SCCAPIRequest](https://developer.squareup.com/docs/api/point-of-sale#sccapirequest) object with the details of your payment. {% aside type="tip" %} Information in the `notes` field is saved in the Square Dashboard and printed on receipts. {% /aside %} [Context: Objective C, iOS] ```objectivec // Replace with your app's callback URL. // Note: You can retrieve this value from Info.plist NSURL *const callbackURL = [NSURL URLWithString:redirectUrl]; // Specify the amount of money to charge. SCCMoney *const amount = [SCCMoney moneyWithAmountCents:100 currencyCode:@"USD" error:NULL]; // Note: You only need to set your application ID once, before creating your first request. [SCCAPIRequest setApplicationID:YOUR_APPLICATION_ID]; SCCAPIRequest *request = [SCCAPIRequest requestWithCallbackURL:callbackURL amount:amount userInfoString:nil merchantID:nil notes:@"Coffee" customerID:nil supportedTenderTypes:SCCAPIRequestTenderTypeAll clearsDefaultFees:NO returnAutomaticallyAfterPayment:NO error:&error]; ``` [Context: Swift, iOS] ```swift import Foundation // Replace with your app's callback URL as set in the // Square ApplicationDashboard [https://connect.squareup.com/apps] // You must also declare this URL scheme in <#YOUR_PROJECT#>.plist, // under URL types. let yourCallbackURL = URL(string: "hellocharge://callback")! // Specify the amount of money to charge. var amount: SCCMoney? do { amount = try SCCMoney(amountCents: 100, currencyCode: "USD") } catch {} // Your client ID is the same as your Square Application ID. // Note: You only need to set your client ID once, before creating your first request. SCCAPIRequest.setApplicationID(YOUR_CLIENT_ID) var request: SCCAPIRequest? do { request = try SCCAPIRequest(callbackURL: callbackURL, amount: amount, userInfoString: nil, merchantID: nil, notes: "Coffee", customerID: nil, supportedTenderTypes: .all, clearsDefaultFees: false, returnAutomaticallyAfterPayment: false) } catch {} ``` ## 6. Add code to send the transaction to the Square Point of Sale application Use the [SCCAPIConnection](https://developer.squareup.com/docs/api/point-of-sale#sccapiconnection) class to send your `SCCAPIRequest` to the Square Point of Sale application. [Context: Objective C, iOS] ```objectivec BOOL success = [SCCAPIConnection performRequest:request error:&error]; ``` [Context: Swift, iOS] ```swift var success = false do { try SCCAPIConnection.perform(request) success = true } catch let error as NSError { print(error.localizedDescription) } ``` ## 7. Add code to receive data from the Square Point of Sale application You need to add code to receive results from the Square Point of Sale application and do something with it. The following sample code implements the [application:openURL:options:](https://developer.apple.com/documentation/uikit/uiapplicationdelegate/1623112-application?language=occ) method in your [UIApplicationDelegate](https://developer.apple.com/library/ios/documentation/uikit/reference/uiapplicationdelegate_protocol/Reference/Reference.html) to receive the results. If the transaction succeeds, the sample code prints the newly created checkout object; otherwise, it prints the error description. {% aside type="important" %} Your application should keep track of whether a Point of Sale API request has been issued and whether a callback has been received. Because of the constraints of application-switching APIs, sellers can leave Square Point of Sale during an API request and return to your application. It's your responsibility to direct them to return to Square and finish the transaction. {% /aside %} [Context: Objective C, iOS] ```objectivec - (BOOL)application:(UIApplication *)app openURL:(NSURL *)url options:(NSDictionary *)options; { NSString *const sourceApplication = options[UIApplicationOpenURLOptionsSourceApplicationKey]; // Make sure the URL comes from Square Point of Sale; fail if it doesn't. if (![SCCAPIResponse isSquareResponse:url]) { return NO; } // The response data is encoded in the URL and can be decoded as an SCCAPIResponse. NSError *decodeError = nil; SCCAPIResponse[] *const response = [SCCAPIResponse responseWithResponseURL:url error:&decodeError]; if (response.isSuccessResponse) { // Print checkout object NSLog(@"Transaction successful: %@", response); } else if (decodeError) { // Print decode error NSLog(@"Decode Error: %@", decodeError); } else { // Print the error code NSLog(@"Request failed: %@", response.error); } return YES; } ``` [Context: Swift, iOS] ```swift func application( _: UIApplication, open url: URL, options: [UIApplication.OpenURLOptionsKey: Any] = [:] ) -> Bool { guard SCCAPIResponse.isSquareResponse(url) else { return false } // The response data is encoded in the URL and can be decoded as an SCCAPIResponse. var decodeError: Error? SCCAPIResponse do { let response = try SCCAPIResponse(responseURL: url) if let error = response.error { // Handle a failed request. print("Error: \(error.localizedDescription)") } else { // Print checkout object print("Transaction successful: \(response)") } } catch let error as NSError { // Handle unexpected errors. print(error.localizedDescription) } return true } ``` ## 8. Test your code 1. Sign in to the Square Point of Sale application with the business location that you want to use to accept payments. 1. Open your application and initiate a transaction. 1. Test your callbacks: * Test the cancellation callback by canceling a transaction. * Test the success callback by completing a cash transaction. The Sandbox doesn't support credit card testing for mobile. To test with credit cards in production, [connect your Square Reader](https://squareup.com/help/us/en/article/5639), process small card payments (as low as $1 USD), and then [issue refunds from Square Point of Sale](https://squareup.com/help/us/en/article/5060). To test your application in development, see [Testing for supported countries](payment-card-support-by-country#testing-for-supported-countries). ## Next step Now that you have a basic build in place, expand on it by integrating with the Square [Payments API](payments-refunds) and [Refunds API](refunds-api/overview). --- # Ruby SDK > Source: https://developer.squareup.com/docs/sdks/ruby > Status: PUBLIC > Languages: All > Platforms: All Use the Square Ruby library to build with Square APIs in a language-idiomatic way that reduces complexity without sacrificing API functionality. {% subheading %}The Square Ruby library supports Square APIs in a language-idiomatic way that reduces complexity without sacrificing API functionality.{% /subheading %} {% toc hide=true /%} {% card-layout %} {% card iconPath="//images.ctfassets.net/1nw4q0oohfju/5OoVpl50baLHOiFMxzrUKB/3571a5bc2d13dbf0f74a32246b5eac8f/rubygems.svg" href="https://rubygems.org/gems/square.rb" %} {% card-link-out %}SDK package{% /card-link-out %} {% /card %} {% card iconPath="//images.ctfassets.net/1nw4q0oohfju/6foMeNHsmKw27jkpa7lPHk/6d5da15335dcf70d1fd1c28ca3bb540e/Github.svg" href="https://github.com/square/square-ruby-sdk/blob/master/README.md#sdk-reference" %} {% card-link-out %}Reference library docs{% /card-link-out %} {% /card %} {% /card-layout %} {% line-break /%} **Latest SDK Version:** 46.0.1.20260715 Each SDK version is tied to a specific [Square API version](build-basics/versioning-overview). As features are added, Square releases a new Square API version and a new SDK version. To use new features, you must update the SDK version in your application. Review the [release notes](changelog/connect) to learn about changes in each API version. An increase in the SDK major version number indicates a breaking change. You should always test your application before deploying a change to production. {% aside type="important" %} Version `44.0.0.20250820` of the Ruby SDK represents a full rewrite of the SDK, with a number of breaking changes, outlined in the following sections. When upgrading to this version or later versions, take note of the changes in the SDK, including client construction and parameter names. If necessary, you can use the legacy version of the SDK along with the latest version. SDK versions `43.0.1.20250716` and earlier continue to function as expected, but you should plan to update your integration as soon as possible to ensure continued support. {% /aside %} ## Installation To install the Square Ruby SDK, use the `gem` command: ```bash gem install square.rb ``` --- # Find your Android Application Certificate Fingerprint > Source: https://developer.squareup.com/docs/pos-api/cookbook/find-your-android-fingerprint > Status: PUBLIC > Languages: Java > Platforms: Android Find the debug and release fingerprints of your Android application to configure the Point of Sale API application. **Applies to:** [Point of Sale API - iOS](https://developer.squareup.com/docs/api/point-of-sale) | [Point of Sale API - Android](https://developer.squareup.com/docs/api/point-of-sale/android) {% subheading %}Learn how to find the Android application certificate fingerprint to configure your Point of Sale API application in the Developer Console.{% /subheading %} {% toc hide=true /%} ## Overview The certificate used to sign your Android application contains a SHA value known as a "fingerprint". You should use a debug fingerprint until you're ready to release your application to production. The SHA "fingerprint" shouldn't be confused with an Android device fingerprint sensor used to authenticate a user. To use the Point of Sale API for Android, you must set the fingerprint of your mobile application in the [Developer Console](https://developer.squareup.com/apps). ![A screenshot showing the Android page in the Developer Console for setting your package name and fingerprint for your mobile application.](//images.ctfassets.net/1nw4q0oohfju/2FEOJ2HoLi5CFzFJTEjIeA/dda703cf989618e970b434c9b9b987f2/developer-dashboard-point-of-sale-api-android-fingerprint.png) ## Find your debug fingerprint Android SDK tools automatically generate a debug certificate and use the certificate to sign your Android package kit (APK) when you build your application locally for debugging and testing. The debug certificate includes your debug fingerprint (among other identifying information). The certificate information is located in the debug.keystore file. You can find the keystore file with the other Android environment configuration files for your application. By default, configuration files live in the ~/.android directory of your development environment. To find your debug fingerprint: 1. Use `keytool` to print information about your debug certificate. ```bash {"id": "debug-print-step1", "": true} keytool -list -v -keystore ~/.android/debug.keystore \ -alias androiddebugkey \ -storepass android \ -keypass android ``` 2. Copy the `SHA1` string from the output. ```bash {"id": "debug-print-step2", "": true} SHA1: LOOK_FOR_THIS_VALUE ``` The `SHA1` string is your debug fingerprint. ## Find your release fingerprint ### Option 1: Copy it from the release certificate To release an Android application (for example, to make it available on Google Play), you must generate a real certificate (`.keystore`) and use it to [sign your APK](https://developer.android.com/studio/publish/app-signing#release-mode). The release certification includes your release fingerprint (among other identifying information). To find your release fingerprint: 1. Use `keytool` to print information about the .keystore file you created. ```bash {"id": "release-print-step1.1", "": true} keytool -list -v -keystore PATH_TO_KEYSTORE -alias VALUE_OF_ALIAS ``` 2. Copy the `SHA1` string from the output: ```bash {"id": "release-print-step1.2", "": true} SHA1: LOOK_FOR_THIS_VALUE ``` The `SHA1` string is your release fingerprint. ### Option 2: Copy it directly from a signed APK If you don't have direct access to your `.keystore` file, you can copy the application fingerprint directly from the signed APK. 1. Use `keytool` to print information about the APK. ```bash {"id": "release-print-step2.1", "": true} keytool -list -printcert -jarfile YOUR_APP.apk ``` 2. Copy the `SHA1` string from the output. ```bash {"id": "release-print-step2.2", "": true} SHA1: LOOK_FOR_THIS_VALUE ``` The `SHA1` string is your release fingerprint. --- # Add an Alert Dialog Helper Class > Source: https://developer.squareup.com/docs/pos-api/cookbook/alert-dialog-helper > Status: PUBLIC > Languages: Java > Platforms: Android Learn how to add an alert dialog helper class. Before you start, get a reference to the Activity that is hosting the Point of Sale user interface. **Applies to:** [Point of Sale API - iOS](https://developer.squareup.com/docs/api/point-of-sale) | [Point of Sale API - Android](https://developer.squareup.com/docs/api/point-of-sale/android) {% subheading %}Learn how to add a helper class that returns an `AlertDialog`.{% /subheading %} {% toc hide=true /%} ## Requirements and limitations Get a reference to the `Activity` that is hosting the Point of Sale user interface. [Context: Java, Android] ## Create a dialog helper class Create a dialog helper class to return an `AlertDialog` to show call results. ```java import android.app.Activity; import android.app.AlertDialog; import android.app.Dialog; import android.content.pm.PackageManager; import android.os.Bundle; import android.support.v4.app.DialogFragment; public class AlertDialogHelper extends DialogFragment { private static AlertDialog mAlertDialog; @Override public Dialog onCreateDialog(Bundle savedInstanceState) { super.onCreateDialog(savedInstanceState); return null; } private static Dialog getDialog(Activity activity, String title, String description, int resourceId) { if (mAlertDialog == null) { mAlertDialog = new AlertDialog.Builder(activity, resourceId) .setTitle(title + ": " + description) .setPositiveButton("OK", null) .create(); } else { mAlertDialog.setTitle(title + ":" + description); mAlertDialog.setOwnerActivity(activity); } return mAlertDialog; } public static void showDialog(Activity activity, String title, String description) { int resourceId = 0; try { resourceId = activity .getPackageManager() .getActivityInfo(activity.getComponentName() , 0) .getThemeResource(); } catch (PackageManager.NameNotFoundException e) { e.printStackTrace(); } finally { getDialog( activity, title, description, resourceId).show(); } } } ``` --- # Build on Mobile Web > Source: https://developer.squareup.com/docs/pos-api/build-mobile-web > Status: PUBLIC > Languages: All > Platforms: All Open the Square Point of Sale application from a custom mobile web application to process in-person payments using Square hardware. **Applies to:** [Point of Sale API - iOS](https://developer.squareup.com/docs/api/point-of-sale) | [Point of Sale API - Android](https://developer.squareup.com/docs/api/point-of-sale/android) {% subheading %}Learn how to open the Square Point of Sale application from a custom mobile web application to process in-person payments using Square hardware.{% /subheading %} {% toc hide=true /%} ## Requirements and limitations * You've read the introductory review of this API. * You're familiar with basic web development. If you're new to web development, you should read [Getting started with the Web ](https://developer.mozilla.org/en-US/docs/Learn/Getting_started_with_the_web) by Mozilla.org before continuing. * You can create and run websites on localhost or a development server. If you're new to testing web pages locally, you should read [Testing for supported countries](payment-card-support-by-country#testing-for-supported-countries) before continuing. * You're familiar with HTTP and JSON. * You're building a mobile web application for POS transactions. If you're building a native mobile application, see [Build on Android](pos-api/build-on-android) or [Build on iOS](pos-api/build-on-ios). * The mobile web application uses JavaScript and HTML. ## 1. Install the Square Point of Sale application Install the latest version of the Square Point of Sale application from the [Google Play Store](https://play.google.com/store/apps/details?id=com.squareup) (Android) or the [Apple App Store](https://itunes.apple.com/us/app/square-register-point-sale/id335393788?mt=8) (iOS). ## 2. Configure your web callback URL You need to go into the Developer Console and set the callback URL in the application. Your callback URL is where the Point of Sale API sends notifications and payment information. For example: `` https://your-web-app.com/path/to/your/callback/ ``` Note that `/path/to/your/callback` should be the path to the code that processes notifications and transaction information received from the Square Point of Sale application. To register your callback URL: 1. In the [Developer Console](https://developer.squareup.com/apps), choose your application, and then choose **Point of Sale API** in the left pane. 1. In the **Web** section, enter your **Web Callback URL**. 1. Choose **Save**. ## 3. Add code to initiate a transaction from your mobile web application Mobile web transactions are initiated by choosing a link to the Square Point of Sale application. Because the request URL includes details about the transaction, you should build the URL dynamically instead of hardcoding it. The link URL includes the transaction information as parameters and is formatted differently for Android and iOS applications. ### Initiate a mobile web transaction on Android Square Point of Sale application request URLs for Android are formatted as intent requests. For example: ```html {"id": "mobile-web-setup-01", "": true} Start Transaction ``` Android requires URLs to be wrapped with Android start and end tokens when they contain key-value pairs delimited with semicolons. The Android start and end tokens are `intent:#Intent;` and `end`. To build your request URL: 1. Create a JavaScript file called open_pos.js. 2. Add code to define some useful constants, configure your mobile web application, and set the transaction total. ```javascript // The URL where the Point of Sale app will send the transaction results. var callbackUrl = "{YOUR CALLBACK URL}"; // Your application ID var applicationId = "{YOUR APPLICATION ID}"; // The total and currency code should come from your transaction flow. // For now, we are hardcoding them. var transactionTotal = "{TRANSACTION TOTAL}"; var currencyCode = "USD"; // The version of the Point of Sale SDK that you are using. var sdkVersion = "v2.0"; ``` 3. Add code to build the request URL. For a detailed list of all possible URL parameters, see [Mobile Web Technical Reference](pos-api/web-technical-reference). ```javascript function openURL(){ // Configure the allowable tender types var tenderTypes = "com.squareup.pos.TENDER_CARD, \ com.squareup.pos.TENDER_CARD_ON_FILE, \ com.squareup.pos.TENDER_CASH, \ com.squareup.pos.TENDER_OTHER"; var posUrl = "intent:#Intent;" + "action=com.squareup.pos.action.CHARGE;" + "package=com.squareup;" + "S.com.squareup.pos.WEB_CALLBACK_URI=" + callbackUrl + ";" + "S.com.squareup.pos.CLIENT_ID=" + applicationId + ";" + "S.com.squareup.pos.API_VERSION=" + sdkVersion + ";" + "i.com.squareup.pos.TOTAL_AMOUNT=" + transactionTotal + ";" + "S.com.squareup.pos.CURRENCY_CODE=" + currencyCode + ";" + "S.com.squareup.pos.TENDER_TYPES=" + tenderTypes + ";" + "end"; window.open(posUrl); } ``` 4. Add the following script tag to your HTML head to load your open_pos.js file: ```html ``` 5. Add a button to your mobile web application that runs open-POS.js. ```html ``` ### Initiate a mobile web transaction on iOS To initiate a Square Point of Sale transaction from your website, call the Square Point of Sale application with a URL using the following format: ```html {"id": "mobile-web-setup-06", "": false} square-commerce-v1://payment/create?data={REPLACE ME} ``` 1. Add code to create a percent-encoded JSON object that contains the information that the Square Point of Sale application needs to process the transaction request. ```javascript {"id": "mobile-web-setup-07", "": true} ``` {% aside type="tip" %} Information in the `notes` field is saved in the Square Dashboard and printed on receipts. {% /aside %} ## 4. Add code to your callback file to process the transaction response When the transaction completes and the device reactivates the mobile web application, the Square Point of Sale application sends a POST request to your mobile web application. The POST parameters provide information about whether the associated transaction succeeded or failed along with its accompanying metadata. You need to add code to the callback file that processes the result: 1. Declare your parameters. 1. Process the result from Square. 1. Print the result to the screen. You add code to your callback file to process the response from the Square Point of Sale application. If you don't already have a callback file, you can make a file called callback.html and paste it in the following template: [Context: HTTP] ```html {"id": "mobile-web-setup-08", "": true}

Callback!

``` ### Initialize your transaction variables Make a file called callback.js. This is where you put your JavaScript code that handles the response. In your callback.js file, declare the possible parameter keys that the Square Point of Sale application might return to your application. For Android devices, you need to declare the following variables: ```javascript {"id": "mobile-web-setup-09", "": true} //If successful, Square Point of Sale returns the following parameters. const clientTransactionId = "com.squareup.pos.CLIENT_TRANSACTION_ID"; const transactionId = "com.squareup.pos.SERVER_TRANSACTION_ID"; //If there's an error, Square Point of Sale returns the following parameters. const errorField = "com.squareup.pos.ERROR_CODE"; ``` For iOS devices, you need to declare the following variables: ```javascript {"id": "mobile-web-setup-10", "": true} //If successful, Square Point of Sale returns the following parameters. const clientTransactionId = "client_transaction_id"; const transactionId = "transaction_id"; //If there's an error, Square Point of Sale returns the following parameters. const errorField = "error_code"; ``` ### Process the result The Square Point of Sale application packages the transaction details differently for iOS and Android devices. #### Android Square Point of Sale applications installed on Android devices send the transaction results back as parameters in a URL. Add a function called `getUrlParams` that grabs the URL parameters and puts them in an array. ```javascript {"id": "mobile-web-setup-11", "": true} //Get the URL parameters and puts them in an array function getUrlParams(URL) { var vars = {}; var parts = URL.replace(/[?&]+([^=&]+)=([^&]*)/gi, function(m,key,value) { vars[key] = value; }); return vars; } ``` #### iOS Square Point of Sale applications installed on IOS devices send back a URL with a single parameter called `data`, which contains the transaction details in a JSON block. ```javascript {"id": "mobile-web-setup-12", "": true} //get the data URL and encode in JSON function getTransactionInfo(URL) { var data = decodeURI(URL.searchParams.get("data")); console.log("data: " + data); var transactionInfo = JSON.parse(data); return transactionInfo; } ``` Depending on the result of the transaction, the `data` object includes some or all of the following fields. If an error occurs during a Point of Sale API transaction, the JSON data object returns the `error_code` field. ### Do something with the transaction details [Context: Javascript/HTML, HTTP] 1. Add functions that handle the success and error responses. If it's successful, `handleSuccess()` saves the parameters to `resultString`. If it's an error, `handleError()` saves the error code and description to a `resultString`. ```javascript {"id": "mobile-web-setup-13", "": true} // Makes a result string for success situation function handleSuccess(transactionInfo){ var resultString =""; if (clientTransactionId in transactionInfo) { resultString += "Client Transaction ID: " + transactionInfo[clientTransactionId] + "
"; } if (transactionId in transactionInfo) { resultString += "Transaction ID: " + transactionInfo[transactionId] + "
"; } else { resultString += "Transaction ID: NO CARD USED
"; } return resultString; } // Makes an error string for error situation function handleError(transactionInfo){ var resultString =""; if (errorField in transactionInfo) { resultString += "Client Transaction ID: " + transactionInfo[clientTransactionId] + "
"; } if (transactionId in transactionInfo) { resultString += "Transaction ID: " + transactionInfo[transactionId] + "
"; } else { resultString += "Transaction ID: PROCESSED OFFLINE OR NO CARD USED
"; } return resultString; } ``` 2. Add a function that grabs the URL returned by Square and grabs the URL parameters using `getUrlParams()`. It then uses an `if` statement to call the correct handler and prints the `resultString`. ```javascript {"id": "mobile-web-setup-14", "": true} // Determines whether error or success based on urlParams, then prints the string function printResponse() { var responseUrl = window.location.href; var transactionInfo = getTransactionInfo(responseUrl); var resultString = ""; if (errorField in transactionInfo) { resultString = handleError(transactionInfo); } else { resultString = handleSuccess(transactionInfo); } document.getElementById('url').innerHTML = resultString; } ``` For more information about Android and iOS error codes, see [Mobile Web Technical Reference](pos-api/web-technical-reference). {% aside type="tip" %} Your application should keep track of whether a Point of Sale API request has been issued and whether a callback has been received. Because of the constraints of application-switching APIs, sellers can leave Square Point of Sale during an API request and return to your application. It's your responsibility to direct them to return to Square and finish the transaction. {% /aside %} ## 5. Test your code ### Android 1. Initialize the Point of Sale application before testing your first transaction: 1. Sign in to the Square Point of Sale application with the business location and employee you want to accept payments. 1. If you're using the [Square Contactless and Chip Reader](https://squareup.com/help/article/5639), connect it to the Square Point of Sale application. You get an error if you call the Point of Sale API without initializing the Point of Sale application first. 1. Open your web application in an emulator or on your mobile device, and then choose **Start transaction** to open the Point of Sale application. 1. To test the cancellation callback, cancel the transaction in the Point of Sale application. 1. To test the success callback, complete a cash payment, and then choose the checkmark to indicate you're done. ### iOS You cannot install the Square Point of Sale application on a virtual Xcode machine. For this reason, you need to test your code on a real iOS device. You can test your code that processes the data by creating a test response URL instead of receiving it from Square. 1. Add a test URL to your callback code. ```javascript {"id": "mobile-web-setup-15", "": true} // Test response URL const responseUrl = new URL( '/create?data={' + '"transaction_id":"transaction123",' + '"client_transaction_id":"40",' + '"status":"ok"' + '}', 'https://squareup.com' ); ``` 2. Comment out the line in `printResponse()` that gets the response URL from Square. ```javascript {"id": "mobile-web-setup-16", "": true} // var responseUrl = window.location.href; ``` --- # Common Square API Patterns > Source: https://developer.squareup.com/docs/sdks/php/common-square-api-patterns > Status: PUBLIC > Languages: All > Platforms: All Learn how the Square PHP SDK supports the common Square API features. {% subheading %}Learn how the Square PHP SDK supports the common Square API features.{% /subheading %} {% toc hide=true /%} ## Overview Some of the Square API patterns are used across various APIs. These include the following: * **Pagination** - Many Square API operations limit the size of the response. When the result of the API operation exceeds the limit, the API truncates the result. You must make a series of requests to retrieve all the data. This is referred to as pagination. * **Idempotency key** - Most Square APIs that perform create, update, or delete operations require idempotency keys to protect against making duplicate calls that can have negative consequences (for example, charging a card on file twice). * **Object versioning** - Some Square resources (for example, the `Customer` object) have versions assigned. The version numbers enable optimistic concurrency, which is the ability for multiple transactions to complete without interfering with each other. * **Clear API object fields** - Square API update endpoints that support sparse updates allow you to specify just the fields you want to add, change, or clear in the request. These Square API patterns are exposed in the Square PHP SDK. ## Pagination Square API [pagination](working-with-apis/pagination) support lets you split a full query result set into pages that are retrieved over a sequence of requests. For example, when you call `$client->customers->list`, you can limit the number of customers returned in the response. To iterate over all customers, you can use a foreach loop and the SDK makes additional HTTP requests for you to retrieve additional pages of data. ```php $customers = $client->customers->list( new ListCustomersRequest([ 'limit' => 10, 'sortField' => 'DEFAULT', 'sortOrder' => 'DESC' ]), ]); foreach ($customers as $customer) { echo sprintf( "customer: ID: %s Version: %s, Given name: %s, Family name: %s\n", $customer->getId(), $customer->getVersion(), $customer->getGivenName(), $customer->getFamilyName() ); } ``` ## Idempotency key When an application calls a Square API, it must be able to repeat an API operation when needed and get the same result each time. For example, if a network error occurs while updating a catalog item, the application might retry the same request and must ensure that the item updates only once. This behavior is called idempotency. Most Square APIs that modify data (create, update, or delete) require you to provide an idempotency key that uniquely identifies the request. This allows you to retry the request if necessary, without duplicating work. You can provide a custom unique key or simply generate one. There are language-specific functions that you can use to generate unique keys. For more information, see [Idempotency](working-with-apis/idempotency). The following example shows how the `idempotencyKey` is generated in a PHP application to create an order: ```php $client->orders->create( new CreateOrderRequest([ 'idempotencyKey' => uniquid(), 'order' => new Order([ 'locationId' => $location['id'], ]), ]), ) ``` ## Optimistic concurrency and object versioning Some Square API resources support versioning. For example, each `Customer` object has a version field. Initially, the version number is 0. Each update increases the version number. If you don't specify a version number in the request, the latest version is assumed. This resource version number enables optimistic concurrency; multiple transactions can complete without interfering with each other. As a best practice, you should include the version field in your request. The value must be set to the current version. For more information, see [Optimistic Concurrency](working-with-apis/optimistic-concurrency). The following example updates a customer name. The `$client->customer->update` method also includes a version number. The method succeeds only if the specified version number is the latest version of the `customer` object on the server. ```php use Square\Customers\Requests\UpdateCustomerRequest use Square\Exceptions\SquareApiException; try { $response = $client->customers->update( new UpdateCustomerRequest([ 'customerId' => 'GZ48C4P2CWVXV7F7K2ZH795RSG', 'givenName' => 'Fred', 'familyName' => 'Jones', 'version' => 7, ]), ); $customer = $response->getCustomer(); printf("customer updated:
Id: %s, %s, %s, %s

", $customer->getId(), $customer->getVersion(), $customer->getGivenName(), $customer->getFamilyName() ); } catch (SquareApiException $e) { echo "SquareApiException occurred: "; echo $e->getMessage() . "

"; } ``` If the version numbers on the client and server don't match, the call fails with the following: * Category - `INVALID_REQUEST_ERROR` * Code - `CONFLICT` * Detail - `Version is not up to date.` ## Clear API object fields For update operations that support sparse updates, your request only needs to specify the fields you want to add, change, or clear, along with any fields required by the update operation. {% aside type="info" %} The Square PHP SDK doesn't support using [null values to clear fields](build-basics/clearing-fields) in a sparse update. To learn whether an update endpoint supports other field clearing methods, reference the endpoint documentation. {% /aside %} --- # Point of Sale API > Source: https://developer.squareup.com/docs/pos-api/what-it-does > Status: PUBLIC > Languages: All > Platforms: All **Applies to:** [Point of Sale API - iOS](https://developer.squareup.com/docs/api/point-of-sale) | [Point of Sale API - Android](https://developer.squareup.com/docs/api/point-of-sale/android) | [Catalog API](catalog-api/what-it-does) {% subheading %}Use the Point of Sale API to allow mobile applications to open the Square Point of Sale application and process in-person payments using Square hardware.{% /subheading %} {% toc hide=true /%} ## Overview You can use the Point of Sale API to build customized POS solutions, POS integrations, or any other application that requires payments without worrying about hardware integrations. Square takes on the burden of staying PCI compliant. No checklists, assessments, or audits are required. The Point of Sale API is available for native and web applications running on iOS and Android. ![An animation showing the Square Point of Sale device and an attached card reader completing a payment.](https://videos.ctfassets.net/1nw4q0oohfju/6wMLW0IS43rM13Qm4FLIIW/3c56251f9e1db68c100ac853c960066c/pos-device-attached-card-reader.mp4) ## Requirements and limitations * Requires an Android or iOS device with the most recent version of the Square Point of Sale application installed. * The Point of Sale API doesn't support Square invoices, itemized sales, or Sandbox testing (see [Testing for supported countries)](payment-card-support-by-country#testing-for-supported-countries). * Processing card payments with the Point of Sale API requires: * An activated Square seller account for accepting card payments. * A [Square Reader](https://squareup.com/reader) for accepting card payments or mobile devices (Android and iPhone) with Tap to Pay enabled. For more information about enabling Tap to Pay for the Point of Sale API, follow the setup guides for [Android](https://squareup.com/help/us/en/article/7960-get-started-with-tap-to-pay-on-android) and [iPhone](https://squareup.com/help/us/en/article/7786-get-started-with-tap-to-pay-on-iphone). * Processing fees for transactions initiated with the Point of Sale API are identical to fees for transactions initiated directly from the Square Point of Sale application. For more information, see [Learn About Square's Fees](https://squareup.com/help/article/5068). * Cannot be directly integrated with the [Payments API](https://developer.squareup.com/reference/square/payments-api) to get the payment details from a POS transaction. However, you can still use the Point of Sale API transaction ID to get the payment details by making a set of related Square API calls. For more information, see [Payments API Integration](pos-api/payments-integration). ## Product components A complete mobile POS integration solution is comprised of a mobile device, a Square card reader, mobile device logic, and a backend service that uses the [Catalog API](catalog-api/what-it-does) to get items and services for purchase. ### Mobile frontend A mobile application uses the Point of Sale API to create a charge request, start a transaction, open the POS UI, and parse transaction results. The Point of Sale API takes care of transmitting a payment to Square for crediting to a Square account. A charge request includes a payment total that can be arbitrary or derived from the unit price of a catalog item or service. ### Mobile backend A mobile application should have a backend process to connect to the product catalog defined for the Square account. The backend provides catalog items and services to the mobile device so that the device can show descriptions and unit prices. A mobile backend isn't required if the mobile application doesn't display the product catalog in a Square account. ## Get started with POS integration Use the following build guides to integrate with the Point of Sale API: * [Build on Android](pos-api/build-on-android) * [Build on iOS](pos-api/build-on-ios) * [Build on Mobile Web](pos-api/build-mobile-web) --- # Subscriptions API > Source: https://developer.squareup.com/docs/subscriptions-api/overview > Status: PUBLIC > Languages: All > Platforms: All Learn about using the Square Subscriptions API to create and manage subscriptions in a subscription plan. **Applies to:** [Subscriptions API](https://developer.squareup.com/reference/square/subscriptions-api) | [Catalog API](catalog-api/what-it-does) | [Orders API](orders-api/what-it-does) | [Invoices API](invoices-api/overview) {% subheading %}Learn about using the Subscriptions API to create and manage subscriptions in a subscription plan.{% /subheading %} {% toc hide=true /%} ## Overview [Square Subscriptions](https://squareup.com/subscriptions) allow sellers to generate recurring revenue by offering a scheduled fulfillment of products or services. For example, a shop might offer customers the ability to receive an item or set of items on a weekly or monthly basis. Multiple subscription options can enable customers to select different tiers and customize the frequency of their subscription. Basically, subscriptions represent recurring orders billed to customers on a specified cadence. A recurring subscription is represented by three parts in the Square API data model: * **Subscription plan** - Represents what is being sold. This can be a single item, a series of recurring services, or a category of items or services. * **Subscription plan variation** - Represents how the product is being sold; that is, how often and for what price. * **Subscription** - Represents who is buying the product or service. It's an agreement with a specific customer to purchase a subscription from the business. Subscriptions work with the [Catalog API](catalog-api/what-it-does), [Orders API](orders-api/what-it-does), [Invoice objects](invoices-api/overview), [Customer objects](customers-api/what-it-does), and [Discount objects](orders-api/apply-taxes-and-discounts). The high-level steps of working with subscriptions are: 1. [Create a subscription plan using the Catalog API](subscriptions-api/plans-and-variations), configuring the items or categories available for subscription. 2. [Create a subscription plan variation using the Catalog API,](subscriptions-api/plans-and-variations#plan-variations) configuring the billing periods, pricing information, discounts, and subscription availability. 3. (Optional) If your subscription involves the sale of items in a Square catalog, create [order templates](subscriptions-api/manage-subscriptions#order-templates) with the Orders API to represent a Square order to be fulfilled on a recurring basis. 4. [Create a subscription with the Subscriptions API](subscriptions-api/manage-subscriptions#create-a-subscription) to represent a customer's enrollment in a subscription. ## Requirements and limitations * Catalog items sold through subscriptions must be shipped to the customer. Subscription items aren't yet available for in-person pickup. * The minimum amount you can charge for a subscription is $1. A subscription can have a free trial period, which is established by setting an initial phase on a `SubscriptionPlanVariation` with a 100% discount. * ACH payments aren't available through the Subscriptions API because bank account sources cannot be stored on file and charged later. * The Subscriptions API requires the following OAuth permissions: * `SUBSCRIPTIONS_READ` and `SUBSCRIPTIONS_WRITE`. * `ORDERS_READ` and `ORDERS_WRITE`. * `ITEMS_READ`. Required for creating itemized subscriptions. * `INVOICES_READ` and `INVOICES_WRITE`. Required for creating invoices. * `PAYMENTS_READ` and `PAYMENTS_WRITE`. Required for charging a card on file for the subscription. * `CUSTOMERS_READ`. Required to associate a subscription with a customer profile in the seller's Customer Directory. Depending on its functionality, your application might also require other Square permissions. For more information, see [OAuth API](oauth-api/overview). ## Webhooks The Subscriptions API supports the following webhook events: | Event{% width="160px" %} | Permission{% width="180px" %} | Description | |--------|-------------------------------|--------------| | [subscription.created](https://developer.squareup.com/reference/square/subscriptions-api/webhooks/subscription.created)|`SUBSCRIPTIONS_READ`| A `Subscription` object was created.| | [subscription.updated](https://developer.squareup.com/reference/square/subscriptions-api/webhooks/subscription.updated)|`SUBSCRIPTIONS_READ`| A `Subscription` object was updated.| Additionally, you might find it useful to subscribe to webhook events for other APIs that integrate with subscriptions, such as the events in the following table: | Event{% width="160px" %} | Permission{% width="180px" %} | Description | |--------------------------|--------------------------------|-------------| | [invoice.published](https://developer.squareup.com/reference/square/invoices-api/webhooks/invoice.published)|`INVOICES_READ`| An invoice was published. All invoices created by the Subscriptions API include a `subscription_id` field.| | [invoice.payment_made](https://developer.squareup.com/reference/square/invoices-api/webhooks/invoice.payment_made)|`INVOICES_READ`| A payment was made for an invoice.| | [order.created](https://developer.squareup.com/reference/square/orders-api/webhooks/order.created)|`ORDERS_READ`| An order was created.| | [order.updated](https://developer.squareup.com/reference/square/orders-api/webhooks/order.updated)|`ORDERS_READ`| An order was updated.| | [payment.updated](https://developer.squareup.com/reference/square/payments-api/webhooks/payment.updated)|`PAYMENTS_READ`| A payment was updated. To determine if a subscription charge failed, listen for this webhook and filter for payments where the `status` is `FAILED`.| For a complete list of webhook events, see [Webhook Events Reference](webhooks/v2webhook-events-tech-ref). --- # Square PHP SDK Quickstart > Source: https://developer.squareup.com/docs/sdks/php/quick-start > Status: PUBLIC > Languages: All > Platforms: All Learn how to quickly set up and test the Square PHP SDK. {% subheading %}Learn how to quickly set up and test the Square PHP SDK.{% /subheading %} {% toc hide=true /%} ## Prepare for the Quickstart Before you begin, you need a Square account and account credentials. You use the Square Sandbox for the Quickstart exercise. 1. [Create a Square account and an application](get-started/create-account-and-application). 2. [Get a Sandbox access token](build-basics/access-tokens#get-a-personal-access-token) from the Developer Console. 3. Install the following: * [PHP](https://www.php.net/manual/en/install.php) - If you don't already have php installed on your machine. * [Composer](https://getcomposer.org/) - If you don't already have composer installed on your machine. {% aside type="info" %} If you prefer to skip the following setup steps, download the [Square PHP SDK Quickstart](https://github.com/Square-Developers/php-getting-started) sample and follow the instructions in the README. {% /aside %} ## Installation Install the latest version by running the following command: ```bash composer require square/square ``` ## Create a project 1. Open a new terminal window. Create a new directory for your project, and then go to that directory. ```bash mkdir quickstart cd ./quickstart ``` 2. Set your square credentials in an `.env` file. In your project directory, create a new file named `.env` with the following content, replacing `yourSandboxAccessToken` with your Square Sandbox access token: ```bash SQUARE_ACCESS_TOKEN=yourSandboxAccessToken ``` ## Write code 1. In your project directory, create a new file named `quickstart.php` with the following content: ```php load(); $square = new SquareClient( token: $_ENV['SQUARE_ACCESS_TOKEN'], options: ['baseUrl' => Environments::Sandbox->value // Used by default ] ); try { $response = $square->locations->list(); foreach ($response->getLocations() as $location) { printf( "%s: %s, %s, %s

", $location->getId(), $location->getName(), $location->getAddress()?->getAddressLine1(), $location->getAddress()?->getLocality() ); } } catch (SquareException $e) { echo 'Square API Exception occurred: ' . $e->getMessage() . "\n"; echo 'Status Code: ' . $e->getCode() . "\n"; } ?> ``` 2. Save the quickstart.php file. This code does the following: * Loads the environment file containing your Square access token. * Creates a new [SquareClient](https://github.com/square/square-php-sdk/tree/master?tab=readme-ov-file#instantiation) object with your Square access token. * Calls the [$square->locations->list()](https://developer.squareup.com/reference/square/locations-api/list-locations) method. * If the request is successful, the code prints the location information on the terminal. ## Run the application 1. PHP ships with a built-in web server for testing purposes. Start the web server as follows: ```bash php -S localhost:8000 ``` 2. Open a web browser and navigate to http://localhost:8000/quickstart.php. 3. Verify the result. You should see at least one location (Square creates one Sandbox location when you create a Square account). ```bash LHI1YXJ8YSV5Z: Default Test Account, 1600 Pennsylvania Ave NW, Washington ``` --- # Cards API > Source: https://developer.squareup.com/docs/cards-api/overview > Status: PUBLIC > Languages: All > Platforms: All Use the Cards API to save a credit or debit card for a customer for future card-on-file payments. **Applies to:** [Cards API](https://developer.squareup.com/reference/square/cards-api) | [Customers API](customers-api/what-it-does) | [Payments API](payments-refunds) | [Web Payments SDK](web-payments/overview) | [In-App Payments SDK](in-app-payments-sdk/what-it-does) | [GraphQL](devtools/graphql) {% subheading %}Use the Cards API to save credit or debit card information for future card-on-file payments.{% /subheading %} {% toc hide=true /%} ## Overview Saving cards on file makes it easy for sellers to take payments — especially for recurring subscriptions and invoices — and for buyers to make payments. Letting buyers select a card on file leads to fast and seamless checkouts that can keep buyers coming back. In addition to storing cards in a seller account for payments to that seller, the Cards API can be used to retrieve card information, disable cards, or store shared cards in a developer account for payments to multiple sellers. Watch the following video tutorial for an introduction to the Cards API and then continue reading for an in-depth overview. {% youtube src="https://www.youtube.com/embed/9iY7rT51PDo" /%} Applications that integrate with the Cards API can benefit from enterprise-level features provided by Square: * **Secure storage** - Card information is securely stored by Square. * **[Network tokenization](#network-tokenization)** - Enables faster, more secure payments with a reduced risk of fraud and declines. * **[Strong Customer Authentication (SCA) verification](sca-overview)** - Integrates support for verifying the buyer's identity, reduces the risk of fraud, and shifts chargeback liability from sellers. * **[Automatic account updates](cards-api/manage-card-on-file-declines#card-automatically-updated-event-notifications)** - Square updates card data when notified by participating banks about expiring cards or account closures, which can help reduce declines and increase customer retention. Subscribe to the `card.automatically_updated` webhook event to be notified when these updates occur. * **[Shared cards](#shared-cards)** - Enables franchise and marketplace applications to make card-on-file payments to multiple sellers. ## Requirements and limitations * To save a card on file for a Square seller in the production environment, the seller account must be enabled for card processing. {% anchor id="oauth-requirements" /%} * Applications using [OAuth](oauth-api/overview) require the following permissions to manage stored cards in a seller account: * `PAYMENTS_WRITE` to create or disable cards. * `PAYMENTS_READ` to retrieve cards. * `CUSTOMERS_READ` and `CUSTOMERS_WRITE` to retrieve and create customer profiles associated with a card. Sellers who receive payments from [shared cards](#shared-cards) must grant the following permissions: * `PAYMENTS_WRITE_SHARED_ONFILE` to create payments from shared cards on file. * `CUSTOMERS_READ` and `CUSTOMERS_WRITE` to retrieve and create corresponding customer profiles. * The access token in the `CreateCard` request must be issued for the same application that generates the payment token or the payment used as the card source. * Only credit cards and debit cards can be saved as cards on file. Payments made using Square Pay, Apple Pay, Google Pay, Cash App Pay, or cards on file cannot be used to store a card. To manage Square gift cards on file, use the [Gift Cards API and Gift Card Activities API](gift-cards/using-gift-cards-api). * To be notified when cards are created or changed, you must subscribe to card [webhook events](webhooks/v2webhook-events-tech-ref#cards-api). * Square doesn't provide a prebuilt form for collecting a billing address or other contact information from a buyer, so you need to create one. {% aside type="important" %} Always ask customers for permission before saving their card information. For example, include a checkbox in your purchase flow that customers can select to specify that they want to save their card information for future purchases. Linking cards on file without obtaining customer permission can result in your application being disabled without notice. {% /aside %} {% anchor id="how-it-works" /%} ## How the API works The Cards API lets you save a credit or debit card on file for a customer in a Square account and later [retrieve or disable](cards-api/manage-cards) the stored card. Cards are typically stored in a seller account and used only for payments to that seller. Square also supports storing [shared cards](#shared-cards) in a developer account for payments to different sellers. After the card is stored, the card ID can be used for [card-on-file payments](#card-on-file-payments). Square [automatically updates cards](cards-api/manage-card-on-file-declines#card-automatically-updated-event-notifications) when notified by participating banks about expiring cards and card account closures. You can subscribe to `card.automatically_updated` and other [webhook events](webhooks/v2webhook-events-tech-ref#cards-api) to be notified about automatic updates and other card changes. ### Saving cards on file The process of saving a card on file typically starts with your application collecting card information from buyers (using the [Web Payments SDK](web-payments/overview) or [In-App Payments SDK](in-app-payments-sdk/what-it-does)) and optionally creating a payment. Then, you can call [CreateCard](https://developer.squareup.com/reference/square/cards-api/create-card) to store the card. Note the following key fields in the request: * `source_id` can be a [payment ID](#store-card-using-payment-id) from a recent payment created using the Payments API or a [payment token](#store-card-using-payment-token) generated using the Web Payments SDK or In-App Payments SDK. * `card` contains information such as the cardholder name and billing address. To get the required `customer_id`, use the Customers API to retrieve an existing customer profile or create a new one if needed. * `verification_token` authenticates a buyer's identity for [SCA](sca-overview), which is required for some regions or sellers. Buyer verification can be implicitly included in the request when using the Web Payments SDK. ```` For each `CreateCard` request, Square initiates a $0 charge for verification purposes, without removing any money from the customer’s account. If the verification fails, Square returns an error. Possible reasons for failure include: * An incorrect card account number was provided. * The card verification value (CVV) check failed. * The expiration date has passed. * The account associated with the card is closed or in bad standing. * The address verification service (AVS) check failed because the billing postal code provided by the customer doesn't match the issuer's records. {% anchor id="store-card-using-payment-id" /%} ### Option 1: Store a card from a payment ID You can save a card on file using the ID of a recent successful [payment](https://developer.squareup.com/reference/square/objects/payment) made using the credit or debit card that you want to store. To use a payment ID: * Get the ID from a [CreatePayment](https://developer.squareup.com/reference/square/payments-api/create-payment) or [ListPayments](https://developer.squareup.com/reference/square/payments-api/list-payments) response. You can also call [RetrieveOrder](https://developer.squareup.com/reference/square/orders-api/retrieve-order) or [SearchOrders](https://developer.squareup.com/reference/square/orders-api/search-orders) and get the payment ID from the `id` or `payment_id` field of the corresponding tender. * Provide the payment ID as the `source_id` in your `CreateCard` request. For example steps, see [Charge and Store Cards for Online Payments](web-payments/charge-and-store-cards). {% accordion expanded=false %} {% slot "heading" %} #### Requirements {% /slot %} * The source payment used for the `CreateCard` request must: * Have been authorized within the last 24 hours. To validate, check the `card_details.created_at` timestamp. * Be in a successful state. To validate, make sure that `card_details.status` is `AUTHORIZED` or `CAPTURED`. * Not be a card-on-file payment. To validate, check that `card_details.entry_method` isn't `ON_FILE`. * Be created in the same seller account where the card is stored. Note that payment IDs cannot be used to store [shared cards](#shared-cards) in a developer account. * If the payment includes a postal code in the `billing_address.postal_code` field, the card on file defaults to this value. If you provide a postal code in a `CreateCard` request, it must match the payment's postal code if one is defined. * Set the appropriate intent when integrating [SCA verification](sca-overview): {% table %} * SDK {% width="175px" %} * Intent or buyer action ----- * Web Payments SDK * `CHARGE_AND_STORE`, which lets you use the same verification for `CreatePayment` and `CreateCard`. ----- * In-App Payments SDK * Android - `Charge` for `CreatePayment` verification and then `Store` for `CreateCard` verification. iOS - `chargeActionWithMoney` for `CreatePayment` verification and then `storeAction` for `CreateCard` verification. {% /table %} {% /accordion %} {% anchor id="store-card-using-payment-token" /%} ### Option 2: Store a card from a payment token You can save a card on file using a payment token, which securely encapsulates payment instrument data. To use a payment token: * Use the [Web Payments SDK](web-payments/take-card-payment) or [In-App Payments SDK](in-app-payments-sdk/what-it-does) from your application frontend to collect credit or debit card information from the buyer and generate a payment token. * Provide the payment token as the `source_id` in your `CreateCard` request. For example steps, see [Create a Card on File and a Payment](cards-api/walkthrough-seller-card). {% accordion expanded=false %} {% slot "heading" %} #### Requirements {% /slot %} * If you provide a postal code in a `CreateCard` request, it must match the postal code entered by the buyer in the SDK's payment card form. * Set the appropriate intent when integrating [SCA verification](sca-overview): {% table %} * SDK {% width="175px" %} * Intent or buyer action. ----- * Web Payments SDK * `STORE` for `CreateCard` verification. ----- * In-App Payments SDK * Android - `Store` for `CreateCard` verification. iOS - `storeAction` for `CreateCard` verification. {% /table %} {% /accordion %} {% anchor id="integration-with-other-apis" /%} ## Integration with other Square APIs The Cards API integrates with other Square APIs when saving cards on file. * **[Payments API](payments-refunds)** - Used to store a card when providing a [payment ID](#store-card-using-payment-id) as the `source_id` in a `CreateCard` request. Typically, this is the payment ID returned from a [CreatePayment](https://developer.squareup.com/reference/square/payments-api/create-payment) request. Alternatively, get the payment ID by calling [ListPayments](https://developer.squareup.com/reference/square/payments-api/list-payments) or by calling [RetrieveOrder](https://developer.squareup.com/reference/square/orders-api/retrieve-order) or [SearchOrders](https://developer.squareup.com/reference/square/orders-api/search-orders) in the Orders API. In an order, the payment ID is the `id` or `payment_id` field of the corresponding tender. * **[Web Payments SDK](web-payments/overview) or [In-App Payments SDK](in-app-payments-sdk/what-it-does)** - Used to store a card when providing a [payment token](#store-card-using-payment-token) as the `source_id` in a `CreateCard` request. Also used to integrate SCA and to generate a payment token for the `source_id` in a `CreatePayment` request. Your application frontend uses one of these SDKs to provide the form where customers input their card information. * **[Customers API](customers-api/what-it-does)** - Used to create or retrieve the customer profile associated with the stored card. Call [SearchCustomers](https://developer.squareup.com/reference/square/customers-api/search-customers) or [CreateCustomer](https://developer.squareup.com/reference/square/customers-api/create-customer) (as needed) to get the `customer_id` for a `CreateCard` request. In addition, applications can configure settings in the [Terminal API](terminal-api/overview), [Point of Sale API](pos-api/what-it-does), and [Invoices API](invoices-api/overview) that allow buyers to save a card on file after a payment. Square handles the card storage process for these integrations. [Square GraphQL](devtools/graphql) queries provide read access to card data through the `cardsOnFile` entry point. {% aside type="info" %} The Cards API also integrates with other Square APIs for [card-on-file payments](#card-on-file-payments). {% /aside %} ## Network tokenization Square supports network tokenization for Visa, Mastercard, and American Express cards in all [supported countries](payment-card-support-by-country#card-on-file-for-payment). Network tokenization replaces the primary account number (PAN) and other card information with a token provided by the card issuer. When used for payment, Square sends the network token instead of the PAN. Network tokenization leads to more sales (fewer declines) because network tokens are updated in real time and are more trusted by issuers than standard PANs. Square manages network tokenization and token updates, so no action is needed by sellers or developers. {% anchor id="shared-cards" /%} {% anchor id="store-and-charge-a-card-on-behalf-of-a-seller-account" /%} ## Shared cards for payments to multiple sellers Developers can store cards in their own Square developer account and use them for payments to different Square sellers. These stored cards, known as shared cards, allow buyers to save a card once and use it with any seller on the application. For example, suppose your application lets buyers order from various food and beverage sellers. When a buyer pays for an order from a seller (such as Pasta Donna), they're prompted to store their card for future payments through the application. The buyer can then use the card to pay for orders from other sellers on the application (such as Joy Bakeshop or Authentic Tacos). Each buyer who pays using a shared card must have a customer profile in your developer account and a corresponding customer profile in each seller account that takes a shared card payment. For the `customer_id` field in the `CreatePayment` request, specify the ID of the corresponding customer profile in the seller account. For steps that show how to store a shared card and use it for a payment, see [Create a Shared Card on File and Make a Payment](cards-api/walkthrough-shared-card). ### OAuth permissions for shared card payments Participating sellers must grant your application the permissions needed to make shared card payments: * `PAYMENTS_WRITE_SHARED_ONFILE` to create payments from shared cards in the seller account. * `CUSTOMERS_WRITE` and `CUSTOMERS_READ` to create and retrieve customer profiles in the seller account. * Optional - `PAYMENTS_READ` if your application also retrieves payment information from the seller account. {% anchor id="card-on-file-payments" /%} ## Card-on-file payments Card-on-file payments can be created or configured using the card ID with the Subscriptions API, Invoices API, and Payments API. If you need to get a card ID, you can [list cards on file for a customer](cards-api/manage-cards#list-cards-saved-for-a-customer). * **[Subscriptions API](subscriptions/overview)** - A `card_id` can be specified in a [CreateSubscription](https://developer.squareup.com/reference/square/subscriptions-api/create-subscription) request to automatically charge the card each billing period. * **[Invoices API](invoices-api/overview)** - A `card_id` can be specified in a [CreateInvoice](https://developer.squareup.com/reference/square/invoices-api/create-invoice) request to automatically charge the card when the payment is due. * **[Payments API](payments-refunds)** - A card ID can be specified as the `source_id` in a [CreatePayment](https://developer.squareup.com/reference/square/payments-api/create-payment) request to make a card-on-file payment. Card-on-file payments also require the `customer_id` of the associated customer profile. For payments from a [shared card](#shared-cards), `customer_id` is the ID of the corresponding customer profile in the seller account (not the developer account). You can integrate [SCA verification](sca-overview) in a `CreatePayment` request. In addition, the Refunds API accepts a card ID for [unlinked refunds](refunds-api/unlinked-refunds) to cards on file. The Invoices API and Point of Sale API can also be used to configure card-on-file payments as an accepted payment method. ## See also * [Manage Customer Cards on File](cards-api/manage-cards) * [Create a Card on File from a Payment ID](cards-api/walkthrough/card-from-payment-id) * [Create a Card on File and a Payment](cards-api/walkthrough-seller-card) * [Create a Shared Card on File and Make a Payment](cards-api/walkthrough-shared-card) * [Manage Card-on-File Declines](cards-api/manage-card-on-file-declines) * [API Reference: Cards API](https://developer.squareup.com/reference/square/cards-api) --- # Square Ruby SDK Quickstart > Source: https://developer.squareup.com/docs/sdks/ruby/quick-start > Status: PUBLIC > Languages: All > Platforms: All Learn how to quickly set up and test the Square Ruby SDK. {% subheading %}Learn how to quickly set up and test the Square Ruby SDK.{% /subheading %} {% toc hide=true /%} ## Prepare for the Quickstart Before you begin, you need a Square account and account credentials. You use the Square Sandbox for the Quickstart exercise. 1. [Create a Square account and an application](get-started/create-account-and-application). 2. [Get a Sandbox access token from the Developer Console](build-basics/access-tokens#get-a-personal-access-token). 3. Install the following: * [Ruby](https://www.ruby-lang.org/en/documentation/installation/) - Square supports Ruby version 3.1 or later. * Square Ruby SDK - To install it, use the `gem` command: ```bash gem install square.rb ``` {% aside type="info" %} If you prefer to skip the following setup steps, download the [Square Ruby SDK Quickstart](https://github.com/Square-Developers/ruby-getting-started) sample and follow the instructions in the README. {% /aside %} ## Create a project 1. Open a new terminal window. Create a new directory for your project, and then go to that directory. ```bash mkdir quickstart cd ./quickstart ``` 2. Set your square credentials in an `.env` file. In your project directory, create a new file named `.env` with the following content, replacing `yourSandboxAccessToken` with your Square Sandbox access token: ``` SQUARE_ACCESS_TOKEN=yourSandboxAccessToken ``` ## Write code 1. In your project directory, create a new file named quickstart.rb with the following content: ```ruby require 'square' client = Square::Client.new( token: ENV['SQUARE_ACCESS_TOKEN'], base_url: Square::Environment::SANDBOX ) begin result = client.locations.list if result.locations result.locations.each do |location| printf("%s: %s, %s, %s\n", location.id, location.name, location.address&.address_line_1, location.address&.locality) end end rescue => e warn "Error: #{e.message}" if e.respond_to?(:errors) && e.errors e.errors.each do |error| warn error.category warn error.code warn error.detail end end end ``` 2. Save the quickstart.rb file. This code does the following: * Loads the environment file containing your Square access token. * Creates a new client object instance with your Square access token. * Calls the `locations.list` method on the `client` object. * If the request is successful, the code prints the location information on the terminal. ## Run the application 1. Run the following command: ```bash ruby ./quickstart.rb ``` 2. Verify the result. You should see at least one location (Square creates one location when you create a Square account). --- # Manage Customer Cards on File > Source: https://developer.squareup.com/docs/cards-api/manage-cards > Status: PUBLIC > Languages: All > Platforms: All The Cards API provides a set of endpoints for you to manage cards on file. You can retrieve card information, list cards on file, and disable a card. **Applies to:** [Cards API](cards-api/overview) | [Customers API](customers-api/what-it-does) | [Payments API](payments-refunds) {% subheading %}Learn how to use the Cards API to retrieve a stored card, list the cards on file for a customer, disable a card, and manage card declines.{% /subheading %} {% toc hide=true /%} ## Overview The [Cards API](https://developer.squareup.com/reference/square/cards-api) provides a set of endpoints you can use to manage credit and debit cards on file. You can retrieve card information using the [RetrieveCard](https://developer.squareup.com/reference/square/cards-api/retrieve-card) endpoint, list cards on file using the [ListCards](https://developer.squareup.com/reference/square/cards-api/list-cards) endpoint, and disable a card using the [DisableCard](https://developer.squareup.com/reference/square/cards-api/disable-card) endpoint. In addition, Square provides tools and guidance to help manage or reduce card declines. {% aside type="info" %} For information about how to save cards on file using the `CreateCard` endpoint, see [How the API works](cards-api/overview#how-it-works). For information about how to use cards on file for payments, see [Card-on-file payments](cards-api/overview#card-on-file-payments). {% /aside %} ## Get a card To get information about a card on file, call [RetrieveCard](https://developer.squareup.com/reference/square/cards-api/retrieve-card) and provide the card ID. If needed, call [ListCards](https://developer.squareup.com/reference/square/cards-api/list-cards) to get the card ID. {% tabset %} {% tab id="Request" %} ```` {% /tab %} {% tab id="Response" %} ```json { "card": { "id": "ccof:uIbfJXhXETSP197M3GB", "billing_address": { "address_line_1": "500 Electric Ave", "address_line_2": "Suite 600", "locality": "New York", "administrative_district_level_1": "NY", "postal_code": "10003", "country": "US" }, "bin": "411111", "card_brand": "VISA", "card_type": "CREDIT", "cardholder_name": "Amelia Earhart", "customer_id": "VDKXEEKPJN48QDG3BGGFAK05P8", "enabled": true, "exp_month": 11, "exp_year": 2018, "last_4": "1111", "prepaid_type": "NOT_PREPAID", "reference_id": "user-id-1", "version": 1 } } ``` {% /tab %} {% /tabset %} ## List cards saved for a customer To get a customer's cards on file, call [ListCards](https://developer.squareup.com/reference/square/cards-api/list-cards) and provide the customer ID. If you need to get the customer ID, call [SearchCustomers](https://developer.squareup.com/reference/square/customers-api/search-customers) and search by phone number, email address, or other supported attribute. The following example request uses the `customer_id` query parameter to get the cards on file for a specified customer. The access token you provide in the request identifies the Square account where the cards are stored. {% tabset %} {% tab id="Request" %} ```` {% /tab %} {% tab id="Response" %} ```json { "cards": [ { "id": "ccof:uIbfJXhXETSP197M3GB", "card_brand": "VISA", "last_4": "1111", "exp_month": 5, "exp_year": 2026, "cardholder_name": "Amelia Earhart", "billing_address": { "address_line_1": "500 Electric Ave", "address_line_2": "Suite 600", "locality": "New York", "administrative_district_level_1": "NY", "postal_code": "94103", "country": "US" }, "fingerprint": "sq-1-Fqm6frzaqEflW0CjZ0_JqJ-17rrOTHmDN9V-18Mnra8ZQ-T7zmVdE9tsDXtYKjaQrg", "customer_id": "Q6VKJKGW8GWQNEYMDRMV01QMK8", "merchant_id": "8QJTJCE6AZSN6", "reference_id": "user-id-1", "enabled": true, "card_type": "CREDIT", "prepaid_type": "NOT_PREPAID", "bin": "453275", "created_at": "2022-08-16T20:54:44Z", "version": 2 }, { "id": "ccof:uIbfJXhXETSP197M3GB", "card_brand": "VISA", "last_4": "5858", "exp_month": 5, "exp_year": 2026, "cardholder_name": "Amelia Earhart", "billing_address": { "address_line_1": "500 Electric Ave", "address_line_2": "Suite 600", "locality": "New York", "administrative_district_level_1": "NY", "postal_code": "94103", "country": "US" }, "fingerprint": "sq-1-1txh-NqEX_paMcSV1G9fSem-NTm2iO0ZB_c6AJu9JuhIb9r7P7W6nrU3p7epAMl0yQ", "customer_id": "Q6VKJKGW8GWQNEYMDRMV01QMK8", "merchant_id": "8QJTJCE6AZSN6", "reference_id": "user-id-1", "enabled": true, "card_type": "CREDIT", "prepaid_type": "NOT_PREPAID", "bin": "453275", "created_at": "2024-05-09T20:39:01Z", "version": 1 } ], "cursor": "13SDKXRNKPJN48QDG3BGGFAK05P81653" } ``` {% /tab %} {% /tabset %} By default, only enabled cards are returned in the response. To also retrieve disabled cards, include the `include_disabled` query parameter in the request. The response returns up to 25 cards. If there are more cards to retrieve, the response includes a cursor. Use this cursor in the `cursor` field of your next `ListCards` request to retrieve the next page of results. ## Disable a card To disable a card on file, call [DisableCard](https://developer.squareup.com/reference/square/cards-api/disable-card) and provide the card ID. If needed, call [ListCards](https://developer.squareup.com/reference/square/cards-api/list-cards) to get the card ID. {% tabset %} {% tab id="Request" %} ```` {% /tab %} {% tab id="Response" %} ```json { "card": { "id": "ccof:uIbfJXhXETSP197M3GB", "billing_address": { "address_line_1": "500 Electric Ave", "address_line_2": "Suite 600", "locality": "New York", "administrative_district_level_1": "NY", "postal_code": "10003", "country": "US" }, "bin": "411111", "card_brand": "VISA", "card_type": "CREDIT", "cardholder_name": "Amelia Earhart", "customer_id": "VDKXEEKPJN48QDG3BGGFAK05P8", "enabled": false, "exp_month": 11, "exp_year": 2018, "last_4": "1111", "prepaid_type": "NOT_PREPAID", "reference_id": "user-id-1", "version": 2 } } ``` {% /tab %} {% /tabset %} After a card is disabled, new [CreatePayment](https://developer.squareup.com/reference/square/payments-api/create-payment) requests that reference the disabled card return an error. By default, only enabled cards are returned in a `ListCards` response. To also retrieve disabled cards, include the `include_disabled` query parameter in the request. ## See also * [Cards API](cards-api/overview) * [Create a Card on File from a Payment ID](cards-api/walkthrough/card-from-payment-id) * [Create a Card on File and a Payment](cards-api/walkthrough-seller-card) * [Create a Shared Card on File and Make a Payment](cards-api/walkthrough-shared-card) * [Manage Card on File Declines](cards-api/manage-card-on-file-declines) --- # Create a Shared Card on File and Make a Payment > Source: https://developer.squareup.com/docs/cards-api/walkthrough-shared-card > Status: PUBLIC > Languages: All > Platforms: All Store a card on file in your Square developer account and make payments with the card in other Square seller accounts. This topic is useful for third-party applications. Store a card on file in your Square developer account and make payments with the card in other Square seller accounts. A customer and card are created in your developer account. A customer and payment are created in a seller account. {% toc hide=true /%} ## Get a payment token Before saving a card on file, you need to get a valid single-use payment token that represents a buyer's payment card using the [Web Payments SDK](web-payments/overview) or [In-App Payments SDK](in-app-payments-sdk/what-it-does). You don't need to charge the buyer's card to save it. The payment token can be used to save a card on file, create a payment, or both. {% aside type="important" %} The postal code entered in the SDK's payment card form must match the postal code used in the [CreateCard](https://developer.squareup.com/reference/square/cards-api/create-card) request. You can use [Sandbox test card information](devtools/sandbox/payments#successstates) to generate a test payment token for the following steps. Be sure to enter the postal code 10003 in the payment card form so it matches the example values used. {% /aside %} ## Step 1: Create customer in your developer account Use the `CreateCustomer` endpoint to create a new customer in your developer account. Use your personal access token or an OAuth token scoped to your developer account. ```` The `Customers API` returns the following response: ```json { "customer": { "id": "Q6VKKKGW8GWQNEYMDRMV01QMK8", "created_at": "2021-03-31T18:27:07.803Z", "updated_at": "2021-03-31T18:27:07Z", "given_name": "Amelia", "family_name": "Earhart", "email_address": "Amelia.Earhart@example.com", "preferences": { "email_unsubscribed": false }, "creation_source": "THIRD_PARTY" } } ``` The `id` field in the response is used in the following step. ## Step 2: Create a shared card in your Developer account Call the `CreateCard` endpoint with a payment card token and an idempotency key. Use your personal access token or an OAuth token scoped to your own developer account. The following example uses your Square account personal access token to create a new card on file in your Square account: ```` The Cards API returns the following response: ```json { "card": { "id": "ccof:uIbfJXhXETSP197M3GB", "billing_address": { "address_line_1": "500 Electric Ave", "address_line_2": "Suite 600", "locality": "New York", "administrative_district_level_1": "NY", "postal_code": "10003", "country": "US" }, "bin": "411111", "card_brand": "VISA", "card_type": "CREDIT", "cardholder_name": "Amelia Earhart", "customer_id": "Q6VKKKGW8GWQNEYMDRMV01QMK8", "enabled": true, "exp_month": 11, "exp_year": 2018, "last_4": "1111", "prepaid_type": "NOT_PREPAID", "reference_id": "user-id-1", "version": 1 } } ``` {% aside type="important" %} Always ask customers for permission before saving their card information. For example, include a checkbox in your purchase flow that customers can select to specify that they want to save their card information for future purchases. Linking cards on file without obtaining customer permission can result in your application being disabled without notice. {% /aside %} ## Step 3: Create a customer in the seller account To make a payment with the card saved in step 2, your application must create a new customer in the Square seller account or find a matching customer in the seller account. The required OAuth scope is `CUSTOMERS_WRITE`. The following example request uses a seller account OAuth access token and is run when a matching customer isn't found and then creates a new customer in the seller account: ```` {% aside type="tip" %} The Customers API allows the creation of duplicate customers. In production, a matching customer might have already been created in the seller account when the buyer made an earlier purchase from the seller. Your application should [search for](/customers-api/what-it-does#searching) an existing customer that matches the customer information you want to create. If a match is found, use that customer instead of creating a new one. {% /aside %} ## Step 4: Create a payment in the seller account using the shared card Use a seller account OAuth access token to create a payment in the seller account, referencing the `customer_id` from step 3 (the customer in the seller account) and the shared card on file as the `source_id` value from step 2. The required OAuth scope is `PAYMENTS_WRITE` and `PAYMENTS_WRITE_SHARED_ONFILE`. ```` ## See also * [Cards API Overview](cards-api/overview) * [Manage Customer Cards on File](cards-api/manage-cards) * [Create a Card on File from a Payment ID](cards-api/walkthrough/card-from-payment-id) * [Create a Card on File and a Payment](cards-api/walkthrough-seller-card) --- # Create a Card on File and a Payment > Source: https://developer.squareup.com/docs/cards-api/walkthrough-seller-card > Status: PUBLIC > Languages: All > Platforms: All This procedure is used when your Square account is a seller account and your application uses only a seller account access token. This procedure is used when your Square account isn't a developer account and your application uses only a seller account access token. The customer, card, and payment are all created in a seller account. {% toc hide=true /%} ## Get a payment token Before saving a card on file, you need to get a valid single-use payment token that represents a buyer's payment card using the [Web Payments SDK](web-payments/overview) or [In-App Payments SDK](in-app-payments-sdk/what-it-does). You don't need to charge the buyer's card to save it. The payment token can be used to save a card on file, create a payment, or both. {% aside type="important" %} The postal code entered in the SDK's payment card form must match the postal code used in the [CreateCard](https://developer.squareup.com/reference/square/cards-api/create-card) request. You can use [Sandbox test card information](devtools/sandbox/payments#successstates) to generate a test payment token for the following steps. Be sure to enter the postal code 10003 in the payment card form so it matches the example values used. {% /aside %} ## Step 1: Create a customer record in the target seller account Use the [CreateCustomer](https://developer.squareup.com/reference/square/customers/create-customer) endpoint to create a new customer in the seller Square account using an OAuth token generated for the seller. The following example `CreateCustomer` request is made with an access token from the seller Square account: ```` The Customers API returns the following response: ```json { "customer": { "id": "Q6VKKKGW8GWQNEYMDRMV01QMK8", "created_at": "2021-03-31T18:27:07.803Z", "updated_at": "2021-03-31T18:27:07Z", "given_name": "Amelia", "family_name": "Earhart", "email_address": "Amelia.Earhart@example.com", "preferences": { "email_unsubscribed": false }, "creation_source": "THIRD_PARTY" } } ``` The `id` field in the response is used in the following step. ## Step 2: Save a card on file in the seller Square account Call the [CreateCard](https://developer.squareup.com/reference/square/cards-api/create-card) endpoint with a card token and idempotency key using an OAuth token from the seller Square account. The following example uses the `customer_id` value of `Q6VKKKGW8GWQNEYMDRMV01QMK8` returned in the response in the previous step: ```` The Cards API returns the following response: ```json { "card": { "id": "ccof:uIbfJXhXETSP197M3GB", "billing_address": { "address_line_1": "500 Electric Ave", "address_line_2": "Suite 600", "locality": "New York", "administrative_district_level_1": "NY", "postal_code": "10003", "country": "US" }, "bin": "411111", "card_brand": "VISA", "card_type": "CREDIT", "cardholder_name": "Amelia Earhart", "customer_id": "Q6VKKKGW8GWQNEYMDRMV01QMK8", "enabled": true, "exp_month": 11, "exp_year": 2024, "last_4": "1111", "prepaid_type": "NOT_PREPAID", "reference_id": "user-id-1", "version": 1 } } ``` {% aside type="important" %} Always ask customers for permission before saving their card information. For example, include a checkbox in your purchase flow that customers can select to specify that they want to save their card information for future purchases. Linking cards on file without obtaining customer permission can result in your application being disabled without notice. {% /aside %} ## Step 3: Create a payment using the card on file Use [CreatePayment](https://developer.squareup.com/reference/square/payments-api/create-payment) for a new payment in the seller account. {% aside type="tip" %} The access token that you use in any Square API call determines which Square account the call applies to. {% /aside %} This is an optional step that you do only if you want to take a payment with the card that was just stored on file. If you don't want to take a payment, skip this step. The customer payment card is already stored on file. Create a new payment in the seller account where the `source_id` is the ID of the newly saved card on file from step 2 and the `customer_id` from step 1. ```` ## See also * [Cards API Overview](cards-api/overview) * [Manage Customer Cards on File](cards-api/manage-cards) * [Create a Card on File from a Payment ID](cards-api/walkthrough/card-from-payment-id) * [Create a Shared Card on File and Make a Payment](cards-api/walkthrough-shared-card) --- # Create a Card on File from a Payment ID > Source: https://developer.squareup.com/docs/cards-api/walkthrough/card-from-payment-id > Status: PUBLIC > Languages: All > Platforms: All Learn how to create a new card on file in a Square account using a payment ID as a source. Learn how to create a new card on file in a Square account using a payment ID as a source. **Applies to:** [Cards API](https://developer.squareup.com/reference/square/cards-api) | [Customers API](https://developer.squareup.com/reference/square/customers-api) | [Payments API](https://developer.squareup.com/reference/square/payments-api) ## Before you start * **You need a valid access token -** Access tokens determine the Square APIs you can call and the Square account that the call applies to. The steps in this topic call Square APIs in the Square Sandbox, so you can use your [Sandbox access token](build-basics/access-tokens#get-a-personal-access-token) in the requests. Square recommends testing with Sandbox credentials when possible. To call Square APIs in the production environment, change the base URL to `https://connect.squareup.com` and use production credentials. Applications that use [OAuth](oauth-api/overview) access tokens require `PAYMENTS_WRITE` and `CUSTOMERS_WRITE` permissions to perform these steps. * **You need a payment token -** Payment tokens are generated by the Web Payments SDK or In-App Payments SDK using card information entered by buyers. To learn more, see [Get a payment token](#get-a-payment-token). ## Get a payment token Before saving a card on file, you need to get a valid single-use payment token that represents a buyer's payment card using the [Web Payments SDK](web-payments/overview) or [In-App Payments SDK](in-app-payments-sdk/what-it-does). You don't need to charge the buyer's card to save it. The payment token can be used to save a card on file, create a payment, or both. {% aside type="important" %} The postal code entered in the SDK's payment card form must match the postal code used in the [CreateCard](https://developer.squareup.com/reference/square/cards-api/create-card) request. You can use [Sandbox test card information](devtools/sandbox/payments#successstates) to generate a test payment token for the following steps. Be sure to enter the postal code 10003 in the payment card form so it matches the example values used. {% /aside %} ## Step 1: Create a payment Call the [CreatePayment](https://developer.squareup.com/reference/square/payments-api/create-payment) endpoint to create a payment. Set `source_id` to the single-source payment token you generated for the card using the Web Payments SDK or In-App Payments SDK. Payment tokens are prefixed by `cnon` (for example, `cnon:CBASEAZOKxw_kwAJQu3FI7dIkek`). ```` If successful, Square returns a [Payment](https://developer.squareup.com/reference/square/objects/Payment) object, as shown in the following example response. Copy the payment ID so you can use it to create a card in step 3. ```json { "payment": { "id": "Dv9xlBgSgVB8i6eT0imRYFjcrOaZY", "created_at": "2021-03-31T20:56:13.220Z", "updated_at": "2021-03-31T20:56:13.411Z", "amount_money": { "amount": 100, "currency": "USD" }, "status": "COMPLETED", "delay_duration": "PT168H", "source_type": "CARD", "card_details": { "status": "CAPTURED", "card": { "card_brand": "AMERICAN_EXPRESS", "last_4": "6550", "exp_month": 3, "exp_year": 2023, "fingerprint": "sq-1-hPdOWUYtEMft3yQ", "card_type": "CREDIT", "prepaid_type": "NOT_PREPAID", "bin": "371263" }, "entry_method": "KEYED", "cvv_status": "CVV_ACCEPTED", "avs_status": "AVS_ACCEPTED", "statement_description": "SQ *DEFAULT TEST ACCOUNT", "card_payment_timeline": { "authorized_at": "2021-03-31T20:56:13.334Z", "captured_at": "2021-03-31T20:56:13.411Z" } }, "location_id": "VJN4XSBFTVPK9", "total_money": { "amount": 100, "currency": "USD" }, "approved_money": { "amount": 100, "currency": "USD" } } } ``` ## Step 2: Create a customer Call the [CreateCustomer](https://developer.squareup.com/reference/square/customers-api/create-customer) endpoint to create a customer to associate with the card. ```` If successful, Square returns a [Customer](https://developer.squareup.com/reference/square/objects/Customer) object, as shown in the following example response. Copy the customer ID so you can use it to create a card in step 3. ```json { "customer": { "id": "Q6VKKKGW8GWQNEYMDRMV01QMK8", "created_at": "2021-03-31T18:27:07.803Z", "updated_at": "2021-03-31T18:27:07Z", "given_name": "Amelia", "family_name": "Earhart", "email_address": "Amelia.Earhart@example.com", "address": { "address_line_1": "500 Electric Ave", "address_line_2": "Suite 600", "locality": "New York", "administrative_district_level_1": "NY", "postal_code": "10003", "country": "US" }, "phone_number": "1-212-555-4240", "note": "a customer on seller account", "reference_id": "reference-id-1", "preferences": { "email_unsubscribed": false }, "creation_source": "THIRD_PARTY", "version": 0 } } ``` ## Step 3: Create a card on file using the payment ID as the source Call the [CreateCard](https://developer.squareup.com/reference/square/cards-api/create-card) endpoint to save a card on file for the customer. Set `source_id` to the payment ID (from step 1) and `card.customer_id` to the customer ID (from step 2). ```` {% aside type="important" %} Always ask customers for permission before saving their card information. For example, include a checkbox in your purchase flow that customers can select to specify that they want to save their card information for future purchases. Linking cards on file without obtaining customer permission can result in your application being disabled without notice. {% /aside %} If successful, Square returns a [Card](https://developer.squareup.com/reference/square/objects/Card) object, as shown in the following example response: ```json { "card": { "id": "ccof:uIbfJXhXETSP197M3GB", "card_brand": "VISA", "last_4": "1111", "exp_month": 11, "exp_year": 2025, "cardholder_name": "Amelia Earhart", "billing_address": { "address_line_1": "500 Electric Ave", "address_line_2": "Suite 600", "locality": "New York", "administrative_district_level_1": "NY", "postal_code": "10003", "country": "US" }, "fingerprint": "sq-1-Fqm6frzaqEflW0CjZ0_JqJ-17rrOTHmDN9V-18Mnra8ZQ-T7zmVdE9tsDXtYKjaQrg", "customer_id": "Q6VKKKGW8GWQNEYMDRMV01QMK8", "merchant_id": "8QJTJCE6AZSN6", "reference_id": "user-id-1", "enabled": true, "card_type": "CREDIT", "prepaid_type": "NOT_PREPAID", "bin": "411111", "created_at": "2021-03-31T22:29:01Z", "version": 1 } } ``` ## See also * [Cards API Overview](cards-api/overview) * [Manage Customer Cards on File](cards-api/manage-cards) * [Create a Card on File and a Payment](cards-api/walkthrough-seller-card) * [Create a Shared Card on File and Make a Payment](cards-api/walkthrough-shared-card) --- # Supported Payment Methods by Country > Source: https://developer.squareup.com/docs/payment-card-support-by-country > Status: PUBLIC > Languages: All > Platforms: All Learn about Square support for payment card brands by country for card-not-present and card-present payments. {% subheading %}Learn about Square support for payment card brands by country for card-not-present and card-present payments.{% /subheading %} {% toc hide=true /%} ## Overview Square support for payment methods varies by country. This topic describes payment method support for all Square APIs and SDKs by the country where a Square seller is based. ## Card present for in-person payment The buyer presents a payment card for payment. | **Country** | **Payment card** | | ------------------ | ------------------------ | | **Australia** | Visa, Mastercard, American Express, JCB, EFTPOS | | **Canada** | Visa, Mastercard, American Express, Discover, Discover Diners, Interac, JCB, UnionPay International | | **France** | Visa, Mastercard, American Express | | **Ireland** | Visa, Mastercard, American Express | | **Japan** | Visa, Mastercard, American Express, Discover, Discover Diners, JCB, Transportation IC, QUICPay, iD, UnionPay International | | **Spain** | Visa, Mastercard, American Express | | **United Kingdom** | Visa, Mastercard, American Express | | **United States** | Visa, Mastercard, American Express, Discover, Discover Diners, JCB, UnionPay International | ## Card on file for payment The buyer's payment card is stored on file with Square and then used in a payment. |Country{% width="120px" %}|Visa{% width="60px" %}|Mastercard|American Express|Discover|Discover Diners|JCB{% width="60px" %}|UnionPay International| |:------|:---|:---------|:---------------|:-------|:--------------|:------|:--| |**Australia**|✅|✅|✅|⛔|⛔|✅|⛔| |**Canada**|✅|✅|✅|✅|✅|✅|✅| |**France**|✅|✅|✅|⛔|⛔|⛔|⛔| |**Ireland**|✅|✅|✅|⛔|⛔|⛔|⛔| |**Japan**|✅|✅|✅|✅|✅|✅|⛔| |**Spain**|✅|✅|✅|⛔|⛔|⛔|⛔| |**United{% line-break /%}Kingdom**|✅|✅|✅|⛔|⛔|⛔|⛔| |**United{% line-break /%}States**|✅|✅|✅|✅|✅|✅|✅| ## Card for online or mobile payment The buyer's payment card is used in the payment form on a web page or in a mobile application. |Country{% width="120px" %}|Visa{% width="60px" %}|Mastercard|American Express|Discover|Discover Diners|JCB{% width="60px" %}|UnionPay International| |:------|:---|:---------|:---------------|:-------|:--------------|:------|:--| |**Australia**|✅|✅|✅|⛔|⛔|✅|⛔| |**Canada**|✅|✅|✅|✅|✅|✅|✅| |**France**|✅|✅|✅|⛔|⛔|⛔|⛔| |**Ireland**|✅|✅|✅|⛔|⛔|⛔|⛔| |**Japan**|✅|✅|✅|✅|✅|✅|⛔| |**Spain**|✅|✅|✅|⛔|⛔|⛔|⛔| |**United{% line-break /%}Kingdom**|✅|✅|✅|⛔|⛔|⛔|⛔| |**United{% line-break /%}States**|✅|✅|✅|✅|✅|✅|✅| ## Digital wallet payments The buyer uses a payment card stored in an Apple Pay, Cash App Pay, or Google Pay wallet on the web or in a mobile application. |Country{% width="120px" %}|Apple Pay{% width="100px" %}|Google Pay{% width="100px" %}| Cash App Pay{% width="100px" %}|PayPay |:------|:---|:---------|:-------------|:---| |**Australia**|✅|✅|⛔|⛔| |**Canada**|✅|✅|⛔|⛔| |**France**|✅|✅|⛔|⛔| |**Ireland**|✅|✅|⛔|⛔| |**Japan**|✅|✅|⛔|✅| |**Spain**|✅|✅|⛔|⛔| |**United{% line-break /%}Kingdom** |✅|✅|⛔|⛔| |**United{% line-break /%}States**|✅|✅|✅|⛔| ## ACH bank transfer payments The buyer uses a bank transfer method to make payment. |Country{% width="180px" %}|ACH| |:------|:---| |**Australia**|⛔| |**Canada**|⛔| |**France**|⛔| |**Ireland**|⛔| |**Japan**|⛔| |**Spain**|⛔| |**United Kingdom**|⛔ |**United States**|✅| ## Afterpay/Clearpay The buyer uses Afterpay to make a payment. In the UK, Afterpay is known as Clearpay. |Country{% width="180px" %}|Afterpay/Clearpay| |:------|:---| |**Australia**|✅| |**Canada**|✅| |**France**|⛔| |**Ireland**|⛔| |**Japan**|⛔| |**Spain**|⛔| |**United Kingdom**|✅ |**United States**|✅| ## House accounts House Account payments cannot be created nor accepted in your application. You can only retrieve house account payments that have been completed in the Square Point of Sale. This is supported only in the United States. ## Testing for supported countries If you're a developer trying to build on Square APIs for a seller based in a Square-supported country, you should use the following test solutions: * **Test eCommerce payment APIs for the account default country in the Sandbox** - Use Sandbox default test account credentials to test payment-related APIs. For more information, see [Test Square APIs in the Sandbox](devtools/sandbox/testing). * **Alpha test payment APIs for other supported countries in the Sandbox** - In the Sandbox, add a test account for the location you're testing and then use Sandbox credentials for that account to test payment-related APIs. The Sandbox supports testing eCommerce payment APIs in the Sandbox environment and applies all payment validation rules to simulate production payments in that location. It's no longer necessary to validate your payment logic in production code before you release a beta. * **Beta test payment APIs or non-payment APIs in production** - Ask the seller who is based in a Square-supported country to provide you with a valid application ID, personal access token, or both. Because payments must use the currency of the seller account, you should use production beta testers who are based in a Square-supported country to test your functionality before making your application generally available in that country. * **Test in-person payment APIs** - The Reader SDK and Point of Sale SDK aren't supported in the Sandbox and Square hardware only works in Square-supported countries. Test payment requests for in-person payments in production using the `CASH` tender type. The Square Reader SDK and Point of Sale API aren't currently supported in the Square Sandbox and Square hardware only works in Square-supported countries. As a result, mobile developers of in-person applications must test in production with real credit cards. If you're a developer trying to build with a Square in-person mobile solution in supported regions, you should: * **Start with cash** - You can test cash payments without spending actual money using the `CASH` tender type. * **Use small card payments** - When you're ready to test card payments, you can charge small amounts, [view the transaction details](https://app.squareup.com/dashboard/sales/transactions), and [refund payments](https://squareup.com/help/article/6116) while in the Square Dashboard. {% aside type="info" %} The In-App Payments SDK is supported in the Square Sandbox. To learn how to test your In-App Payments application, see [Sandbox Payments](testing/test-values). {% /aside %} --- # Common Square API Patterns > Source: https://developer.squareup.com/docs/sdks/ruby/common-square-api-patterns > Status: PUBLIC > Languages: All > Platforms: All Learn how the Square Ruby SDK supports the common Square API features. {% subheading %}Learn how the Square Ruby SDK supports the common Square API features.{% /subheading %} {% toc hide=true /%} ## Overview Some of the Square API patterns are used across various APIs. These include the following: * **Pagination** - Many Square API operations limit the size of the response. When the result of the API operation exceeds the limit, the API truncates the result. You must make a series of requests to retrieve all the data. This is referred to as pagination. * **Idempotency key** - Most Square APIs that perform create, update, or delete operations require idempotency keys to protect against making duplicate calls that can have negative consequences (for example, charging a card on file twice). * **Object versioning** - Some Square resources (for example, the `Customer` object) have versions assigned. The version numbers enable optimistic concurrency, which is the ability for multiple transactions to complete without interfering with each other. * **Clear API object fields** - Square API update endpoints that support sparse updates allow you to specify just the fields you want to add, change, or clear in the request. These Square API patterns are exposed in the Square Ruby SDK. ## Pagination Square API [pagination](working-with-apis/pagination) support lets you split a full query result set into pages that are retrieved over a sequence of requests. For example, when you call `client.customers.list`, you can limit the number of customers returned in the response. To iterate over all customers, you can use the `auto_paging_each` iterator method, which accepts a block that gets called for each customer. The SDK automatically handles pagination by making additional HTTP requests to retrieve additional pages of data. ```ruby page = client.customers.list( body: { limit: 10, sort_field: 'DEFAULT', sort_order: 'DESC' } ) page.auto_paging_each do |customer| puts(customer.id) ``` ## Idempotency key When an application calls a Square API, it must be able to repeat an API operation when needed and get the same result each time. For example, if a network error occurs while updating a catalog item, the application might retry the same request and must ensure that the item updates only once. This behavior is called idempotency. Most Square APIs that modify data (create, update, or delete) require you to provide an idempotency key that uniquely identifies the request. This allows you to retry the request if necessary, without duplicating work. You can provide a custom unique key or simply generate one. There are language specific functions that you can use to generate unique keys. For more information, see [Idempotency](working-with-apis/idempotency). In the following example, you can see how the `idempotency_key` is generated in a Ruby application to create an order. ```ruby client.orders.create( body: { "idempotency_key" => SecureRandom.uuid, "order" => { "location_id" => location.id } } ) ``` ## Optimistic concurrency and object versioning Some Square API resources support versioning. For example, each `Customer` object has a version field. Initially, the version number is 0. Each update increases the version number. If you don't specify a version number in the request, the latest version is assumed. This resource version number enables optimistic concurrency; multiple transactions can complete without interfering with each other. As a best practice, you should include the version field in the request to enable optimistic concurrency. The value must be set to the current version. For more information, see [Optimistic Concurrency](working-with-apis/optimistic-concurrency). The following code example updates a customer name. The `client.customers.update` method also includes a version number. The method succeeds only if the specified version number is the latest version of the `Customer` object on the server. ```ruby require 'square' begin response = client.customers.update_customer( customer_id: "GZ48C4P2CWVXV7F7K2ZH795RSG", body: { given_name: "Fred", family_name: "Jones", version: 7 } ) customer = response.data.customer puts "Customer: ID: #{customer.id}, " \ "Version: #{customer.version}, " \ "Given name: #{customer.given_name}, " \ "Family name: #{customer.family_name}" rescue Square::SquareError => e puts e.response_code puts e.errors end ``` ## Clear API object fields For update operations that support sparse updates, your request only needs to specify the fields you want to add, change, or clear, along with any fields required by the update operation. If you want to clear a field without setting a new value, set its value to `None`. For more information, see [Clear a field with a null](build-basics/clearing-fields#clear-a-field-with-a-null). The following `client.locations.update` example clears the `twitter_username` field and sets the `website_url` field: ```ruby client.locations.update( body: { location_id="M8AKAD8160XGR", location={ "website_url": "https://developer.squareup.com", "twitter_username": None } } ) ``` ### update_order requests If you're using `None` to clear fields in an order, you must add the `X-Clear-Null: true` HTTP header to signal your intention. In the Square Ruby SDK, the `Client` class provides an `additional_headers` parameter that you can use for this purpose: ```ruby client.orders.update( body: { order_id="A4BMDU4438ZLB", order={ "website_url": "https://developer.squareup.com", "twitter_username": None } }, request_options: { headers={"X-Clear-Null": "true"} } ) ``` --- # Invoices API > Source: https://developer.squareup.com/docs/invoices-api/overview > Status: PUBLIC > Languages: All > Platforms: All Learn about using the Square Invoices API to request or automatically collect a payment from a customer for an order. **Applies to:** [Invoices API](https://developer.squareup.com/reference/square/invoices-api) | [Orders API](orders-api/what-it-does) | [Customers API](customers-api/what-it-does) | [Cards API](cards-api/overview) {% subheading %}Use the [Invoices API](https://developer.squareup.com/reference/square/invoices-api) to request or automatically collect a payment from a customer for an order.{% /subheading %} {% toc hide=true /%} ## Overview The [Square Invoices](https://squareup.com/invoices) platform lets sellers request or automatically collect payments from their customers. Sellers can use the [Square Dashboard](https://app.squareup.com/dashboard/invoices/overview), [Square Point of Sale](https://squareup.com/point-of-sale/software), and [Square Invoices application](https://squareup.com/townsquare/free-invoice-app) to create and manage invoices. Developers can use the Invoices API to manage invoicing for orders created using the [Orders API](https://developer.squareup.com/reference/square/orders-api), and then Square collects the payment from customers. ## Requirements and limitations The following requirements and limitations apply when using the Invoices API. {% accordion expanded=false %} {% slot "heading" %} ### Requirements {% /slot %} * **OAuth permissions** - Applications that use [OAuth](oauth-api/overview) and the Invoices API require the following OAuth permissions: * `INVOICES_READ` to use the following endpoints: * [GetInvoice](https://developer.squareup.com/reference/square/invoices-api/get-invoice) * [ListInvoices](https://developer.squareup.com/reference/square/invoices-api/list-invoices) * [SearchInvoices](https://developer.squareup.com/reference/square/invoices-api/search-invoices) * `INVOICES_WRITE` and `ORDERS_WRITE` to use the following endpoints: * [CreateInvoice](https://developer.squareup.com/reference/square/invoices-api/create-invoice) * [UpdateInvoice](https://developer.squareup.com/reference/square/invoices-api/update-invoice) * [DeleteInvoice](https://developer.squareup.com/reference/square/invoices-api/delete-invoice) * [CancelInvoice](https://developer.squareup.com/reference/square/invoices-api/cancel-invoice) * [PublishInvoice](https://developer.squareup.com/reference/square/invoices-api/publish-invoice) * [CreateInvoiceAttachment](https://developer.squareup.com/reference/square/invoices-api/create-invoice-attachment) * [DeleteInvoiceAttachment](https://developer.squareup.com/reference/square/invoices-api/delete-invoice-attachment) * `CUSTOMERS_READ` and `PAYMENTS_WRITE` to charge cards on file. Your application uses these permissions to manage invoices on behalf of a seller. Depending on its functionality, your application might also require other Square permissions. * **The location must be active** - When creating an invoice, the [location](locations-api) of the associated order must have an `ACTIVE` status. If you specify the optional `location_id` field in a `CreateInvoice` request, the value must match the `location_id` of the order. * **The invoice recipient must be in the Customer Directory** - The customer who receives the invoice must have a customer profile in the seller's Customer Directory. This customer is associated with the invoice using the `primary_recipient.customer_id` field. For more information about creating and managing customer profiles, see [Manage Customer Profiles](customers-api/use-the-api/keep-records). * **The seller account must be able to accept payments** - The seller account must be set up to accept payments before Square can accept payments on any invoices. The Invoices API doesn't allow you to publish any invoices configured for automatic payments unless the seller is enabled to accept payments. For invoices scheduled for a future date, the Invoices API also cancels the order and deletes the invoice when the invoice is scheduled to be sent. This requirement also applies to testing with your own Square account in the production environment. * **Error handling for Invoices Plus features** - Your application must be able to handle errors returned when attempting to create or update an invoice with custom fields or installment payments. These premium features are available only with an [Invoices Plus subscription](#invoices-plus-subscription). {% /accordion %} {% accordion expanded=false %} {% slot "heading" %} ### Limitations {% /slot %} {% anchor id="orders-integration-limitations" /%} * **Limitations with the Orders API integration** - Invoices are associated with an order through the `order_id` field of the invoice. You should be aware of the following considerations related to Orders API integration: * When an invoice is canceled or deleted, Square cancels the associated order by setting the order status to `CANCELED`. * Orders that are associated with an invoice cannot be set to the `CANCELED` or `COMPLETED` state using the Orders API. * Payment for the order must be made on the invoice. You cannot use Square APIs such as [PayOrder](orders-api/pay-for-orders#using-payorder) or [CreatePayment](https://developer.squareup.com/reference/square/payments-api/create-payment) to process a payment for an order that is associated with an invoice. After the invoice is paid in full, Square sets the `state` field of the order to `COMPLETED`. * After an order is associated with an invoice, you cannot update order fields that affect the order amount (or their child fields), such as: * `line_items` * `taxes` * `discounts` To update these immutable fields, you must cancel the invoice, which also cancels the order. You can then create a new order and a new invoice. However, you can update order fields that don't affect the cart. * Invoices don't contain information about the order. For itemization and other order information, call `RetrieveOrder` using the `order_id` from the invoice. * Only orders with locations in Canada or the United States can include a [service charge](orders-api/how-it-works#service-charges). However, apportioned service charges aren't supported in any region. For more information about order-related requirements and limitations, see [Create and Publish Invoices](invoices-api/create-publish-invoices). {% anchor id="customers-integration-limitations" /%} * **Limitations with the Customers API integration** - Invoices are associated with a customer profile through the `primary_recipient.customer_id` field, which represents the invoice recipient. This might not be the same customer associated with the underlying order or with any invoice payments. You should be aware of the following considerations related to Customers API integration: * The `InvoiceRecipient` object represents a snapshot of customer data retrieved from the associated customer profile. Square doesn't update the contact information of the recipient in response to changes in the associated customer profile. To update the customer profile information for a draft invoice, [update the profile](customers-api/use-the-api/keep-records#update-customer-profile) using the Customers API and then [update the invoice](invoices-api/update-invoices) by first clearing the `primary_recipient` field and then adding it again. Invoice recipient fields cannot be updated after the invoice is published. However, Square does update the `customer_id` field if the associated customer profile is merged. * Invoices aren't automatically updated or canceled if the customer profile assigned as the invoice recipient is deleted from the Customer Directory. If the invoice has remaining scheduled payments, Square continues to send the invoice. Any remaining automatic payments fail, but the customer can still enter the payment information on the invoice payment page. Consider [canceling these invoices](invoices-api/cancel-delete-invoices) if there isn't a valid reason to keep them. You can subscribe to the [customer.deleted](https://developer.squareup.com/reference/square/customers-api/webhooks/customer.deleted) webhook event to be notified when customers are deleted. For more information about customer-related requirements and limitations, see [Create and Publish Invoices](invoices-api/create-publish-invoices). {% anchor id="payments-fees-limitations" /%} * **Payments and application fees** - You should be aware of the following considerations related to payments and application fees: * Developers cannot collect application fees for invoices. * Square APIs cannot be used to pay an invoice. Square manages invoice payment flows. For more information, see [Pay an invoice.](invoices-api/pay-refund-invoices#pay-invoice) Although Square APIs cannot be used to pay an invoice, you can call [ListPayments](https://developer.squareup.com/reference/square/payments-api/list-payments) or [GetPayment](https://developer.squareup.com/reference/square/payments-api/get-payment) using the tender ID from the order to retrieve the corresponding `Payment` object after a payment is made. For steps, see [Retrieve an invoice payment.](invoices-api/pay-refund-invoices#retrieve-invoice-payment) Payments also appear on the **Transactions** page of the Square Dashboard. * Installment payments are supported only with an [Invoices Plus subscription](#invoices-plus-subscription). * The `BANK_ON_FILE` automatic payment method cannot be set using the Invoices API. This payment method applies only to invoices that sellers create in Square products. * The `BUY_NOW_PAY_LATER` accepted payment method can only be set for invoices that have a single payment request of the `BALANCE` type. For additional requirements, see [Buy Now Pay Later payments with Afterpay](#buy-now-pay-later). {% anchor id="unsupported-features" /%} * **Unsupported features** - The Invoices API doesn't support some of the features available in the Square Dashboard, Square Point of Sale, and Square Invoices application. For example, you cannot use the Invoices API to create or configure the following features: * Color and logo customization for your email invoices and customer payment page. * Recurring invoices. However, you can use the [Subscriptions API](subscriptions/overview) to create and manage recurring subscriptions. * Invoice templates. * Estimates. * Bulk actions. * Automatic payments from a bank account on file. * Attaching a file to an invoice. The Invoices API preserves any existing attachments on an invoice but the API doesn't support accessing and modifying invoice attachments. * Adding or viewing a shipping address. You cannot add a shipping address to an invoice that you create with the Invoices API. In addition, the shipping address isn't included in invoices that you retrieve with the Invoices API. {% anchor id="considerations" /%} * `SMS` (text message) delivery method. Note that when an invoice is configured to use the `SMS` delivery method, Square sends invoices and receipts, but not reminders. Although you cannot use the Invoices API to specify `SMS` for the invoice `delivery_method` field, you can use the API to update other invoice fields or change `delivery_method` to `EMAIL` or `SHARE_MANUALLY`. You should be aware of the following considerations when an invoice is configured for SMS delivery, but the customer opted out of text message updates from Square invoices: * Square cannot send a text message to notify the customer about a change after the invoice is updated. * Calling the `PublishInvoice` endpoint for the invoice returns a `Bad Request` error. * **Sandbox attachment file size limit** - In the {% tooltip text="Square Sandbox" %}An isolated server environment used for testing. API calls in the Sandbox use the "connect.squareupsandbox.com" domain and require an access token that's valid for Sandbox.{% /tooltip %}, invoices have a total file size limit of 1 KB for all attachments. In production, the total file size limit for all attachments is 25 MB. {% /accordion %} ## Benefits of using the Invoices API Simplify invoice management and reduce your application development costs by integrating the Invoices API into your application flow: * You don't need to collect or process payments. Square collects payments from customers by generating a Square-hosted online payment page or by processing automatic payments. For more information, see [Pay an invoice](invoices-api/pay-refund-invoices#pay-an-invoice). * You don't need to send invoices, reminders, or receipts. Square follows up with customers based on the invoice settings you specify, even when invoices are split into multiple payment requests. By default, Square also sends notifications to sellers. For more information, see [Configuring how Square processes an invoice](invoices-api/create-publish-invoices#configure-invoice-processing). * You don't need to manage order status. Using the order ID you provide when creating an invoice, Square updates the order when the invoice is paid or canceled. Square also gets customer contact information based on the customer ID you provide. All invoices can be managed using the Invoices API or Square products (the Square Dashboard, Square Point of Sale, and Square Invoices application). However, note the following considerations: * Invoices created with the Invoices API must be associated with an order that was created with the Orders API. Orders created from Square products cannot be associated with an invoice because they don't include an order ID, which is required by the `CreateInvoice` endpoint. * The Invoices API doesn't support all invoice features that are available from Square products. For example, you cannot set an `SMS` delivery method or `BANK_ON_FILE` automatic payment method. For additional considerations, see [Requirements and limitations](#requirements-and-limitations). ## How it works The following high-level steps represent a typical workflow for using Square APIs to create an invoice: 1. Create an order by calling [CreateOrder](https://developer.squareup.com/reference/square/orders-api/create-order) in the Orders API. Only orders created with the Orders API can be used to create an invoice with the Invoices API. 2. Get the customer ID of the invoice recipient. You can use the `customer_id` from the order or call [SearchCustomers](https://developer.squareup.com/reference/square/customers-api/search-customers) in the Customers API to search for a customer by phone number, email address, or other supported attribute. 3. Create a draft invoice by calling `CreateInvoice` in the Invoices API. The invoice must contain one or more payment requests that define the payment schedule. For automatic card-on-file payments, provide a `card_id` retrieved using [ListCards](https://developer.squareup.com/reference/square/cards-api/list-cards) in the Cards API. 4. Publish the invoice by calling `PublishInvoice` in the Invoices API. After an invoice is published and the `scheduled_at` date (if specified) is reached, Square does the following: - Generates the invoice payment page where customers can make a payment. - Adds the {% tooltip text="public_url" %}A temporary link to the Square-hosted payment page where the customer can pay the invoice. If the link expires, customers can provide the email address or phone number associated with the invoice and request a new link directly from the expired payment page.{% /tooltip %} field with the payment page URL to the invoice. - Adds the `next_payment_amount_money` field with the next payment amount due to the invoice, unless an automatic payment for the balance is completed immediately. - Processes the invoice based on the invoice settings and handles the remaining workflow. For example, Square can email the invoice, charge a card on file, or let you or the seller send the payment page URL to the customer. Square collects all invoice payments, either directly from customers (from the online payment page) or through automatic payments. Square also updates the invoice payment status and sends reminders and receipts as scheduled. For more information, see [Create and Publish Invoices](invoices-api/create-publish-invoices). Because Square APIs cannot be used to pay invoices or manage payment status, no action is required from you after the invoice is published unless you need to [add or remove attachments](invoices-api/attachments), [update the invoice](invoices-api/update-invoices), [cancel the invoice](invoices-api/cancel-delete-invoices), or [refund the invoice.](invoices-api/pay-refund-invoices#refund-invoice) {% aside type="info" %} If sellers accept payment directly from customers, they can record the payment in the Square Dashboard, Square Point of Sale, or Square Invoices application. {% /aside %} {% anchor id="supported-operations" /%} ## Supported operations The Invoices API supports the following operations: * [Create and publish an invoice](invoices-api/create-publish-invoices) * [Retrieve, list, or search invoices](invoices-api/retrieve-list-search-invoices) * [Create or delete invoice attachments](invoices-api/attachments) * [Update an invoice](invoices-api/update-invoices) * [Cancel or delete an invoice](invoices-api/cancel-delete-invoices) Invoice payments are managed by Square. You cannot use Square APIs to pay invoices or associated orders directly. For more information, see [Pay or Refund Invoices](invoices-api/pay-refund-invoices). You can subscribe to receive webhook notifications for [invoice events](#webhooks). ## Common Invoices API workflow The following diagram shows the order of Invoices API requests that you use to manage an invoice and the [webhook events](#webhooks) triggered by each request. ![A diagram showing the process flow of Invoices API requests that you use to manage an invoice and the webhook events triggered by each request.](//images.ctfassets.net/1nw4q0oohfju/6r1DCKcbChJvvGxGVcQpvZ/a89d00dd09b4d5d5f2c1a6647e5f48fa/invoices-api-workflow.png) After the invoice is published and the `scheduled_at` date (if specified) is reached, Square processes the invoice, generates the invoice payment page, adds the {% tooltip text="public_url" %}A temporary link to the Square-hosted payment page where the customer can pay the invoice. If the link expires, customers can provide the email address or phone number associated with the invoice and request a new link directly from the expired payment page.{% /tooltip %} field to the invoice, and manages payments and status. For more information, see [Configuring how Square processes an invoice](invoices-api/create-publish-invoices#configure-invoice-processing). {% aside type="info" %} The diagram doesn't include calls to Square APIs used to obtain required information (such as `order_id` and `customer_id`) or to the `GetInvoice`, `ListInvoices`, or `SearchInvoices` endpoints used to access invoices. {% /aside %} ## Invoice object The `Invoice` object is the core component of the Invoices API. Consider the following draft invoice that requests a single payment of $12 by the due date: ```json { "invoice": { "id": "inv:0-ChAk0kZZW5IUxO0bgfIux95oEI4I", "version": 1, "location_id": "M8AKAD8160XGR", "order_id": "4AGVyEPgvg3RYVZFYjol6QN7Bg4F", "payment_requests": [ { "uid": "1c6e2c0a-0124-40a8-a90f-51957be40f64", "request_type": "BALANCE", "due_date": "2024-01-13", "tipping_enabled": false, "computed_amount_money": { "amount": 6213, "currency": "USD" }, "total_completed_amount_money": { "amount": 0, "currency": "USD" }, "automatic_payment_source": "NONE" } ], "primary_recipient": { "customer_id": "0K8P8KCSV9NXQV2V5129RASF4W", "given_name": "Sara", "family_name": "Vera", "email_address": "s.vera@example.com" }, "invoice_number": "2408_0920", "title": "Downtown Print Shop", "description": "Canvas photo prints", "status": "DRAFT", "timezone": "America/Los_Angeles", "created_at": "2023-12-14T21:22:16Z", "updated_at": "2023-12-14T21:24:10Z", "accepted_payment_methods": { "card": true, "square_gift_card": true, "bank_account": false, "buy_now_pay_later": true, "cash_app_pay": true }, "custom_fields": [ { "label": "Service Agreement", "value": "The following terms and conditions apply to orders ...", "placement": "ABOVE_LINE_ITEMS" }, { "label": "Refund Policy", "value": "Refunds will be made on the original payment method ...", "placement": "ABOVE_LINE_ITEMS" } ], "delivery_method": "EMAIL", "sale_or_service_date": "2023-12-11", "store_payment_method_enabled": true, "attachments": [ { "id": "inva:0-ChDp54tYJAPaJtfwCyzkAEPO", "filename": "terms_and_agreements.pdf", "description": "Service contract", "filesize": 81839, "hash": "2ec7f007ad6d470668a5855aefcb377f", "mime_type": "application/pdf", "uploaded_at": "2023-12-14T21:24:10Z" } ] } } ``` The following table describes key invoice settings. For information about all available invoices settings, see [Invoice](https://developer.squareup.com/reference/square/objects/Invoice). {% table %} * Field {% width="160px" %} * Description --- * `order_id` * The ID of the order that was created using the Orders API and associated with the invoice. You can associate one invoice with each order. The total `computed_amount_money` amounts of all invoice payment requests equal the `total_money` of the order. To view itemization and other order information associated with the invoice, call [RetrieveOrder](https://developer.squareup.com/reference/square/orders-api/retrieve-order) using the order ID. For more information about orders integration, see [Requirements and limitations](#requirements-and-limitations). --- * `payment_requests` * One or more payment requests that define the payment schedule for the invoice. The preceding example invoice contains one payment request for the full order amount due by the specified date. For more information, see [Configuring payment requests.](invoices-api/create-publish-invoices#payment-requests) After an invoice is published, Square adds the following fields to each payment request in the invoice: * `computed_amount_money` with the amount due for the payment request. * `total_completed_amount_money` with the amount the customer has paid for the payment request. Square collects all invoice payments from customers by generating a Square-hosted payment page or by processing automatic payments. To get information about a payment that was made, use the payment ID from the associated tender on the underlying order to call `GetPayment`. For more information, see [Retrieve an invoice payment](invoices-api/pay-refund-invoices#retrieve-an-invoice-payment). --- * `delivery_method` * The method Square uses to send invoices, reminders, or receipts to the customer. If set to `SHARE_MANUALLY`, Square doesn't send the invoice or receipt. For more information, see [Automatic communication from Square to customers](#automatic-communication-from-square-to-customers). --- * `scheduled_at` * The date to process the invoice. If not specified, Square processes the invoice immediately after it is published. --- * `primary_recipient` * The customer responsible for the invoice. Square retrieves contact and billing information based on the provided `customer_id`. For more information about customers integration, see [Requirements and limitations](#requirements-and-limitations). The `customer_id` of the invoice recipient might not be the same as the `customer_id` on the underlying order or any invoice payments. --- * `status` * The invoice [status](https://developer.squareup.com/reference/square/enums/InvoiceStatus), which is managed by Square. When an invoice is created, the status is set to `DRAFT`. A `DRAFT` invoice must be published for the customer to receive the invoice (either immediately or at the scheduled date). --- * `invoice_number` * A user-friendly string that displays on the invoice. You might use the invoice number for client-side operations. If not specified, Square assigns a value. Don't confuse this field with the Square-assigned invoice `id` used for requests to the Invoices API. --- * `version` * The invoice version. When an invoice is created, the version is set to 0. Square increments this value each time the invoice changes. You must provide the current version of the invoice for `PublishInvoice`, `UpdateInvoice`, and `CancelInvoice` requests. You cannot perform actions on previous versions of the invoice. --- * `accepted_payment_methods` * The payment methods that customers can use to pay the invoice on the invoice payment page. This setting is independent of any automatic payment requests for the invoice. It is also independent of the default **Payment method** setting that applies to invoices created in the Square Dashboard. --- * `custom_fields` * Up to two customer-facing seller-defined [custom fields](#custom-fields). Custom fields require an [Invoices Plus](#invoices-plus-subscription) subscription. --- * `public_url` * A temporary link to the Square-hosted payment page where the customer can pay the invoice. If the link expires, customers can provide the email address or phone number associated with the invoice and request a new link directly from the expired payment page. This field is added after the invoice is published and reaches the scheduled date (if one is defined). --- * `attachments` * Metadata for any image or PDF [attachments](invoices-api/attachments) on the invoice. An invoice can have up to 10 attachments. --- * `title` * The invoice title. If not specified, the [business name](https://developer.squareup.com/reference/square/objects/Merchant#definition__property-business_name) is used as the title. You can also provide an optional `description` to display on the invoice. --- * `sale_or_service_date` * The date of the sale or the date of the service. This display field appears on the invoice but doesn't drive any business logic. --- * `store_payment_method_enabled` * Indicates whether to allow customers to save credit card, debit card, or bank transfer payment information when paying an invoice. The default value is `false`. When set to `true`, Square displays a **Save my card on file** or **Save my bank on file** checkbox on the invoice payment page. If the checkbox is selected, Square creates a card on file or a bank account on file for the customer using the information provided in the payment form. Stored payment information can be used for future automatic payments. Allowing customers to save gift cards on file for invoice payments isn't supported. --- * `subscription_id` * The ID of the [subscription](https://developer.squareup.com/reference/square/objects/Subscription) associated with the invoice. This field is present only on recurring [subscription billing](subscriptions/overview) invoices. --- * `creator_team_member_id` * The ID of the [team member](https://developer.squareup.com/reference/square/objects/TeamMember) who created the invoice. This field is present only for invoices created in the Square Dashboard or Square Invoices app by a logged-in team member. {% /table %} For more information, including additional requirements, see [Create and Publish Invoices](invoices-api/create-publish-invoices). {% anchor id="automatic-communication" /%} ## Automatic communication from Square During the lifecycle of an invoice, Square sends automated communications to customers and sellers: * [Automatic communication from Square to customers](#automatic-communication-to-customers) * [Automatic communication from Square to sellers](#automatic-communication-to-sellers) {% anchor id="automatic-communication-to-customers" /%} ### Automatic communication from Square to customers The following table lists the events and conditions that determine when and how Square sends automated communications to customers. One important factor is the `delivery_method` of the invoice: * For `EMAIL`, Square sends emails to customers using the email address in the `primary_recipient` field of the invoice. * For `SMS`, Square sends text messages to customers using the phone number in the `primary_recipient` field of the invoice. * For `SHARE_MANUALLY`, Square doesn't send invoices or receipts to customers. It is the responsibility of the developer or seller to communicate with the customer regarding invoices and receipts. However, Square does send scheduled reminders to customers using the email address in the `primary_recipient` field of the invoice. {% table %} * Event * Communication --- * Invoice published * Square sends an invoice after a successful [PublishInvoice](https://developer.squareup.com/reference/square/invoices-api/publish-invoice) request. Invoices are sent on the `scheduled_at` date if one is specified; otherwise, they're sent immediately after the invoice is published. * For `EMAIL`, Square sends a copy of the invoice. * For `SMS`, Square sends a link to the invoice payment page. * For `SHARE_MANUALLY`, Square doesn't send invoices or receipts to the customer. Square also resends the invoice after `PublishInvoice` is called for an invoice that is already published. --- * Scheduled reminder date reached * On the scheduled date, Square sends the reminder at 11:00 AM in the invoice's time zone. Note the following considerations: * For `SMS`, Square doesn't send reminders. * For `SHARE_MANUALLY`, Square emails scheduled reminders. The `SHARE_MANUALLY` delivery method doesn't apply to reminders. * An invoice can have multiple reminders scheduled for both before and after the payment `due_date`. If the payment is made before the scheduled reminder date, Square doesn't send the reminder. --- * Payment made * Square sends the receipt after one of the following payment events: * A customer makes a payment on the invoice payment page. * An automatic payment is completed. For bank transfer payments (which cannot be configured through the API), Square also notifies the customer when a payment is initiated and when a payment fails after it is initiated. * A seller records a payment in the Square Dashboard, Square Point of Sale, or Square Invoices application and selects the **Send receipt** checkbox. If `delivery method` is set to `SHARE_MANUALLY`, Square doesn't automatically send invoices or receipts to the customer. These are the only supported methods of payment. Square APIs cannot be used to pay invoices or set invoice status. For more information, see [Pay an invoice](invoices-api/pay-refund-invoices#pay-invoice). --- * Automatic payment unsuccessful * Square sends the invoice by email and changes the `automatic_payment_source` field of the payment request to `NONE`. --- * Invoice updated * Square notifies the customer that the invoice is updated after a successful [UpdateInvoice](https://developer.squareup.com/reference/square/invoices-api/update-invoice) request. * For `EMAIL`, Square sends the updated invoice. * For `SMS`, Square notifies the customer that the invoice is updated and includes a link to the invoice payment page. * For `SHARE_MANUALLY`, Square doesn't notify the customer. --- * Invoice canceled * Square notifies the customer that the invoice is canceled after a successful [CancelInvoice](https://developer.squareup.com/reference/square/invoices-api/cancel-invoice) request. * For `EMAIL`, Square sends an invoice marked as canceled. - For `SMS`, Square notifies the customer that the invoice is canceled and includes a link to the invoice payment page, which is marked as canceled. * For `SHARE_MANUALLY`, Square doesn't notify the customer.| {% /table %} {% aside type="info" %} In the preceding table, communications sent in response to Square API requests also apply to corresponding actions that sellers make from the Square Dashboard, Square Point of Sale, or Square Invoices application. Except for payments that are remitted directly to sellers, Square manages all payment flows and updates the `status`, `total_completed_amount_money`, and `next_payment_amount_money` fields of the invoice as needed. Square APIs cannot be used to [pay an invoice](invoices-api/pay-refund-invoices#pay-invoice) or the associated order. {% /aside %} {% anchor id="automatic-communication-to-sellers" /%} ### Automatic communication from Square to sellers Square notifies sellers about the following invoice-related events using email, unless noted otherwise: * A customer views the Square-hosted invoice payment page. This push notification is sent only to the Square Invoices mobile application. * An invoice or reminder is sent to the customer. * An invoice is updated or canceled. * A payment is made on the invoice payment page, or an automatic payment is completed. These events include all invoice-related communications sent to customers. Sellers can manage their notification settings in the Square Dashboard. For more information, see **Edit Your Notification Settings** in [Manage Your Square Invoices Online](https://squareup.com/help/article/6105-manage-your-square-invoices). Square also emails sellers after the following events: * Square encounters problems when attempting to communicate with a customer using the email address or phone number recorded in the `primary_recipient` field of the invoice. * The invoice is canceled due to suspicious activity. * A scheduled automatic invoice payment fails. Sellers cannot unsubscribe from receiving these emails. {% anchor id="invoices-plus-subscription" /%} ## Premium features available with Invoices Plus [Square Invoices Plus](https://squareup.com/help/us/en/article/7642-get-started-with-invoices-plus) is a monthly subscription plan that enables Square sellers to use premium invoice features. The following Invoices Plus features are supported by the [Invoices API](https://developer.squareup.com/reference/square/invoices-api): * Custom fields * Installment payments (used for milestone-based payment schedules) {% aside type="info" %} All other invoice features currently supported by the Invoices API are available without a subscription. However, the Invoices API [doesn't support all Square Invoices features](#unsupported-features). {% /aside %} When using premium features, you should be aware of the following considerations: * To create invoices with premium features, the seller for whom you create the invoice must have an active (or trial) Invoices Plus subscription. Support for premium features spans the lifetime of the invoice. Therefore, you can add premium features to invoices that were created while the subscription is active, even after the subscription expires. * Square APIs cannot be used to check for subscription status or whether an invoice supports premium features before sending the request. Instead, you must implement error handling logic for `CreateInvoice` or `UpdateInvoice` requests to catch the error returned if the invoice contains an unsupported feature. Then, you must remove any premium features from the invoice and retry the request. Specifically: * `custom_fields` must be empty or omitted. * `payment_requests` cannot contain a payment request of the `INSTALLMENT` type. The Invoices API returns `403 MERCHANT_SUBSCRIPTION_NOT_FOUND` for Square version 2021-08-18 or later and `400 BAD_REQUEST` for earlier Square versions. For more information, see [Migration notes](#migration-notes). * Regardless of the subscription status, the Invoices API returns the complete invoice in applicable responses and webhook notifications, including fields related to premium features. {% anchor id="custom-fields" /%} {% accordion expanded=false %} {% slot "heading" %} ### Custom fields {% /slot %} You can use the Invoices API to add up to two custom fields to an invoice, each of which can be placed above or below the line items on the invoice. This enables sellers to customize their invoices by adding information such as their terms of service or refund policy. Custom fields are visible to sellers and buyers on the Square-hosted invoice payment page and in emailed or PDF copies of invoices. They also display in the details pane of the invoice in the Square Dashboard. For example, this invoice includes a **Special Offer** custom field above the invoice line items and an **Arrival instructions** field below the invoice line items: ![An invoice that includes a **Special Offer** custom field above the invoice line items and an **Arrival instructions** custom field below the invoice line items.](https://images.ctfassets.net/1nw4q0oohfju/598CRz1YfMtFxxUgxHw0TN/b86a7555cd0a6ddd34530a4ebe8924ba/invoice-with-custom-offer-field.png) The following `CreateInvoice` request creates an invoice similar to the preceding example: ```` The following considerations apply to custom fields: * Custom fields are supported only with an [Invoices Plus subscription](#invoices-plus-subscription). * If two custom fields use the same placement above or below line items, the custom fields are rendered in the order that they're specified. * In the `text` field, you can use `\n` to render a new line. No other formatting characters are supported. * You cannot use the Invoices API to store custom fields for an account. If you want to enable sellers to reuse custom fields for their invoices, you must define your own storage mechanism. * The Invoices API doesn't support sparse updates for custom fields. To update a custom field, you must provide the complete `custom_fields` list in the update request. {% /accordion %} {% anchor id="installment-payments" /%} {% accordion expanded=false %} {% slot "heading" %} ### Installment payments {% /slot %} Installment payments are used to configure a payment schedule for up to 12 installment payments, either with or without an initial deposit. Configuring an invoice for multiple payments is useful for scenarios such as billing customers based on specific milestones or phases of the job. For information about creating installment payment requests, see [Configuring payment requests](invoices-api/create-publish-invoices#configuring-payment-requests). Installment payments are supported only with an [Invoices Plus subscription](#installment-payments). {% aside type="info" %} For sellers who accept Afterpay (or Clearpay) payments, you can create invoices that allow customers to make Buy Now Pay Later payments. For more information, see [Buy Now Pay Later payments with Afterpay](#buy-now-pay-later). {% /aside %} {% /accordion %} {% accordion expanded=false %} {% slot "heading" %} ### Testing Invoices Plus features in the Sandbox {% /slot %} To test premium features and error handling in the Square Sandbox, you can subscribe to Invoices Plus in the Sandbox Square Dashboard. The following procedure describes how you can subscribe your default test account to Invoices Plus using a test credit card that is never charged. You must repeat these steps for each test account that you want to subscribe to Invoices Plus. 1. Open the [Developer Console](https://developer.squareup.com/apps). 2. On the **Sandbox test accounts** page, choose **Square Dashboard** next to **Default Test Account**. This opens the Sandbox Square Dashboard associated with the default test account. 3. After you sign in and open the Sandbox Square Dashboard as described in the previous steps, navigate to the following page: [https://squareupsandbox.com/dashboard/invoices/learn-more](https://squareupsandbox.com/dashboard/invoices/learn-more). 4. Choose **Try free for 30 days**. 5. To ensure that the subscription doesn't expire after 30 days, provide test credit card information: 1. Open the [Pricing & Subscriptions](https://squareupsandbox.com/dashboard/account/pricing) page for the account. From the main menu, choose **Account & Settings**, expand **Business information**, and then choose **Pricing & Subscriptions**. 1. For the **Invoices Plus** subscription, choose **Subscribe**. 1. Enter the following credit card information, and then choose **Subscribe**: * For the name on the card, enter any name. * For the card number, enter 4111 1111 1111 1111. * For the CVV, enter 111. * For the expiration date, enter 12/40. * For the postal code, enter 22222 or a similar value for your locale. If you already have a test credit card on file for the account, you can just choose **Subscribe**. {% aside type="info" %} In the production environment, each seller using your application must also have an active or trial Invoices Plus subscription to create invoices with premium features. {% /aside %} For more information, see [Square Sandbox](devtools/sandbox/overview). {% /accordion %} {% anchor id="buy-now-pay-later" /%} ## Buy Now Pay Later payments with Afterpay [Afterpay](https://squareup.com/buy-now-pay-later) enables customers to pay invoices using Buy Now Pay Later (BNPL) payments. When customers choose this payment method, Afterpay splits the invoice amount into installments. When the first installment is paid, sellers receive the full invoice amount minus a fee. Afterpay collects the remaining payments. {% aside type="info" %} Afterpay is known as Clearpay in some regions. In this topic, references to Afterpay also apply to Clearpay unless otherwise noted. For pricing information, see [Invoice payments.](payments-pricing#invoice-payments) {% /aside %} To allow customers to make BNPL payments using the Invoices API, set `buy_now_pay_later` to `true` in the `invoice.accepted_payment_methods` field. {% anchor id="buy-now-pay-later-requirements" /%} ### Requirements and processing limits The following requirements apply to BNPL invoice payments: * Seller account requirements: * The seller account must be activated in a [country](#afterpay-countries) where Afterpay invoice payments are supported. This setting is found in the `country` field of the corresponding [Merchant](https://developer.squareup.com/reference/square/objects/merchant) object. * The seller account must be configured to accept Afterpay as a payment method for the Online channel. Sellers can set up payment methods on the [Payment methods](https://app.squareup.com/dashboard/business/payment-methods) page in the Square Dashboard. Square APIs cannot be used to determine whether sellers accept Afterpay payments. If the seller account doesn't accept Afterpay payments, the **Pay by Afterpay** payment option isn't shown on the invoice payment page. * Invoice requirements: * The invoice must contain a single `BALANCE` payment request. Recurring invoices and invoices configured with deposit or installment payment requests aren't supported. * The total invoice amount (including tip) must be within the minimum and maximum processing limits for the country. * Customer requirements: * Customers must have an Afterpay account. Customers who don't already have an account can sign up for one from the invoice payment page. The invoice amount is split into installments that are interest free if paid on time. * Square API version 2021-04-21 or later is required to enable BNPL invoice payments using the Invoices API. However, to access the `buy_now_pay_later` field using a [Square SDK](sdks), you must use a version of the SDK that supports Square API version 2022-10-19 or later. {% anchor id="afterpay-countries" /%} #### Supported countries Currently supported countries and corresponding processing limits are shown in following table: |Country|Minimum invoice amount|Maximum invoice amount| |:------|:------|:------| |Australia (AU)|$1.00|$2,000| |Canada (CA)|$1.00|$2,000| |United Kingdom (UK)|£1.00|£1,000| |United States (US)|$1.00|$4,000| ### How it works If BNPL payments are enabled for the invoice, the **Pay by Afterpay** option is shown on the invoice payment page. The customer can choose this option, sign in to their Afterpay account, and make the first installment payment. Note that the **Pay by Afterpay** option is shown only if the seller accepts Afterpay payments. After the initial payment, the invoice status is set to `PAID` and the seller receives the full invoice amount minus the Afterpay fee. Afterpay assumes the responsibility for collecting the remaining payments from the customer. When creating an invoice, you can enable BNPL payments by setting `buy_now_pay_later` to `true` in the `accepted_payment_methods` field. The following request body excerpt enables the `card`, `square_gift_card`, and `buy_now_pay_later` payment methods: ```json { "invoice": { ... "payment_requests": [ { "request_type": "BALANCE", "due_date": "2022-12-31" } ], "accepted_payment_methods": { "card": true, "square_gift_card": true, "buy_now_pay_later": true } } } ``` Square APIs cannot be used to discover whether sellers accept Afterpay payments. Unless you know through other methods that the seller accepts Afterpay payments, you should enable at least one other payment method. If the seller doesn't accept Afterpay payments, the **Pay by Afterpay** option isn't shown and customers cannot make a payment. Also keep in mind that sellers can disable Afterpay payments after an invoice is created or become ineligible to accept Afterpay payments. In addition, making a BNPL payment requires that customers have (or create) an Afterpay account. If the country of the seller account isn't a supported country, Square returns the following `400 BAD_REQUEST` error: ```json { "code": "BAD_REQUEST", "detail": "Buy now pay later payments are not supported for this location's country", "field": "invoice.accepted_payment_methods", "category": "INVALID_REQUEST_ERROR" } ``` If the invoice is configured with multiple payment requests, Square returns the following `400 BAD_REQUEST` error: ```json { "code": "BAD_REQUEST", "detail": "Buy now pay later payments cannot be enabled for invoices with multiple payment requests", "field": "invoice.accepted_payment_methods", "category": "INVALID_REQUEST_ERROR" } ``` Note that this error is also returned if an invoice that allows `buy_now_pay_later` payments is updated to include another payment request. After the customer successfully pays the initial installment from the invoice payment page, Square does the following: * Sets the invoice status to `PAID`. * Sets the order state to `COMPLETED` and adds payment information to the `tenders` field, as shown in the following excerpt. Afterpay payments have `type` set to `BUY_NOW_PAY_LATER`. You can use the tender's `id` or `payment_id` field to retrieve the corresponding payment for additional information. ```json { "order": { "id": "yUsEDCsfAtaHiewzVUNp0Aexample", "location_id": "LSHCVFexample", "line_items": [ { "uid": "209b68f4-681b-4449-8251-34cfeexample", "quantity": "1", "name": "Winter jacket", "base_price_money": { "amount": 10000, "currency": "USD" }, ... } ], "created_at": "2022-08-22T22:03:08.388Z", "updated_at": "2022-08-23T00:45:39.000Z", "state": "COMPLETED", ... "tenders": [ { "id": "NimOlcvySGXCrL4LHtRTTVexample", "location_id": "LSHCVFexample", "transaction_id": "yUsEDCsfAtaHiewzVUNp0Aexample", "created_at": "2022-08-23T00:45:37Z", "amount_money": { "amount": 10000, "currency": "USD" }, "type": "BUY_NOW_PAY_LATER", "payment_id": "NimOlcvySGXCrL4LHtRTTVexample" } ], ... "net_amount_due_money": { "amount": 0, "currency": "USD" } } } ``` ### Testing Afterpay invoice payments You can test the end-to-end buyer experience for making Afterpay invoice payments in the [Square Sandbox](devtools/sandbox/overview). The following steps describe how you can create a test Afterpay customer account directly from the invoice payment page. 1. Create an order ([example request](https://developer.squareup.com/explorer/square/orders-api/create-order?params=N4IgRg9gJgngCgQwE4ILYFMAu6kGcQBcoESUOhoANhAMYKYCWEAdgPoNSEjAAyA8gGEAggBUAknwByrMQBEAviAA0ISg2bp22VPgIBtUAEcArgmaNMMLgEZl4BLk0AHJAxqbULdFaIg0EY3NCACYABnDQlRpjJCR0ZhofEABVAGVZEHkVZjR0LhF0XEwAAgAhSTgeYvUANwg3dGKnBBgMIPkAXXkskBqcXCZmGwA6UMygA&env=sandbox&v=1)). 2. Create an invoice that enables `buy_now_pay_later` as an accepted payment method ([example request](https://developer.squareup.com/explorer/square/invoices-api/create-invoice?params=N4IgRg9gJgngCgQwE4ILYFMAu6kGcQBcoAlgHYBuExAxuoaAtbQA7ZQD6zCMGpm7GTAAto%2BIiGrIohTEgCu6ADTg5MdqQgB3Tt3YAbBNiQz5S8AlIBrdo2oQ5fEwuW4AjnOTp2Ac2IAzfkkkaQJZBQBfZSh0PWJyHDVBERCQAFEAWQBBAEkAGRBlCGCcdmIU4AB5ACUAEVSq9mya8IKQLh50PnYkdHd0XEwxAG1QKAV2KEM6AhAAJgAGWYBmAFp5gDYVpfnWnr6B9kwYZmmQACFM3MyAOQBhVJBwgF1lZiRiVGQ1HupiZmJOph6BI5AMIBgkKVyrcAKoAZQAKhV0vVGs1HuFIiB4nhiBBSIQQABGAB0O3CQA&env=sandbox&v=1)) and then publish the invoice. 3. Open the invoice payment page. You can find the URL in the `public_url` field that is added to the invoice after it is published (and reaches the `scheduled_at` date, if specified). 4. Choose **Pay by Afterpay**, and then follow the prompts to create an Afterpay customer account. You can provide fake contact information, but the phone number format and address must be valid. * Enter `111111` for the verification code. No SMS messages are sent in the Sandbox. * To link a test credit card with Afterpay, enter `4111 1111 1111 1111` for the card number and `111` for the CVV code. After the payment is processed, it is shown at the bottom of the invoice payment page. {% aside type="info" %} Sandbox test seller accounts are automatically enabled to accept Afterpay payments. The Sandbox ignores Afterpay eligibility checks, such as whether the seller's [business category](https://squareup.com/legal/general/afterpay-merchant-terms) is eligible to accept Afterpay payments. {% /aside %} {% anchor id="cash-app-pay" /%} ## Cash App Pay [Cash App](https://cash.app) is a mobile payment application available in the United States. Sellers with locations in the United States can enable Cash App Pay as an accepted invoice payment method. ### Requirements The following requirements apply to Cash App Pay for invoices: * To enable Cash App Pay as a payment method, the seller account must be activated in the United States. For information about processing rates, see [Invoice payments](payments-pricing#invoice-payments). Square returns the following error for `CreateInvoice` or `UpdateInvoice` requests that set `cash_app_pay` in non-US locations: ```json { "errors": [ { "code": "BAD_REQUEST", "detail": "Cash App payments are not supported for this location's country", "field": "invoice.accepted_payment_methods", "category": "INVALID_REQUEST_ERROR" } ] } ``` If needed, you can check whether the [country](https://developer.squareup.com/reference/square/objects/merchant#definition__property-country) of the corresponding `Merchant` object or the [country](https://developer.squareup.com/reference/square/objects/location#definition__property-country) of the order location is set to `US` before sending the request. * To use Cash App to pay an invoice, the customer must have a Cash App account and install Cash App on a mobile device. Cash App is available only in the United States. * Square API version 2021-04-21 or later is required to configure Cash App Pay using the Invoices API. However, to access the `cash_app_pay` field using a [Square SDK](sdks), you must use a version of the SDK that supports Square API version 2023-07-20 or later. ### How it works When creating an invoice, you can enable Cash App Pay by setting `cash_app_pay` to `true` in the `accepted_payment_methods` field. The following `CreateInvoice` request enables the `card` and `cash_app_pay` payment methods: ```` If Cash App Pay is enabled for the invoice, the **Cash App Pay** option appears on the invoice payment page. * When the payment page is opened in a Desktop web browser, choosing **Cash App Pay** generates a QR code that the customer scans with their mobile device. * When the payment page is opened on a mobile device, choosing **Cash App Pay** deep links to Cash App on the device. After the customer successfully makes a Cash App payment from the invoice payment page, Square does the following: * Updates the invoice status to `PAID`. * Sets `total_completed_amount_money` for the invoice payment request to the amount paid. * Adds payment information to the `tenders` field of the order, as shown in the following excerpt. Cash App payments have `type` set to `WALLET`. ```json { "order": { ... "tenders": [ { "id": "LHtNRTcimvOlySrLGXC4PGexample", "location_id": "LSHCVFexample", "transaction_id": "yUsEUNpDCstaHifAewzV0Aexample", "created_at": "2023-06-22T10:49:45:37Z", "amount_money": { "amount": 2900, "currency": "USD" }, "type": "WALLET", "payment_id": "LHtNRTcimvOlySrLGXC4PGexample" } ], ... } } ``` To get `wallet_details` and other information from the corresponding payment, call `GetPayment` using the `id` or `payment_id` of the tender. * Sets the order state to `COMPLETED` when the order is fully paid. {% aside type="info" %} Square performs [additional actions](invoices-api/pay-refund-invoices#payment-succeeds) after a successful payment. {% /aside %} If the Cash App balance doesn't have enough funds to complete the payment, Square attempts to deduct the entire payment from the linked payment source (debit card or bank account) in the customer's Cash App profile. If there is no linked payment source, the payment is declined. For refunds, payments originating from the Cash App balance are refunded to the Cash App balance. Payments originating from a linked debit card or bank account are refunded to the linked debit card or bank account. For more information about how sellers and buyers use Cash App, see [Accept Payments with Cash App Pay](https://squareup.com/help/article/7635-accept-payments-with-cash-app-pay) and [Cash App Pay](https://cash.app/help/6484-cash-app-pay). ### Testing Cash App Pay invoice payments You can test the end-to-end customer experience for making Cash App Pay invoice payments in the [Square Sandbox](devtools/sandbox/overview). The following steps describe how to enable Cash App Pay for an invoice and then make a Cash App payment from a Desktop browser. 1. Create an order ([example request](https://developer.squareup.com/explorer/square/orders-api/create-order?params=N4IgRg9gJgngCgQwE4ILYFMAu6kGcQBcoAllOqgA4TYB2AxjAPoDW6MhIwAqgHICSARS4BRRgGlhATQC%2BIADQgISMkkKgANhDoJMxCDUakOwADIB5AMIBBACp8zPRnwAisheuI10h7KnwEAbVAARwBXBBpdTHYCEABGeXAEXG8KJGI6b1R9NjUQNAhQyMIAJgBOAAYKhTpQpCR0ehiQLgBlZxBpBRo0dA4zYnUAAjoACwiAcz7pAF1pLpAANxxcPRoOOIA6Cs6gA&env=sandbox&v=1)). 2. Create an invoice with `cash_app_pay` as an accepted payment method ([example request](https://developer.squareup.com/explorer/square/invoices-api/create-invoice?params=N4IgRg9gJgngCgQwE4ILYFMAu6kGcQBcoAllOqgA4TYB2AxjAPoDW6MhIwAqgHICSARS4BRRgGlhATQC%2BIADQhiNAG4RiddIVAQkZJI1IdgAeQBKAEWGnGfc7IUUkxVMiZJ0dYhWLoamLSB0AK64mBAY%2BoYEnADCXADKACrGALJWNnYg0goIdBoU2FCMFAgwGH6MGJgAFtD4RIHIUISYSEHoCnQIuNWMCBQUxaUtbejZIGQANsTKOExVtc3RwikAgnwAMvIgJWW%2BmIzuAI7tofUA2qDHpweYMBSa0QBCqxurPDHC21DtjFAI2A4ACYAAxAgCsAFoAIxAyEAZmhWQAutJxrM8MQIDQONCAHQgrJAA&env=sandbox&v=1)) and then publish the invoice. 3. Pay the invoice: 1. Open the invoice payment page. You can find the URL in the `public_url` field of the published invoice. 2. Choose **Cash App Pay**, and then choose **Continue to Cash App Pay**. 3. Scan the QR code with the camera of your mobile device, which directs you to Cash App's Sandbox test application. 4. Approve the payment. After the payment is processed, the invoice payment page displays payment information. {% anchor id="international-availability-invoices" /%} ## International availability and considerations The Invoices API is supported in the following countries: Australia, Canada, France, Ireland, Japan, Spain, the United Kingdom, and the United States. To use the Invoices API to create and manage invoices, the seller account must be activated in one of these countries. You should be aware of the following location-specific considerations: {% anchor id="recipient-tax-ids" /%} * **Invoice recipient tax IDs -** For sellers in EU countries and the United Kingdom, customer data for the invoice recipient can include a `tax_ids` field that contains the [EU VAT identification number](https://ec.europa.eu/taxation_customs/vat-identification-numbers) of the customer. This tax ID is displayed on the invoice. The following excerpt shows an example invoice recipient that includes the `tax_ids` field: ```json { "invoice": { "id": "inv:0-s0XFqYEBhBWDYERO9C_Zexample", "version": 0, "location_id": "S8GWD5example", "order_id": "4NuiKTlFzWmbLnRz9YfoL8example", ... "primary_recipient": { "customer_id": "HXJKX5BBKGWX34XEMS2example", "given_name": "John", "family_name":"Doe", "email_address":"doe@email.com", "tax_ids": { "eu_vat": "IE3426675K" } } } } ``` Similar to other `InvoiceRecipient` fields, the tax ID is retrieved from the associated customer profile and cannot be changed after the invoice is published. * **Pricing** - Per-transaction pricing for invoice payments varies by location and payment method. For more information, see [Invoice payments](payments-pricing#invoice-payments). * **Buy Now Pay Later payments** - Afterpay (also known as Clearpay) payments enable customers to pay an invoice using interest-free installments. Afterpay payments for Square invoices are supported in the following countries: * Australia * Canada * United Kingdom * United States Sellers in these countries can configure their accounts to use this payment method. For more information, see [Buy Now Pay Later payments with Afterpay](#buy-now-pay-later). * **Cash App Pay** - Sellers can allow customers to pay invoices using [Cash App](https://cash.app), a mobile payment application. This payment method is available only for locations and customers in the United States. For more information, see [Cash App Pay](#cash-app-pay). * **Order service charge** - Only orders with locations in Canada or the United States can include a service charge, provided that the service charge isn't apportioned. Specifically, the following must be true: * The location referenced by the `location_id` of the order or invoice must have `country` set to `CA` or `US`. * The order cannot contain a service charge that has `treatment_type` set to `APPORTIONED_TREATMENT`. This behavior aligns with the seller experience in the Square Dashboard, Square Point of Sale application, and Square Invoices application. {% anchor id="payment-conditions" /%} * **Payment conditions field** - The `payment_conditions` field is available only for sellers in France. This text field contains payment terms and conditions that are displayed on the invoice, such as late payment penalties and early payment discounts. This field is provided so that sellers in France can comply with requirements for documenting this information. The following excerpt shows an example invoice that includes the `payment_conditions` field. The field can contain up to 2000 characters and use `\n` to render a new line. No other formatting characters are supported. ```json { "invoice": { "id": "inv:0-sNXFnYEYEBhBWDRO9Z_Cexample", "version": 0, "location_id": "S8GWD5example", "order_id": "f1XiKTrBzwMBetRz8Yfo9Lexample", ... "payment_conditions": "Cette facture a été envoyée le 7 avril. Celle-ci doit être réglée sous 15 jour(s) à compter de cette date.\nPassé ce délai, une pénalité de retard de 10 % sera appliquée, ainsi qu'une indemnité forfaitaire de 40 EUR due au titre des frais de recouvrement. Pas d'escompte pour paiement anticipé." } } } ``` If this field is included in `CreateInvoice` or `UpdateInvoice` requests for other locations, Square returns the following error: ```json { "errors": [ { "category": "INVALID_REQUEST_ERROR", "code": "BAD_REQUEST", "detail": "Payment conditions are not supported for this location's country", "field": "invoice.payment_conditions" } ] } ``` Before attempting to set the `payment_conditions` field, you can call [RetrieveMerchant](https://developer.squareup.com/reference/square/merchants-api/retrieve-merchant) and check the [country](https://developer.squareup.com/reference/square/objects/Merchant#definition__property-country) of the seller account. ## Webhooks You can subscribe to webhook notifications for the following invoice events. {% table %} * Event * Permission {% width="140px" %} * Description --- * [invoice.created](https://developer.squareup.com/reference/square/invoices-api/webhooks/invoice.created) * `INVOICES_READ` * A draft invoice was created. --- * [invoice.published](https://developer.squareup.com/reference/square/invoices-api/webhooks/invoice.published) * `INVOICES_READ` * An invoice was published. This also applies to invoices that are published but scheduled to be processed at a later time. --- * [invoice.updated](https://developer.squareup.com/reference/square/invoices-api/webhooks/invoice.updated) * `INVOICES_READ` * An invoice was changed. This event is also invoked following `invoice.published` and `invoice.canceled` events. Note that link expiry and dynamic link generation for the {% tooltip text="public_url" %}A temporary link to the Square-hosted payment page where the customer can pay the invoice. If the link expires, customers can provide the email address or phone number associated with the invoice and request a new link directly from the expired payment page.{% /tooltip %} field don't trigger an event. --- * [invoice.payment_made](https://developer.squareup.com/reference/square/invoices-api/webhooks/invoice.payment_made) * `INVOICES_READ` * A payment was made for an invoice. --- * [invoice.scheduled_charge_failed](https://developer.squareup.com/reference/square/invoices-api/webhooks/invoice.scheduled_charge_failed) * `INVOICES_READ` * A scheduled automatic payment has failed. --- * [invoice.canceled](https://developer.squareup.com/reference/square/invoices-api/webhooks/invoice.canceled) * `INVOICES_READ` * An invoice was canceled. --- * [invoice.refunded](https://developer.squareup.com/reference/square/invoices-api/webhooks/invoice.refunded) * `INVOICES_READ` * A refund was processed for an invoice. --- * [invoice.deleted](https://developer.squareup.com/reference/square/invoices-api/webhooks/invoice.deleted) * `INVOICES_READ` * A draft invoice was deleted. A deleted invoice is removed entirely from the seller account (including any attachments) and cannot be retrieved. {% /table %} Invoice event notifications include the invoice ID and the invoice object. The exception is `invoice.deleted`, which doesn't include the invoice object. The following is an example `invoice.created` notification: ```json { "merchant_id": "031FEVexample", "location_id": "S8GWD5example", "type": "invoice.created", "event_id": "b407d383-c47f-4eeb-6785-c235Aexample", "created_at": "2021-11-22T21:45:11Z", "data": { "type": "invoice", "id": "inv:0-ChDjw6T3HRaM2WeOo32zYexample", "object": { "invoice": { "accepted_payment_methods": { "card": true, "square_gift_card": true, "bank_account": false, "buy_now_pay_later": true, "cash_app_pay": false }, "created_at": "2021-11-22T21:45:11Z", "delivery_method": "EMAIL", "id": "inv:0-ChDjw6T3HRaM2WeOo32zYexample", "invoice_number": "2021_04523", "location_id": "S8GWD5example", "order_id": "Wc3lDgzNtDKLH01jwhB4example", "payment_requests": [ { "automatic_payment_source": "NONE", "computed_amount_money": { "amount": 5581, "currency": "USD" }, "due_date": "2021-12-31", "request_type": "BALANCE", "tipping_enabled": false, "total_completed_amount_money": { "amount": 0, "currency": "USD" }, "uid": "255e2f25-0487-4e29-8457-87baa60f50ac" } ], "primary_recipient": { "customer_id": "HXJKX5BBKGWX34XEMS2example", "given_name": "John", "family_name":"Doe", "email_address":"doe@email.com" }, "status": "DRAFT", "timezone": "America/Los_Angeles", "title": "Downtown Print Shop", "updated_at": "2021-11-22T21:45:11Z", "version": 0 } } } } ``` For more information about subscribing to events and validating notifications, see [Square Webhooks](webhooks/overview). {% accordion expanded=false %} {% slot "heading" %} ## Migration notes {% /slot %} The following migration notes apply to the Invoices API. {% anchor id="migrate-invoices-paid-subscription" /%} {% accordion expanded=false %} {% slot "heading" %} ### 2021-08-21: Premium features require an Invoices Plus subscription {% /slot %} [Square Invoices Plus](https://squareup.com/help/us/en/article/7642-get-started-with-invoices-plus) is a paid subscription plan that provides access to premium invoice features. The subscription includes access to the following features that are supported by the Invoices API and that were previously available without a subscription: * Custom fields * Installment payments **Effective date:** September 8, 2021 To create invoices with premium features after the effective date, the seller for whom you are creating the invoice must have an active (or trial) Invoices Plus subscription. For more information, see [Premium features available with Invoices Plus](#invoices-plus-subscription). {% aside type="info" %} This change applies across all Square versions for new invoices only. Invoices that were created before the effective date and have premium features can continue to use the features without a subscription. This support includes updating the invoice to add or change premium features. {% /aside %} Your application must implement error handling logic for `CreateInvoice` or `UpdateInvoice` requests that catches the error returned if the invoice contains an unsupported feature. You must then remove any premium features from the invoice and retry the request. Specifically: * `custom_fields` must be empty or omitted. * `payment_requests` cannot contain a payment request of the `INSTALLMENT` type. The Invoices API returns one of the following error codes if the invoice contains an unsupported premium feature. The `detail` message indicates whether the unsupported feature is custom fields or installment payments. For example, the following errors are returned for a request that contains unsupported installment payments: * **Square version 2021-08-18 and later:** `403 MERCHANT_SUBSCRIPTION_NOT_FOUND` ```json { "errors": [ { "category": "MERCHANT_SUBSCRIPTION_ERROR", "code": "MERCHANT_SUBSCRIPTION_NOT_FOUND", "detail": "Payment request type INSTALLMENT requires an Invoices Plus subscription." } ] } ``` * **Square version 2021-07-21 and earlier:** `400 BAD REQUEST` ```json { "errors": [ { "category": "INVALID_REQUEST_ERROR", "code": "BAD_REQUEST", "detail": "Payment request type INSTALLMENT requires an Invoices Plus subscription." } ] } ``` {% /accordion %} {% anchor id="migrate-Invoice.accepted_payment_method" /%} {% accordion expanded=false %} {% slot "heading" %} ### 2021-04-21: New Invoice.accepted_payment_method {% /slot %} The `Invoice.accepted_payment_method` field represents the payment methods that customers can use to make a payment on the Square-hosted invoice payment page. In Square version 2021-04-21 and later, this field is required to create an invoice and is included in returned invoices. At least one payment method must be set to `true`. For valid values, see [InvoiceAcceptedPaymentMethods](https://developer.squareup.com/reference/square/objects/InvoiceAcceptedPaymentMethods). This setting is independent of any automatic payment requests for the invoice. It is also independent of the default **Payment method** setting that sellers can configure for invoices created from Square products. The default **Payment method** setting cannot be accessed by the Invoices API. {% /accordion %} {% anchor id="migrate-InvoicePaymentRequest.request_method" /%} {% accordion expanded=false %} {% slot "heading" %} ### 2021-01-21: Deprecated InvoicePaymentRequest.request_method {% /slot %} The `InvoicePaymentRequest.request_method` field and corresponding `InvoiceRequestMethod` enum are deprecated. Request method options are now represented by the following fields: * `Invoice.delivery_method` specifies how Square should send invoices, reminders, and receipts to the customer. For valid values, see [InvoiceDeliveryMethod](https://developer.squareup.com/reference/square/enums/InvoiceDeliveryMethod). * `InvoicePaymentRequest.automatic_payment_source` specifies the payment method for an automatic payment. For valid values, see [InvoiceAutomaticPaymentSource](https://developer.squareup.com/reference/square/enums/InvoiceAutomaticPaymentSource). **Deprecated in version:** 2021-01-21 **Retired in version:** TBD The Invoices API continues to accept `request_method` in create and update requests until the field is retired, but you should use `delivery_method` and `automatic_payment_source` when possible. However, starting in version 2021-01-21, `request_method` isn't included in returned `Invoice` objects. The API migrates `request_method` options in responses as follows: | request_method | delivery_method | automatic_payment_source | |------|------|------| | `EMAIL` | `EMAIL` | `NONE` | | `CHARGE_CARD_ON_FILE` | `EMAIL` | `CARD_ON_FILE` | | `CHARGE_BANK_ON_FILE` | `EMAIL` | `BANK_ON_FILE` | | `SHARE_MANUALLY` | `SHARE_MANUALLY` | `NONE` | | `SMS` | `SMS` | `NONE` | | `SMS_CHARGE_CARD_ON_FILE` | `SMS` | `CARD_ON_FILE` | | `SMS_CHARGE_BANK_ON_FILE` | `SMS` | `BANK_ON_FILE` | {% aside type="info" %} The following read-only fields were added for backward compatibility: * `CHARGE_BANK_ON_FILE`, added in version 2021-01-21. * `SMS`, `SMS_CHARGE_CARD_ON_FILE`, and `SMS_CHARGE_BANK_ON_FILE`, added in version 2021-03-17. {% /aside %} {% /accordion %} {% /accordion %} --- # Mobile Authorization API > Source: https://developer.squareup.com/docs/mobile-authz/what-it-does > Status: DEPRECATED > Languages: All > Platforms: All Get an overview of the Square Mobile Authorization API for solutions like the Reader SDK. **Applies to:** [Mobile Authorization API](https://developer.squareup.com/reference/square/mobile-authorization-api) | [Reader SDK](reader-sdk/what-it-does) | [In-App Payments SDK](in-app-payments-sdk/what-it-does) | [OAuth API](oauth-api/overview) {% subheading %}Use the Mobile Authorization API to initialize Square mobile solutions to accept payments.{% /subheading %} {% toc hide=true /%} {% aside type="warning" %} The Mobile Authorization API is used by the Reader SDK, which is now deprecated. This API will be retired along with the Reader SDK on **December 31, 2025**. Developers should [migrate their application to the Mobile Payments SDK](mobile-payments-sdk/migrate), which is the successor to the Reader SDK and contains its own authorization methods. {% /aside %} ## Overview The Mobile Authorization API accepts an account credential (OAuth token or personal access token) and location ID and returns an authorization code that custom mobile applications can use to initialize Square mobile solutions like the Reader SDK to accept payments using Square hardware. ## Requirements and limitations * The Mobile Authorization API accepts requests through HTTPS and TLS 1.2. Connections through HTTP aren't supported. * The Mobile Authorization API isn't supported in the Square Sandbox. For alternative recommendations, see [Testing for supported countries](payment-card-support-by-country#testing-for-supported-countries). * The authorization service uses PHP version 5.4 or later. PHP is used for the example code because it's a common web language and relatively approachable for new developers. However, Square APIs are language agnostic and the setup steps are comparable across languages. * The authorization service uses the Square PHP SDK. Installing the SDK is optional. As long as you can package and receive JSON messages, you can use Square APIs, but installing the SDK makes things easier. {% aside type="info" %} The Reader SDK is currently the only Square mobile solution that requires a mobile authorization flow. The [In-App Payments SDK](in-app-payments-sdk/what-it-does) isn't initialized with an authorization code and therefore doesn't use the Mobile Authorization API. {% /aside %} ## Product components The Mobile Authorization API is part of the Square API suite and is comprised of a client API instance, authorization request body, and authorization response body. It inherits the Connect Configuration object so that the API client can be initialized with an access token such as an OAuth or personal access token. To make calls with this API, a developer must create a backend service that uses the [OAuth API](https://developer.squareup.com/reference/square/oauth-api) to take a user through the OAuth flow to get an authentication token. The token is used by the Mobile Authorization API to get a short-lived authorization code for used with the [Reader SDK](reader-sdk/what-it-does). The mobile authorization flow is initiated by mobile device logic in a call to the backend service and is completed when the backend service returns a mobile authorization code to the mobile application. ## See also * [Mobile Authorization API: How It Works](mobile-authz/how-it-works) * [Build with the Mobile Authorization API](mobile-authz/build-with-mobile-authz) --- # Square .NET SDK Quickstart > Source: https://developer.squareup.com/docs/sdks/dotnet/quick-start > Status: PUBLIC > Languages: All > Platforms: All Learn how to quickly set up and test the Square .NET SDK. {% subheading %}Learn how to quickly set up and test the Square .NET SDK.{% /subheading %} {% toc hide=true /%} ## Prepare for the Quickstart Before you begin, you need a Square account and account credentials. You use the Square Sandbox for the Quickstart exercise. 1. Create a Square account and an application. For more information, see [Create an Account and Application](get-started/create-account-and-application). 2. Get a Sandbox access token from the Developer Console. For more information, see [Get a personal access token](build-basics/access-tokens#get-a-personal-access-token). 3. [Install .NET](https://learn.microsoft.com/en-us/dotnet/core/install/) if you don't already have it on your computer. You can now use one of the following workflows depending on whether you're using Visual Studio. {% aside type="info" %} If you prefer to skip the following setup steps, download the [Square .NET SDK Quickstart](https://github.com/Square-Developers/dotnet-getting-started) sample and follow the instructions in the README. {% /aside %} ## Create a project 1. Open a new terminal window. 2. Find or create a new folder for your .NET project. 3. In that folder, run the following command to create a new .NET project: ```bash dotnet new console --name Quickstart ``` 3. Add an application settings file to the project to store credentials. Go to the newly created Quickstart folder and add the following `appsettings.json` file, replacing `YOUR-SANDBOX-ACCESS-TOKEN` with your Sandbox access token: ```json { "AppSettings": { "AccessToken": "YOUR-SANDBOX-ACCESS-TOKEN" } } ``` 4. Run the following commands to install the necessary packages: ```bash dotnet add package Square dotnet add package Microsoft.Extensions.Configuration.Json dotnet add package Microsoft.Extensions.Configuration ``` The `Microsoft.Extensions.Configuration` and `package Microsoft.Extensions.Configuration.Json` packages are used to manage the application settings file. ## Write code 1. In your Quickstart folder, find and open `Program.cs` in your preferred editor. 2. Replace the contents with the following code and save the file: ```csharp using Square; using Square.Locations; using Microsoft.Extensions.Configuration; namespace ExploreLocationsAPI { public class Program { private static SquareClient client = null!; private static IConfigurationRoot config = null!; static async Task Main(string[] args) { var builder = new ConfigurationBuilder() .AddJsonFile($"appsettings.json", true, true); config = builder.Build(); var accessToken = config["AppSettings:AccessToken"]; client = new SquareClient( accessToken, new ClientOptions { BaseUrl = SquareEnvironment.Sandbox } ); await RetrieveLocationsAsync(); } static async Task RetrieveLocationsAsync() { try { var response = await client.Locations.ListAsync(); if (response.Locations != null) { foreach (var location in response.Locations) { Console.WriteLine($"location: country = {location.Country} name = {location.Name}"); } } else { Console.WriteLine("No locations found."); } } catch (SquareApiException e) { Console.WriteLine("SquareApiException occurred:"); Console.WriteLine("Status Code: {0}", e.StatusCode); Console.WriteLine("Error: {0}", e.Message); } catch (Exception e) { Console.WriteLine($"Exception occurred: {e.Message}"); } } } } ``` This code does the following: * Reads your Square Sandbox access token from the `appsettings.json` file. * Creates a new client using the access token. * Calls the `ListAsync` method on the Locations API to retrieve the locations for your Square account. * If the request is successful, the code prints the location information in the terminal. ## Run the application Run the following command: ```bash dotnet run ``` You should see at least one location listed (Square creates one Sandbox location when you create a Square account). --- # How It Works > Source: https://developer.squareup.com/docs/mobile-authz/how-it-works > Status: DEPRECATED > Languages: All > Platforms: All Use the Mobile Authorization API to request authorization tokens to initialize Square mobile solutions like the Reader SDK. **Applies to:** [Mobile Authorization API](mobile-authz/what-it-does) | [Reader SDK](reader-sdk/what-it-does) | [Locations API](locations-api) {% subheading %}Use the Mobile Authorization API to request authorization tokens to initialize Square mobile solutions like the Reader SDK.{% /subheading %} {% toc hide=true /%} {% aside type="warning" %} The Mobile Authorization API is used by the Reader SDK, which is now deprecated. This API will be retired along with the Reader SDK on **December 31, 2025**. Developers should [migrate their application to the Mobile Payments SDK](mobile-payments-sdk/migrate), which is the successor to the Reader SDK and contains its own authorization methods. {% /aside %} ## Overview The [Mobile Authorization API](https://developer.squareup.com/reference/square/mobile-authorization-api) accepts an account credential (an OAuth token or a personal access token) and location ID and then returns an authorization code that custom mobile applications can use to initialize Square mobile solutions to accept payments using Square hardware. In general, requesting a mobile authorization code involves the following steps: 1. The mobile application calls the custom authorization service. 1. The authorization service completes the [Square OAuth flow](oauth-api/how-it-works) and obtains a valid OAuth token. 1. The authorization service uses the Locations API to call the [ListLocations](https://developer.squareup.com/reference/square/locations-api/listlocations) endpoint and gather a list of locations associated with the target account. 1. The authorization service API selects a target location ID programmatically or with a web UI. 1. The authorization service calls `CreateMobileAuthorizationCode` with the OAuth token and selected location ID. 1. The authorization service returns a mobile authorization code to the mobile application. ![A diagram showing a flowchart of the Mobile Authorization Service process.](//images.ctfassets.net/1nw4q0oohfju/7BMCVSHi6bb0uzAKMtRZ5p/bb541c87a5638b97e2832ec5ad7cd253/mobile-authorization-overview-flow.png) {% aside type="info" %} Mobile authorization codes are short lived and should be used immediately to authorize mobile solutions like the Reader SDK. Mobile authorization doesn't expire after a set amount of time. Authorization remains valid unless it's explicitly revoked (for example, by calling `deauthorize` in the Reader SDK) or the authorized application fails to take a payment within 90 days. {% /aside %} ## See also * [Build with the Mobile Authorization API](mobile-authz/build-with-mobile-authz) * [Request a Mobile Authorization Code on the Command Line](mobile-authz/cookbook/mobile-code-with-curl) --- # Build with the Mobile Authorization API > Source: https://developer.squareup.com/docs/mobile-authz/build-with-mobile-authz > Status: DEPRECATED > Languages: All > Platforms: All Build with the Mobile Authorization API to request authorization tokens to initialize Square mobile solutions like the Reader SDK. **Applies to:** [Mobile Authorization API](mobile-authz/what-it-does) | [Reader SDK](reader-sdk/what-it-does) {% subheading %}Use the Mobile Authorization API to request authorization tokens to initialize Square mobile solutions like the Reader SDK.{% /subheading %} {% toc hide=true /%} {% aside type="warning" %} The Mobile Authorization API is used by the Reader SDK, which is now deprecated. This API will be retired along with the Reader SDK on **December 31, 2025**. Developers should [migrate their application to the Mobile Payments SDK](mobile-payments-sdk/migrate), which is the successor to the Reader SDK and contains its own authorization methods. {% /aside %} ## Overview To embed Square mobile development solutions, you must create a service to request mobile authorization codes. You should integrate this into your existing OAuth process if possible. ## Requirements and limitations To build with the [Mobile Authorization API](https://developer.squareup.com/reference/square/mobile-authorization-api), the following must be true: * **You're using HTTPS** - HTTPS is required for all production Square API calls. HTTP calls are only supported for developing and testing on localhost. * **You're using production credentials** - The Mobile Authorization API isn't supported in the Square Sandbox. Additionally, you need the following information: * **An active location ID** - Copy a valid developer account location ID from the **Production** mode **Locations** setting page of your Square application in the Developer Console. * **A valid access token** - For more information, see [Access Tokens and Other Square Credentials](build-basics/access-tokens). ## Request a mobile authorization code Add code to use the location ID and OAuth token to request a mobile authorization code. The authorization service should return the mobile authorization code to the calling application but for the sake of this example, Square simply prints it to the screen. ```` {% aside type="important" %} Mobile authorization codes are short lived and should be used immediately to authorize mobile solutions like the Reader SDK. Mobile authorization doesn't expire after a set amount of time. Authorization remains valid unless it's explicitly revoked (for example, by calling `deauthorize` in the Reader SDK) or the authorized application fails to take a payment within 90 days. {% /aside %} ## See also * [Mobile Authorization API](mobile-authz/what-it-does) * [Mobile Authorization API: How It Works](mobile-authz/how-it-works) --- # Request a Mobile Authorization Code on the Command Line > Source: https://developer.squareup.com/docs/mobile-authz/cookbook/mobile-code-with-curl > Status: DEPRECATED > Languages: cURL, PowerShell > Platforms: Command Line **Applies to:** [Mobile Authorization API](mobile-authz/what-it-does) | [Reader SDK](reader-sdk/what-it-does) {% subheading %}Learn how to request authorization tokens with a command-line tool to initialize Square mobile solutions like the Reader SDK.{% /subheading %} {% line-break /%} {% toc hide=true /%} {% aside type="warning" %} The Mobile Authorization API is used by the Reader SDK, which is now deprecated. This API will be retired along with the Reader SDK on **December 31, 2025**. Developers should [migrate their application to the Mobile Payments SDK](mobile-payments-sdk/migrate), which is the successor to the Reader SDK and contains its own authorization methods. {% /aside %} ## Requirements and limitations * **An active location ID** - Copy a valid developer account location ID from the **Production** mode **Locations** settings page of your Square application in the Developer Console. * **A valid access token** - For more information, see [Access Tokens and Other Square Credentials](build-basics/access-tokens). ## Generate a mobile authorization code You should generate mobile authorization codes programmatically because they're short lived and cannot be hardcoded or reused. You might, however, need to generate a mobile authorization code manually during development. To manually generate a mobile authorization code: 1. Open the [Developer Console](https://developer.squareup.com/apps). 1. In the left pane, choose **Credentials**, and then copy your personal access token from the **Credentials** page. 1. In the left pane, choose **Locations**, and then copy an active location ID from the **Locations** page. [Context: cURL, Command Line] 4. Paste the values into the following cURL command: ```bash curl https://connect.squareup.com/mobile/authorization-code \ -H 'Content-Type: application/json' \ -H 'Authorization: Bearer YOUR_PERSONAL_ACCESS_TOKEN' \ -d '{"location_id":"YOUR_LOCATION_ID"}' ``` You should get a response that looks like this: ```json squareup.com/mobile/authorization-code { "authorization_code": "YOUR_MOBILE_AUTHORIZATION_CODE", "expires_at": "2018-05-11T02:05:07Z" } ``` ## See also * [Mobile Authorization API: How It Works](mobile-authz/how-it-works) * [Build with the Mobile Authorization API](mobile-authz/build-with-mobile-authz) [Context: PowerShell, Command Line] 4. Paste the values into the following PowerShell command: ```powershell $authHeader = @{ Authorization = 'Bearer {0}' -f "ACCESS_TOKEN" } Invoke-RestMethod -Uri https://connect.squareup.com/mobile/authorization-code | -Method Post | -ContentType "application/json" | -Headers $authHeader | -Body '{"location_id":"YOUR_LOCATION_ID"}' ``` You should get a response that looks like this: ```bash squareup.com/mobile/authorization-code { "authorization_code": "YOUR_MOBILE_AUTHORIZATION_CODE", "expires_at": "2018-05-11T02:05:07Z" } ``` ## See also * [Mobile Authorization API: How It Works](mobile-authz/how-it-works) * [Build with the Mobile Authorization API](mobile-authz/build-with-mobile-authz) --- # Cancel or Delete Invoices > Source: https://developer.squareup.com/docs/invoices-api/cancel-delete-invoices > Status: PUBLIC > Languages: All > Platforms: All Learn how to use the CancelInvoice and DeleteInvoice endpoints in the Square Invoices API to cancel a published invoice or delete a draft invoice. **Applies to:** [Invoices API](invoices-api/overview) {% subheading %}Learn how to use Invoices API endpoints to cancel a published invoice or delete a draft invoice.{% /subheading %} {% toc hide=true /%} {% anchor id="cancel-invoice" /%} ## Cancel an invoice To cancel a published invoice, call [CancelInvoice](https://developer.squareup.com/reference/square/invoices-api/cancel-invoice) and provide the following information: * The ID of the invoice to cancel. The invoice must be in the `SCHEDULED`, `UNPAID`, or `PARTIALLY_PAID` state. * The current version of the invoice. If you need to get the ID and version, call [SearchInvoices](https://developer.squareup.com/reference/square/invoices-api/search-invoices) or [ListInvoices](https://developer.squareup.com/reference/square/invoices-api/list-invoices). If you have the ID but need the version, call [GetInvoice](https://developer.squareup.com/reference/square/invoices-api/get-invoice). {% tabset %} {% tab id="Request" %} The following is an example request: ```` {% /tab %} {% tab id="Success response" %} If the request succeeds, Square returns a `200` status code and the canceled invoice, as shown in the following excerpt: ```json { "invoice": { "id": "gt2zv1z6mnUm1V7example", "version": 2, "location_id": "S8GWD5example", "order_id": "AdSjVqPCzOAQqvTnzy46VLexample", ... "status": "CANCELED", ... } } ``` {% /tab %} {% tab id="Error response" %} If the request fails, Square returns a status code ranging from `400` to `599` and an `errors` field containing error information. ```json no_ { "errors": [ { "code": "VERSION_MISMATCH", "detail": "Version is not up to date", "field": "version", "category": "INVALID_REQUEST_ERROR" } ] } ``` {% /tab %} {% /tabset %} After an invoice is canceled, Square does the following: * Sets the `status` of the invoice to `CANCELED`. Canceled invoices remain accessible in the seller account and are returned by `GetInvoice`, `ListInvoices`, and `SearchInvoices` requests. * Updates the associated order based on the invoice status: * `SCHEDULED` or `UNPAID` invoices - Sets the order `state` to `CANCELED` and sets the `state` of any open fulfillments on the order to `CANCELED`. * `PARTIALLY_PAID` invoices - Sets the order `state` to `COMPLETED` and replaces existing line items with a new `CUSTOM_AMOUNT` line item totaling the partially paid amount. Square doesn't automatically refund any payment amount. * Stops any automatic scheduled actions, such as sending reminders or charging a card on file. Sellers can no longer collect payments from a canceled invoice. * Notifies the seller, if the **Canceled** notification is enabled in the seller's notification settings. * Notifies the customer, as determined by the `delivery_method` setting for the invoice: * For `EMAIL`, Square sends an email notification. * For `SMS`, Square sends a text message. * For `SHARE_MANUALLY`, Square doesn't notify the customer. * Invokes `invoice.updated` and `invoice.canceled` [webhook events](invoices-api/overview#webhooks). `order.updated` events are also invoked after Square updates the associated order. You cannot cancel invoices in the `DRAFT` state or in the `PAID`, `REFUNDED`, `CANCELED`, or `FAILED` terminal state. Note that you can [delete](#delete-invoice) a `DRAFT` invoice. ### Deleted customers Invoices aren't automatically updated or canceled if the customer profile assigned as the invoice recipient is deleted from the Customer Directory. If the invoice has remaining scheduled payments, Square continues to send the invoice to the `primary_recipient.email address`. Any remaining automatic payments fail, but the customer can still pay the invoice from the Square-hosted invoice payment page. Consider canceling these invoices if there isn't a valid reason to keep them. You can subscribe to the [customer.deleted](https://developer.squareup.com/reference/square/customers-api/webhooks/customer.deleted) webhook event to be notified when customers are deleted. {% anchor id="delete-invoice" /%} ## Delete an invoice To delete an invoice, call [DeleteInvoice](https://developer.squareup.com/reference/square/invoices-api/delete-invoice) and provide the following information: * The ID of the invoice to delete. The invoice must be in the `DRAFT` state. * The current version of the invoice. You can optionally provide this in the `version` query parameter to enable [optimistic concurrency control](build-basics/common-api-patterns/optimistic-concurrency). If you need to get the ID and version, call [SearchInvoices](https://developer.squareup.com/reference/square/invoices-api/search-invoices) or [ListInvoices](https://developer.squareup.com/reference/square/invoices-api/list-invoices). If you have the ID but need the version, call [GetInvoice](https://developer.squareup.com/reference/square/invoices-api/get-invoice). {% tabset %} {% tab id="Request" %} The following is an example request: ```` {% /tab %} {% tab id="Success response" %} If the request succeeds, Square returns a `200` status code and an empty object. ```json no_ {} ``` {% /tab %} {% tab id="Error response" %} If the request fails, Square returns a status code ranging from `400` to `599` and an `errors` field containing error information. ```json no_ { "errors": [ { "code": "BAD_REQUEST", "detail": "Only DRAFT invoices can be deleted", "category": "INVALID_REQUEST_ERROR" } ] } ``` {% /tab %} {% /tabset %} After an invoice is deleted, Square does the following: * Removes the invoice from the seller account. Deleted invoices aren't returned by `GetInvoice`, `ListInvoices`, or `SearchInvoices` requests. * Permanently deletes any [attachments](invoices-api/attachments). * Changes the `state` of the associated order to `CANCELED`. * Invokes an `invoice.deleted` [webhook event](invoices-api/overview#webhooks). The `order.updated` event is also invoked after Square sets the associated order to the `CANCELED` state. ## See also * [Invoices API](invoices-api/overview) * [API Reference: Invoices API](https://developer.squareup.com/reference/square/invoices-api) --- # Pay or Refund Invoices > Source: https://developer.squareup.com/docs/invoices-api/pay-refund-invoices > Status: PUBLIC > Languages: All > Platforms: All Learn how Square handles invoice payments and how to retrieve and refund an invoice payment. **Applies to:** [Invoices API](invoices-api/overview) | [Refunds API](refunds-api/overview) | [Payments API](payments-refunds) | [Orders API](orders-api/what-it-does) {% subheading %}Learn how Square handles invoice payments and how to retrieve and refund an invoice payment.{% /subheading %} {% toc hide=true /%} ## Overview An invoice defines a payment schedule, supported payment methods, and other settings that determine how it can be paid. After the invoice is published, Square manages automatic invoice payments and payments that customers make on the invoice payment page. Square APIs cannot be used to pay for invoices or to manage their payment status. However, developers can use the [Refunds API](https://developer.squareup.com/reference/square/refunds-api) to refund invoice payments. {% anchor id="pay-invoice" /%} ## Pay an invoice Square supports the following methods for paying invoices: * Customers make a payment directly on the invoice payment page using an accepted payment method. The payment page is a Square-hosted web page where the customer can view and pay the invoice. * Square initiates an automatic payment on the due date configured for a payment request. * Customers remit payment directly to the seller, who then records the payment in the Square Dashboard, Square Point of Sale, or Square Invoices application. {% aside type="info" %} Applications cannot use Square APIs to take payments for invoices or to manage their payment status. In addition, after an order is associated with an invoice, Square APIs cannot be used to pay the order directly. {% /aside %} Square manages payment flows based on invoice settings, such as `payment_requests` and `accepted_payment_methods`. ### How it works After an invoice is published and the `scheduled_at` date (if specified) is reached, Square generates the invoice payment page and adds a `public_url` field that contains the payment link for the invoice. The following is an example payment link: >https://squareup.com/pay-invoice/invtmp:5e22a2c2-47c1-46d6-b061-808764dfe2b9 If a customer provides payment information on this page, Square processes the payment. If the invoice is configured for automatic payments, Square charges the specified card on file on the `due_date` of the payment request or initiates a bank transfer if the customer approves the payment. The customer receives a request to approve the payment when the invoice is sent or the invoice is updated. Invoice payment links are temporary and expire after a certain period. Customers can provide the email address or phone number associated with the invoice and request a new link directly from the expired payment page, so no action is required from the developer. However, if you need to share a payment link with the customer a few days or more after it was generated, you should retrieve the invoice first to automatically generate a new up-to-date link. Note that link expiry and dynamic link generation don't trigger `invoice.updated` webhook events. #### Payment succeeds After an invoice payment is made, Square does the following: * Sets the invoice `status` to `PAID`, `PAYMENT_PENDING`, or `PARTIALLY_PAID` and sets the `total_completed_amount_money` of the payment request to the amount paid. * Adds payment information to the associated order. * Sets the order `state` to `COMPLETED` when the order is fully paid. * Notifies the seller, if the **Paid** notification is enabled in the seller's notification settings. * Sends a receipt to the customer, as determined by the `delivery_method` setting for the invoice: * `EMAIL` - Square sends an email to the customer. * `SMS` - Square sends a text message to the customer unless the customer has opted out of text message updates from Square invoices. * `SHARE_MANUALLY` - Square doesn't send a receipt to the customer. * Cancels any `PENDING` reminders for the corresponding payment request by setting the reminder status to `NOT_APPLICABLE`. * Triggers an `invoice.payment_made` [webhook event](invoices-api/overview#webhooks), along with `order.updated`, `payment.created`, and `payment.updated` events. * Updates the invoice payment page, Square Dashboard, Square Point of Sale, and Square Invoices application with the payment status, schedule, and history. #### Automatic payment fails If an automatic payment fails, Square does the following: * Sets the `automatic_payment_source` field of all payment requests for the invoice to `NONE`. * Notifies the seller. * Emails an invoice to the customer that contains a link to the invoice payment page where the customer can pay the amount due. * Triggers an `invoice.scheduled_charge_failed` [webhook event.](invoices-api/overview#webhooks) Depending on the cause of the failure, Square might emit payment events, such as a `payment.created` with a status of `FAILED`. Error information indicating why the payment failed isn't available in the webhook payload or corresponding payment. In this case, you or the seller might need to contact the customer. #### Payment overdue Square takes no explicit action if an invoice payment becomes overdue. However, you can schedule reminders to be sent if the payment isn't made by the due date. {% aside type="info" %} If needed, you can determine whether a payment is overdue by [retrieving the invoice](invoices-api/retrieve-list-search-invoices) after the due date and comparing the `total_completed_amount_money` and `computed_amount_money` amounts in the payment request. {% /aside %} For more information about payment-related invoice settings, see [Configuring payment requests](invoices-api/create-publish-invoices#payment-requests) and [Configuring how Square processes an invoice.](invoices-api/create-publish-invoices#configure-invoice-processing) {% anchor id="retrieve-invoice-payment" /%} ### Retrieve an invoice payment Although Square APIs cannot be used to pay an invoice, you can use Square APIs to retrieve payments that were made for an invoice. You can get the payment ID from the order that is associated with the invoice. Orders store a record of payments in the `tenders` field. {% aside type="info" %} When tracking payment history for an invoice, remember that the `customer_id` associated with an invoice represents the invoice recipient. This might not be the same customer associated with the underlying order or with invoice payments. {% /aside %} 1. To retrieve the invoice, call [GetInvoice](https://developer.squareup.com/reference/square/invoices-api/get-invoice) and provide the invoice ID. If you don't have the invoice ID, call [ListInvoices](https://developer.squareup.com/reference/square/invoices-api/list-invoices) or [SearchInvoices](https://developer.squareup.com/reference/square/invoices-api/search-invoices). ```` 2. Copy the `order_id` from the response. 3. To retrieve the order, call [RetrieveOrder](https://developer.squareup.com/reference/square/orders-api/retrieve-order) and provide the order ID. ```` The following excerpt of an example response shows the `tenders` field: ```json { "order": { "id": "DIxOlEityYPJtcuvKTVKT1example", "location_id": "P3CCK6example", ... "tenders": [ { "id": "EnZdNAlWCmfh6Mt5FMN3example", "location_id": "P3CCK6example", "transaction_id": "lgwOlEityYPJtcuvKTVKT1example", "created_at": "2020-08-06T02:47:36.293Z", "amount_money": { "amount": 1000, "currency": "USD" }, "type": "CARD", "card_details": { "status": "CAPTURED", "card": { "card_brand": "AMERICAN_EXPRESS", "last_4": "6550" }, "entry_method": "ON_FILE" }, "tip_money": { "amount": 0, "currency": "USD" } } ], ... } } ``` 4. Copy the `id` of the tender that corresponds to the payment you want to retrieve. This ID represents the payment ID. Note that some tenders also include a `payment_id` field that contains the same ID. 5. To retrieve the payment, call [GetPayment](https://developer.squareup.com/reference/square/payments-api/get-payment) and provide the payment ID. ```` {% aside type="info" %} Payments also appear on the **Transactions** page of the Square Dashboard. {% /aside %} {% anchor id="refund-invoice" /%} ## Refund an invoice You can call the [RefundPayment](https://developer.squareup.com/reference/square/refunds-api/refund-payment) endpoint in the Refunds API to refund invoice payments. The invoice `status` must be `PAID`, `CANCELED`, or `FAILED` to refund a payment. Invoices with a status of `PARTIALLY_PAID` must be canceled using [CancelInvoice](https://developer.squareup.com/reference/square/invoices-api/cancel-invoice) before they can be refunded. ### Refund an invoice payment To refund an invoice payment, you must provide the corresponding payment ID. You can get this ID from the order that is associated with the invoice. Orders store a record of payments in the `tenders` field. 1. To retrieve the invoice, call [GetInvoice](https://developer.squareup.com/reference/square/invoices-api/get-invoice) and provide the invoice ID. If you don't have the invoice ID, call [ListInvoices](https://developer.squareup.com/reference/square/invoices-api/list-invoices) or [SearchInvoices](https://developer.squareup.com/reference/square/invoices-api/search-invoices). ```` 2. Copy the `order_id` from the response. 3. To retrieve the order, call [RetrieveOrder](https://developer.squareup.com/reference/square/orders-api/retrieve-order) and provide the order ID. ```` The following excerpt of an example response shows the `tenders` field: ```json { "order": { "id": "DIxOlEityYPJtcuvKTVKT1example", "location_id": "P3CCK6example", ... "tenders": [ { "id": "EnZdNAlWCmfh6Mt5FMN3example", "location_id": "P3CCK6example", "transaction_id": "lgwOlEityYPJtcuvKTVKT1example", "created_at": "2020-08-06T02:47:36.293Z", "amount_money": { "amount": 1000, "currency": "USD" }, "type": "CARD", "card_details": { "status": "CAPTURED", "card": { "card_brand": "AMERICAN_EXPRESS", "last_4": "6550" }, "entry_method": "ON_FILE" }, "tip_money": { "amount": 0, "currency": "USD" } } ], ... } } ``` 4. Copy the `id` of the tender that corresponds to the payment you want to refund. This ID represents the payment ID. Some tenders also include a `payment_id` field that contains the same ID. The `amount_money` field shows the maximum amount that can be refunded for the payment. 5. To refund the payment, call [RefundPayment](https://developer.squareup.com/reference/square/refunds-api/refund-payment) and provide the payment ID and the amount to refund. For orders with multiple payments, you must make a separate call for each payment that you want to refund. ```` The following is an example response: ```json { "refund": { "id": "EnZdNAlWCmfh6Mt5FMN3example_qOfJKjOzCyU3fZexample", "status": "COMPLETED", "amount_money": { "amount": 1000, "currency": "USD" }, "payment_id": "EnZdNAlWCmfh6Mt5FMN3example", "order_id": "AqBDyr9oJqj4oDHj8example", "created_at": "2020-08-16T18:28:33Z", "reason": "Optional reason for the refund." } } ``` {% aside type="info" %} The `order_id` in the response references the return order that Square creates for the refund operation. The `source_order_id` of the return order references the original order. For more information, see [Order Returns and Exchanges](orders-api/order-returns-exchanges). {% /aside %} The following considerations apply when refunding invoice payments: * When an invoice payment is refunded, Square updates the invoice `status` to `REFUNDED` if the entire amount paid for the invoice is refunded or `PARTIALLY_REFUNDED` if only a portion is refunded. Square also updates the `updated_at` and `version` fields, but doesn't update the `total_completed_amount_money` field of the corresponding payment request. To find the amount that was refunded, [retrieve the payment](#retrieve-invoice-payment) and check the `refunded_money` field. Note that customers cannot pay an invoice in the `REFUNDED` or `PARTIALLY_REFUNDED` state from the invoice payment page, so you should create a new invoice if a payment is still due. * Square invokes an `invoice.refunded` [webhook event](#example-invoice-refunded-events) after the refund is processed, along with `refund.created`, `refund.updated`, and `payment.updated` events. The `inventory.count.updated` event is also invoked if the order associated with the invoice was itemized using catalog objects and the seller configured the [Inventory management for invoices](https://app.squareup.com/dashboard/items/settings/inventory) setting to adjust inventory levels through invoices. * Sellers can also refund invoice payments using the [Square Dashboard](https://app.squareup.com/dashboard/invoices/overview), [Square Point of Sale](https://squareup.com/point-of-sale/software), and [Square Invoices](https://squareup.com/townsquare/free-invoice-app) application. Payments also appear on the **Transactions** page of the Square Dashboard. {% anchor id="example-invoice-refunded-events" /%} ### Example invoice.refunded events The following are example `invoice.refunded` payloads for a `REFUNDED` invoice and a `PARTIALLY_REFUNDED` invoice. #### Example payload for a fully refunded invoice ```json { "merchant_id": "8QJTJCE6AZSN6", "location_id": "M8AKAD8160XGR", "type": "invoice.refunded", "event_id": "30f55824-298d-5dcf-9e36-f87bfdca7111", "created_at": "2023-01-13T21:35:00Z", "data": { "type": "invoice", "id": "inv:0-ChCdyLo76f9j5v1u8of0gmX4EI45", "object": { "invoice": { "accepted_payment_methods": { "bank_account": false, "buy_now_pay_later": false, "card": true, "square_gift_card": true, "cash_app_pay": false }, "created_at": "2022-01-08T11:16:48Z", "delivery_method": "EMAIL", "id": "inv:0-ChCdyLo76f9j5v1u8of0gmX4EI45", "invoice_number": "99846834", "location_id": "M8AKAD8160XGR", "order_id": "kJqJVajFUiMTE7XkCCF3kcq9vaB", "payment_requests": [ { "automatic_payment_source": "CARD_ON_FILE", "card_id": "ccof:kkr7aMBaTCQexGQl3GB", "computed_amount_money": { "amount": 5000, "currency": "USD" }, "due_date": "2023-01-08", "request_type": "BALANCE", "tipping_enabled": false, "total_completed_amount_money": { "amount": 5000, "currency": "USD" }, "uid": "d7c905dc-63ab-4adb-92de-ccdd7c194bd2" } ], "primary_recipient": { "customer_id": "RDWCQZA0D0YRSD2MEC687KC79W", "email_address": "sara.vera0101@gmail.com", "family_name": "Vera", "given_name": "Sara", "phone_number": "2065551234" }, "public_url": "https://squareupsandbox.com/pay-invoice/invtmp:5e22a2c2-47c1-46d6-b061-808764dfe2b9", "status": "REFUNDED", "store_payment_method_enabled": false, "timezone": "America/Los_Angeles", "updated_at": "2023-01-13T21:35:00Z", "version": 4 } } } } ``` #### Example payload for a partially refunded invoice ```json { "merchant_id": "8QJTJCE6AZSN6", "location_id": "M8AKAD8160XGR", "type": "invoice.refunded", "event_id": "6d97283f-60d2-535f-bb51-2de63677ae7a", "created_at": "2023-01-17T20:41:00Z", "data": { "type": "invoice", "id": "inv:0-ChBgiproSx86epKcfiVJgPDsEI45", "object": { "invoice": { "accepted_payment_methods": { "bank_account": false, "buy_now_pay_later": false, "card": true, "square_gift_card": true, "cash_app_pay": false }, "created_at": "2022-12-26T18:15:09Z", "delivery_method": "EMAIL", "id": "inv:0-ChBgiproSx86epKcfiVJgPDsEI45", "invoice_number": "99846845", "location_id": "M8AKAD8160XGR", "order_id": "K2ZyH9ByPUtKK52MovOkq8xfvaB", "payment_requests": [ { "automatic_payment_source": "NONE", "computed_amount_money": { "amount": 2500, "currency": "USD" }, "due_date": "2023-01-02", "percentage_requested": "50", "request_type": "DEPOSIT", "tipping_enabled": false, "total_completed_amount_money": { "amount": 2500, "currency": "USD" }, "uid": "a6c8674d-eed3-485b-87f9-7c7c688efbac" }, { "automatic_payment_source": "NONE", "computed_amount_money": { "amount": 2500, "currency": "USD" }, "due_date": "2023-01-17", "request_type": "BALANCE", "tipping_enabled": false, "total_completed_amount_money": { "amount": 2500, "currency": "USD" }, "uid": "3813fc1f-83c3-4c42-9e4b-17fb01302384" } ], "primary_recipient": { "customer_id": "RDWCQZA0D0YRSD2MEC687KC79W", "email_address": "sara.vera0101@gmail.com", "family_name": "Vera", "given_name": "Sara", "phone_number": "2065551234" }, "public_url": "https://squareupsandbox.com/pay-invoice/invtmp:5e22a2c2-47c1-46d6-b061-808764dfe2b9", "status": "PARTIALLY_REFUNDED", "store_payment_method_enabled": false, "timezone": "America/Los_Angeles", "updated_at": "2023-01-19T20:41:00Z", "version": 6 } } } } ``` For more information about invoice webhooks, see [Webhooks.](invoices-api/overview#webhooks) ## See also * [Invoices API](invoices-api/overview) * [API Reference: Invoices API](https://developer.squareup.com/reference/square/invoices-api) --- # Update Invoices > Source: https://developer.squareup.com/docs/invoices-api/update-invoices > Status: PUBLIC > Languages: All > Platforms: All Learn how to use the UpdateInvoice endpoint in the Square Invoices API to update invoice settings. **Applies to:** [Invoices API](invoices-api/overview) {% subheading %}Learn how to add, change, or clear fields in an invoice using the [Invoices API](https://developer.squareup.com/reference/square/invoices-api).{% /subheading %} {% toc hide=true /%} ## Overview Applications can call the [UpdateInvoice](https://developer.squareup.com/reference/square/invoices-api/update-invoice) endpoint in the Invoices API to update an invoice. For example, you can add or update the title, change the payment schedule, and change accepted payment methods. This endpoint supports [sparse updates](build-basics/clearing-fields#sparse-updates). ## Requirements and limitations * Only invoices in the `DRAFT`, `SCHEDULED`, `UNPAID`, or `PARTIALLY_PAID` state can be updated. You cannot update invoices in the `PAID`, `REFUNDED`, `PARTIALLY_REFUNDED`, `CANCELED`, or `FAILED` terminal state. For invoices in the `PAYMENT_PENDING` state, you must wait for the payment to complete before you can update it (assuming it reaches the `PARTIALLY_PAID` state). In addition, the seller or customer cannot initiate another payment for an invoice in this state. * The following restrictions apply to updating an invoice in a `DRAFT` state: * You cannot update the `order_id` or `location_id` field. * Updating the `primary_recipient` contact information requires two update requests. Use the first request to clear this field and the second request to add the field again. * The following restrictions apply to updating a published invoice in the `SCHEDULED`, `UNPAID`, or `PARTIALLY_PAID` state: * You cannot update the `order_id` or `location_id` field. * You cannot update the `primary_recipient` field. For more information, see [Limitations with the Customers API integration](invoices-api/overview#customers-integration-limitations). * `UpdateInvoice` cannot be used to upload or delete an invoice attachment. To manage attachments, use the `CreateInvoiceAttachment` or `DeleteInvoiceAttachment` endpoint. For more information, see [Create or Delete Invoice Attachments](invoices-api/attachments). ## Update an invoice To update an invoice, call [UpdateInvoice](https://developer.squareup.com/reference/square/invoices-api/update-invoice) and provide the following information: * The ID of the invoice to update. * An `invoice` object with: * The current `version` of the invoice. * Any new fields to add and existing fields to change or clear (remove). * To change fields, provide the updated values. * To clear fields, specify a `null` value. Updating `payment_requests` or `reminders` uses a different syntax. To change a value, specify the `uid` and provide the updated value. To clear an element, specify the `uid` and include the `remove` field set to `true`. The Invoices API also supports using the `fields_to_clear` field to clear fields. However, using `null` values or the `remove` field is the recommended field clearing method. * An optional `idempotency_key` to ensure [idempotency](build-basics/common-api-patterns/idempotency). {% aside type="info" %} If you need to get the invoice ID and version, call [SearchInvoices](https://developer.squareup.com/reference/square/invoices-api/search-invoices) or [ListInvoices](https://developer.squareup.com/reference/square/invoices-api/list-invoices). If you have the ID but need the version, call [GetInvoice](https://developer.squareup.com/reference/square/invoices-api/get-invoice). {% /aside %} The following `UpdateInvoice` request adds (or updates) the `invoice_number` field and clears the `description` field. {% tabset %} {% tab id="null value (recommended)"%} In the `Invoice` object: * Specify a value for `invoice_number`. * Set the `description` value to `null`. ```` {% /tab %} {% tab id="fields_to_clear field"%} In the `Invoice` object, specify a value for `invoice_number`. In the `fields_to_clear` array, add `description`. ```` {% /tab %} {% /tabset %} For this example, Square adds the `invoice_number` field if isn't already defined for the invoice; otherwise, Square updates its value. After an invoice is updated, Square does the following: * Notifies the seller, if the **Updated** notification is enabled in the seller's notification settings. * Notifies the customer, as determined by the `delivery_method` setting for the invoice: * `EMAIL` - Square sends an email to the customer. * `SMS` - Square sends a text message to the customer unless the customer has opted out of text message updates from Square invoices. * `SHARE_MANUALLY` - Square doesn't notify the customer. Opting out of sending `EMAIL` or `SMS` notifications to customers isn't possible when updating an invoice with the Invoices API. * Increments the invoice version. * Triggers an `invoice.updated` [webhook event](invoices-api/overview#webhooks). ## Additional examples The following example `UpdateInvoice` requests show various update scenarios: * [Update payment requests by removing the deposit request](#update-remove-deposit) * [Remove and add payment requests](#update-remove-add-payment-request) * [Replace payment request percentages with exact amounts](#update-change-percentage-to-exact) * [Update custom fields](#update-custom-fields) {% anchor id="update-remove-deposit" /%} {% accordion expanded=true %} {% slot "heading" %} ### Update payment requests by removing the deposit request {% /slot %} Consider the following draft invoice that requests a deposit payment and a balance payment due at a later date. The invoice is configured to automatically charge a card on file and to accept credit and debit card payments on the Square-hosted invoice payment page. ```json { "invoice":{ "id":"inv:0-ChD_YDNHr4E6FJCeveEoAEXAMPLE", "version":0, "location_id":"S8GWD5EXAMPLE", "order_id":"81b7Ar7KPHmlXHs2qhjMc5EXAMPLE", "payment_requests":[ { "uid":"a17ee758-fb36-4226-a535-EXAMPLE", "request_type":"DEPOSIT", "due_date":"2020-06-15", "tipping_enabled": false, "percentage_requested":"20", "card_id":"ccof:aD1D4q9aUXTkEXAMPLE", "computed_amount_money":{ "amount":100, "currency":"USD" }, "total_completed_amount_money":{ "amount":0, "currency":"USD" }, "automatic_payment_source":"CARD_ON_FILE" }, { "uid":"79e1d50d-6a35-40fc-bfd2-EXAMPLE", "request_type":"BALANCE", "due_date":"2020-07-01", "tipping_enabled": true, "card_id":"ccof:aD1D4q9aUXTkEXAMPLE", "computed_amount_money":{ "amount":400, "currency":"USD" }, "total_completed_amount_money":{ "amount":0, "currency":"USD" }, "automatic_payment_source":"CARD_ON_FILE" } ], "invoice_number":"000034", "status":"DRAFT", "timezone":"Etc/UTC", "created_at":"2020-06-10T18:49:06Z", "updated_at":"2020-06-10T18:49:06Z", "primary_recipient":{ "customer_id":"DJREAYPRBMSSFAB4TGaEXAMPLE", "given_name":"John", "family_name":"Doe", "email_address":"doe@email.com" }, "accepted_payment_methods": { "card": true, "square_gift_card": false, "bank_account": false, "buy_now_pay_later": false, "cash_app_pay": false }, "delivery_method":"EMAIL" } } ``` The following `UpdateInvoice` request removes the deposit payment request from the preceding invoice and allows customers to use a Square gift card to make a payment on the invoice payment page. {% tabset %} {% tab id="remove field (recommended)"%} In the `Invoice.payment_requests` array, specify the `uid` of the payment request you want to remove and set the `remove` field to `true`. ```` To remove a reminder in the payment request with the `remove` field, use this format: ```json {% lineNumbers=false %} ... "payment_requests": [ { "uid": "a17ee758-fb36-4226-a535-EXAMPLE", "reminders": [ { "uid": "ba4ae57d-f283-4b2e-a0d0-EXAMPLE", "remove": true } ] } ] ... ``` {% /tab %} {% tab id="fields_to_clear field"%} In the `fields_to_clear` array, specify the payment request you want to remove using its `uid` as an index. ```` To remove a reminder in the payment request with the `fields_to_clear` field, use dot notation format `payment_requests[{PAYMENT_REQUEST_UID}].reminders[{REMINDER_UID}]`. For example: ```json {% lineNumbers=false %} ... "fields_to_clear": [ "payment_requests[a17ee758-fb36-4226-EXAMPLE].reminders[ba4ae57d-f283-4b2e-EXAMPLE]" ], ... ``` {% line-break /%} {% /tab %} {% /tabset %} The following is the updated draft invoice. It now requests only one automatic payment in full (no deposit) and accepts credit card, debit card, and Square gift card payments on the invoice payment page. ```json { "invoice":{ "id":"inv:0-ChD_YDNHr4E6FJCeveEoaEXAMPLE", "version":1, "location_id":"S8GWD5EXAMPLE", "order_id":"81b7Ar7KPHmlXHs2qhjMc5EXAMPLE", "payment_requests":[ { "uid":"79e1d50d-6a35-40fc-bfd2-EXAMPLE", "request_type":"BALANCE", "due_date":"2020-07-01", "tipping_enabled": true, "card_id":"ccof:aD1D4q9aUXTkEXAMPLE", "computed_amount_money":{ "amount":500, "currency":"USD" }, "total_completed_amount_money":{ "amount":0, "currency":"USD" }, "automatic_payment_source":"CARD_ON_FILE" } ], "invoice_number":"000034", "status":"DRAFT", "timezone":"Etc/UTC", "created_at":"2020-06-10T18:49:06Z", "updated_at":"2020-06-10T20:28:50Z", "primary_recipient":{ "customer_id":"DJREAYPRBMSSFAB4TGEXAMPLE", "given_name":"John", "family_name":"Doe", "email_address":"doe@email.com" }, "accepted_payment_methods": { "card": true, "square_gift_card": true, "bank_account": false, "buy_now_pay_later": false, "cash_app_pay": false }, "delivery_method":"EMAIL" } } ``` #### Example variation: Remove the deposit request and change the balance due date Now consider the following variation that removes one payment request and updates another. For example, suppose you want to remove the deposit payment request in the preceding invoice and change the due date of the remaining balance payment request. {% tabset %} {% tab id="remove field (recommended)"%} In the `Invoice.payment_requests` array: * Specify the `uid` of the payment request to update with the new value for the `due_date` field. * Specify the `uid` of the payment request to remove with the `remove` field set to `true`. ```` {% /tab %} {% tab id="fields_to_clear field"%} In the `Invoice.payment_requests` array, specify the `uid` of the payment request to update with the new value for the `due_date` field. In the `fields_to_clear` array, specify the payment request you want to remove using its `uid` as an index. ```` {% /tab %} {% /tabset %} {% /accordion %} {% anchor id="update-remove-add-payment-request" /%} {% accordion expanded=true %} {% slot "heading" %} ### Remove and add payment requests {% /slot %} The following `UpdateInvoice` request removes an existing payment request and adds two payment requests. This scenario might apply if you want to collect a deposit instead of requesting one payment in full. In the update request, specifying the `uid` of an invoice payment request indicates that you want to update an existing payment request. If the `uid` field is omitted, Square attempts to add a new payment request. {% tabset %} {% tab id="remove field (recommended)"%} In the `Invoice.payment_requests` array: * Define the new payment requests. * Specify the `uid` of the payment request to remove with the `remove` field set to `true`. ```` {% /tab %} {% tab id="fields_to_clear field"%} In the `Invoice.payment_requests` array, define the new payment requests. In the `fields_to_clear` array, specify the payment request you want to remove using its `uid` as an index. ```` {% /tab %} {% /tabset %} {% /accordion %} {% anchor id="update-change-percentage-to-exact" /%} {% accordion expanded=true %} {% slot "heading" %} ### Replace payment request percentages with exact amounts {% /slot %} Consider the following draft invoice that has two payment requests: a deposit of 20% and the remaining balance due at a later date. The following is an excerpt of the invoice: ```json { "invoice": { "id": "inv:0-ChB8ZZei5_Hn7WiK8tGL0EXAMPLE", "version": 0, "location_id": "S8GWD5EXAMPLE", "order_id": "8tXvK5qwjkEPbeLixWaKSxEXAMPLE", "payment_requests": [ { "uid": "32d69642-1614-4d84-ae4a-EXAMPLE", "request_type": "DEPOSIT", "due_date": "2020-06-22", "tipping_enabled": false, "percentage_requested": "20", "computed_amount_money": { "amount": 100, "currency": "USD" }, "total_completed_amount_money": { "amount": 0, "currency": "USD" }, "automatic_payment_source": "NONE" }, { "uid": "622a0315-e640-4a7a-9763-EXAMPLE", "request_type": "BALANCE", "due_date": "2020-09-01", "tipping_enabled": false, "computed_amount_money": { "amount": 400, "currency": "USD" }, "total_completed_amount_money": { "amount": 0, "currency": "USD" }, "automatic_payment_source": "NONE" } ], ... } } ``` Now suppose you want to specify the exact amount for these payment requests instead of percentages. To make this change, the following `UpdateInvoice` request performs two distinct updates to the same payment request: * Add a new `fixed_amount_requested_money` field. * Remove the `percentage_requested` field. {% line-break /%} {% tabset %} {% tab id="null value (recommended)" %} In the `Invoice.payment_requests` array: * Specify `uid` and define the new `fixed_amount_requested_money`. * Set the `percentage_requested` value to `null`. ```` {% /tab %} {% tab id="fields_to_clear field" %} In the `Invoice.payment_requests` array, specify the `uid` of the payment request to update and define the new `fixed_amount_requested_money`. In the `fields_to_clear` array, specify the payment request to update using its `uid` index and reference the `percentage_requested` field using dot notation format. ```` Both `invoice` and `fields_to_clear` specify the same `uid` value. As a result, the specified update is applied to the same payment request: * `invoice` adds the `fixed_amount_requested_money` field. * `fields_to_clear` removes the `percentage_requested` field. {% /tab %} {% /tabset %} The following is the updated invoice: ```json { "invoice": { "id": "inv:0-ChB8ZZei5_Hn7WiK8tGL0EXAMPLE", "version": 1, "location_id": "S8GWD5EXAMPLE", "order_id": "8tXvK5qwjkEPbeLixWaKSxEXAMPLE", "payment_requests": [ { "uid": "32d69642-1614-4d84-ae4a-EXAMPLE", "request_type": "DEPOSIT", "due_date": "2020-06-22", "tipping_enabled": false, "fixed_amount_requested_money": { "amount": 100, "currency": "USD" }, "computed_amount_money": { "amount": 100, "currency": "USD" }, "total_completed_amount_money": { "amount": 0, "currency": "USD" }, "automatic_payment_source": "NONE" }, { "uid": "622a0315-e640-4a7a-9763-EXAMPLE", "request_type": "BALANCE", "due_date": "2020-09-01", "tipping_enabled": false, "computed_amount_money": { "amount": 400, "currency": "USD" }, "total_completed_amount_money": { "amount": 0, "currency": "USD" }, "automatic_payment_source": "NONE" } ], ... } ``` {% /accordion %} {% anchor id="update-custom-fields" /%} {% accordion expanded=true %} {% slot "heading" %} ### Update custom fields {% /slot %} Unlike other invoice fields, the Invoices API doesn't support using sparse updates to add or change custom fields. To make these changes, you must provide the complete `custom_fields` list in the update request. For example, consider an invoice that includes the following custom fields: ```json {% lineNumbers=false %} ... "custom_fields": [ { "label": "Rules", "value": "You must agree to the following terms and conditions ...", "placement": "ABOVE_LINE_ITEMS" }, { "label": "Refund Policy", "value": "Refunds will be made on the original payment method ...", "placement": "ABOVE_LINE_ITEMS" } ] ... ``` {% aside type="info" %} Custom fields are supported only with an [Invoices Plus subscription](invoices-api/overview#invoices-plus-subscription). {% /aside %} If you want to change the label from "Rules" to "Terms and Conditions", the `Invoice` object in the request must include complete definitions for both custom fields. For example: ```` Omitting a custom field object or field from the request removes the object or field, or returns an error if the field is required. You can also remove all custom fields from the invoice: {% tabset %} {% tab id="null value (recommended)"%} In the `Invoice` object, set the `custom_fields` value to `null`. ```` {% /tab %} {% tab id="fields_to_clear field"%} In the `fields_to_clear` array, specify `custom_fields`. ```` {% /tab %} {% /tabset %} {% /accordion %} ## See also * [Invoices API](invoices-api/overview) * [Create and Publish Invoices](invoices-api/create-publish-invoices) * [Clear API Object Fields](build-basics/clearing-fields) * [API Reference: Invoices API](https://developer.squareup.com/reference/square/invoices-api) --- # Common Square API Patterns > Source: https://developer.squareup.com/docs/sdks/dotnet/common-square-api-patterns > Status: PUBLIC > Languages: All > Platforms: All Learn how the Square .NET SDK supports the common Square API features. {% subheading %}Learn how the Square .NET SDK supports the common Square API features.{% /subheading %} {% toc hide=true /%} ## Overview Some of the Square API patterns are used across various APIs. These include the following: * **Pagination** - Many Square API operations limit the size of the response. When the result of the API operation exceeds the limit, the API truncates the result. You must make a series of requests to retrieve all the data. This is referred to as pagination. * **Idempotency key** - Most Square APIs that perform create, update, or delete operations require idempotency keys to protect against making duplicate calls that can have negative consequences (for example, charging a card on file twice). * **Object versioning** - Some Square resources (for example, the `Customer` object) have versions assigned. The version numbers enable optimistic concurrency, which is the ability for multiple transactions to complete without interfering with each other. * **Clear API object fields** - Square API update endpoints that support sparse updates allow you to clear fields by setting the value to `null`. Note that `Update` requests on `AsyncOrdersClient` require an `X-Clear-Null: true` HTTP header to indicate that the request contains a `null` field update. These Square API patterns are exposed in the Square .NET SDK. ## Pagination Square API [pagination](working-with-apis/pagination) support lets you split a full query result set into pages that are retrieved over a sequence of requests. For example, when you call `ListAsync` on `CustomersClient`, you can limit the number of customers returned in the response. If there are more customers to retrieve, auto-pagination gives you the next page of results automatically. This is exposed in an iterator, which can be used in a for-each loop as shown in the following example. The code example calls the `ListAsync` method on `CustomersClient`. The request limits the number of customers returned to 10. The for-each loop iterates through all customers across pages seamlessly. ```csharp var pager = await client.Customers.ListAsync(new ListCustomersRequest { Limit = 10, SortField = CustomerSortField.Default, SortOrder = SortOrder.Desc, Count = false }); await foreach (var customer in pager) { Console.WriteLine( "customer: ID: {0} Version: {1}, Given name: {2}, Family name: {3}", customer.Id, customer.Version, customer.GivenName, customer.FamilyName ); } ``` ## Idempotency key When an application calls a Square API, it must be able to repeat an API operation when needed and get the same result each time. For example, if a network error occurs while updating a catalog item, the application might retry the same request and must ensure that the item updates only once. This behavior is called idempotency. Most Square APIs that modify data (create, update, or delete) require you to provide an idempotency key that uniquely identifies the request. This allows you to retry the request if necessary, without duplicating work. You can provide a custom unique key or simply generate one. There are language specific functions that you can use to generate unique keys. For more information, see [Idempotency](working-with-apis/idempotency). ## Optimistic concurrency and object versioning Some Square API resources support versioning. For example, each `Customer` object has a version field. Initially, the version number is 0. Each update increases the version number. If you don't specify a version number in the request, the latest version is assumed. This resource version number enables optimistic concurrency; multiple transactions can complete without interfering with each other. As a best practice, you should include the version field in the request to enable optimistic concurrency. The value must be set to the current version. For more information, see [Optimistic Concurrency](working-with-apis/optimistic-concurrency). The following code example updates a customer name. The `UpdateCustomerRequest` also includes a version number. It succeeds only if the specified version number is the latest version of the `Customer` object on the server. ```csharp var updateCustomer = new UpdateCustomerRequest { CustomerId = customerId, GivenName = "Fred", FamilyName = "Jones", Version = 7 }; var response = await client.Customers.UpdateAsync(updateCustomer); var customer = response.Customer ?? throw new Exception("response.Customer is null"); Console.WriteLine("customer updated:\n Id: {0}, Version: {1} Given name: {2}, Family name: {3}", customer.Id, customer.Version, customer.GivenName, customer.FamilyName ); ``` ## Clear API object fields For update operations that support sparse updates, your request only needs to specify the fields you want to change (along with any fields required by the update operation). If you want to clear a field without setting a new value, set its value using `RequestOptions.AdditionalBodyProperties`. For more information, see [Clear a field with a null](build-basics/clearing-fields#clear-a-field-with-a-null). The following `Client.Locations.UpdateAsync` example clears the `twitterUsername` field and sets the `WebsiteUrl` field: ```csharp await client.Locations.UpdateAsync( new UpdateLocationRequest { LocationId = locationId, Location = new Location { WebsiteUrl = "https://developer.squareup.com" } }, new RequestOptions { AdditionalBodyProperties = new { location = new Dictionary { ["twitter_username"] = null } } } ); ``` The resulting HTTP request body looks like the following: ```json { "location": { "website_url": "https://developer.squareup.com", "twitter_username": null } } ``` {% aside type="info" %} You can pass anything into `AdditionalBodyProperties` that translates to a JSON object, but you should use a dictionary to ensure null values aren't omitted. {% /aside %} ### Async update order requests If you're using `null` to clear fields in an Order, you must add the `X-Clear-Null: true` HTTP header to signal your intention. In the Square .NET SDK, the `RequestOptions` class provides an `AdditionalHeaders` property that you can use for this purpose. ```csharp await client.Orders.UpdateAsync( body, new RequestOptions { AdditionalHeaders = new Dictionary { ["X-Clear-Null"] = "true" } } ); ``` --- # Retrieve, List, or Search Invoices > Source: https://developer.squareup.com/docs/invoices-api/retrieve-list-search-invoices > Status: PUBLIC > Languages: All > Platforms: All Learn how to use the GetInvoice, ListInvoices, and SearchInvoices endpoints in the Square Invoices API to retrieve or search for invoices. **Applies to:** [Invoices API](invoices-api/overview) | [Orders API](orders-api/what-it-does) | [Customers API](customers-api/what-it-does) | [Payments API](payments-refunds) | [Refunds API](refunds-api/overview) | [Subscriptions API](subscriptions/overview) {% subheading %}Learn how to use Invoices API endpoints to retrieve, list, and search for invoices.{% /subheading %} {% toc hide=true /%} ## Overview Use the [GetInvoice](https://developer.squareup.com/reference/square/invoices-api/get-invoice), [ListInvoices](https://developer.squareup.com/reference/square/invoices-api/list-invoices), and [SearchInvoices](https://developer.squareup.com/reference/square/invoices-api/search-invoices) endpoints in the [Invoices API](https://developer.squareup.com/reference/square/invoices-api) to retrieve a specific invoice, list invoices at a specific location, and search for invoices at a specific location. ID fields that reference other objects can be used to get itemization details and other information related to the invoice. For more information, see [Get related order, payment, and other information](#get-related-info). {% anchor id="retrieve-an-invoice" /%} ## Retrieve an invoice by ID To retrieve an invoice by ID, call [GetInvoice](https://developer.squareup.com/reference/square/invoices-api/get-invoice). ```` The following is an example response: ```json { "invoice": { "id": "inv:0-ChD_YNSHr4E6FJDariEoAexample", "version": 1, "location_id": "S8GWD5example", "order_id": "IVbTFOMBAGigR3fQYXlRexample", "payment_requests": [ { "uid": "b165ffb1-e406-4ad7-bff3-6c216example", "request_type": "BALANCE", "due_date": "2022-09-29", "tipping_enabled": true, "computed_amount_money": { "amount": 5000, "currency": "USD" }, "total_completed_amount_money": { "amount": 0, "currency": "USD" }, "reminders": [ { "uid": "65338625-5512-4bc6-9c8b-636aBexample", "relative_scheduled_days": -1, "message": "Your payment is due tomorrow.", "status": "PENDING" }, { "uid": "98d9c2b6-35a0-4392-ab5c-bb791example", "relative_scheduled_days": 3, "message": "Your payment is overdue.", "status": "PENDING" } ], "automatic_payment_source": "NONE" } ], "primary_recipient": { "customer_id": "PGN6M13PEMX0S3D81NCexample", "given_name": "Jane", "family_name": "Doe", "email_address": "Jane.Doe@example.com", "phone_number": "1-206-555-1234" }, "invoice_number": "99846825", "title": "My Invoice Title", "public_url": "https://squareupsandbox.com/pay-invoice/invtmp:5e22a2c2-47c1-46d6-b061-808764dfe2b9", "next_payment_amount_money": { "amount": 5000, "currency": "USD" }, "status": "UNPAID", "timezone": "America/Los_Angeles", "created_at": "2022-07-25T14:26:54Z", "updated_at": "2022-07-25T14:29:02Z", "accepted_payment_methods": { "card": true, "square_gift_card": true, "bank_account": false, "buy_now_pay_later": false, "cash_app_pay": false }, "delivery_method": "EMAIL", "sale_or_service_date": "2022-08-24", "store_payment_method_enabled": false } } ``` For information about key invoice fields, see [Invoice object](invoices-api/overview#invoice-object). ## List invoices To list invoices, call [ListInvoices](https://developer.squareup.com/reference/square/invoices-api/list-invoices) and specify the required location ID. The following example uses the `limit` query parameter to specify a maximum [page size](build-basics/common-api-patterns/pagination#specifying-cursor-and-page-sizes) of three results. The default page size is 100. ```` The following is an excerpt of an example paged response: ```json { "invoices": [ { "id": "inv:0-ChCHu2mZEabLeeHahQnXexample", "version": 3, "location_id": "S8GWD5example", "order_id": "IVbTFOMBAGigR3fQYXlbexample", ... }, { "id": "inv:0-ChCBZAO3T41KICmePMAfCexample", "version": 0, "location_id": "S8GWD5example", "order_id": "M3nZRcF6b7MmIPobPKVPexample", ... }, { "id": "inv:0-ChB8ZZei5_Hn7WiK8tGL0example", "version": 1, "location_id": "S8GWD5example", "order_id": "yedFUsE9sEflYGqqnVQgexample", ... } ], "cursor": "PNEhVUKHBuTOuRIZoUcX5VQexample" } ``` If the response is paged, the response includes a `cursor` field. To retrieve the next page of results, include the `cursor` query parameter in the next `ListInvoices` call, as shown in the following example: ```` {% anchor id="search-invoices" /%} ## Search for invoices To search for invoices at a specified location, call [SearchInvoices](https://developer.squareup.com/reference/square/invoices-api/search-invoices) and provide the location ID. You can optionally provide a customer ID to filter for invoices that belong to a specific customer at the specified location. If you need to get the customer ID, you can [search customer profiles](customers-api/use-the-api/search-customers) by phone number, email address, or other supported attribute. The following example request filters by a customer and location. Although the `location_ids` and `customer_ids` fields are arrays, only a single customer ID and a single location ID can be specified in each filter. ```` The following is an excerpt of an example response: ```json { "invoices": [ { "id": "inv:0-ChBnIWSTQQA57plbuL_nUexample", "version": 4, "location_id": "S8GWD5example", "order_id": "CgoqT20VKa29hwznQgLHexample", ... }, { "id": "inv:0-ChCBZAO3T41KICmePMAfCexample", "version": 0, "location_id": "S8GWD5example", "order_id": "M3nZRcF6b7MmIPobPKVPexample", ... }, ... ] } ``` The following example request filters by a specific customer and location and sorts the results in order from oldest to newest: ```` The `INVOICE_SORT_DATE` sort field works as follows: * If the invoice is a draft, the invoice `created_at` date is used for sorting. * If the invoice was published and has a `scheduled_at` date, the `scheduled_at` date is used for sorting. * If the invoice was published and doesn't have a `scheduled_at` date, the publish date is used for sorting. {% anchor id="get-related-info" %}{% /anchor %} ## Get related order, payment, and other information An invoice represents a payment schedule for an order and might not contain all the information needed for auditing and reporting. However, you can use invoice fields to retrieve the following related information: * Goods, services, or pricing associated with the invoice - Call [RetrieveOrder](https://developer.squareup.com/reference/square/orders-api/retrieve-order) using the `order_id` on the invoice and then check the `line_items` field. * The customer who received the invoice - Call [RetrieveCustomer](https://developer.squareup.com/reference/square/customers-api/retrieve-customer) using the `primary_recipient.customer_id` on the invoice. The `customer_id` might be different on the invoice, underlying order, and any invoice payments. The customer who created the order can be different than the customer who received the invoice. For invoice payments, Square attempts to infer the customer based on the payment information. * The payment or refund processed for an invoice payment request - Use the payment ID from the corresponding tender on the underlying order to call [GetPayment](https://developer.squareup.com/reference/square/payments-api/get-payment). To learn how, see [Retrieve an invoice payment](invoices-api/pay-refund-invoices#retrieve-an-invoice-payment). Note that an invoice might have multiple payment requests. If an invoice payment is refunded, use the refund ID from the `payment.refund_ids` field to call [GetPaymentRefund](https://developer.squareup.com/reference/square/refunds-api/get-payment-refund). A payment might have multiple partial refunds. * The subscription associated with the invoice - Call [RetrieveSubscription](https://developer.squareup.com/reference/square/subscriptions-api/retrieve-subscription) using the `subscription_id` on the invoice. This field is present only on recurring subscription billing invoices. ## See also * [Invoices API](invoices-api/overview) * [API Reference: Invoices API](https://developer.squareup.com/reference/square/invoices-api) --- # Create and Publish Invoices > Source: https://developer.squareup.com/docs/invoices-api/create-publish-invoices > Status: PUBLIC > Languages: All > Platforms: All Learn how to use the CreateInvoice and PublishInvoice endpoints in the Square Invoices API to configure, create, and publish invoices. **Applies to:** [Invoices API](invoices-api/overview) | [Orders API](orders-api/what-it-does) | [Customers API](customers-api/what-it-does) | [Cards API](cards-api/overview) {% subheading %}Learn how to create, configure, and publish invoices using the Invoices API.{% /subheading %} {% toc hide=true /%} ## Overview Applications can use the [Invoices API](https://developer.squareup.com/reference/square/invoices-api) to request or collect payment from customers on behalf of a Square seller. First, call the [CreateInvoice](https://developer.squareup.com/reference/square/invoices-api/create-invoice) endpoint to create a draft invoice for an order (which must be created with the [Orders API](https://developer.squareup.com/reference/square/orders-api)) and configure the payment schedule, recipient, and other invoice settings. Then, call the [PublishInvoice](https://developer.squareup.com/reference/square/invoices-api/publish-invoice) endpoint to begin processing the invoice. ## Requirements and limitations To create and publish an invoice, you must be prepared to provide the following information: * The ID of the associated order. If needed, call [SearchOrders](https://developer.squareup.com/reference/square/orders-api/search-orders) to get the order ID. * The order status must be `OPEN`. * The order cannot include rewards. * The order cannot use pricing rules (rule-based pricing options), which means that the `pricing_options.auto_apply_discounts` and `pricing_options.auto_apply_taxes` fields cannot be set to `true`. * The order can include a service charge only if: * The `country` of the order location is `CA` or `US`. * The `treatment_type` of the service charge isn't `APPORTIONED_TREATMENT`. * The ID of the {% tooltip text="customer profile"%}A customer record in the seller's Customer Directory.{% /tooltip %} that represents the invoice recipient. If needed, call [SearchCustomers](https://developer.squareup.com/reference/square/customers-api/search-customers) to get the customer ID. * The customer profile must include `email_address` or `phone_number`. An email address is required if the invoice is delivered by email or configured for automatic payment. * The invoice recipient can be the customer associated with the order or a different customer. * The ID of a card on file if the invoice is configured for automatic payment. To obtain the card ID, call [ListCards](https://developer.squareup.com/reference/square/cards-api/list-cards) using the `customer_id` query parameter. * The payment schedule for the invoice, list of payment methods accepted on the invoice payment page, and delivery method that Square should use to communicate with the recipient. For more information, see [Configuring payment requests](#payment-requests) and [Configuring how Square processes an invoice](#configure-invoice-processing). In addition, you should be aware of the following considerations: * An order can be associated with a single invoice, and an invoice can be associated with a single order. After an order is associated with an invoice, updates to the order are subject to restrictions. Orders created from Square Online or other Square products cannot be associated with an invoice because they don't initially include an order ID. * To use [custom fields](invoices-api/overview#custom-fields) or installment payments, the seller for whom you create the invoice must have an active (or trial) [Invoices Plus subscription](invoices-api/overview#invoices-plus-subscription). * Invoice requirements and features might vary by location. For more information, see [International availability and considerations](invoices-api/overview#international-availability-invoices). * When a customer ID is first specified for an invoice, Square retrieves contact information from the customer profile and adds it to the invoice. However, this recipient information isn't updated if the information changes in the Customer Directory. * The invoice recipient might not be the same customer associated with the underlying order or with any invoice payments. For more information and other considerations, see [Requirements and limitations](invoices-api/overview#requirements-and-limitations). {% anchor id="create-invoice" /%} ## Create an invoice Call [CreateInvoice](https://developer.squareup.com/reference/square/invoices-api/create-invoice) to create a draft invoice. Ensure that the [requirements and limitations](#requirements-and-limitations) are met and provide the following information in the request: * `order_id` with the ID of the associated order. * `primary_recipient.customer_id` with the ID of the customer who receives the invoice. This field isn't required to create the invoice, but it's required to publish the invoice. * `payment_requests` for the invoice, with one or more payment requests that equal the `total_money` of the order. For more information, see [Configuring payment requests](#payment-requests). * `delivery_method` that Square should use to communicate with the recipient. * `accepted_payment_methods` that customers can use to pay the invoice on the invoice payment page. At least one of the following payment methods must be enabled: * `card` (credit or debit card) * `square_gift_card` * `bank_account` * `buy_now_pay_later` * `cash_app_pay` This setting is independent of any automatic payment requests for the invoice. Customers can choose to make a payment from the invoice payment page even when the invoice is configured for automatic payments. * [Optional invoice settings](#optional-invoice-fields). * An optional `idempotency_key` to ensure [idempotency](build-basics/common-api-patterns/idempotency). The following example request includes one `BALANCE` payment request due by September 30, 2022: ```` You can also configure the invoice to be processed at a future date and configure reminders for before and after the due date. The following `CreateInvoice` request directs Square to send the invoice on the `scheduled_at` date and send a reminder 1 day before the payment due date. ```` The following is an example response. Note that the `status` of the returned invoice is set to `DRAFT`. ```json { "invoice": { "id": "inv:0-ChBoaXkM5QOPv9UO9C_Zexample", "version": 0, "location_id": "S8GWD5example", "order_id": "AdSjVqPCzOAQqvTnzy46VLexample", "payment_requests": [ { "uid": "ccc0fc9b-c2a5-42a9-836d-92d01example", "request_type": "BALANCE", "due_date": "2022-09-30", "tipping_enabled": false, "computed_amount_money": { "amount": 2699, "currency": "USD" }, "total_completed_amount_money":{ "amount":0, "currency":"USD" }, "reminders": [ { "uid": "b0325b84-b231-4c8a-b3ca-d9e23example", "relative_scheduled_days": -1, "message": "Your invoice is due tomorrow", "status": "PENDING" } ], "automatic_payment_source": "NONE" } ], "primary_recipient": { "customer_id": "DJREAYPRBMSSFAB4TGAexample", "given_name": "John", "family_name": "Doe", "email_address": "doe@email.com" }, "invoice_number": "000028", "title": "My Invoice Title", "scheduled_at": "2022-09-01T09:00:00Z", "status": "DRAFT", "timezone": "Etc/UTC", "created_at": "2022-08-26T19:01:32Z", "updated_at": "2022-08-26T19:01:32Z", "accepted_payment_methods": { "card": true, "square_gift_card": true, "bank_account": false, "buy_now_pay_later": false, "cash_app_pay": false }, "delivery_method": "EMAIL", "sale_or_service_date": "2022-08-24", "store_payment_method_enabled": true } } ``` For more `CreateInvoice` request examples, see [Walkthrough: Create and Publish Invoices](invoices-api/walkthrough). After an invoice is created, Square adds the following fields to each payment request: * `computed_amount_money` with the amount of the payment request. * `total_completed_amount_money` with a zero amount, which represents the amount paid for the payment request. Square updates the amount after the payment request is paid. When an invoice is created, Square triggers an `invoice.created` [webhook event](invoices-api/overview#webhooks). The `order.updated` event is also triggered after Square associates the order with the invoice. {% anchor id="optional-invoice-fields" /%} ### Optional invoice settings The following optional fields are commonly used in `CreateInvoice` requests. For information about all optional invoices fields, see [Invoice](https://developer.squareup.com/reference/square/objects/Invoice). | Field{% width="190px" %} | Description | |------|------| |`scheduled_at`|The date to process the invoice and generate the invoice payment page, according to the delivery method and payment request settings. If not specified, Square processes the invoice immediately after it's published.| |`reminders`|Reminders for a payment request that Square should send relative to the due date (before or after). If the payment is made before the due date, Square doesn't send any remaining scheduled reminders.| |`invoice_number`|A user-friendly string that displays on the invoice. You might use the invoice number for client-side operations. If not specified, Square assigns a value.| |`title`|The invoice title that displays on the invoice. If not specified, the [business name](https://developer.squareup.com/reference/square/objects/Merchant#definition__property-business_name) is used as the title.| |`description`|The description that displays on the invoice.| |`sale_or_service_date`|The date of the sale or the date when the service was rendered. This date displays on the invoice but doesn't drive any business logic.| |`custom_fields`|Up to two [custom fields](invoices-api/overview#custom-fields) that display on the invoice. Custom fields require an [Invoices Plus](invoices-api/overview#invoices-plus-subscription) subscription.| |`store_payment_method_enabled`|Indicates whether to allow customers to save credit card, debit card, or bank transfer payment information when paying an invoice. The default value is `false`. When set to `true`, Square displays a **Save my card on file** or **Save my bank on file** checkbox on the invoice payment page. If the checkbox is selected, Square creates a card on file or a bank account on file for the customer using the information provided in the payment form. Stored payment information can be used for future automatic payments. Allowing customers to save gift cards on file for invoice payments isn't supported.| {% anchor id="publish-invoice" /%} ## Publish an invoice To publish an invoice, call [PublishInvoice](https://developer.squareup.com/reference/square/invoices-api/publish-invoice) provide the following information: * The ID of the invoice to publish. The invoice must be in the `DRAFT` state. * The current `version` of the invoice. * An optional `idempotency_key` used to ensure [idempotency](build-basics/common-api-patterns/idempotency). You can use the `id` and `version` fields from the invoice returned in the `CreateInvoice` response. If you need to get the ID and version, call [SearchInvoices](https://developer.squareup.com/reference/square/invoices-api/search-invoices) or [ListInvoices](https://developer.squareup.com/reference/square/invoices-api/list-invoices). If you have the ID but need the version, call [GetInvoice](https://developer.squareup.com/reference/square/invoices-api/get-invoice). {% aside type="important" %} When publishing invoices configured for card-on-file payments, the `CUSTOMERS_READ` and `PAYMENTS_WRITE` [permissions](oauth-api/square-permissions#invoices) are required in addition to `ORDERS_WRITE` and `INVOICES_WRITE`. {% /aside %} ```` The following is an example response: ```json { "invoice": { "id": "inv:0-ChBoaXkM5QOPv9UO9C_Zexample", "version": 1, "location_id": "S8GWD5example", "order_id": "AdSjVqPCzOAQqvTnzy46VLexample", "payment_requests": [ { "uid": "ccc0fc9b-c2a5-42a9-836d-92d01example", "request_type": "BALANCE", "due_date": "2021-09-29", "tipping_enabled": false, "computed_amount_money": { "amount": 2699, "currency": "USD" }, "total_completed_amount_money":{ "amount":0, "currency":"USD" }, "automatic_payment_source": "NONE", "reminders": [ { "uid": "b0325b84-b231-4c8a-b3ca-d9e23example", "relative_scheduled_days": -1, "message": "Your invoice is due tomorrow", "status": "PENDING" } ] } ], "invoice_number": "000028", "title": "My Invoice Title", "public_url": "https://squareupsandbox.com/pay-invoice/invtmp:5e22a2c2-47c1-46d6-b061-808764dfe2b9", "next_payment_amount_money": { "amount": 2699, "currency": "USD" }, "status": "UNPAID", "timezone": "Etc/UTC", "created_at": "2021-08-30T19:01:32Z", "updated_at": "2021-08-30T19:05:01Z", "primary_recipient": { "customer_id": "DJREAYPRBMSSFAB4TGAexample", "given_name": "John", "family_name": "Doe", "email_address": "doe@email.com" }, "accepted_payment_methods": { "card": true, "square_gift_card": true, "bank_account": false, "buy_now_pay_later": false, "cash_app_pay": false }, "delivery_method": "EMAIL", "sale_or_service_date": "2021-08-24", "store_payment_method_enabled": true } } ``` The [status](https://developer.squareup.com/reference/square/enums/InvoiceStatus) of the returned invoice depends on how the invoice is configured. For example, the status is `SCHEDULED` if `scheduled_at` is set to a future date or `UNPAID` if the payment `due_date` is set to a future date. After an invoice is published and the `scheduled_at` date (if specified) is reached, Square does the following: - Generates the invoice payment page where customers can make a payment. - Adds the {% tooltip text="public_url" %}A temporary link to the Square-hosted payment page where the customer can pay the invoice. If the link expires, customers can provide the email address or phone number associated with the invoice and request a new link directly from the expired payment page.{% /tooltip %} field with the payment page URL to the invoice. - Adds the `next_payment_amount_money` field with the next payment amount due to the invoice, unless an automatic payment for the balance is completed immediately. - Processes the invoice based on the invoice settings and handles the remaining workflow. For example, Square can email the invoice, charge a card on file, or let you or the seller send the payment page URL to the customer. Square collects all invoice payments, either directly from customers (from the online payment page) or through automatic payments. Square also updates the invoice payment status and sends reminders and receipts as scheduled. When the invoice is published, Square triggers `invoice.published` and `invoice.updated` [webhook events,](invoices-api/overview#webhooks) along with additional events if the invoice is configured to immediately collect an automatic payment. For more information, see [Pay an invoice](invoices-api/pay-refund-invoices#pay-invoice). {% anchor id="payment-requests" /%} {% anchor id="configure-payment-requests" /%} ## Configuring payment requests The `payment_requests` field defines the payment schedule for an invoice, which includes payment amounts, due dates, and other related settings. The example invoice in the previous section contains one payment request for the full order amount, but you can optionally split the invoice into multiple payment requests. A payment request is represented by the [InvoicePaymentRequest](https://developer.squareup.com/reference/square/objects/InvoicePaymentRequest) object. The following table shows possible payment scenarios and the corresponding `request_type` combinations for the invoice payment requests. | Payment scenario | request_type combination | | :--------------- | :------------------------- | | One payment in full | 1 `BALANCE` | | A deposit with the balance due later | 1 `DEPOSIT` and 1 `BALANCE` | | A deposit with remaining payments in installments{% line-break /%}(requires an [Invoices Plus](invoices-api/overview#invoices-plus-subscription) subscription) | 1 `DEPOSIT` and 2–12 `INSTALLMENT` | | All payments in installments{% line-break /%}(requires an [Invoices Plus](invoices-api/overview#invoices-plus-subscription) subscription) | 2–12 `INSTALLMENT` | Deposit or installment payments can be specified by percentage or as a fixed amount. For percentage-based payments, Square computes the amount based on the `total_money` amount of the order. {% aside type="info" %} For sellers who accept Afterpay (or Clearpay) payments, you can enable invoices to accept Buy Now Pay Later payments. For more information, see [Buy Now Pay Later payments with Afterpay](invoices-api/overview#buy-now-pay-later). {% /aside %} ### Example payment requests The following examples show how you can define payment scenarios in the `payment_requests` field when you [create an invoice](#create-invoice). * **One payment in full** The following `payment_requests` example shows how to request one payment in full: ```json ... "payment_requests": [ { "request_type":"BALANCE", "due_date":"2030-02-01" } ] ... ``` The single `BALANCE` payment request represents the total amount of the order. * **Deposit with balance due later** The following `payment_requests` example shows how to request a 50% deposit and the remaining 50% balance at a later date: ```json ... "payment_requests": [ { "request_type":"DEPOSIT", "due_date":"2030-02-01", "percentage_requested":"50" }, { "request_type":"BALANCE", "due_date":"2030-03-01" } ] ... ``` This example contains two payment requests. The first is a `DEPOSIT` that uses the `percentage_requested` field to request 50% of the total amount of the order. The balance is for the remaining amount, which isn't explicitly specified. {% anchor id="percentage-based-installments" /%} * **Deposit with two installments** (requires an [Invoices Plus](invoices-api/overview#invoices-plus-subscription) subscription) A deposit can also be combined with 2–12 installment payments. **Percentage example** The following `payment_requests` example shows how to use the `percentage_requested` field to request a 50% deposit and the balance paid in two equal installments: ```json ... "payment_requests": [ { "request_type":"DEPOSIT", "due_date":"2030-02-01", "percentage_requested":"50" // 50% of total order amount }, { "request_type":"INSTALLMENT", "percentage_requested":"50", // 50% of remaining balance after deposit "due_date":"2030-03-01" }, { "request_type":"INSTALLMENT", "percentage_requested":"50", // 50% of remaining balance after deposit "due_date":"2030-04-01" } ] ... ``` The percentage requested for the installments applies to the amount remaining after the deposit is paid. For an order with a total amount of $100, the invoice would request a $50 deposit, followed by two installments of $25 each. **Fixed amount example** Instead of percentages, you can use the `fixed_amount_requested_money` field to specify exact amounts for deposits and installments, as shown in the following `payment_requests` example: ```json ... "payment_requests": [ { "request_type":"DEPOSIT", "due_date":"2030-07-30", "fixed_amount_requested_money":{ "amount":5000, // A $50 payment "currency":"USD" } }, { "request_type":"INSTALLMENT", "fixed_amount_requested_money":{ "amount":2500, // A $25 payment "currency":"USD" }, "due_date":"2030-08-30" }, { "request_type":"INSTALLMENT", "fixed_amount_requested_money":{ "amount":2500, // A $25 payment "currency":"USD" }, "due_date":"2030-09-30" } ] ... ``` ### Payment request considerations The following considerations apply when configuring payment requests: * The `due_date` and `request_type` fields must be specified for all payment requests. * For `DEPOSIT` or `INSTALLMENT` payment requests, either a percentage-based amount or a fixed amount must be specified. * To specify a percentage-based amount, set the `percentage_requested` field. * For a `DEPOSIT` request, base the percentage on the total order amount. * For `INSTALLMENT` requests, base the percentage on the total order amount minus any deposit amount. The percentages of all installment payment requests must add up to 100%, as shown in the [preceding example](#percentage-based-installments). Installment payments are supported only with an [Invoices Plus subscription](invoices-api/overview#invoices-plus-subscription). * To specify a fixed amount, set the `fixed_amount_requested_money` field. * The total payment amounts in `payment_requests` must equal the `total_money` amount of the associated order. * The `automatic_payment_source` field of the payment request indicates whether the request is configured for automatic payments. The following are valid values: | Value{% width="130px" %} | Description | | ----- | ----------- | | `NONE` | No automatic payment is configured. This is the default value. | | `CARD_ON_FILE` | Directs Square to charge the credit or debit card on file specified by the `card_id` field of the payment request. To get a card ID, call [ListCards](https://developer.squareup.com/reference/square/cards-api/list-cards) and provide the `customer_id`.{% line-break /%}To set up automatic payments from a card on file, you must set the `delivery_method` of the invoice to `EMAIL`. | | `BANK_ON_FILE` | Directs Square to initiate a transfer from the bank account on file. The customer must approve each payment.{% line-break /%}This value cannot be set from the Invoices API. It applies only to invoices that sellers create in Square products, such as the Square Dashboard. | If an automatic payment fails, Square sends an invoice to the customer. * For each payment request, you can use the `reminders` field to schedule one or more reminders relative to the `due_date` of the payment. For more information, see [InvoicePaymentReminder](https://developer.squareup.com/reference/square/objects/InvoicePaymentReminder). Square sends reminders at 11:00 AM in the `timezone` of the invoice. If the payment is made before the scheduled reminder date, Square doesn't send the reminder. {% anchor id="configure-invoice-processing" /%} ## Configuring how Square processes an invoice After you publish an invoice, Square performs activities to manage the payment schedule (such as sending a reminder to the customer or initiating an automatic payment) based on invoice settings. The following sections describe how to configure invoice settings to control how Square processes the invoice. {% anchor id="configure-send-invoice" /%} ### Option 1: Send an invoice to request payment Square sends the customer an invoice requesting payment by the due date. Square also sends a receipt after a payment is made. * `scheduled_at` - To send an invoice immediately after publishing, omit this field. Otherwise, specify the date to send the invoice. * `delivery_method` - Specify `EMAIL`. * `accepted_payment_methods` - Specify `true` for one or more payment methods that customers can use to pay the invoice on the invoice payment page. * For each payment request, configure the following fields: * `due_date` - Specify the due date of the payment. * `automatic_payment_source` - Keep the default value of `NONE`. * `request_type`, `reminders`, and other payment fields - Specify as needed. For invoices with multiple payment requests, Square sends invoices and reminders according to the payment schedule. For more information, see [Configuring payment requests](#payment-requests) and [Automatic communication from Square](invoices-api/overview#automatic-communication). {% anchor id="configure-automatic-payment" /%} ### Option 2: Automatically charge a credit or debit card on file If the invoice is published on the due date, Square charges the card on file and sends a receipt. If the payment is due later, Square sends an invoice notifying the customer about the upcoming automatic payment. On the due date, Square charges the card on file and sends a receipt. * `scheduled_at` - To send the invoice or receipt immediately after publishing, omit this field. Otherwise, specify the date to send the invoice. * `delivery_method` - Specify `EMAIL`. * `accepted_payment_methods` - Specify `true` for one or more payment methods that customers can use to pay the invoice on the invoice payment page. This field is required even when the invoice is configured for automatic payments because customers can optionally make a payment from the invoice page. * For each payment request, configure the following fields: * `due_date` - Specify the due date of the payment. Square charges the card on file on this date. * `automatic_payment_source` - Specify `CARD_ON_FILE`. * `card_id` - Specify the ID of the card on file to charge. To get a card ID, call [ListCards](https://developer.squareup.com/reference/square/cards-api/list-cards) and provide the `customer_id`. * `request_type`,`reminders`, and other payment fields - Specify as needed. For invoices with multiple payment requests, Square sends invoices and reminders according to the payment schedule. For more information, see [Configuring payment requests](#payment-requests) and [Automatic communication from Square](invoices-api/overview#automatic-communication). {% anchor id="configure-no-action" /%} ### Option 3: Square takes no action In this case, the seller or the application developer follows up with the customer. Square doesn't send the invoice or receipt to the customer. * `delivery_method` - Specify `SHARE_MANUALLY`. * `accepted_payment_methods` - Specify `true` for one or more payment methods that customers can use to pay the invoice on the invoice payment page. * For each payment request, configure the following fields: * `due_date` - Specify the due date of the payment. * `automatic_payment_source` - Keep the default value of `NONE`. * `request_type`, `reminders`, and other payment fields - Specify as needed. For more information, see [Configuring payment requests](#payment-requests). #### Considerations * The `public_url` field that contains the payment link is added to the invoice after it's published and reaches the scheduled date (if one is defined). Invoice payment links are temporary and expire after a certain period. Customers can provide the email address or phone number associated with the invoice and request a new link directly from the expired payment page, so no action is required from the developer. However, if you need to share a payment link with the customer a few days or more after it was generated, you should retrieve the invoice first to automatically generate a new up-to-date link. Link expiry and dynamic link generation don't trigger `invoice.updated` webhook events. * The following settings can be configured only from Square products: * `SMS` (text message) delivery method - See additional [SMS considerations](invoices-api/overview#sms-considerations). * `BANK_ON_FILE` automatic payment method. You cannot use the Invoices API to set these values, but you can use the Invoices API to change them. For example, you can change an `SMS` invoice delivery method to `EMAIL` or `SHARE_MANUALLY`. ## See also * [Invoices API](invoices-api/overview) * [Walkthrough: Create and Publish Invoices](invoices-api/walkthrough) * [Retrieve, list, or search invoices](invoices-api/retrieve-list-search-invoices) * [Create or delete invoice attachments](invoices-api/attachments) * [Update an invoice](invoices-api/update-invoices) * [API Reference: Invoices API](https://developer.squareup.com/reference/square/invoices-api) --- # Payments Pricing with Square APIs and SDKs > Source: https://developer.squareup.com/docs/payments-pricing > Status: PUBLIC > Languages: All > Platforms: All Learn about the processing fees that Square charges for payments made with Square payment APIs. {% subheading %}Learn about the processing fees that Square charges for payments made with Square payment APIs.{% /subheading %} {% toc hide=true /%} ## Overview Square provides secure payment solutions for online and in-person payments made with [supported cards](https://squareup.com/help/article/5085). The payment transaction fees are based on the payment platform, transaction type, and geographical region where a payment is handled. {% anchor id="inperson-pricing" /%} ## In-person payment pricing Square offers various hardware devices (Square Readers and Square Terminal) to process in-person payments. Square also offers SDKs and APIs for your custom applications to connect to these devices. Payment pricing depends on the following conditions: * The API you're using. * Whether a buyer's card is presented for payment: * **Card present** - Indicates that a physical card or [mobile wallet](https://squareup.com/help/us/en/article/7608-accept-mobile-wallet-payments) (such as Apple Pay or Google Pay) is used for payment. The card is tapped, dipped, or swiped depending on the Square Reader used. * **Card not present** - Indicates that a physical card or mobile wallet isn't used for payment. For example, a seller initiates the payment using a card on file or the number is entered manually in the Point of Sale application. For more information about card-not-present payments, see [What Is a Card-Not-Present (CNP) Transaction](https://squareup.com/us/en/the-bottom-line/managing-your-finances/what-is-a-card-not-present-transaction). ### In-person payments using a Square Terminal |Region | Card present |Card not present| |:-------------|:------------------------------|:---------------| |Australia |1.6% |2.2%| |Canada |0.75% + 7¢ (Interac){% line-break /%}2.5% (all other cards)|3.3% + 15¢| |France |1.65% |2%{% line-break /%}2.5%, Card on File| |Ireland |1.75% + VAT |2% + VAT{% line-break /%}2.5%+VAT, Card on File| |Japan |3.25% |3.75%| |Spain |1.25% + 5¢ |2%{% line-break /%}2.5%, Card on File| |United Kingdom|1.75%{% line-break /%}6% + £0.30 GBP (Clearpay)|2.5%| |United States |2.6% + 15¢{% line-break /%}6% + 30¢ (Afterpay)|3.5% + 15¢| ### Payments with Square Readers Depending on your region, Square provides the Mobile Payments SDK and Point of Sale API options for your application to connect to your chosen Square Reader hardware. ### Point of Sale API |Region|Card present|Card not present| |:-----|:-----------|:------------------------------------| |Australia|1.6%|2.2%| |Canada|0.75% + 7¢ (Interac){% line-break /%}2.5% (all other cards)|3.3% + 15¢| |France|1.65%|2%{% line-break /%}2.5%, Card on File| |Ireland|1.75% + VAT|2% + VAT{% line-break /%}2.5%+VAT, Card on File| |Japan |3.25% |3.75%| |Spain|1.25% + 5¢|2%{% line-break /%}2.5%, Card on File| |United Kingdom|1.75%{% line-break /%}6% + £0.30 GBP (Clearpay)|2.5%| |United States|2.6% + 15¢{% line-break /%}6% + 30¢ (Afterpay)|3.5% + 15¢| ### Mobile Payments SDK |Region|Card present|Card not present| |:-----|:-----------|:------------------------------------| |Australia|1.6%|2.2%| |Canada|0.75% + 7¢ (Interac){% line-break /%}2.5% (all other cards)|3.3% + 15¢| |United States|2.6% + 15¢{% line-break /%}6% + 30¢ (Afterpay)|3.5% + 15¢| ### Gift cards pricing * **Processing rates** - Standard payment processing fees apply when selling and reloading Square gift cards. There are no fees when a gift card is redeemed. To find detailed rate information for a particular country, choose the link for the country: * [Australia](https://squareup.com/au/en/gift-cards/pricing) * Canada ([English](https://squareup.com/ca/en/gift-cards/pricing) or [French](https://squareup.com/ca/fr/gift-cards/pricing) translation) * [France](https://squareup.com/fr/fr/gift-cards) * [Ireland](https://squareup.com/ie/en/gift-cards/pricing) * [Japan](https://squareup.com/jp/ja/gift-cards/pricing) * [Spain](https://squareup.com/es/es/gift-cards) * [United Kingdom](https://squareup.com/uk/en/gift-cards/pricing) * [United States](https://squareup.com/us/en/gift-cards/pricing) * **Load fees** - Sellers in the following countries pay 2.5% of the amount added to a Square gift card, in addition to standard payment processing rates: * Australia * Canada * United States Load fees apply to `ACTIVATE`, `LOAD`, and `ADJUST_INCREMENT` activities. {% anchor id="online-pricing" /%} ## Online and in-app payments Online payments can be made with the Checkout API, Invoices API, Subscriptions API, and Web Payments SDK. The buyer enters their card information in a secure card entry form hosted by Square. In-app payments are made using a mobile app integrated with the [In-App Payment SDK](in-app-payments-sdk/what-it-does). In-app payment pricing uses the same fee schedule as online pricing. ### Card payments The seller pays only a single per-transaction percentage fee. Everything from PCI-compliance fees to interchange and chargeback fees are covered by this fee. There are no monthly charges or additional fees for payment processing. For more information about Square pricing, including custom pricing options, see [How much does Square cost](https://squareup.com/pricing) or [Learn About Square's Fees](https://squareup.com/help/article/5068). {% aside type="info" %} [Cash App Pay](payments-api/take-payments/cash-app-payments) payments are processed at the same rate as card payments but are supported only in the United States. {% /aside %} | Region | eCommerce | | -------------- | ---------------- | | Australia | 2.2% | | Canada | 2.8% + 30¢ | | France | 1.4% + 25c per transaction with EU + EEA cards.{% line-break /%}2.9% + 25c per transaction with UK/Non-EEA cards.| | Ireland | 1.4% + 25c + VAT per transaction with EU + EEA cards.{% line-break /%}2.9% + 25c + VAT per transaction with UK/Non-EEA cards.| | Japan | 3.6% | | Spain | 1.4% + 25c per transaction with EU + EEA cards.{% line-break /%}2.9% + 25c per transaction with Non-EEA cards.| | United Kingdom | 1.4% + 25p for transactions with UK cards.{% line-break /%}2.5% + 25p for transactions with non-UK cards. | | United States | 2.9% + 30¢ | ### ACH bank transfer payments In the United States: * **ACH payments taken using the combination of the Web Payments SDK and Payments API** - 1% fee with a $1 minimum and $5 maximum. No chargeback fees or additional fees. * **ACH payments using Square Invoices** - For pricing information, see [Square Invoices](https://squareup.com/payments/ach-payments). ### Afterpay payments * **Australia** - 6% + 30¢. Pricing currently includes the Goods and Service Tax (GST). However, on 11 May 2022, GST will be excluded from pricing. * **Canada** - 6% + 30¢ * **United States** - 6% + 30¢ ### Clearpay payments * **In the UK** - 6% + £0.30 GBP ### Invoice payments Per-transaction payment processing rates for Square invoices vary by country and payment method. To find detailed pricing information for a particular country, choose the link for the country and check the Processing Rates section: * [Australia](https://squareup.com/au/en/invoices/pricing) * Canada ([English](https://squareup.com/ca/en/invoices/pricing) or [French](https://squareup.com/ca/fr/invoices/pricing) translation) * [France](https://squareup.com/fr/fr/invoices/pricing) * [Ireland](https://squareup.com/ie/en/invoices/pricing) * [Japan](https://squareup.com/jp/ja/invoices/pricing) * Spain ([Catalan](https://squareup.com/es/ca/invoices/pricing) or [Spanish](https://squareup.com/es/es/invoices/pricing) translation) * [United Kingdom](https://squareup.com/gb/en/invoices/pricing) * [United States](https://squareup.com/us/en/invoices/pricing) ### Subscription payments The following table provides the per transaction payment price for subscription payments. |Region|Subscription payment| |:-----|:-------------------| |Australia|2.2%| |Canada|2.8% + 30¢| |France|1.4% + 25¢ per transaction with EU + EEA cards.{% line-break /%}2.9% + 25¢ per transaction with UK/Non-EEA cards.| |Ireland|1.4% + 25¢ + VAT per transaction with EU + EEA cards.{% line-break /%}2.9% + 25¢ + VAT per transaction with UK/Non-EEA cards.| |Japan|3.6%| |Spain|1.4% + 25¢ per transaction with EU + EEA cards.{% line-break /%}2.9% + 25¢ per transaction with Non-EEA cards.| |United Kingdom|1.4% + 25p for transactions with UK cards{% line-break /%}2.5% + 25p for transactions with non-UK cards.| |United States|2.9% + 30¢| ### Orders API fee structure There is no transaction fee for orders paid using Square payments. If you want to use the Square Orders API with a non-Square payments provider, there is a 1% fee per transaction. For more information, [contact us](https://squareup.com/help/contact?prefill=developer_api). ### Gift cards pricing * **Processing rates** - Standard payment processing fees apply when selling and reloading Square gift cards. There are no fees when a gift card is redeemed. To find detailed rate information for a particular country, choose the link for the country: * [Australia](https://squareup.com/au/en/gift-cards/pricing) * Canada ([English](https://squareup.com/ca/en/gift-cards/pricing) or [French](https://squareup.com/ca/fr/gift-cards/pricing) translation) * [France](https://squareup.com/fr/fr/gift-cards) * [Ireland](https://squareup.com/ie/en/gift-cards) * [Japan](https://squareup.com/jp/ja/gift-cards/pricing) * [Spain](https://squareup.com/es/es/gift-cards) * [United Kingdom](https://squareup.com/uk/en/gift-cards/pricing) * [United States](https://squareup.com/us/en/gift-cards/pricing) * **Load fees** - Sellers in the following countries pay 2.5% of the amount added to a Square gift card, in addition to standard payment processing rates: * Australia * Canada * United States Load fees apply to `ACTIVATE`, `LOAD`, and `ADJUST_INCREMENT` activities. ## Cannabidiol (CBD) sales in the United States Square processes CBD payments for retailers in the United States. The following table shows CBD seller processing fees. |Payment channel|Card present|Card not present| |:---------|:-------|:---------| |An in-person payment with a Square Terminal or Square Reader (Reader SDK and Point of Sale API)|3.5% + 10¢|4.4% + 15¢| |eCommerce|n/a|3.8% + 30¢| Learn more about [Selling CBD with Square](https://squareup.com/us/en/solutions/cbd). ## International Transaction Fees In addition to standard processing fees, Square charges an International Transaction Fee when a payment is made with a credit or debit card issued outside the seller's home country. This fee applies to all card-present, card-not-present, online, and API payments processed through Square. ### Fee rates by market The International Transaction Fee is charged as an additional percentage on top of the standard processing rate for the payment type: |Market|International Transaction Fee|Tax on Fee| |:-----|:----------------------------|:---------| |United States|1.5%|None| |Canada|1.5%|GST/HST exempt| |Japan|1.5%|Consumption tax (included)| |United Kingdom|1.5%|VAT exempt| |Ireland|1.5%|23% VAT (excluded)| |Spain|1.5%|VAT exempt| |France|1.5%|VAT exempt| ### How the fee is applied The International Transaction Fee is determined by the country of issuance of the buyer's card, not the buyer's physical location: - **United States, Canada, Japan, United Kingdom**: Fee applies when the card's country of issuance differs from the seller's country - **European Economic Area (Ireland, Spain, France)**: Fee applies only when the card is issued outside the EEA (European Economic Area). Cards issued within any EEA country are treated as domestic and do not incur the fee. {% aside type="info" %} The fee is calculated based on the payment total and charged at the time of payment capture. If the card's country of issuance cannot be determined from the BIN (Bank Identification Number), no International Transaction Fee is charged. {% /aside %} ### Fee display and reporting The International Transaction Fee appears as a separate line item in seller reports and dashboards: - **Fees Report**: Lists International Transaction Fees as a distinct fee category - **Payment Methods Report**: Indicates which payments were processed with international cards - **Monthly tax invoices**: Includes any applicable taxes on the International Transaction Fee {% aside type="tip" %} **For sellers**: To help your sellers understand and track their international payment volume, direct them to [View In-App Summaries and Reports](https://squareup.com/help/us/en/article/5381-in-app-summaries-and-reports), which explains how to access detailed transaction reports in the Square Dashboard. {% /aside %} ### Example pricing calculation For a $100 USD card-present payment in the United States processed with a card issued in Canada: - **Payment amount**: $100.00 - **Standard processing fee**: $2.75 (2.6% + $0.15) - **International Transaction Fee**: $1.50 (1.5%) - **Total fees**: $4.25 ### Refunds and disputes The International Transaction Fee follows the same refund policy as standard processing fees: - **Refundable fees**: If your processing fees are refundable, the International Transaction Fee is proportionally refunded - **Non-refundable fees**: If your processing fees are non-refundable, the International Transaction Fee is also non-refundable - **Disputes**: No additional International Transaction Fee is charged when a dispute occurs ### Special considerations **Existing online international rates**: In the United Kingdom and European markets, online payments already have separate domestic and international rates. For these existing tiered online rates, no additional International Transaction Fee is applied to the higher international rate. **Alternative payment methods**: The International Transaction Fee applies only to credit and debit card payments. Alternative payment methods such as ACH, Cash App Pay, Afterpay, and other digital wallets are not subject to this fee. **Cost Plus and Interchange Plus pricing**: Sellers on Cost Plus or Interchange Plus pricing models already have international card costs passed through in their pricing structure and are not charged the additional International Transaction Fee. --- # Payment Minimums > Source: https://developer.squareup.com/docs/payment-minimums > Status: PUBLIC > Languages: All > Platforms: All Learn about the minimum payment amounts required for any Square payment related API. {% subheading %}Learn about the minimum payment amounts required for any Square payment related API.{% /subheading %} {% toc hide=true /%} ## Overview Square requires a minimum payment amount in a [CreatePayment](https://developer.squareup.com/reference/square/payments-api/createpayment) request before the payment request is processed. This minimum amount varies by payment type and supported country. ## Card payment minimums |Country|Minimum payment| |--- |--- | |Australia|$0.01| |Canada|$0.01| |France|0.01 EUR| |Ireland|0.01 EUR| |Japan|¥1| |United Kingdom|£0.01| |United States|$0.01| ## ACH payment minimums |Country|Minimum payment| |--- |--- | |United States|$0.01| ## Cash payment and external payment minimums |Country|Minimum payment for cash/external payments| |--- |--- | |Australia|**Cash:** $0 (the amount can only be specified in increments of $0.05.) **External:** $0|| |Canada|**Cash:** $0 (the amount can only be specified in increments of $0.05). **External:** $0| |France|0 EUR| |Ireland|0 EUR| |Japan|¥0| |United Kingdom|£0| |United States|$0| ## Afterpay minimums and maximums | Country | Minimum payment |Maximum payment | |----------------|-----------------|----------------| | Australia | $1.00 | $2,000 | | Canada | $1.00 | $2,000 | | United Kingdom | £1.00 | £1,000 | | United States | $1.00 | $2,000{% line-break /%}($4,000 for Afterpay monthly payments) | ## See also * [Supported Payment Methods by Country](payment-card-support-by-country) --- # Common Square API Patterns > Source: https://developer.squareup.com/docs/sdks/java/common-square-api-patterns > Status: PUBLIC > Languages: All > Platforms: All Learn how the Square Java SDK supports the common Square API features. {% subheading %}Learn how the Square Java SDK supports the common Square API features.{% /subheading %} {% toc hide=true /%} ## Overview Some of the Square API patterns are used across various APIs. These include the following: * **Pagination** - Many Square API operations limit the size of the response. When the result of the API operation exceeds the limit, the API truncates the result. You must make a series of requests to retrieve all the data. This is referred to as pagination. * **Idempotency key** - Most Square APIs that perform create, update, or delete operations require idempotency keys to protect against making duplicate calls that can have negative consequences (for example, charging a card on file twice). * **Object versioning** - Some Square resources (for example, the `Customer` object) have versions assigned. The version numbers enable optimistic concurrency, which is the ability for multiple transactions to complete without interfering with each other. * **Clear API object fields** - Square API update endpoints that support sparse updates allow you to clear fields by setting the value to `null`. Note that `updateOrderAsync` requires an `X-Clear-Null: true` HTTP header to indicate that the request contains a `null` field update. These Square API patterns are exposed in the Square Java SDK. ## Pagination Square API [pagination](working-with-apis/pagination) support lets you split a full query result set into pages that are retrieved through a sequence of requests. For example, when you call `list` on `AsyncCustomersClient`, you can limit the number of customers returned in the response. If there are more customers to retrieve, auto-pagination gives you the next page of results automatically. This is exposed in an iterator, which can be used in a for-each loop as shown in the following example. The code example calls the `list` method on `AsyncCustomersClient`. The request limits the number of customers returned to 10. The `for-each` loop iterates through all customers across pages seamlessly. ```java AsyncCustomersClient customers = client.customers(); int limit = 10; customers .list(ListCustomersRequest.builder() .limit(limit) .sortField(CustomerSortField.DEFAULT) .sortOrder(SortOrder.DESC) .count(false) .build()) .thenAccept(result -> { for (Customer cust : result) { System.out.printf( "customer: ID: %s, Version: %s, Given name: %s, Family name: %s\n", cust.getId().get(), cust.getVersion().get(), cust.getGivenName().get(), cust.getFamilyName().get()); } }) .exceptionally(exception -> { try { throw exception.getCause(); } catch (SquareApiException ae) { for (Error err : ae.errors()) { System.out.println(err.getCategory()); System.out.println(err.getCode()); System.out.println(err.getDetail()); } } catch (Throwable t) { t.printStackTrace(); } return null; }) .join(); ``` ## Idempotency key When an application calls a Square API, it must be able to repeat an API operation when needed and get the same result each time. For example, if a network error occurs while updating a catalog item, the application might retry the same request and must ensure that the item updates only once. This behavior is called idempotency. Most Square APIs that modify data (create, update, or delete) require you to provide an idempotency key that uniquely identifies the request. This allows you to retry the request if necessary, without duplicating work. You can provide a custom unique key or simply generate one. There are language specific functions that you can use to generate unique keys. For more information, see [Idempotency](working-with-apis/idempotency). ## Optimistic concurrency and object versioning Some Square API resources support versioning. For example, each `Customer` object has a version field. Initially, the version number is 0. Each update increases the version number. If you don't specify a version number in the request, the latest version is assumed. This resource version number enables optimistic concurrency; multiple transactions can complete without interfering with each other. As a best practice, you should include the version field in the request to enable optimistic concurrency. The value must be set to the current version. For more information, see [Optimistic Concurrency](working-with-apis/optimistic-concurrency). The following code example updates a customer name. The update request also includes a version number. It succeeds only if the specified version number is the latest version of the `Customer` object on the server. ```java AsyncCustomersClient customers = client.customers(); UpdateCustomerRequest body = UpdateCustomerRequest.builder() .customerId(CUSTOMER_ID) .givenName("Fred") .familyName("Jones") .version(7L) .build(); customers .update(body) .thenAccept(result -> { Customer cust = result.getCustomer().get(); System.out.printf( "customer updated:\n Id: %s, Version:{%s} Given name:{%s}, Family name: {%s}", cust.getId().get(), cust.getVersion().get(), cust.getGivenName().get(), cust.getFamilyName().get()); }) .exceptionally(exception -> { try { throw exception.getCause(); } catch (SquareApiException ae) { for (Error err : ae.errors()) { System.out.println(err.getCategory()); System.out.println(err.getCode()); System.out.println(err.getDetail()); } } catch (Throwable t) { t.printStackTrace(); } return null; }) .join(); ``` ## Clear API object fields For update operations that support sparse updates, your request only needs to specify the fields you want to change (along with any fields required by the update operation). If you want to clear a field without setting a new value, set its value to `Nullable.ofNull()`. For more information, see [Clear a field with a null](build-basics/clearing-fields#clear-a-field-with-a-null). The following `update` request for `AsyncLocationsClient` clears the `twitterUsername` field and sets the `websiteUrl` field: ```java AsyncLocationsClient locations = client.locations(); String locationId = "M8AKAD8160XGR"; Location loc = Location.builder() .twitterUsername(Nullable.ofNull()) .websiteUrl("https://developer.squareup.com") .build(); UpdateLocationRequest body = UpdateLocationRequest.builder() .locationId(locationId) .location(loc) .build(); locations .update(body) .thenAccept(result -> { Location location = result.getLocation().get(); System.out.println(location); }) .exceptionally(exception -> { try { throw exception.getCause(); } catch (SquareApiException ae) { for (Error err : ae.errors()) { System.out.println(err.getCategory()); System.out.println(err.getCode()); System.out.println(err.getDetail()); } } catch (Throwable t) { t.printStackTrace(); } return null; }) .join(); ``` `update` requests on `AsyncOrdersClient` require an additional header. ### Async update Order requests If you're clearing fields in an order, you must add the `X-Clear-Null: true` HTTP header to signal your intention. In the Square Java SDK, the `RequestOptions` class provides an `addHeader` method that you can use for this purpose. ```java AsyncOrdersClient orders = client.orders(); orders.update( body, RequestOptions.builder().addHeader("X-Clear-Null", "true").build()); ``` --- # .NET SDK > Source: https://developer.squareup.com/docs/sdks/dotnet > Status: PUBLIC > Languages: All > Platforms: All Use the Square .NET library to build with Square APIs in a language-idiomatic way that reduces complexity without sacrificing API functionality. {% subheading %}The Square .NET library supports Square APIs in a language-idiomatic way that reduces complexity without sacrificing API functionality.{% /subheading %} {% toc hide=true /%} {% card-layout %} {% card iconPath="//images.ctfassets.net/1nw4q0oohfju/XBxPd61drpfX7etVH2ACJ/6a27c786aa496c95cda0427691d2019f/nuget.svg" href="https://www.nuget.org/packages/Square" %} {% card-link-out %}SDK package{% /card-link-out %} {% /card %} {% card iconPath="//images.ctfassets.net/1nw4q0oohfju/6foMeNHsmKw27jkpa7lPHk/6d5da15335dcf70d1fd1c28ca3bb540e/Github.svg" href="https://github.com/square/square-dotnet-sdk/blob/master/README.md#sdk-reference" %} {% card-link-out %}Reference library docs{% /card-link-out %} {% /card %} {% /card-layout %} {% line-break /%} **Latest SDK Version:** 45.0.1 Each SDK version is tied to a specific [Square API version](build-basics/versioning-overview). As features are added, Square releases a new Square API version and a new SDK version. To use new features, you must update the SDK version in your application. Review the [release notes](changelog/connect) to learn about changes in each API version. An increase in the SDK major version number indicates a breaking change. You should always test your application before deploying a change to production. {% aside type="important" %} Version 41.0.0 of the .NET SDK represents a full rewrite of the SDK, with a number of breaking changes, including client construction and parameter names. When upgrading from version 40.1.0 or earlier, read the [migration guide](sdks/dotnet/migration) to learn what to update and how to use the new SDK and the legacy version side by side. {% /aside %} ## Quickstart * Follow along with the [Quickstart guide](sdks/dotnet/quick-start) to set up and test the Square .NET SDK in your own project. * Download the [Square .NET SDK Quickstart sample app](https://github.com/Square-Developers/dotnet-getting-started) and follow the instructions in the README. ## Installation {% tabset %} {% tab id=".NET CLI" %} ```bash dotnet add package Square ``` {% /tab %} {% tab id="Package Manager Console" %} ```PowerShell NuGet\Install-Package Square ``` {% /tab %} {% tab id="PackageReference" %} ```xml ``` {% /tab %} {% /tabset %} --- # Java SDK > Source: https://developer.squareup.com/docs/sdks/java > Status: PUBLIC > Languages: All > Platforms: All Use the Square Java library to build with Square APIs in a language-idiomatic way that reduces complexity without sacrificing API functionality. {% subheading %}The Square Java library supports Square APIs in a language-idiomatic way that reduces complexity without sacrificing API functionality.{% /subheading %} {% toc hide=true /%} {% card-layout %} {% card iconPath="//images.ctfassets.net/1nw4q0oohfju/609WZW2rvIgjPSeq5yg3Ki/e52b8e3054df5bf146b4724b5c13cd80/Maven__2_.svg" href="https://central.sonatype.com/artifact/com.squareup/square" %} {% card-link-out %}SDK package{% /card-link-out %} {% /card %} {% card iconPath="//images.ctfassets.net/1nw4q0oohfju/6foMeNHsmKw27jkpa7lPHk/6d5da15335dcf70d1fd1c28ca3bb540e/Github.svg" href="https://github.com/square/square-java-sdk/blob/master/README.md#sdk-reference" %} {% card-link-out %}Reference library docs{% /card-link-out %} {% /card %} {% /card-layout %} {% line-break /%} **Latest SDK Version:** 47.0.1.20260715 Each SDK version is tied to a specific [Square API version](build-basics/versioning-overview). As features are added, Square releases a new Square API version and a new SDK version. To use new features, you must update the SDK version in your application. Review the [release notes](changelog/connect) to learn about changes in each API version. An increase in the SDK major version number indicates a breaking change. You should always test your application before deploying a change to production. {% aside type="important" %} Version `44.0.0.20250319` of the Java SDK represents a full rewrite of the SDK, with a number of breaking changes, including client construction and parameter names. When upgrading from version `43.1.0.20250220` or earlier, read the [migration guide](sdks/java/migration) to learn what to update and how to use the new SDK and the legacy version side by side. {% /aside %} ## Quickstart * Follow along with the [Quickstart guide](sdks/java/quick-start) to set up and test the Square Java SDK in your own project. * Download the [Square Java SDK Quickstart sample app](https://github.com/Square-Developers/java-getting-started) and follow the instructions in the README. ## Installation {% tabset %} {% tab id="Maven" %} ```xml com.squareup square 47.0.1.20260715 ``` {% /tab %} {% tab id="Gradle" %} ```groovy dependencies { implementation 'com.squareup:square:47.0.1.20260715' } ``` {% /tab %} {% /tabset %} --- # API Logs > Source: https://developer.squareup.com/docs/devtools/api-logs > Status: PUBLIC > Languages: All > Platforms: All Learn about the Square API Logs feature, which lets you view the request and response of API calls. {% subheading %}Learn about the Square API Logs feature, which lets you view the request and response of API calls.{% /subheading %} {% toc hide=true /%} ## Overview Square APIs write transaction information to a central log that you can use for diagnostics, troubleshooting, and auditing. The logs consist of an overview page showing all entries and a detailed page for each log entry that shows the transaction request and response, as well as a summary of the API call. Sensitive data, such as access codes and merchant IDs, are redacted from the logs. Logs are retained for 28 days. ## View API logs After each request in API Explorer, a **View Logs** button appears in the response pane. Choose the button to view the log files. ![An animated graphic showing how to use the API Logs feature.](//images.ctfassets.net/1nw4q0oohfju/2ve0fjOoHCZ1LG8Rv4Gxg/42a9627cdac04b1cd3057bc92b61a2d6/source-id.gif) {% aside type="info" %} The maximum size of an individual log entry is 50k. Any bytes beyond that limit are truncated. {% /aside %} The **API Logs** page gives you the ability to search and filter log entries. The following screenshot shows the features of API Logs: ![A screenshot showing the API Logs page.](//images.ctfassets.net/1nw4q0oohfju/1spEmbh0MCeR8O5Lv6EJfa/665d8f497895578b6e2d61132ea1b483/Logs_overview.png) 1. Filter log entries by date and time. 2. Filter log entries by API, endpoint, HTTP status code, or error code. 3. Search log entries by keyword, API name, or other values. 4. The overview table includes: * The status code returned by the API request. * The Square API called. * The endpoint and HTTP method. * The date of the request. Each log entry has a summary, request, and response page. The **Summary** tab shows application and seller information along with the API name and endpoint. ![A screenshot of the Summary tab, which shows application and seller information along with the API name and endpoint.](//images.ctfassets.net/1nw4q0oohfju/3SP0SbVoIPZE1S9iJBKOjr/577ffafc5c9d38b0c0fec0859078a5fc/Logs_summary.png) The **Request** tab shows the API request and provides links to the API Reference and to API Explorer. Use the **Copy** button to copy the request. ![A screenshot of the API Logs Request tab, which shows the API request and provides links to the API Reference and to API Explorer.](//images.ctfassets.net/1nw4q0oohfju/2jUoI1qLQgVAleTnwjx32j/208d4c2f0134a05c450129bc71f64f05/Logs_request.png) The **Response** tab shows the API response and provides links to the API Reference and to API Explorer. Use the **Copy** button to copy the response. ![A screenshot of the API logs Response tab, which shows the API response and provides links to the API Reference and to API Explorer.](//images.ctfassets.net/1nw4q0oohfju/2RUWR2iq6BaVWFlLVu2Jnl/a15ad3d8988dd6ed6ebdeb5772289a67/Logs_response.png) ## See also * [API Explorer](devtools/api-explorer) * [GraphQL Explorer](devtools/graphqlexplorer) * [Webhook Event Logs](devtools/webhook-logs) --- # Authentication > Source: https://developer.squareup.com/docs/auth > Status: PUBLIC > Languages: All > Platforms: All Learn about client application authentication using Square authentication APIs. {% subheading %}Learn about client application authentication using Square authentication APIs.{% /subheading %} {% toc hide=true /%} ## Overview The Square API enables developers to create applications that make API calls on behalf of Square sellers. ## Web clients The [OAuth API](oauth-api/overview) lets you ask a seller to authorize your application for specific permissions on their Square account and get a scoped access token. The token is used to make authorized API calls on their account resources. Using the OAuth API, you can also create access tokens that have a reduced scope from the set of permissions granted and access tokens that have a 24 hour time limit instead of the default 30 day limit. These limited tokens work well in a loosely controlled access environments such as web browsers or mobile clients. For more information, see [Refresh, Revoke, and Limit the Scope of OAuth Tokens](oauth-api/refresh-revoke-limit-scope). ## Mobile clients For developers building mobile applications that take in-person payments using the Reader SDK (Deprecated), the [Mobile Authorization API](mobile-authz/what-it-does) (Deprecated) lets your mobile application get an authorization code to manage the checkout flow and payment processing on behalf of a seller. ## See also * [OAuth API](oauth-api/overview) * [Create the Redirect URL and Square Authorization Page URL](oauth-api/create-urls-for-square-authorization) * [Receive Seller Authorization and Manage Seller OAuth Tokens](oauth-api/receive-and-manage-tokens) * [Refresh, Revoke, and Limit the Scope of OAuth Tokens](oauth-api/refresh-revoke-limit-scope) * [OAuth Walkthrough: Test Authorization with a Web Server](oauth-api/walkthrough) * [OAuth Best Practices](oauth-api/best-practices) --- # Square Sandbox > Source: https://developer.squareup.com/docs/devtools/sandbox/overview > Status: PUBLIC > Languages: All > Platforms: All An overview of the Square Sandbox, which can be used to simulate orders, invoices, payments, and transactions in a test environment. {% subheading %}Use the Sandbox test environment to simulate transactions and experiment with Square APIs while building an application.{% /subheading %} {% toc hide=true /%} ## Overview The Square Sandbox is a free, isolated server environment that allows developers to safely test Square APIs without affecting real data. It lets you simulate payment processing and other business activities using [test seller accounts](#sandbox-test-accounts) and [test payment methods](devtools/sandbox/payments). Square provisions a Sandbox environment for each application you register in the [Developer Console](devtools/developer-dashboard) and a Sandbox Square Dashboard for each test account. The Sandbox base URL is `https://connect.squareupsandbox.com`. The base URL is used for Square API calls in the Sandbox, for example: * `CreatePayment` - `https://connect.squareupsandbox.com/v2/payments` * `ObtainToken` - `https://connect.squareupsandbox.com/oauth2/token` For [Square GraphQL](devtools/graphql) queries in the Sandbox, the base URL is: * `https://connect.squareupsandbox.com/public/graphql` {% aside type="important" %} The production base URL is `https://connect.squareup.com`. Account credentials and resources from one environment cannot be used with or accessed from the other. For example, Sandbox OAuth access tokens cannot be used in production. For more information, see [Move OAuth from the Sandbox to Production](oauth-api/movetoprod). {% /aside %} You can choose the Sandbox environment when using Square developer tools: * In the [Developer Console](https://developer.squareup.com/apps), when you open an application, choose **Sandbox** in the toggle at the top of the page. ![A screenshot showing the Sandbox/Production environment toggle for an application in the Developer Console.](//images.ctfassets.net/1nw4q0oohfju/7hRjEXRoKDwJlxaSa6mmnM/dee7a8fd8ad505a0d8f873ec774d7989/Sandbox-production_switch_highlighted.png) * In [API Explorer](https://developer.squareup.com/explorer/square), choose **Sandbox** in the toggle in the **Access token** box. * In [GraphQL Explorer](https://developer.squareup.com/explorer/graphql), choose **Sandbox** in the toggle at the top of the page. * With [Square SDKs](sdks), configure the Sandbox environment when the Square client is initialized. Use the Sandbox to: * Test different payment scenarios using Sandbox credit card numbers, payment tokens, and other test values. These [Sandbox payment values](devtools/sandbox/payments) are never charged. * Test end-to-end flows using [API Explorer](devtools/api-explorer) or your own code. For example, you can create an inventory and subscriptions, create orders, and take payments using Sandbox payment values. You can also subscribe for Sandbox [webhook notifications](webhooks/overview). * Test new versions of Square APIs before using them in production. You can specify the `Square-Version` in your API requests or change the default **Sandbox API version** for your application on the **Credentials** page in the [Developer Console](devtools/developer-dashboard). * Generate OAuth access tokens for Sandbox test accounts to test permission scopes without implementing an [OAuth flow](oauth-api/overview). * Make sure you gracefully handle API calls in unsupported regions. {% aside type="important" %} The Sandbox Square Dashboard provides only a limited subset of the features available in the production [Square Dashboard](devtools/seller-dashboard) used by sellers, and some functionality available in production may be missing or behave differently in the sandbox. Square recommends using the Sandbox Square Dashboard for basic API testing only. For comprehensive testing and validation, rely on the API Explorer in Sandbox mode, which matches the behavior of our production APIs and provide reliable test coverage. {% /aside %} ## Requirements and limitations * You need a [Square account and an application](get-started/create-account-and-application). Note that some Square developer tools require that you sign in to access features. * The access token in your Square API requests and Square GraphQL queries must be valid for the Sandbox environment. This can be your [personal Sandbox access token](build-basics/access-tokens#get-personal-access-token) or a [Sandbox OAuth access token](build-basics/access-tokens#get-oauth-access-token). If you're signed in to API Explorer, the access tokens associated with your account are available in the **Access token** dropdown. When switching to production, make sure to use an access token that's valid for the production environment. Otherwise, you receive an `UNAUTHORIZED` error for Square API calls or "Failed to fetch" for GraphQL queries. * You must use [Sandbox test values](devtools/sandbox/payments) to make payments in the Sandbox. The Sandbox doesn't accept real credit cards or payment methods. Sandbox test values cannot be used in production. * Not all Square products and features support testing in the Sandbox. {% accordion expanded=false %} {% slot "heading" %} #### More details {% /slot %} The following are some example limitations: * Square hardware, such as a POS terminal, cannot be used in the Sandbox. Testing the Terminal API in the Sandbox is supported, but testing on the device itself isn't. * Square products and applications, including Square for Restaurants, Square Point of Sale, and Square Invoices, aren't supported. * The Point of Sale API, Snippets API, Sites API, and Reader SDK aren't supported. * Customer settings aren't supported. * Gift cards generated with the Gift Cards API cannot be used with Virtual Terminal in the Sandbox Square Dashboard. In addition, physical gift cards cannot be created or managed. {% /accordion %} * The Sandbox Square Dashboard used with Sandbox test accounts also has limitations. {% accordion expanded=false %} {% slot "heading" %} #### More details {% /slot %} The following are some example limitations: * Receipts aren't generated. * Refunds can be viewed but not issued. * Viewing or editing subscriptions isn't supported. * Sending emails isn't supported. * Viewing the booking URL isn't supported. * The **Banking** tab isn't supported. As a result, **Balance** and [application fee reporting](payments-api/take-payments-and-collect-fees#application-fee-reporting) are also not supported. {% /accordion %} {% aside type="important" %} Don't keep any PII (personal identifiable information) in a Sandbox environment, such as names, email addresses, phone numbers, or birthdays. Personal data in a Sandbox doesn't comply with [GDPR](https://gdpr.eu/). For more information, see [Square GDPR FAQs](https://squareup.com/help/us/en/article/6417-gdpr-faqs). If you need to add personal data for any reason (such as migration testing), make sure to promptly delete it after completing your task. {% /aside %} ## Sandbox cost Use of the Sandbox environment is free of charge. You can make an unlimited number of free Sandbox API calls. There are no payment processing fees for Sandbox payments because cards aren't actually charged and payments are never actually processed by a live bank. In the production environment, some API calls require that your application user has a subscription to the related Square software-as-a-service. All production payment processing through Square APIs have a processing fee. For more information, see [Payments Pricing with Square APIs and SDKs](payments-pricing). ## Sandbox test accounts When you sign up for a Square developer account, Square creates the default test account, which grants unrestricted access to all of your applications. Each time an application is registered in the Developer Console, Square generates an access token for this account that can be used to authorize any Square API request in the Sandbox. This access token is the same value as the application's **Sandbox Access token** on the **Credentials** page. You can create additional Sandbox test accounts to simulate sellers operating in supported countries and to test with specific permission scopes. Each Sandbox test account has access to a Sandbox Square Dashboard that lets you see the results of your API calls from the seller's perspective. ![A diagram that shows Sandbox test account relationships.](//images.ctfassets.net/1nw4q0oohfju/rcEFkMvVzlocXBhzqYLi3/f7abda4fe1e7168cb70657582f670b8e/sandbox-relationships.png) ## Open the Sandbox Square Dashboard 1. Sign in to the [Developer Console](devtools/developer-dashboard). 2. In the left pane, choose **Sandbox test accounts**, and then choose **Square Dashboard** next to the account name. ![Open the Developer Console and verify a transaction in the Square Dashboard.](//images.ctfassets.net/1nw4q0oohfju/4xlgYp7sO2yAgwq1RsQ4dx/8cddcd5b70cfa2ca521cced6aa7e1112/sandbox-dashboard.gif) {% anchor id="create-a-sandbox-test-account" /%} ## Create a Sandbox test account You can create up to 10 Sandbox test accounts in addition to the default test account in the Developer Console. A test account simulates a Square seller account. 1. Sign in to the [Developer Console](https://developer.squareup.com/apps). 2. In the left pane, choose **Sandbox test accounts**, and then choose **New sandbox test account**. ![A screenshot of the Sandbox test accounts page in the Developer Console.](//images.ctfassets.net/1nw4q0oohfju/74g0TtelePjPTpemf7E3Do/afff5d38c3d3a8fc89ff866581fd7249/sandbox-test-accounts-page.png) 4. Enter the account name and choose the country of operation. You can create the test account in any [country where Square processes payments](payment-card-support-by-country). Simulated payments follow the banking rules of the account's country. For example, a Sandbox account for France processes payments according to French regulations. 7. To generate access tokens that grant all available permissions for all your applications, select the **Automatically create authorizations for all my current apps** checkbox. 8. Choose **Create**. {% anchor id="authorize-a-sandbox-test-account" /%} ## Authorize a Sandbox test account For each test account that you create, you can generate an OAuth access token that grants a specific set of [permissions](oauth-api/square-permissions) for each of your applications. This feature lets you quickly test with a permission scope without implementing an [OAuth flow](oauth-api/overview). 1. Sign in to the [Developer Console](https://developer.squareup.com/apps) and open the application that you want to test with. 2. At the top of the page, choose **Sandbox** in the environment toggle. 3. In the left pane, choose **OAuth**. The **Test account authorizations** section displays test accounts that currently have access tokens. {% accordion expanded=false %} {% slot "heading" %} #### If the test account is listed in the table {% /slot %} 1. Choose the account name from the table. This opens the **Authorization details** modal where you can view the current tokens and permissions, renew the access token with the existing permissions, or revoke the access token. 2. To change the permission scope, choose **Revoke token**, and then choose **Revoke**. 3. Choose **Authorize test account**. 4. From the **Test account** dropdown, choose the account name. 5. Select the permissions you want to allow. 6. Choose **Save**. {% /accordion %} {% accordion expanded=false %} {% slot "heading" %} #### If the test account isn't listed in the table {% /slot %} 1. Choose **Authorize test account**. 2. From the **Test account** dropdown, choose the account name. 3. Select the permissions you want to allow. 4. Choose **Save**. {% /accordion %} To use the access token, provide it as a bearer token in the `Authorization` header, as shown in the following `ListLocations` example: ```curl curl https://connect.squareupsandbox.com/v2/locations \ -H 'Square-Version: 2025-01-23' \ -H 'Authorization: Bearer {SANDBOX_ACCESS_TOKEN}' \ -H 'Content-Type: application/json' ``` --- # Square SDK and Mobile Samples > Source: https://developer.squareup.com/docs/sample-apps > Status: PUBLIC > Languages: All > Platforms: All Learn about OAuth samples, Square SDK samples, GraphQL samples, and Square mobile samples. {% subheading %}Explore samples for OAuth, Square SDK, GraphQL, and mobile.{% /subheading %} {% toc hide=true /%} ## OAuth samples These sample applications demonstrate a bare-bones implementation of the OAuth flow for Square APIs. Each language-specific application serves a link that directs merchants to the OAuth Permissions form and handles the result of the authorization, which is sent to your application's Redirect URL. For more information and a detailed walkthrough, see [OAuth Walkthrough](oauth-api/walkthrough). [Java](https://github.com/Square-Developers/oauth-examples/tree/main/java)    [Node.js](https://github.com/Square-Developers/oauth-examples/tree/main/node)     [PHP](https://github.com/Square-Developers/oauth-examples/tree/main/php)     [Python](https://github.com/Square-Developers/oauth-examples/tree/main/python)     [Ruby](https://github.com/Square-Developers/oauth-examples/tree/main/ruby)     ## Square SDK samples * Bookings API {% line-break /%} [Node.js](https://github.com/square/connect-api-examples/tree/master/connect-examples/v2/node_bookings) * Catalog API (product management samples) {% line-break /%} [Java](https://github.com/square/connect-api-examples/tree/master/connect-examples/v2/java_catalog) * Gift Cards API {% line-break /%} [Node.js](https://github.com/square/connect-api-examples/tree/master/connect-examples/v2/node_gift-cards) * Invoices API {% line-break /%} [Node.js](https://github.com/square/connect-api-examples/tree/master/connect-examples/v2/node_invoices) * Loyalty API (included in the order-ahead sample) [Node.js](https://github.com/square/connect-api-examples/tree/master/connect-examples/v2/node_orders-payments) * Orders API (order-ahead sample) {% line-break /%} [Node.js](https://github.com/square/connect-api-examples/tree/master/connect-examples/v2/node_orders-payments) * Snippets API {% line-break /%} [Ruby](https://github.com/square/connect-api-examples/tree/master/connect-examples/v2/rails_snippet) * Subscriptions API {% line-break /%} [Node.js](https://github.com/square/connect-api-examples/tree/master/connect-examples/v2/node_subscription) * Web Payments SDK and Payments API (payment processing samples) {% line-break /%} [PHP](https://github.com/square/connect-api-examples/tree/master/connect-examples/v2/php_payment)     [Ruby](https://github.com/square/connect-api-examples/tree/master/connect-examples/v2/rails_payment)     [Python](https://github.com/square/connect-api-examples/tree/master/connect-examples/v2/python_payment)     [Node.js](https://github.com/square/connect-api-examples/tree/master/connect-examples/v2/node_payment)     [Java](https://github.com/square/connect-api-examples/tree/master/connect-examples/v2/java_payment)     [.NET](https://github.com/square/connect-api-examples/tree/master/connect-examples/v2/csharp_payment) ## GraphQL samples Sample applications demonstrating how to use [Square GraphQL](devtools/graphql) queries to access data from Square APIs. Each application includes a script you can run to upload test data to your Square account. * [Square and GraphQL - Code Example](https://github.com/square/connect-api-examples/tree/master/connect-examples/v2/graphql-sample-app) - Node.js program that runs sample GraphQL queries from the command line. * [Square Dev GraphQL and PKCE Example Application](https://github.com/square/squaredev-graphql-pkce-demo) - React Native mobile application (without Expo) that shows some use cases and implementations for GraphQL and PKCE. ## Mobile samples * Mobile Payments SDK {% line-break /%} [Android](https://github.com/square/mobile-payments-sdk-android)     [iOS](https://github.com/square/mobile-payments-sdk-ios/tree/main/Example)     [Flutter]()     [React Native]() * In-App Payments SDK {% line-break /%} [Android](https://github.com/square/in-app-payments-android-quickstart)     [iOS](https://github.com/square/in-app-payments-ios-quickstart)     [Flutter](https://github.com/square/in-app-payments-flutter-plugin/tree/master/example)     [React Native](https://github.com/square/in-app-payments-react-native-plugin/tree/master/react-native-in-app-payments-quickstart) * Point of Sale API: Android {% line-break /%} [Bikeshop sample](https://github.com/square/point-of-sale-android-sdk/tree/master/sample-bikeshop)     [Hello Charge](https://github.com/square/point-of-sale-android-sdk/tree/master/sample-hellocharge)     --- # Versioning in the Square API > Source: https://developer.squareup.com/docs/build-basics/versioning-overview > Status: PUBLIC > Languages: All > Platforms: All Learn about the Square versioning process and how it works with breaking changes. {% subheading %}Describes versioning and version-naming schemes used for the Square API and SDKs.{% /subheading %} {% toc hide=true /%} ## Overview The [Square API](https://developer.squareup.com/reference/square) is a collection of RESTful APIs that provide access to payments, orders, customers, and other resources in a Square account. Instead of calling the APIs directly, developers can optionally use backend platform [SDKs](#square-sdk-versions) in common programming languages. Square API and SDK versions are updated with every release, typically on a monthly basis. Each release uses a single Square API version number that applies to all Square APIs and might contain major, minor, and patch-level updates. You can check the [release notes](changelog/connect) for each API version to decide whether you should upgrade to a newer version. For example, you might decide to upgrade to access new and improved features, get bug fixes, or migrate from deprecated functionality. Note that upgrading to a new version includes all the changes across APIs that were released since your previous version and might require changes to your code. {% aside type="info" %} Square graphs used in [GraphQL](devtools/graphql) queries generally reflect the latest version of the corresponding Square APIs. {% /aside %} ## Square API lifecycle Square APIs follow a lifecycle that can include Beta, General Availability (GA), Deprecated, and Retired stages. In a given API version, individual Square APIs and their components (such as endpoints, objects, fields, or webhooks) can be in any lifecycle stage. New functionality might be released in Beta to allow developers to integrate and test before GA. APIs might be replaced with improved APIs, and then deprecated and eventually retired. For more information about each stage, see [Square API Lifecycle](build-basics/api-lifecycle). ## How Square API versioning works The Square API uses a `YYYY-MM-DD` version-naming scheme that indicates the date the API version is released. This versioning scheme is used to control breaking changes and allows you to test newer API versions before upgrading your application. The API version applies to all Square APIs, such as the Payments API, Orders API, and Customers API. Each application registered in the [Developer Console](devtools/developer-dashboard#developer-dashboard) has a default API version, which you can view or change on the **Credentials** page for the production or Sandbox environment. The default API version is pinned to the application and used for all API requests unless overridden in the `Square-Version` header. The following request omits the `Square-Version` header, which directs Square to use the default API version: ```bash curl https://connect.squareup.com/v2/payments \ -H 'Authorization: Bearer {ACCESS_TOKEN}' \ -H 'Content-Type: application/json' ``` To override the default and test different API versions, explicitly specify the API version in the `Square-Version` header (or corresponding SDK client parameter): ```bash curl https://connect.squareup.com/v2/payments \ -H 'Square-Version: 2024-07-17' \ -H 'Authorization: Bearer {ACCESS_TOKEN}' \ -H 'Content-Type: application/json' ``` You can review the [release notes](changelog/connect) to learn about changes in API versions. {% aside type="info" %} Regardless of whether you explicitly specify a version in the request, the response always returns the `Square-Version` header so you know which API version is used. {% /aside %} {% anchor id="square-sdk-versions" /%} ## Square SDK versions The backend platform [Square SDKs](sdks) are provided in several common programming languages. These SDKs follow the [Semantic Versioning](https://semver.org/) scheme that uses three numbers to delineate `MAJOR`, `MINOR`, and `PATCH` versions of the SDKs. The Java SDK, Ruby SDK, Python SDK, and PHP SDK use the following versioning scheme. ``` ... ``` `SquareAPIVersion` is a date value that represents that Square API version, so you know which API version the SDK supports. This versioning scheme enables developers to quickly recognize the impact of Square SDK changes. The .NET SDK, Node.js SDK, and Go SDK use the following versioning scheme. Note that `SquareAPIVersion` isn't included. Additionally, the Go SDK version is prefixed with a `v`. ``` .. ``` For example, consider the following SDK versions: |Example SDK version|Description| |:------|:------| |2.0.1.20191217|2.0.1 represents the first patch (2.0.**1**) to SDK version 2.0 (**2.0**.1).| |2.2.1.20191217|2.2.1 represents the second minor version (2.**2**.1) to SDK version 2 (**2**.2.1).| |3.0.0.20191217|A major version (**3**.0.0) indicates that the release includes a breaking change.| Although SDK releases typically coincide with the release of a Square API version, this versioning scheme enables Square to independently release updates to Square SDKs. The `MAJOR`, `MINOR`, or `PATCH` version of an SDK can change while still tied to the existing Square API release. For example, Square can release an SDK with a `MINOR` version change while `SquareAPIVersion` remains the same. Each Square SDK version is created for a specific API version. You must upgrade the SDK version if you want to use functionality added in a newer Square API version. {% anchor id=“breaking-changes” /%} ## Breaking versus non-breaking changes Breaking changes in the Square API are introduced in versioned releases (with a new major API version). Non-breaking changes can be introduced to an existing API version. The following table provides examples of breaking and non-breaking changes. {% aside type="important" %} While not considered breaking changes, major releases and deprecations are versioned for easier identification. {% /aside %} |API change|Breaking change| |:------|:------| |New endpoints|No| |New read-only or optional fields|No| |New required fields|Yes| |New string constant|No| |Deprecation|No| |Retirement|Yes| |Rename/reshape of a field, data type, or string constant|Yes| |More restrictive change to field validations|Yes| |Less restrictive change to field validations|No| |Change to field type assignment|Yes| |Change to the HTTP status code returned by an operation|Yes| If you have questions about Square versioning, [contact Developer Support](https://squareup.com/help/contact?panel=BF53A9C8EF68), [join our Discord community](https://discord.gg/squaredev), or reach out to your Square account manager. ## See also * [Square APIs and SDKs Release Notes](changelog/connect) * [Square API Lifecycle](build-basics/api-lifecycle) * [Square SDKs](sdks) --- # Access Tokens and Other Square Credentials > Source: https://developer.squareup.com/docs/build-basics/access-tokens > Status: PUBLIC > Languages: All > Platforms: All Learn about the different Square access tokens and how to generate the correct token for your needs. {% subheading %}Learn about the different types of access tokens and other credentials used to identify, authenticate, and authorize an application for Square development.{% /subheading %} {% toc hide=true /%} ## Overview Access tokens are credentials that allow applications to securely interact with Square APIs. An access token authenticates your application and authorizes access to resources in a Square account, such as customers, orders, and payments. Proper credential management and storage is critical for maintaining security. ## Access token types You must provide a valid access token when calling Square APIs to access resources in your own Square account or other Square accounts. There are two types of access token: * **Personal access token** - Provides unrestricted Square API access to resources in a Square account. You can use your personal access token in Square API calls to perform any activity on any resource in your own Square account. * **OAuth access token** - Provides authenticated and scoped Square API access to resources in a Square account. Applications use OAuth access tokens in Square API calls to access resources on behalf of account owners. When Square sellers sign up to use an application, they grant the specific permissions (scopes) that the application needs to perform some activity on their account resources. In production environments, multi-tenant applications that serve multiple sellers should use OAuth access tokens. For custom integrations that only access your own Square account, personal access tokens are suitable for production use. You must protect access tokens and store them securely. {% aside type="info" %} Calls to the [Webhook Subscriptions API](webhooks/webhook-subscriptions-api) and [Events API](events-api/overview) require the application's personal access token because these APIs manage application-level events. {% /aside %} {% anchor id="get-personal-access-token" /%} ## Get a personal access token Each application you create in the Developer Console provides a personal access token for use in the production environment and a separate Sandbox access token for use in the [Square Sandbox](devtools/sandbox/overview). These access tokens grant full access to the resources in a Square account and are generally used for testing. 1. Sign in to the [Developer Console](https://developer.squareup.com/apps) and open the application that's calling the Square APIs. If needed, follow the steps in [Get Started](get-started) to create a Square account and an application. 2. In the left pane, choose **Credentials**. 3. Get your production or Sandbox access token: {% tabset %} {% tab id="Production" %} 1. At the top of the page, choose **Production**. 2. In the **Production Access token** box, choose **Show** and copy your token. {% /tab %} {% tab id="Sandbox" %} 1. At the top of the page, choose **Sandbox**. 2. In the **Sandbox Access token** box, choose **Show** and copy your token. Your Sandbox access tokens are also available from the **Default Test Account** user on the **Sandbox test accounts** page in the Developer Console and when you're signed in to API Explorer. {% /tab %} {% /tabset %} The following screenshot shows the Sandbox access token on the **Credentials** page. ![A screenshot showing the Sandbox access token on the Credentials page in the Developer Console.](//images.ctfassets.net/1nw4q0oohfju/23ri8kcnAFmJR2AUNpVSLF/5c37f31c2967cacce8e71005690b006b/sandbox-access-token-on-credentials-page.png) {% aside type="tip" %} When you're signed in to [API Explorer](https://developer.squareup.com/explorer/square), the access tokens associated with your account are available in the **Access token** dropdown. {% /aside %} The following guidelines apply to protecting personal access tokens: * **Don't hardcode access tokens in your code** - Consult relevant documentation to find best practices for securely storing credentials, including framework-specific considerations (for example, encrypted credentials for Ruby on Rail) and platform-specific considerations (web or mobile applications). One option might be to use your cloud provider's secrets manager, such as AWS Secrets Manager, Google Cloud Secret Manager, or Azure Key Vault. * **Don't share access tokens** - A personal access token can be used to impersonate the account owner and gain full access to account resources. For example, if you paste a cURL code snippet when debugging an issue with Square support or on community forums, make sure to redact the access token used in the `Authorization` header. {% anchor id="get-oauth-access-token" /%} ## Get an OAuth access token The process of getting an OAuth access token depends on the application type (which determines whether you use the code flow or PKCE flow) and whether the token is used in production or for testing in the Square Sandbox during development. {% tabset %} {% tab id="Production" %} In-production applications start the OAuth flow by sending each seller to the Square authorization page. On successful flow completion, Square returns an OAuth access token to your application. The OAuth flow includes the following high-level stages: {% table %} * Stage 1: Authorization {% width="233px" %} * Stage 2: Callback {% width="233px" %} * Stage 3: Token request --- * Your application uses an {% tooltip text="authorization URL" %}A URL to the Square authorization page that includes the permissions you're requesting, your application ID, and other parameters.{% /tooltip %} to send the seller to the Square authorization page where they can sign in to Square and grant the permissions you requested. * Square uses your {% tooltip text="redirect URL" %}The endpoint for your application or web page that processes the authorization response from Square. Your application's redirect URL is registered in the Developer Console.{% /tooltip %} to send the seller back to your application and appends a `code` query parameter that contains an authorization code. * Your application calls `ObtainToken` and sends the authorization code, your application ID, and other fields. Square returns an access token and refresh token. {% /table %} {% /tab %} {% tab id="Sandbox" %} Testing in the Sandbox lets you verify that your application can successfully access and manage resources in a Square account and gracefully handle authorization errors. You have two options for getting access tokens: * **Simulate the OAuth flow** - You can simulate the OAuth flow in the Sandbox. For more information, see [OAuth Walkthrough: Test Authorization with a Web Server](oauth-api/walkthrough). Note that signing in to the Square authorization page directly using a test Sandbox account isn't supported. * **Generate OAuth access tokens** - If you're not ready to add an OAuth flow, you can quickly generate Sandbox OAuth access tokens to try calling Square APIs with a specific set of permissions. To generate a Sandbox OAuth access token: 1. [Create a Sandbox test account](testing/create-and-authorize-sandbox-account#create-a-sandbox-test-account) in the Developer Console. 2. [Authorize the Sandbox test account](testing/create-and-authorize-sandbox-account#authorize-a-sandbox-test-account) with the set of permissions you want to test. You can get your Sandbox access tokens later from the Developer Console on the **OAuth** page for your application or from the **Sandbox test accounts** page. They're also available when you're signed in to [API Explorer](https://developer.squareup.com/explorer/square). {% line-break /%} {% /tab %} {% /tabset %} **Protect access tokens and store them securely** - Store OAuth access tokens and refresh tokens in a secure storage solution. Don't expose them in client-side code or version control systems. You must refresh OAuth access tokens periodically before they expire. For more information, see [OAuth API](oauth-api/how-it-works) and [OAuth Best Practices](oauth-api/best-practices). {% anchor id="use-access-token" /%} ## Use an access token in your code Access tokens are sent as bearer tokens in the `Authorization` header of Square API requests. * Production requests use the `https://connect.squareup.com/v2` base URL with an access token that's valid for the production environment, as shown in the following cURL request: ```curl curl https://connect.squareup.com/v2/locations \ -H 'Square-Version: 2024-07-17' \ -H 'Authorization: Bearer {PRODUCTION_ACCESS_TOKEN}' \ -H 'Content-Type: application/json' ``` * Sandbox requests use the `https://connect.squareupsandbox.com/v2` base URL with an access token that's valid for the Sandbox environment, as shown in the following cURL request: ```curl curl https://connect.squareupsandbox.com/v2/locations \ -H 'Square-Version: 2024-07-17' \ -H 'Authorization: Bearer {SANDBOX_ACCESS_TOKEN}' \ -H 'Content-Type: application/json' ``` Using the wrong access token for the production or Sandbox environment results in an `AUTHENTICATION_ERROR` error with the `UNAUTHORIZED` error code. ### Using access tokens with Square SDKs When using a backend Square SDK, the client is initialized with an access token and target environment. The following PHP SDK snippet initializes the client for the Sandbox: {% tabset %} {% tab id="SDK version 41.0.0.20250220 and later" %} ```php $client = new SquareClient( token: $_ENV['SQUARE_ACCESS_TOKEN'], options: [ 'baseUrl' => Environments::Sandbox->value ] ); ``` {% /tab %} {% tab id="SDK version 40.0.0.20250123 and earlier" %} ```php $client = SquareClientBuilder::init() ->bearerAuthCredentials( BearerAuthCredentialsBuilder::init( $_ENV['SANDBOX_ACCESS_TOKEN'] ) ) ->environment(Environment::SANDBOX) ->build(); ``` {% /tab %} {% /tabset %} For more information, see the quickstart guide: * [Go SDK](sdks/go/quick-start) * [Java SDK](sdks/java/quick-start) * [.NET SDK](sdks/dotnet/quick-start) * [Node.js SDK](sdks/nodejs/quick-start) * [PHP SDK](sdks/php/quick-start) * [Python SDK](sdks/python/quick-start) * [Ruby SDK](sdks/ruby/quick-start) {% anchor id="whatarecredentials" /%} ## Credential types The following table lists the access tokens and other credentials used for Square development. Credential use is dependent on your development scenario. {% table %} * Credential {% width="120px" %} * Type * Description * Use * Obtained from --- * Application ID * Identification * Random, unique ID assigned by Square * Identifies your application in select Square API and SDK calls against the production environment. Also called a client ID. * Developer Console **Credentials** application page --- * OAuth access token * Authorization * Scoped access token * Grants seller-scoped and limited access to production resources in a Square account by asking an authenticated user for explicit permissions. * Programmatically using the [OAuth API](oauth-api/overview) --- * OAuth refresh token * Authorization * Special-purpose token * Used to obtain a new access token before the current one expires. * Programmatically using the [OAuth API](oauth-api/overview) --- * Application secret * Authentication * OAuth authentication credential * Verifies the identity of your application in OAuth API requests to get or refresh an OAuth access token. Also called a client secret. * Developer Console **OAuth** application page --- * Personal access token * Authorization * Full-access (unscoped) access token * Grants unrestricted access to production resources in the corresponding Square account. Also called a production access token. * Developer Console **Credentials** application page --- * Repository password * Authorization * Random, unique ID assigned by Square * Grants your development environment access to the remote repositories that serve Reader SDK binaries * Developer Console **Reader SDK** application page --- * Sandbox application ID * Identification * Random, unique ID assigned by Square * Identifies your application in select Square API and SDK calls against the Sandbox environment. Also called a Sandbox client ID. * Developer Console **Credentials** application page --- * Sandbox access token * Authorization * Full-access (unscoped) access token * Grants unrestricted access to Sandbox resources in the corresponding Square account. * Developer Console **Credentials** application page --- * Sandbox OAuth access token * Authorization * Scoped access token for a Sandbox account * Grants scoped access to resources for a Sandbox application/account pair based on a specified set of permissions. * Developer Console **OAuth** application page or **Sandbox test accounts** page --- * Sandbox OAuth refresh token * Authorization * Special-purpose token * Used to obtain a new access token before the current one expires. * Developer Console **OAuth** application page --- * Location ID * N/A * Random, unique ID assigned by Square * Not a type of credential, but required for many Square API requests. * Developer Console **Locations** application page or programmatically using the [Locations API](https://developer.squareup.com/reference/square/locations-api) or [Merchants API](https://developer.squareup.com/reference/square/merchants-api) {% /table %} ## See also * [Developer Console](devtools/developer-dashboard) * [Square Sandbox](devtools/sandbox/overview) * [OAuth API](oauth-api/overview) * [Move OAuth from the Sandbox to Production](oauth-api/movetoprod) * [Refresh, Revoke, and Limit the Scope of OAuth Tokens](oauth-api/refresh-revoke-limit-scope) --- # Square API Lifecycle > Source: https://developer.squareup.com/docs/build-basics/api-lifecycle > Status: PUBLIC > Languages: All > Platforms: All Learn about the Square API lifecycle and what to expect for each stage of development. {% subheading %}Learn about the Square API lifecycle and what to expect for each stage of development.{% /subheading %} {% toc hide=true /%} ## Overview [Square APIs](https://developer.squareup.com/reference/square/) typically follow a path from Beta to General Availability (GA). As an API approaches the end of life, Square deprecates it. While deprecated, the API remains in maintenance mode and is then retired. The Square SDKs that encapsulate Square APIs follow the same lifecycle as the APIs. The following sections describe the Square API release states. ## Beta The API is publicly available. Minor changes can be expected between Beta and GA, so you should be prepared to upgrade your API version as needed to incorporate fixes, improvements, and new features. The interfaces are considered stable and closely represent what Square intends for final release, but fixes and updates to the interfaces might still be made. New functionality is released in Beta to give developers an earlier opportunity to integrate and validate the intended release. Any applications you develop with Beta APIs should work with their GA API equivalents with little to no change. As a best practice, you should fully validate your application after upgrading your API version. Beta functionality is publicly available and breaking changes follow the normal [Square API versioning](build-basics/versioning-overview) process. Beta functionality is documented and clearly tagged in the [Square API Reference](https://developer.squareup.com/reference/square). ## General Availability The API is ready for production use. Square APIs are stable, polished, and production ready. They're fully supported with new functionality and bug fixes in subsequent releases. GA functionality is publicly available and breaking changes follow the normal [Square API versioning](build-basics/versioning-overview) process. GA functionality is documented in the developer documentation. GA APIs might include objects, fields, enums, and values that are in a Beta or Deprecated state. {% anchor id="deprecated" /%} ## Deprecated Bug fixes are limited and no new functionality is added. APIs are deprecated as the first stage toward retirement. They're typically deprecated at least 12 months before permanent retirement. Deprecated functionality remains publicly available and fully supported, but its use is strongly discouraged for all applications, regardless of the `Square-Version` provided with API calls. You're discouraged from building new solutions with deprecated APIs. On deprecation, you should plan to update existing applications that depend on the deprecated APIs. Deprecated functionality is clearly tagged in the API Reference. You can also use the following resources to find deprecation information by type: * [Deprecated APIs](migrate-from-v1) * [Deprecated endpoints and webhooks](https://developer.squareup.com/reference/square/deprecated) * [Deprecated objects, fields, enums, and values](migrate-from-v1/current-status) If a deprecated API has a replacement, the deprecated API is moved to the maintenance state when the replacement reaches GA and remains in maintenance for at least 6 months. If no replacement is planned, the deprecated API is moved to maintenance approximately 6 months before retirement. {% aside type="important" %} You're strongly encouraged to migrate to the applicable replacements as soon as possible to avoid disruption. Developers using Square SDKs released on, or after, the deprecation date see deprecation warnings in API logs (for interpreted languages) or compilation warnings (for compiled languages) when referencing deprecated functionality. {% /aside %} {% anchor id="maintenance" /%} ## Retired No support from Square. Retired APIs are no longer available or supported and the API Reference documentation is archived. For information about the retirement timeline for APIs, see [Migrate from Deprecated APIs](migrate-from-v1). Retired API endpoints are unavailable to all applications and return `410 GONE` errors for all requests regardless of the `Square-Version` used for the request. Retired endpoints are removed from all SDKs released on or after the retirement date. Information about retired functionality is removed from the developer documentation on or after the retirement date, though information about retired functionality might still appear in previous versions of the API Reference. Retired functionality might still be accessible for a period of time after the posted retirement date while Square completes the retirement process. You must assume that retired endpoints are no longer available on the retirement date. Retired objects, fields, enums, and values in public APIs remain available in API versions released prior to their retirement date. --- # Basics of Building Applications with Square > Source: https://developer.squareup.com/docs/buildbasics > Status: PUBLIC > Languages: All > Platforms: All Learn about the basics of building applications with Square APIs. {% subheading %}Learn about design concepts and patterns for building applications with Square APIs.{% /subheading %} {% toc hide=true /%} ## Overview The following design concepts and patterns are useful to understand as you develop applications on the Square Developer platform: * [Versioning in Square APIs](build-basics/versioning-overview) - Describes the version-naming schemes used for the Square API and SDKs. * [Access Tokens and Other Square Credentials](build-basics/access-tokens) - An overview of credentials used to identify or authenticate an application and authorize access to resources in a Square account. * [Frontend and Backend Development](build-basics/frontend-backend-development) - An overview of how Square APIs and SDKs are used in frontend and backend development. * [General Development Concepts](build-basics/general-considerations) - Information about calling Square APIs and guidance for collecting and managing customer information and accommodating language preferences. * [Common Data Types](build-basics/common-data-types) - Information about supported date formats and the common `Address` and `Money` data types used across Square APIs. * [Common Square API Patterns](build-basics/common-api-patterns) - Information about programming patterns for idempotency, pagination, and optimistic concurrency that you should understand when using Square APIs. This topic also describes supported methods for clearing fields on objects. * [Square eCommerce APIs](ecommerce-api) - Describes how Square APIs can be used as building blocks for online marketplaces. * [Square API Lifecycle](build-basics/api-lifecycle) - An overview of the beta, general availability, deprecated, and retired stages in the Square API lifecycle. {% aside type="info" %} To develop on the Square Developer platform, you need a Square account and an application. You can follow the [Get Started](square-get-started) guide to learn how to sign up for a Square account, create an application, make your first API calls in the Square Sandbox environment, and view logs of your API calls. {% /aside %} ## See also * [Developer Tools](devtools/overview) * [Square SDKs](sdks) * [Sample Applications](sample-apps) --- # Optimistic Concurrency > Source: https://developer.squareup.com/docs/build-basics/common-api-patterns/optimistic-concurrency > Status: PUBLIC > Languages: All > Platforms: All {% subheading %}Learn about optimistic concurrency and how it prevents lost data writes with Square APIs.{% /subheading %} {% toc hide=true /%} ## Overview Concurrency is the concept of executing two or more applications at the same time. When these applications access the same objects at the same time, they can interfere with each other in unexpected ways. Without optimistic concurrency, if two client applications retrieve the same catalog item and both try to update it, the following can happen: * Client A modifies the item and sends an update. * Client B also modifies the item and sends the update overwriting the changes client A made, which is unintended. Optimistic concurrency refers to the ability of multiple operations to complete without interfering with each other. The Square API enables optimistic concurrency by supporting versioning on some of the API resources. For example, each `Customer` object has a `version` field. Initially, the version number is 0. For each successful update, Square increases the version number. If you don't specify a version number in an update request, the latest version is assumed. {% aside type="info" %} Different Square APIs use different versioning schemes. {% /aside %} In your update or delete request, you must provide the version number you received from Square. Otherwise, Square returns a "version mismatch" error on your request and your application must retrieve the object again and then update it. A version field can only be updated by Square. Your application must have the current object and you pass in the `version` value of the object update request. ## Typical concurrent write flow Consider an example of two clients trying to update the same object at the same time. The first client updates the object and writes it back. The second client tries to write back an update on the same object, gets a concurrency error, does another GET request, and then performs the update. 1. Client A gets a catalog item "Coffee". 2. Client B gets the same "Coffee" item. 3. Client A changes the item `description` to "Filter coffee" and sends the update, which increments the item version. 4. Client B tries to update the now stale "Coffee" item `available_for_pickup` field to `false`. 5. The client B update request fails with a `VERSION_MISMATCH` error. 6. Client B gets the current version of the "Filter coffee" item, changes the `available_for_pickup` field to `false`, and completes an update of the item, which increments the version. ## Additional Square API patterns There are other Square API patterns. For more information, see [Common Square API Patterns](build-basics/common-api-patterns). --- # Pagination > Source: https://developer.squareup.com/docs/build-basics/common-api-patterns/pagination > Status: PUBLIC > Languages: All > Platforms: All Learn how Square API endpoints use pagination to efficiently provide listing results. {% subheading %}Learn how Square API endpoints use pagination to efficiently provide listing results.{% /subheading %} {% toc hide=true /%} ## Overview Pagination is a process used to divide a large dataset into smaller chunks (pages). Most Square API endpoints that return a list of resources also support API pagination, such as `SearchCustomers` and `ListPaymentRefunds`. Each request to these endpoints returns a page of the result set. When the result is truncated and there are more resources to retrieve, the response also returns a `cursor` field. For example, suppose your `SearchCustomers` result set is 500 customers but the page returned in the response has only 100 customers. In this case, the response includes a `cursor`. In your subsequent `SearchCustomers` request, include the `cursor` along with the same original request body to retrieve the next page (next set of customers). As long as each call results in a response that includes a `cursor`, continue to send a `SearchCustomers` request and include the `cursor` returned in the previous response. The last page of the result set doesn't include a `cursor`. ## API pagination limitations All Square API endpoints that support API pagination also support a `limit` field that the application can use to indicate the page size, which is the number of items to return in the response. If you don't specify a `limit`, the default limit applies. The `default` and `maximum` page sizes vary from one endpoint to another. The Square API technical reference provides page size details for each paging endpoint. A page of retrieved records has a limited lifespan. Pages can become stale when other endpoints add, update, or delete records, which changes the set of returned records if a given page is requested again. ## Specifying cursor and page sizes In your initial call to a paginated API endpoint, there's no need to include a `cursor`: the first page of results is returned. Optionally, you can constrain the number of results returned by using the `limit` field. The following guidance applies when specifying `cursor` and `limit` fields in these endpoint requests: * **POST requests** - Include the `cursor` and `limit` fields in the request body. For example, [SearchCustomers](https://developer.squareup.com/reference/square/customers-api/search-customers) is a POST request. The following `SearchCustomers` request specifies a limit of 2 customers in the response. Note that the `limit` is set in the request body. ```bash curl https://connect.squareupsandbox.com/v2/customers/search \ -X POST \ -H 'Square-Version: 2021-12-15' \ -H 'Authorization: Bearer {ACCESS_TOKEN}' \ -H 'Content-Type: application/json' \ -d '{ "limit": 2 }' ``` The sample response shows a `cursor` in the response, indicating that there are more customers to retrieve. ```json { "customers": [ { "id": "JDKYHBWT1D4F8MFH63DBMEN8Y4", ... }, { "id": "A9641GZW2H7Z56YYSD41Q12HDW", ... } ], "cursor": "Cg1HRUY3NEszUERFME40GgAiQAgCEjxDQUlRQWhva056ZzVNakUyWWpjdE5qaGxaQzAwWldRNUxUbG1ZelF0WmpSaE9EVTFaV0ZpTUdabElDbz0qBAgBEAE=" } ``` In your subsequent `SearchCustomers` request, use the same request body as before, but include the `cursor` in the body as shown: ```bash curl https://connect.squareupsandbox.com/v2/customers/search \ -X POST \ -H 'Square-Version: 2021-12-15' \ -H 'Authorization: Bearer {ACCESS_TOKEN}' \ -H 'Content-Type: application/json' \ -d '{ "limit": 2, "cursor": "Cg1HRUY3NEszUERFME40GgAiQAgCEjxDQUlRQWhva056ZzVNakUyWWpjdE5qaGxaQzAwWldRNUxUbG1ZelF0WmpSaE9EVTFaV0ZpTUdabElDbz0qBAgBEAE=" }' ``` Note that each request can specify a different page size (the `limit` field value). {% aside type="important" %} A cursor has a 5-minute lifetime. If you cache the cursor for each page you retrieve, you can use one of these page cursors to retrieve a previous page again. However, after a cursor expires, it can no longer be used. {% /aside %} * **GET requests** - The GET requests don't have a body. Therefore, you include a cursor as a query parameter. For example, [ListPaymentRefunds](https://developer.squareup.com/reference/square/refunds-api/list-payment-refunds) is a GET request. The following `GetPaymentRefund` request specifies a `limit` of 2 refunds in the response: ```bash curl https://connect.squareupsandbox.com/v2/refunds?limit=2 \ -H 'Square-Version: 2021-12-15' \ -H 'Authorization: Bearer {ACCESS_TOKEN}' \ -H 'Content-Type: application/json' ``` The sample response includes a `cursor` indicating that there are more refunds to retrieve. ```json { "refunds": [ { "id": "bP9mAsEMYPUGjjGNaNO5ZDVyLhSZY_69MmgHubkLqx9wGhnmenRUHOaKitE6llfZuxcWYjGxd", ... }, { "id": "zVeulROORfDGNPr6ZG8BoudKQxKZY_1Ccko7Wv71jXw9OZ8f8RQlfGOX66ijLA8jxtKXwZe2Q", ... } ], "cursor": "N4LMZ7RPBUxbVBZccouiIhlFDJ1S3Dy7VsMVMookk2599EUNUaturj6EVXpslxjWc27YUXzDIYPP9O6bImVn1rvUJH98eyyAfsXLIIkYx7mM4UEXZQRcvjSuhHf" } ``` You then send a subsequent request to retrieve the next set of refunds by adding `cursor` as query parameter. ```bash curl https://connect.squareupsandbox.com/v2/refunds?limit=2&cursor=N4LMZ7RPBUxbVBZccouiIhlFDJ1S3Dy7VsMVMookk2599EUNUaturj6EVXpslxjWc27YUXzDIYPP9O6bImVn1rvUJH98eyyAfsXLIIkYx7mM4UEXZQRcvjSuhHf \ -H 'Square-Version: 2021-12-15' \ -H 'Authorization: Bearer {ACCESS_TOKEN}' \ -H 'Content-Type: application/json' ``` As long as the response includes a `cursor`, you continue to make the `GetPaymentRefunds` request. Eventually, there are no more refunds to return and the last response doesn't include the `cursor` field. ## SDK examples The [Square SDK documentation](sdks) provides libraries and sample code for several programming languages. For examples of paginated API requests, see the following: * [Java](sdks/java/common-square-api-patterns#pagination) * [.NET](sdks/dotnet/common-square-api-patterns#pagination) * [Node.js](sdks/nodejs/common-square-api-patterns#pagination) * [PHP](sdks/php/common-square-api-patterns#pagination) * [Python](sdks/python/common-square-api-patterns#pagination) * [Ruby](sdks/ruby/common-square-api-patterns#pagination) ## Additional Square API patterns There are other Square API patterns in addition to API pagination. For more information, see [Common Square API Patterns](build-basics/common-api-patterns). --- # Idempotency > Source: https://developer.squareup.com/docs/build-basics/common-api-patterns/idempotency > Status: PUBLIC > Languages: All > Platforms: All Learn about idempotency and how idempotency keys prevent negative results from accidental duplicate requests. {% subheading %}Learn about idempotency and how idempotency keys prevent unintended results from accidental duplicate requests.{% /subheading %} {% toc hide=true /%} ## What is idempotency? An API call or operation is idempotent if it has the same result no matter how many times it's applied. That is, an idempotent operation provides protection against accidental duplicate calls causing unintended consequences. For example, suppose `CreatePayment` didn't require idempotency and you make a successful `CreatePayment` request (Square successfully processes the payment). However, your connection fails before you receive success confirmation from Square. You don't know what happened to your request and therefore you make the request again, charging the customer twice. Square supports idempotency by allowing API operations to provide an idempotency key (a unique string) to protect against accidental duplicate calls that can have negative consequences. In the case of the preceding `CreatePayment` example: * If you make the same `CreatePayment` request with the same idempotency key again, the endpoint knows it's a duplicate request. It doesn't take the payment again. Instead of getting an error, the endpoint returns the response as the first successful `CreatePayment` response. * If you use the same idempotency key but change the `CreatePayment` request (for example, specify a different payment amount), you get an error indicating that you used the idempotency key previously. Note that this behavior might vary depending on the API. Idempotency keys can be anything, but they need to be unique. Virtually all popular programming languages provide a function for generating unique strings. You should use one of these language calls. | Language | Recommended function | |--------------|-------------------------------| | Ruby | [SecureRandom.uuid](https://ruby-doc.org/stdlib-2.5.0/libdoc/securerandom/rdoc/Random/Formatter.html#method-i-uuid) | | PHP | [uniqid](http://php.net/manual/en/function.uniqid.php) | | Java | [UUID.randomUUID](http://docs.oracle.com/javase/7/docs/api/java/util/UUID.html) | | Python | [uuid](https://docs.python.org/3.1/library/uuid.html) | | C# | [Guid.NewGuid](https://msdn.microsoft.com/en-us/library/system.guid.newguid(v=vs.110).aspx) | | Node.js | [crypto.randomUUID](https://nodejs.org/api/crypto.html#cryptorandomuuidoptions) | ## Additional Square API patterns There are other Square API patterns. For more information, see [Common Square API Patterns](build-basics/common-api-patterns). ## See also * [Video: Sandbox Short - Idempotency](https://www.youtube.com/watch?v=J9jkEdNo5F8) * [Video: The Sandbox - Idempotency](https://www.youtube.com/watch?v=Hx8UdQx_4bE&t=67s) --- # Working with Addresses > Source: https://developer.squareup.com/docs/build-basics/common-data-types/working-with-addresses > Status: PUBLIC > Languages: All > Platforms: All Learn how the Square API model works with address information. {% subheading %}Learn how the Square API model works with address information.{% /subheading %} {% toc hide=true /%} ## Overview The address format used by Square is based on an [open-source library from Google](https://github.com/google/libaddressinput). For more information, see [AddressValidationMetadata](https://github.com/google/libaddressinput/wiki/AddressValidationMetadata). Square APIs store addresses in an [Address](https://developer.squareup.com/reference/square/objects/Address) object. The free-form `address_line_1` and `address_line_2` fields provide a flexible format for entering the street address with secondary information like apartment, suite, or unit number. Other address components (such as `locality`, `administrative_district_level_1`, and `postal_code`) are separate fields, which allows application logic to be based on their specific values. For example, sales tax software might charge different amounts of sales tax based on the postal code, and some software is only available in certain states due to compliance reasons. The following table shows what commonly used address fields represent for each country where Square operates: {% table %} * Address field * Australia * Canada * France * Ireland * Japan * Spain * United Kingdom * United States --- * `address_line_1` * All countries - free-form street address {% colspan=8 align="center" %} --- * `address_line_2` * All countries - free-form street address {% colspan=8 align="center" %} --- * `locality` * Suburb * City * City * Town/city * City/ward * Locality * Town * City --- * `administrative_district_level_1` * State * Province * n/a * County * Prefecture * Province * n/a * State --- * `postal_code` * Postal code * Postal code * Postcode * Eircode * Postal code * Postal code * Postal code * ZIP code {% /table %} {% aside type="info" %} An `Address` is stored as a subtype of the object containing it, such as a `Location` or `Customer`. Addresses aren't stored independently of these objects. Use the relevant API, such as the [Locations API](https://developer.squareup.com/reference/square/locations-api) or [Customers API](https://developer.squareup.com/reference/square/customers-api), to access the address information stored on these objects. {% /aside %} Square products (such as Square Point of Sale and the Square Dashboard) mostly use a seller's [language preference](build-basics/language-preferences) for communication. However, when it comes to addresses, the language preference is overridden. Square products use English for a US address, French for an address in France, and so on. ## Address validation Square validates addresses stored in [Location](locations-api) objects. For an address to be valid, it must meet the following requirements: * Address lines can only contain: - Letters (including Japanese characters) - Numbers - Standard punctuation - Spaces * Address lines cannot contain: - Control characters - Emojis - Special symbols * Address lines must include at least one alphanumeric character. They cannot consist solely of punctuation or spaces. ## Address examples Addresses in the Square data model vary slightly based on the country. The following are example addresses for each country in which Square operates. ### Australia ``` json { "address": { "address_line_1": "300 Main Street", "locality": "Melbourne", "administrative_district_level_1": "VIC", "postal_code": "3000", "country": "AU" } } ``` ### Canada ``` json { "address": { "address_line_1": "520 Maple Street", "address_line_2": "Floor 2", "locality": "Toronto", "administrative_district_level_1": "Ontario", "postal_code": "M6K1L5", "country": "CA" } } ``` ### France ``` json { "address": { "address_line_1": "Chez Mireille COPEAU Apartment 3", "address_line_2": "Entrée A Bâtiment Jonquille", "postal_code": "33380 MIOS", "locality": "CAUDOS", "country": "FR" } } ``` ### Ireland ``` json { "address": { "address_line_1": "43 Main Street", "address_line_2": "The Liberties", "locality": "Dublin 20", "administrative_district_level_1": "Co. Dublin", "postal_code": "D08XK58", "country": "IE" } } ``` ### Japan ``` json { "address": { "address_line_1": "東京都新宿区西新宿1-2-3", "address_line_2": "新宿セントラルパークタワー", "locality": "新宿区", "administrative_district_level_1": "東京都", "postal_code": "160-0023", "country": "JP" } } ``` ### Spain ``` json { "address": { "address_line_1": "Calle del Ejemplo, 195", "address_line_2": "Piso 2, Puerta 3", "postal_code": "08226", "locality": "TERRASSA", "administrative_district_level_1": "BARCELONA", "country": "ES" } } ``` ### United Kingdom ``` json { "address": { "address_line_1": "9 Main Street", "address_line_2": "Level 4", "locality": "London", "postal_code": "W1A3AE", "country": "GB" } } ``` ### United States ``` json { "address": { "address_line_1": "1955 Broadway", "address_line_2": "Suite 600", "locality": "Oakland", "administrative_district_level_1": "CA", "postal_code": "94612", "country": "US" } } ``` ## See also * [Working with Dates](build-basics/common-data-types/working-with-dates) * [Working with Monetary Amounts](build-basics/common-data-types/working-with-monetary-amounts) --- # Working with Monetary Amounts > Source: https://developer.squareup.com/docs/build-basics/common-data-types/working-with-monetary-amounts > Status: PUBLIC > Languages: All > Platforms: All Learn how the Square API model works with monetary amounts. {% subheading %}Learn how the Square API model works with monetary amounts.{% /subheading %} {% toc hide=true /%} ## Money Payments and refunds represent discrete monetary exchanges. Square represents the exchange as a [Money](https://developer.squareup.com/reference/square/objects/Money) object with a specific currency in ISO 4217 format and a positive or negative amount. ## Specifying monetary amounts In the `Money` object, the `amount` field indicates the amount in the base unit of the currency. The following table lists currencies and base units, with an example of each: |Currency|Base unit| |--- |--- | |AUD|Cent (`amount` 100 in the `Money` object indicates $1.00)| |CAD|Cent (`amount` 100 in the `Money` object indicates $1.00)| |JPY|Yen (`amount` 100 in the `Money` object indicates ¥ 100)| |GBP|Pence (`amount` 100 in the `Money` object indicates £1.00)| |USD|Cent (`amount` 100 in the `Money` object indicates $1.00)| |EUR|Cent (`amount` 100 in the `Money` object indicates 1.00 EUR)| For example, the following `Money` object represents 400 cents ($4.00 USD): ```json { "amount": 400, "currency_code": "USD" } ``` The following `Money` object represents an amount of $0.50 USD: ```json { "amount": 50, "currency_code": "USD" } ``` Currencies such as the Japanese Yen are known as zero-decimal currencies. That is, the smallest unit of the currency is ¥1 (1 JPY). For example, the following JSON represents an amount of ¥2: ```json { "amount": 2, "currency_code": "JPY" } ``` ## Monetary amount limits The minimum payment amount you can specify in `CreatePayment` or `UpdatePayment` requests varies depending on the payment source. For more information, see [Monetary amount limits](payments-api/take-payments#monetary-amount-limits). ## About the EXPECTED_INTEGER error code When working with the [Money](https://developer.squareup.com/reference/square/objects/Money) object, applications might get an `EXPECTED_INTEGER` error code because the specified `amount` value is invalid. It indicates that Square was expecting information as an integer but was sent something else (for example, a string or a float). To resolve this error: * Make sure the `amount` value is specified in the smallest denomination of the currency used. For example, the smallest currency denomination for USD is cents. * Make sure the `amount` value is specified as a positive integer. * Make sure the `amount` value is greater than, or equal to, the valid minimum amount. Valid minimums are determined by the `Location.country` associated with the account. For more information, see [Payment Minimums](payment-minimums). ## See also * [Working with Dates](build-basics/common-data-types/working-with-dates) * [Working with Addresses](build-basics/common-data-types/working-with-addresses) --- # Language Preferences for Applications > Source: https://developer.squareup.com/docs/build-basics/general-considerations/language-preferences > Status: PUBLIC > Languages: All > Platforms: All Explains language preferences for applications to communicates with Square sellers and buyers, available options, and related guidance. {% subheading %}Learn about the language preferences for applications to communicates with Square sellers and buyers, available options, and related guidance.{% /subheading %} {% toc hide=true /%} ## Overview People communicate with software through natural languages, such as English, French, and Spanish. Because each person has a different preferred language, it's important for applications to track and accommodate individual language preferences. The following describes how applications that integrate the Square API might accommodate these language preferences in communications. When communicating through a web browser or mobile application, applications can use the language preferences that those devices already provide. For other types of communication, you must have a language preference on file. Example communications include: * Sending a daily status email to a Square seller about how the application's functionality was used that day. * Printing receipts for a buyer when using hardware associated with your application. * Sending a text message to a buyer after they interact with your application. Square maintains language preferences for each seller that applications can use in communications. By using Square's language preferences, sellers get a consistent language experience when they access your application, other third-party applications, and Square software. Square manages language preferences using the `language_code` field at the [Location](https://developer.squareup.com/reference/square/locations-api) and [Merchant](https://developer.squareup.com/reference/square/merchants-api) levels. These language codes are a subset of the language tags described in [RFC 5646](https://tools.ietf.org/html/rfc5646) and each identifies a particular language. For example: * en-US designates American English. * fr-CA designates Canadian French. The language code has a primary language (such as "en") followed by an optional dialect subtag (such as "US"). If a language code has both parts, the parts are separated by a hyphen (for example, "en-US"). The `language_code` can be one of the following Square-supported language codes for the country where the location or merchant exists: * Australia: en-AU * Canada: fr-CA, en-CA * France: en, fr * Ireland: en-IE * Japan: en, ja * United Kingdom: en-GB * United States: en-US, es-US * All other countries: en, es, fr, ja Use the [Locations API](https://developer.squareup.com/reference/square/locations-api) to retrieve or update the `language_code` for each location. You can also [manage these locations in the Square Dashboard](https://squareup.com/help/us/en/article/5580-manage-multiple-locations-with-square). Applications can use this `language_code` for communications at a location when there's neither a personal nor device language. For example: * **Printing receipts** - When Square Point of Sale prints a receipt, the buyer generally doesn't have a Square account or a device to select the language preference. So the receipt should be printed in the location's language. * **Sending emails and other communications** - Applications can use the location language when emailing receipts, invoices, or any other communications for a location. Use the [Merchants API](https://developer.squareup.com/reference/square/merchants-api) to retrieve the `language_code` for a seller. The merchant language is the ultimate fallback language if the location’s language doesn't apply. For example, if your application sends a daily status report to a seller and applies to all their locations, then it's best to use the language of the overall merchant for the communication. ## Additional build basics considerations There are several other introductory topics provided for a new developer to quickly learn the basics of developing applications with Square. For more information, see [Basics of Building Applications with Square](buildbasics). --- # Best Practices for Collecting Information > Source: https://developer.squareup.com/docs/build-basics/general-considerations/collecting-information > Status: PUBLIC > Languages: All > Platforms: All If you collect, or plan to collect, personal information from users, it's critical that you handle that information responsibly. {% subheading %}Learn about the best practices for collecting and handling customer information.{% /subheading %} {% toc hide=true /%} ## Overview If you collect, or plan to collect, personal information from users, it's critical that you handle that data responsibly. Personal identifiable information (PII) includes obvious items such as an email address, phone number, device identifier, physical location, and spending habits. However, even less obvious information such as ZIP codes and typical commute times can be combined to help identify people without their consent. ## Only collect what you need Collect the minimum amount of personal information necessary to provide the desired functionality. For example, if you only use email to communicate with site visitors, there's no reason to also collect phone numbers. ## Always use opt-in instead of opt-out Let customers consent to sharing their data rather than collecting their data by default. For example, include a checkbox asking for permission to collect contact information and leave it unchecked by default. ## Don't persist PII Avoid persistent caching or storage of PII, including in logs. Don't keep the information for longer than needed. The easiest way to avoid unintentionally exposing sensitive information is to delete it when you no longer need it. ## Don't share PII Avoid sharing any PII or location information with third parties. When customers give you permission to collect and save their information, there's an expectation that the information is kept safe and not shared with others. Sharing their information with a third party without asking for explicit permission violates those expectations. You might be complicit if a third party handles the information irresponsibly. ## Encrypt customer information in transit Secure your website traffic with HTTPS and TLS. If you're unfamiliar with HTTPS and TLS, see [TLS and HTTPS](working-with-apis/tls-and-https) for more information. ## Handle customer data responsibly If your application uses contact information from a [Customer](https://developer.squareup.com/reference/square/objects/customer) object, be sure to use that information judiciously. The following tips describe how to handle customer data responsibly: * Respect customer email preferences. An `email_unsubscribed` field set to `true` indicates that the customer has opted out of marketing emails. Don't use their contact information to send marketing communications. * Don't store PII such as names, email addresses, and physical addresses without explicit consent. * Don't store sensitive or payment information in the `note` field. * Always use secure HTTPS for your own services to protect user information in transit. ## Additional build basics considerations There are several other introductory topics provided for a new developer to quickly learn the basics of developing applications with Square. For more information, see [Basics of Building Applications with Square](buildbasics). --- # Handling Errors > Source: https://developer.squareup.com/docs/build-basics/general-considerations/handling-errors > Languages: All > Platforms: All Improve your user experience by handling error information from Square APIs and SDKs. {% subheading %}Learn about error responses and best practices for error handling and logging.{% /subheading %} {% toc hide=true /%} ## Overview Square APIs always return a response. If a request succeeds, the response includes a header with an HTTP status code of `200`. If a request fails, the response includes a header with a [status code](https://developer.mozilla.org/en-US/docs/Web/HTTP/Status) ranging from `400` to `599`. Error responses include an `errors` array with an `Error` object for each error that occurred while processing the request. If multiple errors are returned, the status code matches the first one. Depending on how the request is processed, it's possible to receive a subsequent error response after fixing and retrying a request. `Bulk` endpoints are an exception; they might also return `errors` for individual operations within a `200` response. ## Error object properties The [Error](https://developer.squareup.com/reference/square/objects/Error) object provides error information using the following properties: * `category` - A high-level classification of the error. For a complete list of category values, see [ErrorCategory](https://developer.squareup.com/reference/square/objects/ErrorCategory). * `code` - A specific identifier for the error. For a complete list of error codes, see [ErrorCode](https://developer.squareup.com/reference/square/objects/ErrorCode). * `detail` - A human-readable error description for developers, not intended to be customer facing. This is an optional error field. * `field` - The name of the field in the original request (if applicable) that the error pertains to. This is an optional error field. The following example requests return an error response: * **GetPayment using a nonexistent payment ID** {% tabset %} {% tab id="Request" %} ```` {% /tab %} {% tab id="Error response" %} This example response has a `404` status code: ```json {% lineNumbers=false %} { "errors": [ { "code": "NOT_FOUND", "detail": "Could not find payment with id: 7nDzoTTqoVk6LMeYzfXg2fpcUDaZY", "category": "INVALID_REQUEST_ERROR" } ] } ``` {% /tab %} {% /tabset %} * **UpdateCustomer using invalid values** {% tabset %} {% tab id="Request" %} ```` {% /tab %} {% tab id="Error response" %} This example response has a `400` status code: ```json {% lineNumbers=false %} { "errors": [ { "code": "INVALID_PHONE_NUMBER", "detail": "Expected phone_number to be a valid phone number", "field": "phone_number", "category": "INVALID_REQUEST_ERROR" }, { "code": "INVALID_EMAIL_ADDRESS", "detail": "Expected email_address to be a valid email address", "field": "email_address", "category": "INVALID_REQUEST_ERROR" } ] } ``` {% /tab %} {% /tabset %} ## Error handling basics Avoid presenting a raw `Error` object directly to the user. Instead, your code should anticipate common errors and respond with user-friendly messages. The overall tone of these messages should be similar to other messages that your application shows to users. Direct users to contact your own support team (instead of Square support) about any questions or issues that arise when using your application. Your application should respond gracefully to errors. Some common techniques include the following: * Catch and handle errors so that the application doesn't crash or freeze. Use try-catch blocks or similar mechanisms to handle exceptions and determine next steps. * If an API call fails, consider providing a fallback option or alternative approach. This can help users perform their tasks even if an API is temporarily unavailable. * Set up a continuous monitoring mechanism for the application to collect information about errors and report them. This can help identify recurring issues and allow developers to proactively address them. * Write errors to an error log so developers can diagnose and fix issues. This can include logging relevant information such as error type, stack trace, user context, and any other useful details. {% aside type="tip" %} Square provides an [API Logs feature](devtools/api-logs) that captures data about your API calls. You can use the log data for diagnostics, troubleshooting, and auditing. {% /aside %} ### Error handling with Square SDKs The [Square SDKs](sdks) provide language-specific error-handling mechanisms that you can use in your code. For more information and code snippets, see the quickstart guide: * [Go SDK](sdks/go/quick-start) * [Java SDK](sdks/java/quick-start) * [.NET SDK](sdks/dotnet/quick-start) * [Node.js SDK](sdks/nodejs/quick-start) * [PHP SDK](sdks/php/quick-start) * [Python SDK](sdks/python/quick-start) * [Ruby SDK](sdks/ruby/quick-start) ## Authentication errors If you receive an `AUTHENTICATION_ERROR` error with a `401 Unauthorized` status, the {% tooltip text="access token"%}Authorizes access to resources in a Square account, such as customers, orders, and payments.{% /tooltip %} used in the API request is probably invalid. ```json {% lineNumbers=false %} { "errors": [ { "category": "AUTHENTICATION_ERROR", "code": "UNAUTHORIZED", "detail": "This request could not be authorized." } ] } ``` During development, these `UNAUTHORIZED` errors are commonly encountered when switching between the production and Sandbox environments. To troubleshoot, first make sure you're using the correct access token for the target environment: 1. If needed, find the access token and target environment in the failing request. For more information, see [Use an access token in your code](build-basics/access-tokens#use-access-token). 2. Use the access token to call [RetrieveTokenStatus](https://developer.squareup.com/reference/square/oauth-api/retrieve-token-status) in the production or Sandbox environment. A valid token returns a `200 OK` response and a `scopes` array that lists the authorized permissions. {% aside type="info" %} When testing with a personal access token for your own Square account, you can check whether you're using the correct one in the [Developer Console](devtools/developer-dashboard). Open your application, toggle to **Sandbox** or **Production**, and then view the token on the **Credentials** page. {% /aside %} ### Other authentication issues Other issues might result in `AUTHENTICATION_ERROR` errors. For example: * The provided access token is expired or revoked, or you're sending the encrypted value. * The provided access token doesn't grant sufficient permissions to use the API endpoint you're calling. * The `Authentication` header isn't properly formatted with a bearer token or the access token is missing from the request. * The application ID and secret you provided in the [ObtainToken](https://developer.squareup.com/reference/square/oauth-api/obtain-token) request is from the wrong (production or Sandbox) environment. * You didn't remove `{ }`, `< >`, or other placeholder characters that you copied from a code example. Make sure to handle these issues in your implementation. For example, test with specific OAuth permissions, regularly refresh access tokens, and listen for [oauth.authorization.revoked](https://developer.squareup.com/reference/square/o-auth-api/webhooks/oauth.authorization.revoked) events. For more information, see [OAuth Best Practices](oauth-api/best-practices) and [Move OAuth from the Sandbox to Production](oauth-api/movetoprod). ### Status and error codes for authentication errors Errors in the `AUTHENTICATION_ERROR` category return a `401` or `403` status code with one of the [error codes](https://developer.squareup.com/reference/square/objects/ErrorCode) shown in the following table: {% table %} * Status * ErrorCode {% width="180px" %} * Description --- * 401 * `UNAUTHORIZED` * A general authorization error occurred. --- * 401 * `ACCESS_TOKEN_EXPIRED` * The access token provided in the request recently expired. --- * 401 * `ACCESS_TOKEN_REVOKED` * The access token provided in the request was revoked. The `revoker_type` field in the [oauth.authorization.revoked](https://developer.squareup.com/reference/square/o-auth-api/webhooks/oauth.authorization.revoked) event payload indicates the type of client that revoked the token: `APPLICATION`, `MERCHANT`, or `SQUARE`. --- * 401 * `CLIENT_DISABLED` * The provided client has been disabled. --- * 403 * `FORBIDDEN` * A general access error occurred. --- * 403 * `INSUFFICIENT_SCOPES` * The access token provided in the request doesn't have [sufficient permissions](oauth-api/square-permissions) to perform the requested action. {% /table %} {% aside type="info" %} Some `INVALID_REQUEST_ERROR` errors also return a `403` status code, so make sure to check the `ErrorCode` type. {% /aside %} {% anchor id="rate-limiting" /%} ## Rate limiting errors If your application sends a high number of requests to Square APIs in a short period of time, Square might temporarily stop processing your requests and return `RATE_LIMITED` errors with a `429 Too Many Requests` status. When this occurs, the [API Logs](devtools/api-logs) page in the Developer Console displays errors with a `429` status code. ![A screenshot of the API Logs page in the Developer Console showing errors with the 429 status code.](//images.ctfassets.net/1nw4q0oohfju/5PNq4iu06oPeS16x2noF7x/16025901d46816a2cb94f348198a3b6a/dev-console-with-429-errors.png) Your application should monitor responses for `429` errors and use a retry mechanism with an [exponential backoff](https://en.wikipedia.org/wiki/Exponential_backoff) schedule to resend the requests at an increasingly slower rate. It's also a good practice to use a randomized delay (jitter) in your retry schedule to avoid a [thundering herd effect](https://en.wikipedia.org/wiki/Thundering_herd_problem). Square API endpoints might enforce different rate limits. Logging data about error rates can help identify which API calls in your code encounter `429` errors, so you can make changes to avoid or handle rate limiting errors. For example: * Use `Batch` and `Bulk` endpoints when available. These endpoints allow you to perform multiple operations in a single request. * Use available filters with `Search` and `List` endpoints to limit your requests to the data you need. * Integrate existing libraries or mechanisms that can handle rate limiting for you in your code. * Implement a worker queue system to manage API calls. This system allows you to centrally control your call frequency and retry logic. It's particularly useful for API calls that are prone to rate limiting, but can also improve reliability for high-volume API calls and critical operations. {% accordion expanded=false %} {% slot "heading" %} #### More details {% /slot %} A worker queue system uses the following high-level steps: 1. When an API call needs to be made, the task is added to a queue instead of being executed immediately. 2. A worker picks the task from the queue and executes the API call. 3. If the worker receives a `429` rate limit error, it adds the task back into the queue to be retried later. Note that: * You should retry calls with increasing intervals (for example, by using exponential backoff and randomized delay). * You should log this activity for future analysis. ![A flow diagram of a worker queue system.](//images.ctfassets.net/1nw4q0oohfju/2jzBgOPmUwJQN4j3AIBDW5/9f839a43ab5847b95cc28052d92d5078/worker-queue-system.png) {% /accordion %} {% aside type="info" %} * For information about preventing rate limiting with catalog operations, see [Synchronize a Catalog with an External Platform](catalog-api/sync-with-external-system). * GraphQL queries are also subject to rate limiting. For more information, see [Rate limiting for Square GraphQL](devtools/graphql#rate-limiting). {% /aside %} ## See also * [TLS and HTTPS](build-basics/general-considerations/tls-and-https) --- # Using the REST API > Source: https://developer.squareup.com/docs/build-basics/general-considerations/using-rest-api > Status: PUBLIC > Languages: All > Platforms: HTTP Learn how to use the Square API (REST). You manage the resources of a Square account by making HTTPS requests to URLs that represent those resources. {% subheading %}Learn how to use the Square API (REST) to manage HTTPS requests.{% /subheading %} {% toc hide=true /%} ## Overview The [Square API](https://developer.squareup.com/reference/square/) follows the general patterns of [REST](https://en.wikipedia.org/wiki/Representational_state_transfer). Applications can manage the resources (such as payments, orders, and catalog items) of a Square account by making HTTPS requests to URLs that represent those resources. For a list of Square resources and operations, see [Square API Reference](https://developer.squareup.com/reference/square). Before you call the Square API, you need two items: a Square account and an application created in the Developer Console. The application provides you with credentials (for use in production applications and for testing in the Square Sandbox). Note that: * To access resources in your own account, you use a personal access token. * To manage resources in other Square accounts, use OAuth to ask the account owner for resource permissions so that you can work on their behalf. For more information, see [OAuth API](oauth-api/what-it-does). For information about creating a Square account and an application, see [Get Started](square-get-started). If you know a few patterns, you can call any Square API. The following sections introduce the common patterns. cURL examples are used to keep it simple. {% aside type="info" %} Instead of making REST API calls in your applications, you might choose to use [language-based SDKs](sdks) that provide convenient wrappers for the Square APIs. {% /aside %} ## Create an HTTPS request To perform operations on a resource, you make an HTTPS request that specifies the URL for the resource to act on, as well as the appropriate headers, method, request body, and query parameters. For example, the following cURL command passes a JSON object containing the values used to create a new customer in a Square Sandbox account using the [CreateCustomer](https://developer.squareup.com/reference/square/customers-api/create-customer "Create Customer") endpoint: ```bash curl https://connect.squareupsandbox.com/v2/customers \ -X POST \ -H 'Authorization: Bearer {ACCESS_TOKEN}' \ -H 'Content-Type: application/json' \ -H 'Square-Version: 2019-08-14' \ -d '{ "idempotency_key": "{UNIQUE_KEY}", "given_name": "Lauren", "family_name": "Noble" }' ``` In the request: * `{ACCESS_TOKEN}` is a valid Square access token. * `{UNIQUE_KEY}` is a unique value (an [idempotency](working-with-apis/idempotency) key) that you provide for this particular create operation. A successful call returns a response with `200` status code and a response body with the newly created customer represented as a JSON object that looks like the following: ```json { "customer":{ "id":"N6XSAFC2Y8T01B32ZW1X2WBSJM", "created_at":"2019-09-23T18:39:30.671Z", "updated_at":"2019-09-23T18:39:31Z", "given_name":"Lauren", "family_name":"Noble", "preferences":{ "email_unsubscribed":false }, "creation_source":"THIRD_PARTY", "version":0 } } ``` Now that you've seen what a Square API call looks like, you can review it line by line. ### Specify a resource URL You access a resource with its URL. See the URLs for each resource in the [Square API Reference](https://developer.squareup.com/reference/square). In the example, the first line of the preceding cURL command specifies the URL for the resource you want to work with: ```bash curl https://connect.squareupsandbox.com/v2/customers \ ``` Note the following: * Production and Sandbox environments have different base URLs: * For Production accounts, use `https://connect.squareup.com/v2`. * For Sandbox accounts, use `https://connect.squareupsandbox.com/v2`. * The current major version of the Square API is version 2. Make sure that V2 is in the resource path after the host name. ### Specify the HTTP method You specify an HTTP method to perform an action on a resource. The common actions in the Square API are: * GET to read or list resources. * POST to create. * PUT to update. * DELETE to delete. In the following example, the call is creating a customer and uses the POST method: ```bash curl https://connect.squareupsandbox.com/v2/customers \ -X POST \ ``` ### Set the headers You use HTTP headers to specify additional information about the call. In the following example, the call specifies three headers: ```bash curl https://connect.squareup.com/v2/customers \ -X POST \ -H 'Authorization: Bearer {ACCESS_TOKEN}' \ -H 'Accept: application/json' \ -H 'Square-Version: 2019-09-25' \ ``` Note the following: * **Authorization** - This header is required. It contains the credentials used for the call and the type. The Square access token is the bearer token. {% aside type="important" %} The resource URL determines whether you're accessing resources in the Production or Sandbox account. You must use a valid access token accordingly. {% /aside %} * **Accept** - You provide this header to specify the type of data the calls return. Currently, `application/json` is supported. * **Square-Version** - Specifies the Square API version. If not provided, the default API version associated with the application (in the Developer Console) is assumed. For more information, see [Versioning in Square APIs](build-basics/versioning-overview). ### Create the request body Typically, you use the request body to pass complex parameters (for operations such as create, update, and search) as a JSON object. In the following example, the call has a request body containing a JSON object with the values used to create a new customer: ```bash curl https://connect.squareupsandbox.com/v2/customers \ -X POST \ -H 'Authorization: Bearer {ACCESS_TOKEN}' \ -H 'Accept: application/json' \ -H 'Square-Version: 2019-08-14' \ -d '{ "idempotency_key": "KEY_UNIQUE_TO_THIS_OPERATION", "given_name": "Lauren", "family_name": "Noble" }' ``` [Idempotency](working-with-apis/idempotency) works as follows: * After a resource is created, if you retry the call using the same idempotency key and same request details, the response returns a `200` status code and a response body contains the details of the existing resource. * If you retry the call using the same idempotency key and change any of the request details, you get a `400 Bad Request` status code with an error that looks like the following: ```json { "errors": [ { "category": "INVALID_REQUEST_ERROR", "code": "IDEMPOTENCY_KEY_REUSED", "detail": "The idempotency key can only be retried with the same request data.", "field": "idempotency_key" } ] } ``` {% aside type="tip" %} You can watch [Square video: introduction to idempotency](https://www.youtube.com/watch?v=J9jkEdNo5F8) for a quick multimedia tutorial of the concept. {% /aside %} ### Specify query string parameters Use query string parameters for sorting, filtering, or paging in list operations. List operations use query string parameters to specify how to return the list of resources. For example, the [ListPayments](https://developer.squareup.com/reference/square/payments-api/list-payments "ListPayments") endpoint lets you filter the list of payments returned by the card brand, last four digits of the credit card, and other attributes. The following cURL command returns the list of payments for Visa cards (there could be multiple) with 1234 as the last four digits in the card number: ```bash curl 'https://connect.squareupsandbox.com/v2/payments?card_brand=VISA&last_4=1234' \ -X GET \ -H 'Authorization: Bearer {ACCESS_TOKEN}' \ -H 'Accept: application/json' ``` All list and search operations are [paginated](working-with-apis/pagination) and have a page size that specifies the number of resources returned in a single list endpoint call. A call to a list or search operation returns a cursor value if there are additional pages to return. ## Handle the response API calls return a JSON object that contains the resources requested or an errors list. Check the response status code to see whether the response succeeded or failed. ### Success responses Successful responses are marked by an HTTP `200` status code. Create and update operations return the details of the resources operated on. List and search operations also return a cursor if there's another page of resources to return. In the previous [CreateCustomer](https://developer.squareup.com/reference/square/customers-api/create-customer "Create Customer") example, a successful call returned a JSON object representing the new customer and it looked like the following: ```json { "customer":{ "id":"N6XSAFC2Y8T01B32ZW1X2WBSJM", "created_at":"2019-09-23T18:39:30.671Z", "updated_at":"2019-09-23T18:39:31Z", "given_name":"Lauren", "family_name":"Noble", "preferences":{ "email_unsubscribed":false }, "creation_source":"THIRD_PARTY", "version":0 } } ``` Read the response payload: * For an operation on a single object, the response contains a single JSON object named with the type of resource it is. For example, it is customer for the previous `CreateCustomer` call. In general, the object type is the lowercase name of the API (for example, customer, order, and payment). * For list and search operations, the response contains a named array (the name is the plural of the object type; for example, customers for a `ListCustomer` response) and a cursor value if there are additional objects in the list. If there are no objects for a list call to return, it returns an empty JSON object. Check the cursor for list and search operations. Make sure you get all items returned in a list call by checking for the cursor value returned in the response. When you call a list or search endpoint the first time, you set the cursor to an empty string or omit it in the request. If the response contains a cursor value, you call the API again to get the next page of items using that `cursor` value and continue to call that API with the cursor from the previous call until a cursor isn't returned in the response. ### Error responses Non-`200` HTTP status codes are errors. For more information, see [Handling Errors](build-basics/handling-errors). ## Additional build basics considerations There are several other introductory topics provided for a new developer to quickly learn the basics of developing applications with Square. For more information, see [Basics of Building Applications with Square](buildbasics). ## See also * [Square SDKs](sdks) * [Square video: The Sandbox - Idempotency](https://www.youtube.com/watch?v=Hx8UdQx_4bE) * [Square blog: Understanding the Essentials of Idempotency](https://developer.squareup.com/blog/understanding-the-essentials-idempotency/) --- # Working with Dates > Source: https://developer.squareup.com/docs/build-basics/common-data-types/working-with-dates > Status: PUBLIC > Languages: All > Platforms: All Learn about how Square APIs model date information. {% subheading %}Learn about how Square APIs model date and time information.{% /subheading %} {% toc hide=true /%} ## Overview Square APIs use standardized string formats based on ISO 8601 and RFC 3339 to represent dates, timestamps, and durations. This consistent approach ensures reliable date/time handling across platforms and time zones. Date and time fields in Square APIs are always provided as strings, even when representing numeric values like durations. For specific format requirements, always check the documentation for the API endpoint you're using. ### Quick reference | Type | Format | Example | | ----- | ----- | ----- | | Date | `YYYY-MM-DD` | `"2023-05-01"` | | UTC timestamp | `YYYY-MM-DDTHH:MM:SSZ` | `"2025-01-15T00:00:00Z"` | | Timestamp with offset | `YYYY-MM-DDTHH:MM:SS±hh:mm` | `"2025-01-15T00:00:00-08:00"` | | Duration (full) | `P[n]Y[n]M[n]DT[n]H[n]M[n]S` | `"P1Y2M3DT12H30M15S"`{% line-break /%}(1 year, 2 months, 3 days, 12 hours, 30 minutes, 15 seconds) | | Duration (time only) | `PT[n]H[n]M[n]S` | `"PT3H15M"`{% line-break /%}(3 hours and 15 minutes) | ## Date format Square APIs use the [ISO 8601](https://www.iso.org/iso-8601-date-and-time-format.html) format (`YYYY-MM-DD`) to represent a calendar day without time information. This format is used in fields such as: * `start_date` and `end_date` in a [DateRange](https://developer.squareup.com/reference/square/objects/DateRange) object. * `arrival_date` in a [Payout](https://developer.squareup.com/reference/square/objects/Payout) object. * `birthday` in a [Customer](https://developer.squareup.com/reference/square/objects/Customer) object. ### Example {% table %} * Field type * Format * Example --- * Date * `YYYY-MM-DD` * `"2023-05-01"` {% /table %} ## Timestamp format Timestamps include date and time and follow the [RFC 3339](https://www.rfc-editor.org/rfc/rfc3339) format. For example, this format is used in fields such as: * `created_at` and `updated_at` in an [Order](https://developer.squareup.com/reference/square/objects/Order) object. * `paired_at` in a [DeviceCode](https://developer.squareup.com/reference/square/objects/DeviceCode) object. * `effective_at` in a [PayoutEntry](https://developer.squareup.com/reference/square/objects/PayoutEntry) object. Timestamps can be represented as: * UTC time using the `YYYY-MM-DDTHH:MM:SSZ` format. * Offset time to specify a time zone using `YYYY-MM-DDTHH:MM:SS±hh:mm` (such as `-08:00` for 8 hours behind UTC). ### Examples {% table %} * Field type * Format * Example --- * UTC timestamp * `YYYY-MM-DDTHH:MM:SSZ` * `"2013-01-15T00:00:00Z"` --- * Timestamp with offset * `YYYY-MM-DDTHH:MM:SS±hh:mm` * `"2013-01-15T00:00:00-08:00"` {% /table %} {% aside type="info" %} * `Z` at the end of a timestamp indicates UTC time (Zulu). * If you're using offset timestamps, check the documentation to ensure whether adjustments are made for Daylight Savings Time (DST). {% /aside %} ## Duration format Durations represent a length of time rather than a specific date or time. They follow the [ISO 8601 duration format](https://en.wikipedia.org/wiki/ISO_8601#Durations) as defined by ISO 8601 and clarified in [RFC 3339](https://tools.ietf.org/html/rfc3339#appendix-A). These durations are used in fields such as: * `prep_time_duration` in a [Fulfillment](https://developer.squareup.com/reference/square/objects/Fulfillment) object. * `expected_duration` in a [BreakType](https://developer.squareup.com/reference/square/objects/BreakType) object. * `delay_duration` in a [Payment](https://developer.squareup.com/reference/square/objects/Payment) object. Durations are expressed as a string starting with "P" (for period) and using specific time units: * Y for years * M for months * D for days * T to separate the date and time components * H for hours * M for minutes (when appearing after "T") * S for seconds {% aside type="warning" %} Don't confuse the "M" for months with the "M" for minutes. Minutes follow a "T" or "H" time unit. For example, "P5M" is five months and "PT5M" is five minutes. {% /aside %} {% aside type="info" %} Alternatively, durations can be expressed in weeks using "W", such as "P4W" for 4 weeks. Week-based durations are supported in some endpoints, particularly in fulfillment-related fields. For example: * `pickup_window_duration`: "P1W3D" (1 week and 3 days) * `delivery_window_duration`: "P2W" (2 weeks) The week format cannot be combined with other units (for example, "P1W2D" isn't allowed). {% /aside %} ### Example {% table %} * Duration type * Format * Example --- * Full duration (date and time) * `P[n]Y[n]M[n]DT[n]H[n]M[n]S` * `"P1Y2M3DT12H30M15S"` (1 year, 2 months, 3 days, 12 hours, 30 minutes, 15 seconds) --- * Time-only duration * `PT[n]H[n]M[n]S` * `"PT3H15M"` (3 hours and 15 minutes) --- * Weeks-only duration * `P[n]W` * `"P4W"` (4 weeks) {% /table %} ## See also * [Working with Monetary Amounts](build-basics/common-data-types/working-with-monetary-amounts) * [Working with Addresses](build-basics/common-data-types/working-with-addresses) --- # Common Square API Patterns > Source: https://developer.squareup.com/docs/build-basics/common-api-patterns > Status: PUBLIC > Languages: All > Platforms: All Learn about API patterns that are common across Square APIs. The following API patterns are common across Square APIs: * [Custom Attributes](devtools/customattributes/overview) * [Idempotency](build-basics/common-api-patterns/idempotency) * [Pagination](build-basics/common-api-patterns/pagination) * [Optimistic Concurrency](build-basics/common-api-patterns/optimistic-concurrency) * [Clear API Object Fields](build-basics/clearing-fields) --- # TLS and HTTPS > Source: https://developer.squareup.com/docs/build-basics/general-considerations/tls-and-https > Status: PUBLIC > Languages: All > Platforms: All Learn about the relationship between TLS and HTTPS. {% subheading %}Learn about the relationship between TLS and HTTPS.{% /subheading %} {% toc hide=true /%} ## Overview HTTPS is required for all API calls to Square endpoints. Make sure your website is served using HTTPS and that you're making HTTPS calls to Square APIs. Transport Layer Security (TLS)—previously known as Secure Socket Layer (SSL)—is the process of securing communication over a computer network by encrypting traffic. Encrypting traffic helps prevent eavesdropping, tampering, and [man-in-the-middle](https://en.wikipedia.org/wiki/Man-in-the-middle_attack) attacks. HTTP is a protocol for transferring data between websites. An HTTPS transfer or API call is simply an HTTP call over a connection secured by TLS. For more information about HTTPS, see [Wikipedia](https://en.wikipedia.org/wiki/HTTPS) and [Why HTTPS Matters](https://developers.google.com/web/fundamentals/security/encrypt-in-transit/why-https) on the Google Developer Blog. You should use TLS 1.3; however, TLS 1.2 still works when making Square API calls. TLS 1.1 isn't supported. ## Enable HTTPS on your website Enable TLS on your website by installing a small data file that authenticates your server's identity and encrypts information sent to that server. The authentication and encryption file is called an SSL certificate, which is issued by a certificate authority. A certificate authority is a trusted entity (such as a company, nonprofit, or governing body) that issues SSL certificates after verifying the identities of users or servers. For example, [Let's Encrypt](https://letsencrypt.org/about/) is a free, automated, open-source certificate authority. SSL certificates from Let's Encrypt are easy to use and many hosting providers support one-click installation of Let's Encrypt certificates. Your options to enable HTTPS might be: * [Check to see whether your hosting provider includes Let's Encrypt integration](https://community.letsencrypt.org/t/web-hosting-who-support-lets-encrypt/6920). If it does, use the documentation to set up a Let's Encrypt certification. * If your hosting provider doesn't offer SSL certification, you might be able to manually install a Let's Encrypt SSL certificate. Visit the Let's Encrypt [Get Started](https://letsencrypt.org/) page for a high-level guide about how to obtain and install an SSL certificate. To confirm that you've successfully enabled HTTPS, load your website and verify that the address bar has "https://" at the beginning of your website address. Your browser might also display a closed lock icon. ## HTTPS libraries HTTPS libraries are available for a selection of programming languages. |Language|Built-in HTTPS library|Open-source HTTPS library| |:-------|:---------------------|:------------------------| |PHP|[cURL](http://php.net/manual/en/book.curl.php)|| |Ruby|[Net::HTTP](http://ruby-doc.org/stdlib-2.1.3/libdoc/net/http/rdoc/Net/HTTP.html)|[Faraday](https://github.com/lostisland/faraday)| |Python|[httplib](https://docs.python.org/2/library/httplib.html)|[Requests](https://pypi.org/project/requests)| |.NET|[System.Net](http://msdn.microsoft.com/library/hh674188.aspx)|[RestSharp](http://restsharp.org/)| |Objective-C (iOS and OS X)|[URL loading system](https://developer.apple.com/Library/ios/documentation/Cocoa/Conceptual/URLLoadingSystem/URLLoadingSystem.html)|[AFNetworking](https://github.com/AFNetworking/AFNetworking)| |Java (including Android)|[HTTPURLConnection](http://developer.android.com/reference/java/net/HttpURLConnection.html)|[OkHttp](http://square.github.io/okhttp/)| |Node.js|[http](http://nodejs.org/api/http.html)|[Request](https://github.com/mikeal/request)| |Go|[net/http](http://golang.org/pkg/net/http/)| --- # General Development Concepts > Source: https://developer.squareup.com/docs/build-basics/general-considerations > Status: PUBLIC > Languages: All > Platforms: All Explains some of the introductory common considerations when you begin integrating the Square API in your application. The following concepts are useful to understand as you develop applications on the Square Developer platform: * [TLS and HTTPS](build-basics/general-considerations/tls-and-https) - Guidance for enabling HTTPS to call Square APIs over a secured connection. * [Using the REST API](build-basics/general-considerations/using-rest-api) - Information about sending requests to Square APIs and handling responses. * [Handling Errors](build-basics/general-considerations/handling-errors) - Guidance about error handling and descriptions of the components of an `Error` object. * [Best Practices for Collecting Information](build-basics/general-considerations/collecting-information) - Requirements and general guidelines for collecting and managing customer information. If you collect personal information from customers, it's critical that you handle that information responsibly. * [Language Preferences for Applications](build-basics/general-considerations/language-preferences) - People communicate with software through natural languages, such as English, French, and Spanish. Because each person has a different preferred language, developers must track and accommodate language preferences of customers. This topic explains how applications that integrate the Square API might accommodate these language preferences in communications. --- # Frontend and Backend Development > Source: https://developer.squareup.com/docs/build-basics/frontend-backend-development > Status: PUBLIC > Languages: All > Platforms: All {% subheading %}Learn how Square APIs and SDKs are used in frontend and backend development.{% /subheading %} {% toc hide=true /%} ## Overview A typical application has a frontend client and a backend server: * **Frontend** - Provides a UI that displays information, receives user input (using buttons, menus, and other UI elements), and interacts with the application backend. A frontend is typically built using technologies such as HTML, CSS, and JavaScript for web applications and Objective-C, Swift, Java, or Kotlin for iOS and Android applications. Modern web applications often use frameworks like React, Angular, or Vue.js that improve efficiency. * **Backend** - Receives and processes user input sent from the frontend, pulls the necessary data from internal and external sources, and sends the data back to the frontend. The backend is typically built using server-side languages and frameworks such as PHP, Java, Node.js, or Python. Square provides [payment APIs and SDKs](payments-overview) that support payment processing activities from the frontend and backend. ## Frontend A payment-processing flow usually starts with a buyer providing payment information in the application frontend (for example, entering card information in text boxes). Application frontends can use client-side payment APIs and SDKs for payment processing activities. These libraries provide UI elements used to collect payment information for online payments or payments on Square hardware. {% tabset %} {% tab id="Online payments" %} For online payments, the following client-side libraries are used with backend calls to the [Payments API](https://developer.squareup.com/reference/square/payments-api): * [Web Payments SDK](web-payments/overview) - Used to process payments in web applications (see the [Payment Processing example](https://github.com/square/connect-api-examples/tree/master/connect-examples/v2/node_payment) application). * [In-App Payments SDK](in-app-payments-sdk/what-it-does) - Used to process payments in mobile seller applications that buyers install on their Android or iOS devices. For more information, see [In-App Payments SDK Quickstart](in-app-payments-sdk/quick-start/start). The application frontend uses the SDK to generate a secure payment token (and buyer verification token) from information provided by the buyer. The application backend calls `CreatePayment` using the payment token as the `source_id`. To learn about all options for processing online payments, see [Online Payment Solutions](online-payment-options). {% /tab %} {% tab id="Payments on hardware" %} For in-person payments on Square hardware, the following client-side libraries are used to process payments end to end. No backend Square API calls are required. * [Mobile Payments SDK](mobile-payments-sdk) (US only) - Used to process payments with Square Reader devices or Square Stand. Developers can embed the Mobile Payments SDK in their mobile application. For more information, see [Build on Android](mobile-payments-sdk/android) and [Build on iOS](mobile-payments-sdk/ios). * [Point of Sale API](pos-api/what-it-does) - Used to process payments with Square Reader from a developer's mobile application. Developers can embed the Point of Sale API in their mobile application, and the API acts as an application switcher. When a payment is ready to be processed, the API switches to the Square Point of Sale application and collects the payment with the Square Reader. For more information, see [Build on Android](pos-api/build-on-android), [Build on iOS](pos-api/build-on-ios), and [Build on Mobile Web](pos-api/build-mobile-web). To learn about all options for processing payments from Square hardware, see [Take Payments on Square Hardware](in-person-payment-options). {% /tab %} {% /tabset %} ## Backend [Square APIs](https://developer.squareup.com/reference/square) integrate with backend development. Typically, the application backend sends API requests to Square and processes the responses. Application backends can call Square APIs directly using any programming language or use a [Square SDK](sdks) in a supported programming language. Many Square APIs integrate with other Square APIs for basic or extended functionality. For example, many operations require a location ID that can be retrieved using the [Merchants API](https://developer.squareup.com/reference/square/merchants-api) or [Locations API](https://developer.squareup.com/reference/square/locations-api). The following are some commonly used Square APIs: * [Payments API](payments-refunds) - Process payments using payment tokens (generated by the client-side Web Payments SDK and In-App Payments SDK) or credit card, debit card, and gift card IDs (retrieved using the [Customers API](https://developer.squareup.com/reference/square/customers-api), [Cards API](https://developer.squareup.com/reference/square/cards-api), and [Gift Cards API](https://developer.squareup.com/reference/square/gift-cards-api)). * [Orders API](orders-api/what-it-does) - Create and manage orders. Specify the order ID on a payment to link itemization details to the payment. The Orders API provides close integration with the [Catalog API](https://developer.squareup.com/reference/square/catalog-api), [Inventory API](https://developer.squareup.com/reference/square/inventory-api), and other Square APIs. * [Customers API](customers-api/what-it-does) - Create, retrieve, and manage customer data. Specify the customer ID on orders and payments for improved auditing and reporting integration. * [Subscriptions API](subscriptions/overview) - Provide subscription services to buyers. Subscription plans are designed using the [Catalog API](https://developer.squareup.com/reference/square/catalog-api). Subscriptions are created using a customer ID and location ID. ## See also * [Square API Reference](https://developer.squareup.com/reference/square) * [Square SDK and Mobile Samples](sample-apps) * [Payment APIs and SDKs](payments-overview) * [Commerce APIs](commerce) * [Customer APIs](customers) * [Staff APIs](staff) * [Merchant APIs](merchant-details) --- # Common Data Types > Source: https://developer.squareup.com/docs/build-basics/common-data-types > Status: PUBLIC > Languages: All > Platforms: All Explains some of the common data types commonly used across Square APIs. The following data types are common across Square APIs: * [Working with Dates](build-basics/common-data-types/working-with-dates) * [Working with Monetary Amounts](build-basics/common-data-types/working-with-monetary-amounts) * [Working with Addresses](build-basics/common-data-types/working-with-addresses) --- # Sandbox Payments > Source: https://developer.squareup.com/docs/devtools/sandbox/payments > Status: PUBLIC > Languages: All > Platforms: All A quick reference of test credit card numbers and payment tokens you can use to make test payments with the Square Sandbox. {% subheading %}Learn about test credit card numbers and payment tokens you can use to make test payments with the Square Sandbox.{% /subheading %} {% toc hide=true /%} ## Overview The Square Sandbox can be used for testing Square API calls. Some of the APIs require special test values when creating transactions in the Sandbox, especially when processing test payments. Square platform clients, such as Web Payments SDK and In-App Payments SDK applications, accept payment cards and return one-time-use encrypted payment tokens to be submitted to Square API payment endpoints to take payments. You can avoid testing your code with a real payment card by testing in the Sandbox using test values that provide predictable results. {% aside type="important" %} * The Sandbox doesn't accept valid credit cards. You must use test credit card values found in the following sections. * Testing card-present scenarios is currently not supported. {% /aside %} Test client-side card-not-present logic in your Web Payments SDK or In-App Payments SDK application by using test credit card numbers to generate payment tokens for use with the Square API payments and card-on-file endpoints in the Sandbox. If you don't need to test your client-side payment token logic, you can use [test values](#source-ids-for-createpayment) to make payments in the Sandbox. {% anchor id="clientsidetesting" /%} ## Web and mobile client testing You can use Sandbox credit cards with the Web Payments SDK and In-App Payments SDK to input card numbers that generate a payment token for Sandbox online payments testing. {% anchor id="successstates" /%} ### Card-not-present success state values The Sandbox supports a collection of credit card numbers for all Square-supported card brands for simulating the client side of payment scenarios. Brand | Number | CVV | ------------------ | ------------------- | ---- | Visa | 4111 1111 1111 1111 | 111 | Mastercard | 5105 1051 0510 5100 | 111 | Discover | 6011 0000 0000 0004 | 111 | Diners Club | 3000 000000 0004 | 111 | JCB | 3569 9900 1009 5841 | 111 | American Express | 3400 000000 00009 | 1111 | China UnionPay | 6222 9888 1234 0000 | 123 | Square Gift Card | 7783 3200 0000 0000 | ⛔ | Note the following: * You can set the card expiration date to any future month and year. * Payments in USD (United States), CAD (Canada), or GBP (United Kingdom) require a valid postal code. * Payments in Japan do not support postal codes. * The Sandbox simulates the use of payment cards in Square-supported countries. In production, card brand and country support might be different. Before releasing your application into production, review [Supported Payment Methods by Country](payment-card-support-by-country). ### ACH bank transfer success state values The Sandbox supports ACH bank transfer payments by accepting the test user name `user_good` and the test password `pass_good`. These test values are provided by the Plaid API and might change in the future. For more information, see the Plaid [Sandbox test credentials](https://plaid.com/docs/sandbox/test-credentials/) page. ### Error state values You can reproduce certain error states in the Sandbox by providing special values in the Web Payments SDK or In-App Payments SDK. If you use one of the following values, the returned payment token generates an error when it's processed by the [CreatePayment](https://developer.squareup.com/reference/square/payments-api/create-payment) endpoint. Test values | Desired error state ------------------------------ | ---------------------- CVV: 911 | Card CVV incorrect Postal code: 99999 | Card postal code incorrect Expiration date: 01/40 | Card expiration date incorrect Card number: 4000000000000002 | Card declined number PAN: 4000000000000010 | Card on file auth declined ## SCA testing in the Web Payments SDK To test SCA in the Square Sandbox, you should use a payment token returned by the Web Payments SDK. To test different SCA scenarios, use the cards provided in the following table. Use the [Card.tokenize()](https://developer.squareup.com/reference/sdks/web/payments/objects/Card#Card.tokenize) function for card-not-present and card-on-file (CoF) SCA challenges with the following test values. For more information, see [Take a Card Payment with the Web Payments SDK](web-payments/take-card-payment). {% aside type="important" %} SCA testing with a JCB-branded card number is supported with sellers only in AU, CA, and JP regions. {% /aside %} |Brand |Numbers{% width="150px" %} |CVV |Challenge type |Verification code| |:------------------|:------------------|:---|:-----------------------------------------|:----------------| |Visa |4800 0000 0000 0004|111 |No Challenge |N/A | |Mastercard |5222 2200 0000 0005|111 |No Challenge |N/A | |Discover EU | 6011 0000 0020 1016 | 111 | No Challenge |N/A | |JCB | 3569 9900 0000 0017 | 111 | No Challenge | N/A | |Visa EU |4310 0000 0020 1019|111 |Modal with Verification Code |123456 | |Mastercard |5248 4800 0021 0026|111 |Modal with Verification Code |123456 | |Mastercard EU |5500 0000 0020 1016|111 |Modal with Verification Code |123456 | |American Express EU|3700 000002 01014 |1111 |Modal with Verification Code |123456 | |JCB | 3569 9900 0000 0009 | 111 | Modal with Verification Code | 123456 | |Visa |4811 1100 0000 0008|111 |No Challenge with Failed Verification |N/A | The SCA flow requires buyers to provide a code sent to their mobile phone in an SMS message. When testing in the Sandbox, use the verification code to simulate the code sent using SMS. {% aside type="important" %} * With cards that don't have challenges, the card completes the SCA process without the need for a verification window. * The Web Payments SDK generates a verification token for each call to `verifyBuyer` (except when a buyer cancels the SCA challenge). The seller should pass the verification token when it's used to create a payment or store a payment card. The seller should be prepared for situations where Square or the issuer bank might reject the payment or reject storing the payment card. An example of this is the issuer bank determines that the payment request is suspicious and marks it as a fraud transaction or the bank locks the buyer's account. * In the Sandbox, `verifyBuyer` creates a buyer challenge across all regions, mandated or otherwise. In production, you only see a buyer challenge for mandated regions. {% /aside %} ## SCA testing in the In-App Payments SDK To test SCA in the Square Sandbox, you should use a payment token returned by the In-App Payments SDK. To test different SCA scenarios, use the cards provided in the following table. Use the [BuyerVerification](https://developer.squareup.com/docs/api/in-app-payment/android//sqip/BuyerVerification.html) class (Android) or [SQIPBuyerVerificationSDK](https://developer.squareup.com/docs/api/in-app-payment/ios/Classes/SQIPBuyerVerificationSDK.html) interface (iOS) for card-not-present and card-on-file (CoF) SCA challenges with the following test values. |Brand|Numbers|CVV|Challenge type|Verification code| |---|---|---|---|---| |Visa|4800 0000 0000 0012|111|No Challenge|N/A| |Mastercard|5222 2200 0000 0013|111|No Challenge|N/A| |Discover EU|6011 0000 0020 1024|111|No Challenge|N/A| |JCB|3569 9900 0000 0041|111|No Challenge|N/A| |Visa EU|4310 0000 0020 1027|111|Modal with Verification Code|123456| |Mastercard|5248 4800 0021 0034|111|Modal with Verification Code|123456| |Mastercard EU|5500 0000 0020 1024|111|Modal with Verification Code|123456| |American Express EU|3700 000002 01022|1111|Modal with Verification Code|123456| |JCB|3569 9900 0000 0033|1111|Modal with Verification Code|123456| |Mastercard|5333 3300 0000 0008|111|Modal with Multi Select Challenge Question|Select both Paris and Lyon| |Visa|4811 1100 0000 0016|111|No Challenge with Failed Verification|N/A| ## Sandbox payment risk evaluation In the Sandbox, the following payment amounts in a [CreatePayment](https://developer.squareup.com/reference/square/payments-api/create-payment) request generate a `Payment` object with `risk_evaluation` identifying the specific risk levels. | Charge amount | Risk level | | ---------- | ---------- | | 2222 | MODERATE | | 3333 | HIGH | | Other values | NORMAL | {% anchor id="source-ids-for-createpayment" /%} ## Source IDs for testing the CreatePayment endpoint In a [CreatePayment](https://developer.squareup.com/reference/square/payments-api/createpayment) request, the `source_id` field identifies the payment source to charge. When testing in the Sandbox, you can use the following test values as the `source_id`. {% anchor id="testing-a-card-payment" /%} ### Testing a card payment Square provides Sandbox {% tooltip text="payment token"%}A unique, encrypted string generated by the Web Payments SDK or In-App Payments SDK that securely represents payment information.{% /tooltip %}s for testing card-present payments and Sandbox card IDs for testing card-on-file payments. {% anchor id="payment-token-values" /%} #### Payment tokens Use the following values to test successful card payments: |`source_id` value |Payment method | |:-----|:-----| |`cnon:card-nonce-ok` |Credit or debit card | |`cnon:gift-card-nonce-ok` |Square gift card | Use the following values to test failed card payments: |`source_id` value |Error mapping | |:-----|:-----| |`cnon:card-nonce-rejected-cvv` |Bad CVV | |`cnon:card-nonce-rejected-postalcode` |Bad postal code | |`cnon:card-nonce-rejected-expiration` |Bad expiration date | |`cnon:card-nonce-declined` |Card declined | |`cnon:card-nonce-already-used` |Card payment token already used | |`cnon:gift-card-nonce-insufficient-funds` |Gift card insufficient funds | |`cnon:gift-card-nonce-insufficient-permission` |Gift card no permissions | {% anchor id="card-on-file-id-values" /%} #### Card-on-file IDs Use the following values to test successful card-on-file payments: |`source_id` value |Payment method | |:-----|:-----| |`ccof:customer-card-id-ok` |Card on file | |`ccof:customer-card-id-requires-verification` | Card (SCA) | |`ccof:customer-card-id-visa-ok` |Visa card on file | |`ccof:customer-card-id-mastercard-ok` |Mastercard card on file | |`ccof:customer-card-id-american-express-ok` |American Express card on file | Use the following values to test failed card-on-file payments: |`source_id` value |Error mapping | |:-----|:-----| |`ccof:customer-card-id-rejected-postalcode` |Bad postal code | |`ccof:customer-card-id-rejected-expiration` |Bad expiration date | |`ccof:customer-card-id-declined` |Card declined | {% anchor id="testing-an-ach-payment" /%} ### Testing an ACH payment You can specify a payment token which represents ACH bank information. Square provides the following test values: |source_id value |Error mapping{% width="200px" %} |Expected behavior | |-------------------------------|--------------------|-----------------| |`bnon:bank-nonce-ok` | |The request is successful.| |`bnon:bank-nonce-failure` |`GENERIC_DECLINE` |The request failed.| |`bnon:bank-nonce-account-unusable` |`ACCOUNT_UNUSABLE` |The request failed.| |`bnon:bank-nonce-insufficient-funds` |`INSUFFICIENT_FUNDS` |The request failed.| |`bnon:bank-nonce-invalid-account` |`INVALID_ACCOUNT` |The request failed.| |`bnon:bank-nonce-buyer-refused-payment`|`BUYER_REFUSED_PAYMENT`|The request failed.| Note the following: - The resulting payment has `PENDING` as the initial status, which updates to `COMPLETED` after 1 minute. - For failed requests, the resulting payment has `PENDING` as the initial status, which updates to `FAILED` after 1 minute. {% anchor id="testing-an-afterpay-payment" /%} ### Testing an Afterpay payment Use the following test payment tokens as `source_id` in a `CreatePayment` request for testing Afterpay payments in the Sandbox: |source_id value |Error mapping |Expected behavior | |:-------------------------------------|:--------------------|:-----------------| |`wnon:afterpay-or-clearpay-ok` | |The request is successful.| |`wnon:afterpay-or-clearpay-declined`| `GENERIC_DECLINE`|The request failed.| {% anchor id="testing-a-cash-app-payment" /%} ### Testing a Cash App payment Use the following test payment tokens as `source_id` in a `CreatePayment` request for testing Cash App payments in the Sandbox: |source_id value |Error mapping |Expected behavior | |:-------------------------------------|:--------------------|:-----------------| |`wnon:cash-app-ok` | |The request is successful.| |`wnon:cash-app-declined`|`GENERIC_DECLINE`|The request failed.| {% anchor id="source-ids-for-updatepayment" /%} ## Source IDs for testing the UpdatePayment endpoint In a [UpdatePayment](https://developer.squareup.com/reference/square/payments-api/updatepayment) request, the `source_id` field identifies the payment source to charge. When testing in the Sandbox, you can use the following test values as the `source_id`: |source_id value{% width="190px" %} |Error mapping{% width="160px" %} |Expected behavior | |:--------------------------|:--------------------|:-----------------| |`cnon:card-nonce-ok` | |The request is successful.| |`cnon:card-edit-not-allowed` |`BAD_REQUEST` |The [Payment](https://developer.squareup.com/reference/square/objects/Payment) object created using this token has no [capabilities](https://developer.squareup.com/reference/square/objects/Payment#definition__property-capabilities). As a result, any [UpdatePayment](https://developer.squareup.com/reference/square/payments-api/update-payment) request to update the amount or tip fails.| |`cnon:card-edit-down-only` |`BAD_REQUEST` |The `Payment` created using this token has `EDIT_AMOUNT_DOWN` and `EDIT_TIP_AMOUNT_DOWN` `capabilities`. An `UpdatePayment` request that reduces these amounts succeeds. However, any attempt to increase these amounts fails.| |`cnon:card-edit-tip-failure` |`AMOUNT_TOO_HIGH` |`UpdatePayment` always returns a tip too high error.| |`cnon:card-edit-failure` |`AMOUNT_TOO_HIGH` |`UpdatePayment` always returns an amount too high error.| --- # Development Essentials > Source: https://developer.squareup.com/docs/development-essentials > Status: PUBLIC > Languages: All > Platforms: All The Square Developer platform provides a collection tools, APIs, and SDKs for developing applications. {% subheading %}Learn about the Square Developer platform and how Square APIs and SDKs work together.{% /subheading %} {% toc hide=true /%} ## Overview The [Square Developer platform](homepage) provides APIs, SDKs, and tools that developers can use to integrate with Square business solutions. Millions of sellers use Square hardware (such as Terminal and Reader) and products (such as Square Point of Sale, Square for Retail, Restaurant POS, and the Square Dashboard) to run their business. The developer platform supports independent and partner developers who: * Work in-house for a seller. * Offer custom applications to Square sellers. * Build custom solutions for businesses as a Square Solutions Partner. Square APIs provide payment, commerce, customer, staff, and merchant capabilities that can be used as building blocks to support a broad range of business needs and create experiences that help sellers grow their business. The developer platform also provides SDKs, tools, and other resources that help developers to build, test, and monitor their applications. ## A quick look at the Square Developer platform The following video shows how your application connects with Square sellers and how Square APIs work together. {% youtube src="https://www.youtube.com/embed/hoAUHJfokbg" /%} ## Start developing To build on the Square Developer platform, you need a [Square account and an application](get-started/create-account-and-application). * A Square account represents an entity (person, business, or organization) that uses Square products or APIs to manage resources. For example, they might process payments, manage orders and inventory, and store customer data. Calls to Square APIs are made within the context of a Square account based on the [access token](build-basics/access-tokens) in the request. An account enables access to the [Developer Console](devtools/developer-dashboard) and other developer and seller tools. While testing, you can create resources and process payments in your own account. Later, any [application fees](payments-api/take-payments-and-collect-fees) that you collect to monetize your application are credited to your account. * An application stores configuration settings, such as the default Square API version used for API calls or the application ID and secret used to identify and authenticate your application in the OAuth code flow. You can access and manage settings from the Developer Console. After creating your account and registering an application, use Square developer resources to explore Square APIs and begin developing. A good place to start is [API Explorer](https://developer.squareup.com/explorer/square), which is an interactive tool that lets you sign in with your Square account, choose an access token, and build and send Square API requests in the {% tooltip text="Square Sandbox" %}An isolated server environment used for testing. API calls in the Sandbox use the "connect.squareupsandbox.com" domain and require an access token that's valid for Sandbox.{% /tooltip %} or production environment. If you need help along the way, [contact Developer Support](https://squareup.com/help/contact?panel=BF53A9C8EF68), reach out in the [forums](https://developer.squareup.com/forums), or join our [Discord community](https://discord.gg/squaredev). ## Developer resources The following topics describe Square developer resources: * [Get Started](square-get-started) - Shows how to sign up for a Square account, make your first API call in the Square Sandbox, and view logs of your API calls. During the sign-up flow, Square registers an application for your account. * [Build Basics](buildbasics) - General design concepts and patterns that you should understand when using the developer platform. * [Developer Tools](devtools/overview) - Detailed documentation about using Square developer tools, such as the Square Sandbox, API Explorer, and API Logs. * [Square SDKs](sdks) - Describes the backend platform SDKs for Square APIs that let you code in common programming languages, with links to SDK packages, reference documentation, and quickstarts. * [Sample Applications](sample-apps) - A list of sample applications that demonstrate how to call Square APIs, Square SDKs, or client-side payment SDKs and libraries for payment processing and other business use cases. * [GraphQL](devtools/graphql) - Lets you request exactly the data you need from supported Square graphs (such as orders, payments, catalog, and customers) with faster and more compact data transfers. * [OAuth API](oauth-api/overview) - Used to request and manage permissions from Square sellers that allow an application to access resources in seller accounts. * [Webhook Subscriptions API](webhooks/webhook-subscriptions-api) - Used to programmatically create and manage an application's webhook subscriptions. * [Events API](events-api/overview) - Used to programmatically pull webhook events. * [Migrate from Deprecated APIs](migrate-from-v1) - An overview of the retirement process for Square APIs and migration guides for specific deprecated APIs. * [International Development](international-development) - Key considerations for creating applications for sellers in other countries. {% aside type="info" %} In addition to platform SDKs, Square provides payment processing SDKs for [online](online-payment-options), [in-app](in-app-payments), and [in-person](in-person-payment-options) channels. {% /aside %} ## See also * [Payment APIs and SDKs](payments-overview) * [Commerce APIs](commerce) * [Customer APIs](customers) * [Staff APIs](staff) * [Merchant APIs](merchant-details) * [Square API Reference](https://developer.squareup.com/reference/square) * [Video: Square Developer](https://www.youtube.com/channel/UC1N2X6PEMGo2xjJY1Pm0vng) --- # Merchants API > Source: https://developer.squareup.com/docs/merchants-api > Status: PUBLIC > Languages: All > Platforms: All Learn about the Merchants API and how to retrieve information about a Square seller account that's integrated with your application **Applies to:** [Merchants API](https://developer.squareup.com/reference/square/merchants-api) | [OAuth API](oauth-api/overview) | [Locations API](locations-api) {% subheading %}Learn about the Merchants API and how to retrieve information about a Square seller account that's integrated with your application.{% /subheading %} {% toc hide=true /%} ## Overview The Merchants API groups individual seller locations into larger organizations, allowing them to operate as a single entity. Each merchant represents one organization or business that sells with Square and all [team members](https://squareup.com/us/en/point-of-sale/team-management) of that business can coordinate on behalf of the merchant. When a Square seller connects to your application with [OAuth](oauth-api/what-it-does) or a personal access token, your application receives an access token that is scoped to that merchant group. Use the Merchants API to retrieve core information about the organization connecting to your application, such as the language preferences, business name, country, and account status. Some API tasks, such as managing [orders](orders-api/what-it-does) or taking [payments](payments-api/take-payments), are associated with a specific seller location using a `location_id`. Use the [Locations API](locations-api) to access information about these locations. {% aside type="info" %} * The application developer account and seller account are separate Square accounts. Developers cannot perform any actions, such as taking payments, on behalf of sellers before the seller has granted the application developer permissions through OAuth. For more information, see [OAuth API](oauth-api/what-it-does). * The `id` of a particular merchant is only accessible through the Merchants API. It's not visible on the Square Dashboard or Developer Console. {% /aside %} In the Square data model, the access token (OAuth or PAT) used to connect your application to a Square seller is associated with a single merchant. Use this merchant's ID in the request URL for the [RetrieveMerchant](https://developer.squareup.com/reference/square/merchants-api/retrieve-merchant) endpoint to access information about the merchant. ```` The following is an example response: ```json { "merchant": { "id": "DM7VKY8Q63GNP", "business_name": "Apple a Day", "country": "US", "language_code": "en-US", "currency": "USD", "status": "ACTIVE", "main_location_id": "7WQ0KXC8ZSD90", "created_at": "2021-09-20T14:29:08.025Z" } } ``` Alternatively, you can request the specific merchant associated with your account's access tokens by calling [RetrieveMerchant](https://developer.squareup.com/reference/square/merchants-api/retrieve-merchant) using `me` in place of the merchant ID. ```` You can also retrieve the associated merchant using the [ListMerchants](https://developer.squareup.com/reference/square/merchants-api/list-merchants) endpoint. ```` Note that the response is in the form of a list, but contains only one merchant: the one associated with your application based on the given access token. ```json { "merchant": [ { "id": "DM7VKY8Q63GNP", "business_name": "Apple a Day", "country": "US", "language_code": "en-US", "currency": "USD", "status": "ACTIVE", "main_location_id": "7WQ0KXC8ZSD90", "created_at": "2021-09-20T14:29:08.025Z" } ] } ``` ## See also * [Access Tokens and Other Square Credentials](build-basics/access-tokens) --- # Locations API > Source: https://developer.squareup.com/docs/locations-api > Status: PUBLIC > Languages: All > Platforms: All Learn how to use a Square API to update and retrieve location information for a Square seller. **Applies to:** [Locations API](https://developer.squareup.com/reference/square/locations-api) {% subheading %}Learn how to use a Square API to update and retrieve location information for a Square seller.{% /subheading %} {% toc hide=true /%} ## Overview Locations represent the sources of orders and fulfillments for businesses (such as physical brick and mortar stores, online marketplaces, warehouses, or anywhere a seller does business). When a seller signs up to become a Square merchant, they provide core business profile information that describes their business. At the same time, Square creates the seller's first `Location` object using information from the business profile. This is referred to as the [main location](#about-the-main-location). Newly created accounts only have this single location, but more locations can be created. Sellers can [review and edit location information in the Square Dashboard](https://squareup.com/help/us/en/article/5580-manage-multiple-locations-with-square). {% youtube src="https://www.youtube.com/embed/knf2Y1Iv2Jw?si=bxMilZyzD9cCyg3O" /%} When creating an application that integrates with the Square API, several operations use a location ID as part of the request. For example: * When you send a [CreateCheckout](https://developer.squareup.com/reference/square/checkout-api/create-checkout) request, you must include a location ID to specify which business location to associate with the payment. * When you send a [SearchTeamMembers](https://developer.squareup.com/reference/square/team-api/search-team-members) request, you can optionally specify a location ID to retrieve a list of team members at a specific location. The location ID information is available through the [Locations API](https://developer.squareup.com/reference/square/locations-api) or in the Developer Console: 1. Sign in to the [Developer Console](https://developer.squareup.com/apps). 2. Choose an application from the **My Applications** section. 3. Choose **Locations**. ## About the main location When a seller signs up to become a Square merchant, the initial location that Square creates is referred to as the main location. When working with the Locations API, some endpoints (such as [RetrieveLocation)](https://developer.squareup.com/reference/square/locations-api/retrieve-location) allow you to use the string `main` in place of a location ID to quickly access the main location. Working with the main location is helpful when developing an application or integration that isn't location-aware and that can use a merchant-wide default rather than forcing the user to choose a specific location. Additionally, it might be helpful to retrieve the main location when integrating with another API that uses this main location. The following applies to the main location: * Subscription services (such as [Payroll](https://squareup.com/us/en/payroll) and [Loyalty](https://squareup.com/us/en/software/loyalty)) bill to the business address found for the main location. * Some Square API endpoints (such as [CreatePayment](https://developer.squareup.com/reference/square/payments-api/create-payment)) can include a location ID in the request. If none is specified, the main location will be used. * If you deactivate the main location, Square chooses a new main location from the remaining list of active locations. Newly created Square accounts only have a single main location, which is created from the core business information provided by the seller. You can add more locations (up to 300 for a seller account) at any time. Each new location has a unique location ID assigned by Square. Consider an example business called Raphael's Puppy-Care Emporium, which has nine locations: * Three brick and mortar locations with physical addresses in San Diego, San Francisco, and Boston. * Three mobile locations for "treatmobiles" that sell homemade treats and dog toys around Oakland, Chicago, and New York City. * One location for a fleet of pop-up grooming stations that rotate around local dog parks in various cities. * Two virtual locations for an online store and a mobile application. The eCommerce site and mobile application both allow customers to buy products or book appointments for grooming services. ![A graphic showing four types of business locations: a building, a food truck, a temporary stand, and a card reader representing a virtual location.](https://images.ctfassets.net/1nw4q0oohfju/3yBas5OxqqRuzkx9i5fzQ/226677bee323517da0e076b54d5b52f1/four-types-business-locations.png) While it's possible for this business to use only one location for all Square orders and transactions, having multiple locations allows the seller to separate their sales activity, inventory, receipt layout, and reports, as well as make different products or catalog items available at specific locations. In the Square API, some customer-related interactions (such as taking payments, issuing refunds, and managing inventory) must be attributed to a specific location in the API call. Your software should honor the seller’s existing locations, and might optionally create new locations for its own use. ## Testing in the Sandbox Your Square account has access to a Sandbox account that you can use for API testing. For more information, see [Square Sandbox](testing/sandbox). When testing the API, developers need a location for the Sandbox environment. Square provides a location for use in the Sandbox environment. 1. Go to the [Developer Console](https://developer.squareup.com/apps). 2. Choose an application. 3. On the **Applications** page, you can toggle between the **Sandbox** and **Production** account. Choose **Sandbox**. 4. In the left pane, choose **Locations**. You see a list of locations you can use in Sandbox testing. ## Manage locations Sellers can manage their business locations using the [Square Dashboard](https://app.squareup.com/dashboard). The [Locations API](https://developer.squareup.com/reference/square/locations-api) provides a set of endpoints to programmatically manage these locations. With this API, you can: * [Create a location](#createalocation). * [Retrieve a specific location](#retrievelocation). * [Retrieve a list of locations](#listlocations). * [Update a location](#updatealocation). {% anchor id="createalocation" /%} ### Create a location Create new locations with the [CreateLocation](https://developer.squareup.com/reference/square/locations-api/create-location) endpoint. The location `name` (called **Nickname** in the Square Dashboard) is the only required field and must be unique within a seller account. Note that the location `name` is different from the `business_name`, which can be identical across locations but is visible to customers on receipts. In general, `name` should be used to differentiate between locations in your seller account, while `business_name` should represent your public-facing identity for that location. The `business_name` for a location can be changed no more than three times in a 12-month period. When creating a new location, include any field information that you care about for that location. The remaining fields are automatically added based on the data from the main location. For non-read-only fields, if you don't want Square to set these field values, you can set the field values to `null`. For details about each of these location fields, see the [Location](https://developer.squareup.com/reference/square/objects/Location) type. The following is an example `CreateLocation` request. In the request, the `Authorization` header provides the access token of the seller account where you want to create the location. ```` The following is an example response: ```json { "location":{ "id": "LXX23EZFG5M9S", "name": "Oakland Treatmobile", "address":{ "address_line_1": "1955 Broadway", "address_line_2": "Suite 600", "locality": "Oakland", "administrative_district_level_1": "CA", "postal_code": "94612" }, "timezone": "UTC", "capabilities":[ "CREDIT_CARD_PROCESSING" ], "status":"ACTIVE", "created_at":"2021-11-09T22:00:19Z", "merchant_id":"MLFG72TMMXMCQ", "country":"US", "language_code":"en-US", "currency":"USD", "business_name":"Raphaels Puppy-Care Emporium", "type":"MOBILE", "business_hours":{ "periods": [ { "day_of_week": "THU", "start_local_time": "10:00:00", "end_local_time": "18:00:00" }, { "day_of_week": "FRI", "start_local_time": "10:00:00", "end_local_time": "18:00:00" }, { "day_of_week": "SAT", "start_local_time": "10:00:00", "end_local_time": "18:00:00" } ] }, "description":"Mobile dog treats and toys in Oakland", "twitter_username":"raphaelspupemporium", "instagram_username":"raphaelspupemporium", "facebook_url":"facebook.com/raphaelspupemporium", "mcc":"7299" } } ``` {% anchor id="retrievelocation" /%} ### Retrieve a specific location If you know a location ID, you can retrieve the specific location information using the [RetrieveLocation](https://developer.squareup.com/reference/square/locations-api/retrieve-location) endpoint. This endpoint also supports specifying `main` as the location ID, in which case it returns information about the first location created when the seller account was created. The following example request: * Specifies a location ID in the request URL. * Specifies the access token of the seller account in the `Authorization` header. ```` The following is an example response: ```json { "location": { "id": "7WQ0KXC8ZSD90", "name": "San Francisco Storefront", "address": { "address_line_1": "1455 Market Street", "locality": "San Francisco", "administrative_district_level_1": "CA", "postal_code": "94103", "country": "US" }, "timezone": "America/Los_Angeles", "capabilities": [ "CREDIT_CARD_PROCESSING" ], "status": "ACTIVE", "created_at": "2021-01-16T22:20:13Z", "merchant_id": "2RNAQEFCTQ18Y", "country": "US", "language_code": "en-US", "currency": "USD", "business_name": "Raphaels Puppy-Care Emporium", "type": "PHYSICAL", "business_hours": {}, "coordinates": { "latitude": 37.775470, "longitude": -122.417880 }, "mcc": "7299" } } ``` You can also request the main location without knowing its ID by calling [RetrieveLocation](https://developer.squareup.com/reference/square/locations-api/retrieve-location) using `main` as the location ID. ```` {% anchor id="listlocations" /%} ### Retrieve a list of locations The following [ListLocations](https://developer.squareup.com/reference/square/locations-api/list-locations) request retrieves information about all the locations for a seller account identified by the access token in the `Authorization` header: ```` {% anchor id="adjusting-locations" /%} #### Adjusting locations (best practices) Square sellers need to be able to select one of their Square locations in your application when using it to collect payments, pull their catalog data, and perform other activities. Allow users to update and save a new location selection in your interface and call [ListLocations](https://developer.squareup.com/reference/square/locations-api/list-locations) to populate the selection field options. {% anchor id="updatealocation" /%} ### Update a location Use the [UpdateLocation](https://developer.squareup.com/reference/square/locations-api/update-location) endpoint to update one or more location field values. In the request, provide only the fields you want to update. {% aside type="info" %} The location [Address](https://developer.squareup.com/reference/square/objects/Address) is a composite data type. In this case, even if you want to update only a portion of an address, you must use a complete address, including `address_line_1`, `locality`, `administrative_district_level_1`, and `postal code` in the request. {% /aside %} The following [UpdateLocation](https://developer.squareup.com/reference/square/locations-api/update-location) request updates the `name` and `address` of the location identified by the location ID in the request URL. It also removes the location's `description` by setting it to `null`. ```` ## Permissions The Locations API requires the following OAuth permissions: |Endpoint{% width="320px" %}| Permission | |----------------------------|-------------------------| |[CreateLocation](https://developer.squareup.com/reference/square/locations-api/create-location) |`MERCHANT_PROFILE_WRITE` | |[ListLocations](https://developer.squareup.com/reference/square/locations-api/list-locations) |`MERCHANT_PROFILE_READ` | |[RetrieveLocation](https://developer.squareup.com/reference/square/locations-api/retrieve-location) |`MERCHANT_PROFILE_READ` | |[UpdateLocation](https://developer.squareup.com/reference/square/locations-api/update-location) |`MERCHANT_PROFILE_WRITE` | For more information and a complete list of OAuth permissions required for Square APIs, see the [OAuth Permissions Reference](oauth-api/square-permissions). ## Images A seller can associate up to three images with a location. These images are stored in the `logo_url`, `full_format_logo_url`, and `pos_background_url` fields. The fields are optional and can point to the URLs for the logos used on receipts, invoices, loyalty campaigns, or Square Point of Sale systems. Sellers can upload logos on the **Receipts** page in the [Square Dashboard](https://app.squareup.com/dashboard). In your application, the image found at the `logo_url` works well as a favicon or other small image, while the `full_format_url` works well for wider formats, such as invoice or email headers. If you need to resize or alter seller logo images, you should rehost the image for use in your application. Note, however, that these fields are read-only and cannot be updated with the Locations API. ## Webhooks The Locations API supports the following webhook events: | Event | Permission | Description | |--------------|------------|---------------| |[location.created](https://developer.squareup.com/reference/square/locations-api/webhooks/location.created) |`MERCHANT_PROFILE_READ`|A [Location](https://developer.squareup.com/reference/square/objects/location) was created. | |[location.updated](https://developer.squareup.com/reference/square/locations-api/webhooks/location.updated) |`MERCHANT_PROFILE_READ`|A [Location](https://developer.squareup.com/reference/square/objects/location) was updated. | For more information about using webhooks, see [Square Webhooks](webhooks/overview). For a list of webhook events you can subscribe to, see [Webhook Events Reference](webhooks/v2webhook-events-tech-ref). {% anchor id="initialize-a-merchant-category-code" /%} ## Merchant category codes Each location has a merchant category code (MCC) that describes the types of goods or services sold at that location. The MCC values are standardized by ISO 18245 and are widely used in the financial industry. Some of the sites that provide MCC descriptions are: * [USDA MCC directory](https://www.dm.usda.gov/procurement/card/card_x/mcc.pdf). * [Visa Merchant Data Standards Manual](https://usa.visa.com/content/dam/VCOM/download/merchants/visa-merchant-data-standards-manual.pdf). * [Mastercard Quick Reference](https://www.mastercard.us/content/dam/mccom/en-us/documents/rules/quick-reference-booklet-merchant-edition.pdf). * [Citibank MCC list](https://www.citibank.com/tts/solutions/commercial-cards/assets/docs/govt/Merchant-Category-Codes.pdf). It's helpful to assign an MCC that is closely associated with what the business does at that location. Some examples of how MCCs are used today include the following: * Credit card issuers use MCCs to identify the type of business the merchant is engaged in and offer points for qualified credit card purchases. * Some payment cards are only accepted by certain types of businesses. For example, HSA cards (limited to medical expenses) or virtual cards from a hotel website (limited to hotel reservations). Such methods are enabled only when sellers have an appropriate MCC. * Applications can connect a seller with customers who are suited for the business by setting categories (for example, a [Facebook page category](https://www.facebook.com/business/help/376650512904346?id=939256796236247) or a [Google business category](https://support.google.com/business/answer/7091)). This approach is more effective when an MCC matches what the business does. In the context of MCC initialization, Square refers to an MCC as a "specific MCC" if it accurately describes what a business does at a location. In contrast, some MCCs are general purpose and have catch-all descriptions. The Locations API considers the following MCCs to be general purpose: * 8999 (Professional Services) * 7299 (Personal Services) * 5944 (Other) If there is no specific information available, Square assigns one of the preceding general-purpose MCC values to the location: 5944 for a seller account in Japan and 7299 for a seller account in other countries. If your business location has any of these general-purpose MCC values, you can call [UpdateLocation](https://developer.squareup.com/reference/square/locations-api/update-location) to update the MCC to a value that accurately reflects your business. {% aside type="important" %} In the current implementation, after you change the MCC for a location from a general-purpose MCC to a specific MCC, you cannot make further updates to the MCC through this endpoint. However, during testing you can reset a location's MCC to its default value in the Square Sandbox. For more information, see [Testing MCC initialization](#testing-mcc-initialization). {% /aside %} The following example sets MCC 8299 for a location: ```` ### MCCs available for initialization You can provide the following MCC values to the [UpdateLocation](https://developer.squareup.com/reference/square/locations-api/update-location) endpoint: * **MCCs available in the United States -** 0742, 1520, 4121, 4722, 5192, 5399, 5411, 5499, 5552, 5699, 5712, 5811, 5812, 5813, 5814, 5944, 5971, 5993, 6300, 6513, 7216, 7230, 7298, 7299, 7372, 7392, 7399, 7699, 7997, 8011, 8021, 8082, 8111, 8299, 8398, 8651, 8661, 8675, 8699, 8931, 8999 * **MCCs available in Japan -** 0742, 1520, 4121, 4722, 5499, 5611, 5712, 5812, 5944, 5971, 5999, 6513, 7230, 7278, 7299, 7361, 7372, 7392, 7699, 7922, 7997, 8021, 8082, 8111, 8244, 8398, 8699, 8931, 8999 * **MCCs available in Canada -** 0742, 1520, 4121, 5399, 5499, 5552, 5699, 5712, 5811, 5812, 5813, 5814, 5944, 5971, 5993, 6300, 6513, 7230, 7299, 7372, 7392, 7399, 7699, 8011, 8021, 8082, 8111, 8299, 8398, 8699, 8931, 8999 * **MCCs available in Great Britain -** 0742, 1520, 4121, 4722, 5399, 5499, 5552, 5699, 5712, 5811, 5812, 5813, 5814, 5944, 5971, 5993, 6300, 6513, 7230, 7299, 7372, 7392, 7399, 7699, 8011, 8021, 8082, 8111, 8299, 8398, 8651, 8699, 8931, 8999 * **MCCs available in France -** 0742, 1520, 4121, 4722, 5399, 5499, 5552, 5699, 5712, 5811, 5812, 5813, 5814, 5944, 5971, 5993, 6300, 6513, 7230, 7299, 7372, 7392, 7399, 7699, 8011, 8021, 8082, 8111, 8299, 8398, 8651, 8699, 8931, 8999 * **MCCs available in Ireland -** 0742, 1520, 4121, 4722, 5399, 5499, 5552, 5699, 5712, 5811, 5812, 5813, 5814, 5944, 5971, 5993, 6300, 6513, 7230, 7299, 7372, 7392, 7399, 7699, 8011, 8021, 8082, 8111, 8299, 8398, 8651, 8699, 8931, 8999 * **MCCs available in Spain -** 0742, 1520, 4121, 4722, 5399, 5499, 5552, 5699, 5712, 5811, 5812, 5813, 5814, 5944, 5971, 5993, 6300, 6513, 7230, 7299, 7372, 7392, 7399, 7699, 8011, 8021, 8082, 8111, 8299, 8398, 8651, 8699, 8931, 8999 * **MCCs available in Australia -** 0742, 1520, 4121, 4722, 5331, 5499, 5552, 5699, 5712, 5811, 5812, 5813, 5814, 5921, 5944, 5971, 5993, 6300, 6513, 7230, 7273, 7299, 7372, 7392, 7399, 7538, 8011, 8021, 8082, 8111, 8299, 8398, 8651, 8699, 8931, 8999 ### MCC descriptions The following are descriptions of the MCCs available for initialization: * 0742 - Veterinary * 1520 - Trade Contractor * 4121 - Taxi/Limo * 4722 - Tourism * 5192 - Books, Periodicals, and Newspapers * 5331 - Variety Stores * 5399 - Misc. General Merchandise * 5411 - Grocery / Market * 5499 - Food / Grocery * 5552 - Electric Vehicle Charging * 5611 - Men's Apparel * 5699 - Apparel * 5712 - Furniture / Home Goods * 5811 - Caterers * 5812 - Restaurant/Bar * 5813 - Bar / Club / Lounge * 5814 - Food Truck / Cart * 5944 - Jewelry and Watches * 5944 - Other (Japan only) * 5971 - Art Dealer * 5993 - Tobacco * 5999 - Miscellaneous and Specialty Retail Shops * 6300 - Insurance Sales, Underwriting, and Premiums * 6513 - Real Estate * 7216 - Dry Cleaning and Laundry * 7230 - Beauty / Barber * 7273 - Dating and Escort Services * 7278 - Outdoor Markets * 7298 - Health and Beauty Spas * 7299 - Personal Services * 7372 - Web Dev/Design * 7361 - Tutoring * 7392 - Consultant * 7399 - Business Services * 7699 - Repair Services * 7922 - Ticket Sales * 7997 - Membership Clubs / Sports Facilities * 8011 - Medical Practitioner * 8021 - Dentistry * 8082 - Home Health Care Services * 8111 - Legal Services * 8244 - Education * 8299 - School & Education * 8398 - Charity / Social Services * 8651 - Political Organizations * 8661 - Religious Organizations * 8675 - Automobile Associations and Clubs * 8699 - Membership Org * 8931 - Accounting * 8999 - Professional Services ### Testing MCC initialization In production, you can initialize a location's MCC only once using the [UpdateLocation](https://developer.squareup.com/reference/square/locations-api/update-location) endpoint. However, you can reset a location's MCC to its default value in the Square Sandbox. This lets you initialize a location's MCC any number of times in the Sandbox for testing purposes. To reset a location's MCC, do the following: 1. Go to the [Developer Console](https://developer.squareup.com/apps). 2. Choose an application. 3. In the left pane, choose **Locations**. 4. On the **Locations** page, choose **Sandbox**. 5. Choose **...** (ellipsis) in the **Action** column next to the location you want to update, and then choose **Reset MCC**. After the MCC is reset, you can call [UpdateLocation](https://developer.squareup.com/reference/square/locations-api/update-location) to set a location's MCC again. --- # Custom Attributes for Locations > Source: https://developer.squareup.com/docs/location-custom-attributes-api/overview > Status: BETA > Languages: All > Platforms: All Learn how to create and manage custom attributes for locations using the Location Custom Attributes API. **Applies to:** [Location Custom Attributes API](https://developer.squareup.com/reference/square/location-custom-attributes-api) | [Locations API](locations-api) {% subheading %}Learn how to create and manage custom attributes for locations using the Location Custom Attributes API.{% /subheading %} {% toc hide=true /%} ## Overview [Custom attributes](devtools/customattributes/overview) store additional properties or metadata about certain objects in the Square data model, allowing you to extend the functionality of your applications. Use the [Location Custom Attributes API](https://developer.squareup.com/reference/square/location-custom-attributes-api) to extend the data model and associate seller-specific or application-specific information with locations. For example, merchants using your application might want to store information such as the general manager for a location, whether a particular location can take consignments, or the types of repairs offered at a location. A custom attribute obtains a `key` identifier, the `visibility` setting, allowed data types, and other properties from a custom attribute definition. This relationship is shown in the following diagram: ![A diagram showing a custom attribute definition for "general manager" used by custom attributes on multiple locations.](//images.ctfassets.net/1nw4q0oohfju/56EVmjJVabtZKqpdPjd2sM/e3ea4f174dff897f7eaef1f6e37e54b4/custom-attributes-relationships-locations.png) {% aside type="info" %} Working with custom attributes is different than working with native attributes on the `Location` object (such as `business_hours` or `phone_number`) that are accessed using the [Locations API](locations-api). For example, custom attributes aren't returned in a [RetrieveLocation](https://developer.squareup.com/reference/square/locations-api/retrieve-location) or [ListLocations](https://developer.squareup.com/reference/square/locations-api/list-locations) response or managed using [CreateLocation](https://developer.squareup.com/reference/square/locations-api/create-location) or [UpdateLocation](https://developer.squareup.com/reference/square/locations-api/update-location). {% /aside %} ## Basic workflow Using the Location Custom Attributes API consists of the following workflow: 1. Create a custom attribute definition for a seller. 2. Assign a custom attribute value to a location. 3. Retrieve custom attributes from locations. ### Create a custom attribute definition To create a location-related custom attribute, you must first define its properties by calling [CreateLocationCustomAttributeDefinition](https://developer.squareup.com/reference/square/location-custom-attributes-api/create-location-custom-attribute-definition). The following request creates a custom attribute definition to represent the name of a location's general manager. The `schema` field indicates that the value of the custom attribute is a `String`. ```` The `key` identifier and `visibility` setting specified in the definition are used by the corresponding custom attributes. The `visibility` setting determines the [access level](devtools/customattributes/overview#access-control) that other applications (including other Square products) have to the definition and corresponding custom attributes. ### Assign custom attributes to locations After the custom attribute definition is created, you create new custom attributes and assign them to specific seller locations. The following [UpsertLocationCustomAttribute](https://developer.squareup.com/reference/square/location-custom-attributes-api/upsert-location-custom-attribute) request sets the General Manager custom attribute using the `location_id` and `key`. Note the following: * The `key` in the path is `general-manager`, which is the same as the key specified by the definition. * The `value` in the request body sets the custom attribute value for the location. This value must conform to the [data type](devtools/customattributes/overview#data-types) specified by the `schema` field in the definition. In this case, it's a `String`. ```` {% aside type="info" %} Square also provides the [BulkUpsertLocationCustomAttributes](https://developer.squareup.com/reference/square/location-custom-attributes-api/bulk-upsert-location-custom-attributes) endpoint to update multiple custom attributes on locations in a single request. {% /aside %} ### Retrieve custom attributes from locations You can now retrieve the custom attribute to get the value that was set for the location. The following [RetrieveLocationCustomAttribute](https://developer.squareup.com/reference/square/location-custom-attributes-api/retrieve-location-custom-attribute) request retrieves the General Manager custom attribute for a location using the `location_id` and `key` in the request path: ```` The following is an example response: ```json { "custom_attribute": { "key": "general-manager", "version": 1, "updated_at": "2023-01-10T21:13:48Z", "value": "Christine Lee", "created_at": "2023-01-10T21:13:48Z", "visibility": "VISIBILITY_READ_WRITE_VALUES" } } ``` You can optionally include the `with_definition` query parameter to return the corresponding custom attribute definition in the same call. For example, you might want to retrieve the definition to get the custom attribute's data type, name, or description. ## Supported operations The Location Custom Attributes API supports the following operations. ### Working with location-related custom attribute definitions * [Create a location custom attribute definition](location-custom-attributes-api/custom-attribute-definitions#create-custom-attribute-definition) * [Update a location custom attribute definition](location-custom-attributes-api/custom-attribute-definitions#update-custom-attribute-definition) * [List location custom attribute definitions](location-custom-attributes-api/custom-attribute-definitions#list-custom-attribute-definitions) * [Retrieve a location custom attribute definition](location-custom-attributes-api/custom-attribute-definitions#retrieve-custom-attribute-definition) * [Delete a location custom attribute definition](location-custom-attributes-api/custom-attribute-definitions#delete-custom-attribute-definition) ### Working with location-related custom attributes * [Create or update a location custom attribute](location-custom-attributes-api/custom-attributes#create-update-location-custom-attribute) * [Bulk create or update location custom attributes](location-custom-attributes-api/custom-attributes#bulk-upsert-location-custom-attributes) * [List location custom attributes](location-custom-attributes-api/custom-attributes#list-location-custom-attributes) * [Retrieve a location custom attribute](location-custom-attributes-api/custom-attributes#retrieve-location-custom-attribute) * [Delete a location custom attribute](location-custom-attributes-api/custom-attributes#delete-location-custom-attribute) * [Bulk delete location custom attributes](location-custom-attributes-api/custom-attributes#delete-location-custom-attribute) ## Seller scope Each custom attribute definition is scoped to a specific seller. Creating a definition makes the corresponding custom attribute available to any of that seller's locations. To make the custom attribute available to other sellers, you must call [CreateLocationCustomAttributeDefinition](https://developer.squareup.com/reference/square/location-custom-attributes-api/create-location-custom-attribute-definition) on behalf of each target seller. To do so when using OAuth, call this endpoint for each seller using their access token. The following diagram shows two sellers using identical `general-manager` custom attribute definitions to record their general manager locations: ![A diagram showing two sellers using the same custom attribute definition to record the general manager at each of their locations.](//images.ctfassets.net/1nw4q0oohfju/TU6faKYuF4HMKlHWBfEsF/5097bdc9dfab2cbd86ddba21ff13efd6/custom-attributes-seller-scope-locations.png) You can reuse the same key for your custom attribute definition across sellers. The key must be unique for your application but not for a given seller. {% aside type="tip" %} To simplify management, you might want to keep all definitions that use the same key synchronized across seller accounts. Therefore, if you change a definition for one seller, you should consider making the same change for all other sellers. {% /aside %} ## Webhooks You can subscribe to receive notifications for location-related custom attribute events. Each event provides two options that allow you to choose when Square sends notifications: * `.owned` event notifications are sent when changes are made to custom attribute definitions and custom attributes that are owned by your application. A custom attribute definition is owned by the application that created it. A custom attribute is owned by the application that created the corresponding custom attribute definition. * `.visible` event notifications are sent when changes are made to custom attribute definitions and custom attributes that are visible to your application. These changes apply to: * All custom attribute definitions and custom attributes owned by your application. * All other custom attribute definitions or custom attributes whose `visibility` setting is `VISIBILITY_READ_ONLY` or `VISIBILITY_READ_WRITE_VALUES`. Notification payloads for both options contain the same information. ### Webhook events Subscribe to the following events to receive notifications for changes to custom attribute definitions and custom attributes that are owned by your application: |Event|Permission{% width="150px" %}|Description| |-----|-----|----- |[location.custom_attribute_definition.owned.created](https://developer.squareup.com/reference/square/location-custom-attributes-api/webhooks/location.custom_attribute_definition.owned.created)|`MERCHANT_PROFILE_READ`|A custom attribute definition was created by your application. The application that created the custom attribute definition is the owner of the definition and corresponding custom attributes.| |[location.custom_attribute_definition.owned.updated](https://developer.squareup.com/reference/square/location-custom-attributes-api/webhooks/location.custom_attribute_definition.owned.updated)|`MERCHANT_PROFILE_READ`|A custom attribute definition owned by your application was updated. Note that only the definition owner can update a custom attribute definition.| |[location.custom_attribute_definition.owned.deleted](https://developer.squareup.com/reference/square/location-custom-attributes-api/webhooks/location.custom_attribute_definition.owned.deleted)|`MERCHANT_PROFILE_READ`|A custom attribute definition owned by your application was deleted. Note that only the definition owner can delete a custom attribute definition.| |[location.custom_attribute.owned.updated](https://developer.squareup.com/reference/square/location-custom-attributes-api/webhooks/location.custom_attribute.owned.updated)|`MERCHANT_PROFILE_READ`|A custom attribute owned by your application was created or updated for a location.| |[location.custom_attribute.owned.deleted](https://developer.squareup.com/reference/square/location-custom-attributes-api/webhooks/location.custom_attribute.owned.deleted)|`MERCHANT_PROFILE_READ`|A custom attribute owned by your application was deleted from a location.| Subscribe to the following events to receive notifications for changes to custom attribute definitions and custom attributes that are visible to your application. These `.visible` events include changes to all custom attribute definitions and custom attributes that are owned by your application. Therefore, you do not need to subscribe to an `.owned` event when you subscribe to the corresponding `.visible` event. |Event|Permission{% width="200px" %}|Description| |:------|:------|:------ |[location.custom_attribute_definition.visible.created](https://developer.squareup.com/reference/square/location-custom-attributes-api/webhooks/location.custom_attribute_definition.visible.created)|`MERCHANT_PROFILE_READ`|A custom attribute definition that's visible to your application was created.| |[location.custom_attribute_definition.visible.updated](https://developer.squareup.com/reference/square/location-custom-attributes-api/webhooks/location.custom_attribute_definition.visible.updated)|`MERCHANT_PROFILE_READ`|A custom attribute definition that's visible to your application was updated.| |[location.custom_attribute_definition.visible.deleted](https://developer.squareup.com/reference/square/location-custom-attributes-api/webhooks/location.custom_attribute_definition.visible.deleted)|`MERCHANT_PROFILE_READ`|A custom attribute definition that's visible to your application was deleted.| |[location.custom_attribute.visible.updated](https://developer.squareup.com/reference/square/location-custom-attributes-api/webhooks/location.custom_attribute.visible.updated)|`MERCHANT_PROFILE_READ`|A custom attribute that's visible to your application was created or updated for a location.| |[location.custom_attribute.visible.deleted](https://developer.squareup.com/reference/square/location-custom-attributes-api/webhooks/location.custom_attribute.visible.deleted)|`MERCHANT_PROFILE_READ`|A custom attribute that's visible to your application was deleted from a location.| {% aside type="info" %} Upserting or deleting a custom attribute for a location doesn't invoke a `location.updated` webhook. {% /aside %} The following is an example `location.custom_attribute_definition.visible.created` notification: ```json { "merchant_id": "DM7VKY8Q63GNP", "type": "location.custom_attribute_definition.visible.created", "event_id": "347ab320-c0ba-48f5-959a-4e147b9aefcf", "created_at": "2023-01-20T02:41:37Z", "data": { "type": "custom_attribute_definition", "id": "general-manager", "object": { "created_at": "2023-01-20T02:41:37Z", "description": "Work email address", "key": "general-manager", "name": "General Manager", "schema": { "$ref": "https://developer-production-s.squarecdn.com/schemas/v1/common.json#squareup.common.String" }, "updated_at": "2023-01-20T02:41:37Z", "version": 1, "visibility": "VISIBILITY_READ_WRITE_VALUES" } } } ``` The following is an example `locations.custom_attribute.visible.updated` notification: ```json { "merchant_id": "DM7VKY8Q63GNP", "type": "locations.custom_attribute.visible.updated", "event_id": "1cc2925c-f6e2-4fb6-a597-07c198de59e1", "created_at": "2023-03-15T08:00:00Z", "data": { "type": "custom_attribute", "id": "general-manager", "object": { "created_at": "2023-01-20T02:41:37Z", "key": "general-manager", "updated_at": "2023-03-15T08:00:00Z", "value": "Michael Francis", "version": 2, "visibility": "VISIBILITY_READ_WRITE_VALUES" } } } ``` {% aside type="info" %} Custom attributes are a feature shared by multiple Square APIs. For general information common to all Square APIs that support custom attributes, see [Custom Attributes](devtools/customattributes/overview). {% /aside %} ## See also * [Define Custom Attributes for Locations](location-custom-attributes-api/custom-attribute-definitions) * [Use Custom Attributes for Locations](location-custom-attributes-api/custom-attributes) * [API Reference: Location Custom Attributes API](https://developer.squareup.com/reference/square/location-custom-attributes-api) --- # Clear API Object Fields > Source: https://developer.squareup.com/docs/build-basics/clearing-fields > Status: PUBLIC > Languages: All > Platforms: All Learn how to clear Square API resource fields using a standard method for all clearable fields. {% subheading %}Learn about standard field-clearing methods that allow you to clear a field from an object in a sparse update request.{% /subheading %} {% toc hide=true /%} ## Sparse updates Square provides various endpoints that allow you to update objects such as orders, payments, and customers. Some of these endpoints support sparse updates, which means that the request doesn't need to include an entire replacement object. Instead, it only needs to include the fields that you want to add, change, or clear (in addition to any fields required by the update operation). You cannot clear the value of a required field, though in some cases you can update its value. After the update operation is completed, only the values of the specified fields are changed, along with the `version` and `updated_at` fields if applicable. {% accordion expanded=false %} {% slot "heading" %} #### Endpoints that support sparse updates {% /slot %} * `BulkUpdateCustomers` * `BulkUpdateTeamMembers` * `BulkUpdateVendors` * `UpdateCustomer` * `UpdateCustomerCustomAttributeDefinition` * `UpdateInvoice` * `UpdateJob` * `UpdateLocation` * `UpdateLocationCustomAttributeDefinition` * `UpdateLocationSettings` * `UpdateMerchantCustomAttributeDefinition` * `UpdateMerchantSettings` * `UpdateOrder` * `UpdateOrderCustomAttributeDefinition` * `UpdatePaymentLink` * `UpdateScheduledShift` * `UpdateSubscription` * `UpdateTeamMember` * `UpdateVendor` * `UpdateWebhookSubscription` {% /accordion %} {% anchor id="clear-a-field-value" /%} {% anchor id="clear-a-field-with-null" /%} {% anchor id="null-update-request-example" /%} ## Clear field values To clear a field in a sparse update request, include the field in your request and set the value to `null`. Don't confuse `null` with an empty string. The following `UpdateLocation` example clears the `coordinates` field by specifying `null` as the field value. All other fields for this location are unchanged after the update operation is completed. ```` Fields that can be cleared depend on the object that you're updating. When field clearing is supported, null values can be used to clear any field data type. Note that some array elements in an order or invoice are [cleared using the `remove` field](#delete-elements-from-array-fields) instead of `null`. Global support for null field clearing was added in Square API version 2022-09-21. Although some update endpoints might continue to support alternate field clearing methods, Square recommends using null field clearing when possible. You should avoid mixing field clearing methods in a single request, which might result in unexpected behavior. For example, don't attempt to clear fields using null values and the `fields_to_clear` field in an `UpdateOrder` or `UpdateInvoice` request. However, using null values and the `remove` field in a single request is supported. ### X-Clear-Null header requirement for null values `UpdateOrder` requests that use null to clear fields must also include the `X-Clear-Null` header, as shown in the following example: ```curl curl https://connect.squareupsandbox.com/v2/orders/{{ORDER_ID}} \ -X PUT \ -H 'Square-Version: 2024-06-04' \ -H 'Authorization: Bearer {ACCESS_TOKEN}' \ -H 'Content-Type: application/json' \ -H 'X-Clear-Null: true' \ -d '{ "order": { "version": 3, "reference_id": null } }' ``` If this header is not included, Square ignores any null settings in the `UpdateOrder` request. In Square API version 2023-08-16 and later, the `X-Clear-Null: true` header is optional for other update endpoints. For earlier versions, Square recommends setting this header when clearing fields. {% anchor id="delete-elements-from-array-fields" /%} ## Delete elements from array fields The Orders API and Invoices API support removing an individual element from an array field when the element can be accessed using a `uid` index (for example, order `line_items` or invoice `payment_requests`). For each array element that you want to clear, specify the `uid` of the element and include the `remove` field set to `true`. ```json {% lineNumbers=false %} ... { "uid": "{ELEMENT_UID}", "remove": true } ... ``` The `remove` field is a special field that indicates the intent to delete the specified array element. It isn't present on the object. Square ignores the `remove` field if the value isn't `true`. Requests that specify the `uid` but exclude the `remove` field are treated as sparse updates. ### X-Clear-Null header requirement for the remove field When using the `remove` field to delete an array element in an `UpdateOrder` request, you also need to specify the `X-Clear-Null` header as `true`, as shown in the following example: ```curl curl https://connect.squareupsandbox.com/v2/orders/{{ORDER_ID}} \ -X PUT \ -H 'Square-Version: 2024-06-04' \ -H 'Authorization: Bearer {ACCESS_TOKEN}' \ -H 'Content-Type: application/json' \ -H 'X-Clear-Null: true' \ -d '{ "order": { "version": {CURRENT_VERSION_NUMBER}, "line_items": [ { "uid": "{LINE_ITEM_UID}", "remove": true } ] } }' ``` If this header isn't included, Square ignores the `remove` field in the `UpdateOrder` request. In Square API version 2023-07-20 and earlier, `UpdateInvoice` requests also require the `X-Clear-Null` header when using the `remove` field to delete array elements. --- # Use Custom Attributes for Locations > Source: https://developer.squareup.com/docs/location-custom-attributes-api/custom-attributes > Status: BETA > Languages: All > Platforms: All Learn how to create and manage custom attribute values for Location objects. **Applies to:** [Location Custom Attributes API](location-custom-attributes-api/overview) {% subheading %}Learn how to create and manage custom attribute values for Location objects.{% /subheading %} {% toc hide=true /%} ## Overview Location-related custom attributes are used to store additional properties or metadata on `Location` objects. A custom attribute is based on a custom attribute definition in a Square seller account. After the [definition](location-custom-attributes-api/custom-attribute-definitions) is created, the custom attribute can be set on a seller's locations. For an overview about how location-related custom attributes work, see [Custom Attributes for Locations](location-custom-attributes-api/overview). An individual custom attribute is accessed using the `location_id` and `key`. >`.../v2/locations/{location_id}/custom-attributes/{key}` ## CustomAttribute object A custom attribute is represented by a [CustomAttribute](https://developer.squareup.com/reference/square/objects/CustomAttribute) object. Custom attributes obtain a `key` identifier, the `visibility` setting, allowed data types, and other properties from a custom attribute definition, which is represented by a [CustomAttributeDefinition](https://developer.squareup.com/reference/square/objects/CustomAttributeDefinition) object. The following is an example custom attribute: ```json { "custom_attribute": { "key": "general-manager", "version": 1, "updated_at": "2023-01-10T21:13:48Z", "value": "Christine Lee", "created_at": "2023-01-10T21:13:48Z", "visibility": "VISIBILITY_READ_WRITE_VALUES" } } ``` The following table shows the core properties of a custom attribute: |Field{% width="120px" %}|Description| |------|------| |`key`|The identifier for the custom attribute, which is obtained from the custom attribute definition.| |`version`|The version number of the custom attribute. The version number is initially set to 1 and incremented each time the custom attribute value is updated. Include this field in upsert operations to enable [optimistic concurrency](build-basics/common-api-patterns/optimistic-concurrency) control and in read operations for strong consistency.| |`value`|The value of the custom attribute, which must conform to the schema specified by the definition. For more information, see [Supported data types](devtools/customattributes/overview#supported-data-types). The size of this field cannot exceed 5 KB.| |`visibility`|The [level of access](devtools/customattributes/overview#access-control) that other applications have to the custom attribute. Custom attributes obtain this setting from the `visibility` field of the current version of the definition.| |`definition`|The [CustomAttributeDefinition](https://developer.squareup.com/reference/square/objects/CustomAttributeDefinition) object that defines properties for the custom attribute. This field is included if the custom attribute is retrieved using the `with_definition` or `with_definitions` query parameter set to `true`.| {% anchor id="create-update-location-custom-attribute" /%} ## Create or update a location custom attribute To set the value of a custom attribute for a location, call [UpsertLocationCustomAttribute](https://developer.squareup.com/reference/square/location-custom-attributes-api/upsert-location-custom-attribute) and provide the following information: * `location_id` - The ID of the `Location` object that represents the target location. * `custom_attribute` - The custom attribute with the following fields: * `key` - The key of the custom attribute to create or update. * If the requesting application isn't the definition owner, the `visibility` field value of the custom attribute must be `VISIBILITY_READ_ONLY` or `VISIBILITY_READ_WRITE_VALUES`. * `value` - The value of the custom attribute, which must conform to the schema specified by the definition. For more information, see [Supported data types](devtools/customattributes/overview#data-types). * `version` - The current version of the custom attribute, included to enable [optimistic concurrency](build-basics/common-api-patterns/optimistic-concurrency) when updating a value that was previously set for the location. If this isn't important for your application, `version` can be set to -1. For any other values, the request fails with a `BAD_REQUEST` error. Square increments the version number each time the definition is updated. * `idempotency_key` - A unique ID for the request that can be optionally included to ensure [idempotency](build-basics/common-api-patterns/idempotency). The following example request sets the value for a `String`-type custom attribute. The `key` value in this example is `general-manager`. ```` The following is an example response: ```json { "custom_attribute": { "key": "general-manager", "version": 1, "updated_at": "2023-01-10T21:13:48Z", "value": "Christine Lee", "created_at": "2023-01-10T21:13:48Z", "visibility": "VISIBILITY_READ_WRITE_VALUES" } } ``` During upsert operations, Square validates the provided value against the schema specified by the definition. After a custom attribute is upserted, Square invokes the `location.custom_attribute.owned.updated` and `location.custom_attribute.visible.updated` webhooks. ### Upsert request examples for each data type You can set a corresponding custom attribute for a location by providing a value that conforms to the schema specified by the custom attribute definition. The size of this field cannot exceed 5 KB. The following sections contain `UpsertLocationCustomAttribute` requests for each [supported data type](devtools/customattributes/overview#data-types). #### String A string with up to 1000 UTF-8 characters. Empty strings are allowed. ```` #### Email An email address consisting of ASCII characters that matches the [regular expression](https://developer.mozilla.org/en-US/docs/Web/HTML/Element/input/email#basic_validation) for the HTML5 `email` type. ```` #### PhoneNumber A string representation of a phone number in [E.164 format.](https://en.wikipedia.org/wiki/E.164) For example, `+17895551234`. ```` #### Address An [Address](https://developer.squareup.com/reference/square/objects/Address) object. For information about `Address` fields, see [Working with Addresses.](build-basics/common-data-types/working-with-addresses) You must provide a complete `Address` object in every upsert request. ```` #### Date A date in ISO 8601 format: `YYYY-MM-DD`. ```` #### DateTime A string representation of the date and time in the ISO 8601 format, starting with the year, followed by the month, day, hour, minutes, seconds, and milliseconds. For example, `2022-07-10 15:00:00.000`. ```` #### Duration A duration as defined by the ISO 8601 ABNF. For example, "P3Y6M4DT12H30M5S". ```` #### Boolean A `true` or `false` value. ```` #### Number A string representation of an integer or decimal with up to five digits of precision. Negative numbers are denoted using a - prefix. ```` #### Selection A selection from a set of named options. When working with a `Selection`-type custom attribute, you need to get the schema from the custom attribute definition. The schema shows the mapping between the named options and Square-assigned UUIDs and the maximum number of allowed selections. **Reading the schema** The following is an excerpt of an example `Selection`-type custom attribute definition: ```json { "custom_attribute_definition": { ... "schema": { "$schema": "https://developer-production-s.squarecdn.com/meta-schemas/v1/selection.json", "maxItems": 3, "type": "array", "uniqueItems": true, "items": { "names": [ "Option 1", "Option 2", "Option 3" ], "enum": [ "9492bdda-ab4d-4eeb-8496-0986c8f78499", // UUID for "Option 1" "6b96fba7-d8a5-ae72-48f4-8c3ee875633f", // UUID for "Option 2" "4032c1a2-d749-4c75-9c30-be6472cd2e08" // UUID for "Option 3" ] } }, ... } } ``` * The `maxItems` field represents the maximum number of allowed selections for the custom attribute value. * The `items` field contains two arrays: `names` and `enum`. The options in the `names` field map by index to the UUIDs in the `enum` field. The first option maps to the first UUID, the second option maps to the second UUID, and so on. **Setting a Selection value** To set a `Selection` value for a location, provide the target UUID (that maps to the target named option) in the `value` field. For this data type, `value` is an array that can contain zero or more UUIDs, up to the number specified in `maxItems`. The following request sets two selections for a custom attribute by providing two UUIDs: ```` The following request sets an empty selection by providing an empty array: ```` If necessary, you can update the maximum number of allowed selections and the set of predefined named options in the custom attribute definition.To learn more, see [Updating a Selection schema.](location-custom-attributes-api/custom-attribute-definitions#update-selection-schema) {% anchor id="bulk-upsert-location-custom-attributes" /%} ## Bulk create or update location custom attributes To create or update one or more custom attributes for one or more locations, call [BulkUpsertLocationCustomAttributes](https://developer.squareup.com/reference/square/location-custom-attributes-api/bulk-upsert-location-custom-attributes). This endpoint accepts a `values` map with 1 to 25 objects that each contain: * An arbitrary ID for the individual upsert request, which corresponds to an entry in the response that has the same ID. The ID must be unique within the `BulkUpsertLocationCustomAttributes` request. * An individual [upsert request](#create-update-location-custom-attribute) with the information needed to create or update a custom attribute for a location. During upsert operations, Square validates each provided value against the schema specified by the definition. The `version` field is only supported for update operations. The following `BulkUpsertLocationCustomAttributes` request includes four upsert requests that set four custom attributes on different locations: ```` The following is an example response. Note that: * Individual upsert requests aren't guaranteed to be returned in the same order. Each upsert response has the same ID as the corresponding upsert request, so you can use the ID to map individual requests and responses. * The `errors` field is returned for any individual requests that fail. ```json { "values": { "id2": { "location_id": "7WQ0KXC8ZSD90", "custom_attribute": { "key": "repairs", "version": 2, "updated_at": "2023-05-30T00:16:23Z", "value": false, "created_at": "2023-05-20T20:20:35Z", "visibility": "VISIBILITY_READ_WRITE_VALUES" } }, "id1": { "location_id": "7WQ0KXC8ZSD90", "custom_attribute": { "key": "general-manager", "version": 3, "updated_at": "2023-05-30T00:16:23Z", "value": "Michael Francis", "created_at": "2023-01-01T00:16:23Z", "visibility": "VISIBILITY_READ_WRITE_VALUES" } }, "id3": { "errors": [ { "code": "CONFLICT", "detail": "Attempting to write to version 3, but current version is 4", "field": "version", "category": "INVALID_REQUEST_ERROR" } ] }, "id4": { "location_id": "HF0HKANA3R9FP8", "custom_attribute": { "key": "square:a0f1505a-2aa1-490d-91a8-8d31ff181808", "version": 2, "updated_at": "2023-05-30T00:16:23Z", "value": "person@company.com", "created_at": "2022-11-08T23:14:47Z", "visibility": "VISIBILITY_READ_WRITE_VALUES" } } } } ``` After each custom attribute is upserted, Square invokes the `location.custom_attribute.owned.updated` and `location.custom_attribute.visible.updated` webhooks. {% anchor id="list-location-custom-attributes" /%} ## List location custom attributes To list the custom attributes that are set for a location, call [ListLocationCustomAttributes](https://developer.squareup.com/reference/square/location-custom-attributes-api/list-location-custom-attributes) and provide the `location_id` in the request path. The following parameters are optional: * `with_definitions` - Indicates whether to return the custom attribute definition in the `definition` field of each custom attribute. Set this parameter to `true` to get the name and description of each custom attribute, information about the data type, or other definition details. The default value is `false`. * `limit` - Specifies a maximum [page size](build-basics/common-api-patterns/pagination) of 100 results. The default limit is 20 results. If the results are paged, the `cursor` field in the response contains a value that you can send with the `cursor` query parameter to retrieve the next page of results. The following example request includes the `limit` query parameter: ```` When all pages are retrieved, the results include: * All custom attributes owned by the requesting application that have a value. The `key` for these custom attributes is the `key` value that was provided for the definition. * All custom attributes owned by other applications that have a `value` and a `visibility` setting of `VISIBILITY_READ_ONLY` or `VISIBILITY_WRITE_VALUES`. A custom attribute is owned by the application that created the corresponding definition. The following is an example response: ```json { "custom_attributes": [ { "key": "general-manager", "version": 2, "updated_at": "2023-02-02T04:17:09Z", "value": "Michael Francis", "created_at": "2023-01-20T02:41:37Z", "visibility": "VISIBILITY_READ_ONLY" }, { "key": "repairs", "version": 1, "updated_at": "2023-01-20T02:41:37Z", "value": false, "created_at": "2023-01-20T02:41:37Z", "visibility": "VISIBILITY_READ_WRITE_VALUES" }, { "key": "minimum", "version": 1, "updated_at": "2022-12-02T19:51:29.235Z", "value": 10, "created_at": "2022-12-02T19:51:29.235Z", "visibility": "VISIBILITY_READ_WRITE_VALUES" }, { "key": "services-offered", "version": 1, "updated_at": "2022-12-06T15:57:23.211Z", "value": ["610fa590-70cd-4ec9-b64c-1dad6ba3c8f9" ], "created_at": "2022-12-06T15:57:23.211Z", "visibility": "VISIBILITY_READ_ONLY" } ] } ``` To see the custom attribute definitions along with the custom attributes, set the `with_definitions` query parameter to `true`. ```` The following is an excerpt of an example response showing the custom attribute definition in the definition field: ```json { "key": "repairs", "version": 1, "definition": { "key": "repairs", "name": "Accepts repairs", "description": "Does this location handle repairs?", "version": 1, "updated_at": "2023-01-20T02:41:37Z", "schema": { "$ref": "https://developer-production-s.squarecdn.com/schemas/v1/common.json#squareup.common.Boolean" }, "created_at": "2023-01-20T02:41:37Z", "visibility": "VISIBILITY_READ_WRITE_VALUES" } "updated_at": "2023-01-20T02:41:37Z", "value": false, "created_at": "2023-01-20T02:41:37Z", "visibility": "VISIBILITY_READ_WRITE_VALUES" } ... ``` If no custom attributes are found, Square returns an empty object. ```json {} ``` {% anchor id="retrieve-location-custom-attribute" /%} ## Retrieve a location custom attribute To retrieve a custom attribute from a location, call [RetrieveLocationCustomAttribute](https://developer.squareup.com/reference/square/location-custom-attributes-api/retrieve-location-custom-attribute) and provide the `location_id` in the request path, along with the `key` of the custom attribute to retrieve. The following parameters are optional: * `with_definition` - Indicates whether to return the custom attribute definition in the `definition` field of the custom attribute. Set this parameter to `true` to get the name and description of the custom attribute, information about the data type, or other definition details. The default value is `false`. * `version` - The current version of the custom attribute, optionally used for strongly consistent reads to guarantee that you receive the most up-to-date data. When included in the request, Square returns the specified version or a later version if one exists. If the specified version is later than the current version, Square returns a `400 BAD_REQUEST` error. The following is an example request: ```` The response shows an `Address`-type custom attribute. The `value` field contains the value of the custom attribute. ```json { "custom_attribute": { "key": "businessAddress", "version": 1, "updated_at": "2022-05-26T17:08:57Z", "value": { "address_line_1": "333 2nd St", "locality": "San Francisco", "administrative_district_level_1": "California", "postal_code": "94107", "country": "US" }, "created_at": "2022-05-26T17:08:57Z", "visibility": "VISIBILITY_READ_ONLY" } } ``` To see the custom attribute definitions along with the custom attributes, set the `with_definition` query parameter to `true`: ```` The response shows the custom attribute definition in the `definition` field. This example defines a `Selection`-type custom attribute. The mapping information in the `schema.items` field is used to determine the custom attribute value. The `names` field contains the named options and the `enum` field contains the corresponding Square-assigned UUIDs. The named options map by index to the UUIDs. The first option maps to the first UUID, the second option maps to the second UUID, and so on. Therefore, the UUID in the `value` field of this custom attribute maps to the `"Reupholstery"` option. ```json { "custom_attribute": { "key": "services-offered", "version": 2, "definition": { "key": "services-offered", "name": "Services offered", "description": "The services offered at this location", "version": 2, "updated_at": "2023-01-09T15:57:23.211Z", "schema": { "$schema": "https://developer-production-s.squarecdn.com/meta-schemas/v1/selection.json", "maxItems": 3.0, "type": "array", "uniqueItems": true, "items": { "names": [ "Wood repair", "Leather repair", "Reupholstery", "Furniture consignment", "Rug cleaning" ], "enum": [ "46efa55a-1f1d-467f-9733-468f881a4f20", "954998e1-b666-43a4-baf3-89cb87afe25a", "610fa590-70cd-4ec9-b64c-1dad6ba3c8f9", "gEtd3Mvh-49yt-7yUz-rXDt-vL4XzYgRcmq4", "pbGg9Zmb-e5kw-9zmb-75CQ-yTg8mJW8j2oc" ] } }, "created_at": "2022-12-06T15:57:23.211Z", "visibility": "VISIBILITY_READ_ONLY" }, "updated_at": "2023-01-09T15:57:23.211Z", "Value": [ "610fa590-70cd-4ec9-b64c-1dad6ba3c8f9" ], "created_at": "2022-12-06T15:57:23.211Z", "visibility": "VISIBILITY_READ_ONLY" } } ``` If the custom attribute isn't set for the specified location, Square returns the following response: ```json { "errors": [ { "code": "NOT_FOUND", "detail": "The requested Value `{key}` is not found", "category": "INVALID_REQUEST_ERROR" } ] } ``` If the custom attribute isn't available for the seller's locations, Square returns the following response: ```json { "errors": [ { "code": "BAD_REQUEST", "detail": "No matching definition found for value", "field": "key", "category": "INVALID_REQUEST_ERROR" } ] } ``` {% anchor id="delete-location-custom-attribute" /%} ## Delete a location custom attribute To delete a custom attribute from a location, call [DeleteLocationCustomAttribute](https://developer.squareup.com/reference/square/location-custom-attributes-api/delete-location-custom-attribute) and provide the `location_id` in the request path, along with the `key` of the custom attribute to delete. If the requesting application isn't the definition owner, the `visibility` value of the definition must be `VISIBILITY_READ_ONLY` or `VISIBILITY_READ_WRITE_VALUES`. ```` If successful, Square returns an empty object. ```json {} ``` To delete all custom attributes of one or more locations in a single request, call the [BulkDeleteLocationCustomAttributes](https://developer.squareup.com/reference/square/location-custom-attributes-api/bulk-delete-location-custom-attributes) endpoint. After a custom attribute definition is deleted, Square invokes the `location.custom_attribute.owned.deleted` and `location.custom_attribute.visible.deleted` [webhooks](location-custom-attributes-api/overview#webhooks). --- # Define Custom Attributes for Locations > Source: https://developer.squareup.com/docs/location-custom-attributes-api/custom-attribute-definitions > Status: BETA > Languages: All > Platforms: All Learn how to define location-related custom attributes for Square sellers using the Location Custom Attributes API. **Applies to:** [Location Custom Attributes API](location-custom-attributes-api/overview) {% subheading %}Learn how to define location-related custom attributes for Square sellers using the Location Custom Attributes API.{% /subheading %} {% toc hide=true /%} ## Overview A custom attribute definition specifies the `key` identifier, the `visibility` setting, the `schema` data type, and other properties for a custom attribute. After the definition is created, an associated custom attribute can be created and assigned to sellers' locations. For more information about how location-related custom attributes work, see [Custom Attributes for Locations](location-custom-attributes-api/overview). ## CustomAttributeDefinition object A custom attribute definition is represented by a `CustomAttributeDefinition` object. The following is an example custom attribute definition that defines a "repairs" custom attribute of the `Boolean` data type: ```json { "custom_attribute_definition": { "key": "repairs", "name": "Accepts repairs", "description": "Does this location handle repairs?", "version": 1, "updated_at": "2023-01-20T02:41:37Z", "schema": { "$ref": "https://developer-production-s.squarecdn.com/schemas/v1/common.json#squareup.common.Boolean" }, "created_at": "2023-01-20T02:41:37Z", "visibility": "VISIBILITY_READ_WRITE_VALUES" } } ``` The following fields represent core properties of a custom attribute definition: |Field{% width="120px" %}|Description| |------|------| |`key`|The identifier for the definition and its corresponding custom attributes. This `key` value is unique for the application and cannot be changed after the definition is created.{% line-break /%}{% line-break /%}The field can contain up to 60 alphanumeric characters, periods (`.`), underscores (`_`), and hyphens (`-`) and must match the following regular expression: `^[a-zA-Z0-9\._-]{1,60}$`.| |`name`|The name for the custom attribute. This field is required unless the `visibility` field is set to `VISIBILITY_HIDDEN`.| |`description`|The description for the custom attribute. This field is required unless the `visibility` field is set to `VISIBILITY_HIDDEN`.| |`visibility`|The [access control](devtools/customattributes/overview#access-control) setting that determines whether other applications (including Square products such as the Square Dashboard) can view the definition and view or edit corresponding custom attributes. Valid values are `VISIBILITY_HIDDEN`, `VISIBILITY_READ_ONLY`, and `VISIBILITY_READ_WRITE_VALUES`.| |`schema`|The data type of the custom attribute value. For more information, see [Supported data types.](devtools/customattributes/overview#data-types) The total schema size cannot exceed 12 KB.| |`version`|The version number of the custom attribute definition. The version number is initially set to 1 and incremented each time the definition is updated. Include this field in update operations to enable [optimistic concurrency](build-basics/common-api-patterns/optimistic-concurrency) control and in read operations for strong consistency.| {% anchor id="create-custom-attribute-definition" /%} ## Create a location custom attribute definition Use the [CreateLocationCustomAttributeDefinition](https://developer.squareup.com/reference/square/location-custom-attributes-api/create-location-custom-attribute-definition) endpoint to create a custom attribute definition for a seller account. This operation makes the custom attribute available to the seller and their locations. The following request creates a custom attribute definition to represent the name of a location's general manager. [The `schema` field](devtools/customattributes/overview#data-types) indicates that the value of the custom attribute is a `String`. ```` The following is an example response: ```json { "custom_attribute_definition": { "key": "general-manager", "name": "General Manager", "description": "The General Manager at this Location", "version": 1, "updated_at": "2023-01-20T02:41:37Z", "schema": { "$ref": "https://developer-production-s.squarecdn.com/schemas/v1/common.json#squareup.common.String" }, "created_at": "2023-01-20T02:41:37Z", "visibility": "VISIBILITY_READ_WRITE_VALUES" } } ``` Now that the custom attribute definition is created, you can set the custom attribute for the seller's locations [individually](location-custom-attributes-api/custom-attributes#create-update-location-custom-attribute) or [in bulk](location-custom-attributes-api/custom-attributes#bulk-upsert-location-custom-attributes). After a custom attribute definition is created, Square invokes the `location.custom_attribute_definition.owned.created` and `location.custom_attribute_definition.visible.created` webhooks. A seller account can have a maximum of 100 location-related custom attribute definitions per application. ### Selection data type For a `Selection` data type, the schema contains a `$schema` field that references a JSON meta-schema object, as well as additional fields. Note the following: * `$schema` references the `https://developer-production-s.squarecdn.com/meta-schemas/v1/selection.json meta-schema` hosted on the Square CDN. * `type` must be `array`. * `items` must include a `names` array that contains strings representing the display names of the predefined options that can be selected. Note that the order of the options might not be respected by all UIs. * `maxItems` is an integer that represents the maximum number of allowed selections. Corresponding custom attributes can have zero or more selected values, up to the specified maximum. The minimum value is 1 and cannot exceed the number of options in the `names` field. * `uniqueItems` must be `true`. The following example request creates a `Selection`-type custom attribute definition that contains three named options and allows for a selection of all three: ```` The following is an example response. For each named option, Square generates a UUID and adds it to the `enum` field. The options in the `names` field map by index to the UUIDs in the `enum` field. The first option maps to the first UUID, the second option maps to the second UUID, and so on. These UUIDs are used to set the value of the custom attribute or [update the option names](#update-selection-schema). ```json { "custom_attribute_definition": { "key": "services-offered", "name": "Services offered", "description": "The services offered at this location", "version": 1, "updated_at": "2022-12-06T15:57:23.211Z", "schema": { "$schema": "https://developer-production-s.squarecdn.com/meta-schemas/v1/selection.json", "maxItems": 3.0, "type": "array", "uniqueItems": true, "items": { "names": [ "Wood repair", "Leather repair", "Reupholstery" ], "enum": [ "46efa55a-1f1d-467f-9733-468f881a4f20", "954998e1-b666-43a4-baf3-89cb87afe25a", "610fa590-70cd-4ec9-b64c-1dad6ba3c8f9" ] } }, "created_at": "2022-12-06T15:57:23.211Z", "visibility": "VISIBILITY_READ_ONLY" } } ``` {% anchor id="update-custom-attribute-definition" /%} ## Update a location custom attribute definition Use the [UpdateLocationCustomAttributeDefinition](https://developer.squareup.com/reference/square/location-custom-attributes-api/update-location-custom-attribute-definition) endpoint to update a custom attribute definition for a seller account. The endpoint supports sparse updates, so only new or changed fields need to be included in the request. Only the following fields can be updated: * `name` * `description` * `visibility` * `schema` for a `Selection` data type Note the following about an `UpdateLocationCustomAttributeDefinition` request: * A custom attribute definition can only be updated by the definition owner. * The `key` path parameter is the `key` of the custom attribute definition. * The `version` field must match the current version of the custom attribute definition to enable [optimistic concurrency](build-basics/common-api-patterns/optimistic-concurrency) control. If this isn't important for your application, `version` can be set to -1. For any other values, the request fails with a `BAD_REQUEST` error. Square increments the version number each time the definition is updated. * The `idempotency_key` is a unique ID for the request that can be optionally included to ensure [idempotency](build-basics/common-api-patterns/idempotency). * Changes to the `visibility` setting are propagated to corresponding custom attributes within a few seconds. At that time, the `updated_at` and `version` fields of the custom attributes are also updated. For `VISIBILITY_READ_ONLY` or `VISIBILITY_READ_WRITE_VALUES` settings, the definition must have both a `name` and a `description`. The following request updates the `visibility` setting of a definition: ```` The following is an example response: ```json { "custom_attribute_definition": { "key": "general-manager", "name": "General Manager", "description": "The General Manager at this Location", "version": 2, "updated_at": "2023-02-02T04:17:09Z", "schema": { "$ref": "https://developer-production-s.squarecdn.com/schemas/v1/common.json#squareup.common.String" }, "created_at": "2023-01-20T02:41:37Z", "visibility": "VISIBILITY_READ_ONLY" } } ``` After a location-related custom attribute definition is updated, Square invokes the `location.custom_attribute_definition.owned.updated` and `location.custom_attribute_definition.visible.updated` webhooks. {% aside type="tip" %} To simplify management, you might want to keep all definitions that use the same key synchronized across seller accounts. Therefore, if you change a definition for one seller, you should consider making the same change for all other sellers. {% /aside %} {% anchor id="update-selection-schema" /%} ### Updating a Selection schema For a `Selection` data type, you can update the maximum number of allowed selections and the set of predefined named options. {% aside type="info" %} Square validates custom attribute selections on upsert operations, so these changes apply only for future upsert operations. They don't affect custom attributes that have already been set on a location. {% /aside %} The information you send in the [UpdateLocationCustomAttributeDefinition](https://developer.squareup.com/reference/square/location-custom-attributes-api/update-location-custom-attribute-definition) request depends on the change you want to make: * To change the maximum number of allowed selections, include the `maxItems` field with the new integer value. The minimum value is 1 and cannot exceed the number of options in the `names` field. * To change the set of predefined named options, include the `items` field with the complete `names` and `enum` arrays. The options in the `names` array map by index to the Square-assigned UUIDs in the `enum` array, which are unique per seller. The first option maps to the first UUID, the second option maps to the second UUID, and so on. * To add an option: * Add the name of the new option at the end of the `names` array. New options must always be added to the end of the array. * Don't change the `enum` array. Square generates a UUID for the new option and adds it to the end of the enum array. * To reorder the options: * Change the order of the names in the `names` array. * Change the order of the UUIDs in the `enum` array so that the order of the UUIDs matches the order of the corresponding named options. Note that the order might not be respected by all UIs. * To remove an option: * Remove the name of the option from the `names` array. * Remove the corresponding UUID from the `enum` array. The following `UpdateLocationCustomAttributeDefinition` request adds two new options by adding their names at the end of the `names` array: ```` The following example response includes the UUIDs that Square generated for the new `Furniture consignment` and `Rug cleaning` options: ```json { "custom_attribute_definition": { "key": "services-offered", "name": "Services offered", "description": "The services offered at this location", "version": 2, "updated_at": "2023-01-09T15:57:23.211Z", "schema": { "$schema": "https://developer-production-s.squarecdn.com/meta-schemas/v1/selection.json", "maxItems": 3.0, "type": "array", "uniqueItems": true, "items": { "names": [ "Wood repair", "Leather repair", "Reupholstery", "Furniture consignment", "Rug cleaning" ], "enum": [ "46efa55a-1f1d-467f-9733-468f881a4f20", "954998e1-b666-43a4-baf3-89cb87afe25a", "610fa590-70cd-4ec9-b64c-1dad6ba3c8f9", "gEtd3Mvh-49yt-7yUz-rXDt-vL4XzYgRcmq4", "pbGg9Zmb-e5kw-9zmb-75CQ-yTg8mJW8j2oc" ] } }, "created_at": "2022-12-06T15:57:23.211Z", "visibility": "VISIBILITY_READ_ONLY" } } ``` {% anchor id="list-custom-attribute-definitions" /%} ## List location custom attribute definitions Use the [ListLocationCustomAttributeDefinitions](https://developer.squareup.com/reference/square/location-custom-attributes-api/list-location-custom-attribute-definitions) endpoint to list the custom attribute definitions from a seller account. The limit query parameter optionally specifies a maximum page size of 100 results. The default limit is 20 results. If the results are paged, the `cursor` field in the response contains a value that you can send with the `cursor` query parameter to retrieve the next page of results. The following example request includes the limit query parameter: ```` When all pages are retrieved, all custom attribute definitions created by the requesting application are included in the results. The `key` for these definitions is the `key` value that was provided when the definition was created. Custom attribute definitions created by other applications are included if their `visibility` setting is `VISIBILITY_READ_ONLY` or `VISIBILITY_READ_WRITE_VALUES`. The following is an example response containing four custom attribute definitions: ```json { "custom_attribute_definitions": [ { "key": "general-manager", "name": "General Manager", "description": "The General Manager at this Location", "version": 2, "updated_at": "2023-02-02T04:17:09Z", "schema": { "$ref": "https://developer-production-s.squarecdn.com/schemas/v1/common.json#squareup.common.String" }, "created_at": "2023-01-20T02:41:37Z", "visibility": "VISIBILITY_READ_ONLY" }, { "key": "manager-email", "name": "Manager Email", "description": "The email address of the general manager", "version": 1, "updated_at": "2023-01-20T02:41:37Z", "schema": { "$ref": "https://developer-production-s.squarecdn.com/schemas/v1/common.json#squareup.common.Email" }, "created_at": "2023-01-20T02:41:37Z", "visibility": "VISIBILITY_HIDDEN" }, { "key": "minimum", "name": "Min staffing requirements", "description": "The minimum number of staff required for the location to function", "version": 1, "updated_at": "2022-12-02T19:51:29.235Z", "schema": { "$ref": "https://developer-production-s.squarecdn.com/schemas/v1/common.json#squareup.common.Number" }, "created_at": "2022-12-02T19:51:29.235Z", "visibility": "VISIBILITY_READ_WRITE_VALUES" }, { "key": "services-offered", "name": "Services offered", "description": "The services offered at this location", "version": 1, "updated_at": "2022-12-06T15:57:23.211Z", "schema": { "$schema": "https://developer-production-s.squarecdn.com/meta-schemas/v1/selection.json", "maxItems": 3.0, "type": "array", "uniqueItems": true, "items": { "names": [ "Wood repair", "Leather repair", "Reupholstery", "Furniture consignment", "Rug cleaning" ], "enum": [ "46efa55a-1f1d-467f-9733-468f881a4f20", "954998e1-b666-43a4-baf3-89cb87afe25a", "610fa590-70cd-4ec9-b64c-1dad6ba3c8f9", "gEtd3Mvh-49yt-7yUz-rXDt-vL4XzYgRcmq4", "pbGg9Zmb-e5kw-9zmb-75CQ-yTg8mJW8j2oc" ] } }, "created_at": "2022-12-06T15:57:23.211Z", "visibility": "VISIBILITY_READ_ONLY" } ] } ``` Note that the `"General manager"` and `"Manager email"` custom attribute definitions were created by the requesting application. Because `"Manager email"` is set to `VISIBILITY_HIDDEN`, it's returned only when requested by the definition owner. If no custom attribute definitions are found, Square returns an empty response. ```json {} ``` {% anchor id="retrieve-custom-attribute-definition" /%} ## Retrieve a location custom attribute definition Use the [RetrieveLocationCustomAttributeDefinition](https://developer.squareup.com/reference/square/location-custom-attributes-api/retrieve-location-custom-attribute-definition) endpoint to retrieve a custom attribute definition using its `key`. Note the following: * The `key` path parameter is the `key` value of the custom attribute definition. * The `version` query parameter is optionally used for strongly consistent reads to guarantee that you receive the most up-to-date data. When included in the request, Square returns the specified version or a later version if one exists. If the specified version is later than the current version, Square returns a `400 BAD_REQUEST` error. The following is an example request: ```` {% aside type="info" %} Square also returns custom attribute definitions for `RetrieveLocationCustomAttribute` or `ListLocationCustomAttributes` requests if you set the `with_definition` or `with_definitions` query parameter to `true`. For more information, see [Retrieve a location custom attribute](location-custom-attributes-api/custom-attributes#retrieve-location-custom-attribute) or [List location custom attributes](location-custom-attributes-api/custom-attributes#list-location-custom-attributes). {% /aside %} The following is an example response: ```json { "custom_attribute_definition": { "key": "general-manager", "name": "General Manager", "description": "The General Manager at this Location", "version": 2, "updated_at": "2023-02-02T04:17:09Z", "schema": { "$ref": "https://developer-production-s.squarecdn.com/schemas/v1/common.json#squareup.common.String" }, "created_at": "2023-01-20T02:41:37Z", "visibility": "VISIBILITY_READ_ONLY" } } ``` If the custom attribute definition isn't found, Square returns an `errors` field that contains a `404 NOT_FOUND` error. {% anchor id="delete-custom-attribute-definition" /%} ## Delete a location custom attribute definition Use the [DeleteLocationCustomAttributeDefinition](https://developer.squareup.com/reference/square/location-custom-attributes-api/delete-location-custom-attribute-definition) endpoint to delete a custom attribute definition from a seller account. Note the following: * Only the definition owner can delete a custom attribute definition. * The `key` path parameter is the `key` value of the custom attribute definition. * Deleting a custom attribute definition also deletes the corresponding custom attribute from all locations on which it has been set. The following is an example request: ```` If successful, Square returns an empty object. ```json {} ``` After a custom attribute definition is deleted, Square invokes the `location.custom_attribute_definition.owned.deleted` and `location.custom_attribute_definition.visible.deleted` [webhooks](location-custom-attributes-api/overview#webhooks). --- # Developer Console > Source: https://developer.squareup.com/docs/devtools/developer-dashboard > Status: PUBLIC > Languages: All > Platforms: All Use the Developer Dashboard to manage your applications, permissions, and authorizations. {% subheading %}Use the Developer Console to manage your applications, permissions, and authorizations.{% /subheading %} {% toc hide=true /%} ## Overview Square provides the [Developer Console](https://developer.squareup.com/apps) to manage your applications, permissions, and authorizations, the [Square Dashboard](https://app.squareup.com/dashboard) to track seller activity and create seller resources, and the Sandbox Square Dashboard to simulate the seller experience when testing APIs. When you sign up for a Square account, Square provides the Developer Console and Square Dashboard, which you can access using the **Account** menu: ![A drop-down menu that shows the Developer Console and Square Dashboard options.](//images.ctfassets.net/1nw4q0oohfju/1wkrfgn9DR0UzcKoiRvi05/16fb109bdd2edaf3c137825a4536f0a9/developer-colsole-account-dropdown.png) * **Developer Console** - Use the Developer Console to create and manage your applications, access the Sandbox Square Dashboard, configure webhooks for real-time notifications, and perform other development tasks. * **Sandbox Square Dashboard** - You can use the Sandbox Square Dashboard to simulate the seller experience when testing APIs in the Square Sandbox. You can access it through the Developer Console. * **Square Dashboard** - The Square Dashboard provides sellers with tools to manage daily business operations. A seller can control just about everything needed to ensure that the business is running smoothly. ## Developer Console The Developer Console lets you manage all aspects of your applications in one place. These tasks include: * Creating an application and viewing the application ID and application secret. * Subscribing to webhook events and designating the notification URL where you receive webhook event notifications. * Setting up OAuth permissions so you can manage resources on behalf of a seller. * Reviewing logs for API calls and webhook events. ### Explore the Developer Console 1. Sign in to the [Developer Console](https://developer.squareup.com/apps). 2. On the **Applications** page, choose an application that you created. 3. At the top of the page, toggle **Sandbox** or **Production** to set your environment. For information about the Sandbox, see [Square Sandbox](devtools/sandbox/overview). 4. In the left pane, choose the following pages and review the application's configuration settings: ![An animation showing how to get the Sandbox access token and location ID in the Developer Console.](//images.ctfassets.net/1nw4q0oohfju/3NT64X4CwRRcZxhVPU5BWD/370fbc919638f9aeb9f5f6f47b115d28/console-overview.gif) * **Credentials** - Provides the credentials used to authenticate requests. Credentials are provided for use in production and Sandbox testing. The API version is the default version for your application. {% aside type="info" %} The access token on the **Credentials** page has permissions to update all Square account data. You should therefore not share this access token with other people. {% /aside %} * **OAuth** - Provides the access tokens needed to test your code in the Sandbox environment. For production applications, use the OAuth workflow to obtain tokens at runtime. * **Locations** - Displays all locations created for your Square account. Square creates the initial location based on the information you provided during signup. Several Square APIs require your location ID. If you're signed in to Square, API Explorer prompts you to select one of your locations when creating an API request. In addition, each application maintains information on other pages, such as webhooks (for push notifications) and client payments configurations. ## Square applications A Square application lets you register your application with Square so that your code can connect to Square and make API calls. The application provides the necessary development credentials needed to build with the Square API. In addition to managing credentials, you can manage webhook subscriptions, API versions, Apple Pay configurations, and more. The API version that you choose for the application is the default Square API version. If your application makes an API call without an HTTP version header, Square applies this default version to the request. You might only need one application to address your business needs, but you can create additional applications in the Developer Console if needed. For example, you're using the Square Developer platform to: * Create web and mobile client payment solution and a backend application to support both clients. In this case, you might create an application for each of the three platforms. * Create solutions for different scenarios, such as managing orders or managing a Square catalog. ## Sandbox Square Dashboard You can use the Sandbox Square Dashboard to simulate the seller experience when testing APIs in the Square Sandbox. You can access it through the [Developer Console](https://developer.squareup.com/apps). When you make API calls using the Sandbox test account, you can verify those transactions in the Sandbox Square Dashboard. These transactions don't affect your production data. Open the Developer Console and review the Sandbox Square Dashboard, as shown in the following example: ![Open the Developer Console and verify a transaction in the Square Dashboard.](//images.ctfassets.net/1nw4q0oohfju/4xlgYp7sO2yAgwq1RsQ4dx/8cddcd5b70cfa2ca521cced6aa7e1112/sandbox-dashboard.gif) The **Sandbox test accounts** section shows the **Default Test Account**. 1. To view access tokens for the account, choose the account name. {% aside type="info" %} If your Square account is from a [supported country](payment-card-support-by-country) (where Square processes payments), the default test account is created in the same country. Otherwise, the account is created in the US. You can create a Sandbox test account in any supported country. Simulated payments follow the banking rules of the account's country. For example, a Sandbox account for France processes payments according to French regulations. {% /aside %} 2. To open the Sandbox Square Dashboard, choose **Square Dashboard** next to the account name. 3. In the left pane, choose different pages to see account data. ## See also * [Square Dashboard](devtools/seller-dashboard) * [Square Sandbox](devtools/sandbox/overview) --- # Square Dashboard > Source: https://developer.squareup.com/docs/devtools/seller-dashboard > Status: PUBLIC > Languages: All > Platforms: All Developers can use the Square Dashboard to simulate the seller experience and see the effects of their Square API calls. {% subheading %}Developers can use the [Square Dashboard](https://app.squareup.com/dashboard) to simulate the seller experience and see the effects of their Square API calls.{% /subheading %} {% toc hide=true /%} {% aside type="info" %} **Are you a Square seller looking for information about the Square Dashboard?** If so, visit the [Square Help Center](${SQUARE_HELP_ROOT_URL}) or read the [Square Dashboard product documentation](https://squareup.com/point-of-sale/features/dashboard). {% /aside %} ## Overview Square sellers use the Square Dashboard to manage business operations by tracking orders, processing transactions, managing inventory, engaging with customers, running detailed reports, and more. Developers can sign in to the Square Dashboard with their own Square account to see how their API calls appear in the dashboard and affect the seller's workflow. A good understanding of the seller experience can help with application design, testing, and troubleshooting. Square also provides the [Sandbox Square Dashboard](devtools/developer-dashboard#sandbox-square-dashboard) that developers can use to test with a subset of dashboard features that are supported in the Sandbox environment. ## Explore the Square Dashboard When you sign up for a Square account, Square provides the Developer Console and Square Dashboard, which you can access using the **Account** menu: ![A drop-down menu that shows the Developer Console and Square Dashboard options.](//images.ctfassets.net/1nw4q0oohfju/1wkrfgn9DR0UzcKoiRvi05/16fb109bdd2edaf3c137825a4536f0a9/developer-colsole-account-dropdown.png) When a seller signs in to the Square Dashboard, the **Home** page provides a snapshot of their daily business activities, such as their next transfer amount, top selling items, and customer feedback. ![A screenshot showing the Home page of the Square Dashboard in the Sandbox environment.](//images.ctfassets.net/1nw4q0oohfju/42Cc7QCMXJSaZlS0FRFDXo/f9345ec700e48a300cdcaa14e63db04e/square-dashboard.png) The left pane provides links to pages with additional information. These pages vary depending on your Square Dashboard configuration. These pages might include: * **Loyalty** - Sellers can set up a loyalty program that allows customers to earn points that can be redeemed for future discounts. You can use the [Loyalty API](loyalty-api/overview) to integrate Square Loyalty into third-party applications, such as eCommerce websites, mobile applications, and POS solutions. * **Reports** - Sellers can run, view, and download reports, such as Sales Summary, Sales Trends, Payment Methods, Item Sales, Category Sales, Taxes, Transaction Status, Disputes, and many more. * **Transactions** - Provides detailed reports where sellers can slice and dice numbers. They can customize the date range to pinpoint specific data and review every payment that passes through their business. They can choose a transaction and resend a receipt or issue a refund. You can also use the [Payments API](payments-refunds) and [Refunds API](refunds-api/overview) (together with the [Orders API](orders-api/what-it-does)) to generate detailed reports. * **Items** - Sellers can review items in their item library, create new items, or update existing items. They can also manage item categories, discounts, and taxes on this page. If sellers have items in a spreadsheet, they can bulk import them into the library. You can use the [Catalog API](catalog-api/what-it-does) to create, view, update, or delete items in the Square catalog. * **Customers** - Provides tools to engage with customers and provides insights into customer behavior. Sellers can see useful insights, such as details about new and returning customers, how satisfied customers are, and direct feedback that customers send from their digital receipts. You can use the [Customers API](customers-api/what-it-does) to individually manage customer profiles in a seller's account. * **Team** - Sellers can create team members, manage commissions and payroll, and set permissions. You can use the [Team API](team/overview) and [Labor API](labor-api/what-it-does) to manage seller teams, automate the creation of team members, set their job titles and wage rates, and access seller locations. * **Orders** - Sellers can review orders and track an order's progress from delivery to fulfillment. You can use the [Orders API](orders-api/what-it-does) to build applications to track and manage the lifecycle of a purchase. You also have these Square products: * **Appointments** - Provides integrated scheduling solutions. Sellers can accept appointments from their website, from a Square Online store, or through email. Based on your subscription plan to Square Appointments, you can use the [Bookings API](bookings-api/what-it-is) to create, update, or cancel buyer-level bookings with the seller. * **Online** - Provides all the tools sellers need to quickly build eCommerce websites and start selling online for free. For building a new custom checkout experience or adding Square payments to an existing one, you can use the [Web Payments SDK](web-payments/overview). * **Online Checkout** - Sellers can create quick pay links and schedule recurring payments. You can use the [Checkout API](checkout-api) to get a URL to a Square-hosted checkout payment page for a buyer to pay for goods and services. * **Invoices** - Provides sellers with tools to create and manage invoices, reminders, receipts, and automatic payments. You can use the [Invoices API](invoices-api/overview) to create and manage invoicing for orders. * **Gift Cards** - Sellers can launch a complete gifting program with digital and physical gift cards. You can build applications with the [Web Payments SDK](web-payments/gift-cards-intro) that take payments from a [Square gift card](https://squareup.com/gift-cards). * **Subscriptions** - Sellers can create and manage subscription plans. You can use the [Subscriptions API](subscriptions/overview) to create subscription plans and automatically charge customers on a recurring basis. {% aside type="info" %} Developers use the [Developer Console](/developer-dashboard) to manage their applications. {% /aside %} ## See also * [Developer Console](devtools/developer-dashboard) * [Square Sandbox](devtools/sandbox/overview) * [Square Help Center](https://squareup.com/help/us/en) --- # Take a Payment with Cash App Pay > Source: https://developer.squareup.com/docs/web-payments/add-cash-app-pay > Status: PUBLIC > Languages: All > Platforms: All Learn how to add Cash App Pay as a payment method to an application. **Applies to:** [Web Payments SDK](web-payments/overview) {% subheading %}Learn how to add Cash App Pay as a payment method to an application.{% /subheading %} {% toc hide=true /%} ## Overview Cash App Pay lets customers seamlessly pay with their Cash App account, enabling a fast and familiar checkout experience using a mobile payment application. You can add Cash App Pay to your customer online checkout flow built on the Web Payments SDK. The following video demonstrates how to implement Cash App Pay. For a detailed overview of building with the card payment method, see the following sections. {% youtube src="https://www.youtube.com/embed/nQrjAvIzqRE" /%} Learn how to add a Cash App Pay payment method to the application you built using the quickstart project sample in [Web Payments SDK Quickstart](web-payments/quickstart) to integrate the Web Payments SDK into your application. The following steps add code to the application you created from the [quickstart project sample](https://github.com/square/web-payments-quickstart/blob/main/public/examples/card-payment.html). If you haven't created an application using the quickstart, you need to do so before completing these steps. You can find a complete example of the [Cash App Pay code](https://github.com/square/web-payments-quickstart/blob/main/public/examples/cash-app-pay.html) on GitHub. ## Requirements and limitations * Cash App Pay is currently supported only in the United States. If you implement Cash App Pay for a seller that is based outside of the US, the Cash App Pay button and payment method doesn't render in your application. * Cash App Pay currently doesn't support changing or updating the options specified in a [PaymentRequest](https://developer.squareup.com/reference/sdks/web/payments/objects/PaymentRequest) object. This limitation occurs when the browser displays the Google Pay payment sheet for the buyer. * CBD sellers cannot take Cash App payments. ## 1. Add the Cash App Pay payment method to the page The Cash App Pay payment method needs information about the buyer and the payment amount before it can open the Cash App payment sheet. Your application creates a [PaymentRequest](https://developer.squareup.com/reference/sdks/web/payments/objects/PaymentRequest) object to provide that information and then gets a new [CashAppPay](https://developer.squareup.com/reference/sdks/web/payments/objects/CashAppPay) object initialized with it. The following code creates the payment request and attaches the Cash App Pay payment method to the page: 1. Add an HTML element to the prerequisite walkthrough form with an `id` of `cash-app-pay`. The HTML for the body of index.html should look like the following: ```html

``` 2. Add the following two functions to your script tag: ```javascript function buildPaymentRequest(payments) { const paymentRequest = payments.paymentRequest({ countryCode: 'US', currencyCode: 'USD', total: { amount: '1.00', label: 'Total', } }); return paymentRequest; } async function initializeCashApp(payments) { const paymentRequest = buildPaymentRequest(payments) const cashAppPay = await payments.cashAppPay(paymentRequest,{ redirectURL: 'https://my.website/checkout', referenceId: 'my-website-00000001', }); await cashAppPay.attach('#cash-app-pay'); return cashAppPay; } ``` The `initializeCashApp` function requires a `redirectURL` value to indicate where to send buyers after completing a payment on a mobile device. The `redirectURL` value is only for mobile payments and isn't used for desktop QR payments. You can also include the optional `referenceID` payment identifier value for internal developer use. For example, you use a `referenceId` value to associate the payment with an internal resource. 3. In the `DOMContentLoaded` event listener, add the following code after you initialize the Cash App Pay payment method: ```javascript let cashAppPay; try { cashAppPay = await initializeCashApp(payments); } catch (e) { console.error('Initializing Cash App Pay failed', e); } ``` **Test the application** Navigate to http://localhost:3000/ in your browser. **Checkpoint 1:** You should see the Cash App Pay button rendered on your page. ![A screenshot of the rendered Cash App Pay payment button on a web page payment client.](//images.ctfassets.net/1nw4q0oohfju/5KX62i9wOsL9uVRzULSgeT/c8da4a544f6a553e6bd352e3110301f5/cash-app-pay-button.png) ## 2. Get the payment token and attach it to a DOM element Add the following code after `// Checkpoint 2` in the `DOMContentLoaded` event listener function to listen for the ontokenization: ```javascript cashAppPay.addEventListener('ontokenization', function (event) { const { tokenResult, error } = event.detail; if (error) { // developer handles error } else if (tokenResult.status === 'OK') { // developer passes token to backend for use with CreatePayment } }); ``` This event fires when a buyer authorizes a payment in Cash App, is taken back to the merchant website `redirectUri` (if mobile), and a payment token is ready. Note how Cash App Pay has its own event listeners on the `PaymentRequest` object and how these event listeners have their own specific callbacks. For more information, see [addEventListener](https://developer.squareup.com/reference/sdks/web/payments/objects/PaymentRequest#PaymentRequest.addEventListener). **Test the application** Test the Cash App payment flow from the browser in a sandbox environment. The following animation shows the Cash App Pay payment flow: ![A screenshot shows the dialog box of the approved Cash App linked account.](//images.ctfassets.net/1nw4q0oohfju/4UPvCW9VxdWn9nXsW7kZ5R/492a888883fd52eebcc2be1a52f51b32/cash-app-pay-scan-to-pay.gif) {% aside type="important" %} When you test the Cash App and Web Payments SDK integration in a production environment, you can use both the Cash App camera and the smartphone camera to scan the QR code. When you test the payment flow in a sandbox environment, the sandbox environment only supports using the smartphone camera to scan the QR code. {% /aside %} 1. Navigate to http://localhost:3000/ in your browser. 2. Click the **Cash App Pay** button. You should see the Cash App Pay dialog box appear with the QR code. 3. Using your smartphone's camera, scan the QR code in the dialog box. On your smartphone's web browser at sandbox.api.cash.app, the application displays a dialog box requesting permission to approve or decline the request to link the account. ![A screenshot of the application dialog box requesting permission to approve or decline the request to link the account.](//images.ctfassets.net/1nw4q0oohfju/712VIouGQMVpnRbxV6g72t/65b1dadcd50440584e606816dfe71abc/cash-app-account-link-dialog.png) 4. Tap **Approve** to link the account. **Checkpoint 2.** You should receive a confirmation that the account has been linked. ![A screenshot shows the dialog box of the approved Cash App linked account.](//images.ctfassets.net/1nw4q0oohfju/DHPrjYk3aFC4ubWs9bxQm/19c0e3a86ca90fbc034e6a7187458b28/cash-app-approved-linked-account.png) ## 3. Process a Cash App Pay payment token on your backend The payment token that your application generated for a Cash App Pay payment is processed on your backend in the same way a payment token from one of the other payment methods is processed, with some exceptions. To learn about the specific processing requirements, see [Cash App Payments](payments-api/take-payments/cash-app-payments). ## Build additional controls for payments The Pay Kit JavaScript SDK includes methods to present the Cash App Pay payment method and controls for handling payment requests. The SDK also provides advanced controls for situations where you need to validate customer information or customize the Cash App Pay checkout experience. For more information, see [Cash App's technical reference for Pay Kit use cases](https://developers.cash.app/docs/api/technical-documentation/sdks/pay-kit/use-cases#advanced-controls). --- # Quick Pay Checkout > Source: https://developer.squareup.com/docs/checkout-api/quick-pay-checkout > Status: PUBLIC > Languages: All > Platforms: All Learn how to create a Square-hosted quick pay checkout page by only specifying the name and price (without having to specify the Order object). **Applies to:** [Checkout API](checkout-api) | [Orders API](orders-api/what-it-does) | [Payments API](payments-refunds) {% subheading %}Learn how to create a Square-hosted quick pay checkout page by only specifying the name and price.{% /subheading %} {% toc hide=true /%} ## Overview An application can generate a quick pay checkout page to allow a seller to sell an ad hoc item and get paid (without specifying an [Order](https://developer.squareup.com/reference/square/objects/Order) object in the request). The application can then embed the link in the application or send it to the buyer using, for example, email or social media. ## Create a quick pay checkout page The [CreatePaymentLink](https://developer.squareup.com/reference/square/checkout-api/create-payment-link) request requires only the item name, price, and seller location. The following example request creates a quick pay checkout page for $125 for auto detailing: ```` After receiving the requests, Square creates the following: * An [Order](https://developer.squareup.com/reference/square/objects/Order) object - The `name` and `price_money` map to the order line item `name` and `base_price_amount`. Note that the `state` of the order created is `DRAFT`. After the buyer pays for the order, the `state` changes to `OPEN`. * A [PaymentLink](https://developer.squareup.com/reference/square/objects/PaymentLink) object - It provides, among other things, `order_id` and `URL` to the checkout page that Square renders when requested. An example response is shown: ```json { "payment_link": { "id": "FWT463MU2JIG7S3D", "version": 1, "description": "", "order_id": "C0DMgui6YFmgyURVSRtxr4EShheZY", "url": "https://sandbox.square.link/u/jUjglZiR", "created_at": "2022-04-23T18:54:40Z" }, "related_resources": { "orders": [ { "id": "C0DMgui6YFmgyURVSRtxr4EShheZY", "location_id": "{{LOCATION_ID}}", "source": { "name": "Test Online Checkout Application" }, "line_items": [ { "uid": "8YX13D1U3jO7czP8JVrAR", "name": "Auto Detailing", "quantity": "1", "item_type": "ITEM", "base_price_money": { "amount": 12500, "currency": "USD" }, "variation_total_price_money": { "amount": 12500, "currency": "USD" }, "gross_sales_money": { "amount": 12500, "currency": "USD" }, "total_tax_money": { "amount": 0, "currency": "USD" }, "total_discount_money": { "amount": 0, "currency": "USD" }, "total_money": { "amount": 12500, "currency": "USD" } } ], "fulfillments": [ { "uid": "bBpNrxjdQxGQP16sTmdzi", "type": "DIGITAL", "state": "PROPOSED" } ], "net_amounts": { "total_money": { "amount": 12500, "currency": "USD" }, "tax_money": { "amount": 0, "currency": "USD" }, "discount_money": { "amount": 0, "currency": "USD" }, "tip_money": { "amount": 0, "currency": "USD" }, "service_charge_money": { "amount": 0, "currency": "USD" } }, "created_at": "2022-03-03T00:53:15.829Z", "updated_at": "2022-03-03T00:53:15.829Z", "state": "DRAFT", "version": 1, "total_money": { "amount": 12500, "currency": "USD" }, "total_tax_money": { "amount": 0, "currency": "USD" }, "total_discount_money": { "amount": 0, "currency": "USD" }, "total_tip_money": { "amount": 0, "currency": "USD" }, "total_service_charge_money": { "amount": 0, "currency": "USD" } } ] } } ``` The seller can send or display the checkout page to the buyer to take a payment. The buyer can use the payment link only once. ## Buyer experience The following describes the buyer experience and updates after the buyer pays for the order. Note that the screenshots shown reflect the buyer experience in production. In the Sandbox, you can take and verify a payment, but the UI experience isn't the same as in production. 1. The buyer opens the URL, which opens the Square-hosted checkout page where the buyer can make a payment. ![A graphic showing the basic payment link page.](//images.ctfassets.net/1nw4q0oohfju/2HaDoCVnv9T5qaS6w1zu6G/e22044585ecaf107e69a9a3321f5f18c/checkout-page-with-minimum-fields.png) The checkout page shows the primary business name as configured in the seller's Square account. If the buyer's device (for example, a browser on your computer or a mobile phone) supports Apple Pay or Google Pay, the checkout page shows the payment button that best suits that browser. For example, show the Apple Pay option when the buyer is using Safari. For more information about available payment methods, see [AcceptedPaymentMethods](https://developer.squareup.com/reference/square/objects/AcceptedPaymentMethods) and [Guidelines and Limitations](checkout-api/guidelines-and-limitations). 2. Square processes the buyer's payment as follows: * Displays the order confirmation page to the buyer. If you provided a redirect URL in the request, Square redirects the buyer to that page instead. ![A screenshot showing an example Square-provided confirmation page.](//images.ctfassets.net/1nw4q0oohfju/2C6uiJdBbgZc8NcrZfXss9/3b267662e3abc8865d4b110022dc02e8/square-provided-order-confirmation-page.png) * Sends a Square receipt to the email address that the buyer provided during checkout. * Sends a "payment received" email notification to the seller. The notification is sent to the primary email address associated with their Square account. Note that sellers can enable or disable email notifications in the Square Dashboard by choosing **Payment Links**, and then choosing **General** under **Settings**. * Updates the [Order](https://developer.squareup.com/reference/square/objects/Order) as follows: * Changes `state` from `DRAFT` to `OPEN`. * Adds a `Tender` object to the order. It describes the tender used to pay for the order. Note that the `Tender.id` identifies the associated `Payment` object that was created. You can use the [Payments API](https://developer.squareup.com/reference/square/payments-api) to access the payment. - After the order is paid by the buyer, the order is shown in Order Manager in the [Square Dashboard](https://squareup.com/). For example, you can open the Square Dashboard, choose **Orders**, and review the order (`"state": "OPEN"`). ## See also * [Checkout API](checkout-api) * [Square Order Checkout](checkout-api/square-order-checkout) * [Subscription Plan Checkout](checkout-api/subscription-plan-checkout) * [Optional Checkout Configurations](checkout-api/optional-checkout-configurations) * [Manage Checkout](checkout-api/manage-checkout) --- # Optional Checkout Configurations > Source: https://developer.squareup.com/docs/checkout-api/optional-checkout-configurations > Status: PUBLIC > Languages: All > Platforms: All Learn how to specify optional checkout configurations. **Applies to:** [Checkout API](checkout-api) {% subheading %}Learn how to add optional fields to a checkout page.{% /subheading %} {% toc hide=true /%} ## Overview The `checkout_options` field in the [CreatePaymentLink](https://developer.squareup.com/reference/square/checkout-api/create-payment-link) request allows you to add optional fields to the resulting checkout page (see [Checkout API)](checkout-api). These fields can be used, for example, for tipping options, requesting information from buyers through custom fields, and prepopulating buyer data (such as email address, phone number, and shipping address). ## Prepopulate the shipping address By default, the checkout page doesn't include address fields. The `CreatePaymentLink` request must include `checkout_options` (see [CheckoutOptions](https://developer.squareup.com/reference/square/objects/CheckoutOptions)) with the `ask_for_shipping_address` field set to `true` for these fields to appear on the checkout page as shown. This also results in having `SHIPMENT` as the order fulfillment type. ```` The following is an example response: ```json { "payment_link": { "id": "UO6BJB7EXQOQKIDA", "version": 1, "description": "", "order_id": "0mKB0CULaS8SYRAJXaoIp1SUABZZY", "checkout_options": { "ask_for_shipping_address": true }, "url": "https://sandbox.square.link/u/fTkKKauH", "created_at": "2022-03-20T19:03:01Z" }, "related_resources": { "orders": [ { "id": "C0DMgui6YFmgyURVSRtxr4EShheZY", "location_id": "{{LOCATION_ID}}", "source": { "name": "Test Online Checkout Application" }, "line_items": [ { "uid": "8YX13D1U3jO7czP8JVrAR", "name": "Auto Detailing", "quantity": "1", "item_type": "ITEM", "base_price_money": { "amount": 12500, "currency": "USD" }, "variation_total_price_money": { "amount": 12500, "currency": "USD" }, "gross_sales_money": { "amount": 12500, "currency": "USD" }, "total_tax_money": { "amount": 0, "currency": "USD" }, "total_discount_money": { "amount": 0, "currency": "USD" }, "total_money": { "amount": 12500, "currency": "USD" } } ], "fulfillments": [ { "uid": "bBpNrxjdQxGQP16sTmdzi", "type": "DIGITAL", "state": "PROPOSED" } ], "net_amounts": { "total_money": { "amount": 12500, "currency": "USD" }, "tax_money": { "amount": 0, "currency": "USD" }, "discount_money": { "amount": 0, "currency": "USD" }, "tip_money": { "amount": 0, "currency": "USD" }, "service_charge_money": { "amount": 0, "currency": "USD" } }, "created_at": "2022-03-03T00:53:15.829Z", "updated_at": "2022-03-03T00:53:15.829Z", "state": "DRAFT", "version": 1, "total_money": { "amount": 12500, "currency": "USD" }, "total_tax_money": { "amount": 0, "currency": "USD" }, "total_discount_money": { "amount": 0, "currency": "USD" }, "total_tip_money": { "amount": 0, "currency": "USD" }, "total_service_charge_money": { "amount": 0, "currency": "USD" } } ] } } ``` When the buyer opens the checkout page, they must provide their name, phone number, and address. After the buyer provides the information, Square processes the payment and updates the order as follows: * Sets the `state` from `DRAFT` to `OPEN`. * Updates `Order.fulfillments.shipment_details` to include name, phone number, and address information. Applications can also prepopulate the buyer's address on the checkout page by adding the `pre_populated_data` field in request body as shown: ```` ## Prepopulate the email address and phone number A checkout page always includes a **CONTACT** section showing empty UI fields for the buyer to provide an email address and phone number. You can prepopulate these fields by adding the `pre_populated_data` field in a `CreatePaymentLink` request as shown. The request specifies an ad hoc item name and price to create a quick pay checkout and the optional `pre_populated_data` field. ```` After receiving the request, Square creates an order, creates a checkout page, and returns a response. An example response is shown: ```json { "payment_link": { "id": "FV5LCO32HYNIRWLS", "version": 1, "order_id": "sCE4bdUkTU2OwIi0FsiYtMkmyWfZY", "pre_populated_data": { "buyer_email": "buyer@email.com", "buyer_phone_number": "+14155551212" }, "url": "https://sandbox.square.link/u/qD2HQsln", "created_at": "2022-03-18T20:37:40Z" }, "related_resources": { "orders": [ { "id": "C0DMgui6YFmgyURVSRtxr4EShheZY", "location_id": "{{LOCATION_ID}}", "source": { "name": "Test Online Checkout Application" }, "line_items": [ { "uid": "8YX13D1U3jO7czP8JVrAR", "name": "Auto Detailing", "quantity": "1", "item_type": "ITEM", "base_price_money": { "amount": 12500, "currency": "USD" }, "variation_total_price_money": { "amount": 12500, "currency": "USD" }, "gross_sales_money": { "amount": 12500, "currency": "USD" }, "total_tax_money": { "amount": 0, "currency": "USD" }, "total_discount_money": { "amount": 0, "currency": "USD" }, "total_money": { "amount": 12500, "currency": "USD" } } ], "fulfillments": [ { "uid": "bBpNrxjdQxGQP16sTmdzi", "type": "DIGITAL", "state": "PROPOSED" } ], "net_amounts": { "total_money": { "amount": 12500, "currency": "USD" }, "tax_money": { "amount": 0, "currency": "USD" }, "discount_money": { "amount": 0, "currency": "USD" }, "tip_money": { "amount": 0, "currency": "USD" }, "service_charge_money": { "amount": 0, "currency": "USD" } }, "created_at": "2022-03-03T00:53:15.829Z", "updated_at": "2022-03-03T00:53:15.829Z", "state": "DRAFT", "version": 1, "total_money": { "amount": 12500, "currency": "USD" }, "total_tax_money": { "amount": 0, "currency": "USD" }, "total_discount_money": { "amount": 0, "currency": "USD" }, "total_tip_money": { "amount": 0, "currency": "USD" }, "total_service_charge_money": { "amount": 0, "currency": "USD" } } ] } } ``` When the buyer opens the checkout page, their email address and phone number are prepopulated. The buyer has the option to update the information. After the buyer pays, the email address and phone number are added to the order fulfillment (`recipient` field). ## Specify checkout options Applications can include `checkout_options` in a `CreatePaymentLink` request to specify optional checkout page configurations. This includes enabling the buyer to add a tip, providing a shipping address, provide support email for buyer to contact the merchant, and adding up to two additional custom fields. An example request is shown: ```` The following is an example response: ```json { "payment_link": { "id": "MVDBLSCHZP5ZUZOB", "version": 1, "order_id": "YggCup2fBKScqYhpIglzWMpJxyaZY", "checkout_options": { "allow_tipping": true, "merchant_support_email": "support@email.com", "custom_fields": [ { "title": "Special Instructions", "uid": "QPEENYORWCHZOUL4GO3EVNKL" }, { "title": "Would you like to be on mailing list", "uid": "MWVZ74M34AT4NA4HK7LTB25L" } ], "ask_for_shipping_address": true }, "pre_populated_data": { "buyer_email": "buyer@email.com", "buyer_phone_number": "+14155551212", "buyer_address": { "address_line_1": "1455 MARKET ST #600", "locality": "San Jose", "administrative_district_level_1": "CA", "postal_code": "94103", "country": "US" } }, "url": "https://sandbox.square.link/u/d1Nflwbe", "created_at": "2022-03-18T23:42:11Z" }, "related_resources": { "orders": [ { "id": "C0DMgui6YFmgyURVSRtxr4EShheZY", "location_id": "{{LOCATION_ID}}", "source": { "name": "Test Online Checkout Application" }, "line_items": [ { "uid": "8YX13D1U3jO7czP8JVrAR", "name": "Auto Detailing", "quantity": "1", "item_type": "ITEM", "base_price_money": { "amount": 12500, "currency": "USD" }, "variation_total_price_money": { "amount": 12500, "currency": "USD" }, "gross_sales_money": { "amount": 12500, "currency": "USD" }, "total_tax_money": { "amount": 0, "currency": "USD" }, "total_discount_money": { "amount": 0, "currency": "USD" }, "total_money": { "amount": 12500, "currency": "USD" } } ], "fulfillments": [ { "uid": "bBpNrxjdQxGQP16sTmdzi", "type": "DIGITAL", "state": "PROPOSED" } ], "net_amounts": { "total_money": { "amount": 12500, "currency": "USD" }, "tax_money": { "amount": 0, "currency": "USD" }, "discount_money": { "amount": 0, "currency": "USD" }, "tip_money": { "amount": 0, "currency": "USD" }, "service_charge_money": { "amount": 0, "currency": "USD" } }, "created_at": "2022-03-03T00:53:15.829Z", "updated_at": "2022-03-03T00:53:15.829Z", "state": "DRAFT", "version": 1, "total_money": { "amount": 12500, "currency": "USD" }, "total_tax_money": { "amount": 0, "currency": "USD" }, "total_discount_money": { "amount": 0, "currency": "USD" }, "total_tip_money": { "amount": 0, "currency": "USD" }, "total_service_charge_money": { "amount": 0, "currency": "USD" } } ] } } ``` You can also include a shipping fee and an application fee as a checkout option. ```json curl https://connect.squareupsandbox.com/v2/online-checkout/one-time-links \ -X POST \ -H 'Square-Version: 2022-03-16' \ -H 'Authorization: Bearer EAAAGfIQX8uWKWagu7294hoBzTZCr2Ca6L_WVL439T_lt0vKpGQvfdJb3k3WX_gr' \ -H 'Content-Type: application/json' \ -d '{ "idempotency_key": "{{idempotency_key}}", "quick_pay": { "name": "Gift box", "price_money": { "amount": 2000, "currency": "USD" }, "location_id": "{{location_id}}" }, "checkout_options": { "merchant_support_email": "merchant@support.com", "ask_for_shipping_address": true, "app_fee_money": { "amount": 100, "currency": "USD" }, "shipping_fee": { "name": "Shipping", "charge": { "amount": 499, "currency": "USD" } } }, "pre_populated_data": { "buyer_email": "buyer_email@support.com" }, "payment_note": "This is a payment note." } ``` The following is an example response: ```json { "payment_link": { "id": "PKGHMQUG4Z4XA7WU", "version": 1, "order_id": "{{order_id}}", "checkout_options": { "merchant_support_email": "merchant@support.com", "ask_for_shipping_address": true, "app_fee_money": { "amount": 100, "currency": "USD" }, "shipping_fee": { "name": "Shipping", "charge": { "amount": 499, "currency": "USD" } } }, "pre_populated_data": { "buyer_email": "buyer_email@support.com" }, "url": "https://square.link/u/NezpSrr534233", "created_at": "2022-08-01T18:58:07Z", "payment_note": "This is a payment note." }, "related_resources": { "orders": [ { "id": "{{order_id}}", "location_id": "{{location_id}}", "source": { "name": "My Payment Application" }, "line_items": [ { "uid": "HeKqE38KgTuF8cfQ36GxQC", "name": "Gift box", "quantity": "1", "item_type": "ITEM", "base_price_money": { "amount": 2000, "currency": "USD" }, "variation_total_price_money": { "amount": 2000, "currency": "USD" }, "gross_sales_money": { "amount": 2000, "currency": "USD" }, "total_tax_money": { "amount": 0, "currency": "USD" }, "total_discount_money": { "amount": 0, "currency": "USD" }, "total_money": { "amount": 2000, "currency": "USD" } } ], "service_charges": [ { "uid": "YnyOWYvrKbyEip2AurRc6", "name": "Shipping", "amount_money": { "amount": 499, "currency": "USD" }, "applied_money": { "amount": 499, "currency": "USD" }, "total_money": { "amount": 499, "currency": "USD" }, "total_tax_money": { "amount": 0, "currency": "USD" }, "calculation_phase": "SUBTOTAL_PHASE", "taxable": false, "type": "CUSTOM" } ], "fulfillments": [ { "uid": "AaUb3nFXzKh8ce3k6Rj1XB", "type": "SHIPMENT", "state": "PROPOSED", "shipment_details": { "recipient": { "display_name": " ", "email_address": "buyer_email@support.com" } } } ], "net_amounts": { "total_money": { "amount": 2499, "currency": "USD" }, "tax_money": { "amount": 0, "currency": "USD" }, "discount_money": { "amount": 0, "currency": "USD" }, "tip_money": { "amount": 0, "currency": "USD" }, "service_charge_money": { "amount": 499, "currency": "USD" } }, "created_at": "2022-08-01T18:58:06.745Z", "updated_at": "2022-08-01T18:58:06.745Z", "state": "DRAFT", "version": 1, "total_money": { "amount": 2499, "currency": "USD" }, "total_tax_money": { "amount": 0, "currency": "USD" }, "total_discount_money": { "amount": 0, "currency": "USD" }, "total_tip_money": { "amount": 0, "currency": "USD" }, "total_service_charge_money": { "amount": 499, "currency": "USD" }, "net_amount_due_money": { "amount": 2499, "currency": "USD" } } ] } } ``` A checkout page always includes a `COUPON` section showing an empty UI field for the buyer to provide a Square Marketing Coupon. You can show or hide the `COUPON` section using the `enable_coupon` field as a checkout option. ```json curl https://connect.squareupsandbox.com/v2/online-checkout/payment-links \ -X POST \ -H 'Square-Version: 2022-03-16' \ -H 'Authorization: Bearer EAAAGfIQX8uWKWagu7294hoBzTZCr2Ca6L_WVL439T_lt0vKpGQvfdJb3k3WX_gr' \ -H 'Content-Type: application/json' \ -d '{ "idempotency_key": "{{idempotency_key}}", "quick_pay": { "name": "Auto Detailing", "price_money": { "amount": 12500, "currency": "USD" }, "location_id": "{{location_id}}" }, "checkout_options": { "enable_coupon": false } } ``` The following is an example response: ```json { "payment_link": { "id": "PKVT6XGJZXYUP3N554Z", "version": 1, "order_id": "{{order_id}}", "checkout_options": { "enable_coupon": false }, "url": "https://square.link/u/NezpSrr534233", "long_url": "https://checkout.square.site/merchant/ID/order/{order_id}", }, "created_at": "2023-03-17T23:58:01Z", "updated_at": "2022-08-01T18:58:06.745Z", "state": "DRAFT", "version": 1, "total_money": { "amount": 2499, "currency": "USD" }, "total_tax_money": { "amount": 0, "currency": "USD" }, "total_discount_money": { "amount": 0, "currency": "USD" }, "total_tip_money": { "amount": 0, "currency": "USD" }, "total_service_charge_money": { "amount": 0, "currency": "USD" }, "net_amount_due_money": { "amount": 12500, "currency": "USD" } } ] } } ``` If the seller has enabled [Square Loyalty](https://squareup.com/us/en/software/loyalty), the checkout page includes a `REWARDS` section that allows the buyer to sign up for a Loyalty program, accrue points, or redeem rewards. You can show or hide the `REWARDS` section using the `enable_loyalty` field as a checkout option. ```json curl https://connect.squareupsandbox.com/v2/online-checkout/payment-links \ -X POST \ -H 'Square-Version: 2022-03-16' \ -H 'Authorization: Bearer EAAAGfIQX8uWKWagu7294hoBzTZCr2Ca6L_WVL439T_lt0vKpGQvfdJb3k3WX_gr' \ -H 'Content-Type: application/json' \ -d '{ "idempotency_key": "{{idempotency_key}}", "quick_pay": { "name": "Auto Detailing", "price_money": { "amount": 12500, "currency": "USD" }, "location_id": "{{location_id}}" }, "checkout_options": { "enable_loyalty": false } } ``` The following is an example response: ```json { "payment_link": { "id": "PKVT6XGJZXYUP3N554Z", "version": 1, "order_id": "{{order_id}}", "checkout_options": { "enable_loyalty": false }, "url": "https://square.link/u/NezpSrr534233", "long_url": "https://checkout.square.site/merchant/ID/order/{order_id}", }, "created_at": "2023-03-17T23:58:01Z", "updated_at": "2022-08-01T18:58:06.745Z", "state": "DRAFT", "version": 1, "total_money": { "amount": 2499, "currency": "USD" }, "total_tax_money": { "amount": 0, "currency": "USD" }, "total_discount_money": { "amount": 0, "currency": "USD" }, "total_tip_money": { "amount": 0, "currency": "USD" }, "total_service_charge_money": { "amount": 0, "currency": "USD" }, "net_amount_due_money": { "amount": 12500, "currency": "USD" } } ] } } ``` ## See also * [Checkout API](checkout-api) * [Quick Pay Checkout](checkout-api/quick-pay-checkout) * [Square Order Checkout](checkout-api/square-order-checkout) * [Subscription Plan Checkout](checkout-api/subscription-plan-checkout) * [Manage Checkout](checkout-api/manage-checkout) * [Collect Application Fees](payments-api/take-payments-and-collect-fees) --- # Checkout API > Source: https://developer.squareup.com/docs/checkout-api > Status: PUBLIC > Languages: All > Platforms: All Learn how to use Square-hosted checkout pages for processing payments. **Applies to:** [Checkout API](https://developer.squareup.com/reference/square/checkout-api) | [Subscriptions API](subscriptions/overview) | [Payments API](payments-refunds) | [Orders API](orders-api/what-it-does) {% subheading %}Learn how to use Square-hosted checkout pages for processing payments.{% /subheading %} {% toc hide=true /%} ## Overview Using the [Checkout API](https://developer.squareup.com/reference/square/checkout-api) is the quickest way for you to integrate Square wherever you accept payments (for example, through text, your website, an internal dashboard, or in-store). A simple API call allows an application get a URL to a Square-hosted checkout page for a buyer to pay for goods and services. The checkout pages that the API creates are designed for payment conversion (driving buyers to make a payment). The mobile-first design philosophy ensures a seamless buyer experience on all devices. Buyers can choose to save their contact information and card details for future purchases. The checkout page UI is designed with best checkout practices to offer a seamless payment experience. {% aside type="info" %} The Checkout API is updated with new features, which are described in the next section. Square recommends that you use the new [CreatePaymentLink](https://developer.squareup.com/reference/square/checkout-api/create-payment-link) endpoint in place of the previously released [CreateCheckout](https://developer.squareup.com/reference/square/checkout-api/create-checkout) endpoint. {% /aside %} The following video introduces the Checkout API and demonstrates how to get started. {% youtube src="https://www.youtube.com/embed/lYXTD4KboWc" /%} ## Checkout API highlights The Checkout API provides several endpoints to create and manage Square-hosted checkout pages. Developers can call the [CreatePaymentLink](https://developer.squareup.com/reference/square/checkout-api/create-payment-link) endpoint to create checkout pages. The following summarizes key features of the endpoint: * **Supports creating quick pay links** - For the simplest payment needs, an application can create a hosted checkout page with just a name and price. * **Supports Square subscriptions (recurring payments)** - You can specify a subscription plan ID in the checkout request and charge the buyer for recurring payments. Square charges the buyer's card on file based on the subscription plan cadence. * **Supports various payment methods** - The checkout pages support payment sources such as credit cards, debit cards, Google Pay, Apple Pay, Afterpay, and Cash App. * **Supports tipping** - Applications have the option to enable tipping on the checkout page. * **Supports shipping fees** - Applications have the option to add a shipping fee to the checkout page. The buyer sees the shipping fees during checkout on their order confirmation pages and receipts. * **Supports application fees** - The developer can collect a portion of each payment processed as an application fee for facilitating the payment on behalf of the seller. * **Supports custom fields** - Applications can add up to two custom form fields to the checkout page to collect more information from buyers during checkout. * **Supports saving buyer information for faster checkouts** - Square Pay allows buyers to save their contact information, shipping information, and card details for future purchases. The endpoint creates a customer profile for the buyer in the seller's Customer Directory and saves a card on file using buyer-provided card information. A six-digit code is sent to the buyer's mobile number for confirmation. For more information, see [Save Payment Details for Online Orders with Square Pay](https://squareup.com/help/gb/en/article/6945-save-payment-information-with-square-pay). * **Supports showing or hiding coupons** - You can show or hide the coupon component on the buyer side. * **Turn off Loyalty component** - If a seller has enabled [Square Loyalty](https://squareup.com/us/en/software/loyalty), you can turn off the Loyalty component at the (individual) link level. * **An SMS-friendly checkout page URL** - For example, `https://square.link/u/{short_url_id}`. You also have the option to use a long URL. * **Regional support** - The endpoint is available in all regions where Square payments are accepted. ## How it works The Square Checkout API works as follows: 1. When a buyer wants to make a purchase, your application uses the Checkout API to create a Square-hosted checkout page. You can create a payment link in the following two ways: * **Quick pay checkout** - In this case, an application requests a checkout page by simply providing an ad hoc item name (not from the Square catalog) and its price. This is useful when a seller wants to use Square to only process payments and uses a custom solution (external to Square) to handle itemization, taxes, and other order management functions. * **Square order checkout** - In this case, an application provides an order (see [Order](https://developer.squareup.com/reference/square/objects/Order)) in the request body. This is useful if you want to leverage Square for order management such as itemization, taxes, and fulfillments. 2. After receiving the request, the Checkout API does the following: * Creates an order - If the request includes an `Order` object, it creates the specified order. Note that, applications can follow Orders API and Payments API webhooks to track their orders and payments. * A `PaymentLink` object - It provides, among other things, `order_id` and `URL` to the checkout page that Square renders when requested. This prebuilt checkout page (also called a payment processing page) is hosted by Square. The URL is formatted as `https://square.link/u/{short_url_id}`. The API then returns a response that includes the order ID and the URL to the checkout page. 3. Your application can then give the checkout page URL to the buyer. After the buyer opens the checkout page and pays for the purchase, Square redirects the buyer to a confirmation page. Note that, the application can optionally provide a redirect URL in the request. If not provided, Square redirects the buyer to a Square-provided confirmation page. The following is an example checkout page that the API created. The page requests the buyer to pay $125.00 for Auto Detailing services. The example shows the basic checkout page. It doesn't show optional configuration fields. ![A graphic showing the basic checkout page.](//images.ctfassets.net/1nw4q0oohfju/2HaDoCVnv9T5qaS6w1zu6G/e22044585ecaf107e69a9a3321f5f18c/checkout-page-with-minimum-fields.png) ## See also The following topics provide details with examples. You can test these Checkout API examples using the Square Sandbox: * [Quick Pay Checkout](checkout-api/quick-pay-checkout) * [Square Order Checkout](checkout-api/square-order-checkout) * [Subscription Plan Checkout](checkout-api/subscription-plan-checkout) * [Optional Checkout Configurations](checkout-api/optional-checkout-configurations) * [Manage Checkout](checkout-api/manage-checkout) * [Guidelines and Limitations](checkout-api/guidelines-and-limitations) --- # Subscription Plan Checkout > Source: https://developer.squareup.com/docs/checkout-api/subscription-plan-checkout > Status: PUBLIC > Languages: All > Platforms: All Learn how to create a quick pay checkout for a subscription plan. **Applies to:** [Checkout API](checkout-api) | [Subscriptions API](subscriptions/overview) | [Cards API](cards-api/overview) | [Orders API](orders-api/what-it-does) {% subheading %}Learn how to create a quick pay checkout for a subscription plan. {% /subheading %} {% toc hide=true /%} ## Overview If a seller offers [recurring subscriptions](subscriptions/overview), applications can use the [CreatePaymentLink](https://developer.squareup.com/reference/square/checkout-api/create-payment-link) endpoint to generate a Square-hosted checkout page for buyers to pay and subscribe to a subscription plan variation. ## Requirements and limitations * The Checkout API only supports subscription plan variations with one paid phase (or one free phase and one paid phase). * The Checkout API doesn't support `app_fee_money` as a checkout option when specifying the plan variation ID for recurring payments. * Cash App Pay and Afterpay aren't supported for subscription payments. ## Subscription plans and variations A recurring subscription is represented by three parts in the Square API data model: * **Subscription plan** - Represents what is being sold. This can be a single item, a series of recurring services, or a category of items or services. * **Subscription plan variation** - Represents how the product is being sold; that is, how often and for what price. * **Subscription** - Represents who is buying the product or service. It's an agreement with a specific customer to purchase a subscription from the business. For more information, see [Subscription Plans and Variations](subscriptions-api/plans-and-variations). The Checkout API's [CreatePaymentLink](https://developer.squareup.com/reference/square/checkout-api/create-payment-link) endpoint creates a Square-hosted checkout page for buyers to subscribe to a specific subscription plan variation. Your `CreatePaymentLink` request requires the following: * `price_money` - The initial phase price as defined in the subscription plan variation. The price in your checkout request should match the `price` of the subscription plan variation. If it doesn't match, this acts as a price override. * `subscription_plan_id` - The ID of the subscription plan variation. ## Create a payment link for a Square subscription plan Use the following steps to create a payment link for a Square subscription: 1. Create a [subscription plan](subscriptions-api/plans-and-variations#subscription-plans) to act as a category for various subscription tiers. 2. Create a single-phase [subscription plan variation](subscriptions-api/plans-and-variations#plan-variations). This example shows a weekly $15 subscription fee. 3. Create a checkout page that you can send to a customer to pay and subscribe to the plan variation. ### 1. Create a subscription plan {% tabset %} {% tab id="Request" %} This request creates a new subscription plan called "Membership tiers". ```` {% /tab %} {% tab id="Response" %} In the response, take note of the plan's `id` value. You use it in the next step to create a plan variation. ```json { "catalog_object": { "type": "SUBSCRIPTION_PLAN", "id": "BIEZBOHI7AR6ILK2JDNUGKS3", "updated_at": "2025-02-12T21:11:23.991Z", "created_at": "2025-02-12T21:11:23.991Z", "version": 1, "is_deleted": false, "present_at_all_locations": true, "subscription_plan_data": { "name": "Membership tiers" } }, "id_mappings": [ { "client_object_id": "#plan", "object_id": "BIEZBOHI7AR6ILK2JDNUGKS3" } ] } ``` {% /tab %} {% /tabset %} ### 2. Create a subscription plan variation {% tabset %} {% tab id="Request" %} This request creates a subscription plan variation called "Silver Membership Tier" with one phase (a $15/week subscription fee). The `subscription_plan_id` value associates this variation with the plan created in step 1. ```` {% /tab %} {% tab id="Response" %} In the response, take note of the plan variation's `id` value. You use it in the next step to create a payment link. ```json { "catalog_object": { "type": "SUBSCRIPTION_PLAN_VARIATION", "id": "OO5OGJQR5NBZJVGIE57MMA2L", "updated_at": "2025-02-12T22:27:23.385Z", "created_at": "2025-02-12T22:27:23.385Z", "version": 1739399243385, "is_deleted": false, "present_at_all_locations": true, "subscription_plan_variation_data": { "name": "Silver Membership Tier", "phases": [ { "uid": "G3S4264YWEEZGFUT3QMPDRER", "cadence": "WEEKLY", "ordinal": 0, "pricing": { "type": "STATIC", "price": { "amount": 1500, "currency": "USD" }, "price_money": { "amount": 1500, "currency": "USD" } } } ], "subscription_plan_id": "BIEZBOHI7AR6ILK2JDNUGKS3" } }, "id_mappings": [ { "client_object_id": "#variation", "object_id": "OO5OGJQR5NBZJVGIE57MMA2L" } ] } ``` {% /tab %} {% /tabset %} ### 3. Create a payment link {% tabset %} {% tab id="Request" %} Create a payment link using the Checkout API and the ID of the subscription plan variation you created previously. Put this ID value in the `subscription_plan_id` field. {% aside type="info" %} Customers subscribe to a subscription plan variation, not to a subscription plan. For this reason, the `subscription_plan_id` value in the `CreatePaymentLink` request must contain the ID value for a subscription plan variation. {% /aside %} ```` {% /tab %} {% tab id="Response" %} After receiving the request, Square creates an [Order](orders-api/what-it-does), creates a checkout page, and returns the order ID and checkout page URL in the response. ```json { "payment_link": { "id": "OTGMWB3A65HJW2WF", "version": 1, "description": "Billed weekly", "order_id": "E1Ho92Z8lquV9QRIiQ5MWLxKw6MZY", "checkout_options": { "subscription_plan_id": "OO5OGJQR5NBZJVGIE57MMA2L" }, "url": "https://sandbox.square.link/u/Kzc5PBJq", "long_url": "https://connect.squareupsandbox.com/v2/online-checkout/sandbox-testing-panel/EXAMPLE/EXAMPLE", "created_at": "2025-03-04T20:25:34Z" }, "related_resources": { "orders": [ { "id": "uNaEXQmfdCtgE1iKGrl5ZEfhMc4F", "location_id": "L7WQ0KXC8ZSD90", "source": { "name": "Sandbox Application Name" }, "line_items": [ { "uid": "JavvvLD1V7Qv8mJYM38WgB", "name": "Silver Membership", "quantity": "1", "item_type": "ITEM", "base_price_money": { "amount": 1500, "currency": "USD" }, "variation_total_price_money": { "amount": 1500, "currency": "USD" }, "gross_sales_money": { "amount": 1500, "currency": "USD" }, "total_tax_money": { "amount": 0, "currency": "USD" }, "total_discount_money": { "amount": 0, "currency": "USD" }, "total_money": { "amount": 1500, "currency": "USD" }, "total_service_charge_money": { "amount": 0, "currency": "USD" } } ], "fulfillments": [ { "uid": "ijx3bOOQFH2ErNg79FxPvC", "type": "DIGITAL", "state": "PROPOSED" } ], "net_amounts": { "total_money": { "amount": 1500, "currency": "USD" }, "tax_money": { "amount": 0, "currency": "USD" }, "discount_money": { "amount": 0, "currency": "USD" }, "tip_money": { "amount": 0, "currency": "USD" }, "service_charge_money": { "amount": 0, "currency": "USD" } }, "created_at": "2025-03-04T20:25:34.628Z", "updated_at": "2025-03-04T20:25:34.628Z", "state": "DRAFT", "version": 1, "total_money": { "amount": 1500, "currency": "USD" }, "total_tax_money": { "amount": 0, "currency": "USD" }, "total_discount_money": { "amount": 0, "currency": "USD" }, "total_tip_money": { "amount": 0, "currency": "USD" }, "total_service_charge_money": { "amount": 0, "currency": "USD" }, "net_amount_due_money": { "amount": 1500, "currency": "USD" } } ], "subscription_plans": [ { "type": "SUBSCRIPTION_PLAN_VARIATION", "id": "OO5OGJQR5NBZJVGIE57MMA2L", "updated_at": "2025-02-12T22:27:23.385Z", "created_at": "2025-02-12T22:27:23.432Z", "version": 1, "is_deleted": false, "present_at_all_locations": true, "subscription_plan_variation_data": { "name": "Silver Membership Tier", "phases": [ { "uid": "G3S4264YWEEZGFUT3QMPDRER", "cadence": "WEEKLY", "ordinal": 0, "pricing": { "type": "STATIC", "price": { "amount": 1500, "currency": "USD" }, "price_money": { "amount": 1500, "currency": "USD" } } } ], "subscription_plan_id": "BIEZBOHI7AR6ILK2JDNUGKS3" } } ] } ``` {% /tab %} {% /tabset %} Your application can send the `url` in the `payment_link` to the buyer. The buyer experience is similar to what is described in [Quick Pay Checkout](checkout-api/quick-pay-checkout#buyer-experience). When the buyer makes a payment on the checkout page, Square does the following: * Searches the seller's Customer Directory for a customer with the phone number provided by the buyer. If no customer exists, a new one is created. * Adds the card on file to the customer's profile. To view cards on file, you can call the [ListCards](https://developer.squareup.com/reference/square/cards-api/list-cards) endpoint (Cards API) and specify the customer ID. * Updates the order by adding a fulfillment (see [Order.fulfillments](https://developer.squareup.com/reference/square/objects/Order)). You can use the [RetrieveOrder](https://developer.squareup.com/reference/square/orders-api/retrieve-order) endpoint (Orders API) to verify the order. * Creates a new subscription. You can call the [SearchSubscriptions](https://developer.squareup.com/reference/square/subscriptions-api/search-subscriptions) endpoint (Subscriptions API) and provide the customer ID to retrieve the subscription. * Charges the buyer's card on file for the first priced subscription phase. If the plan offers a free initial phase, the card is charged after the free phase. * Continues to charge the card on file as specified by the cadence of the subscription plan variation. In this example, the buyer's card is charged weekly. --- # Manage Checkout > Source: https://developer.squareup.com/docs/checkout-api/manage-checkout > Status: PUBLIC > Languages: All > Platforms: All Learn how to manage checkout links. The Checkout API provides endpoints to manage the checkout pages you created. **Applies to:** [Checkout API](checkout-api) {% subheading %}Learn how to update, retrieve, and delete the checkout pages you created.{% /subheading %} {% toc hide=true /%} ## Update a payment link You can use the [UpdatePaymentLink](https://developer.squareup.com/reference/square/checkout-api/update-payment-link) endpoint to update the following `payment_link` fields: * `description` - The optional description of the `payment_link` object. * `checkout_options` - You should specify the entire [CheckoutOptions](https://developer.squareup.com/reference/square/objects/CheckoutOptions) object in the update request. If you specify only specific fields, the update operation deletes fields not included in the request. * `pre_populated_data` - You only specify the [PrePopulatedData](https://developer.squareup.com/reference/square/objects/PrePopulatedData) fields that you want to update (or add). If a field you provided in the request doesn't exist, it gets added. You cannot update the `order_id`, `version`, `URL`, or `timestamp` fields. In the following example, you create a checkout page and then call [UpdatePaymentLink](https://developer.squareup.com/reference/square/checkout-api/update-payment-link) to apply the updates: 1. Create a quick pay checkout page for $125 for auto detailing: ```` The following is an example response: ```json { "payment_link": { "id": "OTKXE56AZGRBPAN4", "version": 1, "order_id": "m1rS3y9B95BWRTVJVs9K3iJD4yLZY", "checkout_options": { "allow_tipping": true, "custom_fields": [ { "title": "Special Instructions", "uid": "N3W4FIWOAGI7GMYV62MQ7MQ3" }, { "title": "Would you like to be on mailing list", "uid": "J7ETDA6UANCFB3UIXJP5AGL6" } ], "ask_for_shipping_address": true }, "pre_populated_data": { "buyer_email": "buyer@email.com", "buyer_phone_number": "+14155551212", "buyer_address": { "address_line_1": "1455 MARKET ST #600", "locality": "San Jose", "administrative_district_level_1": "CA", "postal_code": "94103", "country": "US" } }, "url": "https://sandbox.square.link/u/J1lWcEhY", "created_at": "2022-04-22T02:50:39Z" }, "related_resources": { "orders": [ { "id": "C0DMgui6YFmgyURVSRtxr4EShheZY", "location_id": "{{LOCATION_ID}}", "source": { "name": "Test Online Checkout Application" }, "line_items": [ { "uid": "8YX13D1U3jO7czP8JVrAR", "name": "Auto Detailing", "quantity": "1", "item_type": "ITEM", "base_price_money": { "amount": 12500, "currency": "USD" }, "variation_total_price_money": { "amount": 12500, "currency": "USD" }, "gross_sales_money": { "amount": 12500, "currency": "USD" }, "total_tax_money": { "amount": 0, "currency": "USD" }, "total_discount_money": { "amount": 0, "currency": "USD" }, "total_money": { "amount": 12500, "currency": "USD" } } ], "fulfillments": [ { "uid": "bBpNrxjdQxGQP16sTmdzi", "type": "DIGITAL", "state": "PROPOSED" } ], "net_amounts": { "total_money": { "amount": 12500, "currency": "USD" }, "tax_money": { "amount": 0, "currency": "USD" }, "discount_money": { "amount": 0, "currency": "USD" }, "tip_money": { "amount": 0, "currency": "USD" }, "service_charge_money": { "amount": 0, "currency": "USD" } }, "created_at": "2022-03-03T00:53:15.829Z", "updated_at": "2022-03-03T00:53:15.829Z", "state": "DRAFT", "version": 1, "total_money": { "amount": 12500, "currency": "USD" }, "total_tax_money": { "amount": 0, "currency": "USD" }, "total_discount_money": { "amount": 0, "currency": "USD" }, "total_tip_money": { "amount": 0, "currency": "USD" }, "total_service_charge_money": { "amount": 0, "currency": "USD" } } ] } } ``` 2. Update the following fields: * `description` - Add a description. * `checkout_options` - Specify a new `custom_fields` ("Very Special Instructions"). You verify that both the existing custom fields are deleted. * `pre_populated_data` - Specify only the `buyer_email` and `address_line_1` fields. You verify that all other fields are preserved. * `fields_to_clear` - Specify the field to remove `checkout_options.allow_tipping`. 3. Run the following `UpdatePaymentLink` request to apply the updates: ```` Note that `fields_to_clear` is an array where you provide a comma-separated list of fields to delete. For example: ```json "fields_to_clear": [ "checkout_options.allow_tipping", "pre_populated_data.buyer_address" ] ``` This deletes the `allow_tipping` field from `checkout_options` and the entire `buyer_address` from `pre_populated_data`. To delete the entire `checkout_options`, specify the following: ```json "fields_to_clear": [ "checkout_options ] ``` ## Retrieve payment links You can retrieve a specific payment link by ID or all the payment links in the account. The Checkout API provides the [RetrievePaymentLinks](https://developer.squareup.com/reference/square/checkout-api/update-payment-link) and [ListPaymentLinks](https://developer.squareup.com/reference/square/checkout-api/list-payment-links) endpoints. Try using [API Explorer](devtools/api-explorer) to test these endpoints. ## Delete a payment link You can use the [DeletePaymentLinks](https://developer.squareup.com/reference/square/checkout-api/delete-payment-link) endpoint to delete a payment link you created. ```` After receiving the request, the endpoint sets the corresponding order state to `CANCELED` and deletes the checkout link. ```json { "id": "KFLXPQROJALW56ZX", "cancelled_order_id": "6nJTzvMv7nA28JSKAgDpxlg3vgFZY" } ``` --- # Square Order Checkout > Source: https://developer.squareup.com/docs/checkout-api/square-order-checkout > Status: PUBLIC > Languages: All > Platforms: All Learn how to create a checkout for a Square order. **Applies to:** [Checkout API](checkout-api) | [Orders API](orders-api/what-it-does) {% subheading %}Learn how to create a checkout for a Square order.{% /subheading %} {% toc hide=true /%} ## Overview An application can generate a checkout page by including an `order` object in a [CreatePaymentLink](https://developer.squareup.com/reference/square/checkout-api/create-payment-link) request (see [Checkout API)](checkout-api). The `order` object should contain the same properties you would use in an Orders API `CreateOrder` request. Square automatically creates the order and generates the payment link in a single API call. The following example request includes an `order` object with four ad hoc line items for simplicity. {% tabset %} {% tab id="Example request" %} You can also use catalog items. Note that the `catalog_object_id` refers to the [CatalogItemVariation](https://developer.squareup.com/reference/square/objects/CatalogItemVariation) ID that’s associated with a particular line item in a transaction. For more information, see [Create Orders](orders-api/create-orders). ```` {% /tab %} {% tab id="Example response" %} After receiving the requests, Square creates an order, creates a checkout page, and returns the `order_id` and `URL` to the checkout page in the response. The following is an example response: ```json { "payment_link": { "id": "DT77WJMWL4Q72DL5", "version": 1, "description": "", "order_id": "giFLhtoDkFd29kkccWYHzW2Bh3LZY", "url": "https://sandbox.square.link/u/QKhT5kUc", "created_at": "2022-03-16T01:59:01Z" }, "related_resources": { "orders": [ { "id": "C0DMgui6YFmgyURVSRtxr4EShheZY", "location_id": "{{LOCATION_ID}}", "source": { "name": "Test Online Checkout Application" }, "line_items": [ { "uid": "8YX13D1U3jO7czP8JVrAR", "name": "Auto Detailing", "quantity": "1", "item_type": "ITEM", "base_price_money": { "amount": 12500, "currency": "USD" }, "variation_total_price_money": { "amount": 12500, "currency": "USD" }, "gross_sales_money": { "amount": 12500, "currency": "USD" }, "total_tax_money": { "amount": 0, "currency": "USD" }, "total_discount_money": { "amount": 0, "currency": "USD" }, "total_money": { "amount": 12500, "currency": "USD" } } ], "fulfillments": [ { "uid": "bBpNrxjdQxGQP16sTmdzi", "type": "DIGITAL", "state": "PROPOSED" } ], "net_amounts": { "total_money": { "amount": 12500, "currency": "USD" }, "tax_money": { "amount": 0, "currency": "USD" }, "discount_money": { "amount": 0, "currency": "USD" }, "tip_money": { "amount": 0, "currency": "USD" }, "service_charge_money": { "amount": 0, "currency": "USD" } }, "created_at": "2022-03-03T00:53:15.829Z", "updated_at": "2022-03-03T00:53:15.829Z", "state": "DRAFT", "version": 1, "total_money": { "amount": 12500, "currency": "USD" }, "total_tax_money": { "amount": 0, "currency": "USD" }, "total_discount_money": { "amount": 0, "currency": "USD" }, "total_tip_money": { "amount": 0, "currency": "USD" }, "total_service_charge_money": { "amount": 0, "currency": "USD" } } ] } } ``` {% /tab %} {% /tabset %} Applications can use the order ID to access the order details using the Orders API ([RetrieveOrder](https://developer.squareup.com/reference/square/orders-api/retrieve-order) endpoint). The application can send the payment link to the buyer. The buyer experience is identical to what is described in [Quick Pay Checkout](checkout-api/quick-pay-checkout). ## Finding a customer associated with a payment made for an order Orders created from a payment link don't get associated with a customer. These orders don't include a `customer_id` field when they're retrieved by using the Orders API. If a buyer completes a payment through the payment link that's associated with the order, you can find the buyer's `customer_id` in the `Payment.customer_id` field of the corresponding payment. Use the Payments API [GetPayment](https://developer.squareup.com/reference/square/payments-api/get-payment) endpoint to access the payment. ## See also * [Checkout API](checkout-api) * [Quick Pay Checkout](checkout-api/quick-pay-checkout) * [Subscription Plan Checkout](checkout-api/subscription-plan-checkout) * [Optional Checkout Configurations](checkout-api/optional-checkout-configurations) * [Manage Checkout](checkout-api/manage-checkout) --- # Guidelines and Limitations > Source: https://developer.squareup.com/docs/checkout-api/guidelines-and-limitations > Status: PUBLIC > Languages: All > Platforms: All Learn about Square Checkout API guidelines and limitations. **Applies to:** [Checkout API](checkout-api) {% subheading %}Learn about the guidelines and limitations for taking payments using the Checkout API.{% /subheading %} {% toc hide=true /%} The following guidelines apply to [Checkout API](checkout-api): * You cannot specify an existing order in a `CreatePaymentLink` request. You must include an order in the request body. After receiving the request, Square creates the order. * The Checkout API only supports subscription plans with one paid phase (or one free phase and one paid phase). * The Checkout API doesn't support `app_fee_money` as a checkout option when specifying the subscription plan ID for recurring payments. * The Checkout API is available in all regions where Square accepts payments. * Cash App Pay is only available for sellers based in the United States. * Afterpay payments: * Afterpay is only available for sellers based in the United States, Australia, Canada, and the United Kingdom. In the UK, Afterpay is known as Clearpay. * Not all sellers are eligible for Afterpay. Certain [business categories](https://squareup.com/us/en/legal/general/afterpay-merchant-terms) are prohibited from using Afterpay. * Afterpay can only be used for transactions in an eligible purchase range. The default ranges are based on the seller’s business type. They can consult their Afterpay account for more details. * Cash App Pay and Afterpay aren't supported for subscription payments. * Applications have the option to enable tipping on the checkout page. This option defaults to the [Square-wide default tip settings](https://squareup.com/help/us/en/article/5069-accept-tips-with-the-square-app) for the country in which the seller is based. For example, this defaults to a 15% auto-tip in the United States and Canada. * The payment buttons that appear on the checkout page depend on the buyers device. If the hosting device (for example, a browser on your computer or a mobile phone) supports Apple Pay or Google Pay, the checkout page shows the payment button that best suits that browser. For example, it shows the Apple Pay option when the buyer is using Safari. * A payment link can only be used to accept payment from a single buyer. * The Sandbox environment has the following limitations: * Afterpay, Cash App Pay, Google Pay, and Apple Pay payments aren't supported. You can only test with credit and debit card payments. * Creating a payment link with `app_fee_money` as a checkout option isn't supported. * The `CreatePaymentLink` endpoint sometimes generates an `INVALID_EMAIL_ADDRESS` error with the following message: “This account's email is linked to a current Weebly Account.” This happens when a seller has Weebly and Square accounts that use the same email address. To resolve this issue, the seller needs to log in to Weebly and follow the prompt in the UI to link their Weebly account with their existing Square account. After the seller links their Weebly and Square accounts, retry the request. ## See also * [Checkout API](checkout-api) --- # Terminal API > Source: https://developer.squareup.com/docs/terminal-api/overview > Status: PUBLIC > Languages: All > Platforms: All Learn how the Terminal API integrates a POS application with the Square Terminal. **Applies to:** [Terminal API](https://developer.squareup.com/reference/square/terminal-api) | [Devices API](terminal-api/terminal-device-monitoring) | [Payments API](payments-refunds) | [Refunds API](refunds-api/overview) {% subheading %}Use the Terminal API to connect a custom POS application with a Square Terminal.{% /subheading %} {% toc hide=true /%} ## Overview The Terminal API lets developers integrate Square in-person payments so that your custom Point of Sale (POS) application can take full advantage of [Square Terminal](https://squareup.com/shop/hardware/us/en/products/terminal-credit-card-machine) and its features. Square Terminal enables in-person payments with card chip and NFC payments, addresses EMV certification requirements, and ensures PCI compliance. ![A graphic showing a Square Terminal device.](https://images.ctfassets.net/1nw4q0oohfju/4IKek6es9YkUiNFEWI3DG4/dea74b8aa75718c7acd0d88415c44776/square-terminal-device.png) The Terminal API integrates with a POS application to send and receive API calls. Depending on your seller's use case, you might need to integrate your POS application with the [Mobile Payments SDK](mobile-payments-sdk) and connect to a [Square Reader](https://squareup.com/shop/hardware/products/chip-credit-card-reader-with-nfc) or [Square Stand](https://squareup.com/hardware/stand). ## How Square Terminal and a POS application integrate The integration works with a checkout flow as follows: 1. Pair a Square Terminal and a POS application using the [Devices API](https://developer.squareup.com/reference/square/devices-api). To complete the pairing, follow the steps in [POS Application Pairing with Square Terminal](terminal-api/pos-integration). 2. Send requests for payment checkouts with the Terminal API. Learn how the checkout process works in the next section. ## Process a payment with a Square Terminal A POS application sends a request to check out a buyer on a paired Square Terminal by using the Terminal API. The Terminal checkout request goes to Square, which forwards it to the paired Square Terminal. The request carries the total amount to collect and the expected screen behavior of the Square Terminal payment. Use a Terminal API checkout request to set Square Terminal behavior per checkout request. Customizable behaviors include: * Skipping the receipt screen. * Showing a separate tip input screen before getting a buyer's signature. * Allowing custom tip amounts. * Skipping the signature screen. The Terminal API lets a POS application set payment completion options per checkout. When the buyer completes the checkout on the Square Terminal, the POS application can be notified by a Square webhook. If the POS application isn't listening for webhook notifications, it can get the checkout result using the Terminal API. A POS application can get a history of checkout requests and results filtered by Terminal device ID, time range, and checkout status. {% aside type="important" %} * Checkouts in the `COMPLETED` or `CANCELED` state are deleted after 30 days. The [Payment](https://developer.squareup.com/reference/square/objects/payment) object serves as your permanent record. * Square Terminals don't support connecting to external printers when the Square Terminal is paired. {% /aside %} To get started with sending Terminal checkout requests, see [Take Payments with the Terminal API](terminal-api/square-terminal-payments). ## Supported payment types The Terminal API supports payment cards and NFC payments such as Apple Pay and Google Pay. Payment cards include Square gift cards, credit cards, debit cards, and prepaid debit cards. In Japan, PayPay QR code payments and e-money card payments are also accepted. For more information about payment card support by region, see [Card present for in-person payment](payment-card-support-by-country#card-present-for-in-person-payment). The Terminal API doesn't support splitting a checkout into multiple payments for a single checkout request. Instead, you must use the POS application to split the payment. You can also create a partial payment checkout request with a gift card. If the gift card doesn't cover the full payment amount, you can create a second checkout request to pay the remaining balance. Square Terminal doesn't support cash payments. Instead, use the Payments API to take the cash payment and record the payment using [CreatePayment](https://developer.squareup.com/reference/square/payments-api/create-payment). For more information, see [Take Cash Payments](payments-api/take-payments/cash-payments). ## Payment feature availability The following payment options integrate with Terminal checkouts. {% aside type="important" %} Some of these payment features are currently available in the US, CA, AU, GB, and JP. {% /aside %} {% table %} * Payment option * Description --- * Application fees * Collect application fees from payments. --- * Delayed capture * Set up delayed capture of payments. This includes actions to be applied to delayed capture payments after the delay duration time has elapsed. --- * Statement description identifiers * Add a statement description identifier to the checkout request. The identifier can contain a customer ID or an order object ID. --- * Team member ID * Add a team member ID at checkout. --- * Tip money * Collect tips as money at checkout. {% /table %} For more information about adding these payment options to a Terminal checkout request, see [Additional Payment and Checkout Features](terminal-api/additional-payment-checkout-features). ### Processing split tender payments and payments with partial authorization For a payment that involves split tender, the seller creates multiple Terminal checkout requests that address each part of the total payment amount. The buyer can then settle the portions of the total payment with different payment methods. During a partial authorization, the seller creates a Terminal checkout request for the total payment amount, and includes a payment method where the buyer's payment method has insufficient funds (for example, a gift card with an insufficient balance). ## Testing Terminal checkouts in the Square Sandbox You can test your Terminal API integration in the Square Sandbox without Square Terminal hardware interactions. Use these [Sandbox test values](devtools/sandbox/testing#terminal-api-checkouts) to test your integration against successful and failed Terminal checkout requests. When using a Sandbox device ID, you can test the Terminal checkout process and verify the checkout status change. In production, you should use Terminal API webhooks to get a checkout response notification because there can be a significant delay between requesting a checkout and the completion of the checkout. To learn more about subscribing to webhooks, see [Subscribe to Event Notifications](webhooks-api/subscribe-to-events). ## Refund Square Terminal Interac payments For Canadian sellers who want to refund payments on Interac cards, use the [Terminal API](https://developer.squareup.com/reference/square/terminal-api) to request an in-person refund on a Square Terminal. To learn more, see [Refund Interac Payments](terminal-api/square-terminal-refunds). {% aside type="tip" %} Refunds for most Terminal payments use the Refunds API. Terminal API refunds should only be used when the payment card requires it. The [Payment](https://developer.squareup.com/reference/square/objects/payment) record includes a `true` value in the [refund_requires_card_presence](https://developer.squareup.com/reference/square/objects/CardPaymentDetails#definition__property-refund_requires_card_presence) field to identify when the Terminal API refund is to be used. {% /aside %} ## Terminal actions The Terminal API provides additional ways for a Square Terminal and your POS application to interact, beyond accepting payments and refunds. These interactions are known as Terminal actions, which allow you to build non-payment-related workflows for the seller such as saving a card on file or checking the status of a Square Terminal. {% aside type="important" %} Terminal actions are currently in Beta. {% /aside %} For more information, see [Manage Terminal Actions](terminal-api/advanced-features). ## Listen for Terminal API webhooks A webhook is a subscription that notifies you when a Square event occurs. For more information, see [Square Webhooks](webhooks/overview). The Terminal API uses the following webhook events: | Event | Permission {% width="150px" %} | Description | |---------|----------|-----------------------| |[terminal.checkout.created](https://developer.squareup.com/reference/square/terminal-api/webhooks/terminal.checkout.created)|`PAYMENTS_READ`|A `TerminalCheckout` request was created. |[terminal.checkout.updated](https://developer.squareup.com/reference/square/terminal-api/webhooks/terminal.checkout.updated)|`PAYMENTS_READ`|A `TerminalCheckout` status was changed. | |[terminal.refund.created](https://developer.squareup.com/reference/square/terminal-api/webhooks/terminal.refund.created)|`PAYMENTS_READ`|A `TerminalRefund` request was created. |[terminal.refund.updated](https://developer.squareup.com/reference/square/terminal-api/webhooks/terminal.refund.updated)|`PAYMENTS_READ`|A `TerminalRefund` status was changed. | |[terminal.action.created](https://developer.squareup.com/reference/square/terminal-api/webhooks/terminal.action.created)|`PAYMENTS_READ`|A `TerminalAction` request was created. |[terminal.action.updated](https://developer.squareup.com/reference/square/terminal-api/webhooks/terminal.action.updated)|`PAYMENTS_READ`|A `TerminalAction` status was updated. For a complete list of webhook events, see [Webhook Events Reference](webhooks/v2webhook-events-tech-ref). Your POS application should monitor the state of any Terminal checkout requests by subscribing to the Terminal API webhook events. ## See also * [Video: Getting Started with the Terminal API](https://www.youtube.com/embed/kT3--cvQrsI) --- # Take One-Off Payments > Source: https://developer.squareup.com/docs/terminal-api/square-terminal-payments > Status: PUBLIC > Languages: All > Platforms: All Learn how to take a one-off payment with the Square Terminal API and Square Terminal. **Applies to:** [Terminal API](terminal-api/overview) | [Payments API](payments-refunds) | [Devices API](terminal-api/terminal-device-monitoring) | [Orders API](orders-api/what-it-does) {% subheading %}Learn how to take an one-off payment with the Terminal API, Square Terminal, and a POS application.{% /subheading %} {% toc hide=true /%} ## Overview This guide assumes that you obtained a device code, signed in to one or more Square Terminals (depending on the seller's number of Square Terminals in the fleet), and paired the Square Terminal with a POS application. If not, these steps are covered in the Terminal API [Quickstart](terminal-api/quickstart). For more information about how the POS client pairs with the Square Terminal, see [POS Application Pairing with Square Terminal.](terminal-api/pos-integration) To take a payment with a paired [Square Terminal](https://squareup.com/shop/hardware/us/en/products/terminal-credit-card-machine), perform the following steps: 1. Request a Square Terminal checkout for payment from the buyer. 2. Complete the checkout. 3. Verify a payment. 4. Search for Terminal checkout requests. 5. Cancel a checkout request, when applicable. ## Requirements and limitations * To add [payment and checkout features in a Terminal checkout request](terminal-api/additional-payment-checkout-features), the Square Terminal software must be on the latest version and your application should use the latest Square API release version. To view the Square Terminal version and verify that your version supports a given checkout feature or device option: 1. On the Square Terminal, swipe left, and then tap **Settings**. 2. Tap **Hardware**, tap **General**, and then tap **About Terminal**. 3. Under Terminal, view the **OS Version**. * Applications must have the following OAuth permissions: `PAYMENTS_WRITE` to process payments and `PAYMENTS_READ` to retrieve payments. * You cannot take cash payments with the Terminal API. * Application fees require calling `CreateTerminalCheckout` with an OAuth token and the `PAYMENTS_WRITE_ADDITIONAL_RECIPIENTS` permission, in addition to the existing required OAuth permissions. For more information, see [Terminal](oauth-api/square-permissions#terminal). * Using [CancelTerminalCheckout](https://developer.squareup.com/reference/square/terminal-api/cancel-terminal-checkout) to cancel an e-money payment after getting an error on the Square Terminal is currently not supported. To cancel an e-money payment, the buyer needs to manually cancel the payment on the Square Terminal. The following procedure describes the checkout process. ## 1. Request a Square Terminal checkout Your POS application must specify the total amount to be paid by the buyer (including any sales tax or other fees) when requesting a checkout. Optionally, your POS application can require the Square Terminal to prompt the buyer to add a tip amount, show a receipt screen, or show a signature screen. {% aside type="info" %} A Square Terminal accepts Apple Pay, Google Pay, Square gift cards, and prepaid debit cards. However, for US-based sellers, if the balance of a gift card or prepaid card isn't sufficient to pay for a transaction, the seller can delay the capture of the initial payment and request additional transactions to cover the remaining balance. {% /aside %} ### Payment flow To take a payment from a buyer, the Square Terminal needs to have the total purchase amount and currency. For example, a Square Terminal can be told to accept $100 (USD). To process this request: 1. The POS application makes a request to Square using the Terminal API to send the payment request to a paired Square Terminal, identified by the device ID. 2. The payment checkout process starts, which involves enabling the POS client to send a request to checkout a buyer, accept the payment, and complete the checkout. {% aside type="important" %} - In a production environment, you must use the `device_id` returned from the [Devices API](https://developer.squareup.com/reference/square/devices-api). In the checkout request body for `device_id`, you can also enter the Square Terminal's serial number, which is located on the back of the Square Terminal. You cannot use a device code generated from the Square Dashboard; however, you can view the device ID in the Square Dashboard after the Devices API has generated it. - If the `collect_signature` option is set to `true` in the [CreateTerminalCheckout](https://developer.squareup.com/reference/square/terminal-api/create-terminal-checkout) endpoint under `device_options`, the payment flow requests the buyer's signature for the payment. {% /aside %} ## 2. Verify a payment When the status of a Terminal checkout object is updated, webhook notifications are sent to the endpoint that is registered for a POS application. To get the notifications, be sure that your Square application is updated in the Developer Console. The webhook notifications are as follows: * `terminal.checkout.created` * `terminal.checkout.updated` When a Terminal checkout object is created, canceled, or completed, a full copy of the object is sent to your application at your webhook URL. The object provides `status` and `payment_ids` fields. When the checkout completes, a [Payment](https://developer.squareup.com/reference/square/objects/Payment) object is created to record the details of the charge. The payment status can be `COMPLETED`, `CANCELED`, or `FAILED`. A completed payment is normally for the full amount of the purchase but must be verified against the amount expected by your POS application. A completed payment for the full purchase amount means that the checkout is complete and the POS payment window can be closed. When a checkout is completed, it has one or more `payment_ids` listed on it. These are confirmations about how much money was actually collected, if any. {% aside type="important" %} A `COMPLETED` checkout might not have collected the exact total you requested (for example, when a tip is added to the payment). You should always check the `Payment` object to determine the actual amount collected. {% /aside %} Get a completed checkout to find its `payment_ids`, as shown in the following example: ```` The following is returned: ```json { "checkout": { "id": "xv4gh2KBCmlqO", "amount_money": { "amount": 100, "currency": "USD" }, ...snip... "status": "COMPLETED", "payment_ids": [ "{PAYMENT_ID}" ], } } ``` ## 3. Search for Terminal checkout requests Search for existing Terminal checkout requests filtered by the: * Device ID. * Time and date range that the Terminal checkout was requested. * Terminal checkout status. Search results are sorted and paginated and allow for a custom page size. Search for existing requests if you need to verify completed Terminal checkouts and if you need to complete pending checkout requests. The following example requests an additional page of completed Terminal checkout requests sent to the Square Terminal with ID `R5WNWB5BKNG9R`, created on or after noon UTC/GMT, and started on 03-20-2020. Results are limited to 10 Terminal checkouts per result page. To learn more about how to work with cursors, see [Pagination](working-with-apis/pagination). ```` ## 4. Cancel a Terminal checkout A Terminal checkout request can be canceled from the POS application while the status of the checkout is `PENDING` or `IN_PROGRESS`. To cancel a Terminal checkout, POST a request to the [CancelTerminalCheckout](https://developer.squareup.com/reference/square/terminal-api/cancel-terminal-checkout) endpoint. Canceling a `PENDING` Terminal checkout causes the Terminal checkout to be `CANCELED`. `IN_PROGRESS` Terminal checkouts transition to `CANCEL_REQUESTED` and, if the buyer hasn't yet completed the transaction, transition to `CANCELED`. If the transaction is already complete, the checkout request becomes `COMPLETED`. In this case, the seller cannot trigger a refund for the [Payment](https://developer.squareup.com/reference/square/objects/payment) after the transaction is completed. In this example, the seller cancels a `PENDING` Terminal request from the POS application: ```` If the request is successful, the response provides the Terminal checkout object in its new state. ```json { "checkout": { "id": "{CHECKOUT_ID}", "amount_money": { "amount": 100, "currency": "USD" }, "device_options": { "device_id": "432532423`", "tip_settings": { "allow_tipping": false }, "skip_receipt_screen": true }, "status": "CANCELED", "created_at": "2020-04-06T21:37:08.516Z", "updated_at": "2020-04-06T21:37:08.516Z", "app_id": "sq0ids-o38CJ3JfIrKJ_xn10mRhFg" } } ``` ### Errors with canceling an e-money payment Using [CancelTerminalCheckout](https://developer.squareup.com/reference/square/terminal-api/cancel-terminal-checkout) to cancel an e-money payment after getting an error on the Square Terminal is currently not supported. If the Square Terminal gets an error, the buyer needs to close the error message window and then tap the navigation button back to the checkout screen to cancel the checkout. The checkout request has either the `IN_PROGRESS` or `PENDING` status when this error occurs. ### Checkout request timeout cancellation The Terminal API server sets a Terminal checkout to `CANCELED` if a checkout isn't completed prior to the `created_at` time. A Terminal might be completing a payment at the threshold of the timeout. When this happens, the Terminal API server might set the `CANCELED` state on the checkout while the Terminal device is completing it. In this case, the checkout might become `CANCELED` prior to becoming `COMPLETED`. If you subscribe to Terminal API webhooks, any confusion can be avoided because you're receiving updates with each state change. --- # In-App Payments SDK Quickstart > Source: https://developer.squareup.com/docs/in-app-payments-sdk/quick-start > Status: PUBLIC > Languages: All > Platforms: All Learn how to set up an application that embeds the Square In-App Payments SDK. **Applies to:** [In-App Payments SDK - Android](https://developer.squareup.com/docs/api/in-app-payment/android/) | [In-App Payments SDK - iOS](https://developer.squareup.com/docs/api/in-app-payment/ios) | [Payments API](payments-refunds) {% subheading %}Learn how to set up an application that embeds the Square In-App Payments SDK.{% /subheading %} {% toc hide=true /%} ## Overview The mobile application in this Quickstart allows buyers to purchase a cookie and pay for it using a credit card. The application integrates Square-provided SDKs as follows for taking payments: * **Application client** - The mobile client integrates the Square In-App Payments SDK to generate a payment token from the buyer-provided credit card. The Square In-App Payments SDK is supported on devices running Android 9 and later (API 28) and iOS 10 and later. The Quickstart provides sample code for both. You choose one and follow the instructions. The Flutter and React Native plugins for the In-App Payments SDK provides interfaces that call the native SDK implementations for Android and iOS. For more information, see [Flutter Plugin](in-app-payments-sdk/flutter) and [React Native Plugin](in-app-payments-sdk/react-native). * **Application server** - The mobile backend server calls the Square [Payments API](https://developer.squareup.com/reference/square/payments-api) to charge the payment token generated by the In-App Payments SDK. Square provides several wrapper SDK libraries to make the server-side Square API calls (see [Square SDKs](sdks)). The server in this example uses the Node.js SDK. Follow the instructions to test the end-to-end experience. ## Get your credentials The Quickstart uses the Square Sandbox where you can use a Square-provided fictitious credit card to pay for the cookie and test the end-to-end experience. Complete the following steps to get your Sandbox credentials (access token and application ID) and a location ID, which is required when taking a payment: 1. Sign in to the [Developer Console](https://developer.squareup.com/apps). 2. Choose an application. If you don't have an application, see [Get Started](square-get-started) for steps to create a Square application. 4. At the top of the page, choose **Sandbox** to show the Sandbox credentials. 5. In the left pane, choose **Credentials**, and then copy the Sandbox application ID and Sandbox access token. 6. In the left pane, choose **Locations**, and then copy the **Default Test Account** location ID. ![An animation showing the process for getting application credentials and location ID in the Developer Console.](//images.ctfassets.net/1nw4q0oohfju/4VD8YmCpVXhASu4yHCgS6x/2fa0d4a19009b17b92aaef6ff1823020/get-app-credentials-developer-dashboard.gif) ## See also * [Download, Configure, and Run the Client Sample](in-app-payments-sdk/quick-start/generate-token) * [Deploy the Server](in-app-payments-sdk/quick-start/deploy-server-backend) --- # Download, Configure, and Run the Client Sample > Source: https://developer.squareup.com/docs/in-app-payments-sdk/quick-start/generate-token > Status: PUBLIC > Languages: All > Platforms: All Configure a Quickstart example client that embeds the In-App Payments SDK. **Applies to:** [In-App Payments SDK - Android](https://developer.squareup.com/docs/api/in-app-payment/android/) | [In-App Payments SDK - iOS](https://developer.squareup.com/docs/api/in-app-payment/ios) | [Payments API](payments-refunds) {% subheading %}Learn how to configure a Quickstart example client that embeds the In-App Payments SDK.{% /subheading %} {% toc hide=true /%} ## Overview Download a Square-provided sample application. You can choose either the Android or iOS sample application. You need to update the sample application code by providing your Square account information (Square application ID and location ID). You then run the application, buy a cookie, and specify a credit card to pay for it. The card you specify is a Square-provided fictitious credit card used for Sandbox testing. This credit card isn't charged. The In-App Payments SDK (embedded in the application code) uses the card information and generates a payment token. The next section explains how to charge the payment token using server-side Square [Payments API](https://developer.squareup.com/reference/square/payments-api). Choose the Android or iOS sample application and follow the steps to download and test the application. ## Sample Java (Android) application 1. Clone the application from the [In-App Payments SDK Sample Android Application](https://github.com/square/in-app-payments-android-quickstart). 2. In Android Studio, open the application. 3. In in-app-payments-android-quickstart/app/src/main folder, open AndroidManifest.xml and replace the value for `sqip.SQUARE_APPLICATION_ID` with your Square Sandbox application ID (see [Get your credentials).](in-app-payments-sdk/quick-start#get-your-credentials) ```xml {"id": "inapppayments-quickstart-step2.1", "": true} ``` 4. In app/src/main/java/com/example/supercookie, open ConfigHelper.java and replace the value for `GOOGLE_PAY_MERCHANT_ID` in line 13 with your location ID (see [Get your credentials)](in-app-payments-sdk/quick-start#get-your-credentials). ```java {"id": "inapppayments-quickstart-step2.2", "": true} public static final String GOOGLE_PAY_MERCHANT_ID = "REPLACE_ME"; ``` 5. Test the client. The application is preconfigured with the following three UI screens: ![A graphic showing the buyer an Android input fragment in the second screen of the Super Cookie Quickstart application.](https://images.ctfassets.net/1nw4q0oohfju/787C3BZmwYvF7S8U4N1PbC/24fbf0ed18adf2eec2559087a2f01b7a/super-cookie-app-android-studio.png) The application allows you to purchase a cookie for $1. You pay for the cookie using a fictitious credit card that Square provides for Sandbox testing. The In-App Payments SDK uses the credit card information to generate a payment token. After you enter the credit card information in the card entry form, the In-App Payments SDK generates the payment token. For more information, see the `paymentAuthorizationViewController` function in the ExampleViewController.swift file. Complete the following steps to buy a cookie and pay for it with a credit card: 1. Run the application, and then choose **Buy**. 2. Choose **Pay with card**, and then enter the following information: * Card number: 4111 1111 1111 1111 * Expiry date: any date in the future * CVV: any three-digit number * ZIP: any five-digit number In response, the In-App Payments SDK generates a payment token (for example, `cnon:CBASENLkTNuEF6eUTZ8dZlsDsLo`. You can find the generated payment token in the Android Studio Logcat. ## Sample Swift (iOS) application 1. Download the [In-App Payments SDK Sample iOS Application](https://github.com/square/in-app-payments-ios-quickstart). 2. Open InAppPaymentsSample.xcworkspace. 3. In the InAppPaymentsSample project, open the **General** tab for your application target and change the **Bundle identifier** to a unique string. You should append `.YOUR_NAME` to the existing ID. 4. Open Constants.swift and update the `SQUARE_LOCATION_ID` and `APPLICATION_ID` variables with your Sandbox location ID and application ID values, respectively. ```Swift static let SQUARE_LOCATION_ID: String = "<# REPLACE_ME #>" static let APPLICATION_ID: String = "<# REPLACE_ME #>" ``` 5. Test the client. The application is preconfigured with the following three UI screens: ![A graphic showing the buyer a Swift input fragment in the second screen of the Super Cookie Quickstart application.](https://images.ctfassets.net/1nw4q0oohfju/3XHWUBwTdbx4TES6NxliAV/731ca42f967cbfe817a57ad382e3a930/seller-dashboard-view-transaction.gif) The application allows you to purchase a cookie for $1. fictitious credit card that Square provides for Sandbox testing. The In-App Payments SDK uses the card information to generate a payment token. After you enter the credit card information in the card entry form, the In-App Payments SDK generates the payment token. For more information, see the `paymentAuthorizationViewController` function in the ExampleViewController.swift. Complete the following steps to buy a cookie and pay for it with a credit card: 1. Run the application, and then choose **Buy**. 2. Choose **Pay with card**, and then enter the following information: * Card number: 4111 1111 1111 1111 * Expiry date: any date in the future * CVV: any three-digit number * ZIP: any five-digit number In response, the In-App Payments SDK generates a payment token (for example, `cnon:CBASENLkTNuEF6eUTZ8dZlsDsLo)`. You can find the generated payment token in the Xcode console. --- # Deploy the Server > Source: https://developer.squareup.com/docs/in-app-payments-sdk/quick-start/deploy-server-backend > Status: PUBLIC > Languages: All > Platforms: All Configure a test server for the Square In-App Payments SDK Quickstart. **Applies to:** [In-App Payments SDK - Android](https://developer.squareup.com/docs/api/in-app-payment/android/) | [In-App Payments SDK - iOS](https://developer.squareup.com/docs/api/in-app-payment/ios) | [Payments API](payments-refunds) {% subheading %}Configure a test server for the In-App Payments SDK Quickstart.{% /subheading %} {% toc hide=true /%} ## Overview To charge the payment token generated by the In-App Payments SDK, client applications need to call the server [Payments API](https://developer.squareup.com/reference/square/payments-api) ([CreatePayment](https://developer.squareup.com/reference/square/payments-api/create-payment) endpoint). For quick testing, you can use cURL to send a `CreatePayment` request. You can also use API Explorer to test the call. ```` After receiving the request, Square charges the credit card represented by the payment token, specified as `source_id` in the request. In the response, the Payments API returns the `Payment` object created from this transaction. In a production environment, however, the seller uses their server to make a Payments API call. This Quickstart provides instructions to deploy a Heroku server. You can optionally follow steps to set up the server and test the end-to-end application experience. ## 1. Deploy a Heroku server 1. Make sure you have your Sandbox access token (see [Get your credentials)](in-app-payments-sdk/quick-start#get-your-credentials). You add this access token to the server code so that the server can send authenticated requests to Square. 2. Open the [In-App Payments Server Quickstart](https://github.com/square/in-app-payments-server-quickstart) project and follow the instructions in the README.md file. These instructions describe how to set up a Heroku application and deploy the provided server code. This server makes the `CreatePayment` call. See the index.js file in the server code. ## 2. Connect the application client to the server Depending on the platform you're using, follow one of these steps to connect the sample application to the Heroku server: * **Java (Android) client** - In the Android project, open the app\java\com.example.supercookie.ConfigHelper.java file and update the `CHARGE_SERVER_HOST` value from the following to the URL of the Heroku application location (for example, `.herokuapp.com`). Don't include "https://". You can find this location on the Heroku application **Settings** tab. ```java private static final String CHARGE_SERVER_HOST = "REPLACE_ME"; ``` * **Swift (iOS) client** - In the Xcode project, open the InAppPaymentsSample/Constants/Constants.swift file and update the `CHARGE_SERVER_HOST` value from the following to the URL of the Heroku application location (for example, `https://.herokuapp.com`). You can find this location on the Heroku application **Settings** tab. ```swift static let CHARGE_SERVER_HOST: String = "REPLACE_ME" ``` ## 3. Test the application end to end 1. Run the application. In this end-to-end testing, after you buy a cookie and provide credit card information, the In-App Payments SDK generates a payment token. This token is then passed to the backend server. The server sends a `CreatePayment` request to the Square Payments API by providing the payment token generated by the SDK. Square then charges the credit card represented by the payment token and creates a `Payment` object. 2. In the Heroku application, view logs to see the created `Payment` object. You can use the payment ID to retrieve the payment in the next section. If the Heroku log shows only a partial payment object (the payment ID isn't visible), you might see the ID of the order that was created. You can use this ID to first retrieve the order that was created. The `Order.tender` gives the ID of the created payment. You can then use this ID to retrieve the `Payment` object. ## 4. Verify the payment You can call the Payments API (`RetrievePayment` endpoint) to retrieve the payment or view the payment in the Square Dashboard. 1. Confirm the payment by calling the `RetrievePayment` endpoint (Payments API). Update the code by providing your Sandbox access token and payment ID. ```` 2. Confirm the payment in the Square Dashboard. You can also see the payment in the Sandbox Square Dashboard for the default test account. 1. Sign in to the [Developer Console](https://developer.squareup.com/apps). 2. Under **Sandbox Test Accounts**, choose the **Open** button for the default test account to open the Sandbox Square Dashboard. 3. In the Sandbox Square Dashboard, choose **Transactions** to show the list of payments on this test account. {% aside type="success" %} You've now completed a production-style credit card transaction with the In-App Payments SDK. {% /aside %} --- # Partial Payment Authorizations > Source: https://developer.squareup.com/docs/payments-api/take-payments/card-payments/partial-payments-with-gift-cards > Status: PUBLIC > Languages: All > Platforms: All Learn how partial payments work when a gift card is a payment source in a CreatePayment request. **Uses:** [Payments API](payments-refunds) | [Orders API](orders-api/what-it-does) | [Web Payments SDK](web-payments/overview) {% subheading %}Learn how to authorize partial payments with the Square APIs and SDKs.{% /subheading %} {% toc hide=true /%} ## Overview A partial payment is a payment applied to an order that is less than the total amount due. For example, a customer might apply a $10 [external payment](payments-api/take-payments/external-payments) (such as a check or a third-party gift card) to a $50 order. The order cannot be completed until the customer presents an additional payment method to cover the outstanding balance. {% aside type="important" %} Some card networks might not support partial payments. Applications should handle errors accordingly. {% /aside %} You can use the Payments API and Orders API with the Square SDKs to authorize partial payments. The following sections explain how to * Record an external non-Square payment as a partial payment for an order. * Handle errors for partial payments. This topic applies to any seller that handles partial payments, including coffee shops, hair salons, boutiques, and more. {% aside type="info" %} This guide does NOT discuss Square gift cards. To learn how to accept Square gift cards for a partial payment, see [Take Partial Payments with Square Gift Cards](web-payments/gift-card-walkthrough). {% /aside %} ## Requirements * You've [created a Square account and application](get-started/create-account-and-application). * You've installed the client-side SDK of your choice ([Web Payments SDK](https://developer.squareup.com/reference/sdks/web/payments), [In-App Payments SDK \- iOS](sdk/in-app-payment/ios), or [In-App Payments SDK \- Android](sdk/in-app-payment/android)). * There is at least one item in the seller's [catalog](catalog-api/design-a-catalog). * To test the example code, you can find your production personal access token, application ID, and location ID in the [Developer Console](https://app.squareup.com/login?app=developer). {% aside type="important" %} Testing partial payments is not supported in Sandbox, so the example code in this guide calls production endpoints. {% /aside %} {% aside type="warning" %} Don't deploy an application into production that contains your personal access token. For a secure authorization implementation in production, implement OAuth instead of using a personal access token. To handle partial payments, your application needs `PAYMENTS_WRITE`, `ORDERS_WRITE`, and `ORDERS_READ` permissions. For more information about using OAuth with Square, see [OAuth API](oauth-api/overview). {% /aside %} ## Record an external non-Square payment as a partial payment for an order An [external payment](https://developer.squareup.com/docs/payments-api/take-payments/external-payments) is a form of tender issued by an entity outside of Square. Checks and third-party gift cards are some common types of external payments. Square assumes that any external payments are deposited directly to a seller's external bank account. External payments aren't credited to a seller's Square balance. However, you can indicate when an external payment is applied to part of an order. For example, to pay for a $20.00 lunch takeout order at a Square seller, a customer presents a $10.00 gift card issued by a parent restaurant group. The parent restaurant group owns the restaurant, but doesn't have a Square account associated with this establishment. In this case, you create two payments to attach to the Square order, noting that one of them is `EXTERNAL`. The following steps detail how to authorize an external payment as a partial payment for a Square order. The example code was written to complement the [Web Payments Quickstart](web-payments/quickstart), so you might find it useful to consult the [example repository](https://github.com/square/web-payments-quickstart/tree/main). #### 1. Send a CreateOrder request from the server. When a customer finishes adding items to their cart and proceeds to check out on the client, pass their selections to the server so that you can send a [CreateOrder](https://developer.squareup.com/reference/square/orders-api/create-order) request. In addition to authentication credentials and an `idempotency_key`, you need the following information for the request: * `location_id` - A unique identifier for the physical place of business that fulfills the order. * `customer_id` - A unique identifier for the customer that was returned in a request to [CreateCustomer](https://developer.squareup.com/reference/square/customers-api/create-customer). * `line_items` - An array of information about the products that the customer is purchasing, as they relate to your catalog. For more information about how to create more complex orders, see [Create Orders](orders-api/create-orders). {% tabset %} {% tab id="Request" %} The following example `CreateOrder` request creates an Order for a deluxe sandwich. In the corresponding example catalog, a deluxe sandwich has the `catalog_object_id` of `U2LA7CNNKPXMMSBVDY4JCZOO`, and costs $20. ```` {% /tab %} {% tab id="Response" %} On success, Square responds with an Order object that takes the following shape. For comprehensive descriptions of all the returned fields, see [Order](https://developer.squareup.com/reference/square/objects/Order) in the API Reference. ```json { "order": { "id": "KNJvxfeRCWRvNKv59vsCUBnkr2DZY", "location_id": "L95QGYFYAJY3J", "line_items": [ { "uid": "Rxt5v0Ktd0IjaXm2iN0lBD", "catalog_object_id": "U2LA7CNNKPXMMSBVDY4JCZOO", "catalog_version": 1730238005989, "quantity": "1", "name": "Sandwich", "variation_name": "Deluxe", "base_price_money": { "amount": 2000, "currency": "USD" }, "gross_sales_money": { "amount": 2000, "currency": "USD" }, "total_tax_money": { "amount": 0, "currency": "USD" }, "total_discount_money": { "amount": 0, "currency": "USD" }, "total_money": { "amount": 2000, "currency": "USD" }, "variation_total_price_money": { "amount": 2000, "currency": "USD" }, "item_type": "ITEM", "total_service_charge_money": { "amount": 0, "currency": "USD" } } ], "created_at": "2025-01-28T16:14:58.334Z", "updated_at": "2025-01-28T16:14:58.334Z", "state": "OPEN", "version": 1, "total_tax_money": { "amount": 0, "currency": "USD" }, "total_discount_money": { "amount": 0, "currency": "USD" }, "total_tip_money": { "amount": 0, "currency": "USD" }, "total_money": { "amount": 2000, "currency": "USD" }, "total_service_charge_money": { "amount": 0, "currency": "USD" }, "net_amounts": { "total_money": { "amount": 2000, "currency": "USD" }, "tax_money": { "amount": 0, "currency": "USD" }, "discount_money": { "amount": 0, "currency": "USD" }, "tip_money": { "amount": 0, "currency": "USD" }, "service_charge_money": { "amount": 0, "currency": "USD" } }, "source": { "name": "Partial Payments Example Application" }, "customer_id": "customer123", "net_amount_due_money": { "amount": 2000, "currency": "USD" } } } ``` {% /tab %} {% /tabset %} Store the returned ID for the `Order`. You need it to create a `Payment` in the next step. #### 2. From the server, create a Payment with source_id set to EXTERNAL for the Order. In this example, a customer presents a $10.00 non-Square gift card for a parent restaurant company. In addition to authentication credentials and an `idempotency_key`, you need to set the following fields in the [CreatePayment](https://developer.squareup.com/reference/square/payments-api/create-payment) request body: * `order_id` - The ID for the `Order` object that you created in step 1. * `source_id` - Always set to `EXTERNAL` for non-Square gift cards. * `external_details` - An object that details information about the non-Square gift card, including the `type` and `source`. `type` is always `OTHER_GIFT_CARD` for non-Square gift cards. * `autocomplete` - Must be `false`. If there's an outstanding balance, additional payments need to be created and added to the order. * `amount_money` - The payment amount. {% tabset %} {% tab id="Request" %} In the following example, the `order_id` corresponds to an `Order` for one deluxe sandwich, with a `total_money` value of `2000`. The `source_id` is `EXTERNAL`, representing the non-Square gift card. The `amount_money` records the $10.00 on the external card (`1000`). ```` {% /tab %} {% tab id="Response" %} On success, Square responds with a `Payment` object like the following example, with a `total_money` value of `1000` representing the $10.00 gift card. For comprehensive descriptions of all the returned fields, see [Payment](https://developer.squareup.com/reference/square/objects/Payment) in the API Reference. ```json { "payment": { "id": "g8Mv28ShmMzYftlUcdwpJSvhxVdAB", "created_at": "2025-01-30T20:05:57.113Z", "updated_at": "2025-01-30T20:05:57.166Z", "amount_money": { "amount": 1000, "currency": "USD" }, "status": "APPROVED", "source_type": "EXTERNAL", "location_id": "L95QGYFYAJY3J", "order_id": "KNJvxfeRCWRvNKv59vsCUBnkr2DZY", "total_money": { "amount": 1000, "currency": "USD" }, "capabilities": [ "EDIT_AMOUNT_UP", "EDIT_AMOUNT_DOWN", "EDIT_TIP_AMOUNT_UP", "EDIT_TIP_AMOUNT_DOWN" ], "external_details": { "type": "OTHER_GIFT_CARD", "source": "Parent Corp Gift Card" }, "receipt_number": "ao2z", "application_details": { "square_product": "ECOMMERCE_API", "application_id": "sq0idp-uV5JG9Gt8OAXzCEKFRvsRf" }, "version_token": "Qhgxhls8h79QjqVZVB9deLztAA2FckCyklZg7BwW61D6o" } } ``` {% /tab %} {% /tabset %} Keep track of the ID for the `Payment`. You need to pass it in a future request to complete the order. Before you can complete the order, you need to prompt the customer to provide an additional payment method to cover the outstanding balance. To accept a credit card payment, use the Web Payments SDK, as detailed in the following steps. #### 3. From the frontend, initialize the Web Payments SDK and Square Payments object. Store your developer access token, located in the Developer Console, according to your application logic (which could be something like a `.env`). Add the following script to the `` of your `.html` to initialize the Web Payments SDK: ```html ``` To initialize the Square `Payments` object, pass your application ID and location ID, also found in the Developer Console, to `Square.payments`. ```javascript const payments = Square.payments(APPLICATION_ID, LOCATION_ID); ``` {% aside type="warning" %} Never share any developer credentials in your client-side code. {% /aside %} #### 4. Add payments to your frontend UI. Write an `initializeCard` function to call `payments.card()` to create a [`Card`](https://developer.squareup.com/reference/square/sdks/web/payments/objects/Card) object and attach the `Card` to a DOM element. ```javascript async function initializeCard(payments) { const card = await payments.card(); await card.attach('#card-container'); return card; } ``` Add an event listener to execute `initializeCard` when the DOM loads. ```javascript document.addEventListener('DOMContentLoaded', async function () { let card; try { card = await initializeCard(payments); } catch (e) { console.error('Initializing card failed', e); return; } // Placeholder for handlePaymentMethodSubmission }); ``` This displays a card payment input field to the customer. The following example demonstrates how the field looks embedded in the [Web Payments SDK Quickstart](web-payments/quickstart): ![A graphic showing the Quickstart web page after all walkthrough steps are completed and a Pay $1.00 button.](https://images.ctfassets.net/1nw4q0oohfju/4alQpZCdIZPmhopan5SYyi/78441b9a0976e332b4f4cc9ca1d69e1a/card-payment-method-with-pay-button.png) #### 5. On the frontend, get the customer's input and generate a token. To generate a corresponding token from the customer's input, you need to call the SDK `tokenize()` method. The following example calls the method within a helper `tokenize` function: ```javascript async function tokenize(paymentMethod) { const tokenResult = await paymentMethod.tokenize(); if (tokenResult.status === 'OK') { return tokenResult.token; } else { let errorMessage = `Tokenization failed with status: ${tokenResult.status}`; if (tokenResult.errors) { errorMessage += ` and errors: ${JSON.stringify( tokenResult.errors, )}`; } throw new Error(errorMessage); } } ``` Add the helper `tokenize` function to a parent handler function that's called when a customer submits a payment. Listen for when the customer submits the payment. In the following example, an event listener triggers the `handlePaymentMethodSubmission` parent handler function when a customer clicks the **Pay** button: ```javascript const payButton = document.getElementById('pay-button'); payButton.addEventListener('click', async function (event) { await handlePaymentMethodSubmission(event, card); }); ``` `handlePaymentMethodSubmission` calls `tokenize` and passes the token result to a `createPayment` helper function. ```javascript async function handlePaymentMethodSubmission(event, paymentMethod) { try { const token = await tokenize(paymentMethod); const paymentResults = await createPayment(token); } catch (e) { console.error(e.message); } } ``` `createPayment` is a helper function that you write to pass the token and other data from the client to your server, so that you can make the backend call to [`CreatePayment`](https://developer.squareup.com/reference/square/payments-api/create-payment). You need to pass the following information: * `source_id` - The token generated for the card payment method when you called the Square `tokenize` method. * `order_id` - The ID for the `Order` object that you created in step 1. #### 6. Call the CreatePayment endpoint from your server. In addition to the `source_id`, the `order_id`, and an `idempotency_key`, you need to set the following fields in the [CreatePayment](https://developer.squareup.com/reference/square/payments-api/create-payment) request body: * `autocomplete` - Must be `false` because this payment is one of several attached to the `Order`. * `amount_money` - The payment amount, calculated by subtracting the external non-Square gift card amount from `Order.total_money`. {% tabset %} {% tab id="Request" %} In the following example, the `order_id` corresponds to an order for one deluxe sandwich that costs $20.00, with a `total_money` value of `2000`. After the external non-Square gift card is applied to the Order, the total amount due is `1000`. The `amount_money` charges the entire `1000` outstanding balance to the secondary payment method. ```` {% /tab %} {% tab id="Response" %} On success, Square responds with a Payment object like the following example. For comprehensive descriptions of all the returned fields, see [Payment](https://developer.squareup.com/reference/square/objects/Payment) in the API Reference. ```json { "payment": { "id": "f7Mv28ShmMzYftlUcdwpJSvhxVdZY", "created_at": "2025-01-30T20:05:57.113Z", "updated_at": "2025-01-30T20:05:57.166Z", "amount_money": { "amount": 1000, "currency": "USD" }, "status": "APPROVED", "delay_duration": "PT168H", "source_type": "CARD", "card_details": { "status": "AUTHORIZED", "card": { "card_brand": "MASTERCARD", "last_4": "0000", "exp_month": 12, "exp_year": 2050, "fingerprint": "sq-1-dVkpiMbn-FOL6lbZ1GEQX2IGiE2PAaRDUDjtbgC80-TquSCXXgooqLiXwO65LPGKOA", "card_type": "DEBIT", "prepaid_type": "NOT_PREPAID", "bin": "528722" }, "entry_method": "KEYED", "cvv_status": "CVV_ACCEPTED", "avs_status": "AVS_ACCEPTED", "auth_result_code": "0", "card_payment_timeline": { "authorized_at": "2025-01-30T20:05:57.166Z" } }, "location_id": "L95QGYFYAJY3J", "order_id": "KNJvxfeRCWRvNKv59vsCUBnkr2DZY", "risk_evaluation": { "created_at": "2025-01-30T20:05:57.166Z", "risk_level": "NORMAL" }, "total_money": { "amount": 1000, "currency": "USD" }, "approved_money": { "amount": 1000, "currency": "USD" }, "capabilities": [ "EDIT_AMOUNT_UP", "EDIT_AMOUNT_DOWN", "EDIT_TIP_AMOUNT_UP", "EDIT_TIP_AMOUNT_DOWN" ], "receipt_number": "o0ST", "delay_action": "CANCEL", "delayed_until": "2025-02-06T20:05:57.113Z", "application_details": { "square_product": "ECOMMERCE_API", "application_id": "sq0idp-uV5JG9Gt8OAXzCEKFRvsRf" }, "version_token": "Qhgxhls8h79QjqVZVB9deLztAA2FckCyklZg7BwW61D6o" } } ``` {% /tab %} {% /tabset %} Keep track of the `Payment` ID. You need to pass it in the next step to complete the `Order`. #### 7. Call PayOrder to complete the order from your server. Call [PayOrder](https://developer.squareup.com/reference/square/orders-api/pay-order) from your server to complete the customer's purchase. Trigger this call according to your application interface and logic. For example, you can send the request after a customer selects "Submit Order". The endpoint takes the `order_id` as a path parameter: `/orders/order_id/pay`. In the request body, pass the `payment_ids` associated with the `Order` in addition to authentication credentials and an `idempotency_key`, as shown in the following example. {% tabset %} {% tab id="Request" %} ```` {% /tab %} {% tab id="Response" %} On success, Square responds with the `Order` object. The `Order.state` is now `COMPLETED`. ```json { "order": { "id": "KNJvxfeRCWRvNKv59vsCUBnkr2DZY", "location_id": "L95QGYFYAJY3J", "line_items": [ { "uid": "Rxt5v0Ktd0IjaXm2iN0lBD", "catalog_object_id": "U2LA7CNNKPXMMSBVDY4JCZOO", "catalog_version": 1730238005989, "quantity": "1", "name": "Sandwich", "variation_name": "Deluxe", "base_price_money": { "amount": 2000, "currency": "USD" }, "gross_sales_money": { "amount": 2000, "currency": "USD" }, "total_tax_money": { "amount": 0, "currency": "USD" }, "total_discount_money": { "amount": 0, "currency": "USD" }, "total_money": { "amount": 2000, "currency": "USD" }, "variation_total_price_money": { "amount": 2000, "currency": "USD" }, "item_type": "ITEM", "total_service_charge_money": { "amount": 0, "currency": "USD" } } ], "created_at": "2025-01-28T16:14:58.334Z", "updated_at": "2025-01-28T16:14:58.334Z", "state": "COMPLETED", "version": 1, "total_tax_money": { "amount": 0, "currency": "USD" }, "total_discount_money": { "amount": 0, "currency": "USD" }, "total_tip_money": { "amount": 0, "currency": "USD" }, "total_money": { "amount": 2000, "currency": "USD" }, "closed_at": "2025-01-28T16:14:58.334Z", "tenders": [ { "id": "g8Mv28ShmMzYftlUcdwpJSvhxVdAB", "location_id": "L95QGYFYAJY3J", "transaction_id": "KKXZHtjt8XR7UTszrnx3esHdWpRZY", "created_at": "2025-01-28T16:14:58.334Z", "amount_money": { "amount": 1000, "currency": "USD" }, "type": "OTHER", "payment_id": "g8Mv28ShmMzYftlUcdwpJSvhxVdAB" }, { "id": "f7Mv28ShmMzYftlUcdwpJSvhxVdZY", "location_id": "L95QGYFYAJY3J", "transaction_id": "KKXZHtjt8XR7UTszrnx3esHdWpRZY", "created_at": "2025-01-28T16:14:58.334Z", "amount_money": { "amount": 1000, "currency": "USD" }, "type": "CARD", "card_details": { "status": "CAPTURED", "card": { "card_brand": "MASTERCARD", "last_4": "0000", "exp_month": 12, "exp_year": 2050, "fingerprint": "sq-1-dVkpiMbn-FOL6lbZ1GEQX2IGiE2PAaRDUDjtbgC80-TquSCXXgooqLiXwO65LPGKOA", "card_type": "DEBIT", "prepaid_type": "NOT_PREPAID", "bin": "528722", "payment_account_reference": "500151CD7ODP2QA6CYPW2NAJWLRXI" }, "entry_method": "KEYED" }, "payment_id": "f7Mv28ShmMzYftlUcdwpJSvhxVdZY" } ], "total_service_charge_money": { "amount": 0, "currency": "USD" }, "net_amounts": { "total_money": { "amount": 2000, "currency": "USD" }, "tax_money": { "amount": 0, "currency": "USD" }, "discount_money": { "amount": 0, "currency": "USD" }, "tip_money": { "amount": 0, "currency": "USD" }, "service_charge_money": { "amount": 0, "currency": "USD" } }, "source": { "name": "Partial Payments Example Application" }, "net_amount_due_money": { "amount": 0, "currency": "USD" } } } ``` {% /tab %} {% /tabset %} At this point, the customer has paid for the purchase. Display a success message according to your application interface and logic. ## Handle errors for partial payments For help troubleshooting errors, see the following API Reference: * [Payments API errors](build-basics/general-considerations/handling-errors) * [Web Payments SDK errors](https://developer.squareup.com/reference/sdks/web/payments/errors) --- # Delayed Capture of a Card Payment > Source: https://developer.squareup.com/docs/payments-api/take-payments/card-payments/delayed-capture > Status: PUBLIC > Languages: All > Platforms: All Learn how to obtain payment authorization when using a credit card as a payment source in a CreatePayment request. **Applies to:** [Payments API](payments-refunds) {% subheading %}Learn how to obtain payment authorization when using a credit card as a payment source.{% /subheading %} {% toc hide=true /%} ## Overview In a [CreatePayment](https://developer.squareup.com/reference/square/payments-api/create-payment) request, you can set `autocomplete` to `false` to get payment approval, but not charge the payment source as shown in the following example request: ```` The example request obtains authorization for a $1 payment from the payment source represented by the payment token `source_id`. The resulting `Payment` has `APPROVED` as the `status`. ```json { "payment": { "id": "VULXIlJz71QmmfblzQHGhnAkCkRZY", "amount_money": { "amount": 100, "currency": "USD" }, "status": "APPROVED", "delay_duration": "PT168H", "source_type": "CARD", }, } } ``` You have the following options with an approved payment: * **Complete the payment** - Call [CompletePayment](https://developer.squareup.com/reference/square/payments-api/complete-payment) to capture the payment. ```` Square finalizes the payment and sets the `Payment` status to `COMPLETED`. Note that Square supports optimistic concurrency for the `CompletePayment` endpoint. Each `Payment` includes a `version_token` field that uniquely identifies a specific version of the payment. You can optionally include this `version_token` in a `CompletePayment` request. In this case, the completion request succeeds only if the payment hasn't been updated since that `version_token` was generated. * **Cancel the payment** - Call [CancelPayment](https://developer.squareup.com/reference/square/payments-api/cancel-payment) to void the payment. ```` Square finalizes the payment and sets the `Payment` status to `CANCELED`. Delayed capture is required when you want to create payments and apply them later to an order. For more information, see [Orders integration](payments-api/take-payments#orders-integration). ## Time threshold For card payments, you have the following default time thresholds to capture (or cancel) a previously authorized payment: * 36 hours for in-person (card present) payments, where the card was swiped, dipped, or tapped using a card reader. * 7 days for online (card not present) payments, where the buyer used a card on file or typed the card number. After the time period expires, if the payment isn't in a terminal state (`COMPLETED`, `CANCELED`, or `FAILED`), Square takes one of the following actions, depending on the `delay_action` field value: * By default, `delay_action` is set to `CANCEL` and Square cancels the payment. * Applications can explicitly set `delay_action` to `COMPLETE` to direct Square to complete the payment. However, the application can set `delay_action` to `COMPLETE` only if the `CreatePayment` request doesn't explicitly specify an order ID. When an order ID isn't specified, Square creates an order. This ensures that the order amount and payment amounts are the same and Square can therefore complete the payment. Explicitly setting `delay_action` to `COMPLETE` in a `CreatePayment` request ensures that the authorized payment completes (either the seller completes it or, if the seller forgets, Square completes it on behalf of the seller at the time threshold). The `delayed_until` field provides the date and time on Square servers when Square takes one of these automatic actions. ## Configuring the time threshold You can change the preceding default thresholds by specifying the `delay_duration` field in a [CreatePayment](https://developer.squareup.com/reference/square/payments-api/create-payment) request. The time periods you specify must be at least 1 minute and less than the preceding threshold values. {% aside type="info" %} To hold the authorized funds beyond the time threshold, consider storing the card on file with a `Customer` object. You can then charge the card on file to create a new payment after the original payment is canceled. {% /aside %} --- # Card Payment and Statement Description > Source: https://developer.squareup.com/docs/payments-api/take-payments/card-payments/statement-descriptions > Status: PUBLIC > Languages: All > Platforms: All Learn what Square does with statement description identifiers in constructing statement descriptions that it sends to banks. **Applies to:** [Payments API](payments-refunds) {% subheading %}Learn what Square does with statement description identifiers in constructing statement descriptions that it sends to banks.{% /subheading %} {% toc hide=true /%} ## Overview For card payments, you can optionally specify `statement_description_identifier` in a [CreatePayment](https://developer.squareup.com/reference/square/payments-api/create-payment) request. Square uses this identifier in constructing statement descriptions that it sends to banks. Square sends statement description information for payments that Square processes on behalf of the seller, per bank requirements. This information then appears on customer card or bank statements when they make or receive payments. Clear and accurate statement descriptions explain charges and payments and can help reduce the risk of chargebacks and disputes. Bank and card network rules require that statement descriptions clearly indicate the business responsible for the charge or payment, in addition to providing other details to help customers understand their statements. ## Statement description example This is an example statement description: `SQ *MYPHARMACY*#02943` The general format of a statement description that banks include on a customer card or bank statement is as follows: ``` ``` * **Payment-facilitator-id** - For Square-generated descriptors, this value is `SQ *`. * **Business name** - This is the business name shown in the Square Dashboard. A seller configures this information as part of the [business receipt configuration in the Seller Dashboard](https://app.squareup.com/dashboard/business/receipt). * **Delimiter** - This is the required delimiter. Square adds this only if you provide the identifier. * **Identifier (optional)** - The preceding example shows a pharmacy store number (`#02943`) as the identifier. If a `CreatePayment` request includes the [statement_description_identifier](https://developer.squareup.com/reference/square/payments-api/create-payment#request__property-statement_description_identifier), Square uses the value as the identifier. The `Payment` object stores this information in the [card_detail.statement_description](https://developer.squareup.com/reference/square/objects/CardPaymentDetails#definition__property-statement_description) field. Note that this information isn't guaranteed to be exactly what the buyer sees for the following reason: * In constructing a statement descriptor, after `Payment-facilitator-id`, Square is limited to 20 characters. Accordingly, Square truncates the identifier portion as needed. * The statement description that Square sends to the card networks can be further truncated before being displayed to the cardholder. ## See also * [Delayed Capture of a Card Payment](payments-api/take-payments/card-payments/delayed-capture) * [Partial Payment Authorizations](payments-api/take-payments/card-payments/partial-payments-with-gift-cards) --- # Afterpay and Clearpay Payments > Source: https://developer.squareup.com/docs/payments-api/take-payments/afterpay-payments > Status: PUBLIC > Languages: All > Platforms: All Learn how the Payments API processes Afterpay payments for buy now, pay later items. **Applies to:** [Payments API](payments-refunds) | [Web Payments SDK](web-payments/overview) {% subheading %}Learn how the Payments API processes Afterpay payments for buy now, pay later items.{% /subheading %} {% toc hide=true /%} ## Overview Applications take Afterpay payments (Clearpay in the UK) using a combination of the [Web Payments SDK ](web-payments/overview) and the [Payments API](payments-api/take-payments). You use the Payments API [CreatePayment](https://developer.squareup.com/reference/square/payments-api/create-payment) endpoint on your backend to process an Afterpay or Clearpay payment. The client side is explained in [Take Afterpay and Clearpay Payments](web-payments/add-afterpay). This topic refers to Afterpay and Clearpay as "Afterpay" because the same API, calling pattern, and values are used with both payment types. ## Requirements and limitations Guidelines for charging Afterpay using `CreatePayment` include the following: * Application developers should ensure that Afterpay supports their [merchant category code](locations-api#initialize-a-merchant-category-code) (MCC). Each seller location has an MCC that describes the types of goods or services sold at that location. Certain MCCs aren't supported by Afterpay (see [Check for eligibility and limitations)](web-payments/add-afterpay#check-for-eligibility-and-limitations). In such cases, the Web Payments SDK doesn't display Afterpay as a payment option. Limitations for charging Afterpay using `CreatePayment` include the following: * The Web Payments SDK shows the Afterpay payment option only if the following are true: * The seller is eligible for Afterpay. * The checkout amount is within the min/max limit set by Afterpay. Afterpay sets a min/max payment limit for each seller. This limit applies to each checkout amount. When a buyer is ready to check out, the Web Payments SDK shows the Afterpay payment option only if the checkout amount is within this range. * Only the Web Payments SDK supports Afterpay as a payment source. * Afterpay has specific payment size limits that differ by region and type of payment. For example, [Afterpay monthly payments](https://www.afterpay.com/en-US/pay-monthly) allow higher limits than Afterpay's "Pay in 4" payments. For more information, see [Monetary amount limits](payments-api/take-payments#monetary-amount-limits). * For credit card payments, authorization indicates that the purchase amount is within credit card limits or the buyer has enough funds on the card. An authorization puts a hold on the specific amount. An Afterpay payment authorization means that the buyer is charged the first installment by Afterpay and the installment plan is started. * Afterpay allows refunds up to 120 days from the date of purchase. * Afterpay is available in countries according to the [Afterpay/Clearpay](payment-card-support-by-country#afterpayclearpay) table. ## Process an Afterpay payment In a `CreatePayment` request, use a Web Payments SDK payment token that represents Afterpay in the `source_id` field. Creating an Afterpay payment is a two-step process: 1. **Generate a payment token** - Your web application uses the Web Payments SDK to get an Afterpay payment token. The SDK provides the UI for the buyer to sign in to Afterpay, provides Afterpay with the cart information and checkout amount, and returns the payment token. {% aside type="info" %} The Web Payments SDK displays the Afterpay payment option only if the seller is eligible. Eligibility can be checked using the Web Payments SDK. For more information, see [Check for eligibility and limitations](web-payments/add-afterpay#check-for-eligibility-and-limitations). {% /aside %} 2. **Charge the payment token** - The backend of your application makes a `CreatePayment` call to charge the payment token. The amount you charge must be equal to the checkout amount provided to Afterpay. The following shows an example `CreatePayment` request. The request charges $100 USD to Afterpay. The `source_id` field identifies Afterpay as the payment source. ```bash curl https://connect.squareupsandbox.com/v2/payments \ -X POST \ -H 'Authorization: Bearer {ACCESS_TOKEN}' \ -H 'Content-Type: application/json' \ -d '{ "idempotency_key": "{UNIQUE_KEY}", "source_id": "{PAYMENT_TOKEN}", "amount_money": { "amount": 10000, "currency": "USD" } }' ``` The response is as follows: ```json { "payment": { "id": "LdEGliYQbua2JINaY5npuXBnD6JZY", "created_at": "2021-11-30T16:54:22.271Z", "updated_at": "2021-11-30T16:54:22.492Z", "amount_money": { "amount": 10000, "currency": "USD" }, "status": "COMPLETED", "delay_duration": "PT168H", "source_type": "BUY_NOW_PAY_LATER", "location_id": "7WQ0KXC8ZSD90", "order_id": "86wAYurd4ugT2BpnNptXanXnVhdZY", "total_money": { "amount": 10000, "currency": "USD" }, "approved_money": { "amount": 10000, "currency": "USD" }, "receipt_number": "LdEG", "receipt_url": "https://squareupsandbox.com/receipt/preview/LdE...EXAMPLE", "delay_action": "CANCEL", "delayed_until": "2021-12-07T16:54:22.271Z", "application_details": { "square_product": "ECOMMERCE_API", "application_id": "sq0ids-cH-HBFPwv9peECeXONN_uw" }, "buy_now_pay_later_details": { "brand": "AFTERPAY", "afterpay_details": { "email_address": "user@email.com" } }, "version_token": "3SM0bM7g6eZlfhgAOZV9kL8sgoGDBDOcA2VnkiHRnjx6o" } } ``` The following are important response details: * `source_type` indicates the payment source as `"BUY_NOW_PAY_LATER"`. * 'status' is 'COMPLETED'. If you set `autocomplete` to `false` in the request, the initial status is `AUTHORIZED`. You must then explicitly call `CompletePayment`. * `buy_now_pay_later_details` appears in the resulting `Payment` only for the Afterpay payments. * `email_address` is the email of the Afterpay account holder, which is the buyer making the purchase. {% aside type="tip" %} The seller receives the full amount without having to wait for the buyer to pay all Afterpay installments. {% /aside %} ## Test Afterpay payments in the Square Sandbox To test Afterpay payments in the Square Sandbox, get a test payment token using one of the following methods: * **Use a Square-provided Afterpay payment token** - Square provides Afterpay Sandbox payment tokens as `source_id` values for testing the backend component of your application. Use the following test payment tokens as `source_id` in `CreatePayment` requests for testing Afterpay payments in the Sandbox. |source_id value |Error mapping |Expected behavior | |:-------------------------------------|:--------------------|:-----------------| |`wnon:afterpay-or-clearpay-ok` | |The request is successful.| |`wnon:afterpay-or-clearpay-declined`|`GENERIC_DECLINE`|The request failed.| When you use these tokens, you can test `CreatePayment` calls without charging an actual Afterpay account or running the client side of your application. The tokens don't represent a live Afterpay account. However, the `CreatePayment` endpoint returns a payment response as if the account is real. {% aside type="info" %} Be sure to make the `CreatePayment` call against your Square Sandbox environment (`connect.squareupsandbox.com`) when using these tokens. {% /aside %} * **Run the Web Payments SDK sample application to generate a payment token** - The sample provides an end-to-end Afterpay payment experience. For information about building and running the sample, see [Take Afterpay and Clearpay Payments](web-payments/add-afterpay). 1. **Create an Afterpay test customer account** - Use this test account to log in to Afterpay. For more information about creating an Afterpay test account and test credit card, see [Afterpay Sandbox Guide](https://developers.afterpay.com/afterpay-online/docs/customer-accounts). 2. **Set up a web application** - Integrate the Web Payments SDK into your application. 3. **Use the Afterpay-provided credit card to make a card payment to Afterpay** - After the buyer confirms the entire installment plan and provides a credit card for the first installment, Afterpay returns the confirmation to the Web Payments SDK. The SDK then generates a payment token. 4. **Create a payment using the Payments API** - The application calls `CreatePayment` (Payments API) in the Square Sandbox by specifying the payment token. The payment token that the Web Payments SDK generates in Sandbox mode results in a successful `CreatePayment` Sandbox environment call. {% aside type="info" %} These Sandbox payments can be captured, voided, and refunded in the Square Sandbox. However, the Afterpay sandbox environment doesn't reflect these updates. {% /aside %} --- # Refund a Payment with an Application Fee > Source: https://developer.squareup.com/docs/payments-api/collect-fees/payment-with-app-fee-refund > Status: PUBLIC > Languages: All > Platforms: All Learn how to refund payments that include application fees using the Refunds API. **Applies to:** [Refunds API](refunds-api/overview) | [Payments API](payments-refunds) {% subheading %}Learn how to refund payments that include application fees.{% /subheading %} {% toc hide=true /%} ## Overview Square processes refunds for payments with application fees in two ways: * The seller initiates the refund through Square Dashboard or Point of Sale. * Your application initiates the refund through the [Refunds API](https://developer.squareup.com/reference/square/refunds-api). By default, Square automatically handles application fee refunds proportionately in both cases. If the original payment used `app_fee_allocations` to distribute fees to multiple parties, you can also specify `app_fee_allocations` on the refund to control how much each party contributes. For more information, see [Refund payments with fee allocations](#refund-payments-with-fee-allocations). ## How refunds work When processing a refund: * **Square processing fees** — Square retains the processing fees from the original transaction. * **Application fees** — Square automatically refunds these proportionately: * For a full refund, Square refunds the entire application fee. * For a partial refund, Square refunds the proportional amount of the application fee. For example, suppose your application takes a payment of $20.00 USD on behalf of a seller with a $2.00 USD application fee. Square splits the payment as follows: * $0.88 USD goes to Square (assuming a 2.9% + $0.30 USD processing fee). * $2.00 USD goes to your Square account as the application fee. * $20.00 – ($2.00 + $0.88) = $17.12 USD goes to the seller account. If the buyer requests a partial refund of $15.00 USD (75% of the original payment) and `app_fee_money` isn't set, Square refunds proportionately: * $1.50 USD from your Square account (75% of the $2.00 application fee). * $13.50 USD from the seller account ($15.00 – $1.50 = $13.50 USD). {% aside type="info" %} The Square account that receives application fees in a payment or has application fees taken in a refund is your account, as the developer of the application. It's the Square account that you sign in to when you're accessing the Developer Console. {% /aside %} {% aside type="important" %} If your developer account has insufficient funds when Square processes an application fee refund, Square deducts the refund amount from your linked bank account. {% /aside %} ## Control application fee refunds When using the [Refunds API](https://developer.squareup.com/reference/square/refunds-api), you can control how much of the application fee is refunded by setting the `app_fee_money` parameter: * If you don't set `app_fee_money`, Square automatically refunds the application fee proportionately (default behavior). * If you set `app_fee_money` to a specific amount, Square refunds that exact amount from your developer account. * If you set `app_fee_money` to 0, Square doesn't refund any of the application fee. {% aside type="info" %} You can only control the application fee refund amount when initiating the refund through the Refunds API. When sellers initiate refunds through Square directly, Square always refunds application fees proportionately. {% /aside %} ## Example: Refund with a specified application fee The following example shows how to specify a custom application fee refund amount. Using the same $20.00 payment with a $2.00 application fee, suppose your application initiates a partial refund of $15.00 USD (75%) and directs Square to take $8.00 USD from your account: * $8.00 USD from your Square account (the amount you chose to refund). * $7.00 USD from the seller account. 1. Take a payment. Follow the example in [Collect Application Fees](payments-api/take-payments-and-collect-fees#implementation) to take a payment. In the response: * Square splits the payment between the seller and you: $18 for the seller and $2 for you for a total of $20 charged to the buyer. * Get the payment ID from the payment you took and use it in the following step. 2. Refund a portion of the payment. 1. Refund $15.00 USD (75%). The request specifies the `app_fee_money` parameter directing Square to take $8.00 USD from your Square account toward the refund. ```` 2. Verify the response and note the refund ID. Use the refund ID in the next step to verify how Square took funds from different parties to pay for the refund. The `refund.status` might be `PENDING` immediately after the refund is created. When that status is `APPROVED`, you can see how the refund is paid. 3. Send a `GetRefund` request to see how Square processed the refund. ```` The following is an example response: ```json { "refund":{ "id":"MZU5SuSP821fLg9...", "status":"COMPLETED", "amount_money":{ "amount":1500, "currency":"USD" }, "payment_id":"MZU5SuSP821fLg9hLcfp3797vaB", "order_id":"rOnplN8dwaeDfiGa7NKEYgxShb4F", "created_at":"2019-07-05T18:56:58.866Z", "updated_at":"2019-07-05T19:11:23.766Z", "app_fee_money":{ "amount":800, "currency":"USD" }, "location_id":"7WQ0KXC8ZSD90" } } ``` ### Refund updated push notification If your application subscribes to the [refund.updated](https://developer.squareup.com/reference/square/refunds-api/webhooks/refund.updated) webhook, it waits for a notification for the completed refund. The notification body carries the updated `Refund` with the new value of the `status` field. The following example shows the body of a `refund.updated` notification: ```json { "merchant_id": "6SSW7HV8K2ST5", "type": "refund.updated", "event_id": "bc316346-6691-4243-88ed-6d651a0d0c47", "created_at": "2019-07-05T19:11:23.766Z", "data": { "type": "refund", "id": "MZU5SuSP821fLg9...", "object": { "refund": { "id": "MZU5SuSP821fLg9...", "created_at": "2019-07-05T18:56:58.866Z", "updated_at": "2019-07-05T19:11:23.766Z", "amount_money": { "amount": 1500, "currency": "USD" }, "status": "COMPLETED", "location_id": "NAQ1FHV6ZJ8YV", "order_id": "rOnplN8dwaeDfiGa7NKEYgxShb4F", "payment_id": "MZU5SuSP821fLg9hLcfp3797vaB", "version": 10 } } } } ``` The response shows a total refund of $15.00 USD (`amount_money`). Square took funds from various parties as follows: * An application fee refund of $8.00 USD (`app_fee_money`) is taken from your Square account. * The amount Square took from the seller account isn't in the response. You need to compute this amount yourself ($15.00 – $8.00 = $7.00 USD). ## Example: Default proportional refund The following example shows the default behavior when you don't specify `app_fee_money`. Square refunds the application fee proportionally. 1. Take a payment. Follow the example in [Collect Application Fees](payments-api/take-payments-and-collect-fees#implementation) to take a payment. In the response: * Review how Square splits the payment among the parties. * Get the payment ID from the payment you took and use it in the following step. 1. Refund a portion of the payment. 1. Refund $15.00 USD (75%). The request doesn't specify the `app_fee_money` field. ```` 2. Verify the response and note the refund ID. Use the refund ID in the next step to verify how Square took funds from different parties to pay for the refund. 3. Send a `GetRefund` request to see how Square processed the refund. ```` The following is an example response: ```json { "refund":{ "id":"6sqN4XRAx...", "status":"COMPLETED", "amount_money":{ "amount":1500, "currency":"USD" }, "payment_id":"6sqN4XRAxTtw24LXGycSxKHEuaB", "order_id":"9lQuJAYpafsr999GJcNKFiLZbf4F", "created_at":"2019-07-05T18:29:24.385Z", "updated_at":"2019-07-05T18:41:24.260Z", "app_fee_money":{ "amount":150, "currency":"USD" }, "location_id":"7WQ0KXC8ZSD90" } } ``` The response shows a total refund of $15.00 USD (`amount_money`). Square took funds from various parties as follows: * An application fee refund of $1.50 USD (`app_fee_money`) from your Square account (75% of the original $2.00 application fee). * The amount Square took from the seller account isn't in the response. You need to compute this amount yourself using the information in the response ($15.00 – $1.50 = $13.50 USD). ## Refund payments with fee allocations If the original payment used `app_fee_allocations` to distribute fees to multiple parties, you can use `app_fee_allocations` on the refund request to specify how much each party contributes to the refund. ### Allocation refund rules The rules for providing `app_fee_money` and `app_fee_allocations` on a refund depend on how the original payment was created: * **Payment created with only `app_fee_money`** — The refund can use `app_fee_money`. You cannot provide `app_fee_allocations` with multiple locations on the refund. * **Payment created with `app_fee_allocations`** — The refund must use `app_fee_allocations`. You cannot provide only `app_fee_money`, because Square doesn't know how to distribute the refund across the original allocation parties. * **Neither provided on the refund** — Square refunds fees proportionally from all parties, the same as for single-party refunds. When providing `app_fee_allocations` on a refund, the following rules apply: * The set of locations in the refund allocations must match the set of locations on the original payment. You cannot add new locations or omit existing ones. * If both `app_fee_money` and `app_fee_allocations` are provided, the allocation amounts must sum to the `app_fee_money` amount. {% aside type="info" %} If you adopted `app_fee_allocations` for new payments but are refunding an older payment that used only `app_fee_money`, you must continue using `app_fee_money` for that refund. {% /aside %} ### Example: Refund with fee allocations The following `RefundPayment` request refunds $10.00 USD from a payment that distributed fees to two parties. Each party contributes $1.00 USD toward the fee refund: ```json { "idempotency_key": "{UNIQUE_KEY}", "amount_money": { "amount": 1000, "currency": "USD" }, "app_fee_money": { "amount": 200, "currency": "USD" }, "app_fee_allocations": [ { "amount_money": { "amount": 100, "currency": "USD" }, "location_id": "DEVELOPER_LOCATION_ID" }, { "amount_money": { "amount": 100, "currency": "USD" }, "location_id": "PARTNER_LOCATION_ID" } ], "payment_id": "PAYMENT_ID" } ``` The response includes `app_fee_money` (the total fee refunded) and `app_fee_allocations` (the breakdown by party): ```json { "refund": { "id": "ZSZHUj6My6yEQWHSvsPliv8jBLZZY_refund", "status": "PENDING", "amount_money": { "amount": 1000, "currency": "USD" }, "payment_id": "PAYMENT_ID", "created_at": "2026-02-23T18:34:07.559Z", "updated_at": "2026-02-23T18:34:07.981Z", "app_fee_money": { "amount": 200, "currency": "USD" }, "app_fee_allocations": [ { "amount_money": { "amount": 100, "currency": "USD" }, "location_id": "DEVELOPER_LOCATION_ID" }, { "amount_money": { "amount": 100, "currency": "USD" }, "location_id": "PARTNER_LOCATION_ID" } ], "location_id": "SELLER_LOCATION_ID", "destination_type": "CARD" } } ``` --- # Collect Application Fees > Source: https://developer.squareup.com/docs/payments-api/take-payments-and-collect-fees > Status: PUBLIC > Languages: All > Platforms: All Learn how to collect an application fee when processing payments using the Square Payments API. **Applies to:** [Payments API](payments-refunds) | [Disputes API](disputes-api/overview) | [OAuth API](oauth-api/overview) | [Refunds API](refunds-api/overview) {% subheading %}Learn how to collect an application fee when processing payments using the Payments API.{% /subheading %} {% toc hide=true /%} ## Overview You can create an application integrated with Square to process payments on behalf of sellers that sign up to use the application. You can collect a portion of each payment that your application processes as an application fee. The [CreatePayment](https://developer.squareup.com/reference/square/payments-api/create-payment) and [UpdatePayment](https://developer.squareup.com/reference/square/payments-api/update-payment) endpoints support the `app_fee_money` and `app_fee_allocations` fields. When taking a payment, applications set these fields to collect an application fee. The fee can go to a single party using `app_fee_money`, or be distributed to up to 3 parties using `app_fee_allocations`. When the payment is complete, the payment amount is credited to the seller's Square account and the application fee is credited to the specified parties. ## Your Square account The Square account that receives application fees in a payment or has application fees taken in a refund is your account, as the developer of the application. It's the Square account that you sign in to when you're accessing the Developer Console. Application fees aren't deposited in a seller's Square account. The Square Dashboard for your account gives you a report of application fees received for a given period. For more information see [Application fee reporting](#application-fee-reporting). {% aside type="info" %} When using `app_fee_allocations`, the application fee can be distributed to up to 3 Square accounts. For more information, see [Distribute fees to multiple parties](#distribute-fees-to-multiple-parties). {% /aside %} ### Payment disputes and your application fee When there is a payment dispute (see [Disputes API)](disputes-api/overview) for which the seller is liable for the entire sales amount, you keep your portion of the payment. {% anchor id="transfer-fee" /%} ## Transfer your application fee money As application fee money accumulates in your Square account, you can transfer it to your linked bank account. You can set up an automatic daily balance transfer, which runs about 3 hours after the close of business hour that you set in your account. You can also use the Square Instant Transfer feature to get your current balance transferred immediately at a cost of 1.5% of the transfer amount. For more information, see [Set Up and Manage Instant Transfers](https://squareup.com/help/article/5405-set-up-and-manage-instant-deposits). Square identifies the seller's Square account by reading the access token obtained in the OAuth [code flow](oauth-api/overview#code-flow) and used in the `CreatePayment` request. Your Square account is identified by the application ID associated with that access token. {% aside type="important" %} Developers collecting application fees should review [Square Tax Reporting and Form 1099-K Overview](https://squareup.com/help/us/en/article/5048-1099-k-overview). {% /aside %} ## Application fee restrictions ### Currency and Country Requirements When collecting application fees through your Square integration, be sure you meet these requirements: * **Multiple Currency Support** - If you plan to accept application fees in different currencies, you need to maintain separate Square accounts for each currency. * **Country-Specific Accounts** - You need to establish a Square account in each country where you intend to process payments. * **Currency Matching Requirement** - The seller's location currency needs to match the currency of your Square account in that same country. For example: * **For Canadian operations** - Your Canadian sellers needs to use a Canadian Square account with the same currency as your Canadian Square account * **For US operations** - Your US sellers needs to use a US Square account with the same currency as your US Square account ### Supported Payment Types Application fees can only be collected for these specific payment methods: * Card payments (see [Card Payment](payments-api/take-payments/card-payments)) * Cash App Pay payments (with source_type: `WALLET`) * Afterpay payments (with source_type: `BUY_NOW_PAY_LATER`) * ACH bank transfers (with source_type: `BANK_ACCOUNT`) ### Exceptions and Requirements * **Not Applicable to Direct Payments:** Application fees cannot be collected when using CreatePayment to record cash or external payments, as these transactions occur directly between buyer and seller without Square processing. * **Permission Requirements:** To process payments on behalf of other Square sellers, your application needs to: * Implement OAuth to obtain necessary permissions from sellers * Use the OAuth token to authenticate CreatePayment requests For more information about using OAuth in your application, see [OAuth API](oauth-api/how-it-works). {% aside type="important" %} Australia only: Read the [Product Disclosure Statement](https://squareup.com/au/en/legal/general/pds-paaf) for the Payments API Application Fee (PAAF) service and the [Financial Services Guide](https://squareup.com/au/en/legal/general/au-fsg). {% /aside %} ## Application fee limit Square enforces maximum application fee limits to help each seller retain some portion of each payment's total_money. The maximum application fee depends on the payment amount and currency: * When `total_money` is at or above the threshold, the application fee cannot exceed *90%* of total_money. * When `total_money` is below the threshold, the application fee cannot exceed *60%* of total_money. ### Currency-specific thresholds The threshold amount for each currency is set to align with local market conditions and payment patterns: | Currency | Threshold Amount | |----------|------------------| | USD (US Dollar) | $5.00 | | CAD (Canadian Dollar) | $5.00 | | GBP (British Pound) | £4.00 | | AUD (Australian Dollar) | $8.00 | | EUR (Euro) | €5.00 | | JPY (Japanese Yen) | ¥600 | {% aside type="info" %} Thresholds are determined based on typical transaction sizes and market conditions in each region, not exchange rates. These amounts are designed to provide appropriate limits for small-value transactions in each market. {% /aside %} ### Examples by currency **USD Examples:** * A payment of $10.00 USD (at or above the $5.00 threshold) allows up to a 90% application fee ($9.00 maximum) * A payment of $4.99 USD (below the $5.00 threshold) allows up to a 60% application fee ($2.99 maximum) **CAD Examples:** * A payment of $10.00 CAD (at or above the $5.00 threshold) allows up to a 90% application fee ($9.00 maximum) * A payment of $4.99 CAD (below the $5.00 threshold) allows up to a 60% application fee ($2.99 maximum) **GBP Examples:** * A payment of £5.00 GBP (at or above the £4.00 threshold) allows up to a 90% application fee (£4.50 maximum) * A payment of £3.99 GBP (below the £4.00 threshold) allows up to a 60% application fee (£2.39 maximum) **AUD Examples:** * A payment of $10.00 AUD (at or above the $8.00 threshold) allows up to a 90% application fee ($9.00 maximum) * A payment of $7.99 AUD (below the $8.00 threshold) allows up to a 60% application fee ($4.79 maximum) **EUR Examples:** * A payment of €10.00 EUR (at or above the €5.00 threshold) allows up to a 90% application fee (€9.00 maximum) * A payment of €4.99 EUR (below the €5.00 threshold) allows up to a 60% application fee (€2.99 maximum) **JPY Examples:** * A payment of ¥1000 JPY (at or above the ¥600 threshold) allows up to a 90% application fee (¥900 maximum) * A payment of ¥500 JPY (below the ¥600 threshold) allows up to a 60% application fee (¥300 maximum) This `app_fee_money` maximum is based on the payment's `total_money` amount (the sum of `amount_money` and `tip_money`). For more information, see [Payment](https://developer.squareup.com/reference/square/objects/Payment). ## Implementation The `app_fee_money` and `app_fee_allocations` fields can be set in the following requests: * In a [CreatePayment](https://developer.squareup.com/reference/square/payments-api/create-payment) request, `app_fee_money` or `app_fee_allocations` indicates the application fee for a payment. Square takes the specified amount from the payment and deposits it in the designated accounts. * In an [UpdatePayment](https://developer.squareup.com/reference/square/payments-api/update-payment) request, You can update `app_fee_money` or `app_fee_allocations` if a payment is in the `APPROVED` or `PENDING` state. For more information, see [Update Payment and Tip Amounts](payments-api/update-payments). * In a [RefundPayment](https://developer.squareup.com/reference/square/refunds-api/refund-payment) request, `app_fee_money` or `app_fee_allocations` directs Square to take the specified amount from the designated accounts to pay for the refund. For more information, see [Refund a Payment with an Application Fee](payments-api/collect-fees/payment-with-app-fee-refund). * In a [CreatePaymentLink](https://developer.squareup.com/reference/square/checkout-api/create-payment-link) request, the `checkout_options` field provides the `app_fee_money` option to indicate the application fee for a payment to be paid in the payment link request. * In a [CreateTerminalCheckout](https://developer.squareup.com/reference/square/terminal-api/create-terminal-checkout) request, the `checkout` options field provides the `app_fee_money` option to indicate the application fee for a payment to be paid in the Terminal checkout request. For more information, see [Additional Payment and Checkout Features](terminal-api/additional-payment-checkout-features#take-a-fee-from-a-payment). After receiving a request with the `app_fee_money` amount and currency type, Square splits the payment (Square fees, an application fee, and the rest of the funds going to the seller). To understand payment splitting, consider a payment of $20.00 USD that includes an application fee of $2.00 USD. Square first takes its fee. Assuming 2.9% plus a $0.30 USD fee rate, Square receives $0.88 USD, which results in a net amount of $19.12 USD. You receive $2.00 USD from the net amount and the seller receives the remaining $17.12 USD. ![A diagram illustrating payment splitting, where the application developer receives a $2 fee from the payment and the seller receives the remainder of the payment.](//images.ctfassets.net/1nw4q0oohfju/E7EETSCDR2MzS6BrA42mO/9842eeef6077314ccbf050ac94ef2a65/transactions-overview-flow.png) {% anchor id="fee_example" /%} The following is an example [(CreatePayment](https://developer.squareup.com/reference/square/payments-api/create-payment) endpoint) request. In the request: * The `Authorization` header specifies the OAuth access token providing encoded information about the seller Square account and your Square account. * `amount_money` specifies the amount ($20.00 USD) to charge. * `app_fee_money` specifies $2.00 USD as the application fee. * `source_id` identifies the payment source. The example specifies a card on file as the payment source, which also requires the `customer_id` in the request. ```` After receiving the request, Square takes the $0.88 USD processing fee, deposits the $2.00 USD application fee in your Square account, and deposits the remaining $17.12 USD in the seller account. The following is an example response: ```json { "payment": { "id": "AfUqQQo9b932Nbifl1v7example", "created_at": "2019-07-23T20:39:19.831Z", "updated_at": "2019-07-23T20:39:20.317Z", "amount_money": { "amount": 2000, "currency": "USD" }, "app_fee_money": { "amount": 200, "currency": "USD" }, "status": "COMPLETED", "source_type": "CARD", "card_details": { "status": "CAPTURED", "card": { "card_brand": "MASTERCARD", "last_4": "5809", "exp_month": 9, "exp_year": 2022, "fingerprint": "sq-1-..." }, "entry_method": "ON_FILE", "cvv_status": "CVV_ACCEPTED", "avs_status": "AVS_ACCEPTED", "auth_result_code": "revUcH" }, "location_id": "7WQ0KXC8ZSD90", "order_id": "j0gN8yDiDIrtDteHbEbxIS61Xa4F", "customer_id": "REK96J96AS5AN2Y8Z4H01QWYE8", "total_money": { "amount": 2000, "currency": "USD" } } } ``` You might not see the processing fee immediately in the response. You can use a follow-up `GetPayment` request to review the payment and processing fee. ```` ## Distribute fees to multiple parties Platform businesses often involve multiple parties in a single transaction. For example, a veterinary supply platform might need to distribute fees to both itself and a pharmaceutical supplier when processing a payment for a veterinary clinic. Use the `app_fee_allocations` field to distribute the application fee to up to 3 parties in a single transaction. Each allocation specifies a `location_id` and an `amount_money`. ### How it works When `app_fee_allocations` is present on a request, it takes precedence over `app_fee_money`. The developer must include their own location in the `app_fee_allocations` list to receive a share of the fee. The following `CreatePayment` request distributes a $4.00 USD application fee between two parties: ```json { "idempotency_key": "{UNIQUE_KEY}", "autocomplete": true, "amount_money": { "amount": 2000, "currency": "USD" }, "source_id": "ccof:customer-card-id", "customer_id": "CUSTOMER_ID", "location_id": "SELLER_LOCATION_ID", "app_fee_allocations": [ { "location_id": "DEVELOPER_LOCATION_ID", "amount_money": { "amount": 200, "currency": "USD" } }, { "location_id": "PARTNER_LOCATION_ID", "amount_money": { "amount": 200, "currency": "USD" } } ] } ``` The response includes both `app_fee_money` (the total application fee) and `app_fee_allocations` (the breakdown by party): ```json { "payment": { "id": "ZSZHUj6My6yEQWHSvsPliv8jBLZZY", "created_at": "2026-02-23T18:20:22.465Z", "updated_at": "2026-02-23T18:20:23.568Z", "amount_money": { "amount": 2000, "currency": "USD" }, "app_fee_money": { "amount": 400, "currency": "USD" }, "app_fee_allocations": [ { "location_id": "DEVELOPER_LOCATION_ID", "amount_money": { "amount": 200, "currency": "USD" } }, { "location_id": "PARTNER_LOCATION_ID", "amount_money": { "amount": 200, "currency": "USD" } } ], "status": "COMPLETED", "location_id": "SELLER_LOCATION_ID", "total_money": { "amount": 2000, "currency": "USD" } } } ``` ### Using app_fee_money and app_fee_allocations together You can provide both `app_fee_money` and `app_fee_allocations` on the same request. When both are provided, the sum of the amounts in `app_fee_allocations` must equal the `app_fee_money` amount. You can also provide `app_fee_allocations` without `app_fee_money`. In this case, Square calculates `app_fee_money` as the sum of the allocation amounts and includes it in the response. ### Validation rules The following rules apply to `app_fee_allocations`: * The maximum number of allocations is 3. * No duplicate `location_id` values are allowed. * All allocation currencies must match. * All locations must be in the same country as the seller. * If both `app_fee_money` and `app_fee_allocations` are provided, the allocation amounts must sum to the `app_fee_money` amount. * If `app_fee_allocations` is present, the developer must include their own location in the list to receive a share of the fee. ## OAuth Permissions Square sellers that sign up to use third-party applications must grant the necessary permissions so the application can perform tasks on their behalf. Use the OAuth flow to obtain the necessary permissions from sellers. Among other permissions, you must obtain permission for the `PAYMENTS_WRITE_ADDITIONAL_RECIPIENTS` action. The recommended minimum permissions are as follows: * `PAYMENTS_WRITE` * `PAYMENTS_READ` * `PAYMENTS_WRITE_ADDITIONAL_RECIPIENTS` * `ORDERS_READ` * `ORDERS_WRITE` By granting these permissions, Square sellers indicate that you're allowed to take a portion of a payment as an application fee. That is, when taking a payment on behalf of these Square sellers (using the Payments API), the application can specify `app_fee_money` or `app_fee_allocations`. {% aside type="info" %} When using `app_fee_allocations`, your application must have the `PAYMENTS_WRITE_ADDITIONAL_RECIPIENTS` permission authorized for every location in the allocations list. {% /aside %} ## Understanding processing fees When processing payments on behalf of sellers, it's important to understand the various fees that may be assessed. In addition to standard processing fees and any application fees you collect, Square may charge additional fees based on the payment characteristics. ### International Transaction Fees Square charges an International Transaction Fee when a payment is made with a credit or debit card issued outside the seller's home country. This fee is separate from standard processing fees and is automatically assessed based on the card's country of issuance. For current international transaction fee rates by market, see [International Transaction Fees](payments-pricing#international-transaction-fees). ### Identifying fees in payment responses The Payment object includes detailed fee information in the `processing_fee` field, which is an array of `ProcessingFee` objects. When international transaction fees apply, they are automatically included in the total processing fee amount. {% aside type="info" %} International transaction fees are aggregated into the total processing fee amount, not shown as separate line items. This means existing accounting integrations and reporting tools will continue to work without modification. {% /aside %} When you retrieve a payment using the [GetPayment](https://developer.squareup.com/reference/square/payments-api/get-payment) endpoint, the response includes the combined processing fees: ```json { "payment": { "id": "AfUqQQo9b932Nbifl1v7example", "amount_money": { "amount": 10000, "currency": "USD" }, "processing_fee": [ { "effective_at": "2026-01-15T19:27:00.000Z", "type": "INITIAL", "amount_money": { "amount": -425, "currency": "USD" } } ], "total_money": { "amount": 10000, "currency": "USD" }, "status": "COMPLETED" } } ``` In this example for a payment with an internationally-issued card: - The combined processing fee is $4.25 (shown as -425 cents) - This includes the standard processing fee of $2.75 - Plus the international transaction fee of $1.50 - The total payment amount is $100.00 {% aside type="info" %} Fee amounts in the `processing_fee` array are always negative or zero, representing money deducted from the payment. The amounts are specified in the smallest currency unit (for example, cents for USD). {% /aside %} {% aside type="important" %} The `processing_fee` amount includes all applicable fees (standard processing fees, international transaction fees, and any other fee adjustments). You cannot determine the individual fee components from the Payment API response alone. For detailed fee breakdowns, sellers can view their transaction reports in the Square Dashboard. {% /aside %} ### Fee impact on application fees When collecting application fees, be aware that processing fees (including international transaction fees) are deducted before your application fee is calculated. The payment flow is: 1. Total payment amount 2. Minus: Square processing fees (including international transaction fees if applicable) 3. Minus: Your application fee 4. Equals: Amount deposited to seller's account For example, with a $100 payment that includes a $2.75 standard processing fee, a $1.50 international transaction fee, and a $5.00 application fee: - Payment amount: $100.00 - Square processing fees: -$4.25 ($2.75 + $1.50) - Application fee: -$5.00 - Seller receives: $90.75 {% anchor id="application-fee-reporting" /%} ## Application fee reporting Square reports the application fee collected by an application in the Square Dashboard under the default location. ![A graphic showing the application fee collected by an application in the Square Dashboard under the default location.](//images.ctfassets.net/1nw4q0oohfju/1fB3uJa4o9KVpwGmAcGkIr/e62a775e2bf2db0b4a6aea20241c1ed7/active-sales-square-dashboard.png) The application developer needs the name of the default location to review the application fee report. To find the name of the default location: 1. Open the [Developer Console](https://developer.squareup.com/apps). 2. Choose your application. 3. In the left pane, choose **Locations**. 4. In the list, find the default location name. To find the application fee report: 1. Go to the [Square Dashboard](https://app.squareup.com/dashboard). 2. Choose **Banking** 3. Choose **Balance** 4. On the **Balance** page, choose the default location from the list. The application fee is reported only in the main location. 5. To see previous transfers (from the Square account to your bank account), choose **View all transfers**. {% aside type="tip" %} You can find any page in the [Square Dashboard](https://app.squareup.com/dashboard) by using the search field to input the name of the page you are looking for. For example, if you input "Balance", the dashboard search returns a link to the **Balance** page. {% /aside %} ## See also * [Refund a Payment with an Application Fee](payments-api/collect-fees/payment-with-app-fee-refund) * [Payments Pricing with Square APIs and SDKs](payments-pricing) --- # Take Afterpay and Clearpay Payments > Source: https://developer.squareup.com/docs/web-payments/add-afterpay > Status: PUBLIC > Languages: All > Platforms: All Learn how to add an Afterpay and Clearpay payment method to an application. **Applies to:** [Web Payments SDK](web-payments/overview) {% subheading %}Learn how to add an Afterpay and Clearpay payment method to an application.{% /subheading %} {% toc hide=true /%} ## Overview You can add Afterpay and Clearpay payment methods to the application you built using the quickstart project sample in [Web Payments SDK Quickstart](web-payments/quickstart) to integrate the Web Payments SDK into your application. {% aside type="tip" %} - Afterpay is known as Clearpay in the UK. The Web Payments SDK code refers to the payment methods as `Afterpay/Clearpay`. The Afterpay name is used unless otherwise noted. - Afterpay is now available within Cash App as Cash App Afterpay, allowing buyers to pay over time on purchases using a Cash App account. The Afterpay branding assets used to build the Afterpay payment method have been updated to reflect this offering, which are covered in this guide. {% /aside %} The following steps add code to the application you created from the [quickstart project sample](https://github.com/square/web-payments-quickstart/blob/main/public/examples/card-payment.html). If you haven't created an application using the quickstart, you need to do so before completing these steps. You can find a complete example of the [Afterpay code](https://github.com/square/web-payments-quickstart/blob/main/public/examples/afterpay.html) on GitHub. ## Requirements and limitations * The payment amount used in an Afterpay payment might not be supported. * Not all sellers are eligible for Afterpay. Certain [business categories](https://squareup.com/us/en/legal/general/afterpay-merchant-terms) are prohibited from using Afterpay. * The Afterpay Sandbox environment ignores eligibility checks. Before starting the payment method implementation for an individual seller, check for Afterpay eligibility in production. ## 1. Attach Afterpay to the page The Afterpay payment method needs information about the buyer and the payment amount before it can open the Afterpay payment sheet. Your application creates a [PaymentRequest](https://developer.squareup.com/reference/sdks/web/payments/objects/PaymentRequest) object to provide that information and then gets a new [Afterpay/Clearpay](https://developer.squareup.com/reference/sdks/web/payments/objects/AfterpayClearpay) object initialized with it. {% aside type="important" %} To verify that Afterpay is available to process a transaction (in step 3 of [Attach Afterpay to the page)](#step-1-attach-afterpay-to-the-page), make sure to enclose the payment method initialization in a `try...catch` statement immediately after calling the method in the `DOMContentLoaded` event listener. You can then determine when to show the Afterpay payment method on the page and resolve the initialization exception. This validation ensures that it checks for Afterpay availability while loading other applicable payment methods on the page. The `try...catch` statement also ensures that Afterpay is enabled if the seller is onboarded with Afterpay and the transaction amount is eligible. This means that you can add the Afterpay payment method as long as you check eligibility with the `try...catch` statement. {% /aside %} The following code creates the payment request and attaches the Afterpay method to the page: 1. Add an HTML element to the prerequisite walkthrough form with an `id` of `afterpay-button`. The HTML for the body of index.html should look like the following: ```html
``` 2. Add the following two functions to your script tag: ```javascript function buildPaymentRequest(payments) { const req = payments.paymentRequest({ countryCode: 'US', currencyCode: 'USD', total: { amount: '1.00', label: 'Total', }, requestShippingContact: true, }); // Note how afterpay has its own listeners req.addEventListener('afterpay_shippingaddresschanged', function (_address) { return { shippingOptions: [ { amount: '0.00', id: 'shipping-option-1', label: 'Free', taxLineItems: [ { amount: '0.00', label: 'Tax' } ], total: { amount: '1.00', label: 'total', }, }, ], }; }); req.addEventListener('afterpay_shippingoptionchanged', function (_option) { // This event listener is for information purposes only. // Changes here (or values returned) won't affect the Afterpay/Clearpay PaymentRequest. }); return req; } async function initializeAfterpay(payments) { const paymentRequest = buildPaymentRequest(payments) const afterpay = await payments.afterpayClearpay(paymentRequest); await afterpay.attach('#afterpay-button'); return afterpay; } ``` Note how Afterpay has its own event listeners on the `PaymentRequest` object and how these event listeners have their own specific callbacks. For more information, see [addEventListener](https://developer.squareup.com/reference/sdks/web/payments/objects/PaymentRequest#PaymentRequest.addEventListener). 3. In the `DOMContentLoaded` event listener, add the following code after you initialize the Afterpay payment method: ```javascript let afterpay; try { afterpay = await initializeAfterpay(payments); } catch (e) { console.error('Initializing Afterpay/Clearpay failed', e); // There are a number of reasons why Afterpay might not be supported // (such as Browser Support, Device Support, Account). Other reasons // might include the seller account not being eligible or the payment // amount not being supported. Therefore, you should handle // initialization failures, while still loading other applicables. // payment methods. } ``` **Test the application** 1. Navigate to http://localhost:3000/ in your browser. ![A graphic showing the rendered Afterpay payment button.](//images.ctfassets.net/1nw4q0oohfju/71PVxzQ7pCbnhqyl7U2k0k/da7e14caf34b15d7aba34770b7ff14d4/Afterpay-PaymentButton.png) {% aside type="tip" %} The buyer sees either the Afterpay logo or the Clearpay logo depending on their browser locale or on the locale that the developer provides to the Web Payments SDK. {% /aside %} **Checkpoint 1:** You should see the Afterpay button rendered on your page. ## 2. Get the payment token from the Afterpay payment method Add the following code after `// Checkpoint 2` in the `DOMContentLoaded` event listener function: ```javascript if (afterpay !== undefined) { const afterpayButton = document.getElementById('afterpay-button'); afterpayButton.addEventListener('click', async function (event) { await handlePaymentMethodSubmission(event, afterpay); }); } ``` **Test the application** When you test an Afterpay payment in the Sandbox, use `111111` as the verification code when prompted. The following animation shows the Afterpay payment flow: ![An animation showing the Afterpay payment flow completing a payment.](//images.ctfassets.net/1nw4q0oohfju/6AHNKQKF0S8P2rJSqEg6YV/a698742f543043f93b54c8d03a314a0c/afterpay-example.gif) {% aside type="tip" %} When setting up Afterpay in the Sandbox, no SMS messages are sent. You can test Afterpay payments in the Sandbox and test checkout flows by creating test customer accounts. To learn more about using test customer accounts to test checkout flows in the Afterpay Sandbox, see the [Afterpay documentation](https://developers.afterpay.com/afterpay-online/docs/customer-accounts). {% /aside %} 1. Navigate to http://localhost:3000/ in your browser. 2. Choose the **Afterpay** button. 3. Use a test card. For information about setting up a test account and credit card, see [Test Afterpay payments in the Square Sandbox](payments-api/take-payments/afterpay-payments#test-afterpay-payments-in-the-square-sandbox). ![A graphic showing the Afterpay payment form.](//images.ctfassets.net/1nw4q0oohfju/7wNrLOSiLvoqQoP7KzYZwH/7a3ceec56c8cf4175ed3a9e2a389fd97/Afterpay-PaymentButton-1.png) **Checkpoint 2.** You should see the Afterpay form and be able to complete a payment. ## 3. Process an Afterpay payment token on your backend The payment token that your application generated for an Afterpay payment is processed on your backend in the same way a payment token from one of the other payment methods is processed, with some exceptions. To learn about the specific processing requirements, see [Afterpay and Clearpay Payments](payments-api/take-payments/afterpay-payments). ## Afterpay messaging and checkout widgets The Afterpay payment method includes different types of widgets that can be attached to the page to make buyers aware that Afterpay is available and to help improve payment conversion. ### Attach the Afterpay Messaging Widget to the page The Afterpay Messaging Widget tells buyers early in the flow that installments are available through Afterpay. The widget calculates and displays an installment amount, along with providing an informational modal when the user clicks the ⓘ icon. ![A graphic showing the Afterpay Messaging Widget.](//images.ctfassets.net/1nw4q0oohfju/5WKpIMhlQELlWtkNpdFh8m/47a64a418d14ff1f0294046fa6360aee/Afterpay-Widget-Messaging.png) 1. Add the following HTML to the page where you want to display the widget: ```html
``` 2. Call the `attachMessaging` function: ```javascript await afterpay.attachMessaging('#afterpay-messaging'); ``` The appearance of the Afterpay Messaging Widget can be customized through the [AfterpayMessagingOptions](https://developer.squareup.com/reference/sdks/web/payments/objects/AfterpayMessagingOptions) parameter. ### Attach the Afterpay Checkout Widget to the page The Afterpay Checkout Widget displays the consumer payment schedule before verifying the purchase and completing the payment flow. ![A graphic showing the Afterpay Checkout Widget.](//images.ctfassets.net/1nw4q0oohfju/1mzB4TS5kdO0dmVd1n0yCB/9f32d0c29c2745d18c8e2257d4117b79/Afterpay-Widget-Schedule.png) 1. Add the following HTML to the page where you want to display the widget: ```html
``` 2. Call the `attachCheckoutWidget` function: ```javascript await afterpay.attachCheckoutWidget('#afterpay-checkout'); ``` --- # Card Payments > Source: https://developer.squareup.com/docs/payments-api/take-payments/card-payments > Status: PUBLIC > Languages: All > Platforms: All Learn how to provide cards (credit, debit, and square gift card) as a payment source in a Payments API CreatePayment request. **Applies to:** [Payments API](payments-refunds) | [Web Payments SDK](web-payments/overview) | [In-App Payments SDK](in-app-payments-sdk/what-it-does) {% subheading %}Learn how to provide a card as a payment source.{% /subheading %} {% toc hide=true /%} ## Overview You can charge a card (a credit card, debit card, or Square gift card) using the [CreatePayment](https://developer.squareup.com/reference/square/payments-api/create-payment) endpoint. When the request is received, Square charges the specified card and deposits the funds in the Square account. {% aside type="info" %} You cannot use the payment card details provided by a buyer in the `CreatePayment` endpoint. Instead, you need to use the [Web Payments SDK](web-payments/overview) for the web or [In-App Payments SDK](in-app-payments-sdk/what-it-does) for mobile to collect the card details. These libraries return a payment token for use with `CreatePayment`. {% /aside %} As part of processing the card payment, Square takes care of maintaining PCI compliance, detecting fraud, and managing disputes. Don't specify card information (card number, expiration date, and other information) directly in a `CreatePayment` call. Instead, provide one of the following in the request: * **Payment token** - Square provides client libraries that developers use to collect payment information in web or mobile applications. These libraries take the payment information buyers provide in the client UI and generate a secure single-use payment token. For more information, see [Online Payment Solutions](online-payment-options) and [In-App Payments SDK](in-app-payments-sdk/what-it-does). These clients depend on a server component that sends `CreatePayment` requests to Square for processing the payment with the token. In the payment request, the server provides the payment token as the value of the `source_id`. The following is an example `CreatePayment` request that directs Square to charge $20 to the payment token specified as `source_id`: ```` {% aside type="info" %} If your client application has implemented [Strong Customer Authentication](sca-overview) to verify the identity of the buyer, a verification token is returned along with the payment token. This verification token assures the card-issuing bank that the buyer is who they say they are. It doesn't verify that the card they are trying to use is going to be accepted by the bank. The card might still be declined. This is why you can still get [payment errors](https://developer.squareup.com/reference/square/payments-api/create-payment#error-descriptions), some of which indicate card declines. {% /aside %} * **Card on file** - A seller can store customer profiles in the seller's Customer Directory and then add a card on file for the customer. Applications can later charge the card on file by setting the card ID as the `source_id` value in a `CreatePayment` request. In this case, the `customer_id` is also required in the request. ```bash ... "source_id": "{CARD_ON_FILE_ID}", "customer_id": "{CUSTOMER_ID}" ... ``` * **Square gift card on file** - Applications can specify the ID of a Square gift card as a `source_id` in a `CreatePayment` request. For more information, see [Redeem a gift card when using the Payments API.](gift-cards/redeem-gift-cards#redeem-a-gift-card-when-using-the-payments-api) {% anchor id="payment-status" /%} ## Payment status After your application calls `CreatePayment`, Square attempts to get the requested funds. If the issuing bank rejects the request, the `status` is `FAILED`. Otherwise, the `status` is one of the following. ### COMPLETED If the `CreatePayment` request is for authorization and capture, the payment is processed immediately. The process to capture the funds with the cardholder's bank is initiated. The funds are guaranteed and the seller receives the funds when the process is complete. ### APPROVED If the `CreatePayment` request is for authorization only, it's a [delayed capture](payments-api/take-payments/card-payments/delayed-capture). The card is valid and the amount is authorized by the cardholder's bank. The funds are guaranteed and the seller receives the funds when the payment is captured (see [CompletePayment](https://developer.squareup.com/reference/square/payments-api/complete-payment)). Take one of the following actions on an `APPROVED` payment: * Capture the payment by calling `CompletePayment`. * Cancel the payment by calling `CancelPayment`. ### FAILED or CANCELED Funds aren't credited to the seller's Square account when the `Payment.status` is one of the following: * `FAILED` - The payment request is declined. * `CANCELED` - The payment is voided and the funds are released. {% aside type="info" %} For cash or external payments, this `status` has no impact because Square isn't involved in any funds movement (the seller already has the funds). {% /aside %} ## Examples The following are examples of `CreatePayment` requests that you can test in the Square Sandbox and review the resulting `Payment` objects. ### Payment token as a payment source To test `CreatePayment` calls in the Square Sandbox: * Specify the Square-provided fake payment token (for example, `cnon:card-nonce-ok`) as `source_id`. For more information, see [Payment tokens for testing the Payments API](devtools/sandbox/payments#payment-tokens-for-testing-the-payments-api). * Provide a Sandbox access token to authenticate your request in the `Authorization` header. For more information, see [Make your First API Call](get-started/make-api-request). You can then run the following cURL `CreatePayment` request. Note that the request specifies the Square Sandbox domain (`connect.squareupsandbox.com`) as the endpoint URL. ```` In response, the endpoint return a [Payment](https://developer.squareup.com/reference/square/objects/Payment) object as shown: ```json { "payment":{ "id":"Zg81uQkAcCh1aJMAPymUzilP4ADZY", "created_at":"2021-12-22T03:54:17.125Z", "updated_at":"2021-12-22T03:54:17.319Z", "amount_money":{ "amount":2000, "currency":"USD" }, "status":"COMPLETED", "delay_duration":"PT168H", "source_type":"CARD", "card_details":{ "status":"CAPTURED", "card":{ "card_brand":"VISA", "last_4":"5858", "exp_month":12, "exp_year":2023, "fingerprint":"sq-1-INCyQnSb8QOHkoFASh566s5S-jwk6IPaJes7jREW-Zyprrx0smmoNP_J2zwL6j-1OA", "card_type":"CREDIT", "prepaid_type":"NOT_PREPAID", "bin":"453275" }, "entry_method":"KEYED", "cvv_status":"CVV_ACCEPTED", "avs_status":"AVS_ACCEPTED", "statement_description":"SQ *DEFAULT TEST ACCOUNT", "card_payment_timeline":{ "authorized_at":"2021-12-22T03:54:17.234Z", "captured_at":"2021-12-22T03:54:17.320Z" } }, "location_id":"S8GWD5R9QB376", "order_id":"SsTiD94XDwpPPjVDPt2be8w9U47YY", ... } } ``` In the preceding `Payment` object example, note the following: * The payment `status` in the response is `COMPLETED`, which indicates that the payment source is successfully charged. * `order_id` refers to the order that the payment is associated with. For compatibility with other products (for example, the Point of Sale application), all payments taken for a Square seller need an order. If you don't supply one, the Payments API creates and maintains one automatically. * The payment token in the request represents a Sandbox VISA card (see the `card_details.card.card_brand` field value). {% aside type="tip" %} You can also use a Square gift card as a payment source. For more information, see [Redeem a gift card when using the Payments API](gift-cards/redeem-gift-cards#redeem-a-gift-card-when-using-the-payments-api). {% /aside %} ### Card on file as a payment source In this example, do the following: 1. Send a `CreateCustomer` request to create a customer. Make sure to update the command and provide the Sandbox access token. ```` Copy the `id` from the response. You use this value as the `customer_id` in the next step. 2. Send a `CreateCard` request to add a card on file. This example uses the Square-provided payment token (`cnon:card-nonce-ok`) to add a card on file. In a production environment, your application generates a payment token using the card information that customers provide. For more information about adding a gift card on file, see [Payment tokens for testing the Payments API](devtools/sandbox/payments#payment-tokens-for-testing-the-payments-api). ```` This creates a card on file. You need the `id` of the card on file to take a payment. 3. Send a `CreatePayment` request to charge the card on file. This example charges $20 to the card on file. Make sure to update the request by providing the ID of the card on file as `source_id` and the `customer_id`. ```` After processing the payment, the endpoint returns the resulting [Payment](https://developer.squareup.com/reference/square/objects/Payment) object. 4. Verify the transaction in the Sandbox Square Dashboard. For more information, see [Verify the Payment](get-started/verify-transaction-in-seller-dashboard). {% aside type="tip" %} A seller can use the Square Point of Sale application and Square Dashboard to create customers and add a card on file. To test this experience, see [Use Card on File with the Square Point of Sale App](https://squareup.com/help/us/en/article/5770-use-card-on-file-with-the-square-app). {% /aside %} ## See also * [Delayed Capture of a Card Payment](payments-api/take-payments/card-payments/delayed-capture) * [Partial Payment Authorizations](payments-api/take-payments/card-payments/partial-payments-with-gift-cards) * [Card Payment and Statement Description](payments-api/take-payments/card-payments/statement-descriptions) --- # Take Payments > Source: https://developer.squareup.com/docs/payments-api/take-payments > Status: PUBLIC > Languages: All > Platforms: All You can use the Payments API CreatePayment endpoint to direct Square to take payments and record payments processed outside of Square. **Applies to:** [Payments API](payments-refunds) | [Orders API](orders-api/what-it-does) {% subheading %}Learn how to direct Square to take payments and record payments processed outside of Square.{% /subheading %} {% toc hide=true /%} ## Overview The [Payments API](https://developer.squareup.com/reference/square/payments-api) is the backend component of the Square Developer platform payment solution. The API is responsible for creating and completing (or capturing) payments whose source is provided by a Square client SDK. These sources can include a credit card, gift card, digital wallet, or ACH bank transfer. ## Payment source types The Payments API can process or retrieve the following types of payments: * **Card payments** - Charge a card (a credit card, debit card, or Square gift card). For more information, see [Card Payments](payments-api/take-payments/card-payments). * **ACH bank transfer payments** - For more information, see [ACH Bank Transfer Payment](payments-api/take-payments/ach-payments). * **Afterpay payments** - For more information, see [Afterpay and Clearpay Payments](payments-api/take-payments/afterpay-payments). * **Cash App payments** - For more information, see [Cash App Payments](payments-api/take-payments/cash-app-payments). * **Cash payments** - For more information, see [Cash Payments](payments-api/take-payments/cash-payments). * **External payments** - For more information, see [External Payments](payments-api/take-payments/external-payments). * **House accounts** - For more information, see [House Accounts](payments-api/take-payments/house-accounts). Square processes these payments and deposits the funds into the seller's Square account. The seller has options to get the funds, set the Square account to transfer the funds to their bank account, and get a Square debit card with access to the funds. For more information, see [Square Checking](https://squareup.com/payments/balance). ## Accept payments in your application The Payments API provides the [CreatePayment](https://developer.squareup.com/reference/square/payments-api/create-payment) endpoint to take a payment. When the `CreatePayment` request is successfully processed, the endpoint creates a [Payment](https://developer.squareup.com/reference/square/objects/Payment) object and returns it in the response. The `Payment` has a `status` field that indicates the completion state of the payment. The exception is the House Account payment. You cannot accept this kind of payment in your application. You can only retrieve house account payments that have been completed in the Square Point of Sale. The `Payment.status` field value can be: * `APPROVED`. The payment is authorized and awaiting completion or cancellation. * `COMPLETED`. The payment is captured and funds are credited to the seller. * `CANCELED`. The payment is canceled and the payment card funds are released. * `FAILED`. The payment request is declined by the bank. To learn how to use the `CreatePayment` endpoint, see [Card Payments](payments-api/take-payments/card-payments). {% aside type="tip" %} You can use [payment webhooks](payments-api/webhooks) to get notification when a buyer makes a payment to the seller who is signed in to your application. The payments can be made using a Square API-enabled application or a Square product such as Square Point of Sale, Square Terminal, Square Invoice, or any other Square product. {% /aside %} ### Flag payments that are buyer initiated or seller initiated Sellers that integrate their applications with Square APIs need to flag buyer-initiated or seller-initiated payments by using the [CustomerDetails](https://developer.squareup.com/reference/square/objects/CustomerDetails) object with the Payments API [CreatePayment](https://developer.squareup.com/reference/square/payments-api/create-payment) endpoint. The `CustomerDetails` object accepts booleans on customer initiated payments and seller keyed-in payment details: {% table %} * Key * Value (boolean type) --- * [`customer_initiated`](https://developer.squareup.com/reference/square/objects/CustomerDetails#definition__property-customer_initiated) * `true` or `false` --- * [`seller_keyed_in`](https://developer.squareup.com/reference/square/objects/CustomerDetails#definition__property-seller_keyed_in) * `true` or `false` {% /table %} ## Payment location Every seller has a default location. The Payments API assumes the default location when you don't provide a location ID in a request. For example: * In a `CreatePayment` request, if a location ID isn't provided, Square assumes the default location of the seller. In a third-party application scenario, it's the default location of the seller for whom the application is taking the payment. * In a `ListPayment` request, if a location ID isn't provided, the endpoint returns a list of payments taken at the default location. To find your default location name when taking a payment on behalf of yourself: 1. Go to the [Developer Console](https://developer.squareup.com/apps). 2. Choose your application. 3. In the left pane, choose **Locations**. 4. In the list, find the default location name. The `CreatePayments` and `ListPayment` endpoints take optional `location_id` parameters. When those parameter values are omitted, Square uses the seller's default location ID. ### Create payments The `CreatePayment` endpoint request has an optional `location_id` field that records the seller's [location](https://developer.squareup.com/reference/square/objects/Location) where a payment is taken. When the field is empty, Square assigns the payment to the seller's default location. If you want to record the payment at one of a seller's other locations, set the field value to that location ID. ### List payments If you don't set a `location_id` query limit, the [ListPayments](https://developer.squareup.com/reference/square/payments-api/list-payments) endpoint returns payments recorded for the seller's default location. Note that the `ListPayments` endpoint cannot return payments for all locations. Results are from only the default location or the location that you specify. ### Offline payments If you receive a payment while using Offline Mode, the `Payment` object returns `true` for `is_offline_payment`. This field marks a payment taken as offline. For more information, see [Process Card Payments with Offline Mode](https://squareup.com/help/us/en/article/7777-process-card-payments-with-offline-mode). To get timestamps on when a client device received a payment in Offline Mode, the `client_created_at` indicates timestamps for when a client device processes payments in Offline Mode. The `offline_begin_time` and `offline_end_time` filter options in [ListPayments](https://developer.squareup.com/reference/square/payments-api/list-payments) indicate the start and end time ranges for which to retrieve offline payments based on the `client_created_at` time in the payment object. {% anchor id="monitary-amount-limits" /%} ## Monetary amount limits The minimum payment amount you can specify in `CreatePayment` and `UpdatePayment` requests varies depending on the payment source. ### Card payment minimums |Country|Minimum payment| |--- |--- | |Australia|$0.01| |Canada|$0.01| |France|0.01 EUR| |Ireland|0.01 EUR| |Japan|¥1| |United Kingdom|£0.01| |United States|$0.01| ## ACH payment minimums |Country|Minimum payment| |--- |--- | |United States|$0.01| ## Cash payment and external payment minimums |Country|Minimum payment for cash/external payments| |--- |--- | |Australia|**Cash:** $0 (the amount can only be specified in increments of $0.05.) **External:** $0|| |Canada|**Cash:** $0 (the amount can only be specified in increments of $0.05). **External:** $0| |France|0 EUR| |Ireland|0 EUR| |Japan|¥0| |United Kingdom|£0| |United States|$0| ## Afterpay minimums and maximums | Country | Minimum payment |Maximum payment | |----------------|-----------------|----------------| | Australia | $1.00 | $2,000 | | Canada | $1.00 | $2,000 | | United Kingdom | £1.00 | £1,000 | | United States | $1.00 | $2,000{% line-break /%}($4,000 for Afterpay monthly payments) | ## Earn application fees The Payments API lets you earn an application fee each time a seller accepts a payment with your application. An application fee is accrued in your Square account for each payment that Square processes through your application when using the Payments API. For more information about taking application fees, see [Collect Application Fees](payments-api/take-payments-and-collect-fees). ## Orders integration The following considerations apply when applications want to pay for an order created using the Orders API: * **Use the Payments API (CreatePayment endpoint)** - To apply a single payment to an order, applications can use the [CreatePayment](https://developer.squareup.com/reference/square/payments-api/create-payment) endpoint. In the request, you can specify `order_id` to attach an order to the payment. The value of the payment (the `amount_money` field) must exactly match the value of the `total_money` field of the order. Therefore, this approach works when paying for an order using a single payment. * **Use the Orders API (PayOrder endpoint)** - To apply multiple payments to an order, applications must use the [PayOrder](https://developer.squareup.com/reference/square/orders-api/pay-order) endpoint. These payments must be previously authorized (see [Delayed Capture of a Card Payment](payments-api/take-payments/card-payments/delayed-capture)). ### $0 payments Suppose you create an order for $20 and apply a $20 discount. You then need to make a $0 payment to set the order state to `COMPLETED`. You can make a $0 payment using the Payments API or the Orders API. When using the Payments API, call the `CreatePayment` endpoint to record a $0 `CASH` or `EXTERNAL` payment. For more information, see [Pay for Orders](orders-api/pay-for-orders). ## Record tips Tips are recorded at the individual payment level using the [Payment.tip_money](https://developer.squareup.com/reference/square/objects/Payment#definition__property-tip_money) property, not at the `Order` level. When a customer leaves a tip, it is stored with their specific payment transaction. For orders with multiple payments (such as split checks at a restaurant), each person can specify their own tip amount when their card is processed. The total tip for the order is the sum of all individual payment tips. The `Order.tip_money` and `Order.tenders[].tip_money` fields are read-only and calculated by Square. The first field is the sum of all payment tips on the order. The second field is the tip money amount on a payment tendered in an order. The system handles tips in two ways based on the seller's configuration: 1. **Pooled tips** - The system adds all tip amounts from the payments to a shared pool. 2. **Individual tips** - Each tip is credited to the specific team member identified by [payment.team_member_id](https://developer.squareup.com/reference/square/objects/Payment#definition__property-team_member_id) in the payment record. {% aside type="important" %} When processing tips for external vendors (such as third-party delivery couriers), do not use the Payment object's tip fields. Adding tips through the Payment object would incorrectly include these amounts in the seller's internal team members' tip pool. Instead, use the [Order.service_charge](https://developer.squareup.com/reference/square/objects/order#definition__property-service_charges) property on the Order object to record tips for external vendors who help fulfill orders. This ensures: - External vendor tips are properly segregated from internal team member tips - Tips are correctly attributed to the external vendor - Tip amounts don't impact the seller's internal tip pool calculations {% /aside %} ## View payments in the Square Dashboard In production, payments completed using `CreatePayment` appear in the [Square Dashboard](https://app.squareup.com/dashboard). If you test the Payments API in the Square Sandbox, they appear in the Sandbox Square Dashboard. For more information, see [Square Sandbox](testing/sandbox). {% anchor id="payment-api-optimistic-concurrency" /%} ## Payment versioning By default, any updates you apply to a `Payment` are applied in a last-write-wins manner, meaning newer updates overwrite older updates. For many applications, this behavior is sufficient. However, in a complex scenario (for example, you have multiple applications editing the same payment), Square supports optimistic concurrency for `UpdatePayment` and `CompletePayment` endpoints. Each `Payment` includes a `version_token` field that uniquely identifies a specific version of the payment. You can include this `version_token` in payment operations such as `UpdatePayment` and `CompletePayment`. In this case, the request succeeds only if the payment hasn't been updated since that `version_token` was generated. If a failure occurs, the error response gives your application an opportunity to fetch the current version of the `Payment` object and retry the update. {% aside type="info" %} If you exclude the `version_token` from the update request, Square doesn't use optimistic concurrency, which means the update is applied in a last-write-wins manner. Your application isn't notified if your update is overwritten by a newer update unless you have subscribed to the `payment_updated` webhook event. {% /aside %} {% anchor id="payment-api-flexibility" /%} ## Payments API flexibility The Payments API offer additional flexibility: * **Many payment source options** - You can charge a payment token generated on a web client by the Web Payments SDK, a card on file, or a gift card on file. * **Delayed payments** - Using the Payments API, you might only obtain payment authorization and then complete the payment later. * **Partial payments with a Square gift card** - If a buyer provides a gift card as a payment source and the gift card doesn't have sufficient funds, you can take a partial amount and ask the buyer for additional payment with other cards. --- # Strong Customer Authentication > Source: https://developer.squareup.com/docs/sca-overview-iap > Status: PUBLIC > Languages: All > Platforms: All Use Strong Customer Authentication (SCA) to verify buyers for online and in-app payments. **Applies to:** [In-App Payments SDK - Android](https://developer.squareup.com/docs/api/in-app-payment/android/) | [In-App Payments SDK - iOS](https://developer.squareup.com/docs/api/in-app-payment/ios) | [Web Payments SDK](web-payments/overview) | [Payments API](payments-refunds) | [Customers API](customers-api/what-it-does) {% subheading %}Learn how to use Strong Customer Authentication to verify buyers for online and in-app payments. {% /subheading %} {% toc hide=true /%} ## Overview Use Strong Customer Authentication (SCA) with the Web Payment SDK and In-App Payments SDK to verify the buyer and reduce the chance of fraudulent transactions. Strong Customer Authentication refers to the usage of the 3-D Secure (3DS) protocol to verify the identity of a buyer at the time of an online purchase. Square applies 3DS to a payment in accordance with the UK/EEA PSD2 SCA Mandate, the Japan SCA METI Mandate, and/or individual seller risk rules set up in Risk Manager. ## Requirements and limitations Currently, when paying online, buyers must enter their card number, expiration date, CVV, and postal code to make a payment. Buyers are required to complete two of the three factors of authentication when initiating a payment: something they know, something they own, and something they are. For online card payments, the SCA requirements are met by implementing 3DS. For in-store payments, SCA requirements are met through the use of chip and PIN or mobile wallets. Payments without this additional authentication are declined by the cardholder's bank. Payments initiated by sellers, such as recurring transactions or mail-order/telephone order (MOTO), don't require SCA. ![A graphic showing the three elements of a multi-factor authentication, which are something you know, something you have, and something you are.](//images.ctfassets.net/1nw4q0oohfju/5bvK1593kQplQ5XYZtJIyy/3b40c145a89d5a2b139ded95e6c141a6/3D-Secure-SCA-Intro.png) ## What is 3DS? 3DS - also known as "3-D Secure" is a standard protocol developed by a collaboration of several payment card issuers. It defines a multi-factor authentication mechanism that can be used to satisfy authentication requirements in markets wherever Strong Customer Authentication (SCA) is required by local mandates. 3DS can also be used to authenticate buyers in countries where SCA isn't a requirement. In those countries, Square provides the 3DS mechanism for those sellers who opt to use it in Risk Manager. 3DS creates the same buyer experience regardless of whether it's initiated from an SCA-required country. For more information, see [Strong Customer Authentication FAQ](https://squareup.com/help/gb/en/article/7373-strong-customer-authentication-faq). ## Liability shift With 3DS, the liability for fraudulent chargebacks is shifted to the card issuer in most cases. This liability shift to the issuer occurs when the payment is successfully authenticated through 3DS and the card involved is a Mastercard, American Express, JCB, Visa, Diners Club International or Discover card. Any of these cards that can be saved on file with Square can also use 3DS. For more information, see [Charge and Store Cards for Online Payments](web-payments/sca-charge-card-on-file). ## Do I need to authenticate? Square advises all Square developers and partners operating in the European Economic Area (EEA), including the UK, or in Japan to take appropriate steps to be compliant with SCA enforcement to avoid an increase in declined payments for European or Japanese cardholders, respectively. In the UK, banks have required cardholders to complete SCA, with full requirements in place since March 14, 2022. Across the rest of the EEA, banks have applied SCA in full since January 1, 2021, following a staggered rollout through 2021. In Japan, banks have required SCA for their cardholders since April 1, 2025. Square provides SCA features for the [Web Payments SDK](web-payments/sca) and [In-App Payments SDK](in-app-payments-sdk/verify-buyer) within Europe, where the business taking the payment and the cardholder's bank are both in the EEA. {% aside type="info" %} SCA isn't required for in-person payment solutions such as the Square Point of Sale API or Reader SDK applications. {% /aside %} ## How is Square helping me prepare for SCA? {% aside type="important" %} Implementation details of Strong Customer Authentication depends on the SDK used. For more details, see the [Web Payments SDK](web-payments/take-card-payment#migrate-from-paymentsverifybuyer) and [In-App Payments SDK](in-app-payments-sdk/verify-buyer) guides. **In this topic, Square refers to the SCA process as “verify the buyer.”** {% /aside %} Sellers that integrate their applications with Square APIs need to flag buyer-initiated or seller-initiated payments by using the [CustomerDetails](https://developer.squareup.com/reference/square/objects/CustomerDetails) object with the Payments API [CreatePayment](https://developer.squareup.com/reference/square/payments-api/create-payment) endpoint. The `CustomerDetails` object accepts Booleans on buyer initiated payments and seller keyed-in payment details: {% table %} * Property * Value (Boolean type) --- * `customer_initiated` * `true` or `false` --- * `seller_keyed_in` * `true` or `false` {% /table %} Developers and partners that use Square developer products (such as the Web Payments SDK, In-App Payments SDK, and Square APIs) must ensure that their applications are SCA-compliant to minimize the impact of declined payments by following these guidelines: - If the buyer is present and initiates the payment, verify the buyer and set [CustomerDetails.customer_initiated](https://developer.squareup.com/reference/square/objects/CustomerDetails#definition__property-customer_initiated) to `true`. - If the buyer initiates the payment, but is not present (such as for a mail order / telephone only (MOTO) payment), then you don't need to verify the buyer, but instead set [CustomerDetails.customer_initiated](https://developer.squareup.com/reference/square/objects/CustomerDetails#definition__property-customer_initiated) to `true`, and [CustomerDetails.seller_keyed_in](https://developer.squareup.com/reference/square/objects/CustomerDetails#definition__property-seller_keyed_in) to `true`. - If the seller initiates the payment and the buyer is not present, then you don't need to verify the buyer, but instead set [CustomerDetails.customer_initiated](https://developer.squareup.com/reference/square/objects/CustomerDetails#definition__property-customer_initiated) to `false`. Sellers that use Square Online and Square Invoices have their integrations managed by Square and don't need to flag transactions for SCA authentication. {% aside type="important" %} * Verify the buyer only when they are present and have initiated the transaction. * In SCA mandated markets, payments that don't provide authentication get a `CARD_DECLINED_VERIFICATION_REQUIRED` error for transactions that require authentication on the payment request. This error means that the seller didn't verify the buyer on the buyer-initiated payments. {% /aside %} ## SCA in non-mandated markets The SCA flow is started for a buyer if their payment card meets any of the conditions listed in the [Square Risk Manager Glossary](https://squareup.com/help/us/en/article/6740-conditions-glossary). For sellers outside of markets that require SCA, Square provides a mechanism in [Risk Manager](https://squareup.com/dashboard/risk-manager/rules) to let them opt in for 3DS on a location basis. For example, a seller might have an in-person location, an in-person and online location, and an online only location. Online payments are card-not-present payments and benefit from the added security of 3DS. In this case, a seller might opt in for 3DS in those locations. A payment card might trigger the SCA authentication flow and verify the identity of the buyer without generating a payment alert. A payment alert is only created in Risk Manager if the payment appears to be suspicious or fraudulent. ### Enable SCA To enable SCA in a non-mandated market, the seller uses an application integrated with a Square payments SDK to take a payment with a debit or credit card. If the application can verify a buyer, the seller can enable SCA in Risk Manager for the location that is taking the payment. When enabled, SCA is active until the seller disables it. SCA cannot be enabled until the integration has been added by the application. ## Digital wallets For in-app transactions that require SCA and are made with a digital wallet, we recommend verifying the buyer. See [Integrate Digital Wallets with the In-App Payments SDK](in-app-payments-sdk/add-digital-wallets) for more information. For the Web Payments SDK, tokenizing the digital wallet will automatically verify the buyer’s card. ## How it works Learn how SCA works by walking through the steps in the following example: {% tabset %} {% tab id="Web Payments SDK" %} {% table %} * Step * Flow illustration --- * 1. Call tokenize() with verification details included in the request * ![A diagram showing a verifyBuyer() call with the payment token or the buyer card ID and the transactional details.](//images.ctfassets.net/1nw4q0oohfju/CRzuRIMj9ELje54XNnHtl/445dd88b5ca234f6ef0f716f5a067154/02.png) --- * 2. Square automatically checks if authentication required during tokenization * ![A diagram showing Square automatically checking whether the transaction requires Strong Customer Authentication.](//images.ctfassets.net/1nw4q0oohfju/3dDkeugEudYynEo2OOnOdU/1afd24d49aab3402f9eaf7e1b86da1f8/03.png) --- * 3. If challenge needed, display authentication challenge inline * ![A diagram showing the Bank Verification challenge.](//images.ctfassets.net/1nw4q0oohfju/zOVtidxnkIymXH4tGVGPz/62966fc0fbfb8a7a258560e76b85350f/04a.png) --- * 4. Single payment token returned * ![sca-overview-how-it-works-payment-token](//images.ctfassets.net/1nw4q0oohfju/7hyOfKBVeGeedLmMIx1A2m/b34bc3a8ecd6e323e4f132e4284f6bc0/sca-overview-how-it-works-payment-token.png) {% /table %} {% /tab %} {% tab id="In-App Payments SDK" %} {% table %} * Step * Flow Illustration --- * 1. Generate a token with the Square online payment SDK or in-app payment SDK. You can skip this step if you're charging a buyer card on file. * ![A graphic showing SCA being used.](//images.ctfassets.net/1nw4q0oohfju/2YbLGUinW5VTw0stkoW3Xh/7c5c25575b1fd885169dc6fd0a737a97/01.png) --- * 2. Call `verifyBuyer()` with the payment token or the buyer card ID and the transactional details. Square collects all the required device-based information. * ![A diagram showing a verifyBuyer() call with the payment token or the buyer card ID and the transactional details.](//images.ctfassets.net/1nw4q0oohfju/CRzuRIMj9ELje54XNnHtl/445dd88b5ca234f6ef0f716f5a067154/02.png) --- * 3. Square automatically checks whether the transaction requires Strong Customer Authentication. * ![A diagram showing Square automatically checking whether the transaction requires Strong Customer Authentication.](//images.ctfassets.net/1nw4q0oohfju/3dDkeugEudYynEo2OOnOdU/1afd24d49aab3402f9eaf7e1b86da1f8/03.png) --- * 4. If a challenge is required, Square automatically displays the challenge to the buyer. * ![A diagram showing the Bank Verification challenge.](//images.ctfassets.net/1nw4q0oohfju/zOVtidxnkIymXH4tGVGPz/62966fc0fbfb8a7a258560e76b85350f/04a.png) --- * 5. When the SCA process is complete, you get back a verification token. * ![A screenshot showing that when the SCA process is complete, you get back a verification token.](//images.ctfassets.net/1nw4q0oohfju/4YPIlOGn9Y81K80alxW2Ez/3e97cf31878ac1abbf8c6a06ca40229a/04b.png) --- * 6. Use the verification token along with the payment token and buyer card ID to charge the buyer using Square APIs, version 2019-06-12 or newer. * ![A diagram showing the verification token along with the payment token and customer card ID to charge the customer using Square APIs.](//images.ctfassets.net/1nw4q0oohfju/4ziEvmt13AuOrObpt8Acei/3c3001dd08615d8ac34607abec0e34f5/06.png) {% /table %} {% /tab %} {% /tabset %} {% aside type="important" %} __Custom risk-score based SCA authentication private beta__ If the seller has set up custom score rules and logic in Risk Manager, you can trigger SCA authentication based on the custom risk score by passing the custom risk score value when verifying the buyer. To try out this feature, contact your Square representative. {% /aside %} ## Next steps Implement SCA in your application to start the SCA flow by reading the following topics: * For Web Payments SDK: [Add Strong Customer Authentication to a Card Payment](web-payments/sca) * For In-App Payments SDK: [Verify a Buyer](in-app-payments-sdk/verify-buyer) --- # Verify a Buyer > Source: https://developer.squareup.com/docs/in-app-payments-sdk/verify-buyer > Status: PUBLIC > Languages: Swift, Kotlin, Java > Platforms: iOS, Android **Applies to:** [In-App Payments SDK - Android](https://developer.squareup.com/docs/api/in-app-payment/android/) | [In-App Payments SDK - iOS](https://developer.squareup.com/docs/api/in-app-payment/ios) | [Payments API](payments-refunds) | [Cards API](cards-api/overview) {% subheading %}Learn how to start an SCA buyer verification, get the resulting verification token, and complete a payment.{% /subheading %} {% line-break /%} [Context: Swift, iOS] {% toc hide=true /%} ## Overview The In-App Payment SDK supports the [Strong Customer Authentication](sca-overview) (SCA) buyer verification flow for transactions where the buyer is present. When a buyer uses a payment card issued in a region that requires SCA, the issuing bank might require your In-App Payments SDK application to challenge the buyer for additional identifying information. This can happen in a one-time charge when a card is stored on file with Square or when a stored card is used in a transaction. Complete the following steps to add the SCA flow to your application. The In-App Payments SDK handles all the buyer verification logic and the verification UI. You provide the location ID, buyer contact name, and payment ID (the payment token or stored customer payment card ID) to the buyer verification method and the SDK completes the SCA flow to return a verification token to your application. ## Requirements and limitations Complete the steps in [Build on iOS](in-app-payments-sdk/build-on-ios). ## 1. Install the SDK ### Cocoapod installation Install with [CocoaPods](http://cocoapods.org/) by adding the following to your Podfile: ``` use_frameworks! pod "SquareInAppPaymentsSDK" pod "SquareBuyerVerificationSDK" ## Optional ``` ### Manual installation 1. Add the `SquareBuyerVerificationSDK` SDK to your project: 1. Open the **General** tab for your application target in Xcode. 1. Drag the newly downloaded SquareBuyerVerificationSDK.framework into the **Embedded Binaries** section. 1. Choose **Copy Items if Needed**, and then choose **Finish** in the dialog box that appears. ## 2. Prepare for the verification flow 1. Create a [SQIPVerificationParameters](https://developer.squareup.com/docs/api/in-app-payment/ios/Classes/SQIPVerificationParameters.html) object to encapsulate the information in the following list: * [SQIPContact](https://developer.squareup.com/docs/api/in-app-payment/ios/Classes/SQIPContact.html) - You should build the `SQIPContact` object with as many contact field values as possible, including `givenName`, `familyName`, and `city`. The more complete the contact object, the lower the chance that the buyer is challenged by the card-issuing bank. * **Payment source ID** - This ID can be the payment token returned by the `CardEntry` view controller or a card-on-file ID for the buyer's payment card stored with Square. * **Location ID** - The location IDs are found on the **Locations** page for your application in the [Developer Console](https://developer.squareup.com/apps). The ID references a seller location and stores the physical address of the seller. * **Buyer action** - The buyer's intention of storing the card on file or charging it. 2. Pass it into the In-App-Payments SDK buyer verify method in step 3. 3. Create a [SQIPTheme](https://developer.squareup.com/docs/api/in-app-payment/ios/Classes/SQIPTheme.html). You must provide a theme to style the verification challenge controller that `SQIPBuyerVerificationSDK` starts if the card-issuing bank needs to get more identifying information from the buyer. To learn more about creating a theme, see [Customize the Payment Entry Form](in-app-payments-sdk/cookbook/customize-payment-form). ```swift func makeVerificationParameters(paymentSourceID: String, buyerAction: SQIPBuyerAction) -> SQIPVerificationParameters { let contact = SQIPContact() contact.givenName = "John" contact.familyName = "Doe" contact.email = "johndoe@example.com" contact.addressLines = ["London Eye","Riverside Walk"] contact.city = "London" contact.country = .GB contact.postalCode = "SE1 7" contact.phone = "8001234567" return SQIPVerificationParameters( paymentSourceID: paymentSourceID, buyerAction: buyerAction, locationID: VERIFY_BUYER_LOCATION_ID, contact: contact ) } func makeSquareTheme() -> SQIPTheme{ let theme = SQIPTheme() theme.errorColor = .red theme.tintColor = Color.primaryAction theme.keyboardAppearance = .light theme.messageColor = Color.descriptionFont return theme } ``` ## 3. Verify a buyer {% aside type="important" %} SCA should be called for all customer-initiated transactions, including digital wallet payments. If the seller doesn't have SCA called for digital wallet payments, the transactions might be declined due to lack of authentication. {% /aside %} Complete this step if your application stores a buyer's payment card after the buyer enters the card information in the card entry view controller. {% aside type="tip" %} If your application uses Apple Pay, the `verify` function should be called in the `paymentAuthorizationViewControllerDidFinish` method (and not in the `didAuthorizePayment` method) after the buyer dismisses Apple Wallet. Buyer verification won't occur if the Apple Wallet overlay is being displayed. {% /aside %} In this example, note the following: 1. The buyer's action is set to `buyerAction: .store()`. 2. The verification token is passed to the `success` completion handler of the `verify` function. 3. A cURL command is printed with the verification token, card payment token, and customer ID. The command gives an example of the Cards API [CreateCard](https://developer.squareup.com/reference/square/cards-api/create-card) operation. ```swift extension MainViewController: SQIPCardEntryViewControllerDelegate { func cardEntryViewController( _ cardEntryViewController: SQIPCardEntryViewController, didObtain cardDetails: SQIPCardDetails, completionHandler: @escaping (Error?) -> Void) { let params = makeVerificationParameters( paymentSourceID: cardDetails.nonce, buyerAction: .store(), //1: set buyer action to store ) SQIPBuyerVerificationSDK.shared.verify( with: params, theme: makeSquareTheme(), viewController: cardEntryViewController, success: { (details) in //2: verification token available storeCard( nonce: cardDetails.nonce, customerID: CUSTOMER_ID, verificationToken: details.verificationToken, completionHandler: completionHandler ) }, failure: { error in // Stop Square card entry UI spinner and display error message. completionHandler(error) } ) } //3: Print cURL command that stores the customer card on file func storeCard( nonce: String, customerID: String, verificationToken: String, completionHandler: @escaping (Error?) -> Void) { let uuid = UUID().uuidString print("curl --request POST https://connect.squareup.com/v2/customers/{customerID}/cards \\" + "--header \"Content-Type: application/json\" \\" + "--header \"Authorization: Bearer YOUR_ACCESS_TOKEN\" \\" + "--header \"Accept: application/json\" \\" + "--data \'{" + "\"idempotency_key\": \"\(uuid)\"," + "\"card_nonce\": \"\(nonce)\"," + "\"billing_address\": {" + "\"address_line_1\": \"London Eye\"," + "\"address_line_2\": \"Riverside Walk\"," + "\"locality\": \"London\"," + "\"postal_code\": \"SE1 7\"," + "\"country\": \"UK\"}," + "\"cardholder_name\": \"John Doe\"" + "}\'"); // Call Square card entry completion handler to stop the // UI spinner and indicate that the transaction was successful. completionHandler(nil) } } ``` For information about storing a customer card on file after the payment token has been verified, see [Cards API](cards-api). ## 4. Charge the payment token or customer card ID {% aside type="info" %} In production, the `CreateCard` and `CreatePayment` operations are run on your backend after your client provides the payment token and verification token. {% /aside %} Verify the buyer payment card and send the resulting verification token and the payment source ID (the payment token or stored customer payment card ID) to your backend to complete a payment with verification. In this example, note the following: 1. The buyer action is set to `buyerAction: .charge(SQIPMoney)`. 2. The verification token is passed to the `success` completion handler of the `verify` function. 3. A cURL command is printed with the verification token, payment source ID, and [SQIPMoney](https://developer.squareup.com/docs/api/in-app-payment/ios/Classes/SQIPMoney.html). The command gives an example of the Payments API [CreatePayment](https://developer.squareup.com/reference/square/payments-api/create-payment) operation. ```swift extension PurchaseController { func checkout(paymentSourceID: String, purchaseAmount: SQIPMoney) { let params = makeVerificationParameters( paymentSourceID: paymentSourceID, buyerAction: .charge(purchaseAmount) //1: Set buyer action to charge ) SQIPBuyerVerificationSDK.shared.verify( with: params, theme: makeSquareTheme(), viewController: self, success: { (details) in //2: Verification token available // Send payment request to your backend with token here. processPayment( paymentSourceID: paymentSourceID, verificationToken: details.verificationToken, purchaseAmount: purchaseAmount, successHandler: { print("Successfully processed payment") }, errorHandler: { error in print(error.localizedDescription) } ) }, failure: { error in // Unable to verify buyer identity. Handle error. }) } // 3: Print cURL command that completes a payment with verfied payment source func processPayment( paymentSourceID: String, verificationToken: String, purchaseAmount: SQIPMoney, successHandler: (Void) -> Void, errorHandler: (Error) -> Void ) { let uuid = UUID().uuidString print( "curl --request POST https://connect.squareup.com/v2/payments \\" + "--header \"Content-Type: application/json\" \\" + "--header \"Authorization: Bearer YOUR_ACCESS_TOKEN\" \\" + "--header \"Accept: application/json\" \\" + "--data \'{" + "\"idempotency_key\": \"\(uuid)\"," + "\"autocomplete\": true," + "\"amount_money\": {" + "\"amount\": \(purchaseAmount.amount)," + "\"currency\":\"\(purchaseAmount.currency)\"}," + "\"verification_token\": \"\(verificationToken)\"," + "\"source_id\": \"\(paymentSourceID)\"" + "}\'") successHandler() } } ``` [Context: Kotlin, Android] {% toc hide=true /%} ## Overview The In-App Payment SDK supports the [Strong Customer Authentication](sca-overview) (SCA) buyer verification flow for transactions where the buyer is present. When a buyer uses a payment card issued in a region that requires SCA, the issuing bank might require your In-App Payments SDK application to challenge the buyer for additional identifying information. This can happen in a one-time charge when a card is stored on file with Square or when a stored card is used in a transaction. Complete the following steps to add the SCA flow to your application. The In-App Payments SDK handles all the buyer verification logic and the verification UI. You provide the location ID, buyer contact name, and payment ID (the payment token or stored customer payment card ID) to the buyer verification method and the SDK completes the SCA flow to return a verification token to your application. ## Requirements and limitations Complete the steps in [Build on Android](in-app-payments-sdk/build-on-android). ## 1. Add buyer verification dependencies Add the following buyer verification dependency to your module build.gradle file: ```gradle dependencies { def buyerVerificationVersion = 'REPLACE_WITH_IAP_LIBRARY_VERSION' implementation "com.squareup.sdk.in-app-payments:buyer-verification:$buyerVerificationVersion" } ``` Make sure that the `buyerVerificationVersion` dependency version matches the version used for the In-App Payments SDK library version, and is the latest version. ## 2. Prepare for the verification flow 1. Create a [VerificationParameters](https://developer.squareup.com/docs/api/in-app-payment/android//sqip/BuyerVerification.html) object in your activity to encapsulate the information in the following list: * **Contact** - You should build the [Contact](https://developer.squareup.com/docs/api/in-app-payment/android//sqip/Contact.html) object with as many contact field values as possible, including `given_name`, `family_name`, and `city`. The more complete the contact object, the lower the chance that the buyer is challenged by the card-issuing bank. * **Payment source ID** - This ID can be the payment token returned by the `CardEntry` activity or a card-on-file ID for the buyer's payment card stored with Square. * **Location ID** - The location IDs are found on the **Locations** page for your application in the [Developer Console](https://developer.squareup.com/apps). The ID references a seller location and stores the physical address of the seller. * **Buyer action** - The buyer's intention of storing the card on file or charging it. 2. Pass the `VerificationParameters` object into the SDK verify method in step 3. This example creates a contact and sets the verification parameters to the contact and a payment source ID. ```kotlin private fun makeVerificationParameters(paymentSourceId: String, buyerAction: BuyerAction): VerificationParameters { UUID.randomUUID() val contact = Contact.Builder() .familyName("Doe") .email("johndoe@example.com") .addressLines(listOf("London Eye","Riverside Walk")) .city("London") .countryCode(Country.GB) .postalCode("SE1 7") .phone("8001234567") .build(given_name = "John") return VerificationParameters( paymentSourceId = paymentSourceId, action = buyerAction, squareIdentifier = LocationToken(VERIFY_BUYER_LOCATION_ID), contact = contact ) } ``` ## 3. Verify a buyer {% aside type="important" %} SCA should be called for all customer-initiated transactions, including digital wallet payments. If the seller doesn't have SCA called for digital wallet payments, the transactions may be declined due to lack of authentication. {% /aside %} These steps verify the buyer so that their card can be stored or charged. A buyer's stored card ID can be used in place of a payment token in any of the example code that sets the first parameter of the `VerificationParameters` object. 1. Declare a class variable to store the ID of a stored card on file: ```kotlin private var paymentSourceId: String = "A_Customer_Card_ID"; ``` 2. If you're verifying a buyer for a card to be stored, add the following code in `onActivityResult` in your activity: ```kotlin val params = makeVerificationParameters( paymentSourceId = paymentSourceId, buyerAction = Store()) BuyerVerification.verify( activity = this, verificationParameters = params ) ``` 3. If you're verifying a buyer for a card to be charged, add the following: ```kotlin val params = makeVerificationParameters( paymentSourceId = it.nonce, buyerAction = Charge(Money(100, Currency.GBP))) BuyerVerification.verify( activity = this, verificationParameters = params ) ``` 4. Update your `onActivityResult` with the following code to start the buyer verification activity. The verification token is received in step 4. ```kotlin override fun onActivityResult( requestCode: Int, resultCode: Int, data: Intent? ) { when (requestCode) { BuyerVerification.DEFAULT_BUYER_VERIFICATION_REQUEST_CODE -> BuyerVerification.handleActivityResult(data) { //TODO: Replace with code from Step 4 } CARD_ENTRY_REQUEST_CODE -> CardEntry.handleActivityResult(data) { when (it) { is Success -> { //TODO: Add verification code from 2. or 3. (charge or store a card) here } is Canceled -> Toast.makeText(this@MainActivity, "Canceled", Toast.LENGTH_SHORT) .show() } } else -> Toast.makeText( this@MainActivity, "Unexpected onActivityResult requestCode: $requestCode", Toast.LENGTH_SHORT ).show() } } ``` For information about storing a customer card on file after the payment token has been verified, see [Cards API](cards-api). ## 4. Charge the payment token or customer card ID {% aside type="info" %} In production, the `CreateCard` and `CreatePayment` operations are run on your backend after your client provides the payment token and verification token. {% /aside %} In this step, you create helper methods to save a card on file for a verified buyer, and then create a payment using that card with the Payments API [CreatePayment](https://developer.squareup.com/reference/square/payments-api/create-payment). 1. In `onActivityResult` for `requestCode == DEFAULT_BUYER_VERIFICATION_REQUEST_CODE`, send the payment source ID (the payment token or stored customer payment card ID) you got in step 3 and the verification token from this step to your backend to complete a payment with verification. {% aside type="info" %} The cURL command is run when `requestCode` is `DEFAULT_BUYER_VERIFICATION_REQUEST_CODE`. {% /aside %} ```kotlin fun printCurlCommandSaveCard(cardNonce:String) { val uuid = UUID.randomUUID().toString() Log.d("buyer_verification", """ Run this curl command to save a card on file: curl --request POST https://connect.squareup.com/v2/customers/${CUSTOMER_ID}/cards --header \"Content-Type: application/json\" \\ --header \"Authorization: Bearer YOUR_ACCESS_TOKEN\" \\ --header \"Accept: application/json\" \\ --data \'{ \"idempotency_key\": \"\${uuid}\", \"card_nonce\": \"\${cardNonce}\", \"billing_address\": { \"address_line_1\": \"London Eye\", \"address_line_2\": \"Riverside Walk\", \"locality\": \"London\", \"postal_code\": \"SE1 7\", \"country\": \"UK\"}, \"cardholder_name\": \"John Doe\" }\' """ ) } ``` 2. Create a helper method to print a cURL command to charge a card. ```kotlin fun printCurlCommandChargeCard(cardNonce:String, token:String) { val uuid = UUID.randomUUID().toString() Log.i("buyer_verification", """ Run this curl command to charge the nonce:\n" + "curl --request POST https://connect.squareupsandbox.com/v2/payments \\\n" + "--header \"Content-Type: application/json\" \\\n" + "--header \"Authorization: Bearer YOUR_ACCESS_TOKEN\" \\\n" + "--header \"Accept: application/json\" \\\n" + "--data \'{\n" + "\"idempotency_key\": \"" + uuid + "\",\n" + "\"amount_money\": {\n" + "\"amount\": 100,\n" + "\"currency\": \"USD\"},\n" + "\"source_id\": \"" + cardNonce + "\"" + "\"token\": \"" + token + "\"" + "\"billing_address\": {\n" + "\"address_line_1\": \"London Eye \"\n" + "\"address_line_2\": \"Riverside Walk\"\n" + "\"locality\": \"London\"\n" + "\"postal_code\": \"SE1 7\"\n" + "\"country\": \"UK\"}" + "\"cardholder_name\": \"John Doe\"\n" + "}\'" ) } ``` 3. Update `onActivityResult` for `BuyerVerification.DEFAULT_BUYER_VERIFICATION_REQUEST_CODE` to call the cURL helper methods to store and charge a card. ```kotlin override fun onActivityResult( requestCode: Int, resultCode: Int, data: Intent? ) { when (requestCode) CARD_ENTRY_REQUEST_CODE -> CardEntry.handleActivityResult(data) { //Handle card entry result } BuyerVerification.DEFAULT_BUYER_VERIFICATION_REQUEST_CODE -> BuyerVerification.handleActivityResult(data) { when (it){ is BuyerVerificationResult.Success ->{ if (cardNonce !== null) { //Charge the card with the verification token and nonce printCurlCommandChargeCard(cardNonce:String, cardNonce, it.verificationToken) //Store the card with the nonce printCurlCommandSaveCard(cardNonce:String) } } is BuyerVerificationResult.Error -> { Log.d("buyer_verification","Error on verification:" + it.message) } } } else -> Toast.makeText( this@MainActivity, "Unexpected onActivityResult requestCode: $requestCode", Toast.LENGTH_SHORT ).show() } } ``` [Context: Java, Android] {% toc hide=true /%} ## Overview The In-App Payment SDK supports the [Strong Customer Authentication](sca-overview) (SCA) buyer verification flow for transactions where the buyer is present. When a buyer uses a payment card issued in a region that requires SCA, the issuing bank might require your In-App Payments SDK application to challenge the buyer for additional identifying information. This can happen in a one-time charge when a card is stored on file with Square or when a stored card is used in a transaction. Complete the following steps to add the SCA flow to your application. The In-App Payments SDK handles all the buyer verification logic and the verification UI. You provide the location ID, buyer contact name, and payment ID (the payment token or stored customer payment card ID) to the buyer verification method and the SDK completes the SCA flow to return a verification token to your application. ## Requirements and limitations Complete the steps in [Build on Android](in-app-payments-sdk/build-on-android). ## 1. Add buyer verification dependencies Add the following buyer verification dependency to your module build.gradle file: ```gradle dependencies { def buyerVerificationVersion = 'REPLACE_WITH_IAP_LIBRARY_VERSION' implementation "com.squareup.sdk.in-app-payments:buyer-verification:$buyerVerificationVersion" } ``` Make sure that the `buyerVerificationVersion` dependency version matches the version used for the In-App Payments SDK library version, and is the latest version. ## 2. Prepare for the verification flow 1. Create a [VerificationParameters](https://developer.squareup.com/docs/api/in-app-payment/android//sqip/BuyerVerification.html) object in your activity to encapsulate the information in the following list: * **Contact** - You should build the [Contact](https://developer.squareup.com/docs/api/in-app-payment/android//sqip/Contact.html) object with as many contact field values as possible, including `given_name`, `family_name`, and `city`. The more complete the contact object, the lower the chance that the buyer is challenged by the card-issuing bank. * **Payment source ID** - This ID can be the payment token returned by the `CardEntry` activity or a card-on-file ID for the buyer's payment card stored with Square. * **Location ID** - The location IDs are found on the **Locations** page for your application in the [Developer Console](https://developer.squareup.com/apps). The ID references a seller location and stores the physical address of the seller. * **Buyer action** - The buyer's intention of storing the card on file or charging it. 2. Pass the `VerificationParameters` object into the SDK verify method in step 3. This example creates a contact and sets the verification parameters to the contact and a payment source ID. ```java private VerificationParameters makeVerificationParameters(String paymentSourceId, BuyerAction buyerAction) { SquareIdentifier squareIdentifier = new SquareIdentifier.LocationToken(LOCATION_ID); Contact contact = new Contact.Builder() .familyName("Doe") .email("johndoe@example.com") .addressLines(Arrays.asList("London Eye", "Riverside Walk")) .city("London") .countryCode(Country.GB) .postalCode("SE1 7") .phone("8001234567") .build("John"); return new VerificationParameters(paymentSourceId, buyerAction, squareIdentifier, contact); } ``` ## 3. Verify a buyer {% aside type="important" %} SCA should be called for all customer-initiated transactions, including digital wallet payments. If the seller doesn't have SCA called for digital wallet payments, the transactions may be declined due to lack of authentication. {% /aside %} These steps verify the buyer so that their card can be stored or charged. A buyer's stored card ID can be used in place of a payment token in any of the example code that sets the first parameter of the `VerificationParameters` object. 1. Declare a class variable to store the ID of a stored card on file: ```java private String paymentSourceId = "A_Customer_Card_ID"; ``` 2. If you're verifying a buyer for a card to be stored, add the following code in `onActivityResult`: ```java VerificationParameters params = makeVerificationParameters( paymentSourceId, new BuyerAction.Store()); BuyerVerification.verify( this, params ); ``` 3. If you're verifying a buyer for a card to be charged, update your `onActivityResult` with the following code to start the buyer verification activity. The verification token is received in step 4. ```java VerificationParameters params = makeVerificationParameters( cardResult.getNonce(), new BuyerAction.Charge(new Money(100, Currency.GBP))); BuyerVerification.verify( this, params ); ``` 4. Add the verification code from step 2 or step 3 to the `onActivityResult` callback in your activity: ```java @Override protected void onActivityResult(int requestCode, int resultCode, Intent data) { if (requestCode == DEFAULT_CARD_ENTRY_REQUEST_CODE) { CardEntry.handleActivityResult(data, result -> { if (result.isSuccess()) { CardDetails cardResult = result.getSuccessValue(); Card card = cardResult.getCard(); //TODO: Add verification code from 2. or 3. (charge or store a card) here } else if (result.isCanceled()) { Toast.makeText(MainActivity.this, "Canceled", Toast.LENGTH_SHORT) .show(); } }); } if (requestCode == BuyerVerification.DEFAULT_BUYER_VERIFICATION_REQUEST_CODE) { //TODO: Replace with code from Step 4 } } ``` For information about storing a customer card on file after the payment token has been verified, see [Cards API](cards-api). ## 4. Charge the payment token or customer card ID {% aside type="info" %} In production, the `CreateCard` and `CreatePayment` operations are run on your backend after your client provides the payment token and verification token. {% /aside %} In this step, you create helper methods to save a card on file for a verified buyer, and then create a payment using that card with the Payments API [CreatePayment](https://developer.squareup.com/reference/square/payments-api/create-payment). 1. In `onActivityResult` for `requestCode == DEFAULT_BUYER_VERIFICATION_REQUEST_CODE`, send the payment source ID (the payment token or stored customer payment card ID) you got in step 3 and the verification token from this step to your backend to complete a payment with verification. {% aside type="info" %} The cURL command is run when `requestCode` is `DEFAULT_BUYER_VERIFICATION_REQUEST_CODE`. {% /aside %} ```java public void printCurlCommandSaveCard(String cardNonce) { String uuid = UUID.randomUUID().toString(); Log.d("buyer_verification", "Run this curl command to save a card on file:\n" + "curl --request POST https://connect.squareup.com/v2/customers/${CUSTOMER_ID}/cards \\\n" + "--header \"Content-Type: application/json\" \\\n" + "--header \"Authorization: Bearer YOUR_ACCESS_TOKEN\" \\\n" + "--header \"Accept: application/json\" \\\n" + "--data \'{ \n" + "\"idempotency_key\": \"" + uuid + "\",\n" + "\"card_nonce\": \"" + cardNonce + "\",\n" + "\"billing_address\": { \n" + "\"address_line_1\": \"London Eye\" \n" + "\"address_line_2\": \"Riverside Walk\" \n" + "\"locality\": \"London\" \n" + "\"postal_code\": \"SE1 7\" \n" + "\"country\": \"UK\"} \n" + "\"cardholder_name\": \"John Doe\" \n" + "}\'"); } ``` 2. Create a helper method to print a cURL command to charge a card. ```java public void printCurlCommandChargeCard(String cardNonce, String token) { String uuid = UUID.randomUUID().toString(); Log.i("buyer_verification", "Run this curl command to charge the nonce:\n" + "curl --request POST https://connect.squareupsandbox.com/v2/payments \\\n" + "--header \"Content-Type: application/json\" \\\n" + "--header \"Authorization: Bearer YOUR_ACCESS_TOKEN\" \\\n" + "--header \"Accept: application/json\" \\\n" + "--data \'{\n" + "\"idempotency_key\": \"" + uuid + "\",\n" + "\"amount_money\": {\n" + "\"amount\": 100,\n" + "\"currency\": \"USD\"},\n" + "\"source_id\": \"" + cardNonce + "\",\n" + "\"token\": \"" + token + "\",\n" + "\"billing_address\": {\n" + "\"address_line_1\": \"London Eye \",\n" + "\"address_line_2\": \"Riverside Walk\",\n" + "\"locality\": \"London\",\n" + "\"postal_code\": \"SE1 7\",\n" + "\"country\": \"UK\"} ,\n" + "\"cardholder_name\": \"John Doe\"\n" + "}\'"); } ``` 3. Update `onActivityResult` for `requestCode == DEFAULT_BUYER_VERIFICATION_REQUEST_CODE` to call the cURL helper methods to store and charge a card. ```java @Override protected void onActivityResult(int requestCode, int resultCode, Intent data) { if (requestCode == DEFAULT_BUYER_VERIFICATION_REQUEST_CODE) { BuyerVerification.handleActivityResult(data, result -> { if (result.isSuccess()) { //Charge the card with the verification token and nonce printCurlCommandChargeCard( nonce, result.getSuccessValue().getVerificationToken()); //Store the card with the nonce printCurlCommandSaveCard(nonce); } else if (result.isError()) { Log.d("buyer_verification","Error on verification:" + result.getErrorValue().getMessage()); } }); } } ``` --- # Web Payments SDK > Source: https://developer.squareup.com/docs/web-payments/overview > Status: PUBLIC > Languages: All > Platforms: All Learn about the Square Web Payments SDK for taking payments in a web client. **Applies to:** [Web Payments SDK](web-payments/quickstart) | [Payments API](payments-refunds) | [Cards API](cards-api/overview) | [Customers API](customers-api/what-it-does) {% subheading %}Learn about the Square Web Payments SDK and taking payments in a web client.{% /subheading %} {% toc hide=true /%} ## Overview The Web Payments SDK is a JavaScript browser-client SDK that provides a secure payment-card entry method, along with other secure payment methods. The following video introduces the Web Payments SDK and demonstrates how to get started. For an optimal viewing experience, expand the video window to a desired size or watch the video on YouTube. For a detailed overview, see the following sections. {% youtube src="https://www.youtube.com/embed/DNMXYO9JjGU" /%} The Web Payments SDK enables the client implementation of the client/server Square online payment solution. The SDK produces a secure single-use payment token that your application web client sends to your backend, where it's processed as a payment with the Payments API. For more information, see [Take Payments](payments-api/take-payments). The backend is the server part of the client/server Square payment solution, which processes the payment using a payment token. Square provides the Payments API as a backend solution for application developers to process payments. {% aside type="info" %} Starting October 1st, 2025, Square requires all Web Payments SDK implementations to use [Secure Contexts](https://developer.mozilla.org/en-US/docs/Web/Security/Secure_Contexts) and proper [Content Security Policy](web-payments/content-security-policy). {% /aside %} ## Requirements and limitations * The Web Payments SDK requires the use of [Secure Contexts](https://developer.mozilla.org/en-US/docs/Web/Security/Secure_Contexts) and CSP headers. * The Web Payments SDK cannot be used with Internet Explorer 11. * The Web Payments SDK doesn't create payments or customers on its own. The SDK must be used alongside the [Payments API](https://developer.squareup.com/reference/square/payments-api) and the [Customers API](https://developer.squareup.com/reference/square/customers-api). * Chrome extensions don't work with the Web Payments SDK. * In the EU, payments that don't provide authentication get a `CARD_DECLINED_VERIFICATION_REQUIRED` error for transactions that require authentication. This error means that the seller didn't implement `verifyBuyer` on the customer-initiated payments. For more information, see [VerifyBuyerError](https://developer.squareup.com/reference/sdks/web/payments/errors/VerifyBuyerError). ## SDK and payment acceptance implementation The overall implementation flow with the Web Payments SDK and a payment acceptance backend service works as follows: 1. Configure the Web Payments SDK client library with your application to render a payment method form and generate a payment token. 2. Configure the Payments API, or another backend service, to take the payment token and process the payment. To view an example of an application web client, see [Web Payments SDK Quickstart](web-payments/quickstart). To view additional examples of supported payment methods built with the Web Payments SDK, see [Web Payments SDK showcase](https://square.github.io/web-payments-showcase/). ## Web Payments SDK features The Web Payments SDK was created to make integration with your web application simpler and provide better performance. The SDK provides the following advantages: * **Granular configuration** - You only need to write configuration code for the payment methods that your application accepts. Each payment method has its own objects with configuration options appropriate for the method. * **Promise-based pattern** - The async/await pattern is used in place of the callback pattern of earlier payment libraries. This pattern lets your application react to events in a more reasonable way with less code. * **Automatic localization** - The SDK determines the locale of the buyer's browser automatically. However, your application can override localization by setting a configuration option. To set the locale with your application, use the [setLocale()](https://developer.squareup.com/reference/sdks/web/payments/objects/Payments#Payments.setLocale) method and pass the locale for when the application creates a new [Payment](https://developer.squareup.com/reference/sdks/web/payments/objects/Payments) object instance. The Web Payments SDK supports the following languages: * English (Australia) * English (Canada) * English (Ireland) * English (United Kingdom) * English (United States) * French (Canada) * French (France) * Japanese * Spanish ## Payment tokens The Web Payments SDK produces payment tokens from these supported payment methods: credit card, gift card, digital wallets, ACH bank transfer, Afterpay, and Cash App Pay. The payment tokens produced by these payment methods share a common format and are all accepted by the Payments API as `source_id` values. The server-side Payments API code that you write for one of these tokens works seamlessly for all the other methods. You can write unique client logic for each payment method, but you only need one payment process flow on the server. You can also get a payment token to use with the [Cards API](cards-api/walkthrough-seller-card) if you need to store a card on file with a customer. This is useful when your application must support recurring card-not-present payments. ## Create a customer profile The Web Payments SDK doesn't create a new customer in the Square account where a payment is credited. If you want to create a new customer along with a payment on a Square account, you need to collect at least one of the following pieces of information about a buyer: * First name * Family name * Company name * Buyer email address * Buyer phone number The backend of your application can take this information and [create a customer profile](customers-api/use-the-api/keep-records#create-a-customer-profile) using the Customers API. When your backend creates a `Payment` object using the [CreatePayment](https://developer.squareup.com/reference/square/payments-api/create-payment) endpoint, it includes the Web Payments SDK-provided payment token and the new customer ID. ## Accepting cards with postal codes The Web Payments SDK shows a postal code input field on the payment form after the SDK determines the country that issued the buyer's credit card. The Web Payments SDK displays the proper form label for the postal code based on the country: * For US, the form displays "ZIP". * For CA, the form displays "Postal Code". * For UK, the form displays "Postcode". If the payment form displays the postal code field, the payment requires a postal code for the buyer to proceed. The SDK enforces input field validation for the postal code depending on the country. {% aside type="important" %} The postal code field isn't supported for Japan and China. The field doesn't display on the payment form if a card is issued by a Japanese or a Chinese bank. If you're building your application in the Square Sandbox for sellers in these regions, you might still see the payment form render the postal code field if a Sandbox test card is used for testing purposes. {% /aside %} ## Payment session timeout The payment session times out after 24 hours. If the buyer hasn't completed the payment form, the buyer must refresh the browser to complete the payment. Fields that generate based on the issuing country of the credit card might not save input that the buyer entered. ## Application integrations Square provides examples of application integrations where you can initialize the Web Payments SDK with a backend to process payments. The following examples are provided on GitHub. * [Web Payments SDK integration with PHP](https://github.com/square/connect-api-examples/tree/master/connect-examples/v2/php_payment "A GitHub link to Square's public repo of a PHP app integration with the Web Payments SDK.") * [Set up the Web Payments SDK with Node.js](https://github.com/square/web-sdk "A GitHub link to Square's public repo to initialize the Web Payments SDK with Node.js.") ## Next step * If you want to go directly to the quickstart source, go to the GitHub repository for the [Web Payments SDK quickstart application](https://github.com/square/web-payments-quickstart) and review the [README file](https://github.com/square/web-payments-quickstart/blob/main/README.md) to get started. * If you want to set up the credit card payment method step by step, see [Web Payments SDK Quickstart](web-payments/quickstart). {% aside type="info" %} If you've already implemented the Payments API in your application, you can replace the `localhost` domain and URL used in the Web Payments SDK example code and samples with your own server endpoint URL. {% /aside %} ## See also * [Take an Apple Pay Payment](web-payments/apple-pay) * [Take a Google Pay Payment](web-payments/google-pay) * [Take ACH Bank Transfer Payments](web-payments/add-ach) * [Take a Gift Card Payment](web-payments/gift-card) * [Customize the Card Entry Form](web-payments/customize-styles) * [Verify the Buyer When Using a Payment Token](web-payments/sca) * [Take Afterpay and Clearpay Payments](web-payments/add-afterpay) * [Take a Payment with Cash App Pay](web-payments/add-cash-app-pay) --- # Customize the Card Entry Form > Source: https://developer.squareup.com/docs/web-payments/customize-styles > Status: PUBLIC > Languages: All > Platforms: All Learn how to apply custom styles to the Web Payments SDK card payment form. **Applies to:** [Web Payments SDK](web-payments/overview) {% subheading %}Learn how to apply custom styles to the Web Payments SDK card payment form.{% /subheading %} {% toc hide=true /%} ## Overview The Web Payments SDK lets you customize the style of the card entry and gift card entry forms. The following sections show the available style choices, how to set them, and what the resulting form looks like. You can see several customization ideas by viewing the [Design Showcase](https://square.github.io/web-payments-showcase) sample on GitHub. The following steps add code to the application you created from the [quickstart project sample](https://github.com/square/web-payments-quickstart/blob/main/public/examples/card-payment.html). If you haven't created an application using the quickstart, you need to do so before completing these steps. You can find a complete example of the [customized card](https://github.com/square/web-payments-quickstart/blob/main/public/examples/card-styling-simple.html) on GitHub. You can view the supported stylesheet classes and properties in the [CardClassSelectors](https://developer.squareup.com/reference/sdks/web/payments/objects/CardClassSelectors) object API Reference. The five visual elements of the `Card` payment method are represented as selectors that you specify in a card option styling object. You can set colors, fonts, and border options as shown in the following image: ![A graphic showing the five visual elements of the Card payment method, which are represented as selectors that you specify in a card option styling object.](//images.ctfassets.net/1nw4q0oohfju/512I6lwzWyHzA4wz588KD6/ab5513807c73b5d3eefe27fd15563929/visual-elements-card-payment-method-rev1.png) ## Configure a customized Card payment method The following steps produce the dark mode card previously shown. ### Step 1: Add a dark mode style to the page 1. Add a reference to the `dark-mode` css class to the body of the page. ```html
``` 1. Add a `` tag after the current `` in the header to add dark-mode.css. ```html ``` ### Step 2: Define a custom style Declare style customizing options in the [CardOptions](https://developer.squareup.com/reference/sdks/web/payments/objects/CardOptions) object. The `style` field value is of the [CardClassSelectors](https://developer.squareup.com/reference/sdks/web/payments/objects/CardClassSelectors) type. ```javascript const darkModeCardStyle = { '.input-container': { borderColor: '#2D2D2D', borderRadius: '6px', }, '.input-container.is-focus': { borderColor: '#006AFF', }, '.input-container.is-error': { borderColor: '#ff1600', }, '.message-text': { color: '#999999', }, '.message-icon': { color: '#999999', }, '.message-text.is-error': { color: '#ff1600', }, '.message-icon.is-error': { color: '#ff1600', }, input: { backgroundColor: '#2D2D2D', color: '#FFFFFF', fontFamily: 'helvetica neue, sans-serif', }, 'input::placeholder': { color: '#999999', }, 'input.is-error': { color: '#ff1600', }, '@media screen and (max-width: 600px)': { 'input': { 'fontSize': '12px', } } }; ``` ### Step 3: Initialize the Card payment method with a custom style Add the `style` parameter to the [payments.card](https://developer.squareup.com/reference/sdks/web/payments/objects/Payments) function call. ```javascript async function initializeCard(payments) { const card = await payments.card({ style: darkModeCardStyle, }); await card.attach('#card-container'); return card; } ``` ## Dynamic layout Your application and the buyer's actions determine whether the form is shown as a single line or a two-line form. If your application has styled the `` that the form is attached to as a fixed width of less than 480 pixels, the form is rendered as two lines. If the `` is declared with minimum and maximum widths that let the buyer resize the page, the form reacts to a wider `` container by rendering as a single line. ## See also * [Web Payments SDK Quickstart](web-payments/quickstart) * [Take an Apple Pay Payment](web-payments/apple-pay) * [Take ACH Bank Transfer Payments](web-payments/add-ach) * [Take a Gift Card Payment](web-payments/gift-card) * [Verify the Buyer When Using a Payment Token](web-payments/sca) --- # Take a Google Pay Payment > Source: https://developer.squareup.com/docs/web-payments/google-pay > Status: PUBLIC > Languages: All > Platforms: All Learn how to take Google Pay payments in a web client with the Web Payments SDK. **Applies to:** [Web Payments SDK](web-payments/overview) {% subheading %}Learn how to take Google Pay payments in a web client with the Web Payments SDK.{% /subheading %} {% toc hide=true /%} ## Overview You can add Google Pay to the application you built in [Web Payments SDK Quickstart](web-payments/quickstart) using the quickstart project sample. Digital wallet payments with Google Pay are available in [all regions in which Square operates](payment-card-support-by-country#digital-wallet-payments). The following steps add code to the [quickstart project sample](https://github.com/square/web-payments-quickstart). If you haven't created an application using the quickstart, you need to do so before completing these steps. The following shows the Google Pay pay sheet rendered by the Web Payments SDK: ![A graphic showing the Google Pay pay sheet rendered by the Web Payments SDK.](https://images.ctfassets.net/1nw4q0oohfju/5orczAiNhZlWpfSc1udRDv/73c35b34728ed63695962ecc12ffae5b/google-pay-sheet-web-payments-sdk.png) You can find a complete example of the [Google Pay code](https://github.com/square/web-payments-quickstart/blob/main/public/examples/google-pay.html) on GitHub. ## Requirements and limitations * Google Pay is supported on Google Chrome, Mozilla Firefox, Apple Safari, Microsoft Edge, Opera, and UCWeb UC browsers. * Google Pay requires HTTPS. * **WebView Support**: Google Pay works in Android WebView and iOS WKWebView with additional configuration (see [WebView Support](#webview-support) section below). * You must read and adhere to [Google Pay API Terms of Service](https://payments.developers.google.com/terms/sellertos), [Google Pay API Acceptable Use Policy](https://payments.developers.google.com/terms/aup), and [Google's brand guidelines](https://developers.google.com/pay/api/web/guides/brand-guidelines). ## 1. Attach Google Pay to the page The Google Pay payment method needs information about the buyer and the payment amount before it can open the Google Pay sheet. Your application creates a [PaymentRequest](https://developer.squareup.com/reference/sdks/web/payments/objects/PaymentRequest) object to provide that information and then gets a new [GooglePay](https://developer.squareup.com/reference/sdks/web/payments/objects/GooglePay) object initialized with it. The following code creates the payment request and attaches the `GooglePay` method to the page: 1. Add an HTML element to the prerequisite walkthrough form with an ID of `google-pay-button`. The HTML for the body of index.html should look like the following: ```html
``` 2. Add the following two functions to your script tag: ```javascript function buildPaymentRequest(payments) { return payments.paymentRequest({ countryCode: 'US', currencyCode: 'USD', total: { amount: '1.00', label: 'Total', }, }); } async function initializeGooglePay(payments) { const paymentRequest = buildPaymentRequest(payments) const googlePay = await payments.googlePay(paymentRequest); await googlePay.attach('#google-pay-button'); return googlePay; } ``` 3. In the `DOMContentLoaded eventListener`, add the following code after you initialize the `GooglePay` method: ```javascript let googlePay; try { googlePay = await initializeGooglePay(payments); } catch (e) { console.error('Initializing Google Pay failed', e); // There are a number of reasons why Google Pay might not be supported. // (e.g. Browser Support, Device Support, Account). Therefore you // should handle initialization failures, while still loading other // applicable payment methods. } ``` **Test the application** Navigate to http://localhost:3000/ in your browser. ![A graphic showing a typical payment card input and Google Pay layout for Web Payments SDK integrations.](https://images.ctfassets.net/1nw4q0oohfju/79Yb1Kwg8mf0cSyPNlGfY8/8ceeb8641c7e9e425ad6ceb397587ce7/google-pay-form-button.png) {% aside type="success" %} You should see the Google Pay button rendered on your page. {% /aside %} This step uses the standard configuration options for the Google Pay button. More options to customize the Google Pay button with the [GooglePay.attach()](https://developer.squareup.com/reference/sdks/web/payments/digital-wallets/google-pay#GooglePay.attach) method and the [googlePayButtonOptions](https://developer.squareup.com/reference/sdks/web/payments/digital-wallets/google-pay#GooglePay.attach.googlePayButtonOptions) object are available in the Web Payments SDK technical reference. ## 2. Get the payment token from the Google Pay payment method 1. Add the following code after `// Checkpoint 2` in the `DOMContentLoaded eventListener` function: ```javascript if (googlePay !== undefined) { const googlePayButton = document.getElementById('google-pay-button'); googlePayButton.addEventListener('click', async function (event) { await handlePaymentMethodSubmission(event, googlePay); }); } ``` **Test the application** 1. Navigate to http://localhost:3000/ in your browser. 2. Choose the **Google Pay** button. 3. Use your own personal card. This card isn't charged or stored in the Sandbox environment. ![An animation showing Google Pay being used to pay $1.00.](//images.ctfassets.net/1nw4q0oohfju/464F4F13tyxPdt2y4bilVC/03cc55e7ccf4ab9b3808b28b7adfe3cc/2.gPay.gif) {% aside type="success" %} You should see the Google Pay form and be able to complete a payment. {% /aside %} ## Payment request details Before your application can request a digital wallet payment, it must provide payment request details that the digital wallet page shows to the buyer. The previous examples show a payment request with a specified country, currency, and payment amount. In production use, your application might need to declare payment requests that include more detail and with added event listeners. To learn more about advanced payment requests, see [Payment Requests](web-payments/payment-requests). {% aside type="important" %} To enhance payment security, use the `verifyBuyer` function to apply [Strong Customer Authentication (SCA)](sca-overview) and verify the cardholder's identity. SCA should be used for all customer-initiated transactions, including digital wallet payments. If SCA isn't initiated for digital wallet payments, the transactions might be declined due to a lack of authentication. {% /aside %} ## WebView Support Square provides dedicated mobile SDKs for native application development: the [In-App Payments SDK](/docs/in-app-payments-sdk/what-it-does) for online payments with customizable payment screens, and the [Mobile Payments SDK](/docs/mobile-payments-sdk) for in-person payments. Alternatively, if you want to reuse your web payment implementation in mobile apps, you can use the Square Web Payments SDK within a mobile `WebView` with additional configuration. {% tabset %} {% tab id="Android WebView" %} To use Google Pay within an Android WebView: 1. **Add the required dependency** to your `build.gradle` file: ```gradle dependencies { implementation 'androidx.webkit:webkit:1.14.0' } ``` 2. **Add required queries** to your `AndroidManifest.xml`: ```xml ``` 3. **Enable the Payment Request API** in your WebView configuration: {% tabset %} {% tab id="Kotlin" %} ```kotlin import android.webkit.WebSettings; import android.webkit.WebView; import androidx.webkit.WebSettingsCompat; import androidx.webkit.WebViewFeature; AndroidView( factory = { // Update WebView settings to allow JavaScript and payment request settings.javaScriptEnabled = true WebView(it).apply { if (WebViewFeature.isFeatureSupported( WebViewFeature.PAYMENT_REQUEST)) { WebSettingsCompat.setPaymentRequestEnabled(settings, true); } } }, update = {it.loadUrl(url) } ) ``` {% /tab %} {% tab id="Java" %} ```java import android.webkit.WebSettings; import android.webkit.WebView; import androidx.webkit.WebSettingsCompat; import androidx.webkit.WebViewFeature; WebView webView = findViewById(R.id.webview); WebSettings webSettings = webView.getSettings(); // Update WebView settings to allow JavaScript and payment request webSettings.setJavaScriptEnabled(true); if (WebViewFeature.isFeatureSupported(WebViewFeature.PAYMENT_REQUEST)) { WebSettingsCompat.setPaymentRequestEnabled(webSettings, true); } ``` {% /tab %} {% /tabset %} For detailed implementation steps, see Google's documentation for [Android WebView](https://developers.google.com/pay/api/android/guides/recipes/using-android-webview). {% /tab %} {% tab id="iOS WKWebView" %} To use Google Pay within an iOS WKWebView, implement `WKUIDelegate` methods to handle Google Pay popups: {% tabset %} {% tab id="Swift" %} ```swift /// Creates a new WebView for displaying a popup func webView( _ webView: WKWebView, createWebViewWith configuration: WKWebViewConfiguration, for navigationAction: WKNavigationAction, windowFeatures: WKWindowFeatures) -> WKWebView? { // If the target of the navigation is a new window (popup), this property is nil guard navigationAction.targetFrame == nil else { return nil } // Creates a new WebView for a popup, and displays it in the same view controller (on the top of `mainWebView`) let popupWebView = WKWebView(frame: .zero, configuration: configuration) addWebView(popupWebView) return popupWebView } /// Removes the WebView from the view hierarchy and updates the UI as needed (after popup was closed) func webViewDidClose(_ webView: WKWebView) { /// Keeping the `mainWebView` on screen, and removing only popups guard webView != mainWebView else { return } webView.removeFromSuperview() } ``` {% /tab %} {% tab id="Objective-C" %} ```objectivec /// Creates a new WebView for displaying a popup - (nullable WKWebView *)webView:(WKWebView *)webView createWebViewWithConfiguration:(WKWebViewConfiguration *)configuration forNavigationAction:(WKNavigationAction *)navigationAction windowFeatures:(WKWindowFeatures *)windowFeatures { // If the target of the navigation is a new window (popup), this property is nil if (navigationAction.targetFrame != nil) { return nil; } // Create a new WebView for a popup WKWebView *popupWebView = [[WKWebView alloc] initWithFrame:CGRectZero configuration:configuration]; // Create a new instance of `NewViewController` with a newly created WebView, and present it modally NewViewController *popupViewController = [[NewViewController alloc] initWithWebView:popupWebView]; [self presentViewController:popupViewController animated:YES completion:nil]; return popupWebView; } /// Dismisses the current view controller (after popup was closed) - (void)webViewDidClose:(WKWebView *)webView { [self.presentingViewController dismissViewControllerAnimated:YES completion:nil]; } ``` {% /tab %} {% /tabset %} For complete implementation examples including view controller management and SwiftUI integration, see [Google's iOS WKWebView documentation](https://developers.google.com/pay/api/web/guides/recipes/using-ios-wkwebview). {% /tab %} {% /tabset %} ## Cross-Origin Policy Configuration For web applications embedded in WebViews or that use popups, configure your server's `Cross-Origin-Opener-Policy` header to prevent payment errors: ```http Cross-Origin-Opener-Policy: same-origin-allow-popups ``` **Important**: Using `Cross-Origin-Opener-Policy: same-origin` can cause Google Pay to fail with a 400 error (`OR_BIBED_15`) on iOS devices, even when the Google Pay button renders correctly. For more details on troubleshooting this error, see [Google's troubleshooting guide](https://developers.google.com/pay/api/web/support/troubleshooting#OR-BIBED-15). --- # Take an Apple Pay Payment > Source: https://developer.squareup.com/docs/web-payments/apple-pay > Status: PUBLIC > Languages: All > Platforms: All Learn how to take Apple Pay payments in a web client with the Web Payments SDK. **Applies to:** [Web Payments SDK](web-payments/overview) {% subheading %}Learn how to take Apple Pay payments in a web client with the Web Payments SDK.{% /subheading %} {% toc hide=true /%} ## Overview You can add Apple Pay to the application you built in [Web Payments SDK Quickstart](web-payments/quickstart) using the Quickstart project sample. Digital wallet payments with Apple Pay are available in [all regions in which Square operates](payment-card-support-by-country#digital-wallet-payments). The following steps add code to the [quickstart project sample](https://github.com/square/web-payments-quickstart). If you haven't created an application using the quickstart, you need to do so before completing these steps. The following shows the Apple Pay sheet rendered by the Web Payments SDK: ![A graphic showing the Apple Pay sheet rendered by the Web Payments SDK.](https://images.ctfassets.net/1nw4q0oohfju/2iyQDj4TRTenuGau1NNunR/f71e25c0d608025e946167aabff20ba6/apple-pay-sheet-web-payments-sdk.png) You can find a complete example of the [Apple Pay code](https://github.com/square/web-payments-quickstart/blob/main/public/examples/apple-pay.html) on GitHub. ## Requirements and limitations The Web Payments SDK adheres to [Apple's development requirements](https://developer.apple.com/apple-pay/get-started/) for Apple Pay on the Web. To take an Apple Pay payment, the following must be true: * Apple Pay is supported on Apple Safari browsers. * You're using HTTPS and have a Square account. Apple Pay payments cannot be tested with HTTP or from localhost. * You use the payment form in a Safari browser that is: * **iOS 10 or later** - Apple Pay JavaScript is supported on all iOS devices with a Secure Element. It's supported in both Safari and [SFSafariViewController](https://developer.apple.com/documentation/safariservices/sfsafariviewcontroller) objects. * **macOS 10.12 or later** - Apple Pay JavaScript is supported in Safari. The user must have an iPhone or Apple Watch to authorize the payment or have a MacBook Pro with Touch ID. {% aside type="important" %} If you're developing on a MacBook Pro, it might be necessary to activate Apple Pay and Touch ID, and then restart Safari. {% /aside %} ## 1. Register your Sandbox domain with Apple By registering your domain to use Apple Pay and the Apple Pay Platform, you agree to the [Apple Pay Platform Web Merchant Terms and Conditions](https://developer.apple.com/terms/apple-pay-web/). {% aside type="important" %} You must configure the Terms and Conditions certificate to download when the buyer visits the URL. Otherwise, your application won't be able to validate the agreement. Also, if the certificate gets a file extension added to it by your server, the validation won't work. {% /aside %} To register a Sandbox domain for Apple Pay in the Square Sandbox: 1. Open the [Developer Console](https://developer.squareup.com/apps). 1. Choose the application associated with your Web Payments SDK implementation. 1. Set the Developer Console to **Sandbox** mode. 1. In the left pane, choose **Apple Pay** for the selected application. 1. Choose the **Add Sandbox Domain** link and follow the instructions. * **Apple Merchant ID** - Because Square generates domain validation with Apple Pay when the payment page loads, you don't need to create an Apple merchant ID or call the Apple APIs to enable the functionality. * **Domain association folder** - If you're using the server provided by the quickstart application, put the `.well-known/apple-developer-merchantid-domain-association` folder and file under the `public` directory. The domain verification file works only with Square as the domain. {% aside type="warning" %} For Sandbox testing or production, the domain where you use Apple Pay must be an HTTPS domain. You cannot use a localhost or an HTTP URL with Apple Pay. {% /aside %} ## 2. Attach Apple Pay to the page The Apple Pay payment method needs information about the buyer and the payment amount before it can open the Apple Pay sheet. Your application creates a [PaymentRequest](https://developer.squareup.com/reference/sdks/web/payments/objects/PaymentRequest) object to provide that information and then gets a new [ApplePay](https://developer.squareup.com/reference/sdks/web/payments/objects/ApplePay) object initialized with it. The following code creates the payment request and attaches the `ApplePay` method to the page: 1. Add an HTML element to the prerequisite walkthrough form with an ID of `apple-pay-button`. The HTML for the body of index.html should look like the following: ```html
``` 2. Add a style element and button style properties in the `` tag. For a reference of Apple Pay button styles, see [Styling the Apple Pay Button Using CSS](https://developer.apple.com/documentation/apple_pay_on_the_web/styling_the_apple_pay_button_with_css). 3. Add the following functions to the script tag: ```javascript function buildPaymentRequest(payments) { return payments.paymentRequest({ countryCode: 'US', currencyCode: 'USD', total: { amount: '1.00', label: 'Total', }, }); } async function initializeApplePay(payments) { const paymentRequest = buildPaymentRequest(payments) const applePay = await payments.applePay(paymentRequest); // Note: You don't need to `attach` applePay. return applePay; } ``` 4. In the `DOMContentLoaded` event listener, add the following code after you initialize the `ApplePay` method: ```javascript let applePay; try { applePay = await initializeApplePay(payments); } catch (e) { console.error('Initializing Apple Pay failed', e); // There are a number of reason why Apple Pay might not be supported. // (such as Browser Support, Device Support, Account). Therefore you should // handle // initialization failures, while still loading other applicable payment // methods. } ``` **Test the application** 1. Navigate to your registered HTTPS sandbox domain for Apple Pay in your browser. ![A graphic showing a typical payment card input and Apple Pay layout for Web Payments SDK integrations.](https://images.ctfassets.net/1nw4q0oohfju/6VBkeaF7kzzfEfB9vHsRkt/199f0a4525dbc03548f6ab77e8bd7363/apple-pay-form-button.png) {% aside type="success" %} You should see the Apple Pay button rendered on your page. {% /aside %} 1. At this point, return to your code and find the `handlePaymentMethodSubmission` function call to continue. ## 3. Get the payment token from the Apple Pay payment method {% aside type="important" %} To comply with Apple Pay's requirements, you need to call [tokenize()](https://developer.squareup.com/reference/sdks/web/payments#Payments.applePay.Promise%3CApplePay%3E.ApplePay.tokenize) immediately within the button's click handler. Avoid any async operations (such as API calls, await statements, or database queries) between the click and `tokenize()` call. {% /aside %} 1. Add the following code after `// Checkpoint 2` in the `DOMContentLoaded eventListener` function: ```javascript if (applePay !== undefined) { const applePayButton = document.getElementById('apple-pay-button'); applePayButton.addEventListener('click', async function (event) { event.preventDefault() await handlePaymentMethodSubmission(event, applePay); }); } ``` {% aside type="info" %} For a code listing of the example helper method `handlePaymentMethodSubmission(event, applePay)` see the GitHub [QuickStart sample](https://github.com/square/web-payments-quickstart/blob/42e44f9e3845d829684f1713c8df0374ef390d02/public/examples/apple-pay.html#L139). {% /aside %} **Test the application** 1. Navigate to your registered HTTPS sandbox domain for Apple Pay in your browser. 2. Choose the **Apple Pay** button. 3. Use your own personal card. This card isn't charged or stored in the Sandbox environment. ![An animation showing Apply Pay being used to pay $1.00.](https://images.ctfassets.net/1nw4q0oohfju/3Ju1aP4UGuJmy55en1VClF/70ceba9299adc54147ec715b9a00727e/apple-pay-form-button.gif) {% aside type="success" %} You should be able to load the Apple Pay form and create a payment. {% /aside %} ### Payment request details Before your application can request a digital wallet payment, it must provide payment request details that the digital wallet page shows to the buyer. The previous examples showed a payment request with a specified country, currency, and payment amount. In production use, your application might need to declare payment requests that include more detail and with added event listeners. To learn more about advanced payment requests, see [Payment Requests](web-payments/payment-requests). ## 4. Put your integration into production To test your Apple Pay integration, you must [register a valid credit card](https://support.apple.com/es-lamr/HT204506) in your Apple Pay Wallet. {% aside type="important" %} Apple doesn't allow Sandbox [test credit card values](testing/test-values#test-credit-card). You must use a valid credit card from your Apple Pay Wallet. The card isn't charged for test payments as long as you're testing in the Square Sandbox. {% /aside %} ### Production configuration When your application is ready for production, do the following: 1. Register a domain for Apple Pay in production: 1. Open the [Developer Console](https://developer.squareup.com/apps). 1. Choose the application associated with your Web Payments SDK implementation. 1. Set the Developer Console to **Production** mode. 1. In the left pane, choose **Apple Pay** for the selected application. 1. Choose the **Add Domain** link and follow the instructions. 2. Change your payment page script tag that references the Web Payments SDK to the following: ```html https://web.squarecdn.com/v1/square.js ``` 3. Replace the Sandbox application ID and location ID in your payment page JavaScript with your production application ID and location ID. You can also get a production location ID from the Developer Console [Locations](https://app.squareup.com/dashboard/locations) page for a Square account. {% aside type="important" %} To enhance payment security, use the `verifyBuyer` function to apply [Strong Customer Authentication (SCA)](sca-overview) and verify the cardholder's identity. SCA should be used for all customer-initiated transactions, including digital wallet payments. If SCA isn't initiated for digital wallet payments, the transactions might be declined due to a lack of authentication. {% /aside %} --- # Take a Gift Card Payment > Source: https://developer.squareup.com/docs/web-payments/gift-card > Status: PUBLIC > Languages: All > Platforms: All Learn how to take gift card payments in a web client with the Web Payments SDK. **Applies to:** [Web Payments SDK](web-payments/overview) | [Gift Cards API](gift-cards/using-gift-cards-api) {% subheading %}Learn how to take gift card payments in a web client with the Web Payments SDK.{% /subheading %} {% toc hide=true /%} ## Overview You can add a payment method to the application you built using the quickstart project sample in [Web Payments SDK Quickstart](web-payments/quickstart) to integrate the Web Payments SDK into your application. The following steps add code to the application you created from the [quickstart project sample](https://github.com/square/web-payments-quickstart). If you haven't created an application using the quickstart, you need to do so before completing these steps. ![A graphic showing the gift card payment method for the Web Payments SDK rendered on a web page.](https://images.ctfassets.net/1nw4q0oohfju/5LQlBpxHGngbenSjSqWqrn/235b11760ff1cc9efd6698983b639d66/gift-card-payment-field.png) You can find the complete [quickstart example](https://github.com/square/web-payments-quickstart/blob/main/public/examples/gift-card.html) on GitHub. The following video demonstrates how to build an end-to-end payment flow with the gift card payment method, and shows the code you use to build the flow. For an optimal viewing experience, expand the video window to a desired size or watch the video on YouTube. For a detailed overview of Square gift cards, see the following sections in this topic. {% youtube src="https://www.youtube.com/embed/SZWOWw2s_hg?si=IvW29BSIm98uMDgO" /%} ## 1. Attach the GiftCard payment method to the page The following code attaches the [GiftCard](https://developer.squareup.com/reference/sdks/web/payments/gift-cards#GiftCard) method to the page: 1. Add the following gift card HTML elements to the prerequisite walkthrough form: ```html
``` 2. Add an `initializeGiftCard` function below the `initializeCard` function in the ` ``` To initialize the Square `Payments` object, pass your application ID and location ID, also found in the Developer Console, to `Square.payments`. ```javascript const payments = Square.payments(APPLICATION_ID, LOCATION_ID); ``` #### 3. Add gift cards as a payment method to your frontend UI. Write an `initializeGiftCard` function to call `payments.giftCard()` to create a [GiftCard](https://developer.squareup.com/reference/sdks/web/payments/gift-cards) object and attach the `GiftCard` to a DOM element. ```javascript async function initializeGiftCard(payments) { const giftCard = await payments.giftCard(); await giftCard.attach('#gift-card-container'); return giftCard; } ``` Add an event listener to execute `initializeGiftCard` when the DOM loads. ```javascript document.addEventListener('DOMContentLoaded', async function () { let giftCard; try { giftCard = await initializeGiftCard(payments); } catch (e) { console.error('Initializing Gift Card failed', e); return; } // Placeholder for handlePaymentMethodSubmission }); ``` This displays a gift card input field to the customer. ![A graphic showing a typical gift card input layout for Web Payments SDK integrations.](//images.ctfassets.net/1nw4q0oohfju/1Do0k2hOd9TH2eDlry7hlW/1747053342bd196cd74a7aafab2d0f61/gift-card-payment-field-pay-button.png) #### 4. On the frontend, get the customer's input and generate a token. To generate a corresponding token from the customer's input, you need to call the SDK `tokenize()` method. The following example calls the method within a helper `tokenize` function: ```javascript async function tokenize(paymentMethod) { const tokenResult = await paymentMethod.tokenize(); if (tokenResult.status === 'OK') { return tokenResult.token; } else { let errorMessage = `Tokenization failed with status: ${tokenResult.status}`; if (tokenResult.errors) { errorMessage += ` and errors: ${JSON.stringify( tokenResult.errors, )}`; } throw new Error(errorMessage); } } ``` Add the helper `tokenize` function to a parent handler function that's called when a customer submits a payment. For example, the following event listener fires the handler `handlePaymentMethodSubmission` after the customer inputs the gift card number and clicks the **Pay with Gift Card** button: ```javascript const giftCardButton = document.getElementById('gift-card-button'); giftCardButton.addEventListener('click', async function (event) { await handlePaymentMethodSubmission(event, giftCard); }); ``` `handlePaymentMethodSubmission` then calls `tokenize`, and passes the token result to a helper function, called `createPayment` in this example. ```javascript async function handlePaymentMethodSubmission(event, paymentMethod) { try { const token = await tokenize(paymentMethod); const paymentResults = await createPayment(token); } catch (e) { console.error(e.message); } } ``` #### 5. Call a frontend helper function to send client data to your server so that you can call the CreatePayment endpoint from your backend. `createPayment` is a function that you write to pass the token and other data from the client to your server, so that you can make the backend call to [CreatePayment](https://developer.squareup.com/reference/square/payments-api/create-payment). You need to pass the following information: * `source_id` - The token generated for the gift card when you called the Square `tokenize` method. For the purposes of this example, imagine that the `source_id` corresponds to a gift card with a $1 value. * `order_id` - The ID for the `Order` object that you created in step 1. In addition to the `source_id`, the `order_id`, and an `idempotency_key`, you need to set the following fields in the [CreatePayment](https://developer.squareup.com/reference/square/payments-api/create-payment) request body: * `accept_partial_authorization` - Must be `true` to create a gift card payment, in case there's an outstanding balance after the gift card is applied. If `false`, Square returns an `INSUFFICIENT_FUNDS` error. * `autocomplete` - Must be `false`. If there's an outstanding balance, additional payments need to be created and added to the order. * `amount_money` - The payment amount. {% tabset %} {% tab id="Request" %} In the following example, the `order_id` corresponds to an order for one small coffee, with a `total_money` value of `300`. The `source_id` corresponds to a $1.00 gift card. The `amount_money` charges the entire amount owed to the gift card, even though that amount exceeds the card balance. ```` {% /tab %} {% tab id="Response" %} On success, Square responds with a Payment object like the following example. For comprehensive descriptions of all the returned fields, see [Payment](https://developer.squareup.com/reference/square/objects/Payment) in the API Reference. Because the gift card only has a balance of $1, Square creates a `Payment` with a `total_money` value of `100`. The payment ID is automatically attached to the `Order`. You can call [RetrieveOrder](https://developer.squareup.com/reference/square/orders-api/retrieve-order) to get the IDs later. ```json { "payment": { "id": "f7Mv28ShmMzYftlUcdwpJSvhxVdZY", "created_at": "2025-01-30T20:05:57.113Z", "updated_at": "2025-01-30T20:05:57.166Z", "amount_money": { "amount": 100, "currency": "USD" }, "status": "APPROVED", "delay_duration": "PT168H", "source_type": "CARD", "card_details": { "status": "AUTHORIZED", "card": { "card_brand": "SQUARE_GIFT_CARD", "last_4": "0000", "exp_month": 12, "exp_year": 2050, "fingerprint": "sq-1-dVkpiMbn-FOL6lbZ1GEQX2IGiE2PAaRDUDjtbgC80-TquSCXXgooqLiXwO65LPGKOA", "card_type": "DEBIT", "prepaid_type": "PREPAID", "bin": "778332" }, "entry_method": "KEYED", "auth_result_code": "0", "card_payment_timeline": { "authorized_at": "2025-01-30T20:05:57.166Z" } }, "location_id": "L95QGYFYAJY3J", "order_id": "KNJvxfeRCWRvNKv59vsCUBnkr2DZY", "risk_evaluation": { "created_at": "2025-01-30T20:05:57.166Z", "risk_level": "NORMAL" }, "total_money": { "amount": 100, "currency": "USD" }, "approved_money": { "amount": 100, "currency": "USD" }, "capabilities": [ "EDIT_AMOUNT_UP", "EDIT_AMOUNT_DOWN", "EDIT_TIP_AMOUNT_UP", "EDIT_TIP_AMOUNT_DOWN" ], "receipt_number": "f7Mv", "delay_action": "CANCEL", "delayed_until": "2025-02-06T20:05:57.113Z", "application_details": { "square_product": "ECOMMERCE_API", "application_id": "sq0idp-uV5JG9Gt8OAXzCEKFRvsRf" }, "version_token": "Qhgxhls8h79QjqVZVB9deLztAA2FckCyklZg7BwW61D6o" } } ``` {% /tab %} {% /tabset %} #### 6. Calculate the outstanding balance and prompt the customer on the frontend to provide an additional payment method, if needed. In this example, the gift card only has a $1 balance, so a $1 `Payment` is created. The `Payment.amount_money` value is `100`. Subtract `Payment.amount_money` from `Order.net_amount_money_due` to calculate the outstanding balance. In this example, `300` – `100` = `200` is the outstanding balance. Prompt the customer to add an additional payment method in the way that best suits your application interface and logic. Then, repeat the steps that you followed to collect the first gift card payment: after the customer submits their input, generate a token for the payment method and call [CreatePayment](https://developer.squareup.com/reference/square/payments-api/create-payment) from your server. {% tabset %} {% tab id="Request" %} This time, set the `amount_money` to the outstanding balance of 200. ```` {% /tab %} {% tab id="Response" %} Create as many `Payments` as needed until the outstanding balance is `0`. ```json { "payment": { "id": "g8Nw39ShmMzYftlUcdwpJSvhxWdz7", "created_at": "2025-01-30T20:05:57.113Z", "updated_at": "2025-01-30T20:05:57.166Z", "amount_money": { "amount": 200, "currency": "USD" }, "status": "APPROVED", "delay_duration": "PT168H", "source_type": "CARD", "card_details": { "status": "AUTHORIZED", "card": { "card_brand": "VISA", "last_4": "1111", "exp_month": 11, "exp_year": 2050, "fingerprint": "sq-1-dVkpiMbn-FOL6lbZ1GEQX2IGiE2PAaRDUDjtbgC80-TquSCXXgooqLiXwO65LPGKOA", "card_type": "DEBIT", "prepaid_type": "NOT_PREPAID", "bin": "778332" }, "entry_method": "KEYED", "cvv_status": "CVV_ACCEPTED", "avs_accepted": "AVS_ACCEPTED", "auth_result_code": "0", "card_payment_timeline": { "authorized_at": "2025-01-30T20:05:57.166Z" } }, "location_id": "L95QGYFYAJY3J", "order_id": "KNJvxfeRCWRvNKv59vsCUBnkr2DZY", "risk_evaluation": { "created_at": "2025-01-30T20:05:57.166Z", "risk_level": "NORMAL" }, "total_money": { "amount": 200, "currency": "USD" }, "approved_money": { "amount": 200, "currency": "USD" }, "capabilities": [ "EDIT_AMOUNT_UP", "EDIT_AMOUNT_DOWN", "EDIT_TIP_AMOUNT_UP", "EDIT_TIP_AMOUNT_DOWN" ], "receipt_number": "g8Nw", "delay_action": "CANCEL", "delayed_until": "2025-02-06T20:05:57.113Z", "application_details": { "square_product": "ECOMMERCE_API", "application_id": "sq0idp-uV5JG9Gt8OAXzCEKFRvsRf" }, "version_token": "Qhgxhls8h79QjqVZVB9deLztAA2FckCyklZg7BwW61D6o" } } ``` {% /tab %} {% /tabset %} #### 7. From your server, call PayOrder to complete the order. When the outstanding balance is `0`, call [PayOrder](https://developer.squareup.com/reference/square/orders-api/pay-order) from your server to complete the customer’s purchase. Trigger this call according to your application interface and logic. For example, you could send the request after a customer selects "Submit Order." The endpoint takes the `order_id` as a path param: `/orders/order_id/pay`. In the body of the request, pass the `payment_ids` associated with the `Order` in addition to auth credentials and an `idempotency_key`, as in the following example. {% tabset %} {% tab id="Request" %} ```` {% /tab %} {% tab id="Response" %} On success, Square responds with the `Order` object. The `Order.state` is now `COMPLETED`. ```json { "order": { "id": "KNJvxfeRCWRvNKv59vsCUBnkr2DZY", "location_id": "L95QGYFYAJY3J", "line_items": [ { "uid": "Rxt5v0Ktd0IjaXm2iN0lBD", "catalog_object_id": "U2LA7CNNKPXMMSBVDY4JCZOO", "catalog_version": 1730238005989, "quantity": "1", "name": "Coffee", "variation_name": "Small", "base_price_money": { "amount": 300, "currency": "USD" }, "gross_sales_money": { "amount": 300, "currency": "USD" }, "total_tax_money": { "amount": 0, "currency": "USD" }, "total_discount_money": { "amount": 0, "currency": "USD" }, "total_money": { "amount": 300, "currency": "USD" }, "variation_total_price_money": { "amount": 300, "currency": "USD" }, "item_type": "ITEM", "total_service_charge_money": { "amount": 0, "currency": "USD" } } ], "created_at": "2025-01-28T16:14:58.334Z", "updated_at": "2025-01-28T16:14:58.334Z", "state": "COMPLETED", "version": 1, "total_tax_money": { "amount": 0, "currency": "USD" }, "total_discount_money": { "amount": 0, "currency": "USD" }, "total_tip_money": { "amount": 0, "currency": "USD" }, "total_money": { "amount": 300, "currency": "USD" }, "closed_at": "2025-01-28T16:14:58.334Z", "tenders": [ { "id": "f7Mv28ShmMzYftlUcdwpJSvhxVdZY", "location_id": "L95QGYFYAJY3J", "transaction_id": "KKXZHtjt8XR7UTszrnx3esHdWpRZY", "created_at": "2025-01-28T16:14:58.334Z", "amount_money": { "amount": 100, "currency": "USD" }, "type": "SQUARE_GIFT_CARD", "card_details": { "status": "CAPTURED", "card": { "card_brand": "SQUARE_GIFT_CARD", "last_4": "0000", "exp_month": 12, "exp_year": 2050, "fingerprint": "sq-1-dVkpiMbn-FOL6lbZ1GEQX2IGiE2PAaRDUDjtbgC80-TquSCXXgooqLiXwO65LPGKOA", "card_type": "DEBIT", "prepaid_type": "PREPAID", "bin": "778332", "payment_account_reference": "500151CD7ODP2QA6CYPW2NAJWLRXI" }, "entry_method": "KEYED" }, "payment_id": "f7Mv28ShmMzYftlUcdwpJSvhxVdZY" }, { "id": "g8Nw39ShmMzYftlUcdwpJSvhxWdz7", "location_id": "L95QGYFYAJY3J", "transaction_id": "KKXZHtjt8XR7UTszrnx3esHdWpRZY", "created_at": "2025-01-28T16:14:58.334Z", "amount_money": { "amount": 200, "currency": "USD" }, "type": "CARD", "card_details": { "status": "CAPTURED", "card": { "card_brand": "VISA", "last_4": "1111", "exp_month": 11, "exp_year": 2050, "fingerprint": "sq-1-dVkpiMbn-FOL6lbZ1GEQX2IGiE2PAaRDUDjtbgC80-TquSCXXgooqLiXwO65LPGKOA", "card_type": "DEBIT", "prepaid_type": "NOT_PREPAID", "bin": "778332", "payment_account_reference": "500151CD7ODP2QA6CYPW2NAJWLRXI" }, "entry_method": "KEYED" }, "payment_id": "g8Nw39ShmMzYftlUcdwpJSvhxWdz7" } ], "total_service_charge_money": { "amount": 0, "currency": "USD" }, "net_amounts": { "total_money": { "amount": 300, "currency": "USD" }, "tax_money": { "amount": 0, "currency": "USD" }, "discount_money": { "amount": 0, "currency": "USD" }, "tip_money": { "amount": 0, "currency": "USD" }, "service_charge_money": { "amount": 0, "currency": "USD" } }, "source": { "name": "Partial Payments Example Application" }, "net_amount_due_money": { "amount": 0, "currency": "USD" } } } ``` {% /tab %} {% /tabset %} At this point, the customer has paid for the order and the order is visible in the [Square Dashboard Order Manager](https://app.squareup.com/dashboard/orders/overview). Display a success message according to your application interface and logic. --- # Retrieve Refunds > Source: https://developer.squareup.com/docs/refunds-api/retrieve-refunds > Status: PUBLIC > Languages: All > Platforms: All Use the Refunds API to retrieve funds regardless of the payment source or what the seller used to process a payment. **Applies to:** [Refunds API](refunds-api/overview) | [Payments API](payments-refunds) {% subheading %}Learn how to retrieve funds regardless of the payment source or what the seller used to process a payment.{% /subheading %} {% toc hide=true /%} ## Overview Regardless of the payment source [(card](payments-api/take-payments/card-payments), [cash](payments-api/take-payments/cash-payments), or [external](payments-api/take-payments/external-payments) payments) or what the seller used to process a payment (Square first-party products such as Point of Sale, the Square Dashboard, or a custom application that makes [CreatePayment](https://developer.squareup.com/reference/square/payments-api/create-payment) calls), your application can refund these payments by creating a `Refund` object using the [RefundPayment](https://developer.squareup.com/reference/square/refunds-api/refund-payment) endpoint. ## Retrieve payment refunds You can get a specific refund, given a valid `PaymentRefund.id`, or you can request a list of refunds filtered by location ID and other values. ### Get a refund object When a payment is refunded, the `Payment` object is updated with details that include the amount refunded represented by the `Payment.refunded_money` child object. ```json copy-code "refunded_money": { "amount": 100, "currency": "USD" } ``` The `Payment` also refers to the `PaymentRefund` object that was created for the payment refund in the `Payment.refund_ids` child object. ```json copy-code "refund_ids": [ "bF2xukuBtkb8dOntixQhMeIC_qJbFeWF0lInqOrzPL", "bF2xukuBtkb8dOntixQhMeICB_Wg9piDyTF2pP34gyywPorIHvyc" ] ``` `refund_ids` is an array because any one payment might have one or more partial refunds, up to the full amount of the payment. For each payment refund ID, make the following request: ```` The `PaymentRefund` object that is returned shows the amount refunded. If there are multiple refund IDs in the `Payment`, get each of them and total the amounts in the `PaymentRefund.amount_money` fields to get the total amount refunded for the payment. ```json copy-code { "refund": { "id": "bF2xukuBtkb8dOntixQhMeIC_qJbFeWF0lInqOrzPL", "status": "COMPLETED", "amount_money": { "amount": 100, "currency": "USD" }, "payment_id": "5g0hWn5rIggRnXcvUGY01l7H4sNZY", "order_id": "6MAuhu2PP6D3HY56lwO3CHtJd7LZY", "created_at": "2023-03-13T21:23:04.488Z", "updated_at": "2023-03-13T21:23:07.403Z", "processing_fee": [], "location_id": "VJN4XSBFTVPK9", "destination_type": "CARD" } } ``` Note the `"order_id": "6MAuhu2PP6D3HY56lwO3CHtJd7LZY"` field in the `PaymentRefund` object. Use the field value to get the `Order` that was created for the refund. This isn't the same `Order` object that was created for the initial `Payment`. ### Get a list of refund objects Your application can retrieve every payment refund created in the authorized Square account but that list can be quite large. Instead, you should scope your request to something like the following example. In this example, the request is filtering on: * A single location. * The refund status is `Completed`. * The payment type is `Card`. * The refund date is later than 2023-03-01, at 10 PM. * The results are sorted in descending order by their last updated time. The most recently updated items are returned first. * The result page size of 10. ```` The response object is a list of `PaymentRefund` objects that meet the filter conditions of the request. If there are fewer than 10 refunds in the response, it doesn't include a `cursor` field whose value is used in a subsequent request to fetch the next page of results. ```json copy-code { "refunds": [ { "id": "5g0hWn5rIggRnXcvUGY01l7H4sNZY_vmlADPqIUDCtJJVdmQgmW58imZ7n3er5IUmWcIluOZC", "status": "COMPLETED", "amount_money": { "amount": 100, "currency": "USD" }, "payment_id": "5g0hWn5rIggRnXcvUGY01l7H4sNZY", "order_id": "6MAuhu2PP6D3HY56lwO3CHtJd7LZY", "created_at": "2023-03-13T21:23:04.777Z", "updated_at": "2023-03-13T21:23:07.396Z", "processing_fee": [], "location_id": "VJN4XSBFTVPK9", "destination_type": "CARD" } ], "cursor": "nAZ9eiKhOEeXRCZACAsH3dmm9Q1w...scoBqfeqi4jqPeqy3rjSuhHf" } ``` ## Retrieve the associated order If you need to get the `Order` associated with a `PaymentRefund`, use the `PaymentRefund.order_id` field as a path parameter in your request. {% aside type="info" %} If you issue multiple partial payment refunds for a single payment, a separate `Order` is created for each partial payment refund. {% /aside %} The following example retrieves order `6MAuhu2PP6D3HY56lwO3CHtJd7LZY`: ```` The response is the `Order` object with the specified ID. The `refunds` field contains the details of the refund. ```json { "order": { "id": "6MAuhu2PP6D3HY56lwO3CHtJd7LZY", "location_id": "VJN4XSBFTVPK9", "created_at": "2023-03-13T21:23:04.544Z", "updated_at": "2023-03-13T21:23:07.000Z", "state": "COMPLETED", "version": 4, "closed_at": "2023-03-13T21:23:04.941Z", "returns": [ { "uid": "Bre6c4lWXQIiTI4MvekKXD", "source_order_id": "yavR3HdLWE1vJlzlvDTF6cqJgrZZY", "return_line_items": [ { "uid": "xPuGWbCYekQtkxjc5CGZp", "quantity": "1", "item_type": "CUSTOM_AMOUNT", "base_price_money": { "amount": 100, "currency": "USD" }, "variation_total_price_money": { "amount": 100, "currency": "USD" }, "gross_return_money": { "amount": 100, "currency": "USD" }, "total_tax_money": { "amount": 0, "currency": "USD" }, "total_discount_money": { "amount": 0, "currency": "USD" }, "total_money": { "amount": 100, "currency": "USD" } } ] } ], "return_amounts": { "total_money": { "amount": 100, "currency": "USD" }, "tax_money": { "amount": 0, "currency": "USD" }, "discount_money": { "amount": 0, "currency": "USD" }, "tip_money": { "amount": 0, "currency": "USD" }, "service_charge_money": { "amount": 0, "currency": "USD" } }, "refunds": [ { "id": "vmlADPqIUDCtJJVdmQgmW58imZ7n3er5IUmWcIluOZC", "location_id": "VJN4XSBFTVPK9", "transaction_id": "yavR3HdLWE1vJlzlvDTF6cqJgrZZY", "tender_id": "5g0hWn5rIggRnXcvUGY01l7H4sNZY", "created_at": "2023-03-13T21:23:04Z", "reason": "Refund via API", "amount_money": { "amount": 100, "currency": "USD" }, "status": "APPROVED" } ], "source": {}, "net_amount_due_money": { "amount": 0, "currency": "USD" } } } ``` --- # Square Gift Card Payments with the Web Payments SDK > Source: https://developer.squareup.com/docs/web-payments/gift-cards-intro > Status: PUBLIC > Languages: All > Platforms: All Learn about taking gift card payments with the Web Payments SDK. **Applies to:** [Web Payments SDK](web-payments/overview) | [Gift Cards API](gift-cards/using-gift-cards-api) | [Payments API](payments-refunds) | [Orders API](orders-api/what-it-does) {% subheading %}Learn about taking Square gift card payments with the Web Payments SDK.{% /subheading %} {% toc hide=true /%} ## Overview You can build applications with the Web Payments SDK that take payments from a [Square gift card](https://squareup.com/gift-cards). A Square gift card enables sellers to boost sales and attract new customers. Sellers can launch a complete gifting program with digital gift cards, which can be purchased online. Buyers can choose to send digital cards to friends and family and introduce them to the seller's business. ## How gift cards work To make purchases, buyers submit Square gift cards by entering only a card number. Expiration dates, CVV numbers, and postal codes aren't used. Accordingly, the payment form for gift cards only has a card number field. The payment token generated from a gift card is used as the `Payment` `.source_id` value and a payment is created as though the source is any other payment card. {% aside type="tip" %} Gift cards are configured and sold by a seller using the [Square Dashboard](https://squareup.com/dashboard/gift-cards/electronic/configure). A gift card can only be used to pay for purchases from the seller who issued the gift card. {% /aside %} ### Multiple payment purchases Some payment applications allow for multiple payments on a purchase while others don't. Gift card payments must take this into account. For example, an application might not allow a gift card payment if it cannot cover the entire purchase amount. An application can restrict gift card payment approvals based on the available balance of a gift card. The approval restriction is set on individual payment requests. If an application allows multiple payments for a purchase, it should allow for partial authorization approval when the gift card balance is less than the total purchase amount. In this case, the full balance of the card is used in the purchase, leaving a remaining purchase amount. This approval is known as partial authorization. For example, a buyer is purchasing a pair of running shoes for $200 USD and the gift card balance is $50 USD. In this case, the gift card payment is authorized for the full card balance. The remaining purchase amount of $150 USD is covered by another gift card or payment card, creating an additional `Payment` object. The calculation of the remaining purchase amount and linking of individual payments is handled by the payment application's backend and is normally performed in the server session that manages the checkout experience. ### Gift card purchase cancellation A buyer might decide to cancel a purchase after a gift card payment is approved and before completing a checkout. Canceling a purchase with a gift card involves calling [Payments.CancelPayment](https://developer.squareup.com/reference/square/payments-api/cancelpayment). {% aside type="important" %} Approved gift card funds are held until the purchase is completed or canceled or until the approval times out in 7 days. Be sure to complete the payment cancellation flow if the buyer decides not to complete a purchase. {% /aside %} ## Gift card call flow This call flow assumes that your backend provides checkout and payment pages. To accept a gift card, a payment page renders the payment form in a gift card mode that only has a gift card number input field. The payment page should also render a payment form in the payment card mode for accepting credit or debit card payments. To support these payment methods, create the following: * **Client** - A [payment method](web-payments/gift-card) application to render the gift card form, payment card form, and optional digital wallets. * **Server** - An endpoint to create a `Payment` object for each posted payment token. Optionally, the endpoint can request the `Order` object created by the checkout for linking the payments and order completion. Any combination of a gift card and payment card can be used to pay the total purchase amount. When a gift card balance isn't enough to complete a purchase, a buyer makes an additional payment to complete the purchase. The payment can be another gift card or a payment card. This flow processes payment tokens individually and associates all payments with the `Order` representing a purchase. {% aside type="tip" %} When an `Order` is used to associate multiple payments, a single transaction is shown in the Square Dashboard with a payment for each card used by the buyer. If more than one `Payment` object is created without a parent `Order`, the purchase can still be completed but the Square Dashboard shows a separate transaction for each payment. {% /aside %} The following call flow supports a multiple payment purchase: **Client:** The checkout page requests a new `Order` for the purchase from the server. **Server:** Calls the Orders API to create an order and respond to the client with the new `Order` `.id`. **Client:** 1. The payment page gets the `Order` `.id` from the checkout page. 2. The buyer provides a payment in a gift card or payment card form to generate a payment token. **Client:** POSTs the payment token and the `Order` `.id`. **Server:** 1. Gets the unpaid balance of the order from the checkout service. 2. Uses the payment token to create a `Payment` using the unpaid balance and then POSTs the `Payment` to the `Order`. 3. Sends a `200` response to the client with the `Order` `.id`, the remaining order balance (which might be zero), and the payment status. **Client:** 1. If the response payment status is `APPROVED` and the remaining order amount is greater than zero, the client collects another payment. 2. If the response payment status is `COMPLETED`, the purchase gift card flow is complete. The following diagram shows the flow when a buyer makes a purchase with a gift card and then pays the remaining balance with a payment card: ![A diagram showing a typical client/server process flow for a payment form application that takes a Square gift card.](//images.ctfassets.net/1nw4q0oohfju/3VfjRfZK3XiinTdhwF13v7/e0a34a75d337449072db3c5554188606/giftcards-api-overview-flow.png) To support gift card payments, use the [Gift Cards API](https://developer.squareup.com/reference/square/gift-cards-api) and integrate it into your application. The following video introduces the Gift Cards API and demonstrates its features. The Gift Cards API provides endpoints for creating a gift card, retrieving gift card information, linking a customer to a gift card, and unlinking a customer from a gift card. {% youtube src="https://www.youtube.com/embed/2tUbxgkjjCo?si=B6AgXb08P2tdu9F3" /%} ## See also * [Take a Gift Card Payment](web-payments/gift-card) * [Partial Payments with Square Gift Cards](web-payments/gift-card-walkthrough) --- # Integrate Digital Wallets with the In-App Payments SDK > Source: https://developer.squareup.com/docs/in-app-payments-sdk/add-digital-wallets > Status: PUBLIC > Languages: All > Platforms: All Learn about digital wallet payment methods for the In-App-Payments SDK. **Applies to:** [In-App Payments SDK - Android](https://developer.squareup.com/docs/api/in-app-payment/android/) | [In-App Payments SDK - iOS](https://developer.squareup.com/docs/api/in-app-payment/ios) {% subheading %}Learn about digital wallet payment methods for the In-App-Payments SDK.{% /subheading %} {% toc hide=true /%} ## Overview Use the In-App Payments SDK to accept digital wallets (Apple Pay, Google Pay, and Secure Remote Commerce) with a fully customized payment screen that seamlessly matches the branding of the application. The following topics provide step-by-step instructions for integrating Apple Pay or Google Pay with the In-App Payments SDK on an iOS or Android device, respectively: * [Enable Apple Pay](in-app-payments-sdk/add-digital-wallets/apple-pay) * [Enable Google Pay](in-app-payments-sdk/add-digital-wallets/google-pay) {% aside type="important" %} To enhance payment security, use the `verifyBuyer` function to apply [Strong Customer Authentication (SCA)](sca-overview) and verify the cardholder's identity. SCA should be used for all customer-initiated transactions, including digital wallet payments. If SCA isn't initiated for digital wallet payments, the transactions might be declined due to a lack of authentication. {% /aside %} ## See also * [Build on Android](in-app-payments-sdk/build-on-android) * [Build on iOS](in-app-payments-sdk/build-on-ios) --- # Print or Issue Receipts for Cash Payments and Previous Transactions > Source: https://developer.squareup.com/docs/terminal-api/advanced-features/issue-receipts > Status: BETA > Languages: All > Platforms: All Use the Square Terminal and a POS application to print or issue receipts for cash payments and previous transactions. **Applies to:** [Terminal API](terminal-api/overview) | [Devices API](terminal-api/terminal-device-monitoring) | [Payments API](payments-refunds) {% subheading %}Learn how to use the Square Terminal and a POS application to print or issue receipts for cash payments and previous transactions.{% /subheading %} {% toc hide=true /%} ## Overview After pairing a Square Terminal using the [Devices API](https://developer.squareup.com/reference/square/devices-api), use the [Terminal API](https://developer.squareup.com/reference/square/terminal-api) to print or issue a receipt for a pre-existing payment or for a cash payment after recording it with the [Payments API](https://developer.squareup.com/reference/square/[payments-api). This feature uses Terminal action endpoints (such as [CreateTerminalAction](https://developer.squareup.com/reference/square/terminal-api/create-terminal-action)) and the `RECEIPT` Terminal action type. ## When to issue receipts With the `RECEIPT` action type, the Terminal API supports workflows where a seller can print a receipt at the buyer's request. In previous releases, the only way a seller could print a receipt is immediately after a checkout. The seller can print or issue a receipt in the following situations: * A buyer comes back to the seller and requests a reprint of a receipt. * A purchase is made in cash and the buyer requests a receipt for the purchase. * A buyer wants to receive a digital receipt by email or text message (SMS) or receive a printed receipt. ## Requirements and limitations * A Square Terminal must be paired with a POS application. * Applications must have the following OAuth permissions: * `PAYMENTS_READ` for getting or searching for a Terminal action request. * `PAYMENTS_WRITE` for creating or canceling a Terminal action request. * Ensure that the Square Terminal software is up to date. On the Square Terminal, choose **Settings**, choose **General**, choose **About Terminal**, and then check the software version. For more information, see [Square Terminal FAQ](https://squareup.com/help/us/en/article/6538-square-terminal-faq). * Your developer account must be enabled to subscribe to [Terminal API action webhooks](webhooks/v2webhook-events-tech-ref#terminal-api). ## Display the receipt options screen 1. Specify `RECEIPT` as the action type in a new [CreateTerminalAction](https://developer.squareup.com/reference/square/terminal-api/create-terminal-action) request. 2. Specify a configuration for the receipt action in the `receipt_option` property. This requires the `RECEIPT` type and a `payment_id`. You can add either of the following Boolean configurations or add all the configurations to the request: * `is_duplicate` - Identifies the receipt as a reprint rather than an original receipt. Defaults to `false`. * `print_only` - Instructs the device to print the receipt without displaying the receipt selection screen. Defaults to `false`. If the seller prefers for the Square Terminal to directly print receipts without presenting the buyer with the receipt options screen, set the `print_only` parameter to `true`. A Terminal action accepts a `payment_id` and prompts the Square Terminal to present a screen that displays receipt options to the buyer. ```` You receive a `TerminalAction` response that includes an ID and a `PENDING` action status, which means the Square Terminal has yet to receive the Terminal receipt action request. ``` json { "action": { "id": "termapia:HLSMg7K7lyawJiCE", "device_id": "{{DEVICE_ID}}", "deadline_duration": "PT5M", "status": "PENDING", "created_at": "2021-12-27T23:42:43.647Z", "updated_at": "2021-12-27T23:42:43.647Z", "type": "RECEIPT", "app_id": "sq0ids-scQ0-9iAmZkSGnbVvHPWXw", “receipt_options”: { “payment_id”: “Bg049luXa4AtNdLLxDStc1c6GKSZY” } } } ``` After the Square Terminal receives the Terminal receipt action request, the Square Terminal displays the receipt option screen. Depending on which configurations options you provided in the request, the receipt option screen prompts the buyer to choose how to receive the receipt. 3. After the Square Terminal completes printing or issuing a receipt, the Square Terminal returns to the idle screen and the Terminal receipt action transitions to the `COMPLETED` status. --- # Manage Terminal Actions > Source: https://developer.squareup.com/docs/terminal-api/advanced-features > Status: BETA > Languages: All > Platforms: All Use the Terminal API's Terminal Actions endpoint to customize buyer workflows, save cards on file, check a device status, and perform other tasks. **Applies to:** [Terminal API](terminal-api/overview) {% subheading %}Learn how to customize buyer workflows, save cards on file, check a device status, and perform other tasks.{% /subheading %} {% toc hide=true /%} ## Overview The [Terminal API](https://developer.squareup.com/reference/square/terminal-api) provides additional ways for a Square Terminal and a Point of Sale (POS) application to interact. These interactions are called Terminal actions. {% aside type="important" %} Terminal actions are in Beta. {% /aside %} ## Requirements and limitations * A Square Terminal must be paired with a POS application. * Applications must have the following OAuth permissions: * `PAYMENTS_READ` for getting or searching for a Terminal action request. * `PAYMENTS_WRITE` for creating or canceling a Terminal action request. * Ensure that the Square Terminal software is up to date. On the Square Terminal, choose **Settings**, choose **General**, choose **About Terminal**, and then check the software version. For more information, see [Square Terminal FAQ](https://squareup.com/help/us/en/article/6538-square-terminal-faq). * Your developer account must be enabled to subscribe to [Terminal API action webhooks](webhooks/v2webhook-events-tech-ref#terminal-api). ## Create a Terminal action request After pairing a Square Terminal using the Devices API, you can create a new [CreateTerminalAction](https://developer.squareup.com/reference/square/terminal-api/create-terminal-action) request, which is similar to requesting a checkout or refund. The POS application sends a request to Square using the Terminal API. The action request goes to Square, which forwards it to the paired Square Terminal. The request carries the action and prompts the buyer with a screen based on the action type. When the buyer completes the action on the Square Terminal, the POS application can be notified by a Square webhook or get the action result using the Terminal API. The following example shows a POST request to create a new Terminal action for saving a card on file: ```` ## Search for a Terminal action request You can retrieve a filtered list of Terminal action requests created by an account by sending a POST request to the [SearchTerminalActions](https://developer.squareup.com/reference/square/terminal-api/search-terminal-actions) endpoint. Terminal action requests are available for 30 days. The following example shows a request to search for a Terminal action with the device status of `PENDING`: ```` ## Cancel a Terminal action request You can send a POST request to cancel a Terminal action if the status of the request permits it or if the request is pending or in progress. The following example shows a POST request to cancel a Terminal action that takes an `action_id` in the path parameter: ```` ## Types of Terminal actions The Terminal API allows you to create the following Terminal actions: * **Save a card on file** - This action saves the customer card on file for future transactions. For more information, see [Save a Card on File with the Terminal API](terminal-api/advanced-features/save-card-on-file). * **Check device information** - This action checks whether the specific Square Terminal is online or active with the seller. For more information, see [Check Device Information for a Square Terminal](terminal-api/advanced-features/check-device-information). * **Print or issue a receipt** - This action launches the receipt option screen on the Square Terminal, where the buyer can choose how to receive a receipt for a given transaction. For more information, see [Print or Issue Receipts for Cash Payments and Previous Transactions](terminal-api/advanced-features/issue-receipts). * **Custom screen workflow** - This action launches buyer-facing screen interactions, which allow you to build non-payment-related workflows that capture buyer information on the Square Terminal. You can configure these custom screen workflows to extend buyer engagements for the seller's business. For more information, see [Customize Screen Interactions for Non-Payment Workflows](terminal-api/advanced-features/custom-workflows). ## Customize the Square Terminal idle screen In addition to Terminal actions, the Terminal API allows sellers to customize the Square Terminal idle screen and showcase their business and brand. For more information, see [Customize the Square Terminal Idle Screen](terminal-api/advanced-features/customize-idle-screen). --- # Check Device Information for a Square Terminal > Source: https://developer.squareup.com/docs/terminal-api/advanced-features/check-device-information > Status: BETA > Languages: All > Platforms: All Learn how to check device information for a Square Terminal. **Applies to:** [Terminal API](terminal-api/overview) {% subheading %}Learn how to check device information for a Square Terminal using the Terminal API.{% /subheading %} {% toc hide=true /%} ## Overview After pairing a Square Terminal and a POS application, use the [Terminal API](https://developer.squareup.com/reference/square/terminal-api) to check the real-time device information of one or more remote devices. This feature uses the [TerminalAction](https://developer.squareup.com/reference/square/objects/TerminalAction) object and the `PING` Terminal action type. When you need to remotely monitor the performance of a group of Square Terminal devices, use the `PING` Terminal action to capture information such as network connectivity, battery level, and device OS version. ## Requirements and limitations * A Square Terminal must be paired with a POS application. * Applications must have the following OAuth permissions: * `PAYMENTS_READ` for getting or searching for a Terminal action request. * `PAYMENTS_WRITE` for creating or canceling a Terminal action request. * Ensure that the Square Terminal software is up to date. On the Square Terminal, choose **Settings**, choose **General**, choose **About Terminal**, and then check the software version. For more information, see [Square Terminal FAQ](https://squareup.com/help/us/en/article/6538-square-terminal-faq). * Your developer account must be enabled to subscribe to [Terminal API action webhooks](webhooks/v2webhook-events-tech-ref#terminal-api). ## When to check for device information You might need to check the device information when: * A seller has a group of devices that aren't operated by anyone on the floor (automated operation). * You're not located at the same customer site as the seller (remote monitoring). * You need to regularly monitor network connections due to a recent server outage. The `TerminalAction` object provides a foundational method for using the Terminal API to collect device information in real time and measure device availability. With the `PING` Terminal action, you send a request to the device and see whether a device is connected to your seller's network, as indicated by the device's status. If the device is online and sends a response back, you can get additional device status updates. As a device monitoring and health status feature, you can periodically use the `PING` Terminal action so that your seller's devices maintain availability for buyers. The Terminal action request and response are limited to devices that are signed in with a Terminal API device code and that are paired with the Terminal API and your POS application. ## Set up the PING Terminal action 1. Create a `PING` Terminal action request using the [CreateTerminalAction](https://developer.squareup.com/reference/square/terminal-api/create-terminal-action) endpoint that includes the `PING` action type and the `device_id`, which is found on the back of the Square Terminal device. ```` You receive a Terminal action response that includes an ID and a `PENDING` action status. ```json { "action": { "id": "termapia:vguubuhbiuhfyrfrugv", "device_id": "device_id123", "deadline_duration": "PT5M", "status": "PENDING", "created_at": "2021-07-28T23:22:07.476Z", "updated_at": "2021-07-28T23:22:07.476Z", "location_id": "LWTMJESMBQXZC9", "type": "PING", "app_id": "sq0ids-ESXCwyTF7NBxodprF_pvhA" } } ``` 2. After the Terminal device has acknowledged the request, the action status transitions from `PENDING` to `COMPLETED` and the action object updates with the device details in `device_metadata`. ``` json { "action": { "id": "termapia:vguubuhbiuhfyrfrugv", "device_id": "deviceId123", "deadline_duration": "PT5M", "status": "COMPLETED", "created_at": "2021-07-28T23:22:07.476Z", "updated_at": "2021-07-28T23:22:07.476Z", "location_id": "LWTMJESMBQXZC9", "type": "PING", "app_id": "sq0ids-ESXCwyTF7NBxgzdrF_pvhA", "device_metadata": { "os_version": "5.1.0025", "app_version": "5.91", "serial_number": "107CS13101339420", "payment_region": "US", "network_connection_type": "WIFI", "wifi_network_name": "MyNetwork", "wifi_network_strength": "GOOD", "ip_address": "192.158.1.38", "battery_percentage": "80", "charging_state": "NOT_CHARGING", "location_id": "locationid123", "merchant_id": "merchantId123" } } } ``` 3. Using the `action.id` from `CreateActionResponse`, create a GET request using the [GetTerminalAction](https://developer.squareup.com/reference/square/terminal-api/get-terminal-action) endpoint to retrieve the `PING` action. ```` The `PING` Terminal action is in a `PENDING` state if the Square Terminal hasn't acknowledged the request, it's dealing with a slow Internet connection, it's turned off, or it's not signed in to the Terminal API application using a device code from the Devices API. In this case, subscribe to the `terminal.action.created` and `terminal.action.updated` webhooks. For more information, see [Square Webhooks](webhooks/overview). ## Search for a PING Terminal action by status You can also search for devices based on a specified status. When you send the POST request to the [SearchTerminalActions](https://developer.squareup.com/reference/square/terminal-api/search-terminal-actions) endpoint, provide the status query in the request body. You can query by specifying `PENDING`, `IN-PROGRESS`, `COMPLETED`, or `CANCELED` for the status. {% tabset %} {% tab id="Request" %} The following request example specifies the `PING` action type and a limit of 2 for the number of results returned from the request: ```` {% /tab %} {% tab id="Response" %} The response returns the device status and device information, as well as information about the action object. ```json { "action": [ { "id": "termapia:sdmfsdkmflsgmlsk", "device_id": "device123", "deadline_duration": "PT5M", "status": "CANCELED", "cancel_reason": "TIMED_OUT", "created_at": "2021-08-03T16:52:58.082Z", "updated_at": "2021-08-03T16:57:58.699Z", "location_id": "locationId123", "type": "PING", "app_id": "sq0ids-ESXCwyTF7NBxgzdrF_pvhA", }, { "id": "termapia:sdfdsgsdgsdsfa", "device_id": "device123", "deadline_duration": "PT5M", "status": "CANCELED", "cancel_reason": "TIMED_OUT", "created_at": "2021-08-03T16:52:58.082Z", "updated_at": "2021-08-03T16:57:58.699Z", "location_id": "locationId123", "type": "PING", "app_id": "sq0ids-ESXCwyTF7NBxgzdrF_pvhA", }, ] } ``` {% /tab %} {% /tabset %} ## Subscribe to events for Terminal action status updates When a `TerminalAction` object is created or updated, webhook notifications are sent to the endpoint that is registered for a POS application. To get the notifications, be sure that your application is updated in the Developer Console with the following webhooks: * `terminal.action.created` * `terminal.action.updated` A full copy of the object is sent to your application at your webhook URL for every action status update, which includes `PENDING`, `IN_PROGRESS`, `COMPLETED`, or `CANCELED`. ```json { "merchant_id": "ABCXJLNDS6BE", "type": "terminal.action.updated", "event_id": "12345678-e125-4998-83eb-170a6e29433b", "created_at": "2022-06-08T13:57:31.372Z", "data": { "type": "action.event", "id": "termapia:abcd12349UOukCE", "object": { "action": { "app_id": "sq0idp-abc1234_RWKfWkLesEPp8g", "created_at": "2022-06-08T13:57:29.976Z", "deadline_duration": "PT5M", "device_id": "0000000000000000", "device_metadata": { "app_version": "5.92", "battery_percentage": "44", "charging_state": "CHARGING", "ip_address": "0.0.0.0", "location_id": "L5XXSEKV2GFMB", "merchant_id": "ABCXJLNDS6BE", "network_connection_type": "WIFI", "os_version": "5.19.0048", "payment_region": "US", "serial_number": "0000000000000000", "wifi_network_name": "Block Wifi", "wifi_network_strength": "EXCELLENT" }, "id": "termapia:12345iXIdUOAkCE", "status": "COMPLETED", "type": "PING", "updated_at": "2022-06-08T13:57:31.372Z" } } } } ``` --- # Save a Card on File with the Terminal API > Source: https://developer.squareup.com/docs/terminal-api/advanced-features/save-card-on-file > Status: BETA > Languages: All > Platforms: All Learn how to use the Terminal API to save a customer's card for making future purchases. **Applies to:** [Terminal API](terminal-api/overview) | [Cards API](cards-api/overview) | [Payments API](payments-refunds) | [Customers API](customers-api/what-it-does) | [OAuth API](oauth-api/overview) {% subheading %}Learn how to save a customer's card for making future purchases.{% /subheading %} {% toc hide=true /%} ## Overview After pairing a Square Terminal with a POS application, use the [Terminal API](https://developer.squareup.com/reference/square/terminal-api) to save a customer's card on file. This feature uses the [Terminal actions](terminal-api/overview#terminal-actions) endpoint to send a request to the Square Terminal, where it prompts the buyer to confirm to save the card on file. You can then send additional requests to get the card details. You can also manage the card with the [Cards API](https://developer.squareup.com/reference/square/cards-api) and charge it using the [Payments API](https://developer.squareup.com/reference/square/payments-api). ## Requirements and limitations * A Square Terminal must be paired with a POS application. * You must have a customer profile. You create a customer profile with the [Customers API](https://developer.squareup.com/reference/square/customers-api). * The following permissions are enabled using the [OAuth API](https://developer.squareup.com/reference/square/oauth-api): * `PAYMENTS_WRITE` * `PAYMENTS_READ` * `CUSTOMERS_WRITE` * `CUSTOMERS_READ` * The latest Square Terminal OS version is installed. To check the OS version, on the Square Terminal, choose **Settings**, choose **General**, choose **About Terminal**, and then check the software version. * Your developer account must be enabled to subscribe to [Terminal API action webhooks](webhooks/v2webhook-events-tech-ref#terminal-api). * Saving a card on file is available only in the United States, Canada, and Australia. * In the United States, cards can be dipped or swiped to be saved on file. * In Canada and Australia, cards can only be swiped to be saved on file. ## Save a customer's card on file ### Create a new POST request and send it to the Square Terminal Send a POST request to the Square Terminal with the [CreateTerminalAction](https://developer.squareup.com/reference/square/terminal-api/create-terminal-action) endpoint. In the Terminal action request details, provide the `DEVICE_ID` of the Square Terminal, the `SAVE_CARD` action type, and the `customer_id` and `reference_id` for `save_card_options`. You can get the `customer_id` from the [Customers API](https://developer.squareup.com/reference/square/customers-api). The `reference_id` is an optional user-defined reference ID that you can use to associate the `Card` entity to another entity in an external system. For example, the value can be a customer ID that a third-party system generates. {% tabset %} {% tab id="Request object" %} The POST request uses the idempotency key (generated from the API request) and includes details about the Terminal action. ```` {% /tab %} {% tab id="Response object" %} The response includes the Terminal action response ID, the status, and other details. ```json { "action": { "id": "termapia:jveJIAkkAjILHkdCE", "device_id": "device_id123", "deadline_duration": "PT5M", "status": "PENDING", "created_at": "2021-07-28T23:22:07.476Z", "updated_at": "2021-07-28T23:22:07.476Z", "location_id": "LWTMJESMBQXZC9", "type": "SAVE_CARD", "app_id": "sq0ids-ESXCwyTF7NBxgzdrF_pvhA", "save_card_options": { "customer_id": "customer123", “reference_id”: “store-921” } } } ``` After you get the response with a status code `200`, the POS application launches the card collection flow. {% /tab %} {% /tabset %} ### Card collection flow The buyer authorizes the POS application to save the card on file. 1. On the Square Terminal, the buyer swipes the card. 2. The buyer gives authorization to the seller to save their card on file by tapping the **Agree** button. 3. The buyer confirms the email address and taps the **Confirm** button to continue. 4. The Terminal API attempts to save the card. 5. After successfully saving the card on file, the Square Terminal displays a confirmation screen. ## Additional methods ### Get information about the saved card on file Send a GET request to the Square Terminal with the [GetTerminalAction](https://developer.squareup.com/reference/square/terminal-api/get-terminal-action) endpoint, provide the `action_id` in the path parameter, and receive a response with information about the saved card on file. {% tabset %} {% tab id="Request object" %} ```` {% /tab %} {% tab id="Response object" %} The response returns resources for the card and the customer. ```json { "action": { "id": "termapia:jveJIAkkAjILHkdCE", "device_id": "device_id123", "deadline_duration": "PT5M", "status": "PENDING", "created_at": "2021-07-28T23:22:07.476Z", "updated_at": "2021-07-28T23:22:07.476Z", "location_id": "LWTMJESMBQXZC9", "type": "SAVE_CARD", "app_id": "sq0ids-ESXCwyTF7NBxgzdrF_pvhA", "save_card_options": { "customer_id": "customer123", "card_id": "ccof:uIbfJXhXETSP197M3GB" }, }, }, } ``` {% /tab %} {% /tabset %} ### Search for the card on file Send a POST request to the Square Terminal with the [SearchTerminalActions](https://developer.squareup.com/reference/square/terminal-api/search-terminal-actions) endpoint, provide a search query in the request body, and receive a response with information based on the query. You can search for a customer resource, a card that is linked from the Terminal action, or both. {% tabset %} {% tab id="Request object" %} The POST request queries for devices with the `PENDING` status. ```` {% /tab %} {% tab id="Response object" %} The response returns details about the device and the customers. ```json { "action": [ { "id": "98765", "device_id" : "xyz", "type": "SAVE_CARD", "status": "PENDING", "save_card_options": { "customer_id" : "JDKYHBWT1D4F8MFH63DBMEN8Y4" } }, { "id": "98767", "device_id" : "xyz", "type": "SAVE_CARD", "status": "PENDING", "save_card_options": { "customer_id" : "JDKYHBWT1D4F8MFH63DBMEN8Y5" } }, ], "cursor": "slfao29834ifuhk4eu9fgy234" } ``` {% /tab %} {% /tabset %} ### Cancel the card collecting Terminal action Use the `v2/terminals/actions/{action_id}/cancel` endpoint to send a POST request to the Square Terminal to cancel a pending or in-progress Terminal action. The response body contains information about the Terminal action used originally to save the card on file. You can cancel the save card-on-file process in the following cases: * Before the buyer taps the **Confirm** button on the email confirmation screen. * When the buyer sees an error message on the Square Terminal after confirming the email. {% line-break /%} {% tabset %} {% tab id="Request object" %} The POST request includes the Terminal action ID. ```` {% /tab %} {% tab id="Response object" %} The response returns the pending status of the cancel request. ```json { "action": { "id": "actionId123", "device_id" : "deviceId123", "type": "SAVE_CARD", "status": "CANCEL_PENDING", "save_card_options": { "customer_id" : "customerId123" } } } ``` {% /tab %} {% /tabset %} ## See also * [Connect a Square Terminal to a POS Application](terminal-api/integrate-square-terminal) * [OAuth API](oauth-api/overview) * [Customers API](customers-api/what-it-does) * [Cards API](cards-api/overview) --- # Refunds API > Source: https://developer.squareup.com/docs/refunds-api/overview > Status: PUBLIC > Languages: All > Platforms: All Learn how to refund a payment processed by Square by using the Refunds API. **Applies to:** [Refunds API](https://developer.squareup.com/reference/square/refunds-api) | [Payments API](payments-refunds) {% subheading %}Use the Refunds API to refund a payment processed by Square.{% /subheading %} {% toc hide=true /%} ## Overview Square provides the Refunds API to return payment funds to a buyer. A payment to be refunded can originate from a Square product such as Square Point of Sale, Square Terminal, Square Invoice, or any Square payment API such as the Orders API or Payments API. As long as your application has the ID of the payment and the payment is complete, it can be refunded. To learn how to get completed payment IDs, see [Retrieve Payments](payments-api/retrieve-payments). ## See also * [Refund Payments](payments-api/refund-payments) * [Refund a Payment with an Application Fee](payments-api/collect-fees/payment-with-app-fee-refund) * [Retrieve Refunds](refunds-api/retrieve-refunds) --- # Take Cash Payments > Source: https://developer.squareup.com/docs/payments-api/take-payments/cash-payments > Status: PUBLIC > Languages: All > Platforms: All Record cash payments using the Square Payments API. **Applies to:** [Payments API](payments-refunds) | [Orders API](orders-api/what-it-does) {% subheading %}Learn how to record cash payments using the Payments API.{% /subheading %} {% toc hide=true /%} ## Overview A seller can receive cash payments from a buyer (see [Take Payments](payments-api/take-payments)) and applications can record these payments using [CreatePayment](https://developer.squareup.com/reference/square/payments-api/create-payment). In a `CreatePayment` request, in addition to the amount of money to accept for the payment, you provide the cash payment details including: * `source_id`. Set this field to `CASH`. * `cash_details` [(CashPaymentDetails](https://developer.squareup.com/reference/square/objects/CashPaymentDetails)). Use this field to specify the buyer-supplied amount. ## CreatePayment Example The following example `CreatePayment` request specifies: * `amount_money` and `tip_money`. A total of $1.50 to collect. * `cash_details` specifies that the buyer supplied $2 cash. ```` After receiving the request, Square records the payment and returns a `Payment` object in the response as shown: ```json { "payment":{ "id":"Bg049luXa4AtNdLLxDStc1c6GKSZY", "created_at":"2021-01-21T22:31:47.030Z", "amount_money":{ "amount":100, "currency":"USD" }, "tip_money":{ "amount":50, "currency":"USD" }, "status":"COMPLETED", "source_type":"CASH", "location_id":"S8GWD5R9QB376", "order_id":"8xzuTVOviOd8H5ArDptC58RKtjIZY", "total_money":{ "amount":150, "currency":"USD" }, "capabilities":[ "EDIT_TIP_AMOUNT", "EDIT_TIP_AMOUNT_UP", "EDIT_TIP_AMOUNT_DOWN" ], "cash_details":{ "buyer_supplied_money":{ "amount":200, "currency":"USD" }, "change_back_money":{ "amount":50, "currency":"USD" } }, "receipt_number":"Bg04", "receipt_url":"https://squareupsandbox.com/receipt/preview/Bg049luXa4AtNdLLxDStc1c6GKSZY", "version_token":"1QWj4OvtiHELSaSaKCs6H29QOb6xkvOF0KWkHoiceE75o" } } ``` Note that `cash_details` in the response includes `change_back_money`. The API computes this amount based on `total_money` and `buyer_supplied_money`. {% aside type="info" %} You can use a recorded cash payment to pay for an order. If you're using the `PayOrder` endpoint (Orders API), you must set `autocomplete` to `false` in the preceding `CreatePayment` request. This sets the resulting `Payment` status to `APPROVED` as required by the `PayOrder` endpoint. For more information about paying for orders, see [Orders integration](payments-api/take-payments#orders-integration). {% /aside %} ## See also * [Take Payments](payments-api/take-payments) * [Orders integration](payments-api/take-payments#orders-integration) --- # Cash App Payments > Source: https://developer.squareup.com/docs/payments-api/take-payments/cash-app-payments > Status: PUBLIC > Languages: All > Platforms: All Learn how to use the Square Payments API (CreatePayment endpoint) to charge Cash App. **Applies to:** [Payments API](payments-refunds) | [Web Payments SDK](web-payments/overview) {% subheading %}Learn how to take Cash App payments using the Payments API.{% /subheading %} {% toc hide=true /%} ## Overview Applications take [Cash App](https://cash.app/) payments using a combination of the [Web Payments SDK](web-payments/overview) and the [Payments API](payments-api/take-payments). You use the Payments API [CreatePayment](https://developer.squareup.com/reference/square/payments-api/create-payment) endpoint on your backend to process a Cash App payment. The client side is explained in [Take a Payment with Cash App Pay](web-payments/add-cash-app-pay). ## Requirements and limitations The following limitations apply when using the Payments API for Cash App payments: * Cash App payments are supported only in the United States. Only buyers in the United States can choose Cash App as a payment option. * Only the [Web Payments SDK](web-payments/overview) supports Cash App payments. * You cannot store a buyer's Cash App account on file. * CBD sellers cannot take Cash App payments. ## Process a Cash App payment Cash App account information isn't directly specified in a `CreatePayment` request. Instead, that information is gathered by the Web Payments SDK, which returns a payment token for use in the `CreatePayment` request. Taking Cash App payments requires the following steps: 1. **Generate a payment token** - Your web application uses the Web Payments SDK to get Cash App information from a buyer. The SDK generates a payment token after validating the buyer's Cash App account. 2. **Charge the payment token** - The backend component of your application makes a `CreatePayment` request to charge the payment token. The `source_id` field in the request is set to the payment token. The following example shows a `CreatePayment` request. It directs Square to charge $100 USD to the Cash App account identified by the payment token in the `source_id` field. ```` Square processes the payment and returns a [Payment](https://developer.squareup.com/reference/square/objects/Payment) object in the response. ```json { "payment": { "id": "layD0NVOeImmN9PzORnd3fqokeTZY", "created_at": "2021-04-30T21:21:33.721Z", "updated_at": "2021-04-30T21:21:36.960Z", "amount_money": { "amount": 1000, "currency": "USD" }, "status": "COMPLETED", "delay_duration": "PT168H", "source_type": "WALLET", "location_id": "LH3FN1WYPN1B7", "order_id": "iOpdUUwE7VEFb3ZimOlqKbJlD7eZY", "total_money": { "amount": 1000, "currency": "USD" }, "approved_money": { "amount": 1000, "currency": "USD" }, "receipt_number": "layD", "receipt_url": "https://squareupsandbox.com/receipt/preview/lyD...kZY", "delay_action": "CANCEL", "delayed_until": "2021-05-07T21:21:33.721Z", "wallet_details": { "status": "CAPTURED", "brand": "CASH_APP", "cash_app_details": { "buyer_country_code": "US", "buyer_cashtag": "$cashtag" } }, "version_token": "8QRBlDHFI94bd1c15UU5lcAHnygDWN8KpK7B6FQDyeD6o" } } ``` The following are important response details: * `source_type` is `WALLET`, which identifies Cash App as the digital wallet payment type. * `status` is `COMPLETED`. If you set `autocomplete` to `false` in the request, the initial status is `AUTHORIZED`. You must then explicitly call `CompletePayment`. * `order_id` identifies the `Order` that Square created. For compatibility with other Square products, all payments taken for a Square seller need an order. If you don't provide an order, Square creates one. To run a Cash App payment example, see [Web Payments Quickstart](https://github.com/square/web-payments-quickstart) on GitHub. ## Test Cash App payments in the Square Sandbox To test Cash App payments in the Square Sandbox, get a test payment token using one of the following methods: * **Use a Square-provided Cash App payment token** - Square provides Cash App Sandbox payment tokens as `source_id` values for testing the backend component of your application. {% table %} * source_id value * Error mapping * Expected behavior --- * `wnon:cash-app-ok` * * The request is successful. --- * `wnon:cash-app-declined` * `GENERIC_DECLINE` * The request failed. {% /table %} When you use these tokens, you can test `CreatePayment` calls without charging an actual Cash App account or running the client side of your application. The tokens don't represent a live Cash App account. However, the `CreatePayment` endpoint returns a payment response as if the account is real. {% aside type="info" %} Be sure to make the `CreatePayment` call against your Square Sandbox environment (`connect.squareupsandbox.com`) when using these tokens. {% /aside %} * **Run the Web Payments SDK sample application to generate a payment token** - The sample provides an end-to-end Cash App payment experience. For information about building and running the sample, see [Take a Payment with Cash App Pay](web-payments/add-cash-app-pay). The payment token that the Web Payments SDK generates in Sandbox mode results in a successful `CreatePayment` Sandbox environment call. --- # POS Application Pairing with Square Terminal > Source: https://developer.squareup.com/docs/terminal-api/pos-integration > Status: PUBLIC > Languages: All > Platforms: All Learn how the Square Terminal and a POS application operate together as a paired system. **Applies to:** [Terminal API](terminal-api/overview) | [Devices API](terminal-api/terminal-device-monitoring) {% subheading %}Learn how the Square Terminal and a POS application operate together as a paired system.{% /subheading %} {% toc hide=true /%} ## Overview Integrating a Point of Sale (POS) application with the Terminal API requires using the [Devices API](https://developer.squareup.com/reference/square/devices-api) to pair the POS application with the Square Terminal using a device code and connecting the Square Terminal to Square for processing payments. ## How the pairing works A POS application cannot be physically connected to a Square Terminal but must be paired using the Devices API and a wireless Internet connection before a checkout can be processed. The Devices API pairs a POS application with a Square Terminal as long as the Square Terminal is wirelessly connected to Square. The Devices API lets the application request a pairing and returns a device code for the seller to use. The request is sent to Square, which then directly connects to the Square Terminal using the wireless connection. When the connection is made, Square sends the device code back to the application. The following request example uses the Devices API [CreateDeviceCode](https://developer.squareup.com/reference/square/devices-api/createdevicecode) endpoint to send the request: ```` To obtain the device code, you need the `DEVICE_CREDENTIAL_MANAGEMENT` OAuth permission enabled so that you can use the Devices API to connect to the Square Terminal. The seller uses the device code to sign in to a Square Terminal. After the seller signs in, the Devices API returns the unique ID of the Square Terminal as a `DeviceCode.device_id`. The ID is used in later Terminal checkout requests. {% aside type="important" %} The Square Dashboard also generates device codes; however, they won't work for successfully pairing to a Square Terminal. Make sure that you use the device code that the Devices API generated and not the device code from the Square Dashboard. {% /aside %} The following response example shows the generated unique ID of the Square Terminal: ```json { "device_code": { "id": "AF7AJW6VM31P3", "name": "Terminal API Device created on Sep 14, 2022", "code": "JHHYHH", "product_type": "TERMINAL_API", "location_id": "NHTLE2589dCGJ", "pair_by": "2022-09-15T00:01:18.000Z", "created_at": "2022-09-14T23:56:18.000Z", "status": "UNPAIRED", "status_changed_at": "2022-09-14T23:56:18.000Z" } } ``` The Devices API [DeviceCode](https://developer.squareup.com/reference/square/objects/DeviceCode) object represents a POS application/Square Terminal pairing. It contains the sign-in code, pairing status, and device ID of the Square Terminal. When the Square Terminal is paired, the application can send checkout requests using the Terminal API. The Square Terminal uses the wireless connection with Square to get payment information from the request and collect the payment from the buyer. {% aside type="info" %} You can see the device pairing state in the Square Dashboard by choosing **Accounts & Settings**, and then choosing **Devices**. Whether accessed through the Devices API or the Square Dashboard, the `DeviceCode` object represents whether the device code has been used to sign in to a Terminal device. It doesn't represent the current status of the device. {% /aside %} For a complete list of Devices API OAuth permissions to configure the Square Terminal, see [OAuth Permissions Reference](oauth-api/square-permissions#devices). ## Next step To get started with pairing a POS application to a Square Terminal, see [Connect a Square Terminal to a POS Application](terminal-api/integrate-square-terminal). --- # Refunds API Webhooks > Source: https://developer.squareup.com/docs/refunds-api/webhooks > Status: PUBLIC > Languages: All > Platforms: All Learn how to use Square webhooks to get notifications of refund updates. **Applies to:** [Refunds API](refunds-api/overview) {% subheading %}Learn how to use Square webhooks to get notifications of refund updates.{% /subheading %} {% toc hide=true /%} ## Overview The [Refunds API](https://developer.squareup.com/reference/square/refunds-api) supports webhook events that notify you when a refund is created or updated. For example, when a refund is completed, a `refund.updated` event is generated. These notifications are sent on refund events for your seller, regardless of which Square product or Square API application the seller used for the refund activity. For more information about using webhooks, see [Square Webhooks](webhooks/overview). The Refunds API use these webhook events: | Event | Permission{% width="140px" %} | Description | |----------|-------------------------|-----------------------| |[refund.created](https://developer.squareup.com/reference/square/refunds-api/webhooks/refund.created) |`PAYMENTS_READ`|A [Refund](https://developer.squareup.com/reference/square/objects/refund) was created. | |[refund.updated](https://developer.squareup.com/reference/square/refunds-api/webhooks/refund.updated) |`PAYMENTS_READ`|A [Refund](https://developer.squareup.com/reference/square/objects/refund) was updated. Typically, the `refund.status` field changes when a refund is completed. | ## Review webhook logs On the **Webhook logs** page in the Developer Console, you can see webhook events posted to your application in real time. Use API Explorer to create a payment, complete it, and then refund it. You see a `payment.created` event, `payment.updated` event, `refund.created` event, and `refund.updated` event for each status change in the refund. Before you try it, be sure you have a webhook subscription set up for these payment and refund events. On the following **Webhook logs** page, a developer used API Explorer in Sandbox mode to create a new `Payment` object and then refunded the payment. Square creates an `Order` object for every payment and every refund. When the payment and refund are updated, the associated order is also updated. In the simple refund example, 12 webhook events are sent for payment, refund, and order events. ![An image of the Developer Console webhook log showing payment and refund webhook events.](//images.ctfassets.net/1nw4q0oohfju/wYoPxERM7SYl4DLv8BzQq/6dd79213860eea16aa6c88215cddad96/square-developer-dashboard-webhook-log-payment-refund.png) ## refund.created webhook event The [refund.created](https://developer.squareup.com/reference/square/refunds-api/webhooks/refund.created) event notification is sent: * On this Square API requests: the Refunds API [(RefundPayment](https://developer.squareup.com/reference/square/refunds-api/refund-payment) endpoint). * When a payment is refunded by a seller through the Point of Sale application, Square Terminal, or other Square products. {% aside type="info" %} For Point of Sale refunds, the webhook notification doesn't include information added as a `Note`. However, a `reason` added in a `RefundPayment` call is returned in the webhook notification. {% /aside %} ## refund.updated webhook event The [refund.updated](https://developer.squareup.com/reference/square/refunds-api/webhooks/refund.updated) event is generated when any field in a `PaymentRefund` call is updated, such as when it's completed. You get one webhook notification for the change event, which encompasses all field updates in the event. --- # Migrate from the Transactions API > Source: https://developer.squareup.com/docs/payments-api/migrate-from-transactions-api > Status: PUBLIC > Languages: cURL > Platforms: Command Line Learn how to move from processing payments with the Transactions API to using the Square Payments API. Also, learn how to access old transactions. {% subheading %}Learn how to migrate from the Transactions API to the Payments API.{% /subheading %} {% toc hide=true /%} ## Overview The Transactions API previously allowed you to create online payments. The API had limitations that prevented Square from adding features and flexibility that customers requested. As a result, Square split the API into the new [Payments](https://developer.squareup.com/reference/square/payments-api) API and a more robust [Orders](https://developer.squareup.com/reference/square/orders-api) API. Square continues to enhance these APIs, offering you the flexibility to use the two APIs together or separately. The Transactions API is deprecated. Square doesn't plan to add any new features. Square continues to support the Transactions API until a date yet to be determined. The new Payments API is released alongside the Transactions API instead of replacing it. This gives you time to develop and test in parallel and migrate when you're ready. If you're using Square SDKs, you need to update the SDK to version 2.20190814.0 or later (or 2.22.0 or later if you're using the .NET SDK) to use the Payments API and Refunds API. For more information, see [Square SDKs changelog](changelog/sdk-logs/2019-08-15). ## Migration benefits The Payments API and Refunds API provide these benefits: * Support for refunds up to 1 year after the payment is taken. * Support for paying with Square gift cards and other payment methods. * Support for collecting tips at the time of payment. * Additional information about CVV and AVS statuses and improved card decline reasons. ## General guidance The following payment processing general guidelines apply: * Use the Square [Payments API](https://developer.squareup.com/reference/square/payments-api) and [Refunds API](https://developer.squareup.com/reference/square/refunds-api) to process payment when developing new applications. * You can continue to use payment tokens with the Payments API. There is no change to how you use the Square payments form or In-App Payments SDK to generate a payment token. * Refunds of cash and external type payments taken before 2021 are available in the Square Orders API. These aren't available using the Payments API (`GetPaymentRefund` or `ListPaymentRefunds`). For more information, see [Access old transactions using the Payments API and Refunds APIs](#access-old-transactions-using-the-payments-api-and-refunds-apis). You can provide feedback by contacting [Developer Support](https://squareup.com/help/contact?prefill=developer_api) or joining our [Discord community](https://discord.gg/squaredev). ## Code migration to use the Payments API and Refunds API The following examples show how to move common payment processing tasks from the Transactions API to the [Payments API](https://developer.squareup.com/reference/square/payments-api). ### Example 1: Payment using a secure token The following Transactions API `Charge` request charges $1 USD to the payment source identified by a payment token. In the request: * The endpoint URL includes the seller location. * The `Authorization` header provides the seller access token. * `card_nonce` in the body identifies the payment source. * `delay_capture` in the body is set to `false` to request immediate payment completion. ```bash curl https://connect.squareup.com/v2/locations/{LOCATION_ID}/transactions \ -X POST \ -H 'Square-Version: 2021-06-16' \ -H 'Authorization: Bearer {ACCESS_TOKEN}' \ -H 'Content-Type: application/json' \ -d '{ "idempotency_key": "{UNIQUE_KEY}", "amount_money": { "amount": 100, "currency": "USD" }, "card_nonce": "cnon:CBASEIFNPdBL1ZkxDB36example", "note": "this is a test", "delay_capture": false }' ``` After receiving the request, Square charges the payment source and deposits the funds in the Square account of the seller. The response shows the tender status as `CAPTURED`, indicating that the payment source was successfully charged. To migrate the preceding example to use the Payments API [(CreatePayment](https://developer.squareup.com/reference/square/payments-api/create-payment) endpoint), note the following differences between the Transactions API and the Payments API: |Action|Transactions API {% line-break /%}(`Charge` endpoint)|Payments API {% line-break /%}[(CreatePayment](https://developer.squareup.com/reference/square/payments-api/create-payment) endpoint)| |:------|:------|:------| |Specifying the payment method|Depending on the payment method, the endpoint supports different fields in the request, such as `card_nonce` or `customer_card_id`.|The endpoint supports only one field (`source_id`) to specify a payment source regardless of whether it is a card on file or a payment token.| |Specifying the location|The endpoint requires the seller location as part of the endpoint URL.|The endpoint supports the optional `location_id` field in the request body. If it isn't specified, the default seller location (oldest active) is assumed.| |Delaying capture (obtain only payment authorization)|The endpoint supports the `delay_capture` field, which you set to `true`.|The endpoint supports the `autocomplete` field, which you set to `false` to request only authorization.| |Behavior of the `amount_money` field|The `amount_money` field includes the tip amount. To get the base amount of the transaction, subtract the tip amount.|The `amount_money` field excludes the tip amount. The `total_money` field represents the total amount of the transaction including tip and fees.| |`idempotency_key` length|Max length is 192|Max length is 45| The following is a Payments API example using the `CreatePayment` endpoint to charge $1 USD: ```` For information about the payment object in the response, see [Payment](https://developer.squareup.com/reference/square/objects/Payment). ### Example 2: Payment using a card on file The Payments API `CreatePayment` endpoint supports the `source_id` field to set a payment source, which can be a card on file ID or a payment token. The following Transactions API `charge` request charges $1 USD to the payment source identified by a card on file. In the request: * `customer_card_id` identifies the payment source, which is the ID of a card on file. * `customer_id` identifies the customer to whom the card on file is attached. ```bash curl https://connect.squareup.com/v2/locations/{LOCATION_ID}/transactions \ -X POST \ -H 'Square-Version: 2021-06-16' \ -H 'Authorization: Bearer {ACCESS_TOKEN}' \ -H 'Content-Type: application/json' \ -d '{ "idempotency_key": "{UNIQUE_KEY}", "amount_money": { "amount": 100, "currency": "USD" }, "customer_card_id": "ccof:65aSD6rnUryWexample", "customer_id":"SV2K57WMQCS7QAMKKZQexample", "note": "this is a test", "delay_capture": false }' ``` The following is an equivalent example that uses the Payments API `CreatePayment` endpoint to charge $1 USD: ```` ### Example 3: Refund a payment The following Transactions API `CreateRefund` request refunds $1 USD. In the request: * The endpoint URL provides both the transaction ID and seller location. * The `Authorization` header provides the access token of the seller. Square takes funds out of the Square account of the seller to refund the customer. * `tender_id` in the body provides the payment ID being refunded. ```bash curl https://connect.squareup.com/v2/locations/{LOCATION_ID}/transactions/{TRANSACTION_ID}/refund \ -X POST \ -H 'Square-Version: 2021-06-16' \ -H 'Authorization: Bearer {ACCESS_TOKEN}' \ -H 'Content-Type: application/json' \ -d '{ "idempotency_key": "{UNIQUE_KEY}", "tender_id": "EKR9mDvBetVQVMKNeexample", "reason": "testing create refund", "amount_money": { "amount": 100, "currency": "USD" } }' ``` To migrate the preceding example to use the Refunds API `RefundPayment` endpoint, note the following differences between the Transactions API the and Refunds API: |Action|Transactions API {% line-break /%}(`CreateRefund` endpoint)|Refunds API {% line-break /%}[(RefundPayment](https://developer.squareup.com/reference/square/refunds-api/refund-payment) endpoint)| |:------|:------|:-----| |Specifying the payment method|Supports the `tender_id` field in the request body.|Supports the `payment_id` field in the request body. To refund transaction tenders, provide the `tender_id` value in the `payment_id` field.| |Seller location and transaction ID.|The endpoint requires this information as part of the endpoint URL.|The ID of the original `Payment` is provided.| The following is an equivalent example that uses the Refunds API (`RefundPayment` endpoint) to refund $1 USD: ```` For more information about the `Refund` object in the response, see [PaymentRefund](https://developer.squareup.com/reference/square/objects/PaymentRefund). ### Example 4: Payments with delay capture The following Transactions API `Charge` endpoint request charges $1 USD to a card on file. The request specifies `delay_capture=true` in the body to obtain an authorization to charge the card. ```bash curl https://connect.squareup.com/v2/locations/{LOCATION_ID}/transactions/{TRANSACTION_ID}/refund \ -X POST \ -H 'Square-Version: 2021-06-16' \ -H 'Authorization: Bearer {ACCESS_TOKEN}' \ -H 'Content-Type: application/json' \ -d '{ "idempotency_key": "{UNIQUE_KEY}", "customer_card_id" : "ccof:65aSD6rnUryWexample", "customer_id" : "SV2K57WMQCS7QAMKKZQexample", "reason": "a reason", "amount_money": { "amount": 100, "currency": "USD" }, "delay_capture": true }' ``` To migrate the preceding example to use the Payments API (`CreatePayment` endpoint), note the following differences between the Transactions API and the Payments API: |Action|Transactions API {% line-break /%}(`Charge` endpoint)|Payments API {% line-break /%}[(CreatePayment](https://developer.squareup.com/reference/square/payments-api/create-payment) endpoint)| |:------|:------|:------| |Specifying the delayed capture option|Supports the `delay_capture` field in the request body. Set it to `true` if you want only payment authorization.|Supports the `autocomplete` payment in the request body. Set it to `false` if you want only payment authorization.| |Follow-up options|Complete the payment using the [CaptureTransaction](https://developer.squareup.com/reference/square/transactions-api/capture-transaction) endpoint or cancel it using the [VoidTransaction](https://developer.squareup.com/reference/square/transactions-api/void-transaction) endpoint. |Use the [CompletePayment](https://developer.squareup.com/reference/square/payments-api/complete-payment) and [CancelPayment](https://developer.squareup.com/reference/square/payments-api/cancel-payment) endpoints.| The following is an equivalent example using the Payments API `CreatePayment` endpoint to charge $1 USD and requests delayed capture by setting the `autocomplete` parameter to `false` in the request body: ```` For information about the `Payment` object in the response, see [Payment](https://developer.squareup.com/reference/square/objects/Payment). ### Example 5: Collect a developer application fee This example assumes that the application developer collects a fee for each payment processed on behalf of the seller (known as an application fee). After processing the payment, Square splits the payment funds between the application developer account (who gets the application fee) and the seller (who gets the rest of the funds minus the Square payment processing charges). In the example, the seller and developer have separate Square accounts. The following Transactions API `Charge` endpoint request charges $1 USD and gives $0.20 USD to the developer. The seller gets the rest of the amount (minus the Square payment processing fee). In the request: * The endpoint URL specifies the seller location. * The `additional_recipient` field in the body specifies the application fee and location of the application developer. * The `Authorization` header specifies the OAuth access token that identifies the seller and developer accounts. Square uses this information when splitting the payment. ```bash curl https://connect.squareup.com/v2/locations/{LOCATION_ID}/transactions \ -X POST \ -H 'Square-Version: 2021-06-16' \ -H 'Authorization: Bearer {ACCESS_TOKEN}' \ -H 'Content-Type: application/json' \ -d '{ "idempotency_key": "{UNIQUE_KEY}", "amount_money": { "amount": 100, "currency": "USD" }, "additional_recipients": [ { "location_id": "P8DDS5P8JN70N", "description": "Application fees", "amount_money": { "amount": 20, "currency": "USD" } } ], "customer_card_id": "ccof:65aSD6rnUryWzHexample", "customer_id" : "SV2K57WMQCS7QAMKKZQA4example" }' ``` To migrate the preceding example to use the Payments API (`CreatePayment` endpoint), note the following differences between the Transactions API and the Payments API: |Action|Transactions API {% line-break /%}`Charge` endpoint)|Payments API {% line-break /%}[(CreatePayment](https://developer.squareup.com/reference/square/payments-api/create-payment) endpoint)| |:------|:------|:------| |Specifying an additional recipient who gets a portion of the payment|Supports the `additional_recipient` field with the payment amount they receive.|Supports the `app_fee_money` field to specify the application fee for the developer.| |Specifying the seller location|Set the seller location in the endpoint URL.|You can include the `location_id` in the request body to specify the seller location. If it isn't specified, the default location is assumed.| |Specifying an additional recipient location|Include the `location_id` in the `additional_recipient` field for the developer location.|The Payments API assumes the default location.| The following example uses the Payments API `CreatePayment` endpoint to charge $1 USD and gives $0.20 USD to the developer: ```` For more information, see [Collect Application Fees](payments-api/take-payments-and-collect-fees). ## Access old transactions using the Payments API and Refunds API You might have old transactions created with the Transactions API. This section explains how you can get these transactions using the Payments API, Refunds API, or Orders API. This is an example `Transaction` object created by the Transactions API `Charge` endpoint. The transaction has `Tender` and `Refund` objects. ```json { "transaction": { "id": "5apT3UsV4eJW2GpWyWkAtLmeV", "location_id": "X9XWRESTK1CZ1", "created_at": "2019-10-21T18:54:01Z", "tenders": [ { "id": "sOt7GR6knQVf8tcZwQd3rsMF", "location_id": "X9XWRESTK1CZ1", "transaction_id": "5apT3UsV4eJW2GpWyWkAtLmeV", "created_at": "2019-10-21T18:54:00Z", ... } } ], "refunds": [ { "id": "MnBifltgmC7XJAClam95S", "location_id": "X9XWRESTK1CZ1", "transaction_id": "5apT3UsV4eJW2GpWyWkAtLmeV", "tender_id": "sOt7GR6knQVf8tcZwQd3rsMF", "created_at": "2019-10-21T19:10:40Z", ... } ], ... } } ``` The following guidelines describe how the Payments API and Refunds API get these old transactions. * **Transactions are now returned as orders** - Use the Orders API to access the old transactions. The `Transaction.id` from the previous example maps to an `Order.id`. The following [BatchRetrieveOrders](https://developer.squareup.com/reference/square/orders-api/batch-retrieve-orders) can return old transactions as shown. The request specifies a list of order IDs, one of which is also the ID of an old transaction. ```` The response includes three `Order` objects, one of which represents the old transaction. * **Transaction tenders of all types (card, cash, or other) are now payments** - Regardless of the `Transaction.Tender.type` [(Tender](https://developer.squareup.com/reference/square/objects/Tender)) type (card, cash, or other types), each tender is available as a `Payment` object. The `Tender.id` maps to `Payment.id`. The Payments API [(GetPayment](https://developer.squareup.com/reference/square/payments-api/get-payment) and [ListPayments](https://developer.squareup.com/reference/square/payments-api/list-payments) endpoints) returns these tenders as `Payment` objects. The following is an example `ListPayments` request: ```` The response can include payments created with the Payments API `CreatePayment` endpoint and tenders created with the Transactions API `charge`. * **Refunds of transaction tenders of all types (card, cash, or other) can be accessed using the Refunds API** - Regardless of the `Transaction.Tender.type` [(Tender](https://developer.squareup.com/reference/square/objects/Tender)) type (card, cash, or other), you can access the tender refunds using the Refunds API. The refund ID is the concatenation of the tender ID and refund ID with an underline (for example, `Tender.id_Refund.id`). The following [GetPaymentRefund](https://developer.squareup.com/reference/square/refunds-api/get-payment-refund) request retrieves refund information about an old transaction. The request specifies the `_` as the refund ID in the endpoint URL. ```` {% aside type="info" %} Refunds of cash and external type payments taken before 2021 are available in the [Orders API](https://developer.squareup.com/reference/square/orders-api) but they aren't available using the Payments API (`GetPaymentRefund` or `ListPaymentRefunds`). Using the Orders API, you first retrieve the old transaction by specifying the transaction ID as the order ID. You then search the `Order` object for refunds. {% /aside %} --- # Troubleshoot the Team API > Source: https://developer.squareup.com/docs/team/troubleshooting > Status: PUBLIC > Languages: All > Platforms: All Learn how to troubleshoot errors with the Team API. **Applies to:** [Team API](https://developer.squareup.com/reference/square/team-api) {% subheading %}Troubleshoot errors you might encounter when using the Team API.{% /subheading %} {% toc hide=true /%} ## Overview The Team API uses the standard set of Square [error](https://developer.squareup.com/reference/square/objects/Error) codes to communicate API operation errors. The following sections provide details about the request state that returns errors. {% anchor id="CreateTeamMember" /%} ## Create a team member The Square error response says that the request is a `BAD_REQUEST`. ### Cause Any of the following error conditions might apply: * Required fields are empty. * The [phone_number](https://developer.squareup.com/reference/square/objects/TeamMember#definition__property-phone_number) and [email_address](https://developer.squareup.com/reference/square/objects/TeamMember#definition__property-email_address) values aren't in a valid format. {% anchor id="UpdateTeamMember" /%} ## Update a team member The Square error response says that the request is a `BAD_REQUEST`. ### Cause Any of the following error conditions might apply: * The request body is clearing required fields. * The request body [phone_number](https://developer.squareup.com/reference/square/objects/TeamMember#definition__property-phone_number) and [email_address](https://developer.squareup.com/reference/square/objects/TeamMember#definition__property-email_address) values aren't in a valid format. * Updating [email_address](https://developer.squareup.com/reference/square/objects/TeamMember#definition__property-email_address) when a team member has already linked their Square account. This is because a team member's Square account email cannot be changed. * Updating [email_address](https://developer.squareup.com/reference/square/objects/TeamMember#definition__property-email_address) use the email address of a different team member. A given email address can only be registered to a single team member. #### Missing compliance required fields - Canada only To comply with regulatory requirements, sellers operating in Canada must record the address and date of birth (DOB) of team members when assigning permissions in the Square Dashboard. Starting April 22, 2024, Square enforces these requirements if the seller: * Didn't specify their business as Individual/Sole Proprietor. * Created a Square account after April 27, 2022. Attempts by applications to update team members that don't have a DOB and address return `BAD_REQUEST` errors with the following details: * `Missing compliance required field: birth_date` * `Missing compliance required field: address` Any updates to these team members must be made by the seller in the [Team members](https://app.squareup.com/dashboard/team/team-members) section of the Square Dashboard. {% anchor id="RetrieveTeamMember" /%} ## Retrieve a team member The Square error response says that the request is a `BAD_REQUEST`. ### Cause A team member with the specified ID isn't found. Make sure that the `team_member_id` provided in the request is the Square-assigned ID, which is represented by the `id` field in the `TeamMember` object. Retrieving a team member using the ID assigned by sellers in the Square Dashboard (represented by the `reference_id` field) isn't supported. {% anchor id="UpdateWageSetting" /%} ## Create or update a wage setting The Square error response says that the request is a `BAD_REQUEST` or an `UNPROCESSABLE_ENTITY`. ### BAD_REQUEST Any of the following error conditions might apply: * [job_assignments](https://developer.squareup.com/reference/square/objects/WageSetting#definition__property-job_assignments) isn't included in the request. * [job_assignments](https://developer.squareup.com/reference/square/objects/WageSetting#definition__property-job_assignments) is an empty array. * [job_assignments](https://developer.squareup.com/reference/square/objects/WageSetting#definition__property-job_assignments) contains more than 12 job assignments. * `version` is supplied but doesn't match the server version. ### UNPROCESSABLE_ENTITY Any of the following error conditions might apply: * Invalid [JobAssignment](https://developer.squareup.com/reference/square/objects/JobAssignment) objects are included in `job_assignments`. Common invalid job assignments include: * [pay_type](https://developer.squareup.com/reference/square/objects/JobAssignment#definition__property-pay_type) is `HOURLY` and [hourly_rate](https://developer.squareup.com/reference/square/objects/JobAssignment#definition__property-hourly_rate) isn't supplied. * [pay_type](https://developer.squareup.com/reference/square/objects/JobAssignment#definition__property-pay_type) is `HOURLY` and [annual_rate](https://developer.squareup.com/reference/square/objects/JobAssignment#definition__property-annual_rate) or [weekly_hours](https://developer.squareup.com/reference/square/objects/JobAssignment#definition__property-weekly_hours) is supplied. * [pay_type](https://developer.squareup.com/reference/square/objects/JobAssignment#definition__property-pay_type) is `SALARY` and [annual_rate](https://developer.squareup.com/reference/square/objects/JobAssignment#definition__property-annual_rate) or [weekly_hours](https://developer.squareup.com/reference/square/objects/JobAssignment#definition__property-weekly_hours) isn't supplied. * [pay_type](https://developer.squareup.com/reference/square/objects/JobAssignment#definition__property-pay_type) is `SALARY` and [hourly_rate](https://developer.squareup.com/reference/square/objects/JobAssignment#definition__property-hourly_rate) is supplied but the amount doesn't match the product of [hourly_rate](https://developer.squareup.com/reference/square/objects/JobAssignment#definition__property-hourly_rate) multiplied by [weekly_hours](https://developer.squareup.com/reference/square/objects/JobAssignment#definition__property-weekly_hours). * [pay_type](https://developer.squareup.com/reference/square/objects/JobAssignment#definition__property-pay_type) is `NONE` and [hourly_rate](https://developer.squareup.com/reference/square/objects/JobAssignment#definition__property-hourly_rate), [annual_rate](https://developer.squareup.com/reference/square/objects/JobAssignment#definition__property-annual_rate), or [weekly_hours](https://developer.squareup.com/reference/square/objects/JobAssignment#definition__property-weekly_hours) is supplied. * The amount of [annual_rate](https://developer.squareup.com/reference/square/objects/JobAssignment#definition__property-annual_rate) or [hourly_rate](https://developer.squareup.com/reference/square/objects/JobAssignment#definition__property-hourly_rate) is negative. * The currency of [annual_rate](https://developer.squareup.com/reference/square/objects/JobAssignment#definition__property-annual_rate) or [hourly_rate](https://developer.squareup.com/reference/square/objects/JobAssignment#definition__property-hourly_rate) does match the currency of the Square account. * [job_title](https://developer.squareup.com/reference/square/objects/JobAssignment#definition__property-job_title) is duplicated. * There is no active Team Plus subscription with the Square account and `job_assignments` in the request body contains more than one job assignment. Subscribe to activate a Team Plus subscription to be able to add multiple wages for a team member in the Square Dashboard: 1. Open the **Team** page in the Square Dashboard. 2. Choose the team member who you want to have multiple wages. ![A graphic showing where to add team member permissions in the Seller Dashboard Team management application.](https://images.ctfassets.net/1nw4q0oohfju/3unLf8YQgZQFrHayEQmrn8/8d5475bd48ee0ec52c847c1047b4da86/add-team-member-permissions.png) 3. In the team member window, choose **...** to open a menu of more edit options. 4. Choose **Edit Compensation**. ![A graphic showing where to set a team member job title in the Seller Dashboard Team management application.](https://images.ctfassets.net/1nw4q0oohfju/3gdNr4yQnlBdpZRKRt8wsa/0d0038992f8bc6d5e808ff360b3cbf41/set-team-member-job-titles.png) 5. Choose **Sign up for Team Plus to add another wage**. {% anchor id="RetrieveWageSetting" /%} {% anchor id="BulkCreateTeamMembers" /%} ## Bulk create team members An attempt to create [TeamMember](https://developer.squareup.com/reference/square/objects/TeamMember) objects can result in a `BAD_REQUEST` error when: * Required fields are empty. * The [phone_number](https://developer.squareup.com/reference/square/objects/TeamMember#definition__property-phone_number) and [email_address](https://developer.squareup.com/reference/square/objects/TeamMember#definition__property-email_address) values aren't in a valid format. {% anchor id="BulkUpdateTeamMembers" /%} ## Bulk update team members An attempt to update [TeamMember](https://developer.squareup.com/reference/square/objects/TeamMember) objects can result in a `BAD_REQUEST` error when: * Clearing required fields. * The [phone_number](https://developer.squareup.com/reference/square/objects/TeamMember#definition__property-phone_number) and [email_address](https://developer.squareup.com/reference/square/objects/TeamMember#definition__property-email_address) values aren't in a valid format. * Updating [email_address](https://developer.squareup.com/reference/square/objects/TeamMember#definition__property-email_address) when a team member has already linked their Square account. This is because a team member's Square account email cannot be changed. --- # Team API > Source: https://developer.squareup.com/docs/team/overview > Status: PUBLIC > Languages: All > Platforms: All Learn how the Square Team API lets you create and manage a roster of employees. **Applies to:** [Team API](https://developer.squareup.com/reference/square/team-api) | [Labor API](labor-api/what-it-does) {% subheading %}Manage a roster of employees, associates, or volunteers for Square sellers.{% /subheading %} {% toc hide=true /%} ## Overview Use the [Team API](https://developer.squareup.com/reference/square/team-api) to create and manage team member and job data, including profiles, wage settings, and activation status. In the [Square Dashboard](#square-dashboard-team), team members can be further configured for Square Payroll, scheduled in appointments, assigned to a labor shift, and more. The [Labor API](labor-api/what-it-does) is used with the Team API to manage team schedules and manage time tracking for labor cost reporting, payroll, and overtime management. ## Requirements and limitations * Sellers manage the following operations in the Square Dashboard or other Square products. Square APIs cannot be used for these operations. * Get or set permissions for team members or set a passcode. Sellers manage team access in the **Team** section of the Square Dashboard. * Update the team member that represents the seller account. In the API, this team member has the `is_owner` field set to `true`. * Add team members to the staff for payroll or appointments, or assign team members to cash drawer shifts or invoices. * The Team API cannot be used to send the team member an invitation to join the team. Square does this automatically after the seller assigns the team member's permissions and passcode. * After accepting the invitation to join the team, only the team member can change their email address by updating their personal settings on the [Square](https://squareup.com) website. Although this change is reflected in their team member profile, it doesn't invoke a `team_member.updated` webhook event. * Generate sales, tip, or activity reports for team members. However, you might be able to get similar data for sales and tip reporting using team member IDs with the Payments API and Labor API. For more information, see [Track tips](labor-api/what-it-does#track-tips). * The {% tooltip text="Square Sandbox" %}An isolated server environment used for testing. API calls in the Sandbox use the "connect.squareupsandbox.com" domain and require an access token that's valid for Sandbox.{% /tooltip %} doesn't support all features that integrate with team members. For example, the **Permissions** and **Payroll** sections aren't available in the [Sandbox Square Dashboard](devtools/developer-dashboard#sandbox-square-dashboard). ## Supported operations Your application can use the Team API to perform the following operations: * [CreateTeamMember](https://developer.squareup.com/reference/square/team-api/create-team-member), [UpdateTeamMember](https://developer.squareup.com/reference/square/team-api/update-team-member), [BulkCreateTeamMembers](https://developer.squareup.com/reference/square/team-api/bulk-create-team-members), and [BulkUpdateTeamMember](https://developer.squareup.com/reference/square/team-api/bulk-update-team-members) - Create and update team members to manage their profile, status, assigned locations, and wage setting. Team members can be created and updated individually or in bulk. * [RetrieveTeamMember](https://developer.squareup.com/reference/square/team-api/retrieve-team-member) and [SearchTeamMembers](https://developer.squareup.com/reference/square/team-api/search-team-members) - Retrieve a specific team member, list all team members, or search for team members by location and status or by whether the team member is the Square account owner. * [CreateJob](https://developer.squareup.com/reference/square/team-api/create-job) and [UpdateJob](https://developer.squareup.com/reference/square/team-api/update-job) - Create and update job definitions by specifying the job title and tip eligibility. A team member's job assignments and compensation is managed through the team member's `wage_setting` field. * [RetrieveJob](https://developer.squareup.com/reference/square/team-api/retrieve-job) and [ListJobs](https://developer.squareup.com/reference/square/team-api/list-jobs) - Retrieve a specific job or list all jobs. To learn how to use the Team API, see [Integration Guide](team/integration). {% aside type="info" %} `Job` endpoints are available in Square API version 2024-12-18 or higher. {% /aside %} {% anchor id="square-dashboard-team" /%} ## Team members in the Square Dashboard Team members created with the Team API are available in the Square Dashboard and integrate with the following features: * **Team** - The new team member is shown in the **Team members** list. ![A graphic showing details of a team member in the Seller Dashboard Team management application.](//images.ctfassets.net/1nw4q0oohfju/44t41i0VE8L91tH5E5blqS/57fa9f61ea8786174a2c2c606e14e460/team-member-details.png) Sellers use the Square Dashboard to assign a passcode and permissions to team members. * **Timecards** - The new team member is shown in the **New Shift** window in the **Name** list. * **Appointments** - A team member can be added to the **Staff** list. * **Cash drawers** - A team member who is logged in with a passcode is automatically assigned to a cash drawer shift. * **Payroll** - A team member can be added to the payroll. For more information about Square team management tools, see [Square Staff](https://squareup.com/staff). ## Webhooks A webhook is a subscription that notifies you when a Square event occurs. For more information about using webhooks, see [Square Webhooks](webhooks/overview). The Team API uses the following webhook events: {% table %} * Event * Permission {% width="140px" %} * Description ----- * [team_member.created](https://developer.squareup.com/reference/square/team-api/webhooks/team_member.created) * `EMPLOYEES_READ` * A team member was created. ----- * [team_member.updated](https://developer.squareup.com/reference/square/team-api/webhooks/team_member.updated) * `EMPLOYEES_READ` * A team member was updated. ----- * [team_member.wage_setting.updated](https://developer.squareup.com/reference/square/team-api/webhooks/team_member.wage_setting.updated) * `EMPLOYEES_READ` * A team member's wage setting was updated. ----- * [job.created](https://developer.squareup.com/reference/square/team-api/webhooks/job.created) * `EMPLOYEES_READ` * A job was created. ----- * [job.updated](https://developer.squareup.com/reference/square/team-api/webhooks/job.updated) * `EMPLOYEES_READ` * A job was updated. {% /table %} For a complete list of webhook events, see [Webhook Events Reference](webhooks/v2webhook-events-tech-ref). ## See also * [Team API Integration Guide](team/integration) * [Build a Tip Report](staff/scenarios/tip-reporting) * [API Reference: Team API](https://developer.squareup.com/reference/square/team-api) --- # Integration Guide > Source: https://developer.squareup.com/docs/team/integration > Status: PUBLIC > Languages: All > Platforms: All Learn how to use the Team API to manage team members for a Square seller. **Applies to:** [Team API](https://developer.squareup.com/reference/square/team-api) | [Labor API](labor-api/what-it-does) | [Locations API](locations-api) | [Cash Drawer Shifts API](cashdrawershift-api/reporting) | [Webhooks](webhooks/overview) | [Events API](events-api/overview) {% subheading %}Learn how to use the Team API to manage team members for a Square seller.{% /subheading %} {% toc hide=true /%} ## Overview Applications can use the Team API to create and configure team members and jobs and to synchronize team member data with external platforms. The Team API supports individual and bulk updates to team members, including setting job descriptions and compensation. Team members can be integrated into business operations. For example, they can be assigned to a [timecard](https://developer.squareup.com/reference/square/objects/Timecard) to track worked hours, assigned to a [scheduled shift](https://developer.squareup.com/reference/square/objects/ScheduledShift) in a team schedule, associated with a [cash drawer](https://developer.squareup.com/reference/square/objects/CashDrawerShift) connected to Square Point of Sale, and assigned to an appointment segment in a [booking](https://developer.squareup.com/reference/square/objects/Booking). ## Requirements and limitations * Applications that use [OAuth](oauth-api/overview) require the following permissions to call Team API endpoints: * `EMPLOYEES_READ` is required for `SearchTeamMembers`, `RetrieveTeamMember`, `RetrieveWageSetting`, `ListJobs`, and `RetrieveJob`. * `EMPLOYEES_WRITE` is required for `CreateTeamMember`, `BulkCreateTeamMembers`, `UpdateTeamMember`, `BulkUpdateTeamMembers`, `UpdateWageSetting`, `CreateJob`, and `UpdateJob`. * Permissions, permission sets, and passcodes cannot be accessed using the Team API. Sellers use the Square Dashboard to assign permissions and passcodes to team members, after which Square emails an invitation to join the team and create a Square account. * Square recommends using `Job` and `TeamManager` endpoints to manage jobs and wage settings instead of `RetrieveWageSetting` and `UpdateWageSetting`. {% accordion expanded=false %} {% slot "heading" %} #### More details {% /slot %} The following Beta features are added in Square API version 2024-12-18. * The `CreateJob`, `UpdateJob`, `ListJobs`, and `RetrieveJob` endpoints, `Job` object, and `JobAssignment.job_id` field. * `TeamMember.wage_setting` field. This field lets applications use `CreateTeamMember`, `RetrieveTeamMember` and other `TeamMember` endpoints to access and manage job assignments and compensation for team members. The `wage_setting` and `job_id` fields are available to all API versions, but using Square SDKs to access them requires the [corresponding Square SDK version](changelog/connect-logs/2024-12-18#version-summary) or later. {% /accordion %} For more information and other considerations, see [Team API: Requirements and limitations](team/overview#requirements-and-limitations). {% anchor id="set-up-a-new-team-member" /%} {% anchor id="bulk-create-team-members" /%} ## Set up new team members Using the Team API, first retrieve the jobs that team members can do and then create the team members. After a team member is created, sellers can assign team permissions in the Square Dashboard. ### 1. List jobs To assign jobs to a team member, you need to provide the corresponding job IDs. To get all jobs in a seller account, call [ListJobs](https://developer.squareup.com/reference/square/team-api/list-jobs), as shown in the following example request: {% tabset %} {% tab id="Request" %} ```` If you need to create a new job, call [CreateJob](https://developer.squareup.com/reference/square/team-api/create-job) and specify the job title and tip eligibility. {% aside type="info" %} `Job` endpoints are available in Square API version 2024-12-18 or later. {% /aside %} {% /tab %} {% tab id="Response" %} If successful, Square returns the jobs in the seller account, as shown in the following example: ```json { "jobs": [ { "id": "VDNpRv8da51NU8qZFC5zDWpF", "title": "Cashier", "is_tip_eligible": true, "created_at": "2024-12-02T22:55:45Z", "updated_at": "2024-12-12T10:06:23Z", "version": 2 }, { "id": "FjS8x95cqHiMenw4f1NAUH4P", "title": "Manager", "is_tip_eligible": false, "created_at": "2024-12-02T23:19:01Z", "updated_at": "2024-12-02T23:19:01Z", "version": 1 } ] } ``` If the `cursor` field is present in the response, append the cursor to your `ListJobs` request and resend it to retrieve the next page of results. To get all jobs, repeat this process until the response no longer contains a `cursor`. For more information, see [Pagination](build-basics/common-api-patterns/pagination). Copy the `id` of each job that applies to the team member. You use the job IDs in the team member's `wage_setting.job_assignments` field in the next step. {% /tab %} {% /tabset %} ### 2. Create team members To create team members, call one of the following endpoints: * `CreateTeamMember` - [Create a single team member](#create-single-team-member). * `BulkCreateTeamMembers` - [Create multiple team members](#create-multiple-team-members). For each team member, provide profile and job information: * `given_name` and `family_name` - The team member's first and last name. These fields are required to create a team member. * `assigned_locations` - The locations where the team member's permissions apply. {% accordion expanded=false %} {% slot "heading" %} #### More details {% /slot %} Valid values for `assignment_type`: * `ALL_CURRENT_AND_FUTURE_LOCATIONS` - Assigns the team member to all of the seller's locations, including locations added in the future. Any `location_ids` setting is ignored. * `EXPLICIT_LOCATIONS` - Used with `location_ids` to assign the team member to specific locations. Use [ListLocations](https://developer.squareup.com/reference/square/locations-api/list-locations) to get the seller's locations. If `assigned_locations` is omitted, `assignment_type` defaults to `EXPLICIT_LOCATIONS`. For sellers with one location, the team member is assigned to that location. With multiple locations, the team member isn't assigned to any, so you must explicitly specify `location_ids` later. {% /accordion %} * `email_address` - The email address for the team member, which must be unique across team members in the seller account. Square sends an invitation to this address after team permissions are assigned in the Square Dashboard. * `phone_number` - The team member's phone number in E.164 format: `+[country code][area code][subscriber number]`. * `wage_setting` - The team member's overtime exemption status and job assignments with compensation. {% accordion expanded=false %} {% slot "heading" %} #### More details {% /slot %} * `is_overtime_exempt` - Whether the team member is exempt from overtime rules. * `job_assignments` - The list of jobs the team member can do, with the primary job listed first. For each job assignment, specify: * `job_id` - The job ID returned in the `ListJobs` or `CreateJob` response. * `pay_type` - The job's pay type. * For `HOURLY` pay types, also provide `hourly_rate`. * For `SALARY` pay types, also provide `annual_rate` and `weekly_hours`. Square uses these values to calculate the hourly rate. For jobs that don't have a pay type, such as volunteer positions, specify `NONE`. {% aside type="info" %} The `TeamMember.wage_setting` field (added in Square API version 2024-12-18) lets you access and manage wage settings using `TeamMember` endpoints instead of [RetrieveWageSetting](https://developer.squareup.com/reference/square/team-api/retrieve-wage-setting) and [UpdateWageSetting](https://developer.squareup.com/reference/square/team-api/update-wage-setting). {% /aside %} {% /accordion %} * `reference_id` - An external team member ID. This field is recommended if you [synchronize team members with an external platform](#synchronize). {% anchor id="create-single-team-member" /%} {% accordion expanded=false %} {% slot "heading" %} #### Create a single team member {% /slot %} To create a single team member, call [CreateTeamMember](https://developer.squareup.com/reference/square/team-api/create-team-member). The following example request creates a team member assigned to the Manager job in two locations: {% tabset %} {% tab id="Request" %} ```` This example includes the optional [idempotency key](build-basics/common-api-patterns/idempotency) to ensure that the request is processed one time only. {% /tab %} {% tab id="Response" %} If successful, Square returns the new team member, as shown in the following example: ```json { "team_member": { "id": "K6JiNAakLUf5lUYmfjn", "is_owner": false, "status": "ACTIVE", "given_name": "Joe", "family_name": "Doe", "email_address": "joedoe@gmail.com", "phone_number": "+12085551235", "created_at": "2024-12-05T19:09:37+00:00", "updated_at": "2024-12-05T19:09:37+00:00", "assigned_locations": { "location_ids": [ "L5MD8YG8Q3S02", "CHQV7VKNFR3SV" ], "assignment_type": "EXPLICIT_LOCATIONS" }, "wage_setting": { "team_member_id": "K6JiNAakLUf5lUYmfjn", "is_overtime_exempt": true, "job_assignments": [ { "job_id": "FjS8x95cqHiMenw4f1NAUH4P", "job_title": "Manager", "pay_type": "SALARY", "annual_rate": { "amount": 6000000, "currency": "USD" }, "hourly_rate": { "amount": 2885, "currency": "USD" }, "weekly_hours": 40 } ], "version": 1, "created_at": "2024-12-05T19:09:37+00:00", "updated_at": "2024-12-05T19:09:37+00:00" } } } ``` Copy the `id` to assign a wage setting to the team member in the next step. {% /tab %} {% /tabset %} {% /accordion %} {% anchor id="create-multiple-team-members" /%} {% accordion expanded=false %} {% slot "heading" %} #### Create multiple team members {% /slot %} To create 1 to 25 team members in a bulk operation, call [BulkCreateTeamMembers](https://developer.squareup.com/reference/square/team-api/bulk-create-team-members) and provide a map of key-value pairs that represent individual create requests. For each key-value pair, the key is an idempotency key and the value is the team member data. Bulk operations are non-atomic. Each individual create request returns a success or failure response within the bulk operation response. Creating new team members in a bulk operation includes the following steps: 1. Define individual create requests that contain team member data. ```json { "team_member": { "given_name": "Joe", "family_name": "Doe", "assigned_locations": { "location_ids": [ "L5MD8YG8Q3S02", "CHQV7VKNFR3SV" ], "assignment_type": "EXPLICIT_LOCATIONS" }, "email_address": "joedoe@gmail.com", "phone_number": "+12085551235", "wage_setting": { "is_overtime_exempt": true, "job_assignments": [ { "job_id": "FjS8x95cqHiMenw4f1NAUH4P", "pay_type": "SALARY", "annual_rate": { "amount": 6000000, "currency": "USD" }, "weekly_hours": 40 } ] } } } ``` 2. Assign an unique idempotency key to individual create requests and add them to the `team_members` map. ```json { "team_members": { "{UNIQUE_KEY 1}" : { // create request for team member 1 goes here }, "{UNIQUE_KEY 2}" : { // create request for team member 2 goes here } } } ``` 3. Call `BulkCreateTeamMembers` and provide the `team_members` map. {% tabset %} {% tab id="Request" %} ```` {% /tab %} {% tab id="Response" %} If the `BulkCreateTeamMembers` operation is successfully processed, Square returns a `200` status code and a `team_members` object with key-value pairs that contain responses for individual create requests. For each key-value pair, the key is an idempotency key that was specified in the request and the value is either: * `team_member` with the new team member if the request succeeded. * `errors[]` with error information if the request failed. ```json { "team_members": { "Cf634970-17a0-403c-9c3b-21c399d2b6ea" : { "team_member": { "id": "K6JiNAakLUf5lUYmfjn", "is_owner": false, "status": "ACTIVE", "given_name": "Joe", "family_name": "Doe", "email_address": "joedoe@gmail.com", "phone_number": "+12085551235", "created_at": "2024-12-05T19:09:37Z", "updated_at": "2024-12-05T19:09:37Z", "assigned_locations": { "location_ids": [ "L5MD8YG8Q3S02", "CHQV7VKNFR3SV" ], "assignment_type": "EXPLICIT_LOCATIONS" }, "wage_setting": { "team_member_id": "K6JiNAakLUf5lUYmfjn", "is_overtime_exempt": true, "job_assignments": [ { "job_id": "FjS8x95cqHiMenw4f1NAUH4P", "job_title": "Manager", "pay_type": "SALARY", "annual_rate": { "amount": 6000000, "currency": "USD" }, "hourly_rate": { "amount": 2885, "currency": "USD" }, "weekly_hours": 40 } ], "version": 1, "created_at": "2024-12-05T19:09:37+00:00", "updated_at": "2024-12-05T19:09:37+00:00" } } }, "40468e44-41f2-48e9-887e-60b0d52c8630" : { "team_member": { "id": "4O2xVQah-8Ql2MJKpS9I", "is_owner": false, "status": "ACTIVE", "given_name": "Harper", "family_name": "Smith", "email_address": "hsmith@gmail.com", "created_at": "2024-12-05T19:09:37Z", "updated_at": "2024-12-05T19:09:37Z", "assigned_locations": { "assignment_type": "ALL_CURRENT_AND_FUTURE_LOCATIONS" } } } } } ``` {% /tab %} {% /tabset %} {% /accordion %} ### 3. Assign team member permissions in the Square Dashboard After the team member is created, the seller needs to assign permissions to the team member in the **Team** section of the Square Dashboard. Permissions, permission sets, and passcodes cannot be accessed using the Team API. The following steps describe how you can simulate the seller experience using your own account. 1. In the [Square Dashboard](https://app.squareup.com/dashboard), choose **Team** in the left pane. 2. On the **Team Members** page, choose the new team member from the **Name** list to open their details pane. 3. Select a permission set for the team member and enter or generate a personal passcode, and then choose **Save**. Square sends an email to the team member with an invitation to join the team. For more information about how sellers manage their team, see [Add and manage team members](https://squareup.com/help/article/8356-add-and-manage-team-members). {% aside type="info" %} The code examples in this topic call Square APIs in the production environment. Alternatively, you can use the `https://connect.squareupsandbox.com/v2` domain to create team members in the {% tooltip text="Square Sandbox" %}An isolated server environment used for testing. API calls in the Sandbox use the "connect.squareupsandbox.com" domain and require an access token that's valid for Sandbox.{% /tooltip %} and then view them in the [Sandbox Square Dashboard](devtools/developer-dashboard#sandbox-square-dashboard). However, the Sandbox Square Dashboard doesn't support testing these permission-related steps. {% /aside %} {% anchor id="update-a-team-member" /%} {% anchor id="bulk-update-team-members" /%} ## Update team members You can use the Team API to activate or deactivate team members and update assigned locations or other profile information. You can also update wage settings, including job assignments and compensation. {% line-break /%} {% anchor id="update-exceptions" /%} Note the following exceptions: * The Team API cannot be used to update the team member that represents the seller account. In the API, this team member has the `is_owner` field set to `true`. The seller can update their profile in the Square Dashboard. * After accepting the invitation to join the team, the Team API cannot be used to update the team member's email address. Only the team member can change their email address by updating their personal settings on the [Square](https://squareup.com) website. * Job assignments don't support sparse updates so you must provide the complete `job_assignments` list when updating this field. ### 1. Retrieve team members If you need to get team member IDs or other details, call [SearchTeamMembers](#search-for-team-members). If you have the team member ID but need to get other details, call [RetrieveTeamMember](#retrieve-a-team-member). ### 2. Update team members To update team members, call one of the following endpoints: * `UpdateTeamMember` - [Update a single team member](#update-single-team-member). * `BulkUpdateTeamMembers` - [Update multiple team members](#update-multiple-team-members). These endpoints support [sparse updates](build-basics/clearing-fields#sparse-updates). For each team member, you only need to include fields you want to add or change. To clear an optional field, specify `null`. The following fields can be updated: * `given_name` and `family_name` - The team member's first and last name. * `assigned_locations` - The locations where the team member's permissions apply. {% accordion expanded=false %} {% slot "heading" %} #### More details {% /slot %} Valid values for `assignment_type` include: * `ALL_CURRENT_AND_FUTURE_LOCATIONS` - Assigns the team member to all of the seller's locations, including locations added in the future. Any `location_ids` setting is ignored. * `EXPLICIT_LOCATIONS` - Used with `location_ids` to assign the team member to specific locations. Use [ListLocations](https://developer.squareup.com/reference/square/locations-api/list-locations) to get the seller's locations. If `assigned_locations` is omitted, `assignment_type` defaults to `EXPLICIT_LOCATIONS`. For sellers with one location, the team member is assigned to that location. With multiple locations, the team member isn't assigned to any, so you must explicitly specify `location_ids` later. {% /accordion %} * `email_address` - The email address for the team member, which must be unique across team members in the seller account. Square sends an invitation to this address after team permissions are assigned in the Square Dashboard. The Team API [cannot update](#update-exceptions) this field after the team member joins the team. * `phone_number` - The team member's phone number in E.164 format: `+[country code][area code][subscriber number]`. * `wage_setting` - The team member's overtime exemption status and job assignments with compensation. {% accordion expanded=false %} {% slot "heading" %} #### More details {% /slot %} * `is_overtime_exempt` - Whether the team member is exempt from overtime rules. * `job_assignments` - The complete list of jobs the team member can do, with the primary job listed first. For each job assignment, specify: * `job_id` - The job ID returned in the `ListJobs` or `CreateJob` response. * `pay_type` - The job's pay type. * For `HOURLY` pay types, also provide `hourly_rate`. * For `SALARY` pay types, also provide `annual_rate` and `weekly_hours`. Square uses these values to calculate the hourly rate. For jobs that don't have a pay type, such as volunteer positions, specify `NONE`. To enable [optimistic concurrency](build-basics/common-api-patterns/optimistic-concurrency) control for the wage setting update, include `version` set to the current wage setting version. {% aside type="info" %} The `TeamMember.wage_setting` field (added in Square API version 2024-12-18) lets you access and manage wage settings using `TeamMember` endpoints instead of [RetrieveWageSetting](https://developer.squareup.com/reference/square/team-api/retrieve-wage-setting) and [UpdateWageSetting](https://developer.squareup.com/reference/square/team-api/update-wage-setting). For applications that continue to use `UpdateWageSetting`, you must provide the complete `WageSetting` object. {% /aside %} {% /accordion %} * `reference_id` - An external team member ID. This field is recommended if you [synchronize team members with an external platform](#synchronize). {% anchor id="update-single-team-member" /%} {% accordion expanded=false %} {% slot "heading" %} #### Update a single team member {% /slot %} To update a single team member, call [UpdateTeamMember](https://developer.squareup.com/reference/square/team-api/update-team-member) and specify the `team_member_id`. The following example request deactivates a team member, as shown in the following example: {% line-break /%} {% tabset %} {% tab id="Request" %} ```` {% /tab %} {% tab id="Response" %} If successful, Square returns the updated team member, as shown in the following example:: ```json { "team_member": { "id": "K6JiNAakLUf5lUYmfjn", "is_owner": false, "status": "INACTIVE", "given_name": "Joe", "family_name": "Doe", "email_address": "joedoe@gmail.com", "phone_number": "+12085551235", "created_at": "2024-12-05T19:09:37Z", "updated_at": "2024-12-05T25:49:28Z", "assigned_locations": { "location_ids": [ "L5MD8YG8Q3S02", "CHQV7VKNFR3SV" ], "assignment_type": "EXPLICIT_LOCATIONS" }, "wage_setting": { "team_member_id": "K6JiNAakLUf5lUYmfjn", "is_overtime_exempt": true, "job_assignments": [ { "job_id": "FjS8x95cqHiMenw4f1NAUH4P", "job_title": "Manager", "pay_type": "SALARY", "annual_rate": { "amount": 6000000, "currency": "USD" }, "hourly_rate": { "amount": 2885, "currency": "USD" }, "weekly_hours": 40 } ], "version": 1, "created_at": "2024-12-05T19:09:37+00:00", "updated_at": "2024-12-05T19:09:37+00:00" } } } ``` {% /tab %} {% /tabset %} {% /accordion %} {% anchor id="update-multiple-team-members" /%} {% accordion expanded=false %} {% slot "heading" %} #### Update multiple team members {% /slot %} To update 1 to 25 team members in a bulk operation, call [BulkUpdateTeamMembers](https://developer.squareup.com/reference/square/team-api/bulk-update-team-members) and provide a map of key-value pairs that represent individual update requests. For each key-value pair, the key is the team member ID and the value is the team member data. Bulk operations are non-atomic. Each individual update request returns a success or failure response within the bulk operation response. Updating team members in a bulk operation includes the following steps: 1. Define individual update requests that specify the fields that you want to add, change, or clear. ```json { "team_member": { "family_name": "McGee", "assigned_locations": { "assignment_type": "ALL_CURRENT_AND_FUTURE_LOCATIONS" } } } ``` 2. Assign the team member ID to individual update requests and add them to the `team_members` map. ```json { "team_members": { "{TEAM_MEMBER_ID 1}" : { // update request for team member 1 goes here }, "{TEAM_MEMBER_ID 2}" : { // update request for team member 2 goes here } } } ``` 3. Call `BulkUpdateTeamMembers` and provide the `team_members` map. {% tabset %} {% tab id="Request" %} The following example updates two team members. The first update request changes the last name and location assignment type. The second update request updates the assigned locations and job assignments and removes the phone number. ```` {% /tab %} {% tab id="Response" %} If the `BulkUpdateTeamMembers` operation is successfully processed, Square returns a `200` status code and a `team_members` object with key-value pairs that contain responses for individual update requests. For each key-value pair, the key is a team member ID that was specified in the request and the value is either: * `team_member` with the updated team member if the request succeeded. * `errors[]` with error information if the request failed. ```json { "team_members": { "TMOzfkfRDWQsVDX9" : { "team_member": { "id": "TMOzfkfRDWQsVDX9", "is_owner": false, "status": "ACTIVE", "given_name": "Reese", "family_name": "McGee", "email_address": "reesemcgee_12@gmail.com", "created_at": "2024-12-05T19:09:37Z", "updated_at": "2024-12-13T04:07:11Z", "assigned_locations": { "assignment_type": "ALL_CURRENT_AND_FUTURE_LOCATIONS" }, "wage_setting": { "team_member_id": "TMOzfkfRDWQsVDX9" } } }, "K6JiNAakLUf5lUYmfjn" : { "team_member": { "id": "K6JiNAakLUf5lUYmfjn", "is_owner": false, "status": "ACTIVE", "given_name": "Joe", "family_name": "Doe", "email_address": "joedoe@gmail.com", "created_at": "2024-12-05T19:09:37Z", "updated_at": "2024-12-13T04:07:11Z", "assigned_locations": { "location_ids": [ "L5MD8YG8Q3S02" ], "assignment_type": "EXPLICIT_LOCATIONS" }, "wage_setting": { "team_member_id": "K6JiNAakLUf5lUYmfjn", "is_overtime_exempt": true, "job_assignments": [ { "job_id": "FjS8x95cqHiMenw4f1NAUH4P", "job_title": "Manager", "pay_type": "SALARY", "annual_rate": { "amount": 6250000, "currency": "USD" }, "hourly_rate": { "amount": 3005, "currency": "USD" }, "weekly_hours": 40 } ], "version": 2, "created_at": "2024-12-05T19:09:37+00:00", "updated_at": "2024-12-13T04:07:11+00:00" } } } } } ``` {% /tab %} {% /tabset %} {% /accordion %} {% anchor id="update-job-assignments" /%} {% anchor id="add-a-second-job-assignment" /%} ### Examples: Update job assignments The following example `UpdateTeamMember` requests add, remove, or reorder job assignments and change the pay rate. The first job assignment is considered the team member's primary job. When adding or changing job assignments, you can call [ListJobs](https://developer.squareup.com/reference/square/team-api/list-jobs) to get job IDs. {% tabset %} {% tab id="Single job assignment" %} Reactivate the team member and specify a single job assignment. ```` {% /tab %} {% tab id="Add another job assignment" %} Add a second job assignment, while keeping the primary job assignment. ```` {% /tab %} {% tab id="Reorder job assignments" %} Make the second job assignment the primary job assignment and change the pay rate. ```` {% /tab %} {% /tabset %} These examples include the `version` field to enable [optimistic concurrency](build-basics/common-api-patterns/optimistic-concurrency) control for wage setting updates. {% anchor id="search-for-team-members" /%} ## List or search for team members Use the [SearchTeamMembers](https://developer.squareup.com/reference/square/team-api/search-team-members) endpoint to get a list of team members, optionally filtered by location, status, or whether the team member is the owner. If needed, call [ListLocations](https://developer.squareup.com/reference/square/locations-api/list-locations) to get the seller's locations. To return all team members, don't specify any filters. If you're looking for a particular team member, iterate through the results and check the `phone_number`, `email_address`, or other fields to see if there's a match. {% aside type="info" %} As a best practice, check the team member's `status` if you're retrieving team member data to perform a business activity. In many cases, only `ACTIVE` team members are applicable. {% /aside %} {% tabset %} {% tab id="Request" %} The following example lists all active team members whose location assignment includes the specified location ID. The `limit` field specifies a {% tooltip text="page size" %}The maximum number of results to return in a single paged response.{% /tooltip %} of 2. The default and maximum page size is 25. ```` {% /tab %} {% tab id="Response" %} If successful, Square returns two active team members, one of whom is assigned to multiple locations, including the filtered location. ```json { "team_members": [ { "id": "K6JiNAakLUf5lUYmfjn", "is_owner": false, "status": "ACTIVE", "given_name": "Joe", "family_name": "Doe", "email_address": "joedoe@gmail.com", "phone_number": "+12085551235", "created_at": "2024-12-05T19:09:37+00:00", "updated_at": "2024-12-05T19:09:37+00:00", "assigned_locations": { "location_ids": [ "L5MD8YG8Q3S02", "CHQV7VKNFR3SV" ], "assignment_type": "EXPLICIT_LOCATIONS" }, "wage_setting": { "team_member_id": "K6JiNAakLUf5lUYmfjn", "is_overtime_exempt": true, "job_assignments": [ { "job_id": "FjS8x95cqHiMenw4f1NAUH4P", "job_title": "Manager", "pay_type": "SALARY", "annual_rate": { "amount": 6000000, "currency": "USD" }, "hourly_rate": { "amount": 2885, "currency": "USD" }, "weekly_hours": 40 } ], "version": 1, "created_at": "2024-12-05T19:09:37+00:00", "updated_at": "2024-12-05T19:09:37+00:00" } }, { "id": "4O2xVQah-8Ql2MJKpS9I", "is_owner": false, "status": "ACTIVE", "given_name": "Harper", "family_name": "Smith", "email_address": "hsmith@gmail.com", "created_at": "2024-12-05T19:09:37Z", "updated_at": "2024-12-05T19:09:37Z", "assigned_locations": { "assignment_type": "ALL_CURRENT_AND_FUTURE_LOCATIONS" }, "wage_setting": { "team_member_id": "4O2xVQah-8Ql2MJKpS9I" } }, ... // more results ], "cursor": "VZ9Ii490J3bcQGw4l6XUGFbJE0X6m" } ``` {% /tab %} {% /tabset %} If the `SearchTeamMembers` response includes a `cursor` field, append the cursor to your previous request and resend it to retrieve the next page of results. Repeat this process until the response no longer contains a `cursor`. For more information, see [Pagination](build-basics/common-api-patterns/pagination). {% anchor id="retrieve-a-team-member" /%} ## Retrieve a team member The [RetrieveTeamMember](https://developer.squareup.com/reference/square/team-api/retrieve-team-member) endpoint returns a single `TeamMember` value based on the ID provided in the request. {% tabset %} {% tab id="Request" %} ```` {% /tab %} {% tab id="Response" %} If successful, Square returns the requested team member. ```json { "team_member": { "id": "K6JiNAakLUf5lUYmfjn", "is_owner": false, "status": "ACTIVE", "given_name": "Joe", "family_name": "Doe", "email_address": "joedoe@gmail.com", "phone_number": "+12085551235", "created_at": "2024-12-05T19:09:37+00:00", "updated_at": "2024-12-05T19:09:37+00:00", "assigned_locations": { "location_ids": [ "L5MD8YG8Q3S02", "CHQV7VKNFR3SV" ], "assignment_type": "EXPLICIT_LOCATIONS" }, "wage_setting": { "team_member_id": "K6JiNAakLUf5lUYmfjn", "is_overtime_exempt": true, "job_assignments": [ { "job_id": "FjS8x95cqHiMenw4f1NAUH4P", "job_title": "Manager", "pay_type": "SALARY", "annual_rate": { "amount": 6000000, "currency": "USD" }, "hourly_rate": { "amount": 2885, "currency": "USD" }, "weekly_hours": 40 } ], "version": 1, "created_at": "2024-12-05T19:09:37+00:00", "updated_at": "2024-12-05T19:09:37+00:00" } } } ``` {% /tab %} {% /tabset %} {% anchor id="change-job-title" /%} ## Manage jobs (Beta) Square provides the following `Job` endpoints to create and manage jobs. A job defines a title and tip eligibility. Jobs are referenced by job assignments, which also include compensation information for a team member. A team member's job assignments are accessed and managed from the `wage_setting.job_assignments` field. {% aside type="info" %} `Job` endpoints are available in Square API version 2024-12-18 or later. {% /aside %} [CreateJob](https://developer.squareup.com/reference/square/team-api/create-job) - To create a job, call `CreateJob` and specify the title and tip eligibility. The `title` field is required and `is_tip_eligible` defaults to `true`. [UpdateJob](https://developer.squareup.com/reference/square/team-api/update-job) - To change a job title or its tip eligibility, call `UpdateJob`. All job assignments (for any team member) and all `Timecard` and `TeamMemberWage` objects in the Labor API that use this job ID are updated to show the new job title. [ListJobs](https://developer.squareup.com/reference/square/team-api/list-jobs) or [RetrieveJob](https://developer.squareup.com/reference/square/team-api/retrieve-job) - To get job IDs or other details, call `ListJobs` or call `RetrieveJob` if you have the job ID. `ListJobs` has a {% tooltip text="page size" %}The maximum number of results to return in a single paged response.{% /tooltip %} of 100 and returns jobs sorted by title in ascending order. {% anchor id="synchronize" /%} ## Synchronize team members with an external platform Applications that interact with team members for scheduling, payroll, accounting, and other purposes might need to periodically synchronize with Square to ensure data consistency. Synchronization between the external platform and Square can be bi-directional or one way. {% anchor id="sync-to-square" /%} ### Sync from an external platform to Square Use the Team API to push changes to a Square seller account when team members are created or updated in your platform. {% accordion expanded=false %} {% slot "heading" %} #### Creating team members {% /slot %} Adding a new team member in Square includes creating the team member and then configuring job assignments and compensation. For more information, see [Set up a new team member](#set-up-a-new-team-member) and [List or search for team members](#search-for-team-members). This process might use the following endpoints: * Use [ListJobs](https://developer.squareup.com/reference/square/team-api/list-jobs) to get job IDs to configure job assignments in the team member's wage setting. * Use [ListLocations](https://developer.squareup.com/reference/square/locations-api/list-locations) to get location IDs to configure explicitly assigned locations. * Use [SearchTeamMembers](https://developer.squareup.com/reference/square/team-api/search-team-members) if you need to check whether a team member already exists. Omit the `status` filter to make sure that you're retrieving both activated and deactivated team members. * Use [CreateTeamMember](https://developer.squareup.com/reference/square/team-api/create-team-member) or [BulkCreateTeamMembers](https://developer.squareup.com/reference/square/team-api/bulk-create-team-members) to create one or more team members. It's a good practice to store the team member ID from your platform in the `TeamMember.reference_id` field and store the `TeamMember.id` field in your platform. {% aside type="info" %} Square recommends using `TeamMember` and `Job` endpoints to manage job assignments and compensation when possible. Previously, applications had to call `UpdateWageSetting`. For more information, see [RetrieveWageSetting and UpdateWageSetting](#using-wage-setting-endpoints). {% /aside %} {% /accordion %} {% anchor id="updating-team-members" /%} {% anchor id="updating-team-member-details" /%} {% accordion expanded=false %} {% slot "heading" %} #### Updating team members {% /slot %} Updates to team member details include changing contact information, assigned locations, or the `status` to activate or deactivate the team member. For more information, see [Update team members](#update-team-members). This process might use the following endpoints: * Use [ListJobs](https://developer.squareup.com/reference/square/team-api/list-jobs) to get job IDs to configure job assignments in the team member's wage setting. * Use [ListLocations](https://developer.squareup.com/reference/square/locations-api/list-locations) to get location IDs to configure explicitly assigned locations. * Use [SearchTeamMembers](https://developer.squareup.com/reference/square/team-api/search-team-members) to get the team member ID or other details. You can call [RetrieveTeamMember](https://developer.squareup.com/reference/square/team-api/retrieve-team-member) if you have the team member ID but need to get other details. * Use [UpdateTeamMember](https://developer.squareup.com/reference/square/team-api/update-team-member) or [BulkUpdateTeamMembers](https://developer.squareup.com/reference/square/team-api/bulk-update-team-members) to update one or more team members. {% aside type="info" %} Square recommends using `TeamMember` and `Job` endpoints to manage job assignments and compensation when possible. Previously, applications had to call `UpdateWageSetting`. For more information, see [RetrieveWageSetting and UpdateWageSetting](#using-wage-setting-endpoints). {% /aside %} {% /accordion %} {% anchor id="sync-from-square" /%} ### Sync from Square to an external platform To sync to an external platform, your application gets team member updates from Square and writes them to your platform. Common strategies include using webhook notifications, intermittent polling, or both. {% accordion expanded=false %} {% slot "heading" %} #### On notification of a change {% /slot %} Subscribe to the following webhook events to be notified about team member changes: * [team_member.created](https://developer.squareup.com/reference/square/team-api/webhooks/team_member.created) * [team_member.updated](https://developer.squareup.com/reference/square/team-api/webhooks/team_member.updated) * [team_member.wage_setting.updated](https://developer.squareup.com/reference/square/team-api/webhooks/team_member.wage_setting.updated) The `team_member.created` and `team_member.updated` notification payload includes the new or updated `TeamMember` object. The `team_member.wage_setting.updated` payload includes the new or updated `WageSetting` object. For more information about using webhooks, see [Square Webhooks](webhooks/overview). Note that the [Events API](events-api/overview) can be used with webhook subscriptions for recovery and reconciliation of missed webhook events. {% /accordion %} {% accordion expanded=false %} {% slot "heading" %} #### Regular interval polling {% /slot %} On a set time interval, poll for changes to team member details or job assignments and compensation. The following steps use the timestamp of your last sync to determine whether you need to update the data stored in your external platform. 1. Call [SearchTeamMembers](https://developer.squareup.com/reference/square/team-api/search-team-members) and iterate through the list of `TeamMember` objects returned in each paged response. 2. Check the `TeamMember.updated_at` timestamp and the `TeamMember.wage_setting.updated_at` timestamp. If either timestamp is greater than the timestamp of your last sync, write the data to your platform. As a best practice, check the team member's `status` if you're retrieving team member data to perform a business activity. For many use cases, only `ACTIVE` team members are applicable. If you regularly poll to synchronize stored team member data, you can use webhooks and increase the time between your polling. {% aside type="info" %} Square recommends using `TeamMember` and `Job` endpoints to retrieve job assignments and compensation when possible. Previously, applications had to call `RetrieveWageSetting`. For more information, see [RetrieveWageSetting and UpdateWageSetting](#using-wage-setting-endpoints). {% /aside %} {% aside type="warning" %} Applications that send many requests in a short time might be subject to [rate limiting](build-basics/general-considerations/handling-errors#rate-limiting) by Square. {% /aside %} {% /accordion %} {% anchor id="retrieve-a-wage-setting-for-a-team-member" /%} {% anchor id="step-2-assign-a-job-title-and-wage" /%} {% anchor id="using-wage-setting-endpoints" /%} ## RetrieveWageSetting and UpdateWageSetting The `RetrieveWageSetting` and `UpdateWageSetting` endpoints are used to access and manage a team member's job assignments and compensation by interacting with a `WageSetting` object associated with the team member. New features added in Square API version 2024-12-24 provide new, recommended ways to access and manage wage settings and jobs: * A new `TeamMember.wage_setting` field that lets you access and manage a team member's job assignments and compensation using `TeamMember` endpoints. * A new `Job` object and `CreateJob`, `UpdateJob`, `ListJobs`, and `RetrieveJob` endpoints. * A new `JobAssignment.job_id` field that references the job ID. Square API version 2024-12-18 or later is required to use `Job` endpoints. In addition, using a Square SDK to access the `TeamMember.wage_setting` and `JobAssignment.job_id` fields requires the [corresponding Square SDK version](changelog/connect-logs/2024-12-18#version-summary) or later. ### RetrieveWageSetting To get the team member's current wage setting, call [RetrieveWageSetting](https://developer.squareup.com/reference/square/team-api/retrieve-wage-setting) and specify the `team_member_id`. Use [SearchTeamMembers](https://developer.squareup.com/reference/square/team-api/search-team-members) to get the team member ID. {% tabset %} {% tab id="Request" %} ```` {% /tab %} {% tab id="Response" %} If successful, Square returns the team member's wage setting. If a wage setting isn't defined for the specified team member, only `team_member_id` is returned. ```json { "wage_setting": { "team_member_id": "K6JiNAakLUf5lUYmfjn", "is_overtime_exempt": true, "job_assignments": [ { "job_title": "Manager", "job_id": "c8-6JiNAakLUf5lUYmfj", "pay_type": "SALARY", "annual_rate": { "amount": 5000000, "currency": "USD" }, "hourly_rate": { "amount": 2403, "currency": "USD" }, "weekly_hours": 40 } ], "version": 2, "created_at": "2024-12-05T19:09:37+00:00", "updated_at": "2024-12-06T06:41:30+00:00" } } ``` If you're using [optimistic concurrency](build-basics/common-api-patterns/optimistic-concurrency), copy the current `version` of the wage setting. {% /tab %} {% /tabset %} {% aside type="info" %} Square recommends using `RetrieveTeamMember` or `SearchTeamMembers` instead of `RetrieveWageSetting` when possible. {% /aside %} ### UpdateWageSetting To add or update the team member's wage setting, call [UpdateWageSetting](https://developer.squareup.com/reference/square/team-api/update-wage-setting) and specify the `team_member_id`. Use [SearchTeamMembers](https://developer.squareup.com/reference/square/team-api/search-team-members) to get the team member ID. You must provide the complete `WageSetting` object in the request. To enable [optimistic concurrency](build-basics/common-api-patterns/optimistic-concurrency) control, include `version` set to the current wage setting version. {% tabset %} {% tab id="Request" %} ```` {% /tab %} {% tab id="Response" %} If successful, Square returns the new or updated wage setting. ```json { "wage_setting": { "team_member_id": "K6JiNAakLUf5lUYmfjn", "is_overtime_exempt": true, "job_assignments": [ { "job_title": "Manager", "job_id": "c8-6JiNAakLUf5lUYmfj", "pay_type": "SALARY", "annual_rate": { "amount": 5500000, "currency": "USD" }, "hourly_rate": { "amount": 2644, "currency": "USD" }, "weekly_hours": 40 } ], "version": 3, "created_at": "2024-12-05T19:09:37+00:00", "updated_at": "2024-12-18T11:04:52+00:00" } } ``` {% /tab %} {% /tabset %} {% aside type="info" %} Square recommends using `CreateTeamMember`, `BulkCreateTeamMembers`, `UpdateTeamMember`, or `BulkUpdateTeamMembers` instead of `UpdateWageSetting` when possible. {% /aside %} Applications that use `UpdateWageSetting` must specify `job_id` (recommended) or `job_title` for job assignments, and this setting must be consistently applied to all job assignments in the request. If you specify both `job_id` and `job_title`, `job_title` is ignored. Call [ListJobs](https://developer.squareup.com/reference/square/team-api/list-jobs) to get job IDs. If you specify only job titles, make sure to: * Specify the exact, case-sensitive title of an existing job unless you want to create a new job. * Assign the same title to all team members who have the same job. For example, use "Bartender" for all of the seller's bartenders. To avoid creating new job types based on spelling variations, your UI should provide an enumerated selection of job titles instead of letting team members input a job title. ## See also * [Troubleshoot the Team API](team/troubleshooting) * [API Reference: Team API](https://developer.squareup.com/reference/square/team-api) --- # Labor API > Source: https://developer.squareup.com/docs/labor-api/what-it-does > Status: PUBLIC > Languages: All > Platforms: All Learn about the time tracking and scheduling capabilities of the Square Labor API. **Applies to:** [Labor API](https://developer.squareup.com/reference/square/labor-api) | [Team API](team/overview) | [Locations API](locations-api) | [Webhooks](webhooks/overview) | [GraphQL](devtools/graphql) {% subheading %}Manage timecards and schedules for team members within a Square business.{% /subheading %} {% toc hide=true /%} ## Overview Use the [Labor API](https://developer.squareup.com/reference/square/labor-api) to manage time tracking and scheduling for team members. Time-tracking features let you manage timecards to record hours worked (including breaks, wages, and declared cash tips) for labor cost reporting, payroll, and overtime management. Scheduling features let you manage team schedules using draft and published scheduled shifts. The Labor API integrates with the [Team API](team/overview) and [Locations API](locations-api). In addition to calling the Labor API using REST calls or [Square SDKs](sdks), developers can send [GraphQL](devtools/graphql) queries to get labor data in fewer, more compact data transfers. Developers can also subscribe to be notified about labor [webhook events](labor-api/webhooks). {% aside type="info" %} The Labor API defines two types of objects; be careful not to confuse them: - A [ScheduledShift](https://developer.squareup.com/reference/square/objects/ScheduledShift) is used to manage team schedules. - A [Timecard](https://developer.squareup.com/reference/square/objects/Timecard) represents a single work shift for a team member. Each `Timecard` captures: - The actual time worked during one shift - Information needed for payroll processing For example, if an employee works five different shifts in a week, they will have five separate Timecard records - one for each shift. **Note:** The older `Shift` object type is deprecated. Use Timecards instead. For information about migration, see [Migration notes](labor-api/what-it-does#migration-notes). {% /aside %} ## Time tracking Use the Labor API to track actual hours worked by team members: - Record timecard start and end times with breaks. - Set hourly wage rates based on job assignments. - Track declared cash tips. - Retrieve timecard data for payroll and reporting. For more information, see [Time Tracking with the Labor API](labor-api/how-it-works). ## Scheduling Use the Labor API to manage team member schedules: - Create and manage scheduled shifts. - View and update scheduled shifts. - Search scheduled shifts by team member, location, dates, and more. - Get schedule details such as assigned jobs. For more information, see [Scheduling with the Labor API](labor-api/scheduling). ## Integration with other Square APIs The Labor API integrates directly with the following Square APIs: * [Team API](team/overview) for team member, job, and wage management. * [Locations API](locations-api) for location management, such as setting the location's time zone. Applications can also integrate with these and other Square APIs for custom use cases, such as advanced operational analytics and reporting. ## Migration notes The following migration notes apply to the Labor API. {% anchor id="shift-renamed-to-timecard" /%} ### Deprecated Shift endpoints, data types, and webhooks Deprecated in version: 2025-05-21 Retired in version: 2026-05-21 The [Shift](https://developer.squareup.com/reference/square/objects/Shift) object is renamed to [Timecard](https://developer.squareup.com/reference/square/objects/Timecard) in Square API version 2025-05-21. As part of this process, all `Shift` endpoints (`/v2/labor/shifts/...`) are replaced by `Timecard` endpoints (`/v2/labor/timecards/...`) that provide the same functionality. In addition, all `Shift`-related data types and webhook events are deprecated and replaced by new `Timecard` equivalents. For a complete list, see [Deprecated Shift items](#deprecated-shift-items). `Shift` and `Timecard` endpoints operate on the same resources. For example, both `SearchShifts` and `SearchTimecards` return the same set of resources in the results. However, they're returned as `Shift` objects in the `SearchShifts` response and `Timecard` objects in the `SearchTimecards` response. At retirement, `Shift` endpoints become unavailable to all applications and return `410 GONE` errors regardless of the `Square-Version` header in the request. Applications must migrate before the retirement date to avoid disruption. The following examples show the request and response format changes for each endpoint pair. {% accordion expanded=false %} {% slot "heading" %} #### CreateShift to CreateTimecard {% /slot %} Changes: - `shift` is renamed to `timecard` in the `CreateTimecard` request and response. - `employee_id` (deprecated) isn't supported in the `CreateTimecard` request or returned in the response. {% line-break /%} {% tabset %} {% tab id="CreateShift request (deprecated)" %} ```` {% /tab %} {% tab id="Response" %} ```json { "shift": { "id": "MG5YHDYXRFY9C", "employee_id": "K6JiNAakLUf5lUYmfjn", "team_member_id": "K6JiNAakLUf5lUYmfjn", "location_id": "B5MD8YG8Q3S04", "timezone": "America/Los_Angeles", "start_at": "2025-03-05T11:00:12-07:00", "end_at": "2025-03-05T15:00:12-07:00", "wage": { "title": "Bartender", "effective_hourly_rate": { "amount": 1234, "currency": "USD" } }, "status": "OPEN", "version": 1, "created_at": "2025-03-05T20:21:54.859Z", "updated_at": "2025-03-05T20:21:54.859Z" } } ``` {% /tab %} {% /tabset %} {% tabset %} {% tab id="CreateTimecard request" %} ```` {% /tab %} {% tab id="Response" %} ```json { "timecard": { "id": "MG5YHDYXRFY9C", "team_member_id": "K6JiNAakLUf5lUYmfjn", "location_id": "B5MD8YG8Q3S04", "timezone": "America/Los_Angeles", "start_at": "2025-03-05T11:00:12-07:00", "wage": { "title": "Bartender", "effective_hourly_rate": { "amount": 1234, "currency": "USD" } }, "status": "OPEN", "version": 1, "created_at": "2025-03-05T10:59:54.859Z", "updated_at": "2025-03-05T20:21:54.859Z" } } ``` {% /tab %} {% /tabset %} {% /accordion %} {% accordion expanded=false %} {% slot "heading" %} #### GetShift to RetrieveTimecard {% /slot %} Changes: - `shift` is renamed to `timecard` in the response. - `employee_id` (deprecated) isn't returned in the response. {% line-break /%} {% tabset %} {% tab id="GetShift request (deprecated)" %} ```` {% /tab %} {% tab id="Response" %} ```json { "shift": { "id": "MG5YHDYXRFY9C", "employee_id": "K6JiNAakLUf5lUYmfjn", "team_member_id": "K6JiNAakLUf5lUYmfjn", "location_id": "B5MD8YG8Q3S04", "timezone": "America/Los_Angeles", "start_at": "2025-03-05T11:00:00+00:00", "end_at": "2025-03-05T15:00:00+00:00", "wage": { "title": "Bartender", "effective_hourly_rate": { "amount": 1234, "currency": "USD" } }, "breaks": [ { "start_at": "2025-03-05T12:00:01+00:00", "end_at": "2025-03-05T12:12:00+00:00", "break_type_id": "M9BBKEPQAQD2T", "name": "Tea Break", "expected_duration": "PT10M", "is_paid": true } ], "declared_cash_tip_money": { "amount": 500, "currency": "USD" }, "status": "CLOSED", "version": 1, "created_at": "2025-03-05T10:59:54.859Z", "updated_at": "2025-03-05T17:06:32.859Z" } } ``` {% /tab %} {% /tabset %} {% tabset %} {% tab id="RetrieveTimecard request" %} ```` {% /tab %} {% tab id="Response" %} ```json { "timecard": { "id": "MG5YHDYXRFY9C", "team_member_id": "K6JiNAakLUf5lUYmfjn", "location_id": "B5MD8YG8Q3S04", "timezone": "America/Los_Angeles", "start_at": "2025-03-05T11:00:00+00:00", "end_at": "2025-03-05T15:00:00+00:00", "wage": { "title": "Bartender", "effective_hourly_rate": { "amount": 1234, "currency": "USD" } }, "breaks": [ { "start_at": "2025-03-05T12:00:01+00:00", "end_at": "2025-03-05T12:12:00+00:00", "break_type_id": "M9BBKEPQAQD2T", "name": "Tea Break", "expected_duration": "PT10M", "is_paid": true } ], "declared_cash_tip_money": { "amount": 500, "currency": "USD" }, "status": "CLOSED", "version": 1, "created_at": "2025-03-05T10:59:54.859Z", "updated_at": "2025-03-05T17:06:32.859Z" } } ``` {% /tab %} {% /tabset %} {% /accordion %} {% accordion expanded=false %} {% slot "heading" %} #### SearchShifts to SearchTimecards {% /slot %} Changes: - `match_shifts_by` in the `workday` filter is renamed to `match_timecards_by`. - `employee_ids` (deprecated) isn't a supported filter in the request. - `shifts` is renamed to `timecards` in the response. - `employee_id` (deprecated) isn't returned in the response. {% line-break /%} {% tabset %} {% tab id="SearchShifts request (deprecated)" %} ```` {% /tab %} {% tab id="Response" %} ```json { "shifts": [ { "id": "MG5YHDYXRFY9C", "employee_id": "K6JiNAakLUf5lUYmfjn", "team_member_id": "K6JiNAakLUf5lUYmfjn", "location_id": "B5MD8YG8Q3S04", "timezone": "America/Los_Angeles", "start_at": "2025-03-05T20:00+00:00", "end_at": "2025-03-06T03:00+00:00", "wage": { "title": "Bartender", "effective_hourly_rate": { "amount": 1234, "currency": "USD" } }, "breaks": [ { "start_at": "2025-03-05T21:12:00+00:00", "end_at": "2025-03-05T21:24:00+00:00", "break_type_id": "M9BBKEPQAQD2T", "name": "Tea Break", "expected_duration": "PT10M", "is_paid": true } ], "declared_cash_tip_money": { "amount": 500, "currency": "USD" }, "status": "CLOSED", "version": 1, "created_at": "2025-03-05T10:59:54.859Z", "updated_at": "2025-03-05T20:21:54.859Z" }, { "id": "Q2KGRK3G5KGRS", "employee_id": "P4HxU7Ykvh4PiQsN9rY", "team_member_id": "P4HxU7Ykvh4PiQsN9rY", "location_id": "B5MD8YG8Q3S04", "timezone": "America/Los_Angeles", "start_at": "2025-03-06T01:00+00:00", "end_at": "2025-03-06T08:00+00:00", "wage": { "title": "Server", "effective_hourly_rate": { "amount": 1100, "currency": "USD" } }, "breaks": [ { "start_at": "2025-03-06T03:12:00+00:00", "end_at": "2025-03-06T03:24:00+00:00", "break_type_id": "M9BBKEPQAQD2T", "name": "Tea Break", "expected_duration": "PT10M", "is_paid": true } ], "declared_cash_tip_money": { "amount": 2650, "currency": "USD" }, "status": "CLOSED", "version": 1, "created_at": "2025-03-06T01:05:22.859Z", "updated_at": "2025-03-06T08:12:33.859Z" } ], "cursor": "PNEhVUKBuTOuRIZoUcX5VQ...UE1cVyWmbXhoY" } ``` {% /tab %} {% /tabset %} {% tabset %} {% tab id="SearchTimecards request" %} ```` {% /tab %} {% tab id="Response" %} ```json { "timecards": [ { "id": "MG5YHDYXRFY9C", "team_member_id": "K6JiNAakLUf5lUYmfjn", "location_id": "B5MD8YG8Q3S04", "timezone": "America/Los_Angeles", "start_at": "2025-03-05T20:00+00:00", "end_at": "2025-03-06T03:00+00:00", "wage": { "title": "Bartender", "effective_hourly_rate": { "amount": 1234, "currency": "USD" } }, "breaks": [ { "start_at": "2025-03-05T21:12:00+00:00", "end_at": "2025-03-05T21:24:00+00:00", "break_type_id": "M9BBKEPQAQD2T", "name": "Tea Break", "expected_duration": "PT10M", "is_paid": true } ], "declared_cash_tip_money": { "amount": 500, "currency": "USD" }, "status": "CLOSED", "version": 1, "created_at": "2025-03-05T10:59:54.859Z", "updated_at": "2025-03-05T20:21:54.859Z" }, { "id": "Q2KGRK3G5KGRS", "team_member_id": "P4HxU7Ykvh4PiQsN9rY", "location_id": "B5MD8YG8Q3S04", "timezone": "America/Los_Angeles", "start_at": "2025-03-06T01:00+00:00", "end_at": "2025-03-06T08:00+00:00", "wage": { "title": "Server", "effective_hourly_rate": { "amount": 1100, "currency": "USD" } }, "breaks": [ { "start_at": "2025-03-06T03:12:00+00:00", "end_at": "2025-03-06T03:24:00+00:00", "break_type_id": "M9BBKEPQAQD2T", "name": "Tea Break", "expected_duration": "PT10M", "is_paid": true } ], "declared_cash_tip_money": { "amount": 2650, "currency": "USD" }, "status": "CLOSED", "version": 1, "created_at": "2025-03-06T01:05:22.859Z", "updated_at": "2025-03-06T08:12:33.859Z" } ], "cursor": "PNEhVUKBuTOuRIZoUcX5VQ...UE1cVyWmbXhoY" } ``` {% /tab %} {% /tabset %} {% /accordion %} {% accordion expanded=false %} {% slot "heading" %} #### UpdateShift to UpdateTimecard {% /slot %} Changes: - `shift` is renamed to `timecard` in the request and response. - `employee_id` (deprecated) isn't supported in the request or returned in the response. {% line-break /%} {% tabset %} {% tab id="UpdateShift request (deprecated)" %} ```` {% /tab %} {% tab id="Response" %} ```json { "shift": { "id": "MG5YHDYXRFY9C", "employee_id": "K6JiNAakLUf5lUYmfjn", "team_member_id": "K6JiNAakLUf5lUYmfjn", "location_id": "B5MD8YG8Q3S04", "timezone": "America/New_York", "start_at": "2025-03-05T11:00:12+00:00", "end_at": "2025-03-05T15:00:12+00:00", "wage": { "title": "Bartender", "effective_hourly_rate": { "amount": 1234, "currency": "USD" } }, "breaks": [ { "start_at": "2025-03-05T11:00:12+00:00", "end_at": "2025-03-05T15:00:12+00:00", "break_type_id": "M9BBKEPQAQD2T", "name": "Tea Break", "expected_duration": "PT10M", "is_paid": true } ], "declared_cash_tip_money": { "amount": 500, "currency": "USD" }, "status": "CLOSED", "version": 2, "created_at": "2025-03-05T10:59:54.859Z", "updated_at": "2025-03-05T20:21:54.859Z" } } ``` {% /tab %} {% /tabset %} {% tabset %} {% tab id="UpdateTimecard request" %} ```` {% /tab %} {% tab id="Response" %} ```json { "timecard": { "id": "MG5YHDYXRFY9C", "team_member_id": "K6JiNAakLUf5lUYmfjn", "location_id": "B5MD8YG8Q3S04", "timezone": "America/New_York", "start_at": "2025-03-05T11:00:12+00:00", "end_at": "2025-03-05T15:00:12+00:00", "wage": { "title": "Bartender", "effective_hourly_rate": { "amount": 1234, "currency": "USD" } }, "breaks": [ { "start_at": "2025-03-05T11:00:12+00:00", "end_at": "2025-03-05T15:00:12+00:00", "break_type_id": "M9BBKEPQAQD2T", "name": "Tea Break", "expected_duration": "PT10M", "is_paid": true } ], "declared_cash_tip_money": { "amount": 500, "currency": "USD" }, "status": "CLOSED", "version": 2, "created_at": "2025-03-05T10:59:54.859Z", "updated_at": "2025-03-05T20:21:54.859Z" } } ``` {% /tab %} {% /tabset %} {% /accordion %} {% accordion expanded=false %} {% slot "heading" %} #### DeleteShift to DeleteTimecard {% /slot %} {% tabset %} {% tab id="DeleteShift request (deprecated)" %} ```` {% /tab %} {% tab id="Response" %} ```json {} ``` {% /tab %} {% /tabset %} {% tabset %} {% tab id="DeleteTimecard request" %} ```` {% /tab %} {% tab id="Response" %} ```json {} ``` {% /tab %} {% /tabset %} {% /accordion %} {% anchor id="deprecated-shift-items" /%} {% accordion expanded=false %} {% slot "heading" %} #### Deprecated Shift items {% /slot %} The following tables map deprecated `Shift` endpoints, data types, and webhook events to their `Timecard` replacements. `Timecard` replacements are available in Square API version 2025-05-21 and later. **Endpoints** {% table %} * Shift * Timecard ----- * [CreateShift](https://developer.squareup.com/reference/square/labor-api/create-shift) * [CreateTimecard](https://developer.squareup.com/reference/square/labor-api/create-timecard) ----- * [DeleteShift](https://developer.squareup.com/reference/square/labor-api/delete-shift) * [DeleteTimecard](https://developer.squareup.com/reference/square/labor-api/delete-timecard) ----- * [GetShift](https://developer.squareup.com/reference/square/labor-api/get-shift) * [RetrieveTimecard](https://developer.squareup.com/reference/square/labor-api/retrieve-timecard) ----- * [SearchShifts](https://developer.squareup.com/reference/square/labor-api/search-shifts) * [SearchTimecards](https://developer.squareup.com/reference/square/labor-api/search-timecards) ----- * [UpdateShift](https://developer.squareup.com/reference/square/labor-api/update-shift) * [UpdateTimecard](https://developer.squareup.com/reference/square/labor-api/update-timecard) {% /table %} **Objects and enums** {% table %} * Shift * Timecard ----- * [Shift](https://developer.squareup.com/reference/square/objects/Shift) * [Timecard](https://developer.squareup.com/reference/square/objects/Timecard) ----- * [ShiftWage](https://developer.squareup.com/reference/square/objects/ShiftWage) * [TimecardWage](https://developer.squareup.com/reference/square/objects/TimecardWage) ----- * [ShiftSort](https://developer.squareup.com/reference/square/objects/ShiftSort) * [TimecardSort](https://developer.squareup.com/reference/square/objects/TimecardSort) ----- * [ShiftFilter](https://developer.squareup.com/reference/square/objects/ShiftFilter) * [TimecardFilter](https://developer.squareup.com/reference/square/objects/TimecardFilter) ----- * [ShiftQuery](https://developer.squareup.com/reference/square/objects/ShiftQuery) * [TimecardQuery](https://developer.squareup.com/reference/square/objects/TimecardQuery) ----- * [ShiftWorkday](https://developer.squareup.com/reference/square/objects/ShiftWorkday) * [TimecardWorkday](https://developer.squareup.com/reference/square/objects/TimecardWorkday) ----- * [ShiftStatus](https://developer.squareup.com/reference/square/enums/ShiftStatus) * [TimecardStatus](https://developer.squareup.com/reference/square/enums/TimecardStatus) ----- * [ShiftSortField](https://developer.squareup.com/reference/square/enums/ShiftSortField) * [TimecardSortField](https://developer.squareup.com/reference/square/enums/TimecardSortField) ----- * [ShiftFilterStatus](https://developer.squareup.com/reference/square/enums/ShiftFilterStatus) * [TimecardFilterStatus](https://developer.squareup.com/reference/square/enums/TimecardFilterStatus) ----- * [ShiftWorkdayMatcher](https://developer.squareup.com/reference/square/enums/ShiftWorkdayMatcher) * [TimecardWorkdayMatcher](https://developer.squareup.com/reference/square/enums/TimecardWorkdayMatcher) {% /table %} **Webhook events** {% table %} * Shift * Timecard ----- * [labor.shift.created](https://developer.squareup.com/reference/square/labor-api/webhooks/labor.shift.created) * [labor.timecard.created](https://developer.squareup.com/reference/square/labor-api/webhooks/labor.timecard.created) ----- * [labor.shift.updated](https://developer.squareup.com/reference/square/labor-api/webhooks/labor.shift.updated) * [labor.timecard.updated](https://developer.squareup.com/reference/square/labor-api/webhooks/labor.timecard.updated) ----- * [labor.shift.deleted](https://developer.squareup.com/reference/square/labor-api/webhooks/labor.shift.deleted) * [labor.timecard.deleted](https://developer.squareup.com/reference/square/labor-api/webhooks/labor.timecard.deleted) {% /table %} Until `Shift` endpoints are retired, operations on a `Shift` or `Timecard` object triggers events for both resource types. For example, a successful `CreateShift` or `CreateTimecard` request triggers both `labor.shift.created` and `labor.timecard.created` events. Note that the new shift and new timecard have the same ID. To avoid receiving duplicate notifications (with different event IDs) for the same operation, subscribe to only one event type. {% /accordion %} ## See also - [Time Tracking with the Labor API](labor-api/how-it-works) - [Scheduling with the Labor API](labor-api/scheduling) - [API Reference: Labor API](https://developer.squareup.com/reference/square/labor-api) --- # Use Webhooks to Integrate with a Payroll System > Source: https://developer.squareup.com/docs/labor-api/webhooks > Status: BETA > Languages: All > Platforms: All Learn how to subscribe to Labor API webhooks that send notifications about created, updated, and deleted labor shifts. **Applies to:** [Labor API](labor-api/what-it-does) {% subheading %}Learn about [Labor API webhook events](https://developer.squareup.com/reference/square/labor-api/webhooks) that are published when labor shifts are created, updated, or deleted.{% /subheading %} {% toc hide=true /%} ## Subscribe to Labor API events The Labor API supports the following webhook events: {% table %} * Event * Permission {% width="135px" %} * Description --- * [labor.timecard.created](https://developer.squareup.com/reference/square/labor-api/webhooks/labor.timecard.created) * `TIMECARDS_READ` * A timecard was created at the start of a shift. The event data contains the complete [Timecard](https://developer.squareup.com/reference/square/objects/Timecard) object. --- * [labor.timecard.updated](https://developer.squareup.com/reference/square/labor-api/webhooks/labor.timecard.updated) * `TIMECARDS_READ` * A timecard was updated. The event data contains the complete [Timecard](https://developer.squareup.com/reference/square/objects/Timecard) object. --- * [labor.timecard.deleted](https://developer.squareup.com/reference/square/labor-api/webhooks/labor.timecard.deleted) * `TIMECARDS_READ` * A timecard was deleted. The event data contains only the `id` of the deleted timecard and the `deleted` field set to `true`. --- * [labor.shift.created](https://developer.squareup.com/reference/square/labor-api/webhooks/labor.shift.created) * `TIMECARDS_READ` * A shift was started. The event data contains the complete [Shift](https://developer.squareup.com/reference/square/objects/Shift) object. Deprecated at Square API version 2025-05-21 and replaced by `labor.timecard.created`. --- * [labor.shift.updated](https://developer.squareup.com/reference/square/labor-api/webhooks/labor.shift.updated) * `TIMECARDS_READ` * A shift was updated. The event data contains the complete [Shift](https://developer.squareup.com/reference/square/objects/Shift) object. Deprecated at Square API version 2025-05-21 and replaced by `labor.timecard.updated`. --- * [labor.shift.deleted](https://developer.squareup.com/reference/square/labor-api/webhooks/labor.shift.deleted) * `TIMECARDS_READ` * A shift was deleted. The event data contains only the `id` of the deleted shift and the `deleted` field set to `true`. Deprecated at Square API version 2025-05-21 and replaced by `labor.timecard.deleted`. {% /table %} **Deprecation notice** - The `Shift` object is deprecated in Square API version 2025-05-21 and replaced by `Timecard`. You should unsubscribe from `Shift` events and subscribe to `Timecard` events after [migrating your application](labor-api/what-it-does#migration-notes) to `Timecard` endpoints. **Duplicate events** - Until `Shift` endpoints are retired, `Shift` or `Timecard` operations trigger both `Shift` and `Timecard` events. For example, creating a shift or timecard triggers both `labor.shift.created` and `labor.timecard.created` events. Note that the new shift and new timecard have the same ID, but each event has a different event ID. To avoid receiving duplicate notifications for the same operation, subscribe to either `Shift` or `Timecard` events, but not both. {% line-break /%} A webhook is a subscription where you specify which events you want to be notified about. For information about using webhooks, see [Square Webhooks](webhooks/overview). For a list of all webhook events supported by Square APIs, see [Webhook Events Reference](webhooks/v2webhook-events-tech-ref). * **Shift created** - `labor.shift.created` * **Shift delete** - `labor.shift.deleted` * **Shift updated** - `labor.shift.updated` ## Shift event notification body The event notification body includes properties that identify the notification and a `data` object for the current state of the [Shift](https://developer.squareup.com/reference/square/objects/Shift) that is changed. Read the `type` property to identify the notification as a create, update, or delete notification. The `merchant_id` property identifies the merchant/employer of the worker associated with the shift. The current state of the `Shift` is carried by the value of `data.object.shift`. To access a `Shift` represented by a notification, your application requests `TIMECARDS_READ` permission when authenticating with the OAuth flow. ## Shift created event When a `Shift` is created (normally when an employee starts a shift), the webhook notification body includes a `shift` object representing the new shift. If you use this event to synchronize an external payroll system with a Square Point of Sale time clock, use the value of `data.object.shift.id` to create a unique ID for the created shift in the payroll system. ```json { "merchant_id": "6SSW7HV8K2ST5", "type": "labor.shift.created", "event_id": "aeaaa5f6-c4fd-4e93-b688-71b50706266f", "created_at": "2019-10-29T17:26:16.808603647Z", "data": { "type": "shift", "id": "PY4YSMVKXFY9E", "object": { "shift": { "id": "PY4YSMVKXFY9E", "employee_id": "AnuhZhsN95oT8f-eCn9D", "team_member_id": "AnuhZhsN95oT8f-eCn9D", "location_id": "NAQ1FHV6ZJ8YV", "timezone": "Etc/UTC", "start_at": "2019-01-25T08:11:00Z", "wage": { "title": "Barista", "hourly_rate": { "amount": 1100, "currency": "USD" }, "job_id": "J8p7B7nyVA3QfMdnU1BkEfjP", "tip_eligible": true }, "declared_cash_tip_money": { "amount": 0, "currency": "USD" }, "status": "OPEN", "version": 1, "created_at": "2019-01-25T08:11:00Z", "updated_at": "2019-01-25T08:11:00Z" } } } } ``` Shifts are created using a Square POS terminal or by calling [CreateShift](https://developer.squareup.com/reference/square/labor-api/create-shift). Call [GetShift](https://developer.squareup.com/reference/square/labor-api/get-shift) with `data.object.shift.id` to get the newest version of the `Shift` represented by the notification. The `Shift` returned by the `GetShift` call returns an equal or greater [version](https://developer.squareup.com/reference/square/objects/Shift#definition__property-version) value as the notification `data.object.shift.version`. ## Shift updated event Shifts are updated when a break is started, a break is ended, or the shift ends. Other actions that trigger this event include updates to any read/write property. If you use this event to synchronize an external payroll system with a Square Point of Sale time clock, use the value of `data.object.shift.id` to look up the shift in the payroll system. The following example event body shows that a team member signed out for a break: ```json { "merchant_id": "6SSW7HV8K2ST5", "type": "labor.shift.updated", "event_id": "aeaaa5f6-c4fd-4e93-b688-71b50706266f", "created_at": "2019-10-29T17:26:16.808603647Z", "data": { "type": "shift", "id": "PY4YSMVKXFY9E", "object": { "shift": { "id": "PY4YSMVKXFY9E", "employee_id": "AnuhZhsN95oT8f-eCn9D", "team_member_id": "AnuhZhsN95oT8f-eCn9D", "location_id": "NAQ1FHV6ZJ8YV", "timezone": "Etc/UTC", "start_at": "2019-01-25T08:11:00Z", "end_at": "2019-01-25T18:11:00Z", "wage": { "title": "Barista", "hourly_rate": { "amount": 1100, "currency": "USD" }, "job_id": "J8p7B7nyVA3QfMdnU1BkEfjP", "tip_eligible": true }, "breaks": [ { "id": "0EGK74E8BJF62", "start_at": "2019-01-25T11:11:00Z", "break_type_id": "REGS1EQR1TPZ5", "name": "Tea Break", "expected_duration": "PT5M", "is_paid": true } ], "declared_cash_tip_money": { "amount": 4830, "currency": "USD" }, "status": "CLOSED", "version": 2, "created_at": "2019-01-25T08:11:00Z", "updated_at": "2019-01-25T18:09:37Z" } } } } ``` Shifts are updated using a Square POS terminal or by calling [UpdateShift](https://developer.squareup.com/reference/square/labor-api/update-shift). Call `GetShift` with `data.object.shift.id` to get the newest version of the `Shift` represented by the notification. The `Shift` returned by the `GetShift` call returns an equal or greater [version](https://developer.squareup.com/reference/square/objects/Shift#definition__property-version) value as the notification `data.object.shift.version`. ## Shift deleted event When a `Shift` is deleted, the `data` object provides the `id` of the deleted shift. If you use this event to synchronize an external payroll system with a Square Point of Sale time clock, look up the ID of the deleted shift using the value of `data.id`. ```json { "merchant_id": "6SSW7HV8K2ST5", "type": "labor.shift.deleted", "event_id": "aeaaa5f6-c4fd-4e93-b688-71b50706266f", "created_at": "2019-10-29T17:26:16.808603647Z", "data": { "type": "labor", "id": "PY4YSMVKXFY9E", "deleted": true } } ``` Shifts are deleted by calling [DeleteShift](https://developer.squareup.com/reference/square/labor-api/delete-shift). --- # Time Tracking with the Labor API > Source: https://developer.squareup.com/docs/labor-api/how-it-works > Status: PUBLIC > Languages: All > Platforms: All Use the Square Labor API to record the hours worked by team members, with breaks, pay rate, and declared cash tips. **Applies to:** [Labor API](labor-api/what-it-does) | [Team API](team/overview) | [Locations API](locations-api) | [Webhooks](webhooks/overview) | [GraphQL](devtools/graphql) {% subheading %}Learn how to use the [Labor API](https://developer.squareup.com/reference/square/labor-api) to capture team member work hours with breaks, pay rate, and declared cash tips.{% /subheading %} {% toc hide=true /%} ## Overview The Labor API provides time-tracking features for team members. You can import and export timekeeping data between Square Point of Sale and third-party applications for labor cost reporting, payroll, and overtime management. You can also integrate a time clock application for [Square Dashboard](https://app.squareup.com/dashboard) labor reporting or Square Payroll. The API supports: * Recording labor hours with multiple paid or unpaid breaks and declared cash tips. * Accessing team member wage information such as job title and hourly pay rate. * Defining break types to standardize the name, expected duration, and paid or unpaid status of breaks. * Configuring workweek settings for overtime calculations. Timecards created by the API are visible in the **Staff** section of the Square Dashboard. {% aside type="info" %} The Labor API defines two types of objects; be careful not to confuse them: - A [ScheduledShift](https://developer.squareup.com/reference/square/objects/ScheduledShift) is used to manage team schedules. - A [Timecard](https://developer.squareup.com/reference/square/objects/Timecard) represents a single work shift for a team member. Each `Timecard` captures: - The actual time worked during one shift - Information needed for payroll processing For example, if an employee works five different shifts in a week, they will have five separate Timecard records - one for each shift. **Note:** The older `Shift` object type is deprecated. Use Timecards instead. For information about migration, see [Migration notes](labor-api/what-it-does#migration-notes). {% /aside %} ## Requirements and limitations The following requirements and limitations apply when managing timecards using the Labor API: - Square API version 2025-05-21 or later is required to access or manage `Timecard` objects. In this version, `Shift`-related endpoints, data types, and webhook events are deprecated and replaced by `Timecard` equivalents. For more information, see [Migration notes](labor-api/what-it-does#migration-notes). - The `Timecard.wage` field contains wage information for the timecard (shift), such as the job title and hourly pay rate. To provide this information based on team member job assignments, the team member's wage settings must be configured using the [Square Dashboard](https://app.squareup.com/dashboard) or [Team API](team/overview). For more information, see [Set up new team members](team/integration#set-up-a-new-team-member). Otherwise, wage settings must be obtained from another source and then recorded on the timecard for future reporting. See additional [requirements and limitations](labor-api/build-with-labor#requirements-and-limiiations) for timecard management. {% anchor id="process-flows" /%} ## How time tracking works A timecard records the hours worked by a team member for a single shift on a specific day. The time-tracking workflow starts by creating a timecard with the start time, team member assignment, and location of the work shift. You can also provide team member wage information to integrate timecard data with payroll and labor cost reporting. Update the timecard as needed to record the start and end times of any breaks (based on predefined break types). When the shift is completed, update the timecard to record any declared cash tips and set the end time. For detailed steps about this process, including code examples, see [Start and End Timecards](labor-api/build-with-labor) and [Add Breaks to Timecards](labor-api/cookbook/add-shift-breaks). {% table %} * Process * Steps --- * Start a timecard * - Find the team member and location. - Check for existing open timecards. - Get team member wage information for the job to be performed. - Create the new timecard. --- * Add breaks * - Get the timecard to update. - Get available break types. - Add a break with the start time and break type. - Add the end time to the break. --- * End the timecard * - Verify that all breaks are ended. - Record any declared cash tips. - Add the end time to the timecard. {% /table %} The following key concepts apply to time tracking with the Labor API: {% accordion expanded=false %} {% slot "heading" %} ### Timecards record the hours worked for a single shift {% /slot %} A [timecard](https://developer.squareup.com/reference/square/objects/Timecard) is a record of the hours worked by a team member for a single shift on a specific day, including breaks and declared cash tips. Team members are people who work as an employee, contractor, or volunteer for a seller and whose work hours are tracked. Breaks are paid or unpaid time that the team member isn't expected to be doing work during the shift. A timecard also typically includes wage information, such as job title, hourly pay rate, and tip eligibility. Timecards can be used to compensate team members for the shifts they worked and for labor reporting. To record labor cost on a timecard, you must specify the `wage.hourly_rate` field. Otherwise, the timecard has no associated pay amount. The pay rate from the team member's primary job aren't used by default. {% aside type="info" %} The `Shift` object and related endpoints, data types, and webhook events are deprecated and replaced by `Timecard` equivalents. For more information, see [Migration notes](labor-api/what-it-does#migration-notes). {% /aside %} {% /accordion %} {% anchor id="import-or-export-labor-hours" /%} {% accordion expanded=false %} {% slot "heading" %} ### Timecard data can integrate with external systems {% /slot %} Applications can import and export team member labor hours for time-clock, labor, and sales reporting and for overtime management solutions: * **Export labor hours** - Use the `SearchTimecards` endpoint or [GraphQL](devtools/graphql) `timecards` entry point to get labor hours data in a pay period for use in an external payroll system. Optionally, use [webhook events](labor-api/webhooks) to track timecard activities. * **Import timekeeping data** - Track team member labor hours in an existing time-clock application and import the data into a Square account as timecards. Generate labor and sales reports in the Square Dashboard or pay team members using Square Payroll. {% /accordion %} {% anchor id="track-tips" /%} {% anchor id="track-tips-using-payments-api-and-labor-api" /%} {% accordion expanded=false %} {% slot "heading" %} ### Tips are tracked on different objects {% /slot %} Tips can come from different sources and are recorded in different objects: * Tips collected directly from payment methods are recorded in the `tip_money` field of a [Payment](https://developer.squareup.com/reference/square/objects/Payment) object or the `total_tip_money` field of the [Order](https://developer.squareup.com/reference/square/objects/Order) object that corresponds to the payment. * Cash tips declared by team members are recorded in the `declared_cash_tip_money` field of a [Timecard](https://developer.squareup.com/reference/square/objects/Timecard) object. {% accordion expanded=false %} {% slot "heading" %} #### Tracking tips using the Payments API and Labor API {% /slot %} To use the Payments API and Labor API to generate a tip report, the following must be true: * Tips are allocated directly to team members. Reporting on [pooled tip](https://squareup.com/help/article/7654-get-started-with-tip-pooling-for-team-management) allocations isn't supported. * Payments are processed by the team member who should be credited with the sale or tip. Square populates the `team_member_id` field with the ID of the team member who ran the payment, provided that the team member is logged in to a cash drawer shift. 1. Call [ListPayments](https://developer.squareup.com/reference/square/payments-api/list-payments) to retrieve payments for a specific date range. 2. Iterate over the payments and calculate the sales and tips for each team member: * `amount_money` - The sales amount. This amount might include taxes, fees, and discounts applied to the associated order but doesn't include tips. * `tipping_money` - The tip amount collected for the payment. * `team_member_id` - The team member who made the sale. 3. Call [SearchTimecards](https://developer.squareup.com/reference/square/labor-api/search-timecards) to get timecards for the date range. 4. Iterate over the timecards and find any declared cash tips: * `declared_cash_tip_money` - The cash tip amount declared for the shift. * `team_member_id` - The team member assigned to the shift. {% aside type="info" %} Learn about a [sample application](staff/scenarios/tip-reporting) that calculates pooled tips for a timecard. {% /aside %} Although processing fees apply to the total amount of each payment (including tip), Square Dashboard reports and `Payment` objects show the full tipped amount with no fees deducted. {% /accordion %} {% /accordion %} {% accordion expanded=false %} {% slot "heading" %} ### Workweek settings determine overtime calculations {% /slot %} A workweek ([WorkweekConfig](https://developer.squareup.com/reference/square/objects/WorkweekConfig)) defines the starting day and time of the business week, which factors into payroll and overtime calculations and accounting reporting periods. While many businesses use Sunday at midnight as the start time, a business can optionally configure different start times to better match their operating hours. For example, businesses such as bars and clubs that are open during late night hours might shift the day or the time that the week starts (such as to Tuesday night at 4 AM). You can use the Labor API to [manage workweek settings](#managing-workweek-settings). All workdays within the workweek are 24-hour periods that start at this configured time. {% /accordion %} ## Example timecard workflow The following is an example workflow for a virtual time clock in a restaurant POS application which is running on all of the restaurant POS devices including the front cashier's station, bar, or other restaurant location. A team member can use any of those devices to punch their timecard. ### 1. Start a timecard A team member uses the POS device in the restaurant bar to clock in. 1. The time clock gets a list of team members by location and lets the team member choose their name. 2. The time clock searches for an open timecard for the team member. An open timecard indicates that the team member forgot to clock out from their previous shift and must be closed before a new timecard can be created. 3. The time clock gets the [TeamMemberWage](https://developer.squareup.com/reference/square/objects/TeamMemberWage) objects for the team member to retrieve the appropriate wage information for the timecard. Team members might have multiple job assignments; for example, they might be working a bartender shift or server shift with different hourly rates. 4. The time clock creates a new timecard associated with the start time, team member assignment, location, and wage information. {% aside type="info" %} A `TeamMemberWage` object provides the wage information used for `Timecard.wage` fields. Optionally, your application can obtain these settings from another source, such as a personnel datastore in an external application. {% /aside %} ### 2. Add a break During the shift, the team member clocks out for a dinner break from the POS device at the front cashier station. 1. The time clock gets a list of team members by location and lets the team member choose their name. 2. The time clock gets the open timecard for the current shift. 3. The time clock reads the state of any `breaks` that might have been recorded during the shift. * If there's an open break, it's closed by setting the `Break.end_at` field. * If there are no open breaks, a new break is created. 4. The time clock starts the break by sending an update request with the updated timecard details to replace the current details. At the end of the break, the bartender ends the break from the bar POS device. 5. The time clock ends the break by sending another update request with the updated timecard details to replace the current details. ### 3. End the timecard The team member uses the bar POS device to clock out of the shift. 1. The time clock gets a list of team members by location and lets the team member choose their name. 2. The time clock gets the open timecard for the current shift. 3. The time clock verifies that all recorded breaks are ended. 4. The time clock updates the `Timecard.declared_cash_tip_money` field with any cash tips declared by the team member. 5. The time clock sets the `Timecard.end_at` field to close the shift. 6. The time clock creates and sends an update request with the updated timecard to replace the current timecard. {% anchor id="shift-reporting-endpoints" /%} ## Time-tracking endpoints The Labor API provides a set of endpoints used for tracking team member work hours. Applications using [OAuth](oauth-api/overview) to authorize API requests require appropriate permissions to call these endpoints. ### Managing timecards Use the following endpoints to record the start time and end time for a work shift, the duration of any breaks taken, information about the job and the hourly pay rate, and declared cash tips. {% tabset %} {% tab id="Timecards" %} {% table %} * Endpoint * Permission {% width="145px" %} * Description ----- * [CreateTimecard](https://developer.squareup.com/reference/square/labor-api/create-timecard) * `TIMECARDS_WRITE` * Creates a timecard (shift) with details such as start time, location, team member assignment, and wage information. ----- * [SearchTimecards](https://developer.squareup.com/reference/square/labor-api/search-timecards) * `TIMECARDS_READ` * Retrieves a paginated list of timecards matching specified criteria such as team member, date range, or status. ----- * [DeleteTimecard](https://developer.squareup.com/reference/square/labor-api/delete-timecard) * `TIMECARDS_WRITE` * Deletes a timecard. ----- * [RetrieveTimecard](https://developer.squareup.com/reference/square/labor-api/retrieve-timecard) * `TIMECARDS_READ` * Retrieves a single timecard by ID. ----- * [UpdateTimecard](https://developer.squareup.com/reference/square/labor-api/update-timecard) * `TIMECARDS_READ`, `TIMECARDS_WRITE` * Updates a timecard with changes such as breaks, end time, or declared cash tips. {% /table %} {% /tab %} {% tab id="Shifts (deprecated)" %} {% table %} * Endpoint * Permission {% width="145px" %} * Description ----- * [CreateShift](https://developer.squareup.com/reference/square/labor-api/create-shift) * `TIMECARDS_WRITE` * Creates a shift with details such as start time, location, team member assignment, and wage information. ----- * [SearchShifts](https://developer.squareup.com/reference/square/labor-api/search-shifts) * `TIMECARDS_READ` * Retrieves a paginated list of shifts matching specified criteria such as team member, date range, or status. ----- * [DeleteShift](https://developer.squareup.com/reference/square/labor-api/delete-shift) * `TIMECARDS_WRITE` * Deletes a shift. ----- * [GetShift](https://developer.squareup.com/reference/square/labor-api/get-shift) * `TIMECARDS_READ` * Retrieves a single shift by ID. ----- * [UpdateShift](https://developer.squareup.com/reference/square/labor-api/update-shift) * `TIMECARDS_READ`, `TIMECARDS_WRITE` * Updates a shift with changes such as breaks, end time, or declared cash tips. {% /table %} For information about migrating from deprecated `Shift` endpoints, datatypes, and webhooks to `Timecard` equivalents, see [Migration notes](labor-api/what-it-does#migration-notes). {% /tab %} {% /tabset %} ### Managing break types Use the following endpoints to [create and manage](labor-api/cookbook/add-shift-breaks) break types. A break type defines the name, expected duration, and paid or unpaid status of a break that can be added to a timecard. {% table %} * Endpoint * Permission {% width="220px" %} * Description ----- * [ListBreakTypes](https://developer.squareup.com/reference/square/labor-api/list-break-types) * `TIMECARDS_SETTINGS_READ` * Retrieves a paginated list of all break types for an account. ----- * [CreateBreakType](https://developer.squareup.com/reference/square/labor-api/create-break-type) * `TIMECARDS_SETTINGS_WRITE` * Creates a new break type for an account. ----- * [DeleteBreakType](https://developer.squareup.com/reference/square/labor-api/delete-break-type) * `TIMECARDS_SETTINGS_WRITE` * Deletes an existing break type. ----- * [GetBreakType](https://developer.squareup.com/reference/square/labor-api/get-break-type) * `TIMECARDS_SETTINGS_READ` * Retrieves a single break type by ID. ----- * [UpdateBreakType](https://developer.squareup.com/reference/square/labor-api/update-break-type) * `TIMECARDS_SETTINGS_READ` `TIMECARDS_SETTINGS_WRITE` * Updates an existing break type. {% /table %} ### Retrieving wage information Use the following endpoints to get the job title, hourly pay rate, and tip eligibility to provide for the `wage` field on a timecard. {% table %} * Endpoint * Permission {% width="145px" %} * Description ----- * [ListTeamMemberWages](https://developer.squareup.com/reference/square/labor-api/list-team-member-wages) * `EMPLOYEES_READ` * Retrieves a paginated list of job and wage settings for team members. ----- * [GetTeamMemberWage](https://developer.squareup.com/reference/square/labor-api/get-team-member-wage) * `EMPLOYEES_READ` * Retrieves a specific job and wage setting by ID. {% /table %} The Labor API provides these endpoints for convenience. You can also use the [Team API](team-api/overview) to retrieve team member wage information. ### Managing workweek settings Use the following endpoints to manage workweek start times for use in overtime calculations. {% table %} * Endpoint * Permission {% width="220px" %} * Description ----- * [ListWorkweekConfigs](https://developer.squareup.com/reference/square/labor-api/list-workweek-configs) * `TIMECARDS_SETTINGS_READ` * Retrieves a list of workweek configurations for an account. ----- * [UpdateWorkweekConfig](https://developer.squareup.com/reference/square/labor-api/update-workweek-config) * `TIMECARDS_SETTINGS_READ`, `TIMECARDS_SETTINGS_WRITE` * Updates a workweek configuration. {% /table %} For detailed steps that show how to use many of these endpoints for timecard management, see [Start and End Timecards](labor-api/build-with-labor), [Add Breaks to Timecards](labor-api/cookbook/add-shift-breaks), and [Get Completed Timecards](labor-api/cookbook/get-completed-shifts). {% aside type="info" %} You can use the `timecards` (or deprecated `shifts`) entry point in [Square GraphQL](devtools/graphql) queries to access timecard data through read-only operations. GraphQL queries can improve performance and reduce development time by letting you request exactly the data you need in fewer, more compact data transfers. {% /aside %} ## Time-tracking objects Time-tracking operations use the following primary objects. {% table %} * Object{% width="200px"%} * Description ----- * [Timecard](https://developer.squareup.com/reference/square/objects/Timecard){% line-break /%}(or deprecated [Shift](https://developer.squareup.com/reference/square/objects/Shift)) * A record of the hours worked by a team member for a single shift on a specific day, including breaks and declared cash tips. The `Timecard.wage` field is a `TimecardWage` object that contains wage information for the timecard. ----- * [TimecardWage](https://developer.squareup.com/reference/square/objects/TimecardWage){% line-break /%}(or deprecated [ShiftWage](https://developer.squareup.com/reference/square/objects/ShiftWage)) * The job title, job ID, hourly pay rate, and tip eligibility settings for the timecard. This object is embedded in the `Timecard.wage` field and represents a snapshot of the team member's hourly rate at the time of the shift. ----- * [TeamMemberWage](https://developer.squareup.com/reference/square/objects/TeamMemberWage) * Wage information that defines how much a team member earns for a specific job (such as job title, hourly pay rate, and tip eligibility). This convenience object can be used to populate the `wage` field for a timecard. It captures the straight or computed hourly rate of a job assignment in the team member's [wage settings](https://developer.squareup.com/reference/square/objects/WageSetting). ----- * [Break](https://developer.squareup.com/reference/square/objects/Break) * Records the start and end times for paid or unpaid breaks taken during a shift. These objects are embedded in the timecard's `breaks` field. ----- * [BreakType](https://developer.squareup.com/reference/square/objects/BreakType) * Defines the title, expected duration, and paid or unpaid status of a break allowed at a location. This information can be used to standardize the `breaks` for a timecard. {% /table %} The following diagram shows the relationship between `Timecard`, `TimecardWage`, `Break`, `BreakType`, `TeamMemberWage`, and `TeamMember` resources. ![A diagram showing the relationship between objects that contribute to a timecard record.](//images.ctfassets.net/1nw4q0oohfju/4pMTSm7xpeaGtXfZuWU01O/4198161bc3977c39c73e26b5764a97f1/timecard-object-model.png) ## See also * [Labor API](labor-api/what-it-does) * [Start and End Timecards](labor-api/build-with-labor) * [Build a Pooled Tip Report](staff/scenarios/tip-reporting) --- # Start and End Timecards > Source: https://developer.squareup.com/docs/labor-api/build-with-labor > Status: PUBLIC > Languages: All > Platforms: All Learn how to start and end a timecard to record hours worked for a shift using the Square Labor API. **Applies to:** [Labor API](labor-api/what-it-does) | [Team API](team/overview) | [Locations API](locations-api) | [Webhooks](webhooks/overview) {% subheading %}Use the [Labor API](https://developer.squareup.com/reference/square/labor-api) to record hours worked by team members.{% /subheading %} {% toc hide=true /%} ## Overview Applications can use the Labor API to create and manage timecards. A timecard is a record of the hours worked by a team member for a single shift on a specific day, including breaks, declared cash tips, and wage information. Timecard data can be used for payroll, labor cost reporting, overtime management, and to inform scheduling decisions. The basic steps for recording hours worked include starting a timecard for a team member (with the start time, job title, and pay rate) and then updating the timecard to add the end time. ## Requirements and limitations * **Square API version** - Square API version 2025-05-21 or later is required to call `Timecard` endpoints. The `Shift` object and related endpoints, data types, and webhook events are deprecated and replaced by `Timecard` equivalents. For more information, see [Migration notes](labor-api/what-it-does#migration-notes). * **Valid access token** - Square API requests require an `Authorization` header with a bearer access token. The examples in this topic use the {% tooltip text="Square Sandbox" %}An isolated server environment used for testing. API calls in the Sandbox use the "connect.squareupsandbox.com" domain and require an access token that's valid for Sandbox.{% /tooltip %}, so you can test using your [Sandbox access token](build-basics/access-tokens#get-a-personal-access-token). {% accordion expanded=false %} {% slot "heading" %} #### More details {% /slot %} Applications using [OAuth](oauth-api/overview) access tokens to authorize requests typically require the following permissions for timecard management: - `MERCHANT_PROFILE_READ` to retrieve location information. - `EMPLOYEES_READ` to retrieve team member, job, and wage information. - `TIMECARDS_READ` and `TIMECARDS_WRITE` to retrieve and manage timecards (shifts). - `TIMECARDS_SETTINGS_READ` and `TIMECARDS_SETTINGS_WRITE` to retrieve and manage break types and workweek settings. To call Square APIs in the production environment, change the base URL to `https://connect.squareup.com` and use your production (personal) access token. {% /accordion %} * **A team member with an assigned wage setting** - To create a timecard, you must provide the ID of a team member who's active at the timecard location. If needed, you can create and set up a team member using the Square Dashboard or [Team API](team/integration#set-up-a-new-team-member). To include wage information on timecards, populate the `TeamMember.wage_setting` field during team member setup or plan to get the information from an external source. A team member can be assigned to only one `OPEN` timecard at a time. {% aside type="info" %} The Labor API defines two types of objects; be careful not to confuse them: - A [ScheduledShift](https://developer.squareup.com/reference/square/objects/ScheduledShift) is used to manage team schedules. - A [Timecard](https://developer.squareup.com/reference/square/objects/Timecard) represents a single work shift for a team member. Each `Timecard` captures: - The actual time worked during one shift - Information needed for payroll processing For example, if an employee works five different shifts in a week, they will have five separate Timecard records - one for each shift. **Note:** The older `Shift` object type is deprecated. Use Timecards instead. For information about migration, see [Migration notes](labor-api/what-it-does#migration-notes). {% /aside %} {% anchor id="open-a-new-timecard" /%} ## Start the timecard To start a timecard, first get the location ID, team member ID, and wage information and verify that the team member doesn't have an `OPEN` timecard. Then, create a timecard by providing the start time and the information you collected. ### 1. Get the timecard location If needed, call [ListLocations](https://developer.squareup.com/reference/square/locations-api/list-locations) to get the ID of the location for the shift. {% tabset %} {% tab id="Request" %} ```` {% /tab %} {% tab id="Response" %} The response returns an array of `Location` objects associated with the business. ```json { "locations": [ { "id": "L4A07E2VMQ64Y", "name": "TBW_Branch1", "address":{ "address_line_1": "1955 Broadway", "address_line_2": "Suite 600", "locality": "Oakland", "administrative_district_level_1": "CA", "postal_code": "94612" }, "timezone": "America/Los_Angeles", "capabilities": [ "CREDIT_CARD_PROCESSING", "AUTOMATIC_TRANSFERS" ], "status": "ACTIVE", "created_at": "2020-07-10T16:53:39.885Z", "merchant_id": "MLXSMQPV8WGBAR", "country": "US", "language_code": "en-US", "currency": "USD", "phone_number": "+1 510-555-1234", "business_name": "The Brass Wolf", "type": "PHYSICAL", "business_hours": { "periods": [ { "day_of_week": "MON", "start_local_time": "11:00:00", "end_local_time": "22:00:00" }, { "day_of_week": "TUE", "start_local_time": "11:00:00", "end_local_time": "22:00:00" }, { "day_of_week": "WED", "start_local_time": "11:00:00", "end_local_time": "22:00:00" }, { "day_of_week": "THU", "start_local_time": "11:00:00", "end_local_time": "22:00:00" }, { "day_of_week": "FRI", "start_local_time": "11:00:00", "end_local_time": "23:00:00" }, { "day_of_week": "SAT", "start_local_time": "11:00:00", "end_local_time": "23:00:00" } ] }, "mcc": "5812" } ] } ``` {% /tab %} {% /tabset %} ### 2. Get the team member Call [SearchTeamMembers](https://developer.squareup.com/reference/square/team-api/search-team-members) to get active team members for the location using the `location_ids` and `status` query filters. Copy the ID of the team member who's working the shift. {% tabset %} {% tab id="Request" %} ```` {% /tab %} {% tab id="Response" %} The response returns an array of `TeamMember` objects that are active for the specified location. Location assignments might define explicit `location_ids` or rely on the `ALL_CURRENT_AND_FUTURE_LOCATIONS` setting. ```json { "team_members": [ { "id": "TMdPdzTDYznwKW4p", "is_owner": false, "status": "ACTIVE", "given_name": "Sara", "family_name": "Vera", "email_address": "sara_vera@example.com", "phone_number": "+15105555678", "created_at": "2024-12-05T19:09:37+00:00", "updated_at": "2024-12-05T19:09:37+00:00", "assigned_locations": { "location_ids": [ "L4A07E2VMQ64Y", "CHQV7VKNFR3SV" ], "assignment_type": "EXPLICIT_LOCATIONS" }, "wage_setting": { "team_member_id": "TMdPdzTDYznwKW4p", "is_overtime_exempt": true, "job_assignments": [ { "job_id": "eAEnF26SMU9Lz84nqztaeCxW", "job_title": "Manager", "pay_type": "SALARY", "annual_rate": { "amount": 6000000, "currency": "USD" }, "hourly_rate": { "amount": 2500, "currency": "USD" }, "weekly_hours": 40 } ], "version": 1, "created_at": "2024-12-05T19:09:37+00:00", "updated_at": "2024-12-05T19:09:37+00:00" } }, ... // 2 more results ], "cursor": "N:9UglUjOXQ13-hMFypCft" } ``` The `limit` in the example request defines a {% tooltip text="page size" %}The maximum number of results to return in a single paged response.{% /tooltip %} of 3 (default 100, maximum 200). If the response includes a `cursor` field, append the cursor to your previous request and resend it to retrieve the next page of results. To get all the results, repeat this process until the response no longer contains a cursor. For more information, see [Pagination](build-basics/common-api-patterns/pagination). {% /tab %} {% /tabset %} ### 3. Get wage information for the team member Call [ListTeamMemberWages](https://developer.squareup.com/reference/square/labor-api/list-team-member-wages) using the `team_member_id` query parameter to get jobs and pay rates for the team member. A team member might have multiple job assignments, so you need to find the job title and pay rate for the job to be done on the timecard. {% tabset %} {% tab id="Request" %} ```` {% /tab %} {% tab id="Response" %} The list of `TeamMemberWage` objects in the response contain information about the jobs assigned to the team member. The first item is the team member's primary job. Copy the `title`, `hourly_rate`, and `tip_eligible` values of the job to be done. `TeamMemberWage` objects are convenience objects that provide the values you use for `Timecard.wage` when you create the timecard. ```json { "team_member_wages": [ { "id": "iVLHz3adFg6kXJESFpwBvqiH", "team_member_id": "TMdPdzTDYznwKW4p", "title": "Manager", "hourly_rate": { "amount": 2500, "currency": "USD" }, "job_id": "eAEnF26SMU9Lz84nqztaeCxW", "tip_eligible": true } ] } ``` {% /tab %} {% /tabset %} {% anchor id="checkforopentimecard" /%} ### 4. Check for an open timecard Call [SearchTimecards](https://developer.squareup.com/reference/square/labor-api/search-timecards) to search for an `OPEN` timecard for the team member using the `status`, `team_member_ids`, and `location_ids` query filters. A team member can have only one open timecard at a time. {% tabset %} {% tab id="Request" %} ```` {% /tab %} {% tab id="Response" %} An empty object in the response indicates that the team member doesn't have an open timecard, so you can create a new one. If the response includes a timecard, you need to [end the timecard](#end-the-timecard) first. ```json {} ``` {% /tab %} {% /tabset %} {% accordion expanded=false %} {% slot "heading" %} #### SearchShifts example (deprecated) {% /slot %} `SearchShifts` is [deprecated](labor-api/what-it-does#migration-notes) and replaced by `SearchTimecards`. {% tabset %} {% tab id="Request" %} ```` {% /tab %} {% tab id="Response" %} ```json {} ``` {% /tab %} {% /tabset %} {% /accordion %} ### 5. Create a timecard Call [CreateTimecard](https://developer.squareup.com/reference/square/labor-api/create-timecard) to create a timecard using information you collected in previous steps. Provide the location ID, team member ID, and the start timestamp in UTC or local time. For UTC timestamps, Square calculates the local time based on the timecard location. For the `wage` field, provide the job title, pay rate, and tip eligibility. {% tabset %} {% tab id="Request" %} ```` {% /tab %} {% tab id="Response" %} The response returns the new `Timecard` object with an `OPEN` status. ```json { "timecard": { "id": "BWRE5VKKGZ9W4", "team_member_id": "TMdPdzTDYznwKW4p", "location_id": "L4A07E2VMQ64Y", "timezone": "UTC", "start_at": "2025-05-07T23:02:00Z", "wage": { "title": "Manager", "hourly_rate": { "amount": 2500, "currency": "USD" }, "job_id": "eAEnF26SMU9Lz84nqztaeCxW", "tip_eligible": true }, "declared_cash_tip_money": { "amount": 0, "currency": "USD" }, "status": "OPEN", "version": 1, "created_at": "2025-05-07T23:01:30Z", "updated_at": "2025-05-07T23:01:30Z" } } ``` {% /tab %} {% /tabset %} {% aside type="important" %} To record labor cost, you must include the `wage.hourly_rate` field. Otherwise, the timecard record has no associated pay amount. Job and wage information from the team member's primary job aren't used by default. {% /aside %} #### Webhooks Creating a timecard triggers a [labor.timecard.created](https://developer.squareup.com/reference/square/labor-api/webhooks/labor.timecard.created) [webhook event](webhooks/overview). {% accordion expanded=false %} {% slot "heading" %} #### CreateShift example (deprecated) {% /slot %} `CreateShift` is [deprecated](labor-api/what-it-does#migration-notes) and replaced by `CreateTimecard`. {% tabset %} {% tab id="Request" %} ```` {% /tab %} {% tab id="Response" %} ```json { "shift": { "id": "BWRE5VKKGZ9W4", "team_member_id": "TMdPdzTDYznwKW4p", "employee_id": "TMdPdzTDYznwKW4p", "location_id": "L4A07E2VMQ64Y", "timezone": "UTC", "start_at": "2025-05-07T23:02:00Z", "wage": { "title": "Manager", "hourly_rate": { "amount": 2500, "currency": "USD" }, "job_id": "eAEnF26SMU9Lz84nqztaeCxW", "tip_eligible": true }, "declared_cash_tip_money": { "amount": 0, "currency": "USD" }, "status": "OPEN", "version": 1, "created_at": "2025-05-07T23:01:30Z", "updated_at": "2025-05-07T23:01:30Z" } } ``` {% /tab %} {% /tabset %} {% /accordion %} ## End the timecard To end a timecard, get the timecard ID and verify that all breaks are ended. Then, update the timecard with the `end_at` time. ### 1. Get the timecard to close Call [SearchTimecards](https://developer.squareup.com/reference/square/labor-api/search-timecards) to get the open timecard for the team member using the `status`, `team_member_ids`, and `location_ids` query filters. {% tabset %} {% tab id="Request" %} ```` {% /tab %} {% tab id="Response" %} The response should return the `Timecard` object created in the previous section. Copy the timecard ID. ```json { "timecards": [ { "id": "BWRE5VKKGZ9W4", "team_member_id": "TMdPdzTDYznwKW4p", "location_id": "L4A07E2VMQ64Y", "timezone": "UTC", "start_at": "2025-05-07T23:02:00Z", "wage": { "title": "Manager", "hourly_rate": { "amount": 2500, "currency": "USD" }, "job_id": "eAEnF26SMU9Lz84nqztaeCxW", "tip_eligible": true }, "declared_cash_tip_money": { "amount": 0, "currency": "USD" }, "status": "OPEN", "version": 1, "created_at": "2025-05-07T23:01:30Z", "updated_at": "2025-05-07T23:01:30Z" } ] } ``` {% /tab %} {% /tabset %} {% accordion expanded=false %} {% slot "heading" %} #### SearchShifts example (deprecated) {% /slot %} `SearchShifts` is [deprecated](labor-api/what-it-does#migration-notes) and replaced by `SearchTimecards`. {% tabset %} {% tab id="Request" %} ```` {% /tab %} {% tab id="Response" %} ```json { "shifts": [ { "id": "BWRE5VKKGZ9W4", "team_member_id": "TMdPdzTDYznwKW4p", "employee_id": "TMdPdzTDYznwKW4p", "location_id": "L4A07E2VMQ64Y", "timezone": "UTC", "start_at": "2025-05-07T23:02:00Z", "wage": { "title": "Manager", "hourly_rate": { "amount": 2500, "currency": "USD" }, "job_id": "eAEnF26SMU9Lz84nqztaeCxW", "tip_eligible": true }, "declared_cash_tip_money": { "amount": 0, "currency": "USD" }, "status": "OPEN", "version": 1, "created_at": "2025-05-07T23:01:30Z", "updated_at": "2025-05-07T23:01:30Z" } ] } ``` {% /tab %} {% /tabset %} {% /accordion %} ### 2. Verify that any breaks are ended Check whether the timecard has a `breaks` field, which is added to a timecard if the team member took any breaks. If you're following the steps in this topic, you shouldn't see this field because no breaks were recorded. If the timecard does include the `breaks` field, confirm that each break contains an `end_at` field with a valid timestamp. If the timecard has an open break, you need to [end the break](labor-api/cookbook/add-shift-breaks#4-end-the-break) before you can end the timecard. ### 3. Update the timecard To end a timecard, call [UpdateTimecard](https://developer.squareup.com/reference/square/labor-api/update-timecard) and add the `Timecard.end_at` field. {% aside type="info" %} Including the `version` field in the request enables [optimistic concurrency control](working-with-apis/optimistic-concurrency). If the specified `version` doesn't match the current version of the `Timecard` object, the update fails and you receive an error. {% /aside %} {% tabset %} {% tab id="Request" %} ```` {% /tab %} {% tab id="Response" %} The response returns the updated version of the `Timecard` object with a `CLOSED` status and an incremented version number. ```json { "timecard": { "id": "BWRE5VKKGZ9W4", "team_member_id": "TMdPdzTDYznwKW4p", "location_id": "L4A07E2VMQ64Y", "timezone": "UTC", "start_at": "2025-05-07T23:02:00Z", "end_at": "2025-05-08T07:02:00Z", "wage": { "title": "Manager", "hourly_rate": { "amount": 2500, "currency": "USD" }, "job_id": "eAEnF26SMU9Lz84nqztaeCxW", "tip_eligible": true }, "declared_cash_tip_money": { "amount": 0, "currency": "USD" }, "status": "CLOSED", "version": 2, "created_at": "2025-05-07T23:01:30Z", "updated_at": "2025-05-08T07:02:00Z" } } ``` {% /tab %} {% /tabset %} Note that you can update the `wage` or `declared_cash_tip_money` field for a timecard at any time. #### Webhooks Updating a timecard triggers a [labor.timecard.updated](https://developer.squareup.com/reference/square/labor-api/webhooks/labor.timecard.updated) [webhook event](webhooks/overview). {% accordion expanded=false %} {% slot "heading" %} #### UpdateShift example (deprecated) {% /slot %} `UpdateShift` is [deprecated](labor-api/what-it-does#migration-notes) and replaced by `UpdateTimecard`. {% tabset %} {% tab id="Request" %} ```` {% /tab %} {% tab id="Response" %} ```json { "shift": { "id": "BWRE5VKKGZ9W4", "team_member_id": "TMdPdzTDYznwKW4p", "employee_id": "TMdPdzTDYznwKW4p", "location_id": "L4A07E2VMQ64Y", "timezone": "UTC", "start_at": "2025-05-07T23:02:00Z", "end_at": "2025-05-08T07:02:00Z", "wage": { "title": "Manager", "hourly_rate": { "amount": 2500, "currency": "USD" }, "job_id": "eAEnF26SMU9Lz84nqztaeCxW", "tip_eligible": true }, "declared_cash_tip_money": { "amount": 0, "currency": "USD" }, "status": "CLOSED", "version": 2, "created_at": "2025-05-07T23:01:30Z", "updated_at": "2025-05-08T07:02:00Z" } } ``` {% /tab %} {% /tabset %} {% /accordion %} ## Next steps * Learn how to [add breaks to an open timecard](labor-api/cookbook/add-shift-breaks). * Learn how to [get all completed timecards for a workweek](labor-api/cookbook/get-completed-shifts). ## See also * [Labor API](labor-api/what-it-does) * [Use Labor API Webhooks](labor-api/webhooks) * [Team API](team/overview) --- # Troubleshoot the Labor API > Source: https://developer.squareup.com/docs/labor-api/troubleshooting > Status: PUBLIC > Languages: All > Platforms: All Find problems and solutions related to managing timecards (shifts) using the Labor API. **Applies to:** [Labor API](labor-api/what-it-does) {% subheading %}Find problems and solutions related to managing timecards and breaks using the [Labor API](https://developer.squareup.com/reference/square/labor-api).{% /subheading %} {% toc hide=true /%} {% aside type="info" %} The `Shift` object and related endpoints, data types and webhook events are deprecated in Square API version 2025-05-21 and replaced by `Timecard` equivalents. For more information, see [Migration notes](labor-api/what-it-does#migration-notes). {% /aside %} ## I cannot create a new timecard for a team member The error response says that the team member can only have one open timecard (or shift) at a time. **Cause** The team member has an open timecard (or shift) from a previous day that needs to be closed before a new one can be created. **Solution** {% tabset %} {% tab id="Timecard" %} 1. To find the open timecard, call [SearchTimecards](https://developer.squareup.com/reference/square/labor-api/search-timecards) and verify that the `end_at` field is null or missing. When checking for an open timecard for a team member, use the `status` and `team_member_ids` query filters, as shown in the following example: ```` Note that the response is an empty object if the team member doesn't have an `OPEN` timecard: ```json {} ``` 2. To end the timecard, call [UpdateTimecard](https://developer.squareup.com/reference/square/labor-api/update-timecard) and set the `end_at` time. {% /tab %} {% tab id="Shift (deprecated)" %} 1. To find the open timecard, call [SearchShifts](https://developer.squareup.com/reference/square/labor-api/search-shifts) and verify that the `end_at` field is null or missing. When checking for an open shift for a team member, use the `status` and `team_member_ids` query filters, as shown in the following example: ```` Note that the response is an empty object if the team member doesn't have an `OPEN` shift: ```json {} ``` 2. To end the shift, call [UpdateShift](https://developer.squareup.com/reference/square/labor-api/update-shift) and set the `end_at` time. {% /tab %} {% /tabset %} ## My create request returns the timecard from a previous create operation **Cause** An idempotency key was reused for the [CreateTimecard](https://developer.squareup.com/reference/square/labor-api/create-timecard) (or [CreateShift](https://developer.squareup.com/reference/square/labor-api/create-shift)) request. **Solution** Generate a new idempotency key and resend the request. ## When closing a timecard, the API was unable to service the request There are no overlapping timecards (or shifts) for the team member and the body of the update request is formed correctly. **Cause** An open [Break](https://developer.squareup.com/reference/square/objects/break) needs to be closed. **Solution** Iterate the `Break` objects in the `breaks` field in the returned object. When a `Break` with no `end_at` property is found, set the property to the current time and resend your update request. ## My search query returns too many results **Cause** A filter field is invalid (REST only) or an enum value is invalid (REST and SDK). When the search endpoint receives a filter field or an enum value it doesn't recognize, the related filter criteria is ignored. **Solution** Enum values and field names are case-sensitive. Confirm that the field name is correct and lowercase (REST) and the provided enum values match their definition in the [Square API Reference](https://developer.squareup.com/reference/square). ## See also * [Start and End Timecards](labor-api/build-with-labor) * [Time Tracking with the Labor API](labor-api/how-it-works) * [Access Tokens and Other Square Credentials](build-basics/access-tokens) * [Handling Errors](build-basics/handling-errors) --- # Get Completed Timecards > Source: https://developer.squareup.com/docs/labor-api/cookbook/get-completed-shifts > Status: PUBLIC > Languages: All > Platforms: All Learn how to get all closed timecards for the workweek using the Square Labor API. **Applies to:** [Labor API](labor-api/what-it-does) | [Team API](team/overview) | [Locations API](locations-api) {% subheading %}Learn how to get all closed timecards (shifts) for the workweek using the [Labor API](https://developer.squareup.com/reference/square/labor-api).{% /subheading %} {% toc hide=true /%} ## Requirements and limitations * **Square API version** - Square API version 2025-05-21 or later is required to call `Timecard` endpoints. The `Shift` object and related endpoints, data types, and webhook events are deprecated and replaced by `Timecard` equivalents. For more information, see [Migration notes](labor-api/what-it-does#migration-notes). * **Valid access token** - Square API requests require an `Authorization` header with a bearer access token. The examples in this topic use the {% tooltip text="Square Sandbox" %}An isolated server environment used for testing. API calls in the Sandbox use the "connect.squareupsandbox.com" domain and require an access token that's valid for Sandbox.{% /tooltip %}, so you can test using your [Sandbox access token](build-basics/access-tokens#get-a-personal-access-token). {% accordion expanded=false %} {% slot "heading" %} #### More details {% /slot %} Applications using [OAuth](oauth-api/overview) access tokens to authorize requests typically require the following permissions for timecard management: - `MERCHANT_PROFILE_READ` to retrieve location information. - `EMPLOYEES_READ` to retrieve team member, job, and wage information. - `TIMECARDS_READ` and `TIMECARDS_WRITE` to retrieve and manage timecards (shifts). - `TIMECARDS_SETTINGS_READ` and `TIMECARDS_SETTINGS_WRITE` to retrieve and manage break types and workweek settings. To call Square APIs in the production environment, change the base URL to `https://connect.squareup.com` and use your production (personal) access token. {% /accordion %} * **A timecard for testing** - For this exercise, you need at least one `CLOSED` timecard (shift) to receive any `SearchTimecards` results. In addition, you must [create a break type](https://developer.squareup.com/reference/square/labor-api/create-break-type) that defines the break. A timecard is a record of the hours worked by a team member for a single shift on a specific day, including breaks, declared cash tips, and wage information. For completed timecards, the `status` field is set to `CLOSED` and an `end_at` timestamp is defined. To learn how to start and end a timecard, see [Start and End Timecards](labor-api/build-with-labor). {% aside type="info" %} The Labor API defines two types of objects; be careful not to confuse them: - A [ScheduledShift](https://developer.squareup.com/reference/square/objects/ScheduledShift) is used to manage team schedules. - A [Timecard](https://developer.squareup.com/reference/square/objects/Timecard) represents a single work shift for a team member. Each `Timecard` captures: - The actual time worked during one shift - Information needed for payroll processing For example, if an employee works five different shifts in a week, they will have five separate Timecard records - one for each shift. **Note:** The older `Shift` object type is deprecated. Use Timecards instead. For information about migration, see [Migration notes](labor-api/what-it-does#migration-notes). {% /aside %} ## 1. Get all closed shifts for the workweek The following [SearchTimecards](https://developer.squareup.com/reference/square/labor/search-timecards) example uses supported filter and sort criteria to search for all completed timecards for a specified location and pay period: * The targeted pay period is May 12, 2025, through May 19, 2025. * The results are sorted using the shift creation timestamp in ascending order. * The results are limited to 20 shifts per response (page size). {% aside type="tip" %} The default time zone is set in the filter and used in the query when a time zone isn't set in the Square Dashboard for the targeted location. {% /aside %} {% tabset %} {% tab id="Request" %} ```` {% /tab %} {% tab id="Response" %} Square returns a list of `Timecard` objects for the specified location and within the requested date range. ```json { "timecards": [ { "id": "F4TXCQN30D7QG", "location_id": "KACM8A41GR60X", "timezone": "America/Los_Angeles", "start_at": "2025-05-19T09:00:00-08:00", "end_at": "2025-05-19T14:00:00-08:00", "wage": { "title": "Bartender", "hourly_rate": { "amount": 3500, "currency": "USD" }, "job_id": "CKDpRv8da51NU8qZFC5zDWpF", "tip_eligible": true }, "status": "CLOSED", "version": 1, "created_at": "2025-05-19T18:06:01-08:00", "updated_at": "2025-05-19T18:06:01-08:00", "team_member_id": "TM89nRVkpARCW66D", "declared_cash_tip_money": { "amount": 2250, "currency": "USD" } }, { "id": "7NEDHJWA2SQW1", "location_id": "KACM8A41GR60X", "timezone": "America/Los_Angeles", "start_at": "2025-05-19T09:00:00-08:00", "end_at": "2025-05-19T14:00:00-08:00", "wage": { "title": "Bartender", "hourly_rate": { "amount": 3500, "currency": "USD" }, "job_id": "CKDpRv8da51NU8qZFC5zDWpF", "tip_eligible": true }, "status": "CLOSED", "version": 1, "created_at": "2025-05-19T18:06:00-08:00", "updated_at": "2025-05-19T18:06:00-08:00", "team_member_id": "TMKhulbHJDbTsaY0", "declared_cash_tip_money": { "amount": 0, "currency": "USD" } }, { "id": "CK0WV6Y0EKY84", "location_id": "KACM8A41GR60X", "timezone": "America/Los_Angeles", "start_at": "2025-05-19T09:00:00-08:00", "end_at": "2025-05-19T14:00:00-08:00", "wage": { "title": "Server", "hourly_rate": { "amount": 3000, "currency": "USD" }, "job_id": "RqS8b95cqHiMenw4f1NAUH4P", "tip_eligible": true }, "status": "CLOSED", "version": 1, "created_at": "2025-05-19T18:05:58-08:00", "updated_at": "2025-05-19T18:05:58-08:00", "team_member_id": "TMI5_L2aJKwB4BjY", "declared_cash_tip_money": { "amount": 4500, "currency": "USD" } }, { "id": "SKXJ0BRHEWEP2", "location_id": "KACM8A41GR60X", "timezone": "America/Los_Angeles", "start_at": "2025-05-19T09:00:00-08:00", "end_at": "2025-05-19T14:00:00-08:00", "wage": { "title": "Manager", "hourly_rate": { "amount": 3900, "currency": "USD" }, "job_id": "DSNpRv8da51NU8qZFC5zDWpF", "tip_eligible": false }, "status": "CLOSED", "version": 1, "created_at": "2025-05-19T18:05:57-08:00", "updated_at": "2025-05-19T18:05:57-08:00", "team_member_id": "TMunHRm_uOvsqQts", "declared_cash_tip_money": { "amount": 0, "currency": "USD" } }, { "id": "T5WXVEA4WYN17", "location_id": "KACM8A41GR60X", "timezone": "America/Los_Angeles", "start_at": "2025-05-19T09:00:00-08:00", "end_at": "2025-05-19T14:00:00-08:00", "wage": { "title": "Manager", "hourly_rate": { "amount": 3900, "currency": "USD" }, "job_id": "DSNpRv8da51NU8qZFC5zDWpF", "tip_eligible": false }, "status": "CLOSED", "version": 1, "created_at": "2025-05-19T18:05:55-08:00", "updated_at": "2025-05-19T18:05:55-08:00", "team_member_id": "TM1dh73UnfQcTuLh", "declared_cash_tip_money": { "amount": 0, "currency": "USD" } }, { "id": "VVMN1K1F1GMN2", "location_id": "KACM8A41GR60X", "timezone": "America/Los_Angeles", "start_at": "2025-05-19T09:00:00-08:00", "end_at": "2025-05-19T14:00:00-08:00", "wage": { "title": "Bartender", "hourly_rate": { "amount": 3500, "currency": "USD" }, "job_id": "CKDpRv8da51NU8qZFC5zDWpF", "tip_eligible": true }, "status": "CLOSED", "version": 1, "created_at": "2025-05-19T18:05:54-08:00", "updated_at": "2025-05-19T18:05:54-08:00", "team_member_id": "TMKK37xgGEINz0FV", "declared_cash_tip_money": { "amount": 1500, "currency": "USD" } }, ... // 14 more timecards ], "cursor": "MgBkM87tV9237Pamp26hI8E2g4PatKhVaMPlZwAi3MMgEXAMPLE" } ``` The `Timecard.wage` field contains the wage information applied to the shift, including the job title, job ID, and hourly pay rate. Note that a seller can change a job title at any time after a timecard is created. For example, the "Bartender" job title can be changed to "Bar server". For existing timecards with that job ID, the `wage.title` is updated to "Bar server" but the `job_id` remains unchanged. {% /tab %} {% /tabset %} {% accordion expanded=false %} {% slot "heading" %} ### SearchShifts example (deprecated) {% /slot %} `SearchShifts` is [deprecated](labor-api/what-it-does#migration-notes) and replaced by `SearchTimecards`. {% tabset %} {% tab id="Request" %} ```` {% /tab %} {% tab id="Response" %} ```json { "shifts": [ { "id": "F4TXCQN30D7QG", "employee_id": "TM89nRVkpARCW66D", "location_id": "KACM8A41GR60X", "timezone": "America/Los_Angeles", "start_at": "2025-05-19T09:00:00-08:00", "end_at": "2025-05-19T14:00:00-08:00", "wage": { "title": "Bartender", "hourly_rate": { "amount": 3500, "currency": "USD" }, "job_id": "CKDpRv8da51NU8qZFC5zDWpF", "tip_eligible": true }, "status": "CLOSED", "version": 1, "created_at": "2025-05-19T18:06:01-08:00", "updated_at": "2025-05-19T18:06:01-08:00", "team_member_id": "TM89nRVkpARCW66D", "declared_cash_tip_money": { "amount": 2250, "currency": "USD" } }, { "id": "7NEDHJWA2SQW1", "employee_id": "TMKhulbHJDbTsaY0", "location_id": "KACM8A41GR60X", "timezone": "America/Los_Angeles", "start_at": "2025-05-19T09:00:00-08:00", "end_at": "2025-05-19T14:00:00-08:00", "wage": { "title": "Bartender", "hourly_rate": { "amount": 3500, "currency": "USD" }, "job_id": "CKDpRv8da51NU8qZFC5zDWpF", "tip_eligible": true }, "status": "CLOSED", "version": 1, "created_at": "2025-05-19T18:06:00-08:00", "updated_at": "2025-05-19T18:06:00-08:00", "team_member_id": "TMKhulbHJDbTsaY0", "declared_cash_tip_money": { "amount": 0, "currency": "USD" } }, { "id": "CK0WV6Y0EKY84", "employee_id": "TMI5_L2aJKwB4BjY", "location_id": "KACM8A41GR60X", "timezone": "America/Los_Angeles", "start_at": "2025-05-19T09:00:00-08:00", "end_at": "2025-05-19T14:00:00-08:00", "wage": { "title": "Server", "hourly_rate": { "amount": 3000, "currency": "USD" }, "job_id": "RqS8b95cqHiMenw4f1NAUH4P", "tip_eligible": true }, "status": "CLOSED", "version": 1, "created_at": "2025-05-19T18:05:58-08:00", "updated_at": "2025-05-19T18:05:58-08:00", "team_member_id": "TMI5_L2aJKwB4BjY", "declared_cash_tip_money": { "amount": 4500, "currency": "USD" } }, { "id": "SKXJ0BRHEWEP2", "employee_id": "TMunHRm_uOvsqQts", "location_id": "KACM8A41GR60X", "timezone": "America/Los_Angeles", "start_at": "2025-05-19T09:00:00-08:00", "end_at": "2025-05-19T14:00:00-08:00", "wage": { "title": "Manager", "hourly_rate": { "amount": 3900, "currency": "USD" }, "job_id": "DSNpRv8da51NU8qZFC5zDWpF", "tip_eligible": false }, "status": "CLOSED", "version": 1, "created_at": "2025-05-19T18:05:57-08:00", "updated_at": "2025-05-19T18:05:57-08:00", "team_member_id": "TMunHRm_uOvsqQts", "declared_cash_tip_money": { "amount": 0, "currency": "USD" } }, { "id": "T5WXVEA4WYN17", "employee_id": "TM1dh73UnfQcTuLh", "location_id": "KACM8A41GR60X", "timezone": "America/Los_Angeles", "start_at": "2025-05-19T09:00:00-08:00", "end_at": "2025-05-19T14:00:00-08:00", "wage": { "title": "Manager", "hourly_rate": { "amount": 3900, "currency": "USD" }, "job_id": "DSNpRv8da51NU8qZFC5zDWpF", "tip_eligible": false }, "status": "CLOSED", "version": 1, "created_at": "2025-05-19T18:05:55-08:00", "updated_at": "2025-05-19T18:05:55-08:00", "team_member_id": "TM1dh73UnfQcTuLh", "declared_cash_tip_money": { "amount": 0, "currency": "USD" } }, { "id": "VVMN1K1F1GMN2", "employee_id": "TMKK37xgGEINz0FV", "location_id": "KACM8A41GR60X", "timezone": "America/Los_Angeles", "start_at": "2025-05-19T09:00:00-08:00", "end_at": "2025-05-19T14:00:00-08:00", "wage": { "title": "Bartender", "hourly_rate": { "amount": 3500, "currency": "USD" }, "job_id": "CKDpRv8da51NU8qZFC5zDWpF", "tip_eligible": true }, "status": "CLOSED", "version": 1, "created_at": "2025-05-19T18:05:54-08:00", "updated_at": "2025-05-19T18:05:54-08:00", "team_member_id": "TMKK37xgGEINz0FV", "declared_cash_tip_money": { "amount": 1500, "currency": "USD" } }, ... // 14 more shifts ], "cursor": "MgBkM87tV9237Pamp26hI8E2g4PatKhVaMPlZwAi3MMgEXAMPLE" } ``` {% /tab %} {% /tabset %} {% /accordion %} ## 2. Get additional results The `limit` in the previous `SearchTimecards` request defines a {% tooltip text="page size" %}The maximum number of results to return in a single paged response.{% /tooltip %} of 20 (default 200, maximum 200). If more results are available, the response includes a `cursor` that you use to get the next page of results. Append the cursor to your previous request and resend it to retrieve the next page of results. Repeat this process until the response no longer contains a cursor. For more information, see [Pagination](build-basics/common-api-patterns/pagination). ```` --- # Add Breaks to Timecards > Source: https://developer.squareup.com/docs/labor-api/cookbook/add-shift-breaks > Status: PUBLIC > Languages: All > Platforms: All Learn how to get available break types, add a break to a timecard, and close the break using the Square Labor API. **Applies to:** [Labor API](labor-api/what-it-does) | [Webhooks](webhooks/overview) {% subheading %}Learn how to get details for the timecard (shift) you want to update, get available break types, and add a break to the timecard using the [Labor API](https://developer.squareup.com/reference/square/labor-api).{% /subheading %} {% toc hide=true /%} ## Requirements and limitations * **Square API version** - Square API version 2025-05-21 or later is required to call `Timecard` endpoints. The `Shift` object and related endpoints, data types, and webhook events are deprecated and replaced by `Timecard` equivalents. For more information, see [Migration notes](labor-api/what-it-does#migration-notes). * **Valid access token** - Square API requests require an `Authorization` header with a bearer access token. The examples in this topic use the {% tooltip text="Square Sandbox" %}An isolated server environment used for testing. API calls in the Sandbox use the "connect.squareupsandbox.com" domain and require an access token that's valid for Sandbox.{% /tooltip %}, so you can test using your [Sandbox access token](build-basics/access-tokens#get-a-personal-access-token). {% accordion expanded=false %} {% slot "heading" %} #### More details {% /slot %} Applications using [OAuth](oauth-api/overview) access tokens to authorize requests typically require the following permissions for timecard management: - `MERCHANT_PROFILE_READ` to retrieve location information. - `EMPLOYEES_READ` to retrieve team member, job, and wage information. - `TIMECARDS_READ` and `TIMECARDS_WRITE` to retrieve and manage timecards (shifts). - `TIMECARDS_SETTINGS_READ` and `TIMECARDS_SETTINGS_WRITE` to retrieve and manage break types and workweek settings. To call Square APIs in the production environment, change the base URL to `https://connect.squareup.com` and use your production (personal) access token. {% /accordion %} * **A timecard for testing** - For this exercise, you need an `OPEN` timecard (shift) to add a break to. In addition, you must [create a break type](https://developer.squareup.com/reference/square/labor-api/create-break-type) that defines the break. A timecard is a record of the hours worked by a team member for a single shift on a specific day, including breaks, declared cash tips, and wage information. For open timecards, the `status` field is set to `OPEN` and there's no `end_at` timestamp. To learn how to create a timecard, see [Start and End Timecards](labor-api/build-with-labor). {% aside type="info" %} The Labor API defines two types of objects; be careful not to confuse them: - A [ScheduledShift](https://developer.squareup.com/reference/square/objects/ScheduledShift) is used to manage team schedules. - A [Timecard](https://developer.squareup.com/reference/square/objects/Timecard) represents a single work shift for a team member. Each `Timecard` captures: - The actual time worked during one shift - Information needed for payroll processing For example, if an employee works five different shifts in a week, they will have five separate Timecard records - one for each shift. **Note:** The older `Shift` object type is deprecated. Use Timecards instead. For information about migration, see [Migration notes](labor-api/what-it-does#migration-notes). {% /aside %} ## 1. Get the timecard you want to update To get details about the target timecard, call [RetrieveTimecard](https://developer.squareup.com/reference/square/labor-api/get-timecard) and specify the timecard ID. If you don't have the timecard ID, call [SearchTimecards](https://developer.squareup.com/reference/square/labor-api/search-timecards) using supported filters to get the timecard. The timecard is updated each time the team member takes a break during the shift. {% tabset %} {% tab id="Request" %} ```` {% /tab %} {% tab id="Response" %} The response returns the `Timecard` object that has the specified timecard ID. You use these timecard details when you update the timecard in a later step. ```json { "timecard": { "id": "BWRE5VKKGZ9W4", "team_member_id": "TMdPdzTDYznwKW4p", "location_id": "L4A07E2VMQ64Y", "timezone": "UTC", "start_at": "2025-05-07T23:02:00Z", "wage": { "title": "Bartender", "hourly_rate": { "amount": 1050, "currency": "USD" }, "job_id": "J4e3B7nyVA3QfMdnU1BkEfjP", "tip_eligible": true }, "declared_cash_tip_money": { "amount": 0, "currency": "USD" }, "status": "OPEN", "version": 1, "created_at": "2025-05-07T23:01:30Z", "updated_at": "2025-05-07T23:01:30Z" } } ``` {% /tab %} {% /tabset %} {% accordion expanded=false %} {% slot "heading" %} ### GetShift example (deprecated) {% /slot %} `GetShift` is [deprecated](labor-api/what-it-does#migration-notes) and replaced by `RetrieveTimecard`. {% tabset %} {% tab id="Request" %} ```` {% /tab %} {% tab id="Response" %} ```json { "shift": { "id": "BWRE5VKKGZ9W4", "team_member_id": "TMdPdzTDYznwKW4p", "employee_id": "TMdPdzTDYznwKW4p", "location_id": "L4A07E2VMQ64Y", "timezone": "UTC", "start_at": "2025-05-07T23:02:00Z", "wage": { "title": "Bartender", "hourly_rate": { "amount": 1050, "currency": "USD" }, "job_id": "J4e3B7nyVA3QfMdnU1BkEfjP", "tip_eligible": true }, "declared_cash_tip_money": { "amount": 0, "currency": "USD" }, "status": "OPEN", "version": 1, "created_at": "2025-05-07T23:01:30Z", "updated_at": "2025-05-07T23:01:30Z" } } ``` {% /tab %} {% /tabset %} {% /accordion %} ## 2. Get available break types To get details about available break types, call [ListBreakTypes](https://developer.squareup.com/reference/square/labor-api/list-break-types). For businesses with more than one location, you can filter by `location_id`. {% tabset %} {% tab id="Request" %} ```` {% /tab %} {% tab id="Response" %} The response returns an array of `BreakType` objects. ```json { "break_types": [ { "id": "RXD5TMQK683CT", "location_id": "L4A07E2VMQ64Y", "break_name": "Lunch", "expected_duration": "PT30M", "is_paid": true, "version": 1, "created_at": "2024-06-10T17:57:41Z", "updated_at": "2024-06-10T17:57:41Z" }, { "id": "Y32XW5N9JHHW3", "location_id": "L4A07E2VMQ64Y", "break_name": "Coffee", "expected_duration": "PT15M", "is_paid": true, "version": 1, "created_at": "2024-08-20T18:06:07Z", "updated_at": "2024-08-20T18:06:07Z" } ] } ``` {% /tab %} {% /tabset %} ## 3. Add the break to the timecard When the break starts, call [UpdateTimecard](https://developer.squareup.com/reference/square/labor-api/update-timecard) to add the break to the `Timecard.breaks` field. Specify the `start_at` time of the break, as well as the `name`, `break_type_id`, `expected_duration`, and `is_paid` fields that correspond to the break type. {% aside type="info" %} Including the `version` field in the request enables [optimistic concurrency control](working-with-apis/optimistic-concurrency). If the specified `version` doesn't match the current version of the `Timecard` object, the update fails and you receive an error. {% /aside %} {% tabset %} {% tab id="Request" %} ```` {% /tab %} {% tab id="Response" %} The response returns the updated `Timecard` object with the break you added and an incremented version number. ```json { "timecard": { "id": "BWRE5VKKGZ9W4", ... "breaks": [ { "id": "QC0CT8JEB76ZD", "start_at": "2025-05-08T01:28:45Z", "break_type_id": "RXD5TMQK683CT", "name": "Lunch", "expected_duration": "PT30M", "is_paid": true } ], "status": "OPEN", "version": 2, ... } } ``` {% /tab %} {% /tabset %} ### Webhooks Updating a timecard triggers a [labor.timecard.updated](https://developer.squareup.com/reference/square/labor-api/webhooks/labor.timecard.updated) [webhook event](webhooks/overview). {% accordion expanded=false %} {% slot "heading" %} ### UpdateShift example (deprecated) {% /slot %} `UpdateShift` is [deprecated](labor-api/what-it-does#migration-notes) and replaced by `UpdateTimecard`. {% tabset %} {% tab id="Request" %} ```` {% /tab %} {% tab id="Response" %} ```json { "shift": { "id": "BWRE5VKKGZ9W4", ... "breaks": [ { "id": "QC0CT8JEB76ZD", "start_at": "2025-05-08T01:28:45Z", "break_type_id": "RXD5TMQK683CT", "name": "Lunch", "expected_duration": "PT30M", "is_paid": true } ], "status": "OPEN", "version": 2, ... } } ``` {% /tab %} {% /tabset %} {% /accordion %} {% anchor id="end-the-break" /%} ## 4. End the break When the break ends, call `UpdateTimecard` again and update the break with the `end_at` time. Make sure to specify the latest version number of the timecard. {% tabset %} {% tab id="Request" %} ```` {% /tab %} {% tab id="Response" %} The response returns the updated `Timecard` object with the updated break and incremented version number. ```json { "timecard": { "id": "BWRE5VKKGZ9W4", ... "breaks": [ { "id": "QC0CT8JEB76ZD", "start_at": "2025-05-08T01:28:45Z", "end_at": "2025-05-08T01:57:15Z", "break_type_id": "RXD5TMQK683CT", "name": "Lunch", "expected_duration": "PT30M", "is_paid": true } ], "status": "OPEN", "version": 3, ... } } ``` {% /tab %} {% /tabset %} ### Webhooks Updating a timecard triggers a [labor.timecard.updated](https://developer.squareup.com/reference/square/labor-api/webhooks/labor.timecard.updated) [webhook event](webhooks/overview). {% accordion expanded=false %} {% slot "heading" %} ### UpdateShift example (deprecated) {% /slot %} `UpdateShift` is [deprecated](labor-api/what-it-does#migration-notes) and replaced by `UpdateTimecard`. {% tabset %} {% tab id="Request" %} ```` {% /tab %} {% tab id="Response" %} ```json { "shift": { "id": "BWRE5VKKGZ9W4", ... "breaks": [ { "id": "QC0CT8JEB76ZD", "start_at": "2025-05-08T01:28:45Z", "end_at": "2025-05-08T01:57:15Z", "break_type_id": "RXD5TMQK683CT", "name": "Lunch", "expected_duration": "PT30M", "is_paid": true } ], "status": "OPEN", "version": 3, ... } } ``` {% /tab %} {% /tabset %} {% /accordion %} --- # Walkthrough 1: Sell a Gift Card > Source: https://developer.squareup.com/docs/gift-cards/walkthrough-1 > Status: PUBLIC > Languages: All > Platforms: All Use the Square Gift Cards API to create and activate a gift card. This walkthrough provides step-by-step instructions that show how to create a digital gift card and then activate it with an initial balance. The walkthrough includes separate procedures for applications that process gift card orders with the Square Orders and Payments APIs or with a custom order and payment processing system. To prepare for the walkthrough, you review information about using the Square Sandbox for testing. You also copy the Sandbox access token and location ID for your Square account. {% toc hide=true /%} {% anchor id="review-sandbox-testing-considerations" /%} ## Step 1: Review Sandbox testing considerations The [Square Sandbox](devtools/sandbox/overview) is an isolated server environment provisioned for each Sandbox test account. You use your Sandbox access token to create and access account resources in the Sandbox. In this walkthrough, you create and activate a gift card in the Sandbox. If you follow the procedure that integrates with the Orders API and Payments API, you also create a gift card order and use a test payment token (`cnon:card-nonce-ok`) to pay for the order. Sandbox payment methods are easy to use and are never charged. For more information, see [Testing a card payment.](devtools/sandbox/payments#testing-a-card-payment) In addition, you view gift card status in the Sandbox Square Dashboard. {% aside type="info" %} This walkthrough creates a digital gift card in the Sandbox. Although testing physical gift cards isn't supported in the Sandbox, you can register and activate physical gift cards in the production environment using the process described in this walkthrough. {% /aside %} {% anchor id="gather-account-information" /%} ## Step 2: Gather account information Follow these steps to get the access token and location ID used in this walkthrough. 1. Sign in to the [Developer Console](https://developer.squareup.com/apps) and open your application. If you don't have a Square account, see [Get Started](get-started) to learn how to create an account and an application. 2. Get your Sandbox access token: 1. At the top of the page, in the **Sandbox** and **Production** toggle, choose **Sandbox**. 1. On the **Credentials** page, under **Sandbox Access Token**, choose **Show** and then copy the token. All Square API requests require an access token for authorization. This [personal access token](build-basics/access-tokens) grants full access to the Sandbox resources in your account. {% aside type="important" %} The Sandbox access token is a secure secret. Don't share it with anyone. {% /aside %} 3. Get your location ID: 1. In the left pane, choose **Locations**. 1. On the **Locations** page, keep **Default Test Account** selected and copy a location ID. ![An animation showing how to get the Sandbox access token and location ID in the Developer Console.](//images.ctfassets.net/1nw4q0oohfju/1qM4MIFJxxbESkevva9dXN/7ccff399610661d0a2f1fd92d6b1c66a/get-sandbox-access-token-and-location-id.gif) {% aside type="info" %} To retrieve location IDs programmatically, call [ListLocations.](https://developer.squareup.com/reference/square/locations-api/list-locations) {% /aside %} ## Next step You are now ready to sell a gift card. To do so, your application creates and processes an order for the gift card amount and then creates and activates the gift card with the initial balance. This walkthrough provides two separate application flows: * [Create and Activate a Gift Card When Using Orders API Integration](gift-cards/walkthrough-1-with-orders-api) - This procedure shows how to create and activate a gift card when your application uses the Orders API and Payments API to take and process a gift card order. * [Create and Activate a Gift Card When Using a Custom Processing System](gift-cards/walkthrough-1-without-orders-api) - This procedure shows how to create and activate a gift card when your application uses a custom order and payment processing system to process a gift card order. ## See also * [Gift Cards API and Gift Card Activities API Overview](gift-cards/using-gift-cards-api) * [Walkthrough 2: Use a Gift Card](gift-cards/walkthrough-2) * [Video: Sandbox 101: Gift Cards API](https://www.youtube.com/watch?v=2tUbxgkjjCo) * [Sample Application: Gift Card API Sample App](https://github.com/square/connect-api-examples/tree/master/connect-examples/v2/node_gift-cards) * [Video: Gift Card API Sample App Overview](https://www.youtube.com/watch?v=epYIYs52Img) --- # Walkthrough 2: Use a Gift Card > Source: https://developer.squareup.com/docs/gift-cards/walkthrough-2 > Status: PUBLIC > Languages: All > Platforms: All Learn how to redeem and reload a Square gift card and the check activity history using the Gift Card Activities API. This walkthrough provides step-by-step instructions that show how to redeem a gift card for a purchase, reload it with additional funds, and check gift card activity. The walkthrough includes separate procedures for applications that process orders and payments with the Square Orders and Payments APIs or with a custom processing system. This walkthrough assumes that you completed [Walkthrough 1: Sell a Gift Card](gift-cards/walkthrough-1) and have an activated gift card. {% toc hide=true /%} {% anchor id="link-customer-to-gift-card" /%} ## Step 1: Add a gift card on file (optional) This walkthrough includes steps that show how your application can take payment from a gift card on file. To prepare for this procedure, you must link a customer profile to your gift card. {% aside type="info" %} Linking a customer profile to a gift card is only required to follow the steps in this walkthrough, which takes a payment from a gift card on file. Alternatively, to get the gift card ID to provide as the `source_id` in the `CreatePayment` request, your application can collect the gift card account number (GAN) from the buyer and call [RetrieveGiftCardFromGAN](https://developer.squareup.com/reference/square/gift-cards-api/retrieve-gift-card-from-gan). {% /aside %} 1. Call [SearchCustomers](https://developer.squareup.com/reference/square/customers-api/search-customers) or [ListCustomers](https://developer.squareup.com/reference/square/customers-api/list-customers) to get the ID of a customer profile in your Customer Directory. If you don't have a customer profile, call [CreateCustomer](https://developer.squareup.com/reference/square/customers-api/create-customer) to create one: ```` 1. Copy the `id` of the customer profile from the response. 1. Call [LinkCustomerToGiftCard](https://developer.squareup.com/reference/square/gift-cards-api/link-customer-to-gift-card) to add a gift card on file for the customer. Provide the gift card ID as a path parameter and the customer ID as a body parameter: ```` For more information about linking customers to gift cards, see [Manage gift cards on file](gift-cards/manage-gift-cards-on-file). ## Next step You are now ready to use a gift card. In this walkthrough, you take a gift card payment, add additional funds to the gift card, and check gift card activity. This walkthrough provides two separate application flows: * [Redeem and Reload a Gift Card When Using Orders and Payments API Integration](gift-cards/walkthrough-2-orders-and-payments-integration). This procedure shows how to redeem and reload a gift card when your application uses the Orders API and Payments API. * [Redeem and Reload a Gift Card When Using a Custom Processing System](gift-cards/walkthrough-2-custom-processing-system). This procedure shows how to redeem and reload a gift card when your application uses a custom order and payment processing system. ## See also * [Gift Cards API and Gift Card Activities API Overview](gift-cards/using-gift-cards-api) * [Walkthrough 1: Sell a Gift Card](gift-cards/walkthrough-1) * [Sample Application: Gift Card API Sample App](https://github.com/square/connect-api-examples/tree/master/connect-examples/v2/node_gift-cards) * [Video: Gift Card API Sample App Overview](https://www.youtube.com/watch?v=epYIYs52Img) --- # Create and Activate a Gift Card When Using Orders API Integration > Source: https://developer.squareup.com/docs/gift-cards/walkthrough-1-with-orders-api > Status: PUBLIC > Languages: All > Platforms: All Learn how to sell a Square gift card when your application integrates with the Orders API. This walkthrough shows how to sell a Square gift card when your application uses the Orders API and Payments API to process orders and payments. First, you take an order for a gift card using the Orders API and pay for the order using the Payments API. Then, you create a gift card and activate it with an initial balance. After the gift card is activated, it's ready for use. {% aside type="tip" %} Watch the [Sandbox 101: Gift Cards API](https://www.youtube.com/watch?v=2tUbxgkjjCo) video to see how to purchase, create, and activate a gift card using steps that are similar to this walkthrough. You can also check out the [Gift Cards API Sample App](https://github.com/square/connect-api-examples/tree/master/connect-examples/v2/node_gift-cards) and the accompanying [Gift Cards API Sample App Overview](https://www.youtube.com/watch?v=epYIYs52Img) video to see how you can create and manage gift cards in a Node.js application. {% /aside %} {% toc hide=true /%} ## Step 1: Create and pay for a gift card order To enable a buyer to purchase a gift card for themselves or another recipient, you create a gift card order using the Orders API and take payment for the order using the Payments API. {% aside type="info" %} To learn how to create and activate a gift card when your application uses a custom order and payment processing system, see [Create and Activate a Gift Card When Using a Custom Processing System.](gift-cards/walkthrough-1-without-orders-api) {% /aside %} ### Create the order 1. Call [CreateOrder](https://developer.squareup.com/reference/square/orders-api/create-order) to create an order for a gift card. In the request, the line item for the gift card must specify an `item_type` of `GIFT_CARD`. Otherwise, the order isn't processed as a gift card sale and the subsequent gift card activation doesn't succeed. ```` 2. Copy the ID of the order and the UID of the gift card line item from the response. * You provide the ID of the order when you pay for the order and activate the gift card. * You provide the UID of the gift card line item when you activate the gift card. ### Take the payment 1. Generate a secure payment token using the [Web Payments SDK](web-payments/overview) or [In-App Payments SDK.](in-app-payments-sdk/what-it-does) The payment token represents the card used to pay for an order. {% aside type="info" %} For this walkthrough, you skip this step and use a [test payment token](devtools/sandbox/payments#testing-a-card-payment) as the `source_id` for the `CreatePayment` request in the next step. {% /aside %} 2. Call [CreatePayment](https://developer.squareup.com/reference/square/payments-api/create-payment) to take the payment for the order. ```` In the response, the payment status is set to `COMPLETED`. Because the order is fully paid, Square also sets the order state to `COMPLETED`. {% anchor id="view-gift-cards-report" /%} ## Step 2: (Optional) Review gift card reports in the Square Dashboard At this point, the gift card is reported as pending activation in the Square Dashboard. Because you are using the Sandbox for testing, you can view the reports in the Sandbox Square Dashboard associated with your Sandbox test account. 1. Open the [Developer Console](https://developer.squareup.com/apps). 2. In the left pane, choose **Sandbox test accounts**. 3. For **Default Test Account**, choose **Square Dashboard**. 3. Choose **Reports**. 4. Choose **Gift Cards** and verify that the report shows the pending activation. ## Step 3: Create and activate a gift card After the buyer pays for the gift card order, you create a gift card using the Gift Cards API and activate the gift card with an initial balance using the Gift Card Activities API. ### Create the gift card 1. Call [CreateGiftCard](https://developer.squareup.com/reference/square/gift-cards-api/create-gift-card) to create a digital gift card. ```` The previous request specifies only the gift card `type`, which directs Square to generate the gift card account number (GAN). However, providing a [custom GAN](gift-cards/using-gift-cards-api#custom-gans) is also supported. {% aside type="info" %} This walkthrough creates a digital gift card in the Sandbox. Although testing physical gift cards isn't supported in the Sandbox, you can register and activate physical gift cards in the production environment using the process described in this walkthrough. {% /aside %} The following example response shows the gift card state is `PENDING` and the current balance is 0: ```json { "gift_card": { "id": "gftc:012440e514754c42990f3de4527498dc", "type": "DIGITAL", "gan_source": "SQUARE", "state": "PENDING", "balance_money": { "amount": 0, "currency": "USD" }, "gan": "7783320002382646", "created_at": "2021-04-11T18:49:34Z" } } ``` 2. Copy the `id` from the response. You use this value to activate the gift card. ### Activate the gift card 1. Call [CreateGiftCardActivity](https://developer.squareup.com/reference/square/gift-card-activities-api/create-gift-card-activity) to activate the gift card with an initial balance. The request must include either `gift_card_id` with the gift card ID or `gift_card_gan` with the GAN. This endpoint [supports various activity types.](gift-cards/using-gift-cards-api#supported-activity-types) For an `ACTIVATE` activity, you provide activity-specific details in the `activate_activity_details` field: * For `order_id`, specify the ID of the associated order. The order state must be `COMPLETED`. * For `line_item_uid`, specify the UID of the gift card line item. Square reads the order information to determine the amount to add to the gift card balance. ```` The following is an example response: ```json { "gift_card_activity": { "id": "gcact_c24da663c0d242f5a29837d8e165bf97", "type": "ACTIVATE", "location_id": "S8GWD5R9QB376", "created_at": "2021-04-11T19:01:14.000Z", "gift_card_id": "gftc:012440e514754c42990f3de4527498dc", "gift_card_gan": "7783320002382646", "gift_card_balance_money": { "amount": 2500, "currency": "USD" }, "activate_activity_details": { "amount_money": { "amount": 2500, "currency": "USD" }, "order_id": "q8vfn99RLTr7FuMaUtuDG6RHdCcZY", "line_item_uid": "syHOf0zv9OjS2vhkhFozVC" } } } ``` 2. Optional. Call [RetrieveGiftCard](https://developer.squareup.com/reference/square/gift-cards-api/retrieve-gift-card) to see that the gift card state is set to `ACTIVE` and the balance is $25. ```` The following is an example response: ```json { "gift_card": { "id": "gftc:012440e514754c42990f3de4527498dc", "type": "DIGITAL", "gan_source": "SQUARE", "state": "ACTIVE", "balance_money": { "amount": 2500, "currency": "USD" }, "gan": "7783320002382646", "created_at": "2021-04-11T18:49:34Z" } } ``` Now that the gift card is activated, you can [open the Gift Cards reports page in the Sandbox Square Dashboard](#view-gift-cards-report) and verify that the activity and gift card amount are listed under **Activations**. In addition, the gift card is now listed on the **Overview** page in the **Gift Cards** section of the Sandbox Square Dashboard. ## Step 4: Send the gift card Buyers can purchase a gift card for themselves or for another recipient. The Gift Cards API doesn't provide email support, so your application must handle the [delivery of the gift card information.](gift-cards/sell-gift-cards#deliver-gift-card) For example, your application might choose to: * Show gift card information on your application's website. * Email gift card information to the recipient. ## Next step Continue to [Walkthrough 2: Use a Gift Card](gift-cards/walkthrough-2) and learn how to pay for an order using an activated gift card. In addition, you can explore the Gift Cards and Gift Card Activities APIs in other ways. For example, you can try out the [Gift Cards sample](https://github.com/square/connect-api-examples/tree/master/connect-examples/v2/node_gift-cards) (Node.js) or build and send API requests from [API Explorer](https://developer.squareup.com/explorer/square) using your Sandbox access token. --- # Gift Cards API and Gift Card Activities API > Source: https://developer.squareup.com/docs/gift-cards/using-gift-cards-api > Status: PUBLIC > Languages: All > Platforms: All Use the Gift Cards API and Gift Card Activities API to create and manage Square gift cards that help sellers increase sales and attract new customers. **Applies to:** [Gift Cards API](https://developer.squareup.com/reference/square/gift-cards-api) | [Gift Card Activities API](https://developer.squareup.com/reference/square/gift-card-activities-api) | [Orders API](orders-api/what-it-does) | [Payments API](payments-refunds) | [Refunds API](refunds-api/overview) | [Customers API](customers-api/what-it-does) | [Web Payments SDK](web-payments/overview) | [In-App Payments SDK](in-app-payments-sdk/what-it-does) | [GraphQL](devtools/graphql) {% subheading %}Use the Gift Cards API and Gift Card Activities API to create and manage Square gift cards.{% /subheading %} {% toc hide=true /%} ## Overview [Square gift cards](https://squareup.com/gift-cards) allow sellers to offer a complete gifting program that can boost sales and attract new customers. Gift cards can be purchased online or in person and redeemed at all of the seller's locations. Buyers can send gift cards to friends and family to introduce them to a seller's business. Developers use the [Gift Cards API](https://developer.squareup.com/reference/square/gift-cards-api) and [Gift Card Activities API](https://developer.squareup.com/reference/square/gift-card-activities-api) to integrate gift cards into their applications. Watch the following video to see how the APIs work: {% youtube src="https://www.youtube.com/embed/2tUbxgkjjCo?si=B6AgXb08P2tdu9F3" /%} You can also send [Square GraphQL](devtools/graphql) queries for read-only access to gift card data and use [webhook events](gift-cards/webhooks) to keep track of activities. {% aside type="info" %} Sellers use [Square Point of Sale](https://squareup.com/point-of-sale) and the [Square Dashboard](https://app.squareup.com/dashboard/gift-cards) to sell, redeem, track, or reload Square gift cards. Sellers can publish an eGift Card Order Site where buyers can purchase gift cards. Buyers can view and manage their gift cards from their [Square profile](https://profile.squareup.com/). {% /aside %} ## Requirements and limitations The following requirements, limitations, and other considerations apply when working with the Gift Cards API and Gift Card Activities API: * **OAuth permissions** - Applications using OAuth require `GIFTCARDS_READ` for read operations and `GIFTCARDS_WRITE` for write operations. Additional permissions might be required in gift card flows. For example: * `CUSTOMERS_READ` - To get a customer ID to link a gift card. * `PAYMENTS_WRITE` - To [charge a gift card on file](gift-cards/manage-gift-cards-on-file#take-gift-card-on-file-payment). * `PAYMENTS_WRITE` and `ORDERS_WRITE` - To activate or reload gift cards using Orders API integration. Learn more about [OAuth](oauth-api/overview) and [endpoint permission requirements](oauth-api/square-permissions##gift-cards). * **Gift card delivery** - The developer is responsible for [delivering information for digital gift cards](gift-cards/sell-gift-cards#deliver-gift-cards) created using the Gift Cards API. * **Security of custom GANs** - The developer is responsible for ensuring the security of [custom GANs](#custom-gans). For example, to mitigate the risk of fraud, don't use repeatable patterns or GANs that are easy to guess (such as 12345678). * **No application fees** - Developers cannot collect application fees for gift card payments.`CreatePayment` returns a `BAD_REQUEST` error if the `app_fee_money` field is included in a request to create a Square gift card payment. {% anchor id="load-fees" /%} * **Load fees** - Sellers in the following countries pay 2.5% of the amount added to a Square gift card, in addition to standard payment processing rates: * Australia * Canada * United States Load fees apply to `ACTIVATE`, `LOAD`, and `ADJUST_INCREMENT` activities. There are no fees when a gift card is redeemed or refunded. For more information, see [Gift cards pricing](payments-pricing#gift-cards-pricing). Square deducts or refunds load fees in seller payouts. To see all load fee deductions and refunds for a given payout, call [ListPayoutEntries](https://developer.squareup.com/reference/square/payouts-api/list-payout-entries) and iterate through the results to find following entry types: * [GIFT_CARD_LOAD_FEE](payouts-api/list-payout-entries#gift_card_load_fee) * [GIFT_CARD_LOAD_FEE_REFUND](payouts-api/list-payout-entries#gift_card_load_fee_refund) * [UNDO_GIFT_CARD_LOAD_FEE_REFUND](payouts-api/list-payout-entries#undo_gift_card_load_fee_refund) * **Customer linking limits** - When saving [gift cards on file](gift-cards/manage-gift-cards-on-file): * The maximum number of gift cards you can link to a customer profile is 50. * The maximum number of customer profiles you can link to a gift card is 10. * **Square Dashboard reporting** - When third-party applications use [Orders API or Payments API integration](#integration-with-orders-api-and-payments-api) to reload or redeem a gift card, the Square Dashboard reports include these transactions. In contrast, there's no reporting when reloading and redeeming gift cards using non-Square APIs. All activated gift cards are listed in the Square Dashboard regardless of the system used to process the gift card order. However, if the gift card order was processed with non-Square APIs, the **Receipt** link to the transaction isn't available from the gift card's **Activity** card in the **Gift Cards** section. * **Square API integration** - Additional requirements and limitations apply when [integrating with other Square APIs](#integration-with-square-apis). * **Activity history** - `ACTIVATE`, `CLEAR_BALANCE`, and `IMPORT` activities that occurred before March 2, 2016, aren't included in `ListGiftCardActivities` results or when viewing the activity history in the Square Dashboard. {% anchor id="giftcard" /%} ## Gift Cards API You can create gift cards, retrieve gift card information, and manage gift cards on file. The following example `CreateGiftCard` request creates a `DIGITAL` gift card. You can also use this endpoint to register a `PHYSICAL` gift card. {% tabset %} {% tab id="CreateGiftCard request" %} ```` {% /tab %} {% tab id="GiftCard object in response" %} ```json { "gift_card": { "id": "gftc:012440e514754c42990f3de4527498dc", "type": "DIGITAL", "gan_source": "SQUARE", "state": "PENDING", "balance_money": { "amount": 0, "currency": "USD" }, "gan": "7783320002382646", "created_at": "2024-08-11T18:49:34Z" } } ``` Gift cards are represented by a [GiftCard](https://developer.squareup.com/reference/square/objects/GiftCard) object. The `gan` is the gift card number, also called the redemption code. Gift cards can be [saved as gift cards on file](gift-cards/manage-gift-cards-on-file). The IDs of any linked customers are listed in the `customer_ids` field. ```json { "gift_card": { "id": "gftc:012440e514754c42990f3de4527498dc", "type": "DIGITAL", "gan_source": "SQUARE", "state": "PENDING", "balance_money": { "amount": 0, "currency": "USD" }, "customer_ids": [ "ASG67K1YGCSQQ47KSW7J7WX53M", "QNTC0TYTWMRSFFQ157KK4V7MVR" ], "gan": "7783320002382646", "created_at": "2024-08-11T18:49:34Z" } } ``` {% /tab %} {% /tabset %} New gift cards have a `PENDING` state and zero balance. After creating a gift card, call `CreateGiftCardActivity` to activate it with an initial balance before first use. For steps, see [Sell Square Gift Cards](gift-cards/sell-gift-cards). The `id` and `gan` fields are used in API requests. For example, use: * `gan` with the Web Payments SDK or In-App Payments SDK to generate a `source_id` for a gift card payment in a `CreatePayment` request. * `id` as the `source_id` for a gift card on file payment in a `CreatePayment` request. * `id` as the `destination_id` when issuing store credit in a `CreateRefund` request. This is an alternative method for activating a gift card. {% anchor id="giftcardactivity" /%} {% anchor id="manage-balance-or-state" /%} {% anchor id="managing-the-gift-card-balance-or-state" /%} ## Gift Card Activities API You can activate a gift card with a balance, load additional funds, redeem the gift card for purchases, and create other activities that change the gift card balance or state. A `CreateGiftCardActivity` request defines a specific activity `type` and includes a corresponding `_activity_details` field that provides the information needed to create the activity. The following example creates an `ACTIVATE` type based on the provided `activate_activity_details`: {% tabset %} {% tab id="CreateGiftCardActivity request" %} ```` {% /tab %} {% tab id="GiftCardActivity object in response" %} ```json { "gift_card_activity": { "id": "gcact_c24da663c0d242f5a29837d8e165bf97", "type": "ACTIVATE", "location_id": "M8AKAD8160XGR", "created_at": "2024-08-11T19:01:14.000Z", "gift_card_id": "gftc:012440e514754c42990f3de4527498dc", "gift_card_gan": "7783320002382646", "gift_card_balance_money": { "amount": 2500, "currency": "USD" }, "activate_activity_details": { "amount_money": { "amount": 2500, "currency": "USD" }, "order_id": "q8vfn99RLTr7FuMaUtuDG6RHdCcZY", "line_item_uid": "syHOf0zv9OjS2vhkhFozVC" } } } ``` Gift card activities are represented by a [GiftCardActivity](https://developer.squareup.com/reference/square/objects/GiftCardActivity) object. In the previous example: * The `type` field indicates that this is an `ACTIVATE` activity. * The `activate_activity_details` field contains information related to the `ACTIVATE` activity. In this example, `amount_money` was obtained based on the provided order and line item IDs. * The `gift_card_balance_money` field shows the updated gift card balance resulting from the activity. {% line-break /%} {% /tab %} {% /tabset %} [Built-in integration](#integration-with-square-apis) with other Square APIs helps simplify activate, reload, redeem, and refund flows. {% anchor id="supported-activity-types" /%} ### Supported activity types for CreateGiftCardActivity Gift card activities are used to manage a gift card's balance or state. You can use the `CreateGiftCardActivity` endpoint to create the following activity types: {% table %} * Activity type {% width="220px" %} * Description --- * `ACTIVATE` * Activates a gift card with a balance. A gift card must be in the `ACTIVE` state to be used for any other activity. For more information, see [Sell Square Gift Cards](gift-cards/sell-gift-cards). Details field: [activate_activity_details](https://developer.squareup.com/reference/square/objects/GiftCardActivityActivate) --- * `LOAD` * Loads a gift card with additional funds. For more information, see [Reload Square Gift Cards](gift-cards/reload-gift-cards). Details field: [load_activity_details](https://developer.squareup.com/reference/square/objects/GiftCardActivityLoad) --- * `REDEEM` * Redeems funds from a gift card after a gift card payment. If your application uses the Payments API to make a gift card payment, Square automatically creates a `REDEEM` activity that updates the gift card balance after the payment is completed. For more information, see [Redeem Square Gift Cards](gift-cards/redeem-gift-cards). Details field: [redeem_activity_details](https://developer.squareup.com/reference/square/objects/GiftCardActivityRedeem) --- * `CLEAR_BALANCE` * Sets a gift card balance to zero. This activity should be called before reusing a physical gift card. When a physical gift card reaches a zero balance for any reason, Square automatically unlinks all customers from the gift card. This behavior helps keep the linked customer profile setting up to date if the card is reused. Details field: [clear_balance_activity_details](https://developer.squareup.com/reference/square/objects/GiftCardActivityClearBalance) --- * `DEACTIVATE` * Permanently blocks a gift card from any future balance-changing activities. This activity should be called to prevent a gift card from being used (for example, before discarding a physical gift card or if the card is lost or stolen). Details field: [deactivate_activity_details](https://developer.squareup.com/reference/square/objects/GiftCardActivityDeactivate) --- * `ADJUST_INCREMENT` * Increases a gift card balance when the adjustment isn't related to a gift card order or payment. To increase the balance based on gift card orders or payments, use the appropriate `LOAD`, `REFUND`, or `UNLINKED_ACTIVITY_REFUND` activity. Details field: [adjust_increment_activity_details](https://developer.squareup.com/reference/square/objects/GiftCardActivityAdjustIncrement) --- * `ADJUST_DECREMENT` * Decreases a gift card balance when the adjustment isn't related to a gift card payment. To decrease the balance based on a gift card payment, use the `REDEEM` activity. Details field: [adjust_decrement_activity_details](https://developer.squareup.com/reference/square/objects/GiftCardActivityAdjustDecrement) --- * `REFUND` * Adds money to a gift card from a refunded transaction. Refunds linked to a Square payment have a `payment_id`. Refunds to the same gift card used to make the payment have a `redeem_activity_id`. If your application uses the Refunds API to refund a payment to a gift card, Square automatically creates a `REFUND` activity that updates the gift card balance. Applications that use a custom processing system for {% tooltip text="same-method gift card refunds" %}Refunds a payment to the same gift card used to make the payment.{% /tooltip %} must explicitly create a `REFUND` activity and specify the `redeem_activity_id`. Details field: [refund_activity_details](https://developer.squareup.com/reference/square/objects/GiftCardActivityRefund) --- * `UNLINKED_ACTIVITY_REFUND` * Adds money to a gift card from a refunded transaction that wasn't paid with the same gift card. This activity type is used by applications that use a custom processing system for {% tooltip text="cross-method gift card refunds" %}Refunds a payment to a gift card that wasn't used to make the payment.{% /tooltip %}. Details field: [unlinked_activity_refund_activity_details](https://developer.squareup.com/reference/square/objects/GiftCardActivityUnlinkedActivityRefund) {% /table%} {% anchor id="unsupported-activities" /%} {% accordion expanded=false %} {% slot "heading" %} #### Unsupported activity types {% /slot %} You cannot use `CreateGiftCardActivities` to create the following activity types: * `BLOCK` or `UNBLOCK` - Square manages these activities while processing chargeback transactions for disputed payments. * `IMPORT` or `IMPORT_REVERSAL` - Sellers must work with Square Support to import [third-party gift cards](#third-party-gift-cards) or reverse previously imported gift cards. * `TRANSFER_BALANCE_TO` or `TRANSFER_BALANCE_FROM` - Square creates these activities when a buyer transfers money between gift cards linked to their [Square profile](https://profile.squareup.com). However, these activity types are included in `ListGiftCardActivities` results and invoke `gift_card.activity.created` and `gift_card.updated` [webhook events](gift-cards/webhooks). {% /accordion %} {% aside type="info" %} You can call `ListGiftCardActivities` to view all activities or a filtered set of activities. The response includes gift card activities initiated by sellers and buyers using Square products, third-party applications calling Square APIs, and Square. For more information, see [List gift card activities](gift-cards/retrieve-gift-cards-and-activities#list-gift-card-activities). {% /aside %} {% anchor id="integration-with-orders-api-and-payments-api" /%} {% anchor id="integration-with-square-apis" /%} ## Integration with Square APIs Square provides integrated gift card workflows for applications that use the [Orders API](https://developer.squareup.com/reference/square/orders-api), [Payments API](https://developer.squareup.com/reference/square/payments-api), or [Refunds API](https://developer.squareup.com/reference/square/refund-api). {% anchor id="orders-api-integration" /%} {% accordion expanded=false %} {% slot "heading" %} ### Orders API integration with ACTIVATE and LOAD activities {% /slot %} With Orders API integration, Square reads information from the order used to sell or reload a gift card. You provide an `order_id` and `line_item_uid` (of the `GIFT_CARD` line item) when you create the `ACTIVATE` or `LOAD` activity. The following are typical high-level flows: * **Selling a gift card** - Includes creating an `ACTIVATE` activity: `CreateOrder` -> `CreatePayment` -> `CreateGiftCard` -> `CreateGiftCardActivity` * **Reloading a gift card** - Includes creating a `LOAD` activity: `CreateOrder` -> `CreatePayment` -> `CreateGiftCardActivity` Resulting `ACTIVATE` and `LOAD` activities include the `order_id` and `line_item_uid` you provided in the `CreateGiftCardActivity` request, as shown in the following examples. The amount of the `GIFT_CARD` line item is added to the gift card balance. {% tabset %} {% tab id="ACTIVATE activity" %} ```json { "gift_card_activity": { "id": "gcact_c24da663c0d242f5a29837d8e165bf97", "type": "ACTIVATE", "location_id": "M8AKAD8160XGR", "created_at": "2024-08-11T19:01:14.000Z", "gift_card_id": "gftc:012440e514754c42990f3de4527498dc", "gift_card_gan": "7783320002382646", "gift_card_balance_money": { "amount": 2500, "currency": "USD" }, "activate_activity_details": { "amount_money": { "amount": 2500, "currency": "USD" }, "order_id": "q8vfn99RLTr7FuMaUtuDG6RHdCcZY", "line_item_uid": "syHOf0zv9OjS2vhkhFozVC" } } } ``` {% /tab %} {% tab id="LOAD activity" %} ```json { "gift_card_activity": { "id": "gcact_31ce61ffa4df4d42bf250d8a21d844c2", "type": "LOAD", "location_id": "M8AKAD8160XGR", "created_at": "2024-08-15T10:21:47.000Z", "gift_card_id": "gftc:012440e514754c42990f3de4527498dc", "gift_card_gan": "7783320002382646", "gift_card_balance_money": { "amount": 3883, "currency": "USD" }, "load_activity_details": { "amount_money": { "amount": 3000, "currency": "USD" }, "order_id": "YcErdVPXmBSmn84OjBqnoS5hrb4F", "line_item_uid": "YKGb57Cj7Oxzv02PrenjkC" } } } ``` {% /tab %} {% /tabset %} For more information, see [Sell Square Gift Cards](gift-cards/sell-gift-cards) and [Reload Square Gift Cards](gift-cards/reload-gift-cards). #### Requirements and limitations for Orders API integration * `order_id` - The specified order must be in the `COMPLETED` state before you can activate or load the gift card. * `line_item_uid` - The specified line item with the gift card amount must explicitly set `GIFT_CARD` as the `item_type`. Otherwise, the order isn't processed as a gift card sale and you cannot use Orders API integration to activate or load the gift card. * If a gift card order is later refunded, the Refunds API doesn't automatically update the gift card balance. To deduct the funds from the balance, call `CreateGiftCardActivity` and create an `ADJUST_DECREMENT` activity with the `PURCHASE_WAS_REFUNDED` reason. Note that the Refunds API does update the balance after refunding a payment to a gift card. {% accordion expanded=false %} {% slot "heading" %} #### Custom order processing (non-Square APIs) {% /slot %} If your application doesn't use the Orders API to process orders, you must call `CreateGiftCardActivity` to create the `ACTIVATE` or `LOAD` activity. Provide the following activity details in the request: * `amount_money` * `buyer_payment_instrument_ids` * `reference_id` (optional) {% /accordion %} {% /accordion %} {% anchor id="payments-api-integration" /%} {% accordion expanded=false %} {% slot "heading" %} ### Payments API integration with REDEEM activities {% /slot %} With Payments API integration, Square automatically creates a `REDEEM` activity that updates the gift card balance after the payment is processed. Your application doesn't need to call `CreateGiftCardActivity`. Resulting `REDEEM` activities have a `payment_id`, as shown in the following example. The payment amount is deducted from the gift card balance. ```json { "gift_card_activity": { "id": "gcact_d31b4200f5174fc48cb7138aeae197d0", "type": "REDEEM", "location_id": "M8AKAD8160XGR", "created_at": "2024-08-15T15:57:43.000Z", "gift_card_id": "gftc:065fd3c6e1014c9293bd2d09475ea189", "gift_card_gan": "7783320009623257", "gift_card_balance_money": { "amount": 7450, "currency": "USD" }, "redeem_activity_details": { "amount_money": { "amount": 2550, "currency": "USD" }, "payment_id": "9WIIrJKZXMgSF9dI7SX9pOlWy7DZY", "status": "COMPLETED" } } } ``` For more information, see [Redeem Square Gift Cards](gift-cards/redeem-gift-cards). #### Gift card details in a Payment object For gift card payments, the `card_brand` field is `SQUARE_GIFT_CARD`. Note that Square supports [partial payment flows](payments-api/take-payments/card-payments/partial-payments-with-gift-cards) using gift cards. ```json { "payment": { "id": "JaHoTpbmK8dofR9cUheOJl9dQVcZY", "created_at": "2024-07-25T17:24:30.345Z", "updated_at": "2024-07-25T17:24:30.444Z", "amount_money": { "amount": 522, "currency": "USD" }, "status": "COMPLETED", "delay_duration": "PT168H", "source_type": "CARD", "card_details": { "status": "CAPTURED", "card": { "card_brand": "SQUARE_GIFT_CARD", "last_4": "1923", "exp_month": 12, "exp_year": 2050, "fingerprint": "sq-1-y_yFcziMlsxVSomRNQZ7xBaW0F1xxE-6TbcGKl7KOoy3GI1mh094CY4_Ox5RzUN7Vg", "card_type": "DEBIT", "prepaid_type": "PREPAID", "bin": "778332" }, "entry_method": "KEYED", "auth_result_code": "0", "card_payment_timeline": { "authorized_at": "2024-07-25T17:24:30.381Z", "captured_at": "2024-07-25T17:24:30.444Z" } }, "location_id": "M8AKAD8160XGR", "order_id": "sYr0y9eUZBoXd2dmXhjvDGOW0e4F", "total_money": { "amount": 522, "currency": "USD" }, "approved_money": { "amount": 522, "currency": "USD" }, "receipt_url": "https://squareupsandbox.com/receipt/preview/JaHoTpbmK8dofR9cUheOJl9dQVcZY", "delay_action": "CANCEL", "delayed_until": "2024-08-01T17:24:30.345Z", "application_details": { "square_product": "ECOMMERCE_API", "application_id": "sandbox-sq0idb-ioiyW39PwreFzwXoGyLtYg" }, "version_token": "4WWgYqa7KXd6rIW82VkYxKF36EYkNyx4MGrq0Vxf5cm6o" } } ``` {% accordion expanded=false %} {% slot "heading" %} #### Custom payment processing (non-Square APIs) {% /slot %} If your application doesn't use the Payments API to process payments, you must call `CreateGiftCardActivity` to create the `REDEEM` activity. Provide the following activity details in the request: * `amount_money` * `reference_id` (optional) {% /accordion %} {% /accordion %} {% anchor id="refunds-api-integration" /%} {% accordion expanded=false %} {% slot "heading" %} ### Refunds API integration with REFUND activities {% /slot %} With Refunds API integration, you can process {% tooltip text="same-method gift card refunds" %}Refunds a payment to the same gift card used to make the payment.{% /tooltip %} and {% tooltip text="cross-method gift card refunds" %}Refunds a payment to a gift card that wasn't used to make the payment.{% /tooltip %}. Square automatically creates a `REFUND` activity that updates the gift card balance after the refund is processed. Your application doesn't need to call `CreateGiftCardActivity`. {% aside type="info" %} You can issue a cross-method refund to a new gift card by first calling `CreateGiftCard` to create the gift card and then refunding directly to the new gift card. Doing so automatically changes the state from `PENDING` to `ACTIVE`. {% /aside %} Resulting `REFUND` activities include a `payment_id` if the refund is linked to a payment processed by Square and a `redeem_activity_id` if the payment was redeemed from the same gift card. The refund amount is added to the gift card balance. ```json { "gift_card_activity": { "id": "gcact_5a877a9e75d840e990aae654173ed655", "type": "REFUND", "location_id": "M8AKAD8160XGR", "created_at": "2024-08-15T15:59:45.000Z", "gift_card_id": "gftc:065fd3c6e1014c9293bd2d09475ea189", "gift_card_gan": "7783320009623257", "gift_card_balance_money": { "amount": 10000, "currency": "USD" }, "refund_activity_details": { "redeem_activity_id": "gcact_d31b4200f5174fc48cb7138aeae197d0", "amount_money": { "amount": 2550, "currency": "USD" }, "payment_id": "9WIIrJKZXMgSF9dI7SX9pOlWy7DZY" } } } ``` #### Gift card details in a Refund object The refund flow determines whether gift card details are included in the refund. For gift card transactions, the `card_details.card.card_brand` field is set to `SQUARE_GIFT_CARD`. {% tabset %} {% tab id="Same-method gift card refund" %} Gift card details aren't included in a same-method refund. To get details about the gift card that made the payment and received the refund, call `GetPayment` using the `payment_id` from the refund and check the `card_details` field. ```json { "refund": { "id": "9WIIrJKZXMgSF9dI7SX9pOlWy7DZY_JnAde8lQt5pt9MLAMZ4UgaXt0sN3ZGqr62Ohx23tGGH", "status": "COMPLETED", "amount_money": { "amount": 1500, "currency": "USD" }, "payment_id": "9WIIrJKZXMgSF9dI7SX9pOlWy7DZY", "order_id": "kayuaH6E5v63RuuaXLSyJa8Qrc4F", "created_at": "2024-08-15T15:59:30.564Z", "updated_at": "2024-08-15T15:59:45.590Z", "location_id": "M8AKAD8160XGR", "destination_type": "CARD" } } ``` {% /tab %} {% tab id="Cross-method gift card refund" %} Cross-method refunds to gift cards include a `destination_details` field that provides gift card details. ```json { "refund": { "id": "j3ra9pWVGwJjvSUEPtZwnmxquaB_GqWV0VwrM5gKVEfiGs35S", "status": "COMPLETED", "amount_money": { "amount": 1000, "currency": "USD" }, "payment_id": "j3ra9pWVGwJjvSUEPtZwnmxquaB", "order_id": "EERJy2F14ljdo9ESBL7nGzMF", "created_at": "2024-08-12T19:13:10.072Z", "updated_at": "2024-08-12T19:13:12.466Z", "location_id": "M8AKAD8160XGR", "destination_type": "CARD", "destination_details": { "card_details": { "card": { "card_brand": "SQUARE_GIFT_CARD", "last_4": "2281", "exp_month": 12, "exp_year": 2026, "fingerprint": "sq-1-fingerprint-id", "card_type": "DEBIT", "prepaid_type": "PREPAID", "bin": "778332", }, "entry_method": "KEYED" } } } } ``` {% /tab %} {% /tabset %} Refunds to the `SQUARE_GIFT_CARD` card brand don't affect a seller's payment processing balance. Note that a refund might take up to 14 days to complete. For more information about refund flows, see [Refund Payments](payments-api/refund-payments). #### Requirements and limitations for Refunds API integration * Square API version 2024-08-21 or later is required for the following features related to cross-method refunds: * Using `RefundPayment` to create cross-method gift card refunds. * Using `GetRefund` or `ListRefunds` to retrieve cross-method gift card refunds. When using earlier Square API versions, `GetRefund` returns an `API_VERSION_INCOMPATIBLE` error and `ListRefunds` omits cross-method gift card refunds from the results. * Using `GetPayment` or `ListPayments` to get `refunded_money` or `refund_ids` details related to the refund. When using earlier Square API versions, this information is omitted from the returned payments. Therefore, the payment IDs in corresponding `REFUND` activity details aren't useful for tracking refund activity. * Refunding to a new gift card activates the card by changing the `PENDING` state to `ACTIVE` and adding an initial balance equal to the refund amount. This process creates a `REFUND` activity but doesn't create an `ACTIVATE` activity. * Gift cards with custom GANs cannot receive cross-method refunds using the Refunds API. {% accordion expanded=false %} {% slot "heading" %} #### Custom refund processing (non-Square APIs) {% /slot %} If your application doesn't use the Refunds API to process refunds, you must call `CreateGiftCardActivity` to create the `REFUND` or `UNLINKED_ACTIVITY_REFUND` activity. * For {% tooltip text="same-method gift card refunds" %}Refunds a payment to the same gift card used to make the payment.{% /tooltip %} - Create a `REFUND` activity and provide the following activity details in the request: * `amount_money` * `redeem_activity_id` * `reference_id` (optional) * For {% tooltip text="cross-method gift card refunds" %}Refunds a payment to a gift card that wasn't used to make the payment.{% /tooltip %} - Create an `UNLINKED_ACTIVITY_REFUND` activity and provide the following activity details in the request: * `amount_money` * `reference_id` (optional) `REFUND` and `UNLINKED_ACTIVITY_REFUND` activities created by custom processing systems don't have a `payment_id` because they aren't linked to a Square payment. {% /accordion %} {% /accordion %} {% anchor id="custom-gans" /%} ## Custom GANs The `CreateGiftCard` endpoint allows you to specify a custom GAN when you create a gift card. The custom GAN that you provide in the request must meet the following requirements: * The custom GAN must be unique for the Square seller account. * The custom GAN must contain 8 to 20 alphanumeric characters. Note that only numeric characters can be used if you want to generate [QR codes or barcodes](#scanning). * The custom GAN cannot start with: * A bank identification number (BIN) pattern used by major credit cards (such as Visa, Mastercard, and American Express). * A BIN used by Square gift cards: 778273 (physical) or 778332 (digital). Gift cards created with a custom GAN have a `gan_source` of `OTHER`. {% aside type="info" %} For an example `CreateGiftCard` request that creates a gift card with a custom GAN, see [Create or register the gift card](gift-cards/sell-gift-cards#create-gift-card). {% /aside %} Custom GANs can enable scenarios that aren't possible with Square-assigned GANs. For example, they can be used for gift card redemptions across multiple Square sellers and channels, to attach a value to non-gift-card items such as tickets, and to allow sellers to accept gift cards created by external sites. Gift cards with custom GANs can be redeemed just like gift cards with Square-assigned GANs. Buyers use GANs to make gift card payments and check the gift card balance. It's the responsibility of the developer to ensure the security of their custom GANs. For example, to mitigate the risk of fraud, avoid using repeatable patterns or GANs that are easy to guess (such as 12345678). You should be aware of the following limitation for gift cards with custom GANs: * After using the `LinkCustomerToGiftCard` endpoint to add a gift card on file for a customer profile, the customer ID is added to the `customer_ids` field of the `gift_card` object. However, linked gift cards that have custom GANs aren't currently visible as a card on file for the customer in Square products, such as Square Point of Sale or the Square Dashboard. {% anchor id="scanning" /%} ## QR code and barcode scanning Although Square APIs don't provide native code-generation support, you can use a third-party solution to generate a QR code or barcode for digital gift cards. For example, the [Gift Card API Sample App](https://github.com/square/connect-api-examples/tree/master/connect-examples/v2/node_gift-cards/public/js/generate-barcode.js) uses a JavaScript library to generate barcodes. When generating a QR code or barcode, the encoded message must include the gift card number (GAN) in the following format: >`sqgc://` (for example: `sqgc://82000571903`) * Gift cards with a Square-assigned GAN have the `gan_source` field set to `SQUARE`. These gift cards can be scanned in Square Point of Sale. * Gift cards with a [custom GAN](#custom-gans) have the `gan_source` field set to `OTHER`. To support scanning with the `sqgc://` prefix, the GAN must: * Not start with a BIN used by major credit cards. * Not start with a BIN used by Square gift cards: 778273 (physical) or 778332 (digital). * Contain numeric characters only. * Pass the [Luhn algorithm check](https://en.wikipedia.org/wiki/Luhn_algorithm). Note that physical (plastic) Square gift cards are imprinted with a QR code and barcode. ## Physical gift cards Note the following when working with physical (plastic) gift cards: * Physical gift cards are imprinted with a 16-digit GAN and a barcode. The GAN is numeric only and starts with 778273. The GAN is stored in the `gan` field of the `GiftCard` object. * To sell physical gift cards, the seller must have previously ordered the gift card from Square and the gift card must be unused. Sellers can [order a pack of Square gift cards](https://squareup.com/help/us/en/article/5393-order-your-square-gift-cards) in the Square Dashboard. * Testing physical gift cards in the Square Sandbox isn't supported. * When a physical gift card reaches a zero balance for any reason, Square automatically unlinks all customers from the gift card. This behavior helps keep the linked customer profiles setting current if the card is reused. {% anchor id="third-party-gift-cards" /%} ## Third-party gift cards If a seller previously purchased gift cards from another gift card provider (not from Square) and sold them to customers, the seller must follow a one-time process with Square Support to import these third-party gift cards into Square. The seller can then accept these gift cards for redemption like Square gift cards. Third-party gift cards cannot be reloaded. For third-party gift cards, the `gan` field can contain a maximum of 255 characters and `gan_source` is `OTHER`. {% aside type="info" %} If you attempt to migrate third-party gift cards by creating digital Square gift cards programmatically, you might receive compliance limit or rate limit errors. For more information, [contact Developer Support](https://squareup.com/help/contact?panel=BF53A9C8EF68). {% /aside %} ## Sandbox testing You can create and manage Square gift cards in the [Square Sandbox](devtools/sandbox/overview). In addition, Square provides a test value that you can use to test gift card payments. For more information, see [Testing gift card payments in the Sandbox](gift-cards/redeem-gift-cards#sandbox-gift-card-payments). The following limitations apply to testing gift card payments in the Sandbox: * Creating, managing, and testing with physical gift cards isn't supported. * The Virtual Terminal doesn't accept gift card payments. * The Web Payments SDK and In-App Payments SDK only accept Sandbox test values provided by Square. These values aren't tied to any gift cards in your account, so you cannot check whether the balance of the gift card is updated. {% anchor id="compliance-limits" /%} ## Compliance limits Square enforces the following compliance limits for gift card activities that load funds onto digital or physical gift cards: * **Maximum balance amount per gift card** - The maximum amount for a gift card balance. * **Maximum load amount per gift card per day** - The maximum amount that can be loaded onto a gift card in a 24-hour period. * **Maximum load amount per payment card per day** - The maximum amount that a single payment card can load onto gift cards in a 24-hour period. * **Maximum outstanding balance amount per seller** - The maximum amount of the total outstanding balance across all gift cards issued for a single seller. If a limit is exceeded, the `CreateGiftCardActivity` endpoint [returns an error](#compliance-limit-errors) and doesn't complete the activity. ### Per-country compliance limits The following tables contain the per-country limits that are enforced by Square: |Limits for Australia (AU){% width="350px" %}|Amount in AUD| |------|------| |{% tooltip text="Maximum balance amount per gift card" %}The maximum amount for a gift card balance.{% /tooltip %}|$2,000| |{% tooltip text="Maximum load amount per gift card per day" %}The maximum amount that can be loaded onto a gift card in a 24-hour period.{% /tooltip %}|$2,000| |{% tooltip text="Maximum load amount per payment card per day" %}The maximum amount that a single payment card can load onto gift cards in a 24-hour period.{% /tooltip %}|$10,000| |{% tooltip text="Maximum outstanding balance amount per seller" %}The maximum amount of total outstanding balance across all gift cards issued for a single seller.{% /tooltip %}|Not applicable| |Limits for Canada (CA){% width="350px" %}|Amount in CAD| |------|------| |{% tooltip text="Maximum balance amount per gift card" %}The maximum amount for a gift card balance.{% /tooltip %}|$2,000| |{% tooltip text="Maximum load amount per gift card per day" %}The maximum amount that can be loaded onto a gift card in a 24-hour period.{% /tooltip %}|$2,000| |{% tooltip text="Maximum load amount per payment card per day" %}The maximum amount that a single payment card can load onto gift cards in a 24-hour period.{% /tooltip %}|$10,000| |{% tooltip text="Maximum outstanding balance amount per seller" %}The maximum amount of total outstanding balance across all gift cards issued for a single seller.{% /tooltip %}|Not applicable| |Limits for France (FR) and Ireland (IR) {% width="350px" %}|Amount in EUR| |------|------| |{% tooltip text="Maximum balance amount per gift card" %}The maximum amount for a gift card balance.{% /tooltip %}|750 EUR| |{% tooltip text="Maximum load amount per gift card per day" %}The maximum amount that can be loaded onto a gift card in a 24-hour period.{% /tooltip %}|750 EUR| |{% tooltip text="Maximum load amount per payment card per day" %}The maximum amount that a single payment card can load onto gift cards in a 24-hour period.{% /tooltip %}|7.500 EUR / 7,500 EUR| |{% tooltip text="Maximum outstanding balance amount per seller" %}The maximum amount of total outstanding balance across all gift cards issued for a single seller.{% /tooltip %}|Not applicable| |Limits for Japan (JP){% width="350px" %}|Amount in YEN| |------|------| |{% tooltip text="Maximum balance amount per gift card" %}The maximum amount for a gift card balance.{% /tooltip %}|¥50,000| |{% tooltip text="Maximum load amount per gift card per day" %}The maximum amount that can be loaded onto a gift card in a 24-hour period.{% /tooltip %}|¥50,000| |{% tooltip text="Maximum load amount per payment card per day" %}The maximum amount that a single payment card can load onto gift cards in a 24-hour period.{% /tooltip %}|¥1,000,000| |{% tooltip text="Maximum outstanding balance amount per seller" %}The maximum amount of total outstanding balance across all gift cards issued for a single seller.{% /tooltip %}|¥10,000,000| |Limits for Spain (ES){% width="350px" %}|Amount in EUR| |------|------| |{% tooltip text="Maximum balance amount per gift card" %}The maximum amount for a gift card balance.{% /tooltip %}|250 EUR (card cannot be reloaded)| |{% tooltip text="Maximum load amount per gift card per day" %}The maximum amount that can be loaded onto a gift card in a 24-hour period.{% /tooltip %}|250 EUR (card cannot be reloaded)| |{% tooltip text="Maximum load amount per payment card per day" %}The maximum amount that a single payment card can load onto gift cards in a 24-hour period.{% /tooltip %}|7,500 EUR| |{% tooltip text="Maximum outstanding balance amount per seller" %}The maximum amount of total outstanding balance across all gift cards issued for a single seller.{% /tooltip %}|Not applicable| |Limits for the United Kingdom (UK){% width="350px" %}|Amount in GBP| |------|------| |{% tooltip text="Maximum balance amount per gift card" %}The maximum amount for a gift card balance.{% /tooltip %}|£750| |{% tooltip text="Maximum load amount per gift card per day" %}The maximum amount that can be loaded onto a gift card in a 24-hour period.{% /tooltip %}|£750| |{% tooltip text="Maximum load amount per payment card per day" %}The maximum amount that a single payment card can load onto gift cards in a 24-hour period.{% /tooltip %}|£7,500| |{% tooltip text="Maximum outstanding balance amount per seller" %}The maximum amount of total outstanding balance across all gift cards issued for a single seller.{% /tooltip %}|Not applicable| |Limits for the United States (US){% width="350px" %}|Amount in USD| |------|------| |{% tooltip text="Maximum balance amount per gift card" %}The maximum amount for a gift card balance.{% /tooltip %}|$2,000| |{% tooltip text="Maximum load amount per gift card per day" %}The maximum amount that can be loaded onto a gift card in a 24-hour period.{% /tooltip %}|$2,000| |{% tooltip text="Maximum load amount per payment card per day" %}The maximum amount that a single payment card can load onto gift cards in a 24-hour period.{% /tooltip %}|$10,000| |{% tooltip text="Maximum outstanding balance amount per seller" %}The maximum amount of total outstanding balance across all gift cards issued for a single seller.{% /tooltip %}|Not applicable| ### Compliance limit errors Square returns the following errors when compliance limits are exceeded: * Maximum balance amount per gift card: ```json { "code": "BAD_REQUEST", "detail": "Cannot load balance on this giftcard as the card maximum value has been reached", "category": "INVALID_REQUEST_ERROR" } ``` * Maximum load amount per gift card per day: ```json { "code": "PAYMENT_LIMIT_EXCEEDED", "detail": "The gift card limit for increasing balance reached.", "category": "PAYMENT_METHOD_ERROR" } ``` * Maximum load amount per payment card per day: ```json { "code": "BAD_REQUEST", "detail": "Load amount exceeds maximum buyer daily amount.", "category": "INVALID_REQUEST_ERROR" } ``` * Maximum outstanding balance amount per seller: ```json { "code": "PAYMENT_LIMIT_EXCEEDED", "detail": "The merchant cannot accrue any more liability.", "category": "PAYMENT_METHOD_ERROR" } ``` {% accordion expanded=false %} {% slot "heading" %} ## Migration notes {% /slot %} The following migration notes apply to the Gift Cards API or Gift Card Activities API. {% anchor id="migrate-refund-replaces-unlinked-activity-refund" /%} ### Activity type is changed from UNLINKED_ACTIVITY_REFUND to REFUND for cross-tender refunds made from Square products Effective date: 2022-06-16 All cross-tender refunds made from Square Point of Sale or the Square Dashboard are now processed as `REFUND` activities instead of `UNLINKED_ACTIVITY_REFUND` activities. This type of refund occurs when a gift card is refunded for a payment that was processed by Square and paid for using a credit card or different gift card. The resulting `REFUND` activity has a `payment_id` but doesn't have a `redeem_activity_id`. Existing `UNLINKED_ACTIVITY_REFUND` activities that represent cross-tender refunds made from Square Point of Sale or the Square Dashboard are now also returned as `REFUND` activities for a `ListGiftCardActivities` request. This change applies to all Square versions. However, new and existing `UNLINKED_ACTIVITY_REFUND` activities that are explicitly created by third-party applications continue to be returned as `UNLINKED_ACTIVITY_REFUND` activities. {% /accordion %} ## See also * [Video: Sandbox 101: Gift Cards API](https://www.youtube.com/watch?v=2tUbxgkjjCo) * [Sample Application: Gift Card API Sample App](https://github.com/square/connect-api-examples/tree/master/connect-examples/v2/node_gift-cards) * [Video: Gift Card API Sample App Overview](https://www.youtube.com/watch?v=epYIYs52Img) * [API Reference: Gift Cards API](https://developer.squareup.com/reference/square/gift-cards-api) * [API Reference: Gift Card Activities API](https://developer.squareup.com/reference/square/gift-card-activities-api) --- # Redeem and Reload a Gift Card When Using a Custom Processing System > Source: https://developer.squareup.com/docs/gift-cards/walkthrough-2-custom-processing-system > Status: PUBLIC > Languages: All > Platforms: All Provides steps that show how to redeem and reload a Square gift card when your application uses a custom order and payment processing system. This walkthrough shows how to redeem and reload a gift card when your application uses a custom order and payment processing system. The walkthrough assumes that you completed [Walkthrough 1: Sell a Gift Card](gift-cards/walkthrough-1) and have an activated gift card. {% aside type="info" %} To learn how to redeem or reload a gift card when your application integrates with the Orders API and Payments API, see [Redeem and Reload a Gift Card When Using Orders API and Payments API Integration.](gift-cards/walkthrough-2-orders-and-payments-integration) {% /aside %} {% toc hide=true /%} ## Step 1: Redeem the gift card for a purchase The following procedure shows a typical application flow for accepting a payment when your application uses a custom payment processing system. If your application supports gift card on file payments, first list the gift cards on file. Gift cards on file are made available by linking customer profiles to gift cards, which requires integration with the [Customers API](https://developer.squareup.com/reference/square/customers-api). After creating and processing the order and payment, you must call `CreateGiftCardActivity` in the Gift Card Activities API and create a `REDEEM` activity. **List gift cards on file** Before you begin, make sure that you [linked a customer to the gift card](gift-cards/walkthrough-2). {% aside type="info" %} Linking a customer profile to a gift card is only required to follow the steps in this walkthrough that take a payment from a gift card on file. Alternatively, to get the gift card ID to use for your custom payment processing, your application can collect the gift card account number (GAN) from the buyer and call [RetrieveGiftCardFromGAN](https://developer.squareup.com/reference/square/gift-cards-api/retrieve-gift-card-from-gan). {% /aside %} 1. If needed, call [SearchCustomers](https://developer.squareup.com/reference/square/customers-api/search-customers) to find the customer profile for the buyer. You can search by phone number, email address, and other supported attributes. For example, if the buyer signs in to your application using an email address, you can use the following request: ``` endpoint:Customers-SearchCustomers { "authentication": { "accessToken": "{ACCESS_TOKEN}" }, "bodyParameters": { "query": { "filter": { "email_address": { "exact": "{EMAIL_ADDRESS}" } } } } } ``` 1. Copy the `id` of the customer profile from the response. You use this ID to list the gift cards on file for the buyer in the next step. 1. Call [ListGiftCards](https://developer.squareup.com/reference/square/gift-cards-api/list-gift-cards) and specify the ID of the customer profile for the `customer_id` query parameter: ```` The following example response contains one gift card, which means that the buyer has only one gift card on file: ```json { "gift_cards": [ { "id": "gftc:012440e514754c42990f3de4527498dc", "type": "DIGITAL", "gan_source": "SQUARE", "state": "ACTIVE", "balance_money": { "amount": 2500, "currency": "USD" }, "gan": "7783320002382646", "created_at": "2021-04-11T18:49:34Z", "customer_ids": [ "62Y0FBFDQ0ZHDCGKBYP7FZK474" ] } ] } ``` 1. Allow the buyer to confirm or select the gift card they want to use for payment. For example, for each linked gift card in the `ACTIVE` state, display the last four digits of the GAN along with the gift card balance. If you're not taking a payment from a gift card on file, you can collect the GAN from the buyer. **Process the order and payment** 1. Create an order using your custom processing system. 2. Optional. Check the gift card balance and state by calling [RetrieveGiftCard](https://developer.squareup.com/reference/square/gift-cards-api/retrieve-gift-card) using the gift card ID or [RetrieveGiftCardFromGAN](https://developer.squareup.com/reference/square/gift-cards-api/retrieve-gift-card-from-gan) using the GAN that you collected from the buyer. 3. Take a payment from the gift card using your custom processing system. For this walkthrough, assume that you processed a $3 gift card payment. {% aside type="info" %} If you're using the Payments API with a custom ordering system, Square updates the balance when the payment is completed so you can skip the next step. {% /aside %} **Create a REDEEM activity to update the gift card balance** 1. Call [CreateGiftCardActivity](https://developer.squareup.com/reference/square/gift-card-activities-api/create-gift-card-activity) to update the gift card balance. The request must include either `gift_card_id` with the gift card ID or `gift_card_gan` with the GAN. This endpoint [supports various activity types.](gift-cards/using-gift-cards-api#supported-activity-types) For a `REDEEM` activity, you provide related details in the `redeem_activity_details` field: * For `amount_money`, specify the amount to deduct from the gift card balance. This example deducts $3. * For `reference_id`, optionally reference an object from your custom processing system, such as the ID of the associated order. ```` The following example response shows the updated gift card balance and the amount that was redeemed: ```json { "gift_card_activity": { "id": "gcact_e303d6390aae4573a38e8a7027c3f51a", "type": "REDEEM", "location_id": "S8GWD5R9QB376", "created_at": "2021-04-11T19:12:08.000Z", "gift_card_id": "gftc:012440e514754c42990f3de4527498dc", "gift_card_gan": "7783320002382646", "gift_card_balance_money": { "amount": 2200, "currency": "USD" }, "redeem_activity_details": { "amount_money": { "amount": 300, "currency": "USD" }, "reference_id": "custom-order-id", "status": "COMPLETED" } } } ``` 1. Optional. Show the updated balance to the buyer. ## Step 2: Add money to the gift card For this walkthrough scenario, the buyer wants to add money to the gift card balance after redeeming the gift card for a purchase. Buyers can load additional funds onto gift cards that are in an `ACTIVE` state. After collecting the funds from the buyer, you must call `CreateGiftCardActivity` in the Gift Card Activities API and create a `LOAD` activity that updates the gift card balance. The following procedure shows a typical application flow for reloading a gift card when your application uses a custom system to process orders and payments. First, you create an order for the amount to add to the gift card and then create the payment. After the payment is completed, you create a `LOAD` activity and provide the amount to add to the gift card, any payment instrument IDs, and an optional reference ID. **Process the order and payment** 1. Create an order using your custom processing system. This order defines the amount the buyer wants to add to the gift card. 1. Take a payment from the gift card using your custom processing system. For this walkthrough, assume that you processed a $10 payment. **Create a LOAD activity to update the gift card balance** 1. Call [CreateGiftCardActivity](https://developer.squareup.com/reference/square/gift-card-activities-api/create-gift-card-activity) to update the gift card balance. The request must include either `gift_card_id` with the gift card ID or `gift_card_gan` with the GAN. If needed, you can collect the GAN from the buyer. This endpoint [supports various activity types.](gift-cards/using-gift-cards-api#supported-activity-types) For a `LOAD` activity, you provide related details in the `load_activity_details` field: * For `amount_money`, specify the amount to add to the gift card. For this walkthrough, the amount is $10. * For `buyer_payment_instrument_ids`, specify any payment instrument IDs (such as a card ID or bank account ID) that was used for the payment. Square uses this information to perform [compliance checks.](gift-cards/using-gift-cards-api#compliance-limits) For this walkthrough, you can use the example value. * For `reference_id`, optionally reference an object from your custom processing system, such as the ID of the line item for the gift card amount. ```` The following example response shows the updated gift card balance and the amount that was added: ```json { "gift_card_activity": { "id": "gcact_7003b1adf7b042b19499280e2bf82e83", "type": "LOAD", "location_id": "S8GWD5R9QB376", "created_at": "2021-04-11T20:48:51.000Z", "gift_card_id": "gftc:012440e514754c42990f3de4527498dc", "gift_card_gan": "7783320002382646", "gift_card_balance_money": { "amount": 3200, "currency": "USD" }, "load_activity_details": { "amount_money": { "amount": 1000, "currency": "USD" }, "reference_id": "custom-line-item-id", "buyer_payment_instrument_ids": [ "card-id" ] } } } ``` 1. Optional. Show the updated balance to the buyer. ## Step 3: List gift card activities To see the activity history for a gift card, call [ListGiftCardActivities](https://developer.squareup.com/reference/square/gift-card-activities-api/list-gift-card-activities) using the `gift_card_id` query parameter. If needed, you can call [RetrieveGiftCardFromGAN](https://developer.squareup.com/reference/square/gift-cards-api/retrieve-gift-card-from-gan), [RetrieveGiftCardFromNonce](https://developer.squareup.com/reference/square/gift-cards-api/retrieve-gift-card-from-nonce), or [ListGiftCards](https://developer.squareup.com/reference/square/gift-cards-api/list-gift-cards) to get the gift card ID. The following example request lists all activities for the specified gift card. By default, the response returns a maximum [page size](build-basics/common-api-patterns/pagination) of 50 activities. ```` You can optionally use other query parameters to sort the activities and filter by activity type, location, and reporting period. {% aside type="info" %} If you encounter issues when running the cURL command from a terminal window, try wrapping the endpoint URL in quotation marks and resending the request. {% /aside %} **Viewing gift card activities in the Square Dashboard** Square sellers can view gift card activities in the Square Dashboard. Because you're testing this walkthrough in the Sandbox, you can review gift card activities in the Sandbox Square Dashboard. 1. Open the [Developer Console](https://developer.squareup.com/apps). 2. In the **Sandbox Test Accounts** section, choose **Open** next to **Default Test Account**. This opens the Sandbox Square Dashboard associated with the default test account. 3. In the left pane, choose **Gift Cards**. 4. On the **Overview** page, select the gift card from the list. A pane opens to display the gift card details and list of activities. You can search for a particular gift card by entering the full GAN in the **Search by Gift Card Number** box. --- # Redeem and Reload a Gift Card When Using Orders API and Payments API Integration > Source: https://developer.squareup.com/docs/gift-cards/walkthrough-2-orders-and-payments-integration > Status: PUBLIC > Languages: All > Platforms: All Learn how to redeem and reload a Square gift card when your application integrates with the Orders API and Payments API. This walkthrough shows how to redeem and reload a Square gift card when your application uses the Orders API and Payments API to process orders and payments. The walkthrough assumes that you completed [Walkthrough 1: Sell a Gift Card](gift-cards/walkthrough-1) and have an activated gift card. {% aside type="info" %} To learn how to redeem or reload a gift card when your application doesn't use the Orders API and Payments API, see [Redeem and Reload a Gift Card When Using a Custom Processing System.](gift-cards/walkthrough-2-custom-processing-system) {% /aside %} {% toc hide=true /%} ## Step 1: Redeem the gift card for a purchase When using the Payments API to take a gift card payment, the `source_id` of your `CreatePayment` request can specify either a gift card ID or a payment token generated from the [Web Payments SDK](web-payments/overview) or [In-App Payments SDK](in-app-payments-sdk/what-it-does). This walkthrough provides procedures for both options: * [Option 1: Create a payment using a gift card ID](#create-payment-using-gift-card-id) * [Option 2: Create a payment using a payment token](#create-payment-using-payment-token) {% anchor id="create-payment-using-gift-card-id" /%} ### Option 1: Create a payment using a gift card ID The following procedure shows a typical application flow for accepting a payment from a gift card on file when your application uses the Orders API and Payments API. First, you list the gift cards on file for the customer, create an order, and create the payment. After the payment is completed, Square automatically updates the gift card balance. **List gift cards on file** Before you begin, make sure that you [linked a customer to the gift card](gift-cards/walkthrough-2). {% aside type="info" %} Linking a customer profile to a gift card is only required to follow the steps in this walkthrough, which takes a payment from a gift card on file. Alternatively, to get the gift card ID to provide as the `source_id` in the `CreatePayment` request, your application can collect the gift card account number (GAN) from the buyer and call [RetrieveGiftCardFromGAN](https://developer.squareup.com/reference/square/gift-cards-api/retrieve-gift-card-from-gan). {% /aside %} 1. If needed, call [SearchCustomers](https://developer.squareup.com/reference/square/customers-api/search-customers) to find the customer profile for the buyer. You can search by phone number, email address, and other supported attributes. For example, if the buyer signs in to your application using an email address, you can use the following request: ``` endpoint:Customers-SearchCustomers { "authentication": { "accessToken": "{ACCESS_TOKEN}" }, "bodyParameters": { "query": { "filter": { "email_address": { "exact": "{EMAIL_ADDRESS}" } } } } } ``` 1. Copy the `id` of the customer profile from the response. You use this ID to list the gift cards on file for the buyer in the next step. 1. Call [ListGiftCards](https://developer.squareup.com/reference/square/gift-cards-api/list-gift-cards) and specify the ID of the customer profile for the `customer_id` query parameter: ```` The following example response contains one gift card, which means that the buyer has only one gift card on file: ```json { "gift_cards": [ { "id": "gftc:012440e514754c42990f3de4527498dc", "type": "DIGITAL", "gan_source": "SQUARE", "state": "ACTIVE", "balance_money": { "amount": 2500, "currency": "USD" }, "gan": "7783320002382646", "created_at": "2021-04-11T18:49:34Z", "customer_ids": [ "62Y0FBFDQ0ZHDCGKBYP7FZK474" ] } ] } ``` 1. Allow the buyer to confirm or select the gift card they want to use for payment. For example, for each linked gift card in the `ACTIVE` state, display the last four digits of the GAN along with the gift card balance. 5. Copy the `id` of the selected gift card. You use this ID when you create the payment. **Create the order** 1. Call [CreateOrder](https://developer.squareup.com/reference/square/orders-api/create-order) to create an order. ```` 1. Copy the `id` of the order from the response. You use this ID when you create the payment. **Create the payment** 1. Call [CreatePayment](https://developer.squareup.com/reference/square/payments-api/create-payment) to pay for the order using the gift card ID. Specify the gift card ID for `source_id` and the order ID for `order_id`. ```` The response should show that the payment status is `COMPLETED` and the `card_details` status is `CAPTURED`. Note that Square also supports [taking partial payments with Square gift cards.](payments-api/take-payments/card-payments/partial-payments-with-gift-cards) When you use the Payments API to process the payment, Square automatically creates a `REDEEM` activity that updates the gift card balance after the payment is successfully completed. 1. Optional. [Retrieve the gift card](gift-cards/retrieve-gift-cards-and-activities#retrieve-a-gift-card) and get the updated balance to display to the buyer. {% anchor id="create-payment-using-payment-token" /%} ### Option 2: Create a payment using a payment token The following procedure shows a typical application flow for using the Web Payments SDK or In-App Payments SDK to take a gift card payment. First, you create an order, generate a payment token, and create the payment. After the payment is completed, Square automatically updates the gift card balance. **Create the order** 1. Call [CreateOrder](https://developer.squareup.com/reference/square/orders-api/create-order) to create an order. ```` 1. Copy the `id` of the order from the response. You use this ID when you create the payment. **Generate the payment token** 1. After the buyer enters the gift card account number (GAN) in your payment form, the Web Payments SDK or In-App Payments SDK generates a secure payment token for the gift card. For more information, see [Take a Gift Card Payment](web-payments/gift-card) (Web Payments SDK) or [Gift Card Payments](in-app-payments-sdk/cookbook/giftcards) (In-App Payments SDK). {% aside type="info" %} For this walkthrough, you skip this step and use a [test payment token](devtools/sandbox/payments#testing-a-card-payment) for your `CreatePayment` request in the next step. Test payment tokens cannot be used to retrieve a gift card, so you also skip the optional step of calling [RetrieveGiftCardFromNonce](https://developer.squareup.com/reference/square/gift-cards-api/retrieve-gift-card-from-nonce) to get the gift card balance and state before creating the payment. {% /aside %} **Create the payment** 1. Call [CreatePayment](https://developer.squareup.com/reference/square/payments-api/create-payment) to pay for the order using the payment token. Specify the order ID for `order_id`. Note that the `cnon:gift-card-nonce-ok` value specified for `source_id` is the test payment token for a Sandbox gift card. ```` The response should show that the payment status is `COMPLETED` and the `card_details` status is `CAPTURED`. Note that Square also supports [taking partial payments with Square gift cards.](payments-api/take-payments/card-payments/partial-payments-with-gift-cards) When you use the Payments API to process the payment, Square automatically creates a `REDEEM` activity that updates the gift card balance after the payment is successfully completed. 1. Optional. [Retrieve the gift card](gift-cards/retrieve-gift-cards-and-activities#retrieve-a-gift-card) and get the updated balance to display to the buyer. {% aside type="info" %} For this walkthrough, you skip this step. The test payment token used for the `CreatePayment` request isn't associated with your gift card, so the balance wasn't updated. Calling the `RetrieveGiftCardFromNonce` endpoint in the production environment enables you to retrieve a gift card using a payment token. Neither the Web Payments SDK, In-App Payments SDK, nor `CreatePayment` response expose the gift card ID or full GAN. {% /aside %} ## Step 2: Add money to the gift card For this walkthrough scenario, the buyer wants to add money to the gift card balance after redeeming the gift card for a purchase. Buyers can load additional funds onto gift cards that are in an `ACTIVE` state. After collecting the funds from the buyer, you must call `CreateGiftCardActivity` in the Gift Card Activities API and create a `LOAD` activity that updates the gift card balance. The following procedure shows a typical application flow for reloading a gift card when your application uses the Orders API and Payments API. First, you create an order for the amount to add to the gift card, generate a payment token, and create the payment. After the payment is completed, you create a `LOAD` activity and provide the order and line item IDs. **Create the order** 1. Call [CreateOrder](https://developer.squareup.com/reference/square/orders-api/create-order) to create an order for the amount to add to the gift card. In the order, the line item for the gift card funds must specify an `item_type` of `GIFT_CARD`. Otherwise, the order isn't processed as a gift card order and the corresponding `LOAD` activity doesn't succeed. ```` 1. Copy the `id` of the order and the `uid` of the `GIFT_CARD` line item from the response. * You provide the ID of the order when you pay for the order and load the gift card. * You provide the UID of the `GIFT_CARD` line item when you load the gift card. **Generate the payment token** 1. After the buyer enters the credit card number in your payment form, the [Web Payments SDK](web-payments/overview) or [In-App Payments SDK](in-app-payments-sdk/what-it-does) generates a secure payment token for the credit card. {% aside type="info" %} For this walkthrough, you skip this step and use a [test payment token](devtools/sandbox/payments#testing-a-card-payment) as the `source_id` for your `CreatePayment` request in the next step. {% /aside %} **Create the payment** 1. Call [CreatePayment](https://developer.squareup.com/reference/square/payments-api/create-payment) to pay for the order. Specify the order ID for `order_id`. Note that the `cnon:card-nonce-ok` value specified for `source_id` is the test payment token for a Sandbox credit card. ```` The response should show that the payment status is `COMPLETED` and the `card_details` status is `CAPTURED`. Because the order is now fully paid, Square sets the order state to `COMPLETED`. **Create a LOAD activity to update the gift card balance** 1. Call [CreateGiftCardActivity](https://developer.squareup.com/reference/square/gift-card-activities-api/create-gift-card-activity) to update the gift card balance. The request must include either the `gift_card_id` with the gift card ID or the `gift_card_gan` with the GAN. If needed, you can collect the GAN from the buyer. This endpoint [supports various activity types.](gift-cards/using-gift-cards-api#supported-activity-types) For a `LOAD` activity, you provide related details in the `load_activity_details` field: * For `order_id`, specify the ID of the order. The order state must be `COMPLETED`. * For `line_item_uid`, specify the UID of the gift card line item. Square reads the order information to determine the amount to add to the gift card. ```` The following example response shows the updated gift card balance and the amount that was added: ```json { "gift_card_activity": { "id": "gcact_add1aab7693e4fa6891d0597ee3f63dd", "type": "LOAD", "location_id": "S8GWD5R9QB376", "created_at": "2021-04-11T19:21:59.000Z", "gift_card_id": "gftc:01696eaf3d5141bfb4c7869494257bb6", "gift_card_gan": "7783320005719034", "gift_card_balance_money": { "amount": 1901, "currency": "USD" }, "load_activity_details": { "amount_money": { "amount": 1000, "currency": "USD" }, "order_id": "UXEmEo3X5XYPyfKIrB4tde4LupGZY", "line_item_uid": "m2nFRgmD4AhdUmDxmDhRBC" } } } ``` 1. Optional. Show the updated balance to the buyer. ## Step 3: List gift card activities To see the activity history for a gift card, call [ListGiftCardActivities](https://developer.squareup.com/reference/square/gift-card-activities-api/list-gift-card-activities) using the `gift_card_id` query parameter. If needed, you can call [RetrieveGiftCardFromGAN](https://developer.squareup.com/reference/square/gift-cards-api/retrieve-gift-card-from-gan), [RetrieveGiftCardFromNonce](https://developer.squareup.com/reference/square/gift-cards-api/retrieve-gift-card-from-nonce), or [ListGiftCards](https://developer.squareup.com/reference/square/gift-cards-api/list-gift-cards) to get the gift card ID. The following example request lists all activities for the specified gift card. By default, the response returns a maximum [page size](build-basics/common-api-patterns/pagination) of 50 activities. ```` You can optionally use other query parameters to sort the activities and filter by activity type, location, and reporting period. {% aside type="info" %} If you encounter issues when running the cURL command from a terminal window, try wrapping the endpoint URL in quotation marks and resending the request. {% /aside %} **Viewing gift card activities in the Square Dashboard** Square sellers can view gift card activities in the Square Dashboard. Because you're testing this walkthrough in the Sandbox, you can review gift card activities in the Sandbox Square Dashboard. 1. Open the [Developer Console](https://developer.squareup.com/apps). 2. In the **Sandbox Test Accounts** section, choose **Open** next to **Default Test Account**. This opens the Sandbox Square Dashboard associated with the default test account. 3. In the left pane, choose **Gift Cards**. 4. On the **Overview** page, select the gift card from the list. A pane opens to display the gift card details and list of activities. You can search for a particular gift card by entering the full GAN in the **Search by Gift Card Number** box. --- # Create and Activate a Gift Card When Using a Custom Processing System > Source: https://developer.squareup.com/docs/gift-cards/walkthrough-1-without-orders-api > Status: PUBLIC > Languages: All > Platforms: All Provides steps that show how to sell a Square gift card when your application uses a custom order processing system. This walkthrough shows how to sell a gift card when your application uses a custom order and payment processing system instead of the Orders API and Payments API. After processing the order to purchase a gift card, you create a gift card and activate it with an initial balance. Because you are using a custom processing system, you specify the balance amount and payment instrument IDs when you activate the card. After the gift card is activated, it's ready for use. {% toc hide=true /%} ## Step 1: Create and pay for a gift card order For the purposes of this walkthrough, assume that your application processed a $25 gift card purchase using your custom order and payment processing system. {% aside type="info" %} To learn how to use the Square Orders API and Payments API to process the gift card order and payment, see [Create and Activate a Gift Card When Using Orders API Integration](gift-cards/walkthrough-1-with-orders-api). {% /aside %} ## Step 2: Create and activate a gift card After the buyer pays for the gift card order, you create a gift card using the Gift Cards API and activate the gift card with an initial balance using the Gift Card Activities API. ### Create the gift card 1. Call [CreateGiftCard](https://developer.squareup.com/reference/square/gift-cards-api/create-gift-card) to create a digital gift card. ```` The previous request specifies only the gift card `type`, which directs Square to generate the gift card account number (GAN). However, providing a [custom GAN](gift-cards/using-gift-cards-api#custom-gans) is also supported. {% aside type="info" %} This walkthrough creates a digital gift card in the Sandbox. Although testing physical gift cards isn't supported in the Sandbox, you can register and activate physical gift cards in the production environment using the process described in this walkthrough. {% /aside %} The following example response shows the gift card state is `PENDING` and the current balance is `0`. ```json { "gift_card": { "id": "gftc:01696eaf3d5141bfb4c7869494257bb6", "type": "DIGITAL", "gan_source": "SQUARE", "state": "PENDING", "balance_money": { "amount": 0, "currency": "USD" }, "gan": "7783320005719034", "created_at": "2021-04-11T20:31:43Z" } } ``` 2. Copy the `id` from the response. You use this value to activate the gift card. ### Activate the gift card 1. Call [CreateGiftCardActivity](https://developer.squareup.com/reference/square/gift-card-activities-api/create-gift-card-activity) to activate the gift card with an initial balance. The request must include either `gift_card_id` with the gift card ID or `gift_card_gan` with the GAN. This endpoint [supports various activity types.](gift-cards/using-gift-cards-api#supported-activity-types) For an `ACTIVATE` activity, you provide activity-specific details in the `activate_activity_details` field: * For `amount_money`, specify the amount of money to add to the gift card balance. This example adds $25. * For `buyer_payment_instrument_ids`, specify any card IDs, bank account IDs, or other payment instrument IDs used for the gift card purchase. Square uses this information to perform [compliance checks.](gift-cards/using-gift-cards-api#compliance-limits) For this walkthrough, you can use the example values. * For `reference_id`, optionally reference an object from your custom order and payment processing system. For this walkthrough, you can use the example value. ```` The following is an example response: ```json { "gift_card_activity": { "id": "gcact_e091f58d49b94d149587a94560b24c60", "type": "ACTIVATE", "location_id": "S8GWD5R9QB376", "created_at": "2021-04-11T20:38:49.000Z", "gift_card_id": "gftc:01696eaf3d5141bfb4c7869494257bb6", "gift_card_gan": "7783320005719034", "gift_card_balance_money": { "amount": 2500, "currency": "USD" }, "activate_activity_details": { "amount_money": { "amount": 2500, "currency": "USD" }, "reference_id": "client-side-payment-id", "buyer_payment_instrument_ids": [ "card-id-1", "card-id-2" ] } } } ``` 2. Optional. Call [RetrieveGiftCard](https://developer.squareup.com/reference/square/gift-cards-api/retrieve-gift-card) to see that the gift card state is set to `ACTIVE` and the balance is $25. ```` The following is an example response: ```json { "gift_card": { "id": "gftc:01696eaf3d5141bfb4c7869494257bb6", "type": "DIGITAL", "gan_source": "SQUARE", "state": "ACTIVE", "balance_money": { "amount": 2500, "currency": "USD" }, "gan": "7783320005719034", "created_at": "2021-04-11T20:31:43Z" } } ``` ## Step 3: (Optional) Review gift card reports in the Square Dashboard In the Square Dashboard, the gift card is reported as activated. Because you are using the Sandbox for testing, you can view the reports in the Sandbox Square Dashboard associated with your Sandbox test account. 1. Open the [Developer Console](https://developer.squareup.com/apps). 2. In the left pane, choose **Sandbox test accounts**. 3. For **Default Test Account**, choose **Square Dashboard**. 4. Choose **Reports**. 5. Choose **Gift Cards** and verify that **Activations** includes the activity and gift card amount. The gift card is also now listed in the **Gift Cards** section of the Sandbox Square Dashboard. ## Step 4: Send the gift card Buyers can purchase a gift card for themselves or for another recipient. The Gift Cards API doesn't provide email support, so your application must handle the [delivery of the gift card information.](gift-cards/sell-gift-cards#deliver-gift-card) For example, your application might choose to: * Show gift card information on your application's website. * Email gift card information to the recipient. ## Next step Continue to [Walkthrough 2: Use a Gift Card](gift-cards/walkthrough-2) and learn how to pay for an order using an activated gift card. In addition, you can explore the Gift Cards and Gift Card Activities APIs in other ways. For example, you can try out the [Gift Cards sample](https://github.com/square/connect-api-examples/tree/master/connect-examples/v2/node_gift-cards) (Node.js) or build and send API requests from [API Explorer](https://developer.squareup.com/explorer/square) using your Sandbox access token. --- # Customers API > Source: https://developer.squareup.com/docs/customers-api/what-it-does > Status: PUBLIC > Languages: All > Platforms: All Learn more about managing customer profiles with the Square Customers API. **Applies to:** [Customers API](https://developer.squareup.com/reference/square/customers-api) | [GraphQL](devtools/graphql) | [Customer Custom Attributes API](customer-custom-attributes-api/overview) | [Cards API](cards-api/overview) | [Gift Cards API](gift-cards/using-gift-cards-api) {% subheading %}Learn about the Customers API and how to manage customer profiles.{% /subheading %} {% toc hide=true /%} ## Overview The [Square Customer Directory](https://squareup.com/point-of-sale/features/customer-directory) is a customer relationship management (CRM) tool where Square sellers store customer information, analyze customer interactions and activity, and more. Each customer has a corresponding customer profile — a record of the customer's contact and personal information (such as name, email address, phone number, and birthday) and supplemental information (such as the groups or segments the customer belongs to). Customer profiles are created through Square APIs, the Square Dashboard, Square Point of Sale, and other Square products or experiences. The Customers API lets you create and manage customer profiles for Square sellers, including memberships in customer groups. The Customers API is often used with other Square APIs, Square products, and third-party tools to provide robust experiences for sellers and their customers. The lean and flexible interface makes it easy to integrate custom functionality into eCommerce and other experiences, typically across analytics, marketing, loyalty, and personalization channels. Examples of activities you can perform using the Customers API include: * Keeping customer records for a Square seller account. * Synchronizing customer data with the Customer Directory by using [webhooks](customers-api/use-the-api/customer-webhooks) and polling for changes. * Searching for customers using supported query filters. * Integrating customer data with other Square services to facilitate the customer purchasing experience. {% aside type="info" %} Applications typically collect customer information from their frontend client and call the Customers API from their backend server (for example, see [Basic process flow)](customers-api/how-it-works#basic-process-flow). The developer must create the UI that collects customer information. Square doesn't provide a prebuilt form for this purpose. {% /aside %} ## Requirements and limitations * **OAuth permissions** - Applications that use OAuth must have appropriate `CUSTOMER_READ` or `CUSTOMER_WRITE` access permissions to manage customer profiles. For more information, see [Permissions Reference for the Customers API](oauth-api/square-permissions#customers) and [OAuth API](oauth-api/overview). * **Collecting and storing PII** - You must obtain permission from customers before you store their information. You must protect personally identifiable information (PII) and other sensitive information, such as customer name, address, and phone number. Abuse of customer contact information might result in your application being disabled without notice. For more information, see [Best Practices for Collecting Information](build-basics/collecting-information). * **Avoiding duplicate customer profiles** - The `CreateCustomer` and `BulkCreateCustomers` endpoints don't check for duplicate records during profile creation. To avoid creating duplicate profiles, call the `SearchCustomers` endpoint and search by phone number, email address, or reference ID to determine whether a profile of the customer already exists. For more information, see [Search for Customer Profiles](customers-api/use-the-api/search-customers). * **Searching the Customer Directory** - The [SearchCustomers](https://developer.squareup.com/reference/square/customers-api/search-customers) endpoint doesn't support searching by name, location, or the employee who created the customer profile. For information about supported search query filters, such as email address and phone number, see [Search for Customer Profiles](customers-api/use-the-api/search-customers). * **Customer linking limitation** - Orders made from Square Online stores might not include a `customer_id` when retrieved from the Orders API, so you shouldn't rely on this field for your integration. Instead, consider using the `customer_id` field of the corresponding payment. For more information, see [Customer assignments for orders and payments](customers-api/use-the-api/integrate-with-other-services#customer-assignments-for-orders-and-payments). * **Incomplete order history for merged customer profiles** - When a customer ID is changed as a result of a merge operation, searching for orders using the new customer ID doesn't currently return any orders made using a previous customer ID. For more information, see [Customer assignments for orders and payments](customers-api/use-the-api/integrate-with-other-services#customer-assignments-for-orders-and-payments). {% anchor id="no-public-information" %}{% /anchor %} * **Accessing instant profiles that have no public information** - Under certain conditions, Square might create instant profiles that don't have public information (such as a given name, family name, email address, phone number, or company name). For example, if a customer doesn't provide an email address or phone number at the time of purchase, Square creates a new `Customer` object to associate with the `Payment` object for the purchase. Square uses these `Customer` objects for activities such as tracking repeat purchases. Instant profiles that don't contain public information cannot be viewed or accessed from the Square Dashboard. In addition, this type of instant profile isn't returned in a `ListCustomers` or `SearchCustomers` response, even if the `creation_source` search query filter is set to `INSTANT_PROFILE`. However, if you have the customer ID, you can use it to call `RetrieveCustomer`, `UpdateCustomer`, `DeleteCustomer`, `BulkRetrieveCustomers`, `BulkUpdateCustomers`, `BulkDeleteCustomers`, or `SearchOrders`. * **Rate limiting** - If your application sends a high number of calls to Square APIs in a short period of time, you should make sure to handle potential `429` rate limiting errors. For more information, see [Rate limiting errors](build-basics/general-considerations/handling-errors#rate-limiting). {% anchor id="customer-tax-ids" /%} * **Customer tax IDs** - For sellers in France, Ireland, Spain, and the United Kingdom, customer profiles can include a `tax_ids` field that contains the [EU VAT identification number](https://ec.europa.eu/taxation_customs/vat-identification-numbers) of the customer. The following excerpt shows an example customer profile that includes the `tax_ids` field: ```json { "customer": { "id": "TNQC0TYTWMRSFFQ157KK4V7MVR", "created_at": "2020-03-23T20:21:54.859Z", "updated_at": "2021-07-14T18:25:21.342Z", ... "tax_ids": { "eu_vat": "IE3426675K" } } } ``` Note the following considerations: * If `tax_ids` is specified in `CreateCustomer`, `UpdateCustomer`, `BulkCreateCustomers`, or `BulkUpdateCustomers` requests in other countries, Square returns a `400 BAD_REQUEST` error for Square API version 2021-10-20 or later. For earlier versions, Square ignores this field. * Square doesn't verify that the `eu_vat` identification number is a valid tax ID. * Square doesn't automatically merge customer profiles that explicitly specify different `eu_vat` identification numbers. * You can call [RetrieveMerchant](https://developer.squareup.com/reference/square/merchants-api/retrieve-merchant) if you want to check the [country](https://developer.squareup.com/reference/square/objects/Merchant#definition__property-country) of the seller account before attempting to set the `tax_ids` field. * **Unsupported first-party features** - The Customers API doesn't support all customer profile attributes or all features that are available in the Square products, such as the Square Dashboard. For example: * **Email or text messages** - Sellers can send email or text messages directly to a customer from the Square Dashboard (in the production environment only). The Customers API cannot be used to send email or text messages. * **Notes with reminders** - The rich notes with optional reminders that sellers can create in the Square Dashboard cannot be accessed through the Customers API. However, the `Customer.note` field can contain simple text that displays under **Other** details for the customer profile in the Square Dashboard (or under **Personal information** the Sandbox Square Dashboard). * **Private customer feedback** - The private feedback that customers can provide from an emailed receipt isn't included in the `Customer` object. For more information about this feature, see [Private customer feedback you can work with](https://squareup.com/customer-engagement/feedback). * **Marketing campaign email preferences** - The `email_unsubscribed` preference indicates whether the customer has unsubscribed from marketing campaign emails. A value of `true` means that the customer has opted out of email marketing from the current Square seller or from all Square sellers. This value is read-only from the Customers API. For information about how customers can set their preferences, see [How Customers Can Unsubscribe From Square Marketing Emails](https://squareup.com/help/article/6549-how-customers-can-unsubscribe-from-square-marketing-emails). * **Activate Square account for payment processing** - Before you can use Square APIs to process payments, your Square account must be fully activated and enabled for payment processing. If you haven't enabled payment processing on your account (or if you're not sure), visit [squareup.com/activation](https://squareup.com/activation). ## Supported operations You can use Customers API endpoints to perform the following operations in a seller account. ### Manage customers The following endpoints are used to [manage customer profiles](customers-api/use-the-api/keep-records): * [CreateCustomer](https://developer.squareup.com/reference/square/customers-api/create-customer) - Create a single customer profile. * [UpdateCustomer](https://developer.squareup.com/reference/square/customers-api/update-customer) - Update a single customer profile. * [DeleteCustomer](https://developer.squareup.com/reference/square/customers-api/delete-customer) - Delete a single customer profile. * [BulkCreateCustomers](https://developer.squareup.com/reference/square/customers-api/bulk-create-customers) - Create multiple customer profiles. * [BulkUpdateCustomers](https://developer.squareup.com/reference/square/customers-api/bulk-update-customers) - Update multiple customer profiles. * [BulkDeleteCustomers](https://developer.squareup.com/reference/square/customers-api/bulk-delete-customers) - Delete multiple customer profiles. {% aside type="info" %} You should avoid creating duplicate customer profiles. Before you create a new profile, call the [SearchCustomers](https://developer.squareup.com/reference/square/customers-api/search-customers) endpoint and search by phone number, email address, or reference ID to make sure a profile doesn't already exist for the customer. {% /aside %} ### Retrieve customers The following endpoints are used to [retrieve customer profiles](customers-api/use-the-api/retrieve-profiles): * [RetrieveCustomer](https://developer.squareup.com/reference/square/customers-api/retrieve-customer) - Retrieve a customer using the customer ID. * [BulkRetrieveCustomers](https://developer.squareup.com/reference/square/customers-api/bulk-retrieve-customers) - Retrieve multiple customer profiles using customer IDs. * [ListCustomers](https://developer.squareup.com/reference/square/customers-api/list-customers) - List the customer profiles. You can also use the `count` query parameter to get the seller's total customer count. ### Search for customers The following endpoint is used to [search for customer profiles](customers-api/use-the-api/search-customers): * [SearchCustomers](https://developer.squareup.com/reference/square/customers-api/search-customers) - Search for customer profiles using one or more query filters. ### Manage group membership The following endpoints are used to [manage customer group membership](customer-groups-api/how-to-use-it#manage-customer-group-membership): * [AddGroupToCustomer](https://developer.squareup.com/reference/square/customers-api/add-group-to-customer) - Assign a group membership to a customer profile. * [RemoveGroupFromCustomer](https://developer.squareup.com/reference/square/customers-api/remove-group-from-customer) - Remove a group membership from a customer profile. {% aside type="important" %} If you save customer contact information, you must obtain explicit permission from the customer. This means you should enable an option for the customer to agree explicitly to have their contact information stored on file. Storing customer contact information without explicit consent and any other form of abuse of customer information might result in your application being disabled without notice. {% /aside %} ## Customer components The Customers API works with the following primary data types: * [Customer](https://developer.squareup.com/reference/square/objects/Customer) - A single customer profile that contains contact and other personal information such as name, address, email, and phone number. * [Address](https://developer.squareup.com/reference/square/objects/Customer#definition__property-address) - A collection of string fields that represent a physical address. * [CustomerGroup](https://developer.squareup.com/reference/square/objects/CustomerGroup) - A group of customer profiles whose membership is explicitly defined. * [CustomerSegment](https://developer.squareup.com/reference/square/objects/CustomerSegment) - A group of customer profiles whose membership is dynamically defined by filter criteria. * [CustomerPreferences](https://developer.squareup.com/reference/square/objects/CustomerPreferences) - A customer's preference for receiving marketing emails and contains a single field that can have a true or false value. A `Customer` object requires at least one of the following attributes: * A first or last name. * The name of the company where the customer works. * An email address, which must have the @ symbol and a valid domain. * A phone number, which must meet [validation criteria](customers-api/use-the-api/keep-records#phone-number). `Customer` objects might also contain other attributes, such as: * An address. * A note about the customer. This `note` field is separate from the rich Notes feature in the Square Dashboard, which doesn't provide any API access. * A reference ID to associate the customer with an entity in another system. * Lists of the IDs of the customer groups and customer segments the customer belongs to. `Customer` objects can be associated with a collection of [custom attributes](#custom-attributes) that store properties that aren't natively available on the object. ### Square API integration Built-in integration between customers and other Square APIs is typically surfaced through a `customer_id` field on various objects. For example, when present on an `Order`, the `customer_id` field contains the ID of the customer who placed the order. The customer ID can be used with supported `List` and `Search` endpoints. For more information, see [Customer ID integration points](customers-api/use-the-api/integrate-with-other-services#customer-id-integration-points). ## Sorting and searching customer profiles The Customers API provides two ways to return a list of customer profiles: * [ListCustomers](https://developer.squareup.com/reference/square/customers-api/list-customers) returns an unfiltered list of customer profiles in sorted order. * [SearchCustomers](https://developer.squareup.com/reference/square/customers-api/search-customers) returns a filtered list of customer profiles in sorted order. {% aside type="tip" %} [Square GraphQL](devtools/graphql) queries can also be used to access customer data. {% /aside %} ### Sorting By default, customer profiles are sorted alphanumerically by concatenating the `given_name` and `family_name` fields. If neither field is set, the following fields are compared in the following order: * `company_name` * `email_address` * `phone_number` ### Searching The [SearchCustomers](https://developer.squareup.com/reference/square/customers-api/search-customers) endpoint allows you to search for customer profiles using the following filters: * `phone_number` * `email_address` * `creation_source` * `created_at` * `updated_at` * `reference_id` * `group_ids` * `segment_ids` * `custom_attribute` A search query can contain multiple query filters in any combination, which are combined as `AND` statements. For more information, see [Search for Customer Profiles](customers-api/use-the-api/search-customers). ## Retrieving a customer profile by ID The Customers API provides the [RetrieveCustomer](https://developer.squareup.com/reference/square/customers-api/retrieve-customer) and [BulkRetrieveCustomers](https://developer.squareup.com/reference/square/customers-api/bulk-retrieve-customers) endpoints that you can use to retrieve one or more customer profiles by ID. The ID is stored in the `id` field in the corresponding `Customer` object. When duplicate customer profiles are identified and merged, either manually by the seller or using automated detection, the existing profiles are merged into a single profile that is assigned a new ID. If you specify the ID of a customer profile that was deleted in a merge operation, the Customers API returns the new customer profile. For example, suppose customers A and B are merged and a new customer C is created. If you call `RetrieveCustomer` using the ID of customer A or B, the Customers API returns customer C. {% anchor id="instant-profiles" /%} ## Instant profiles Instant profiles are customer profiles that are automatically created in a seller's Customer Directory following a payment. Future purchases made with the same card update the profile history with new payment details and other activities for your business. When a payment is created without an explicit customer assignment, Square attempts to infer the associated customer. First, Square checks the `customer_id` field in the corresponding order. If this field isn't set, Square searches the Customer Directory for a matching profile using payment or related information (such as the billing and shipping address, email address, and payment source). If one cannot be found, Square attempts to create an instant profile. Note that this process is asynchronous and might take some time before `customer_id` is added to the payment. If Square cannot find a matching customer profile and cannot create an instant profile, the `customer_id` field of the payment remains unset. {% aside type="info" %} Some regions prevent the creation of instant profiles or allow sellers to disable this feature. If the `customer_id` isn't set for a payment made using a non-payment-card payment method (such as gift card, ACH, or Cash App), Square doesn't attempt to find or create a customer profile to populate the `customer_id` field. {% /aside %} `Customer` objects that represent instant profiles have the `creation_source` field set to `INSTANT_PROFILE`. While instant profiles can be merged with other customer profiles in the Square Dashboard, merging doesn't retroactively link completed transactions to the newly created profile (that is, the `customer_id` field remains unchanged). To [track merged customer profiles,](customers-api/use-the-api/customer-webhooks#notifications-for-customer-profile-merge-events) subscribe to the `customer.created` webhook event. {% anchor id="custom-attributes" /%} ## Custom attributes Custom attributes can be used to extend the `Customer` data model by associating seller-specific or application-specific information with customer profiles. Custom attributes can store properties or metadata that help simplify integration, synchronization, and personalization workflows. Working with custom attributes is different than working with native attributes that are accessed using the Customers API, such as `given_name` and `email_address`. For example, custom attributes aren't returned in a `RetrieveCustomer` or `ListCustomers` response or managed using `CreateCustomer` or `UpdateCustomer`. In addition, the custom attribute definition must be created in the Square seller account before the corresponding value can be assigned to custom profiles in the seller's Customer Directory. To create and manage custom attribute definitions and custom attributes, use the [Customer Custom Attributes API](customer-custom-attributes-api/overview). {% anchor id="customer-profile-version" /%} ## Customer profile versions and optimistic concurrency support Customer profiles contain a `version` attribute that represents the current version of the customer profile. When a customer profile is created, the version is set to 0. Square increments the version each time the profile is updated, except for changes to customer segment membership, cards on file, or features that are available only in Square products. For example, the version increments after changes to contact information, group membership, or email preferences but not after changes to the notes or custom fields managed in the Square Dashboard. The source of an update can be Square products, third-party applications, or an internal operation performed by Square. You can use the `version` attribute to enable optimistic concurrency control. When you include `version` in an [UpdateCustomer](https://developer.squareup.com/reference/square/customers-api/update-customer), [BulkUpdateCustomers](https://developer.squareup.com/reference/square/customers-api/bulk-update-customers), or [DeleteCustomer](https://developer.squareup.com/reference/square/customers-api/delete-customer) request, the operation fails if the current version of the customer profile is newer than the version specified in the request. For more information, see [Optimistic Concurrency](build-basics/common-api-patterns/optimistic-concurrency). Square also uses the version to filter events that trigger [webhook notifications](customers-api/use-the-api/customer-webhooks). If concurrent updates are made to the same customer profile, Square compares the version numbers and sends a notification for the latest version only. Similarly, if you process notifications in batches, you can use the `version` attribute of the `Customer` object in the notification to determine the latest version of an updated customer profile. Customers API endpoints don't support actions against previous versions of the customer profile. ## Customer profiles and cards on file Credit cards, debit cards, and gift cards can be associated with customer profiles. You can use the [Cards API](cards-api/overview) and [Gift Cards API](gift-cards/using-gift-cards-api) to save and manage cards on file for a customer. The `customer_id` field is used to map cards to a customer profile. {% aside type="info" %} The `CreateCustomerCard` endpoint, `DeleteCustomerCard` endpoint, and `Customer.cards` field are deprecated. For more information, see [Migrate to the Cards API and Gift Cards API](#migrate-createcustomercard). {% /aside %} ## Customer profiles and cash transactions POS applications attempt to implicitly link cash tenders to existing customer profiles based on the provided receipt email or phone number. Implicit links to customer profiles show up in POS applications and the Square Dashboard. ## Migration notes The following migration notes apply to the Customers API. {% anchor id="migrate-address-updates" /%} ### Sparse updates and null updates for the address field in UpdateCustomer requests The `UpdateCustomer` endpoint now supports [sparse updates](build-basics/clearing-fields#sparse-updates) for the `address` field. With sparse updates, only fields that are added or changed are required in the request. In addition, removing the `address` field now requires the [null update method.](build-basics/clearing-fields#clear-a-field-value) Earlier Square versions continue to require the complete `address` field for updates and accept an empty object (`{}`) to clear the field. Starting in version: 2022-11-16 The following example requests are based on the Square version: * **Square version 2022-11-16 and later** The following example request includes three address fields. These fields are updated if they are already defined or added if they aren't already defined. ```` The following example request updates the `address.address_line_1` field and removes the `address.address_line_2` field using the recommended null update method. For null update operations, the `X-Clear-Null` header must be present and set to `true`. ```curl curl https://connect.squareupsandbox.com/v2/customers/{CUSTOMER_ID} \ -X PUT \ -H 'Square-Version: 2022-11-16' \ -H 'Authorization: Bearer {ACCESS_TOKEN}' \ -H 'Content-Type: application/json' \ -H 'X-Clear-Null: true' \ -d '{ "address": { "address_line_1": "505 Gardenia Lane", "address_line_2": null }, "version": 1 }' ``` The following example request removes the `address` field from the customer profile. For null update operations, the `X-Clear-Null` header must be present and set to `true`. ```curl curl https://connect.squareupsandbox.com/v2/customers/{CUSTOMER_ID} \ -X PUT \ -H 'Square-Version: 2022-11-16' \ -H 'Authorization: Bearer {ACCESS_TOKEN}' \ -H 'Content-Type: application/json' \ -H 'X-Clear-Null: true' \ -d '{ "address": null, "version": 2 }' ``` {% aside type="info" %} `String`-type fields can be cleared using the null update method (recommended) or by setting the value to an empty string. However, specifying `"address": {}` has no effect and doesn't clear the field. {% /aside %} * **Square version 2022-10-19 and earlier** The following example request includes the complete address. This operation is an atomic update that replaces the entire address. ```curl curl https://connect.squareupsandbox.com/v2/customers/{CUSTOMER_ID} \ -X PUT \ -H 'Square-Version: 2022-10-19' \ -H 'Authorization: Bearer {ACCESS_TOKEN}' \ -H 'Content-Type: application/json' \ -d '{ "address": { "address_line_1": "1313 Main St", "address_line_2": "Apt 2B", "locality": "Springfield", "administrative_district_level_1": "MA", "postal_code": "01119" }, "version": 0 }' ``` The following example request specifies an empty object to remove the `address` field from the customer profile: ```curl curl https://connect.squareupsandbox.com/v2/customers/{CUSTOMER_ID} \ -X PUT \ -H 'Square-Version: 2022-10-19' \ -H 'Authorization: Bearer {ACCESS_TOKEN}' \ -H 'Content-Type: application/json' \ -d '{ "address": {}, "version": 1 }' ``` {% anchor id="migrate-phone-number-validation" /%} ### CreateCustomer and UpdateCustomers requests with invalid phone numbers are rejected `CreateCustomer` and `UpdateCustomer` requests that contain an invalid phone number now return a `400 INVALID_PHONE_NUMBER` error. Valid phone numbers can optionally include a country code with the leading `+` sign and supported special characters. For more information, see [Customer phone numbers.](customers-api/use-the-api/keep-records#phone-number) Earlier Square versions continue to accept any phone number that contains between 9–16 digits, even if they are invalid. This change ensures that phone numbers added to the Customer Directory can be indexed for search operations. Existing phone numbers aren't affected. Starting in version: 2022-10-19 Square performs additional validation on the phone number provided in the request. For invalid phone numbers, Square returns the `400 INVALID_PHONE_NUMBER` error. ```json { "errors": [ { "code": "INVALID_PHONE_NUMBER", "detail": "Expected phone_number to be a valid phone number", "field": "phone_number", "category": "INVALID_REQUEST_ERROR" } ] } ``` {% aside type="info" %} Starting in version 2022-10-19, the `400 INVALID_PHONE_NUMBER` error is always returned in the initial response. In earlier versions, the phone number is validated only after all other errors in the request have been resolved. {% /aside %} {% anchor id="migrate-birthday-format" /%} ### Birthday uses YYYY-MM-DD or MM-DD format For `CreateCustomer` and `UpdateCustomer` requests, the optional `birthday` value is now specified using a `YYYY-MM-DD` or `MM-DD` format. In addition, all `birthday` values in responses are now returned in `YYYY-MM-DD` format, including existing birthdays that were previously returned as timestamps. Earlier Square versions continue to accept `YYYY-MM-DD` or a timestamp (without time zone or time precision) in the request and return the timestamp in the response. Starting in version: 2022-10-19 #### Example birthday formats in requests The following table shows example `birthday` values for a `CreateCustomer` or `UpdateCustomer` request: |Request{% width="100px" %}|Square version 2022-10-19 and later{% width="150px" %}|Square version 2022-09-21 and earlier{% width="160px" %}| |:------|:------|:------| |Birth year specified:{% line-break /%}`CreateCustomer` or `UpdateCustomer`|`2001-04-20`|`2001-04-20` or{% line-break /%}`2001-04-20T00:00:00-00:00`| |Birth year not specified:{% line-break /%}`CreateCustomer` or `UpdateCustomer`|`0000-04-20` or{% line-break /%}`04-20`|`0000-04-20` or{% line-break /%}`0000-04-20T00:00:00-00:00`| #### Example birthday formats in responses The following table shows example `birthday` values for a `Customer` object in a response: |Response{% width="100px" %}|Square version 2022-10-19 and later{% width="150px" %}|Square version 2022-09-21 and earlier{% width="160px" %}| |:------|:------|:------| |Birth year specified:{% line-break /%}`CreateCustomer`,{% line-break /%}`UpdateCustomer`,{% line-break /%}`RetrieveCustomer`, `ListCustomers`, or{% line-break /%}`SearchCustomers`|`2001-04-20`|`2001-04-20T00:00:00-00:00`| |Birth year not specified:{% line-break /%}`CreateCustomer`,{% line-break /%}`UpdateCustomer`,{% line-break /%}`RetrieveCustomer`, `ListCustomers`, or{% line-break /%}`SearchCustomers`|`0000-04-20`|`0000-04-20T00:00:00-00:00`| The following example responses for a request with an invalid birthday format are based on the Square version: * **Square version 2022-10-19 and later:** `400 INVALID_TIME` ```json { "errors": [ { "code": "INVALID_TIME", "detail": "Expected birthday to be a valid date formatted as `YYYY-MM-DD` or `MM-DD`.", "field": "birthday", "category": "INVALID_REQUEST_ERROR" } ] } ``` * **Square version 2022-09-21 and earlier:** `400 INVALID_VALUE` ```json { "errors": [ { "code": "INVALID_VALUE", "detail": "This provided date `January 7` is not valid.", "field": "birthday", "category": "INVALID_REQUEST_ERROR" } ] } ``` {% anchor id="migrate-max-length-validation" /%} ### Maximum length for string fields in CreateCustomer and UpdateCustomer requests All string-type fields in a `CreateCustomer` and `UpdateCustomer` request (except `note`) now have a maximum length constraint. Earlier Square versions enforce limits only for `email_address` (maximum 254 characters) and `phone_number` (maximum 16 digits). Starting in version: 2022-10-19 The following table shows newly affected fields and the maximum number of characters allowed: |Field|Maximum length| |:------|:------| |`given_name`|300| |`family_name`|300| |`company_name`|500| |`nickname`|100| |`reference_id`|100| |`address.first_name`|300| |`address.last_name`|300| |`address.address_line_1`|500| |`address.address_line_2`|500| |`address.address_line_3`|500| |`address.administrative_district_level_1`|200| |`address.administrative_district_level_2`|200| |`address.administrative_district_level_3`|200| |`address.locality`|300| |`address.sublocality`|200| |`address.sublocality_2`|200 |`address.sublocality_3`|200| |`address.postal_code`|12| The following example responses for a request that exceeds the new maximum length limit are based on the Square version: * **Square version 2022-10-19 and later:** `400 VALUE_TOO_LONG` ```json { "errors": [ { "code": "VALUE_TOO_LONG", "detail": "Expected reference_id to contain a string of max length 100", "field": "reference_id", "category": "INVALID_REQUEST_ERROR" } ] } ``` * **Square version 2022-09-21 and earlier:** `200 OK` {% aside type="info" %} Starting in version 2022-10-19, Square returns a `VALUE_TOO_LONG` error if the `email_address` limit is exceeded (instead of the `INVALID_EMAIL_ADDRESS` and `INVALID_VALUE` errors returned in earlier versions). {% /aside %} {% anchor id="migrate-reject-unrecognized-fields" /%} ### CreateCustomer and SearchCustomers requests with unrecognized fields are rejected Starting in version: 2022-03-16 Calls to the `CreateCustomer` or `SearchCustomers` endpoint that contain an unrecognized field now return a `BAD_REQUEST` error. An unrecognized field is any field in the request body that isn't supported for the request. For earlier Square versions, the Customers API continues to ignore unrecognized fields. The following are example responses based on the Square version: * **Square version 2022-03-16 and later:** `400 BAD_REQUEST` ```json { "errors": [ { "code": "BAD_REQUEST", "detail": "The field named '{field_name}' is unrecognized (line 4, character 9)", "field": "{field_name}", "category": "INVALID_REQUEST_ERROR" } ] } ``` * **Square version 2022-02-16 and earlier:** `200 OK` (unrecognized fields are ignored) {% anchor id="migrate-invalid-phone-email-errors" /%} ### CreateCustomer and UpdateCustomer requests with an invalid phone number or email address return specific error codes Starting in version: 2022-03-16 Calls to the `CreateCustomer` or `UpdateCustomer` endpoint that specify an invalid phone number or email address return an `INVALID_PHONE_NUMBER` or `INVALID_EMAIL_ADDRESS` error code with a corresponding `detail` field. For earlier Square versions, the Customers API continues to return an `INVALID_VALUE` code. The following are example responses based on the Square version: * **Square version 2022-03-16 and later** * `400 INVALID_PHONE_NUMBER` ```json { "errors": [ { "code": "INVALID_PHONE_NUMBER", "detail": "Expected phone_number to be a valid phone number", "field": "phone_number", "category": "INVALID_REQUEST_ERROR" } ] } ``` * `400 INVALID_EMAIL_ADDRESS` ```json { "errors": [ { "code": "INVALID_EMAIL_ADDRESS", "detail": "Expected email_address to be a valid email address", "field": "email_address", "category": "INVALID_REQUEST_ERROR" } ] } ``` * **Square version 2022-02-16 and earlier** * `400 INVALID_VALUE` for `phone_number` ```json { "errors": [ { "code": "INVALID_VALUE", "detail": "Provided value for `phone_number` is invalid.", "field": "phone_number", "category": "INVALID_REQUEST_ERROR" } ] } ``` * `400 INVALID_VALUE` for `email_address` ```json { "errors": [ { "code": "INVALID_VALUE", "detail": "Provided value for `email_address` is invalid.", "field": "email_address", "category": "INVALID_REQUEST_ERROR" } ] } ``` {% anchor id="migrate-updatecustomer-empty-request" /%} ### UpdateCustomer returns an error for empty requests Starting in version: 2021-10-20 Calls to the `UpdateCustomer` endpoint that don't specify any customer fields return a `400 BAD_REQUEST` status code and error. For earlier Square versions, the Customers API continues to return a `200 OK` status along with the customer profile. The following are example responses based on the Square version: * **Square version 2021-10-20 and later:** `400 BAD_REQUEST` ```json { "errors": [ { "code": "BAD_REQUEST", "detail": "At least one field must be set to update a customer.", "category": "INVALID_REQUEST_ERROR" } ] } ``` * **Square version 2021-09-15 and earlier:** `200 OK` ```json { "customer": { "id": "62Y0FBFDQ0ZHDCGKBYP7FZK474", "created_at": "2020-11-12T03:51:06.371Z", "updated_at": "2021-08-29T00:03:37Z", "given_name": "Amelia", "family_name": "Earhart", "email_address": "Amelia.Earhart@aviators.com", ... } } ``` {% aside type="info" %} In Square version 2021-09-15 and earlier, the `updated_at` timestamp is updated in response to this request. However, the `version` of the customer profile isn't updated. {% /aside %} {% anchor id="migrate-createcustomercard" /%} {% anchor id="deprecated-createcustomercard-endpoint" /%} ### Deprecated CreateCustomerCard endpoint Deprecated in version: 2021-06-16 Retired in version: TBD The [CreateCustomerCard](https://developer.squareup.com/reference/square/customers-api/create-customer-card) endpoint is deprecated. You should use one of the following endpoints instead: * To save a credit or debit card on file for a customer, call [CreateCard](https://developer.squareup.com/reference/square/cards-api/create-card) in the Cards API and specify the `customer_id` field. This endpoint returns a [Card](https://developer.squareup.com/reference/square/objects/Card) object. For more information, see [Create a Card on File and a Payment](cards-api/walkthrough-seller-card). Starting in Square version 2022-05-12, you can also call [CreateTerminalAction](https://developer.squareup.com/reference/square/terminal-api/create-terminal-action) to save a card on file when using the Terminal API. Specify the `SAVE_CARD` action type and `save_card_options` with the `customer_id` field. The card on file can then be managed using the Cards API. For more information, see [Save a Card on File with the Terminal API](terminal-api/advanced-features/save-card-on-file). * To save a gift card on file for a customer, call [LinkCustomerToGiftCard](https://developer.squareup.com/reference/square/gift-cards-api/link-customer-to-gift-card) in the Gift Cards API and specify the `customer_id` field. This endpoint returns a [GiftCard](https://developer.squareup.com/reference/square/objects/GiftCard) object. For more information, see [Manage gift cards on file](gift-cards/additional-considerations#manage-gift-cards-on-file). {% anchor id="migrate-deletecustomercard" /%} {% anchor id="deprecated-deletecustomercard-endpoint" /%} ### Deprecated DeleteCustomerCard endpoint Deprecated in version: 2021-06-16 Retired in version: TBD The [DeleteCustomerCard](https://developer.squareup.com/reference/square/customers-api/delete-customer-card) endpoint is deprecated. You should use one of the following endpoints instead: * To disable a credit or debit card on file for a customer, call [DisableCard](https://developer.squareup.com/reference/square/cards-api/disable-card) in the Cards API. This endpoint returns a [Card](https://developer.squareup.com/reference/square/objects/Card) object. For more information, see [Disable a card](cards-api/manage-cards#disable-a-card). * To unlink a gift card on file from a customer, call [UnlinkCustomerFromGiftCard](https://developer.squareup.com/reference/square/gift-cards-api/unlink-customer-from-gift-card) in the Gift Cards API and specify the `customer_id` field. This endpoint returns a [GiftCard](https://developer.squareup.com/reference/square/objects/GiftCard) object. For more information, see [Manage gift cards on file](gift-cards/additional-considerations#manage-gift-cards-on-file). {% anchor id="migrate-customer-cards" /%} {% anchor id="deprecated-customercards-field" /%} ### Deprecated Customer.cards field Deprecated in version: 2021-06-16 Retired in version: 2025-01-23 The [cards](https://developer.squareup.com/reference/square/objects/Customer#definition__property-cards) field on the `Customer` object is retired in Square API version 2025-01-23 and later. Use one of the following endpoints instead: * To get the credit or debit cards on file for a customer, call [ListCards](https://developer.squareup.com/reference/square/cards-api/list-cards) in the Cards API and specify the `customer_id` query parameter. This endpoint returns a list of [Card](https://developer.squareup.com/reference/square/objects/Card) objects. For more information, see [List cards saved for a customer](cards-api/manage-cards#list-cards-saved-for-a-customer). * To get the gift cards on file for a customer, call [ListGiftCards](https://developer.squareup.com/reference/square/gift-cards-api/list-gift-cards) in the Gift Cards API and specify the `customer_id` query parameter. This endpoint returns a list of [GiftCard](https://developer.squareup.com/reference/square/objects/GiftCard) objects. For more information, see [Manage gift cards on file](gift-cards/additional-considerations#manage-gift-cards-on-file). ## See also * [Manage Customer Profiles](customers-api/use-the-api/keep-records) * [Retrieve Customer Profiles](customers-api/use-the-api/retrieve-profiles) * [Search for Customer Profiles](customers-api/use-the-api/search-customers) * [Integrate Customer Profiles with Other Services](customers-api/use-the-api/integrate-with-other-services) * [Use Customer Webhooks](customers-api/use-the-api/customer-webhooks) * [Custom Attributes for Customers](customer-custom-attributes-api/overview) * [Video: Sandbox 101: Linking Customer Data](https://www.youtube.com/watch?v=Hq3cYdRqYaw) --- # Custom Attributes for Customers > Source: https://developer.squareup.com/docs/customer-custom-attributes-api/overview > Status: PUBLIC > Languages: All > Platforms: All Learn how custom attributes can be added to Square customer profiles using the Customer Custom Attributes API. **Applies to:** [Customer Custom Attributes API](https://developer.squareup.com/reference/square/customer-custom-attributes-api) | [Customers API](customers-api/what-it-does) | [GraphQL](devtools/graphql) | [OAuth API](oauth-api/overview) {% subheading %}Learn how custom attributes can be added to Square customer profiles using the Customer Custom Attributes API.{% /subheading %} {% toc hide=true /%} ## Overview Custom attributes can help simplify integration or synchronization and enable new personalization workflows. The [Customer Custom Attributes API](https://developer.squareup.com/reference/square/customer-custom-attributes-api) lets you define custom attributes (such as Favorite Drink, Occupation, Last Check-In Date, and Entity ID) and apply them to customer profiles. You can also use the API to retrieve and manage seller-defined custom fields. The following videos show how you can use custom attributes: {% tabset %} {% tab id="How the API works" %} {% youtube src="https://www.youtube.com/embed/l8FzTSBxF-Q?si=B6AgXb08P2tdu9F3" /%} {% /tab %} {% tab id="Automate marketing" %} {% youtube src="https://www.youtube.com/embed/5HSRFT6dLBE" /%} {% /tab %} {% /tabset %} A custom attribute obtains a `key` identifier, `visibility` setting, allowed data type, and other properties from a custom attribute definition. This relationship is shown in the following diagram: ![A diagram showing how properties of a custom attribute definition are used by corresponding custom attributes.](//images.ctfassets.net/1nw4q0oohfju/6dCanC9g51dwuEdhqe7eJH/e5518465c70c3866e0138268b19d648a/custom-attributes-relationships.png) After a customer-related custom attribute definition is created for a Square seller account, you can set the custom attribute for the seller's customers. ## Requirements and limitations The following requirements, limitations, and other considerations apply when working with customer-related custom attributes: * **Minimum Square version** - Square version `2022-05-12` or higher is required to work with the Customer Custom Attributes API. * **Sensitive data** - Custom attributes are intended to store additional information or store associations with an entity in another system. Don't use custom attributes to store any PCI data, such as credit card details. PII is supported in custom attribute values, but applications that create or read this data should observe applicable privacy laws and data regulations such as requesting the hard deletion of custom attribute data when a GDPR request for erasure is received. Never store secret-level information in a custom attribute. The use of custom attributes is subject to developers adhering to the Square API Data Policy Disclosures. * **Unsupported data types** - You can only create customer-related custom attribute definitions that specify a `schema` for a [supported data type](#supported-data-types). The following data types aren't supported for customer-related custom attributes: * `DateTime` * `Duration` * **Search support in the Customers API** - The `custom_attribute` filter can be used with the [SearchCustomers](https://developer.squareup.com/reference/square/customers-api/search-customers) endpoint to search customer profiles by custom attribute. However, custom attributes aren't included in the search results. To retrieve or list custom attributes for a customer profile based on a search, you can call `RetrieveCustomerCustomAttribute` or `ListCustomerCustomAttributes` using a customer ID from the result set. For more information, see [Search by custom attributes](customers-api/use-the-api/search-customers#search-by-custom-attributes). * **Limits** - A seller account can have a maximum of 100 customer-related custom attribute definitions per application. * **Unique name** - If the `visibility` of a customer-related custom attribute definition is `VISIBILITY_READ_ONLY` or `VISIBILITY_READ_WRITE_VALUES`, the `name` must be unique (case-sensitive) across all visible customer-related custom attribute definitions for the seller. This requirement is intended to help sellers differentiate between custom attributes that are visible in the [Customer Directory](https://squareup.com/customer-directory) and other Square products. * **OAuth permissions** - Applications that use OAuth require `CUSTOMER_READ` or `CUSTOMER_WRITE` permission to work with customer-related custom attributes. For more information, see [OAuth API](oauth-api/overview) and [Customer Custom Attributes](oauth-api/square-permissions#customer-custom-attributes). If a seller revokes the permissions of the application that created a custom attribute definition, or if the token expires, the application cannot access the definition or corresponding custom attributes until permissions are restored. However, the definition and custom attributes remain available to other applications according to the `visibility` setting. {% anchor id="idempotency" /%} * **Idempotency** - Including an idempotency key in a request guarantees that the request is processed only once. The following endpoints allow you to specify an `idempotency_key`: * `CreateCustomerCustomAttributeDefinition` * `UpdateCustomerCustomAttributeDefinition` * `UpsertCustomerCustomAttribute` * `BulkUpsertCustomerCustomAttributes` Be sure to generate a unique idempotency key for each request. If an idempotency key is reused in requests to the same endpoint on behalf of the same seller, Square returns the response from the first request that was successfully processed using the key. Square doesn't process subsequent requests that use the same key, even if they contain different fields. For more information, see [Idempotency](build-basics/common-api-patterns/idempotency). ## Basic workflow You can use the Customer Custom Attributes API to extend the `Customer` data model and associate seller-specific or application-specific information with customer profiles. For a high-level understanding of how you work with customer-related custom attributes, it's helpful to focus on three basic operations: {% accordion expanded=false %} {% slot "heading" %} ### Create a custom attribute definition for a seller {% /slot %} When you want to create a new customer-related custom attribute, you must first define its properties by calling `CreateCustomerCustomAttributeDefinition`. The following example request defines a Favorite Drink custom attribute. The `schema` field indicates that the value of the custom attribute is a `String`. ```` The `key` identifier and `visibility` setting that you specify for the definition are also used by corresponding custom attributes. The `visibility` setting determines the [access level](#access-control) that other applications (including the Customer Directory and other Square products) have to the definition and corresponding custom attributes. {% /accordion %} {% accordion expanded=false %} {% slot "heading" %} ### Set the custom attribute for customer profiles {% /slot %} After the custom attribute definition is created, you can set the custom attribute for any customer profile in the seller's Customer Directory. The following example `UpsertCustomerCustomAttribute` request sets the Favorite Drink custom attribute using the `customer_id` and `key`. Note the following: * The `key` in the path is `favorite-drink`, which is the same key specified by the definition. * The `value` in the request body sets the custom attribute value for the customer profile. This value must conform to the data type specified by the `schema` field in the definition (for this example, a `String`). ```` {% aside type="info" %} Square also provides the `BulkUpsertCustomerCustomAttributes` endpoint to update multiple custom attributes and customer profiles in a single request. {% /aside %} {% /accordion %} {% accordion expanded=false %} {% slot "heading" %} ### Retrieve the custom attribute from customer profiles {% /slot %} You can now retrieve the custom attribute to get the value that was set for the customer profile. The following example `RetrieveCustomerCustomAttribute` request retrieves the Favorite Drink custom attribute for a customer profile using the `customer_id` and `key`: ```` The `value` field in the following example represents the custom attribute value: ```json { "custom_attribute": { "key": "favorite-drink", "version": 1, "updated_at": "2022-05-20T21:13:48Z", "value": "Double-shot breve", "created_at": "2022-05-20T21:13:48Z", "visibility": "VISIBILITY_READ_WRITE_VALUES" } } ``` You can include the `with_definition` query parameter to return the corresponding custom attribute definition in the same call. For example, you might want to retrieve the definition to get the custom attribute's data type or name. {% aside type="info" %} Square provides the `ListCustomerCustomAttributes` endpoint to retrieve all the custom attributes associated with a customer profile. [Square GraphQL](devtools/graphql) queries can also be used to access customer custom attributes. {% /aside %} {% /accordion %} {% anchor id="supported-operations" /%} ## Supported operations The Customer Custom Attributes API supports the following operations: ### Working with customer-related custom attribute definitions * [Create a customer custom attribute definition](customer-custom-attributes-api/custom-attribute-definitions#create-customer-custom-attribute-definition) * [Update a customer custom attribute definition](customer-custom-attributes-api/custom-attribute-definitions#update-customer-custom-attribute-definition) * [List customer custom attribute definitions](customer-custom-attributes-api/custom-attribute-definitions#list-customer-custom-attribute-definitions) * [Retrieve a customer custom attribute definition](customer-custom-attributes-api/custom-attribute-definitions#retrieve-customer-custom-attribute-definition) * [Delete a customer custom attribute definition](customer-custom-attributes-api/custom-attribute-definitions#delete-customer-custom-attribute-definition) ### Working with customer-related custom attributes * [Create or update a customer custom attribute](customer-custom-attributes-api/custom-attributes#upsert-customer-custom-attribute) (upsert) * [Bulk create or update customer custom attributes](customer-custom-attributes-api/custom-attributes#bulk-upsert-customer-custom-attributes) (bulk upsert) * [List customer custom attributes](customer-custom-attributes-api/custom-attributes#list-customer-custom-attributes) * [Retrieve a customer custom attribute](customer-custom-attributes-api/custom-attributes#retrieve-customer-custom-attribute) * [Delete a customer custom attribute](customer-custom-attributes-api/custom-attributes#delete-customer-custom-attribute) {% aside type="info" %} Working with custom attributes is different than working with native attributes on the `Customer` object (such as `given_name` and `email_address`) that are accessed using the Customers API. For example, custom attributes aren't returned in a `RetrieveCustomer` or `ListCustomers` response or managed using `CreateCustomer` or `UpdateCustomer`. {% /aside %} {% aside type="tip" %} [Square GraphQL](devtools/graphql) queries provide read access to customer attributes and definitions. With GraphQL, custom attributes are returned on the `Customer` object. {% /aside %} {% anchor id="supported-data-types" /%} ## Supported data types The data type of a custom attribute is specified in the `schema` field of the custom attribute definition. For all data types except `Selection`, this field contains a simple URL reference to a schema object hosted on the Square CDN. Customer-related custom attributes support the following data types: * `String` * `Email` * `PhoneNumber` * `Address` * `Date` * `Boolean` * `Number` * `Selection` {% aside type="info" %} Customer-related custom attributes don't support `DateTime` or `Duration` data types. {% /aside %} For information about defining the data type for a customer-related custom attribute, see [Specifying the schema](customer-custom-attributes-api/custom-attribute-definitions#specify-schema). ## Seller scope A `CreateCustomerCustomAttributeDefinition` request is scoped to a specific seller. Creating a definition makes the corresponding custom attribute available to the customer profiles in the seller's Customer Directory. To make the custom attribute available to other sellers, you must call `CreateCustomerCustomAttributeDefinition` on behalf of each target seller. To do so when using OAuth, call this endpoint for each seller using their access token. The following diagram represents two sellers using identical `favorite-drink` custom attribute definitions to record their customers' favorite drink: ![A diagram showing two sellers using the same custom attribute.](//images.ctfassets.net/1nw4q0oohfju/5uOuPW6YCTqDOLP0b04yGW/295f0ad72597d55bc4be368b857dfc3b/custom-attributes-seller-scope.png) You can reuse the same `key` for your custom attribute definition across sellers. The `key` must be unique for your application but not for a given seller. However, if provided, the `name` must be unique (case-sensitive) across all visible customer-related custom attribute definitions for the seller. {% aside type="tip" %} To simplify management, you might want to keep all definitions that use the same `key` synchronized across seller accounts. Therefore, if you change a definition for one seller, you should consider making the same change for all other sellers. {% /aside %} {% anchor id="access-control" /%} ## Access control The application that creates a custom attribute definition is the definition owner. The definition owner always has READ and WRITE permissions to the definition and all instances of the corresponding custom attribute. The `visibility` of a custom attribute definition determines how other applications can access the definition and corresponding custom attributes when making calls on behalf of a seller. This access control applies to third-party applications and Square products, such as the Customer Directory. The following table shows the access permitted by each supported `visibility` setting. | | Custom attribute{% line-break /%}definition{% colspan=2 %} | {% line-break /%}Custom attribute{% colspan=2 %} | | | | ---------- | ---------- | ---------- | ---------- | ---------- | | **Visibility setting** | **READ** | **WRITE** | **READ** | **WRITE** | | `VISIBILITY_HIDDEN` (default) | No | No | No 1 | No | | `VISIBILITY_READ_ONLY` | Yes | No | Yes 2 | No | | `VISIBILITY_READ_WRITE_VALUES`| Yes | No | Yes | Yes | 1. All custom attributes are visible in the .csv file when the customer data is exported, including those set to `VISIBILITY_HIDDEN`. Sellers can generate this file using the **Export Customers** button in the Customer Directory. 2. Customer-related custom attributes set to `VISIBILITY_READ_ONLY` aren't currently visible in the Customer Directory or Point of Sale application. ### Accessing custom attributes owned by other applications To access custom attributes or definitions owned by other applications, the following conditions must be true: * The `visibility` field must be set to one of the following: * `VISIBILITY_READ_ONLY` - Allows other applications to view the definition and corresponding custom attributes. * `VISIBILITY_READ_WRITE_VALUES` - Additionally allows other applications to set the value of the custom attribute for customer profiles or delete the custom attribute from customer profiles. * The requesting application must use the {% tooltip text="qualified key" %}The key provided when the definition was created, prefixed by the application ID of the definition owner: {application ID}:{key}.{% /tooltip %} for the following requests: * `RetrieveCustomerCustomAttributeDefinition` * `UpsertCustomerCustomAttribute` * `BulkUpsertCustomerCustomAttributes` * `RetrieveCustomerCustomAttribute` * `DeleteCustomerCustomAttribute` To obtain a qualified key, call `ListCustomerCustomAttributeDefinitions` or `ListCustomerCustomAttributes`. These endpoints return qualified keys for custom attribute definitions and custom attributes that are owned by other applications and visible to your application. For more information, see [List customer custom attribute definitions](customer-custom-attributes-api/custom-attribute-definitions#list-customer-custom-attribute-definitions) and [List customer custom attributes](customer-custom-attributes-api/custom-attributes#list-customer-custom-attributes). {% aside type="info" %} You should be aware of the following considerations when using custom attributes that are owned by other applications: * If the `visibility` of a custom attribute definition is updated, the change propagates to all corresponding custom attributes within a couple seconds. * If a custom attribute definition is deleted, all corresponding custom attributes are also deleted from customer profiles. {% /aside %} ## Webhooks You can subscribe to receive notifications for customer-related custom attribute events. Each event provides two options that allow you to choose when Square sends notifications: * `.owned` event notifications are sent when changes are made to custom attribute definitions and custom attributes that are owned by your application These changes apply to: * All custom attribute definitions created by your application. * All custom attributes based on a custom attribute definition created by your application. * `.visible` event notifications are sent when changes are made to custom attribute definitions and custom attributes that are visible to your application. These changes apply to: * All custom attribute definitions and custom attributes owned by your application. * All other custom attribute definitions or custom attributes whose `visibility` setting is `VISIBILITY_READ_ONLY` or `VISIBILITY_READ_WRITE_VALUES`. This includes seller-defined custom attributes (also known as custom fields), which are always set to `VISIBILITY_READ_WRITE_VALUES`. Notification payloads for both options contain the same information. ### Webhook events Subscribe to the following events to receive notifications for changes to custom attribute definitions and custom attributes that are owned by your application: |Event|Permission|Description| |:------|:------|:------ |[customer.custom_attribute_definition.owned.created](https://developer.squareup.com/reference/square/customer-custom-attributes-api/webhooks/customer.custom_attribute_definition.owned.created)|`CUSTOMERS_READ`|A custom attribute definition was created by your application. The application that created the custom attribute definition is the owner of the definition and corresponding custom attributes.{% line-break /%}{% line-break /%}This event replaces the deprecated `customer.custom_attribute_definition.created` event.| |[customer.custom_attribute_definition.owned.updated](https://developer.squareup.com/reference/square/customer-custom-attributes-api/webhooks/customer.custom_attribute_definition.owned.updated)|`CUSTOMERS_READ`|A custom attribute definition owned by your application was updated. Note that only the definition owner can update a custom attribute definition.{% line-break /%}{% line-break /%}This event replaces the deprecated `customer.custom_attribute_definition.updated` event.| |[customer.custom_attribute_definition.owned.deleted](https://developer.squareup.com/reference/square/customer-custom-attributes-api/webhooks/customer.custom_attribute_definition.owned.deleted)|`CUSTOMERS_READ`|A custom attribute definition owned by your application was deleted. Note that only the definition owner can delete a custom attribute definition.{% line-break /%}{% line-break /%}This event replaces the deprecated `customer.custom_attribute_definition.deleted` event.| |[customer.custom_attribute.owned.updated](https://developer.squareup.com/reference/square/customer-custom-attributes-api/webhooks/customer.custom_attribute.owned.updated)|`CUSTOMERS_READ`|A custom attribute owned by your application was created or updated for a customer profile.{% line-break /%}{% line-break /%}This event replaces the deprecated `customer.custom_attribute.updated` event.| |[customer.custom_attribute.owned.deleted](https://developer.squareup.com/reference/square/customer-custom-attributes-api/webhooks/customer.custom_attribute.owned.deleted)|`CUSTOMERS_READ`|A custom attribute owned by your application was deleted from a customer profile.{% line-break /%}{% line-break /%}This event replaces the deprecated `customer.custom_attribute.deleted` event.| Subscribe to the following events to receive notifications for changes to custom attribute definitions and custom attributes that are visible to your application. These `.visible` events include changes to all custom attribute definitions and custom attributes that are owned by your application, so you do not need to subscribe to an `.owned` event when you subscribe to the corresponding `.visible` event. |Event|Permission|Description| |------|------|------ |[customer.custom_attribute_definition.visible.created](https://developer.squareup.com/reference/square/customer-custom-attributes-api/webhooks/customer.custom_attribute_definition.visible.created)|`CUSTOMERS_READ`|A custom attribute definition that's visible to your application was created.{% line-break /%}{% line-break /%}This event replaces the deprecated `customer.custom_attribute_definition.public.created` event.| |[customer.custom_attribute_definition.visible.updated](https://developer.squareup.com/reference/square/customer-custom-attributes-api/webhooks/customer.custom_attribute_definition.visible.updated)|`CUSTOMERS_READ`|A custom attribute definition that's visible to your application was updated.{% line-break /%}{% line-break /%}This event replaces the deprecated `customer.custom_attribute_definition.public.updated` event.| |[customer.custom_attribute_definition.visible.deleted](https://developer.squareup.com/reference/square/customer-custom-attributes-api/webhooks/customer.custom_attribute_definition.visible.deleted)|`CUSTOMERS_READ`|A custom attribute definition that's visible to your application was deleted.{% line-break /%}{% line-break /%}This event replaces the deprecated `customer.custom_attribute_definition.public.deleted` event.| |[customer.custom_attribute.visible.updated](https://developer.squareup.com/reference/square/customer-custom-attributes-api/webhooks/customer.custom_attribute.visible.updated)|`CUSTOMERS_READ`|A custom attribute that's visible to your application was created or updated for a customer profile.{% line-break /%}{% line-break /%}This event replaces the deprecated `customer.custom_attribute.public.updated` event.| |[customer.custom_attribute.visible.deleted](https://developer.squareup.com/reference/square/customer-custom-attributes-api/webhooks/customer.custom_attribute.visible.deleted)|`CUSTOMERS_READ`|A custom attribute that's visible to your application was deleted from a customer profile.{% line-break /%}{% line-break /%}This event replaces the deprecated `customer.custom_attribute.public.deleted` event.| The deprecated `.public` events and replacement `.visible` events apply to a different set of events. For more information, see [Deprecated webhooks](#migrate-webhooks). {% aside type="info" %} Upserting or deleting a custom attribute for a customer profile doesn't invoke a `customer.updated` webhook. {% /aside %} The following is an example `customer.custom_attribute_definition.visible.created` notification: ```json { "merchant_id": "DM7VKY8Q63GNP", "type": "customer.custom_attribute_definition.visible.created", "event_id": "347ab320-c0ba-48f5-959a-4e147b9aefcf", "created_at": "2022-05-21T21:40:49.943Z", "data": { "type": "custom_attribute_definition", "id": "sq0idp-BushoY39o1X-GPxRRUWc0A:businessEmail", "object": { "created_at": "2022-05-21T21:40:49Z", "description": "Work email address", "key": "sq0idp-BushoY39o1X-GPxRRUWc0A:businessEmail", "name": "Work email", "schema": { "$ref": "https://developer-production-s.squarecdn.com/schemas/v1/common.json#squareup.common.Email" }, "updated_at": "2022-05-21T21:40:49Z", "version": 1, "visibility": "VISIBILITY_READ_WRITE_VALUES" } } } ``` The following is an example `customer.custom_attribute.visible.updated` notification: ```json { "merchant_id": "DM7VKY8Q63GNP", "type": "customer.custom_attribute.visible.updated", "event_id": "1cc2925c-f6e2-4fb6-a597-07c198de59e1", "created_at": "2022-06-26T01:22:29Z", "data": { "type": "custom_attribute", "id": "sq0idp-BushoY39o1X-GPxRRUWc0A:businessEmail:CUSTOMER:TNQC0TYTWMRSFFQ157KK4V7MVR", "object": { "created_at": "2022-05-22T21:40:54Z", "key": "sq0idp-BushoY39o1X-GPxRRUWc0A:businessEmail", "updated_at": "2022-06-26T01:22:29Z", "value": "dana@company.com", "version": 2, "visibility": "VISIBILITY_READ_WRITE_VALUES" } } } ``` Note the following: * The `.owned` and `.visible` events are available for webhook subscriptions starting in Square version `2022-08-17`. The deprecated events are available starting in Square version `2022-05-12`. * The `CUSTOMERS_READ` permission is required to receive notifications about customer-related custom attribute events. * The `key` of the custom attribute definition or custom attribute in the notification is always the {% tooltip text="qualified key" %}The key provided when the definition was created, prefixed by the application ID of the definition owner: {application ID}:{key}.{% /tooltip %}. * If you subscribe to the `.owned` and `.visible` options for the same event, Square sends both notifications for changes to custom attribute definitions and custom attributes owned by the subscribing application. * The value of the `data.id` in the notification depends on the affected object: * For custom attribute definition events, `data.id` is the qualified key. * For custom attribute events, `data.id` is generated using the qualified key and the ID of the affected customer profile. This `data.id` cannot be used directly with the Customer Custom Attributes API. For more information about custom attribute webhooks, see [Subscribing to webhooks](devtools/customattributes/overview#subscribing-to-webhooks). For more information about how to subscribe to events and validate notifications, see [Square Webhooks](webhooks/overview). {% anchor id="migration-notes" /%} {% accordion expanded=false %} {% slot "heading" %} ## Migration notes {% /slot %} The following migration notes apply to the Customer Custom Attributes API. {% anchor id="migrate-webhooks" /%} ### Deprecated webhooks Deprecated in version: 2022-08-17 Retired in version: TBD The following table lists deprecated webhook events and their replacements. |Deprecated event|Replacement event| |------|------| |[customer.custom_attribute_definition.created](https://developer.squareup.com/reference/square/customer-custom-attributes-api/webhooks/customer.custom_attribute_definition.created)|[customer.custom_attribute_definition.owned.created](https://developer.squareup.com/reference/square/customer-custom-attributes-api/webhooks/customer.custom_attribute_definition.owned.created)| |[customer.custom_attribute_definition.updated](https://developer.squareup.com/reference/square/customer-custom-attributes-api/webhooks/customer.custom_attribute_definition.updated)|[customer.custom_attribute_definition.owned.updated](https://developer.squareup.com/reference/square/customer-custom-attributes-api/webhooks/customer.custom_attribute_definition.owned.updated)| |[customer.custom_attribute_definition.deleted](https://developer.squareup.com/reference/square/customer-custom-attributes-api/webhooks/customer.custom_attribute_definition.deleted)|[customer.custom_attribute_definition.owned.deleted](https://developer.squareup.com/reference/square/customer-custom-attributes-api/webhooks/customer.custom_attribute_definition.owned.deleted)| |[customer.custom_attribute.updated](https://developer.squareup.com/reference/square/customer-custom-attributes-api/webhooks/customer.custom_attribute.updated)|[customer.custom_attribute.owned.updated](https://developer.squareup.com/reference/square/customer-custom-attributes-api/webhooks/customer.custom_attribute.owned.updated)| |[customer.custom_attribute.deleted](https://developer.squareup.com/reference/square/customer-custom-attributes-api/webhooks/customer.custom_attribute.deleted)|[customer.custom_attribute.owned.deleted](https://developer.squareup.com/reference/square/customer-custom-attributes-api/webhooks/customer.custom_attribute.owned.deleted)| |[customer.custom_attribute_definition.public.created](https://developer.squareup.com/reference/square/customer-custom-attributes-api/webhooks/customer.custom_attribute_definition.public.created)|[customer.custom_attribute_definition.visible.created](https://developer.squareup.com/reference/square/customer-custom-attributes-api/webhooks/customer.custom_attribute_definition.visible.created)| |[customer.custom_attribute_definition.public.updated](https://developer.squareup.com/reference/square/customer-custom-attributes-api/webhooks/customer.custom_attribute_definition.public.updated)|[customer.custom_attribute_definition.visible.updated](https://developer.squareup.com/reference/square/customer-custom-attributes-api/webhooks/customer.custom_attribute_definition.visible.updated)| |[customer.custom_attribute_definition.public.deleted](https://developer.squareup.com/reference/square/customer-custom-attributes-api/webhooks/customer.custom_attribute_definition.public.deleted)|[customer.custom_attribute_definition.visible.deleted](https://developer.squareup.com/reference/square/customer-custom-attributes-api/webhooks/customer.custom_attribute_definition.visible.deleted)| |[customer.custom_attribute.public.updated](https://developer.squareup.com/reference/square/customer-custom-attributes-api/webhooks/customer.custom_attribute.public.updated)|[customer.custom_attribute.visible.updated](https://developer.squareup.com/reference/square/customer-custom-attributes-api/webhooks/customer.custom_attribute.visible.updated)| |[customer.custom_attribute.public.deleted](https://developer.squareup.com/reference/square/customer-custom-attributes-api/webhooks/customer.custom_attribute.public.deleted)|[customer.custom_attribute.visible.deleted](https://developer.squareup.com/reference/square/customer-custom-attributes-api/webhooks/customer.custom_attribute.visible.deleted)| The `.owned` and `.visible` event types introduced in Square version 2022-08-17 enable you to subscribe to a single webhook event to receive all notifications related to the event. For example, a subscription to the `customer.custom_attribute.visible.updated` event includes notifications for the `customer.custom_attribute.owned.updated` event because the custom attributes owned by your application are also visible to your application. The deprecated `.public` event types and replacement `.visible` event types apply to a different set of events. Both are invoked for changes to any custom attributes or definitions whose `visibility` is set to `VISIBILITY_READ_ONLY` or `VISIBILITY_READ_WRITE_VALUES`. In addition, `.visible` event types are invoked for changes to custom attributes or definitions that are owned by the subscribing application and set to `VISIBILITY_HIDDEN`. The deprecated non-public event types and replacement `.owned` event types apply to the same set of events. Both are invoked for changes to custom attributes or definitions that are owned by the subscribing application. The names have been changed to clarify the scope. For more information about `.owned` and `.visible` events, see [Webhooks](#webhooks). For information about how to manage your webhooks subscriptions, see [Subscribe to Event Notifications](webhooks/step2subscribe). {% /accordion %} ## See also * [Create and Manage Customer Custom Attribute Definitions](customer-custom-attributes-api/custom-attribute-definitions) * [Create and Manage Customer Custom Attributes](customer-custom-attributes-api/custom-attributes) * [Custom Attributes](devtools/customattributes/overview) * [API Reference: Customer Custom Attributes API](https://developer.squareup.com/reference/square/customer-custom-attributes-api) * [Video: Sandbox 101: Customer Custom Attributes](https://www.youtube.com/watch?v=l8FzTSBxF-Q) * [Video: Automate Marketing with Square's Customer Custom Attributes API](https://www.youtube.com/watch?v=5HSRFT6dLBE) --- # Create and Manage Customer Custom Attribute Definitions > Source: https://developer.squareup.com/docs/customer-custom-attributes-api/custom-attribute-definitions > Status: PUBLIC > Languages: All > Platforms: All Learn how to create and manage customer-related custom attribute definitions for Square sellers using the Customer Custom Attributes API. **Applies to:** [Customer Custom Attributes API](customer-custom-attributes-api/overview) | [Customer Groups API](customer-groups-api/what-it-does) {% subheading %}Learn how to create and manage customer-related custom attribute definitions for Square sellers using the Customer Custom Attributes API.{% /subheading %} {% toc hide=true /%} ## Overview A custom attribute definition specifies the `key` identifier, `visibility` setting, `schema` data type, and other properties for a custom attribute. After the definition is created, the custom attribute can be set for customer profiles in the seller's Customer Directory. For more information about how customer-related custom attributes work, see [Custom Attributes for Customers](customer-custom-attributes-api/overview). Custom attribute definitions are stored as a collection for a Square seller. Customer-related custom attribute definitions are accessed using the `customers` segment in the endpoint URL. >`.../v2/customers/custom-attribute-definitions` {% aside type="info" %} The [Customer Groups API](customer-groups-api/what-it-does) also enables personalized customer experiences. For example, the API can be used to set the same label for a group of customer profiles. {% /aside %} ## CustomAttributeDefinition object A custom attribute definition is represented by a [CustomAttributeDefinition](https://developer.squareup.com/reference/square/objects/CustomAttributeDefinition) object. The following is an example custom attribute definition that defines a "Favorite Drink" custom attribute of the `String` data type: ```json { "custom_attribute_definition": { "key": "favorite-drink", "name": "Favorite Drink", "description": "The favorite drink of the customer", "version": 1, "updated_at": "2022-05-20T02:41:37Z", "schema": { "$ref": "https://developer-production-s.squarecdn.com/schemas/v1/common.json#squareup.common.String" }, "created_at": "2022-05-20T02:41:37Z", "visibility": "VISIBILITY_READ_WRITE_VALUES" } } ``` The following fields represent core properties of a custom attribute definition: |Field{% width="130px" %}|Description| |------|------| |`key`|The identifier for the definition and its corresponding custom attributes. This key is unique for the application and cannot be changed after the definition is created.{% line-break /%}{% line-break /%}If the requesting application isn't the definition owner, the value is a qualified key. A qualified key is the application ID of the definition owner followed by the `key` that was provided when the definition was created, in the following format: `{application ID}:{key}`.{% line-break /%}{% line-break /%}For custom fields created by sellers in the Customer Directory, the qualified key is `square:{key}`.| |`name`|The name for the custom attribute. This name must be unique (case-sensitive) across all visible customer-related custom attribute definitions for the seller. This field is required if `visibility` is `VISIBILITY_READ_ONLY` or `VISIBILITY_READ_WRITE_VALUES`.| |`description`|The description for the custom attribute. This field is required if `visibility` is `VISIBILITY_READ_ONLY` or `VISIBILITY_READ_WRITE_VALUES`.| |`visibility`|The access control setting that determines whether other applications (including Square products such as the Square Dashboard) can view the definition and view or edit corresponding custom attributes. Valid values are `VISIBILITY_HIDDEN`, `VISIBILITY_READ_ONLY`, `VISIBILITY_READ_WRITE_VALUES`. For more information, see [Access control](customer-custom-attributes-api/overview#access-control).{% line-break /%}{% line-break /%}Regardless of the `visibility` setting, all custom attribute data is visible to sellers when exporting customer data.| |`schema`|The data type of the custom attribute value. For more information, see [Specifying the schema](#specify-schema). The total schema size cannot exceed 12 KB.| |`version`|The version number of the custom attribute definition. The version number is initially set to 1 and incremented each time the definition is updated. Include this field in update operations to enable [optimistic concurrency](build-basics/common-api-patterns/optimistic-concurrency) control and in read operations for strong consistency.| {% anchor id="create-customer-custom-attribute-definition" /%} ## Create a customer custom attribute definition Use the [CreateCustomerCustomAttributeDefinition](https://developer.squareup.com/reference/square/customer-custom-attributes-api/create-customer-custom-attribute-definition) endpoint to create a custom attribute definition for a seller account. This operation makes the custom attribute available to customer profiles in the seller's Customer Directory. Note the following: * `key` is the identifier for the definition and its corresponding custom attributes. The value must be unique for the application. It can contain up to 60 alphanumeric characters, periods (`.`), underscores (`_`), and hyphens (`-`) and must match the following regular expression: `^[a-zA-Z0-9\._-]{1,60}$` * `visibility` is the [access control](customer-custom-attributes-api/overview#access-control) setting that determines whether other applications can view the definition and view or edit corresponding custom attributes. The following are valid values: * `VISIBILITY_HIDDEN` (default) * `VISIBILITY_READ_ONLY` * `VISIBILITY_READ_WRITE_VALUES` Sellers can view all custom attributes in exported customer data, including those set to `VISIBILITY_HIDDEN`. * `schema` is the data type of the custom attribute. For more information, see [Specifying the schema](#specify-schema). * `name` and `description` are the name and description of the custom attribute. Each field can contain up to 255 characters. Both fields are required when `visibility` is set to `VISIBILITY_READ_ONLY` or `VISIBILITY_READ_WRITE_VALUES`. If provided, `name` must be unique (case-sensitive) across all visible customer-related custom attribute definitions for the seller. Seller-facing custom attributes should be given a friendly name and description. * `idempotency_key` is a unique ID for the request that can be optionally included to ensure [idempotency](customer-custom-attributes-api/overview#idempotency). The following example request defines a "Favorite Drink" custom attribute whose value can be a `String`: ```` The following is an example response: ```json { "custom_attribute_definition": { "key": "favorite-drink", "name": "Favorite Drink", "description": "The favorite drink of the customer", "version": 1, "updated_at": "2022-05-20T02:41:37Z", "schema": { "$ref": "https://developer-production-s.squarecdn.com/schemas/v1/common.json#squareup.common.String" }, "created_at": "2022-05-20T02:41:37Z", "visibility": "VISIBILITY_READ_WRITE_VALUES" } } ``` Now that the custom attribute definition is created, you can set the custom attribute for the seller's customers. For more information, see [Create or update a customer custom attribute](customer-custom-attributes-api/custom-attributes#upsert-customer-custom-attribute) or [Bulk create or update customer custom attributes](customer-custom-attributes-api/custom-attributes#bulk-upsert-customer-custom-attributes). After a custom attribute definition is created, Square invokes the `customer.custom_attribute_definition.owned.created` and `customer.custom_attribute_definition.visible.created` [webhook events](customer-custom-attributes-api/overview#webhooks). A seller account can have a maximum of 100 customer-related custom attribute definitions per application. {% aside type="info" %} To view your custom attributes in the Customer Directory, the `visibility` setting for the definition must be `VISIBILITY_READ_WRITE_VALUES` and the seller must make the field visible from the [Configure Profiles](https://app.squareup.com/dashboard/customers/settings/profiles) page. The custom attribute name appears in the directory, but the description doesn't. {% /aside %} {% anchor id="specify-schema" /%} ### Specifying the schema The data type of a custom attribute is specified by the `schema` field of the definition. Square uses the `schema` to validate the custom attribute value when it's assigned to a customer profile. The total schema size cannot exceed 12 KB. When setting the value of the custom attribute for a customer profile, the total value size cannot exceed 5 KB. The following data types are supported for customer-related custom attributes: * `String` * `Email` * `PhoneNumber` * `Address` * `Date` * `Boolean` * `Number` * `Selection` {% aside type="info" %} Customer-related custom attributes don't support `DateTime` or `Duration` data types. {% /aside %} In a `CreateCustomerCustomAttributeDefinition` request, the `schema` field specifies a data type by referencing a JSON schema or meta-schema object hosted on the Square CDN. #### JSON schema objects For the data types in the following table, specify a `$ref` value that references the corresponding schema object, as shown in the following snippet that references the `String` data type: ```json { "custom_attribute_definition": { ... "schema": { "$ref": "https://developer-production-s.squarecdn.com/schemas/v1/common.json#squareup.common.String" }, ... } } ``` {% table %} * Data type{% width="120px" %} * Description --- * `String` * A string with up to 1000 UTF-8 characters. Empty strings are allowed. `$ref` value:{% line-break /%} https://developer-production-s.squarecdn.com/schemas/v1/common.json#squareup.common.String --- * `Email` * An email address consisting of ASCII characters that matches the [regular expression](https://developer.mozilla.org/en-US/docs/Web/HTML/Element/input/email#basic_validation) for the HTML5 `email` type. `$ref` value:{% line-break /%} https://developer-production-s.squarecdn.com/schemas/v1/common.json#squareup.common.Email --- * `PhoneNumber` * A string representation of a phone number in [E.164 format.](https://en.wikipedia.org/wiki/E.164) For example, `+17895551234`. `$ref` value:{% line-break /%} https://developer-production-s.squarecdn.com/schemas/v1/common.json#squareup.common.PhoneNumber --- * `Address` * An [Address](https://developer.squareup.com/reference/square/objects/Address) object. For information about `Address` fields, see [Working with Addresses.](build-basics/common-data-types/working-with-addresses) `$ref` value:{% line-break /%} https://developer-production-s.squarecdn.com/schemas/v1/common.json#squareup.common.Address --- * `Date` * A date in ISO 8601 format: `YYYY-MM-DD`. Customer-related custom attributes don't support `DateTime` or `Duration` data types. `$ref` value:{% line-break /%} https://developer-production-s.squarecdn.com/schemas/v1/common.json#squareup.common.Date --- * `Boolean` * A `true` or `false` value. `$ref` value:{% line-break /%} https://developer-production-s.squarecdn.com/schemas/v1/common.json#squareup.common.Boolean --- * `Number` * A string representation of an integer or decimal with up to 5 digits of precision. Negative numbers are denoted using a `-` prefix. The absolute value cannot exceed (2^63-1)/10^5 or 92233720368547. For numeric values that act as identifiers rather than representing a quantity (such as account numbers), you might consider using the `String` data type because it supports an [exact match search](customers-api/use-the-api/search-customers#custom-attribute-value-filter-text-exact) and isn't subject to this limit. In contrast, a [number-range search](customers-api/use-the-api/search-customers#custom-attribute-value-filter-number) is used for `Number` data types. `$ref` value:{% line-break /%} https://developer-production-s.squarecdn.com/schemas/v1/common.json#squareup.common.Number {% /table %} #### JSON meta-schema object {% anchor id="selection-data-type" /%} For a `Selection` data type, the `schema` contains a `$schema` field that references a JSON meta-schema object, as well as additional fields. Note the following: * `$schema` references the `https://developer-production-s.squarecdn.com/meta-schemas/v1/selection.json` meta-schema hosted on the Square CDN. * `type` must be `array`. * `items` must include a `names` array that contains strings representing the display names of the predefined options that can be selected. Note that the order of the options might not be respected by all UIs. * `maxItems` is an integer that represents the maximum number of allowed selections. Corresponding custom attributes can have zero or more selected values, up to the specified maximum. The minimum value is 1 and cannot exceed the number of options in the `names` field. * `uniqueItems` must be `true`. The following example request creates a `Selection`-type custom attribute definition that contains three named options and allows one selection: ```` The following is an example response. For each named option, Square generates a UUID and adds it to the `enum` field. The options in the `names` field map by index to the UUIDs in the `enum` field. The first option maps to the first UUID, the second option maps to the second UUID, and so on. These UUIDs are used to set the value of the custom attribute or update the option names. ```json { "custom_attribute_definition": { "key": "shirt-size", "name": "Default shirt size", "description": "The default shirt size ordered by the customer.", "version": 1, "updated_at": "2022-05-20T02:41:37Z", "schema": { "$schema": "https://developer-production-s.squarecdn.com/meta-schemas/v1/selection.json", "maxItems": 1, "type": "array", "uniqueItems": true, "items": { "names": [ "Small", "Medium", "Large" ], "enum": [ "a5fc0632-b5cf-4855-af35-7bfc88bdc9f5", // UUID for "Small" "e875633f-a5d8-4872-aef4-6b96fba78c3e", // UUID for "Medium" "30528ff7-b11b-425a-aa11-26ff5cf1996f" // UUID for "Large" ] } }, "created_at": "2022-05-20T02:41:37Z", "visibility": "VISIBILITY_READ_WRITE_VALUES" } } ``` {% anchor id="update-customer-custom-attribute-definition" /%} ## Update a customer custom attribute definition Use the [UpdateCustomerCustomAttributeDefinition](https://developer.squareup.com/reference/square/customer-custom-attributes-api/update-customer-custom-attribute-definition) endpoint to update a custom attribute definition for a seller account. Only the following fields can be updated: * `name` * `description` * `visibility` * `schema` for a `Selection` data type Only new or changed fields need to be included in the request. For more information, see [Updatable definition fields](#updatable-fields). Note the following about an `UpdateCustomerCustomAttributeDefinition` request: * A custom attribute definition can be updated only by the definition owner. * The `key` path parameter is the `key` of the custom attribute definition. * The `version` field can be optionally included to enable [optimistic concurrency](build-basics/common-api-patterns/optimistic-concurrency) control. If included, `version` must match the current version of the custom attribute definition; otherwise, the request fails with a `CONFLICT` error. Square increments the version number each time the definition is updated. * The `idempotency_key` is a unique ID for the request that can be optionally included to ensure [idempotency](customer-custom-attributes-api/overview#idempotency). The following example request updates the `visibility` setting of a definition: ```` The following is an example response: ```json { "custom_attribute_definition": { "key": "favorite-drink", "name": "Favorite Drink", "description": "The favorite drink of the customer", "version": 2, "updated_at": "2022-05-28T04:17:09Z", "schema": { "$ref": "https://developer-production-s.squarecdn.com/schemas/v1/common.json#squareup.common.String" }, "created_at": "2022-05-20T02:41:37Z", "visibility": "VISIBILITY_READ_ONLY" } } ``` After a custom attribute definition is updated, Square invokes the `customer.custom_attribute_definition.owned.updated` and `customer.custom_attribute_definition.visible.updated` [webhook events](customer-custom-attributes-api/overview#webhooks). {% anchor id="updatable-fields" /%} ### Updatable definition fields The `UpdateCustomerCustomAttributeDefinition` endpoint can be used to update one or more of the following fields. The endpoint supports sparse updates, so only new or changed fields need to be included in the request. Square ignores custom attribute definition fields that are unchanged or read-only. * `name` - The name of the custom attribute of up to 255 characters. Seller-facing custom attributes should be given a friendly name. The name must be unique (case-sensitive) across all visible customer-related custom attribute definitions for the seller. * `description` - The description of the custom attribute of up to 255 characters. Seller-facing custom attributes should be given a friendly description. * `visibility` - The [access control](customer-custom-attributes-api/overview#access-control) setting that determines whether other applications can view the definition and view or edit corresponding custom attributes. The following are valid values: * `VISIBILITY_HIDDEN` (default) * `VISIBILITY_READ_ONLY` * `VISIBILITY_READ_WRITE_VALUES` Changes to the `visibility` setting are propagated to corresponding custom attributes within a couple seconds. At that time, the `updated_at` and `version` fields of the custom attributes are also updated. For `VISIBILITY_READ_ONLY` or `VISIBILITY_READ_WRITE_VALUES` settings, both `name` and `description` are required. All custom attributes are visible in the .csv file when the customer data is exported, including those set to `VISIBILITY_HIDDEN`. Sellers can generate this file using the **Export Customers** button in the Customer Directory. * `schema`- For a `Selection` data type. Only changes to the named options and maximum number of selections are supported, as described in the following section. The total `schema` size cannot exceed 12 KB. {% aside type="tip" %} To simplify management, you might want to keep all definitions that use the same key synchronized across seller accounts. Therefore, if you change the definition for one seller, you should consider making the same change for all other sellers. {% /aside %} {% anchor id="update-selection-schema" /%} #### Updating a Selection schema For a `Selection` data type, you can update the maximum number of allowed selections and the set of predefined named options. {% aside type="info" %} Square validates custom attribute selections on upsert operations, so these changes apply only for future upsert operations. They don't affect custom attributes that have already been set on customer profiles. {% /aside %} The information you send in the `UpdateCustomerCustomAttributeDefinition` request depends on the change you want to make: * To change the maximum number of allowed selections, include the `maxItems` field with the new integer value. The minimum value is 1 and cannot exceed the number of options in the `names` field. * To change the set of predefined named options, include the `items` field with the complete `names` and `enum` arrays. The options in the `names` array map by index to the Square-assigned UUIDs in the `enum` array, which are unique per seller. The first option maps to the first UUID, the second option maps to the second UUID, and so on. * To add an option: * Add the name of the new option at the end of the `names` array. New options must always be added to the end of the array. * Don't change the `enum` array. Square generates a UUID for the new option and adds it to the end of the `enum` array. * To reorder the options: * Change the order of the names in the `names` array. * Change the order of the UUIDs in the `enum` array so that the order of the UUIDs matches the order of the corresponding named options. Note that the order might not be respected by all UIs. * To remove an option: * Remove the name of the option from the `names` array. * Remove the corresponding UUID from the `enum` array. The following example `UpdateCustomerCustomAttributeDefinition` request adds two new options by adding the names at the end of the `names` array. ```` The following example response includes the UUID that Square generated for the new `X-Small` and `X-Large` options: ```json { "custom_attribute_definition": { "key": "shirt-size", "name": "Default shirt size", "description": "The default shirt size ordered by the customer.", "version": 2, "updated_at": "2022-05-27T15:55:42Z", "schema": { "$schema": "https://developer-production-s.squarecdn.com/meta-schemas/v1/selection.json", "maxItems": 1, "type": "array", "uniqueItems": true, "items": { "names": [ "Small", "Medium", "Large", "X-Small", "X-Large" ], "enum": [ "a5fc0632-b5cf-4855-af35-7bfc88bdc9f5", "e875633f-a5d8-4872-aef4-6b96fba78c3e", "30528ff7-b11b-425a-aa11-26ff5cf1996f", "18fb06bd-9be0-4709-9c7f-737a1fd40e44", "6031c1b2-d749-4c78-9c40-ae5472ed2e03" ] } }, "created_at": "2022-05-20T02:41:37Z", "visibility": "VISIBILITY_READ_WRITE_VALUES" } } ``` {% anchor id="list-customer-custom-attribute-definitions" /%} ## List customer custom attribute definitions Use the [ListCustomerCustomAttributeDefinitions](https://developer.squareup.com/reference/square/customer-custom-attributes-api/list-customer-custom-attribute-definitions) endpoint to list the custom attribute definitions from a seller account. Note the following: * The `limit` query parameter optionally specifies a maximum [page size](build-basics/common-api-patterns/pagination) of 1 to 100 results. The default limit is 20. If the results are paged, the `cursor` field in the response contains a value that you can send with the `cursor` query parameter to get the next page of results. The following example request includes the `limit` query parameter: ```` When all pages are retrieved, all custom attribute definitions created by the requesting application are included in the results. The `key` for these definitions is the `key` that was provided when the definition was created. Custom attribute definitions created by other applications are included if their `visibility` is `VISIBILITY_READ_ONLY` or `VISIBILITY_READ_WRITE_VALUES`. The `key` for these definitions is a {% tooltip text="qualified key" %}The key provided when the definition was created, prefixed by the application ID of the definition owner: {application ID}:{key}.{% /tooltip %}. Custom attributes created in the Customer Directory are called custom fields in the UI and they're always set to `VISIBILITY_READ_WRITE_VALUES`. The following is an example response: ```json { "custom_attribute_definitions": [ { "key": "favorite-drink", "name": "Favorite Drink", "description": "The favorite drink of the customer", "version": 2, "updated_at": "2022-05-28T04:17:09Z", "schema": { "$ref": "https://developer-production-s.squarecdn.com/schemas/v1/common.json#squareup.common.String" }, "created_at": "2022-05-22T21:30:16Z", "visibility": "VISIBILITY_READ_WRITE_VALUES" }, { "key": "entity-id", "name": "Entity ID", "version": 1, "updated_at": "2022-05-30T09:44:42Z", "schema": { "$ref": "https://developer-production-s.squarecdn.com/schemas/v1/common.json#squareup.common.String" }, "created_at": "2022-05-30T09:44:42Z", "visibility": "VISIBILITY_HIDDEN" }, { "key": "sq0idp-BuahoY39o1X-GPxRRUWc0A:businessEmail", "name": "Work email", "description": "Work email address", "version": 1, "updated_at": "2022-06-14T03:23:15Z", "schema": { "$ref": "https://developer-production-s.squarecdn.com/schemas/v1/common.json#squareup.common.Email" }, "created_at": "2022-06-22T03:23:15Z", "visibility": "VISIBILITY_READ_WRITE_VALUES" }, { "key": "square:0460be56-6783-4482-8d55-634f9ae61684", "name": "Is Premium Member", "description": "Created via the Customers Directory.", "version": 1, "updated_at": "2021-10-02T23:15:51Z", "schema": { "$ref": "https://developer-production-s.squarecdn.com/schemas/v1/common.json#squareup.common.Boolean" }, "created_at": "2021-10-02T23:15:51Z", "visibility": "VISIBILITY_READ_WRITE_VALUES" } ], "cursor": "ODmcskdO5tF0GTrPAPjlGQ...QxACXlOQYbdKq0FZ4LC" } ``` The example response contains four custom attribute definitions: * "Favorite Drink" and "Entity ID" were created by the requesting application. Because "Entity ID" is set to `VISIBILITY_HIDDEN`, it's returned only when requested by the definition owner. * "Work email" was created by another third-party application. Note that the qualified key includes the ID of the application that created the custom attribute definition. * "Is Premium Member" was created by the seller in the Customer Directory. For first-party Square products, the `application_id` is `square`. If no custom attribute definitions are found, Square returns an empty response. ```json {} ``` {% anchor id="retrieve-customer-custom-attribute-definition" /%} ## Retrieve a customer custom attribute definition Use the [RetrieveCustomerCustomAttributeDefinition](https://developer.squareup.com/reference/square/customer-custom-attributes-api/retrieve-customer-custom-attribute-definition) endpoint to retrieve a custom attribute definition using the `key`. Note the following: * The `key` path parameter is the `key` of the custom attribute definition. * If the requesting application is the definition owner, use the `key` that was provided when the definition was created. * If the requesting application isn't the definition owner, use the {% tooltip text="qualified key" %}The key provided when the definition was created, prefixed by the application ID of the definition owner: {application ID}:{key}.{% /tooltip %}. The `visibility` of the definition must be `VISIBILITY_READ_ONLY` or `VISIBILITY_READ_WRITE_VALUES`. Custom attributes created in the Customer Directory are called custom fields in the UI and they're always set to `VISIBILITY_READ_WRITE_VALUES`. * The `version` query parameter is optionally used for strongly consistent reads to guarantee that you receive the most up-to-date data. When included in the request, Square returns the specified version or a higher version if one exists. If the specified version is higher than the current version, Square returns a `400 BAD_REQUEST` error. The following is an example request: ```` {% aside type="info" %} Square also returns custom attribute definitions for `RetrieveCustomerCustomAttribute` or `ListCustomerCustomAttributes` requests if you set the `with_definition` or `with_definitions` query parameter to `true`. For more information, see [Retrieve a customer custom attribute](customer-custom-attributes-api/custom-attributes#retrieve-customer-custom-attribute) or [List customer custom attributes](customer-custom-attributes-api/custom-attributes#list-customer-custom-attributes). {% /aside %} The following is an example response: ```json { "custom_attribute_definition": { "key": "favorite-drink", "name": "Favorite Drink", "description": "The favorite drink of the customer", "version": 1, "updated_at": "2022-05-20T02:41:37Z", "schema": { "$ref": "https://developer-production-s.squarecdn.com/schemas/v1/common.json#squareup.common.String" }, "created_at": "2022-05-20T02:41:37Z", "visibility": "VISIBILITY_READ_WRITE_VALUES" } } ``` If the custom attribute definition isn't found, Square returns an `errors` field that contains a `404 NOT_FOUND` error. {% anchor id="delete-customer-custom-attribute-definition" /%} ## Delete a customer custom attribute definition Use the [DeleteCustomerCustomAttributeDefinition](https://developer.squareup.com/reference/square/customer-custom-attributes-api/delete-customer-custom-attribute-definition) endpoint to delete a custom attribute definition from a seller account. Note the following: * A custom attribute definition can be deleted only by the definition owner. * The `key` path parameter is the `key` of the custom attribute definition. * Deleting a custom attribute definition also deletes the corresponding custom attribute from all customer profiles in the seller's directory. The following is an example request: ```` If successful, Square returns an empty object. ```json {} ``` After a custom attribute definition is deleted, Square invokes the `customer.custom_attribute_definition.owned.deleted` and `customer.custom_attribute_definition.visible.deleted` [webhook events](customer-custom-attributes-api/overview#webhooks). ## See also * [Custom Attributes for Customers](customer-custom-attributes-api/overview) * [Create and Manage Customer Custom Attributes](customer-custom-attributes-api/custom-attributes) * [Custom Attributes](devtools/customattributes/overview) * [API Reference: Customer Custom Attributes API](https://developer.squareup.com/reference/square/customer-custom-attributes-api) --- # Create and Manage Customer Custom Attributes > Source: https://developer.squareup.com/docs/customer-custom-attributes-api/custom-attributes > Status: PUBLIC > Languages: All > Platforms: All Learn how to create and manage custom attributes for Square customer profiles using the Customer Custom Attributes API. **Applies to:** [Customer Custom Attributes API](customer-custom-attributes-api/overview) | [Customer Groups API](customer-groups-api/what-it-does) {% subheading %}Learn how to create and manage custom attributes for Square customer profiles using the Customer Custom Attributes API.{% /subheading %} {% toc hide=true /%} ## Overview Customer-related custom attributes are used to store properties or metadata for a customer profile. A custom attribute is based on a custom attribute definition in a Square seller account. After the definition is created, the custom attribute can be set for customer profiles in the seller's Customer Directory. For an overview of how customer-related custom attributes work, see [Custom Attributes for Customers](customer-custom-attributes-api/overview). Customer-related custom attributes are stored as a collection for a customer profile. >`.../v2/customers/{customer_id}/custom-attributes` An individual custom attribute is accessed using the `customer_id` and `key`. If the requesting application isn't the definition owner, `key` is a {% tooltip text="qualified key" %}The key provided when the definition was created, prefixed by the application ID of the definition owner: {application ID}:{key}.{% /tooltip %}. >`.../v2/customers/{customer_id}/custom-attributes/{key}` ## CustomAttribute object A custom attribute is represented by a [CustomAttribute](https://developer.squareup.com/reference/square/objects/CustomAttribute) object. Custom attributes obtain a `key` identifier, `visibility` setting, allowed data type, and other properties from a custom attribute definition, which is represented by a [CustomAttributeDefinition](https://developer.squareup.com/reference/square/objects/CustomAttributeDefinition) object. The following is an example custom attribute: ```json { "custom_attribute": { "key": "favoritebook", "version": 1, "updated_at": "2022-12-08T00:07:20Z", "value": "Dune", "created_at": "2022-12-08T00:07:20Z", "visibility": "VISIBILITY_READ_WRITE_VALUES" } } ``` The following fields represent core properties of a custom attribute: |Field{% width="120px" %}|Description| |:------|:------| |`key`|The identifier for the custom attribute, which is obtained from the custom attribute definition. If the requesting application isn't the definition owner, the `key` is a qualified key. For more information, see [Qualified keys](#qualified-keys).| |`version`|The version number of the custom attribute. The version number is initially set to 1 and incremented each time the custom attribute value is updated. Include this field in upsert operations to enable [optimistic concurrency](build-basics/common-api-patterns/optimistic-concurrency) control and in read operations for strong consistency.| |`visibility`|The level of access that other applications have to the custom attribute. Custom attributes obtain this setting from the `visibility` field of the current version of the definition.| |`definition`|The [CustomAttributeDefinition](https://developer.squareup.com/reference/square/objects/CustomAttributeDefinition) object that defines properties for the custom attribute. This field is included if the custom attribute is retrieved using the `with_definition` or `with_definitions` query parameter set to `true`.| |`value`|The value of the custom attribute, which must conform to the `schema` specified by the definition. For more information, see [Value data types](#value-data-types). The size of this field cannot exceed 5 KB.| {% anchor id="qualified-keys" /%} ### Qualified keys When working with custom attributes owned by other applications, you must provide a qualified key for the following endpoints: * `UpsertCustomerCustomAttribute` * `BulkUpsertCustomerCustomAttributes` * `RetrieveCustomerCustomAttribute` * `DeleteCustomerCustomAttribute` Square generates a qualified key in the format `{application ID}:{key}`, using the application ID of the definition owner and the `key` that was provided when the definition was created. Custom attributes use the same `key` as the corresponding definition. The following example is a qualified key generated for a third-party application: >`sq0idp-BuahoY39o1X-GPxRRUWc0A:businessEmail` The following example is a qualified key for a seller-defined custom field created in the Customer Directory. In this case, the `square` application ID is combined with a GUID. >`square:0460be56-6783-4482-8d55-634f9ae61684` You can find keys by calling the following endpoints. Square returns qualified keys for the custom attributes and definitions that aren't owned by the requesting application: * [ListCustomerCustomAttributeDefinitions](https://developer.squareup.com/reference/square/customer-custom-attributes-api/list-customer-custom-attribute-definitions) * [ListCustomerCustomAttributes](https://developer.squareup.com/reference/square/customer-custom-attributes-api/list-customer-custom-attributes) - Include the `with_definitions` query parameter to also return the corresponding custom attribute definitions. Only custom attributes that have a value are returned. {% aside type="info" %} In addition, the `visibility` setting of the custom attribute must be `VISIBILITY_READ_ONLY` or `VISIBILITY_READ_WRITE_VALUES`. For more information, see [Access control.](customer-custom-attributes-api/overview#access-control) Custom fields created in the Customer Directory are always set to `VISIBILITY_READ_WRITE_VALUES`. {% /aside %} ### Value data types The following data types are supported for customer-related custom attributes: |Data type|Example value| |---------|-------------| |[String](#string)|`"Nellie"`{% line-break /%}`"The quick brown fox."`| |[Email](#email)|`"person@company.com"`| |[PhoneNumber](#phonenumber)|`"+12085551234"`| |[Address](#address)|`{`{% line-break /%}`"address_line_1": "Chez Mireille COPEAU Apartment 3",`{% line-break /%}`"address_line_2": "Entrée A Bâtiment Jonquille",`{% line-break /%}`"postal_code": "33380 MIOS",`{% line-break /%}`"locality": "CAUDOS",`{% line-break /%}`"country": "FR"`{% line-break /%}`}`| |[Date](#date)|`"2022-05-12"`| |[Boolean](#boolean)|`true`{% line-break /%}`false`| |[Number](#number)|`"48"`{% line-break /%}`"12.3"`| |[Selection](#selection)|`[`{% line-break /%}`"6b96fba7-d8a5-ae72-48f4-8c3ee875633f",`{% line-break /%}`"46c2716e-f559-4b75-c015-764897e3c4a0"`{% line-break /%}`]`| For more examples and descriptions of supported data types, see [Upsert request examples for each data type](#upsert-custom-attribute-examples). {% aside type="info" %} The `DateTime` and `Duration` data types aren't supported for customer-related custom attributes. {% /aside %} {% anchor id="get-data-type" /%} #### Getting the data type of a custom attribute A custom attribute's data type is specified by the `schema` field of the corresponding definition. You can call the following endpoints to retrieve a definition using the key: * [RetrieveCustomerCustomAttributeDefinition](https://developer.squareup.com/reference/square/customer-custom-attributes-api/retrieve-customer-custom-attribute-definition) * [RetrieveCustomerCustomAttribute](https://developer.squareup.com/reference/square/customer-custom-attributes-api/retrieve-customer-custom-attribute) with the `with_definition` query parameter set to `true`. For more information, see [Retrieve a customer custom attribute.](customer-custom-attributes-api/custom-attributes#retrieve-customer-custom-attribute) In the definition, the `schema` field specifies the data type as a URL reference to an object hosted on the Square CDN. The `Selection` data type provides additional information. The following is an example `String`-type custom attribute definition: ```json { "custom_attribute_definition": { "key": "favorite-drink", "name": "Favorite Drink", "description": "The favorite drink of the customer", "version": 1, "updated_at": "2022-05-20T02:41:37Z", "schema": { "$ref": "https://developer-production-s.squarecdn.com/schemas/v1/common.json#squareup.common.String" }, "created_at": "2022-05-20T02:41:37Z", "visibility": "VISIBILITY_READ_WRITE_VALUES" } } ``` The following is an excerpt of an example `Selection`-type custom attribute definition: ```json { "custom_attribute_definition": { ... "schema": { "$schema": "https://developer-production-s.squarecdn.com/meta-schemas/v1/selection.json", "maxItems": 3, "type": "array", "uniqueItems": true, "items": { "names": [ "Option 1", "Option 2", "Option 3" ], "enum": [ "9492bdda-ab4d-4eeb-8496-0986c8f78499", // UUID for "Option 1" "6b96fba7-d8a5-ae72-48f4-8c3ee875633f", // UUID for "Option 2" "4032c1a2-d749-4c75-9c30-be6472cd2e08" // UUID for "Option 3" ] } }, ... } } ``` Note the following: * The `maxItems` field represents the maximum number of allowed selections for the custom attribute value. * The `items` field contains two arrays: `names` and `enum`. The options in the `names` field map by index to the UUIDs in the `enum` field. The first option maps to the first UUID, the second option maps to the second UUID, and so on. This mapping is used to set the custom attribute value. For example, the value of the following custom attribute maps to Option 2. ```json { "custom_attribute": { "key": "favoritebook", "version": 1, "updated_at": "2022-08-08T00:07:20Z", "value": [ "6b96fba7-d8a5-ae72-48f4-8c3ee875633f" ], "created_at": "2022-08-08T00:07:20Z", "visibility": "VISIBILITY_READ_WRITE_VALUES" } } ``` {% anchor id="upsert-customer-custom-attribute" /%} ## Create or update a customer custom attribute To set the value of a custom attribute for a customer profile, call [UpsertCustomerCustomAttribute](https://developer.squareup.com/reference/square/customer-custom-attributes-api/upsert-customer-custom-attribute) and provide the following information: * `customer_id` - The `id` of the [Customer](https://developer.squareup.com/reference/square/objects/Customer) object that represents the target customer profile. * `key` - The `key` of the custom attribute to create or update. * If the requesting application is the definition owner, use the `key` that was provided when the definition was created. * If the requesting application isn't the definition owner, use the {% tooltip text="qualified key" %}The key provided when the definition was created, prefixed by the application ID of the definition owner: {application ID}:{key}.{% /tooltip %}. The `visibility` of the custom attribute must be `VISIBILITY_READ_WRITE_VALUES`. For more information, see [Qualified keys](#qualified-keys). * `custom_attribute` - The custom attribute with the following fields: * `value` - The `value` of the custom attribute, which must conform to the `schema` specified by the definition and cannot exceed 5 KB. For more information, see [Value data types](#value-data-types). * `version` - The current version of the custom attribute, optionally included to enable [optimistic concurrency](build-basics/common-api-patterns/optimistic-concurrency) control when updating a value that was previously set for the customer profile. If the specified version is less than the current version of the custom attribute, the request fails with a `CONFLICT` error. If the specified version is higher than the current version, Square returns a `BAD_REQUEST` error. * `idempotency_key` - A unique ID for the request that can be optionally included to ensure [idempotency](customer-custom-attributes-api/overview#idempotency). The following example request sets the value for a `String`-type custom attribute. The `key` in this example is `favoritebook`. ```` The following is an example response: ```json { "custom_attribute": { "key": "favoritebook", "version": 1, "updated_at": "2022-12-08T00:07:20Z", "value": "Dune", "created_at": "2022-12-08T00:07:20Z", "visibility": "VISIBILITY_READ_WRITE_VALUES" } } ``` During upsert operations, Square validates the provided value against the `schema` specified by the definition. After a custom attribute is upserted, Square invokes the `customer.custom_attribute.owned.updated` and `customer.custom_attribute.visible.updated` [webhook events](customer-custom-attributes-api/overview#webhooks). {% aside type="info" %} To view your custom attributes in the Customer Directory, the `visibility` setting must be `VISIBILITY_READ_WRITE_VALUES` and the seller must make the field visible from the **Configure Profiles** page. These custom attributes appear in the **Personal Information** tile of customer profiles that have been assigned a value. You must refresh the page to see an updated value. {% /aside %} {% anchor id="upsert-custom-attribute-examples" /%} ### Upsert request examples for each data type You can set a custom attribute for a customer profile by providing a `value` that conforms to the `schema` specified by the corresponding custom attribute definition. For information about getting the `schema`, see [Getting the data type of a custom attribute](#get-data-type). The following sections contain `UpsertCustomerCustomAttribute` requests for each supported data type. #### String A string with up to 1000 UTF-8 characters. Empty strings are allowed. ```` #### Email An email address consisting of ASCII characters that matches the [regular expression](https://developer.mozilla.org/en-US/docs/Web/HTML/Element/input/email#basic_validation) for the HTML5 `email` type. ```` #### PhoneNumber A string representation of a phone number in [E.164 format.](https://en.wikipedia.org/wiki/E.164) For example, `+17895551234`. ```` #### Address An [Address](https://developer.squareup.com/reference/square/objects/Address) object. For information about `Address` fields, see [Working with Addresses.](build-basics/common-data-types/working-with-addresses) You must provide a complete `Address` object in every upsert request. ```` #### Date A date in ISO 8601 format: `YYYY-MM-DD`. ```` {% aside type="info" %} The `DateTime` and `Duration` data types aren't supported for customer-related custom attributes. {% /aside %} #### Boolean A `true` or `false` value. A Toggle custom field created by sellers in the Customer Directory is a Boolean. ```` #### Number A string representation of an integer or decimal with up to 5 digits of precision. Negative numbers are denoted using a `-` prefix. The absolute value cannot exceed (2^63-1)/10^5 or 92233720368547. ```` #### Selection A selection from a set of named options. When working with a `Selection`-type custom attribute, you need to get the `schema` from the custom attribute definition. The `schema` shows the mapping between the named options and Square-assigned UUIDs and the maximum number of allowed selections. **Reading the schema** The following is an excerpt of an example `Selection`-type custom attribute definition: ```json { "custom_attribute_definition": { ... "schema": { "$schema": "https://developer-production-s.squarecdn.com/meta-schemas/v1/selection.json", "maxItems": 3, "type": "array", "uniqueItems": true, "items": { "names": [ "Option 1", "Option 2", "Option 3" ], "enum": [ "9492bdda-ab4d-4eeb-8496-0986c8f78499", // UUID for "Option 1" "6b96fba7-d8a5-ae72-48f4-8c3ee875633f", // UUID for "Option 2" "4032c1a2-d749-4c75-9c30-be6472cd2e08" // UUID for "Option 3" ] } }, ... } } ``` Note the following: * The `maxItems` field represents the maximum number of allowed selections for the custom attribute value. * The `items` field contains two arrays: `names` and `enum`. The options in the `names` field map by index to the UUIDs in the `enum` field. The first option maps to the first UUID, the second option maps to the second UUID, and so on. **Setting a selection value** To set a selection value for a customer profile, provide the target UUID (that maps to the target named option) in the `value` field. This `value` field is an array that can contain zero or more UUIDs, up to the number specified in `maxItems`. The following example request sets two selections for a custom attribute by providing two UUIDs: ```` The following example request sets an empty selection by providing an empty array: ```` {% anchor id="bulk-upsert-customer-custom-attributes" /%} ## Bulk create or update customer custom attributes To create or update one or more custom attributes for one or more customer profiles, call [BulkUpsertCustomerCustomAttributes](https://developer.squareup.com/reference/square/customer-custom-attributes-api/bulk-upsert-customer-custom-attributes). This endpoint accepts a `values` map with 1 to 25 objects that each contain: * An arbitrary ID for the individual upsert request, which corresponds to an entry in the response that has the same ID. The ID must be unique within the `BulkUpsertCustomerCustomAttributes` request. * An individual upsert request with the information needed to create or update a custom attribute for a customer profile. The following example includes two upsert requests that set two custom attributes for two customer profiles: ```json { "values": { "id1": { "customer_id": "SY8EMWRNDN3TQDP2H4KS1QWMMM", "custom_attribute": { "key": "favoritebook", "value": "Alice in Wonderland" }, "idempotency_key": "{UNIQUE_KEY}" }, "id2": { "customer_id": "N3NCVYY3WS27HF0HKANA3R9FP8", "custom_attribute": { "key": "favoritemovie", "value": "Brazil", "version": 3 // Only supported when updating an existing value }, "idempotency_key": "{UNIQUE_KEY}" } } } ``` During upsert operations, Square validates each provided value against the `schema` specified by the definition. The optional `version` field is only supported for update operations. {% aside type="tip" %} If you're providing idempotency keys, you can use them as the arbitrary ID for individual upsert requests. {% /aside %} An individual upsert request contains the information needed to set the value of a custom attribute for a customer profile. Each request includes the following fields: * `customer_id` - The `id` of the [Customer](https://developer.squareup.com/reference/square/objects/Customer) object that represents the target customer profile. * `custom_attribute` - The custom attribute with following fields: * `key` - The key of the custom attribute to create or update. * If the requesting application is the definition owner, use the `key` that was provided when the definition was created. * If the requesting application isn't the definition owner, use the {% tooltip text="qualified key" %}The key provided when the definition was created, prefixed by the application ID of the definition owner: {application ID}:{key}.{% /tooltip %}. The `visibility` of the custom attribute must be `VISIBILITY_READ_WRITE_VALUES`. For more information, see [Qualified keys](#qualified-keys). * `value` - The value of the custom attribute, which must conform to the `schema` specified by the definition and cannot exceed 5 KB. For more information, see [Value data types](#value-data-types). * `version` - The current version of the custom attribute, optionally included to enable [optimistic concurrency](build-basics/common-api-patterns/optimistic-concurrency) control when updating a value that was previously set for the customer profile. If the specified version is less than the current version of the custom attribute, the request fails with a `CONFLICT` error. If the specified version is higher than the current version, Square returns a `BAD_REQUEST` error. * `idempotency_key` - A unique ID for the individual request that can be optionally included to ensure [idempotency](customer-custom-attributes-api/overview#idempotency). The following example `BulkUpsertCustomerCustomAttributes` request includes five individual upsert requests: ```` The following is an example response. Note that the `errors` field is returned for any individual requests that fail. ```json { "values": { "id2": { "customer_id": "SY8EMWRNDN3TQDP2H4KS1QWMMM", "custom_attribute": { "key": "favoritebook", "version": 3, "updated_at": "2022-05-30T00:16:23Z", "value": "Through the Looking Glass", "created_at": "2022-05-20T20:20:35Z", "visibility": "VISIBILITY_READ_WRITE_VALUES" } }, "id1": { "customer_id": "N3NCVYY3WS27HF0HKANA3R9FP8", "custom_attribute": { "key": "favoritebook", "version": 1, "updated_at": "2022-05-30T00:16:23Z", "value": "Dune", "created_at": "2022-05-30T00:16:23Z", "visibility": "VISIBILITY_READ_WRITE_VALUES" } }, "id3": { "errors": [ { "code": "CONFLICT", "detail": "Attempting to write to version 3, but current version is 4", "field": "version", "category": "INVALID_REQUEST_ERROR" } ] }, "id4": { "customer_id": "N3NCVYY3WS27HF0HKANA3R9FP8", "custom_attribute": { "key": "square:a0f1505a-2aa1-490d-91a8-8d31ff181808", "version": 1, "updated_at": "2022-05-30T00:16:23Z", "value": "10.5", "created_at": "2021-11-08T23:14:47Z", "visibility": "VISIBILITY_READ_WRITE_VALUES" } }, "id5": { "customer_id": "70548QG1HN43B05G0KCZ4MMC1G", "custom_attribute": { "key": "sq0ids-0evKIskIGaY45fCyNL66aw:backupemail", "version": 2, "updated_at": "2022-05-30T00:16:23Z", "value": "person@company.com", "created_at": "2022-05-29T03:51:18Z", "visibility": "VISIBILITY_READ_WRITE_VALUES" } } } } ``` Individual upsert requests aren't guaranteed to be returned in the same order. Each upsert response has the same ID as the corresponding upsert request, so you can use the ID to map individual requests and responses. After each custom attribute is upserted, Square invokes the `customer.custom_attribute.owned.updated` and `customer.custom_attribute.visible.updated` [webhook events](customer-custom-attributes-api/overview#webhooks). {% anchor id="list-customer-custom-attributes" /%} ## List customer custom attributes To list the custom attributes that are set for a customer profile, call [ListCustomerCustomAttributes](https://developer.squareup.com/reference/square/customer-custom-attributes-api/list-customer-custom-attributes) and provide the following information: * `customer_id` - The `id` of the [Customer](https://developer.squareup.com/reference/square/objects/Customer) object that represents the target customer profile. * `with_definitions` - Indicates whether to return the custom attribute definition in the `definition` field of each custom attribute. Set this parameter to `true` to get the name and description of each custom attribute, information about the data type, or other definition details. The default value is `false`. * `limit` - The maximum [page size](build-basics/common-api-patterns/pagination) of 1 to 100 results to return in the response. The default value is 20. If the results are paged, the `cursor` field in the response contains a value that you can send with the `cursor` query parameter to get the next page of results. The following example request includes the `limit` query parameter: ```` When all pages are retrieved, the results include: * All custom attributes owned by the requesting application that have a value. The `key` for these custom attributes is the `key` that was provided for the definition. * All custom attributes owned by other applications that have a value and a `visibility` setting of `VISIBILITY_READ_ONLY` or `VISIBILITY_READ_WRITE_VALUES`. The `key` for these custom attributes is a {% tooltip text="qualified key" %}The key provided when the definition was created, prefixed by the application ID of the definition owner: {application ID}:{key}.{% /tooltip %}. For more information, see [Qualified keys](#qualified-keys). A custom attribute is owned by the application that created the corresponding definition. The following is an example response: ```json { "custom_attributes": [ { "key": "entity-id", "version": 1, "updated_at": "2022-05-30T09:44:42Z", "value": "mbj_004508", "created_at": "2022-05-30T09:44:42Z", "visibility": "VISIBILITY_HIDDEN" }, { "key": "favoritebook", "version": 3, "updated_at": "2022-05-30T00:16:23Z", "value": "Through the Looking Glass", "created_at": "2022-05-20T20:20:35Z", "visibility": "VISIBILITY_READ_WRITE_VALUES" }, { "key": "sq0idp-BuahoY39o1X-GPxRRUWc0A:businessAddress", "version": 2, "updated_at": "2022-05-31T17:40:28Z", "value": { "address_line_1": "1455 Market Street", "postal_code": "94103", "country": "US", "administrative_district_level_1": "California", "locality": "San Francisco" }, "created_at": "2022-05-26T17:08:57Z", "visibility": "VISIBILITY_READ_WRITE_VALUES" }, { "key": "square:a0f1505a-2aa1-490d-91a8-8d31ff181808", "version": 4, "updated_at": "2022-05-16T00:16:23Z", "value": "10.5", "created_at": "2021-11-08T23:14:47Z", "visibility": "VISIBILITY_READ_WRITE_VALUES" } ], "cursor": "O5tF0DmcskdGTrPOAPjlIL...BxACXlOQYbdKq0RC4LZ" } ``` The following example request includes the `with_definitions` query parameter set to `true`: ```` The following is an excerpt of an example response that shows the custom attribute definition in the `definition` field: ```json { "custom_attributes": [ { "key": "entity-id", "version": 1, "definition": { "key": "entity-id", "name": "Entity ID", "version": 1, "updated_at": "2022-05-13T23:23:30Z", "schema": { "$ref": "https://developer-production-s.squarecdn.com/schemas/v1/common.json#squareup.common.String" }, "created_at": "2022-05-13T23:23:30Z", "visibility": "VISIBILITY_HIDDEN" }, "updated_at": "2022-05-30T09:44:42Z", "value": "mbj_004508", "created_at": "2022-05-30T09:44:42Z", "visibility": "VISIBILITY_HIDDEN" }, ... ] } ``` If no custom attributes are found, Square returns an empty object. ```json {} ``` {% anchor id="retrieve-customer-custom-attribute" /%} ## Retrieve a customer custom attribute To retrieve a custom attribute from a customer profile, call [RetrieveCustomerCustomAttribute](https://developer.squareup.com/reference/square/customer-custom-attributes-api/retrieve-customer-custom-attribute) and provide the following information: * `customer_id` - The `id` of the [Customer](https://developer.squareup.com/reference/square/objects/Customer) object that represents the target customer profile. * `key` - The `key` of the custom attribute to retrieve. * If the requesting application is the definition owner, use the `key` that was provided when the definition was created. * If the requesting application isn't the definition owner, use the {% tooltip text="qualified key" %}The key provided when the definition was created, prefixed by the application ID of the definition owner: {application ID}:{key}.{% /tooltip %}. The `visibility` of the custom attribute must be `VISIBILITY_READ_ONLY` or `VISIBILITY_READ_WRITE_VALUES`. For more information, see [Qualified keys](#qualified-keys). * `with_definition` - Indicates whether to return the custom attribute definition in the `definition` field of the custom attribute. Set this parameter to `true` to get the name and description of the custom attribute, information about the data type, or other definition details. The default value is `false`. * `version` - The current version of the custom attribute, optionally included for strongly consistent reads to guarantee that you receive the most up-to-date data. When included in the request, Square returns the specified version or a higher version if one exists. If the specified version is higher than the current version, Square returns a `400 BAD_REQUEST` error. The following is an example request: ```` The following is an example response for an `Address`-type custom attribute. The `value` field contains the value of the custom attribute. ```json { "custom_attribute": { "key": "sq0idp-BuahoY39o1X-GPxRRUWc0A:businessAddress", "version": 1, "updated_at": "2022-05-26T17:08:57Z", "value": { "address_line_1": "43 Main Street", "address_line_2": "The Liberties", "locality": "Dublin 20", "administrative_district_level_1": "Co. Dublin", "postal_code": "D08XK58", "country": "IE" }, "created_at": "2022-05-26T17:08:57Z", "visibility": "VISIBILITY_READ_WRITE_VALUES" } } ``` The following example request includes the `with_definition` query parameter: ```` The following example response shows the custom attribute definition in the `definition` field. This example defines a `Selection`-type custom attribute. The mapping information in the `schema.items` field is used to determine the custom attribute value. The `names` field contains the named options and the `enum` field contains the corresponding Square-assigned UUIDs. The named options map by index to the UUIDs. The first option maps to the first UUID, the second option maps to the second UUID, and so on. Therefore, the UUID in the `value` field of this custom attribute maps to the Small option. ```json { "custom_attribute": { "key": "shirt-size", "version": 1, "definition": { "key": "shirt-size", "name": "Default shirt size", "description": "The default shirt size ordered by the customer.", "version": 1, "updated_at": "2022-05-20T00:27:17Z", "schema": { "$schema": "https://developer-production-s.squarecdn.com/meta-schemas/v1/selection.json", "maxItems": 1, "type": "array", "uniqueItems": true, "items": { "names": [ "Small", "Medium", "Large" ], "enum": [ "1a052285-7224-4d25-9232-69f941bb0612", "4034d1bb-ff6c-4f7f-9108-a01625e8aadd", "fb27f80b-24e1-463b-9aa1-d32fcec6b22a" ] } }, "created_at": "2022-05-20T00:27:17Z", "visibility": "VISIBILITY_READ_WRITE_VALUES" }, "updated_at": "2022-05-26T16:19:07Z", "value": [ "1a052285-7224-4d25-9232-69f941bb0612" ], "created_at": "2022-05-26T16:19:07Z", "visibility": "VISIBILITY_READ_WRITE_VALUES" } } ``` If the custom attribute isn't set for the specified customer profile, Square returns the following response: ```json { "errors": [ { "code": "NOT_FOUND", "detail": "The requested Value `{key}` is not found", "category": "INVALID_REQUEST_ERROR" } ] } ``` If the custom attribute isn't available for customer profiles in the directory, Square returns the following response: ```json { "errors": [ { "code": "BAD_REQUEST", "detail": "No matching definition found for value", "field": "key", "category": "INVALID_REQUEST_ERROR" } ] } ``` {% anchor id="delete-customer-custom-attribute" /%} ## Delete a customer custom attribute To delete a custom attribute from a customer profile, call [DeleteCustomerCustomAttribute](https://developer.squareup.com/reference/square/customer-custom-attributes-api/delete-customer-custom-attribute) and provide the following information: * `customer_id` - The `id` of the [Customer](https://developer.squareup.com/reference/square/objects/Customer) object that represents the target customer profile. * `key` - The `key` of the custom attribute to delete. * If the requesting application is the definition owner, use the `key` that was provided when the definition was created. * If the requesting application isn't the definition owner, use the {% tooltip text="qualified key" %}The key provided when the definition was created, prefixed by the application ID of the definition owner: {application ID}:{key}.{% /tooltip %}. The `visibility` of the custom attribute must be `VISIBILITY_READ_WRITE_VALUES`. For more information, see [Qualified keys](#qualified-keys). The following is an example request: ```` If the operation is successful, Square returns an empty object: ```json {} ``` After a custom attribute is deleted, Square invokes the `customer.custom_attribute.owned.deleted` and `customer.custom_attribute.visible.deleted` [webhook events](customer-custom-attributes-api/overview#webhooks). ## See also * [Custom Attributes for Customers](customer-custom-attributes-api/overview) * [Create and Manage Customer Custom Attribute Definitions](customer-custom-attributes-api/custom-attribute-definitions) * [Custom Attributes](devtools/customattributes/overview) * [API Reference: Customer Custom Attributes API](https://developer.squareup.com/reference/square/customer-custom-attributes-api) --- # Loyalty Program > Source: https://developer.squareup.com/docs/loyalty/overview > Status: PUBLIC > Languages: All > Platforms: All Learn about Square loyalty programs, accrual rules, and reward tiers. **Applies to:** [Loyalty API](loyalty-api/overview) {% subheading %}Learn about Square loyalty programs, accrual rules, and reward tiers.{% /subheading %} {% toc hide=true /%} ## Overview Customer loyalty programs help sellers to increase repeat visits to their business by rewarding customers. Square sellers who use Square Point of Sale (POS) or Square Online can subscribe to Square Loyalty and set up a loyalty program in the Square Dashboard. For feature and pricing information, see [Square Loyalty](https://squareup.com/us/en/software/loyalty) and [Overview of Square Loyalty](https://squareup.com/help/us/en/article/5744-overview-of-square-loyalty). For the list of countries where Square Loyalty is available, see [International availability of Square Loyalty](loyalty-api/overview#international-availability). Square provides a Loyalty API that developers can use to integrate Square Loyalty into their applications. For more information, see [Loyalty API](loyalty-api/overview). {% anchor id="set-up-loyalty-program" /%} ## Setting up a loyalty program Sellers can set up a loyalty program and subscribe to Square Loyalty from the [Loyalty](https://app.squareup.com/dashboard/loyalty) page in the Square Dashboard. A seller account can have one loyalty program with one or more participating locations. When setting up a Square loyalty program in the Square Dashboard, sellers configure loyalty program settings such as accrual rules and reward tiers. {% aside type="info" %} The Loyalty API cannot be used to create or update a loyalty program. To test your calls to the Loyalty API, you can subscribe to Square Loyalty in the Square Dashboard using your Sandbox test account and a test credit card that is never charged. For steps that show to subscribe and set up a free loyalty program in the Sandbox environment, follow step 1 in [Loyalty Walkthrough 1](loyalty-api/walkthrough1) or [Loyalty Walkthrough 2](loyalty-api/walkthrough2) or watch the [Sandbox 101: Loyalty API](https://www.youtube.com/watch?v=LFwO9DiwxEs) video. {% /aside %} {% anchor id="accrual-rules" /%} ## Accrual rules An accrual rule defines how buyers can earn points from the base loyalty program. The type of accrual rule used by the program determines the program type. Sellers configure their loyalty program to use one of the following ways to earn points: ![A screenshot showing how sellers can select a program type that defines how buyers can earn points.](https://images.ctfassets.net/1nw4q0oohfju/6jP0KBAfiHVUPL8tZoV8Ya/b0ee1d4fbe762c9fe11424f49e9b135e/loyalty-program-types.png) **Visit based** - Buyers earn points for every purchase, with an optional minimum spend requirement. For example, "Earn one point for each visit, with a $5 minimum purchase required". This program type defines one `VISIT` accrual rule. **Amount spent** - Buyers earn points based on the amount they spend. For example, "Earn one point for every $2 dollars spent". This program type defines one `SPEND` accrual rule. **Item based** - Buyers earn points when they purchase specific items or services. For example, "Earn one point for each pumpkin latte purchased", where pumpkin latte is an item in the seller's catalog. This program type defines one or more `ITEM_VARIATION` accrual rules. **Category based** - Buyers earn points when they purchase items or services from specific categories. For example, "Earn one point for any drink purchased", where drink is an item category in the seller's catalog. This program type defines one or more `CATEGORY` accrual rules. For more information, see [Accrual rules](loyalty-api/loyalty-programs#accrual-rules). {% aside type="info" %} Sellers can also run loyalty promotions that enable buyers to earn extra points from a purchase. For more information, see [Manage Loyalty Promotions](loyalty-api/loyalty-promotions). {% /aside %} {% anchor id="reward-tiers" /%} ## Reward tiers A reward tier defines how buyers can redeem points for a discount by specifying the number of points required and the value and scope of the discount. Sellers can configure multiple reward tiers for their loyalty program that offer the following reward types: ![A screenshot showing how sellers can set up reward tiers.](https://images.ctfassets.net/1nw4q0oohfju/1iyrfuBIlOBUOexvUlvtbf/8c3dc4b8f8f0ceb05f4cbb7f4a753892/loyalty-reward-types.png) **Discount on entire sale** - Offers a discount on the entire sale. The discount can be a specific amount or percentage off the entire sale: * **Amount based** - A specific amount off a purchase. For example, "Redeem 10 points for a $1 discount." * **Percentage based** - A percentage off a purchase, with an optional maximum discount amount. For example, "Redeem 25 points for a 20% discount, with a maximum discount of $40." **Discount on specific categories** - Offers a discount on items or services that belong to specific categories in the seller's catalog. For example, suppose the seller catalog has a drink category that contains items such as tea, coffee, and hot chocolate. The discount can apply to any item in the drink category. The discount can be an amount or percentage off one or more qualifying categories: * **Amount based** - A specific amount off a purchase. For example, "Redeem 10 points for a $1 discount on a drink." If an order contains multiple drinks, the discount applies to only one item. * **Percentage based** - A percentage off a purchase, with an optional maximum discount amount. For example, "Redeem 10 points for a 5% discount on a drink." **Discount on specific items** - Offers a discount on specific items or services in the seller's catalog. The discount applies to only a single item in a given sale. The discount can be a specific amount or percentage off one or more qualifying items or services: * **Amount based** - A specific amount off a purchase. For example, "Redeem 10 points for a $1 discount on a coffee or cake." * **Percentage based** - A percentage off a purchase, with an optional maximum discount amount. For example, "Redeem 15 points for a 10% discount on a haircut." **Free item** - Offers a free item or service from the seller's catalog. For example, "Redeem 10 points to get a free coffee." The qualifying item or service is specified by the seller. A reward that offers a free item doesn't automatically add the item to an order. However, you can create a custom UI experience to offer the free item even if it's not included in the order. {% aside type="info" %} Square's pricing engine applies discounts so that they maximize the reward value for the buyer. For example, consider a "Redeem 10 points for 20% off a drink" reward tier. If an order contains one coffee for $2 and one latte for $4, Square applies the discount to the higher priced latte. {% /aside %} Tiered rewards allow sellers to offer better discounts to buyers who spend more, as shown in the following examples: * Reward tiers example 1: * Tier 1 - Redeem 10 points and get a free coffee. * Tier 2 - Redeem 15 points and get a free sandwich. * Reward tiers example 2: * Tier 1 - Redeem 10 points and get 5% off the entire purchase. * Tier 2 - Redeem 20 points and get 15% off the entire purchase. * Reward tiers example 3: * Tier 1 - Redeem 10 points and get $1 off an entrée. * Tier 2 - Redeem 20 points and get $3 off an entrée. * Tier 3 - Redeem 30 points and get $8 off an entrée. {% anchor id="loyalty-feature-names" /%} ## Loyalty feature names in the Loyalty API For some loyalty program features, the Loyalty API uses different names than the Square Dashboard or other Square products. The earning points rule that sellers can configure in Square products is represented by an [accrual rule](https://developer.squareup.com/reference/square/objects/LoyaltyProgramAccrualRule) in the Loyalty API. The type of rule used by a loyalty program determines the program type. Accrual rule settings are shown in the `accrual_rules` field of the `LoyaltyProgram` object. A reward that sellers configure in Square products is represented by a [reward tier](https://developer.squareup.com/reference/square/objects/LoyaltyProgramRewardTier) in the Loyalty API. Reward tier settings are shown in the `reward_tiers` field of the `LoyaltyProgram` object. A [reward](https://developer.squareup.com/reference/square/objects/LoyaltyReward) that you create using the Loyalty API is a contract for the buyer to redeem loyalty points for a reward tier discount. The reward can have an `ISSUED`, `REDEEMED`, or `DELETED` status and is associated with a loyalty account, reward tier, and (optionally) an order. ## See also * [Loyalty API](loyalty-api/overview) * [Retrieve a Loyalty Program](loyalty-api/loyalty-programs) * [Loyalty API Example Walkthrough 1](loyalty-api/walkthrough1) * [Loyalty API Example Walkthrough 2](loyalty-api/walkthrough2) * [Square Loyalty Pricing](https://squareup.com/help/us/en/article/6382-square-loyalty-pricing) * [Video: Sandbox 101: Loyalty API](https://www.youtube.com/watch?v=LFwO9DiwxEs) --- # Loyalty API > Source: https://developer.squareup.com/docs/loyalty-api/overview > Status: PUBLIC > Languages: All > Platforms: All Learn about the Loyalty API and how to set up a loyalty program, enroll buyers in the program, accrue points, and redeem points. **Applies to:** [Loyalty API](https://developer.squareup.com/reference/square/loyalty-api) | [Customers API](customers-api/what-it-does) | [Orders API](orders-api/what-it-does) | [Catalog API](catalog-api/what-it-does) | [GraphQL](devtools/graphql) {% subheading %}Learn about the Loyalty API and how to set up a loyalty program, enroll buyers in the program, accrue points, and redeem points.{% /subheading %} {% toc hide=true /%} ## Overview Square sellers who use Square Point of Sale (POS) or Square Online can subscribe to Square Loyalty and set up a loyalty program in the Square Dashboard. Loyalty programs help drive repeat visits to businesses by allowing customers to earn points that can be redeemed for future discounts. Developers can use the [Loyalty API](https://developer.squareup.com/reference/square/loyalty-api) to integrate Square Loyalty into third-party applications, such as eCommerce websites, mobile applications, and POS solutions. Watch the following video to see how the API works: {% youtube src="https://www.youtube.com/embed/LFwO9DiwxEs?si=B6AgXb08P2tdu9F3" /%} {% aside type="info" %} For feature and pricing information, see [Square Loyalty](https://squareup.com/software/loyalty) and [Overview of Square Loyalty](https://squareup.com/help/article/5744-overview-of-square-loyalty). For international considerations, see [International availability of Square Loyalty](#international-availability). {% /aside %} ## Requirements and limitations The following requirements and limitations apply when integrating the Square loyalty program in applications using the Loyalty API. For more information about loyalty programs, including pricing information, see [Overview of Square Loyalty](https://squareup.com/help/article/5744-overview-of-square-loyalty) and [Loyalty Program](loyalty/overview). {% anchor id="loyalty-market-availability" /%} {% anchor id="international-availability" /%} * **International availability of Square Loyalty** - [Square Loyalty](https://squareup.com/software/loyalty) is available in Australia, Canada, France, Ireland, Japan, Spain, the United Kingdom, and the United States. The country code of the phone number used to create a loyalty account must correspond to a country where Square Loyalty is available. Square applies the following accrual logic for `SPEND` program types and `VISIT` program types that have a minimum spend requirement: * **Before-tax versus after-tax purchase amounts** - By default, the country of the seller account determines whether points accrual is based on the before-tax or after-tax purchase amount: * Seller accounts activated in Canada and the United States use the before-tax purchase amount. * Seller accounts activated in Australia, France, Ireland, Japan, Spain, and the United Kingdom use the after-tax purchase amount. Sellers can also configure the before-tax or after-tax points accrual setting on the **Settings** page in the **Loyalty** section of the Square Dashboard. In a `LoyaltyProgram` object, this setting corresponds to the `tax_mode` field of `SPEND` or `VISIT` accrual rules. * **Before-tip purchase amounts** - For all countries, points are accrued based on purchase amounts before any added tip. * **Loyalty programs are read-only with the Loyalty API** - The Loyalty API cannot be used to create or modify loyalty program settings. Sellers can configure their loyalty program only on the **Loyalty** page of the Square Dashboard. Creating a program invokes the `loyalty.program.created` [webhook event](#webhooks) and updating the program invokes a `loyalty.program.updated` event. Note that the Loyalty API can be used to create and manage [loyalty promotions](loyalty-api/loyalty-promotions) for a loyalty program. * **Limited support for loyalty promotions for custom ordering applications** - For applications that use a custom ordering system to process orders (instead of the Orders API), Square provides limited support for managing promotion points for buyers. For more information, see [Considerations](loyalty-api/loyalty-promotions#considerations). {% anchor id="limited-support-loyalty-accounts" /%} * **Limited support for managing loyalty accounts with the Loyalty API** - The Loyalty API lets you create loyalty accounts and manage points and rewards for loyalty accounts, but it cannot be used to update account settings or delete accounts. However, sellers can change the phone number for an account or delete an account from the customer's **Loyalty Summary** tile in the Square Dashboard. Note the following: * Changing the phone number replaces the existing `LoyaltyAccount.mapping` object with a new `mapping` that contains the updated phone number. This action invokes the `loyalty.account.updated` webhook event. The phone number assigned to the associated customer profile isn't affected. * Deleted loyalty accounts are permanently removed from the seller account and don't appear in `SearchLoyaltyAccounts` results. This action invokes the `loyalty.account.deleted` webhook event. * **OAuth permissions** - Applications that use OAuth require the `LOYALTY_READ` or `LOYALTY_WRITE` permission to perform any Loyalty API actions. For more information, see [OAuth API](oauth-api/overview) and [Permissions Reference for Loyalty](oauth-api/square-permissions#loyalty). * **Reward redemption** - The following considerations apply when redeeming rewards: * Redeeming multiple rewards from different reward tiers on the same order is supported, but redeeming multiple rewards from the same reward tier on the same order isn't supported. * When redeeming multiple rewards on the same order, only one reward can apply to each line item. Consequently, redeeming multiple whole purchase rewards leads to the highest discount being used and others being ignored. * If a reward tier references an invalid catalog item, or another condition prevents the Loyalty API from converting a reward tier, calls to `RetrieveLoyaltyProgram` and `ListLoyaltyPrograms` (deprecated) return an `UNSUPPORTED_LOYALTY_REWARD_TIER` error. If this occurs, [contact Developer Support](https://squareup.com/help/contact?panel=BF53A9C8EF68), [join our Discord community](https://discord.gg/squaredev), or reach out to your Square account manager. ## Get started with the Loyalty API After a seller [sets up a loyalty program](loyalty/overview#set-up-loyalty-program) and subscribes to Square Loyalty in the Square Dashboard, you can create loyalty accounts to enroll buyers in the loyalty program. Then, buyers can start earning points from purchases and redeeming points for reward discounts. To enroll a buyer in a loyalty program, you create a loyalty account for the buyer: 1. Obtain the buyer's phone number, which you need to provide (in E.164 format) when creating the loyalty account. 1. Call [RetrieveLoyaltyProgram](https://developer.squareup.com/reference/square/loyalty-api/retrieve-loyalty-program) using the `main` keyword to get the ID of the seller's loyalty program. 1. Call [CreateLoyaltyAccount](https://developer.squareup.com/reference/square/loyalty-api/create-loyalty-account) to create a loyalty account in the loyalty program. The loyalty account is associated with a customer profile in the seller's Customer Directory. If a matching customer profile cannot be found, a new customer profile is created. For more information, see [Create a loyalty account](loyalty-api/loyalty-accounts#create-loyalty-account). After you create the loyalty account, you can enable the buyer to earn (accumulate) points from purchases and redeem points for reward discounts: * [Accumulate points from a purchase](loyalty-api/loyalty-points#accumulate-loyalty-points-from-a-purchase) * [Redeem points for a reward discount](loyalty-api/loyalty-rewards#create-loyalty-reward) {% aside type="info" %} If your application uses the Orders API, Square provides a simplified process for accumulating and redeeming loyalty points. {% /aside %} When you're ready to try calling the Loyalty API, you can watch the [Sandbox 101: Loyalty API](https://www.youtube.com/watch?v=LFwO9DiwxEs) video or follow step 1 in [walkthrough 1](loyalty-api/walkthrough1) or [walkthrough 2](loyalty-api/walkthrough2) to set up a loyalty program in the Square Sandbox and subscribe to Square Loyalty for free. You can then continue with the walkthrough steps or build and send test API requests using [API Explorer](https://developer.squareup.com/explorer/square). {% anchor id="supported-operations" /%} ## Supported Loyalty API operations You can use Loyalty API endpoints to perform the following operations: ### Working with loyalty programs * [RetrieveLoyaltyProgram](https://developer.squareup.com/reference/square/loyalty-api/retrieve-loyalty-program) - Get information about a loyalty program, such as the program ID used to create a loyalty account and the program's accrual rules and reward tiers. For more information, see [Retrieve a Loyalty Program](loyalty-api/loyalty-programs). ### Working with loyalty promotions * [CreateLoyaltyPromotion](https://developer.squareup.com/reference/square/loyalty-api/create-loyalty-promotion) - Create a loyalty promotion that enables buyers to earn extra points. * [RetrieveLoyaltyPromotion](https://developer.squareup.com/reference/square/loyalty-api/retrieve-loyalty-promotion) - Get information about a loyalty promotion, such as the promotion status, incentive, and available time. * [ListLoyaltyPromotions](https://developer.squareup.com/reference/square/loyalty-api/list-loyalty-promotions) - List the loyalty promotions associated with a loyalty program. * [CancelLoyaltyPromotion](https://developer.squareup.com/reference/square/loyalty-api/cancel-loyalty-promotion) - Cancel a loyalty promotion. For more information, see [Manage Loyalty Promotions](loyalty-api/loyalty-promotions). ### Working with loyalty accounts * [CreateLoyaltyAccount](https://developer.squareup.com/reference/square/loyalty-api/create-loyalty-account) - Create a loyalty account that enrolls a buyer in a loyalty program. * [RetrieveLoyaltyAccount](https://developer.squareup.com/reference/square/loyalty-api/retrieve-loyalty-account) - Get information about a loyalty account, such as the available point balance and associated customer ID. * [SearchLoyaltyAccounts](https://developer.squareup.com/reference/square/loyalty-api/search-loyalty-accounts) - List all loyalty accounts, or search accounts by one or more phone number mappings or customer IDs. For more information, see [Create and Retrieve Loyalty Accounts](loyalty-api/loyalty-accounts). ### Working with loyalty points * [AccumulateLoyaltyPoints](https://developer.squareup.com/reference/square/loyalty-api/accumulate-loyalty-points) - Add points earned from a purchase to a buyer's loyalty account. * [AdjustLoyaltyPoints](https://developer.squareup.com/reference/square/loyalty-api/adjust-loyalty-points) - Add or remove points from a loyalty account outside of the normal order-purchase flow. For example, you might call this endpoint to give extra points for a special offer or remove points after an item is returned. * [CalculateLoyaltyPoints](https://developer.squareup.com/reference/square/loyalty-api/calculate-loyalty-points) - Get the number of points a buyer would earn from a purchase, which you can display while building the order. If your application doesn't integrate with the Orders API, you can also call this endpoint to help compute the points to provide to the `AccumulateLoyaltyPoints` endpoint. For more information, see [Manage Loyalty Points](loyalty-api/loyalty-points). ### Working with loyalty rewards * [CreateLoyaltyReward](https://developer.squareup.com/reference/square/loyalty-api/create-loyalty-reward) - Issue a loyalty reward, which removes the required points from the loyalty account balance and holds them in reserve until the reward is redeemed or deleted. * [RedeemLoyaltyReward](https://developer.squareup.com/reference/square/loyalty-api/redeem-loyalty-reward) - Redeem a loyalty reward, which permanently removes the points from the loyalty account balance. If your application integrates with the Orders API, Square automatically calls this endpoint after an order is paid to redeem any eligible rewards that you created for the order. * [RetrieveLoyaltyReward](https://developer.squareup.com/reference/square/loyalty-api/retrieve-loyalty-reward) - Get information about a loyalty reward. * [SearchLoyaltyRewards](https://developer.squareup.com/reference/square/loyalty-api/search-loyalty-rewards) - List all loyalty rewards, or search rewards by a loyalty account ID and then optionally by a reward status. * [DeleteLoyaltyReward](https://developer.squareup.com/reference/square/loyalty-api/delete-loyalty-reward) - Delete a reward that was issued but not redeemed. For more information, see [Manage Loyalty Rewards](loyalty-api/loyalty-rewards). ### Working with balance-changing loyalty events * [SearchLoyaltyEvents](https://developer.squareup.com/reference/square/loyalty-api/search-loyalty-events) - List all events that resulted in a change to the loyalty point balance, or search events by a loyalty account ID, date range, and other supported attributes. For more information, see [Search for Balance-Changing Loyalty Events](loyalty-api/loyalty-events). {% aside type="info" %} You can also subscribe for [webhook notifications about all loyalty events](#webhooks). {% /aside %} {% aside type="tip" %} [Square GraphQL](devtools/graphql) queries provide read access to loyalty data through the `loyaltyAccounts`, `loyaltyEvents`, `loyaltyProgram`, `loyaltyPromotions`, and `loyaltyRewards` entry points. {% /aside %} ## Integration with other Square APIs Loyalty programs have built-in integration with the following Square APIs: * [Customers API](#integration-with-the-customers-api) * [Orders API](#integration-with-the-orders-api) * [Catalog API](#integration-with-the-catalog-api) {% anchor id="integration-with-the-customers-api" /%} ### Integration with the Customers API All loyalty accounts have a `customer_id` field that associates the account with a customer profile in the seller's [Customer Directory](https://app.squareup.com/dashboard/customers/directory). This association enables integration features such as searching loyalty accounts by customer ID and accessing loyalty activity from the customer's Loyalty Summary card in the directory. When possible, you should provide a `customer_id` in the `CreateLoyaltyAccount` request when you enroll buyers in a loyalty program. If `customer_id` isn't provided, Square uses the phone number provided in the request to search the directory for a matching customer profile. If a match isn't found, Square creates a new customer profile and associates it with the loyalty account. However, this process can result in duplicate profiles if the buyer's customer profile doesn't have a matching phone number. To avoid creating duplicate customer profiles, call [SearchCustomers](https://developer.squareup.com/reference/square/customers-api/search-customers) to search customer profiles by another identifying attribute, such as email address or reference ID before creating the account. {% aside type="info" %} When Square creates a customer profile for a `CreateLoyaltyAccount` request, the `creation_source` field of the customer profile is set to `LOYALTY`. {% /aside %} {% anchor id="integration-with-the-orders-api" /%} ### Integration with the Orders API The Loyalty API is integrated with the Orders API and you should leverage this in your applications. Some of the benefits are: * **A simplified point accrual flow.** The following Loyalty API endpoints let you easily compute the points earned on orders you create with the Orders API: * The [CalculateLoyaltyPoints](https://developer.squareup.com/reference/square/loyalty-api/calculate-loyalty-points) endpoint computes program points and promotion points for the specified order. * The [AccumulateLoyaltyPoints](https://developer.squareup.com/reference/square/loyalty-api/accumulate-loyalty-points) endpoint computes program points and promotion points for the specified order and adds the points to the loyalty account of the buyer. Square also automatically adjusts loyalty points when an order is refunded, depending on the program type and refund type. For more information, see Customer and Refunds in [Square Loyalty FAQ](https://squareup.com/help/article/6462-square-loyalty-faqs). * **A simplified reward redemption flow.** If you provide an order ID when you call the [CreateLoyaltyReward](https://developer.squareup.com/reference/square/loyalty-api/create-loyalty-reward) endpoint to create a reward, Square automatically updates the order with appropriate discounts and redeems the reward after the order is paid. The [Loyalty Walkthrough 1](loyalty-api/walkthrough1) and [Loyalty Walkthrough 2](loyalty-api/walkthrough2) examples show how this integration works. The Orders API provides an added benefit when working with multiple discounts on an order. The pricing engine that Square provides can aggregate multiple discounts from various sources. Without the Orders API, you need to write code to accomplish this task. * **Useful reporting in the Square Dashboard.** The loyalty reports in the Square Dashboard provide useful metrics about how the loyalty program is working: * The [Visits report](https://app.squareup.com/dashboard/customers/loyalty/reports/visits) uses order data to show the number of visits by first-time and repeat loyalty buyers and the average visits by loyalty and non-loyalty buyers. * The [Sales report](https://app.squareup.com/dashboard/customers/loyalty/reports/sales) shows the sales amount and average amount spent by loyalty and non-loyalty buyers. The Square Dashboard also shows the Top Customers report. Depending on the program type, your development costs might be higher if you don't use the Orders API for order processing. However, the following loyalty programs are easy to implement without using the Orders API: * **A loyalty program that offers visit-based accrual** - Consider this `VISIT` accrual rule: "Earn one point for every visit, with a minimum purchase of $10." In this case, you can add points to the buyer's account with minimal code. You don't need itemized orders. For example, suppose a buyer pays $15 for an order. You can use the `CalculateLoyaltyPoints` endpoint to compute loyalty points and then call `AccumulateLoyaltyPoints` to add the points to the buyer's account. * **A loyalty program that offers amount-spent accrual** - Consider this `SPEND` accrual rule: "Earn one point for each dollar spent." You can use the `CalculateLoyaltyPoints` endpoint to compute loyalty points and then call `AccumulateLoyaltyPoints` to add the points to the loyalty account of the buyer. This doesn't require matching any order line items to compute the loyalty points. Note that the accrual logic used to calculate the number of points earned depends on the `tax-mode` setting of the `VISIT` or `SPEND` accrual rule. If you use the Orders API, these amounts are known and the points are computed appropriately without the need of additional code. {% anchor id="integration-with-the-catalog-api" /%} ### Integration with the Catalog API A loyalty program contains [accrual rules](loyalty/overview#accrual-rules) and [reward tiers,](loyalty/overview#reward-tiers) both of which are integrated with the Catalog API. * **Accrual rules** - An [accrual rule](loyalty-api/loyalty-programs#accrual-rules) defines how buyers can earn points from the base loyalty program. The type of accrual rule used by the program determines the program type. For example, a Category-based program type is configured using one or more `CATEGORY` accrual rules. The following rule types integrate with the Catalog API: * `CATEGORY` accrual rules specify a `category_id`, which references the `CATEGORY` catalog object that qualifies for points accrual. * `ITEM_VARIATION` accrual rules specify an `item_variation_id`, which references the `ITEM_VARIATION` catalog object that qualifies for points accrual. * `SPEND` accrual rules can optionally specify `excluded_category_ids` and `excluded_item_variation_ids`, which contain the IDs of any `CATEGORY` and `ITEM_VARIATION` catalog objects that don't qualify for points accrual. * **Reward tiers** - Loyalty programs can include one or more reward tiers. A reward tier defines how buyers can redeem points for discounts. For example, a reward tier might represent a reward such as "Redeem 10 points for 10% off your entire purchase." A loyalty reward tier uses `PRICING_RULE`, `DISCOUNT`, and `PRODUCT_SET` catalog objects to define the discount details for a reward. A reward tier definition is a read-only integration with the Catalog API that's pinned to a specific catalog version. For more information, see [Get discount details for a reward tier](loyalty-api/loyalty-rewards#get-discount-details). * **Loyalty promotions** - [Loyalty promotions](loyalty-api/loyalty-promotions) enable buyers to earn extra points in addition to points earned from the base loyalty program. Category-based and item-based promotions specify the IDs of `CATEGORY` and `ITEM_VARIATION` catalog objects that qualify for promotion points. {% anchor id="active-subscription" /%} ## Square Loyalty subscription A Square seller must have an active [Square Loyalty](https://squareup.com/software/loyalty) subscription to use loyalty features. To find a seller's subscription status, call [RetrieveLoyaltyProgram](https://developer.squareup.com/reference/square/loyalty-api/retrieve-loyalty-program) and check the `status` field (either `ACTIVE` or `INACTIVE`) of the returned loyalty program. With inactive subscriptions, write operations such as `CreateLoyaltyAccount`, `AdjustLoyaltyPoints`, and `AccumulateLoyaltyPoints` return the `404 NOT_FOUND` error shown in the following example. Calls to other Loyalty API endpoints might also fail. ```json { "errors": [ { "code": "NOT_FOUND", "detail": "Merchant does not have a loyalty program", "category": "INVALID_REQUEST_ERROR" } ] } ``` The Loyalty API cannot be used to create or update a loyalty program. Your application can direct sellers to the [Square Dashboard](https://app.squareup.com/dashboard) where they can subscribe to Square Loyalty and [set up their loyalty program](loyalty/overview#setting-up-a-loyalty-program). They can also check their subscription status and resubscribe in the Square Dashboard by choosing **Settings**, **Accounts & Settings**, **Business information**, and **Pricing & subscriptions**. If the subscription has expired, the **Loyalty** page displays a banner with the message "You aren't currently subscribed to Square Loyalty" along with a **Subscribe** link. {% aside type="info" %} To test your calls to the Loyalty API, you can subscribe to Square Loyalty in the Square Dashboard using your Sandbox test account and a test credit card that is never charged. For more information, see step 1 in [Loyalty Walkthrough 1](loyalty-api/walkthrough1) or [Loyalty Walkthrough 2](loyalty-api/walkthrough1/setup-loyalty-program) or watch the [Sandbox 101: Loyalty API](https://www.youtube.com/watch?v=LFwO9DiwxEs) video. {% /aside %} ### One loyalty program per seller account A Square seller can have only one loyalty program. However, the program can be active at multiple participating locations. Sellers can also have up to 10 `ACTIVE` and `SCHEDULED` loyalty promotions, which are available in all active locations. Note that sellers can enable or disable whether buyers can accrue loyalty points for in-person purchases on a given device. ## Webhooks You can subscribe to webhook notifications for the following loyalty events. {% table %} * Event * Permission {% width="130px" %} * Description --- * [loyalty.account.created](https://developer.squareup.com/reference/square/loyalty-api/webhooks/loyalty.account.created) * `LOYALTY_READ` * A loyalty account was created for a buyer. A loyalty account can be created using any of the following methods, which all publish this event: - An application calls the `CreateLoyaltyAccount` endpoint. - A buyer enrolls in the program from a Square Point of Sale application. - The seller enrolls a buyer using the Customer Directory. - The seller merges two customer accounts into one account using the Customer Directory. In this process, sellers might merge the two corresponding loyalty accounts by creating a new account and deleting the existing accounts. --- * [loyalty.account.updated](https://developer.squareup.com/reference/square/loyalty-api/webhooks/loyalty.account.updated) * `LOYALTY_READ` * A loyalty account was updated. For example: - The seller updates the phone number registered for the loyalty account using the Square Dashboard. For more information, see [Square Loyalty FAQ](https://squareup.com/help/us/en/article/6462-square-loyalty-faqs#can-i-edit-my-customers-phone-number-associated-to-loyalty). - Any change in the loyalty point balance, such as points added for visits, points expiration, or a manual adjustment to the point balance that a seller might perform. - The customer ID of the loyalty account was changed. For example, the loyalty account moved to another customer. --- * [loyalty.account.deleted](https://developer.squareup.com/reference/square/loyalty-api/webhooks/loyalty.account.deleted) * `LOYALTY_READ` * Published when a loyalty account is deleted. The published event does not contain the `customer_id` that was associated with the deleted account. The following actions to delete the account can publish this event: - The seller deletes an account using the Square Dashboard. - The seller merges two customer profiles using the Customer Directory. In this process, sellers might merge the two corresponding loyalty accounts by creating a new account and deleting the existing accounts. --- * [loyalty.program.created](https://developer.squareup.com/reference/square/loyalty-api/webhooks/loyalty.program.created) * `LOYALTY_READ` * A loyalty program was created. Loyalty programs can only be created from the Square Dashboard. --- * [loyalty.program.updated](https://developer.squareup.com/reference/square/loyalty-api/webhooks/loyalty.program.updated) * `LOYALTY_READ` * A loyalty program was updated. Loyalty programs can only be updated from the Square Dashboard. --- * [loyalty.promotion.created](https://developer.squareup.com/reference/square/loyalty-api/webhooks/loyalty.promotion.created) * `LOYALTY_READ` * A loyalty promotion was created. --- * [loyalty.promotion.updated](https://developer.squareup.com/reference/square/loyalty-api/webhooks/loyalty.promotion.updated) * `LOYALTY_READ` * A loyalty promotion was canceled. --- * [loyalty.event.created](https://developer.squareup.com/reference/square/loyalty-api/webhooks/loyalty.event.created) * `LOYALTY_READ` * A balance-changing event occurred. Square Loyalty maintains a ledger of events that occur over the lifetime of a loyalty account. Square publishes notifications for each loyalty event logged to the ledger. These loyalty events are immutable, which means they are never updated or deleted. For example, when a buyer redeems a reward and then returns the order, Square publishes separate notifications for the corresponding `CREATE_REWARD` and `DELETE_REWARD` events. Similarly, Square publishes a notification for the `OTHER` event when points are deducted after a purchase that accrued points is refunded. {% /table %} All notifications include the corresponding `loyalty_account`, `loyalty_event`, `loyalty_program`, or `loyalty_promotion` object, as shown in the following excerpt of an example `loyalty.account.created` notification: ```json { "merchant_id": "6QJXJGB6AZFN7", "type": "loyalty.account.created", "event_id": "45957f82-1e7e-42a3-9532-a4e787c3344c", "created_at": "2021-07-13T17:37:11Z", "data": { "type": "loyalty_account", "id": "dd17bfc8-178a-456c-ba4e-dae5813d429f", "object": { "loyalty_account": { // loyalty account fields } } } } ``` For more information about subscribing to events and validating notifications, see [Square Webhooks](webhooks/overview). {% anchor id="loyalty-migration-notes" /%} {% anchor id="migration-notes" /%} {% accordion expanded=false %} {% slot "heading" %} ## Migration notes {% /slot %} The following migration notes apply to the Loyalty API. {% anchor id="migrate-LoyaltyPromotionIncentivePointsMultiplierData-multiplier" /%} {% accordion expanded=false %} {% slot "heading" %} ### Deprecated points_multiplier field {% /slot %} The `points_multiplier` field in the `LoyaltyPromotionIncentivePointsMultiplierData` object is deprecated and replaced by the new `multiplier` field. This change adds support for decimal multipliers of up to three precision points. Multipliers are used in loyalty promotions that define a `POINTS_MULTIPLIER` incentive type. **Deprecated in version:** 2023-08-16 **Retired in version:** TBD To update your `CreateLoyaltyPromotion` requests when defining a `POINTS_MULTIPLIER` incentive, replace `points_multiplier` with `multiplier` and provide a string representation of a decimal. Decimal notation is optional for multipliers that represent integer values. The following examples represent a `POINTS_MULTIPLIER` incentive that earns double points, based on the Square version: * Square version 2023-08-16 and later: ```curl ... "incentive": { "type": "POINTS_MULTIPLIER", "points_multiplier_data": { "multiplier": "2" // or "2.0", "2.00", "2.000" } }, ... ``` If the deprecated `points_multiplier` is provided in a `CreateLoyaltyPromotion` request, Square returns both the `points_multiplier` and `multiplier` fields in the response. The `multiplier` value is returned in three point precision (except "10.00"). In addition, applications that don't integrate with the Orders API (and therefore use client-side logic to calculate promotion points) must change their logic before the `points_multiplier` field is retired. Specifically, you need to support decimal multipliers and convert the `multiplier` string value to a decimal. For more information, see [Calculating promotion points.](loyalty-api/loyalty-promotions#calculate-promotion-points) * Square version 2023-07-20 and earlier: ```curl ... "incentive": { "type": "POINTS_MULTIPLIER", "points_multiplier_data": { "points_multiplier": 2 } }, ... ``` {% /accordion %} {% anchor id="migrate-accumulateloyaltypointsresponse-event" /%} {% accordion expanded=false %} {% slot "heading" %} ### Deprecated event field in AccumulateLoyaltyPoints response {% /slot %} The `event` field in an [AccumulateLoyaltyPoints](https://developer.squareup.com/reference/square/loyalty-api/accumulate-loyalty-points) response is deprecated and replaced by the new `events` field. This change allows the endpoint to return the `ACCUMULATE_POINTS` and `ACCUMULATE_PROMOTION_POINTS` events when a Square order specified in the request qualifies for points from the base loyalty program and an associated loyalty promotion. **Deprecated in version:** 2022-08-17 **Retired in version:** TBD To migrate to version 2022-08-17, update your code to handle an `events` field in the `AccumulateLoyaltyPoints` response: * If your application uses Orders API integration, the new `events` field can contain a single `ACCUMULATE_POINTS` event or an `ACCUMULATE_POINTS` event and an `ACCUMULATE_PROMOTION_POINTS` event. Applications that integrate with the Orders API specify the ID of a Square order in the `order_id` of the `AccumulateLoyaltyPoints` request. * If your application uses a custom ordering system, the new `events` field always contains a single `ACCUMULATE_POINTS` event. The `ACCUMULATE_PROMOTION_POINTS` event is only supported for applications that use Orders API integration. Square continues to return an empty object when a purchase doesn't qualify for loyalty points. The following are example responses based on the Square version: * Square version 2022-08-17 and later: ```json { "events": [ { "id": "bbd1ef00-92ac-3e5f-8887-cd3c6ba29313", "type": "ACCUMULATE_POINTS", "created_at": "2022-09-07T22:31:48Z", "accumulate_points": { "loyalty_program_id": "8031c1b2-d749-4c76-9c40-ae5472ed2e04", "points": 12, "order_id": "cb9LSpDgOH3rITBaZ6eIBb9ee4F" }, "loyalty_account_id": "716cefbc-3d71-4d7c-bdc8-9c7f84c2d793", "location_id": "S8GWD509MEHCA", "source": "LOYALTY_API" } ] } ``` * Square version 2022-07-20 and earlier: ```json { "event": { "id": "ee46aafd-1af6-3695-a385-276e2ef0be26", "type": "ACCUMULATE_POINTS", "created_at": "2020-05-08T21:41:12Z", "accumulate_points": { "loyalty_program_id": "d619f755-2d17-41f3-990d-c04ecedd64dd", "points": 6, "order_id": "RFZfrdtm3mhO1oGzf5Cx7fEMsmGZY" }, "loyalty_account_id": "5adcb100-07f1-4ee7-b8c6-6bb9ebc474bd", "location_id": "P034NEENMD09F", "source": "LOYALTY_API" } } ``` {% /accordion %} {% anchor id="migrate-LoyaltyProgramAccrualRule-subtypes" /%} {% accordion expanded=false %} {% slot "heading" %} ### Retired LoyaltyProgramAccrualRule type-specific fields {% /slot %} An accrual rule in a loyalty program is represented by a `LoyaltyProgramAccrualRule` object. The following `LoyaltyProgramAccrualRule` fields are retired and replaced by fields in new type-specific objects, as shown in the following table: |Retired field{% width="240px" %}|Rule type{% width="135px" %}|Replacement field| |------|------|------| |`catalog_object_id`|`CATEGORY`|[`category_data.category_id`](https://developer.squareup.com/reference/square/objects/LoyaltyProgramAccrualRuleCategoryData#definition__property-category_id)| |`catalog_object_id`|`ITEM_VARIATION`|[`item_variation_data.item_variation_id`](https://developer.squareup.com/reference/square/objects/LoyaltyProgramAccrualRuleItemVariationData#definition__property-item_variation_id)| |`spend_amount_money`|`SPEND`|[`spend_data.amount_money`](https://developer.squareup.com/reference/square/objects/LoyaltyProgramAccrualRuleSpendData#definition__property-amount_money)| |`excluded_category_ids`|`SPEND`|[`spend_data.excluded_category_ids`](https://developer.squareup.com/reference/square/objects/LoyaltyProgramAccrualRuleSpendData#definition__property-excluded_category_ids)| |`excluded_item_variation_ids`|`SPEND`|[`spend_data.excluded_item_variation_ids`](https://developer.squareup.com/reference/square/objects/LoyaltyProgramAccrualRuleSpendData#definition__property-excluded_item_variation_ids)| |`visit_minimum_amount_money`|`VISIT`|[`visit_data.minimum_amount_money`](https://developer.squareup.com/reference/square/objects/LoyaltyProgramAccrualRuleVisitData#definition__property-minimum_amount_money)| **Retired in version:** 2022-01-20 These new and retired fields are read-only from the Loyalty API, which cannot be used to create or update loyalty programs. Loyalty programs can be configured and managed only in the Square Dashboard. To migrate from the retired fields, you must update code that parses the [accrual rules](loyalty/overview#accrual-rules) in a `RetrieveLoyaltyProgram` and `ListLoyaltyPrograms` (deprecated) response. Specifically, for the `accrual_rules` field of the loyalty program, your code must handle the new `category_data`, `item_variation_data`, `spend_data`, or `visit_data` fields and related data. These fields are shown in the following examples. * Example `CATEGORY` accrual rules. The new `category_data.category_id` field replaces the retired `catalog_object_id` field. ```json ... "accrual_rules": [ { "accrual_type": "CATEGORY", "points": 1, "category_data": { "category_id": "7ZERJKO5PVYXCVUHV2JCZ2UG" } }, { "accrual_type": "CATEGORY", "points": 3, "category_data": { "category_id": "FQKAOJE5C4FIMF5A2URMLW6V" } } ] ... ``` * Example `ITEM_VARIATION` accrual rules. The new `item_variation_data.item_variation_id` field replaces the retired `catalog_object_id` field. ```json ... "accrual_rules": [ { "accrual_type": "ITEM_VARIATION", "points": 1, "item_variation_data": { "item_variation_id": "CBZXBUVVTYUBZGQO44RHMR6B" } }, { "accrual_type": "ITEM_VARIATION", "points": 2, "item_variation_data": { "item_variation_id": "EDILT24Z2NISEXDKGY6HP7XV" } } ] ... ``` * Example `SPEND` accrual rule with the following new fields: * `spend_data.amount_money` replaces the retired `spend_amount_money` field. * `spend_data.excluded_category_ids` (optional) replaces the retired `excluded_category_ids` field. * `spend_data.excluded_item_variation_ids` (optional) replaces the retired `excluded_item_variation_ids` field. ```json ... "accrual_rules": [ { "accrual_type": "SPEND", "points": 1, "spend_data": { "amount_money": { "amount": 500, "currency": "USD" }, "excluded_category_ids": [ "7ZERJKO5PVYXCVUHV2JCZ2UG", "FQKAOJE5C4FIMF5A2URMLW6V" ], "excluded_item_variation_ids": [ "CBZXBUVVTYUBZGQO44RHMR6B", "EDILT24Z2NISEXDKGY6HP7XV" ], "tax_mode": "BEFORE_TAX" } } ] ... ``` * Example `VISIT` accrual rule. The new `visit_data.minimum_amount_money` field (optional) replaces the retired `visit_minimum_amount_money` field. ```json ... "accrual_rules": [ { "accrual_type": "VISIT", "points": 1, "visit_data": { "minimum_amount_money": { "amount": 500, "currency": "USD" }, "tax_mode": "BEFORE_TAX" } } ] ... ``` {% aside type="info" %} The `SPEND` and `VISIT` accrual rule examples include the `tax_mode` field that was added in Square version 2022-01-20. {% /aside %} {% /accordion %} {% anchor id="migrate-ListLoyaltyPrograms" /%} {% accordion expanded=false %} {% slot "heading" %} ### Deprecated ListLoyaltyPrograms endpoint {% /slot %} The [ListLoyaltyPrograms](https://developer.squareup.com/reference/square/loyalty-api/list-loyalty-programs) endpoint is deprecated. It's replaced by calling the [RetrieveLoyaltyProgram](https://developer.squareup.com/reference/square/loyalty-api/retrieve-loyalty-program) endpoint with the `main` keyword. Both endpoints are used to return the single loyalty program for a seller account. **Deprecated in version:** 2021-05-13 **Retired in version:** TBD To migrate to the `RetrieveLoyaltyProgram` endpoint, do the following: 1. Update your requests. Make sure to include the `main` keyword in your `RetrieveLoyaltyProgram` request: ```` 2. Update code that handles responses. You must also update your code to handle the `RetrieveLoyaltyProgram` response, which returns a top-level `program` object instead of a `programs` array. The following excerpts show the difference between the responses from the two endpoints. Excerpt from a `RetrieveLoyaltyProgram` response that returns a `program` object: ```json { "program": { // program details } } ``` Excerpt from a `ListLoyaltyPrograms` (deprecated) response that returns a `programs` array: ```json { "programs": [ { // program details } ] } ``` {% /accordion %} {% anchor id="migrate-mappings-type-value" /%} {% accordion expanded=false %} {% slot "heading" %} ### Retired mappings, type, and value fields {% /slot %} A loyalty account mapping is used to associate the loyalty account with a buyer by phone number. The following mapping-related fields are retired: * In the [LoyaltyAccount](https://developer.squareup.com/reference/square/objects/LoyaltyAccount) object, the `mappings` field is retired and replaced by `mapping`. * In the [LoyaltyAccountMapping](https://developer.squareup.com/reference/square/objects/LoyaltyAccountMapping) object, the `type` and `value` fields are retired and replaced by `phone_number`. **Retired in version:** 2021-05-13 In Square version 2021-05-13 and later: * The `mappings` field isn't accepted in `CreateLoyaltyAccount` requests. * The `type` and `value` fields aren't accepted in `CreateLoyaltyAccount` or `SearchLoyaltyAccounts` requests. * The `mappings`, `type`, and `value` fields aren't returned in responses. To migrate to the required mapping implementation, do the following: 1. **Update your requests.** * In your `CreateLoyaltyAccount` requests, you must use `mapping` and `phone_number` instead of `mappings`, `type`, and `value`, as shown in the following example: ```` * In your `SearchLoyaltyAccounts` requests that query by phone number, you must use `phone_number` instead of `type` and `value`, as shown in the following example. Note that `mappings` is still a valid search query filter. ```` 2. **Update code that handles responses.** You must update your code to handle returned loyalty accounts that include only the `mapping` and `phone_number` fields. The following example responses show the changes in a returned `loyalty_account` object. Example `CreateLoyaltyAccount` response in Square version 2021-05-13 and later: ```json { "loyalty_account":{ "id":"716cefbc-3d71-4d7c-bdc8-9c7f84c2d793", "mapping": { "id":"6377d589-3f09-4f00-a0e8-56d7dfc1d2b5", "phone_number":"+16295551234", "created_at":"2020-01-30T00:11:58Z" }, "program_id":"8031c1b2-d749-4c76-9c40-ae5472ed2e04", "balance":0, "lifetime_points":0, "customer_id":"REK96J96AS5AN2Y8Z4HE2Z5NVX", "created_at":"2020-01-30T00:11:58Z", "updated_at":"2020-01-30T00:11:58Z" } } ``` Example `CreateLoyaltyAccount` response in Square version 2021-04-21: ```json { "loyalty_account":{ "id":"716cefbc-3d71-4d7c-bdc8-9c7f84c2d793", "mappings":[ { "id":"6377d589-3f09-4f00-a0e8-56d7dfc1d2b5", "type":"PHONE", "value":"+16295551234", "phone_number":"+16295551234", "created_at":"2020-01-30T00:11:58Z" } ], "mapping": { "id":"6377d589-3f09-4f00-a0e8-56d7dfc1d2b5", "type":"PHONE", "value":"+16295551234", "phone_number":"+16295551234", "created_at":"2020-01-30T00:11:58Z" }, "program_id":"8031c1b2-d749-4c76-9c40-ae5472ed2e04", "balance":0, "lifetime_points":0, "customer_id":"REK96J96AS5AN2Y8Z4HE2Z5NVX", "created_at":"2020-01-30T00:11:58Z", "updated_at":"2020-01-30T00:11:58Z" } } ``` {% aside type="info" %} The `mapping` field was added in Square version 2021-04-21, so earlier versions only return `mappings`. {% /aside %} {% /accordion %} {% /accordion %} ## See also * [Loyalty Program](loyalty/overview) * [Loyalty API Example Walkthrough 1](loyalty-api/walkthrough1) * [Loyalty API Example Walkthrough 2](loyalty-api/walkthrough2) * [Square Loyalty Pricing](https://squareup.com/help/us/en/article/6382-square-loyalty-pricing) * [Video: Sandbox 101: Loyalty API](https://www.youtube.com/watch?v=LFwO9DiwxEs) * [API Reference: Loyalty](https://developer.squareup.com/reference/square/loyalty-api) --- # Search for Balance-Changing Loyalty Events > Source: https://developer.squareup.com/docs/loyalty-api/loyalty-events > Status: PUBLIC > Languages: All > Platforms: All Learn about the LoyaltyEvent object and how to use the Square Loyalty API to list or search for events that affect the point balance of loyalty accounts. **Applies to:** [Loyalty API](loyalty-api/overview) {% subheading %}Learn how to use the Loyalty API to list or search for events that affect the point balance of loyalty accounts.{% /subheading %} {% toc hide=true /%} ## Overview Square Loyalty maintains a ledger of events that occur during the lifetime of a buyer's loyalty account, such as when a buyer earns points or redeems a reward. Each point balance change is recorded in the ledger. The Loyalty API supports the following operation for working with loyalty events: * [List or search for balance-changing events](#search-loyalty-events) {% aside type="info" %} Balance-changing activities also invoke the [loyalty.account.updated](https://developer.squareup.com/reference/square/webhooks/loyalty.account.updated) and [loyalty.event.created](https://developer.squareup.com/reference/square/webhooks/loyalty.event.created) webhook events. {% /aside %} ## LoyaltyEvent object The following is an example [LoyaltyEvent](https://developer.squareup.com/reference/square/objects/LoyaltyEvent) object: ```json { "id": "bbd1ef00-92ac-3e5f-8887-cd3c6ba29313", "type": "ACCUMULATE_POINTS", "created_at": "2020-05-07T22:31:48Z", "accumulate_points": { "loyalty_program_id": "8031c1b2-d749-4c76-9c40-ae5472ed2e04", "points": 12, "order_id": "cb9LSpDgOH3rITBaZ6eIBb9ee4F" }, "loyalty_account_id": "716cefbc-3d71-4d7c-bdc8-9c7f84c2d793", "location_id": "S8GWD5R9QB376", "source": "LOYALTY_API" } ``` Each event contains the ID of the associated loyalty account, the ID of the purchase location, and the event `type` with a corresponding metadata object: * An `ACCUMULATE_POINTS` event includes an [accumulate_points](https://developer.squareup.com/reference/square/objects/LoyaltyEventAccumulatePoints) object, as shown in the following excerpt: ```json { ... "accumulate_points": { "loyalty_program_id": "8031c1b2-d749-4c76-9c40-ae5472ed2e04", "points": 12, "order_id": "cb9LSpDgOH3rITBaZ6eIBb9ee4F" }, ... } ``` This event is invoked when points earned from an accrual rule defined for the loyalty program are added to a loyalty account. * An `ACCUMULATE_PROMOTION_POINTS` event includes an [accumulate_promotion_points](https://developer.squareup.com/reference/square/objects/LoyaltyEventAccumulatePromotionPoints) object, as shown in the following excerpt: ```json { ... "accumulate_promotion_points": { "loyalty_program_id": "8031c1b2-d749-4c76-9c40-ae5472ed2e04", "loyalty_promotion_id": "93cc7415-ba40-42e6-80fc-dd8c798a39db", "points": 5, "order_id": "cb9LSpDgOH3rITBaZ6eIBb9ee4F" }, ... } ``` This event is invoked when points earned from a loyalty promotion are added to a loyalty account. A purchase must first qualify for program points before it can qualify for promotion points. This event type is only supported for applications that use Orders API integration. * An `ADJUST_POINTS` event includes an [adjust_points](https://developer.squareup.com/reference/square/objects/LoyaltyEventAdjustPoints) object, as shown in the following excerpts: **Points added** ```json { ... "adjust_points": { "loyalty_program_id": "8031c1b2-d749-4c76-9c40-ae5472ed2e04", "points": 5, "reason": "Lunch lottery" }, ... } ``` **Points removed** ```json { ... "adjust_points": { "loyalty_program_id": "8031c1b2-d749-4c76-9c40-ae5472ed2e04", "points": -3, "reason": "Exchanged for item of lesser value" }, ... } ``` * A `CREATE_REWARD` event includes a [create_reward](https://developer.squareup.com/reference/square/objects/LoyaltyEventCreateReward) object, as shown in the following excerpt: ```json { ... "create_reward": { "loyalty_program_id": "8031c1b2-d749-4c76-9c40-ae5472ed2e04", "reward_id": "b5e384d9-f873-3f08-84b6-ba4d406d5d3b", "points": -15 }, ... } ``` * A `REDEEM_REWARD` event includes a [redeem_reward](https://developer.squareup.com/reference/square/objects/LoyaltyEventRedeemReward) object, as shown in the following excerpt: ```json { ... "redeem_reward": { "loyalty_program_id": "8031c1b2-d749-4c76-9c40-ae5472ed2e04", "reward_id": "c307328e-0eae-3817-ad9f-e22187798007", "order_id": "YLCHbGktxbjyVDYw58mSVdfivaB" }, ... } ``` * A `DELETE_REWARD` event includes a [delete_reward](https://developer.squareup.com/reference/square/objects/LoyaltyEventDeleteReward) object, as shown in the following excerpt: ```json { ... "delete_reward": { "loyalty_program_id": "8031c1b2-d749-4c76-9c40-ae5472ed2e04", "reward_id": "b5e384d9-f873-3f08-84b6-ba4d406d5d3b", "points": 15 }, ... } ``` * An `EXPIRE_POINTS` event includes an [expire_points](https://developer.squareup.com/reference/square/objects/LoyaltyEventExpirePoints) object, as shown in the following excerpt: ```json { ... "expire_points": { "loyalty_program_id": "8031c1b2-d749-4c76-9c40-ae5472ed2e04", "points": -5 }, ... } ``` * An `OTHER` event is invoked when Square automatically adjusts the point balance after an order is refunded. This event is returned in `SearchLoyaltyEvents` results, as shown in the following excerpt: ```json { "events": [ { "id": "ee70b425-43ad-3849-9526-8419be89a79a", "type": "OTHER", "created_at": "2023-05-04T22:35:26Z", "loyalty_account_id": "716cefbc-3d71-4d7c-bdc8-9c7f84c2d793", "location_id": "S8GWD5R9QB376", "source": "SQUARE", "other_event": { "loyalty_program_id": "8031c1b2-d749-4c76-9c40-ae5472ed2e04", "points": -3 } }, ... ] } ``` {% anchor id="search-loyalty-events" /%} ## List or search for balance-changing events Call [SearchLoyaltyEvents](https://developer.squareup.com/reference/square/loyalty-api/search-loyalty-events) endpoint to search for events that affect the point balance of loyalty accounts. Square processes any optional query filters included in the request according to a defined [processing logic](#processing-logic-for-query-filters). The following example request searches for `ACCUMULATE_POINTS` and `CREATE_REWARD` events for a specified loyalty account and date range. The example request also sets the `limit` field to specify a maximum [page size](working-with-apis/pagination) of 10 results. ```` The following is an example response. ```json { "events": [ { "id": "b200cb8c-371e-3cf0-bc7a-892f6f39052d", "type": "ACCUMULATE_POINTS", "created_at": "2020-10-17T00:17:54Z", "accumulate_points": { "loyalty_program_id": "8031c1b2-d749-4c76-9c40-ae5472ed2e04", "points": 12, "order_id": "4LODyZIm7IFGgEOy7KssqDtTuaB" }, "loyalty_account_id": "716cefbc-3d71-4d7c-bdc8-9c7f84c2d793", "location_id": "M8AKAD8160XGR", "source": "LOYALTY_API" }, { "id": "a089eb36-0867-3b73-a2dd-10b8d3b8e632", "type": "CREATE_REWARD", "created_at": "2020-09-11T19:08:04Z", "redeem_reward": { "loyalty_program_id": "8031c1b2-d749-4c76-9c40-ae5472ed2e04", "reward_id": "b5e384d9-f873-3f08-84b6-ba4d406d5d3b", "points": -15 }, "loyalty_account_id": "716cefbc-3d71-4d7c-bdc8-9c7f84c2d793", "location_id": "M8AKAD8160XGR", "source": "LOYALTY_API" }, { "id": "ffbe24b1-74a9-39c6-b1d5-c6693b0e4fc0", "type": "CREATE_REWARD", "created_at": "2020-09-02T12:55:18Z", "accumulate_points": { "loyalty_program_id": "8031c1b2-d749-4c76-9c40-ae5472ed2e04", "reward_id": "998d1351-0a56-337a-aef4-502a04e11b5f", "points": -10 }, "loyalty_account_id": "716cefbc-3d71-4d7c-bdc8-9c7f84c2d793", "location_id": "M8AKAD8160XGR", "source": "LOYALTY_API" } ] } ``` Results are sorted by the `created_at` timestamp in descending order. If no results are found, the response contains an empty object: ```json {} ``` You can use the `SearchLoyaltyEvents` endpoint to get status information for your buyer-facing loyalty status page. For example, the **Activity** section of the Square Dashboard displays information from the ledger of events. {% anchor id="processing-logic-for-query-filters" /%} ## How Square processes query filters The `SearchLoyaltyEvents` endpoint supports several optional query filters. Square processes any query filters included in the request as follows: * Multiple filters in a request are evaluated using a logical `AND`. * Multiple values in an array field are evaluated using a logical `OR`. Both `type_filter` and `location_filter` allow you to provide an array of values. For the following example request that includes all supported query filters except `order_filter`, Square processes the filters as follows: * Performs a logical `AND` of the following query filters: * `date_time_filter` * `location_filter` * `loyalty_account_filter` * `type_filter` * Performs a logical `OR` of the values in the following array fields: * `location_ids` in the `location_filter` * `types` in the `type_filter` ```` For the list of supported query filters, see [LoyaltyEventFilter](https://developer.squareup.com/reference/square/objects/LoyaltyEventFilter). For the list of valid loyalty events for the `type_filter` field, see [LoyaltyEventType](https://developer.squareup.com/reference/square/enums/LoyaltyEventType). ## See also * [Loyalty API](loyalty-api/overview) * [Manage Loyalty Points](loyalty-api/loyalty-points) * [Manage Loyalty Rewards](loyalty-api/loyalty-rewards) * [Video: Sandbox 101: Loyalty API](https://www.youtube.com/watch?v=LFwO9DiwxEs) * [API Reference: Loyalty API](https://developer.squareup.com/reference/square/loyalty-api) --- # Manage Loyalty Points > Source: https://developer.squareup.com/docs/loyalty-api/loyalty-points > Status: PUBLIC > Languages: All > Platforms: All Learn how to use the Square Loyalty API to accumulate or adjust points for a loyalty account. **Applies to:** [Loyalty API](loyalty-api/overview) | [Orders API](orders-api/what-it-does) {% subheading %}Learn how to use the Loyalty API to accumulate or adjust points for a loyalty account.{% /subheading %} {% toc hide=true /%} ## Overview Buyers can earn loyalty points from qualified purchases and redeem points for reward discounts. The `balance` field of a loyalty account represents the number of points that can be used to [create and redeem a reward](loyalty-api/loyalty-rewards). The Loyalty API supports the following operations for working with loyalty points: * [Accumulate loyalty points from a purchase](#accumulate-loyalty-points) * [Adjust loyalty points manually](#adjust-loyalty-points) * [Calculate loyalty points for a purchase](#calculate-loyalty-points) {% aside type="info" %} To get the available point balance for a loyalty account, call [RetrieveLoyaltyAccount](https://developer.squareup.com/reference/square/loyalty-api/retrieve-loyalty-account) or [SearchLoyaltyAccounts](https://developer.squareup.com/reference/square/loyalty-api/search-loyalty-accounts) and check the `balance` field. {% /aside %} {% anchor id="accumulate-loyalty-points" /%} ## Accumulate loyalty points from a purchase Call [AccumulateLoyaltyPoints](https://developer.squareup.com/reference/square/loyalty-api/accumulate-loyalty-points) to add points earned from a purchase to a loyalty account. The information you provide in the request depends on whether your application uses the Orders API to process orders. * [Orders API integration](#accumulate-loyalty-points-orders-api) * [Custom order processing](#accumulate-loyalty-points-custom-processing) The [accrual rules](loyalty-api/loyalty-programs#accrual-rules) of a loyalty program determine whether a purchase qualifies for program points. Purchases that qualify for points from the base loyalty program might also qualify for points from a loyalty promotion. {% anchor id="accumulate-loyalty-points-orders-api" /%} ### Orders API integration If your application uses the [Orders API](orders-api/what-it-does) to process orders, provide the following information in the `AccumulateLoyaltyPoints` request: * `account_id` with the ID of the target loyalty account. To get the account ID, call [SearchLoyaltyAccounts](https://developer.squareup.com/reference/square/loyalty-api/search-loyalty-accounts) and search using a phone number or customer ID. * `accumulate_points` with an `order_id` field that specifies the ID of the associated order. The order must be in the `COMPLETED` state. Square reads the order and computes the number of program points and promotion points earned from the purchase. * `location_id` with the ID of the [location](https://developer.squareup.com/reference/square/objects/Location) where the purchase was made. You can get this ID from the order. * `idempotency_key` with a unique identifier for this request, which is used to ensure [idempotency](build-basics/common-api-patterns/idempotency). ```` For purchases that qualify for multiple accrual rules, Square computes points based on the accrual rule that grants the most points. For purchases that qualify for multiple promotions, Square computes points based on the most recently created promotion. A purchase must first qualify for program points to be eligible for promotion points. {% aside type="info" %} To see a typical application flow for adding earned points to a loyalty account, see [Accumulate Loyalty Points for a Buyer](loyalty-api/walkthrough1/accrue-points). {% /aside %} When the purchase qualifies for points, Square returns [loyalty events](loyalty-api/loyalty-events) that represent the changes to the point balance. Square generates a searchable event each time the balance changes. * If program points are added, the response contains an `ACCUMULATE_POINTS` event. * If promotion points are added, the response also contains an `ACCUMULATE_PROMOTION_POINTS` event. The following example response contains an `ACCUMULATE_POINTS` event. This single event indicates that the purchase only qualifies for program points. ```json { "events": [ { "id": "bbd1ef00-92ac-3e5f-8887-cd3c6ba29313", "type": "ACCUMULATE_POINTS", "created_at": "2022-09-07T22:31:48Z", "accumulate_points": { "loyalty_program_id": "8031c1b2-d749-4c76-9c40-ae5472ed2e04", "points": 12, "order_id": "cb9LSpDgOH3rITBaZ6eIBb9ee4F" }, "loyalty_account_id": "716cefbc-3d71-4d7c-bdc8-9c7f84c2d793", "location_id": "S8GWD509MEHCA", "source": "LOYALTY_API" } ] } ``` The following example response contains an `ACCUMULATE_POINTS` event and `ACCUMULATE_PROMOTION_POINTS` event: ```json { "events": [ { "id": "bbd1ef00-92ac-3e5f-8887-cd3c6ba29313", "type": "ACCUMULATE_POINTS", "created_at": "2022-09-07T22:31:48Z", "accumulate_points": { "loyalty_program_id": "8031c1b2-d749-4c76-9c40-ae5472ed2e04", "points": 12, "order_id": "cb9LSpDgOH3rITBaZ6eIBb9ee4F" }, "loyalty_account_id": "716cefbc-3d71-4d7c-bdc8-9c7f84c2d793", "location_id": "S8GWD509MEHCA", "source": "LOYALTY_API" }, { "id": "b525f003-47ea-43aa-bb18-6d12cde50637", "type": "ACCUMULATE_PROMOTION_POINTS", "created_at": "2022-09-07T22:31:51Z", "accumulate_points": { "loyalty_program_id": "8031c1b2-d749-4c76-9c40-ae5472ed2e04", "points": 5, "order_id": "cb9LSpDgOH3rITBaZ6eIBb9ee4F" }, "loyalty_account_id": "716cefbc-3d71-4d7c-bdc8-9c7f84c2d793", "location_id": "S8GWD509MEHCA", "source": "LOYALTY_API" } ] } ``` If the purchase doesn't qualify for points, Square returns an empty object. ```json {} ``` {% anchor id="accumulate-loyalty-points-custom-processing" /%} ### Custom order processing If your application uses a custom ordering system to process orders (instead of the Orders API), provide the following information in the `AccumulateLoyaltyPoints` request: * `account_id` with the ID of the target loyalty account. To get the account ID, call [SearchLoyaltyAccounts](https://developer.squareup.com/reference/square/loyalty-api/search-loyalty-accounts) and search using a phone number or customer ID. * `accumulate_points` with a `points` field that specifies the number of program points and promotion points to add to the account. You must first use client-side logic to compute the number of points earned from the purchase. For more information, see [Computing points earned from a purchase](#accumulate-custom-points). * `location_id` with the ID of the [location](https://developer.squareup.com/reference/square/objects/Location) where the purchase was made. * `idempotency_key` with a unique identifier for this request, which is used to ensure [idempotency](build-basics/common-api-patterns/idempotency). ```` Square returns an `ACCUMULATE_POINTS` [loyalty event](loyalty-api/loyalty-events) that represents the change to the point balance. Square generates a searchable event each time the balance changes. The following is an example response: ```json { "events": [ { "id": "bbd1ef00-92ac-3e5f-8887-cd3c6ba29313", "type": "ACCUMULATE_POINTS", "created_at": "2020-05-07T22:31:48Z", "accumulate_points": { "loyalty_program_id": "8031c1b2-d749-4c76-9c40-ae5472ed2e04", "points": 7 }, "loyalty_account_id": "716cefbc-3d71-4d7c-bdc8-9c7f84c2d793", "location_id": "S8GWD509MEHCA", "source": "LOYALTY_API" } ] } ``` For applications that don't use the Orders API to process orders, the `events` field contains a single `ACCUMULATE_POINTS` event. The `ACCUMULATE_PROMOTION_POINTS` event type is returned only when using Orders API integration. {% anchor id="accumulate-custom-points" /%} #### Computing points earned from a purchase Applications that use a custom ordering system can use the following process to compute the points earned from a purchase: 1. Call [RetrieveLoyaltyProgram](https://developer.squareup.com/reference/square/loyalty-api/retrieve-loyalty-program) using the `main` keyword (or the loyalty program ID, which is specified in the loyalty account). 1. Check the `accrual_rules` field in the response. Each [accrual rule](https://developer.squareup.com/reference/square/objects/LoyaltyProgramAccrualRule) defines the program type (`SPEND`, `VISIT`, `CATALOG`, or `ITEM_VARIATION`) in the `accrual_type` field, along with additional data that specifies the conditions for earning points from the base loyalty program. For purchases that qualify for multiple accrual rules, use the accrual rule that grants the most points. {% aside type="info" %} For `SPEND` program types and `VISIT` program types with a minimum spend requirement, you can call [CalculateLoyaltyPoints](https://developer.squareup.com/reference/square/loyalty-api/calculate-loyalty-points) and provide the purchase amount to get the number of program points the purchase qualifies for. Make sure to check the `visit_data.tax_mode` or `spend_data.tax_mode` field in the accrual rule to determine whether tax should be included in the purchase amount. {% /aside %} 1. If the purchase qualifies for program points, check whether it also qualifies for points from an associated loyalty promotion. For purchases that qualify for multiple promotions, use the most recently created promotion. For more information, see [Calculating promotion points](loyalty-api/loyalty-promotions#calculate-promotion-points). 1. Provide the combined program points and promotion points earned from the purchase in the `points` field of the `AccumulateLoyaltyPoints` request. {% anchor id="adjust-loyalty-points" /%} ## Adjust loyalty points manually Call [AdjustLoyaltyPoints](https://developer.squareup.com/reference/square/loyalty-api/adjust-loyalty-points) to add or remove points from a loyalty account. You should use this endpoint only to add or remove points outside of the normal order-purchase flow (that uses [AccumulateLoyaltyPoints](#accumulate-loyalty-points)). For example, use this endpoint to give extra points for a special offer or deduct points for a returned item. {% aside type="info" %} If you use the Refunds API to refund a Square order, Square automatically adjusts the loyalty points. For more information, see Customer and Refunds in [Square Loyalty FAQ](https://squareup.com/help/article/6462-square-loyalty-faqs). {% /aside %} Provide the following information in the request: * `account_id` with the ID of the target loyalty account. To get the account ID, call [SearchLoyaltyAccounts](https://developer.squareup.com/reference/square/loyalty-api/search-loyalty-accounts) and search using a phone number or customer ID. * `adjust_points` with a `points` field that specifies the number of points to add or remove and an optional `reason` field. * To add points, specify a positive integer. * To remove points, specify a negative integer. By default, Square doesn't accept a value that would result in a negative point balance. To allow a negative balance when subtracting points (for example, as a result of a refund or exchange), include the `allow_negative_balance` field in the request and set the value to `true`. * `idempotency_key` with a unique identifier for this request, which is used to ensure [idempotency](build-basics/common-api-patterns/idempotency). The following example request adds 15 points to a specified loyalty account: ```` Square returns an `ADJUST_POINTS` [loyalty event](loyalty-api/loyalty-events) that represents the change to the point balance. Square generates a searchable event each time the balance changes. The following is an example response: ```json { "event": { "id": "e13a6fca-8d67-39d0-bbd2-3b4bC1beb38f", "type": "ADJUST_POINTS", "created_at": "2020-04-10T00:18:51Z", "adjust_points": { "loyalty_program_id": "8031c1b2-d749-4c76-9c40-ae5472ed2e04", "points": 15, "reason": "Sign up bonus." }, "loyalty_account_id": "0146344c-77fa-4fa8-86db-4a4b8fec801", "source":"LOYALTY_API" } } ``` The following example request subtracts 6 points from the balance and sets `allow_negative_balance` to `true`: ```` The following is an example response: ```json { "event": { "id": "65b05a96-92b8-4831-97b6-55eb3adf00b3", "type": "ADJUST_POINTS", "created_at": "2022-08-17T11:40:08Z", "adjust_points": { "loyalty_program_id": "8031c1b2-d749-4c76-9c40-ae5472ed2e04", "points": -6, "reason": "Returned item" }, "loyalty_account_id": "0146344c-77fa-4fa8-86db-4a4b8fec801", "source":"LOYALTY_API" } } ``` If `allow_negative_balance` is omitted from the request or set to `false`, Square returns a `400 BAD_REQUEST` error if the operation would result in a negative point balance. {% anchor id="calculate-loyalty-points" /%} ## Calculate loyalty points for a purchase Call [CalculateLoyaltyPoints](https://developer.squareup.com/reference/square/loyalty-api/calculate-loyalty-points) to compute the number of points a purchase qualifies for. You can use this endpoint if you want to display the points while the buyer is building an order. The information you provide in the request depends on whether your application uses the Orders API to process orders. * [Orders API integration](#calculate-loyalty-points-orders-api) * [Custom order processing](#calculate-loyalty-points-custom-processing) For purchases that qualify for multiple accrual rules, Square computes points based on the accrual rule that grants the most points. For purchases that qualify for multiple promotions, Square computes points based on the most recently created promotion. A purchase must first qualify for program points to be eligible for promotion points. {% anchor id="calculate-loyalty-points-orders-api" /%} ### Orders API integration If your application uses the [Orders API](orders-api/what-it-does) to process orders, provide the following information in the `CalculateLoyaltyPoints` request: * `program_id` with the ID of the loyalty program. To get this ID, call [RetrieveLoyaltyProgram](https://developer.squareup.com/reference/square/loyalty-api/retrieve-loyalty-program) using the `main` keyword. * `order_id` with the ID of the associated order. Square reads the order and automatically computes the number of program points the purchase qualifies for. * `loyalty_account_id` with the ID of the loyalty account. * Specify this field to get the promotion points the buyer would earn from the purchase, based on whether the promotion's `trigger_limit` (the maximum number of times that a buyer can trigger the promotion) has been reached. * Omit this field to get the promotion points the purchase qualifies for regardless of the trigger limit. ```` The following example response shows that the purchase qualifies for 6 program points. The 0 value for `promotion_points` means the purchase didn't meet the conditions of a loyalty promotion or the buyer already reached the trigger limit. ```json { "points": 6, "promotion_points": 0 } ``` The following example response shows that the purchase qualifies for 6 program points and 12 promotion points: ```json { "points": 6, "promotion_points": 12 } ``` The following example response shows that the purchase doesn't qualify for program points or promotion points: ```json { "points": 0, "promotion_points": 0 } ``` {% anchor id="calculate-loyalty-points-custom-processing" /%} ### Custom order processing If your application uses a custom ordering system to process orders (instead of the Orders API), provide the following information in the `CalculateLoyaltyPoints` request: * `program_id` with the ID of the loyalty program. To get this ID, call [RetrieveLoyaltyProgram](https://developer.squareup.com/reference/square/loyalty-api/retrieve-loyalty-program) using the `main` keyword. * `transaction_amount_money` with the purchase amount. ```` Applications that use a custom ordering system should be aware of the following considerations: * Because you must specify a purchase amount, this endpoint only supports `SPEND` program types or `VISIT` program types with a minimum spend requirement. * You must first check the tax mode to determine whether taxes should be included in the purchase amount. To find the tax mode setting for the loyalty program, check the `visit_data.tax_mode` field or `spend_data.tax_mode` field of any [accrual rule](https://developer.squareup.com/reference/square/objects/LoyaltyProgramAccrualRule) listed in the `accrual_rules` field of the loyalty program. * If the purchase qualifies for program points, you must check whether it also qualifies for promotion points. For purchases that qualify for multiple promotions, use the most recently created promotion. For more information, see [Calculating promotion points](loyalty-api/loyalty-promotions#calculate-promotion-points). The following example response shows that the purchase qualifies for 3 program points based on the specified purchase amount: ```json { "points": 3, "promotion_points": 0 // always 0 for custom ordering systems } ``` The following example response shows that the purchase doesn't qualify for program points: ```json { "points": 0, "promotion_points": 0 // always 0 for custom ordering systems } ``` ## Expiring points If a seller configures an expiration policy for a loyalty program, loyalty accounts that have a point balance include the `expiring_point_deadlines` field. This field contains a list of [LoyaltyAccountExpiringPointDeadline](https://developer.squareup.com/reference/square/objects/LoyaltyAccountExpiringPointDeadline) objects that represent sets of points scheduled to expire at a specific time. This example loyalty account has two sets of points with expiration dates: ```json { "loyalty_account":{ "id":"716cefbc-3d71-4d7c-bdc8-9c7f84c2d793", "mapping": { "id":"6377d589-3f09-4f00-a0e8-56d7dfc1d2b5", "phone_number":"+16295551234", "created_at":"2020-01-30T00:11:58Z" }, "program_id":"8031c1b2-d749-4c76-9c40-ae5472ed2e04", "balance":17, "lifetime_points":84, "customer_id":"REK96J96AS5AN2Y8Z4HE2Z5NVX", "created_at":"2020-01-30T00:11:58Z", "updated_at":"2021-07-15T09:33:45ZZ", "enrolled_at": "2020-01-30T00:11:58Z", "expiring_point_deadlines":[ { "points":12, "expires_at":"2021-11-01T09:59:00Z" }, { "points":5, "expires_at":"2022-08-01T09:59:00Z" } ] } } ``` The total number of points in the `expiring_point_deadlines` field equals the number of points in the `balance` field. Square notifies buyers 14 days before points expire. You can use expiration information to display expiring points in your application or send custom notifications. When loyalty points are redeemed, Square uses the points with the earliest expiration date. When points expire, Square updates the account's point balance and creates a searchable [loyalty event](loyalty-api/loyalty-events). These actions trigger the [loyalty.account.updated](https://developer.squareup.com/reference/square/loyalty-api/webhooks/loyalty.account.updated) and [loyalty.event.created](https://developer.squareup.com/reference/square/loyalty-api/webhooks/loyalty.event.created) webhook events. ## See also * [Loyalty API](loyalty-api/overview) * [Create and Retrieve Loyalty Accounts](loyalty-api/loyalty-accounts) * [Manage Loyalty Promotions](loyalty-api/loyalty-promotions) * [Manage Loyalty Rewards](loyalty-api/loyalty-rewards) * [Search for Balance-Changing Loyalty Events](loyalty-api/loyalty-events) * [Video: Sandbox 101: Loyalty API](https://www.youtube.com/watch?v=LFwO9DiwxEs) * [API Reference: Loyalty API](https://developer.squareup.com/reference/square/loyalty-api) --- # Retrieve a Loyalty Program > Source: https://developer.squareup.com/docs/loyalty-api/loyalty-programs > Status: PUBLIC > Languages: All > Platforms: All Learn about the LoyaltyProgram object and how to use the Square Loyalty API to retrieve a loyalty program. **Applies to:** [Loyalty API](loyalty-api/overview) {% subheading %}Learn about the `LoyaltyProgram` object and how to use the Loyalty API to retrieve a loyalty program.{% /subheading %} {% toc hide=true /%} ## Overview After Square sellers subscribe to [Square Loyalty](https://squareup.com/software/loyalty) and set up their loyalty program, you can use the Loyalty API to get information about the program, such as the accrual rules and reward tiers. The Loyalty API supports the following operations for working with loyalty programs: * [Retrieve a loyalty program](#retrieve-loyalty-program) * [List loyalty programs](#list-loyalty-programs) (deprecated) {% aside type="info" %} The Loyalty API cannot be used to create or update loyalty programs. For information about how sellers set up accrual rules and reward tiers for their loyalty program, see [Loyalty Program](loyalty/overview). {% /aside %} {% anchor id="loyaltyprogram-object" /%} ## LoyaltyProgram object The following is an example `LoyaltyProgram` object: ```json { "id": "8031c1b2-d749-4c76-9c40-ae5472ed2e04", "status": "ACTIVE", "reward_tiers": [ { "id": "7b897fee-572a-4516-a3d3-47676931e4f3", "points": 15, "name": "10% off entire sale", "created_at": "2020-12-16T17:39:54Z", "pricing_rule_reference": { "object_id": "ESNLTB2A77HXVKRBM", "catalog_version": "564027IS7PT6" } }, { "id": "46c2716e-f559-4b75-c015-764897e3c4ae0", "points": 30, "name": "25% off entire sale", "created_at": "2020-12-16T17:47:22Z", "pricing_rule_reference": { "object_id": "GR4C4RSNLFBU2GMWT", "catalog_version": "738021351929" } } ], "terminology": { "one": "Point", "other": "Points" }, "location_ids": [ "S8GWD5R9QB376" ], "created_at": "2020-12-16T23:35:41Z", "updated_at": "2020-12-20T02:00:02Z", "accrual_rules": [ { "accrual_type": "SPEND", "points": 1, "spend_data": { "amount_money": { "amount": 200, "currency": "USD" }, "excluded_category_ids": [ "7ZERJKO5PVYXCVUHV2JCZ2UG", "FQKAOJE5C4FIMF5A2URMLW6V" ], "excluded_item_variation_ids": [ "CBZXBUVVTYUBZGQO44RHMR6B", "EDILT24Z2NISEXDKGY6HP7XV" ], "tax_mode": "BEFORE_TAX" } } ] } ``` This example loyalty program allows buyers to accrue one point for every $2 spent on qualifying items and offers two percentage-based reward tiers. The following fields represent key attributes of a loyalty program: |Field{% width="160px" %}|Description| |----|----| |`status`|The status of the loyalty program, which is determined by the status of the seller's Square Loyalty subscription. All write operations in the Loyalty API require that the loyalty program is `ACTIVE`.| |`location_ids`|The IDs of the participating [locations](https://developer.squareup.com/reference/square/objects/Location) in the loyalty program.| |`accrual_rules`|The accrual rules that define how buyers can earn points from the base loyalty program. A loyalty program can contain a single type of accrual rule: `CATEGORY`, `ITEM_VARIATION`, `SPEND`, or `VISIT`. For more information, see [Accrual rules](#accrual-rules).{% line-break /%}{% line-break /%}Buyers can also earn additional points from [loyalty promotions](loyalty-api/loyalty-promotions) associated with a loyalty program.| |`expiration_policy`|The number of months before points expire, in `P[n]M` RFC 3339 duration format. For example, a value of `P12M` represents a duration of 12 months. This field is present only if the loyalty program has an expiration policy. For information about how sellers configure an expiration policy, see Add Points Expiration Date in [Create a Loyalty Program with Square](https://squareup.com/help/article/3952-create-a-loyalty-program-with-square).{% line-break /%}{% line-break /%}Loyalty accounts that have [expiring points](loyalty-api/loyalty-points#expiring-points) include an `expiring_point_deadlines` field.| |`terminology`|The terminology used to represent points. For example, Point or Points and Star or Stars.| |`reward_tiers`|Contains one or more reward tiers that define how buyers can redeem points for rewards. To get information about the reward tier discount, call the `RetrieveCatalogObject` endpoint using the `object_id` and `catalog_version` from the `pricing_rule_reference` field. Make sure to set `include_related_objects` to `true`. For more information, see [Integration with the Catalog API](loyalty-api/overview#integration-with-the-catalog-api) and [Getting discount details for a reward tier.](loyalty-api/loyalty-rewards#get-discount-details)| A loyalty program can have up to 10 `ACTIVE` and `SCHEDULED` loyalty promotions that enable buyers to earn extra points. Square provides specific endpoints for working with loyalty promotions; they aren't visible or accessible directly from the `LoyaltyProgram` object. For more information, see [Manage Loyalty Promotions](loyalty-api/loyalty-promotions). {% anchor id="accrual-rules" /%} ### Accrual rules Accrual rules define how buyers can earn points from the base loyalty program. The type of accrual rule used by a loyalty program determines the program type. The accrual rules for a loyalty program are defined in the `accrual_rules` field. Accrual rules are represented by a [LoyaltyProgramAccrualRule](https://developer.squareup.com/reference/square/objects/LoyaltyProgramAccrualRule) object. Each accrual rule specifies the rule type, number of points that buyers earn from the rule, and type-specific data. Loyalty programs use the following rule types: * [VISIT](#visit-accrual-rules) * [SPEND](#spend-accrual-rules) * [ITEM_VARIATION](#item-variation-accrual-rules) * [CATEGORY](#category-accrual-rules) {% aside type="info" %} `CATEGORY`, `ITEM_VARIATION`, and `SPEND` accrual rules integrate with the Catalog API. To get information about the catalog objects used in accrual rules, you can call [BatchRetrieveCatalogObjects](https://developer.squareup.com/reference/square/catalog-api/batch-retrieve-catalog-objects) in the Catalog API. {% /aside %} {% anchor id="visit-accrual-rules" /%} #### VISIT accrual rules `VISIT` accrual rules are used by Visit-based program types. Buyers earn points for every purchase, with an optional minimum spend requirement. For example, "Earn one point for each visit, with a $5 minimum purchase required". This program type defines one `VISIT` accrual rule. `VISIT` accrual rules define type-specific data in the `visit_data` field. This rule type can optionally specify `minimum_amount_money`, which defines the minimum purchase amount required during the visit to quality for points. If `minimum_amount_money` is specified, the `tax_mode` field indicates how taxes should be treated when calculating the purchase amount. The following example accrual rule enables buyers to earn 1 point for each visit with a $5.00 minimum purchase (not including tax): ```json ... "accrual_rules": [ { "accrual_type": "VISIT", "points": 1, "visit_data": { "minimum_amount_money": { "amount_money": { "amount": 500, "currency": "USD" } }, "tax_mode": "BEFORE_TAX" } } ], ... ``` {% anchor id="spend-accrual-rules" /%} #### SPEND accrual rules `SPEND` accrual rules are used by Amount-spent program types. Buyers earn points based on the amount they spend. For example, "Earn one point for every $2 dollars spent". This program type defines one `SPEND` accrual rule. `SPEND` accrual rules define type-specific data in the `spend_data` field. The `tax_mode` field indicates how taxes should be treated when calculating the purchase amount. This rule type can optionally specify `excluded_category_ids` and `excluded_item_variation_ids`, which contain the IDs of any `CATEGORY` and `ITEM_VARIATION` catalog objects that don't qualify for points accrual. The following example accrual rule enables buyers to earn 5 points for purchases of $25.00 or more, excluding the specified items: ```json ... "accrual_rules": [ { "accrual_type": "SPEND", "points": 5, "spend_data": { "amount_money": { "amount": 2500, "currency": "USD" }, "excluded_category_ids": [ "FQKAOJE5C4FIMF5A2URMLW6V" ], "excluded_item_variation_ids": [ "CBZXBUVVTYUBZGQO44RHMR6B", "EDILT24Z2NISEXDKGY6HP7XV" ], "tax_mode": "BEFORE_TAX" } } ], ... ``` {% anchor id="item-variation-accrual-rules" /%} #### ITEM_VARIATION accrual rules `ITEM_VARIATION` accrual rules are used by Item-based program types. Buyers earn points when they purchase specific items or services. For example, "Earn one point for each pumpkin latte purchased", where pumpkin latte is an item in the seller's catalog. This program type defines one or more `ITEM_VARIATION` accrual rules. `ITEM_VARIATION` accrual rules define type-specific data in the `item_variation_data` field. This rule type specifies an `item_variation_id`, which references the `ITEM_VARIATION` catalog object that qualifies for points accrual. The following example accrual rules enable buyers to earn 1 or 2 points by purchasing the specified items: ```json ... "accrual_rules": [ { "accrual_type": "ITEM_VARIATION", "points": 1, "item_variation_data": { "item_variation_id": "CBZXBUVVTYUBZGQO44RHMR6B" } }, { "accrual_type": "ITEM_VARIATION", "points": 2, "item_variation_data": { "item_variation_id": "EDILT24Z2NISEXDKGY6HP7XV" } } ], ... ``` {% anchor id="category-accrual-rules" /%} #### CATEGORY accrual rules `CATEGORY` accrual rules are used by Category-based program types. Buyers earn points when they purchase items or services from specific categories. For example, "Earn one point for any drink purchased", where drink is an item category in the seller's catalog. This program type defines one or more `CATEGORY` accrual rules. `CATEGORY` accrual rules define type-specific data in the `category_data` field. This rule type specifies a `category_id`, which references the `CATEGORY` catalog object that qualifies for points accrual. The following example accrual rules enable buyers to earn 1 or 3 points by purchasing items from the specified categories: ```json ... "accrual_rules": [ { "accrual_type": "CATEGORY", "points": 1, "category_data": { "category_id": "7ZERJKO5PVYXCVUHV2JCZ2UG" } }, { "accrual_type": "CATEGORY", "points": 3, "category_data": { "category_id": "FQKAOJE5C4FIMF5A2URMLW6V" } } ], ... ``` {% anchor id="retrieve-loyalty-program" /%} ## Retrieve a loyalty program Call [RetrieveLoyaltyProgram](https://developer.squareup.com/reference/square/loyalty-api/retrieve-loyalty-program) to get a loyalty program by the program ID or using the `main` keyword. A seller account can contain only one loyalty program, so either value can be used to retrieve the loyalty program that belongs to the seller. * Retrieve a loyalty program by the program ID. ```` * Retrieve a loyalty program using the `main` keyword. ```` {% aside type="info" %} Only the `RetrieveLoyaltyProgram` endpoint supports using the `main` keyword in place of the program ID. For example, you cannot use `main` to call `CalculateLoyaltyPoints`. {% /aside %} The following is an example `RetrieveLoyaltyProgram` response: ```json { "program": { "id": "8031c1b2-d749-4c76-9c40-ae5472ed2e04", "status": "ACTIVE", "reward_tiers": [ { "id": "7b897fee-572a-4516-a3d3-47676931e4f3", "points": 15, "name": "10% off entire sale", "created_at": "2020-12-16T17:39:54Z", "pricing_rule_reference": { "object_id": "ESNLTB2A77HXVKRBM", "catalog_version": "564027IS7PT6" } }, { "id": "46c2716e-f559-4b75-c015-764897e3c4ae0", "points": 30, "name": "25% off entire sale", "created_at": "2020-12-16T17:47:22Z", "pricing_rule_reference": { "object_id": "GR4C4RSNLFBU2GMWT", "catalog_version": "738021351929" } } ], "terminology": { "one": "Point", "other": "Points" }, "location_ids": [ "S8GWD5R9QB376" ], "created_at": "2020-12-16T23:35:41Z", "updated_at": "2020-12-20T02:00:02Z", "accrual_rules": [ { "accrual_type": "SPEND", "points": 1, "spend_data": { "amount_money": { "amount": 200, "currency": "USD" }, "excluded_category_ids": [ "7ZERJKO5PVYXCVUHV2JCZ2UG", "FQKAOJE5C4FIMF5A2URMLW6V" ], "excluded_item_variation_ids": [ "CBZXBUVVTYUBZGQO44RHMR6B", "EDILT24Z2NISEXDKGY6HP7XV" ], "tax_mode": "BEFORE_TAX" } } ] } } ``` Square returns a `404 NOT_FOUND` error if the seller has never subscribed to Square Loyalty. ```json { "errors": [ { "code": "NOT_FOUND", "detail": "Merchant does not have a loyalty program", "category": "INVALID_REQUEST_ERROR" } ] } ``` {% anchor id="list-loyalty-programs" /%} ## ListLoyaltyPrograms (deprecated) Call [ListLoyaltyPrograms](https://developer.squareup.com/reference/square/loyalty-api/list-loyalty-programs) to list the loyalty programs in a seller's account. A seller account can contain one loyalty program, so only one loyalty program is returned in the list. {% aside type="info" %} The `ListLoyaltyPrograms` endpoint is deprecated. When possible, you should use the [RetrieveLoyaltyProgram](#retrieve-loyalty-program) endpoint with the `main` keyword instead. `RetrieveLoyaltyProgram` and `ListLoyaltyPrograms` provide the same functionality because a seller account can contain only one loyalty program. For more information, see [Migration notes.](loyalty-api/overview#migrate-ListLoyaltyPrograms) {% /aside %} ```` The following is an example `ListLoyaltyPrograms` response: ```json { "programs": [ { "id": "8031c1b2-d749-4c76-9c40-ae5472ed2e04", "status": "ACTIVE", "reward_tiers": [ { "id": "7b897fee-572a-4516-a3d3-47676931e4f3", "points": 15, "name": "10% off entire sale", "created_at": "2020-12-16T17:39:54Z", "pricing_rule_reference": { "object_id": "ESNLTB2A77HXVKRBM", "catalog_version": "564027IS7PT6" } }, { "id": "46c2716e-f559-4b75-c015-764897e3c4ae0", "points": 30, "name": "25% off entire sale", "created_at": "2020-12-16T17:47:22Z", "pricing_rule_reference": { "object_id": "GR4C4RSNLFBU2GMWT", "catalog_version": "738021351929" } } ], "terminology": { "one": "Point", "other": "Points" }, "location_ids": [ "S8GWD5R9QB376" ], "created_at": "2020-12-16T23:35:41Z", "updated_at": "2020-12-20T02:00:02Z", "accrual_rules": [ { "accrual_type": "SPEND", "points": 1, "spend_amount_money": { "amount": 200, "currency": "USD" }, "excluded_category_ids": [ "7ZERJKO5PVYXCVUHV2JCZ2UG", "FQKAOJE5C4FIMF5A2URMLW6V" ], "excluded_item_variation_ids": [ "CBZXBUVVTYUBZGQO44RHMR6B", "EDILT24Z2NISEXDKGY6HP7XV" ] } ] } ] } ``` Square returns an empty object if the seller has never subscribed to Square Loyalty. ```json {} ``` ## See also * [Loyalty API](loyalty-api/overview) * [Loyalty Program](loyalty/overview) * [Manage Loyalty Promotions](loyalty-api/loyalty-promotions) * [Create and Retrieve Loyalty Accounts](loyalty-api/loyalty-accounts) * [Square Loyalty Pricing](https://squareup.com/help/article/6382-square-loyalty-pricing) * [Video: Sandbox 101: Loyalty API](https://www.youtube.com/watch?v=LFwO9DiwxEs) * [API Reference: Loyalty API](https://developer.squareup.com/reference/square/loyalty-api) --- # Manage Loyalty Rewards > Source: https://developer.squareup.com/docs/loyalty-api/loyalty-rewards > Status: PUBLIC > Languages: All > Platforms: All Learn about the LoyaltyReward object and how to use the Square Loyalty API to create and manage loyalty rewards. **Applies to:** [Loyalty API](loyalty-api/overview) | [Orders API](orders-api/what-it-does) | [Catalog API](catalog-api/what-it-does) {% subheading %}Learn how to use the Loyalty API to create and manage loyalty rewards.{% /subheading %} {% toc hide=true /%} ## Overview A loyalty program can have one or more [reward tiers](loyalty/overview#reward-tiers) that define how buyers can redeem points for discounts. While building an order, you can offer discount options to the buyer for qualifying purchases based on the point balance of their loyalty account and reward tier requirements. For information about retrieving reward tier information, see [Get discount details for a reward tier](#get-discount-details). The Loyalty API supports the following operations for working with loyalty rewards: * [Create a loyalty reward](#create-loyalty-reward) * [Redeem a loyalty reward](#redeem-loyalty-reward) (applications that integrate with the Orders API don't need to call `RedeemLoyaltyReward`) * [Retrieve a loyalty reward](#retrieve-loyalty-reward) * [List or search for loyalty rewards](#search-loyalty-rewards) * [Delete a loyalty reward](#delete-loyalty-reward) ## LoyaltyReward object The following is an example `LoyaltyReward` object: ```json { "id": "c7f57ff2-c3ad-38d7-bef8-31a345e883e0", "status": "REDEEMED", "loyalty_account_id": "716cefbc-3d71-4d7c-bdc8-9c7f84c2d793", "reward_tier_id": "7b897fee-572a-4516-a3d3-47676931e4f3", "points": 15, "created_at": "2022-03-03T21:32:12Z", "updated_at": "2022-03-03T21:38:52Z", "redeemed_at": "2022-03-03T21:38:53Z" } ``` This example loyalty reward requires 15 points and has a `REDEEMED` status. The following fields represent key attributes of a loyalty reward: |Field{% width="180px" %}|Description| |------|------| |`status`|The reward status: `ISSUED`, `REDEEMED`, or `DELETED`. Rewards with a `REDEEMED` status also include a `redeemed_at` field. Both `REDEEMED` and `DELETED` are terminal states.| |`loyalty_account_id`|The ID of the loyalty account to which the reward belongs.| |`reward_tier_id`|The ID of the reward tier that defines the reward details.| |`points`|The number of points required to claim the reward discount.| {% anchor id="create-loyalty-reward" /%} ## Create a loyalty reward Call [CreateLoyaltyReward](https://developer.squareup.com/reference/square/loyalty-api/create-loyalty-reward) to issue a loyalty reward when a buyer chooses to redeem points for a discount. You provide the following information in the request: * The ID of the loyalty account associated with the buyer. To get the loyalty account ID, call `SearchLoyaltyAccounts` and search by phone number or search by customer ID. * The ID of the corresponding reward tier. * If the order was created with the Orders API, the ID of the order. [Integrating with the Orders API](loyalty-api/overview#integration-with-the-orders-api) can simplify loyalty workflows. ```` After receiving the request, Square does the following: * Removes the required points from the loyalty account balance and holds them in reserve until the reward is redeemed or deleted. * Generates a searchable [loyalty event](loyalty-api/loyalty-events). {% aside type="tip" %} You can show buyers a preview of the discount before creating the reward. For more information, see [Deferred reward creation](#deferred-reward-creation). {% /aside %} The following is an example response, which includes the points required to redeem the reward: ```json { "reward":{ "id": "6c1ac262-a066-3c0e-8386-5704eac36b86", "status": "ISSUED", "loyalty_account_id": "716cefbc-3d71-4d7c-bdc8-9c7f84c2d793", "reward_tier_id": "46c2716e-f559-4b75-c015-764897e3c4ae0", "points": 10, "order_id": "cb9LSpDgOH3rITBaZ6eIBb9ee4F", "created_at": "2022-03-13T00:00:51Z", "updated_at": "2022-03-13T00:00:51Z" } } ``` The following considerations apply when creating loyalty rewards: * Your integration with the Orders API determines whether Square updates the order or whether it's your responsibility to do so: * If an order ID was specified in the `CreateLoyaltyReward` request, Square attaches the reward to the order, applies the corresponding discounts to qualifying line items, and adjusts the discount and total amounts accordingly. * If no order ID was specified, you need to apply all appropriate discounts to the order. * The Orders API allows you to add items and rewards to an order in any sequence. If adding a reward first, you should verify that the discounted item is part of the order. For example, if the reward gives the buyer a free coffee, make sure the order includes a coffee. * If an order ID was specified when creating the reward but the item isn't included in the order, Square deletes the reward after the order is paid and returns the points to the buyer's loyalty account. * The steps required to redeem the reward and manage the order also depend on whether you specified the order ID in your `CreateLoyaltyReward` request. If you use the Orders API to manage orders, Square handles most of the remaining workflow. For more information, see [Managing the reward state](#manage-reward-state). {% anchor id="redeem-loyalty-reward" /%} ## Redeem a loyalty reward If your application doesn't integrate with the Orders API, call [RedeemLoyaltyReward](https://developer.squareup.com/reference/square/loyalty-api/redeem-loyalty-reward) to redeem the reward. The `location_id` provided in the request needs to reference a participating location in the loyalty program. {% aside type="info" %} If your application integrates with the Orders API, you don't need to call `RedeemLoyaltyReward` directly. After you call `CreateLoyaltyReward` with the order ID and the order is paid, Square calls this endpoint automatically to redeem the reward. For more information, see [Managing the reward state](#manage-reward-state). {% /aside %} ```` After receiving the request, Square does the following: * Permanently removes the points from the loyalty account balance. * Sets the reward to the `REDEEMED` terminal state. * Generates a searchable [loyalty event](loyalty-api/loyalty-events). The following is an example response, which contains the generated loyalty event: ```json { "event": { "id": "08fb6143-3716-3a78-8b6a-858230b4041b", "type": "REDEEM_REWARD", "created_at": "2022-03-03T21:38:53Z", "redeem_reward": { "loyalty_program_id": "8031c1b2-d729-4c76-9c40-ab5472ed2e04", "reward_id": "c7f57ff2-c3ad-38d7-bef8-31a345e883e0" }, "loyalty_account_id": "716cefbc-3d71-4d7c-bdc8-9c7f84c2d793", "location_id": "MK34ENDNWY03R", "source": "LOYALTY_API" } } ``` {% anchor id="retrieve-loyalty-reward" /%} ## Retrieve a loyalty reward Call [RetrieveLoyaltyReward](https://developer.squareup.com/reference/square/loyalty-api/retrieve-loyalty-reward) to retrieve a loyalty reward by the reward ID. ```` The following is an example response: ```json { "event": { "id": "08fb6143-3716-3a78-8b6a-858230b4041b", "type": "REDEEM_REWARD", "created_at": "2022-03-03T21:38:53Z", "redeem_reward": { "loyalty_program_id": "8031c1b2-d729-4c76-9c40-ab5472ed2e04", "reward_id": "c7f57ff2-c3ad-38d7-bef8-31a345e883e0" }, "loyalty_account_id": "716cefbc-3d71-4d7c-bdc8-9c7f84c2d793", "location_id": "MK34ENDNWY03R", "source": "LOYALTY_API" } } ``` If the reward cannot be found, Square returns a `404 NOT_FOUND` error. {% anchor id="search-loyalty-rewards" /%} ## List or search for loyalty rewards Call [SearchLoyaltyRewards](https://developer.squareup.com/reference/square/loyalty-api/search-loyalty-rewards) to list loyalty rewards, optionally filtered for a loyalty account or reward status. ```` The following is an example response: ```json { "rewards": [ { "id": "c7f57ff2-c3ad-38d7-bef8-31a345e883e0", "status": "REDEEMED", "loyalty_account_id": "716cefbc-3d71-4d7c-bdc8-9c7f84c2d793", "reward_tier_id": "7b897fee-572a-4516-a3d3-47676931e4f3", "points": 15, "created_at": "2022-03-03T21:32:12Z", "updated_at": "2022-03-03T21:38:52Z", "redeemed_at": "2022-03-03T21:38:53Z" }, { "id": "zf7720a4-de70-4871-8b16-6434cf634fc5", "status": "REDEEMED", "loyalty_account_id": "716cefbc-3d71-4d7c-bdc8-9c7f84c2d793", "reward_tier_id": "46c2716e-f559-4b75-c015-764897e3c4ae0", "points": 30, "created_at": "2022-02-18T23:09:45Z", "updated_at": "2022-02-19T01:21:33Z", "redeemed_at": "2022-02-19T01:21:33Z" } ] } ``` Results are sorted by the `updated_at` timestamp in descending order. If no results are found, the response contains an empty object: ```json {} ``` {% anchor id="delete-loyalty-reward" /%} ## Delete a loyalty reward Call [DeleteLoyaltyReward](https://developer.squareup.com/reference/square/loyalty-api/delete-loyalty-reward) to delete a reward that was issued but not redeemed. ```` After receiving the request, Square does the following: * If an order ID was specified when the reward was created, updates the order by removing the reward and related discounts. * Returns the reserved points to the loyalty account. * Sets the reward to the `DELETED` terminal state. * Generates a searchable [loyalty event](loyalty-api/loyalty-events). If successful, the response contains an empty object: ```json {} ``` A deleted reward can still be retrieved. {% anchor id="manage-reward-state" /%} ## Managing the reward state A loyalty reward can be in one of the following states: * `ISSUED` - The initial state of a reward. When a reward is created, the points required to redeem the reward are removed from the loyalty account and held in reserve until the reward is redeemed or deleted. * `REDEEMED` - The reward was redeemed. When a reward is redeemed, the reserved points are permanently removed from the loyalty account. * `DELETED` - The reward was deleted. When a reward is deleted, the reserved points are returned to the loyalty account. {% aside type="info" %} `REDEEMED` and `DELETED` are terminal states. You cannot delete a redeemed reward in order to return points to a loyalty account. If you need to manually adjust the point balance of a loyalty account, call [AdjustLoyaltyPoints](https://developer.squareup.com/reference/square/loyalty-api/adjust-loyalty-points). {% /aside %} After a reward is created, the following common workflows can cause the reward to move from `ISSUED` to the `REDEEMED` or `DELETED` state. Your responsibility depends on whether a Square order ID was specified when creating the reward. ### If the buyer pays for the order and receives the discount * Order ID specified - Square sets the reward status to `REDEEMED`. * No order ID specified - You need to call [RedeemLoyaltyReward](https://developer.squareup.com/reference/square/loyalty-api/redeem-loyalty-reward), which sets the status to `REDEEMED`. ### If the buyer pays for the order but didn't receive the discount * Order ID specified - Square sets the reward status to `DELETED`. * No order ID specified - You need to call [DeleteLoyaltyReward](https://developer.squareup.com/reference/square/loyalty-api/delete-loyalty-reward), which sets the status to `DELETED`. An example scenario for this workflow is when a buyer removes a discounted item from the order before paying for the order. ### If the buyer chooses not to redeem a reward or abandons the order You need to first call [DeleteLoyaltyReward](https://developer.squareup.com/reference/square/loyalty-api/delete-loyalty-reward), which sets the reward status to `DELETED`. The next step depends on whether an order ID was specified when creating the reward: * Order ID specified - Square removes the discount from the order and updates the order amount. * No order ID specified - You need to also update the order appropriately. For abandoned orders, you can determine the appropriate amount of time to wait before deleting dangling rewards, but it's your responsibility to clean them up. Otherwise, they remain in the `ISSUED` state and the reserved points cannot be used for other purchases. Showing buyers a preview of the discount before creating the reward might help avoid creating dangling rewards. For more information, see [Deferred reward creation](#deferred-reward-creation). {% aside type="info" %} The operations involved in changing the reward state run asynchronously, so changes might not be immediately visible if you call [RetrieveLoyaltyReward](https://developer.squareup.com/reference/square/loyalty-api/retrieve-loyalty-reward) to retrieve the reward. {% /aside %} {% anchor id="get-discount-details" /%} ## Getting discount details for a reward tier Reward tier discounts are defined using catalog objects. The following high-level steps describe how to use the Loyalty API and Catalog API to get discount details and product information for the reward tiers in a loyalty program: 1. [Get the reward tiers for the loyalty program](#step-get-reward-tiers) - Call `RetrieveLoyaltyProgram` in the Loyalty API to get the active reward tiers and current discount details. At this point, you might want to check whether the loyalty account balance has enough points to qualify for a reward tier. 2. [Get the discount details for the reward tier](#step-get-discount-details) - Call `RetrieveCatalogObject` in the Catalog API to get the `PRICING_RULE`, `DISCOUNT`, and `PRODUCT_SET` catalog objects that define the discount for each qualifying reward tier. You need to retrieve these objects at a specific catalog version. 3. [Get current product information](#step-get-current-product-information) - Call `BatchRetrieveCatalogObjects` in the Catalog API to get the `CATEGORY` and `ITEM_VARIATION` catalog objects that the discount applies to. This step applies only for catalog-based or item-based discounts so you can show the most recent product information to the buyer. This process ensures that you don't use obsolete information for discounts (if reward tiers are updated or removed) or products (if the catalog changes after the reward tier is created). {% anchor id="step-get-reward-tiers" /%} ### 1. Get the reward tiers for the loyalty program Call `RetrieveLoyaltyProgram` in the Loyalty API to get the active reward tiers and current discount details. At this point, you might want to check whether the loyalty account balance has enough points to qualify for a reward tier. To get the reward tiers for a loyalty program, call the [RetrieveLoyaltyProgram](https://developer.squareup.com/reference/square/loyalty-api/retrieve-loyalty-program) endpoint. ```` The following is an excerpt of a `RetrieveLoyaltyProgram` response. The `reward_tiers` field contains a list of [LoyaltyProgramRewardTier](https://developer.squareup.com/reference/square/objects/LoyaltyProgramRewardTier) objects that represent the reward tiers in the loyalty program. ```json { "program": { "id": "946651f0-229e-488c-bb97-183e34c20de6", "status": "ACTIVE", "reward_tiers": [ { "id": "e1b39225-9da5-43d1-a5db-782c4e3c4ae0", "points": 10, "name": "10% off entire sale", "created_at": "2020-04-20T16:55:11Z", "pricing_rule_reference": { "object_id": "74C4JSHESNLTB2A7ITO5HO6F", "catalog_version": "1605486402527" } }, ... ], ... } } ``` Each reward tier in the response contains the following key fields: * `id` - The reward tier ID that you use to create a loyalty reward for a buyer. * `points` - The number of points that need to be redeemed to claim the reward. * `name` - The seller-defined name for the reward tier. * `pricing_rule_reference` - The specific version of a `PRICING_RULE` catalog object that references the discount details for the reward tier. The `object_id` and `catalog_version` fields are used to retrieve the discount details in the next step. {% anchor id="step-get-discount-details" /%} ### 2. Get the discount details for the reward tier To get the discount details for a reward tier, call the [RetrieveCatalogObject](https://developer.squareup.com/reference/square/catalog-api/retrieve-catalog-object) endpoint in the Catalog API. The request needs to include: * The `object_id` parameter set to the `pricing_rule_reference.object_id` field in the reward tier. * The `catalog_version` parameter set to the `pricing_rule_reference.catalog_version` field in the reward tier. * The `include_related_objects` query parameter set to `true`, which tells Square to return all catalog objects that are part of the discount definition. ```` The response includes the `PRICING_RULE` catalog object, along with the `DISCOUNT` catalog object that defines the discount type and the `PRODUCT_SET` catalog object that defines the discount scope (see [example responses](#examples)). #### Discount type The discount type and type-specific details are defined in the `discount_data` field of the `DISCOUNT` catalog object in the `RetrieveCatalogObject` response. | Discount detail{% width="340px" %} | DISCOUNT field mapping | | :------ | :------ | | Discount type | `discount_data.discount_type` | | Amount of a `FIXED_AMOUNT` discount | `discount_data.amount_money` | | Percentage of a `FIXED_PERCENTAGE` discount | `discount_data.percentage` | | Maximum amount of a `FIXED_PERCENTAGE` discount (optional) | `discount_data.maximum_amount_money` | | Discount name | `discount_data.name` | A reward discount can be a fixed amount or a percentage: * For a fixed amount discount (such as $5 off): * `discount_type` is `FIXED_AMOUNT`. * `amount_money` is the discount amount. This amount is specified as a `Money` object, which uses the smallest denomination of the currency. * For a percentage discount (such as 20% off): * `discount_type` is `FIXED_PERCENTAGE`. * `percentage` is the discount percentage, specified as a string representation of a decimal number. For example, a 7.25% discount is represented as "7.25" and a free item is "100.0". * `maximum_amount_money` is the optional maximum discount amount. This amount is specified as a `Money` object, which uses the smallest denomination of the currency. #### Discount scope The discount scope is defined in the `PRODUCT_SET` catalog object in the `RetrieveCatalogObject` response. A reward discount can be scoped to the entire order or to one or more categories or items. | Scope | PRODUCT_SET settings | | :------ | :------ | | Discount applies to the entire order | `product_set_data` contains `"all_products": true` | | Discount applies to specific categories of items | `product_set_data` contains a `product_ids_any` field that references one or more `CATEGORY` catalog objects | | Discount applies to specific items | `product_set_data` contains a `product_ids_any` field that references one or more `ITEM_VARIATION` catalog objects | #### Examples The following `RetrieveCatalogObject` responses are examples of different discount scopes: * **Entire order discount** The following example represents a "$10.00 Off Entire Order" reward. It specifies a `FIXED_AMOUNT` discount of $10.00. ```json { "object": { "type": "PRICING_RULE", "id": "L63DXGEYPJJTAM5JBX32ZBR5", "updated_at": "2020-12-16T22:48:32.75Z", "version": 1602888512750, "is_deleted": false, "present_at_all_locations": true, "pricing_rule_data": { "discount_id": "ZSWOAGU2E75BO7OI33AFIUMU", "match_products_id": "UHB65AGFKMS2IYVA7KHXMDYU", "application_mode": "ATTACHED", "discount_target_scope": "WHOLE_PURCHASE" } }, "related_objects": [ { "type": "DISCOUNT", "id": "ZSWOAGU2E75BO7OI33AFIUMU", "updated_at": "2020-12-16T22:48:32.75Z", "version": 1602888512750, "is_deleted": false, "present_at_all_locations": true, "discount_data": { "name": "$10.00 Off Entire Order", "discount_type": "FIXED_AMOUNT", // Discount type "amount_money": { // Discount amount "amount": 1000, "currency": "USD" }, "application_method": "MANUALLY_APPLIED" } }, { "type": "PRODUCT_SET", "id": "UHB65AGFKMS2IYVA7KHXMDYU", "updated_at": "2020-12-16T22:48:32.75Z", "version": 1602888512750, "is_deleted": false, "present_at_all_locations": true, "product_set_data": { "all_products": true // Discount is for entire order } } ] } ``` * **Category-based discount** The following example represents a "50% Off One Hot Drink" reward. It specifies a `FIXED_PERCENTAGE` discount of 50.0 with a maximum discount amount of $2.75. It also specifies the category (hot drinks) to which the discount applies. This example applies to a single category, but a `CATEGORY` reward tier can apply to multiple categories. ```json { "object": { "type": "PRICING_RULE", "id": "74C4JSHESNLTB2A7ITO5HO6F", "updated_at": "2020-12-16T00:26:42.527Z", "version": 1605486402527, "is_deleted": false, "present_at_all_locations": true, "pricing_rule_data": { "discount_id": "ZLSTXZUW6BJED7ZZON4QZ4F5", "match_products_id": "RJM4MYXSBWZICCRS4N2B63QV", "application_mode": "ATTACHED", "discount_target_scope": "LINE_ITEM", "max_applications_per_attachment": 1 } }, "related_objects": [ { "type": "DISCOUNT", "id": "ZLSTXZUW6BJED7ZZON4QZ4F5", "updated_at": "2020-12-16T00:26:42.527Z", "version": 1605486402527, "is_deleted": false, "present_at_all_locations": true, "discount_data": { "name": "50% Off One Hot Drink", "discount_type": "FIXED_PERCENTAGE", // Discount type "percentage": "50.0", // Discount percentage "application_method": "MANUALLY_APPLIED", "maximum_amount_money": { // Optional max discount amount "amount": 275, "currency": "USD" } } }, { "type": "PRODUCT_SET", "id": "RJM4MYXSBWZICCRS4N2B63QV", "updated_at": "2020-12-16T00:26:42.527Z", "version": 1605486402527, "is_deleted": false, "present_at_all_locations": true, "product_set_data": { "product_ids_any": [ // List of discounted categories "TWCJXQJZMIAJJ3MQJNCWLCQG" ], "quantity_exact": 1 } }, { "type": "CATEGORY", // Discounted category "id": "TWCJXQJZMIAJJ3MQJNCWLCQG", ... } ] } ``` * **Item-based discount** The following example represents a "Free Latte or Cappuccino" reward. It specifies a `FIXED_PERCENTAGE` discount of 100.0, which represents a free item. It also specifies two item variations (latte and cappuccino) to which the discount applies. ```json { "object": { "type": "PRICING_RULE", "id": "AZH2XITJVQQTYSWSOEXIW57Z", "updated_at": "2020-12-08T21:01:37.385Z", "version": 1607461297385, "is_deleted": false, "present_at_all_locations": true, "pricing_rule_data": { "discount_id": "2PS6ILT65FVO6UY227FZ4HGM", "match_products_id": "P35KAELYZUVV7YHR3DLCWRJN", "application_mode": "ATTACHED", "discount_target_scope": "LINE_ITEM", "max_applications_per_attachment": 1 } }, "related_objects": [ { "type": "DISCOUNT", "id": "2PS6ILT65FVO6UY227FZ4HGM", "updated_at": "2020-12-08T21:01:37.385Z", "version": 1607461297385, "is_deleted": false, "present_at_all_locations": true, "discount_data": { "name": "Free Latte or Cappuccino", "discount_type": "FIXED_PERCENTAGE", // Discount type "percentage": "100.0", // Discount percentage "application_method": "MANUALLY_APPLIED" } }, { "type": "PRODUCT_SET", "id": "P35KAELYZUVV7YHR3DLCWRJN", "updated_at": "2020-12-08T21:01:37.385Z", "version": 1607461297385, "is_deleted": false, "present_at_all_locations": true, "product_set_data": { "product_ids_any": [ // List of discounted items "QBIAVB2BWSPT2PYLPNAFJZ36", "MHXTR5VRKLXN767RCBTNB7YJ" ], "quantity_exact": 1 } }, { "type": "ITEM_VARIATION", // Discounted item 1 "id": "QBIAVB2BWSPT2PYLPNAFJZ36", ... }, { "type": "ITEM_VARIATION", // Discounted item 2 "id": "MHXTR5VRKLXN767RCBTNB7YJ", ... } ] } ``` #### Considerations The following considerations apply to reward tier discount integrations: * Developers cannot use Square APIs to manage loyalty programs or reward tiers. To ensure that the discount details for a reward tier cannot be changed using the Catalog API, Square pins the corresponding pricing rule to a `PRICING_RULE` catalog object at a specific catalog version. When a seller updates the reward tier in the Square Dashboard or Point of Sale application, new `PRICING_RULE`, `DISCOUNT`, and `PRODUCT_SET` catalog objects are created. Note that Square doesn't delete obsolete catalog objects when reward tiers are updated. * You should always retrieve the loyalty program to get the active reward tiers with references to the specific pricing rule and version that defines current discount information. This step ensures you don't use obsolete discount information defined for reward tiers that are updated or removed. * You should use the `RetrieveCatalogObject` endpoint to get discount details for a reward tier. Although the `BatchRetrieveCatalogObject` endpoint can also return catalog objects at a specific version, a single call might not return all pricing rules for a loyalty program because the corresponding `PRICING_RULE` catalog objects might belong to different versions. * The Loyalty API doesn't use all fields in the `PRICING_RULE`, `DISCOUNT`, and `PRODUCT_SET` catalog objects. You can ignore returned fields that aren't described for the [discount type](#discount-type) or [discount scope](#discount-scope). {% anchor id="step-get-current-product-information" /%} ### 3. Get current product information To get the current product information for the catalog objects that are eligible for the discount, call the [BatchRetrieveCatalogObjects](https://developer.squareup.com/reference/square/catalog-api/batch-retrieve-catalog-objects) or [RetrieveCatalogObject](https://developer.squareup.com/reference/square/catalog-api/retrieve-catalog-object) endpoint in the Catalog API. This step ensures that you retrieve all updates made since the catalog version specified in the previous `RetrieveCatalogObject` request, such as changes to an item's price. {% aside type="info" %} This step applies to `CATEGORY` and `ITEM_VARIATION` scopes; it doesn't apply to `ORDER` scopes. If you already retrieved the most current category or item information in your application flow, you can skip this step. {% /aside %} For this call, the request should: * Include the IDs from the `product_set_data.product_ids_any` field of the `PRODUCT_SET` catalog object from the previous request. * Not include the `catalog_version` field. ```` {% anchor id="deferred-rewards" /%} ## Deferred reward creation In your application flow, you can show buyers a preview of how a loyalty reward would affect a purchase before you create the reward. Buyers can use this preview to decide whether they want to redeem the points. By deferring reward creation until the buyer completes the order, you can avoid locking reward points prematurely. When a reward is created, the required points are removed from the loyalty account. The points are held in reserve and cannot be used for discounts on other purchases. For more information, see [Managing the reward state](#manage-reward-state). For example, consider the following eCommerce checkout scenarios. * **Window shopping -** Buyers can add items to the cart and apply available discounts to see the effect on purchase price. They might keep the cart open for a long time without paying for it. * **Abandoned carts -** Buyers might never pay for items they added to the cart. Both scenarios illustrate the benefit of deferring reward creation until the buyer completes the order. In such scenarios, you can call [CalculateOrder](https://developer.squareup.com/reference/square/orders-api/calculate-order) in the Orders API to create a copy of an order with the specific rewards applied. Then, you can show the buyer the effect of applying the discounts. Later, when the buyer is ready to make a purchase, you can call `CreateLoyaltyReward` to create a reward. The following example `CalculateOrder` request calculates the amounts for a non-catalog item order. ```` For the `order` object in the request body, you can provide an existing order or a preview order that isn't yet created: * **Existing order** - If you know the order ID, you can call [RetrieveOrder](https://developer.squareup.com/reference/square/orders-api/retrieve-order) to retrieve the order and pass the entire `Order` object. * **Preview order** - While you're building an order, you can pass an `Order` object that doesn't contain an order ID, as shown in the preceding example. Use the same object that you would send to the [CreateOrder](https://developer.squareup.com/reference/square/orders-api/create-order) endpoint. For the `proposed_rewards` field, provide the following: * `reward_tier_id` - The ID of the reward tier from the loyalty program. * `id` - A random string that serves as the ID for the simulated reward. The following is an example response that provides a preview of the order with the applied discount: ```json { "order": { "location_id": "S8GWD5R9QB376", "line_items": [ { "uid": "HFROFMx2MckcvMe7pkU23", "quantity": "1", "name": "Unisex Poncho", "base_price_money": { "amount": 4200, "currency": "USD" }, "gross_sales_money": { "amount": 4200, "currency": "USD" }, "total_tax_money": { "amount": 0, "currency": "USD" }, "total_discount_money": { "amount": 420, "currency": "USD" }, "total_money": { "amount": 3780, "currency": "USD" }, "variation_total_price_money": { "amount": 4200, "currency": "USD" }, "applied_discounts": [ { "uid": "QcKsxjGUDfNWZT8oi80ncK", "discount_uid": "XOzfxZ6LaeTjL66knISe4F", "applied_money": { "amount": 420, "currency": "USD" } } ] } ], "discounts": [ { "uid": "XOzfxZ6LaeTjL66eaK4Ile", "catalog_object_id": "RU4L3FVPCAZ5WR2SKVPS4IZE", "name": "10% off entire sale (up to $50.00 off)", "percentage": "10.0", "applied_money": { "amount": 420, "currency": "USD" }, "type": "FIXED_PERCENTAGE", "scope": "LINE_ITEM", "reward_ids": [ "random-reward-id" ], "pricing_rule_id": "JNKW5IZGLA6JI2EFW2GMWTHX" } ], "created_at": "2021-02-27T00:12:52.857Z", "updated_at": "2021-02-27T00:12:52.857Z", "state": "OPEN", "version": 1, "total_tax_money": { "amount": 0, "currency": "USD" }, "total_discount_money": { "amount": 420, "currency": "USD" }, "total_tip_money": { "amount": 0, "currency": "USD" }, "total_money": { "amount": 3780, "currency": "USD" }, "total_service_charge_money": { "amount": 0, "currency": "USD" }, "net_amounts": { "total_money": { "amount": 3780, "currency": "USD" }, "tax_money": { "amount": 0, "currency": "USD" }, "discount_money": { "amount": 420, "currency": "USD" }, "tip_money": { "amount": 0, "currency": "USD" }, "service_charge_money": { "amount": 0, "currency": "USD" } }, "rewards": [ { "id": "some-random-id", "reward_tier_id": "b525f003-47ea-43aa-bb18-6d12Ca04c73b" } ] } } ``` Note the following fields in the response: * The `total_discount_money`, `total_money`, and `discount_money` amounts for the order and line item are updated with the applied discount. * The `discounts` field is added to the order. The discount contains information about the applied discount. * The `applied_discounts` field is added to the line item. The discount maps to the order-level discount. * The `rewards` field is added to the order. This simulated reward contains the reward and reward tier IDs you provided in the `proposed_rewards` field of the request. {% anchor id="multiple-redemption" /%} ## Multiple reward redemption In a simple scenario, applications might allow a buyer to redeem only one reward per order. The application flow is simple: show the rewards the buyer qualifies for (for example, a free coffee for 10 points and a free sandwich for 15 points) and let the buyer make the choice. After the buyer chooses a reward, the point balance is adjusted accordingly. Alternatively, applications (such as Square Point of Sale) can allow buyers to redeem multiple rewards per order. To provide a consistent experience, your application can also allow multiple redemptions. In this scenario, your application needs to track changes to the loyalty point balance when buyers add or remove rewards, as follows: * If your application immediately calls `CreateLoyaltyReward` each time the buyer adds a reward or `DeleteLoyaltyReward` each time the buyer removes a reward, the loyalty account reflects the latest point balance. You can call [RetrieveLoyaltyAccount](https://developer.squareup.com/reference/square/loyalty-api/retrieve-loyalty-account) to fetch the updated balance. * If your application uses the [deferred reward creation](#deferred-rewards) approach as buyers add and remove rewards, the buyer's loyalty account doesn't accurately reflect the available point balance. In this case, your application needs to keep track of the available point balance on the client side. You can use the following logic to track the available point balance on the client side: ```javascript var availableBalance = getLoyaltyAccount().balance var allTiers = getLoyaltyProgram().reward_tiers var selectedTiers = [] // Use this logic to determine which tiers are available to the buyer function getAvailableTiers() { var availableTiers = [] for (tier : allTiers) { if (availableBalance >= tier.points) { availableTiers.push(tier) } } return availableTiers } // Use this logic when the buyer selects a tier function selectTier(rewardTier) { selectedTiers.push(rewardTier) availableBalance -= rewardTier.points } ``` Redeeming multiple rewards of different tiers on the same order is supported, but redeeming multiple rewards of the same tier on the same order isn't supported. ### Maximum reward applied When you apply multiple rewards to an order, the Square pricing engine applies discounts so that they maximize the reward value in the buyer's favor. Therefore, discounts might be rearranged as more rewards are added to the order. For example, consider the following scenario: * Your cart contains one tea for $4 and one coffee for $2. * You offer two rewards: a Free Drink and a Free Tea. If you first add the Free Drink reward to the order, Square discounts the tea because it's more expensive. If you then add the Free Tea reward, the Free Drink discount is moved from the tea to the coffee, so the Free Tea reward can be applied to the tea. If non-loyalty catalog pricing rules also apply to the order, Square includes the resulting automatically applied discounts when determining which rewards or discounts to apply to the order. For more information, see [Apply Taxes and Discounts](orders-api/apply-taxes-and-discounts). {% aside type="info" %} For other considerations related to multiple redemptions, see [Requirements and limitations](loyalty-api/overview#requirements-and-limitations). {% /aside %} ## See also * [Loyalty API](loyalty-api/overview) * [Create and Retrieve Loyalty Accounts](loyalty-api/loyalty-accounts) * [Manage Loyalty Points](loyalty-api/loyalty-points) * [Search for Balance-Changing Loyalty Events](loyalty-api/loyalty-events) * [Video: Sandbox 101: Loyalty API](https://www.youtube.com/watch?v=LFwO9DiwxEs) * [API Reference: Loyalty API](https://developer.squareup.com/reference/square/loyalty-api) --- # Create and Retrieve Loyalty Accounts > Source: https://developer.squareup.com/docs/loyalty-api/loyalty-accounts > Status: PUBLIC > Languages: All > Platforms: All Learn about the LoyaltyAccount object and how to use the Square Loyalty API to create and retrieve loyalty accounts. **Applies to:** [Loyalty API](loyalty-api/overview) | [Customers API](customers-api/what-it-does) {% subheading %}Learn about the LoyaltyAccount object and how to use the Square Loyalty API to create and retrieve loyalty accounts.{% /subheading %} {% toc hide=true /%} ## Overview A loyalty account references the loyalty program of a Square seller and a customer profile in the seller's Customer Directory. A loyalty account also contains the point balance and a phone number mapping that associates the account with a buyer. The Loyalty API supports the following operations for working with loyalty accounts: * [Create a loyalty account](#create-loyalty-account) * [Retrieve a loyalty account](#retrieve-loyalty-account) * [List or search for loyalty accounts](#search-loyalty-accounts) {% aside type="info" %} The point balance of the loyalty account is managed through calls to the `AccumulateLoyaltyPoints`, `AdjustLoyaltyPoints`, `CreateLoyaltyReward`, `RedeemLoyaltyReward`, and `DeleteLoyaltyReward` endpoints. For more information, see [Manage Loyalty Points](loyalty-api/loyalty-points) or [Manage Loyalty Rewards](loyalty-api/loyalty-rewards). {% /aside %} {% anchor id="loyaltyaccount-object" /%} ## LoyaltyAccount object The following is an example `LoyaltyAccount` object: ```json { "id": "716cefbc-3d71-4d7c-bdc8-9c7f84c2d793", "mapping": { "id": "66aaab3f-da99-49ed-8b19-b87f824d73a4", "phone_number": "+16295551234", "created_at": "2020-04-16T21:44:32Z" }, "program_id": "8031c1b2-d749-4c76-9c40-ae5472ed2e04", "balance": 10, "lifetime_points": 20, "customer_id": "Q8002F9Y7E9JJTJ5P6JKYYEM0BC7VPG", "created_at": "2020-04-16T21:44:32Z", "updated_at": "2020-05-08T09:10:50Z", "enrolled_at": "2020-05-01T22:01:15Z" } ``` This example loyalty account has a point balance of 10. The following fields represent key attributes of a loyalty account: |Field{% width="220px" %}|Description| |----|----| |`mapping`|The phone number mapping for the account.| |`program_id`|The ID of the Square loyalty program that the account belongs to. You can call [RetrieveLoyaltyProgram](https://developer.squareup.com/reference/square/loyalty-api/retrieve-loyalty-program) to get program details.| |`balance`|The number of available points in the account. The point balance is managed through calls to the `AccumulateLoyaltyPoints`, `AdjustLoyaltyPoints`, `CreateLoyaltyReward`, `RedeemLoyaltyReward`, `DeleteLoyaltyReward` endpoints.| |`lifetime_points`|The total number of points accrued during the lifetime of the account.| |`customer_id`|The ID of the customer profile of the buyer associated with the account.| |`enrolled_at`|The timestamp of when the buyer joined the loyalty program. If this field isn't set in the `CreateLoyaltyAccount` request, Square populates it after the buyer's first action on their account, specifically after the first `AccumulateLoyaltyPoints` or `CreateLoyaltyReward` call made on behalf of the buyer. In first-party flows, Square populates the field when the buyer agrees to the terms of service in Square Point of Sale.{% line-break /%}{% line-break /%}Typically, you provide this field in a `CreateLoyaltyAccount` request when creating a loyalty account for a buyer who already interacted with their account. For example, you would set this field when migrating accounts from an external system.| |`expiring_point_deadlines`|The schedule for when points in the account balance expire. This field is present only if the account has points that are scheduled to expire.| The Loyalty API cannot be used to update account settings or delete accounts. However, sellers can change the phone number for an account or delete an account in the Square Dashboard. For more information, see [Limited support for managing loyalty accounts with the Loyalty API](loyalty-api/overview#limited-support-loyalty-accounts). {% anchor id="create-loyalty-account" /%} ## Create a loyalty account Call [CreateLoyaltyAccount](https://developer.squareup.com/reference/square/loyalty-api/create-loyalty-account) to create a loyalty account and enroll the buyer in a loyalty program. You must provide the following information for this request: * `mapping` and `phone_number`, with the buyer's phone number specified in E.164 format. You can obtain the phone number from your application flow. A given phone number can be mapped to only one loyalty account in a loyalty program. * `program_id` with the ID of the loyalty program. To get the program ID, call [RetrieveLoyaltyProgram](loyalty-api/overview#retrieve-loyalty-program) using the `main` keyword. ```` {% aside type="info" %} If you have the ID of the customer profile that is associated with the buyer, you should also specify the `customer_id` field in the request. Doing so can help prevent creating duplicate customer profiles in the seller's Customer Directory. For more information, see [Integration with the Customers API](loyalty-api/overview#integration-with-the-customers-api). {% /aside %} After receiving the request, Square does the following: * If `customer_id` isn't specified, Square checks the directory to determine whether it contains a customer profile with the same phone number. If not, Square creates a customer profile using the buyer's phone number. * Creates an account in the specified loyalty program. The following is an example `CreateLoyaltyAccount` response: ```json { "loyalty_account":{ "id":"716cefbc-3d71-4d7c-bdc8-9c7f84c2d793", "mapping": { "id":"6377d589-3f09-4f00-a0e8-56d7dfc1d2b5", "phone_number":"+16295551234", "created_at":"2020-01-30T00:11:58Z" }, "program_id":"8031c1b2-d749-4c76-9c40-ae5472ed2e04", "balance":0, "lifetime_points":0, "customer_id":"REK96J96AS5AN2Y8Z4HE2Z5NVX", "created_at":"2020-01-30T00:11:58Z", "updated_at":"2020-01-30T00:11:58Z" } } ``` Both `balance` and `lifetime_points` are 0 because the buyer hasn't yet accrued any loyalty points. Now that the account is created, the buyer can start [earning points](loyalty-api/loyalty-points#accumulate-loyalty-points). The phone number that you provide to create a loyalty account must use the E.164 format (for example, `+16295551234`). The country code of the phone number must correspond to a [country where Square Loyalty is available](loyalty-api/overview#international-availability). Otherwise, the `CreateLoyaltyAccount` request returns an `INVALID_PHONE_NUMBER` error code. {% anchor id="terms-of-service" /%} ### Terms of service and text notifications After a loyalty account is created, Square can contact a buyer using the phone number provided and send text messages, such as "You have a reward available." However, the buyer must agree to the terms of service before Square can send any text messages. Buyers can agree to the terms of service when they enroll in a loyalty program from a Square Point of Sale application. They can also agree on the Loyalty status page after the account is created. When you create an account through the Loyalty API, Square cannot show the terms of service until a buyer makes a purchase through a Point of Sale application. Therefore, unless the buyer agrees to the terms of service on the Loyalty status page, they cannot receive any text messages until they agree to the terms of service when they make a purchase. {% anchor id="retrieve-loyalty-account" /%} ## Retrieve a loyalty account Call [RetrieveLoyaltyAccount](https://developer.squareup.com/reference/square/loyalty-api/retrieve-loyalty-account) if you know the ID of the loyalty account. ```` The following is an example `RetrieveLoyaltyAccount` response: ```json { "loyalty_account": { "id": "716cefbc-3d71-4d7c-bdc8-9c7f84c2d793", "mapping": { "id": "66aaab3f-da99-49ed-8b19-b87f824d73a4", "phone_number": "+16295551234", "created_at": "2020-04-16T21:44:32Z" }, "program_id": "8031c1b2-d749-4c76-9c40-ae5472ed2e04", "balance": 10, "lifetime_points": 20, "customer_id": "Q8002F9Y7E9JJTJ5P6JKYYEM0BC7VPG", "created_at": "2020-04-16T21:44:32Z", "updated_at": "2020-05-08T09:10:50Z", "enrolled_at": "2020-05-01T22:01:15Z" } } ``` If the account cannot be found, Square returns a `404 NOT_FOUND` error. {% anchor id="search-loyalty-accounts" /%} ## List or search for loyalty accounts Call [SearchLoyaltyAccounts](https://developer.squareup.com/reference/square/loyalty-api/search-loyalty-accounts) to retrieve all loyalty accounts for the seller or to search for accounts by phone number or customer ID. A search query can contain the `mappings` field (to search by phone number) or the `customer_ids` field, but not both. Loyalty accounts in the response are sorted by the `created_at` date in ascending order. If you search for phone number mappings or customer IDs, the API returns only the accounts that match the search criteria. You can use the `limit` field to specify a maximum [page size](working-with-apis/pagination) of 1 to 200 results. The default page size is 30. {% anchor id="search-by-phone-number" /%} ### Search by phone number To search loyalty accounts by phone number, provide a mapping that specifies the phone number in E.164 format. You can provide up to 30 mapping entries per query. ```` {% aside type="info" %} In a loyalty account, the phone number mapping that associates a loyalty account with a buyer can be specified using the `phone_number` field (preferred) or a combination of the `type` and `value` fields. When possible, you should use `phone_number`, as shown in the preceding example. {% /aside %} {% anchor id="search-by-customer-id" /%} ### Search by customer ID To search loyalty accounts by customer ID, provide the customer IDs as a list of strings. You can provide up to 30 customer IDs per query. This feature is most useful when you already have the customer ID (for example, when a buyer is logged in to your application). This way, you can retrieve loyalty accounts without prompting the buyer for a phone number. ```` {% anchor id="search-list-loyalty-accounts" /%} ### Search without query parameters to retrieve all loyalty accounts To retrieve all loyalty accounts in the program, specify an empty `query` object, as shown in the following example, or omit the `query` field entirely: ```` The following is an example `SearchLoyaltyAccounts` response: ```json { "loyalty_accounts": [ { "id": "716cefbc-3d71-4d7c-bdc8-9c7f84c2d793", "mapping": { "id": "66aaab3f-da99-49ed-8b19-b87f824d73a4", "phone_number": "+16295551234", "created_at": "2020-05-08T21:44:32Z" }, "program_id": "8031c1b2-d749-4c76-9c40-ae5472ed2e04", "balance": 20, "lifetime_points": 50, "customer_id": "Q8002F9Y7E9JJTJ5P6JKYYEM0BC7VPG", "created_at": "2020-05-08T21:44:32Z", "updated_at": "2020-11-08T12:03:18Z", "enrolled_at": "2020-05-08T21:44:48Z" }, { "id": "452ea896-f36e-4c5c-95d5-e5aa727b9b2c", "mapping": { "id": "cbde1ec6-96df-40d4-8019-af9a4fa893ed", "phone_number": "+14255554670", "created_at": "2020-05-29T04:04:11Z" }, "program_id": "8031c1b2-d749-4c76-9c40-ae5472ed2e04", "balance": -10, "lifetime_points": 10, "customer_id": "6E51KR0B3GVAKE0GP0HAMH6BT0", "created_at": "2020-05-29T04:04:11Z", "updated_at": "2020-06-20T11:19:28Z", "enrolled_at": "2020-05-29T04:56:02Z" } ] } ``` Your application should be able to handle loyalty accounts that have a negative point balance (`balance` is less than 0). This might occur as a result of a points adjustment, refund, or exchange. Results are sorted by `created_at` in ascending order. If no results are found, the response contains an empty object: ```json {} ``` ## See also * [Loyalty API](loyalty-api/overview) * [Manage Loyalty Points](loyalty-api/loyalty-points) * [Redeem Loyalty Rewards](loyalty-api/loyalty-rewards) * [Search for Balance-Changing Loyalty Events](loyalty-api/loyalty-events) * [Video: Sandbox 101: Loyalty API](https://www.youtube.com/watch?v=LFwO9DiwxEs) * [API Reference: Loyalty API](https://developer.squareup.com/reference/square/loyalty-api) --- # Use Customer Webhooks > Source: https://developer.squareup.com/docs/customers-api/use-the-api/customer-webhooks > Status: PUBLIC > Languages: cURL > Platforms: All Learn how to configure webhooks to get notified of events when a customer profile is created, updated, deleted, or merged. **Applies to:** [Customers API](customers-api/what-it-does) | [Payments API](payments-refunds) | [Cards API](cards-api/overview) | [Gift Cards API](gift-cards/using-gift-cards-api) | [Customer Custom Attributes API](customer-custom-attributes-api/overview) {% subheading %}Learn how to configure webhooks to get notified of events when a customer profile is created, updated, deleted, or merged.{% /subheading %} {% toc hide=true /%} ## Overview Use webhooks to receive notifications when customer profiles are created, updated, or deleted. Webhooks help streamline the process of synchronizing customer data across Square and third-party applications. Webhooks also enable custom integration scenarios that respond to changes in near real time. For example, when a customer signs up for a new account, Square creates a customer profile, which triggers an event notification. After your application receives the notification, it can perform some action in response to the event, such as sending a coupon to the new customer to use for their next purchase. ## Requirements and limitations The following requirements and limitations apply to webhooks for customer events: * Applications that use OAuth must have `CUSTOMERS_READ` permission to receive notifications about customer events. * You must protect personally identifiable information (PII) and other sensitive customer information that you receive in the notification. This includes information such as customer name, address, and phone number. For more information, see [Best Practices for Collecting Information](build-basics/general-considerations/collecting-information). * The following operations don't invoke customer event notifications: * Changing membership in [customer segments](customer-segments-api/what-it-does). * Creating or deleting a customer's cards on file. However, you can subscribe to receive notifications for [Cards API events](webhooks/v2webhook-events-tech-ref#cards-api) and [Gift Cards API events](webhooks/v2webhook-events-tech-ref#gift-cards-api). * Creating, updating, or deleting a customer-related [custom attribute](customer-custom-attributes-api/overview). However, you can subscribe to receive notifications for [Customer Custom Attributes API events](customer-custom-attributes-api/overview#webhooks). * Changing customer-related integrations from other Square APIs, such as the Payments API, Orders API, Loyalty API, or Subscriptions API. For example, changing the customer ID on an order doesn't invoke a `customer.updated` notification. Square doesn't send notifications for events that fail. For general webhook requirements and limitations, components, and processes see [Square Webhooks](webhooks/overview). For information about viewing webhook logs, see [Webhook Event Logs](devtools/webhook-logs). ## How customer event notifications work Webhooks make it possible for Square to notify you when customer events occur, so you don't need to rely only on polling for changes. If you regularly poll the Customers API to synchronize stored customer data, you can use webhooks and increase the time between your polling. A webhook is a subscription that registers your notification URL and the events that you want to be notified about. You can configure webhooks for the following customer events. {% table %} * Event * Permission {% width="140px" %} * Description --- * [customer.created](https://developer.squareup.com/reference/square/customers-api/webhooks/customer.created) * `CUSTOMERS_READ` * A customer profile is created, including when customer profiles are [merged](customers-api/use-the-api/customer-webhooks#customer-profile-merges) into a new customer profile. --- * [customer.deleted](https://developer.squareup.com/reference/square/customers-api/webhooks/customer.deleted) * `CUSTOMERS_READ` * A customer profile is deleted, including when customer profiles are [merged](customers-api/use-the-api/customer-webhooks#customer-profile-merges) into a new customer profile. --- * [customer.updated](https://developer.squareup.com/reference/square/customers-api/webhooks/customer.updated) * `CUSTOMERS_READ` * An attribute on a customer profile is changed, except for the `segment_ids` field. {% /table %} When an event occurs, Square collects data about the event, creates a notification, and sends the notification as a POST request to the URL of all webhooks that are subscribed to the event. The following actions can invoke customer events: * Using the Customer Directory in the Square Dashboard or Point of Sale application to create, delete, update, or [merge](#customer-profile-merges) customer profiles. * Calling one of the following Customers API endpoints from a third-party application: * [CreateCustomer](https://developer.squareup.com/reference/square/customers-api/create-customer) * [DeleteCustomer](https://developer.squareup.com/reference/square/customers-api/delete-customer) * [UpdateCustomer](https://developer.squareup.com/reference/square/customers-api/update-customer) * [BulkCreateCustomers](https://developer.squareup.com/reference/square/customers-api/bulk-create-customers) * [BulkDeleteCustomers](https://developer.squareup.com/reference/square/customers-api/bulk-delete-customers) * [BulkUpdateCustomers](https://developer.squareup.com/reference/square/customers-api/bulk-update-customers) * [AddGroupToCustomer](https://developer.squareup.com/reference/square/customers-api/add-group-to-customer) * [RemoveGroupFromCustomer](https://developer.squareup.com/reference/square/customers-api/remove-group-from-customer) Note that each create, update, or delete event triggers a separate webhook notification, even for bulk operations. * Integrations with other Square APIs, for example: * [CreateLoyaltyAccount](https://developer.squareup.com/reference/square/loyalty-api/create-loyalty-account) in the Loyalty API creates a customer profile if a customer ID isn't provided and a matching profile cannot be found. For more information, see [Integration with the Customers API.](loyalty-api/overview#integration-with-the-customers-api) * [CreatePayment](https://developer.squareup.com/reference/square/payments-api/create-payment) in the Payments API might create an [instant profile](customers-api/what-it-does#instant-profiles) if a customer ID isn't provided and a matching profile cannot be found. * Square performs an internal action that invokes a `customer.updated` event. {% anchor id="customer-profile-merges" /%} ### Customer profile merge events The use of different tools or information silos might produce multiple customer profiles for the same customer. For example, if a customer makes a payment without signing in to their account, Square might generate an [instant profile](customers-api/what-it-does#instant-profiles). To maintain accurate records, Square uses automated detection to identify and merge duplicate customer profiles. In addition, sellers can merge duplicate profiles from the Customer Directory in the Square Dashboard or Square Point of Sale. For more information, see [Duplicates](https://squareup.com/help/article/5498-manage-your-customer-directory-online#duplicates). In a merge operation, Square creates a new profile using aggregated properties from the existing profiles and then deletes the existing profiles. As a result, a merge operation triggers one `customer.created` event and at least two `customer.deleted` events. For more information, see [Notifications for customer profile merge events](#notifications-merge-events). {% anchor id="subscribe-to-events" /%} ## Subscribe to customer events To subscribe for notifications about customer events, you can configure webhooks for your Square application. A webhook registers the URL that Square should send notifications to, the events you want to be notified about, and the Square API version. ### To configure a webhook 1. In the [Developer Console](https://developer.squareup.com/apps), open your application. 1. In the left pane, under **Webhooks**, choose **Subscriptions**. 1. At the top of the page, choose **Sandbox** or **Production**. Square recommends using the [Sandbox](testing/sandbox) environment for testing. 1. Choose **Add subscription**, and then configure the subscription: 1. For **Webhook name**, enter a name such as **Customers Webhook**. 1. For **URL**, enter your notification URL. If you don't have a working URL yet, enter **https://example.com** as a placeholder. 1. Optional. For **API version**, select a Square API version. By default, this is set to the same version as the application. Customer webhooks are available starting in version `2021-02-26`. 1. For **Events**, select **customer.created**, **customer.deleted**, and **customer.updated**. If you want to receive notifications about other events at the same URL, select them or configure another endpoint. 1. Choose **Save**. {% anchor id="send-test-event" /%} ### To validate your webhook subscription You can send a generic notification from the [Developer Console](https://developer.squareup.com/apps) to validate that your webhook is configured correctly. 1. On the **Webhook subscriptions** page for your application, choose the webhook that you want to test. 2. In the **Endpoint details** pane, choose **More**, and then choose **Send test event**. 3. Select an event, and then choose **Send**. If the endpoint is configured correctly, the **Send test event** window displays the response code and notification body. You can choose **View logs** to open the **Webhook logs** page. {% aside type="tip" %} The [Webhook logs](devtools/webhook-logs) page in the Square Dashboard displays webhook event notifications in real time. After you subscribe to `customer.created`, `customer.deleted`, and `customer.updated` events, you can use [API Explorer](https://developer.squareup.com/explorer/square) to create, update, and delete customer profiles and then view the event logs. {% /aside %} {% anchor id="receive-event-notifications" /%} ## Handle customer event notifications When customer profiles in your account are created, updated, deleted, or [merged](#customer-profile-merges), Square sends a notification for any webhooks that are subscribed to the corresponding event. To handle notifications, applications typically perform the following steps: 1. Validate the authenticity of the notification. 1. Respond with an `HTTP 2xx` response code after receiving the notification. 1. Inspect, process, store, or forward the notification. 1. Synchronize customer data or take some other action based on the event. For code examples that show how to validate that notifications are from Square and send a 200 response code, see [Verify and Validate an Event Notification](webhooks/step3validate). The body of the notification is a JSON object that contains the following properties. {% table %} * Property {% width="150px" %} * Description --- * `merchant_id` * The ID of the seller whose directory contains the affected customer. --- * `type` * The type of event: - `customer.created` - `customer.deleted` - `customer.updated` --- * `event_id` * The unique ID of this event, used for [idempotency support.](webhooks/step4manage#webhooks-best-practices) --- * `created_at` * A timestamp of when the event occurred. For example, `2021-07-30T21:59:15.286Z` --- * `data` * Information about the affected customer, represented by one of the following objects, depending on the event type: - [CustomerCreatedEventData](https://developer.squareup.com/reference/square/objects/CustomerCreatedEventData) - [CustomerDeletedEventData](https://developer.squareup.com/reference/square/objects/CustomerDeletedEventData) - [CustomerUpdatedEventData](https://developer.squareup.com/reference/square/objects/CustomerUpdatedEventData) The `data.object` property represents the `Customer` resource and includes attributes defined for the customer (except `segment_ids`). If your use case requires the full `Customer` resource, use the customer ID from the notification to call the [RetrieveCustomer](https://developer.squareup.com/reference/square/customers-api/retrieve-customer) endpoint. {% /table %} {% anchor id="notifications-customer.created" /%} ## Notifications for customer.created events A `customer.created` event is invoked when a customer profile is created. The following is an example event notification: ```json { "merchant_id": "KTDR6CEPCWXYL", "type": "customer.created", "event_id": "226ea61b-476d-4487-84c8-f68b142976f8", "created_at": "2021-01-21T19:00:04Z", "data": { "type": "customer", "id": "YBE4YXMS1CT7K4HP1KTXYFBWZ0", "object": { "customer": { "created_at": "2021-01-21T19:00:04.693Z", "creation_source": "THIRD_PARTY", "email_address": "jdoe@email.com", "family_name": "Doe", "given_name": "Jane", "id": "YBE4YXMS1CT7K4HP1KTXYFBWZ0", "phone_number": "+12065551212", "preferences": { "email_unsubscribed": false }, "updated_at": "2021-01-21T19:00:04Z", "version": 0 } } } } ``` {% aside type="info" %} `customer.created` notifications don't include the `segment_ids` field. {% /aside %} Notifications for `customer.created` events from merge operations also include an `event-context` object. For more information, see [Notifications for customer profile merge events](#notifications-merge-events). {% anchor id="notifications-customer.deleted" /%} ## Notifications for customer.deleted events A `customer.deleted` event is invoked when a customer profile is deleted. The following is an example event notification. Notifications for delete events contain `"deleted": true`. ```json { "merchant_id": "KTDR6CEPCWXYL", "type": "customer.deleted", "event_id": "3af6a667-34cf-42ca-bd76-96b637d8e67f", "created_at": "2021-01-21T19:46:09Z", "data": { "type": "customer", "id": "YBE4YXMS1CT7K4HP1KTXYFBWZ0", "deleted": true, "object": { "customer": { "creation_source": "THIRD_PARTY", "email_address": "jdoe@email.com", "family_name": "Doe", "given_name": "Jane", "id": "YBE4YXMS1CT7K4HP1KTXYFBWZ0", "phone_number": "+12065551212", "preferences": { "email_unsubscribed": false }, "version": 11 } } } } ``` {% aside type="info" %} `customer.deleted` notifications don't include the `group_ids` or `segment_ids` field. {% /aside %} Notifications for `customer.deleted` events from merge operations also include an `event-context` object. For more information, see [Notifications for customer profile merge events](#notifications-merge-events). {% anchor id="notifications-customer.updated" /%} ## Notifications for customer.updated events A `customer.updated` event is invoked when a customer profile is updated, except when the `segment_ids` field changes. The following is an example event notification: ```json { "merchant_id": "KTDR6CEPCWXYL", "type": "customer.updated", "event_id": "8478cc17-a7b9-40e6-b5fa-692e58794ff5", "created_at": "2021-01-21T19:42:51Z", "data": { "type": "customer", "id": "YBE4YXMS1CT7K4HP1KTXYFBWZ0", "object": { "customer": { "created_at": "2021-01-21T19:00:04.693Z", "creation_source": "THIRD_PARTY", "email_address": "jdoe@email.com", "family_name": "Doe", "given_name": "Jane", "group_ids": [ "3MEP3VM842KQZXQ9WSBJRTX73H" ], "id": "YBE4YXMS1CT7K4HP1KTXYFBWZ0", "phone_number": "+12065551212", "preferences": { "email_unsubscribed": false }, "updated_at": "2021-02-10T13:02:15Z", "version": 3 } } } } ``` {% aside type="info" %} `customer.updated` notifications don't include the `segment_ids` field. {% /aside %} To discover which customer profile attributes changed, compare the updated `customer` resource in the notification with your local copy of the customer profile. If `customer.updated` events for the same customer profile occur concurrently, Square compares their version numbers and sends a webhook notification for the latest version only. If you receive multiple `customer.updated` notifications for the same customer profile before you process them, you can use the `version` field of the `customer` object to determine the latest version. {% anchor id="notifications-merge-events" /%} ## Notifications for customer profile merge events When two or more customer profiles are merged, Square creates a new customer profile using aggregated properties from the existing profiles and then deletes the existing profiles. As a result, a merge triggers a combination of notifications: * One `customer.created` event for the new customer profile. * Two or more `customer.deleted` events, one for each existing customer profile that was merged and deleted. All notifications from a merge include an `event_context` field with a `merge` object that contains the IDs of the affected customer profiles. ```json "event_context": { "merge": { "from_customer_ids": [ // ID of existing customer profile A that was merged and deleted, // ID of existing customer profile B that was merged and deleted, // ... ], "to_customer_id": // ID of new customer profile C with aggregated properties } } ``` All notifications sent for a particular merge operation contain the same `merge` object. {% aside type="tip" %} If you only want to track the IDs of customer profiles affected by a merge, you can listen for `customer.created` events and check whether the notifications contain the `event_context.merge` field. This method is more efficient than checking `customer.deleted` events because a merge always create a single customer profile and the associated `merge` object contains the IDs of all affected customer profiles. If you need additional information about the deleted customer profiles, make sure to also subscribe for `customer.deleted` event notifications, which include the `customer` object. You cannot retrieve a customer profile after it is deleted. {% /aside %} #### Example notifications from a merge operation In this example scenario, two customer profiles are merged, so Square sends three notifications: one `customer.created` notification and two `customer.deleted` notifications. The `customer.created` notification is sent when the new profile is created. Note the following customer profile attributes: * `creation_source` is set to `MERGE`. * `note` lists the merge date and any non-transferable attributes. The following is an example `customer.created` notification: ```json { "merchant_id": "KTDR6CEPCWXYL", "type": "customer.created", "event_id": "04d6e69f-d3dc-4fb7-a891-beb0cf7e8457", "created_at": "2021-01-21T23:10:38Z", "data": { "type": "customer", "id": "A9641GZW2H7Z56YYSD41Q12HDW", "object": { "customer": { "address": { "address_line_1": "123 Main Street", "administrative_district_level_1": "WA", "country": "US", "locality": "Seattle", "postal_code": "98104" }, "birthday": "1998-09-01", "company_name": "ACME Inc", "created_at": "2021-01-21T22:59:16.271Z", "creation_source": "MERGE", "email_address": "johndoe@acme.com", "family_name": "Doe", "given_name": "John", "group_ids": [ "3MEP3VM842KQZXQ9WSBJRTX73H" ], "id": "A9641GZW2H7Z56YYSD41Q12HDW", "note": "Favorite: Double-shot Iced Americano\n// Merged on 2021/01/21. Following fields were not transferred to the current customer:\nPhone Number: +14065551212", "phone_number": "+14065551112", "preferences": { "email_unsubscribed": false }, "updated_at": "2021-01-21T23:10:39Z", "version": 0 }, "event_context": { "merge": { "from_customer_ids": [ "20R574N4D0VP74N56QTRSKDJ9C", "P3ZRDK895X1JQCX9D3C4KEF4YG" ], "to_customer_id": "A9641GZW2H7Z56YYSD41Q12HDW" } } } } } ``` Two `customer.deleted` notifications are sent when the two existing profiles are merged and then are automatically deleted as part of the merge operation. The following are example event notifications: * Example for existing customer profile 1: ```json { "merchant_id": "KTDR6CEPCWXYL", "type": "customer.deleted", "event_id": "1cad466e-400a-40a8-84a6-6b8c278acc95", "created_at": "2021-01-21T23:10:38Z", "data": { "type": "customer", "id": "P3ZRDK895X1JQCX9D3C4KEF4YG", "deleted": true, "object": { "customer": { "address": { "address_line_1": "123 Main Street", "administrative_district_level_1": "WA", "country": "US", "locality": "Seattle", "postal_code": "98104" }, "birthday": "1998-09-01", "company_name": "ACME Inc", "creation_source": "DIRECTORY", "email_address": "johndoe@acme.com", "family_name": "Doe", "given_name": "John", "id": "P3ZRDK895X1JQCX9D3C4KEF4YG", "note": "Favorite: Double-shot Iced Americano", "phone_number": "+14065551112", "preferences": { "email_unsubscribed": false }, "version": 10 }, "event_context": { "merge": { "from_customer_ids": [ "20R574N4D0VP74N56QTRSKDJ9C", "P3ZRDK895X1JQCX9D3C4KEF4YG" ], "to_customer_id": "A9641GZW2H7Z56YYSD41Q12HDW" } } } } } ``` * Example for existing customer profile 2: ```json { "merchant_id": "KTDR6CEPCWXYL", "type": "customer.deleted", "event_id": "ca6a30a6-3c58-49ec-b626-5ed733e861ad", "created_at": "2021-01-21T23:10:38Z", "data": { "type": "customer", "id": "20R574N4D0VP74N56QTRSKDJ9C", "deleted": true, "object": { "customer": { "creation_source": "LOYALTY", "id": "20R574N4D0VP74N56QTRSKDJ9C", "phone_number": "+14065551212", "preferences": { "email_unsubscribed": false }, "version": 4 }, "event_context": { "merge": { "from_customer_ids": [ "20R574N4D0VP74N56QTRSKDJ9C", "P3ZRDK895X1JQCX9D3C4KEF4YG" ], "to_customer_id": "A9641GZW2H7Z56YYSD41Q12HDW" } } } } } ``` {% anchor id="test-webhooks" /%} ## Test your webhooks To test your webhook with actual resources, you can make changes to the customer profiles in your account. Make sure to test with the same environment (Sandbox or Production) that you registered for the webhook. The following are some ways you can trigger customer event notifications. {% tabset %} {% tab id="From API Explorer" %} Sign in to API Explorer and choose your **Sandbox** or **Production** environment. Then, call the following Customers API endpoints as needed to test your webhook: * [CreateCustomer](https://developer.squareup.com/explorer/square/customers-api/create-customer) * [DeleteCustomer](https://developer.squareup.com/explorer/square/customers-api/delete-customer) * [UpdateCustomer](https://developer.squareup.com/explorer/square/customers-api/update-customer) * [BulkCreateCustomers](https://developer.squareup.com/explorer/square/customers-api/bulk-create-customers) * [BulkDeleteCustomers](https://developer.squareup.com/explorer/square/customers-api/bulk-delete-customers) * [BulkUpdateCustomers](https://developer.squareup.com/explorer/square/customers-api/bulk-update-customers) * [AddGroupToCustomer](https://developer.squareup.com/explorer/square/customers-api/add-group-to-customer) * [RemoveGroupFromCustomer](https://developer.squareup.com/explorer/square/customers-api/remove-group-from-customer) {% /tab %} {% tab id="Using cURL" %} Send cURL requests to Customers API endpoints. For more information, see the following documentation: * [Create customer profiles](customers-api/use-the-api/keep-records#create-customer-profiles) * [Update customer profiles](customers-api/use-the-api/keep-records#update-customer-profiles) * [Delete customer profiles](customers-api/use-the-api/keep-records#delete-customer-profiles) * [Manage customer group membership](customer-groups-api/how-to-use-it#manage-customer-group-membership) {% /tab %} {% tab id="From the Square Dashboard" %} 1. Open the Square Dashboard. * To test with Sandbox resources, open the the **Sandbox test accounts** page in the [Developer Console](https://developer.squareup.com/apps), and then choose **Square Dashboard** next to the test account. This opens the Sandbox Square Dashboard associated with the test account. * To test with production resources, open the [Square Dashboard](https://app.squareup.com/dashboard). 1. In the left pane, choose **Marketing & loyalty** and **Customer directory**, and then create, update, delete, or [merge](#customer-profile-merges) customers. To merge profiles, select two or more customers, and then choose **Merge**. For more information, see [Duplicates](https://squareup.com/help/article/5498-manage-your-customer-directory-online#duplicates). {% /tab %} {% /tabset %} {% aside type="info" %} You can also [send a generic test notification](#send-test-event) from the Developer Console. {% /aside %} You should receive notifications for customer events that you subscribe to. Square doesn't send notifications for events that fail. For information about troubleshooting Square Webhooks, see [Troubleshoot Webhooks](webhooks/troubleshooting). --- # Integrate Customer Profiles with Other Services > Source: https://developer.squareup.com/docs/customers-api/use-the-api/integrate-with-other-services > Status: PUBLIC > Languages: All > Platforms: All Learn how to integrate customer profiles with the Square Orders API and Payments API. **Applies to:** [Customers API](customers-api/what-it-does) | [Cards API](cards-api/overview) | [Gift Cards API](gift-cards/using-gift-cards-api) | [Payments API](payments-refunds) | [Web Payments SDK](web-payments/overview) | [In-App Payments SDK](in-app-payments-sdk/what-it-does) | [Orders API](orders-api/what-it-does) {% subheading %}Learn how the Customers API integrates with other Square APIs.{% /subheading %} {% toc hide=true /%} ## Overview Integrating the [Customers API](https://developer.squareup.com/reference/square/customers-api) with other Square APIs can help Square sellers improve the customer-relationship management experience and simplify transactions. For example, integration with the Cards API can facilitate card payments and integration with the Orders API and Payments API can streamline reporting and auditing processes. {% anchor id="migrate-customer-cards" /%} {% anchor id="save-cards-on-file" /%} {% anchor id="manage-cards-on-file" /%} ## Manage cards on file Buyers can agree to store their credit, debit, and gift cards for future payments to Square sellers. These cards on file provide a quick and convenient payment method for both buyers and sellers. ### Manage credit and debit cards on file with the Cards API The Cards API lets you store, access, and manage credit and debit cards on file. This API integrates with the Customers API, Payments API, Web Payments SDK, In-App Payments SDK, and other Square APIs. For more information, see [Cards API](cards-api/overview). ### Manage gift cards on file with the Gift Cards API The Gift Cards API lets you store, access, and manage gift cards on file. This API integrates with the Customers API, Payments API, Gift Card Activities API, and other Square APIs. For more information, see [Manage Square Gift Cards on File](gift-cards/manage-gift-cards-on-file). ### Manage cards on file with the Customers API (deprecated) Using the Customers API to manage cards on file is deprecated. For more information, see [Migration notes](customers-api/what-it-does#migrate-createcustomercard). {% accordion expanded=false %} {% slot "heading" %} #### Save cards on file (deprecated) {% /slot %} {% aside type="warning" %} Using the Customers API to save cards on file is [deprecated](customers-api/what-it-does#migrate-createcustomercard). {% /aside %} If you're using OAuth, you need `CUSTOMERS_WRITE` permission to save a card on file and `PAYMENTS_WRITE` permission to process payments with the saved card. Cards on file are automatically updated on a monthly basis to confirm that they're valid and can be charged. {% aside type="important" %} Always ask customers for permission before saving their card information. For example, include a checkbox in your purchase flow that the customers can select to specify that they want to save their card information for future purchases. Linking cards on file without obtaining customer permission can result in your application being disabled without notice. {% /aside %} To save a card on file for a customer, you must first create a payment token, which is a secure card payment token that can be generated using the [Web Payments SDK](web-payments/overview) or [In-App Payments SDK](in-app-payments-sdk/what-it-does). For information about using Strong Customer Authentication (SCA) to also generate a verification token with the Web Payments SDK or In-App Payments SDK, see [Strong Customer Authentication](sca-overview). {% tabset %} {% tab id="Request" %} The following request calls the [CreateCustomerCard](https://developer.squareup.com/reference/square/customers-api/create-customer-card) endpoint (deprecated) in the Customers API. The request uses an example customer ID and the [Sandbox test value](devtools/sandbox/payments#source-ids-for-testing-the-createpayment-endpoint) (`cnon:card-nonce-ok`). If you specify the `billing_address.postal_code` field when using the test value, you must set the value to `94103`. ```` {% /tab %} {% tab id="Response" %} If the operation is successful, the card specified in the `card_nonce` field of the request is saved on file for the customer. The saved card information is returned as the payload of a `200` OK response, as shown in the following example response: ```json { "card": { "id": "ccof:uFfUBcvleXzBEXAMPLE", "card_brand": "VISA", "last_4": "5858", "exp_month": 5, "exp_year": 2022, "cardholder_name": "John Doe", "billing_address": { "address_line_1": "123 Main Street", "locality": "San Francisco", "administrative_district_level_1": "CA", "postal_code": "94103", "country": "US" } } } ``` {% /tab %} {% /tabset %} The stored card can be used for [card on file payments](#charge-cards-on-file). {% /accordion %} {% accordion expanded=false %} {% slot "heading" %} #### Delete cards on file (deprecated) {% /slot %} {% aside type="warning" %} Using the Customers API to delete cards on file is [deprecated](customers-api/what-it-does#migrate-deletecustomercard). {% /aside %} To remove a previously stored card from a customer profile, call the [DeleteCustomerCard](https://developer.squareup.com/reference/square/customers-api/delete-customer-card) endpoint (deprecated) in the Customers API. The following request uses an example customer ID and card ID: ```` {% /accordion %} ## Charge cards on file To take a payment from a credit, debit, or gift card on file, call [CreatePayment](https://developer.squareup.com/reference/square/payments-api/create-payment) and provide the card ID and the customer ID. Providing a customer ID is required for payments from credit or debit cards on file and recommended for payments from gift cards on file. If needed, call `SearchCustomers` to [search customer profiles](customers-api/use-the-api/search-customers) by phone number, email address, or other supported attribute to get the customer ID. Then call [ListCards](https://developer.squareup.com/reference/square/cards-api/list-cards) using the `customer_id` parameter to get the credit or debit card ID or [ListGiftCards](https://developer.squareup.com/reference/square/gift-cards-api/list-gift-cards) using the `customer_id` parameter to get the gift card ID. {% tabset %} {% tab id="Request" %} The following `CreatePayment` request charges a credit card on file for $25.15 (`amount_money.amount` is specified in cents): ```` {% /tab %} {% tab id="Response" %} If the operation is successful, Square returns a `200` OK response with the new payment. ```json { "payment": { "id": "dG4ee1fVu3yAuO0sMM4m56EXAMPLE", "created_at": "2022-05-28T00:44:41.032Z", "updated_at": "2022-05-28T00:44:41.185Z", "amount_money": { "amount": 2515, "currency": "USD" }, "status": "COMPLETED", "delay_duration": "PT168H", "source_type": "CARD", "card_details": { "status": "CAPTURED", "card": { "card_brand": "AMERICAN_EXPRESS", "last_4": "6550", "exp_month": 1, "exp_year": 2025, "fingerprint": "sq-1-9nRcYRrqbyICxeh8CzwO3tVT9ZCOTRYl6Oz6fMZpaBepMG7MIQPmOU578dQEXAMPLE", "card_type": "CREDIT", "prepaid_type": "NOT_PREPAID", "bin": "371263" }, "entry_method": "ON_FILE", "cvv_status": "CVV_NOT_CHECKED", "avs_status": "AVS_ACCEPTED", "statement_description": "SQ *DEFAULT TEST ACCOUNT" }, "location_id": "EF6D9CEXAMPLE", "order_id": "Y4j2ECeeGNVIMNAxaJuyiDEXAMPLE", "customer_id": "TNQC0TYTWMRSFFQ157KEXAMPLE", "total_money": { "amount": 2515, "currency": "USD" }, "approved_money": { "amount": 2515, "currency": "USD" }, "receipt_number": "dG4e", "receipt_url": "https://squareupsandbox.com/receipt/preview/dG4ee1fVu3yAuO0sMM4m56EXAMPLE", "delay_action": "CANCEL", "delayed_until": "2022-06-04T00:44:41.032Z", "application_details": { "square_product": "ECOMMERCE_API", "application_id": "sandbox-sq0idb-ioiyW39PwreFzwXEXAMPLE" }, "version_token": "WXvk1ZKd3SDMQf7NwaPvFGTK15GyItPrEUe5gYEXAMPLE" } } ``` {% /tab %} {% /tabset %} For more information about credit or debit card-on-file payments, see [Card on file as a payment source](payments-api/take-payments/card-payments#card-on-file-as-a-payment-source). For more information about gift cards on file payments, see [Taking payments from gift cards on file](gift-cards/manage-gift-cards-on-file#take-gift-card-on-file-payment). {% anchor id="link-customer-to-orders" /%} {% anchor id="link-customer-to-orders-and-payments" /%} ## Link customers to orders and payments Linking customers to orders and payments can help provide a more seamless experience for Square sellers and their customers. If your application collects information from the customer, you should specify the `customer_id` when you create orders and payments. {% accordion expanded=false %} {% slot "heading" %} ### Link customers to orders {% /slot %} The following steps show how to link a customer to a new order: 1. If you need to get the customer ID, call [SearchCustomers](https://developer.squareup.com/reference/square/customers-api/search-customers) to get the `id` of the customer profile you want to link to. You can search by email address, phone number, or other supported attribute. If a match cannot be found, call [CreateCustomer](https://developer.squareup.com/reference/square/customers-api/create-customer) to create a new profile using information collected from the customer. 2. Call [CreateOrder](https://developer.squareup.com/reference/square/orders-api/create-order) and provide the customer ID, as shown in the following example request that creates a simple order: {% tabset %} {% tab id="Request" %} ```` For more information about using the Orders API to create and manage orders, see [Orders API: What It Does](orders-api/what-it-does). {% /tab %} {% tab id="Response" %} The `customer_id` field in the response shows that the customer is linked to the order. ```json { "order": { "id": "oguJj8uJvgdOXwtU1X0I04J4kd4F", "location_id": "M8AKAD8160XGR", "line_items": [ { "uid": "V8ZlPwgDgLpat73ego3NXD", "quantity": "1", "name": "Table risers", "base_price_money": { "amount": 3500, "currency": "USD" }, "gross_sales_money": { "amount": 3500, "currency": "USD" }, "total_tax_money": { "amount": 0, "currency": "USD" }, "total_discount_money": { "amount": 0, "currency": "USD" }, "total_money": { "amount": 3500, "currency": "USD" }, "variation_total_price_money": { "amount": 3500, "currency": "USD" }, "item_type": "ITEM", "total_service_charge_money": { "amount": 0, "currency": "USD" } } ], "created_at": "2024-08-22T19:25:19.278Z", "updated_at": "2024-08-22T19:25:19.278Z", "state": "OPEN", "version": 1, "total_tax_money": { "amount": 0, "currency": "USD" }, "total_discount_money": { "amount": 0, "currency": "USD" }, "total_tip_money": { "amount": 0, "currency": "USD" }, "total_money": { "amount": 3500, "currency": "USD" }, "total_service_charge_money": { "amount": 0, "currency": "USD" }, "net_amounts": { "total_money": { "amount": 3500, "currency": "USD" }, "tax_money": { "amount": 0, "currency": "USD" }, "discount_money": { "amount": 0, "currency": "USD" }, "tip_money": { "amount": 0, "currency": "USD" }, "service_charge_money": { "amount": 0, "currency": "USD" } }, "source": { "name": "Sandbox for sq0idp-LJ1Sr4Iim0hGGvAwrv8HIA" }, "customer_id": "2XKHFGXKPS0X1AZRQ7GX2V1J0M", "net_amount_due_money": { "amount": 3500, "currency": "USD" } } } ``` You should be aware that not all orders have a customer ID. For more information, see [Link customers to orders](#link-customers-to-orders). {% /tab %} {% /tabset %} {% aside type="info" %} Watch the [Sandbox 101: Linking Customer Data](https://www.youtube.com/watch?v=Hq3cYdRqYaw) video to see how you can show linked customer, order, and card-on-file data in a dashboard using Rails. {% /aside %} {% /accordion %} {% accordion expanded=false %} {% slot "heading" %} ### Link customers to payments {% /slot %} The following steps show how to explicitly link a customer to a new payment: 1. Get the customer ID. This might be the customer that's linked to the order (in the `Order.customer_id` field) or a different customer. If you're not using a customer ID from the order, call [SearchCustomers](https://developer.squareup.com/reference/square/customers-api/search-customers) to get the `id` of the customer profile you want to link to. You can search by email address, phone number, or other supported attribute. If a match cannot be found, call [CreateCustomer](https://developer.squareup.com/reference/square/customers-api/create-customer) to create a new profile using information collected from the customer. 2. Call [CreatePayment](https://developer.squareup.com/reference/square/payments-api/create-payment) and provide the customer ID. This example also provides the order ID: {% tabset %} {% tab id="Request" %} ```` {% /tab %} {% tab id="Response" %} The `customer_id` field in the response shows that the customer is linked to the payment. ```json { "payment": { "id": "bnb1lpUV63NTYDfKZNTRyayZfkSZY", "created_at": "2024-08-23T17:00:30.657Z", "updated_at": "2024-08-23T17:00:30.940Z", "amount_money": { "amount": 3500, "currency": "USD" }, "status": "COMPLETED", "delay_duration": "PT168H", "source_type": "CARD", "card_details": { "status": "CAPTURED", "card": { "card_brand": "VISA", "last_4": "5858", "exp_month": 8, "exp_year": 2026, "fingerprint": "sq-1-_wL_XQNkNUzWqRaiasnVzdASrbaYWe8BAXxUYgXBvmjVp7da6rucfHQjLSqB5jErVw", "card_type": "CREDIT", "prepaid_type": "NOT_PREPAID", "bin": "453275" }, "entry_method": "KEYED", "cvv_status": "CVV_ACCEPTED", "avs_status": "AVS_ACCEPTED", "statement_description": "SQ *DEFAULT TEST ACCOUNT", "card_payment_timeline": { "authorized_at": "2024-08-23T17:00:30.784Z", "captured_at": "2024-08-23T17:00:30.940Z" } }, "location_id": "M8AKAD8160XGR", "order_id": "oguJj8uJvgdOXwtU1X0I04J4kd4F", "risk_evaluation": { "created_at": "2024-08-23T17:00:30.784Z", "risk_level": "NORMAL" }, "customer_id": "2XKHFGXKPS0X1AZRQ7GX2V1J0M", "total_money": { "amount": 3500, "currency": "USD" }, "approved_money": { "amount": 3500, "currency": "USD" }, "receipt_number": "bnb1", "receipt_url": "https://squareupsandbox.com/receipt/preview/bnb1lpUV63NTYDfKZNTRyayZfkSZY", "delay_action": "CANCEL", "delayed_until": "2024-08-30T17:00:30.657Z", "application_details": { "square_product": "ECOMMERCE_API", "application_id": "sandbox-sq0idb-ioiyW39PwreFzwXoGyLtYg" }, "version_token": "eKAnT7E4TcvoVp4IEVXLSzcgQvRUE7PJx4Gf4oWBLxw6o" } } ``` {% /tab %} {% /tabset %} {% /accordion %} {% aside type="info" %} If your application doesn't collect any information from the customer, you can omit `customer_id` and let Square attempt to [assign a customer](customers-api/what-it-does#instant-profiles) to the payment asynchronously. {% /aside %} {% anchor id="get-transaction-history" /%} ## Get transaction history Customers can be assigned to payments and orders. When retrieving transaction history for auditing, reporting, and tracking activities, Square recommends relying on `Payment.customer_id` instead of using the order (or corresponding tenders) because: * Orders might not have a customer assignment. For example, orders made from Square Online stores or generated from [payment links](https://developer.squareup.com/reference/square/checkout-api/create-payment-link) don't include a `customer_id` field when retrieved using the Orders API. * Payments are more likely to have a customer assignment because Square might populate the `Payment.customer_id` field [using inference or by creating an instant profile](customers-api/what-it-does#instant-profiles). Note that this process is asynchronous. Payments are the primary source of truth for payment information. They contain more details than order tenders and provide the most accurate and up-to-date information. * Some orders have multiple payments, and each payment can have a different customer assignment. {% accordion expanded=false %} {% slot "heading" %} ### Get customers linked to payments {% /slot %} Square recommends using this process to get all customers associated with an order: 1. Call [SearchOrders](https://developer.squareup.com/reference/square/orders-api/search-orders) or [RetrieveOrder](https://developer.squareup.com/reference/square/orders-api/retrieve-order) to get order details. Don't use the `customer_filter` filter in the `SearchOrders` request because not all orders have a customer assignment. {% tabset %} {% tab id="Request" %} ```` {% /tab %} {% tab id="Response" %} ```json { "order": { "id": "oguJj8uJvgdOXwtU1X0I04J4kd4F", "location_id": "M8AKAD8160XGR", "line_items": [ { "uid": "V8ZlPwgDgLpat73ego3NXD", "quantity": "1", "name": "Table risers", "base_price_money": { "amount": 3500, "currency": "USD" }, "gross_sales_money": { "amount": 3500, "currency": "USD" }, "total_tax_money": { "amount": 0, "currency": "USD" }, "total_discount_money": { "amount": 0, "currency": "USD" }, "total_money": { "amount": 3500, "currency": "USD" }, "variation_total_price_money": { "amount": 3500, "currency": "USD" }, "item_type": "ITEM", "total_service_charge_money": { "amount": 0, "currency": "USD" } } ], "created_at": "2024-08-22T19:25:19.278Z", "updated_at": "2024-08-23T17:00:33.000Z", "state": "COMPLETED", "version": 4, "total_tax_money": { "amount": 0, "currency": "USD" }, "total_discount_money": { "amount": 0, "currency": "USD" }, "total_tip_money": { "amount": 0, "currency": "USD" }, "total_money": { "amount": 3500, "currency": "USD" }, "closed_at": "2024-08-23T17:00:31.042Z", "tenders": [ { "id": "bnb1lpUV63NTYDfKZNTRyayZfkSZY", "location_id": "M8AKAD8160XGR", "transaction_id": "oguJj8uJvgdOXwtU1X0I04J4kd4F", "created_at": "2024-08-23T17:00:30Z", "amount_money": { "amount": 3500, "currency": "USD" }, "type": "CARD", "card_details": { "status": "CAPTURED", "card": { "card_brand": "VISA", "last_4": "5858", "exp_month": 8, "exp_year": 2026, "fingerprint": "sq-1-_wL_XQNkNUzWqRaiasnVzdASrbaYWe8BAXxUYgXBvmjVp7da6rucfHQjLSqB5jErVw", "card_type": "CREDIT", "prepaid_type": "NOT_PREPAID", "bin": "453275" }, "entry_method": "KEYED" }, "payment_id": "bnb1lpUV63NTYDfKZNTRyayZfkSZY" } ], "total_service_charge_money": { "amount": 0, "currency": "USD" }, "net_amounts": { "total_money": { "amount": 3500, "currency": "USD" }, "tax_money": { "amount": 0, "currency": "USD" }, "discount_money": { "amount": 0, "currency": "USD" }, "tip_money": { "amount": 0, "currency": "USD" }, "service_charge_money": { "amount": 0, "currency": "USD" } }, "source": { "name": "Sandbox for sq0idp-LJ1Sr4Iim0hGGvAwrv8HIA" }, "customer_id": "2XKHFGXKPS0X1AZRQ7GX2V1J0M", "net_amount_due_money": { "amount": 0, "currency": "USD" } } } ``` {% /tab %} {% /tabset %} 2. For each order that applies to your use case, iterate through the `order.tenders` field and copy `tender.id` or `tender.payment_id` (if present). Both values represent the ID of the corresponding payment. 3. For each payment, call [GetPayment](https://developer.squareup.com/reference/square/payments-api/get-payment) using the payment ID and copy the `customer_id` field. {% tabset %} {% tab id="Request" %} ```` {% /tab %} {% tab id="Response" %} ```json { "payment": { "id": "bnb1lpUV63NTYDfKZNTRyayZfkSZY", "created_at": "2024-08-23T17:00:30.657Z", "updated_at": "2024-08-23T17:00:31.860Z", "amount_money": { "amount": 3500, "currency": "USD" }, "status": "COMPLETED", "delay_duration": "PT168H", "source_type": "CARD", "card_details": { "status": "CAPTURED", "card": { "card_brand": "VISA", "last_4": "5858", "exp_month": 8, "exp_year": 2026, "fingerprint": "sq-1-_wL_XQNkNUzWqRaiasnVzdASrbaYWe8BAXxUYgXBvmjVp7da6rucfHQjLSqB5jErVw", "card_type": "CREDIT", "prepaid_type": "NOT_PREPAID", "bin": "453275" }, "entry_method": "KEYED", "cvv_status": "CVV_ACCEPTED", "avs_status": "AVS_ACCEPTED", "statement_description": "SQ *DEFAULT TEST ACCOUNT", "card_payment_timeline": { "authorized_at": "2024-08-23T17:00:30.784Z", "captured_at": "2024-08-23T17:00:30.940Z" } }, "location_id": "M8AKAD8160XGR", "order_id": "oguJj8uJvgdOXwtU1X0I04J4kd4F", "risk_evaluation": { "created_at": "2024-08-23T17:00:30.784Z", "risk_level": "NORMAL" }, "processing_fee": [ { "effective_at": "2024-08-23T19:00:31.000Z", "type": "INITIAL", "amount_money": { "amount": 132, "currency": "USD" } } ], "customer_id": "2XKHFGXKPS0X1AZRQ7GX2V1J0M", "total_money": { "amount": 3500, "currency": "USD" }, "approved_money": { "amount": 3500, "currency": "USD" }, "receipt_number": "bnb1", "receipt_url": "https://squareupsandbox.com/receipt/preview/bnb1lpUV63NTYDfKZNTRyayZfkSZY", "delay_action": "CANCEL", "delayed_until": "2024-08-30T17:00:30.657Z", "application_details": { "square_product": "ECOMMERCE_API", "application_id": "sandbox-sq0idb-ioiyW39PwreFzwXoGyLtYg" }, "version_token": "bgijDdSx1BLV4MJMqpl61P7kFE1KTEOigSmAvjmqn0g6o" } } ``` {% /tab %} {% /tabset %} 4. Call [RetrieveCustomer](https://developer.squareup.com/reference/square/customers-api/retrieve-customers) or [BulkRetrieveCustomers](https://developer.squareup.com/reference/square/customers-api/bulk-retrieve-customers) to get customer information. {% /accordion %} {% anchor id="get-customers-linked-to-orders" /%} {% accordion expanded=false %} {% slot "heading" %} ### Get customers linked to orders {% /slot %} To get customers that are directly linked to orders, call [SearchOrders](https://developer.squareup.com/reference/square/orders-api/search-orders) and specify 1 – 10 customer IDs in the `customer_filter` query parameter. Keep in mind that not all orders have a customer assignment. For more information, see [Missing customer assignment](#missing-customer-assignment). ```` Note that you can also inspect the `Order.customer_id` field in unfiltered `SearchOrders` results to find all customer assignments for orders. {% /accordion %} {% anchor id="customer-assignments-for-orders-and-payments" /%} {% anchor id="missing-customer-assignment" /%} #### Missing customer assignment Orders made from a Square Online store or generated from a [payment link](https://developer.squareup.com/reference/square/checkout-api/create-payment-link) aren't associated with a customer, so these orders don't include a `customer_id` field when retrieved using the Orders API. Additionally, other integrations might not specify a customer ID when creating orders. Square recommends using the `customer_id` field from the corresponding payment or payments instead of relying on `Order.customer_id`. `Payment.customer_id` is more likely to be populated because Square attempts to asynchronously [assign a customer](customers-api/what-it-does#instant-profiles) to a payment when a customer isn't specified. {% anchor id="order-history-for-merged-customer-profiles" /%} #### Order history for merged customer profiles Sellers can merge duplicate customer profiles that represent the same customer. The merge operation deletes the existing customer profiles and creates a new aggregated customer profile with a new ID. Searching for orders using the new customer ID doesn't return any orders that were made using a previous customer ID. As a workaround, you should store all previous customer IDs and provide them in the `customer_ids` query filter in your `SearchOrders` request. To obtain these IDs, subscribe to `customer.created` webhook events and check whether the notifications contain the `event_context.merge` field. This field is included when the customer profile is created from a merge operation and contains the IDs of all affected customer profiles. For more information, see [Notifications for customer profile merge events](customers-api/use-the-api/customer-webhooks#notifications-for-customer-profile-merge-events). ## Customer ID integration points The following Square objects contain a customer ID, which is commonly specified when the object is created: * [Booking](https://developer.squareup.com/reference/square/objects/Booking) * [BookingCreatorDetails](https://developer.squareup.com/reference/square/objects/BookingCreatorDetails) * [Card](https://developer.squareup.com/reference/square/objects/Card) * [GiftCard](https://developer.squareup.com/reference/square/objects/GiftCard) * [InvoiceRecipient](https://developer.squareup.com/reference/square/objects/InvoiceRecipient) * [LoyaltyAccount](https://developer.squareup.com/reference/square/objects/LoyaltyAccount) * [Order](https://developer.squareup.com/reference/square/objects/Order) * [FulfillmentRecipient](https://developer.squareup.com/reference/square/objects/FulfillmentRecipient) (the customer who picks up or receives the order, replaces the deprecated [OrderFulfillmentRecipient](https://developer.squareup.com/reference/square/objects/OrderFulfillmentRecipient)) * [Tender](https://developer.squareup.com/reference/square/objects/Tender) (a snapshot of payment information for an order) * [Payment](https://developer.squareup.com/reference/square/objects/Payment) * [SaveCardOptions](https://developer.squareup.com/reference/square/objects/SaveCardOptions) (options for a `SAVE_CARD` Terminal action) * [Subscription](https://developer.squareup.com/reference/square/objects/Subscription) * [TerminalCheckout](https://developer.squareup.com/reference/square/objects/TerminalCheckout) The following `List` and `Search` endpoints support filtering by customer ID: * [ListBookings](https://developer.squareup.com/reference/square/bookings-api/ListBookings) * [ListCards](https://developer.squareup.com/reference/square/cards-api/ListCards) * [ListCustomerCustomAttributes](https://developer.squareup.com/reference/square/customer-custom-attributes-api/list-customer-custom-attributes) * [ListGiftCards](https://developer.squareup.com/reference/square/gift-cards-api/ListGiftCards) * [SearchInvoices](https://developer.squareup.com/reference/square/invoices-api/SearchInvoices) * [SearchLoyaltyAccounts](https://developer.squareup.com/reference/square/loyalty-api/SearchLoyaltyAccounts) * [SearchOrders](https://developer.squareup.com/reference/square/orders-api/SearchOrders) * [SearchSubscriptions](https://developer.squareup.com/reference/square/subscriptions-api/SearchSubscriptions) ## See also * [Customers API](customers-api/what-it-does) * [Video: Sandbox 101: Linking Customer Data](https://www.youtube.com/watch?v=Hq3cYdRqYaw) * [Cards API](cards-api/overview) * [Gift Cards API and Gift Card Activities API](gift-cards/using-gift-cards-api) * [Orders API](orders-api/what-it-does) * [Custom Attributes for Customers](customer-custom-attributes-api/overview) --- # Retrieve Customer Profiles > Source: https://developer.squareup.com/docs/customers-api/use-the-api/retrieve-profiles > Status: PUBLIC > Languages: All > Platforms: All Use the Square Customers API to retrieve customers profiles stored in a Square account. **Applies to:** [Customers API](customers-api/what-it-does) {% subheading %}Learn how to retrieve and list customers profiles stored in a Square account.{% /subheading %} {% toc hide=true /%} ## Overview Developers can use the following endpoints in the Customers API to get detailed information about [customer profiles](https://developer.squareup.com/reference/square/objects/customer) stored in a seller's {% tooltip text="Customer Directory" %}Customer relationship management (CRM) tool that sellers can access from Square products.{% /tooltip %}: * `RetrieveCustomer` - [Retrieves a single customer profile by ID](#retrieve-customer). * `BulkRetrieveCustomers` - [Retrieves multiple customer profiles by IDs](#bulk-retrieve-customers). * `ListCustomers` - [Lists the customer profiles in a seller account](#list-customers). {% aside type="info" %} The `SearchCustomers` endpoint in the Customers API can be used to find and view customer profiles based on phone number, email address, or other query filters. For more information, see [Search for Customer Profiles](customers-api/use-the-api/search-customers). Several list and search endpoints in other Square APIs return objects that are associated with a customer, such as orders, bookings, cards on file, and custom attributes. For more information, see [Customer ID integration points](customers-api/use-the-api/integrate-with-other-services#customer-id-integration-points). {% /aside %} {% anchor id="retrieve-customer" /%} {% anchor id="retrieve-the-customer-profile-of-a-given-id" /%} {% accordion %} {% slot "heading" %} ## Retrieve a single customer profile by ID {% /slot %} To get details about a single customer profile, call [RetrieveCustomer](https://developer.squareup.com/reference/square/customers-api/retrieve-customer) and provide the customer ID, as shown in the following request: ```` {% aside type="info" %} The `BulkRetrieveCustomers` endpoint can also be used to retrieve a single customer. {% /aside %} {% tabset %} {% tab id="Success response" %} If the `RetrieveCustomer` operation is successful, Square returns a `200` status code and a `customer` field that contains the requested customer profile. For example: ```json { "customer": { "id": "TNQC0TYTWMRSFFQ157KK4V7MVR", "created_at": "2020-04-27T17:28:50.073Z", "updated_at": "2020-05-27T04:43:53Z", "given_name": "John", "family_name": "Doe", "company_name": "Company", "email_address": "john.doe@mail.com", "address": { "address_line_1": "123 Main Street", "locality": "City", "postal_code": "12345", "country": "US" }, "phone_number": "+12065551212", "birthday": "0000-01-13", "preferences": { "email_unsubscribed": false }, "creation_source": "THIRD_PARTY", "segment_ids": [ "499XKDADA7682.REACHABLE" ], "version": 0 } } ``` {% /tab %} {% tab id="Error response" %} If the `RetrieveCustomer` operation fails, Square returns a `4xx` status code with an `errors` array that contains the error information. For example: ```json { "errors": [ { "code": "NOT_FOUND", "detail": "Customer with ID `FQWDXGAB2Q9WT1ZD60KKSE9NQC` not found.", "category": "INVALID_REQUEST_ERROR" } ] } ``` {% /tab %} {% /tabset %} {% /accordion %} {% anchor id="bulk-retrieve-customers" /%} {% accordion %} {% slot "heading" %} ## Retrieve multiple customer profiles by IDs {% /slot %} To retrieve 1 to 100 customer profiles in a bulk operation, call [BulkRetrieveCustomers](https://developer.squareup.com/reference/square/customers-api/bulk-retrieve-customers) and provide a list of customer IDs. The following `BulkRetrieveCustomers` request retrieves three customer profiles: ```` For bulk operations, Square processes the retrieved requests individually and returns a map of responses. {% tabset %} {% tab id="Success response" %} If the `BulkRetrieveCustomers` operation is successfully processed, Square returns a `200` status code and a `responses` map of key-value pairs that represent the responses for individual retrieve requests. For each key-value pair, the key is a customer ID that was specified in the request and the value is either the requested customer profile (if the request succeeded) or error information (if the request failed). For example: ```json { "responses": { "5CZ99Q9SD8C71SGFD4CR96CBCT": { "errors": [ { "code": "NOT_FOUND", "detail": "Customer with ID `5CZ99Q9SD8C71SGFD4CR96CBCT` not found.", "category": "INVALID_REQUEST_ERROR" } ] }, "TNQC0TYTWMRSFFQ157KK4V7MVR": { "customer": { "id": "TNQC0TYTWMRSFFQ157KK4V7MVR", "created_at": "2020-04-27T17:28:50.073Z", "updated_at": "2020-05-27T04:43:53Z", "given_name": "John", "family_name": "Doe", "company_name": "Company", "email_address": "john.doe@mail.com", "address": { "address_line_1": "123 Main Street", "locality": "City", "postal_code": "12345", "country": "US" }, "phone_number": "+12065551212", "birthday": "0000-01-13", "preferences": { "email_unsubscribed": false }, "creation_source": "THIRD_PARTY", "segment_ids": [ "499XKDADA7682.REACHABLE" ], "version": 0 } }, "PE6CW5359K3J913DH3PF4PREF8": { "customer": { "id": "PE6CW5359K3J913DH3PF4PREF8", "created_at": "2024-01-20T00:32:34.43Z", "updated_at": "2024-01-20T00:32:34Z", "given_name": "Vera", "family_name": "Sara", "email_address": "sara.vera0101@gmail.com", "phone_number": "+14167779999", "preferences": { "email_unsubscribed": false }, "creation_source": "THIRD_PARTY", "version": 1 } } } } ``` Note that the responses might not be returned in the same order as the list of customer IDs sent to `BulkRetrieveCustomers`. {% /tab %} {% tab id="Error response" %} If any top-level errors prevent the `BulkRetrieveCustomers` operation from running, Square returns a `4xx` status code with an `errors` array that contains the error information. For example: ```json { "errors": [ { "code": "BAD_REQUEST", "detail": "Unexpected end of JSON object (line 11, character 2)", "category": "INVALID_REQUEST_ERROR" } ] } ``` {% /tab %} {% /tabset %} {% /accordion %} {% anchor id="list-customers" /%} {% anchor id="retrieve-a-list-of-customer-profiles" /%} {% accordion %} {% slot "heading" %} ## List customer profiles in a seller account {% /slot %} To list the customer profiles in the seller's Customer Directory, call [ListCustomers](https://developer.squareup.com/reference/square/customers-api/list-customers). ```` {% tabset %} {% tab id="Success response" %} If the `ListCustomers` operation is successfully processed, Square returns returns a `200` response that contains a list of customer profiles or an empty object (`{}`) if no profiles exist. ```json { "customers": [ { "id": "A537H7KAQWSAF8M8EM1Y23E16M", "created_at": "2021-10-28T20:19:07.692Z", "updated_at": "2024-01-09T20:14:21Z", "given_name": "Amelia", "family_name": "Earhart", "email_address": "Amelia.Earhart@example.com", "address": { "address_line_1": "123 Main St", "locality": "Seattle", "administrative_district_level_1": "WA", "postal_code": "98121", "country": "US" }, "phone_number": "1-212-555-4240", "note": "a customer on seller account", "reference_id": "YOUR_REFERENCE_ID", "company_name": "ACME", "preferences": { "email_unsubscribed": false }, "creation_source": "THIRD_PARTY", "segment_ids": [ "8QJTJCE6AZSN6.REACHABLE", "8QJTJCE6AZSN6.CARDS_ON_FILE", "gv2:8H24YRM74H2030XWJWP9F0MAEW", "gv2:4TR2NFVP8N63D9K1FZ5E62VD78" ], "version": 4 }, { "id": "XVN84NCJS9QWX0N202WX90TJ5R", "created_at": "2024-01-09T23:45:20.789Z", "updated_at": "2024-01-09T23:45:20Z", "given_name": "Sara", "family_name": "Vera", "email_address": "sara.vera1010@gmail.com", "address": { "address_line_1": "292 Adelaide St", "locality": "Toronto", "administrative_district_level_1": "ON", "country": "CA" }, "phone_number": "+14167779999", "preferences": { "email_unsubscribed": false }, "creation_source": "THIRD_PARTY", "birthday": "2000-10-10", "segment_ids": [ "8QJTJCE6AZSN6.REACHABLE" ], "version": 0 }, { "id": "T4BKEYWKMS6G14BQ06Z961H7QW", "created_at": "2020-10-28T19:13:36.64Z", "updated_at": "2021-03-08T22:56:28Z", "given_name": "John", "family_name": "Doe", "email_address": "johndoe@example.com", "phone_number": "2065551012", "note": "\n// Merged on 2021/03/08. Following fields were not transferred to the current customer:\nFirst Name: Doe\nEmail Address: johndoe@example.com\nPhone Number: (206) 555-1011\n// Merged on 2021/03/08.", "preferences": { "email_unsubscribed": false }, "creation_source": "MERGE", "segment_ids": [ "8QJTJCE6AZSN6.REACHABLE", "8QJTJCE6AZSN6.CARDS_ON_FILE", "8QJTJCE6AZSN6.LOYALTY_ALL", "gv2:8H24YRM74H2030XWJWP9F0MAEW", "gv2:4TR2NFVP8N63D9K1FZ5E62VD78" ], "version": 1 }, { "id": "6ZK40WV46EM8M2AVC9ZEF7B018", "created_at": "2024-01-20T00:32:34.533Z", "updated_at": "2024-01-20T12:46:09Z", "given_name": "Silva", "family_name": "Antonio", "email_address": "antonio1568silva@gmail.com", "address": { "address_line_1": "1001 Broadway Ave", "locality": "Toronto", "administrative_district_level_1": "ON", "country": "CA" }, "phone_number": "+14375552222", "note": "Birthday Club member", "reference_id": "refid", "preferences": { "email_unsubscribed": false }, "creation_source": "THIRD_PARTY", "birthday": "0000-07-07", "segment_ids": [ "8QJTJCE6AZSN6.REACHABLE" ], "version": 2 }, { "id": "T9Q21K8PA5MQY3PAZZT2WGGVC0", "created_at": "2023-04-12T20:38:05.255Z", "updated_at": "2023-04-12T20:38:05Z", "phone_number": "2085550988", "preferences": { "email_unsubscribed": false }, "creation_source": "LOYALTY", "segment_ids": [ "8QJTJCE6AZSN6.LOYALTY_ALL" ], "version": 0 }, { "id": "Q8002JB4YQ5SB8A9FPE2476ADMM30NG", "created_at": "2022-10-14T22:51:57.306Z", "updated_at": "2022-10-14T22:51:57Z", "phone_number": "4255550000", "preferences": { "email_unsubscribed": false }, "creation_source": "LOYALTY", "segment_ids": [ "8QJTJCE6AZSN6.LOYALTY_ALL" ], "version": 0 }, { "id": "Q8002VV1DJTRG0TF3A55MAWPZR2EA80", "created_at": "2022-07-16T20:15:11.123Z", "updated_at": "2022-07-16T20:15:11Z", "phone_number": "6095550923", "preferences": { "email_unsubscribed": false }, "creation_source": "LOYALTY", "segment_ids": [ "8QJTJCE6AZSN6.LOYALTY_ALL" ], "version": 0 } ] } ``` Only customer profiles that contain public information (`given_name`, `family_name`, `company_name`, `email_address`, or `phone_number`) are included in the results. Customer profiles with [no public information](customers-api/what-it-does#no-public-information) are excluded. {% /tab %} {% tab id="Error response" %} If the `ListCustomers` operation fails, Square returns a `4xx` status code with an `errors` array that contains the error information. For example: ```json { "errors": [ { "category": "AUTHENTICATION_ERROR", "code": "UNAUTHORIZED", "detail": "This request could not be authorized." } ] } ``` {% /tab %} {% /tabset %} ### Sorting the results By default, Square sorts the results by concatenating the `given_name` and `family_name` fields of each customer profile and returning them in ascending order. If neither field is set, a string comparison is performed using one of the following fields in the following order: `company_name`, `email_address`, `phone_number`. You can optionally use the `sort_field` query parameter to sort by the `created_at` field and the `sort_order` query parameter to sort by descending order. ```` ### Setting a page size You can also optionally specify a maximum [page size](build-basics/common-api-patterns/pagination) in the request. The following example request uses the `limit` query parameter to specify a maximum page size of three results. The default page size is 100. ```` {% aside type="info" %} Square treats the `limit` value as advisory and might return more or fewer results. {% /aside %} The following is an excerpt of an example paged response with the `count` field: ```json { "customers": [ { // customer 1 fields }, { // customer 2 fields }, { // customer 3 fields } ], "cursor": "PNEhVUKBuTOuRIZoUcX5VQ...UE1cVyWmbXhoY", "count": 13293 } ``` When the number of results exceeds the page size, the response includes a `cursor` field. To get the next page of results, send the previous `ListCustomers` request and include the `cursor` query parameter set to the cursor returned in the response. ```` To retrieve all customer profiles, use the new `cursor` value returned in each response for the next request, until the response doesn't include a `cursor` field. ### Getting the customer count The preceding example also sets the optional `count` parameter to `true`, which directs Square to return a `count` field that contains the total number of customer profiles in the directory. Only customer profiles that contain public information (`given_name`, `family_name`, `company_name`, `email_address`, or `phone_number`) are included in the count. Customer profiles with [no public information](customers-api/what-it-does#no-public-information) are excluded. {% /accordion %} ## Considerations * **Use SearchCustomers with a large customer base** - Although the `ListCustomers` endpoint can be used to retrieve all customers in the Customer Directory, it might not be practical with a large customer base. Using the [SearchCustomers](https://developer.squareup.com/reference/square/customers-api/search-customers) endpoint with one or more query filters is a more efficient method for retrieving customers when you don't know their IDs. For more information, see [Search for Customer Profiles](customers-api/use-the-api/search-customers). * **Synchronizing customer data** - To synchronize customer data from the Customer Directory to your application, you can use [customer webhooks](customers-api/use-the-api/customer-webhooks) to be notified of changes in addition to polling periodically with the `SearchCustomers` or `ListCustomers` endpoint. * **Custom attributes not included in Customer API responses** - The `RetrieveCustomer`, `BulkRetrieveCustomers`, and `ListCustomers` endpoints cannot be used to retrieve custom attributes for customer profiles. However, you can use the customer ID with the `RetrieveCustomerCustomAttribute` or `ListCustomerCustomAttributes` endpoint to retrieve or list custom attributes for a specified customer profile, including seller-defined custom fields. For more information, see [Create and Manage Customer Custom Attributes](customer-custom-attributes-api/custom-attributes). * **Customer profiles have multiple sources** - Customer profiles returned in `RetrieveCustomer`, `BulkRetrieveCustomers`, and `ListCustomers` responses include customers created using the Square Dashboard, Square Point of Sale, the Customers API, and other flows. For example, a customer profile might be created for loyalty accounts and [instant profiles](customers-api/what-it-does#instant-profiles) might be created for payments. For information about how to create customer profiles using the Customers API, see [Manage Customer Profiles](customers-api/use-the-api/keep-records). Sometimes Square creates instant profiles that have [no public information](customers-api/what-it-does#no-public-information). These instant profiles aren't included in `ListCustomers` or `SearchCustomers` responses. ## See also * [Manage Customer Profiles](customers-api/use-the-api/keep-records) * [Search for Customer Profiles](customers-api/use-the-api/search-customers) * [Custom Attributes for Customers](customer-custom-attributes-api/overview) --- # Manage Customer Profiles > Source: https://developer.squareup.com/docs/customers-api/use-the-api/keep-records > Status: PUBLIC > Languages: All > Platforms: All Use the Square Customers API to perform CRUD operations on customers profiles in a Square account. **Applies to:** [Customers API](customers-api/what-it-does) | [Customer Custom Attributes API](customer-custom-attributes-api/overview) | [Cards API](cards-api/overview) | [Gift Cards API](gift-cards/using-gift-cards-api) {% subheading %}Learn how to create, update, and delete customer profiles in a Square seller account.{% /subheading %} {% toc hide=true /%} ## Overview Developers can use the Customers API to keep customer records for a Square seller by adding [customer profiles](https://developer.squareup.com/reference/square/objects/customer) to the seller's {% tooltip text="Customer Directory" %}Customer relationship management (CRM) tool that sellers can access from Square products.{% /tooltip %} and making timely updates when customer information changes. Additionally, developers can delete customer profiles when a customer becomes inactive or requests to be removed. Customer profiles can be created and managed individually or using bulk operations. {% anchor id="create-a-customer-profile" /%} {% anchor id="create-customers" /%} {% accordion %} {% slot "heading" %} ## Create customer profiles {% /slot %} To add customer profiles to a seller's Customer Directory, call one of the following endpoints: * `CreateCustomer` - [Creates a single customer profile](#create-customer). * `BulkCreateCustomers` - [Creates multiple customer profiles](#bulk-create-customers). At least one of the following fields is required to create a customer profile. Your application frontend can collect this information from the customer using input fields. * `given_name` - The customer's first name. * `family_name` - The customer's last name. * `company_name` - The name of the customer's workplace. * `email_address` - The customer's email address. * [`phone_number`](#phone-number) - The customer's phone number. Before creating a customer profile: * **Get consent to store customer data** - You must explicitly ask the customer for permission to store the information you collect. You should also be aware of other [best practices for collecting information](build-basics/general-considerations/collecting-information). * **Check for duplicate profiles** - You should call the `SearchCustomers` endpoint and search by the customer's phone number, email address, or reference ID to avoid creating a duplicate customer profile. Including a unique `email_address`, `phone_number`, or `reference_id` when creating a customer profile can make it easier to find customers later. Note that some Square API integrations might require `email_address`, `phone_number`, or other specific customer fields. {% anchor id="create-customer" /%} {% accordion expanded=false %} {% slot "heading" %} ### Create a single customer profile {% /slot %} To create a single customer profile, call [CreateCustomer](https://developer.squareup.com/reference/square/customers-api/create-customer) and provide the customer data. The following is an example request: ```` {% aside type="info" %} The `BulkCreateCustomers` endpoint can also be used to create a single customer. {% /aside %} {% tabset %} {% tab id="Success response" %} If the operation is successful, Square returns a `200` status code and a `Customer` object that represents the new customer profile, as shown in the following example. ```json { "customer": { "id": "FQWDXGBB2Q9WT1ZD6HKKSE9NQC", "created_at": "2022-05-29T21:14:49.48Z", "updated_at": "2022-05-29T21:14:49Z", "given_name": "John", "family_name": "Doe", "nickname": "Junior", "email_address": "john.doe.jr@acme.com", "address": { "address_line_1": "1955 Broadway", "locality": "Springfield", "administrative_district_level_1": "MA", "postal_code": "01111" }, "phone_number": "+1 (206) 222-3456", "company_name": "ACME Inc.", "preferences": { "email_unsubscribed": false }, "creation_source": "THIRD_PARTY", "version": 0 } } ``` {% /tab %} {% tab id="Error response" %} If the operation fails, Square returns a `4xx` status code with an `errors` array that contains information about any errors that occurred. For example: ```json { "errors": [ { "code": "BAD_REQUEST", "detail": "The field named '' is unrecognized (line 2, character 3)", "field": "", "category": "INVALID_REQUEST_ERROR" } ] } ``` {% /tab %} {% /tabset %} {% /accordion %} {% anchor id="bulk-create-customers" /%} {% accordion expanded=false %} {% slot "heading" %} ### Create multiple customer profiles {% /slot %} To create 1 to 100 customer profiles in a bulk operation, call [BulkCreateCustomers](https://developer.squareup.com/reference/square/customers-api/bulk-create-customers) and provide a map of key-value pairs that represent individual create requests. For each key-value pair, the key is an idempotency key and the value is the customer data used to create the customer profile: ```json { "customers": { "idempotency_key_1": { // customer fields }, "idempotency_key_2": { // customer fields }, "idempotency_key_3": { // customer fields }, ... } } ``` The following `BulkCreateCustomers` request attempts to create three customer profiles: ```` For bulk operations, Square processes the create requests individually and returns a map of responses. {% tabset %} {% tab id="Success response" %} If the `BulkCreateCustomers` operation is successfully processed, Square returns a `200` status code and a `responses` map of key-value pairs that represent responses for individual create requests. For each key-value pair, the key is an idempotency key that was specified in the request and the value is either: * The new customer profile if the request succeeded. * Error information if the request failed. In the following example, two requests succeeded and one failed: ```json { "responses": { "452ea896-f36e-4c5c-95d5-e5aa727b9b2c": { "customer": { "id": "TFVGJNH46AVMDCZY93KKKF5QW4", "created_at": "2024-01-20T00:32:34.43Z", "updated_at": "2024-01-20T00:32:34Z", "given_name": "Vera", "family_name": "Sara", "email_address": "sara.vera0101@gmail.com", "phone_number": "+14167779999", "preferences": { "email_unsubscribed": false }, "creation_source": "THIRD_PARTY", "version": 0 } }, "cbde1ec6-96df-40d4-8019-af9a4fa893ed": { "customer": { "id": "6ZK40WV46EM8M2AVC9ZEF7B018", "created_at": "2024-01-20T00:32:34.533Z", "updated_at": "2024-01-20T00:32:34Z", "given_name": "Silva", "family_name": "Antonio", "email_address": "antonio1568silva@gmail.com", "address": { "address_line_1": "1001 Broadway Ave", "address_line_2": "Apt 1311", "locality": "Toronto", "administrative_district_level_1": "ON", "country": "CA" }, "phone_number": "+14375552222", "note": "Birthday Club member", "preferences": { "email_unsubscribed": false }, "creation_source": "THIRD_PARTY", "birthday": "0000-07-22", "version": 0 } }, "716cefbc-3d71-4d7c-bdc8-9c7f84c2d793": { "errors": [ { "code": "INVALID_EMAIL_ADDRESS", "detail": "Expected email_address to be a valid email address", "field": "email_address", "category": "INVALID_REQUEST_ERROR" } ] } } } ``` Note that the responses might not be returned in the same order as the individual create requests sent to `BulkCreateCustomers`. {% /tab %} {% tab id="Error response" %} If any top-level errors prevent the `BulkCreateCustomers` operation from running, Square returns a `4xx` status code with an `errors` array that contains the error information. For example: ```json { "errors": [ { "code": "BAD_REQUEST", "detail": "Unexpected end of JSON object (line 11, character 2)", "category": "INVALID_REQUEST_ERROR" } ] } ``` {% /tab %} {% /tabset %} {% /accordion %} {% aside type="info" %} [Idempotency keys](build-basics/common-api-patterns/idempotency) are optional for `CreateCustomer` requests but required for `BulkCreateCustomers` requests. An idempotency key is a client-generated string (for example, a UUID) that Square uses to ensure a request is processed only once. An application cannot reuse idempotency keys in requests to the same seller. {% /aside %} {% /accordion %} {% anchor id="update-a-customer-profile" /%} {% anchor id="update-customers" /%} {% accordion %} {% slot "heading" %} ## Update customer profiles {% /slot %} Keeping customer profiles up to date helps to maintain seamless experiences in customer interactions and communications. To update customer profiles, call one of the following endpoints: * `UpdateCustomer` - [Updates a single customer profile](#update-customer). * `BulkUpdateCustomers` - [Updates multiple customer profiles](#bulk-update-customers). You can add, edit, or remove the following fields: * `given_name`, `family_name`, `company_name`, and `nickname` * [`phone_number`](#phone-number) * `email_address` * [`address`](#address) and address fields * `reference_id` * [`birthday`](#birthday) * `note` * `tax_ids` (in [supported countries](customers-api/what-it-does#customer-tax-ids) only) To enable [optimistic concurrency control](#version) when updating customer data, include the `version` field and specify the current version of the customer profile. {% anchor id="update-customer" /%} {% accordion expanded=false %} {% slot "heading" %} ### Update a single customer profile {% /slot %} To update a single customer profile, call [UpdateCustomer](https://developer.squareup.com/reference/square/customers-api/update-customer) and provide the customer ID and the fields you want to change. If needed, you can get the customer ID by calling [SearchCustomers](https://developer.squareup.com/reference/square/customers-api/search-customers) or [ListCustomers](https://developer.squareup.com/reference/square/customers-api/list-customers). The following `UpdateCustomer` request sets the customer's birthday to January 13 (without the year) and updates some address fields. ```` {% aside type="info" %} The `BulkUpdateCustomers` endpoint can also be used to update a single customer. {% /aside %} {% tabset %} {% tab id="Success response" %} If the `UpdateCustomer` operation is successful, Square returns a `200` status code and a `customer` field that contains the updated customer profile, as shown in the following example: ```json { "customer": { "id": "FQWDXGBB2Q9WT1ZD6HKKSE9NQC", "created_at": "2022-05-29T21:14:49.48Z", "updated_at": "2022-09-16T09:36:22Z", "given_name": "John", "family_name": "Doe", "nickname": "Junior", "email_address": "john.doe.jr@acme.com", "address": { "address_line_1": "1313 Main St", "address_line_2": "Apt 2B", "locality": "Springfield", "administrative_district_level_1": "MA", "postal_code": "01119" }, "phone_number": "+1 (206) 222-3456", "company_name": "ACME Inc.", "preferences": { "email_unsubscribed": false }, "creation_source": "THIRD_PARTY", "birthday": "0000-01-13", "segment_ids": [ "MLYQHTSHXM6E8.REACHABLE", "gv2:8ESCGMK9GN26570X8VR2AP9W1G" ], "version": 1 } } ``` {% /tab %} {% tab id="Error response" %} If the `UpdateCustomer` operation fails, Square returns a `4xx` status code with an `errors` array that contains information about any errors that occurred. For example: ```json { "errors": [ { "code": "INVALID_PHONE_NUMBER", "detail": "Expected phone_number to be a valid phone number", "field": "phone_number", "category": "INVALID_REQUEST_ERROR" } ] } ``` {% /tab %} {% /tabset %} {% /accordion %} {% anchor id="bulk-update-customers" /%} {% accordion expanded=false %} {% slot "heading" %} ### Update multiple customer profiles {% /slot %} To update 1 to 100 customer profiles in a bulk operation, call [BulkUpdateCustomers](https://developer.squareup.com/reference/square/customers-api/bulk-update-customers) and provide a map of key-value pairs that represent individual update requests. For each key-value pair, the key is a customer ID and the value is the customer data used to update the customer profile. If needed, you can get the customer ID by calling [SearchCustomers](https://developer.squareup.com/reference/square/customers-api/search-customers) or [ListCustomers](https://developer.squareup.com/reference/square/customers-api/list-customers). ```json { "customers": { "customer_id_1": { // customer fields }, "customer_id_2": { // customer fields }, "customer_id_3": { // customer fields }, ... } } ``` The following `BulkUpdateCustomers` request attempts to update two customer profiles: ```` For bulk operations, Square processes the update requests individually and returns a map of responses. {% tabset %} {% tab id="Success response" %} If the `BulkUpdateCustomers` operation is successfully processed, Square returns a `200` status code and a `responses` map of key-value pairs that represent responses for individual update requests. For each key-value pair, the key is a customer ID that was specified in the request and the value is either: * The updated customer profile if the request succeeded. * Error information if the request failed. In the following example, one request succeeded and one failed: ```json { "responses": { "6ZK40WV46EM8M2AVC9ZEF7B018": { "customer": { "id": "6ZK40WV46EM8M2AVC9ZEF7B018", "created_at": "2024-01-20T00:32:34.533Z", "updated_at": "2024-01-20T00:32:34Z", "given_name": "Silva", "family_name": "Antonio", "email_address": "antonio1568silva@gmail.com", "address": { "address_line_1": "900 1st Ave", "locality": "Toronto", "administrative_district_level_1": "ON", "country": "CA" }, "phone_number": "+14375552222", "note": "Birthday Club member", "company_name": "Swatch Design", "preferences": { "email_unsubscribed": false }, "creation_source": "THIRD_PARTY", "birthday": "0000-07-22", "version": 2 } }, "TFVGJNH46AVMDCZY93KKKF5QW4": { "errors": [ { "code": "INVALID_EMAIL_ADDRESS", "detail": "Expected email_address to be a valid email address", "field": "email_address", "category": "INVALID_REQUEST_ERROR" } ] } } } ``` Note that the responses might not be returned in the same order as the individual update requests sent to `BulkUpdateCustomers`. {% /tab %} {% tab id="Error response" %} If any top-level errors prevent the `BulkUpdateCustomers` operation from running, Square returns a `4xx` status code with an `errors` array that contains the error information. For example: ```json { "errors": [ { "code": "BAD_REQUEST", "detail": "Unexpected end of JSON object (line 11, character 2)", "category": "INVALID_REQUEST_ERROR" } ] } ``` {% /tab %} {% /tabset %} {% /accordion %} {% anchor id="sparse-updates" / %} {% anchor id="clear-fields" / %} {% accordion expanded=false %} {% slot "heading" %} ### Sparse updates and clearing fields {% /slot %} Update operations support using a [sparse update](build-basics/clearing-fields#sparse-updates) object, which only needs to include fields that are added, changed, or cleared. You can clear fields using one of the following methods: * Set the value to `null` (recommended). * Set the value to an empty string. This method applies only to `String`-type fields. The following example request updates the `address.address_line_1` and `birthday` fields and clears the `address.address_line_2` and `nickname` fields using the null update method: ```` The following example request clears the `address` field and updates the `phone_number` field. To remove the address from the customer profile, you must use the null update method. ```` {% /accordion %} {% /accordion %} {% anchor id="delete-a-customer-profile" /%} {% anchor id="delete-customers" /%} {% accordion %} {% slot "heading" %} ## Delete customer profiles {% /slot %} To delete customer profiles from the seller's Customer Directory, call one of the following endpoints: * `DeleteCustomer` - [Deletes a single customer profile](#delete-customer). * `BulkDeleteCustomers` - [Deletes multiple customer profiles](#bulk-delete-customers). A delete operation permanently removes the customer profile from the Customer Directory in the seller account across all locations. You might want to delete a customer profile when a customer is inactive for a specified period of time or when the customer makes an explicit request to be removed from the customer base. {% anchor id="delete-customer" /%} {% accordion expanded=false %} {% slot "heading" %} ### Delete a single customer profile {% /slot %} To delete a single customer profile, call [DeleteCustomer](https://developer.squareup.com/reference/square/customers-api/delete-customer) and provide the customer ID. If needed, you can get the customer ID by calling [SearchCustomers](https://developer.squareup.com/reference/square/customers-api/search-customers) or [ListCustomers](https://developer.squareup.com/reference/square/customers-api/list-customers). ```` The example request also includes the recommended `version` attribute, which must be set to the current version of the customer profile when included in the request. For more information, see [Considerations](#version). {% aside type="info" %} The `BulkDeleteCustomers` endpoint can also be used to delete a single customer. {% /aside %} {% tabset %} {% tab id="Success response" %} If the `DeleteCustomer` operation is successful, Square returns a `200` response with an empty object. ```json {} ``` {% /tab %} {% tab id="Error response" %} If the `DeleteCustomer` operation fails, Square returns a `4xx` status code with an `errors` array that contains information about any errors that occurred. For example: ```json { "errors": [ { "code": "NOT_FOUND", "detail": "Customer with ID `FQWDXGAB2Q9WT1ZD60KKSE9NQC` not found.", "category": "INVALID_REQUEST_ERROR" } ] } ``` {% /tab %} {% /tabset %} {% /accordion %} {% anchor id="bulk-delete-customers" /%} {% accordion expanded=false %} {% slot "heading" %} ### Delete multiple customer profiles {% /slot %} To delete 1 to 100 customer profiles in a bulk operation, call [BulkDeleteCustomers](https://developer.squareup.com/reference/square/customers-api/bulk-delete-customers) and provide the IDs of the customer profiles to delete. If needed, you can get the customer ID by calling [SearchCustomers](https://developer.squareup.com/reference/square/customers-api/search-customers) or [ListCustomers](https://developer.squareup.com/reference/square/customers-api/list-customers). The following `BulkDeleteCustomers` request deletes four customer profiles: ```` Note that `BulkDeleteCustomers` operations don't support specifying a `version` field for customer profiles. For bulk operations, Square processes the delete requests individually and returns a map of responses. {% tabset %} {% tab id="Success response" %} If the `BulkDeleteCustomers` operation is successfully processed, Square returns a `200` status code and a `responses` map of key-value pairs that represent responses for individual delete requests. For each key-value pair, the key is a customer ID that was specified in the request and the value is either an empty object (if the request succeeded) or error information (if the request failed). For example: ```json { "responses": { "W8Q7NZQT08R6V6BSKVVC1VW5B0": {}, "P6BZGEMCPAP4P31Y9M8PWQWE80": {}, "8K35J21GQM4MVXDQTHCQBQDZ58": {}, "1PTNXQXT5J2KS2YF7R80GHP69Z": { "errors": [ { "code": "NOT_FOUND", "detail": "Customer with ID `1PTNXQXT5J2KS2YF7R80GHP69Z` not found.", "category": "INVALID_REQUEST_ERROR" } ] } } } ``` Note that the responses might not be returned in the same order as the list of customer IDs sent to `BulkDeleteCustomers`. {% /tab %} {% tab id="Error response" %} If any top-level errors prevent the `BulkDeleteCustomers` operation from running, Square returns a `4xx` status code with an `errors` array that contains the error information. For example: ```json { "errors": [ { "code": "BAD_REQUEST", "detail": "Unexpected end of JSON object (line 11, character 2)", "category": "INVALID_REQUEST_ERROR" } ] } ``` {% /tab %} {% /tabset %} {% /accordion %} {% anchor id="deleted-customers" /%} {% accordion expanded=false %} {% slot "heading" %} ### How deleting customer profiles affects other Square APIs and objects {% /slot %} The following Square integration scenarios are affected when a customer profile is deleted: * **Gift cards on file** - [Gift cards](gift-cards/using-gift-cards-api) stored on file for the customer are unlinked when the customer profile is deleted. They can still be used to create a Square payment because a `customer_id` isn't required or validated for a gift card payment. * **Loyalty accounts** - The [loyalty account](loyalty-api/overview) associated with the customer is deleted, along with any remaining loyalty points. Loyalty events associated with the loyalty account aren't deleted; however, searching events using the ID of a deleted account isn't supported. * **Subscription billing** - All [subscriptions](subscriptions-api/overview) associated with the customer are canceled. * **Bookings** - [Bookings](bookings-api/what-it-is) associated with the customer aren't canceled. Before deleting a customer profile, you should call `ListBookings` to find the bookings that are scheduled for the customer and then call `CancelBooking` for each booking. * **Credit and debit cards on file** - [Credit and debit cards](cards-api/overview) stored on file for the customer aren't disabled or deleted. However, they can no longer be used to create a Square card-on-file payment for the customer. Before deleting a customer profile, you should call `ListCards` using the `customer_id` query parameter to find any cards on file and then call `DisableCard` for each card. Filtering by `customer_id` after the profile is deleted isn't supported. * **Automatic invoice payments** - [Invoices](invoices-api/overview) associated with the customer that are scheduled for automatic payment aren't canceled. Future automatic payments don't succeed, but Square continues to send invoice-related communications to the email address specified in the `invoice_recipient.email_address` field (which allows customers to make a payment from the invoice payment page). If needed, you can call `SearchInvoices` using the `customer_ids` query filter to list invoices for the customer and then call `CancelInvoice`. * **Transaction history** - Order and payment records aren't deleted. The `SearchOrders` endpoint can be used to search for orders using the ID of deleted customers. When customer profiles are deleted as a result of a merge operation, searching for orders using the ID of the new merged customer profile doesn't return orders whose `customer_id` is the IDs of the deleted customer profiles. * **Custom attributes** - Square deletes all [custom attributes](customer-custom-attributes-api/overview) that are associated with the deleted customer profile. {% /accordion %} {% /accordion %} {% anchor id="manage-customer-considerations" /%} ## Considerations You should be aware of the following considerations when managing customer profiles, which are represented by [Customer](https://developer.squareup.com/reference/square/objects/Customer) objects: * **Managing group membership** - To change group membership, call [AddGroupToCustomer](https://developer.squareup.com/reference/square/customers-api/add-group-to-customer) or [RemoveGroupFromCustomer](https://developer.squareup.com/reference/square/customers-api/remove-group-from-customer). `CreateCustomer` or `UpdateCustomer` cannot be used to manage membership in a customer group. * **Managing customer-related custom attributes** - To work with custom attributes (also known as custom fields), use the [Customer Custom Attributes API](customer-custom-attributes-api/overview). `CreateCustomer` or `UpdateCustomer` cannot be used to add or update a custom attribute. * **Managing cards on file** - To manage stored credit and debit cards, use the [Cards API](cards-api/overview). To manage stored gift cards, use the [Gift Cards API](gift-cards/using-gift-cards-api). Using the Customers API to manage cards on file for the customer is deprecated. For more information, see [Migration notes](customers-api/what-it-does#deprecated-createcustomercard-endpoint). * **Merging customer profiles** - Using the Customers API to merge customer profiles isn't supported. * **Webhooks** - Customer profiles in the Customer Directory are managed using Square products (such as the Square Dashboard and Square Point of Sale) and through calls to Square APIs. Each create, update, or delete event triggers a separate webhook notification, even for bulk operations. Subscribe to the following webhook events to be notified when customer profiles are added, changed, or removed: * `customer.created` - This event is also useful for tracking customer profiles [affected by a merge operation](customers-api/use-the-api/customer-webhooks#customer-profile-merges). * `customer.updated` * `customer.deleted` For more information, see [Use Customer Webhooks](customers-api/use-the-api/customer-webhooks). * **Rate limiting** - If your application sends a high number of calls to Square APIs in a short period of time, you should make sure to handle potential `429` [RATE_LIMIT](build-basics/general-considerations/handling-errors#rate-limiting) errors. * **Sandbox Square Dashboard** - When testing the Customers API in the [Square Sandbox](devtools/sandbox/overview), the customer profiles that you create can be viewed and managed from the Customer Directory in the Sandbox Square Dashboard. To access the Sandbox Square Dashboard for a test account, open the **Sandbox test accounts** page in the [Developer Console](https://developer.squareup.com/apps), and then choose **Square Dashboard** next to the test account. The default test account is created by Square and granted full access to the Sandbox resources in your account. * **Creation source** - The Square-assigned `creation_source` field indicates how the customer profile was created, as shown in the following examples. For a complete list of sources, see [CustomerCreationSource](https://developer.squareup.com/reference/square/enums/CustomerCreationSource). * `THIRD_PARTY` - Created by applications calling the Customers API. * `DIRECTORY` - Created by sellers in the Square Dashboard or Square Point of Sale. * `MERGED` - Created by merging two or more existing profiles. {% anchor id="version" /%} * **Customer versions** - The `version` field represents the current version of the customer profile. The version is incremented each time a customer profile is updated. Square recommends including the `version` field in `UpdateCustomer`, `BulkUpdateCustomers`, and `DeleteCustomer` requests. Doing so allows the operation to succeed only if the current version of the customer profile matches the version specified in the request. Otherwise, the request fails with a `CONFLICT` error. For more information, see [Customer profile versions and optimistic concurrency support](customers-api/what-it-does#customer-profile-version). Note that `BulkDeleteCustomers` requests don't support specifying the `version` field. {% anchor id="phone-number" /%} * **Customer phone numbers** - The phone number for a customer profile is stored as a string in the `phone_number` field. If `phone_number` is provided in a `CreateCustomer` or `UpdateCustomer` request, the Customers API validates the value as follows. Character constraints: * The phone number must contain between 9 and 16 digits. * The phone number can contain spaces, a leading `+` symbol (when used with a country code), and the special characters `(`, `)`, `-`, and `.`. Alphabetical characters aren't allowed. Regional validation: * For national phone numbers where a country code isn't specified, the Customers API validates phone numbers based on the [country](https://developer.squareup.com/reference/square/objects/Location#definition__property-country) of the seller. If a country isn't specified for the seller, `US` is used by default. The following are some validation examples: * The phone number must be valid for the seller's country. For example, `655560344` isn't a valid number for a `US` seller, because it's an `ES` number. * The area code must be valid for the seller's country. For example, `418184082` isn't a valid `JP` phone number for a `JP` seller because `41` isn't a valid area code in Japan. * The exchange code (or telephone prefix) must be valid for the seller's country. For example, `6091234567` isn't a valid `US` phone number for a `US` seller because an exchange code in the United States cannot start with a 1. * For international phone numbers where a country code is specified: * The country code must be valid and include the leading `+` symbol. A phone number that uses this format is considered E.164-compliant. [E.164](https://en.wikipedia.org/wiki/E.164) is the international standard for formatting phone numbers. The national or international version of a phone number is valid for customers in the same country as the seller. For example, a `US` seller can store the following `US` phone numbers: `234.567.8901`, `+1 (234) 567-8901`, and `+12345678901`. The international version of phone numbers must be used for customers in a different country. Square returns a `400 INVALID_PHONE_NUMBER` error if the request contains an invalid phone number. {% aside type="info" %} The Customers API also accepts phone numbers that use an [international prefix](https://en.wikipedia.org/wiki/List_of_international_call_prefixes) in front of the country code instead of the `+` symbol. A phone number can include the `+` or an international prefix, but not both. The international prefix changes according to the country of the seller. In contrast, E.164-compliant phone numbers are valid for any country (for example, a phone number that is valid for a `US` seller is also valid for a `JP` seller). For example, the Customers API accepts `011 1 4152345678` for a `US` seller and `010 1 4152345678` for a `JP` seller. Alternatively, both these numbers are valid for any country if provided as `+14152345678` (without the international prefix). {% /aside %} {% anchor id="address" /%} * **Customer addresses** - The physical address for a customer profile is stored in the `address` field, which is represented by an [Address](https://developer.squareup.com/reference/square/objects/Address) object. The following table shows the maximum number of characters the Customers API allows for string-type `address` fields: |Address field|Maximum length| |:------|:------| |`address_line_1`|500| |`address_line_2`|500| |`address_line_3`|500| |`administrative_district_level_1`|200| |`administrative_district_level_2`|200| |`administrative_district_level_3`|200| |`locality`|300| |`sublocality`|200| |`sublocality_2`|200 |`sublocality_3`|200| |`postal_code`|12| The `first_name` and `last_name` address fields are ignored for customer profiles. For information about how address fields are used, see [Working with Addresses](build-basics/common-data-types/working-with-addresses). {% anchor id="birthday" /%} * **Customer birthdays** - The customer's birthday is stored in the `birthday` field. For a create or update request, `birthday` is specified using `YYYY-MM-DD` or `MM-DD` format and returned in `YYYY-MM-DD` format. If no year is specified in the request, `0000` is used as the year portion. * **Custom notes** - The `note` field contains simple text that displays under **Other** details for the customer profile in the Square Dashboard (or under **Personal information** the Sandbox Square Dashboard). Custom notes created with the Customers API are different than the rich notes created by sellers, which cannot be accessed through the API. * **Updates to the Customer Directory** - Customer profiles can be retrieved using the `SearchCustomers`, `ListCustomers`, `RetrieveCustomer`, and `BulkRetrieveCustomers` endpoints. For more information, see [Retrieve Customer Profiles](customers-api/use-the-api/retrieve-profiles) and [Search for Customer Profiles](customers-api/use-the-api/search-customers). New and updated customer profiles are typically available in `SearchCustomers` and `ListCustomers` endpoints in less than 30 seconds, though some updates can take up to 1 minute to propagate. Occasionally, incidents, outages, and other network conditions can slow the propagation even further. Under such conditions, newly created or updated profiles might not be included in your search or list results. When this happens, wait a short time and then retry your request. ## See also * [Retrieve Customer Profiles](customers-api/use-the-api/retrieve-profiles) * [Search for Customer Profiles](customers-api/use-the-api/search-customers) * [Use Customer Webhooks](customers-api/use-the-api/customer-webhooks) * [Custom Attributes for Customers](customer-custom-attributes-api/overview) --- # Search for Customer Profiles > Source: https://developer.squareup.com/docs/customers-api/use-the-api/search-customers > Status: PUBLIC > Languages: All > Platforms: All Use the Square Customers API to search for customers using one or more supported query filters. **Applies to:** [Customers API](customers-api/what-it-does) | [Customer Groups API](customer-groups-api/what-it-does) | [Customer Segments API](customer-segments-api/what-it-does) | [Customer Custom Attributes API](customer-custom-attributes-api/overview) {% subheading %}Learn how to search for customer profiles using one or more query filters.{% /subheading %} {% toc hide=true /%} ## Overview Developers can use the [SearchCustomers](https://developer.squareup.com/reference/square/customers-api/search-customers) endpoint in the Customers API to search customer profiles in the Customer Directory using supported query filters. The search results include customer profiles that meet all the query conditions. ## How it works The `SearchCustomers` endpoint searches the Customer Directory associated with a Square seller account. When calling this endpoint, you can use one or more of the following search query filters in any combination: * `phone_number` - Filters by the phone number of the customer profile, which was collected by the seller or imported into the Customer Directory. * `email_address` - Filters by the email address of the customer profile, which was collected by the seller or imported into the Customer Directory. * `creation_source` - Filters by the source that created the customer profile. * `created_at` - Filters by the timestamp of when the customer profile was created. * `updated_at` - Filters by the timestamp of when the customer profile was last updated. * `reference_id` - Filters by an ID used to cross-reference the customer to an entity in an external system. * `group_ids` - Filters by the [customer groups](customer-groups-api/how-to-use-it) the customer profile belongs to. * `segment_ids` - Filters by the [customer segments](customer-segments-api/how-to-use-it) the customer profile belongs to. * `custom_attribute` - Filters by the value or updated date of [custom attributes](customer-custom-attributes-api/overview) that are associated with a customer profile. Only customer profiles that contain public information (`given_name`, `family_name`, `company_name`, `email_address`, or `phone_number`) are included in the results. Customer profiles that have [no public information](customers-api/what-it-does#no-public-information) are omitted. ### Multiple query filters Multiple query filters specified in a search request are combined as `AND` statements, so the search results include the customer profiles that meet all the query conditions. These matching customer profiles are represented as a list of `Customer` objects. Consider the following set of customer profiles, all of which were updated in the last week: * **Customer A** - Created 1 year ago through an eCommerce site that calls the Customers API. * **Customer B** - Created 2 months ago through an eCommerce site that calls the Customers API. * **Customer C** - Created 2 weeks ago using Square Point of Sale. The following table shows example search queries for the set of customer profiles. Note that only profiles that satisfy all of the filters in the search query are returned in the results. |Search query|Customers returned| |------------|------------------| |Include profiles created through the Customers API.{% line-break /%}Include profiles created in the last 6 months.{% line-break /%}Include profiles updated in the last week.|B| |Include profiles created through the Customers API.{% line-break /%}Include profiles updated in the last week.|A and B| |Include profiles updated in the last week.|A, B, and C| Combining multiple filters as `OR` statements in a search query isn't supported. To search for customers that meet at least one of a set of query conditions, send multiple single-filter searches and then join the result sets. If any search condition isn't met, the result is an empty object (`{}`). ### Exact and fuzzy search When searching by `email_address`, `phone_number`, `reference_id`, and some `custom attribute` types, the API lets you search with an exact or fuzzy match of the specified customer attributes against a query expression. With an exact search, a query expression is compared literally against the targeted customer attribute value. With a fuzzy match, the query expression is tokenized and each resulting token is compared against targeted attribute values. Customer profiles are returned if their targeted attribute values match all tokens in any order. ### Search result sorting You can choose to sort search results using the `created_at` field or using the default sort order. By default, customer profiles are sorted alphanumerically by concatenating `given_name` and `family_name`. If these names aren't set, a string comparison is performed using one of the following fields in the following order: `company_name`, `email_address`, and `phone_number`. ### Search result pagination The default `SearchCustomers` [page size](build-basics/common-api-patterns/pagination) is 100 records, but you can use the `limit` query filter to specify a smaller page size. If your search results include more than the default or specified limit, the endpoint paginates the results and returns a `cursor` that lets you retrieve the next page of results. Note that the `SearchCustomers` endpoint treats the search limit as advisory and might return more or fewer results. ### Matching customer count To get the total number of customer profiles that match the search query, set the `count` field to `true` in the request. This directs Square to return a `count` field in the response that contains the count of matching customer profiles. Only customer profiles that contain public information are counted. ### Newly created and updated profiles Under normal operating conditions, newly created or updated customer profiles become available in [SearchCustomers](https://developer.squareup.com/reference/square/customers-api/search-customers) and [ListCustomers](https://developer.squareup.com/reference/square/customers-api/list-customers) endpoints in less than 30 seconds after they are created or updated. Some updates can take up to 1 minute to propagate. Occasionally, extraordinary network conditions (such as, incidents or outages) can slow the propagation even further. Under such circumstances, newly created or updated profiles might not be included in your search result. When this happens, wait a short time and then retry your search request. ## Search by creation source Customer profiles can be created from different sources. For example, you can create a customer profile using the Square Dashboard, Square Point of Sale, and the Customers API. For the complete list of creation source values, see [CustomerCreationSource](https://developer.squareup.com/reference/square/enums/customer-creation-source). {% aside type="info" %} For information about using the Customers API to create and manage customer profiles, see [Manage Customer Profiles](customers-api/use-the-api/keep-records). {% /aside %} To search customer profiles by creation source, include the `creation_source` filter in the request and specify one or more values. Multiple values are treated as `OR` statements. For example, to search for customer profiles created by the Square Directory service (either through the Square Dashboard or Square Point of Sale), specify `DIRECTORY`: ```` To search for customer profiles created by third-party applications, specify `THIRD_PARTY`: ```` To search for customer profiles created by the Square Directory service or a third-party application, include both values: ```` {% anchor id="search-by-creation-or-update-time" /%} ## Search by created or updated time You can call the [SearchCustomers](https://developer.squareup.com/reference/square/customers-api/search-customers) endpoint with the `created_at` or `updated_at` filter to search for customer profiles based on the time they were created or last updated, respectively. Such filters are useful to synchronize customer data by polling. For example, you can send `updated_at` search queries at a given time interval and determine subsequent actions to take on the customer profiles returned in the results. The `created_at` and `updated_at` filters are identical in structure. They both require that you specify a `start_at` and `end_at` time to specify a time interval in which the targeted customer profiles were created or updated. For example, the following `created_at` filter defines the time interval when targeted customer profiles were created: ```` The timestamp format must be RFC-3339 compliant. To search for a customer profile created or updated at a specific point of time, set the `start_at` value slightly smaller than the `end_at` value. The following `updated_at` filter shows an example of how to specify a specific time when a customer profile was updated: ```` ## Search by email address You can search for customer profiles by email address with an exact or fuzzy filter. A search query can include either an exact filter or a fuzzy filter, but not both. {% anchor id="exact-search-by-email-address" /%} ### Exact search by email address To search for customer profiles by email address with an exact match, use the `email_address` filter as shown in the following search request example: ```` This returns all customer profiles whose `email_address` field holds the value of `"johndoe@hotmail.com"`. If you make an error in your query expression (for example, enter `"johndoe@hotmail.com"` as `"johndoe@hotmail.co"`), none of the previous results are returned. As shown in the following example, this behavior differs from the fuzzy search. {% anchor id="fuzzy-search-by-email-address" /%} ### Fuzzy search by email address To search for customer profiles by email address with a fuzzy match, use the `email_address` filter as shown in the following search request example: ```` The query expression of `john.doe` is first tokenized into two tokens of `john` and `doe`. The customer profile containing the email address of `johndoe@hotmail.com` matches both tokens and is therefore returned in the search result. A fuzzy search also serves as a partial search. For example, if you typed `johndoe@hotmail.co` by mistake in the fuzzy query filter, you still get customer profiles containing the email address `johndoe@hotmail.com`. A fuzzy search provides you with great flexibility. For example, you can obtain the customer profiles containing `johndoe@hotmail.com` even with the following fuzzy filter: ```` Tokenization of the query expression of `doe.john #com` turns it into a three-token (`john`, `doe`, and `com`) query. The fuzzy search then selects customers profiles whose email addresses are `john*doe@*.com` or `doe*john@*.com`, where `*` stands for any valid email-address characters that can include, for example, `.`, `_`, or even a middle of name like `joe`. Fuzzy search by email addresses can be a powerful option when used in a simple partial match or more advanced type-ahead user interfaces or embedded search experiences. ## Search by phone number You can search for customer profiles by phone number with an exact or fuzzy filter. A search query can include either an exact filter or a fuzzy filter, but not both. Phone numbers are represented by the `phone_number` field of a `Customer` object. Searches by phone number are applicable only to customer profiles that are stored in or imported into the seller's Customer Directory. {% anchor id="exact-search-by-phone-number" /%} ### Exact search by phone number To conduct an exact search by phone number, specify the complete phone number in [E.164](https://en.wikipedia.org/wiki/E.164)-compliant format. This format starts with a `+` symbol and is followed by a country code and the subscriber number (which includes the area code). Spaces, dashes, parentheses, and periods are allowed in the query expression. For an exact match operation, Square removes spaces and non-numeric characters from the query expression and the stored phone numbers. The following are E.164-compliant examples: * +12345678901 (standard form) * +1-234-567-8901 * +1 234.567.8901 * +1 (234) 567-8901 The following example request shows an exact search by phone number using an E.164-compliant format: ```` {% aside type="tip" %} For exact matching, specifying an E.164-compliant query expression (for example `+12345678901`) also returns phone numbers that use an [international prefix](https://en.wikipedia.org/wiki/List_of_international_call_prefixes) instead of the `+` symbol (for example `0012345678901`). {% /aside %} The following table shows more examples to demonstrate the behavior of the exact match `phone_number` filter: | Search query | Matched phone numbers | Unmatched phone numbers | |-------------------|----------------------|------------------------| | **+14152345678** or{% line-break /%}**+1 (415) 234-5678** | **For US sellers:**{% line-break /%}4152345678{% line-break /%}415.234.5678{% line-break /%}415-234-5678{% line-break /%}(415) 234-5678{% line-break /%}+1(415)234-5678 | **For US sellers:**{% line-break /%}+12344155678{% line-break /%}415-234-5679 | | **+61298765432** or{% line-break /%}**+61 2 9876 5432** | **For AU sellers:**{% line-break /%}298765432{% line-break /%}2 9876 5432{% line-break /%}02 9876 5432{% line-break /%}(02) 9876-5432{% line-break /%}+61-2-9876-5432 | **For AU sellers:**{% line-break /%}+61 3 9876 5432{% line-break /%}2 9876 5431 | {% anchor id="fuzzy-search-by-phone-number" /%} ### Fuzzy search by phone number Fuzzy search by phone number works in a similar way to fuzzy search by email addresses. A phone number is tokenized by removing non-numeric characters. Matched customer profiles are those whose `phone_number` field has tokens that match all the provided tokens in the search query at least once in any order of tokens. For a fuzzy match operation, Square first removes non-numeric characters from the query expression and then tokenizes the expression on spaces. For example, `+33` becomes `33` and `(234) 567-8901` becomes `234 5678901`. To use the fuzzy search by phone number, you can specify part of a customer's phone number. For example: ```` As another example, if you use the following fuzzy search filter: ```` You get all the US customers whose phone numbers use the following formats: * (234) 567-NNNN, (234) N56-7NNN, (234) NN5-67NN, (234) NNN-567N, (234) NNN-N567 * (n23) 456-7NNN, (n23) 4N5-67NN, (n23) 4NN-567N, (n23) 4NN-N567 * (nN2) 345-67NN, (nN2) 34N-567N, (nN2) 34N-N567 * (nNN) 234-567N, (nNN) N23-4567, (nNN) 234-N567 * (nNN) 567-234N, (nNN) N56-7243, (nNN) 567-N234 * (nN5) 672-34NN, (nN5) 67N-234N, (nN5) 67N-N234 * (n56) 723-4NNN, (n56) 7N2-34NN, (n56) 7NN-234N, (n56) 7NN-N234 * (567) 234-NNNN, (567) N23-4NNN, (567) NN23-4NN, (567) NNN-234N, (567) NNN-N234 Where "n" stands for any number between 1 and 9 and "N" stands for a number between 0 and 9. This example shows that the fuzzy `phone_number` filter matches a query expression with the stored `phone_number` field token by token, irrespective of the token order. Fuzzy search by phone numbers can be powerful. For example, you can use a fuzzy search filter to offer likely matches that users can select while they enter the phone number digit by digit, provided that you have defined metrics for the likelihood of the match. ## Search by reference ID When a Square customer profile is associated with an external entity in another system, the association is captured by the `reference_id` field of the Square [Customer](https://developer.squareup.com/reference/square/objects/customer) object. Given the ID of an external entity, you can use the Square Customers API search by reference ID to determine the associated customer profiles in a Square seller's Customer Directory. To do so, you specify a `reference_id` filter when calling the [SearchCustomers](https://developer.squareup.com/reference/square/customers-api/search-customers) endpoint. As with search by email address and by phone number, the `reference_id` search filter lets you query customer profiles with an exact or fuzzy match of the query expression against the value of the `reference_id` field. ### Exact search by reference ID To search Square customer profiles by reference ID with an exact match, use a `reference_id` filter as shown in the following example search request: ```` The response returns the Square customer profiles whose `reference_id` field is exactly `ZGYZ-ABZG-97YX-XJ16`. ### Fuzzy search by reference ID To perform a fuzzy search by reference ID, use a fuzzy search filter as shown in the following example search filter: ```` This filter returns the customer profiles whose `reference_id` field contains the `ZGYZ` and `97YX` tokens at least once each and in any order. As a string value, a reference ID is tokenized by removing non-alphanumeric characters. A customer profile is selected if each provided token is matched at least once against the profile's `reference_id` field, irrespective of the order of the tokens. Fuzzy search by reference ID can be a useful tool for managing customer profiles. For example, when used with a structured, multi-part identifier schema, a fuzzy search helps simplify the discovery of customer profiles in a structured way by matching part of a reference ID (for example, a prefix or suffix) or by querying reference IDs that contain multiple tokens. |Search query|Matched reference_ids|Unmatched reference_ids| |----|-----|-----| |**XJ15**|**XJ15**-ABZG-97YX-ZGYZ,{% line-break /%}ZGYZ-ABZG-97YX-**XJ15**|ZGYZ-ABZG-97YX-XJ16 | |**NYC M**|**NYC**_**M**_35_JOHNSON{% line-break /%}**NYC**_27_**M**URRAY |NYC-F-27_WILSON {% line-break /%}SFO_M_35_THOMAS| {% anchor id="search-by-group-ids" /%} ## Search by group IDs A customer can belong to one or more [customer groups](customer-groups-api/how-to-use-it). Group membership is represented by the `group_ids` field of the corresponding customer profile, which stores the IDs of the groups the customer belongs to. This field is present only if the customer belongs to at least one group. You can use the `group_ids` filter to search customer profiles based on their group membership. This filter specifies groups by ID and can contain any combination of the `all`, `any`, and `none` fields: * For `all`, the customer must belong to all of the specified groups (logical `AND`). * For `any`, the customer must belong to at least one of the specified groups (logical `OR`). * For `none`, the customer must not belong to any of the specified groups (logical `NOT`). When multiple fields are provided, they are combined as `AND` statements. Customers must meet all filter conditions to be returned in the results. If needed, you can obtain group IDs by calling [ListCustomerGroups](https://developer.squareup.com/reference/square/customer-groups-api/list-customer-groups) in the Customer Groups API. The following example query searches for customers who belong to all the specified groups: ```` The following example searches for regular customers (based the `LOYAL` segment) who enrolled in the Free Lunch Giveaway group (`7WDV991WCZD7BW4896CZYGAEAS`) and who haven't yet won a free lunch in this period (`HEM2Z4Y5DJKA172RSNKSNHKX5S`): ```` {% anchor id="search-by-segment-ids" /%} ## Search by segment IDs A customer can belong to one or more [customer segments](customer-segments-api/how-to-use-it). Segment membership is represented by the `segment_ids` field of the corresponding customer profile, which stores the IDs of the segments the customer belongs to. This field is present only if the customer belongs to at least one segment. Segment membership is dynamic and adjusts automatically based on whether the customer currently meets the segment criteria. You can use the `segment_ids` filter to search customer profiles based on their segment membership. This filter can specify up to three segment IDs using any combination of the `any`, `all`, and `none` fields: * For `all`, the customer must belong to all of the specified segments (logical `AND`). * For `any`, the customer must belong to at least one of the specified segments (logical `OR`). * For `none`, the customer must not belong to any of the specified segments (logical `NOT`). When multiple fields are provided, they are combined as `AND` statements. Customers must meet all filter conditions to be returned in the results. If needed, you can obtain segment IDs by calling [ListCustomerSegments](https://developer.squareup.com/reference/square/customer-segments-api/list-customer-segments) in the Customer Segments API. The following example query searches for customers who belong to any of the specified segments: ```` The following example query searches for customer profiles created in the first half of 2022 who are lapsed and can be reached, but who don't have a history of low visits (`gv2:KF92J19VXN5FK30GX2E8HSGQ20`). ```` When the `segment_ids` filter is included in a search query, Square validates that the specified IDs map to existing segments. If an invalid segment ID is found, Square stops processing the request and returns a `400 BAD_REQUEST` error with the invalid ID. {% anchor id="search-by-custom-attribute" /%} {% anchor id="search-by-custom-attributes-beta" /%} ## Search by custom attributes You can search customer profiles by one or more [custom attributes](customer-custom-attributes-api/overview), which contain custom properties or metadata for the customer profile. For example, a customer profile might have `EmergencyContactName` and `EmergencyContactPhone` custom attributes. You can search based on the value of a custom attribute or its last updated date. The `custom_attribute` filter has a `filters` array that can contain up to 10 custom attribute filters. Each custom attribute filter must specify: * The `key` of the target custom attribute. * One or both of the following: * `filter` with the value filter that corresponds to the data type of the target custom attribute. For example, use the `address` filter to search by an `Address`-type custom attribute. * `updated_at` with `start_at`, `end_at`, or both. The following example includes two custom attribute filters. This query searches for all customer profiles whose `veterinarian_name` custom attribute is Pet Hospital and whose `is_member` custom attribute is `true` and was last updated in April 2022. ```json no_ "custom_attribute": { "filters": [ { "key": "veterinarian_name", "filter": { "text": { "exact": "Pet Hospital" } } }, { "key": "is_member", "filter": { "boolean": true }, "updated_at": { "start_at": "2022-04-01T00:00:00Z", "end_at": "2022-04-30T23:59:59Z" } } ] } ``` Multiple custom attribute filters in a search query are combined as `AND` statements. Combining filters as `OR` statements in a query isn't supported, but you can send multiple single-filter queries and join the result sets. The following are supported custom attribute filters: {% anchor id="custom-attribute-value-filter-address" /%} {% accordion expanded=false %} {% slot "heading" %} #### address {% /slot %} Use the `address` filter to search based on the value of an `Address`-type custom attribute. The filter can include `postal_code`, `country`, or both. The `postal_code` parameter only supports the `exact` match condition. ```` Other address fields aren't supported as search parameters. {% /accordion %} {% anchor id="custom-attribute-value-filter-boolean" /%} {% accordion expanded=false %} {% slot "heading" %} #### boolean {% /slot %} Use the `boolean` filter to search based on the value of a `Boolean`-type custom attribute. ```` {% /accordion %} {% anchor id="custom-attribute-value-filter-date" /%} {% accordion expanded=false %} {% slot "heading" %} #### date {% /slot %} Use the `date` filter to search based on the value of a `Date`-type custom attribute. This filter defines a date range using `start_at`, `end_at`, or both. Range boundaries are inclusive. Dates can be specified in RFC 3339 full-date or date-time format. The following example uses the full-date (`YYYY-MM-DD`) format to search for any date in February 2022: ```` The following example uses the date-time format for the same search: ```` {% /accordion %} {% anchor id="custom-attribute-value-filter-email" /%} {% accordion expanded=false %} {% slot "heading" %} #### email {% /slot %} Use the `email` filter to search based on the value (case-insensitive) of an `Email`-type custom attribute. This filter can include `exact` or `fuzzy`, but not both. #### Exact matching For an `exact` match, provide the complete email address. ```` #### Fuzzy matching For a `fuzzy` match, provide a query expression containing one or more query tokens in any order to match against the email address. For example, `doe` or `doe j` matches j.doe@gmail.com and john@doe.com. ```` The [Fuzzy search by email address](#fuzzy-search-by-email-address) section provides more information about how fuzzy matching works with email addresses. {% /accordion %} {% anchor id="custom-attribute-value-filter-number" /%} {% accordion expanded=false %} {% slot "heading" %} #### number {% /slot %} Use the `number` filter to search based on the value of a `Number`-type custom attribute, which can be an integer or a decimal with up to five digits of precision. This filter defines a range using `start_at`, `end_at`, or both. Range boundaries are inclusive. The absolute value of range boundaries must not exceed `(2^63-1)/10^5`, or 92233720368547. Provide string representations of decimals or integers (if your search parameters don't require decimal precision). The following example searches for any value from -28.5 to 40: ```` {% /accordion %} {% anchor id="custom-attribute-value-filter-phone" /%} {% accordion expanded=false %} {% slot "heading" %} #### phone {% /slot %} Use the `phone` filter to search based on the value of a `PhoneNumber`-type custom attribute. This filter can include `exact` or `fuzzy`, but not both. #### Exact matching For an `exact` match, provide the complete phone number, including the leading + sign. ```` #### Fuzzy matching For a `fuzzy` match, provide a query expression containing one or more query tokens in any order to match against the phone number. For example, `609` or `609 555` matches +16095551234 and +12155536090. ```` The [Fuzzy search by phone number](#fuzzy-search-by-phone-number) section provides more information about how fuzzy matching works with phone numbers. {% /accordion %} {% anchor id="custom-attribute-value-filter-text" /%} {% accordion expanded=false %} {% slot "heading" %} #### text {% /slot %} Use the `text` filter to search based on the value (case-insensitive) of a `String`-type custom attribute. This filter can include `exact` or `fuzzy`, but not both. {% anchor id="custom-attribute-value-filter-text-exact" /%} #### Exact matching For an `exact` match, provide the complete string. The following example searches for the customer profile that has the specified account number: ```` The following example searches for customer profiles whose `favorite-drink` custom attribute is Iced Mocha Latte: ```` #### Fuzzy matching For a `fuzzy` match, provide a query expression containing one or more query tokens in any order that contain complete words to match against the string. Square tokenizes the expression using a grammar-based tokenizer. For example, the expressions `quick brown`, `brown quick`, `fox dog`, and `jumps` all match "The quick brown fox jumps over the lazy dog". However, `quick foxes` and `qui` don't match. ```` {% /accordion %} {% anchor id="custom-attribute-value-filter-selection" /%} {% accordion expanded=false %} {% slot "heading" %} #### selection {% /slot %} Use the `selection` filter to search based on the display name (case-sensitive) for a `Selection`-type custom attribute. This filter can